I welcome everyone. If you have a workshop and often have to work with metal, you probably have a need to clean it from rust. Doing it manually for quite a while is dirty, and it's not so easy to do it with a grinder. Especially when it comes to long pipes, corner and other material. To solve this problem, you can create for yourself just such a simple machine, as the author did. Now you can easily clean the material from rust or dirt.
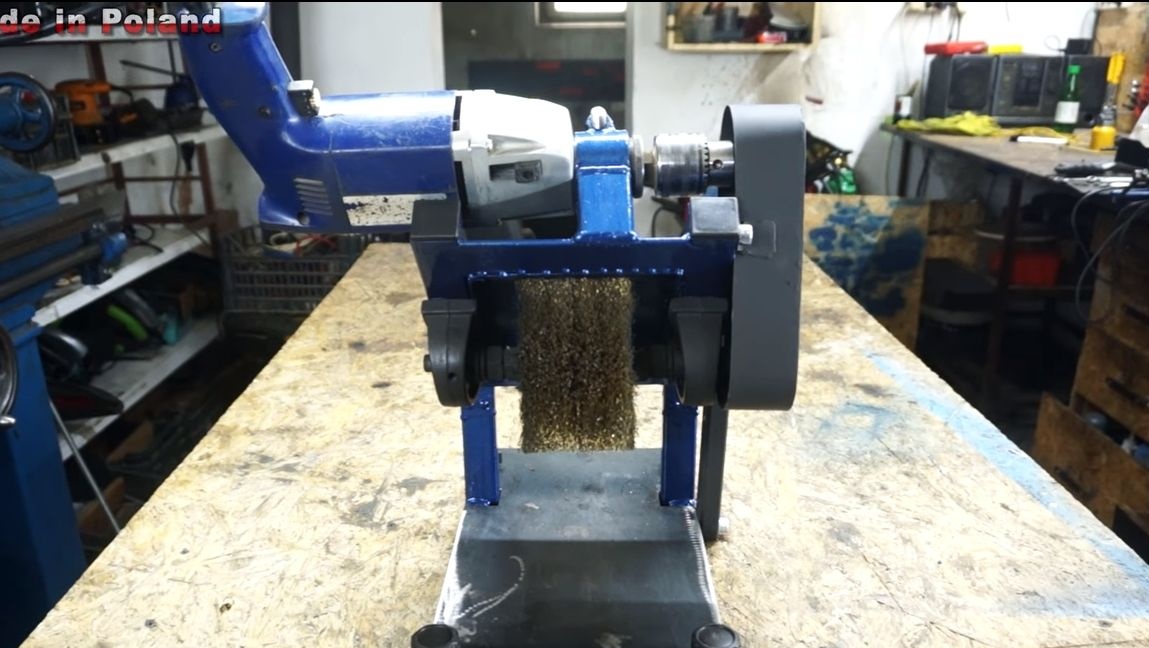
For assembly, very simple and affordable materials and tools are used. So, for example, an electric drill is used as a power organ. As for the nozzle, it is assembled from wire brushes for the grinder. All you need to do is assemble the frame and connect the drill chuck to the machine shaft. The machine is powerful, durable, adjustable in height. And the most interesting feature is that you can use it to clean sheet metal of a large area. To do this, the nozzle lowers down, and the machine itself moves along the machined surface. So, we will consider in more detail how to make such a machine.
Materials and tools used by the author:
Material List:
- ;
- bearings with brackets;
- Sheet steel;
- pipes of square section;
- bolts, nuts, washers;
- brushes for grinders;
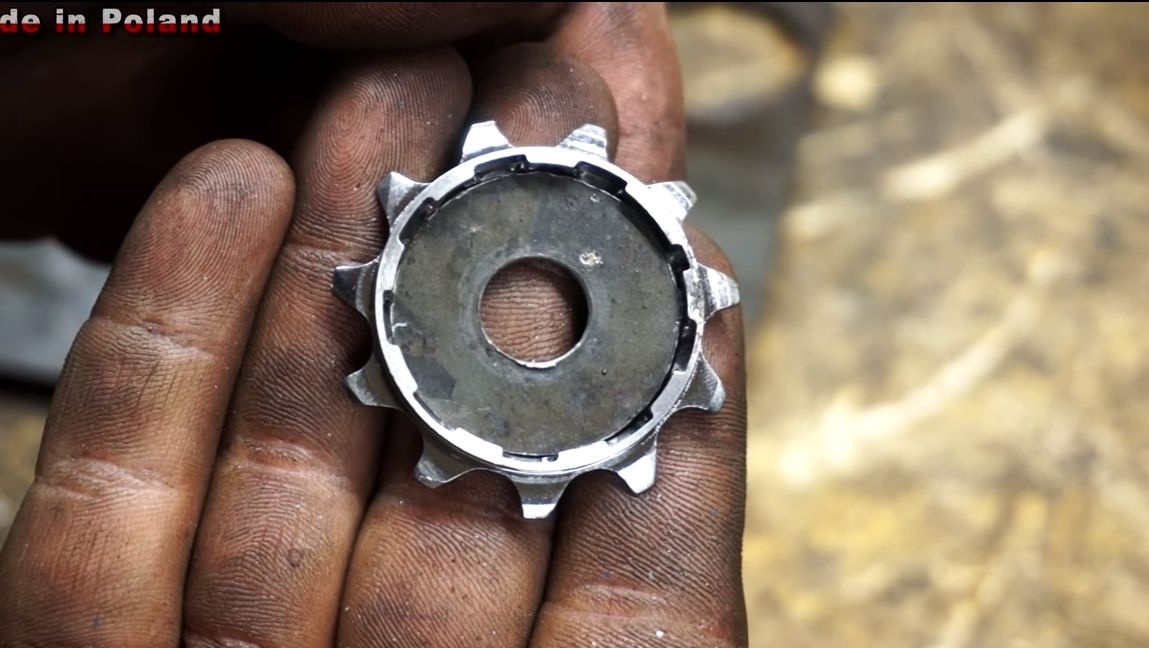
- two bicycle sprockets and a chain;
- swivel joints;
- paint.
Tool List:
- spanners;
- welding machine;
- cutting machine or grinder;
- drill or drilling machine;
- lathe;
- magnetic squares;
- a vise.
The manufacturing process of the treatment machine:
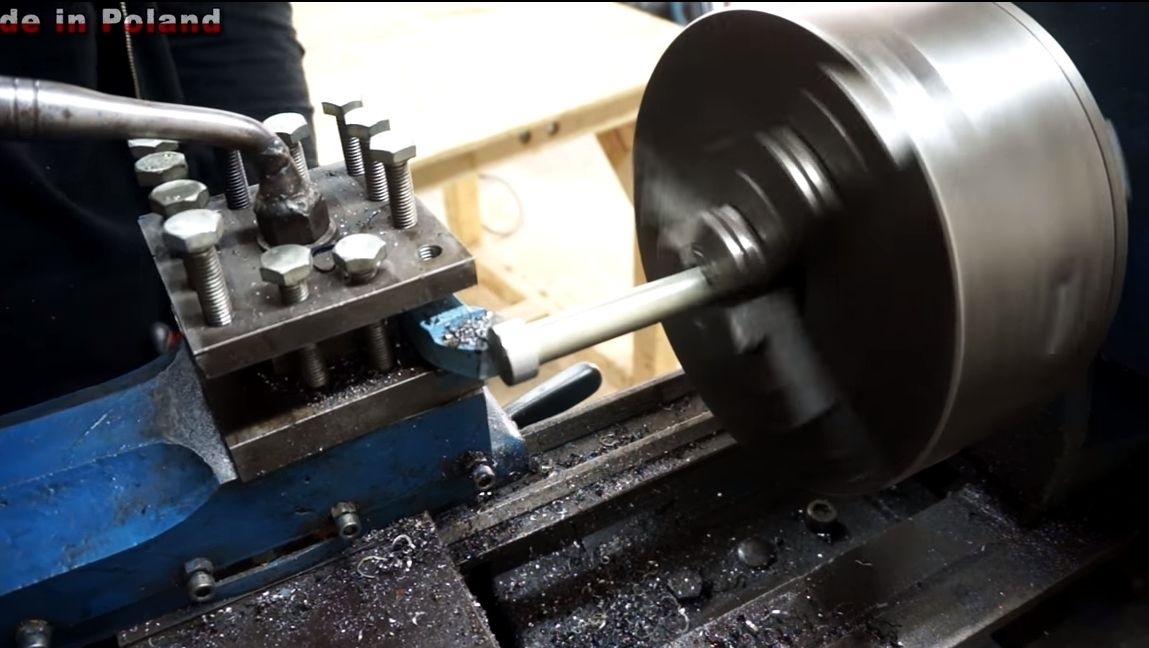
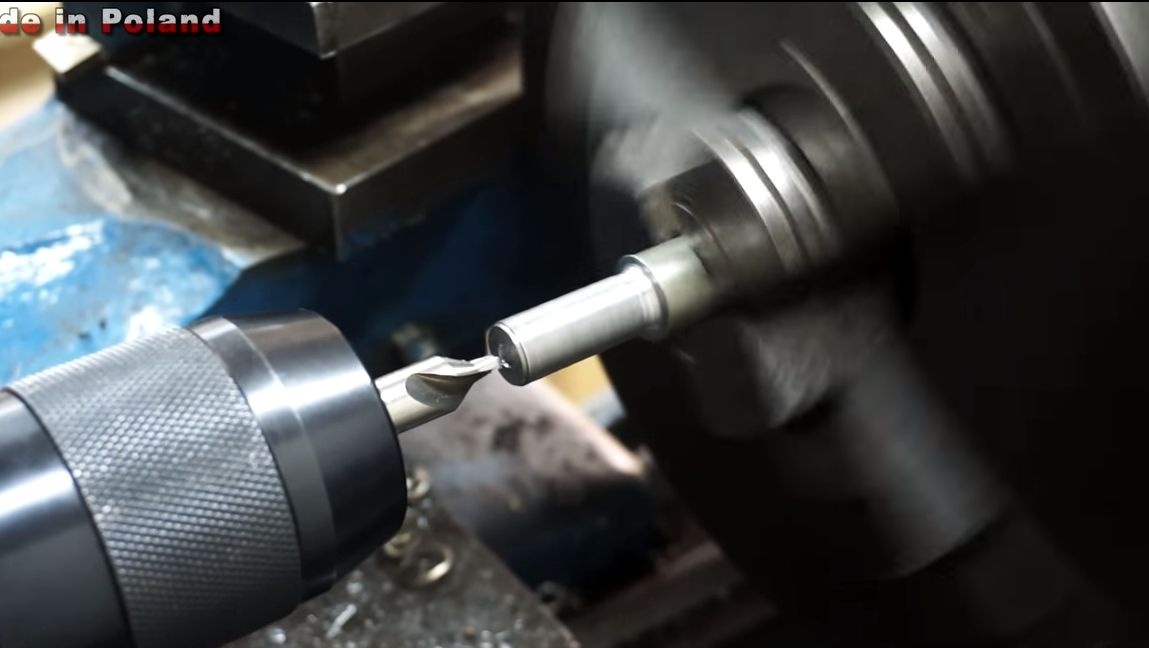
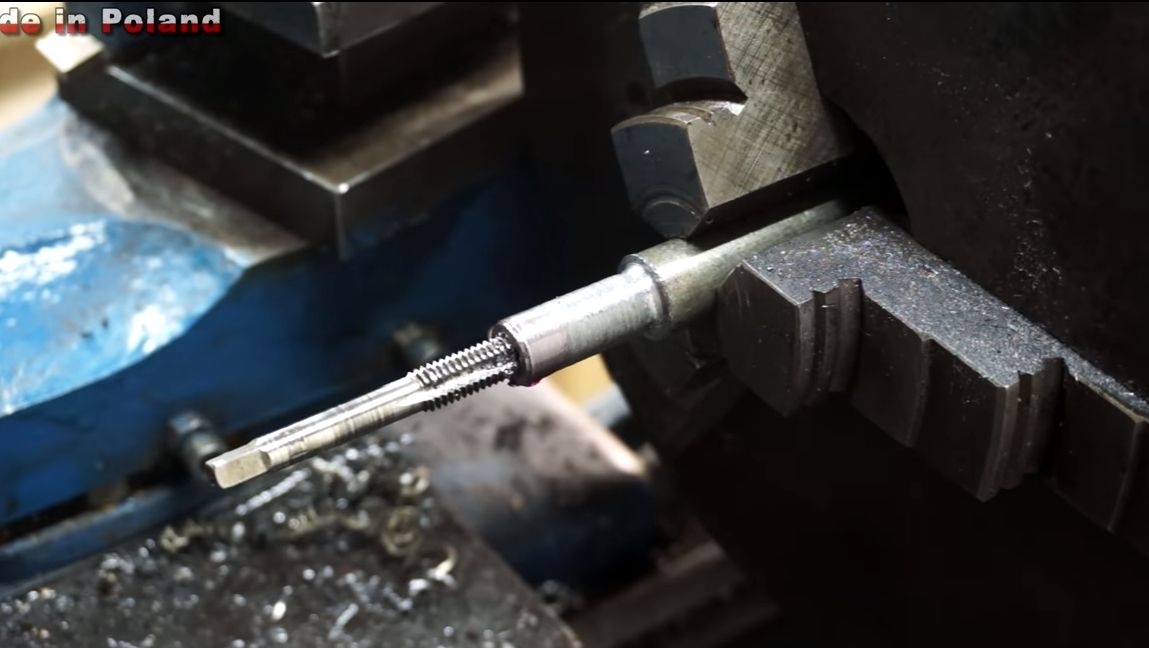
Step one. Grind the driven shaft of the machine
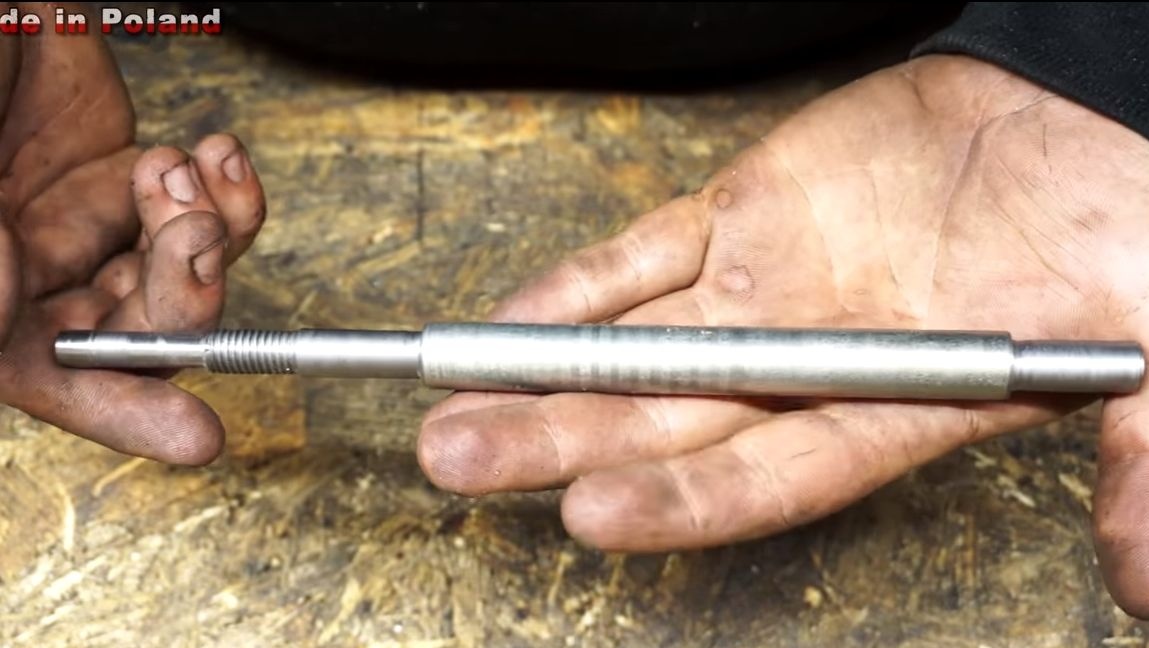
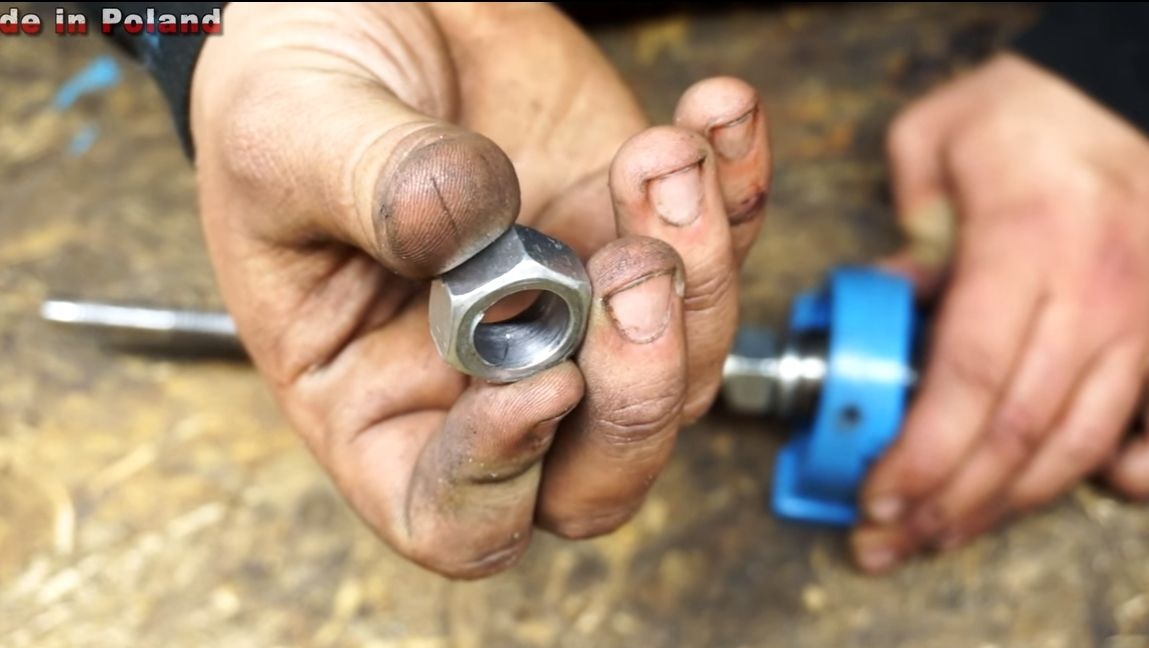
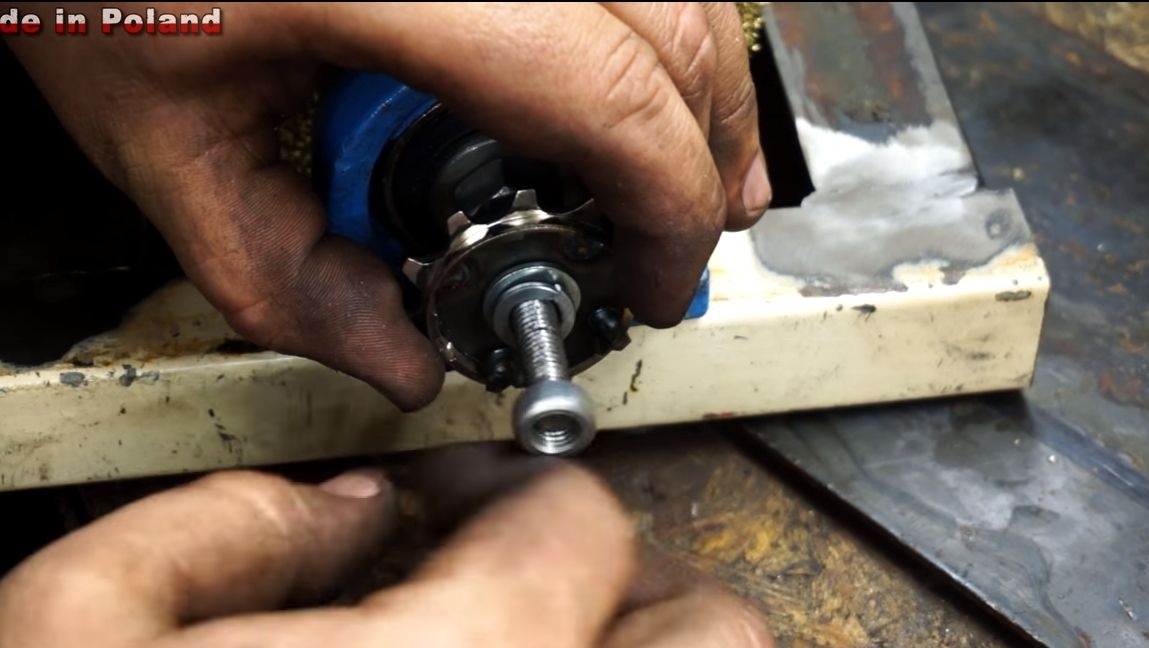
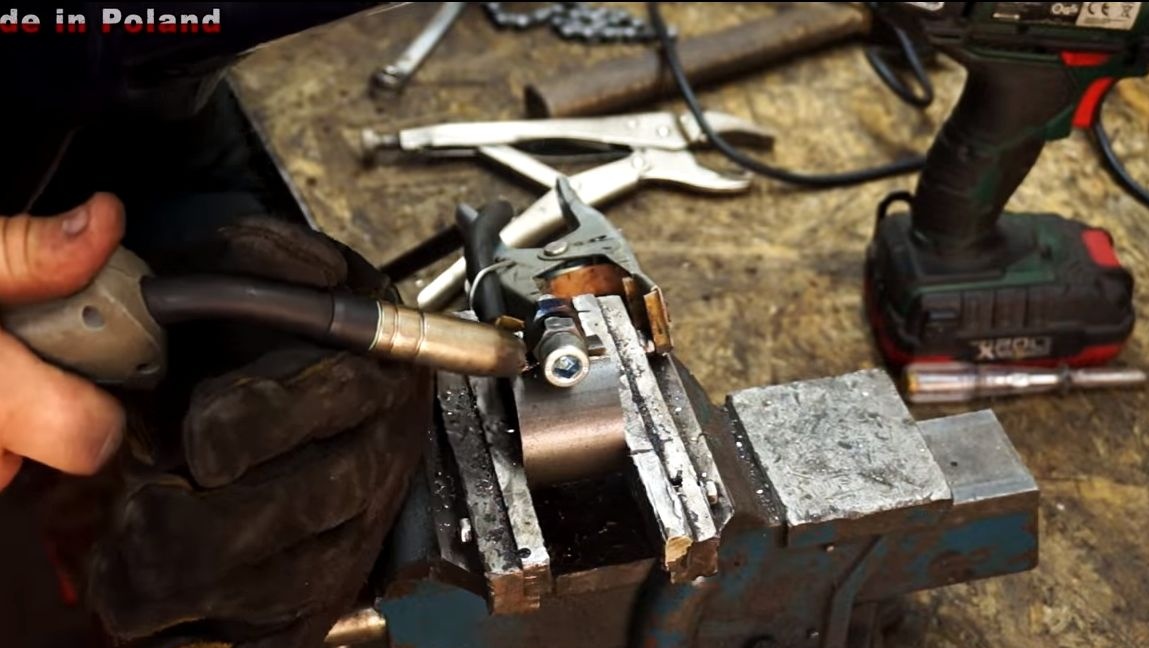
First of all, we need to grind the main shaft of the machine, on which the brushes will be located. For these purposes, we need a lathe. As a starting material, you can use a long bolt or just a threaded rod. There must be a thread on the shaft to pull off the brushes and bearings.
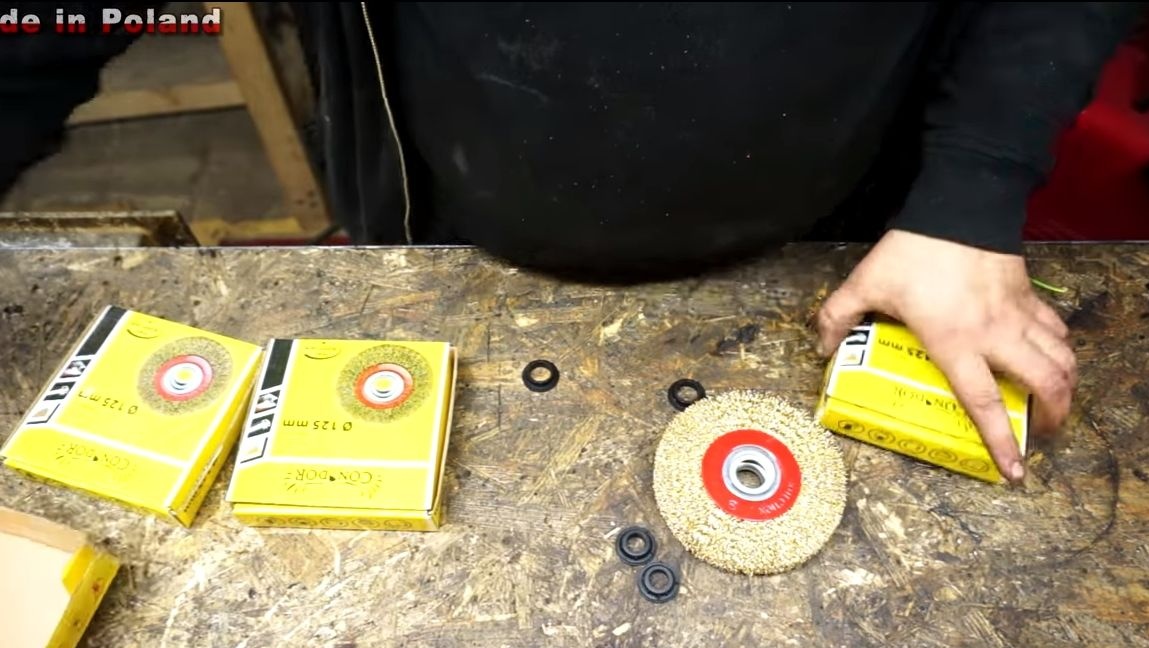
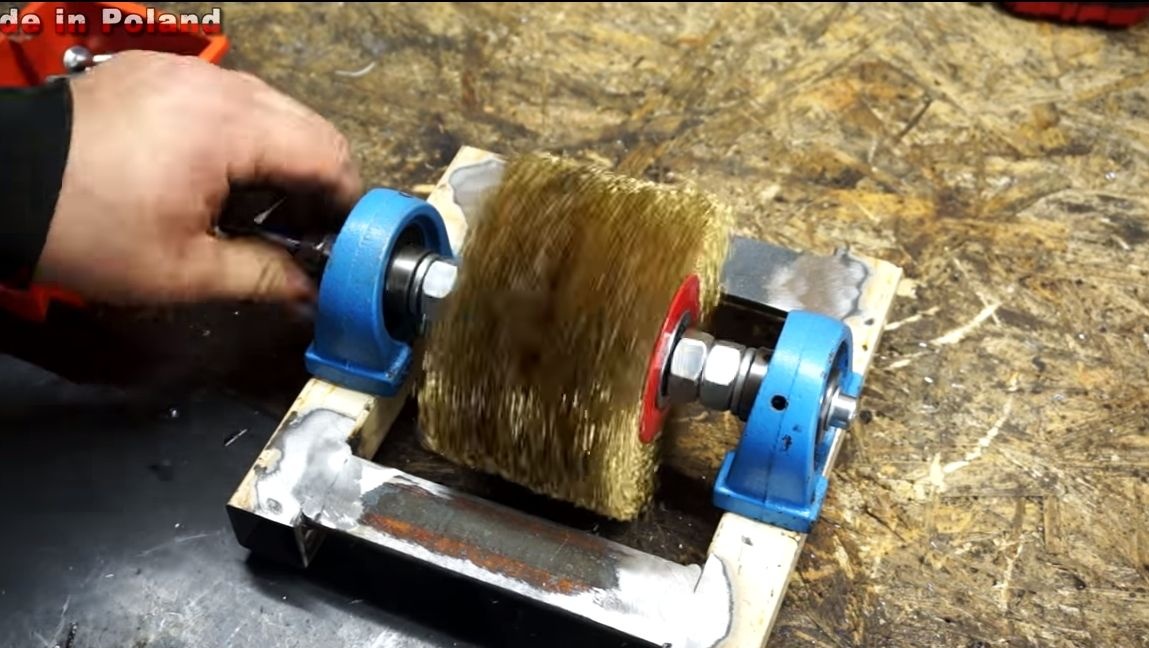
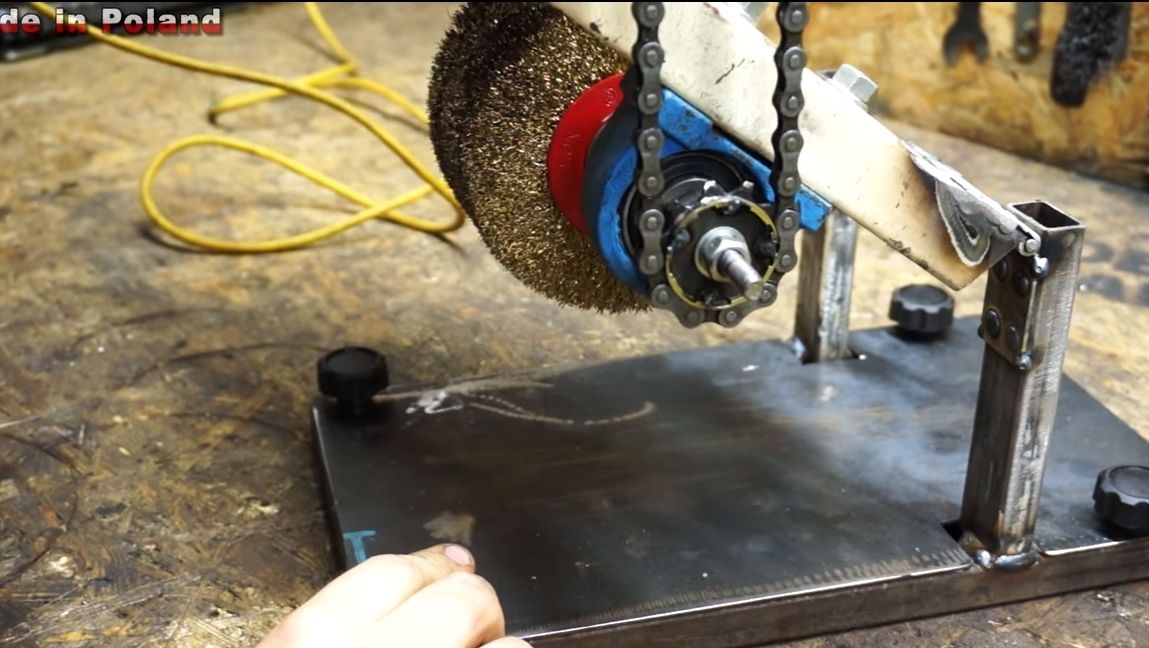
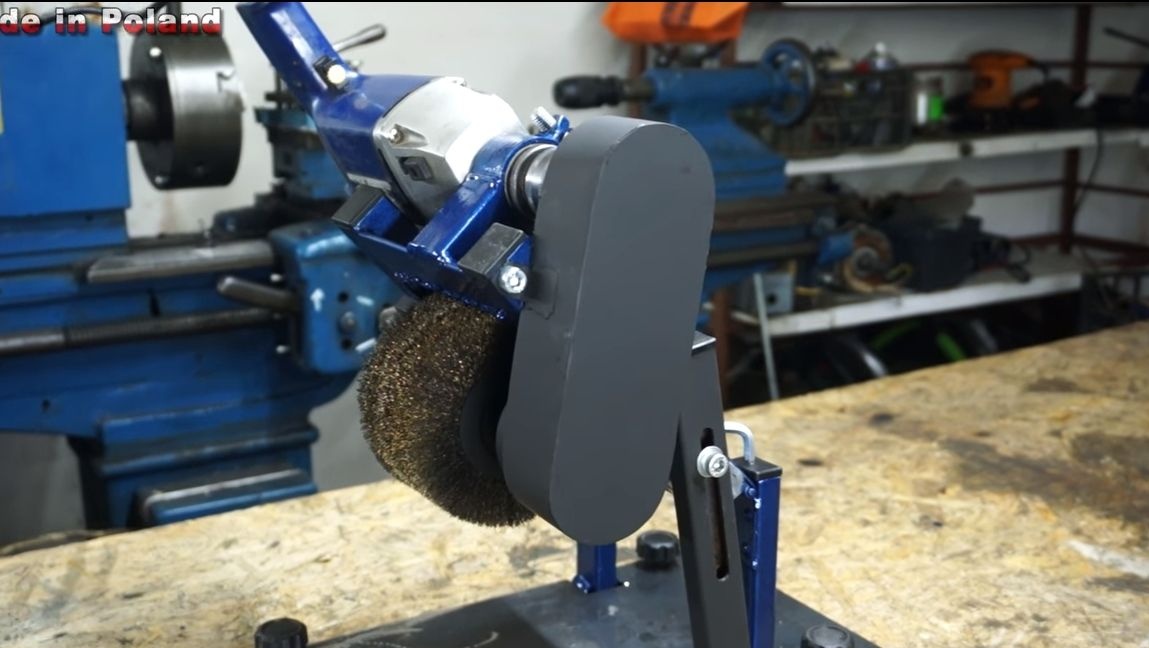
Step Two Putting the nozzle together
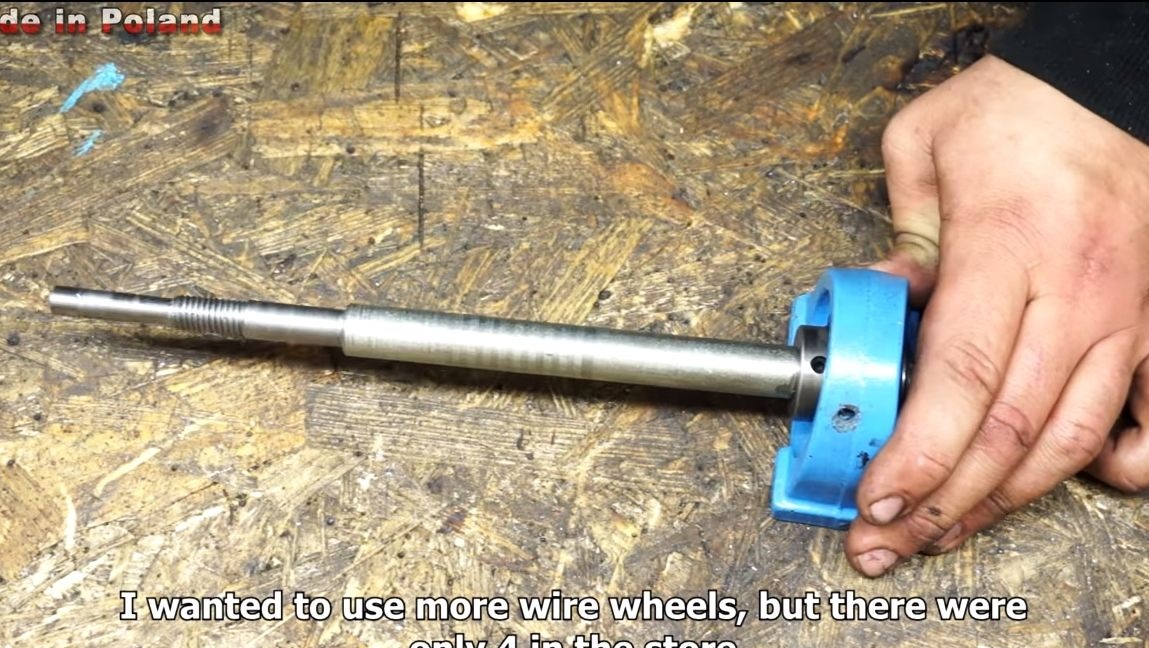
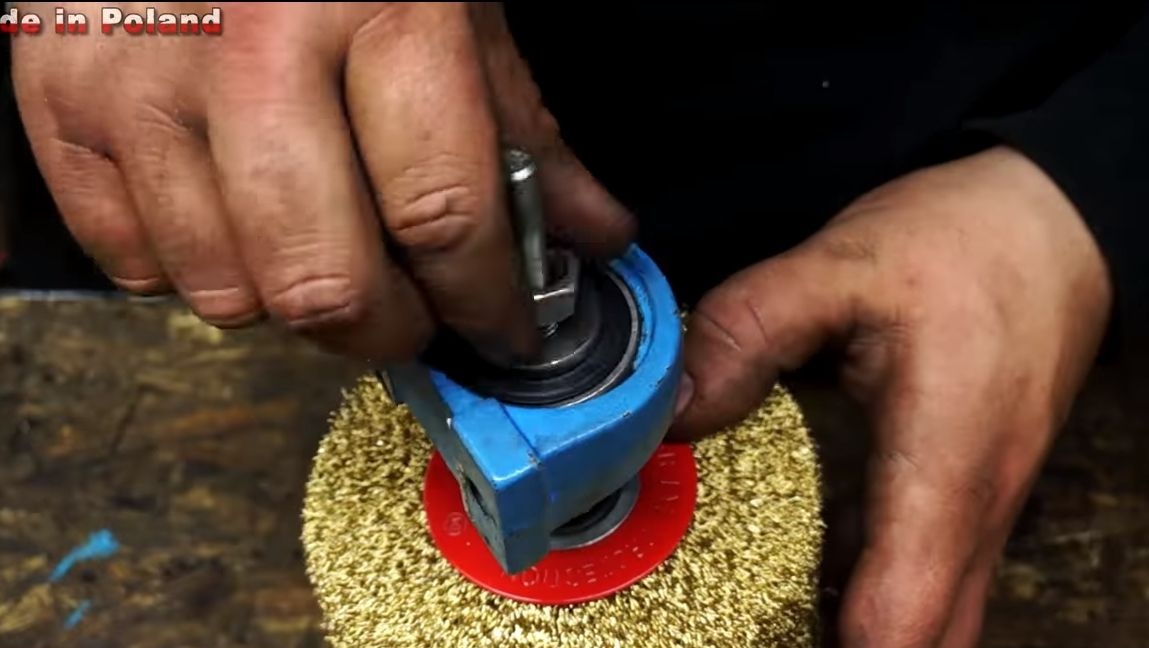
To assemble the cleaning nozzle, the author used four wire nozzles for the grinder. First, we install the first bearing on the axis, then, in turn, put on the nozzle. We install washers between the nozzles to withstand a small gap and so that the brushes do not rotate. Well, then we install the second bearing, and tighten the whole thing with nuts. To maintain the clearance between the bearings, the author used nuts as washers.Holes need to be drilled in them so that they are worn on the shaft.

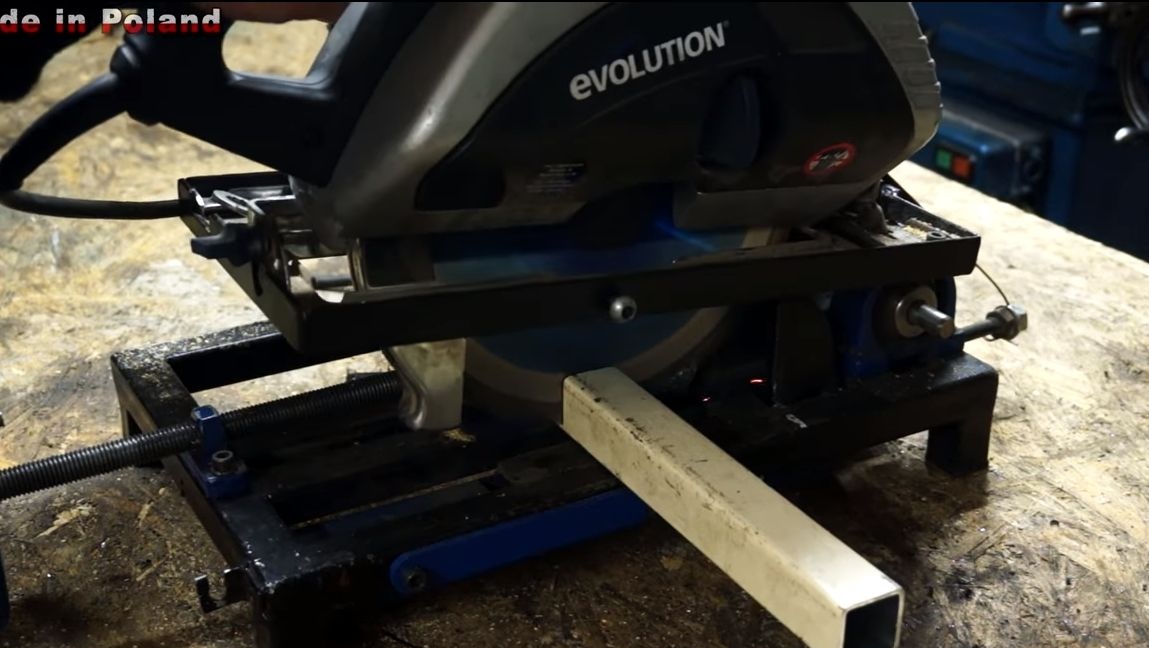
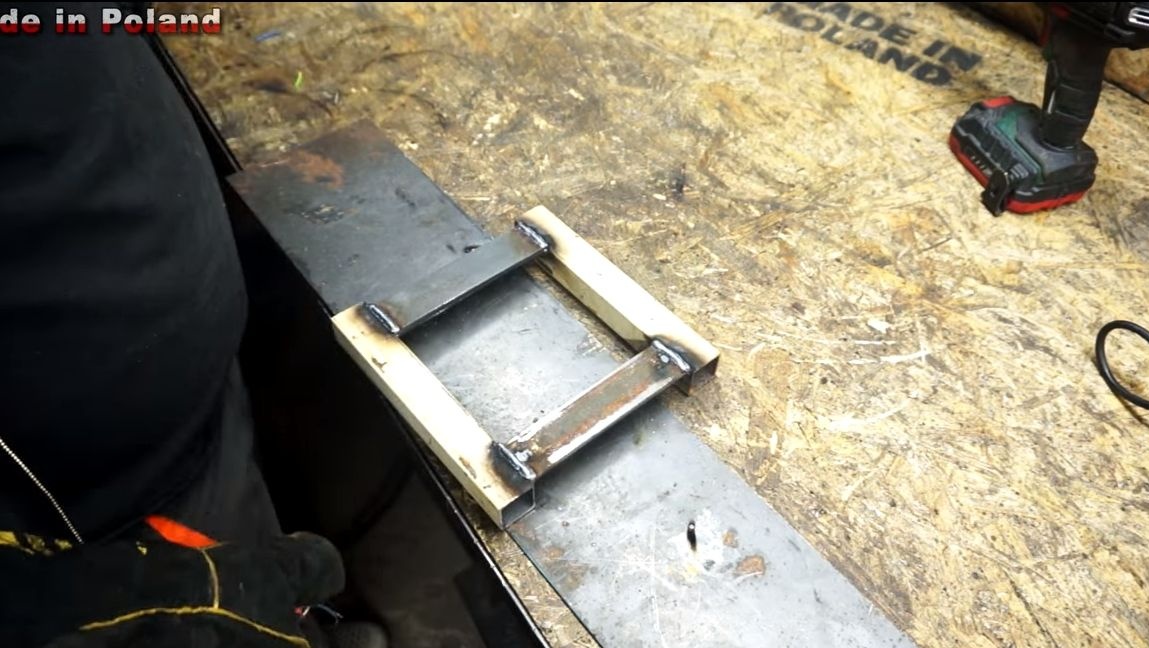
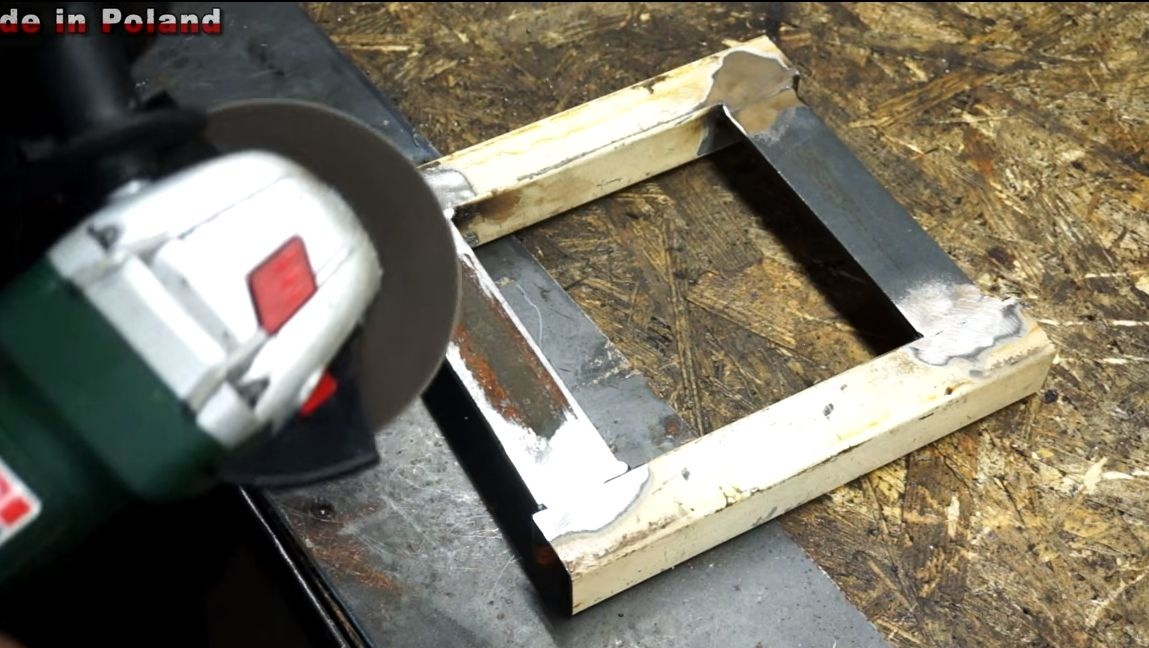
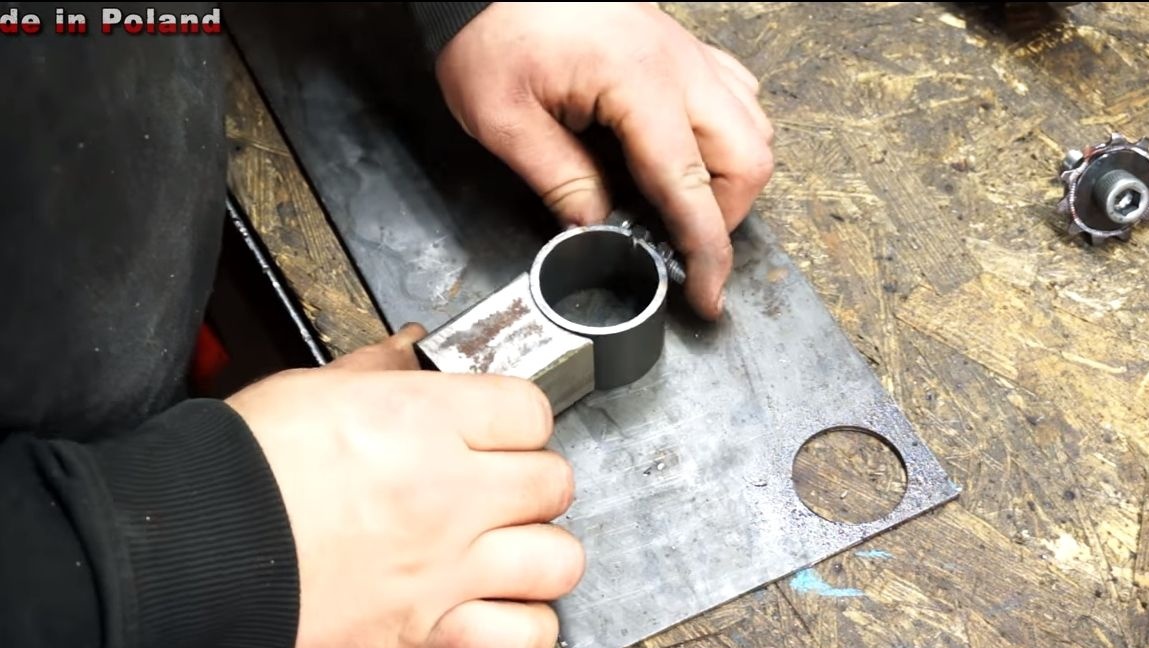
Step Three We make the basis
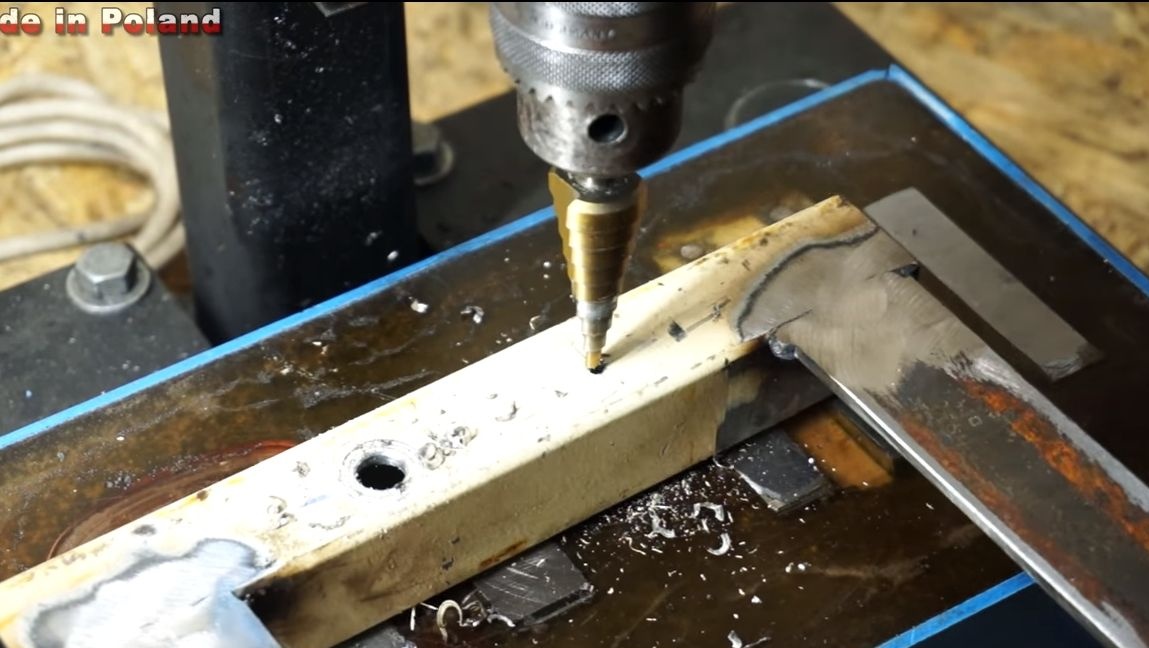
To make the base, you will need a square pipe and a steel plate. Cut two pieces of pipe and two pieces of plate. We weld the whole thing in the form of a square. We clean welds so that everything looks beautiful and aesthetically pleasing. Now we take a drill or go to the drilling machine. We need to drill four holes for the bolts with which we will mount the bearings. Bearing housings can also come with studs or threaded holes.
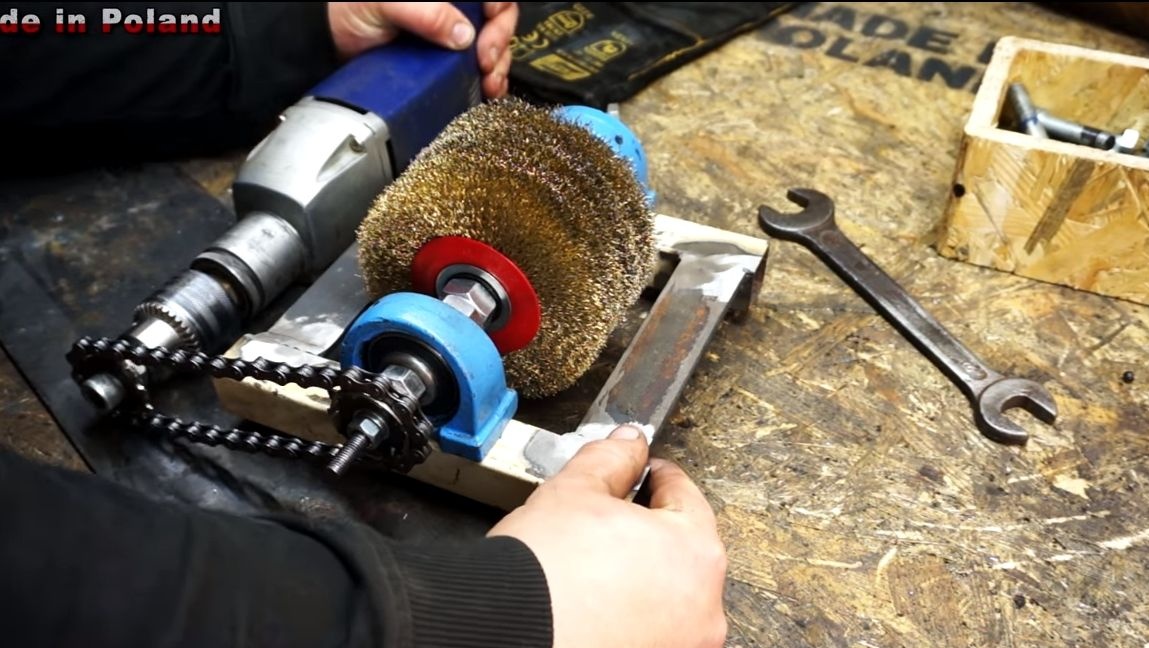
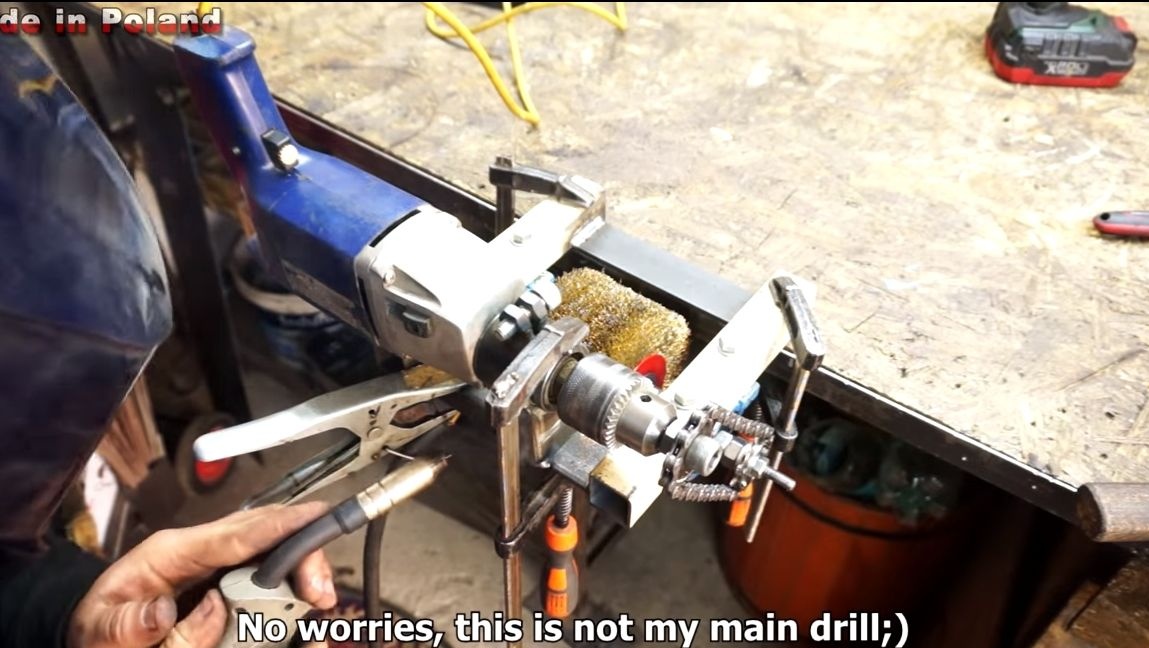
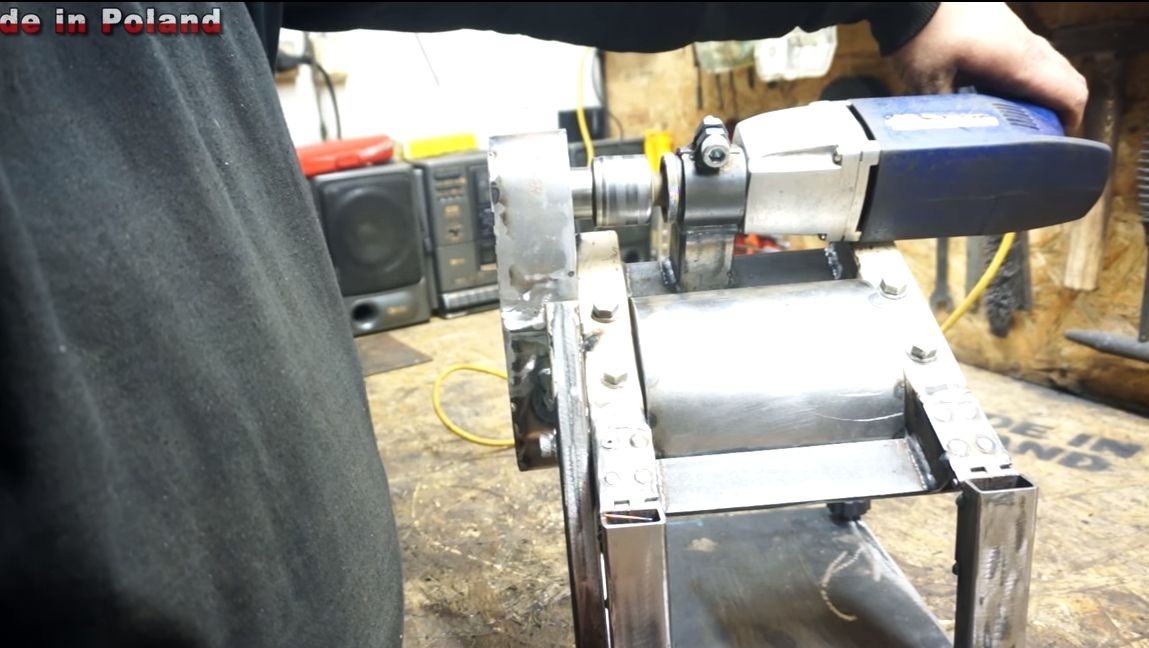
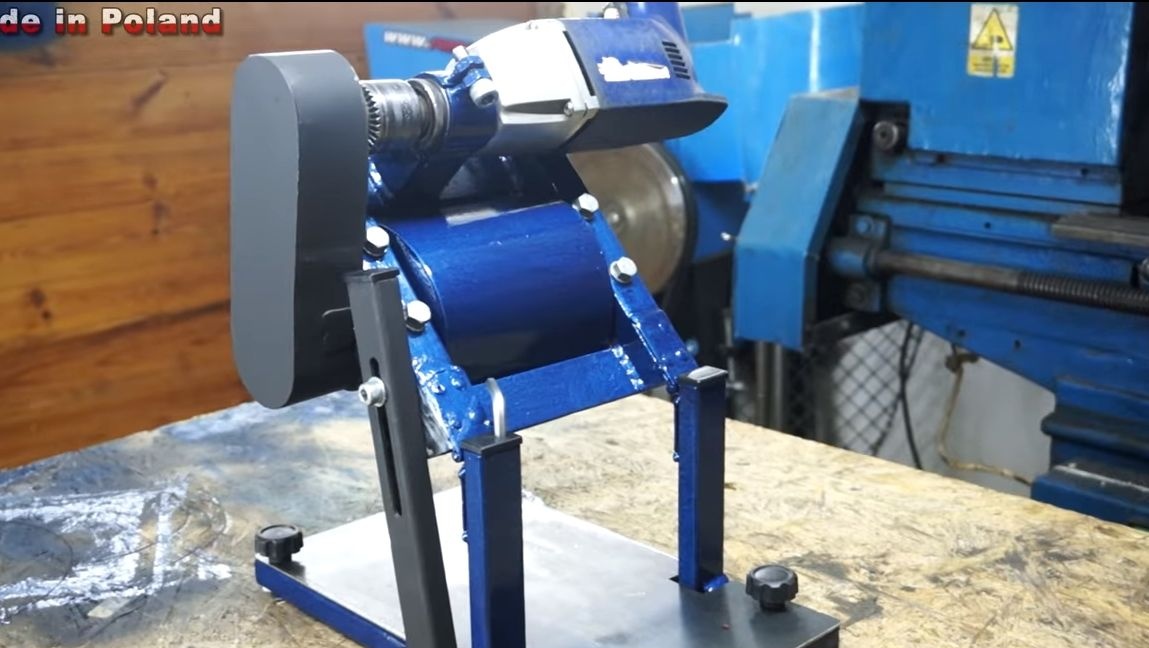
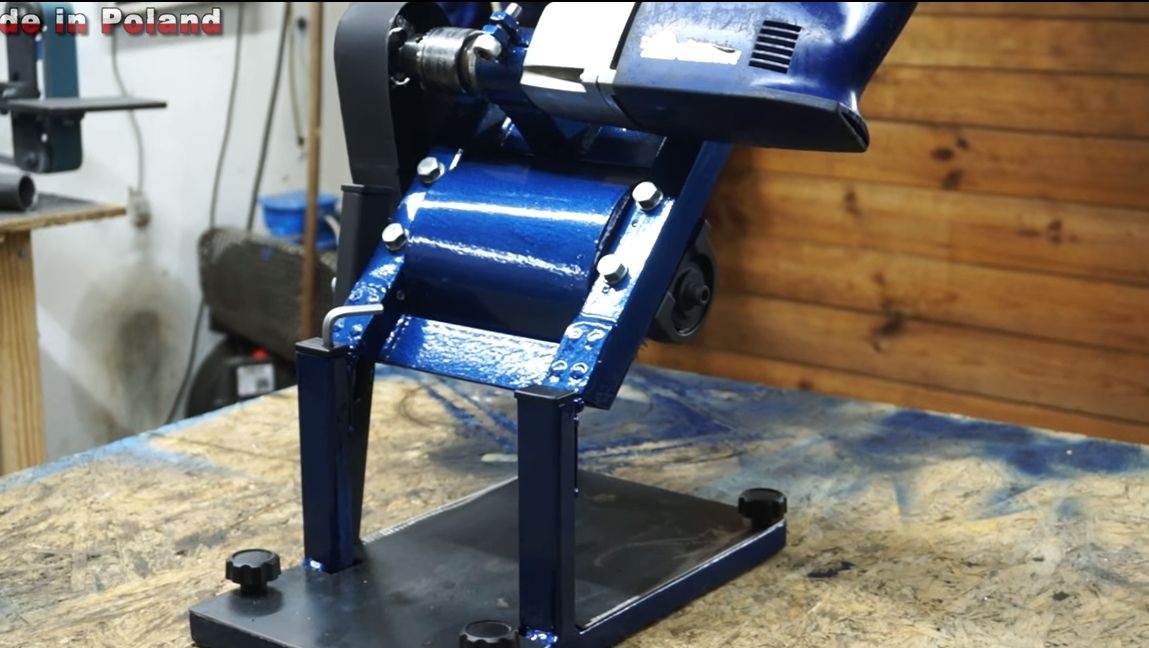
Step Four Chain Drive Fabrication
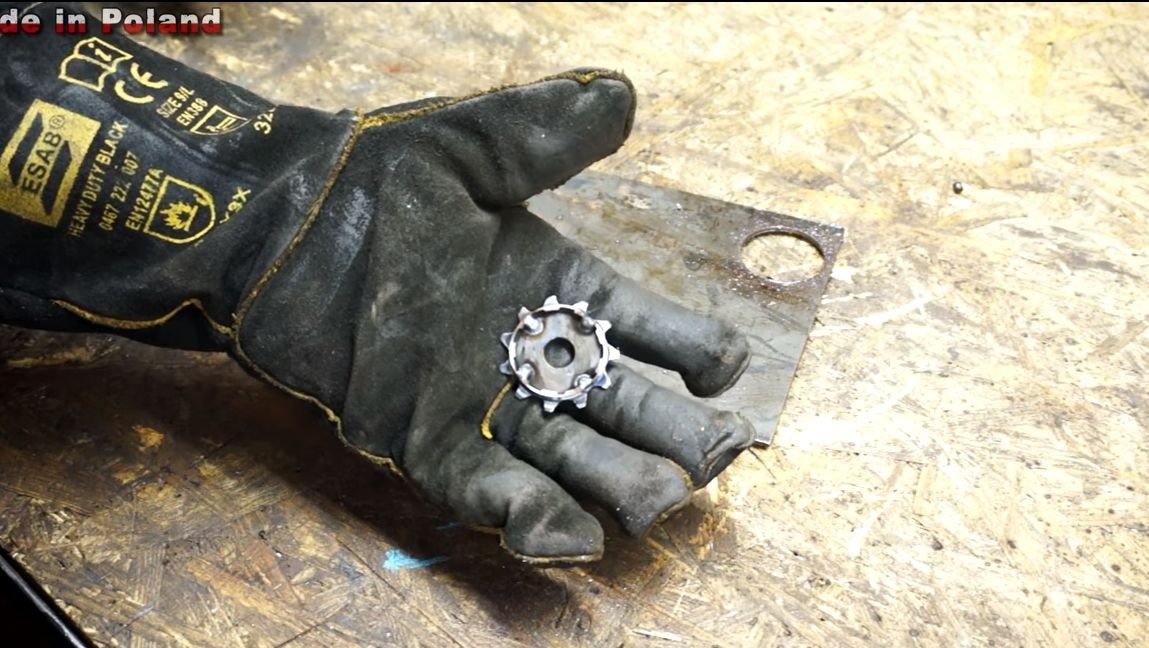
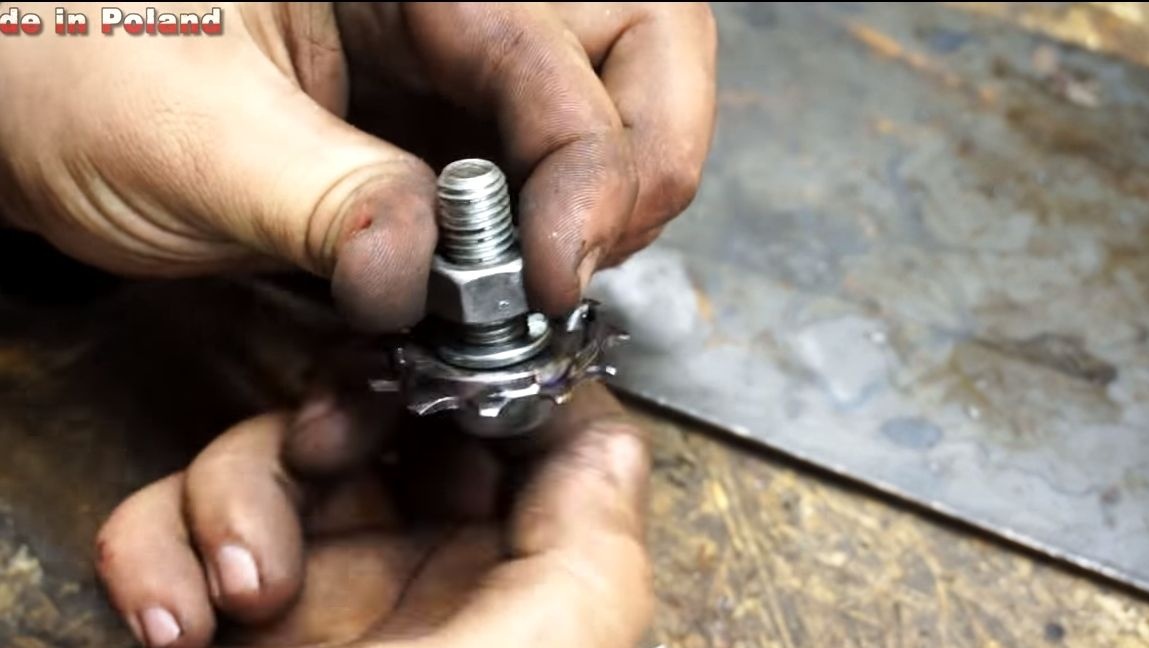
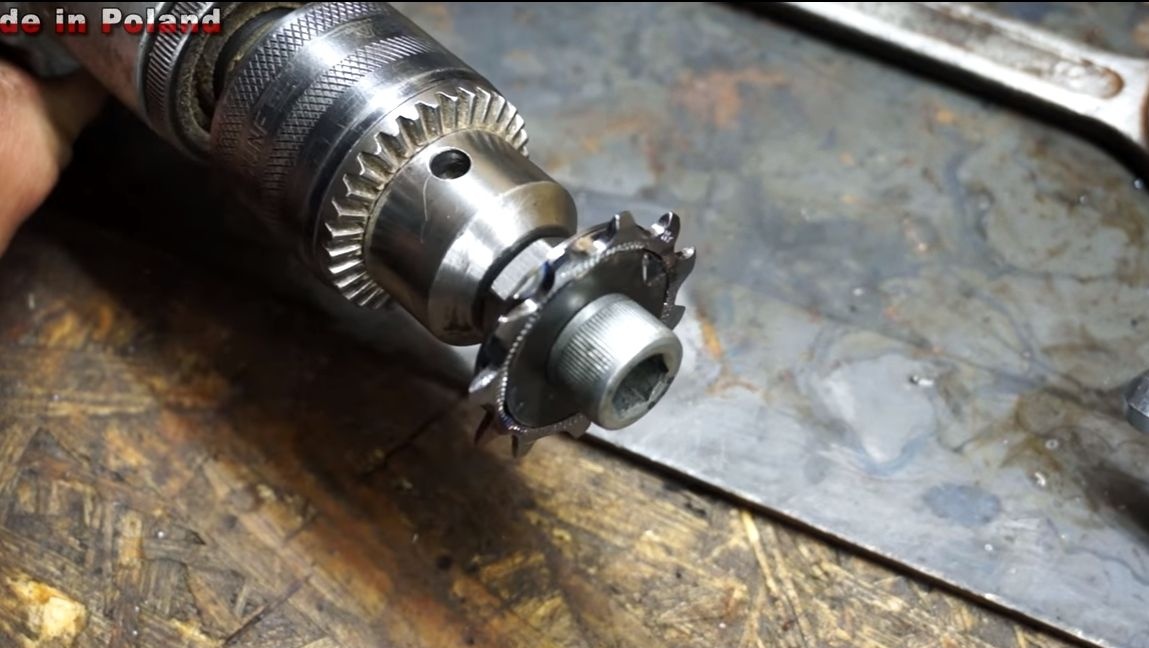
The author decided to transmit the movement from the drill to the machine using a chain transmission. To do this, a chain from a bicycle, as well as two small stars, will suit you. Inside the sprockets we need to install and weld the washers. Well, then we take a bolt or a threaded rod with nuts and install an asterisk on it. Now you can tighten the bolt in the drill chuck. Well, we attach an asterisk to the nozzle shaft with a nut, there we already have a thread.
You can hold the drill near the nozzle with your hand, pulling the chain and try to turn on the device.

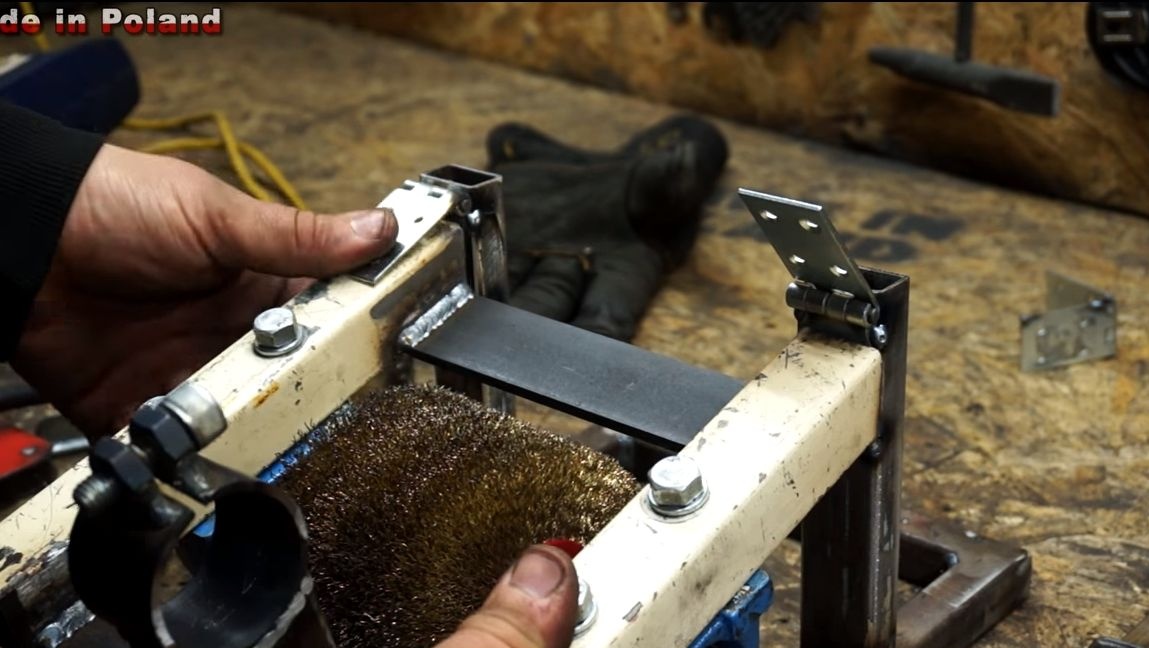
Step Five Installing the drill retainer
To fix the drill on the machine, and then easily remove it if necessary, you need to make a latch. This is done very simply. Look for a piece of steel pipe so that it fits onto the front of the drill, where the handle is mounted, with a slight gap. Next, cut a small piece from this pipe and cut it along. You may need to cut some strip to make a gap.
For tightening we need two nuts, we drill a thread in them. However, only one nut can be drilled, which will be used as a thrust nut. Well, then these nuts are welded to our cut pipe, as the author in the photo. That's all, now you can wrap the bolt and as the screw is wrapped, the pipe will compress.
At the end, it remains to fix this bracket in the right place on the machine. To connect, use a piece of square pipe of suitable length. Before final welding, make sure that everything is assembled smoothly and that the chain does not fly off during operation of the device.
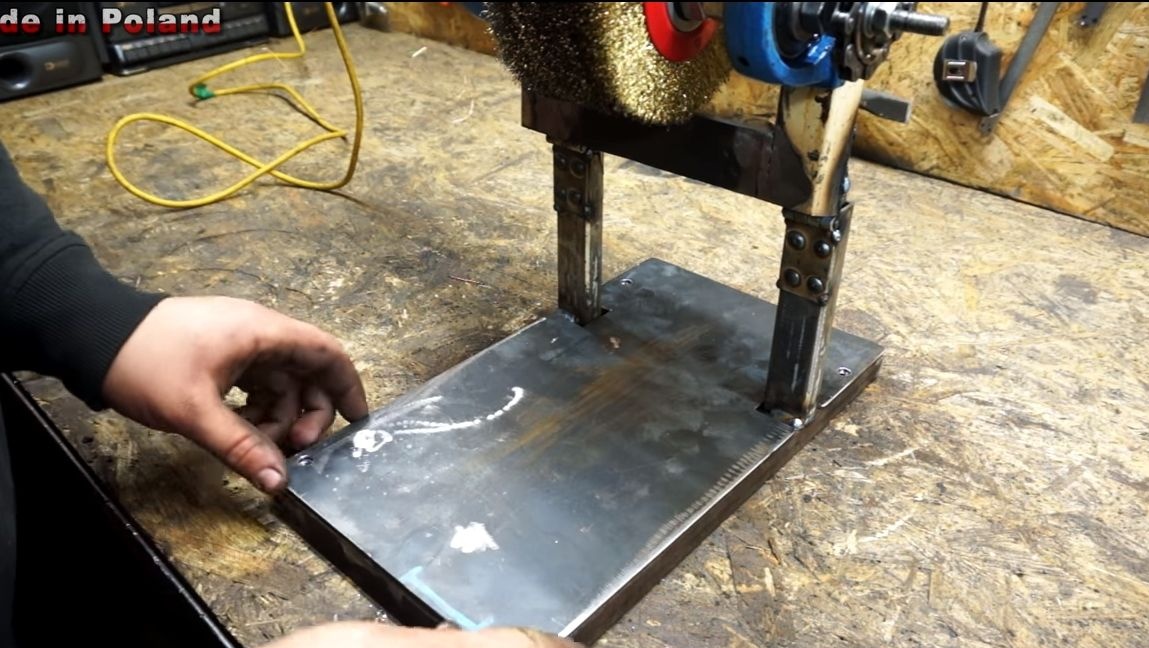
Step Six The basis for the device
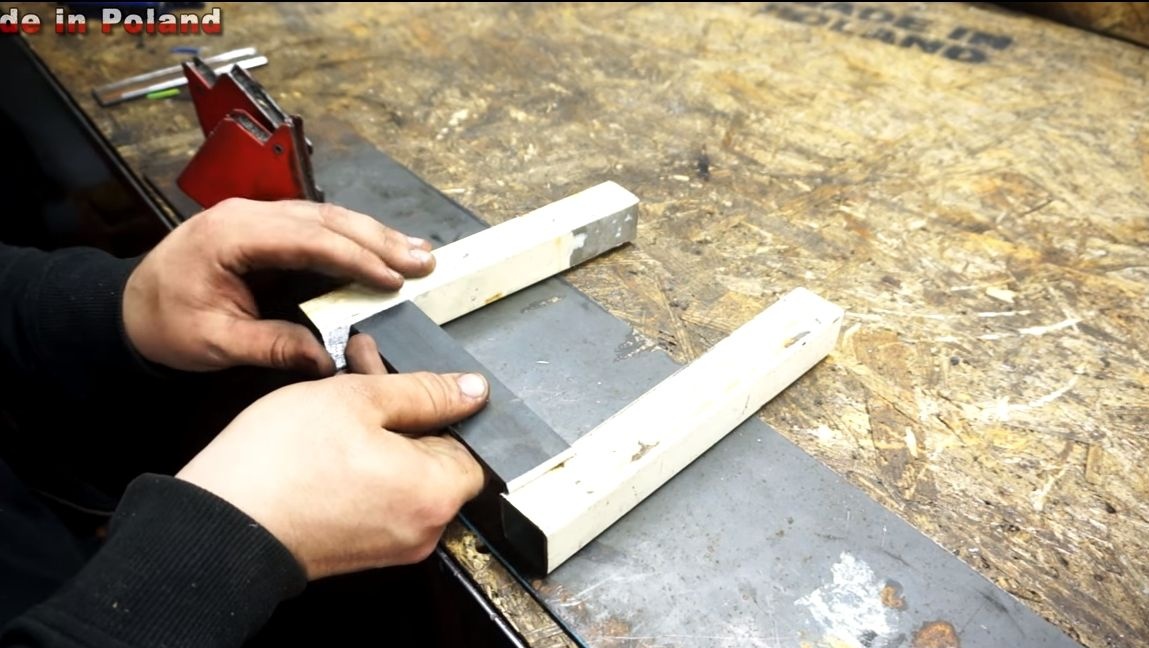
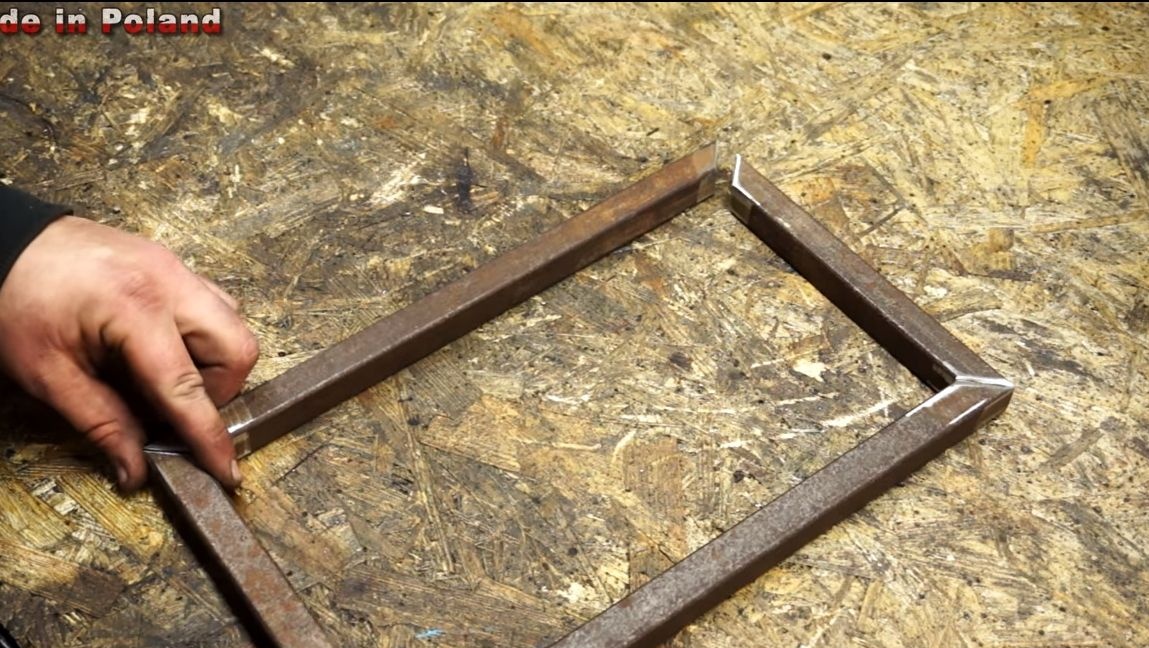
For the machine we need to put together a solid foundation. For these purposes, we take a square tube and cut it into 4 parts. As a result, you should get a rectangle after assembly. We weld the product and clean the welds with a grinder. To the base you will need to weld two more vertical racks.
Seventh step. Machine assembly
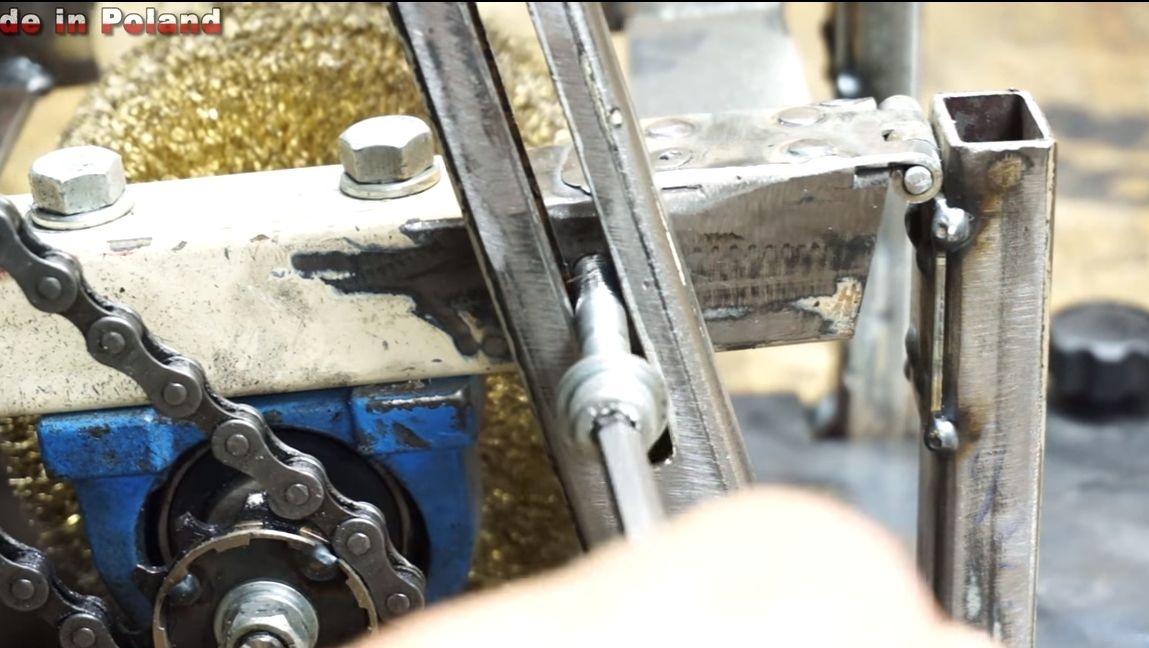
The nozzle must rise and fall, for this it needs to be pivotally fixed. The author used two hinges. They are welded to the racks installed in the step earlier.
Step Eight. Work table
Make a work table for the machine so that it is convenient to process products. To do this, you need sheet steel, cut it to size. We fix the platform with bolts with flaps or the like, so that you can remove the platform and use the machine to process sheet material.
Step Nine. Locking device
To fix the nozzle at the desired height from the working surface, we need to make a fixing device. To do this, we attach a lever to the base, which is used as a piece of a square pipe with a slot. The lever must be pivoted, enough for this bolt. Well, then to this lever with a bolt we fasten our platform with a nozzle. We adjust the desired height and fix the machine for a specific material.
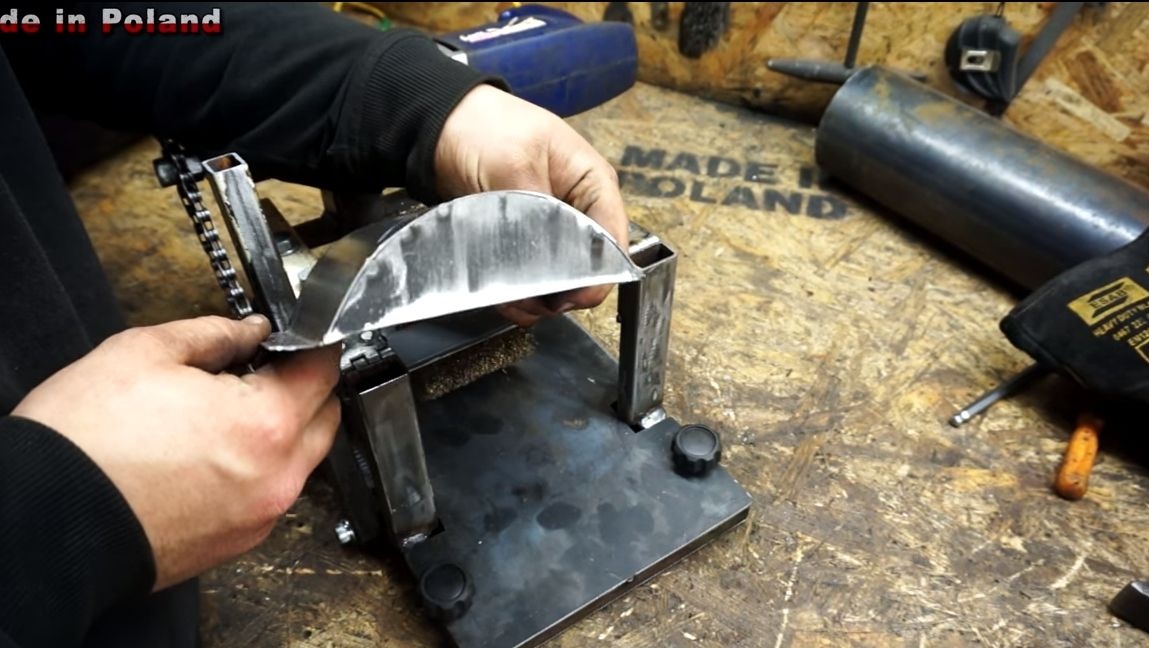
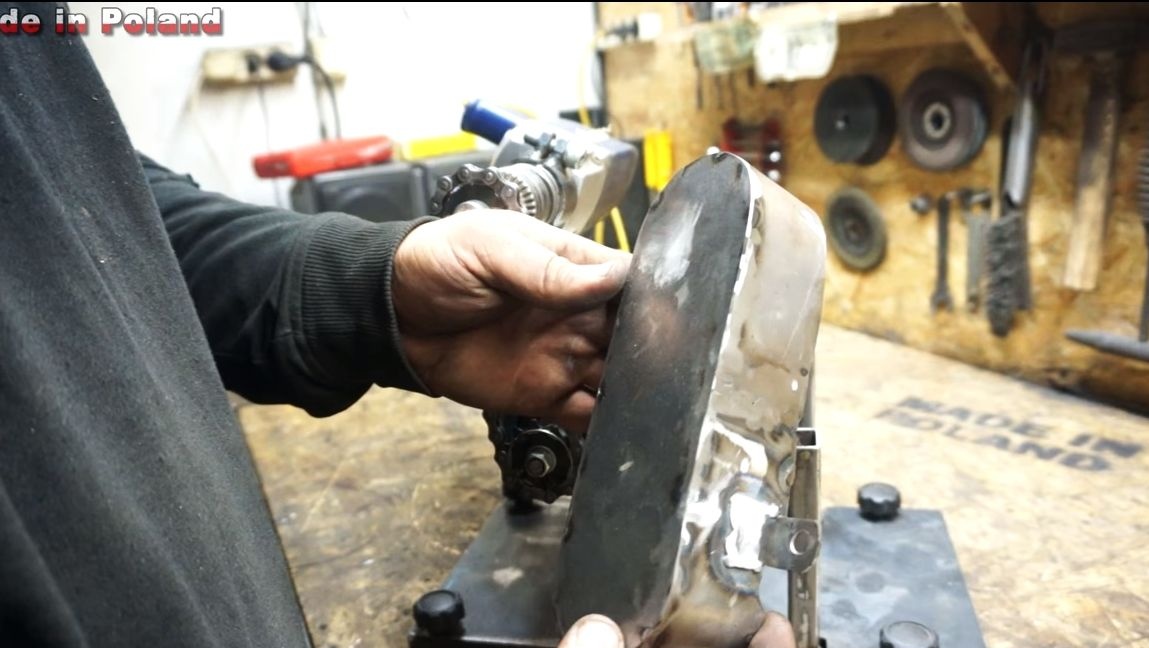
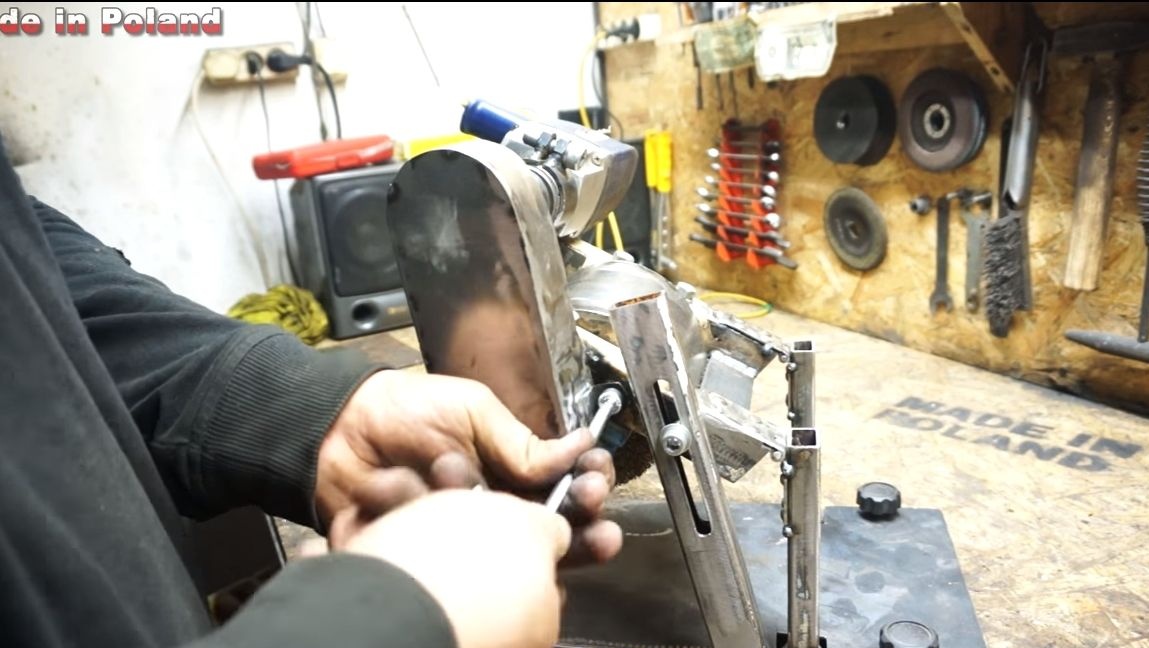
Step Ten Machine guards
Be sure to make protective shields for the machine. One shield is mounted above the brushes. It is very important, since without it the dust will fly anywhere, including into your eyes.And another shield is needed to protect the chain, it is also advisable to do it so that nothing gets into the chain mechanism. Shields are made of sheet steel. We bend, cook and install on the machine with screws.
Step eleven. Painting
To make the machine look beautiful, paint it in any colors you like. In addition to beauty, the paint will protect the metal from rust. You can also plug the ends of square pipes. For this you will need plugs for pipes. That's all, the device is assembled. Everything turned out pretty neatly. You can’t even say that the device is made do it yourself.
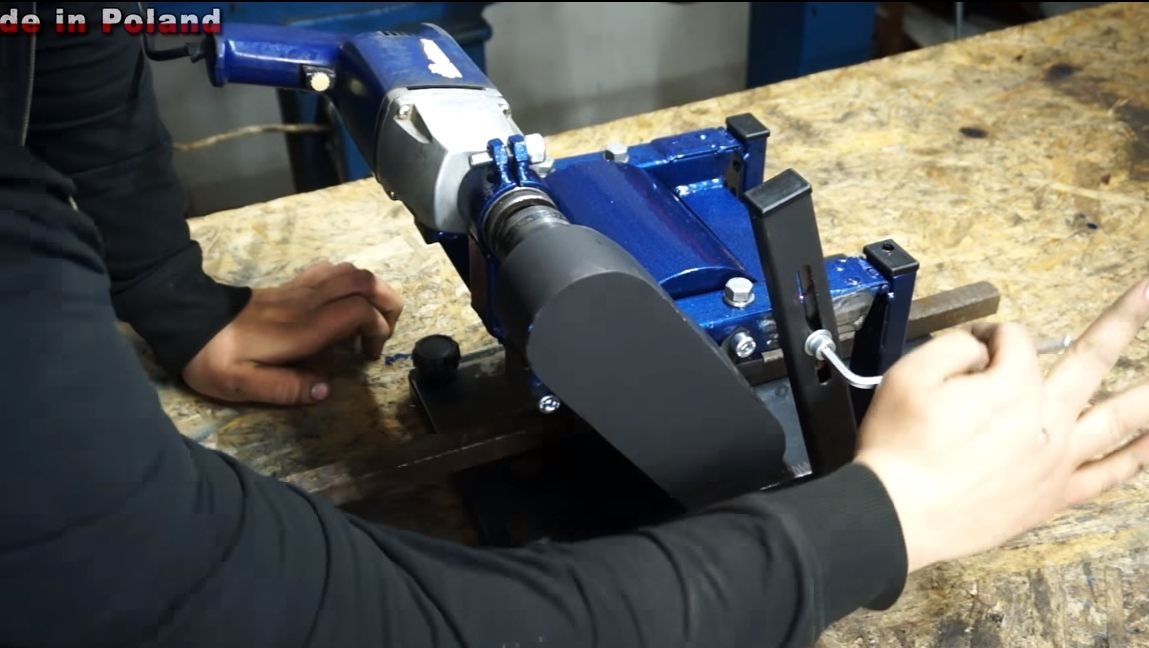
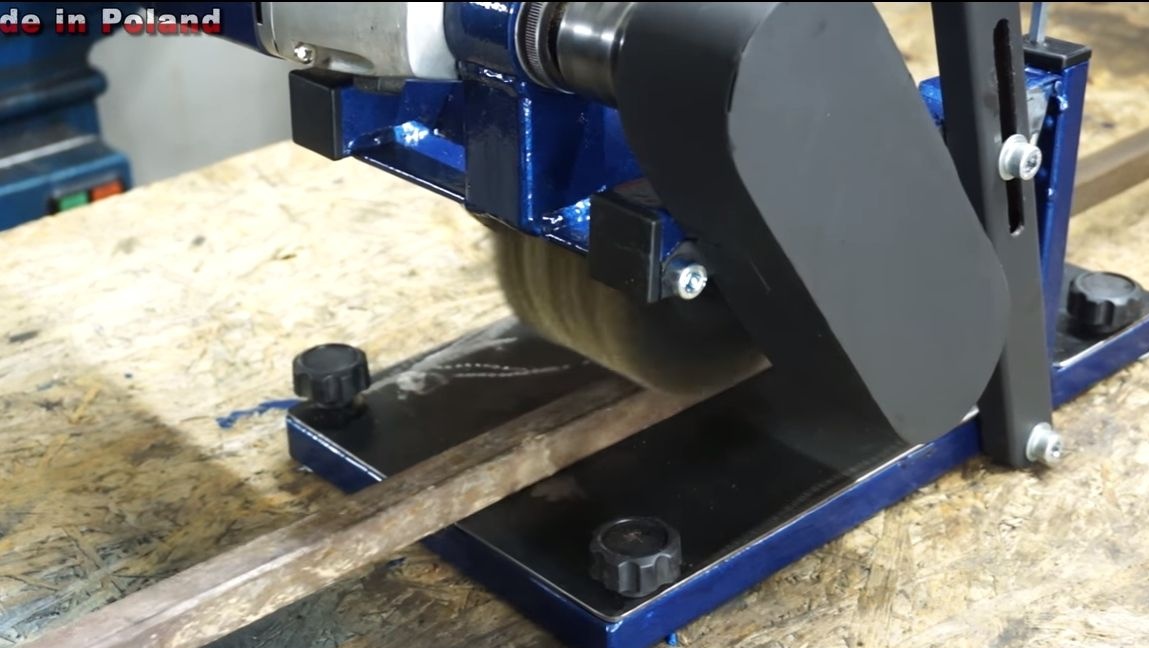
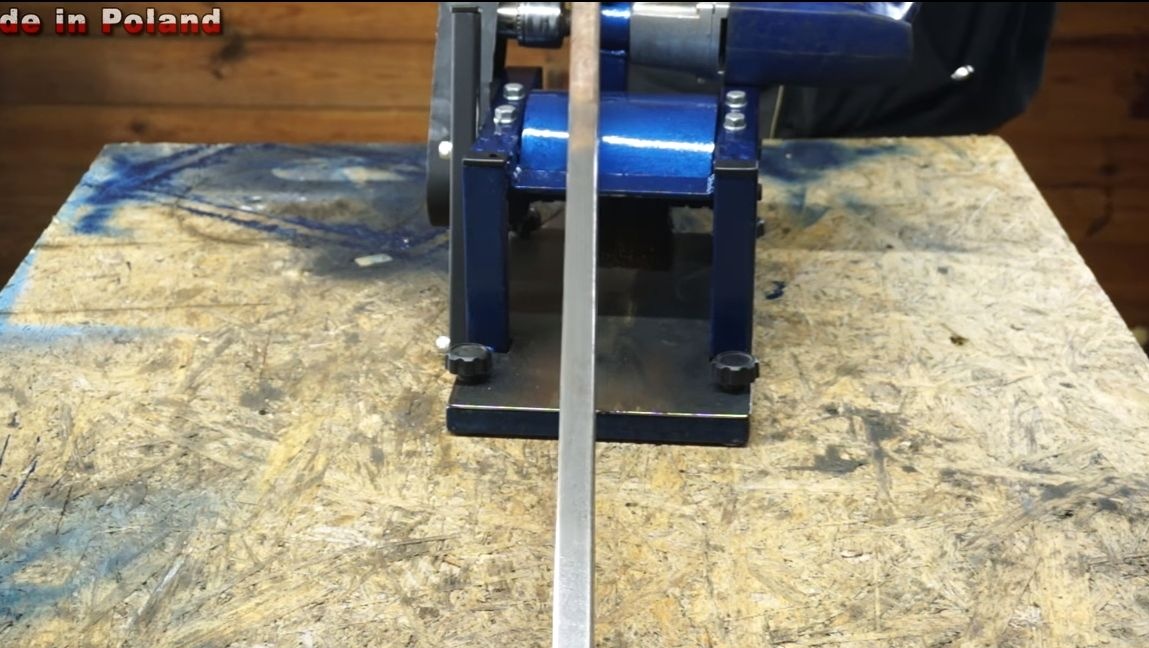
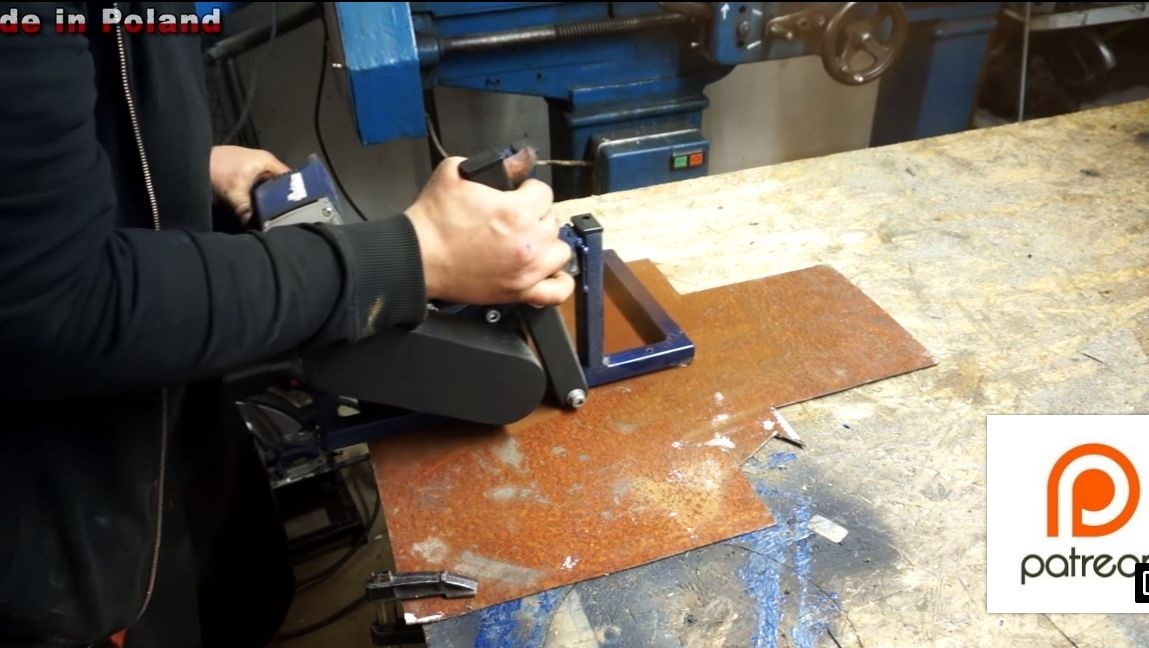
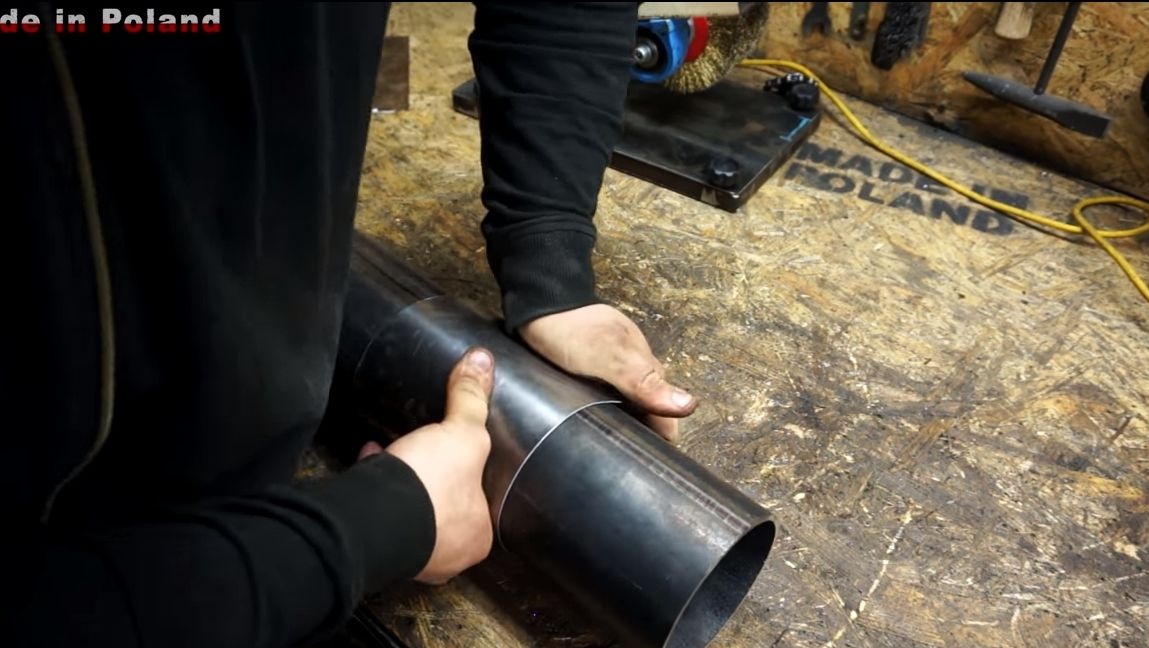
It is time to test the machine! We take the material we need, for example, a square pipe. We release the adjustment bolt and adjust the machine so that the brush is pressed a little against the pipe. Next, tighten the fixing bolt. We start the machine, for this we fix the trigger of the drill at the desired speed. The nozzle should rotate away from you, otherwise all the dirt will fly into your face. We make several passes and from the rusty pipe we get a beautiful and shiny one.
If you need to grind a large area of sheet steel, then this is also not a problem. We remove the work table from the machine, and lower the nozzle so that it touches the work surface. Well, then just drag the machine on sheet metal.
That's all, I hope you enjoyed the project. Good luck and creative inspiration if you decide to craft something. Do not forget to share your homemade with us!