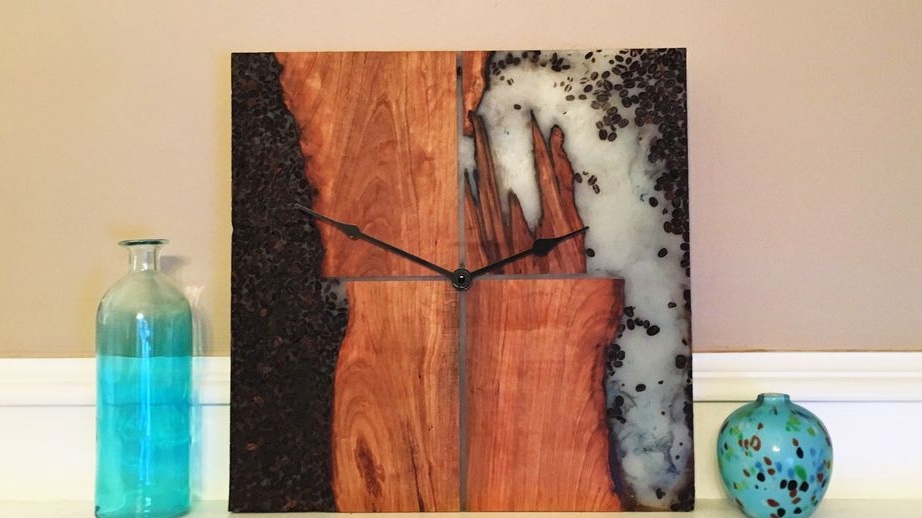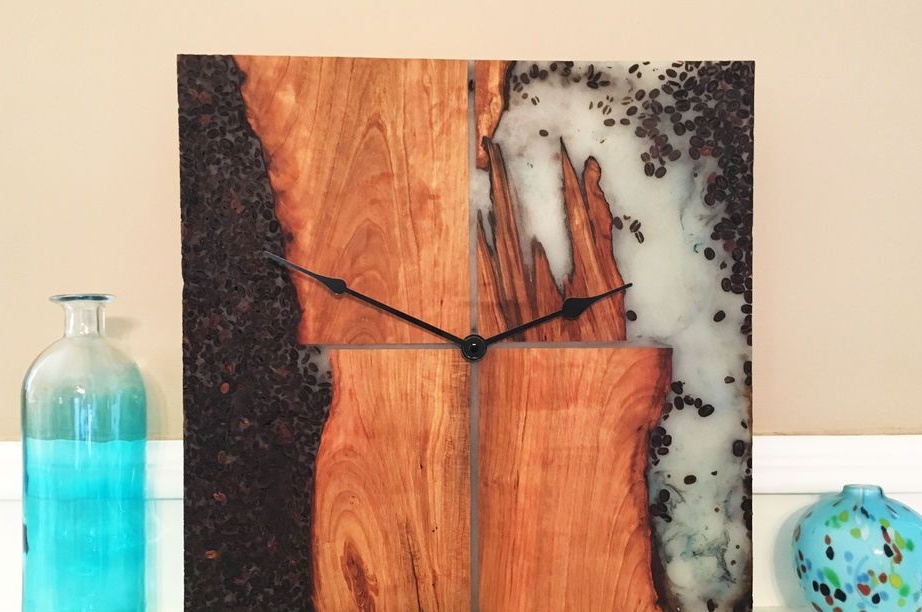
Greetings, readers of the best site on homemade! Today we will learn how to make unique watches do it yourself. Especially coffee lovers will appreciate them, because in the watch case there are real coffee beans. So if you suddenly run out of coffee, you can always make it from the clock! This is a joke, of course)) The main material used here was wood, as well as epoxy. In principle, you can design the design at your discretion, instead of coffee beans it can be flowers, beetles, pebbles and anything else.
The watch is durable and easy to manufacture, the quality of the product will depend on epoxy resin and casting skill. As for the mechanism itself, then you can, there are clock mechanisms of a penny. In quality, they are also different, here you need to pick up something reliable and accurate. Watches have always been and will be a great gift. But if you make these and yourself, you will not regret the time spent. So, we will consider in more detail how to make such a watch.
Materials and tools used by the author:
Material List:
- ;
- a cut of a tree (or the like);
- coffee beans;
- dye for epoxy (at your discretion);
- boards for the manufacture of formwork;
- oil, wax or other polishing agent;
- good dense adhesive tape;
- self-tapping screws;
- plywood.
Tool List:
- circular machine;
- orbital sander;
- clamps;
- drill;
- a screwdriver.
Watch making process:
Step one. How to pour coffee beans?
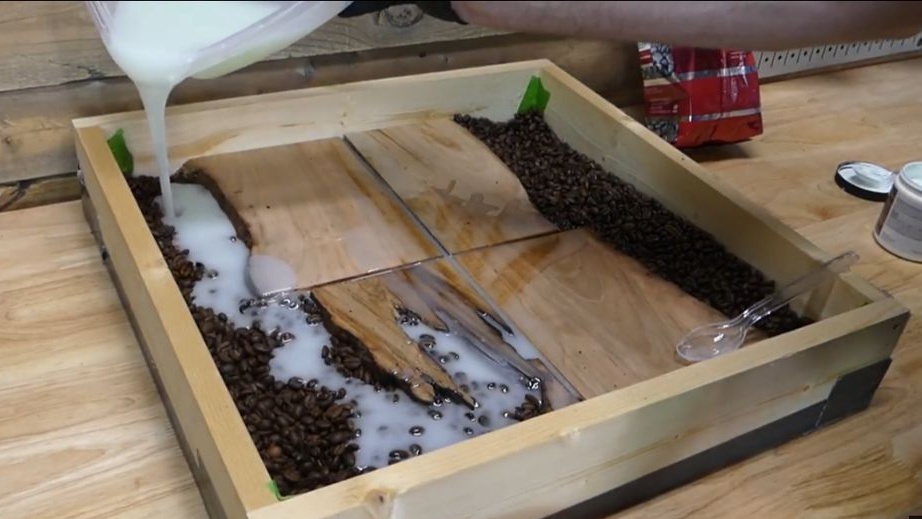
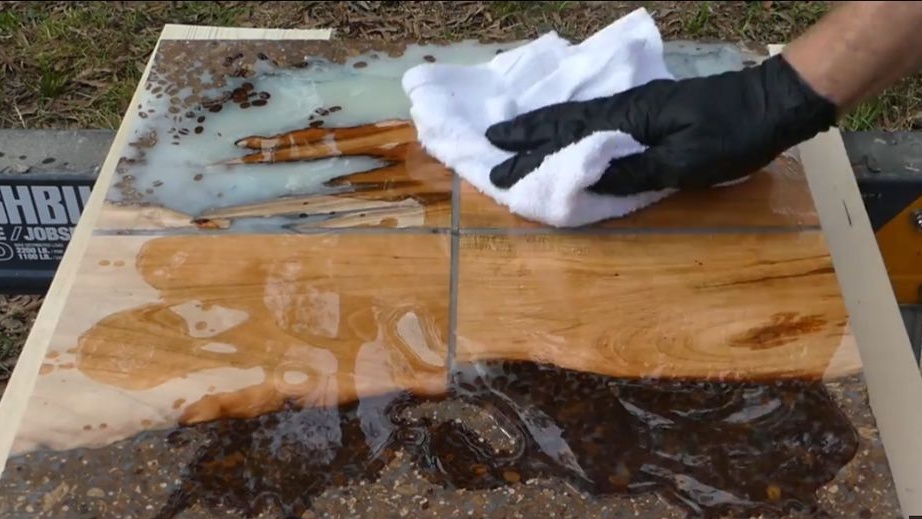
When pouring coffee beans, you will have a problem. The fact is that they are light and float on the surface of epoxy. In this regard, the resin must be poured in layers. First fill in the first layer and spread coffee beans on it. And when this layer sets, you can fill the second one on top. This also applies to other light objects that you want to fill. Coffee beans are easy to grind, just like epoxy, but avoid breathing this dust.
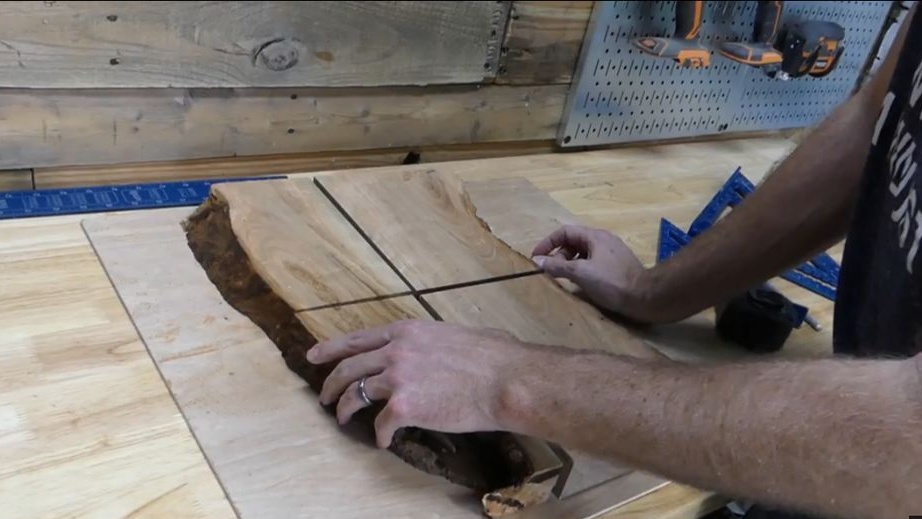
Step Two We work with wood
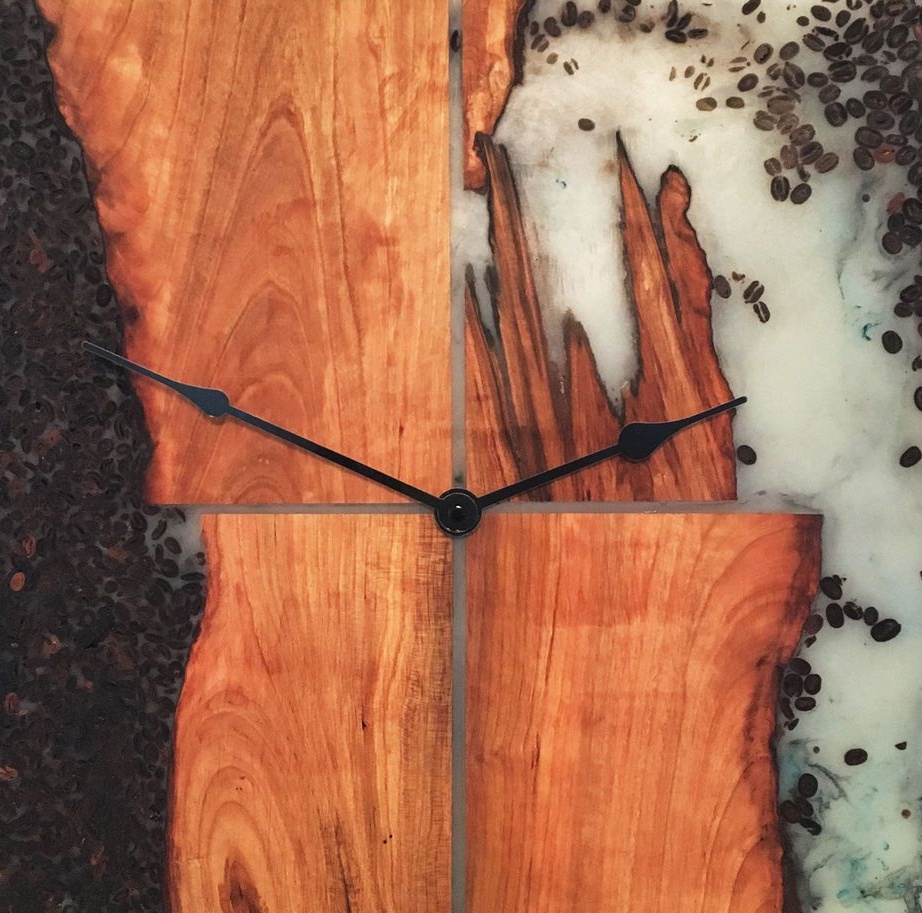
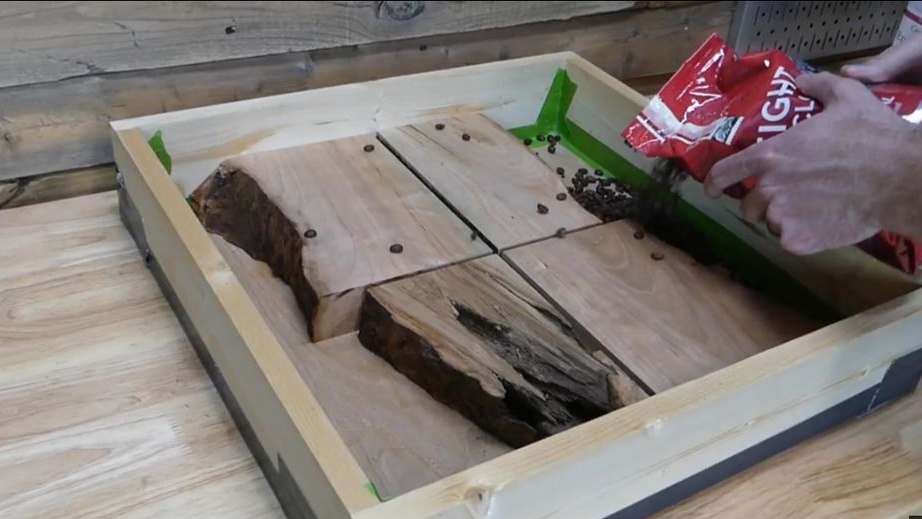
At the center of the watch is a cut tree slice. Its author decided to cut it crosswise, which displays noon, 3 hours, 6 hours, and 9 hours. To cut the material, use a circular saw. But this task can be completely dealt with using a hacksaw, electric saw or chainsaw.
Of course, the wood must be well dried in advance and preferably polished.

Step Three We make a form for filling
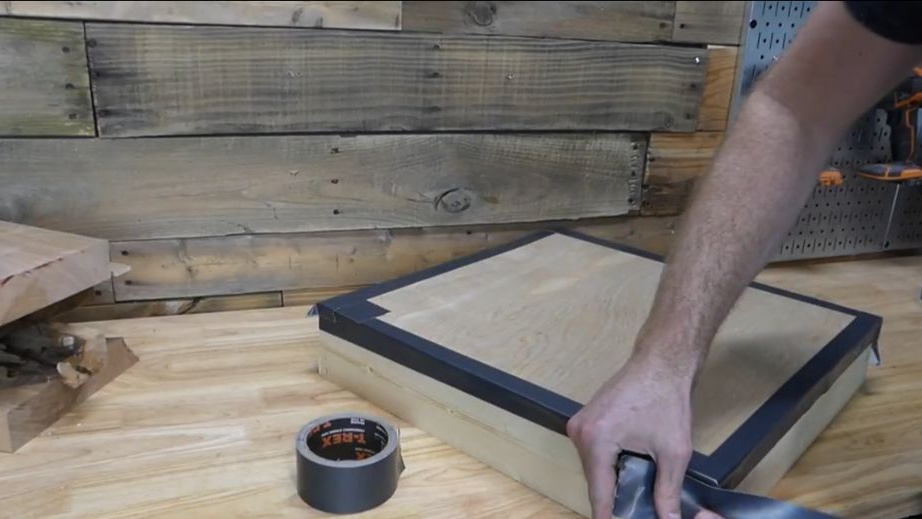
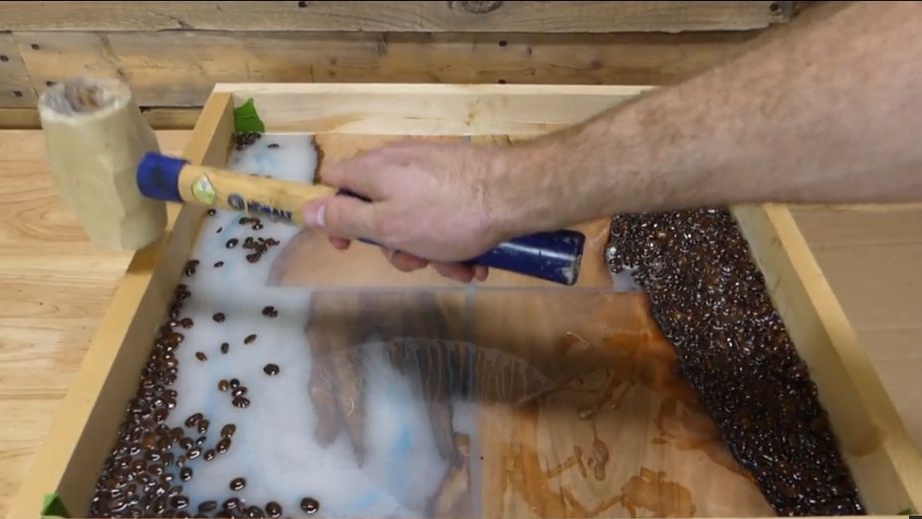
You can begin to make the mold for filling. For these purposes, you will need plywood or four boards. From the boards we collect a rectangle or square, we choose the sizes at our discretion. We use plywood as a bottom; it can be screwed on the other side using self-tapping screws. We need to glue all the cracks well so that the epoxy does not leak anywhere. For these purposes, find a good adhesive tape that can support the weight of the resin. It is advisable to glue from the inside, so there is less chance that the tape will peel off.
Step Four Fill the form and fill
The form can be filled out! We put our four pieces of wood in the center. Pour coffee in a circle, select the cheapest grains for this business. Now you can complete the first stage of filling. Pour some epoxy to fix the grains in place. When the glue dries, fill the last layer on top, it should not be too thick, since we still need to grind the grains. The author decided to tint the resin in white, everything looks pretty pretty. You can choose the dye at your discretion. Dye is usually added to the hardener.
That's all, now leave the epoxy to dry. Depending on the brand and quality, it can dry from eight hours to several days.

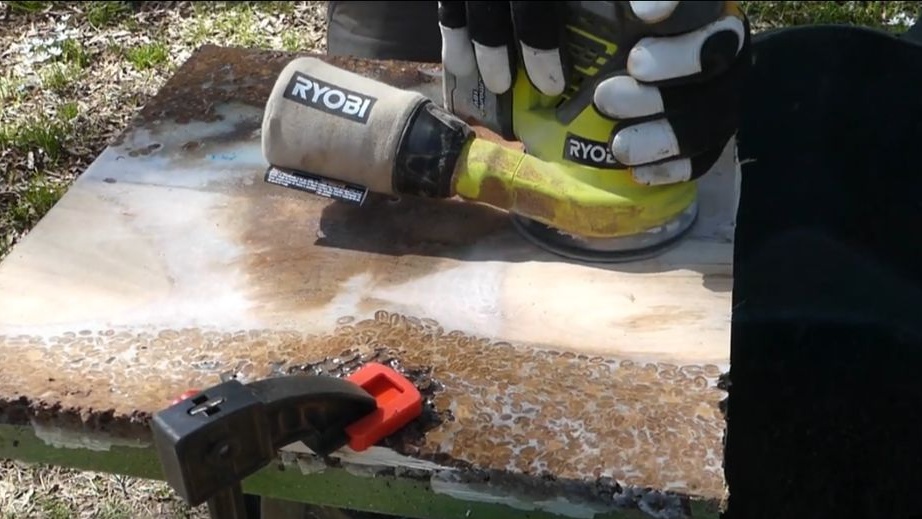
Step Five Grinding
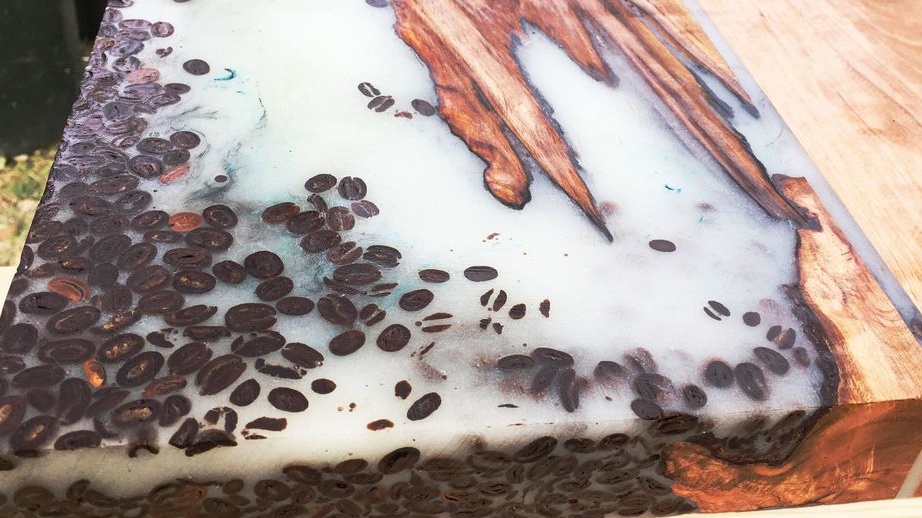
When the glue dries, you can start grinding. Get a flat plane will allow manual belt sander. But if there is none, you can cope with the help of an orbital machine. First, we level the plane with a large emery cloth, and then gradually reduce the graininess, the surface should not have deep scratches. The final is sandpaper with a grit of 220.
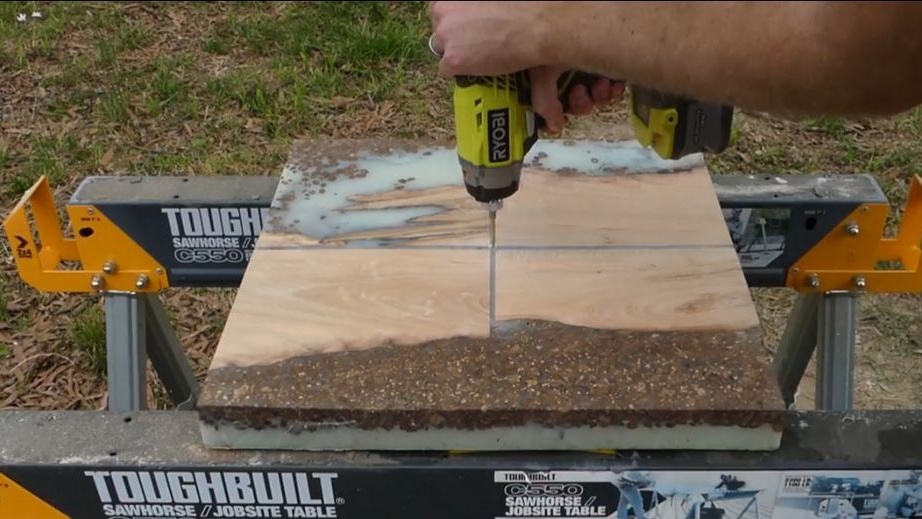
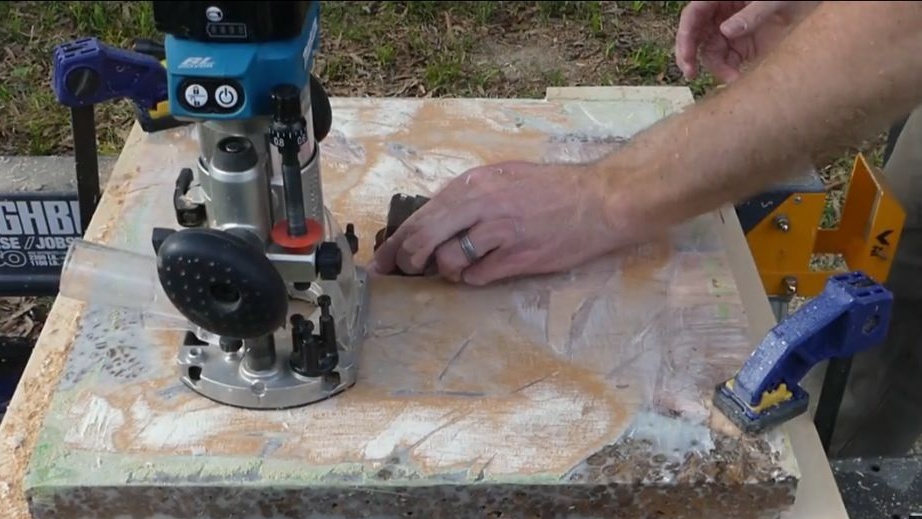
Step Six Place for installing the clockwork
Depending on the size and shape, you need to cut a seat under it. Here you will come to the rescue hand mill. Drill a hole in the center of the watch where the clockwork shaft will be pulled out. It is best to buy a watch movement with a shaft more authentic, since our material is quite thick. That's all, set the clock mechanism in its place and see what you got.
Seventh step. Final processing
The surface of the watch after grinding will be matte. To give the watch transparency, we apply oil, varnish or a thin layer of epoxy on the surface. Finally, when the oil dries, you can also polish the surface with wax.
Step Eight. Start the clock
The clock is ready, set the hands and set the time. Now you just have to install the batteries. That's all, the clock has earned! They look pretty impressive.
That's all for me, I hope you enjoyed the project, and you found interesting information for yourself. Good luck and creative inspiration in the manufacture of homemade goods! Do not forget to share homemade goods and ideas with readers of the site!