Greetings to lovers of devour! The spring time has come, and this means that it is time to get out into the nature and fry kebabs, chicken, geese or whoever has what. If you are planning to fry something big, then for these purposes you will need a trident for grilling. To make such a thing is not difficult, but it has one drawback - it cannot turn itself. When frying meat, you have to constantly turn it manually, and this is not so pleasant, because often smoke comes into your eyes, mosquitoes bite, and you also want to talk with friends. One author found a way out of this situation and decided to motorize the trident.
As the main element here, a small motor with a gearbox that works on 12V voltage is used. Power is enough to rotate not one trident, but even more chickens. The installation is collapsible, very convenient to use. In nature, you can connect it to a car battery. But in order not to risk the charge of a car battery, it is better to bring along a separate battery for the device. So, we will consider in more detail how to assemble such homemade!
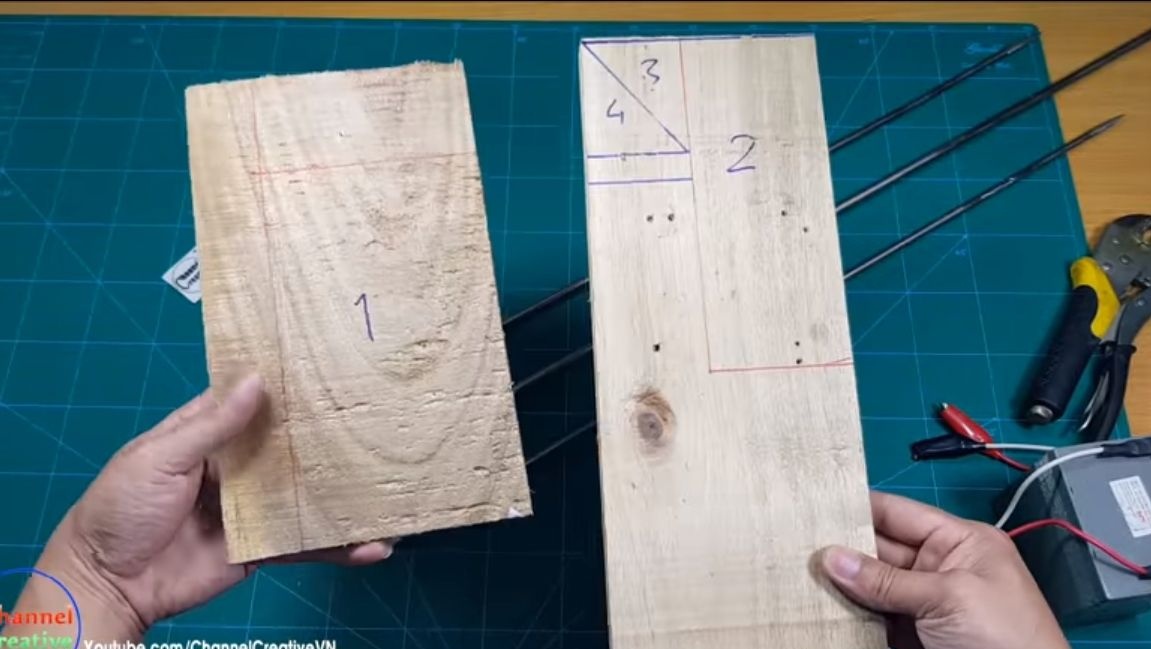
Materials and tools used by the author:
Material List:
- (from where, it is unknown who knows, we write in the comments);
- steel rods, preferably stainless steel;
- boards;
- self-tapping screws;
- door hinge;
- cogs with nuts;
- wires.
Tool List:
- grinder;
- roulette;
- welding machine;
- drilling machine;
- marker;
- a vise.
Homemade manufacturing process:
Step one. Choose an engine
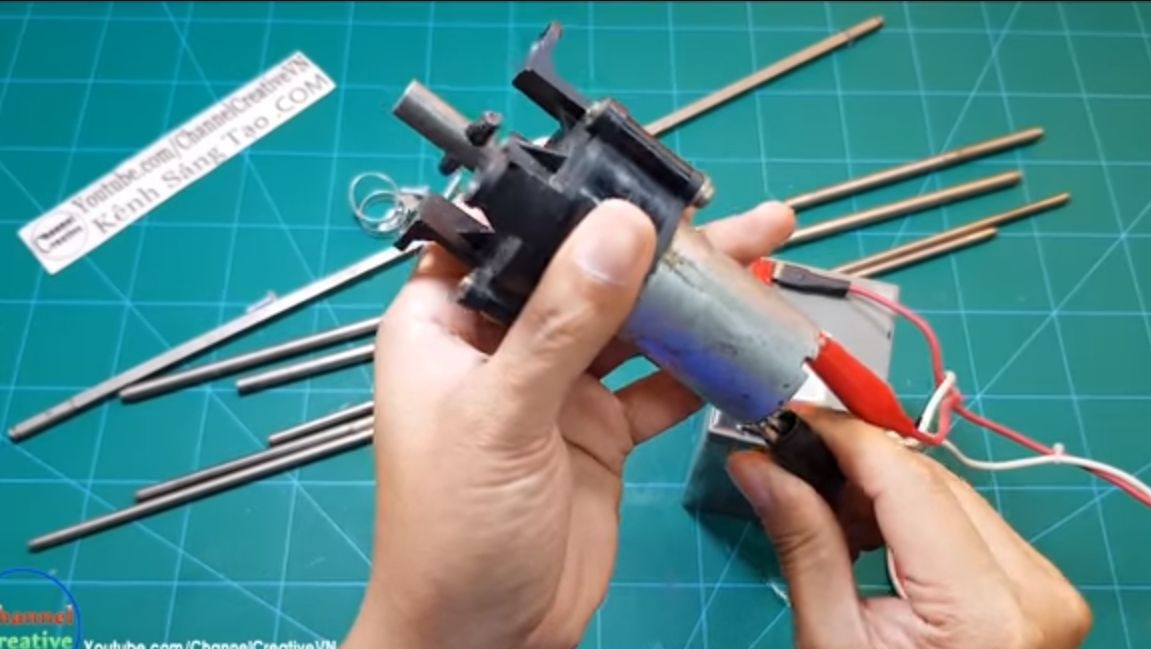
The author’s engine is 12V, the 775 motor or the like is suitable here. But the most important thing here is the gearbox. Turnovers should be kept to a minimum, as it is not necessary to rotate the meat too quickly. But at low speeds there will be high torque, which will allow you to twist quite significant objects. The author used a motor with a convenient bracket for mounting, but specifically why this part was removed remains unknown.
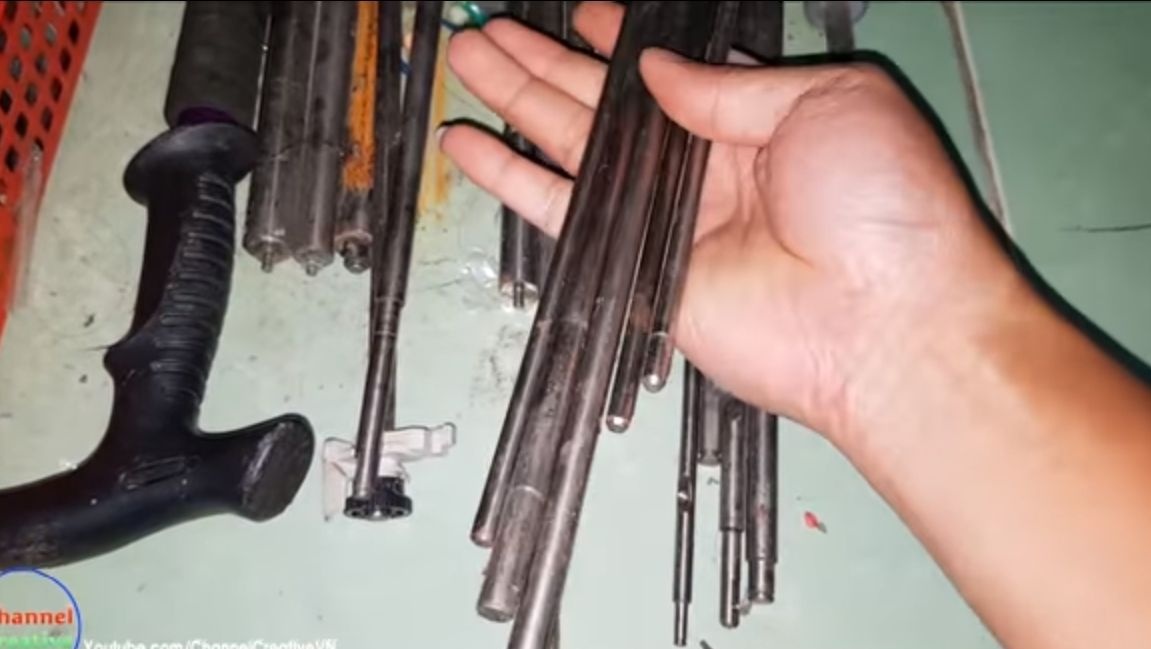
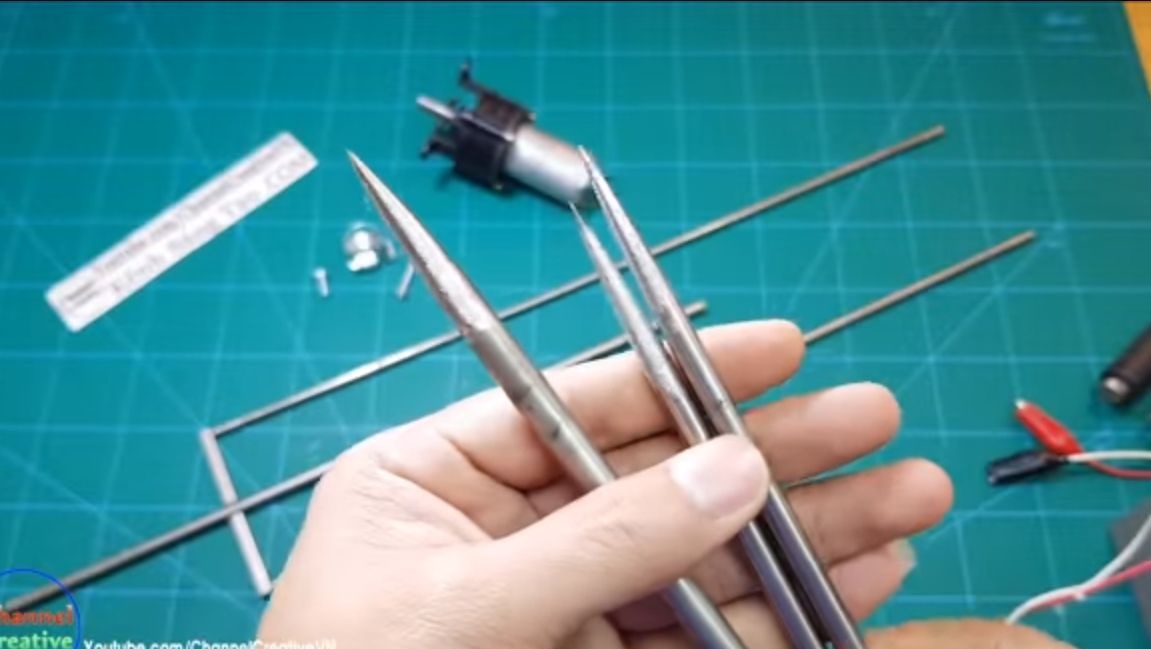
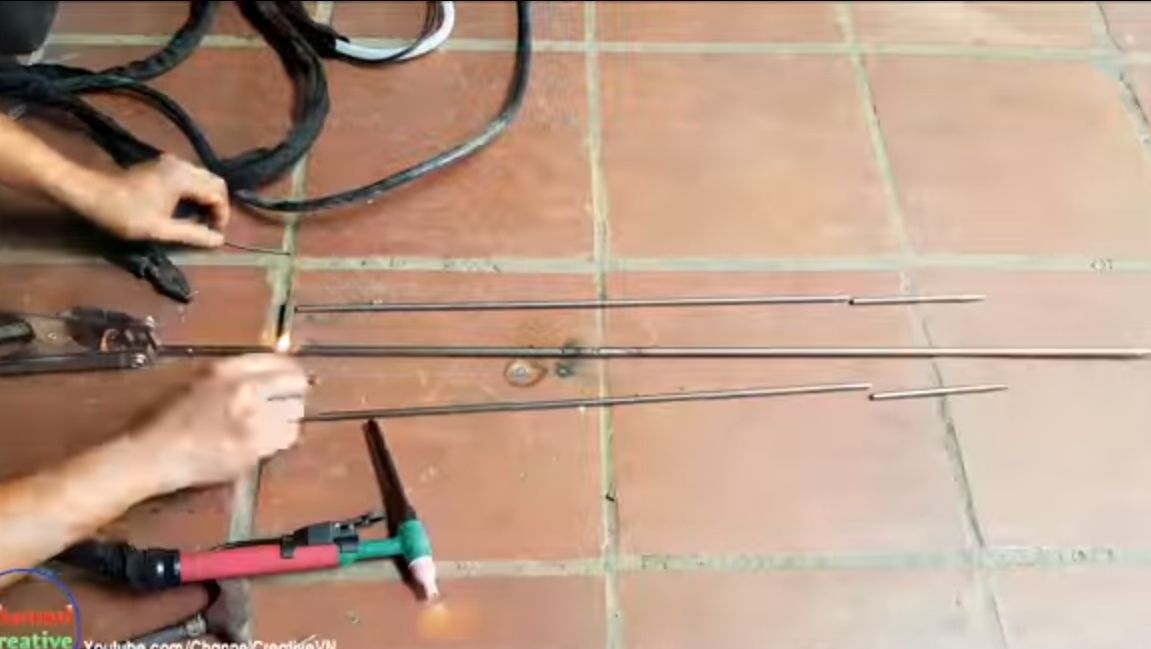
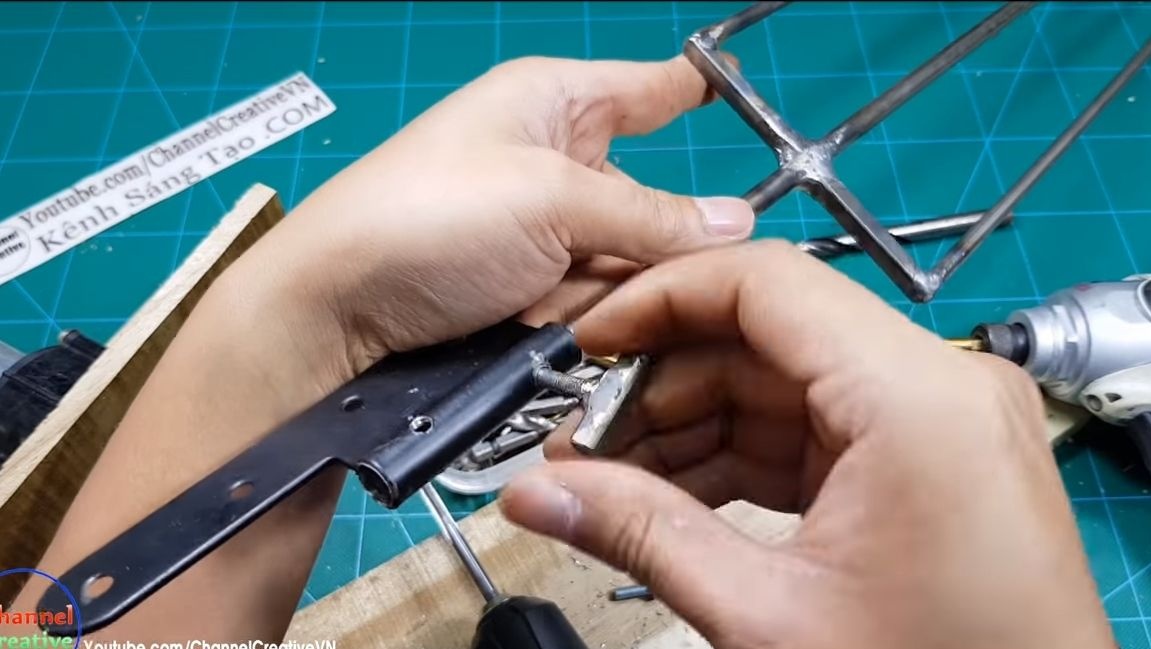
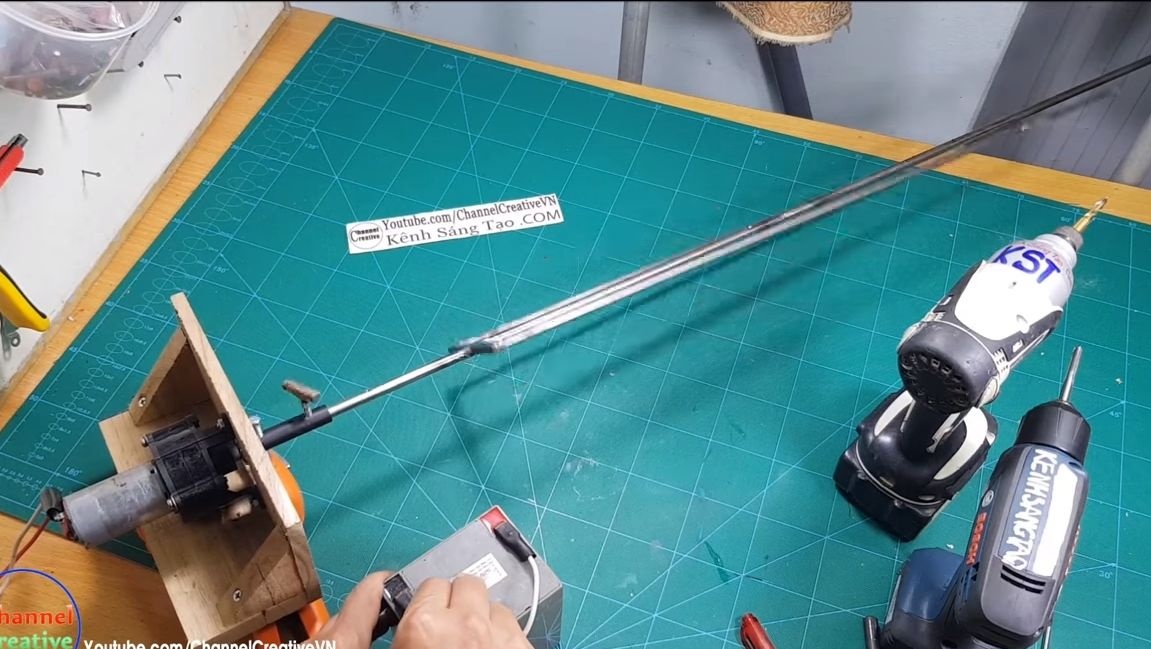
Step Two Trident assembly
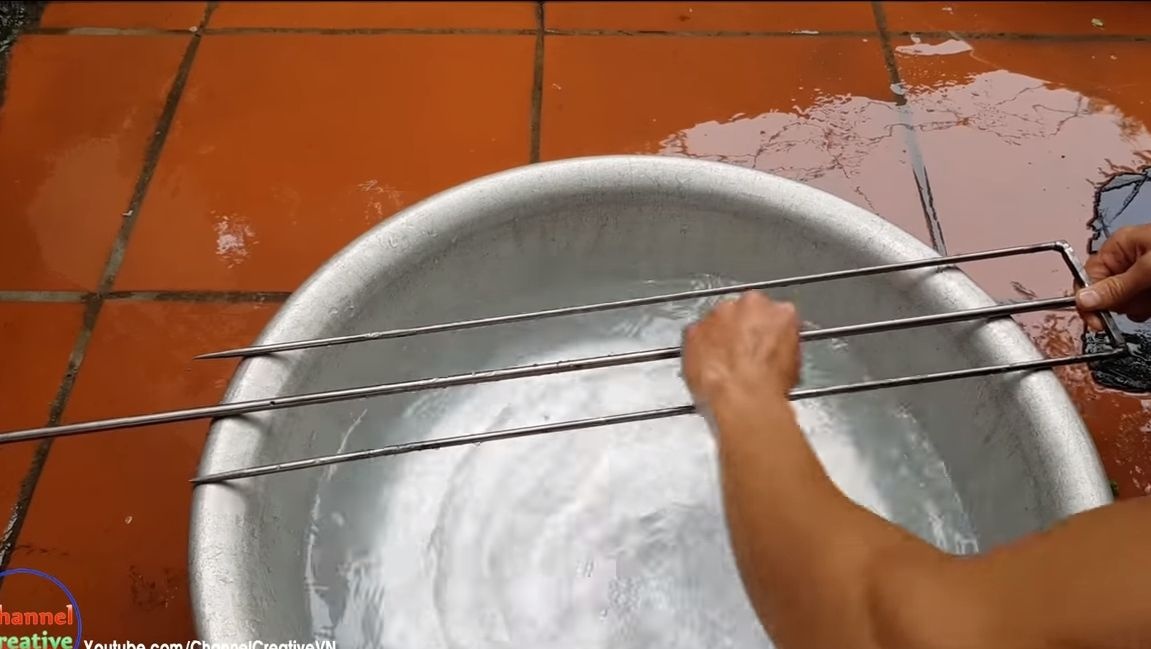
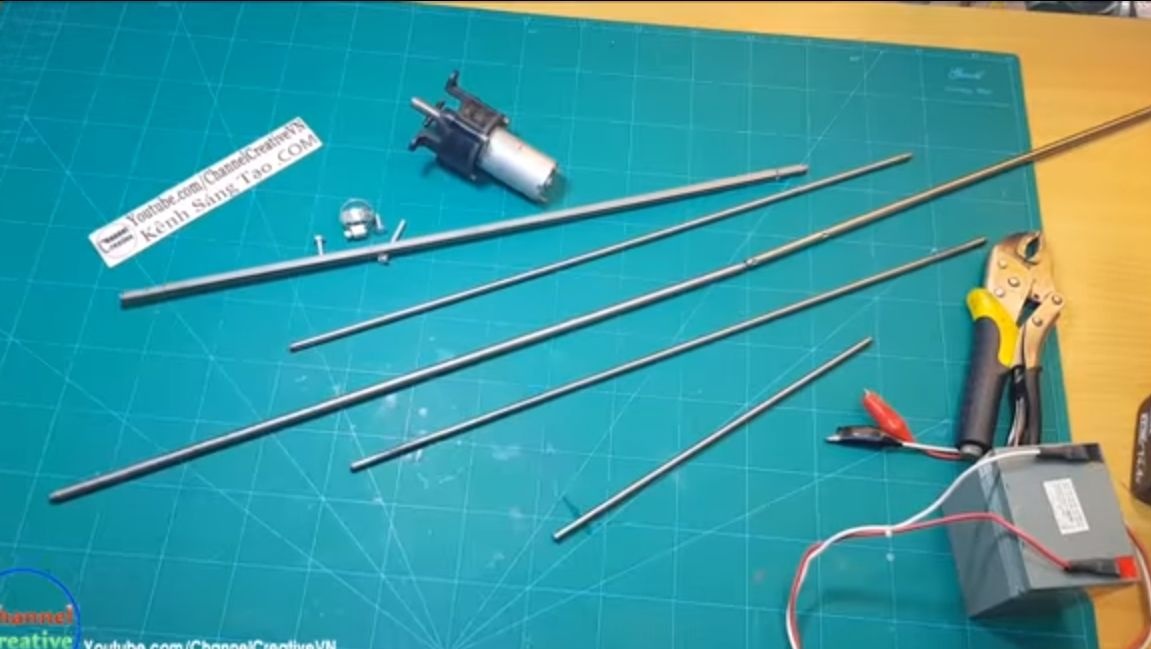
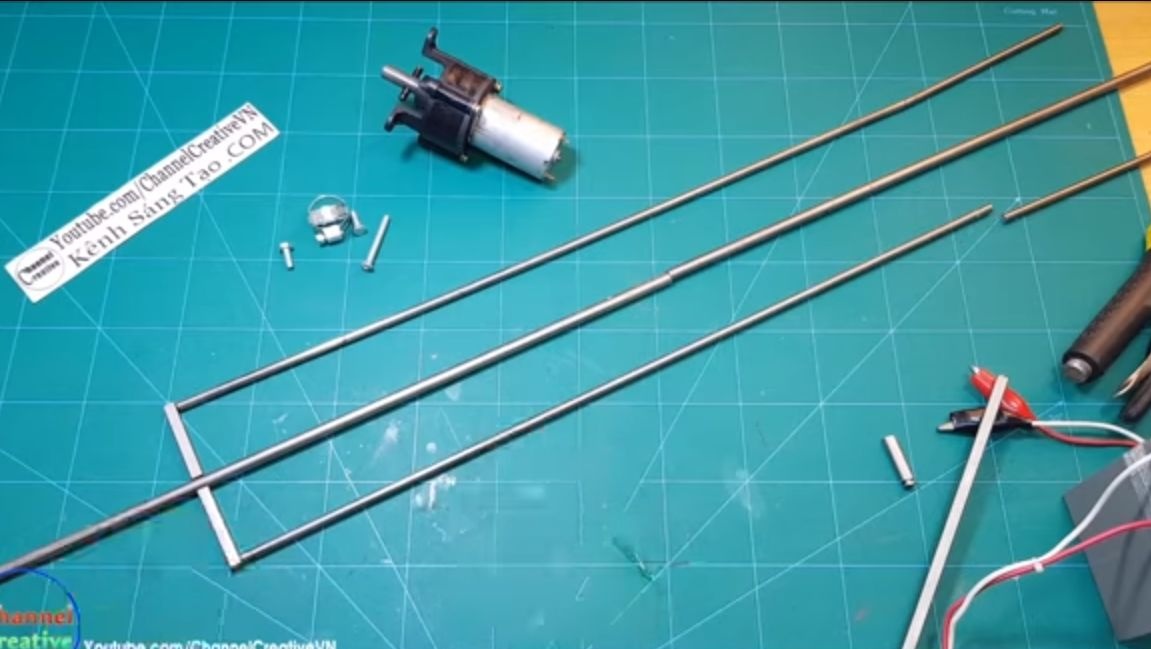
We are looking for materials for the assembly of the trident. The central rod should be quite thick to support the weight of the meat, it should not bend. As for the side rods, they can be thicker, their task is to keep the meat from turning. It would be nice to use stainless steel rods for making, but it can be problematic to cook, it all depends on the particular brand.
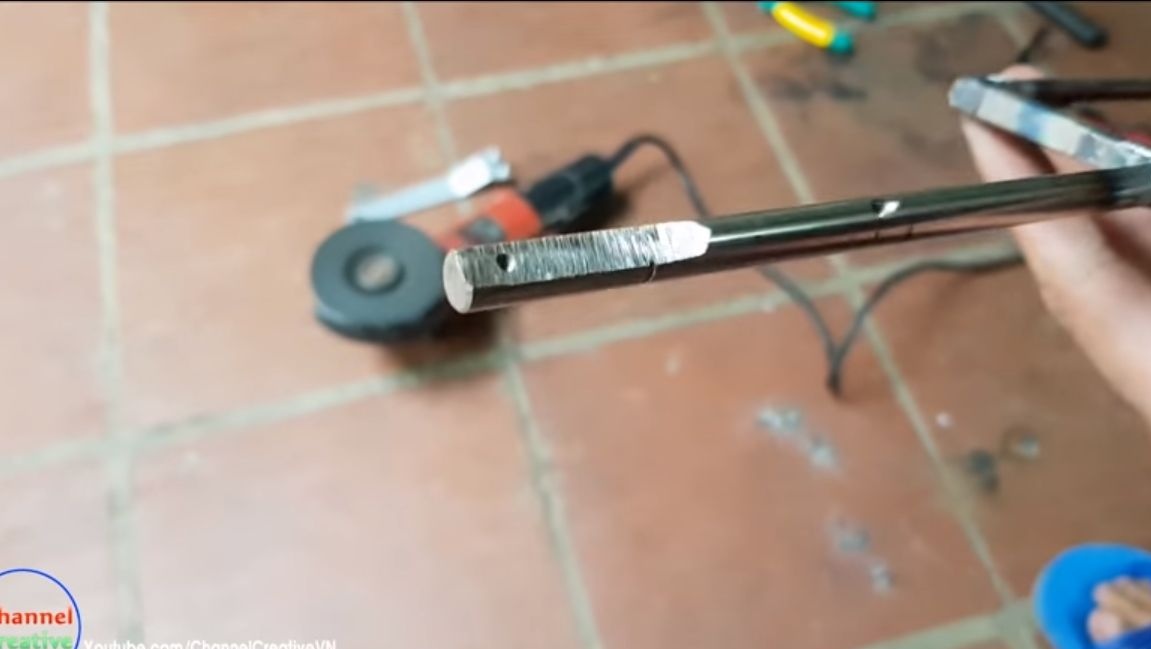
Black steel is quite suitable, but it would be nice to apply heat-resistant non-toxic paint to it.Alternatively, the metal can be cleaned, covered with linseed oil, and then calcined. The procedure can be done several times. As a result, a durable protective layer is formed on the surface, which will not allow the metal to rust.
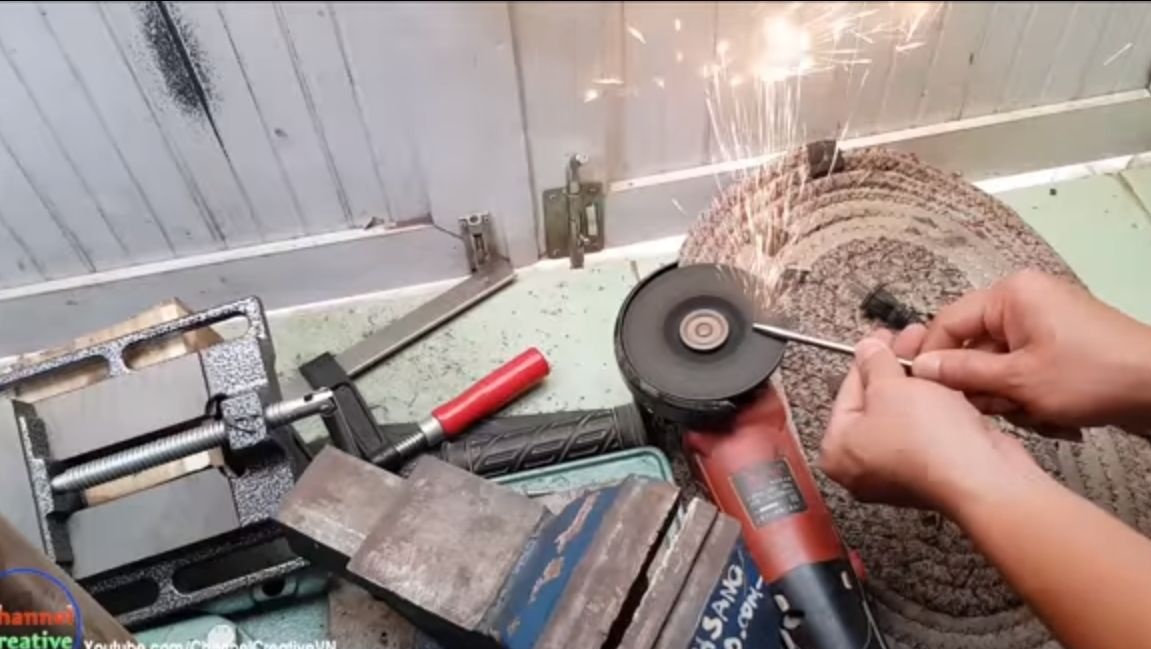
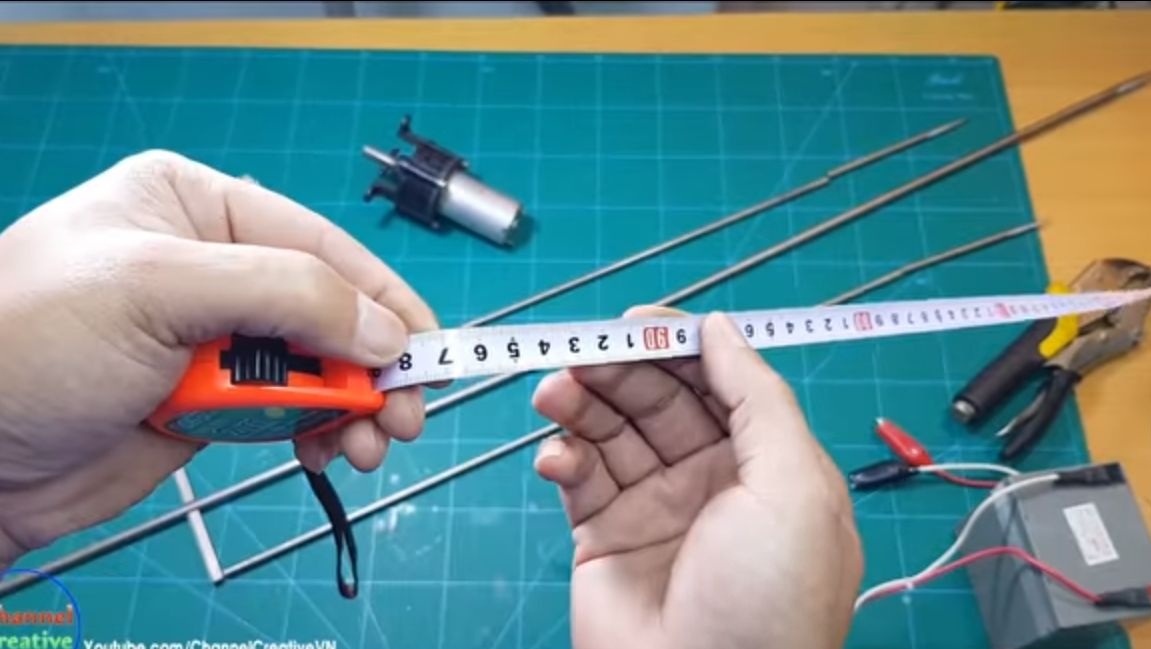
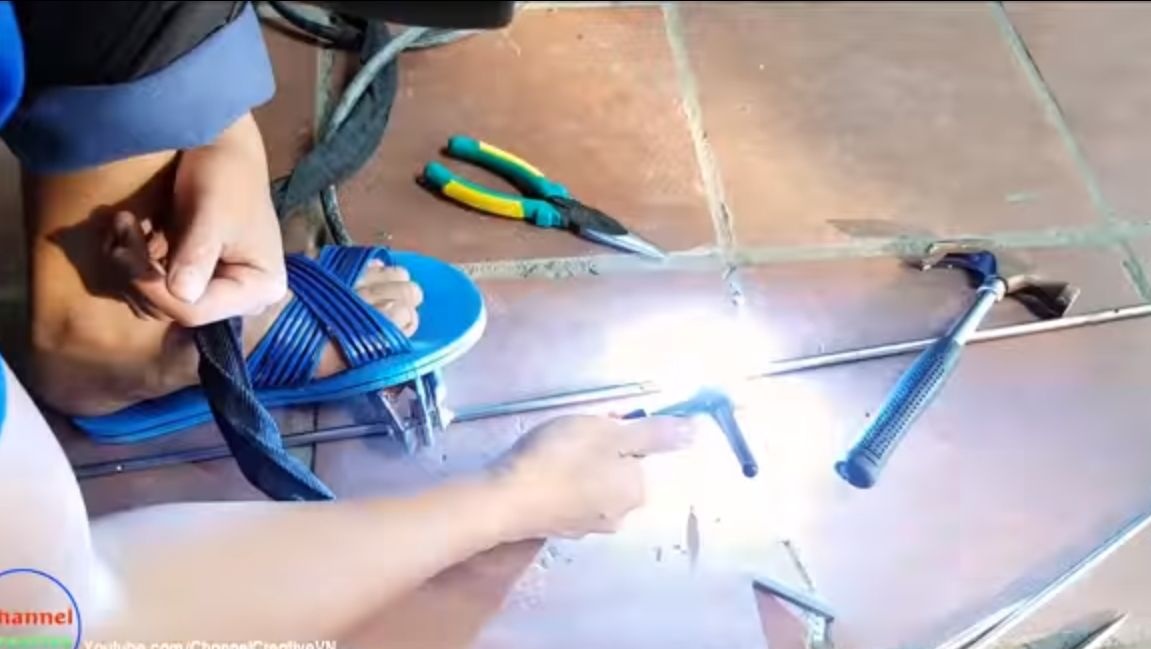
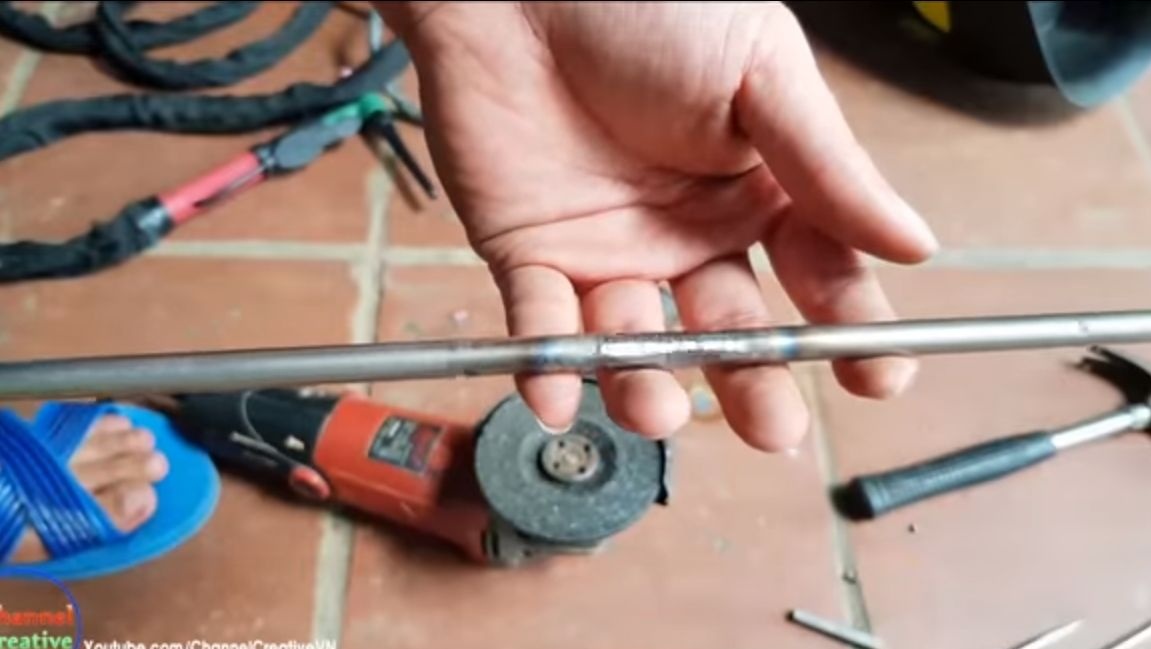
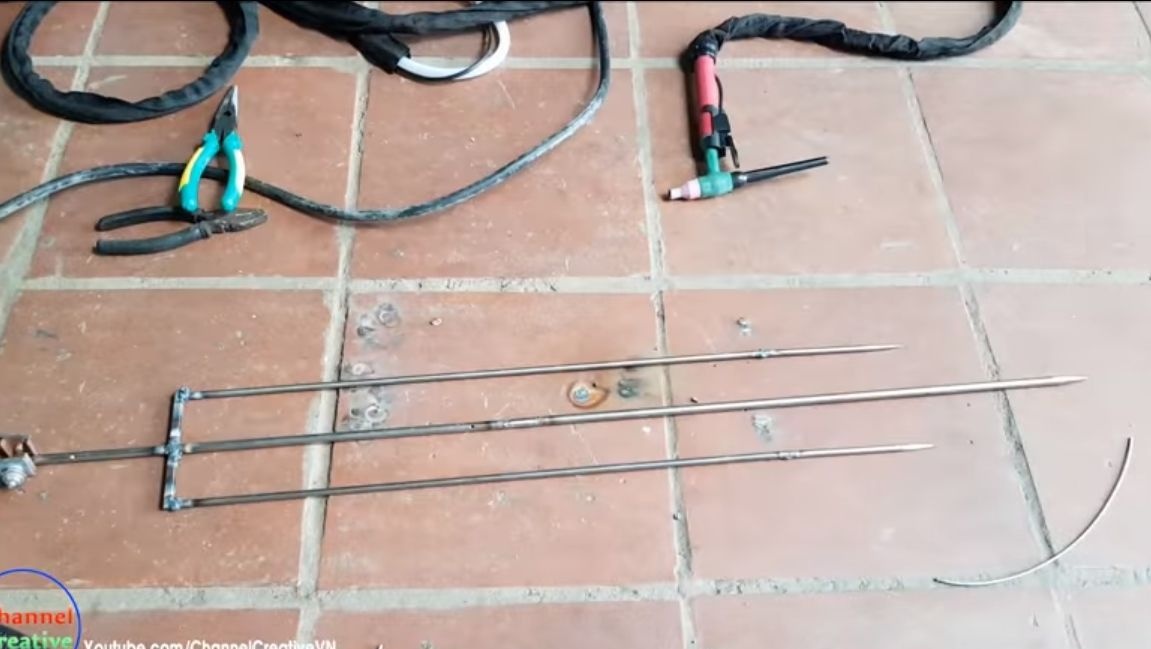
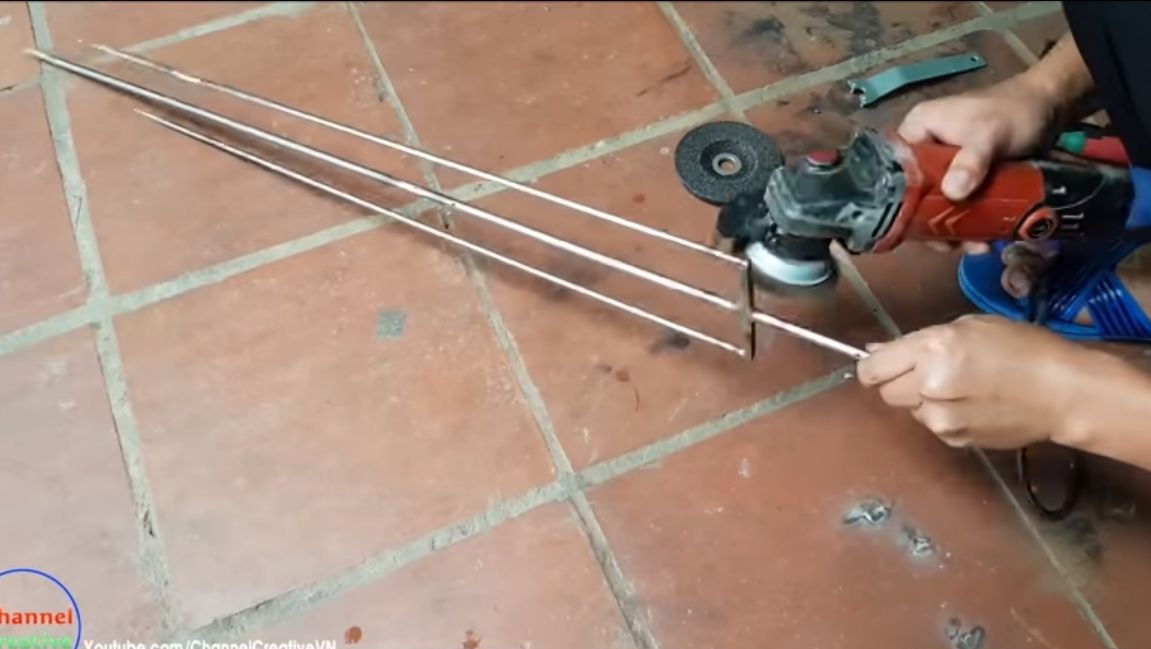
We make the necessary measurements, cut the workpieces, and then weld. The ends of the trident need to be sharpened for easy stringing of meat. We clean the welds with a grinder, otherwise they will interfere with the process of cooking the roast. At the end, we process the trident with a grinder with a wire brush to clean all the dirt.
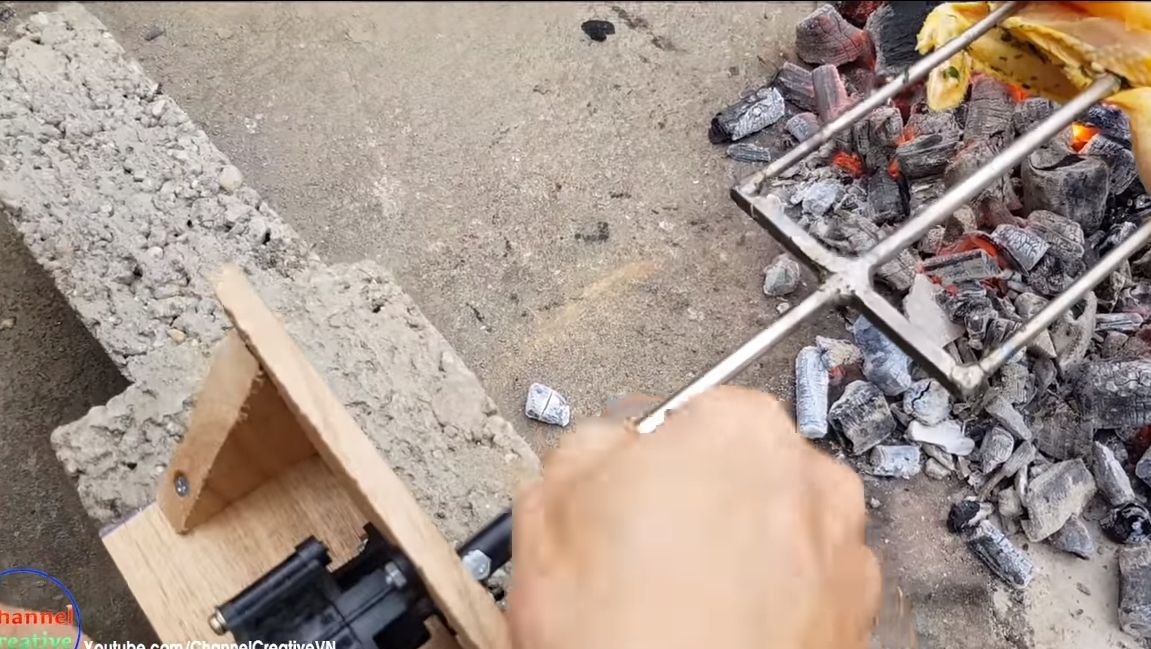
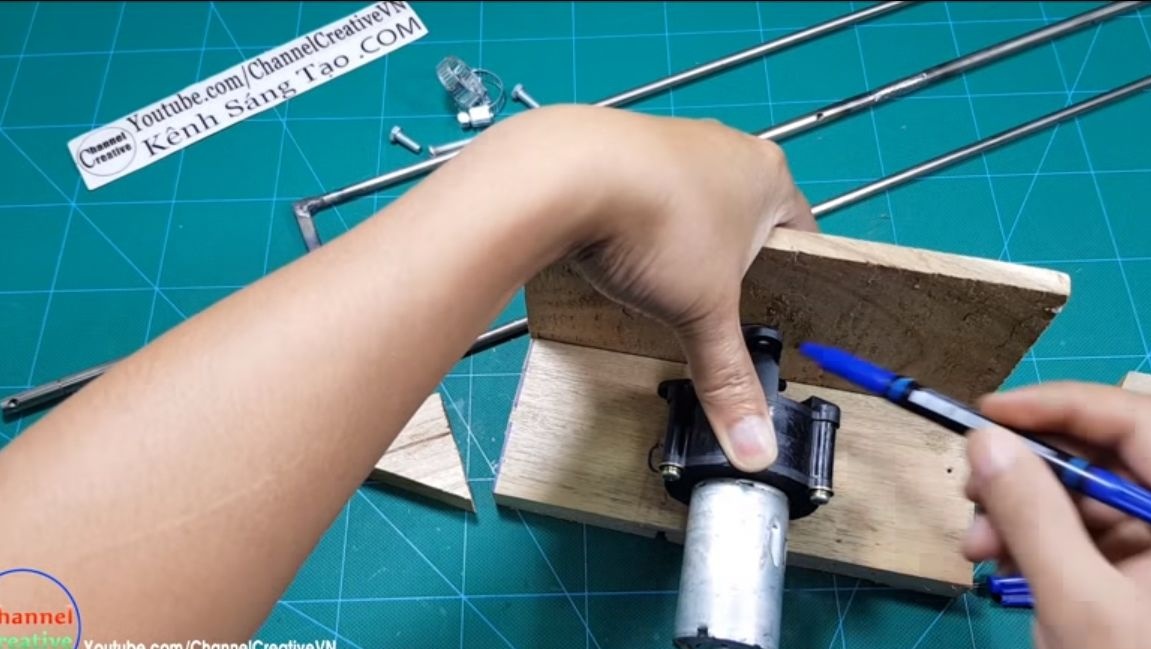
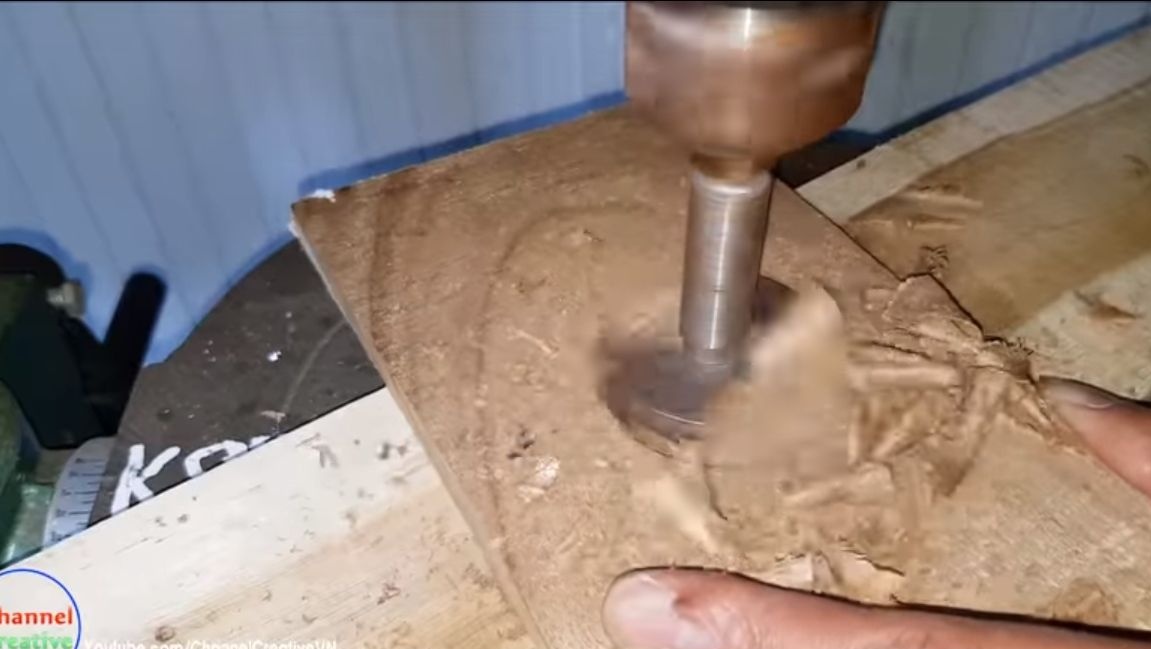
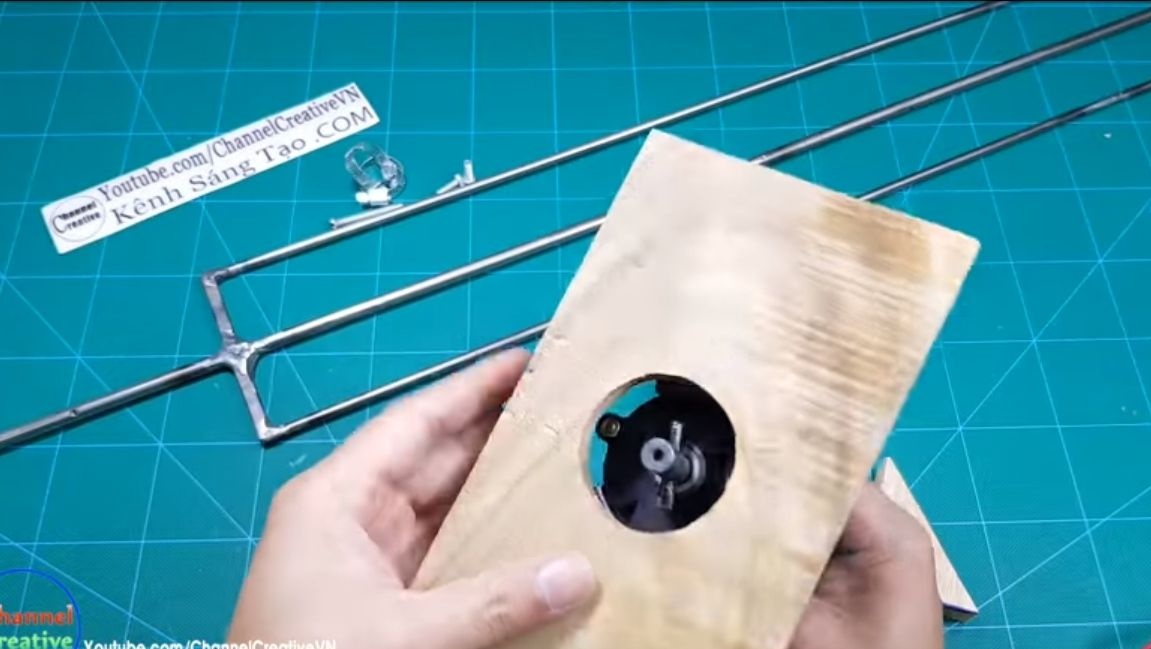
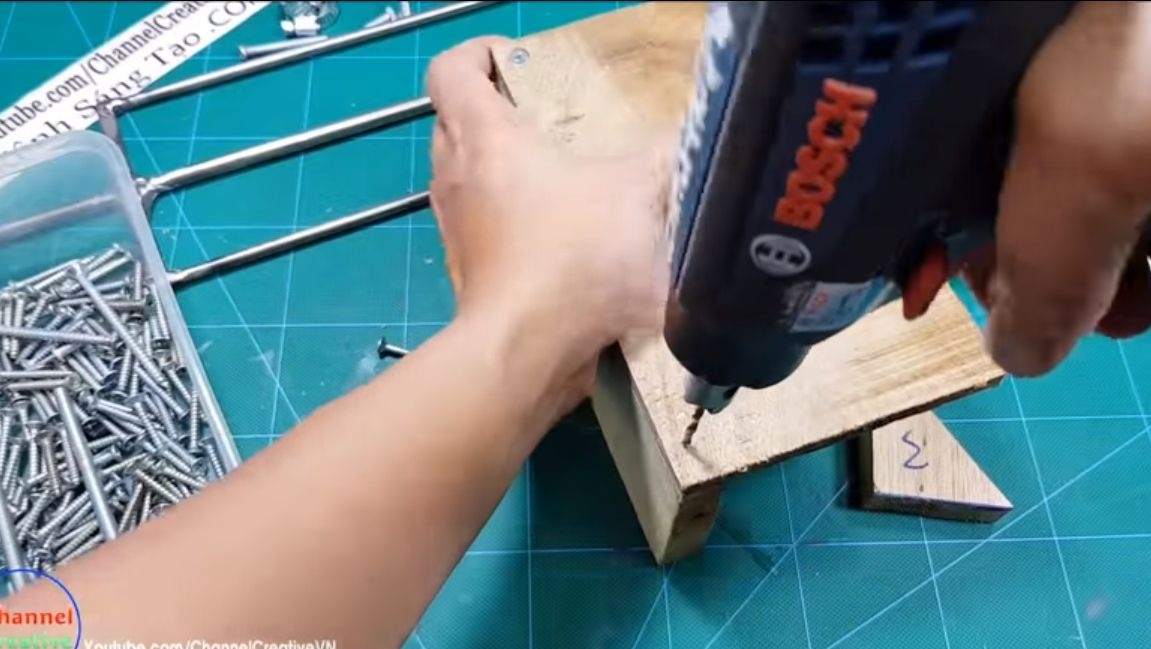
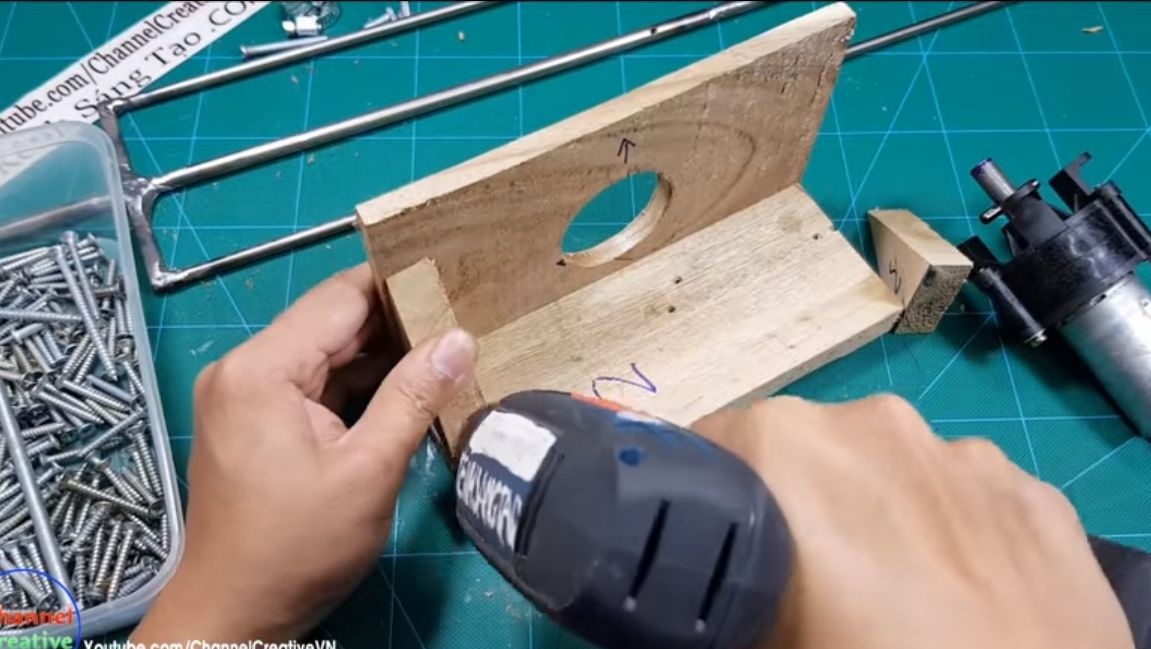
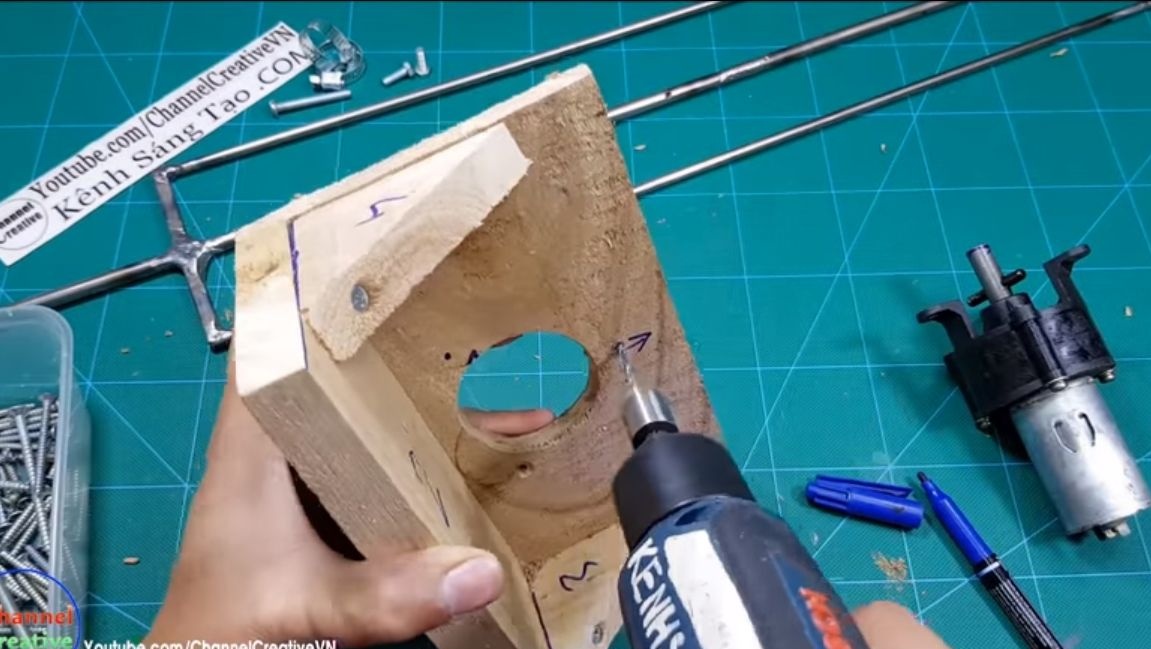
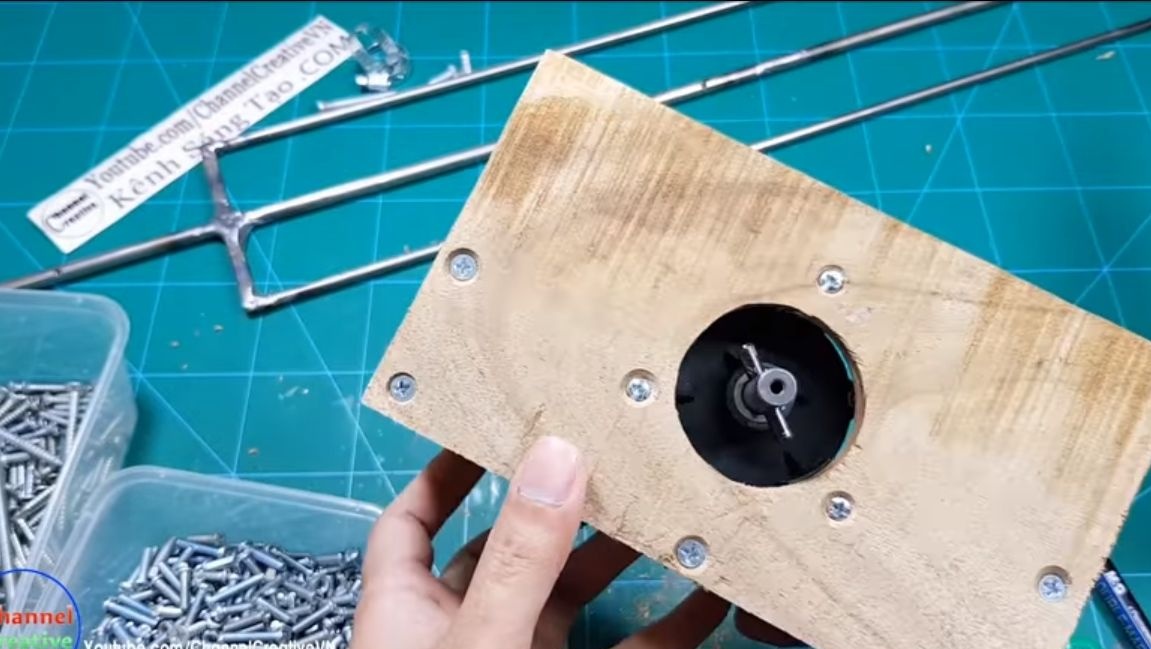
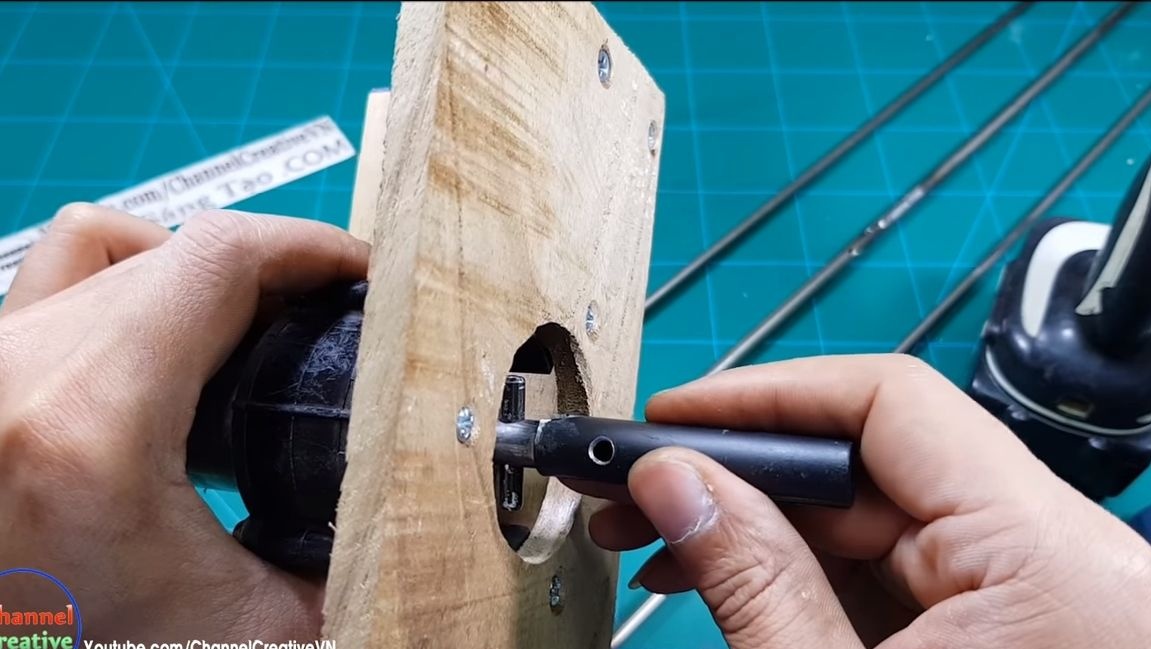
Step Three The basis for the motor
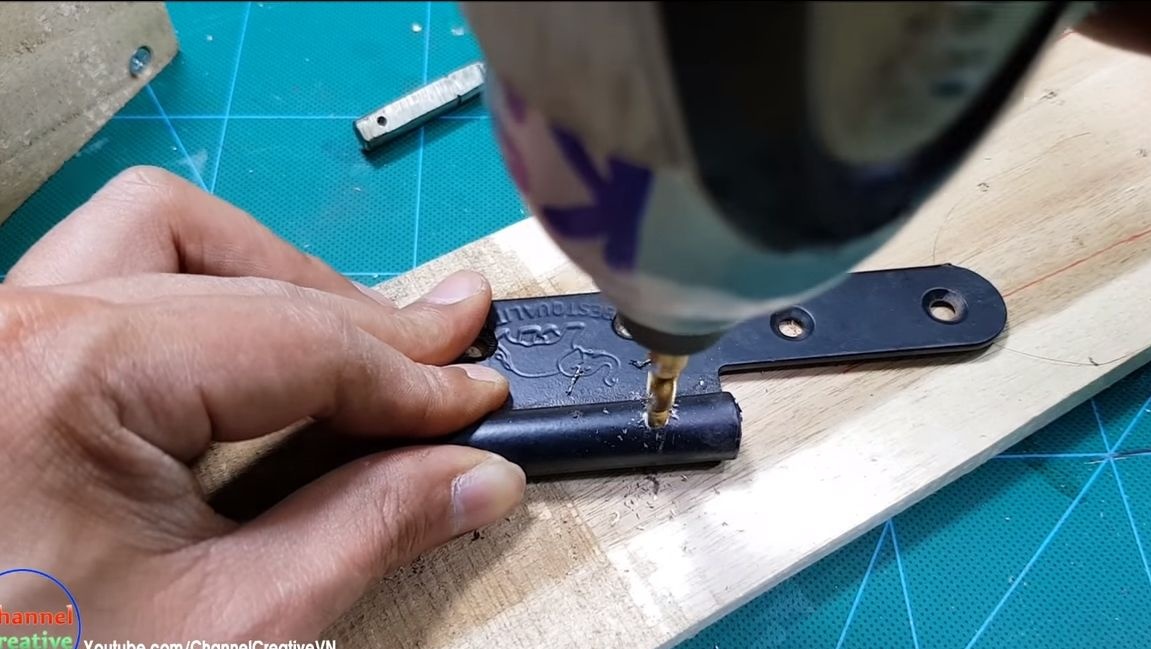
We need to fix the engine on some basis, which can then be put on brick or ground. The author collects it from the boards. Choose a genuine board so that the motor does not crank together with the platform at high load. Drill a hole under the motor shaft with a bat and secure it using screws with nuts or another method.
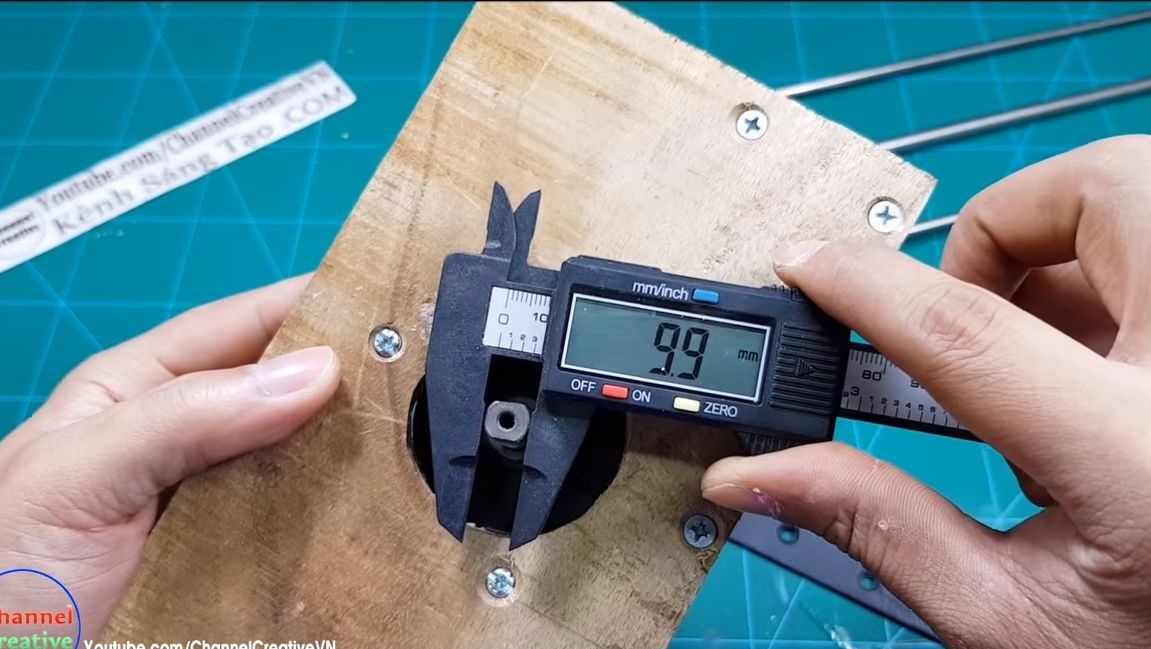
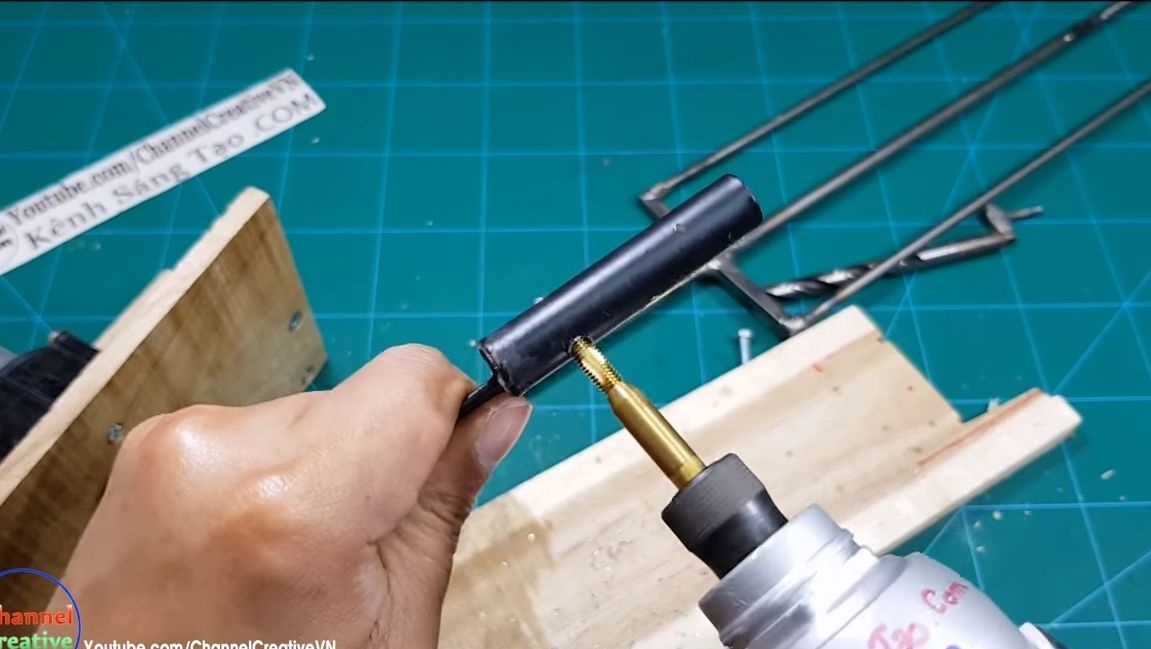
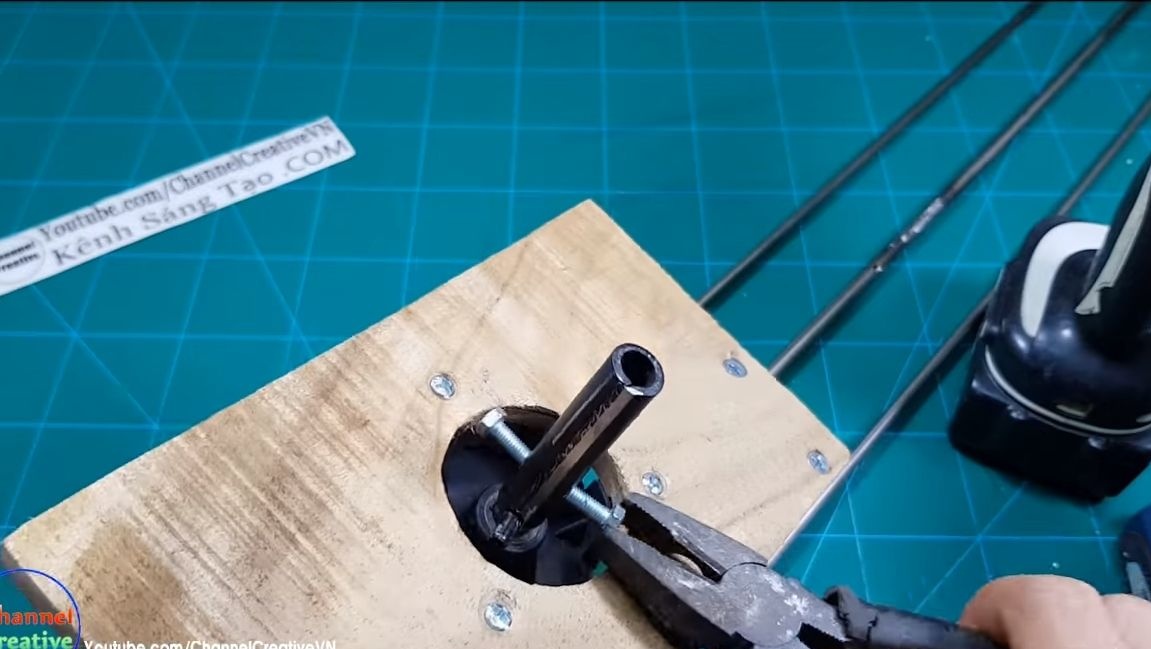
Step Four Making an adapter between the axles
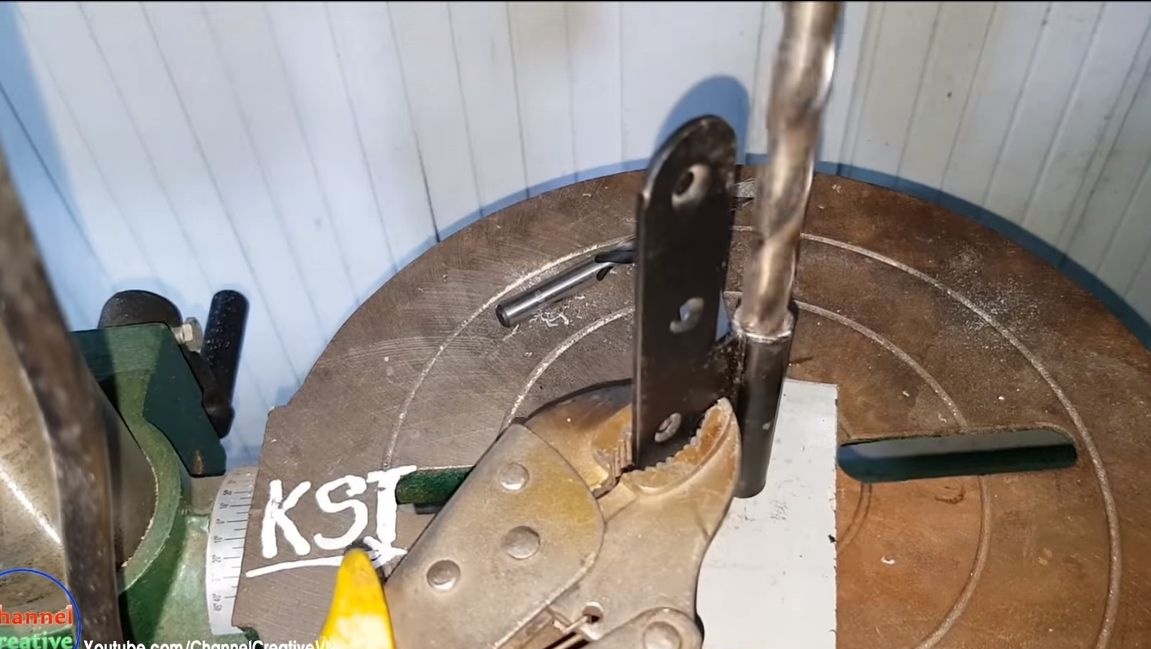
The gearbox axis must be connected to the trident axis. For these purposes, you will need to make an adapter. The author used a door hinge for such a thing, but you can pick up any other piece of pipe in diameter.
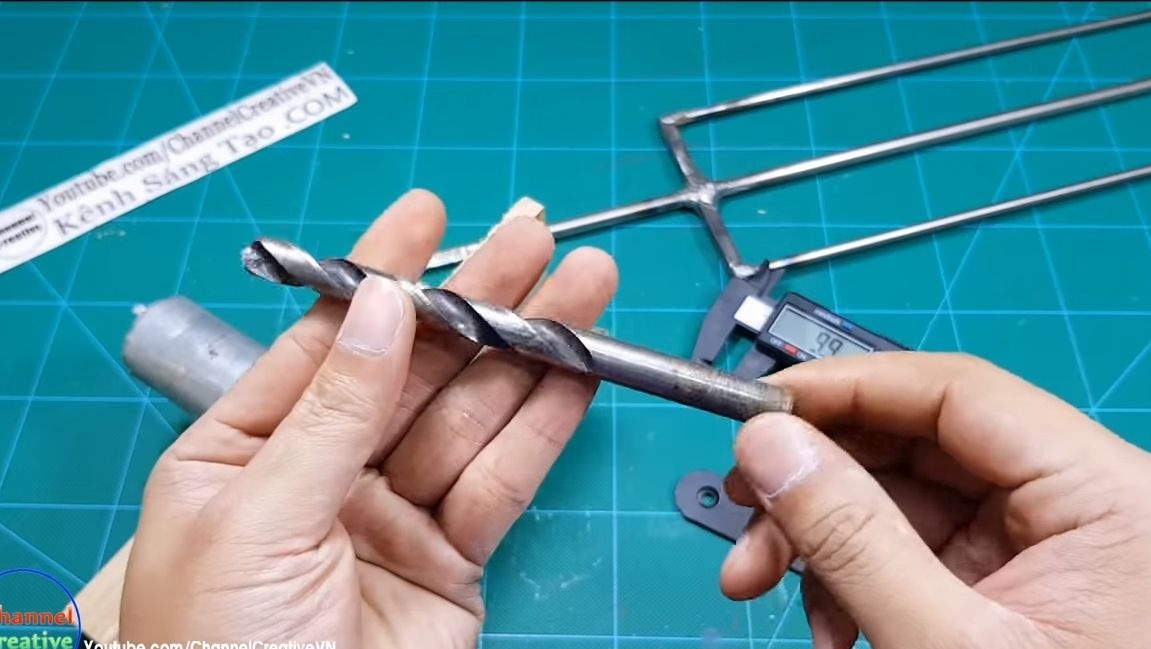
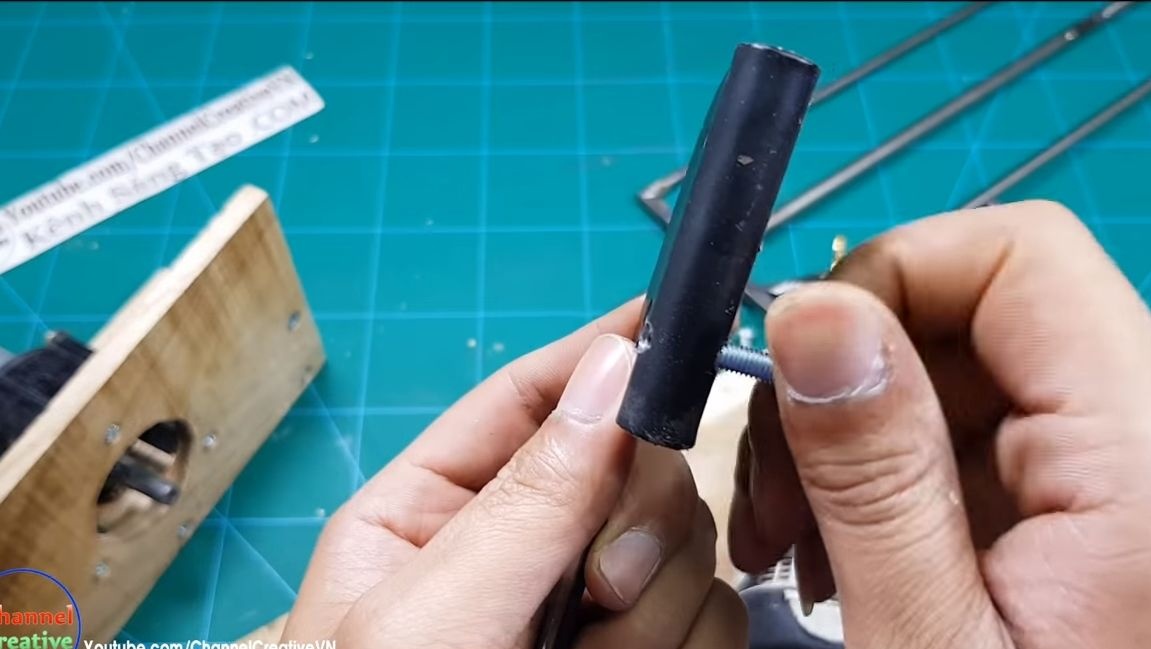
The diameter of the axes of the author turned out to be different, the axis of the gearbox was slightly larger, in this regard, the pipe had to be drilled to the desired diameter.
To fix on both ends of the pipe we drill holes and cut the threads. The tube is fixed tightly to the gearbox shaft using two screws. As for the other end, the idea is that the trident should be removed for ease of use. For these purposes, the author has welded a steel rod across the bolt across the bolt so that the latch can be twisted or unscrewed by hand.


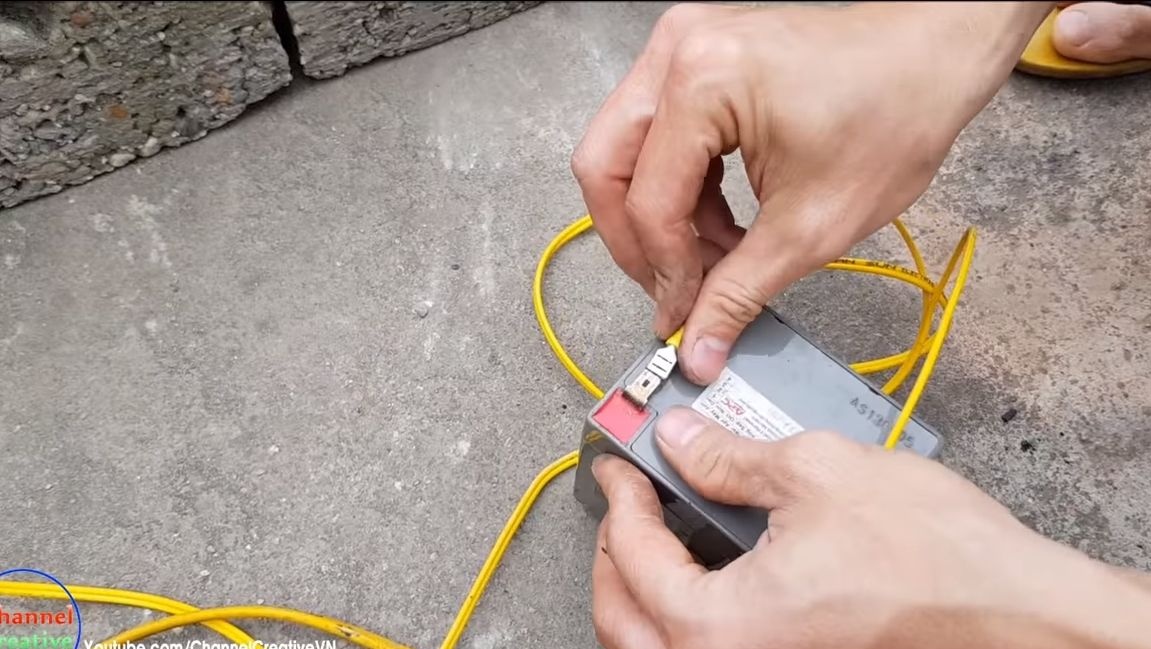
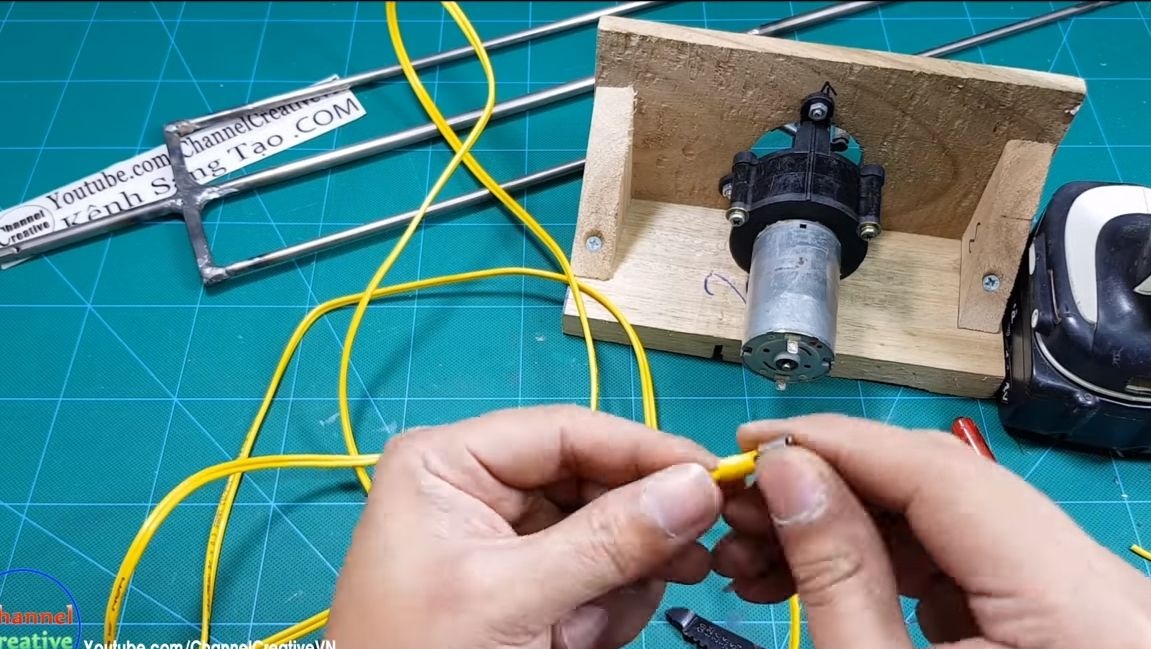
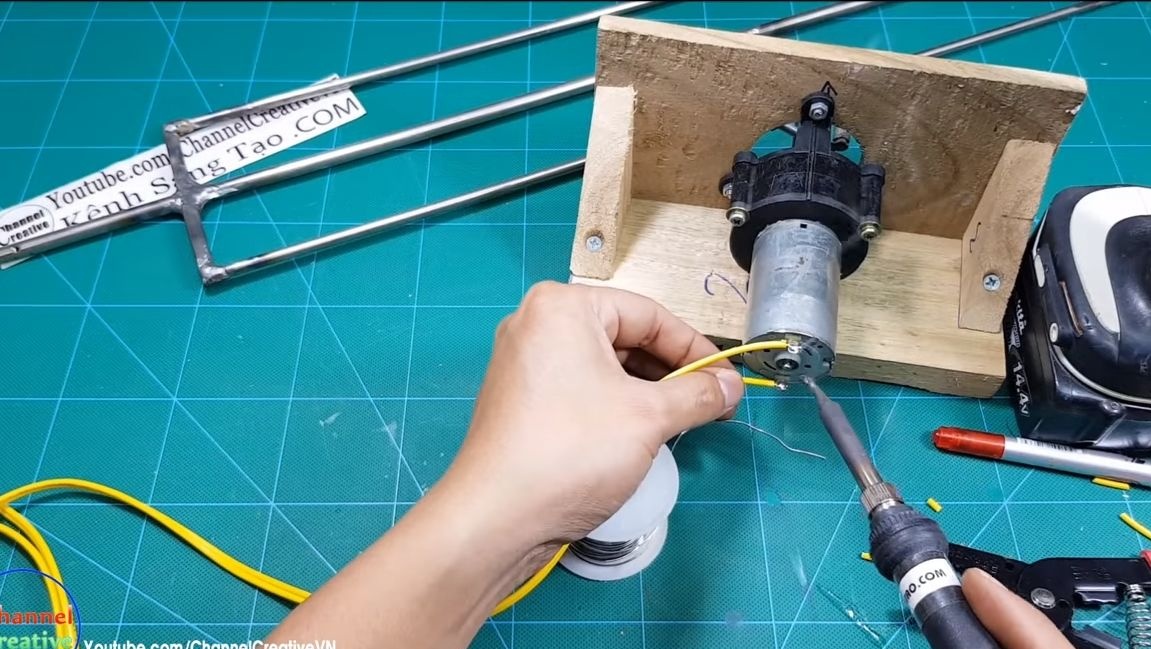
Step Five Connection
We solder the wires to the motor contacts, and the author decided to install the terminals at the other ends. Now it is very convenient to connect the wires to the battery. You can also use crocodiles, this will allow you to connect to almost any battery.
Step Six Test
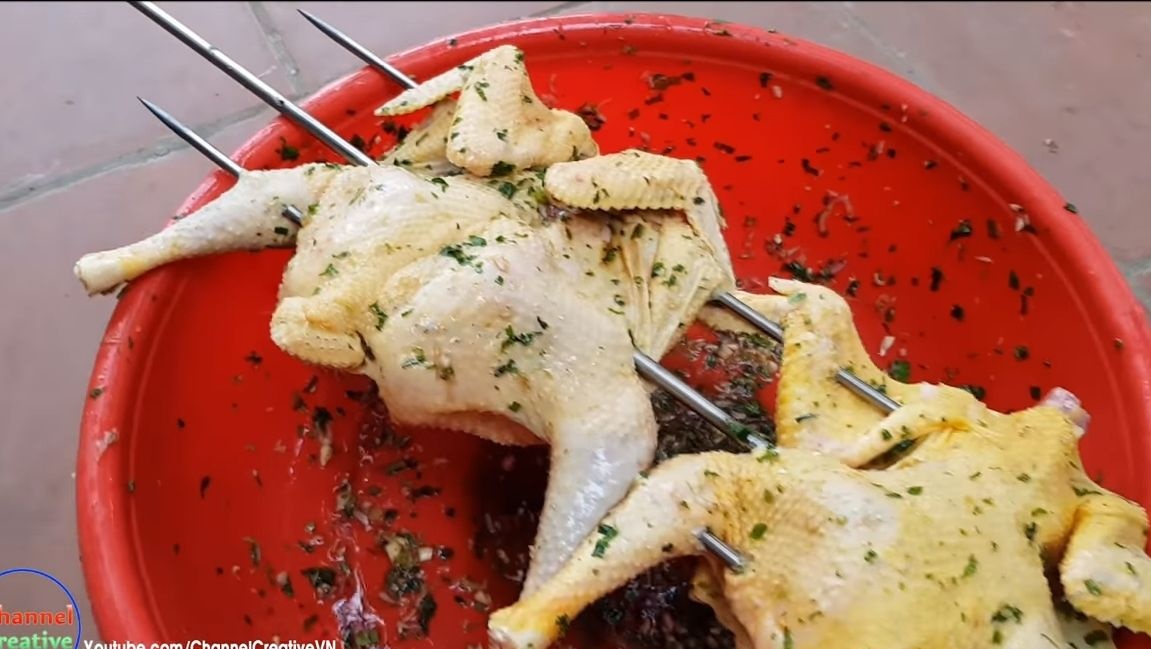
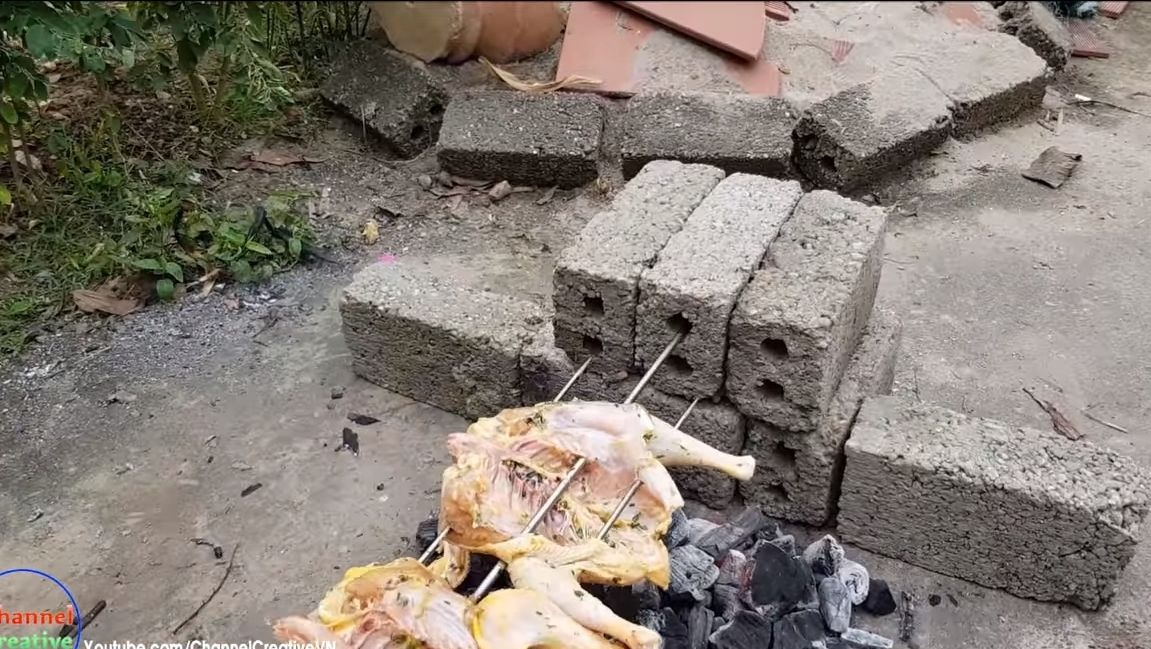
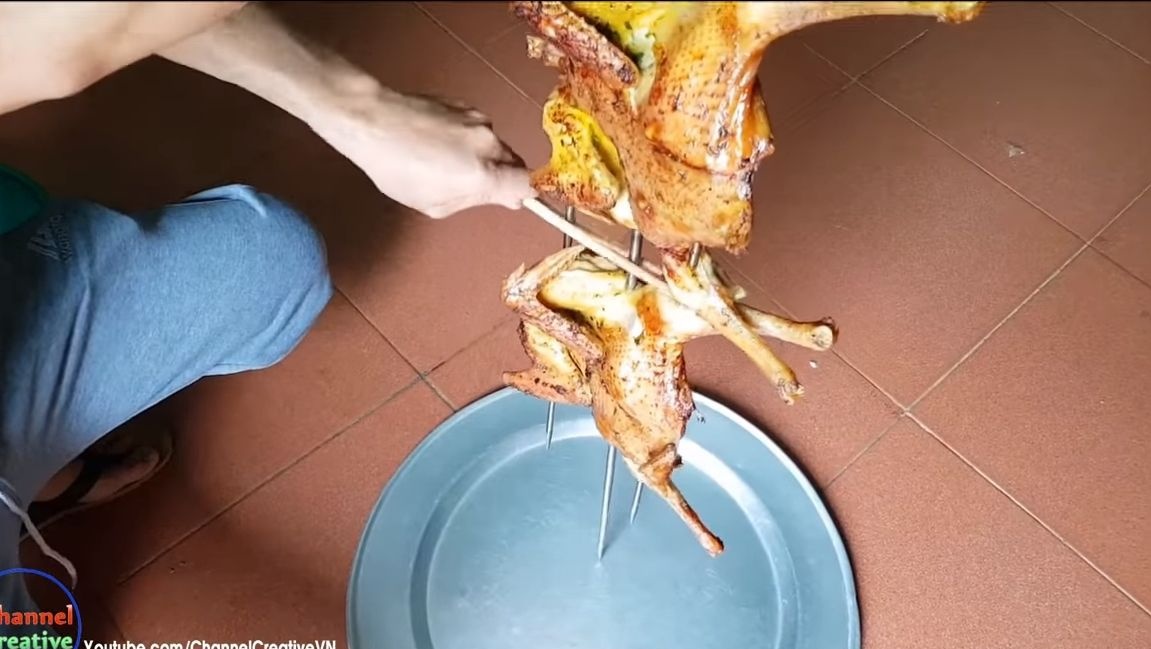
You can start homemade tests! To do this, thoroughly wash the trident with detergent. Well, then we make a fire, more precisely, coals should remain from it. Set bricks near the fire. If you find bricks made of foam concrete or other similar material, you can always take them with you, since they are quite light. While the bonfire comes to condition, string the meat, the author has chicken.
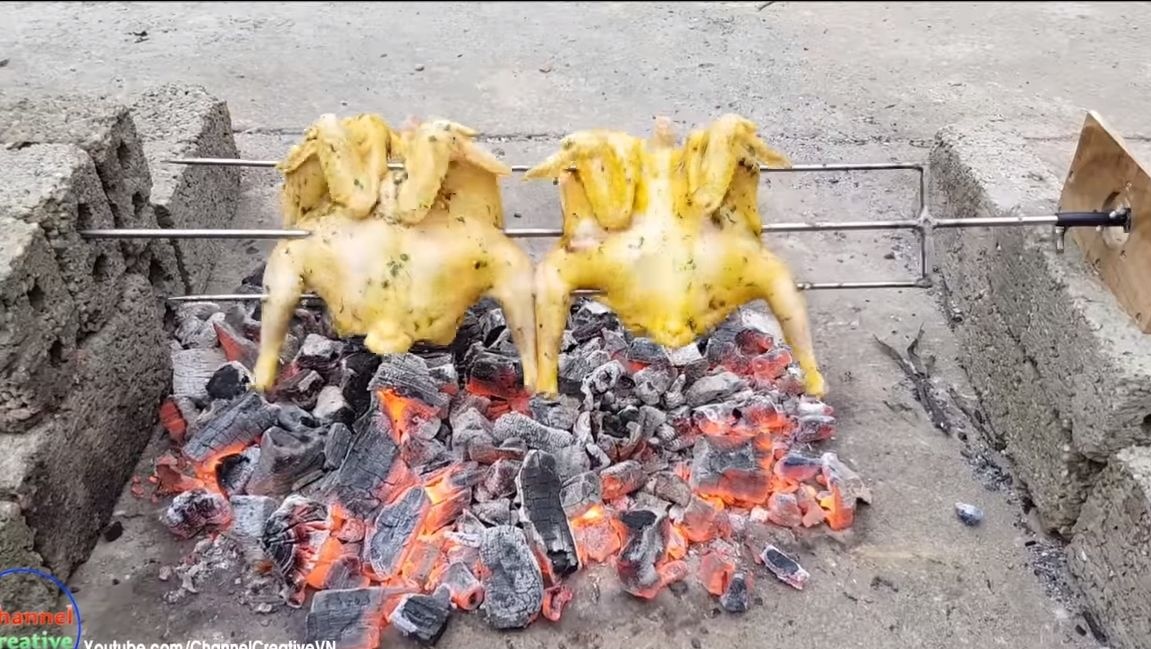
That's all, we install the device on bricks or just on the ground, and on the other hand, put a stag beetle from the tree as the base under the axis. Turn on the motor and enjoy the process! Now this process has become easier, more pleasant, you have more time.
That's all, I hope you liked the project, and you found useful information for yourself. Good luck and inspiration in the manufacture. Do not forget to share your best practices with us and comment on homemade products!