

Hello to all lovers homemade. In this article I will tell how do it yourself make a semi-automatic punch. It is necessary in cases where the goal is to mark holes for the initial installation of the drill or other markings. With it, there will no longer be situations when the drill slides over the metal. This tool also helps to achieve greater accuracy in the location of the holes. By making this punch you will save your money, and the tool itself will not be inferior to the factory version.
Before reading the article, I suggest watching a video with a detailed assembly process and a small test of a homemade semi-automatic punch.
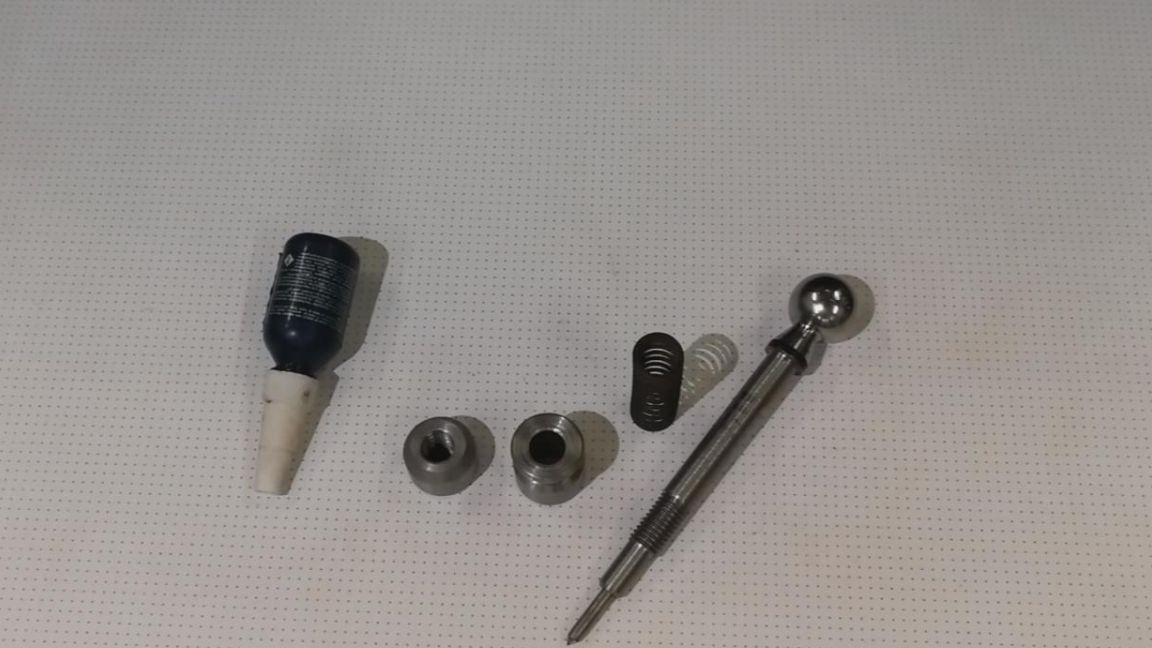
In order to make a semi-automatic punch yourself, you will need:
* Angle grinder, cutting disc
* Metal lathe, cut-off and feed-through tool
* Old steering draft from the car
* Metal rod with a diameter of 25 mm
* Spring
* Dowel nail
* M12 tap
* Die M12
* Personal protective equipment, gloves, earphones and goggles
Step one.
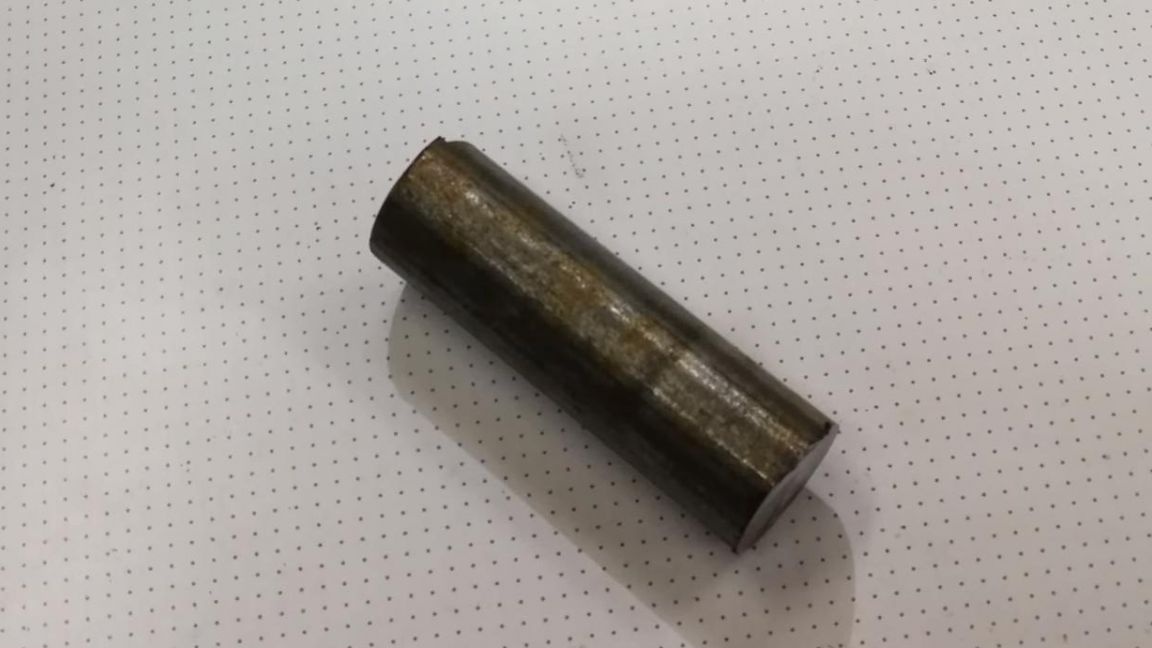
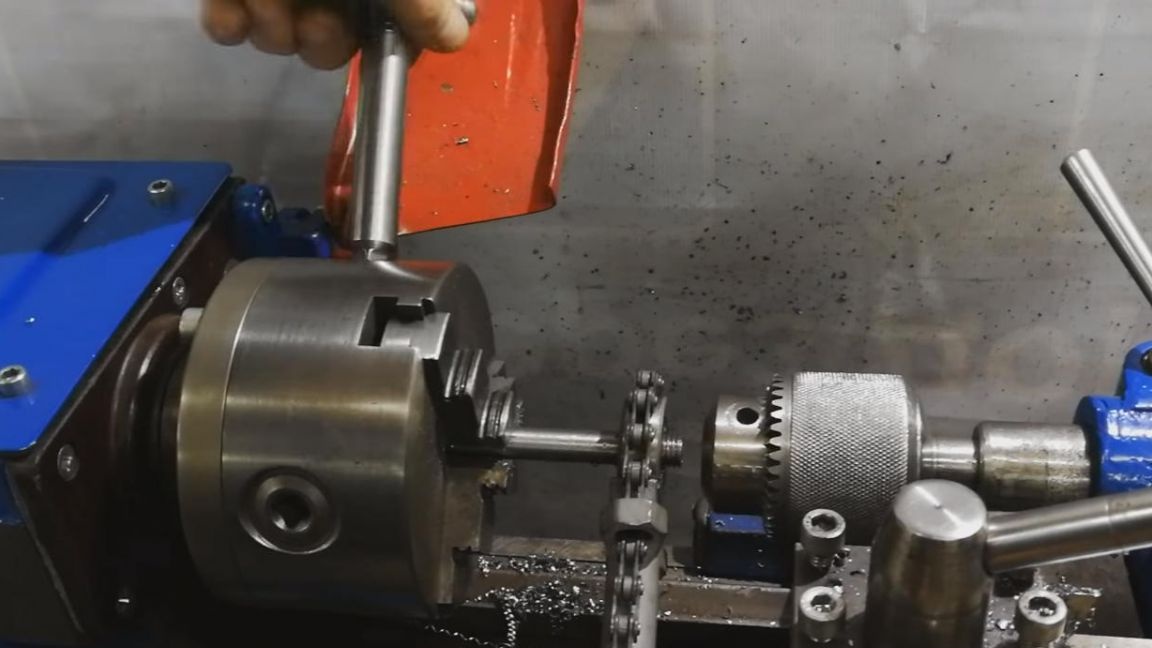
First of all, you need to saw off the hinge from the steering link.
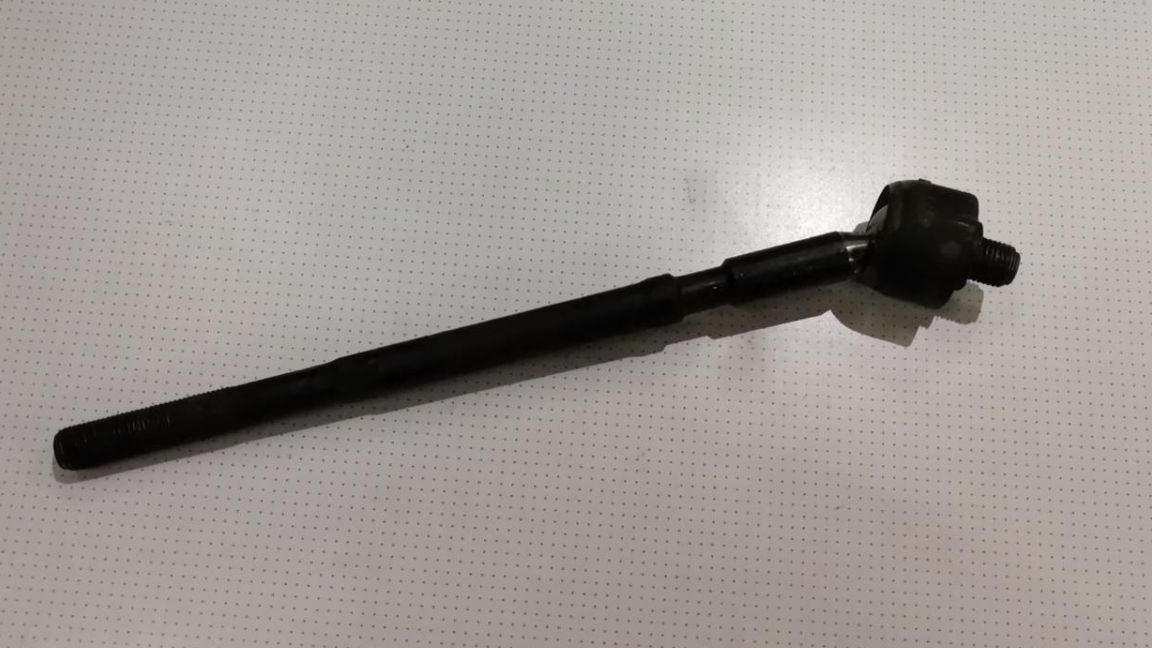
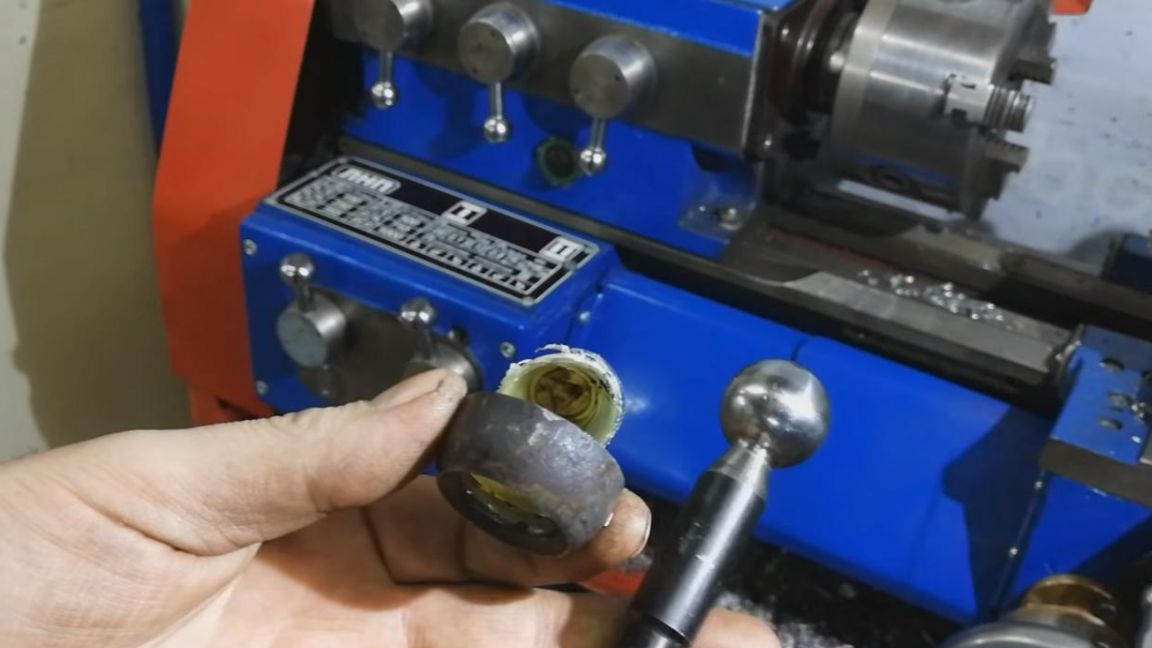
This can be done using an angle grinder or a lathe. In this case, it is better to saw off the hinge on a lathe so as not to damage the ball, since it will serve as a handle and, to some extent, a decorative component. We clamp the steering rod into the three-jaw chuck of the lathe for metal and with the help of a cutting tool we release the rod from the hinge.
As a result, we get such a blank that will be the handle of our tool.
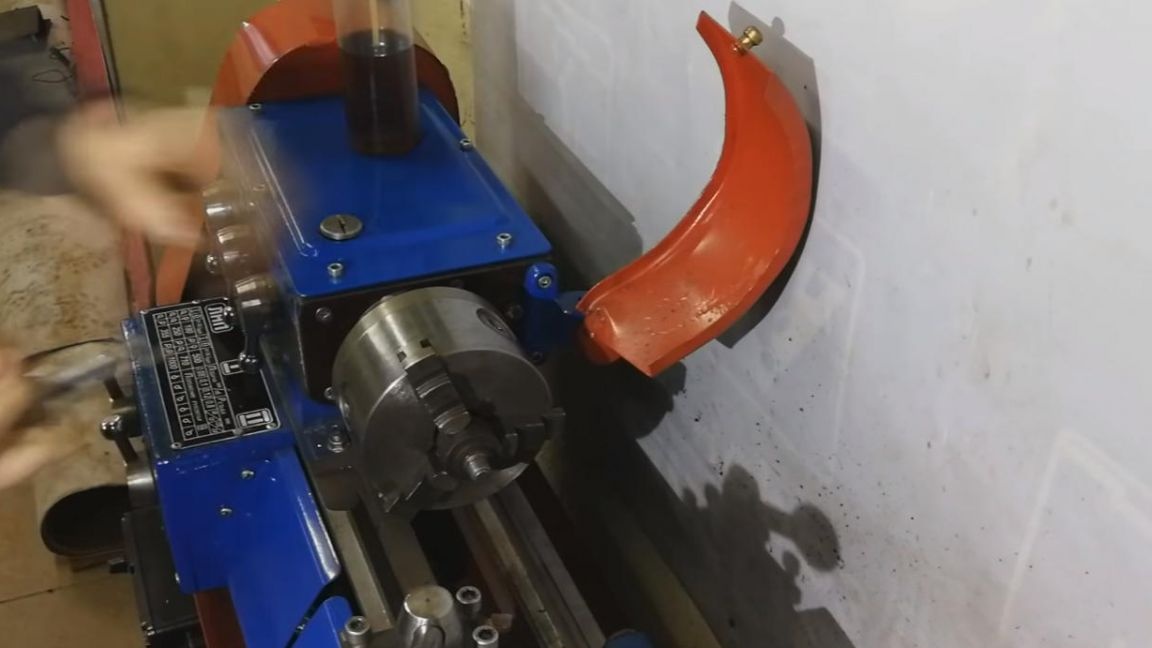
Step Two
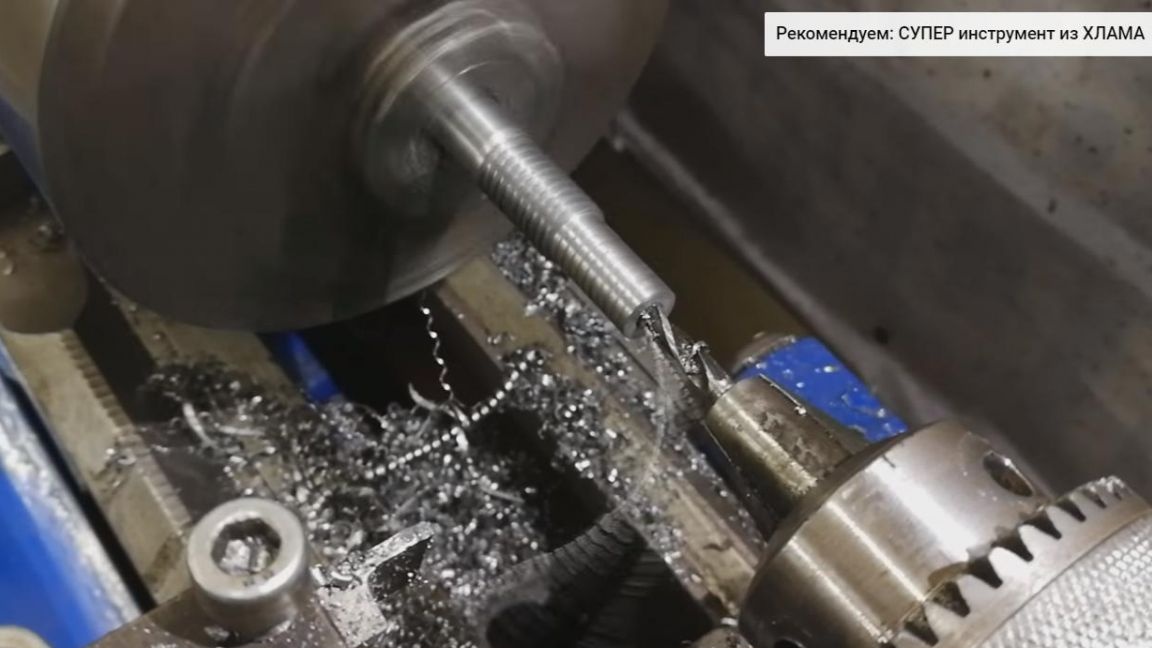
Next, you need to grind the steering rod to a diameter of 12 mm. To do this, install it in the lathe chuck and grind the entire length without touching the ball with a through cutter. It turned out such a workpiece with the desired rod diameter.

We cut off the excess part using an angle grinder and a cutting wheel, then we grind sharp edges.
When working with an angle grinder, be careful, the power tool must be held tight during cutting, and personal protective equipment, gloves, headphones and safety glasses must be used.
Step Three
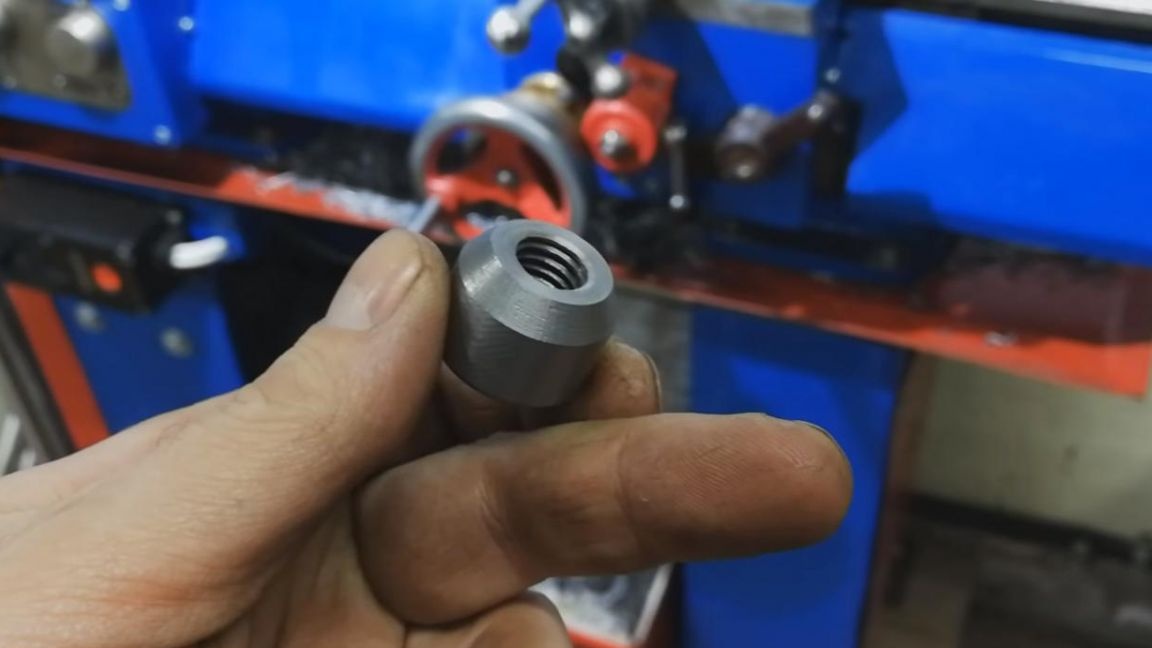
Now we make a nut from a metal bar, which must be shortened to a length of about 10 cm using an angle grinder with a cutting wheel.
We clamp a metal rod with a diameter of 25 mm into the chuck of the lathe, slightly grind it and make a chamfer, then we make a hole using a 12 mm metal drill.
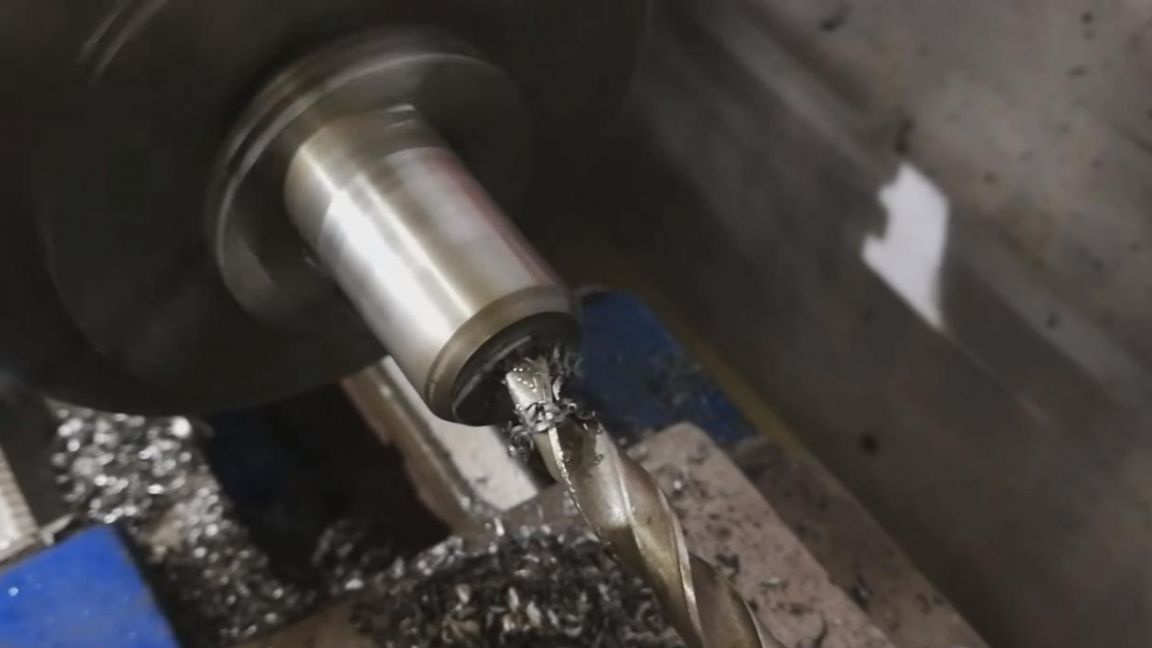
In this hole, you need to cut the thread, for this we take the M12 tap and rotate the machine chuck manually. In the process of threading, we use technical oil, so the tap will last longer, due to the fact that the load on the cutting edge will decrease.
After cutting the threads in the nut, we cut off the excess part of the bar by installing a cutting tool in the tool holder. The result is such a detail, if necessary, it can be replaced with a regular 12mm nut.
Step Four
Next, from a metal rod we make the movable part of the punch. On a lathe, we drill a recess in a metal workpiece under the fingers and remove the chamfer. Then we drill a hole in it with a diameter slightly larger than the bar so that this part moves freely.

After the hole in the moving part is ready, cut it off from the bar.
Step Five
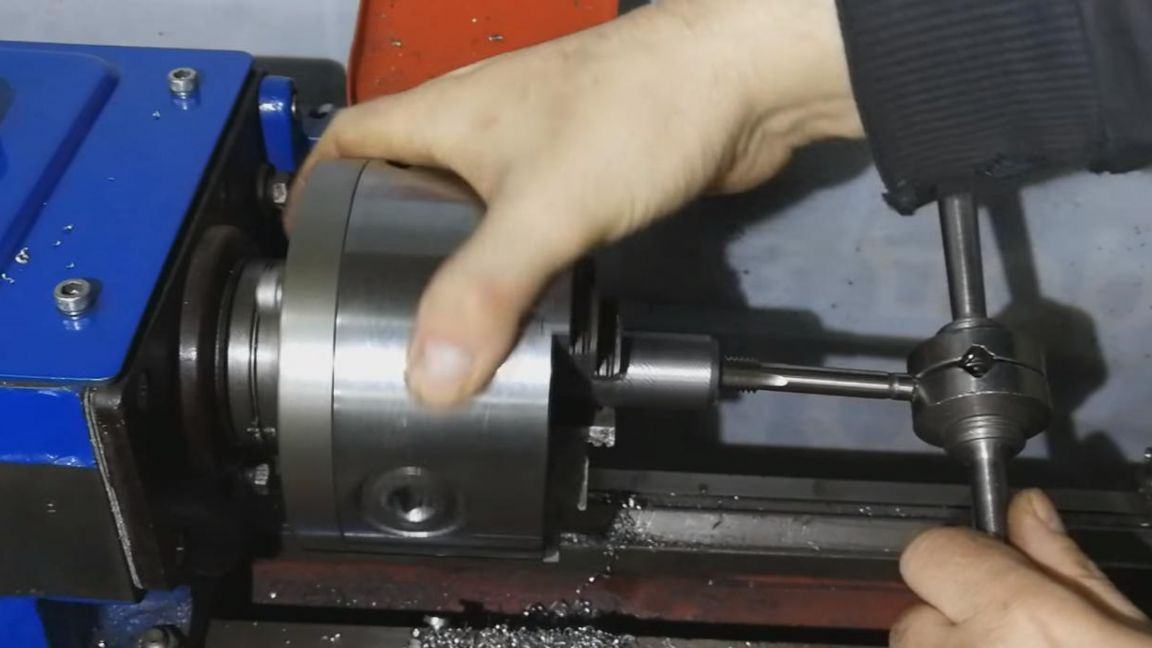
We fix the handle in the chuck of the lathe for metal and cut the thread manually using the M12 die.
To install the striker, we drill a hole in the handle using a drill whose diameter should be slightly less than the dowel-nail, since it will be tightened.
As a striker, you can also use a broken drill or a worn out tap.
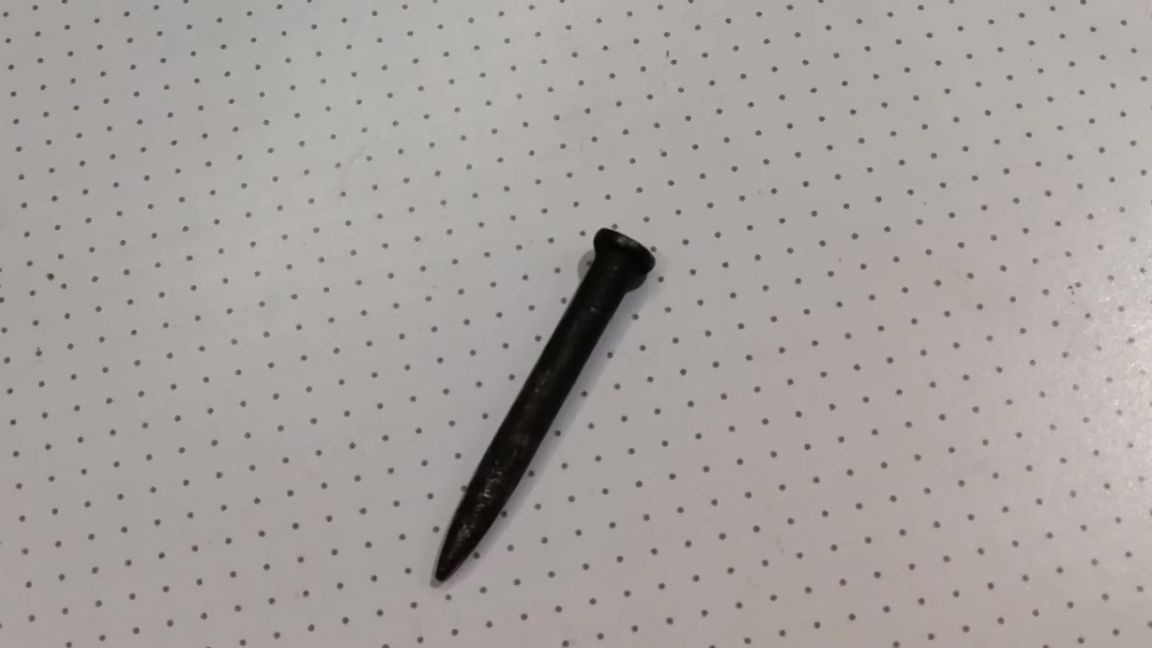
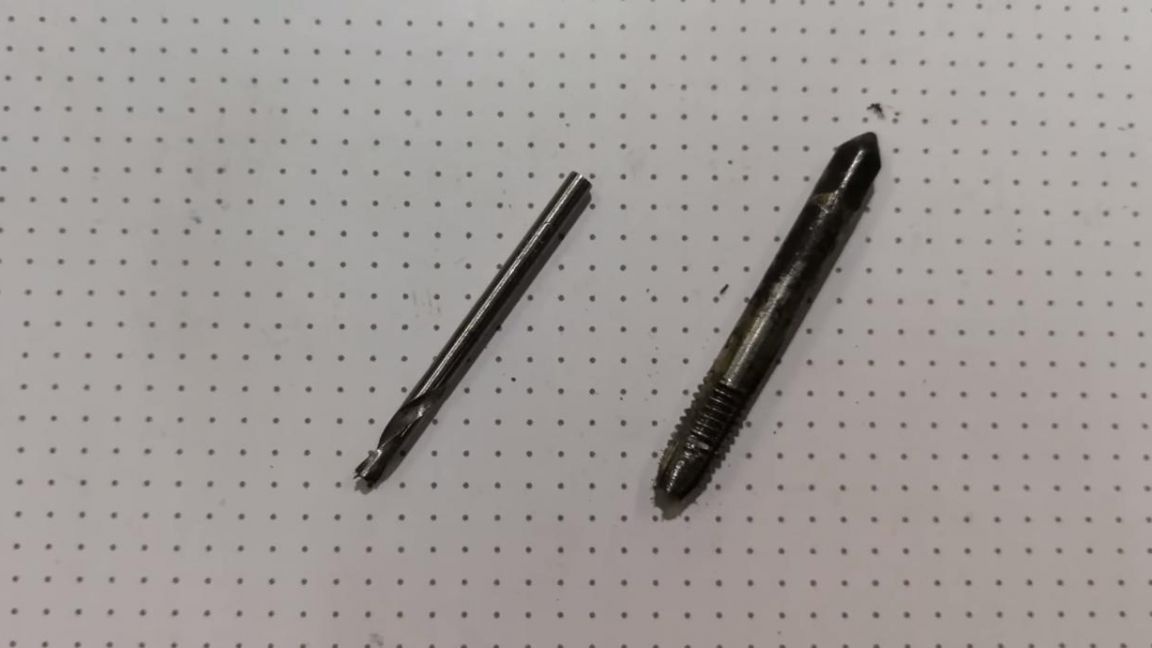
We put the dowel-nail tightly into the previously made hole and on this all the details of the tool are ready.
Step Six
We collect all the details in one piece. In order to prevent the nut from loosening when working with the tool, we use a blue threaded lock, which must be applied in a small amount to the thread.
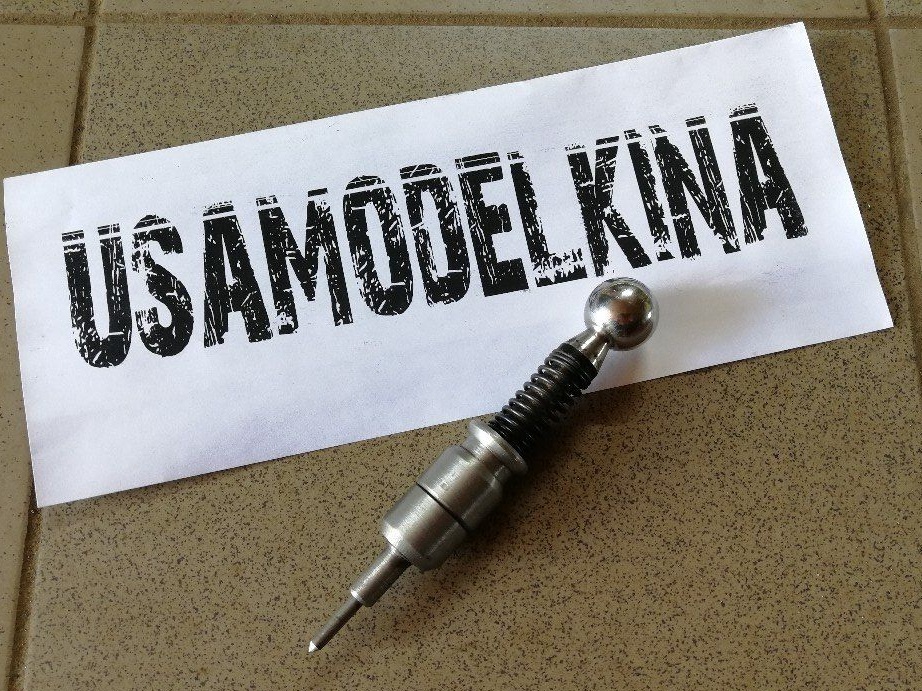
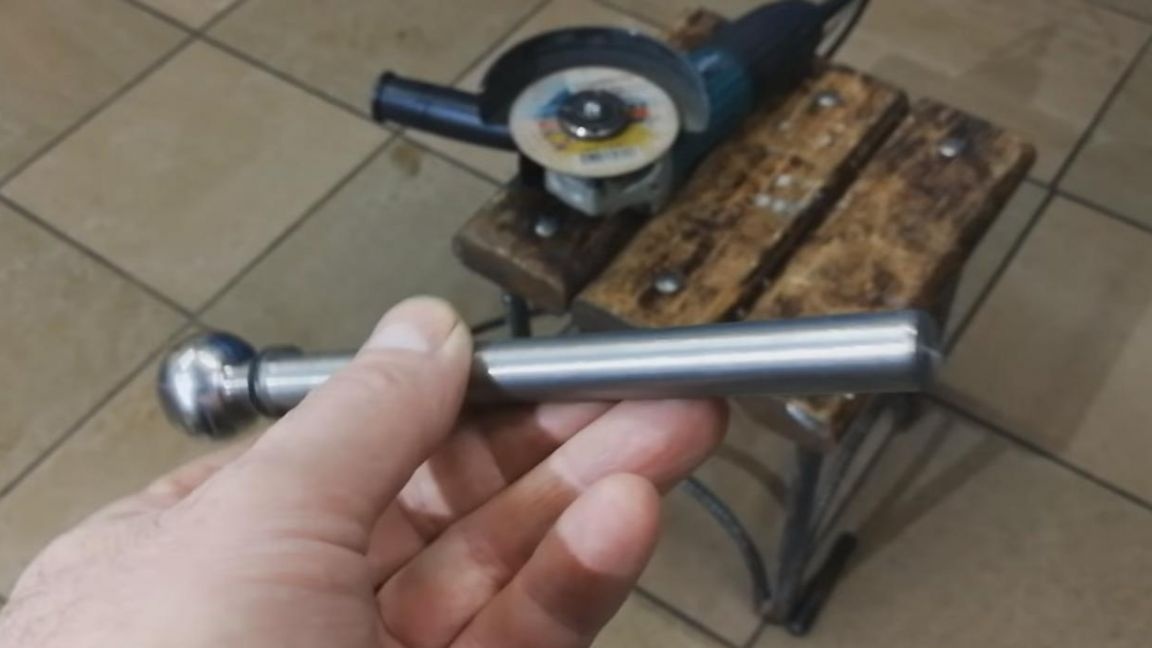
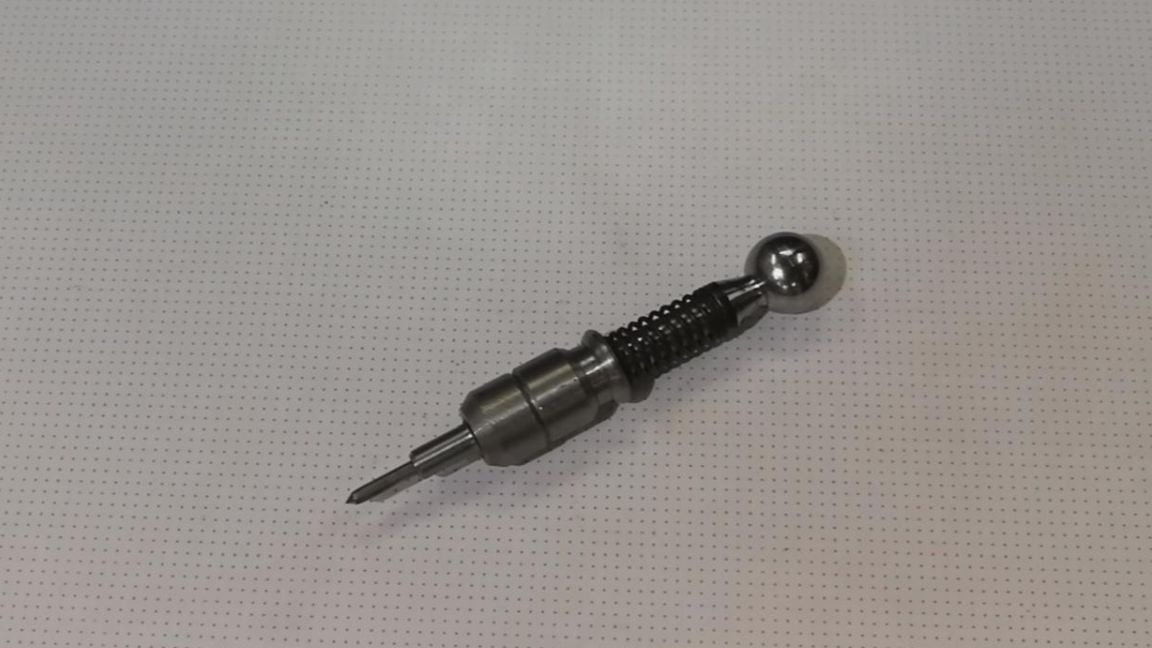
This is how the instrument looks when fully assembled.
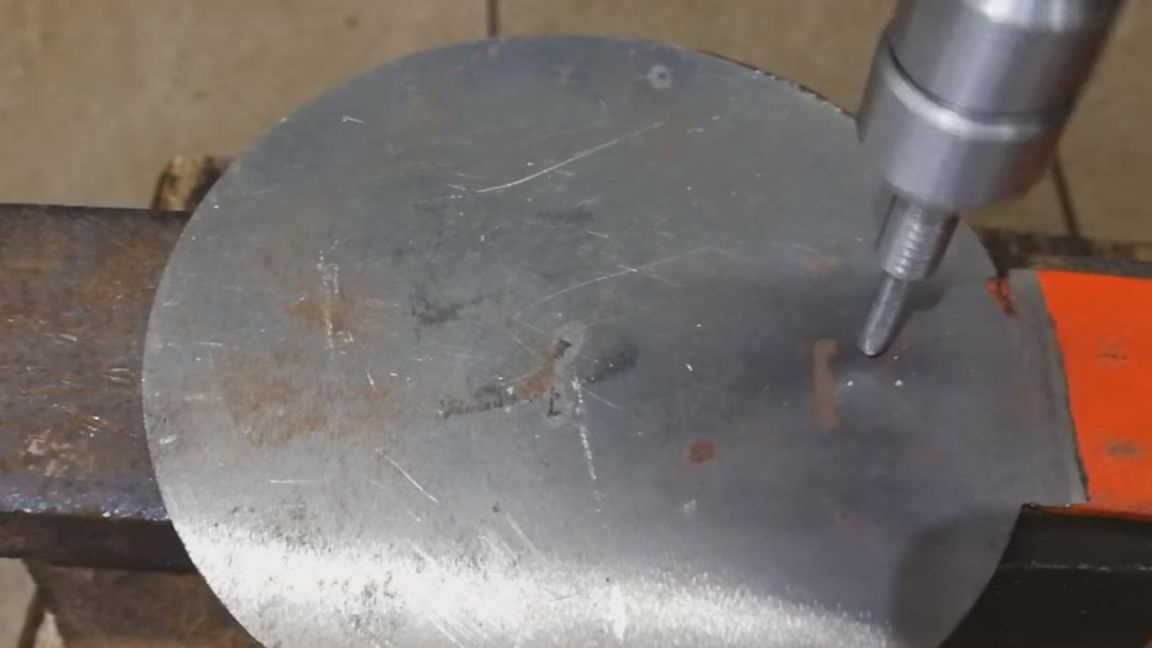
Now you can check it in real conditions. Set the center punch on a metal sheet, cock the spring with your fingers and release the moving part, as a result, it hits the nut, during which a small groove is obtained.
That's all for me, thank you all for your attention and creative success.