The foundation is a responsible thing, you need to approach it with all seriousness. Is it a joke - the basis for the building, on which it depends in many respects, the building's durability, and in what, ease of use. The construction cost depends heavily on the construction of the foundation, part of the cost of it, from the total to a third. Not surprisingly, in fact, it is quite natural that citizens seek to save during construction - the cost of building materials is considerable, their quantity is large. As a rule, manufacturers of new building materials and technologies play these strings. Take, for example, the TISE technology or screw piles, as long as it came to foundations.
Generally speaking, there are several common foundation designs used in low-rise individual construction.
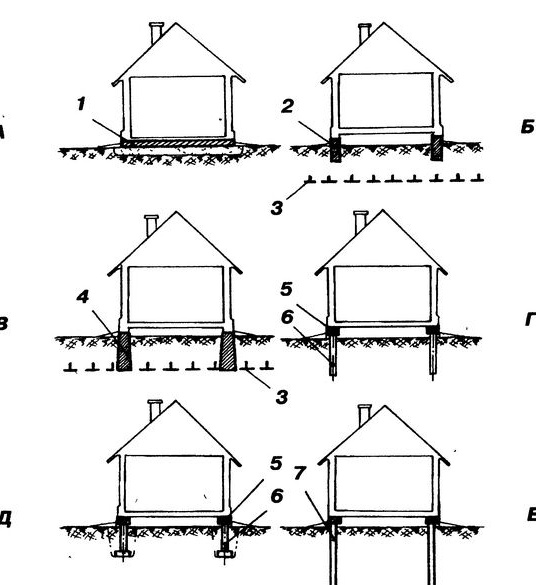
Typical foundations. A - shallow on the stove; B - shallow; In - buried tape; G - columnar; D - columnar with an expanded lower part; E - on stilts; 1 - plate; 2 - ribbon shallow; 3 - freezing boundary; 4 - the tape is buried; 5 - grillage; 6 - support; 7 - pile.
Column foundations - arrange in cases where the use of strip foundations is impractical. Pillars can be wooden, stone, brick, concrete, concrete, reinforced concrete and metal. The depth of such columns can be either minimal or laid at or below the freezing depth of the soil.
Column and strip foundations include columns laid to the depth of freezing and a ribbon grillage connecting the top ends of the pillars into a single structure. A distinctive feature of such a foundation is the presence of a gap of 10 ... 15 cm under the tape. Outside, the gap is closed by a blind area not connected to the grillage tape. When installing the foundation on heaving soils, the air gap compensates for the expansion of the heaving soil, and on non-heaving soils it provides a “soft” support of the house on the base.
Strip foundations represent a monolithic or prefabricated tape, evenly loaded with the structure of the house.There are monolithic strip foundations, which are made directly at the construction site from concrete or concrete, and prefabricated foundations constructed using ready-made reinforced concrete blocks.
Solid foundation in the form of a monolithic reinforced concrete slab or lattice can significantly reduce the specific load on the base. It is often used on weak, water-saturated or subsidence soils, when built on bulk soils.
Pile foundation it is applied on soft soils, as well as on surface soft soils, when reaching the natural base is thus considered more appropriate. Piles can be driven, made of ready-made reinforced concrete piles, driven into the ground by impact mechanisms; and printed, made directly in the ground, with filling the well with a bucket. According to their work in the ground, according to how the load is transferred to the base, the piles are divided into hanging, which transmit the bulk of the load due to friction on the side surfaces of the pile; and on piles-racks, transmitting the main part of the load with its lower part, relying on strong layers of soil. This category of foundations is constructed using special mechanized means, inaccessible to the ordinary individual developer.
Basement, made around the perimeter of the house, can be considered an element of the foundation, transferring the weight of the house to the base. The walls of the basement can rest both on the slab and on the tape.
By the depth of the foundation, the foundations are divided into:
In-depth - in which the sole is located at the level of the depth of freezing of the soil or below it.
Shallow - foundations, the sole of which is above the depth of freezing.
Unfinished - foundations, the sole of which is located on the ground surface or higher.
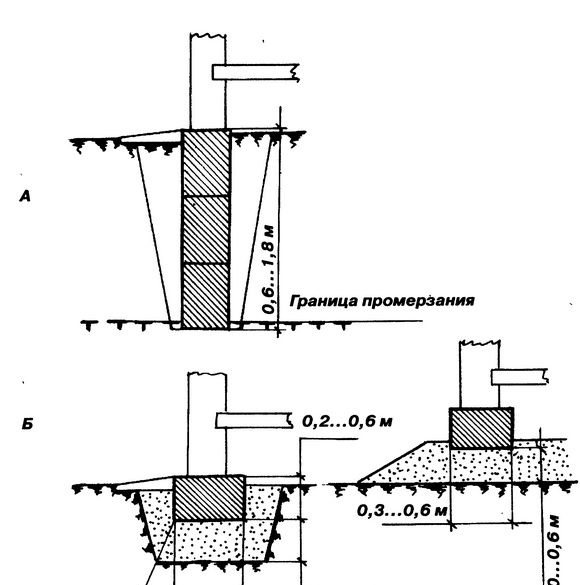
Where A is a buried foundation; B - shallow; B - shallow.
The decision on the use of a particular foundation design occurs after evaluating many factors, especially the purely natural, characteristic of the terrain in general and the construction site in particular. First of all, this is the nature of the soil at the construction site, the presence and amount of groundwater, the depth of its freezing.
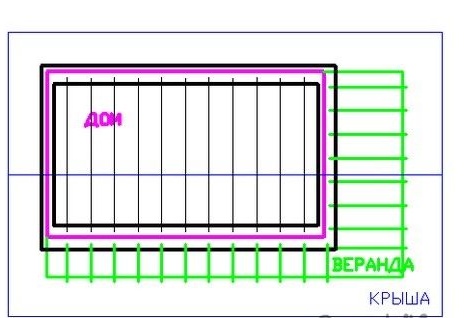
The idea to erect a log house on his plot in the village, of course, was faced with the choice of foundation. Faced with materials on the foundations of TISE on the original columns, they were tempted by slogans about extreme savings. A special drill was made - a close copy made do it yourself. Glands, welding, and two part-time days for manufacturing. The blades were made from a worn out saw blade from a circular saw. In the city, in the private sector of a grandmother in the front garden, a drill drilled holes in the ground just the easiest, but at the facility, he was capricious. In the construction site, places with heavy, extremely dense clay were regularly met. She was too tough for a buru. I had to slightly modify the foundation - dig holes for the columns on their own. Shovel. It turned out to be more productive. The foundation itself has also changed - three of its sides are made expanded to varying degrees, for installing floor beams and verandas. Instead of lags, the foundation is rather high.
So, what was needed for work.
Tools, equipment.
Standard trench and marking tool for earthworks. Cutting machine for cutting reinforcement. Sledgehammer, nowhere without her. A concrete mixer and associated ones were also used - a trough, buckets. Trowel of course. Levels, plumb line. A set of simple carpentry tools.
Materials
Fittings in proper quantity, knitting wire. Of course, the components for the preparation of concrete. Boards for formwork, fasteners. Thick film or ruberoid for finishing the inner surface of the molds.
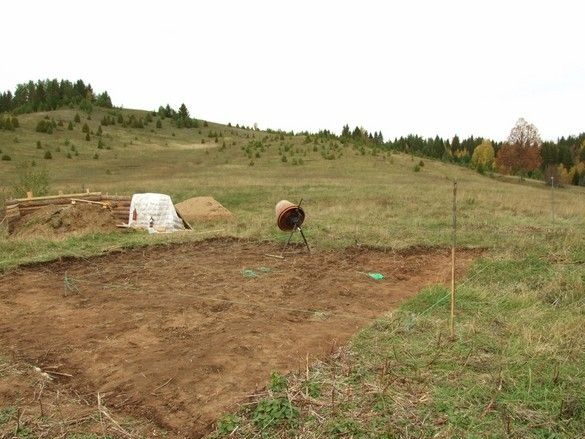
First of all, I marked the site, removed the upper fertile layer. I missed a bit, so the foundation is a bit “shifted”.
Excavations are ropes, a thirty-meter tape measure, pegs and a helper would be nice. According to the plan, transferred to the area.He marked the corners with pegs, placed “cast-offs” - wooden gates at some distance from the corners, so as not to get in the way and remove the ropes, it was possible to restore the marking at any necessary time. Then he marked the corners of the pits with pegs.
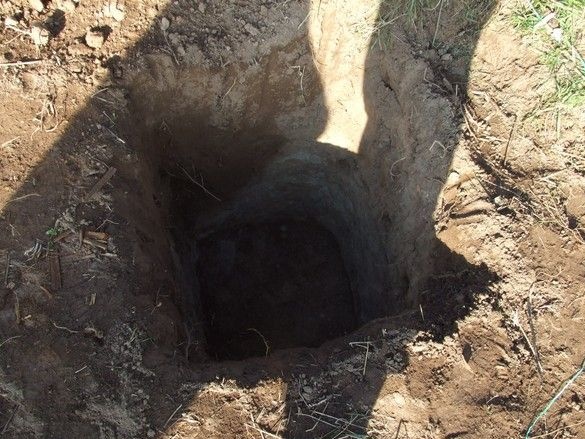
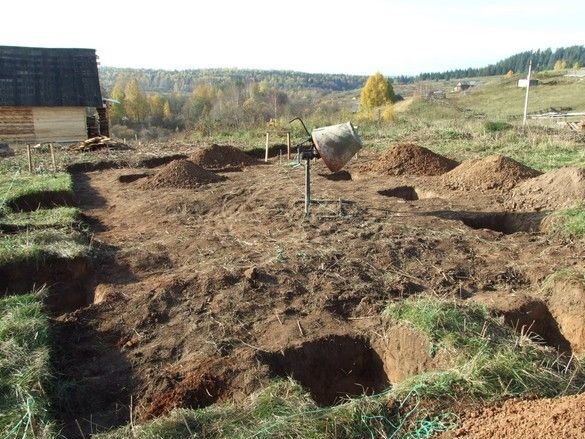
Pits dug with ordinary shovels - bayonet, shovel, to the depth, when it was still possible to dig. Aligned the bottom. It turned out 1.35 ... 1.5m, depending on size. The soil is very different, from sandy to dense clay, which had to be pre-milled with magic crowbar.
At the bottom of each pit, a sole was cast - a rectangle about 20 cm thick. A small reinforcement was laid. Also, several long reinforces were stuck into the bottom, so that they fell into the body of the column and into the grillage.
Since the foundation is regarded as “buried,” a sand cushion was not used.
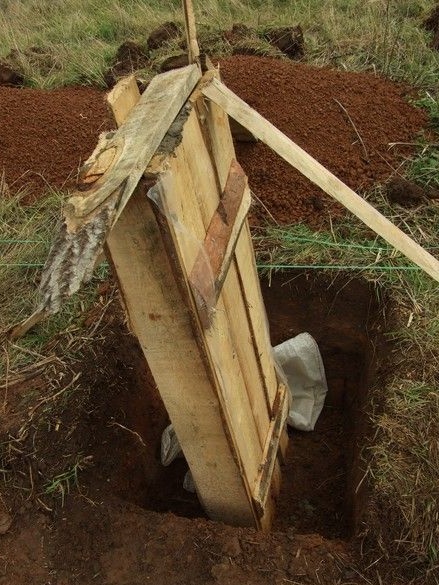
After casting the underground part of the foundation - the soles, he began to manufacture columns. They were also made of concrete casting, for which several formwork forms were made - sort of boxes without bottom and top. Two wider walls were made of several boards in the form of shields, narrow walls of a single board. The walls were fastened in several places with self-tapping screws. Unlike nails, self-tapping screws allow you to very carefully disassemble the mold on a barely frozen cast without violating it, which saves time. Moreover, with incomplete solidification of concrete, the walls of the formwork are removed more accurately, not clinging so much to the casting. The inner walls of the mold, it is desirable to finish with roofing material or a thick plastic film, the walls of the castings in this case are smoother and better removed. It is convenient to fasten the roofing material to the boards with a furniture stapler.
The order of work was as follows - after assembling the form of the column, he jammed it on the reinforcing bars and, using pegs and spacers, secured it in an upright position so that the reinforcement was in the middle of the box. After leveling the bottom edges of the box, it was far from always tightly fitting to the base - it was strengthened and sealed with improvised means - scraps of tin, a brick wrapped in film, planks, he poured and trampled a little soil on top. A long rail with a level laid on it, marked the level on the outside of the box - on the neighboring column when it was, and first with the help of the water level - a long hose with water. Then, using a screwdriver, a hole in the box wall was made with a thick drill, and a carnation or wire was inserted - it was convenient to navigate them when pouring concrete.
The first batches of liquid concrete had to be laid very carefully - if you plop from the very top of the box, then it would reach such a speed that it would reach the bottom (a portion of concrete) so that all my tricks for sealing, all the tricks and bricks would blow out. After laying the first bucket, it was better to let the concrete solidify a bit so that the liquid column would not burst out and push out the plugs below. For the time of solidification, he passed on to other works. After some hardening of the first portion of concrete at the bottom, it was possible to act much bolder - flooded immediately to the top (to the level mark).
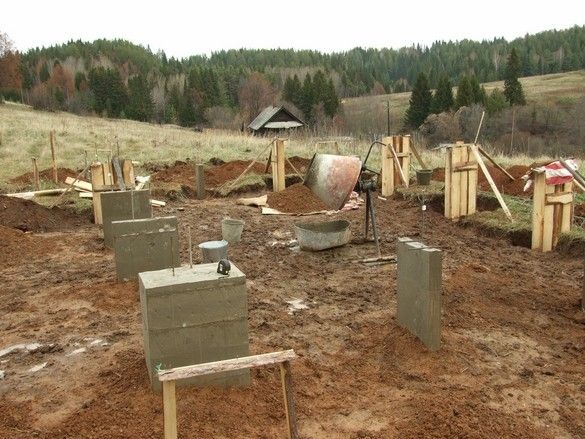
The formwork was usually dismantled and removed the next day, it was removed well, the concrete kept its shape, but was not solid enough - it allowed smoothing corners, faces with a brick. The formwork was assembled, fixed at another place, the cycle was repeated. Initially, the extreme columns were cast on each side, installing the formwork of the others was much easier - visually, “in alignment” or by string.
After removing the formwork from the column, he poured water, however, it was in the fall, the weather was pretty rainy - everything was wet anyway.
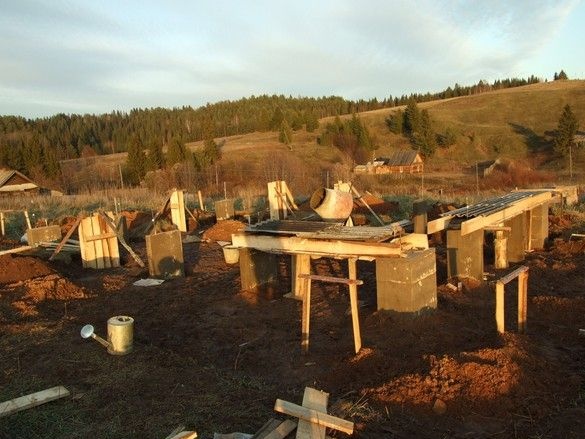
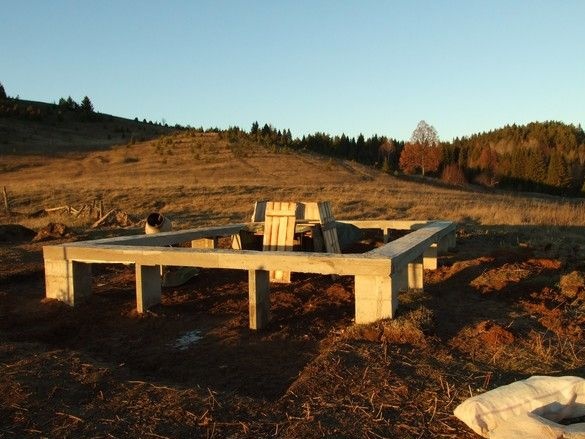
From this moment the most interesting began - the construction of the grillage formwork. For a low grillage, the same TISE recommends pouring a mound of sand along the entire length. Put the bottom of the box on it. After the casting has hardened, the sand is removed. Here, the bottom edges rested on posts, plus props. He built a set of shields for several boxes, and rearranged them as the next “span” was cast.
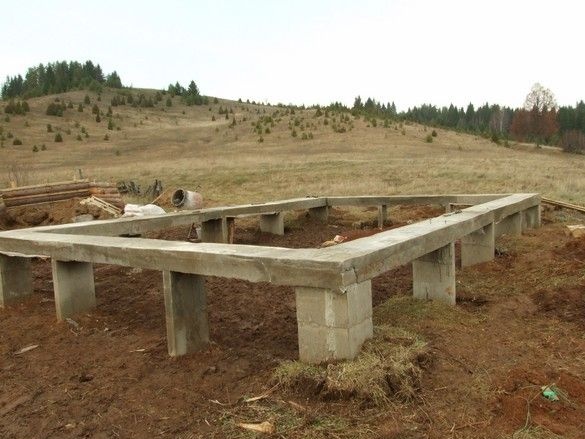
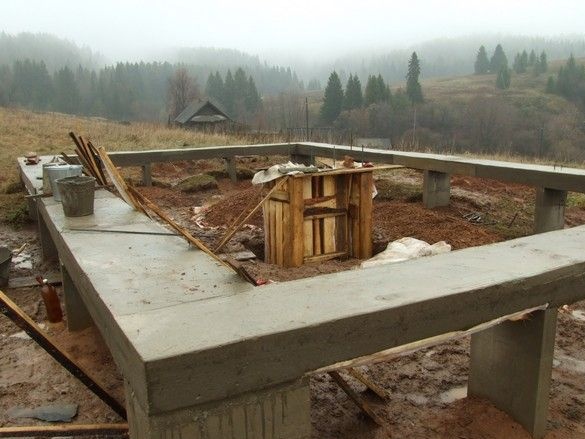
Finally, the foundation is ready, in all its glory, "insisted" for two weeks - the initial set of strength. Snow had already fallen when we arrived to collect the log house - a tractor with a crane and specially trained comrades.
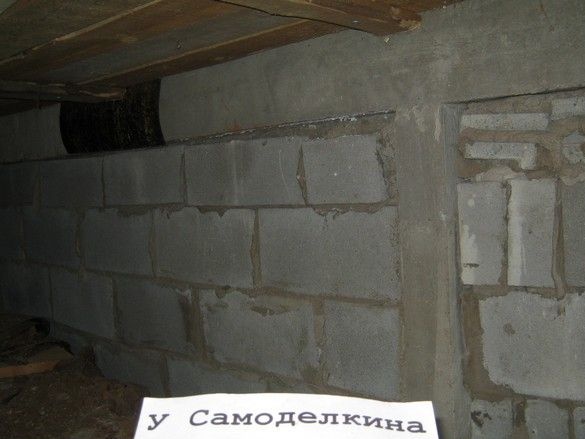
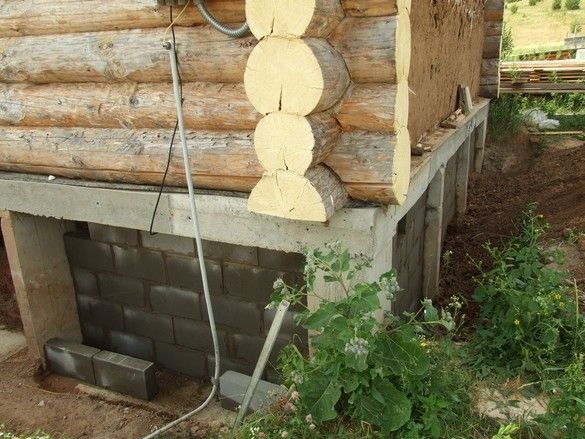
The closure of the intercolumn space is a special conversation. It is this process and the selection of materials for it that, to my taste, discredit the idea of such a construction of a relatively high foundation (slope, whim of the architect). Especially if there is or may need to use a basement. It is practically impossible to make the "underground" fence insulating and airtight. Maximum - wind protection. This implies the impossibility of the full use of the basement and the mandatory insulation of the floor.
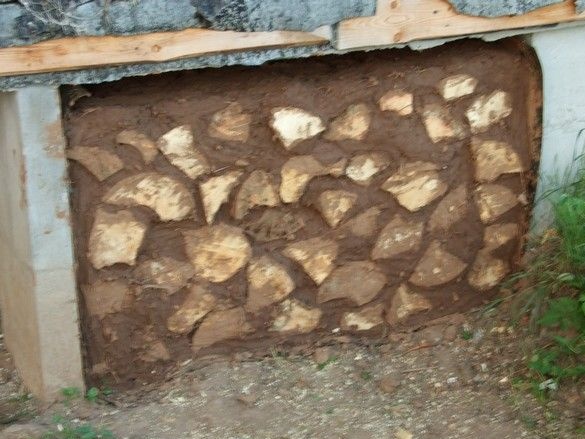
Above, in the photo there is an attempt to make an "eco-fence" of the basement, in the manner of a woodpile. Of course, everything cracked over time, moreover - since the "woodpile" was laid directly on the ground (through waterproofing) it was not brought to the top of the opening by 5 ... 7 cm to compensate for seasonal variations in the ground - "frost heaving". Of course, there was no talk of any use of the basement, the fence was an obstacle, except for the wind and immodest look.
After some time, an attempt was made to radically solve the problem - the foundation was finalized, in essence, to a "deepened tape".
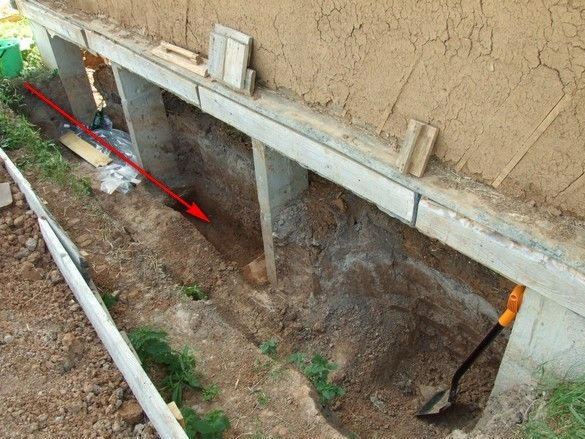
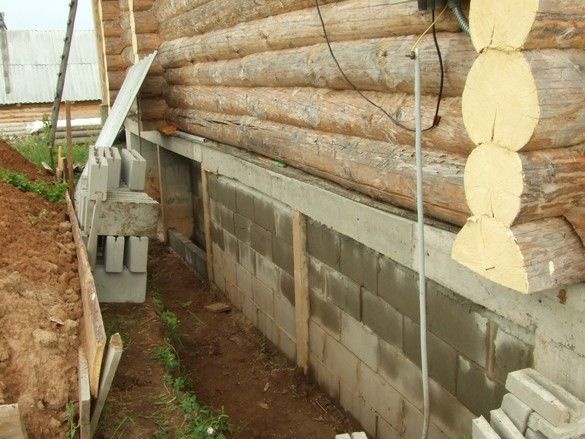
Why are there trenches between the columns, a depth to the bottom of the square support, and a narrow slab — the base — is cast between them. Then, on this basis, walls are laid out from narrow, wide, ready-made hollow concrete blocks. On the northern narrow side - one row, the rest, wider - in two rows.
The completion required a fair amount of excavation in uncomfortable places, however, it made the basement “warm”, and in the future, part of the communications (water supply), washing machine, and possibly a boiler will be placed there. Moreover, the loss of heat through the floor of the building, oddly enough - a significant article of heat consumption from heating. In this sense, refinement will allow more economical heating in the cold season.
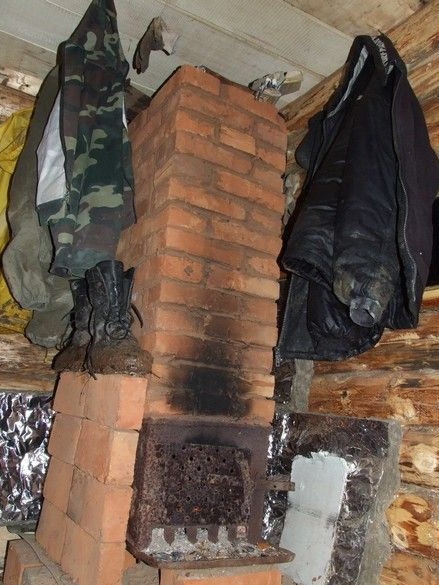
By the way - the view from the basement.