
Good day to all, dear friends! In today's article, I would like to describe in detail how to make a radio-controlled tank out of cardboard. Homemade differs from others in its accessibility, since not expensive and sometimes improvised materials and tools will be taken as material. This homemade product is a good way to start a new “modeling” hobby, as the tank’s forms are very simple and most likely you won’t have any problems with the assembly of the tank’s hull, so we won’t pull it, let's go!
And so, for this homemade product we need:
- sheets of thick cardboard.
- paper.
- two gearboxes.
- electronics from the old radio-controlled machine.
- 18650 battery.
- sandpaper.
- plastic tube (from candy).
- wooden skewers.
- bath mat (foam with transverse lines)
Of the tools we will also need:
- stationery knife.
- Super glue.
- terma glue.
- a compass.
- ruler.
- awl.
- scissors.
- a simple pencil.
- nippers.
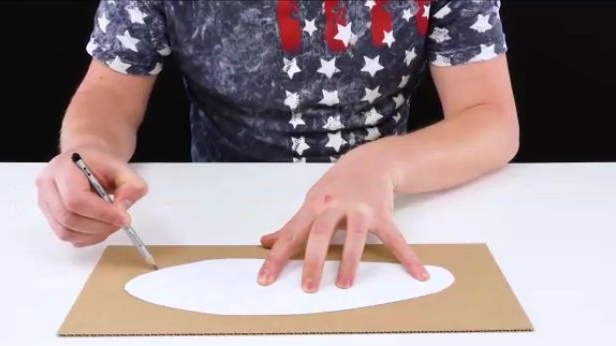
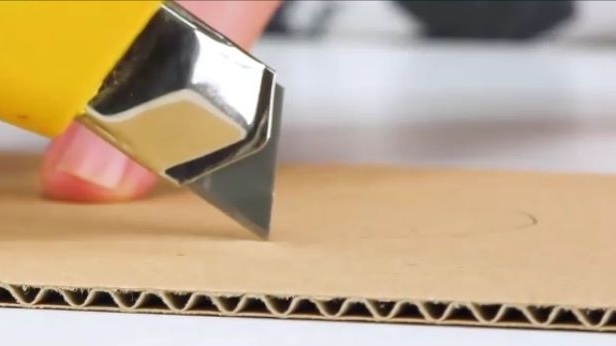
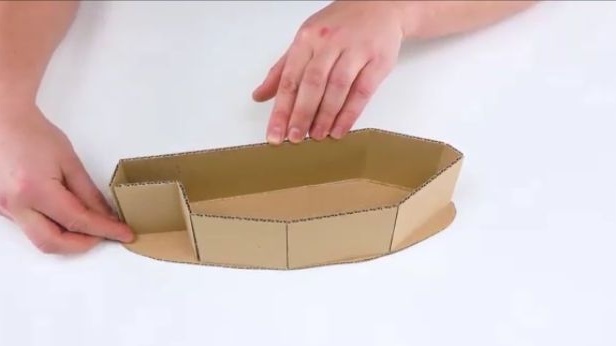
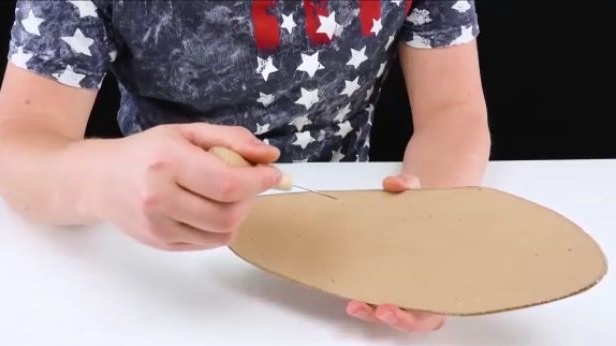
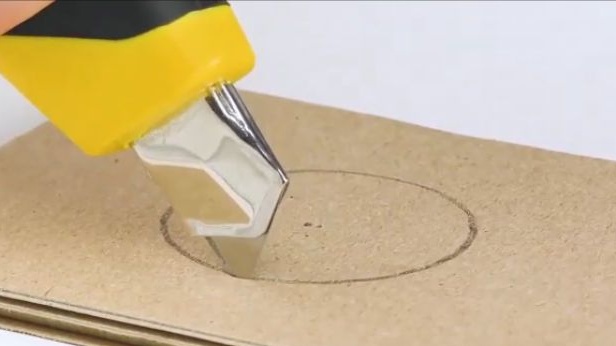
First of all, on a sheet of plain white paper, cut out the side part template (see photo below). Then, after the template has been cut out, we apply it to a sheet of thick cardboard and circle it with a simple pencil. Having circled with a pencil, we cut out a cardboard blank with the help of an office knife. Cutting out with the help of a clerical knife, you will get more even and accurate than if you would do the same with scissors.
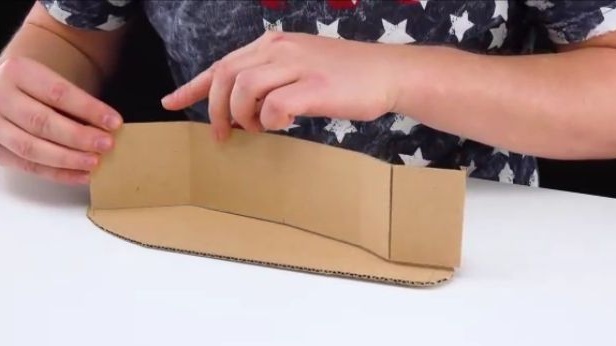
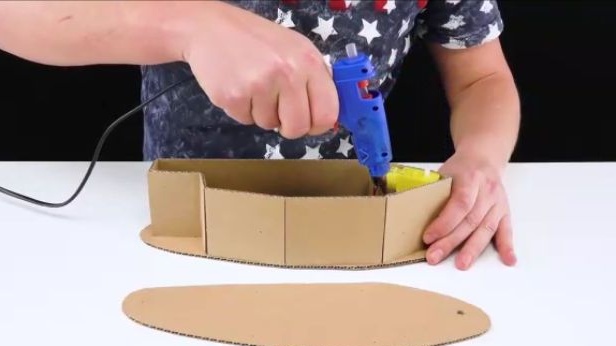
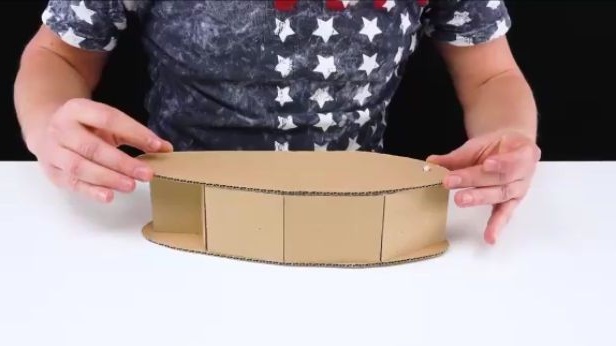
Then from a sheet of thick cardboard we cut out a strip about the same as in the photo below. Glue the cut blank to the blank cut earlier. The most convenient way to glue cardboard is glue. As a result, you should get exactly the same as in the photo.
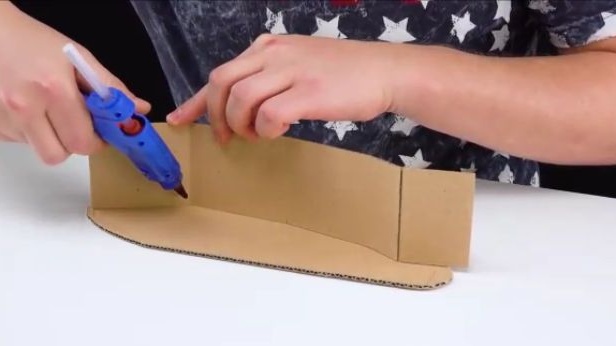
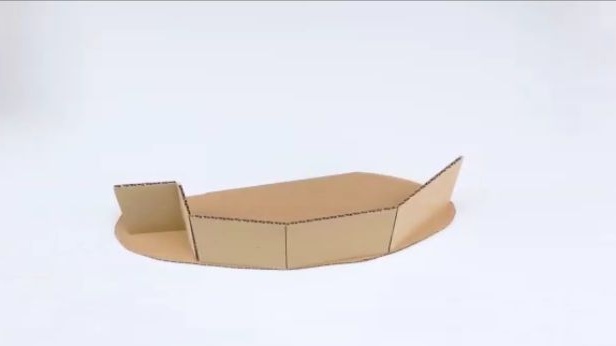
Again, a strip of width equal to the width of the strip that was previously cut should be cut out of cardboard. This strip will have a less complex form of the previous one. It should also be glued to the workpiece using a term of glue, like the previous one.
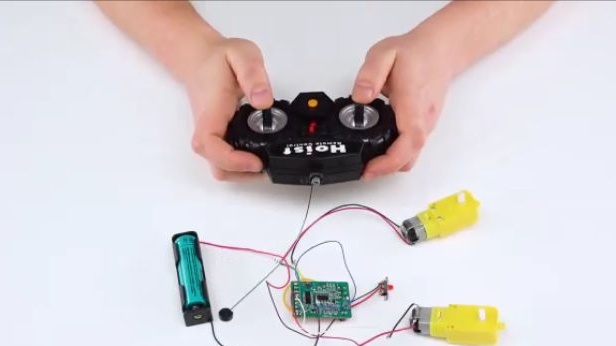
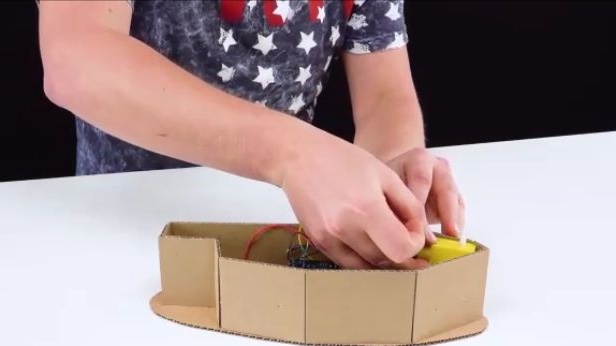
Then we should deal with the electronic components of the homemade product. The author has already taken the filling from the tank, but it can also be used from an old broken machine, the most important thing is that we have two full channels, that is, it should turn out so that two electric motors can be connected, and they can rotate independently different sides. And if you take the electronics from the car, then it will simply be less convenient to control the tank. Well, the design will be powered by your favorite 18650 battery, it can even be called a “henchman”.
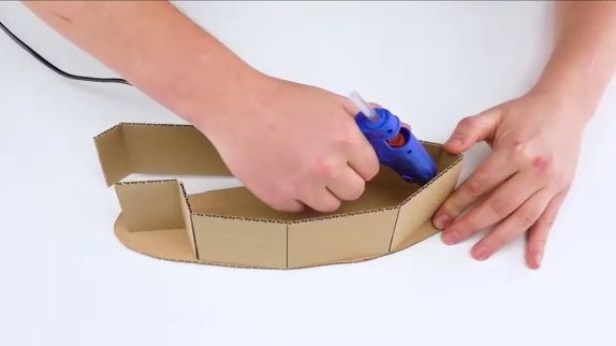
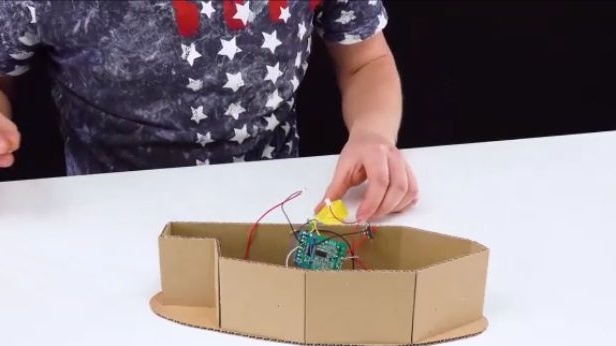
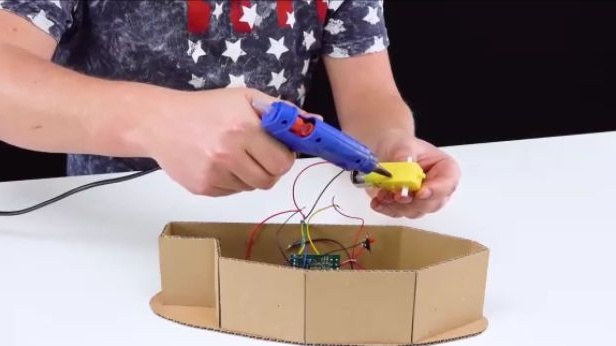
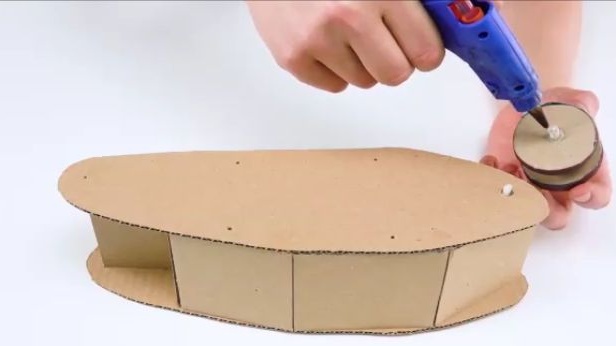
In the design at the indicated place, we make a hole and insert an electric motor with a reducer into it, as well as cram the entire electronic part and fix it all with the help of a glue term. On the other hand, where there will also be an electric motor, a hole should also be made for the gearbox shaft.
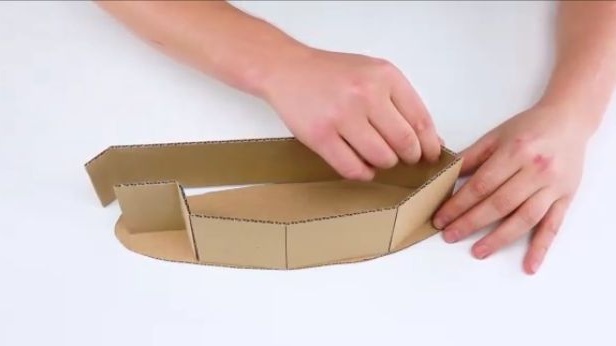
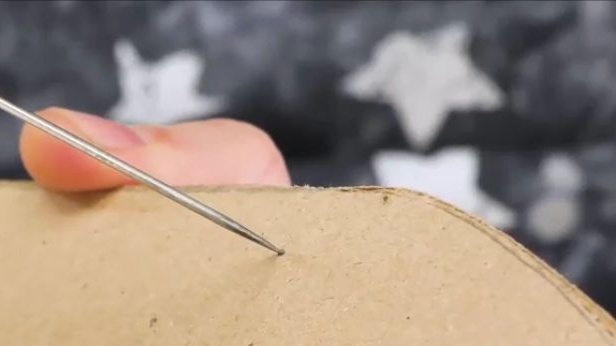
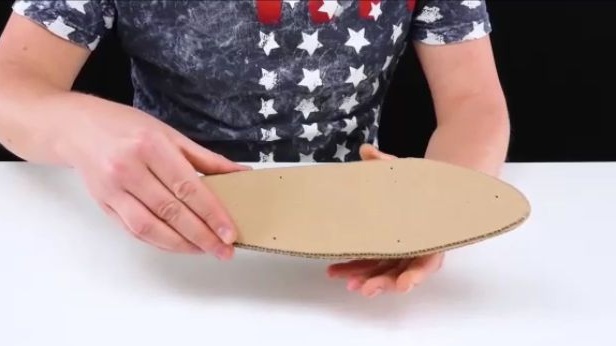
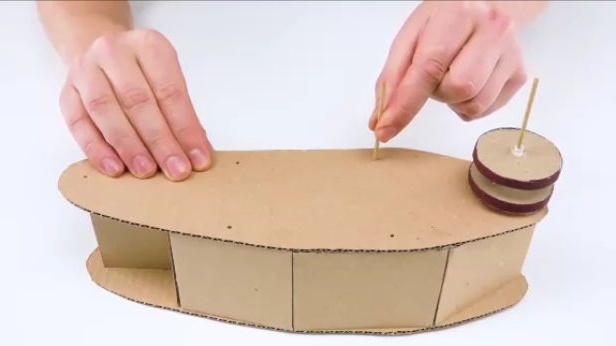
Having taken two identical sidewalls with an awl, we make holes in the indicated places, we will need them for fixing the axles. And glue one of them on the tank.
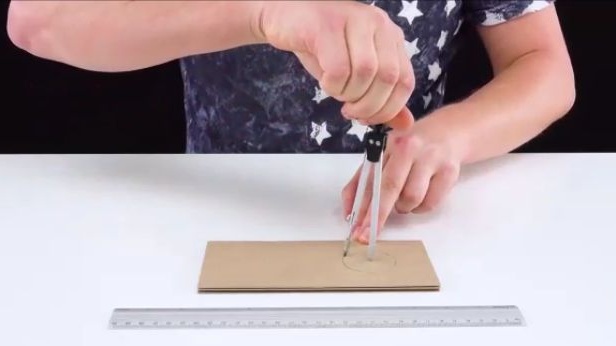
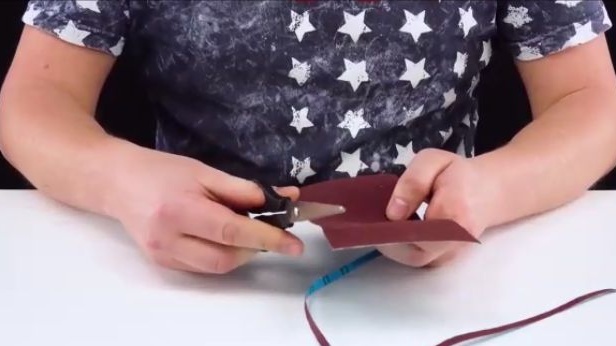
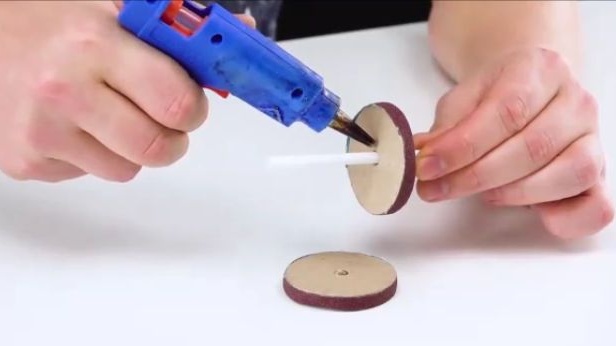
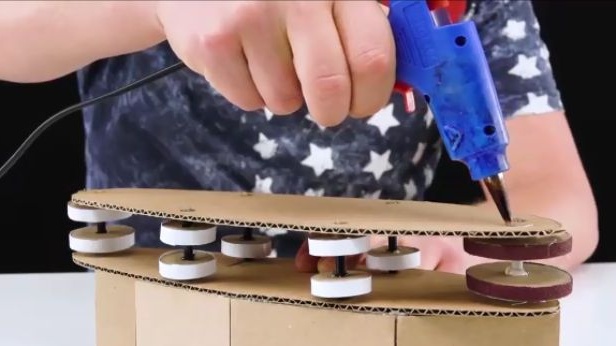
After that, we will need to make a track rotation mechanism. To do this, take a small piece of cardboard and draw a circle with a compass approximately the same as in the photo (in fact, the scale of this circle is arbitrary, it will affect the gear ratio, that is, the larger the circle, the greater the speed and vice versa). In general, we need 4 of these “wheels”.
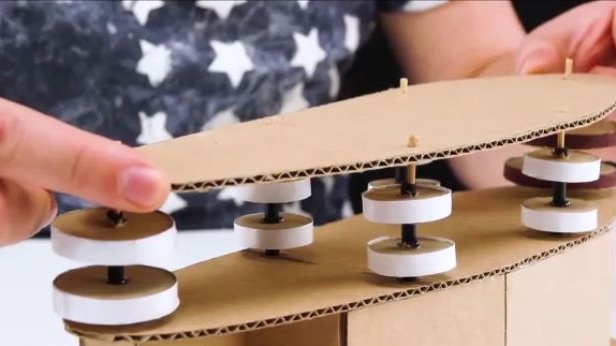
We also need sandpaper, which must be glued to the rim of the cut wheels from cardboard. Just take the paper and cut out thin strips of thickness equal to the thickness of the wheels and glue them with a glue term.
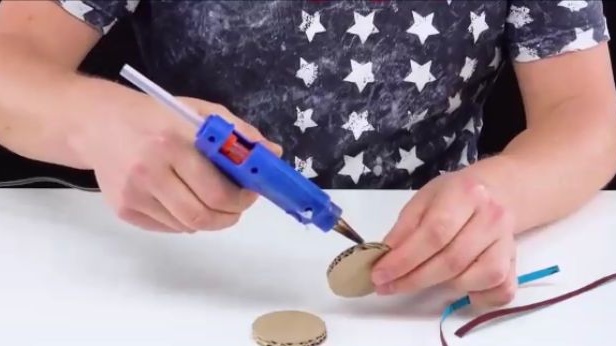
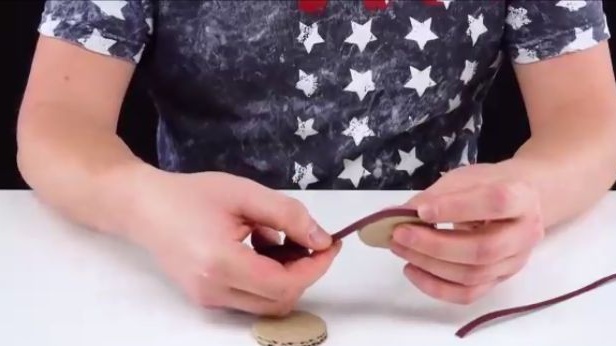
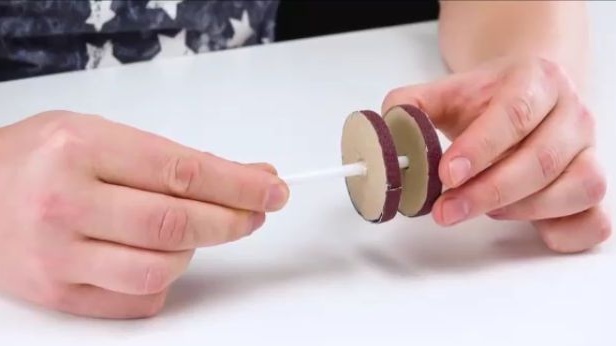
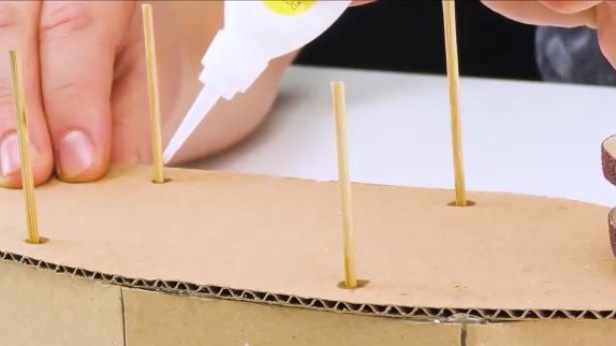
After that, we need the “axis” on which they will hold, and rotate around its axis of the wheel. As an axis we will take a plastic tube from a lollipop. We set the wheels in a similar way and fix them to the axis using the term glue. And we attach the axle with wheels to the shaft of the gearbox of the electric motor.
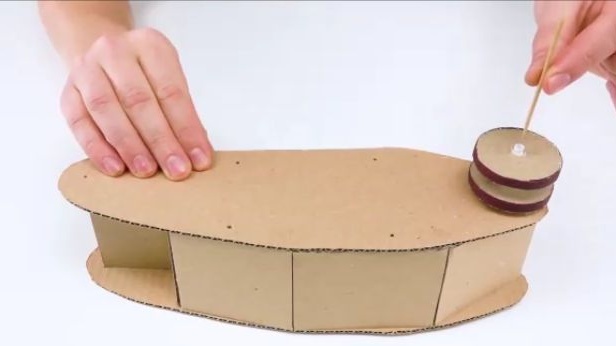
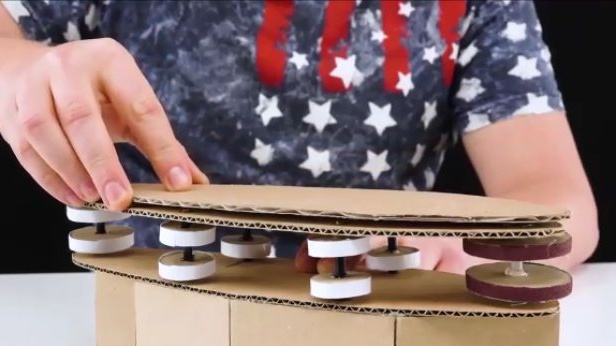
We insert wooden skewers into the previously made holes and fix them on the structure using super glue.
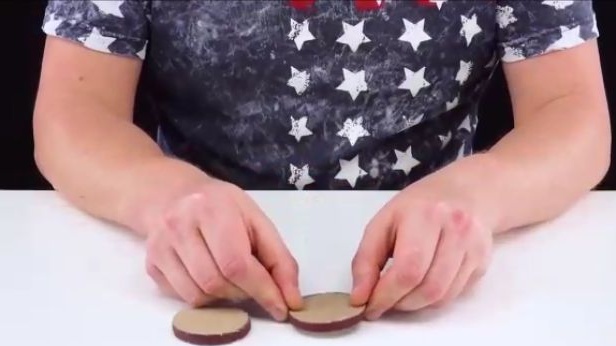
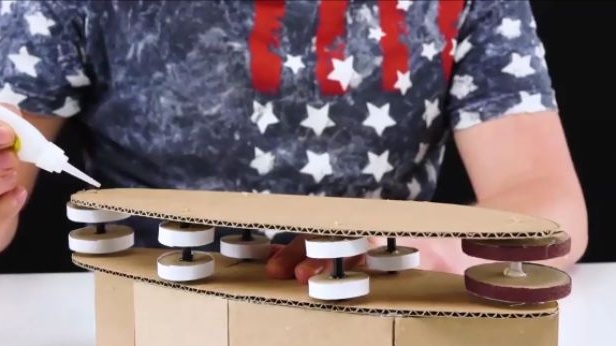
Then, in a similar way as described earlier, we will manufacture 10 more axles with wheels, but of a smaller diameter and without sandpaper, they will play the role of a “closer”. And install them as shown in the photo, while installing the side of the tank.
We bite off the excess length of wooden skewers with a pair of pliers and glue the places where the skewers are with super glue. And on top with a term of glue we glue a decorative overlay. We perform exactly the same actions on the other hand.
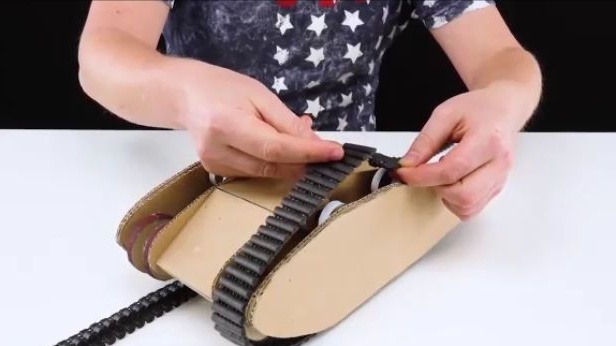
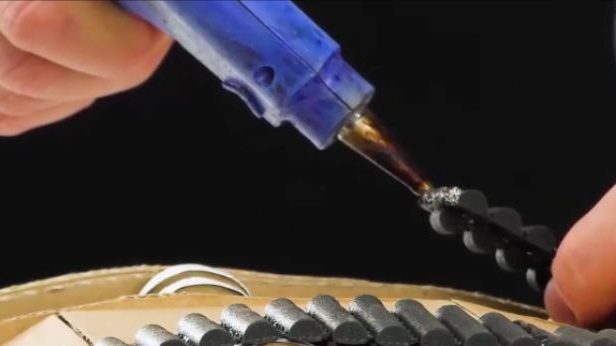
From the foam rubber bath mat, we cut and paint the tracks for the tank. Having measured the desired length, we cut off the excess and connect the ends of the tracks, and install them on the tank.
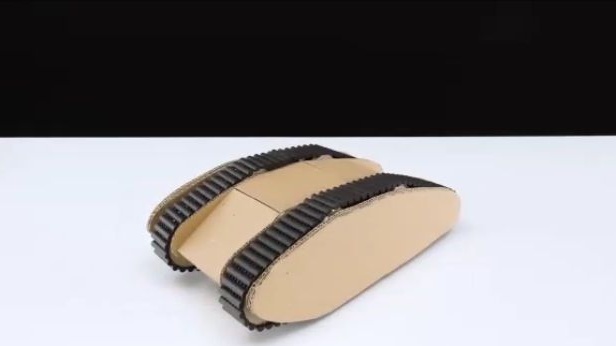
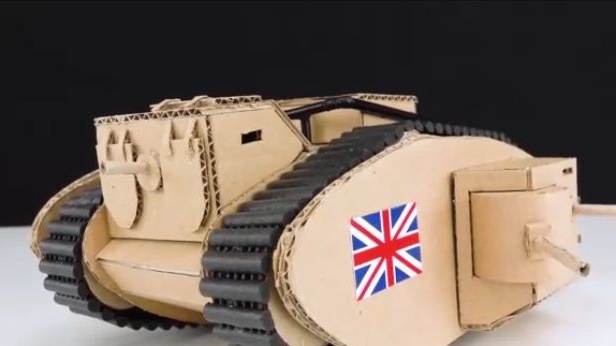
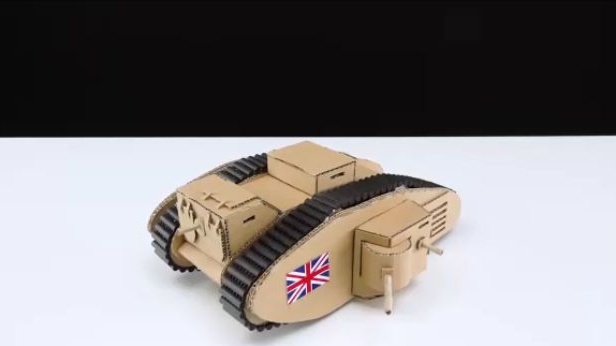
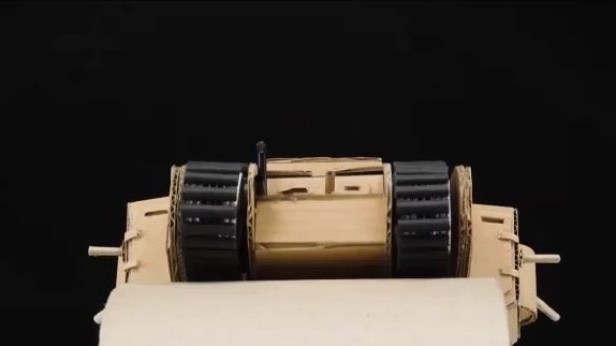
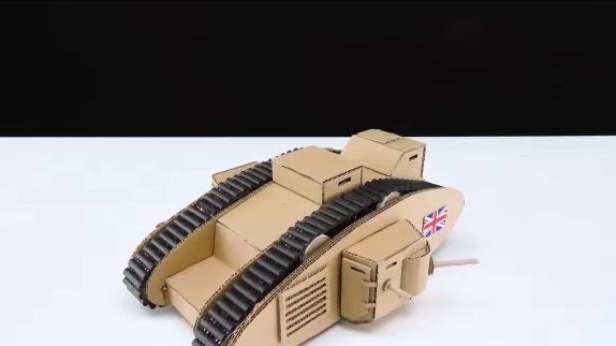
The tank is ready! And it remains to ennoble his appearance. The design, of course, is not ideal, and it should be brought to the ideal, but this is the meaning of modelism "to constantly improve and perfect your model". And as a material, you can use not sheets of cardboard, but for example sheets of ABS plastic that can already be primed and painted with high quality.
Here is a detailed video from the author with the assembly and corrections of this homemade product:
Well, thank you all for your attention and good luck in future projects, friends!