
Good day to all dear friends! In today's article, I would like to show you how to make portable portable travel charging for your phone - Power Bank. Its traveling qualities are that it can be charged using solar energy. This Power Bank will cost quite cheaply, as secondary batteries and cheap Chinese components from online stores will be used in its assembly. Oh well, enough of the long preface, let's go!
And so, for this homemade we will need:
- Rechargeable batteries of 18650 format.
- Cassettes for batteries.
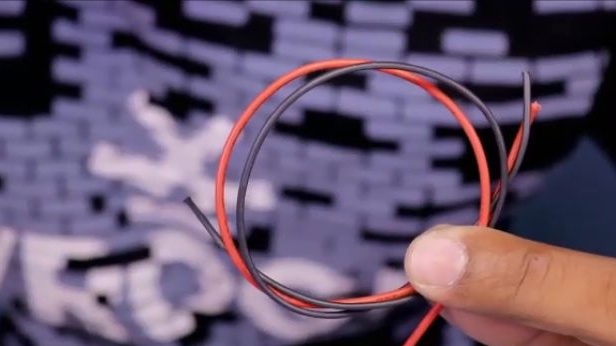
- Wires.
- Power Bank management board (can be bought from the Chinese).
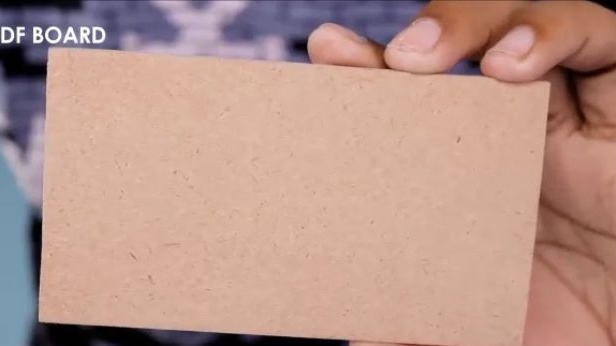
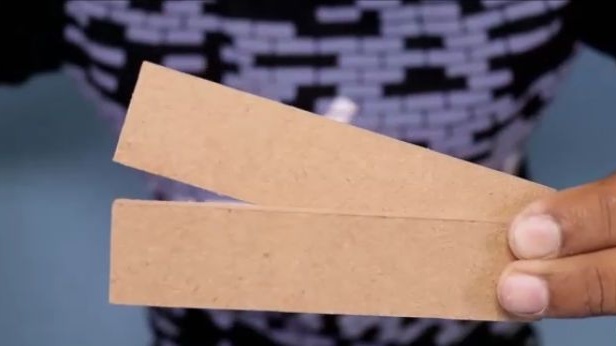
- Fiberboard or MDF panels (you can also use plastic, since this is useful to us for the Power Banka case).
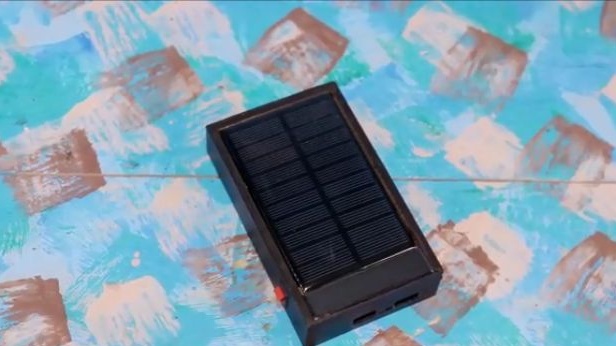
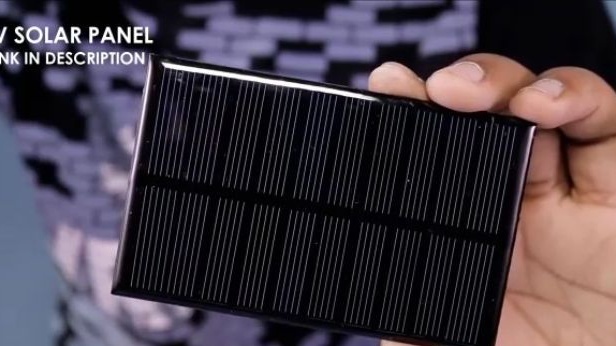
- Solar panel (battery) 5V.
- The switch.
- Thin plastic tube.
Of the tools we will also need:
-Soldering iron.
- Super glue.
- A screwdriver.
- Pen (or pencil, marker, etc.).
- Stationery knife.
- Drill.
- terma glue.
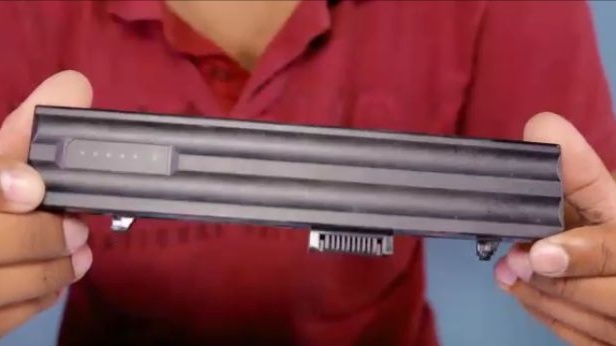
Before you start building Power Bank, you should deal with batteries. It was decided to use 18650 batteries, as this is the most common battery format and choosing a control module for them in Chinese online stores will be as easy as shelling pears. You can buy these batteries with new ones, which will be very good, but you can save and get these batteries from your old laptop, as the author of the homemade product did. But you must understand that using old batteries, the Power Banka characteristics will not be very good, there will be slow charging, small capacity, etc.

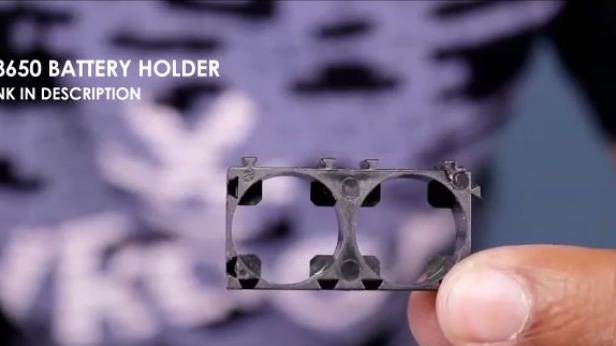
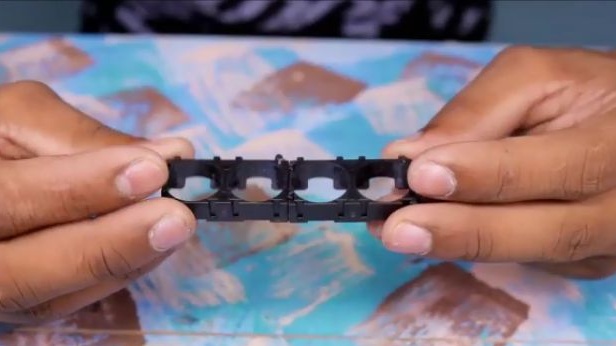
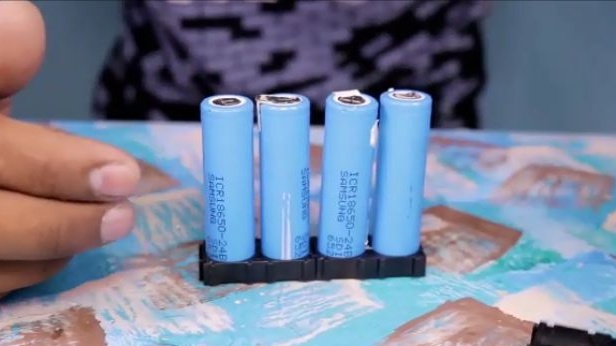
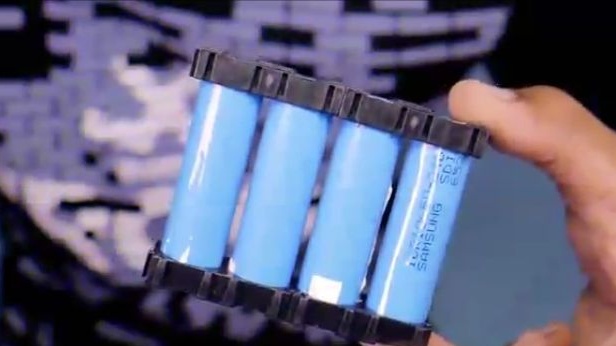
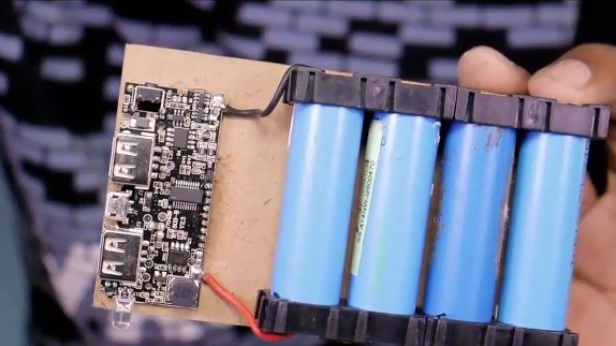
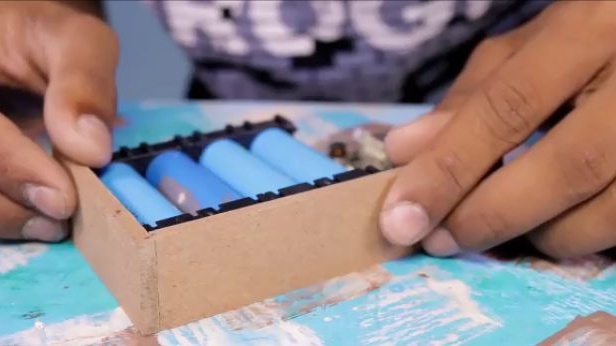
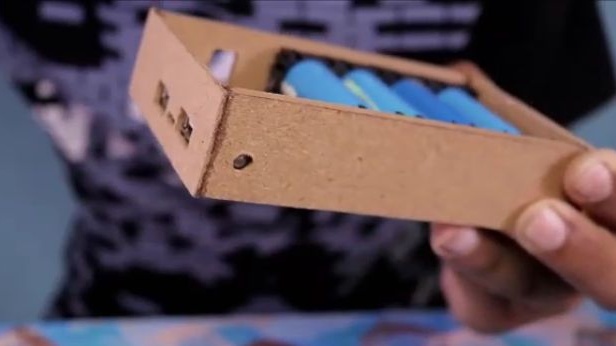
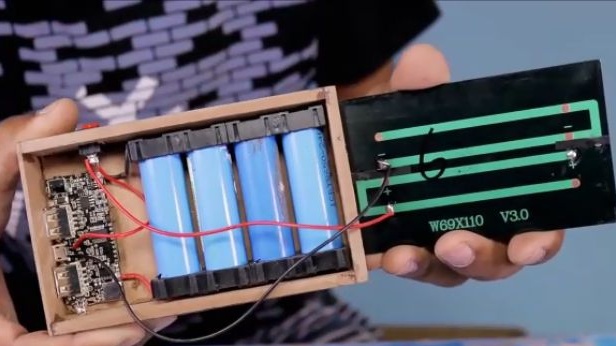
We proceed to the assembly of batteries in one battery. Our battery will consist of four batteries. In order to assemble several batteries into one, we will need special cassettes (photo below), of course you can tie them with electrical tape or glue the term with glue, but using cassettes will be much more convenient.
We insert the batteries into the cassettes so that by soldering the batteries, we get a parallel connection.
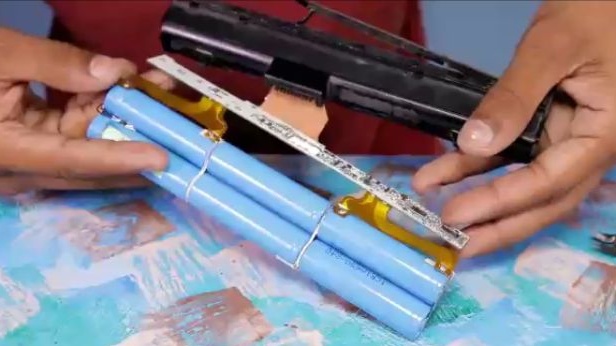
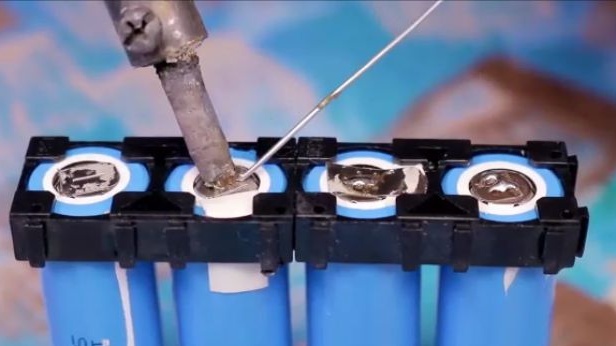
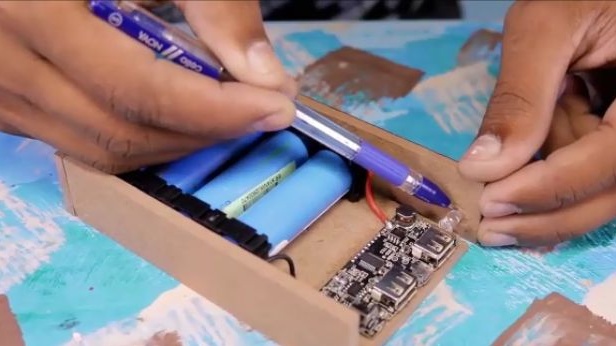
The next step is to solder the batteries together. Many already know that batteries can not be soldered with a soldering iron, since they are very easy to overheat, and they will fail. The best way to connect the batteries is contact welding, if you have one, then you are a very happy person and use it to assemble this homemade product. Well, if you just own a soldering iron, then note that soldering the batteries should be short-term so that the battery does not have time to warm up, and also use soldering acid for soldering. It is necessary to tin the batteries as in the photo, and then solder the wire.
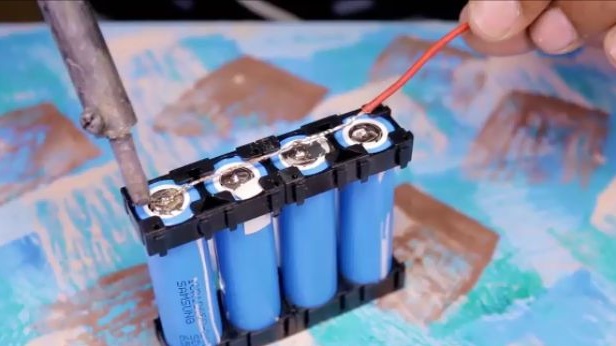
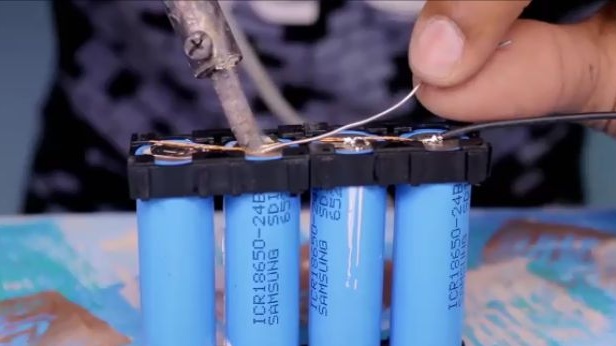
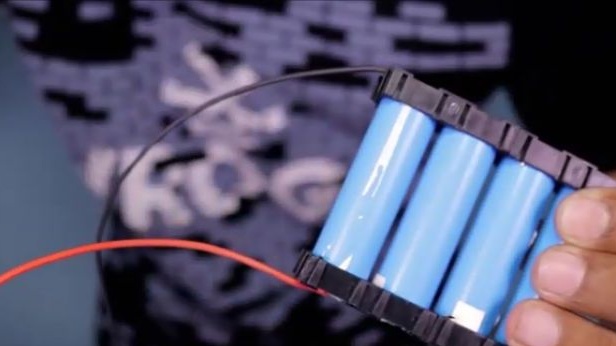
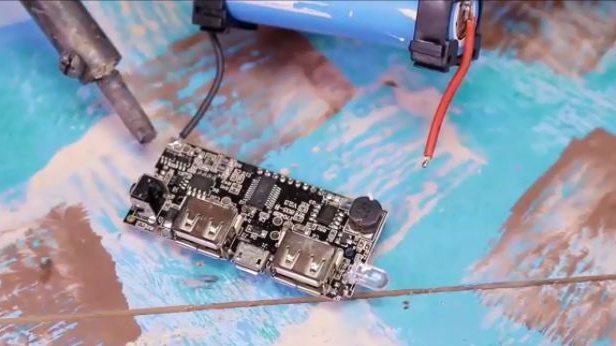
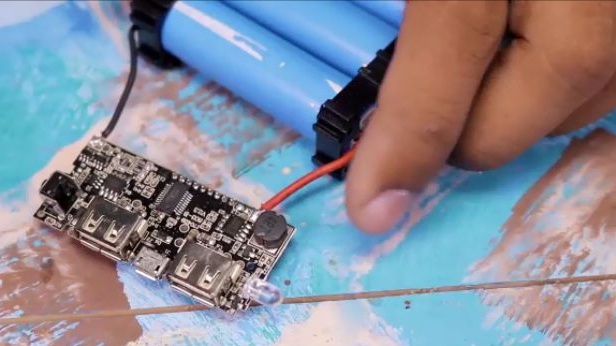
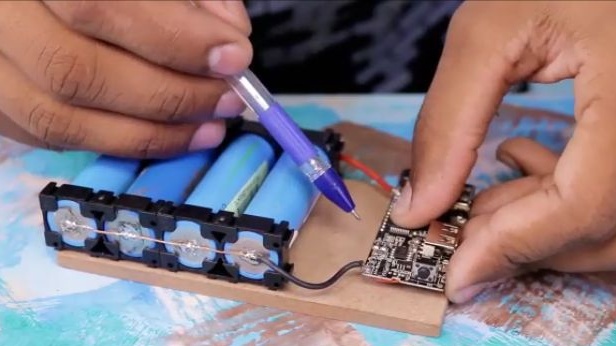
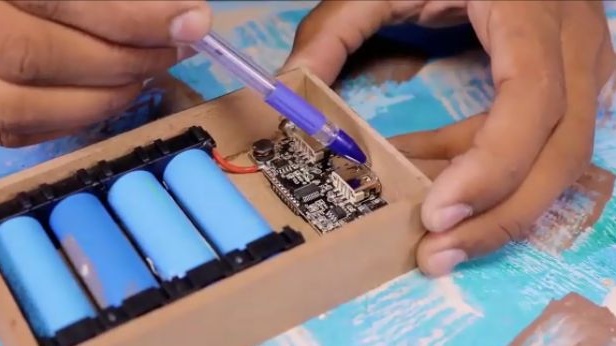
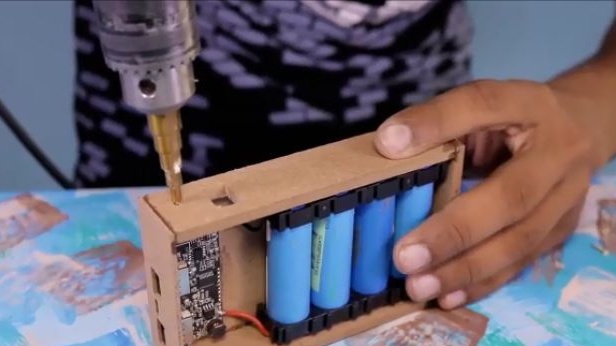
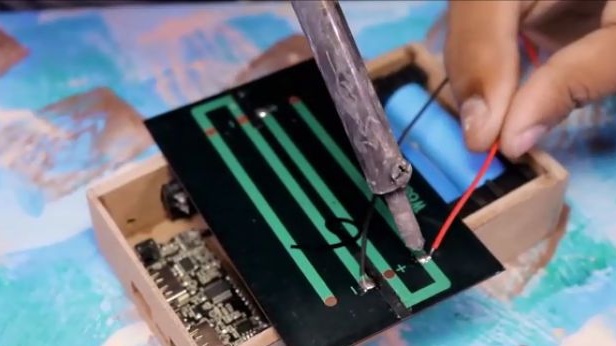
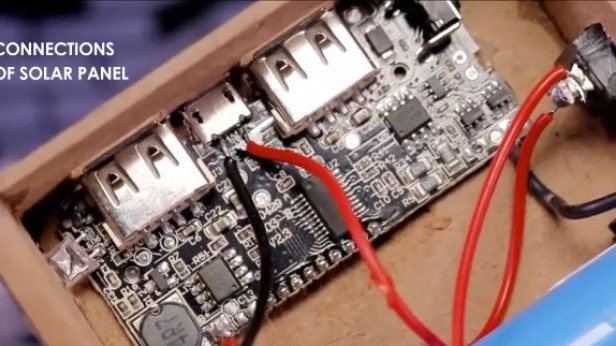
For the next step, we need a Power Banka management board, this board includes many functions that allows you to make the design as compact as possible. Solder our battery assembly to the control board. Not forgetting the polarity, there are “+” and “-” markings on the board, so you won’t get confused.
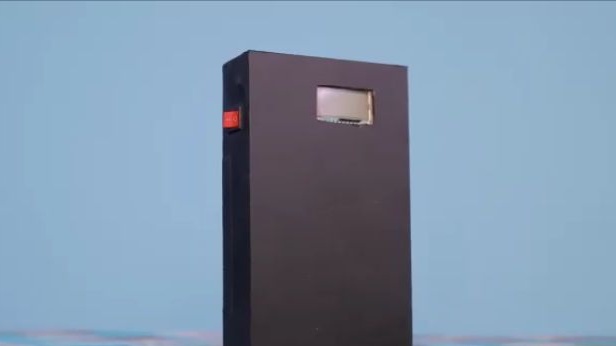
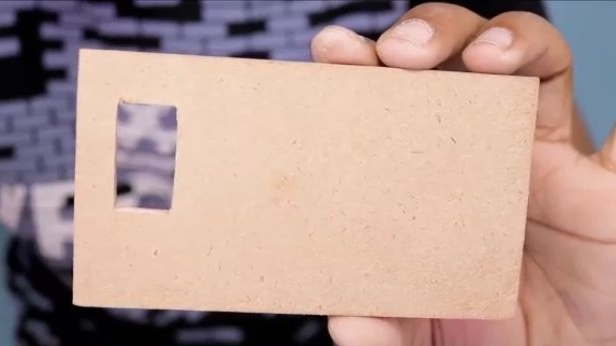
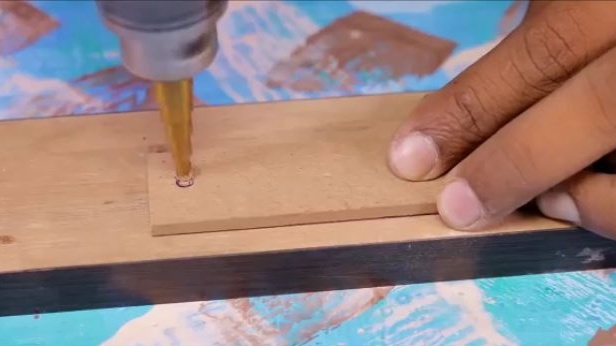
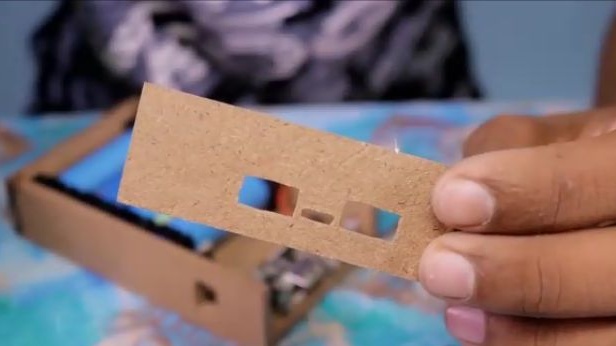
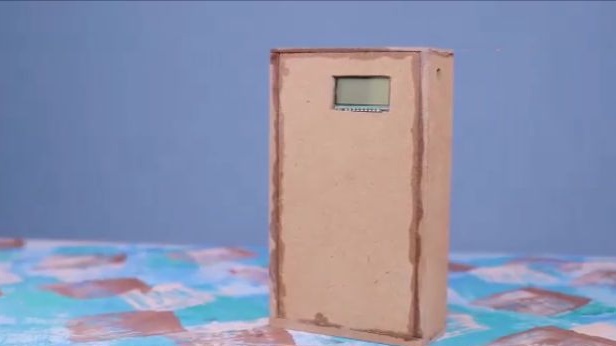
Let's make the case. For the case we need a wooden MDF panel, but you can use any suitable flat material that you can work with. We cut out a panel of a suitable size and attach the control board, circle it along the contour.
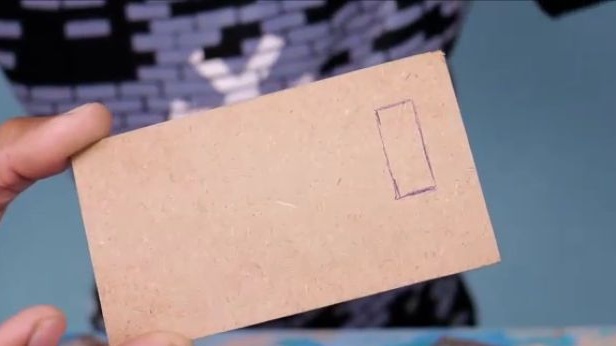
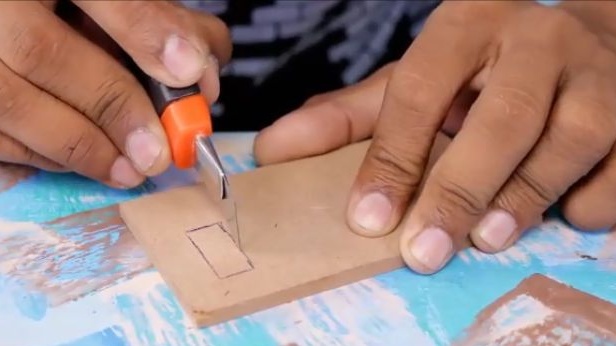
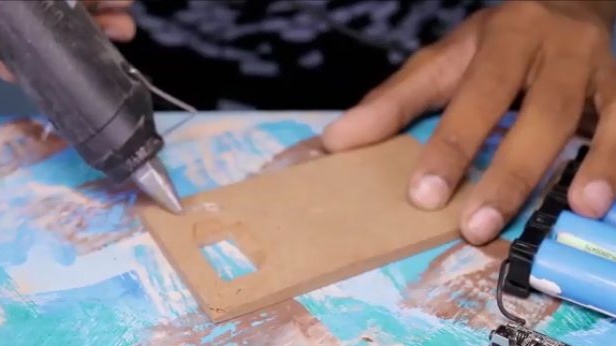
Cut out a window for the display. The MTF panel is quite soft and to cut a window under the display we need a clerical knife. Just draw several times with a knife along the marked contour, using force.
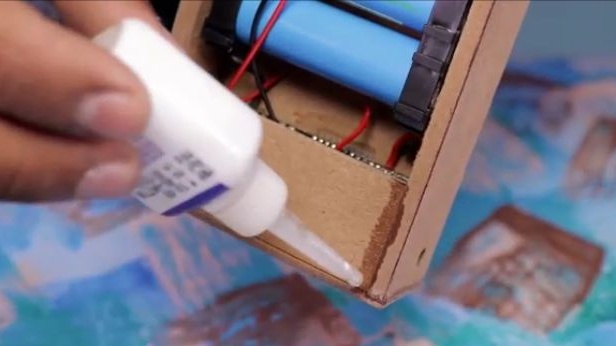
Using a glue term, glue the battery assembly and control board to the MTF panel.
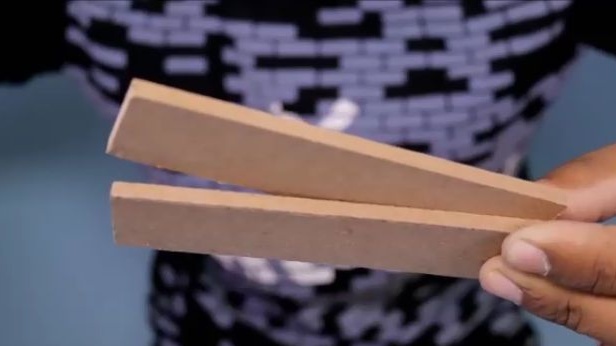
Two identical rectangles should be cut from the same MTF panel, the length of which will be equal to the length of the main part of the case, and the width should be such that the battery fits. And two more identical rectangles of the same width, but the length should be equal to the width of the body. After cutting the blanks we glue two of them, those that are shown in the photo.

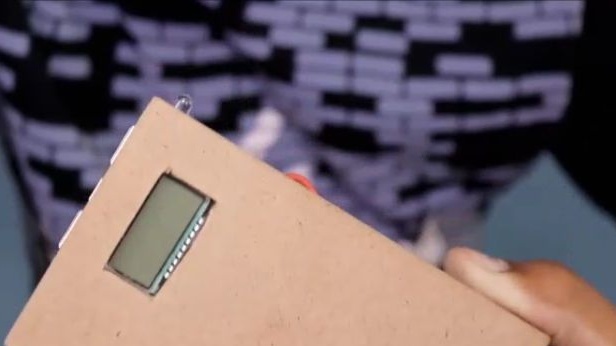
Seeing that the LED from the control board is a bit in the way, the author decided to make holes so that his indication was visible and the LED did not rest. And also glue to the body.
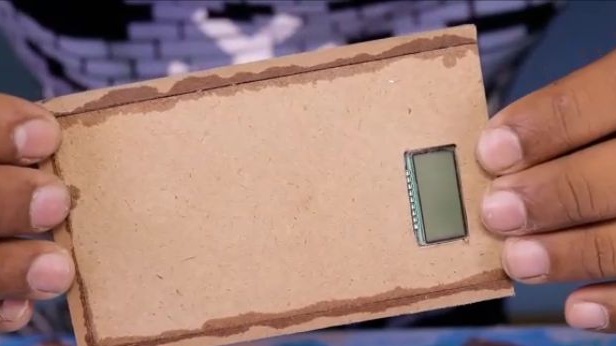
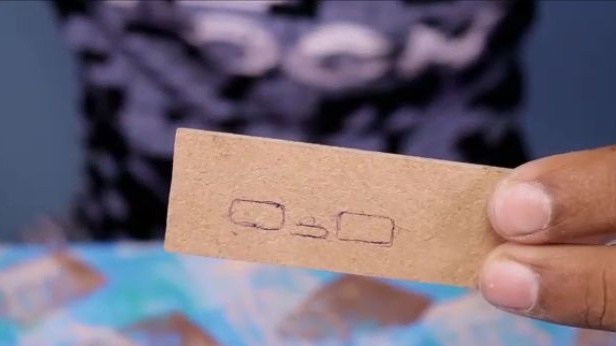
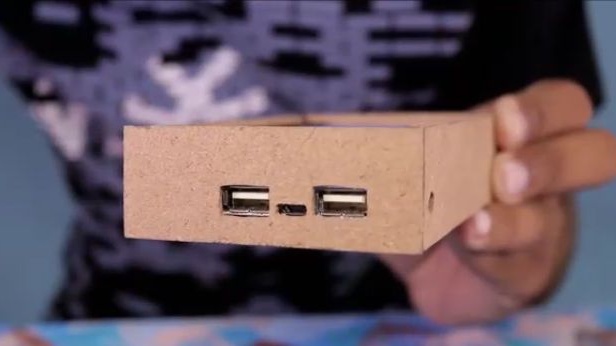
Then, on the other panel, we also mark the holes for USB and charging Power Banka. And also glue it to the body for super glue.
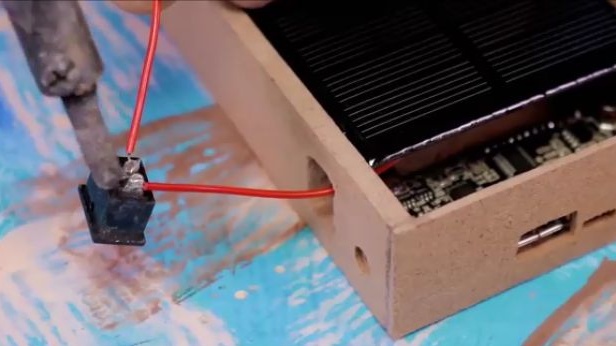
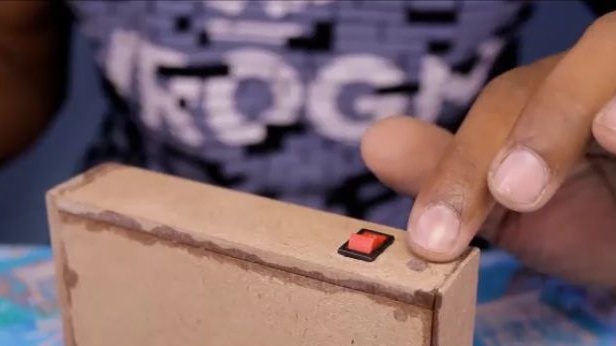
On one of the side parts we cut and drill holes for the switch and the shutdown button. We need a switch to turn on and off charging from solar energy.
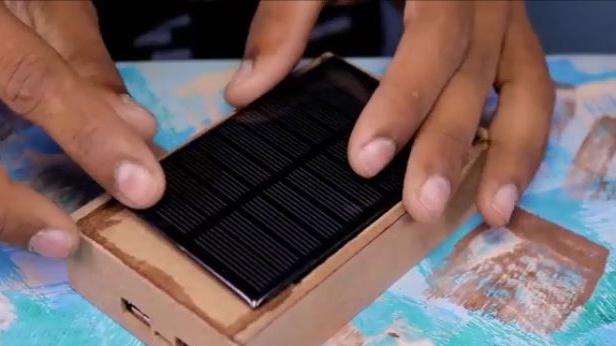
Next, we need a solar battery, which should be connected to the control board. Solder should be in those places that are indicated in the photo, and through the switch.
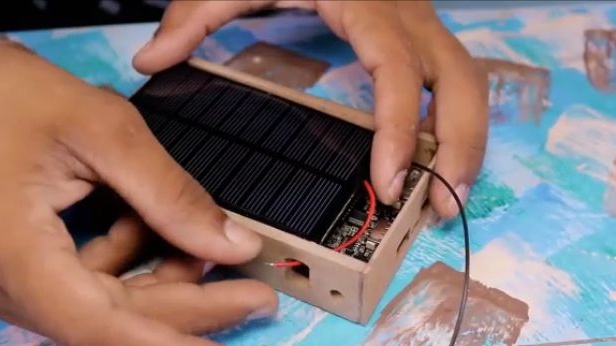
Since our solar battery is smaller than the Power Bank case and it will not be enough to use the wall. For the last wall of the case, cut a small rectangle from the MTF panel, and glue it with super glue to the specified location as in the photo.
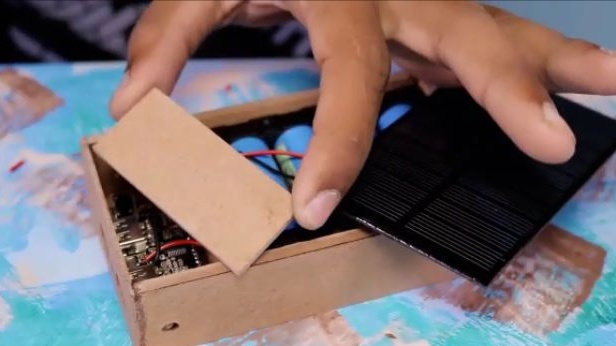
And we glue the solar panel itself to the case and on this we finish the assembly of the case.
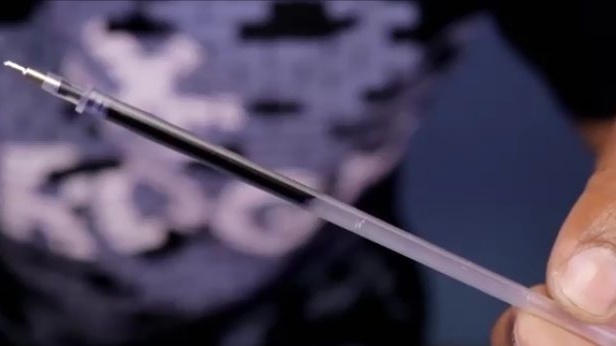
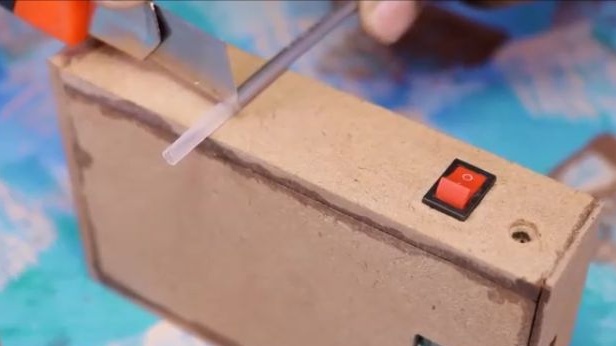
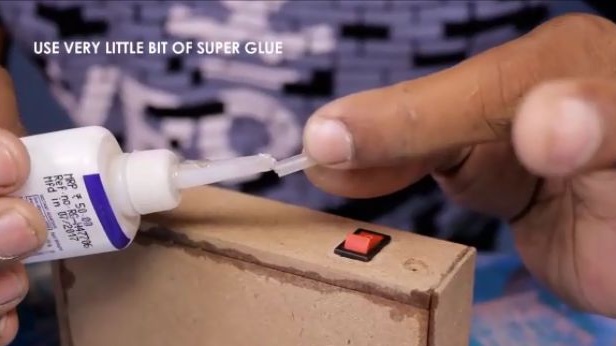
Due to the fact that the thickness of the case did not allow us to use the power button, we need to make a kind of extension cord for the button. For an extension cord, we need some kind of plastic tube, a tube with paste from a ballpoint pen is perfect. Cut off the length we need, drip super glue and glue it.
All is ready! It remains only to tint a little and that's for sure.
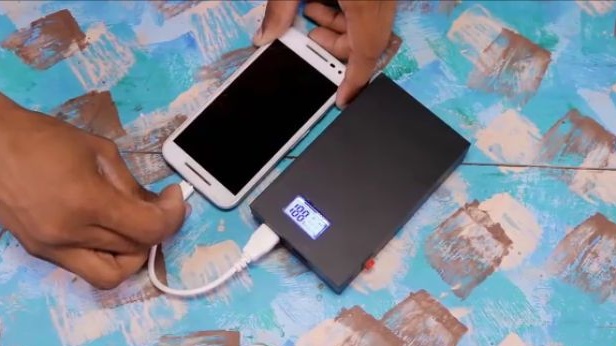
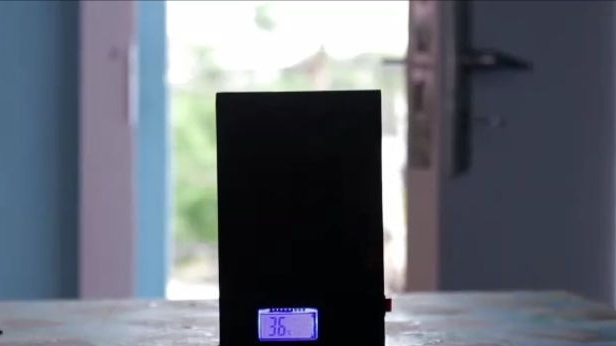
As a result, we got a great assistant who can definitely help us in the forest or just on a hike. This Power Bank can issue up to 2.1A and can charge two of your devices at once.

Here is a detailed video from the author with the assembly and testing of this homemade product:
Well, thank you all for your attention and good luck in future projects, friends!