

I continue to gradually collect materials, tools and equip the workplace for glass-blowing. Having assembled a device for producing carburetor gas (gasoline vapors), I was faced with the need for a good stable blower. She, by the way, would be needed for gas glass blowers. Even with oxygen blasting, air addition is necessary.
In short, you need a good compressor. At first, for experiments with a glass-blower burner using gasoline vapor, I used homemade compressor from the fridge. However, it turned out that he had to turn on quite often, ideally - to work almost continuously. In this case, the pressure will be the most stable. In this mode, a dehumidifier in the form of a box-can with silica gel should be installed on the air intake. Otherwise, moisture from the air will accumulate inside the compressor in the oil. One of the design features of compressors from refrigerators is that an open electric motor floats in oil. Accumulating water will sink to the bottom and can easily cause a short in the windings.
The factory “building” compressor is much more productive. A fairly long work between switching on is ensured by its 24-liter receiver, so it’s more convenient to work. In addition, the compressor of the classic layout is a piston group separately, the engine separately is like nuts and cutlets in the message, and there is no need to drain the incoming air. One of the drawbacks of the compressor is its difficult start-up - an electric motor of 1.5 kW, seemingly small power, but given the deplorable state of the village networks, and the high starting currents of powerful single-phase motors ... Often, at the moment of switching on, the compressor says - mmm-m- uh! Then, run to him headlong turned off until something bad happened. It’s good when you are on your feet and near, and when you are sitting comfortably, you CREATE, and you cannot take out the complex glass from the flame of the burner, and he puts such a pig for you.
Yes, refrigeration compressors are also not easy to start, and with prolonged operation in an unstable network, there are times when it also refuses to start - but at least you do not need to rush it off. It copes. That's just about a good stable torch on the burner, we can’t talk.
The electrical network in the village, this in itself is something. Tension jumps and dances to a fair extent. And even though three-phase, the voltage difference across the phases is also not small. So I do not risk motors without protective devices to connect, as expected. One joy is that you can choose a phase where the voltage is larger and more stable. To do this, I had to climb into the shield on the street with a screwdriver and a tester. In winter, this is especially unpleasant.
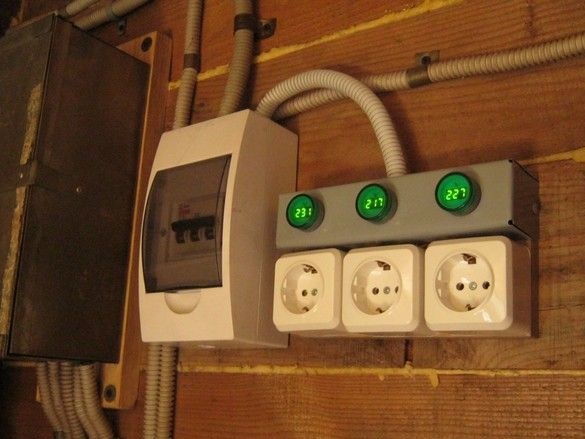
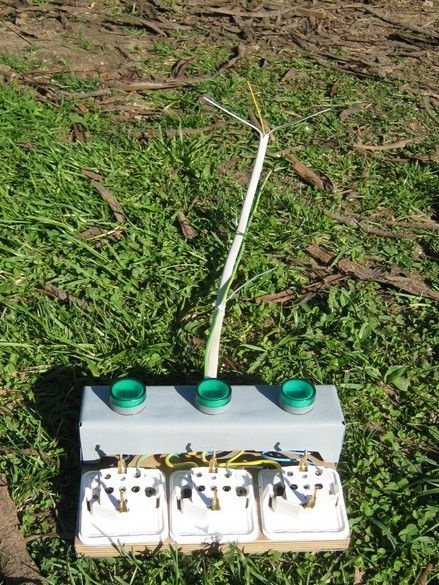
In order to have an idea of the state in a three-phase network in the fastest and most visual way, and to select the most satisfactory phase to turn on critical loads, this simple device was assembled.
It consists of three sockets, according to the number of phases, with individual miniature digital voltmeters. All this business is integrated into a module located near the internal electric cabinet with “automatic machines”.
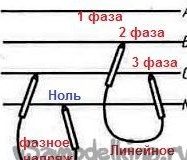
It will not be amiss to recall here - in a three-phase network, the voltage is usually estimated according to the line voltage data. For three-phase lines that depart from the substation, a linear voltage of 380 volts is set. This corresponds to a phase voltage of 220 volts. In three-phase four-wire networks, the rated voltage is indicated with the designation of both values - 380/220 V. This means that both 380 volt and single-phase devices with 220 volts are connected to such a network. The most widespread three-phase system is 380/220 volts with a grounded neutral wire. Single-phase 220 volt electrical appliances connect to line voltage between any pair of phase conductors. Three-phase electrical appliances connect to three different phase wires. In the latter case, the use of a neutral wire is not required, while the absence of grounding increases the risk of electric shock when the insulation is broken.
So, what was used at work.
Tools, equipment.
For the manufacture of the base I used a circular saw, a pendulum saw. In the manufacture of nipples made of roofing steel, we needed metal scissors, a mallet, a jewelry jigsaw with accessories. A screwdriver, brush, dishes for painting came in handy. A set of tools for electrical installation, it is understandable a soldering iron, medium power, about 60W, with accessories. A building or special hairdryer for working with thermotubes.
Materials
In addition to the installation parts - sockets and voltmeters, I needed - a piece of thick plywood or a plaque for the base, a piece of “roofing” galvanized steel 0.5mm, paintwork, cotton rags. Fasteners, wires, thermotube, a piece of corrugated plastic sleeve with a diameter of 16 mm. Nylon ties for electrical installation.
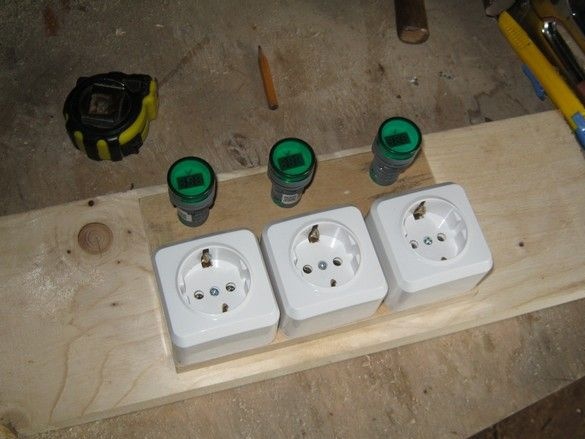
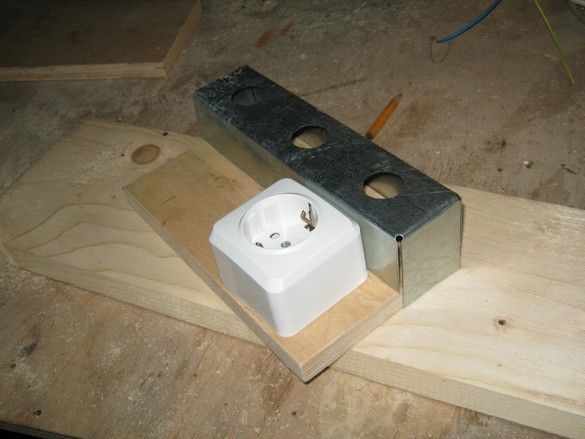
The first step was to pick up a wooden base. Found a suitable width, a piece of thick plywood, seven times measured and cut the ends. And the size, and so that they were flat. He arranged the elements - for installation, it would be more convenient if, first, there were sockets and then voltmeters on the path of the incoming cable, but using the device would be inconvenient. Miniature voltmeters "block" - designed for installation on the front panel of the unit, cabinet. They are made in the housing, with sizes matching the signal lights. For their convenient and safe placement requires a casing, which was made of "roofing" galvanized steel. The casing is of the simplest design, without additional petals fastening and “sealing” the side slots. With a low "IP". Its task is to fix the voltmeters in the selected position and hide the installation, there is not even a need for special protection against electric shock - the terminals on the voltmeters are recessed, the wire connections are insulated.
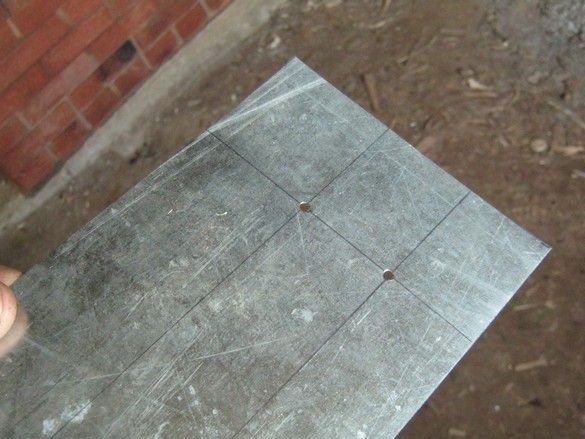
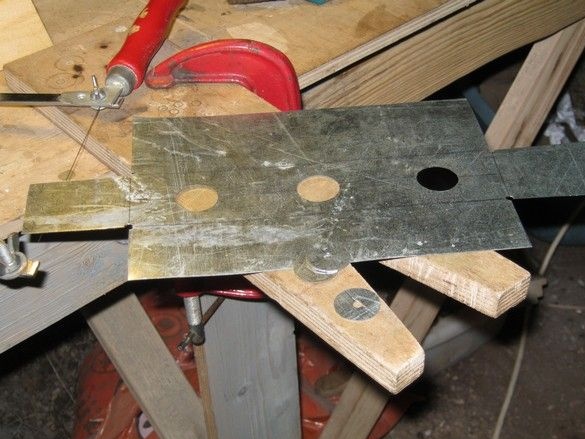
In order to prevent ugly “wrinkles” in the corners when bending, I drilled holes there. I was too lazy to change the drill in the machine, and it turned out not very beautiful - it looks good about 3mm. Making large holes in a thin metal by common means is always a problem - either cut out with a small sharp chisel (the metal stretches, it turns out “eight”), or drill many small holes in a circle and then connect them, remove the middle and align the toothy opening with half or round file.The drill will also not allow you to cut a circle with a small abrasive disc - only approaching it.
Any openings and shapes in thin metal are very convenient to cut with a jewelry jigsaw. Moreover, the jigsaw itself is sometimes unnecessary - a “pioneer” jigsaw on wood with a jewelry file was used here. He has a much larger “knee”, he knows how to get deeper into the workpiece. For steel 0.5 mm it is convenient to use a file No. 4.
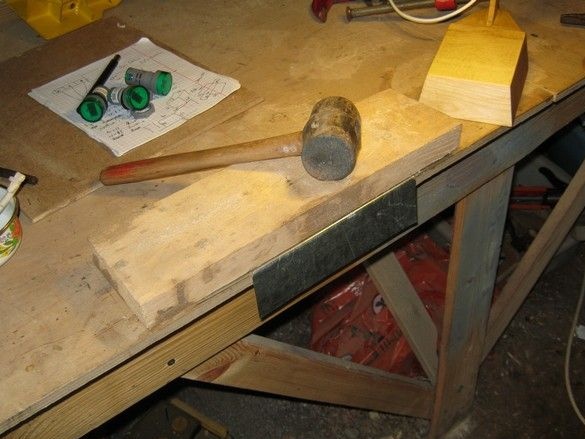
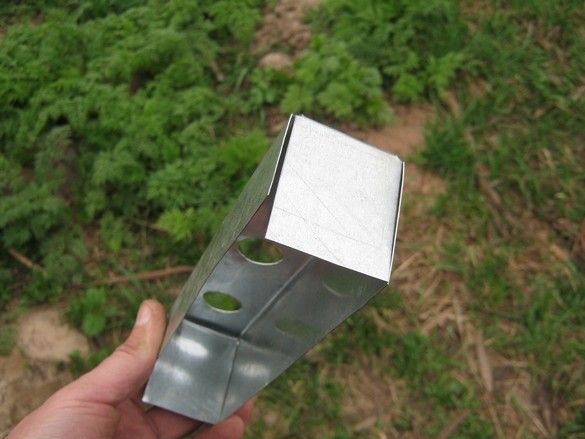
He bent the casing from the workpiece, for this, the fold line is clamped between two planks with smooth edges. It is advisable to clamp with clamps. After the necessary part is bent by a plank along the entire length, an even angle is formed by a mallet. The casing is tried on to the base, openings and holes for wires and fastening screws are cut or drilled.
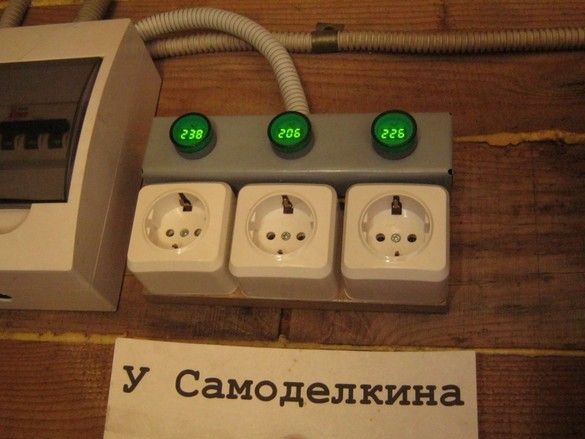
Before installation and installation, I checked voltmeters. These are low-cost models purchased at Aliexpress. Perhaps their only drawback is the lack of adjustment of the displayed voltage. When connecting all three copies in parallel, the difference was about a volt, from the readings of the multimeter by two - the error is about a percent, which is quite acceptable for this application.
He painted a casing and a piece of wood in two layers - iron with gray soil-enamel on rust, wood with yacht varnish.
After complete drying, he took up the installation, the wires to the sockets - a significant section with a mono-core, to the voltmeters - a flexible mounting wire. Sockets are connected to phase voltages - a common "zero" and the output from each phase. Zero - a yellow-green wire over a gray three-core cable in the photo below, a bundle is soldered to it under the casing - three of the same powerful wires to outlets and three mounting wires to voltmeters. The end of each conductor was stripped of insulation at a length of about 30 mm, tinned. The prepared ends were folded into a bundle and wrapped with a thin tinned copper wire. A flux was applied and the beam was carefully soldered. If there is not enough heat of the soldering iron, you can add a small gas burner or a construction hairdryer. In this case, flux is better to use inorganic (non-combustible). After removal of flux residues, the soldering point was isolated with two layers of the heat pipe.
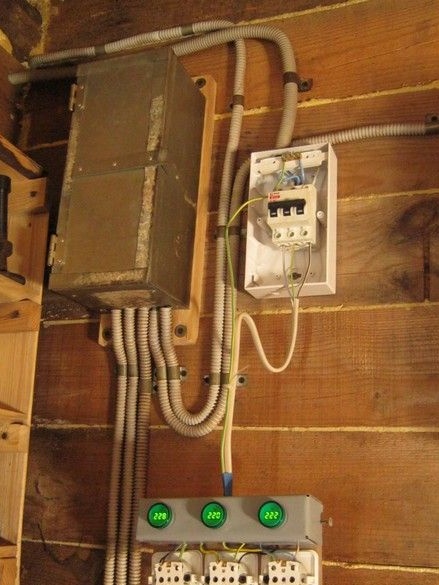
After the installation was completed, the device was connected to the network "on a live thread", to test the performance. All voltages are in place, voltmeters are working - can be mounted on the finishing.
With its extreme simplicity, the device was extremely convenient and useful.