Do not throw away old files from the times of the USSR, this is a source of excellent strong steel from which wonderful knives can be made. This steel is not inferior in quality to such foreign analogues as 1060-1095. It contains only pure steel and carbon, which makes the metal durable and well tempered. You may also come across modern files, they have only the solid outer part, and usually the metal inside is of poor quality. Such files are not suitable for making a knife!
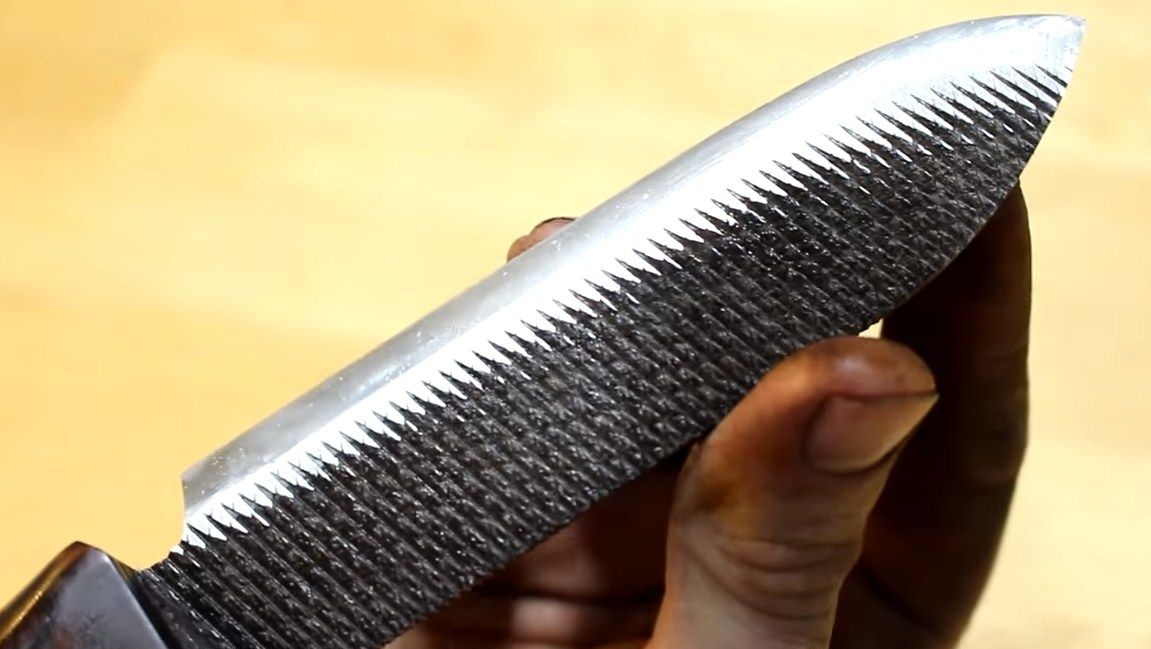
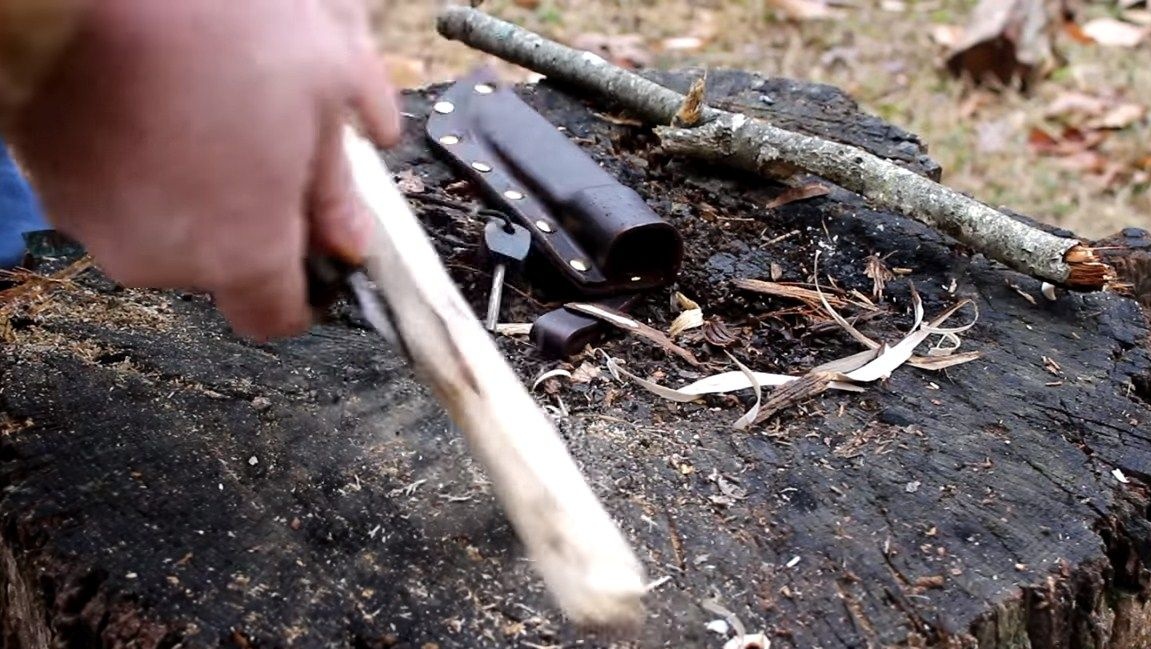
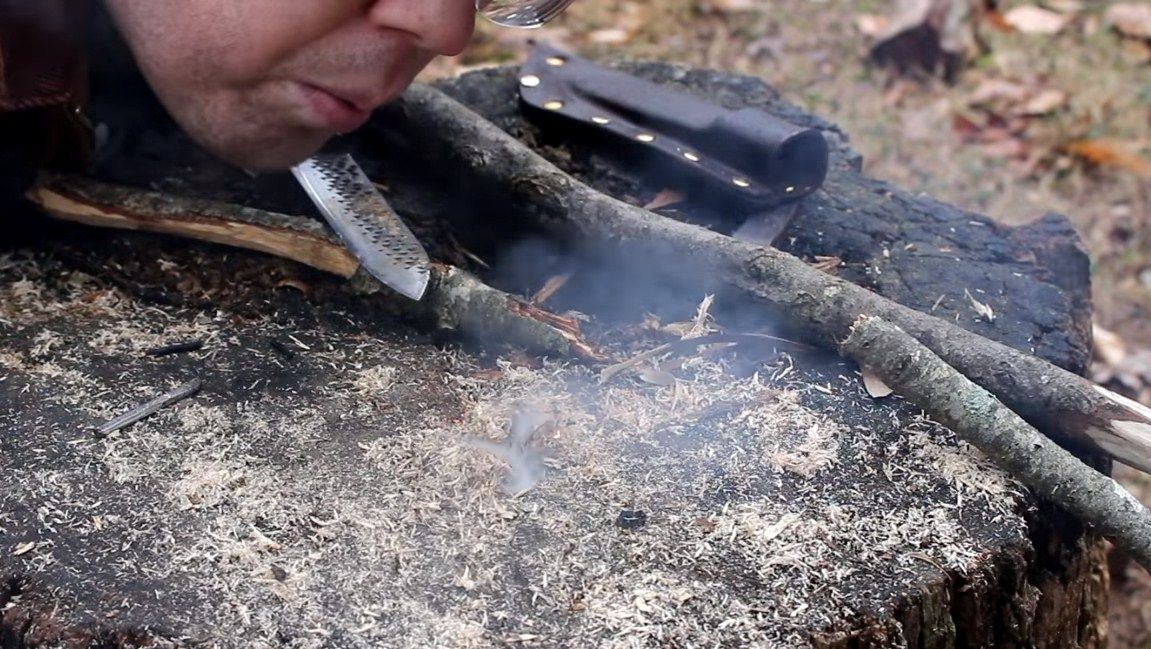
In this instruction, we will discuss how to make an excellent hiking or hunting knife from a file with our own hands using a minimal set of tools. A feature of this knife can be considered that the author decided to leave the cloves of the file on the blade. This extends the functionality, because such a knife can be used as a rasp. For example, it will be useful if you had no matches in the campaign and there is nothing to light a fire. We just take our rasp knife and plan the shavings from a dry stick. Now you can easily get fire from this dry shavings. So, we will consider in more detail how to make such a knife!
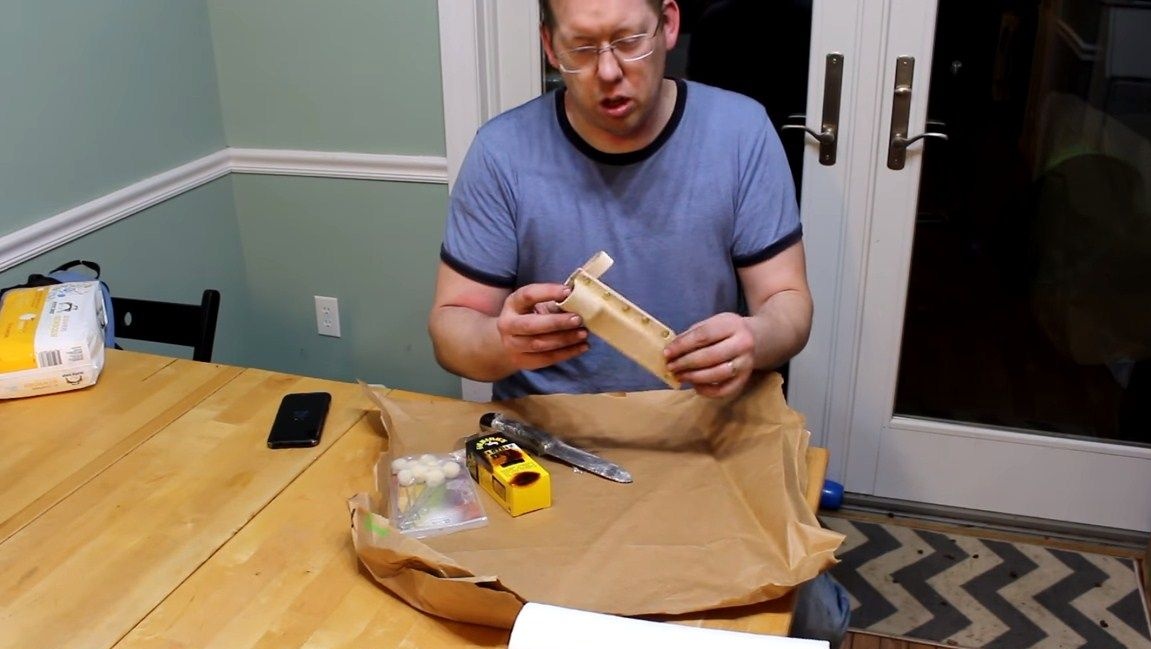
Materials and tools used by the author:
Material List:
- old file (rasp);
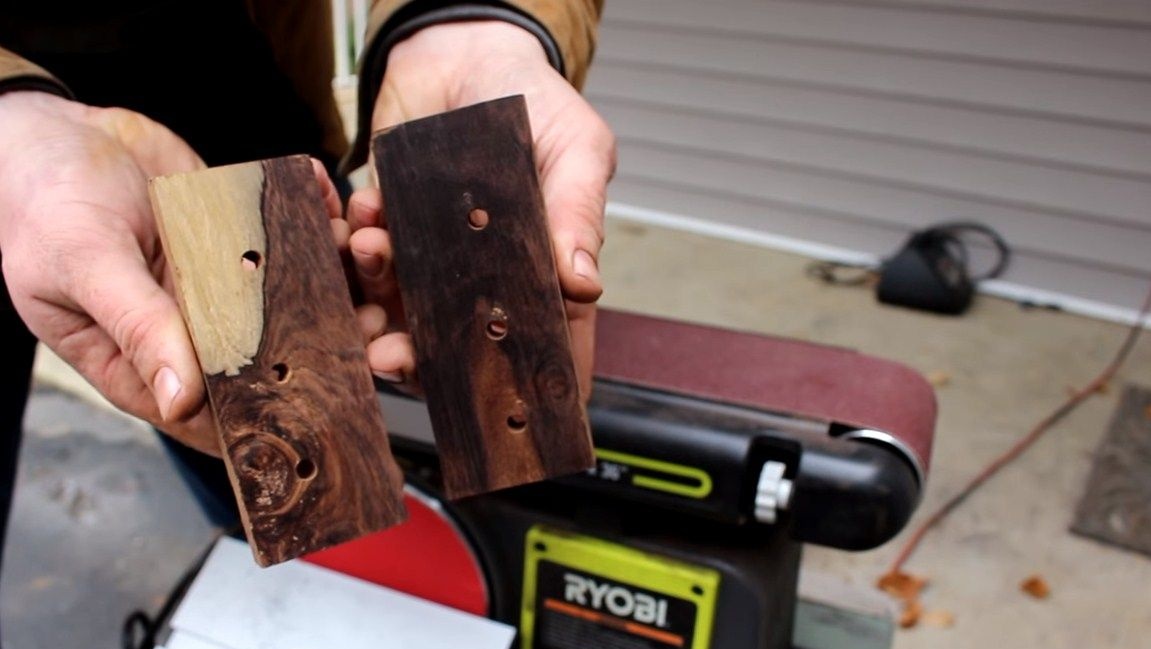
- wood for linings (choose something beautiful and rare);
- epoxy adhesive;
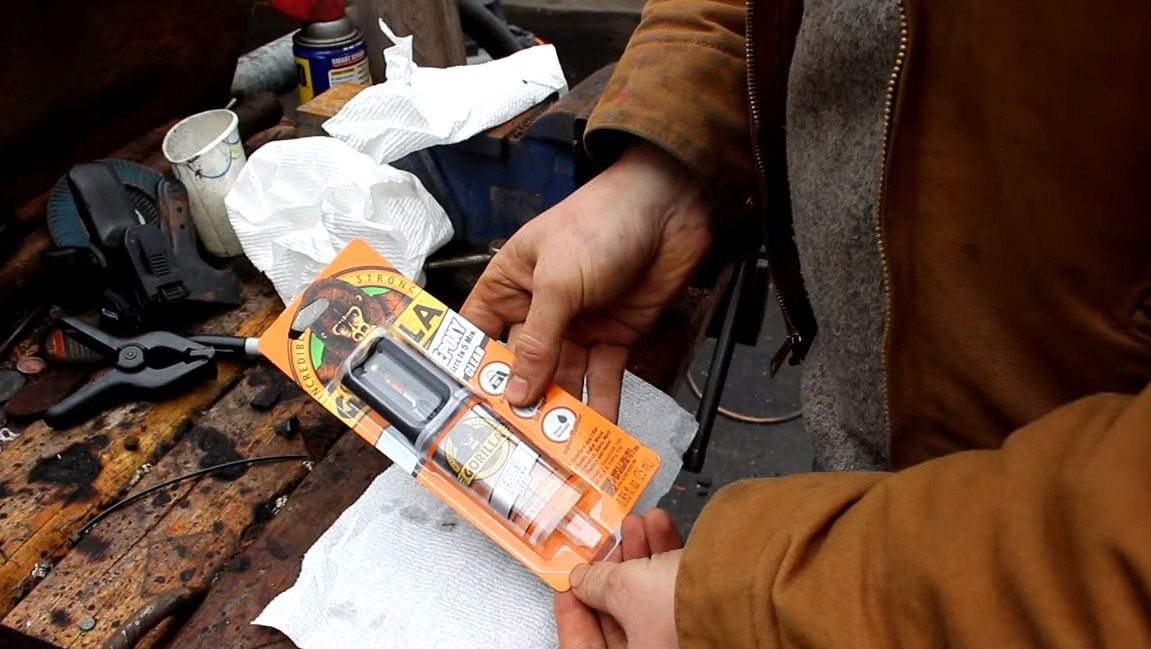
- steel or brass rods (for pins);
- leather and rivets (to make scabbard);
- oil for wood impregnation.
Tool List:
- grinder;
- belt sander (optional);
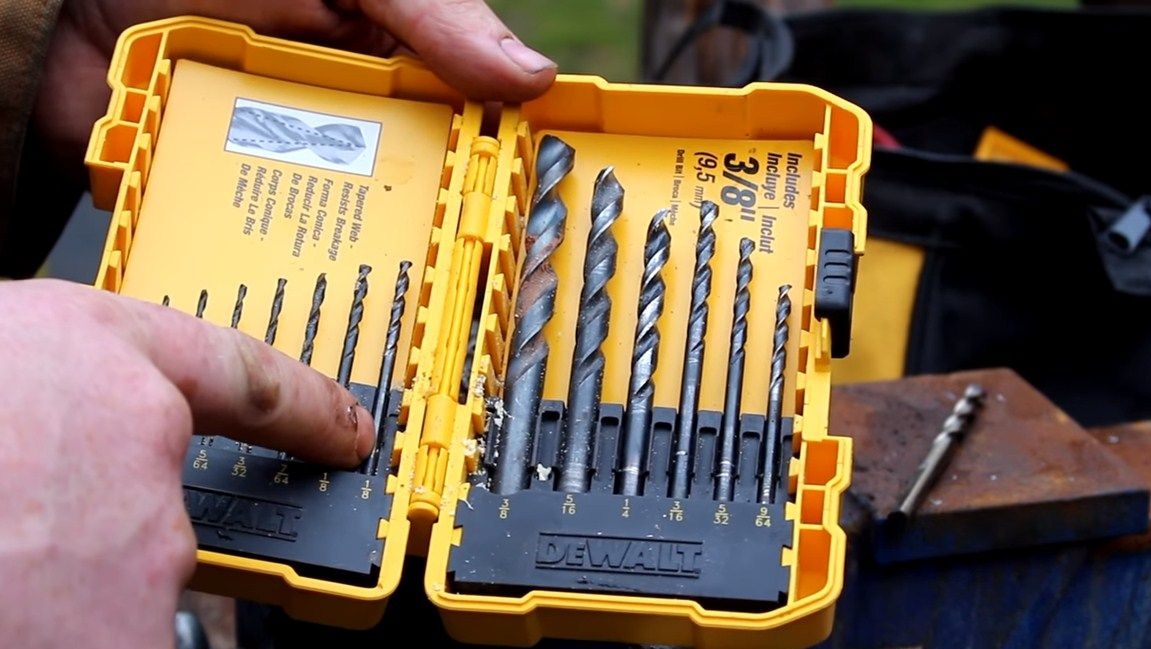
- a drill with good drills (you need to drill a file);
- vise;
- hacksaw for wood;
- marker;
- sandpaper;
- clamps;
- hammer;
- scissors;
- grinding stones and stuff.
The process of making a knife:
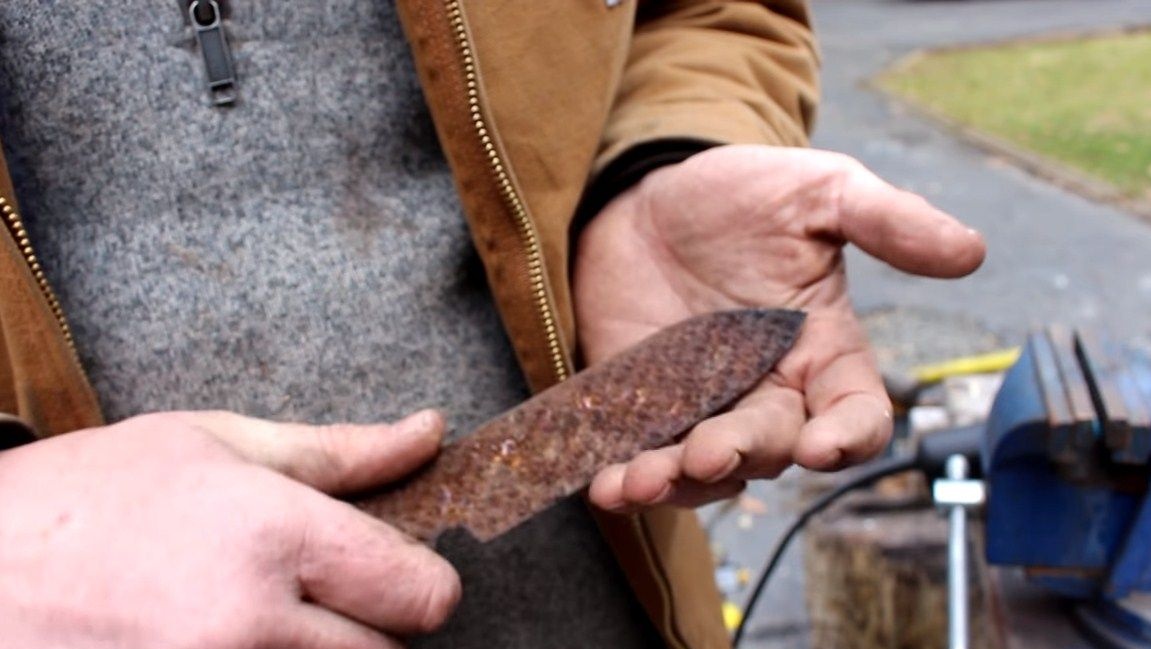
Step one. Cut the main profile
It should be noted right away that the author does not heat-treat the blade, which means that it will be difficult to work with steel, and it is also important for us not to overheat it, since the metal will temper and the steel will no longer be so strong.
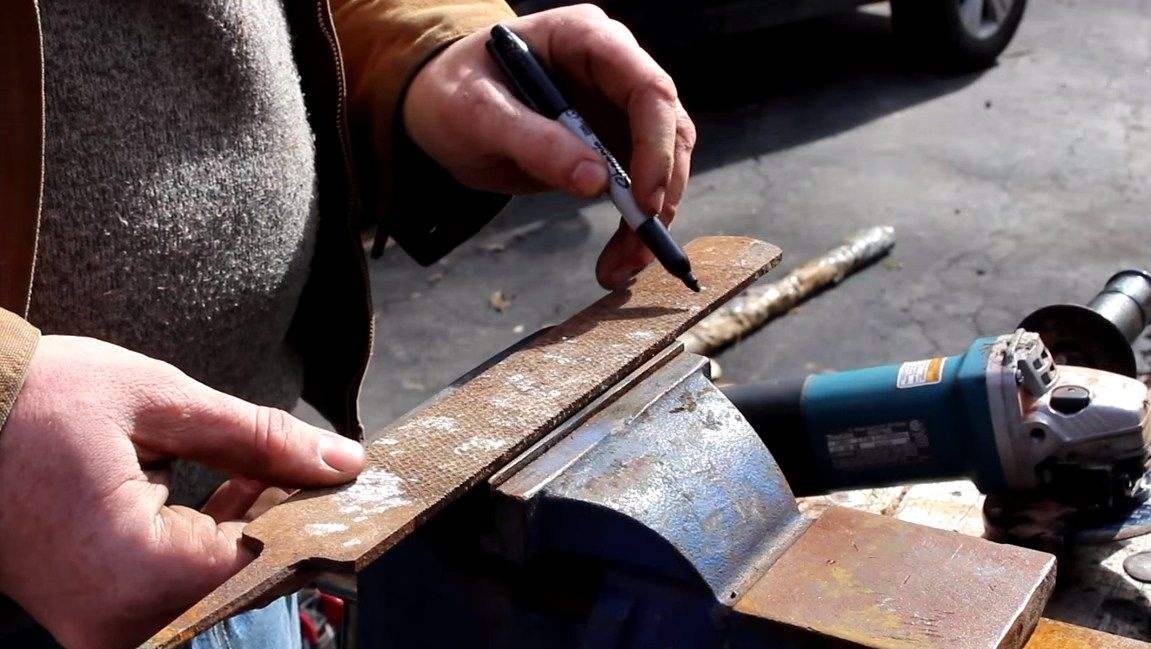
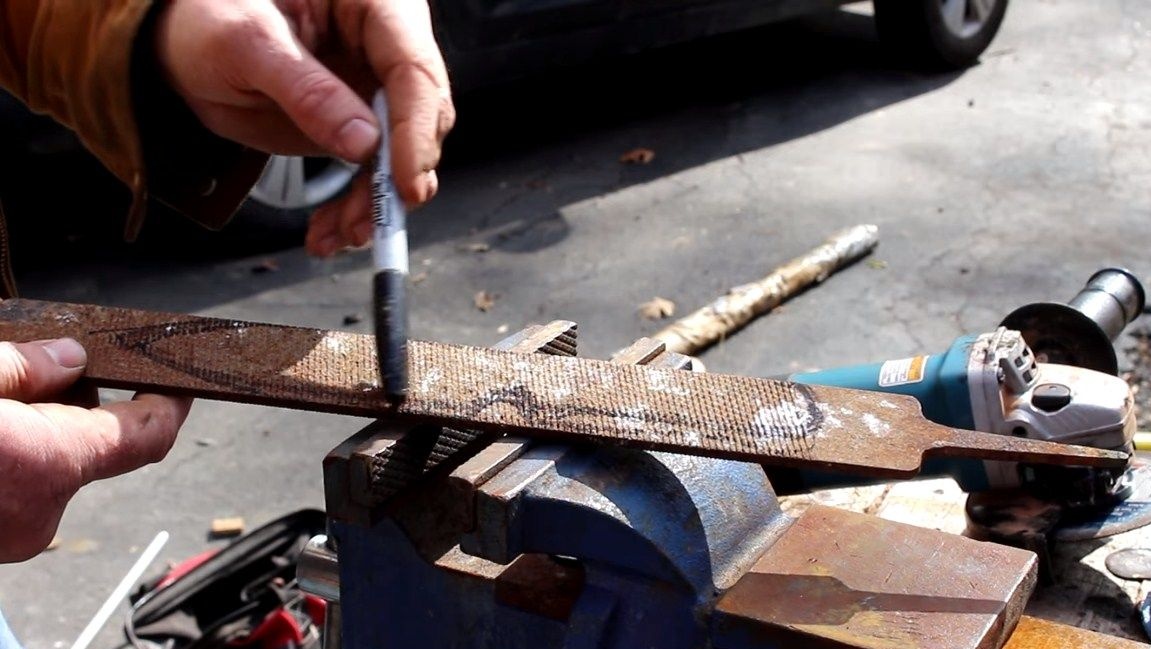
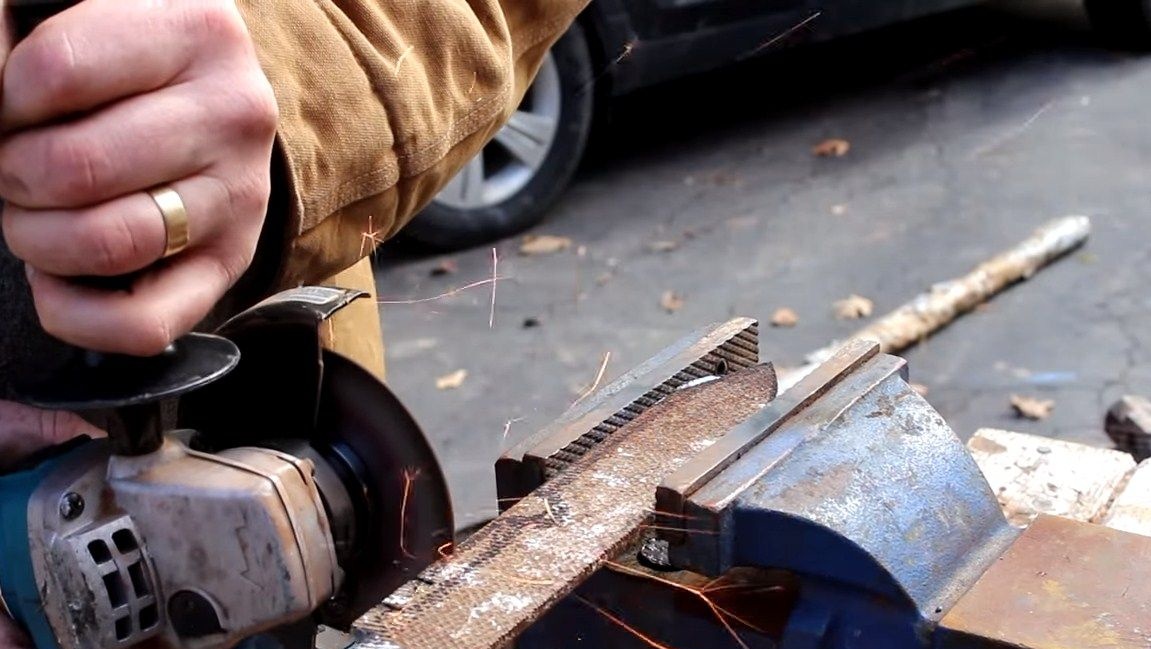
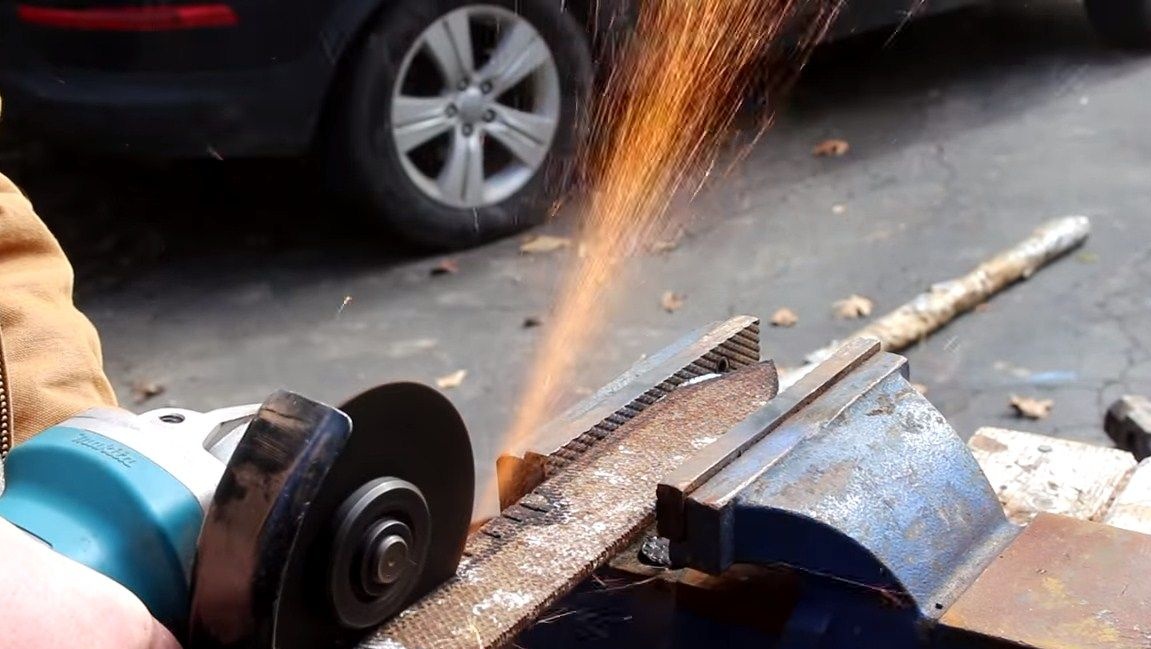
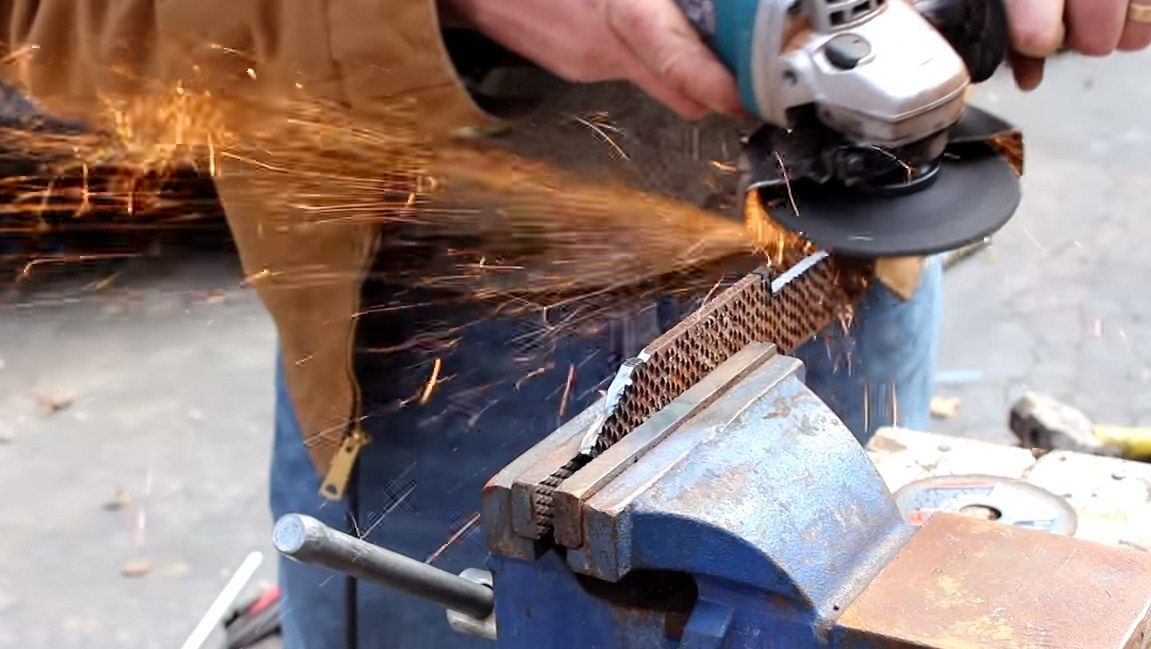
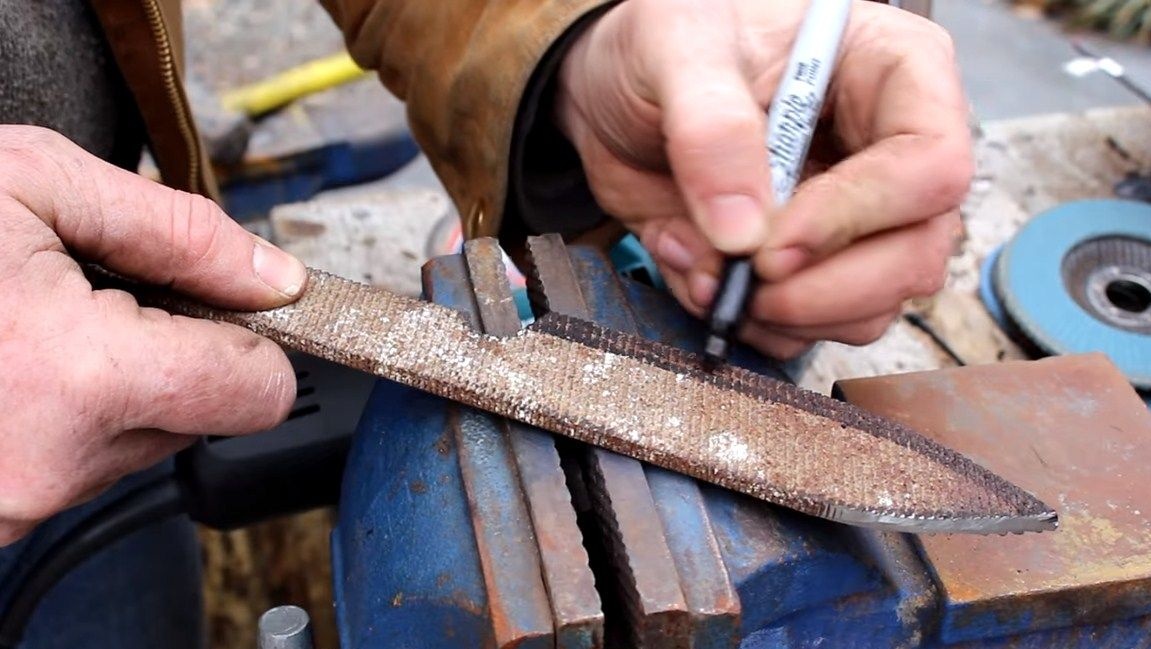
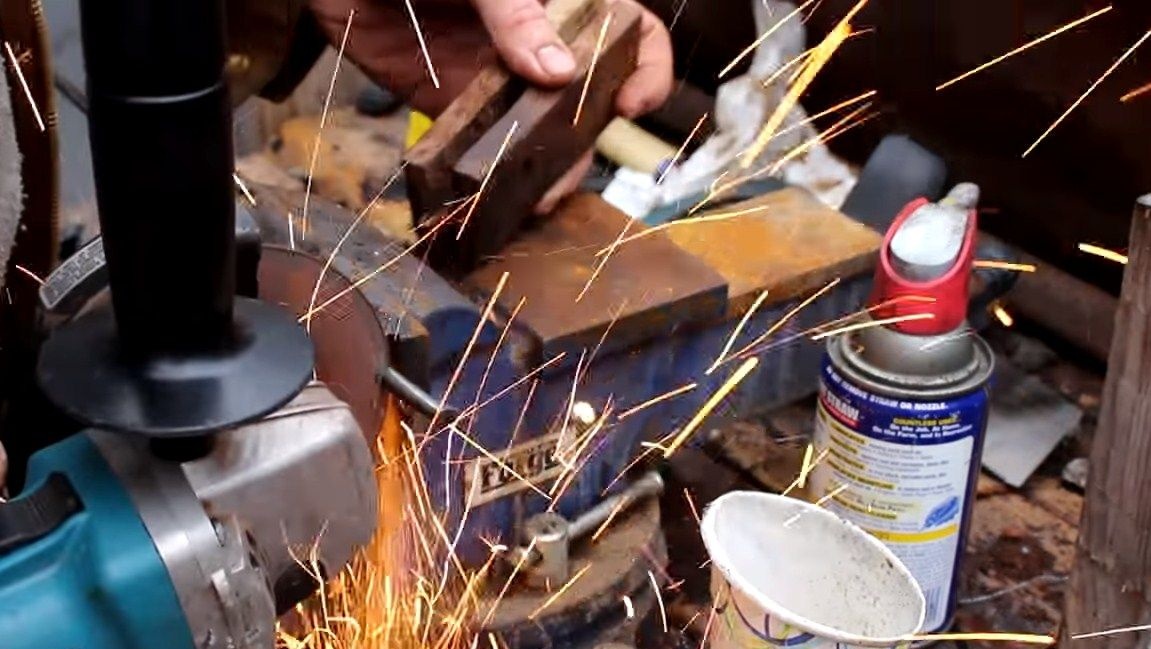
First, cut a rough profile of our knife. To do this, you first need to draw a profile on a file. Come up with an interesting design for your knife. The author draws it simply by hand with a marker on a file. Professionals first carefully develop the design of the knife on paper, and then cut it out and get the finished template. If you doubt the design of your knife, you can cut it first from thick cardboard.This will give you the opportunity to hold the knife in your hands and make sure that it will be convenient.
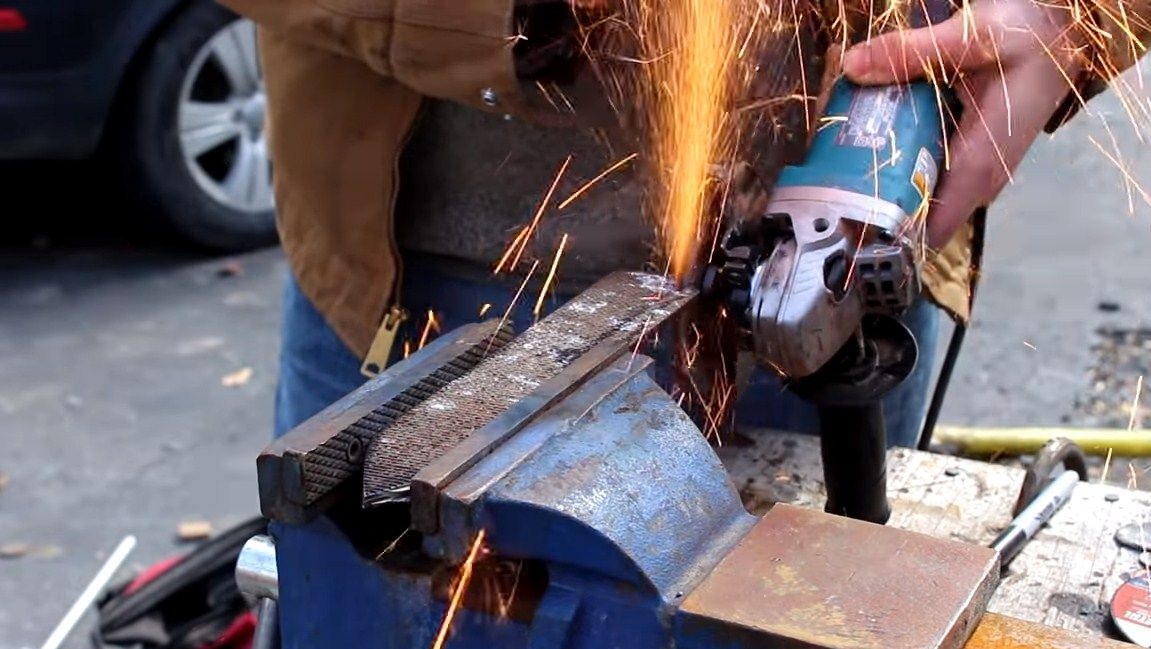
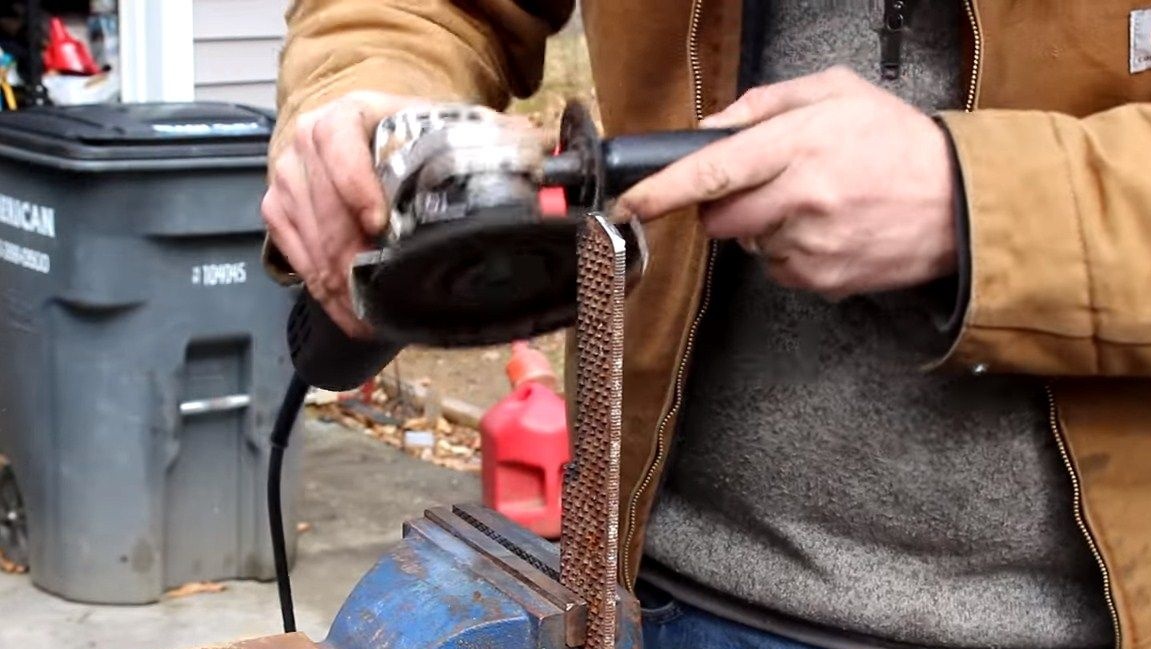
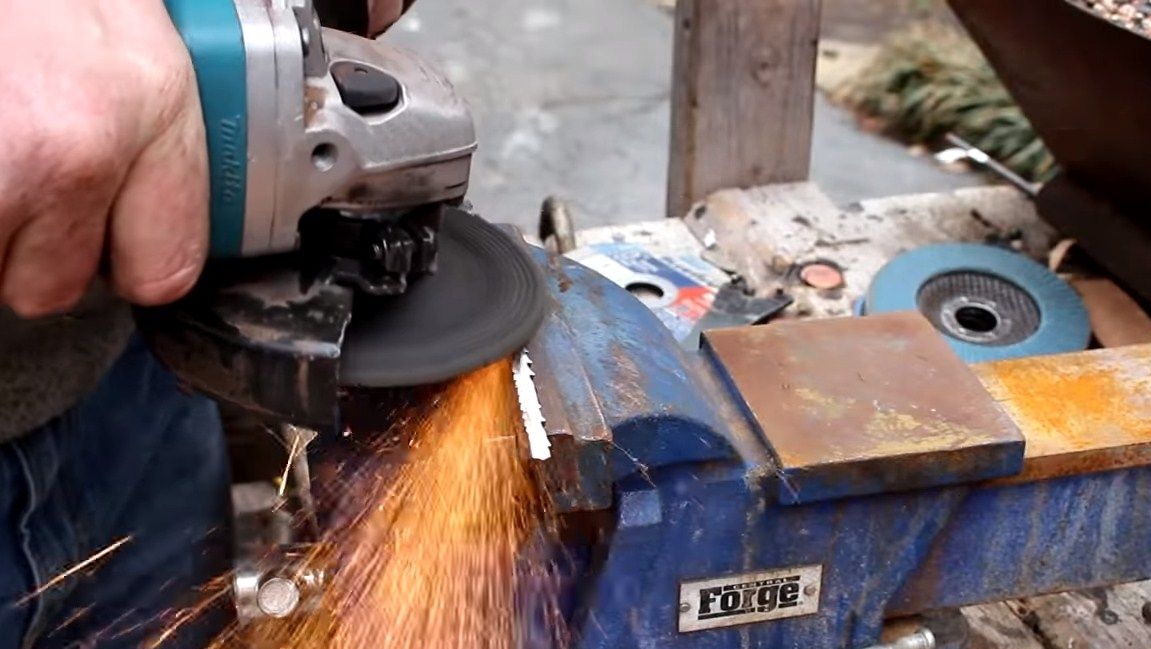
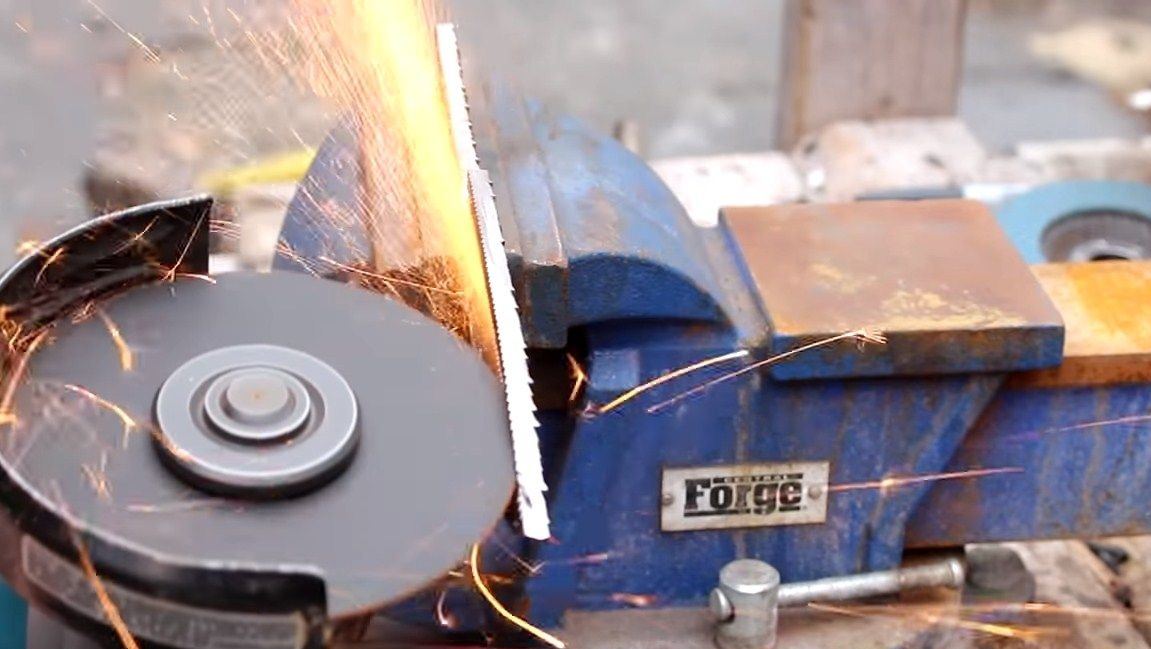
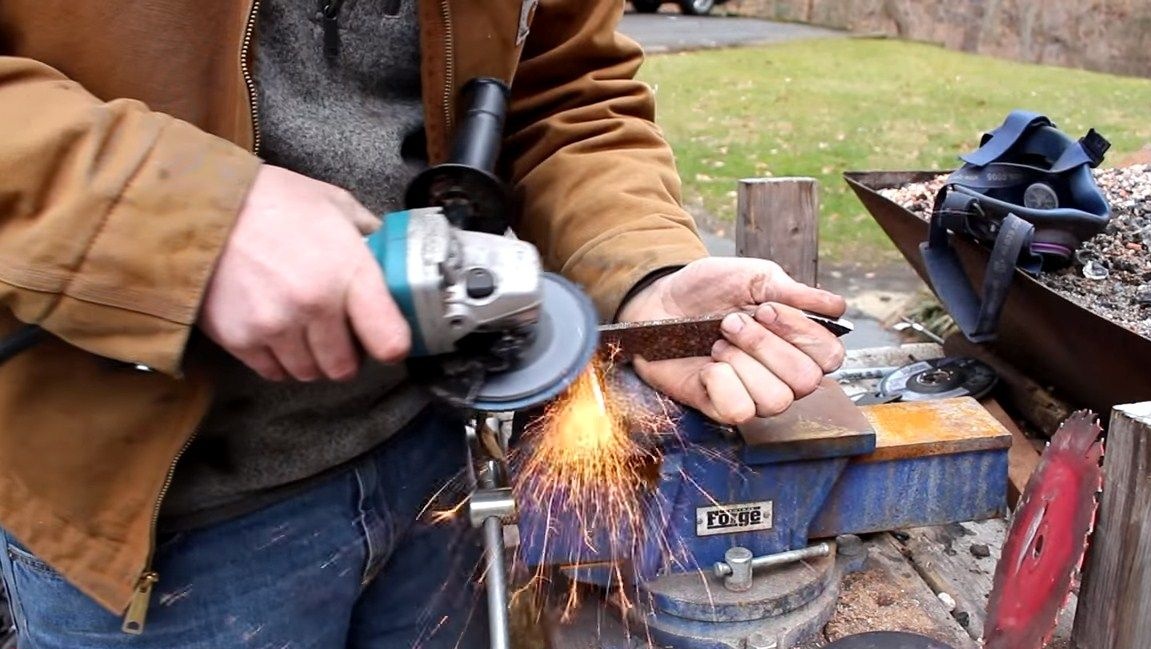
The author cuts the profile with a grinder. Where there are bends and other difficult places, cut them into pieces. When everything that can be cut will be cut, we proceed to rough grinding. To do this, install a grinding wheel on the grinder. In addition, grind the part of the knife where the handle will be, there will be overlays.
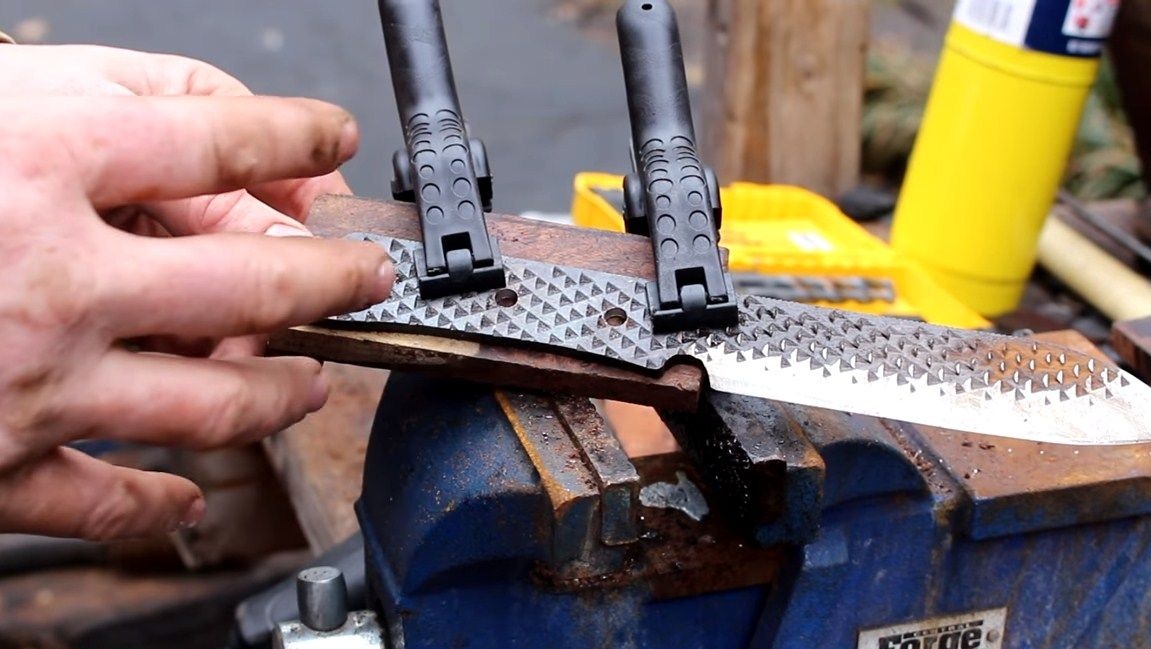
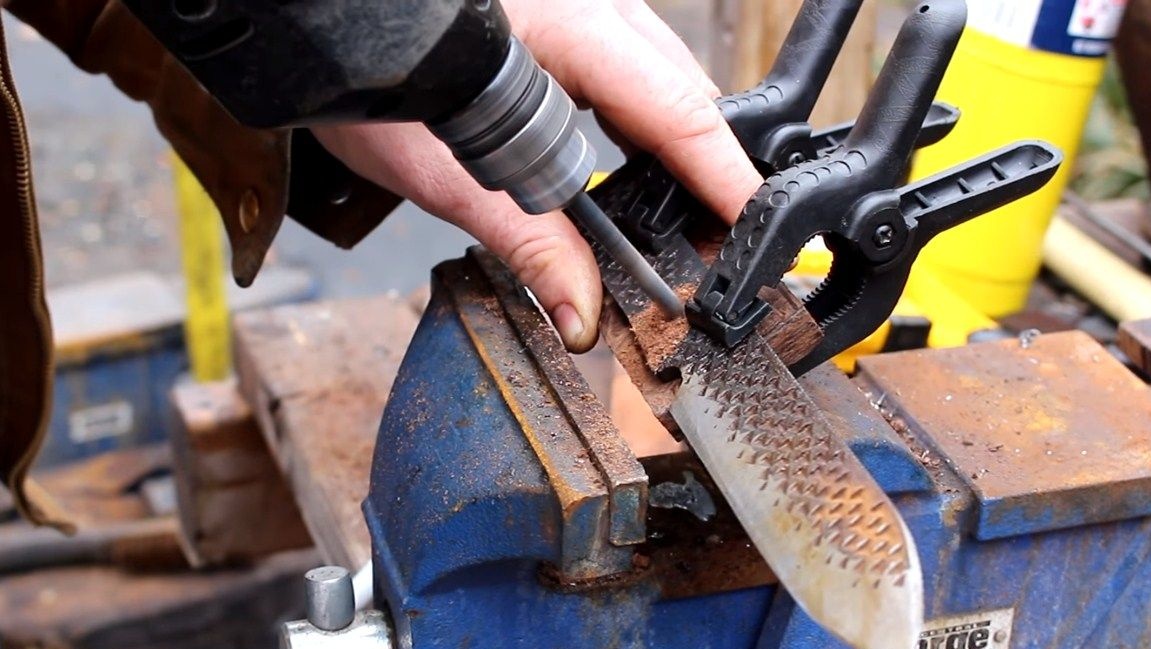
Step Two We clean clinics
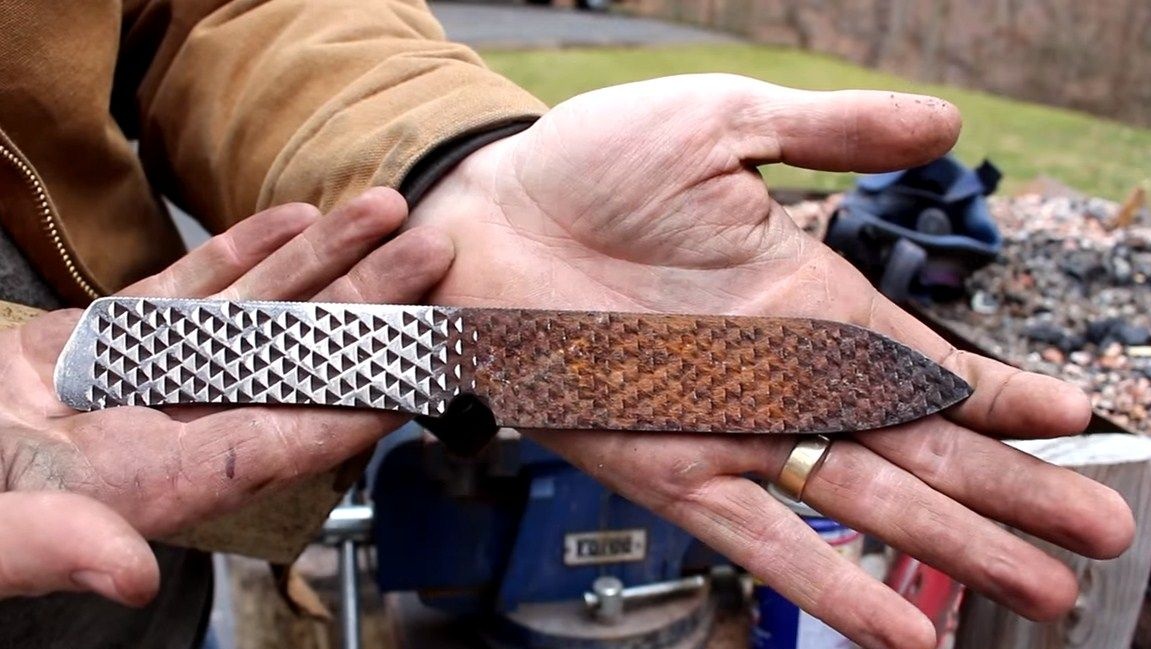
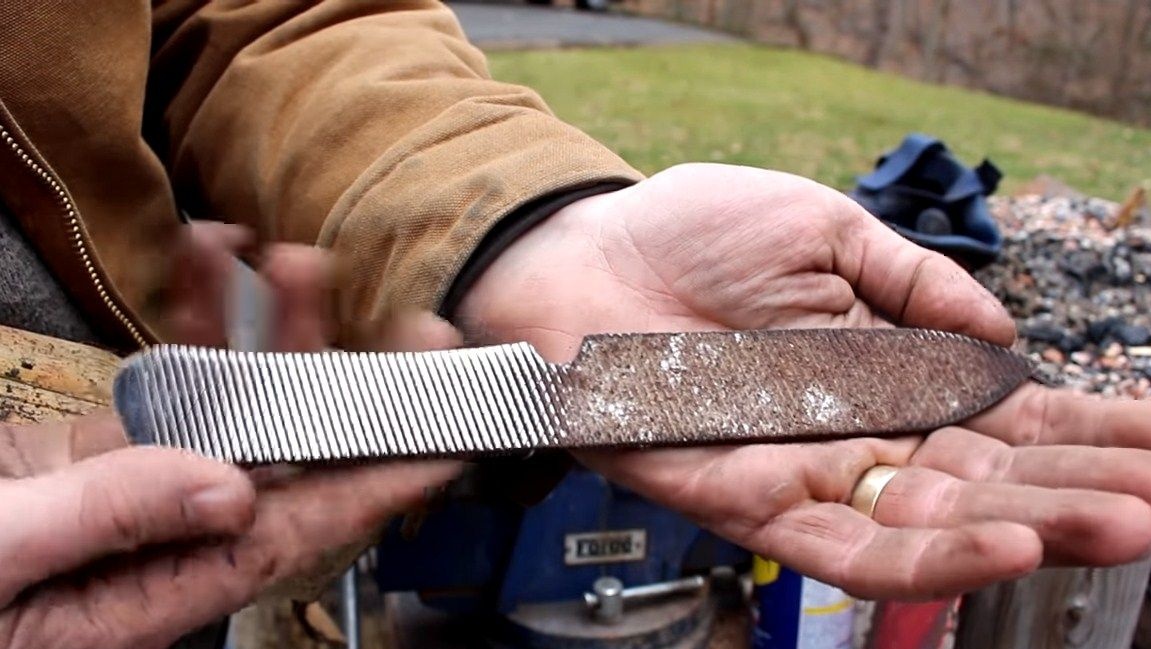
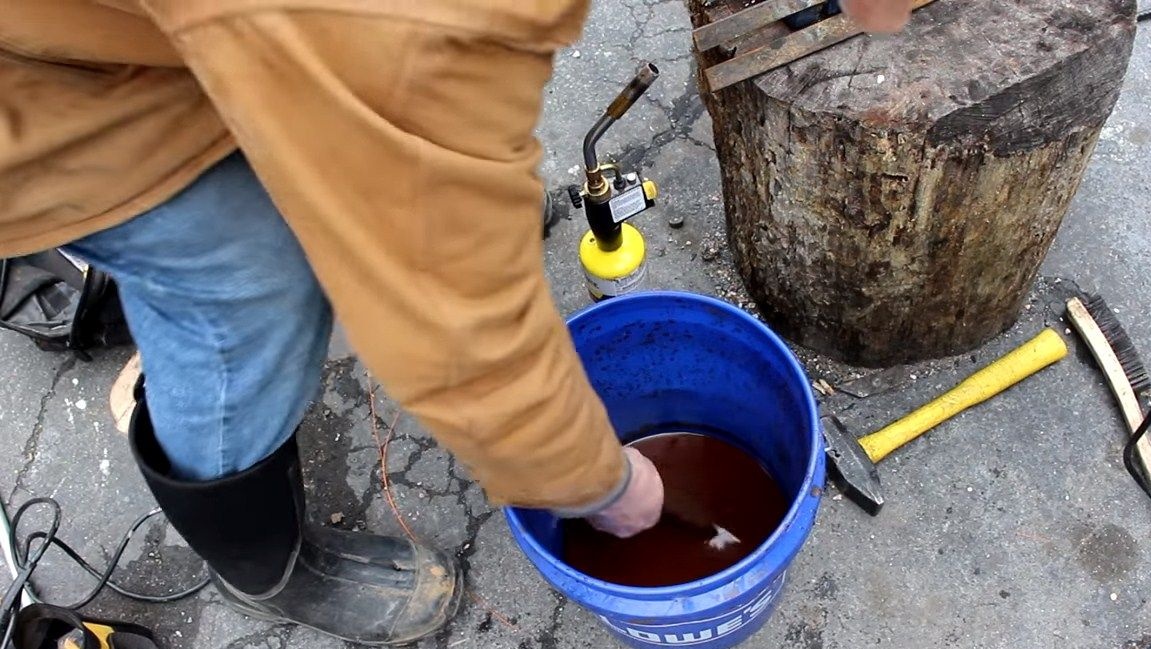
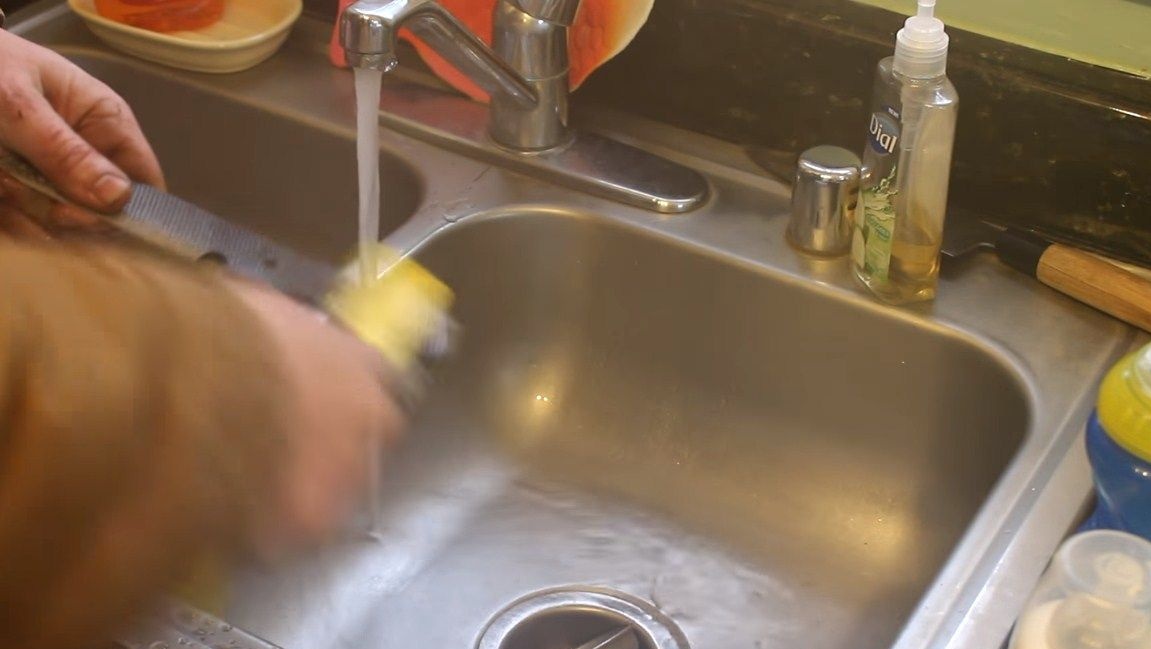
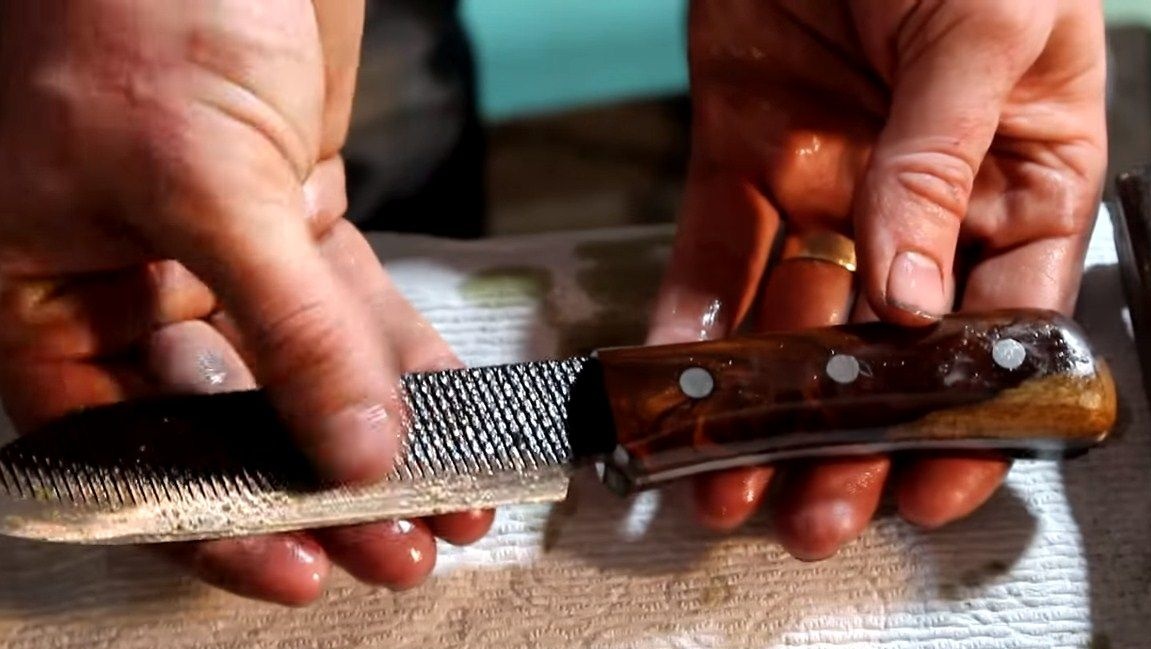
The author decided to leave the notches of the file on the blade to use the knife for some other tactical purposes. So, for example, such a knife will perfectly sharpen wood and other materials. But since the file is old and rusty, we have to clean it. For these purposes, the author washed the file, and then brushed it with a wire brush. You can also lightly walk along the blade with sandpaper and so on. By the way, you can use some acids to clean the metal from rust or try WD-40.

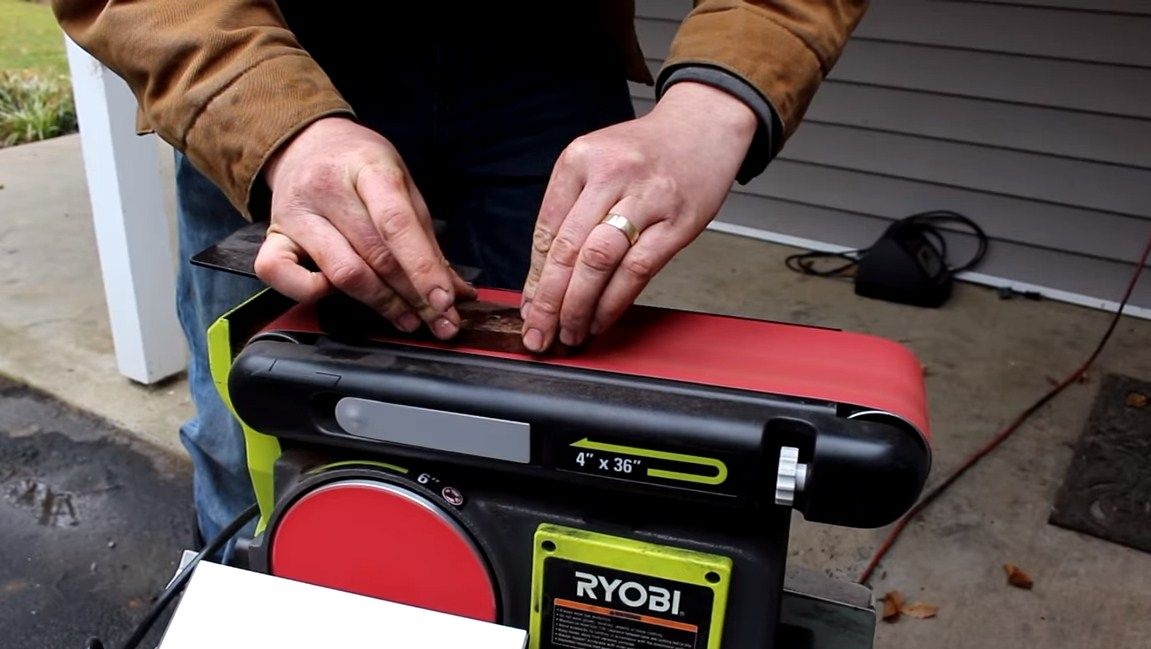
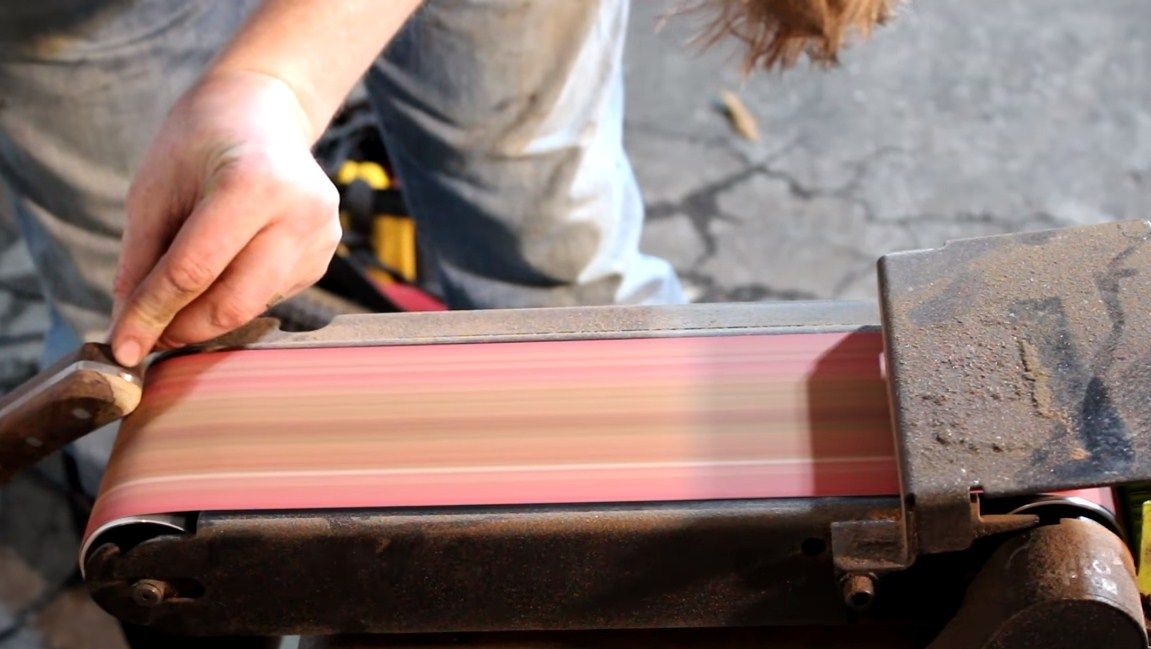
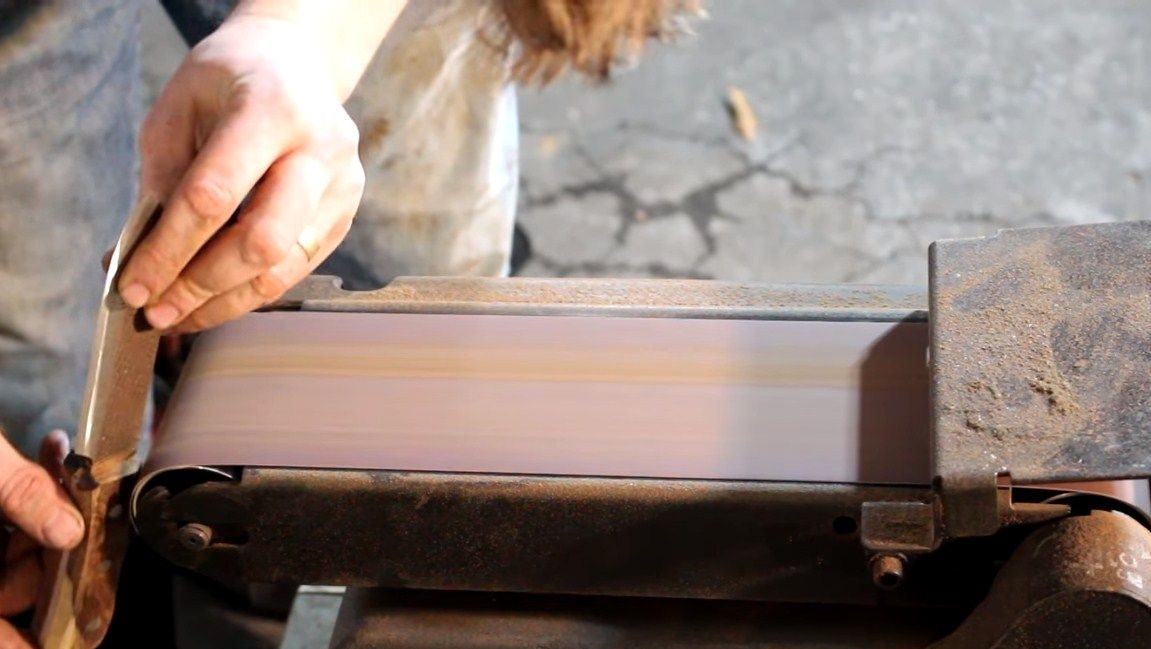
Step Three We form bevels on a knife
Now we pass to the descents on the knife or bevels, as they are also called. A lot of a knife depends on the angle of sharpening. So, for example, if the sharpening angle is steep, the knife will be poorly sharpened and not very well cut, but the blade will be strong and it will be easy to chop branches and other objects with it. And if you make the descents smooth, the blade will cut everything well and be easy to sharpen, but its strength may not be enough under heavy loads. So in this case you have to choose a certain middle ground.

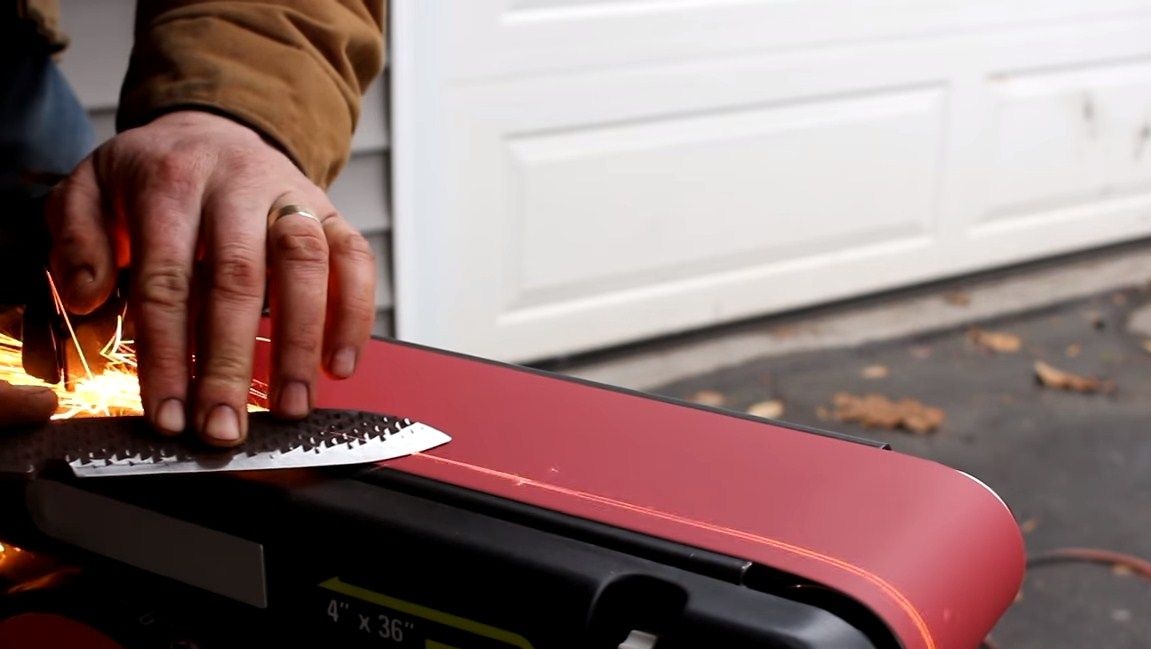
Bevels are most conveniently done on a belt sander, and it turns out pretty quickly and efficiently. The author does not mark anything and makes bevels on the eye. If there is no such machine, you can try to do the job of a grinder. Hand tools will not cope with this task, since our metal is hardened and will not be taken with a file. Grind the knife along the contour also where possible.
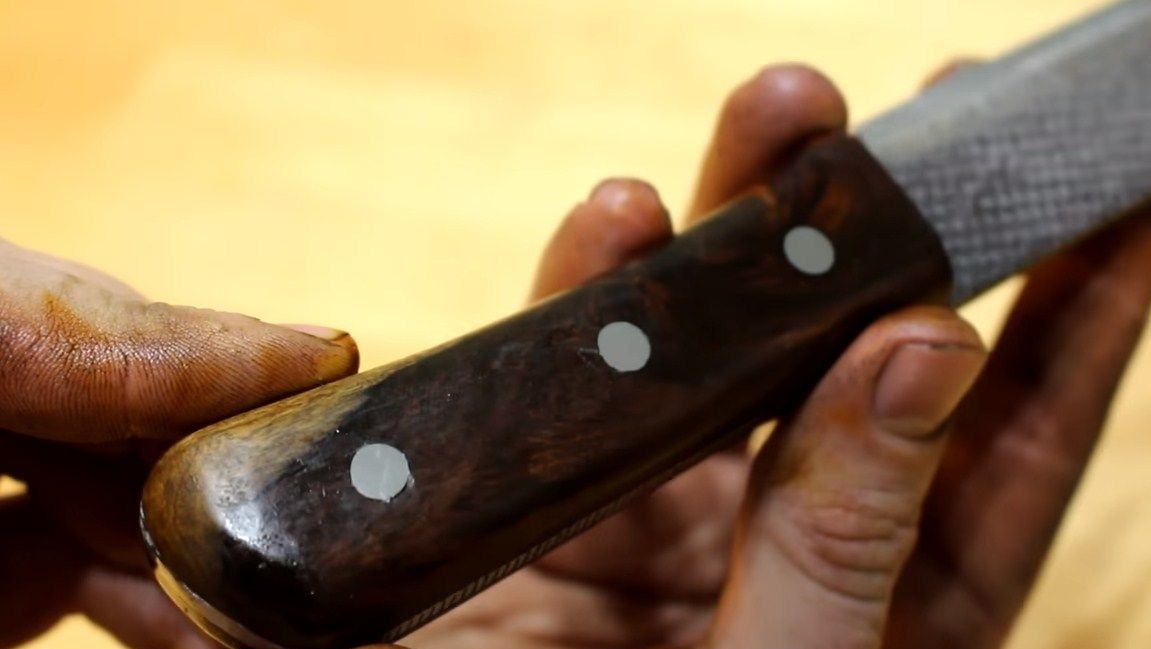
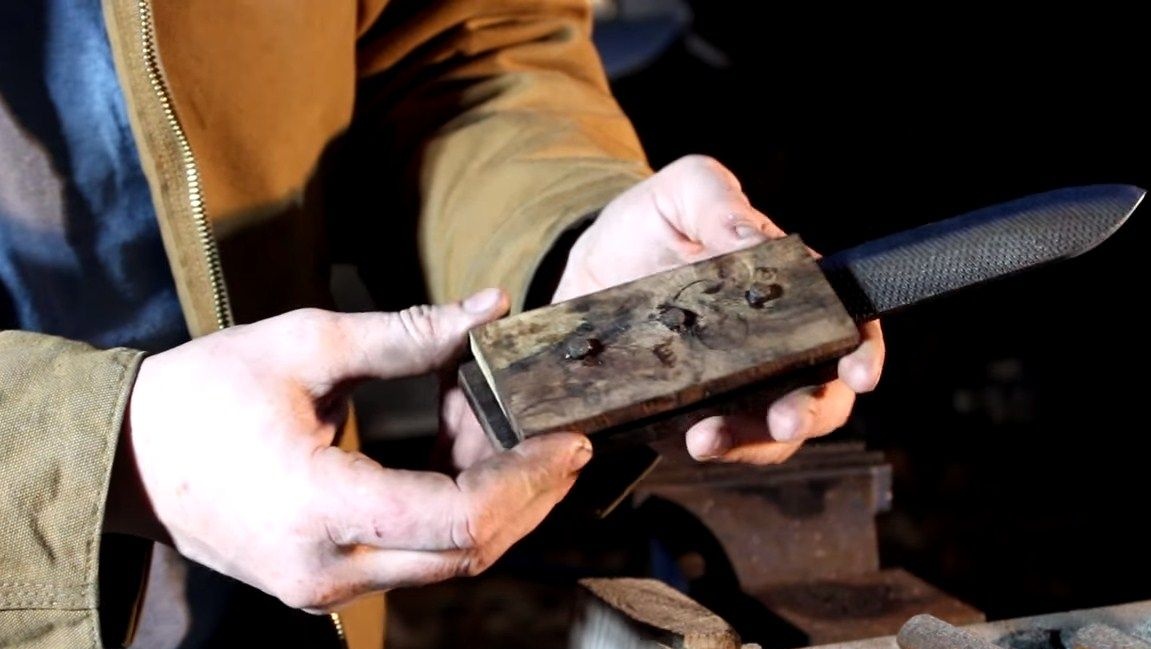
Step Four Production and installation of linings
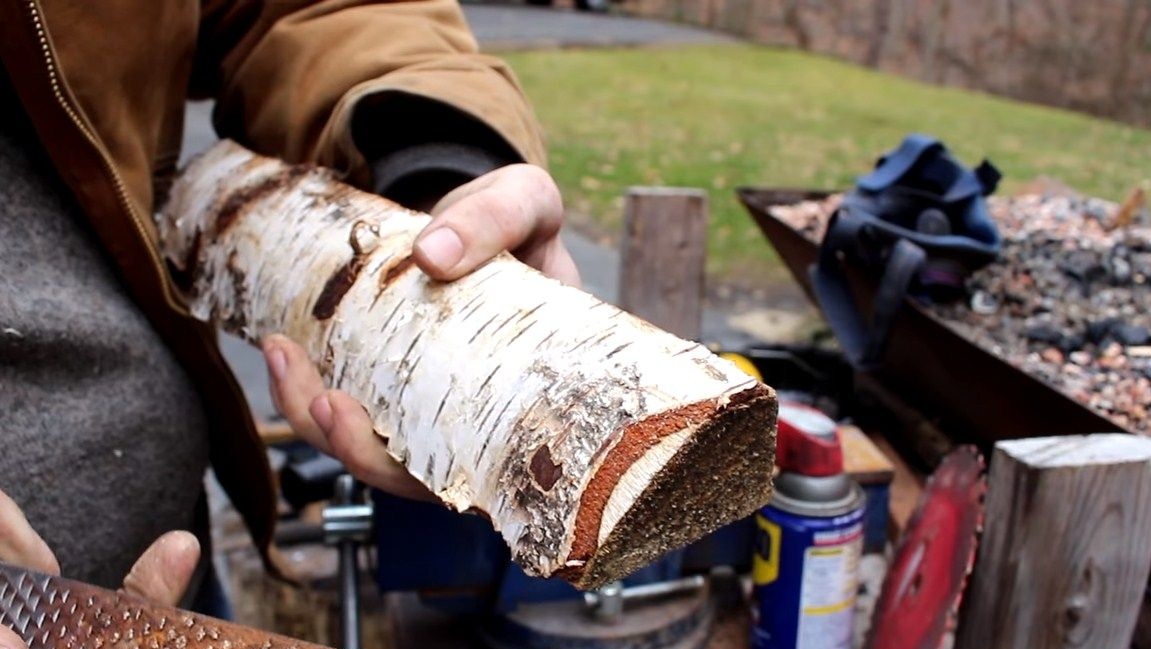
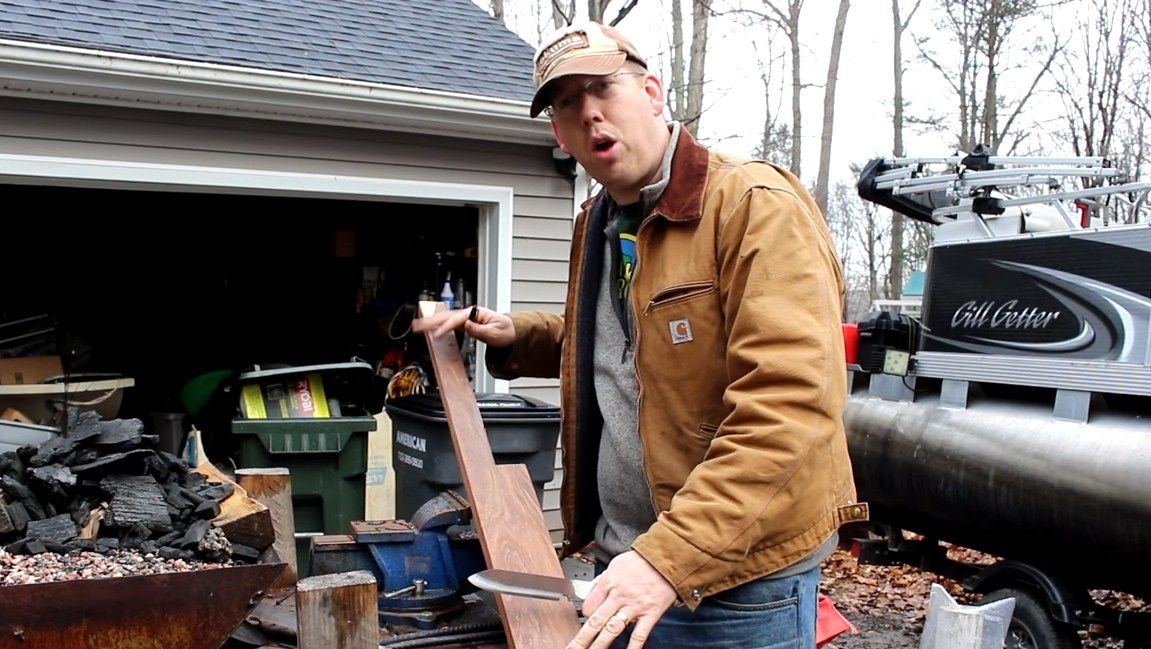
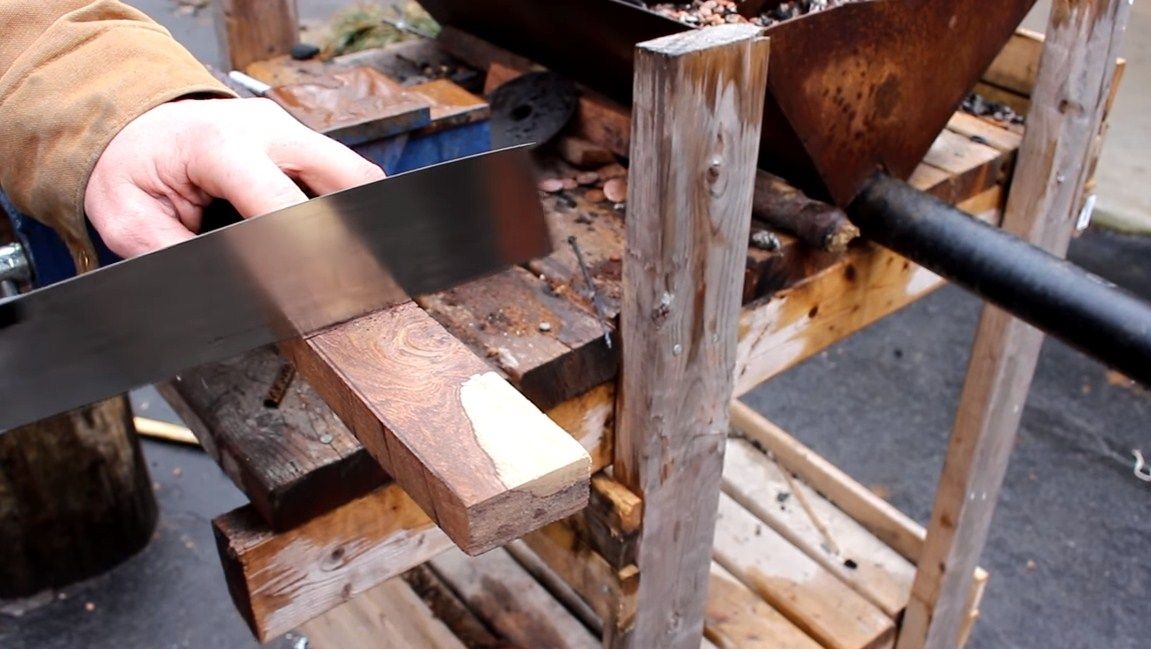
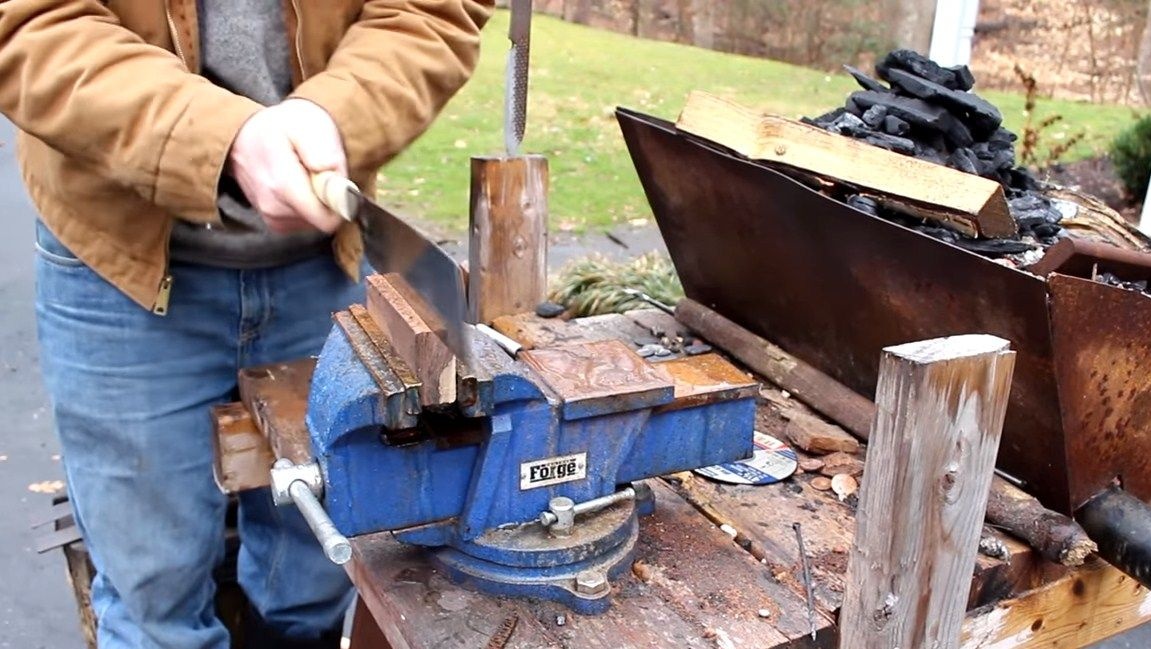
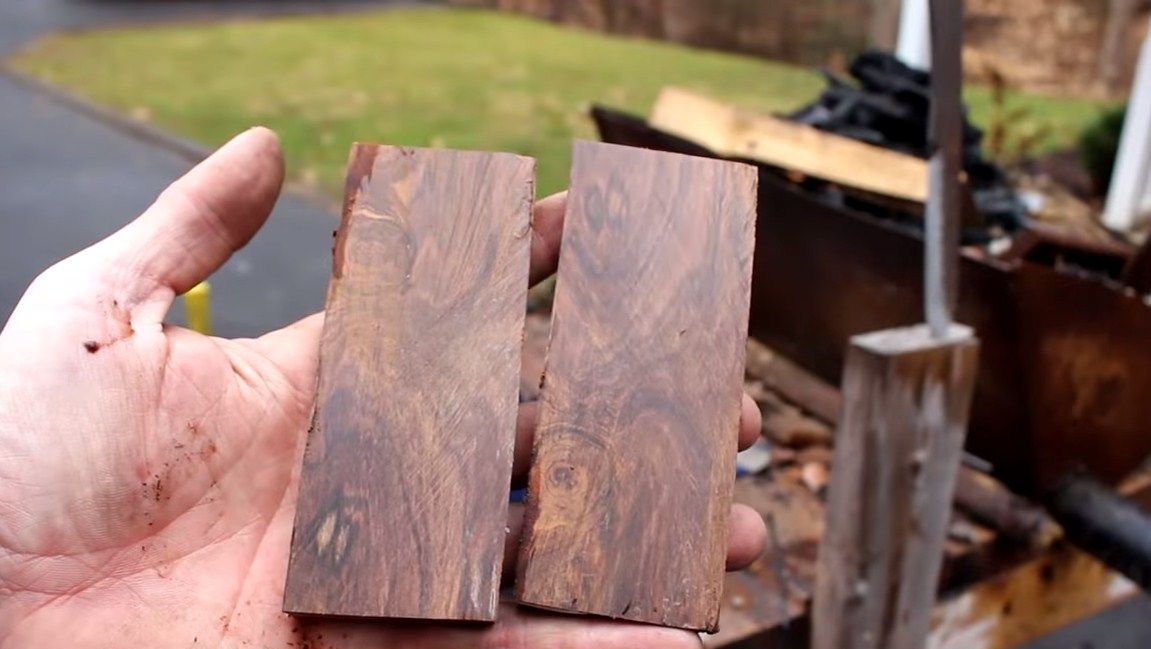
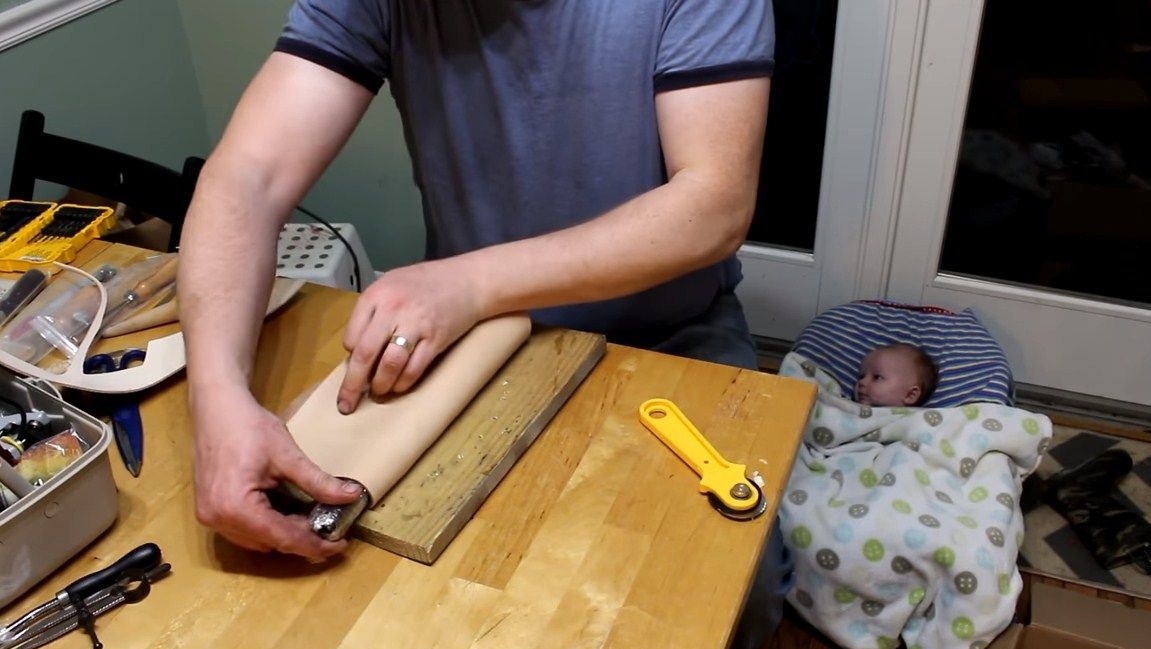
That's all, now you can take care of the pen. It is made of wood, pick up beautiful rare wood for this matter, so that the knife looks stylish. We need a board of suitable thickness, it needs to be cut into two halves. The author cuts the material with a hand saw. Next, you have to level the plane, for this it would also be nice to have a belt grinder. But if it is not, you can simply fix a piece of sandpaper on the bar and so on.
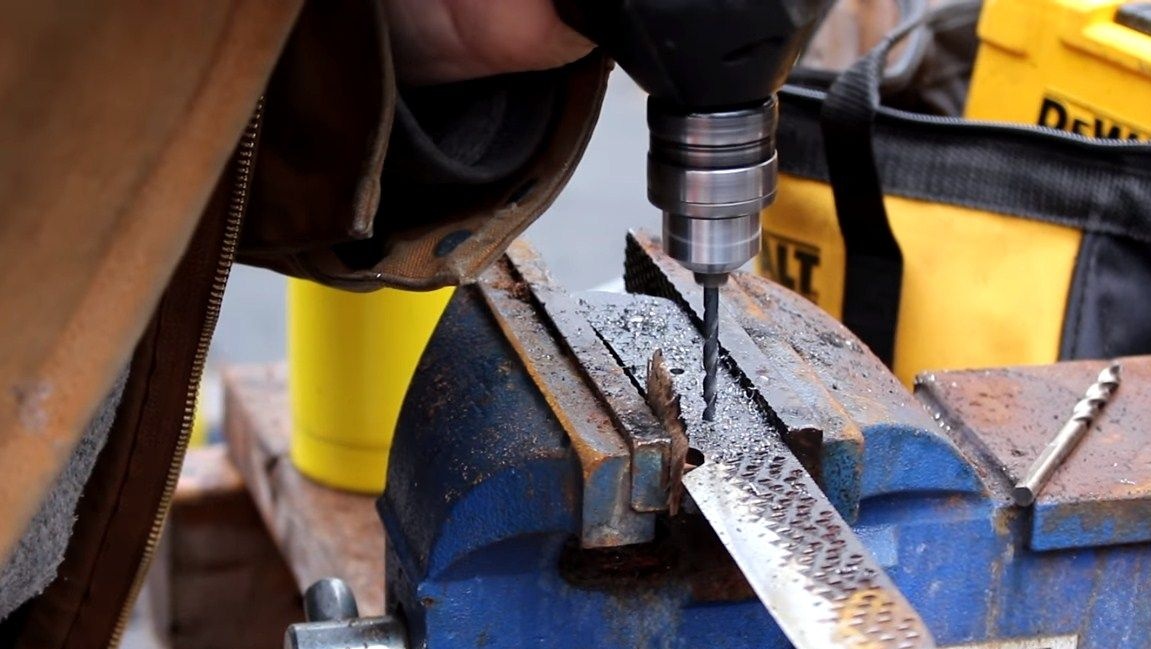
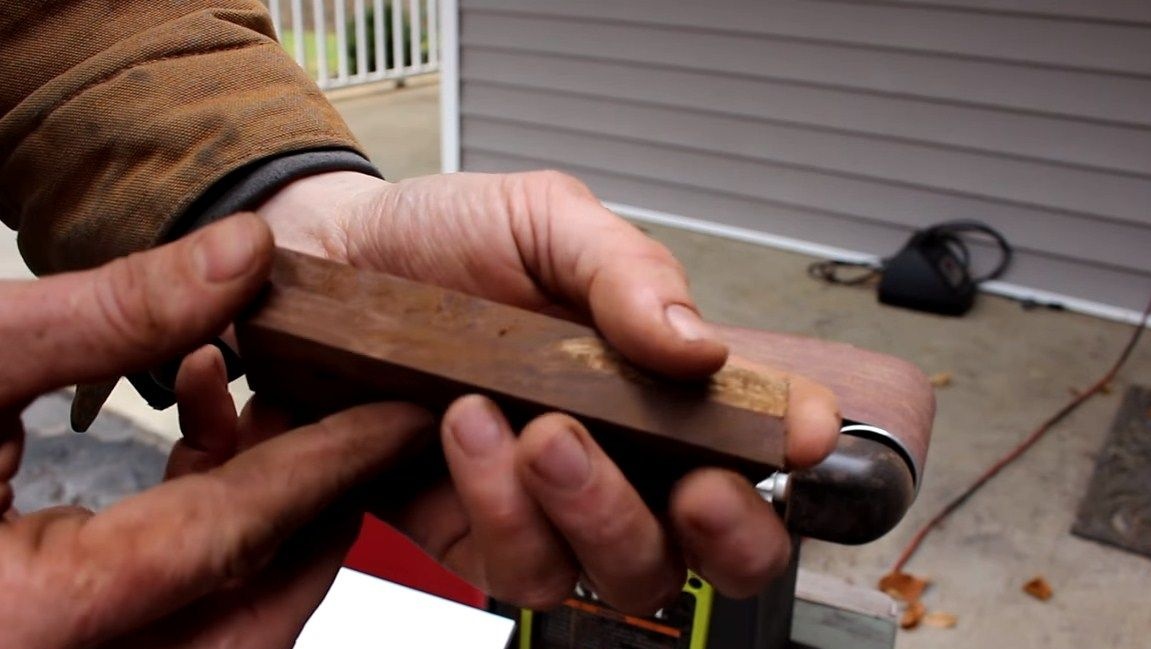
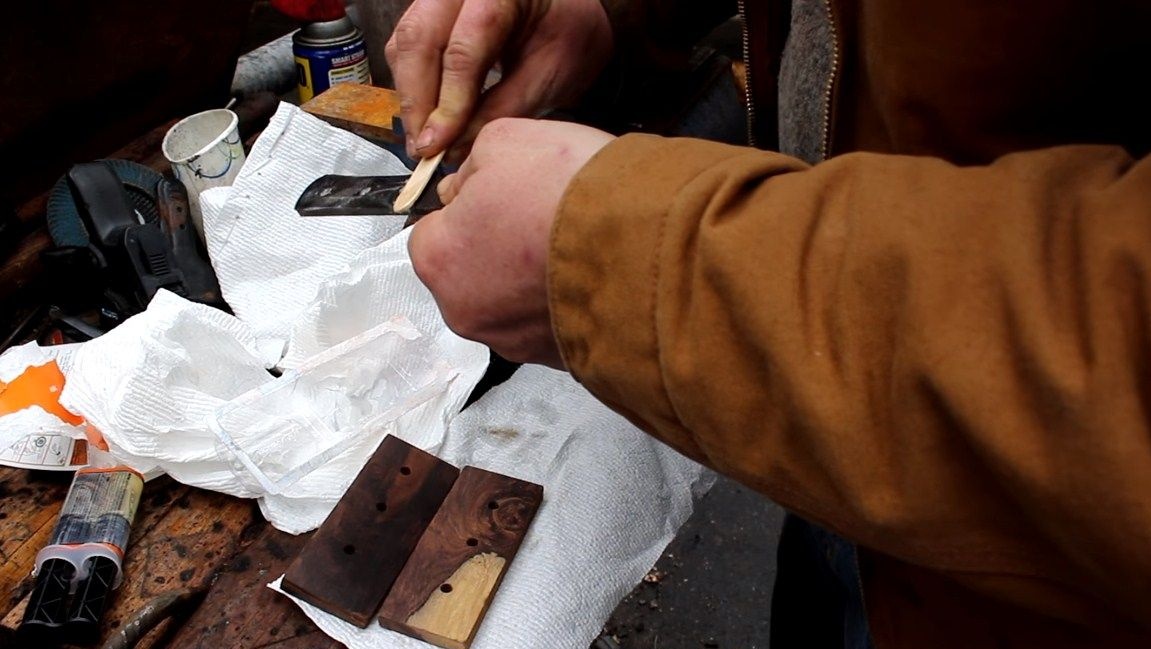
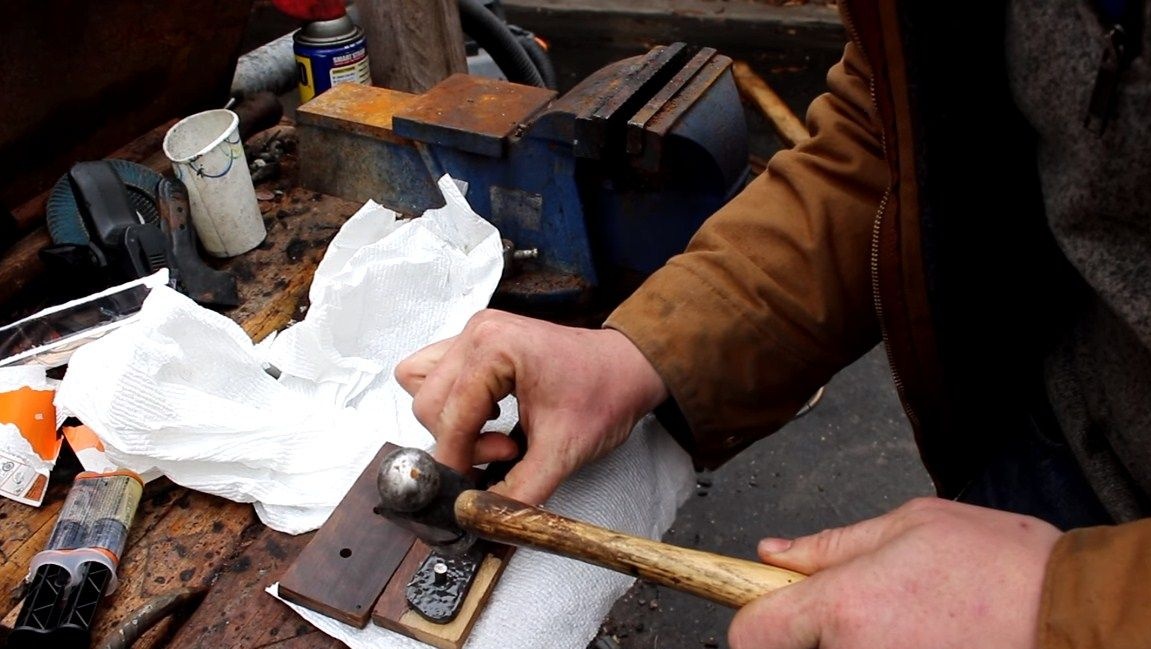
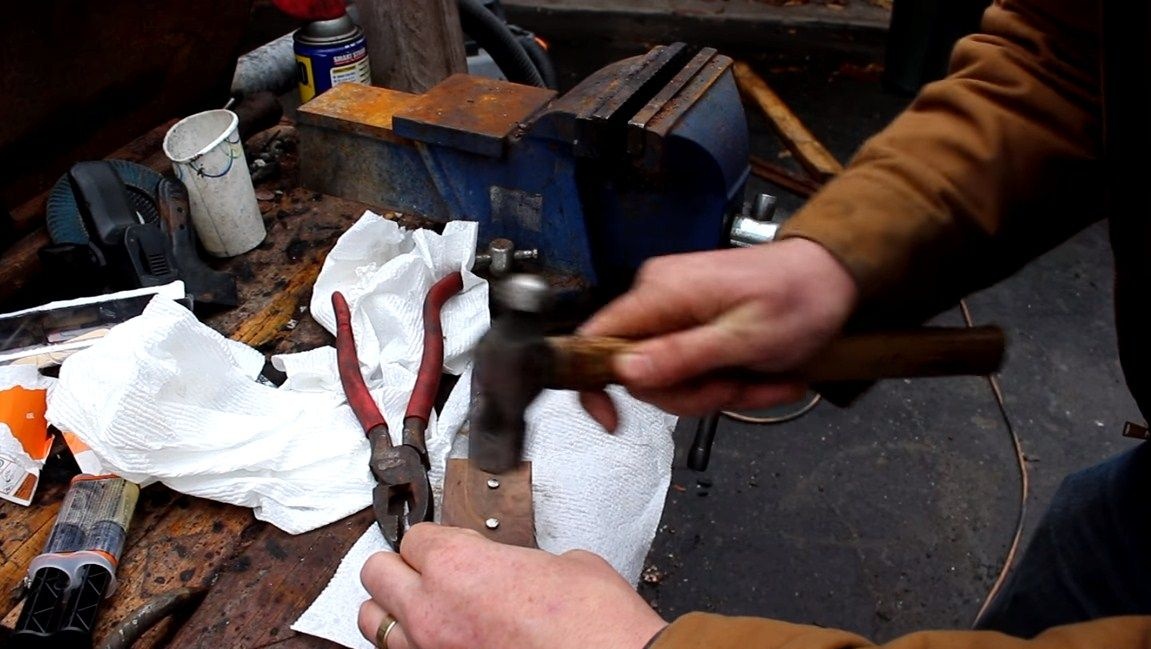

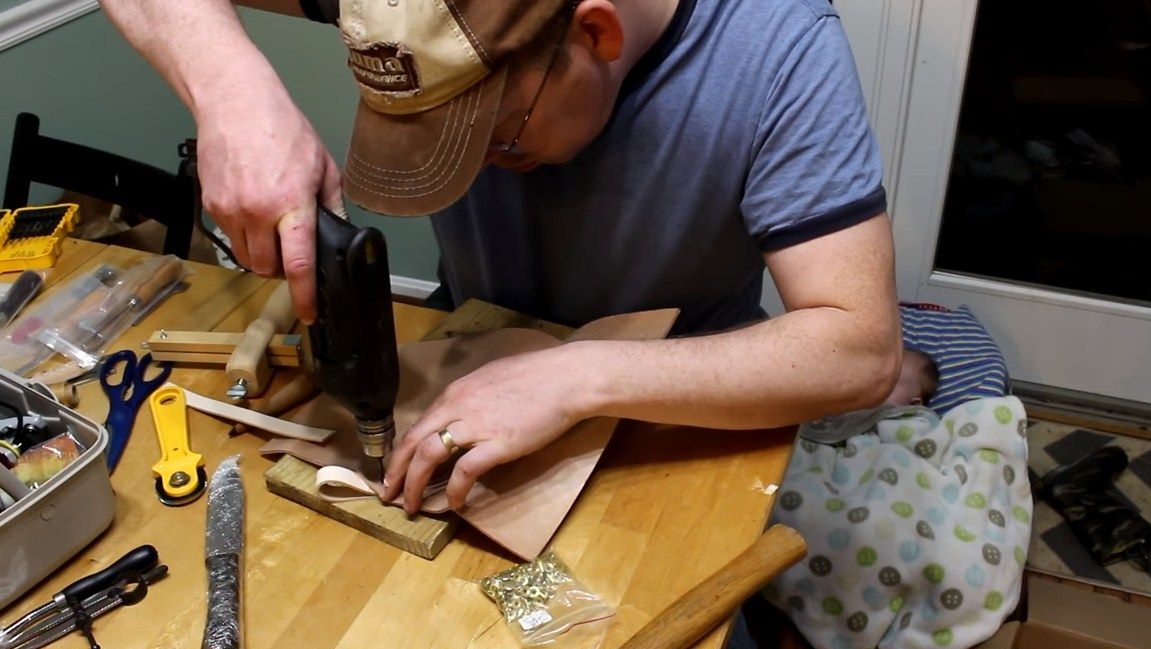
To attach the pads, you will need to drill several holes for the pins, the author has three of them. The most difficult thing is to drill the file, because the metal here is very durable. You will need good solid-tipped drills. If there are no high-quality drills, the tail section can be warmed up and allowed to cool smoothly. After that, the metal will become softer. The author used steel rods as pins. We cut them in length slightly more than the thickness of the handle and collect the handle. It is collected on epoxy glue. The glue is thoroughly mixed with the hardener, and the handle is reliably squeezed with clamps until the glue completely dries. Leave the glue to dry for 24 hours.
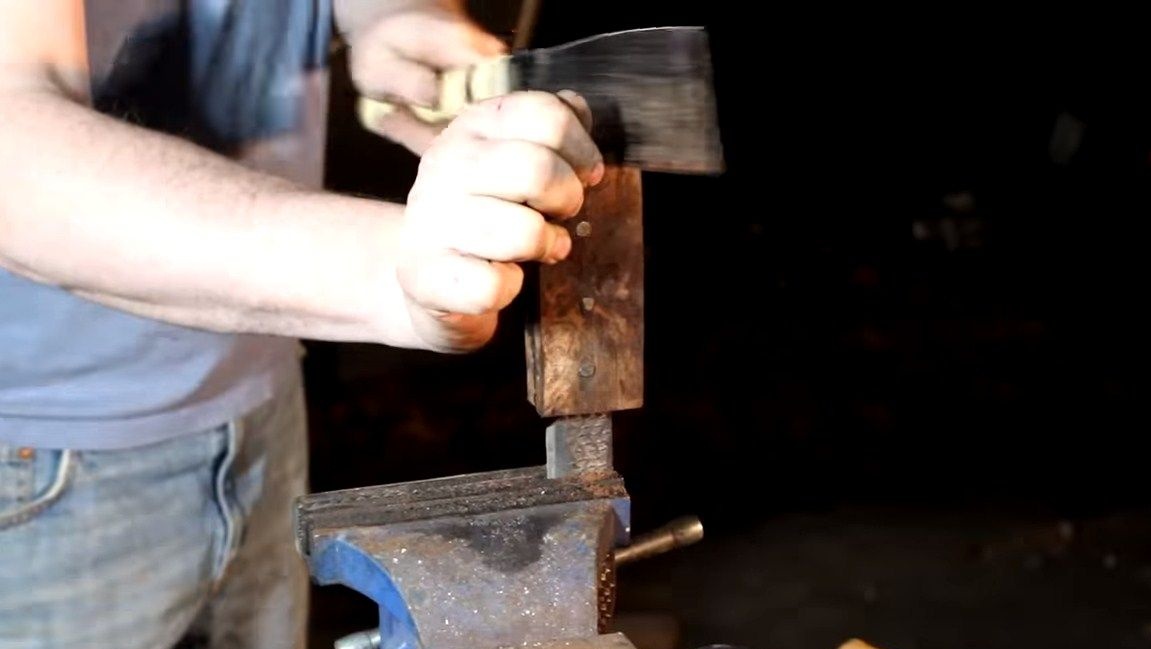
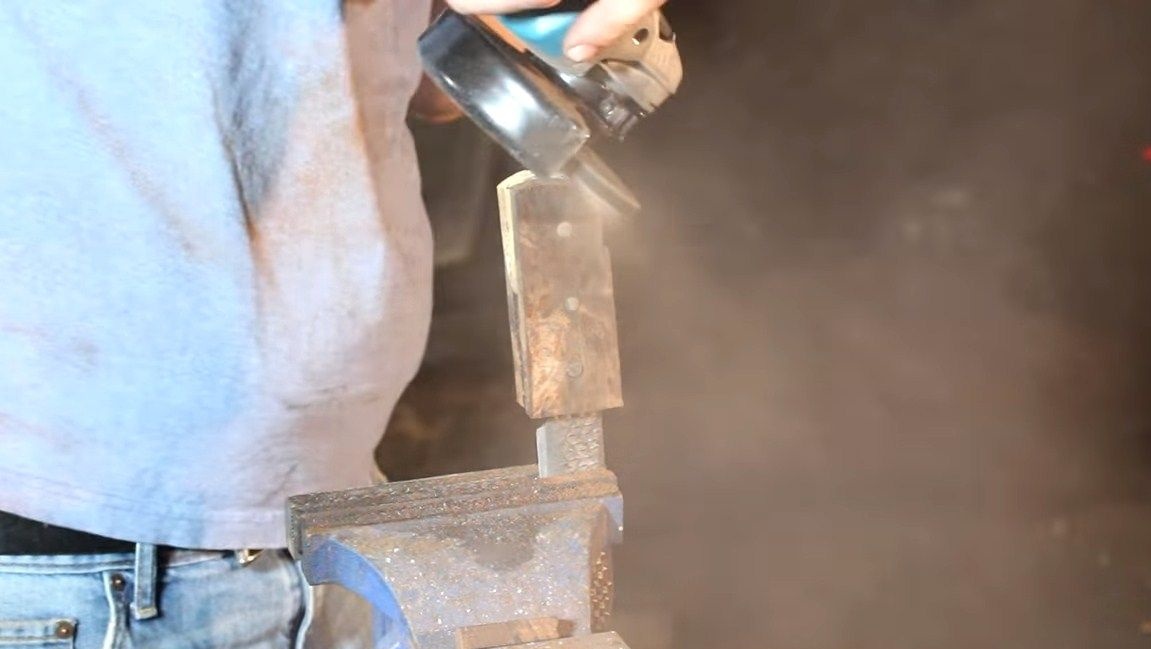
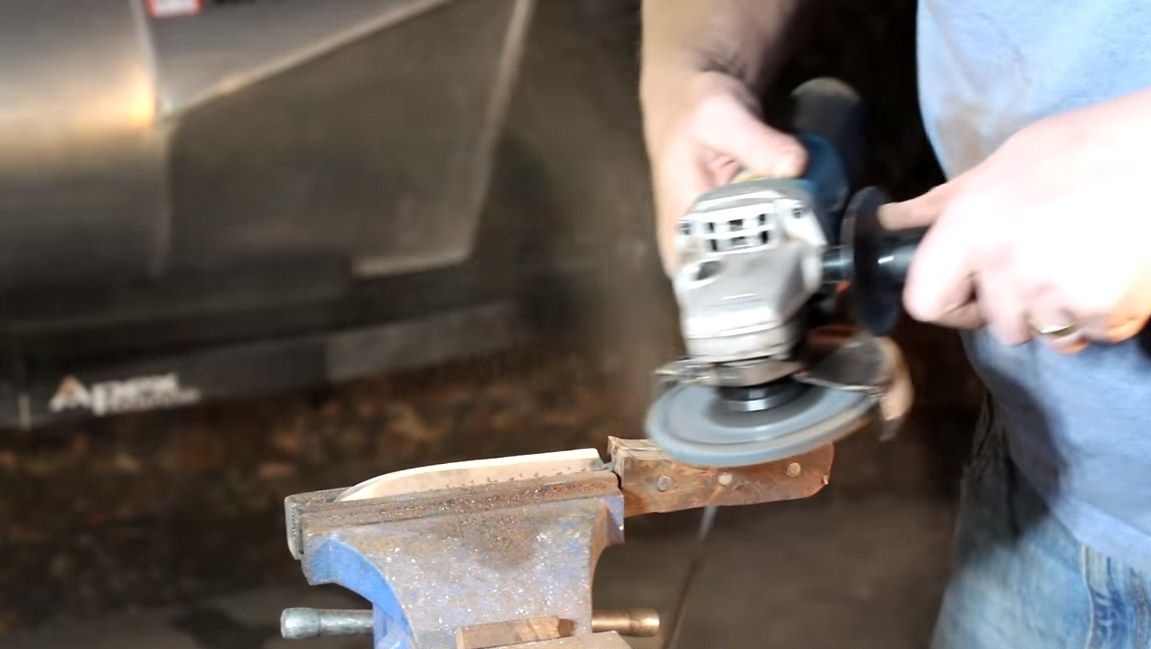
Step Five We form a handle profile
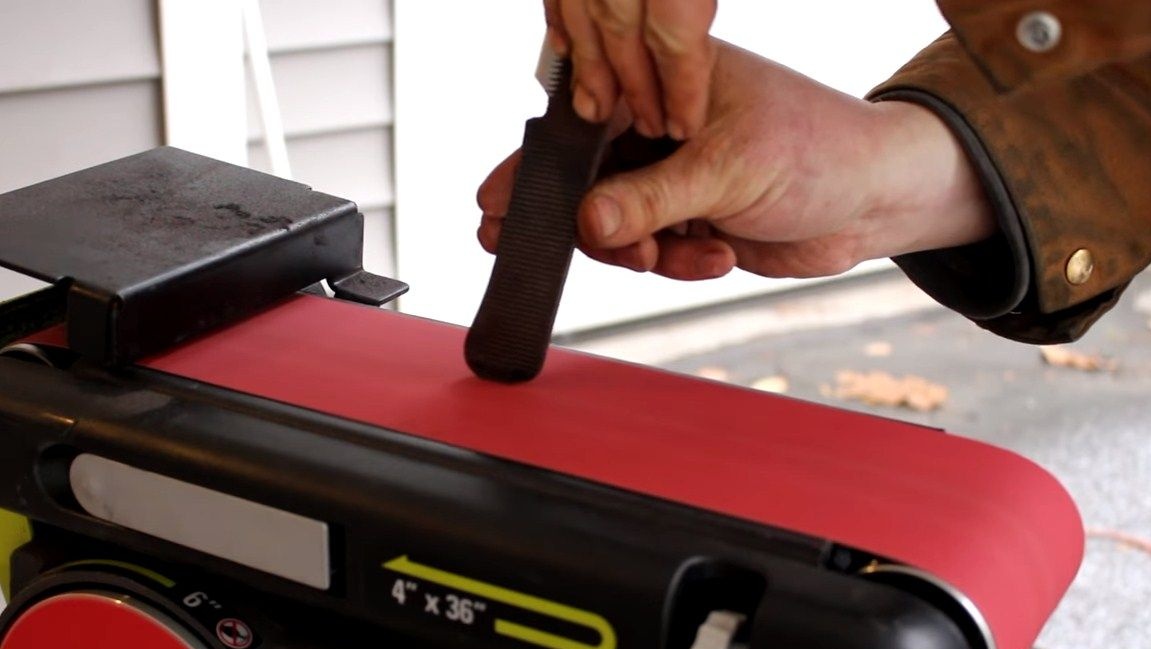
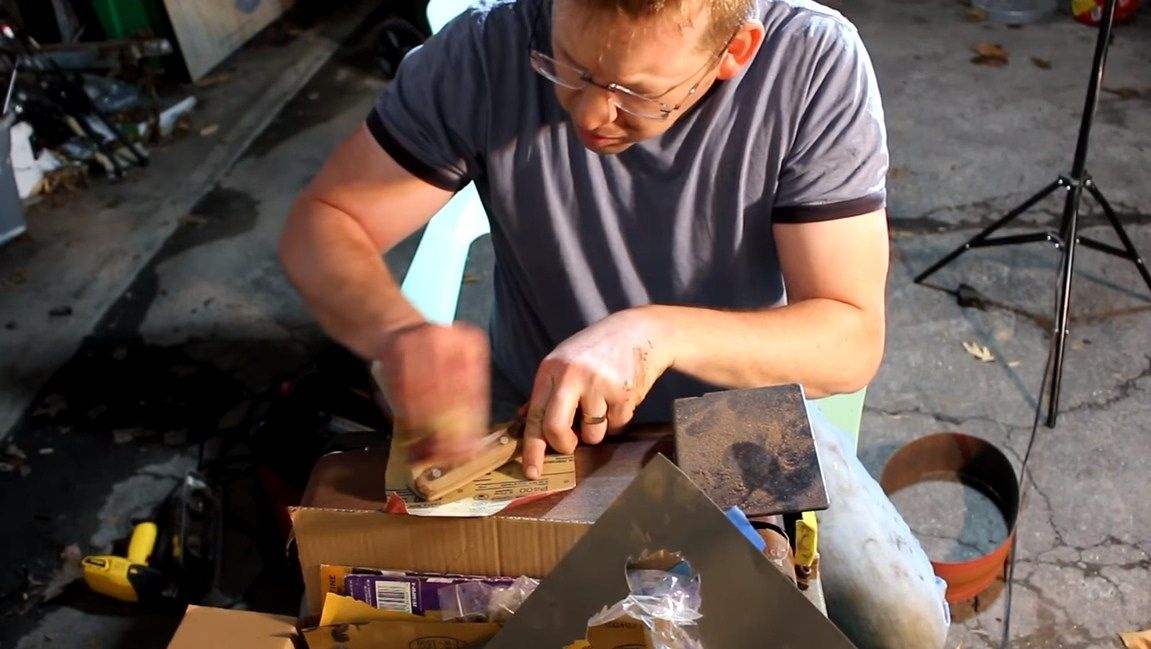
When the glue dries, you can form the desired profile of the handle. To do this, cut off the excess, you can use a jigsaw or an ordinary hacksaw. Then we grind too much, here files will come to your aid, the author uses a grinder with grinding nozzles for this purpose. When this is done, we go to the belt sander. Grind the handle well. In the end, the author processes it manually using fine sandpaper.

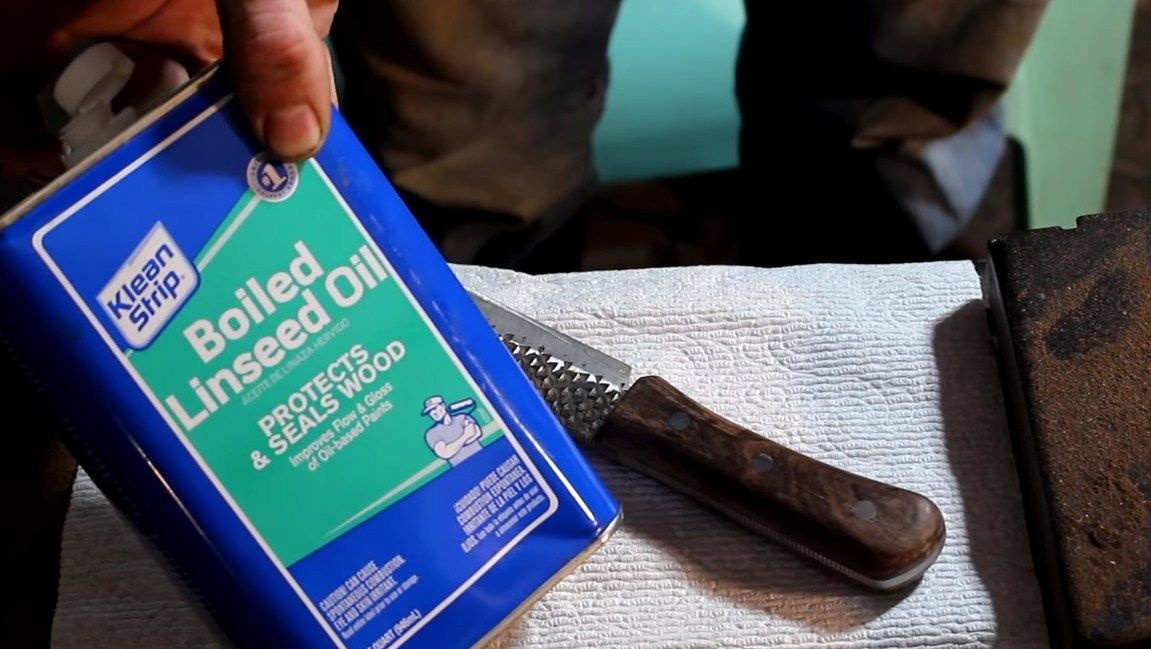
Step Six Pen impregnation
Be sure to soak the handle with oil. The wood will look prettier in this case, and the wood will not absorb moisture and deteriorate. You can use linseed oil or special ones purchased for wood impregnation.
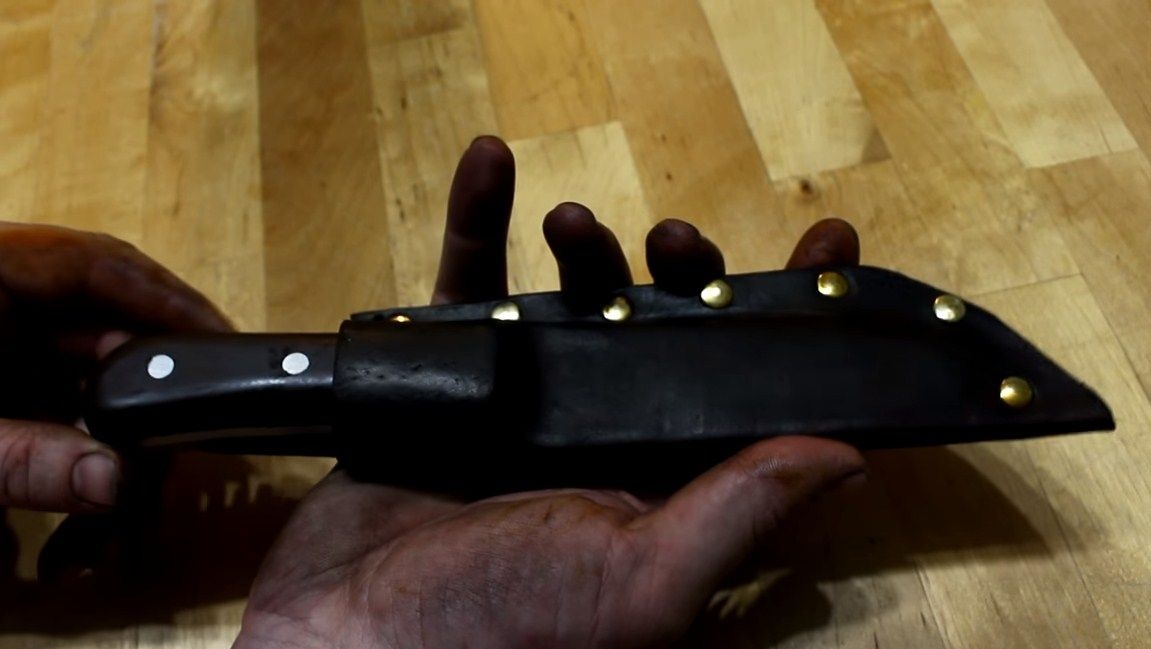
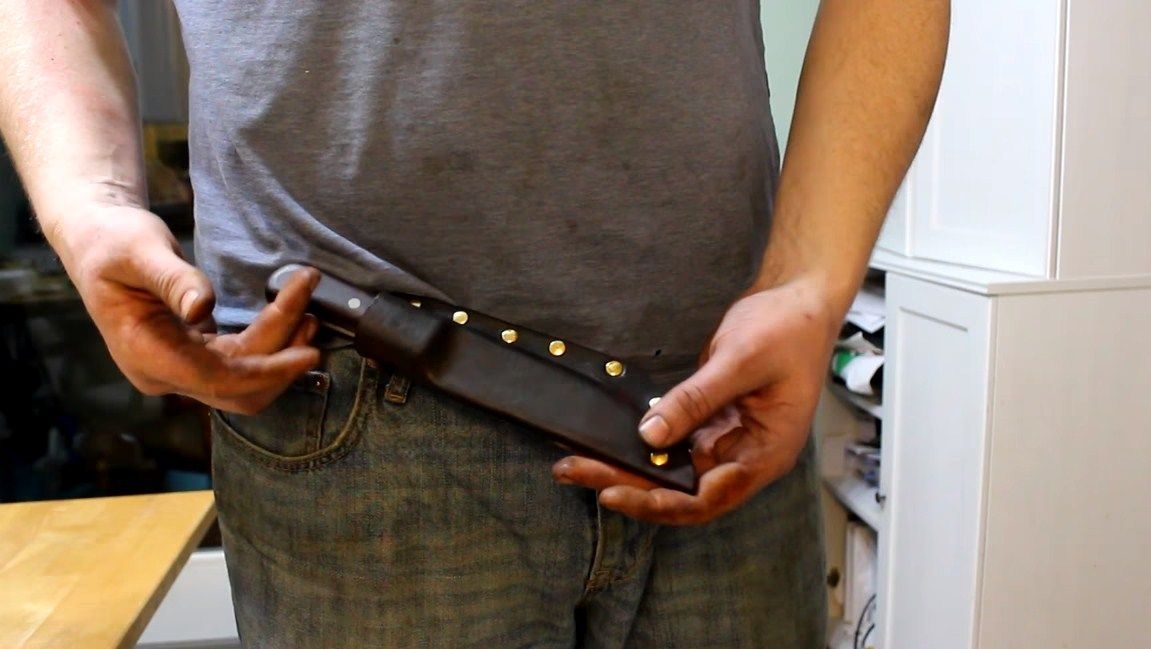
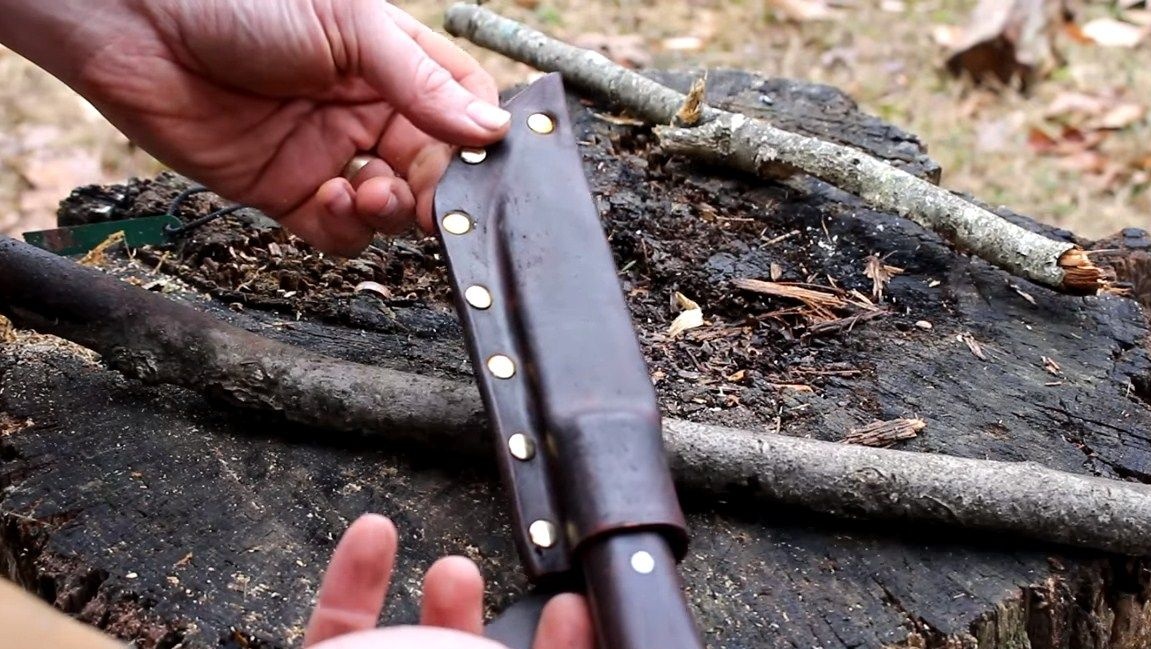
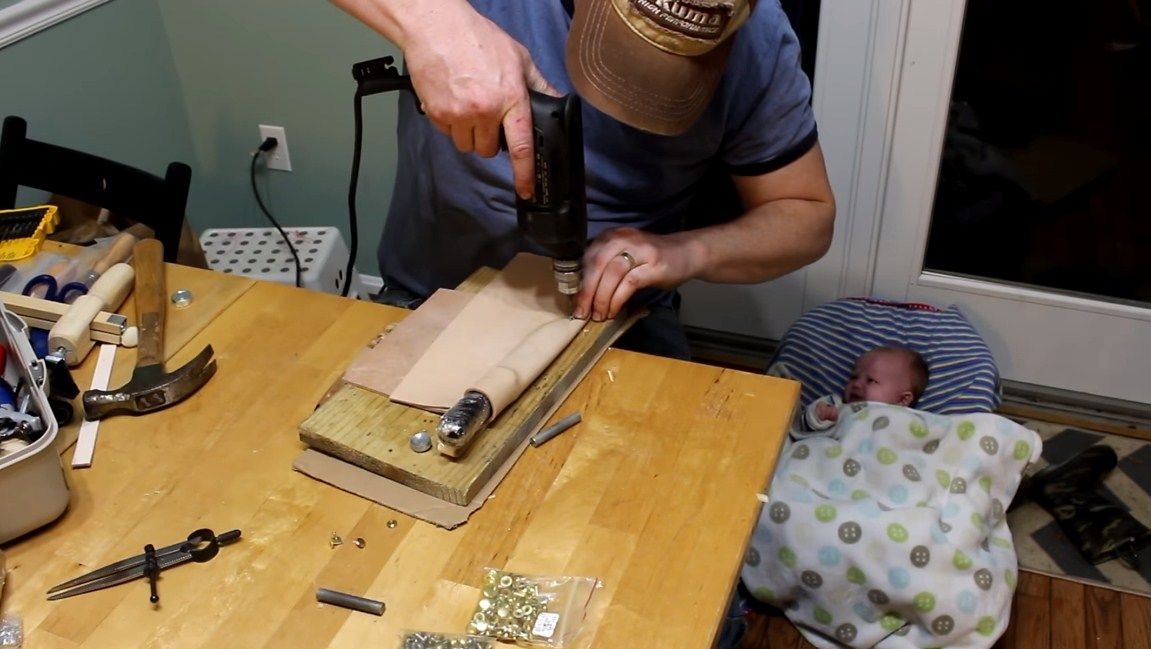
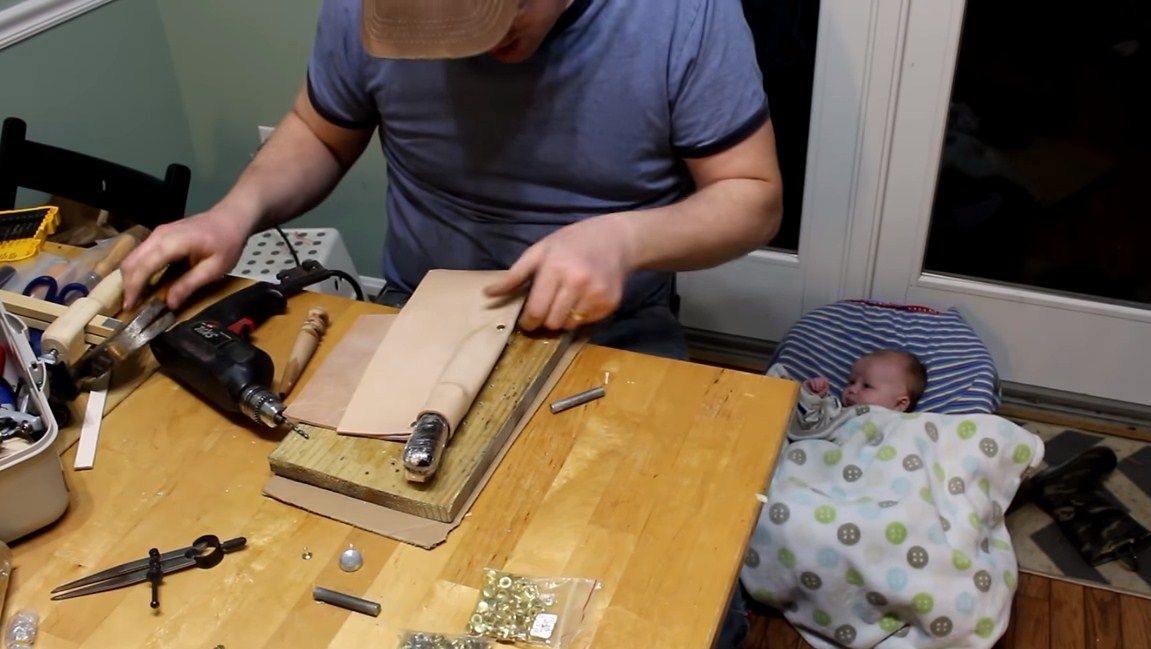
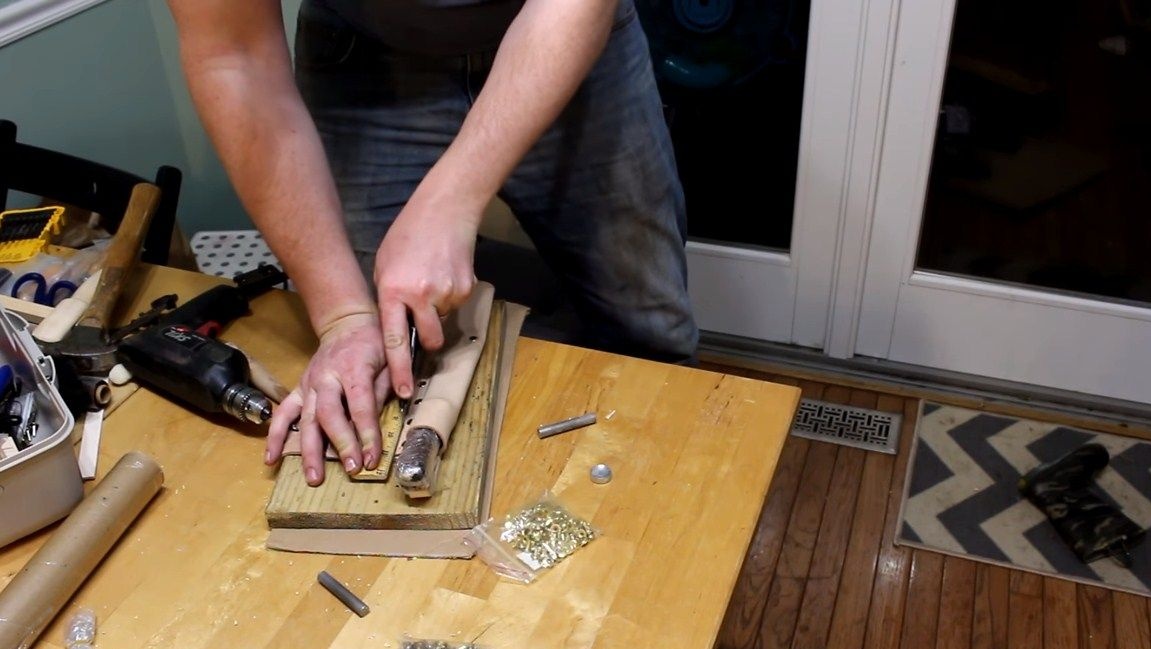
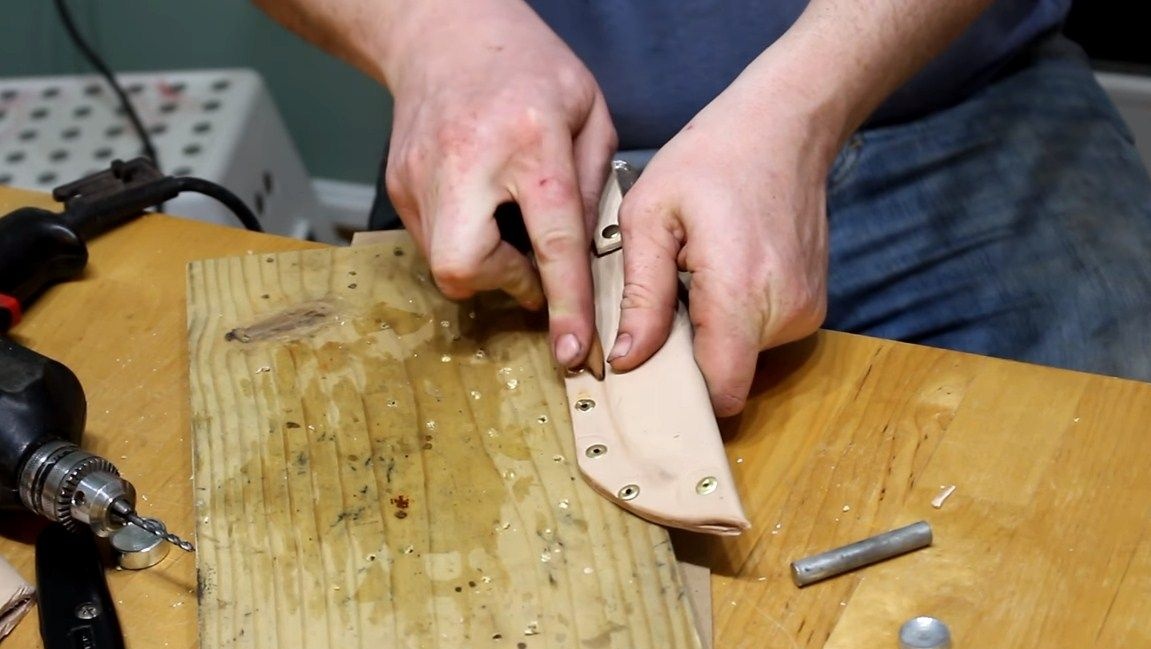
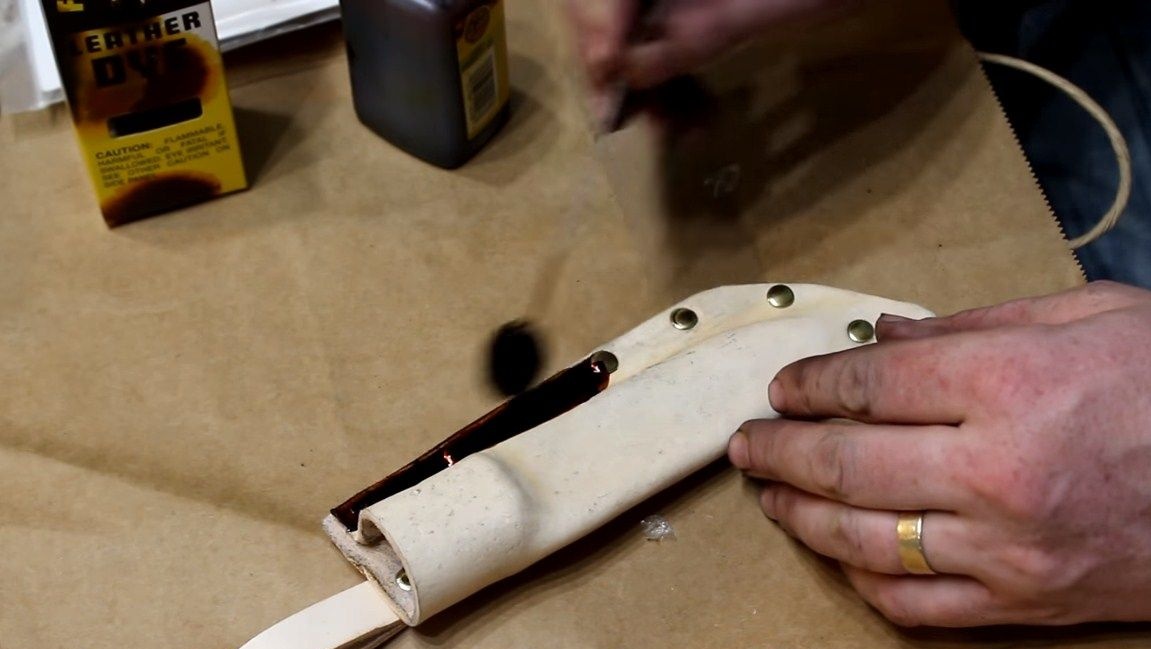
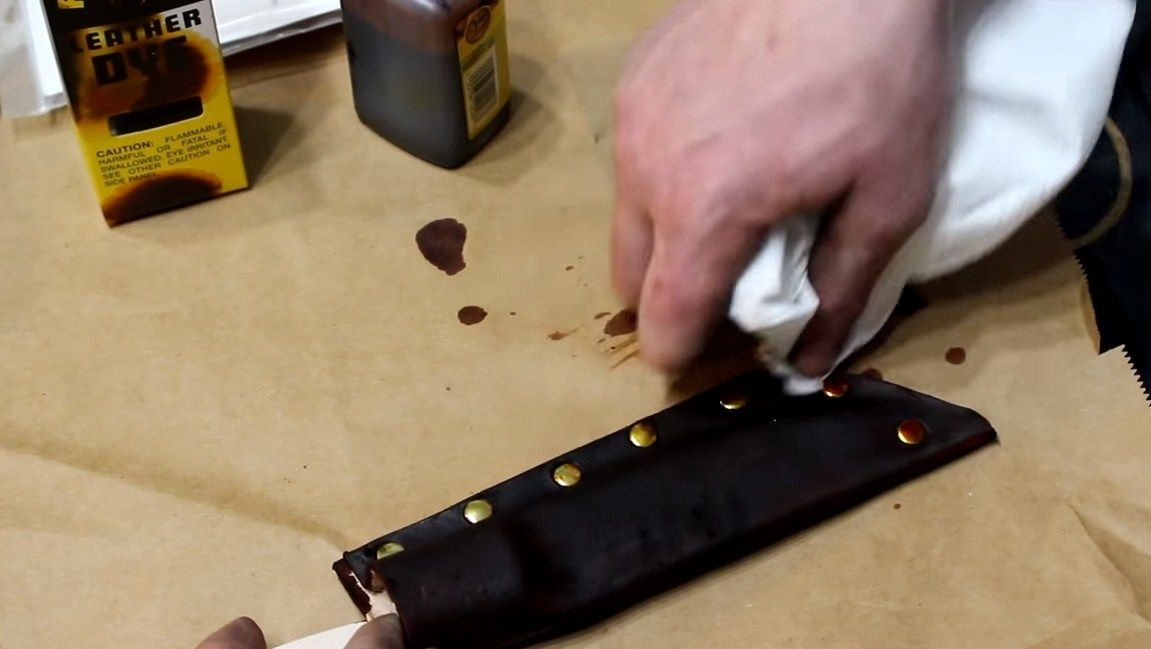
Seventh step. Making a knife sheath
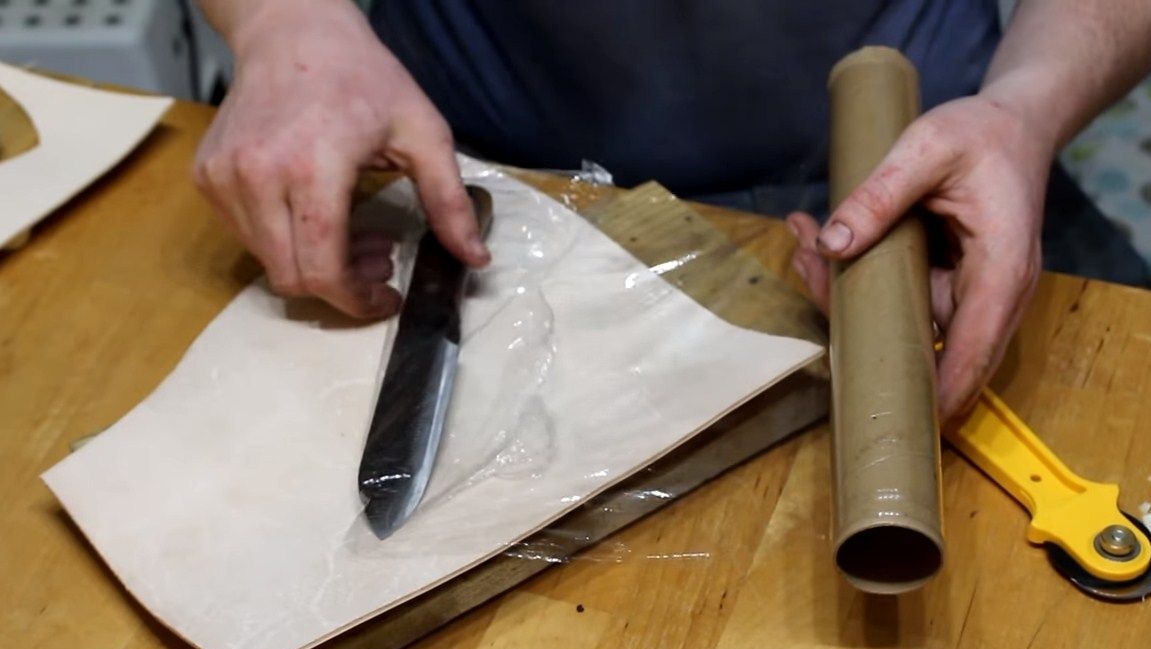
To make a knife sheath, we need leather. Soak it before forming for a couple of minutes in water. Wrap the knife itself with a film, it will serve as a template for manufacturing.
Well, then everything is simple, wrap the knife with leather, drill holes and install rivets where required. When the scabbard has a finished look, let them dry, they will fix the shape. At the end, paint the scabbard in any color you like.

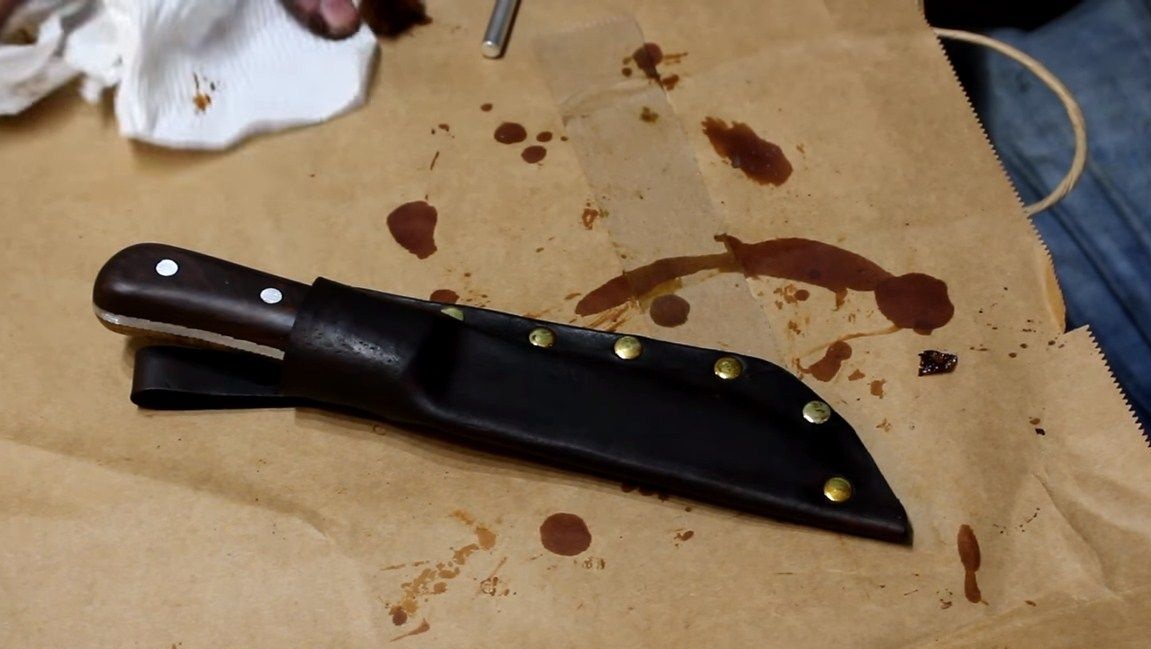
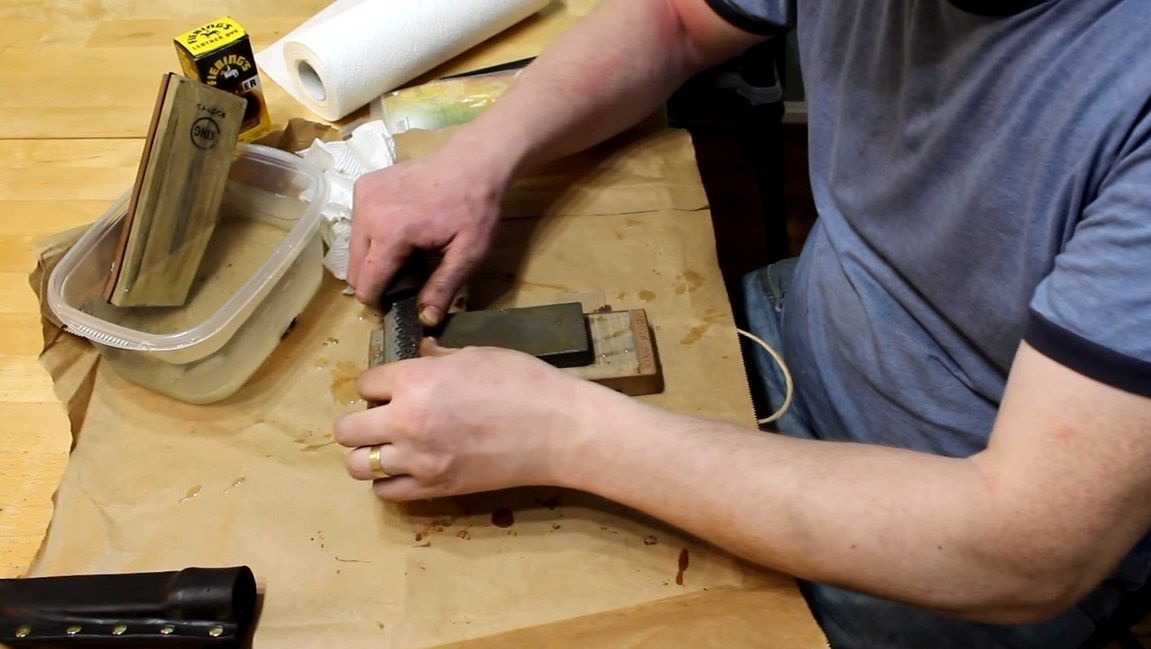
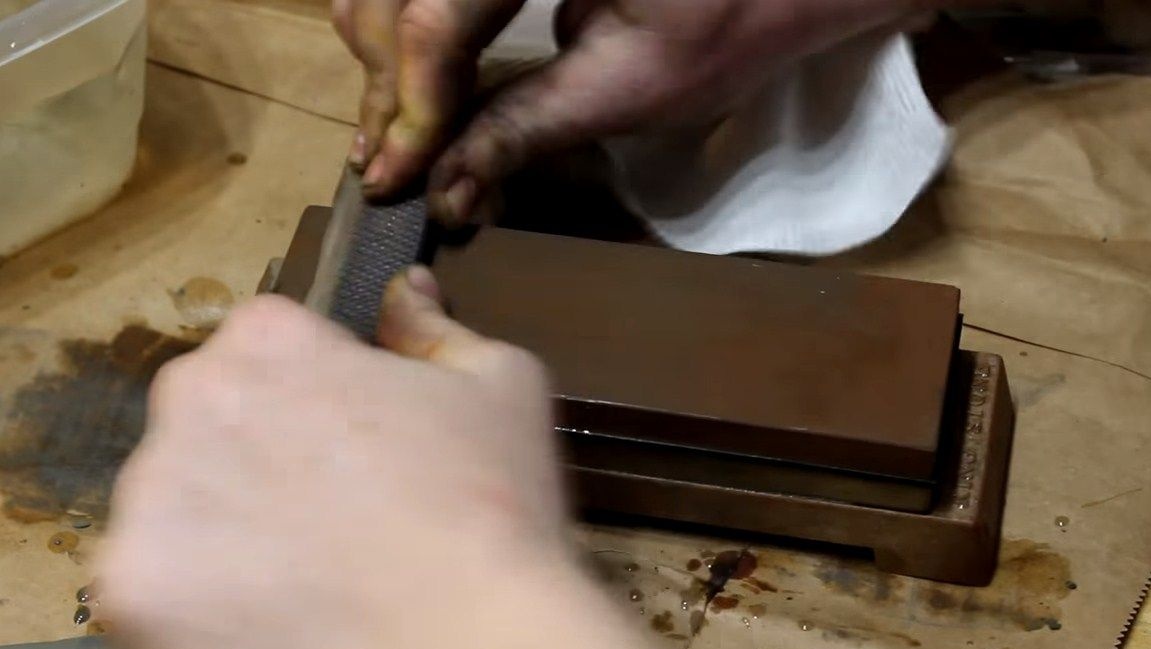
Step Eight. Knife sharpening
Our knife is ready, it remains only to sharpen it! To make the knife like a blade, it is good to use Japanese water stone of different grain sizes. Wet the stones with water and sharpen the blade. After sharpening, the author easily cuts the paper. Also, the blade is quite strong and they can easily be pulled wood. That's all, good luck and inspiration, if you want to repeat it!