
Good day to all dear friends! In today's article, I would like to show you a very interesting and at the same time useful idea homemade. The idea is to make a compact, but powerful and efficient air conditioner for cooling indoor air. Also, homemade should be easy to manufacture and should not require hard-to-reach parts. The homemade product that will be discussed in today's article is ideally suited for these parameters. Of course I already did an article about air conditioning do it yourself, but it used a different cooling method, for many it simply does not fit. The air conditioner, which we will consider today is much easier to manufacture and uses ordinary ice for cooling, by the way it is made, also of their corrugated cardboard. Corrugated cardboard, as you know, is now very popular in the manufacture of any homemade products.
But we will not delay with a long introduction, we drove!
And so, for a corrugated cardboard air conditioner, we need:
-corrugated cardboard
thin foam
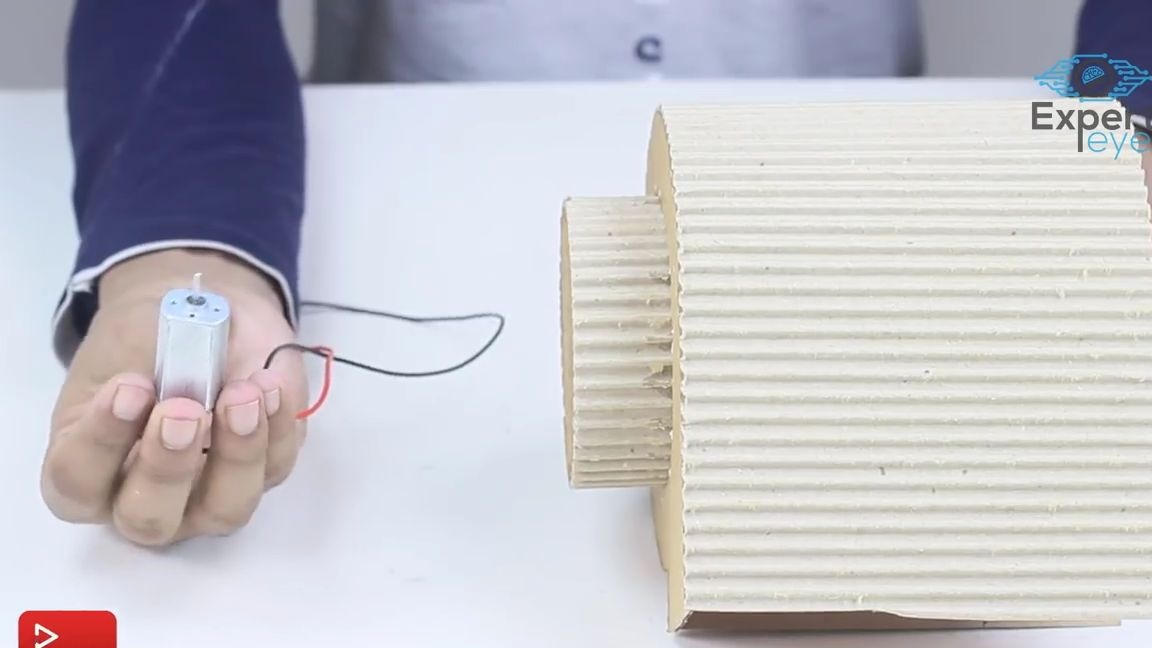
mini electric motor
wire
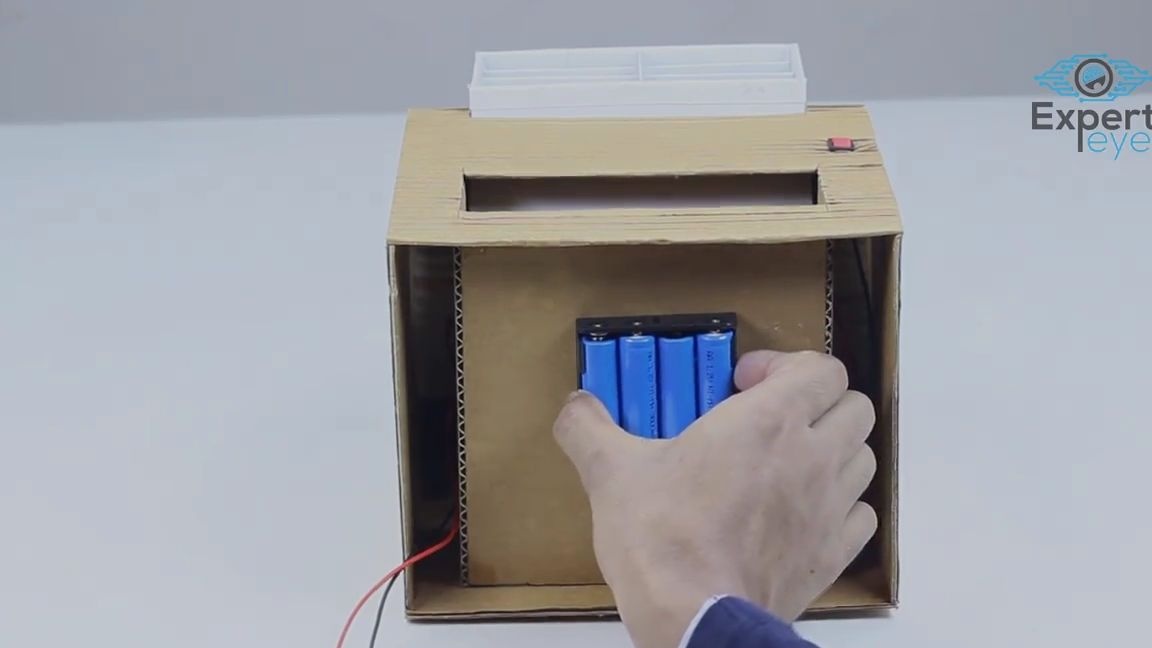
- power supply (in our case, it is 4 batteries of type 18650)
box for 4 18650 batteries
-switch
-metal grid from a computer power supply
From the tools you will also need:
soldering iron
hotmelt
-scissors
-stationery knife
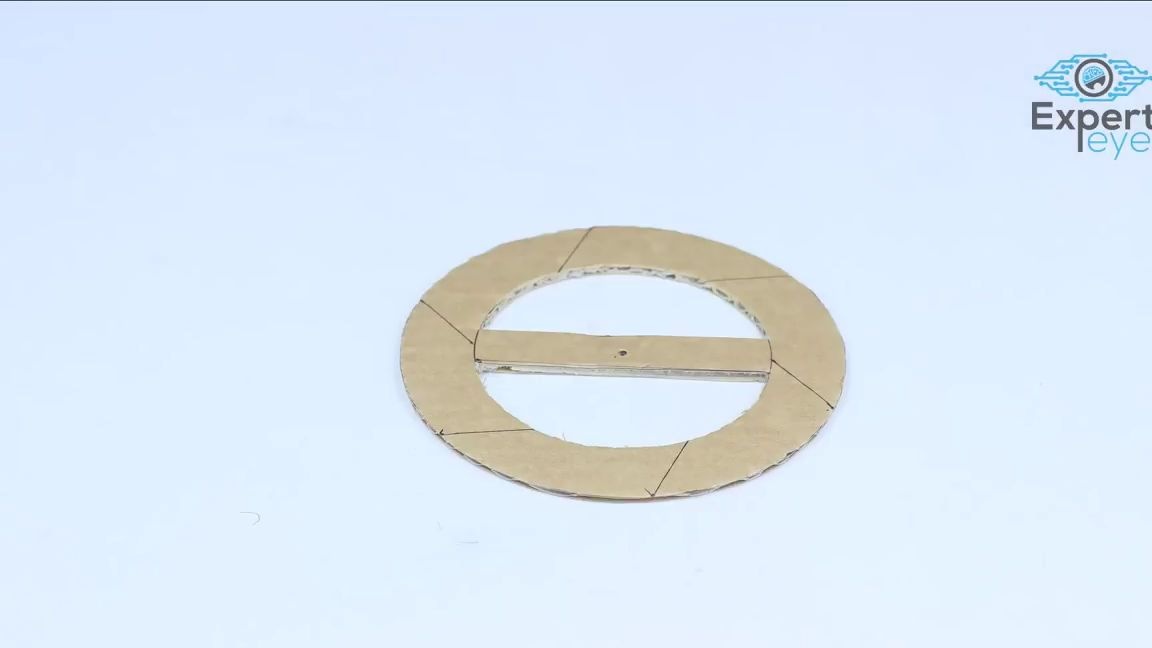
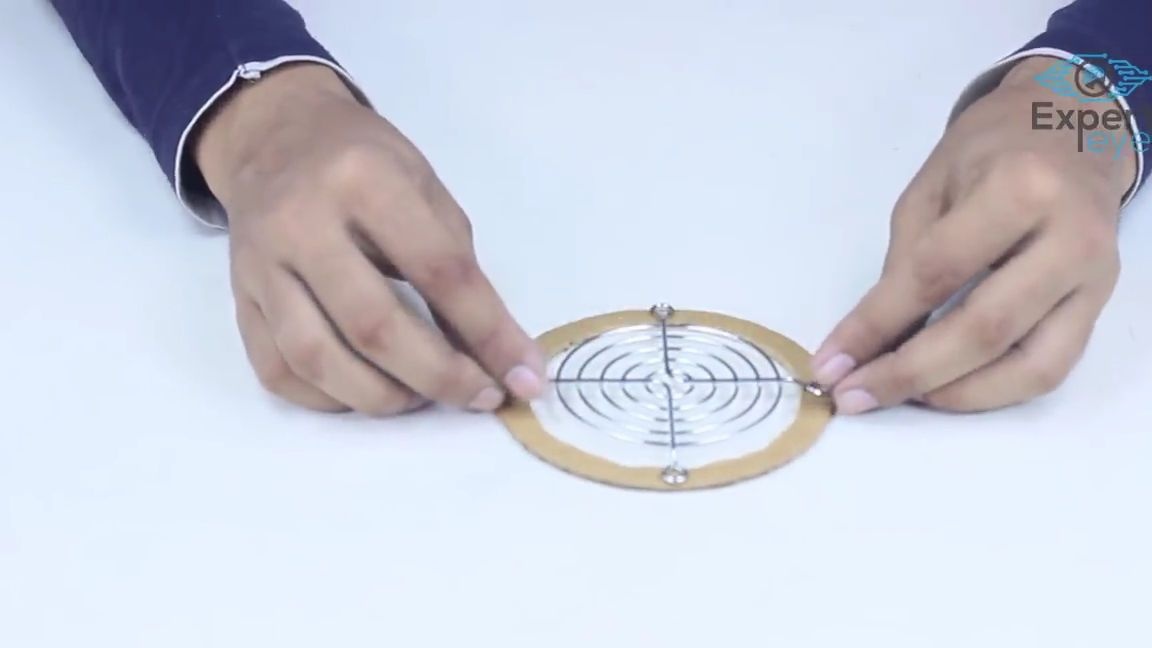
First of all, it is necessary to draw a circle on a sheet of corrugated cardboard, in the center of which there should be a crossbar, the inner space of the circle should be empty. On the circle, six marks must also be drawn at an angle.
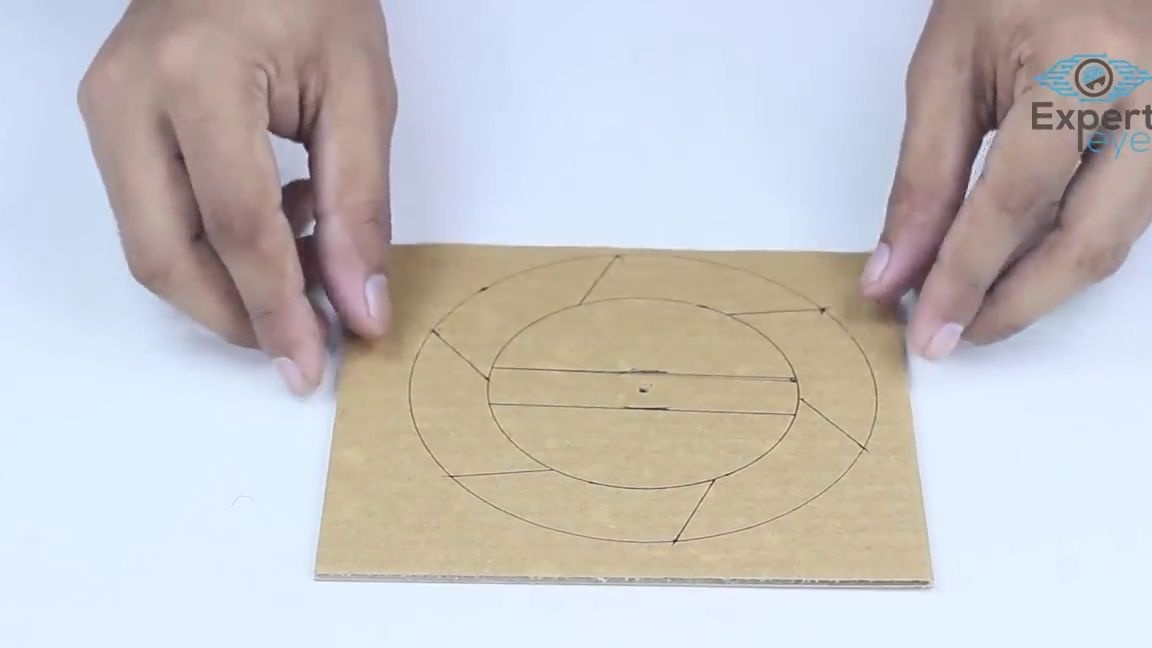
After drawing this part, it must be cut with scissors or a clerical knife, it should be cut carefully. By the way, in the center of the part there should be a mark for the motor shaft.
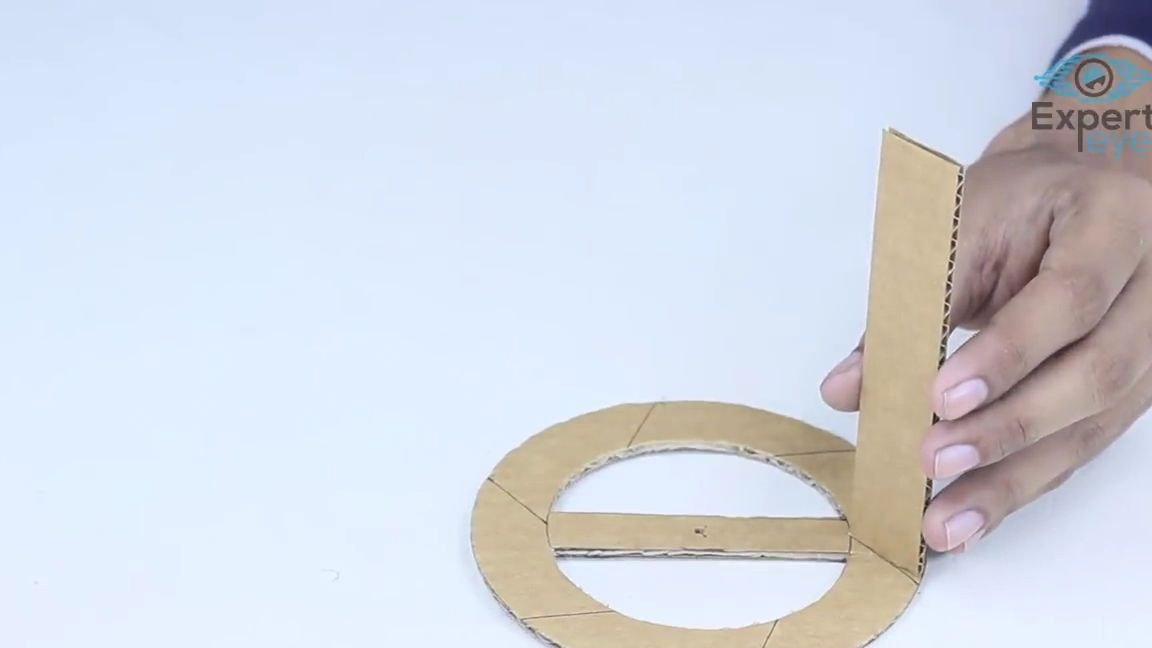
We cut out six equal-sized rectangles from corrugated cardboard, then they must be glued with a small side to the round part according to the markings that were done earlier, the angle must also be observed.
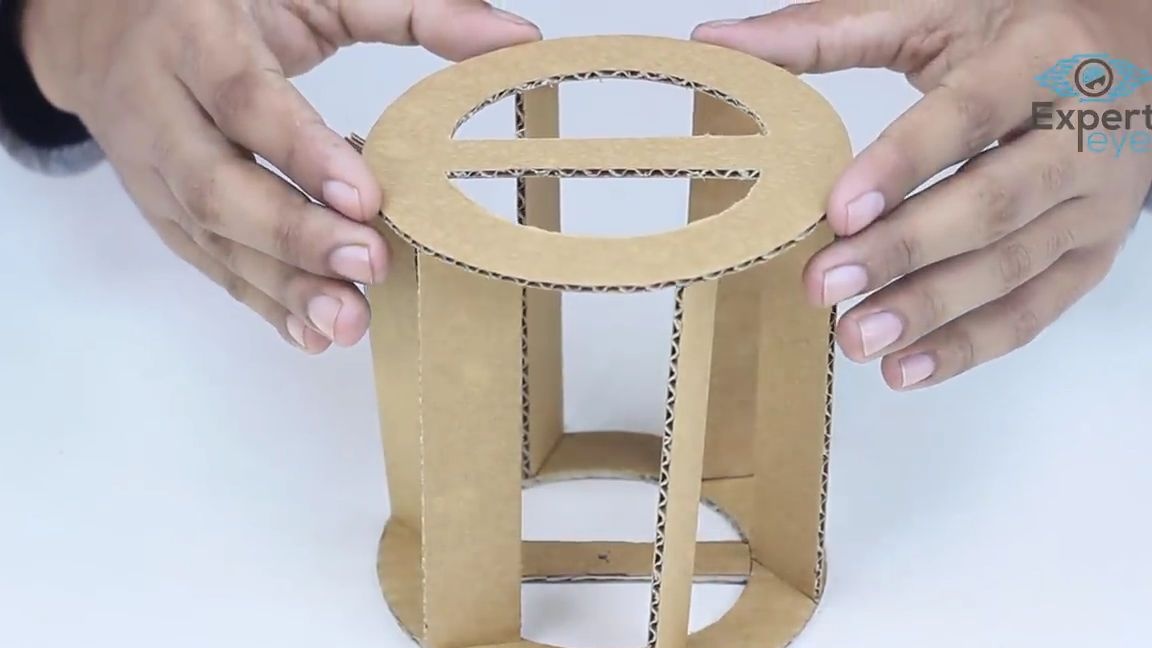
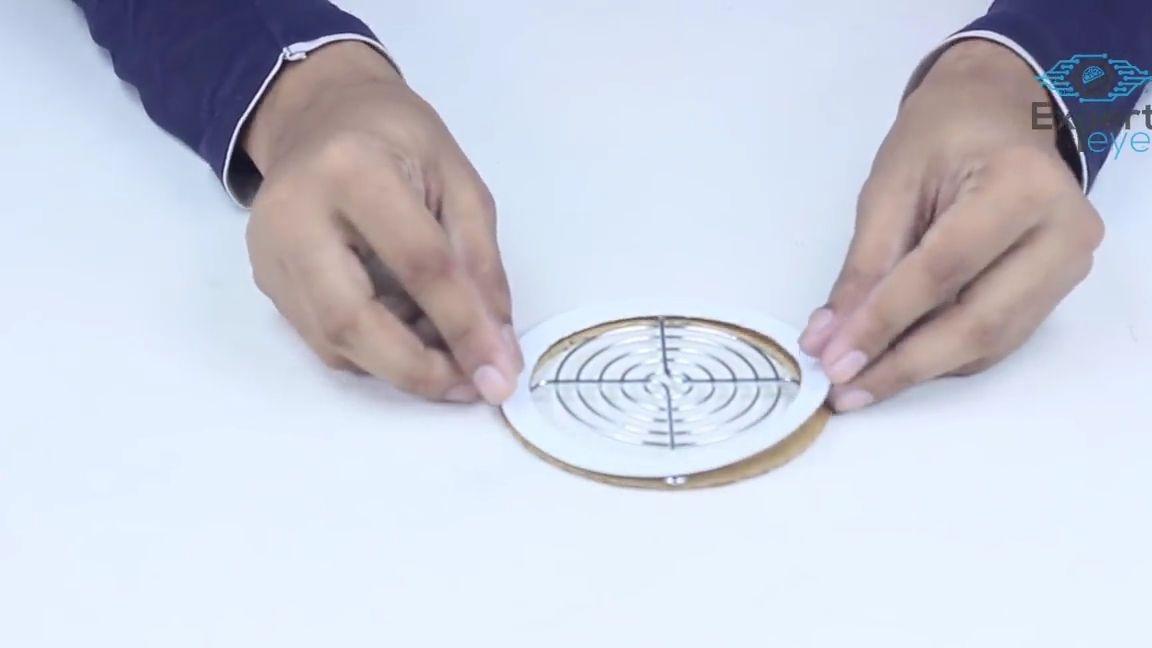
After gluing the rectangles (which by the way are blades for the rotating rotor of the air conditioner), you need to glue on top of the second round parts, which should be exactly the same as the first:
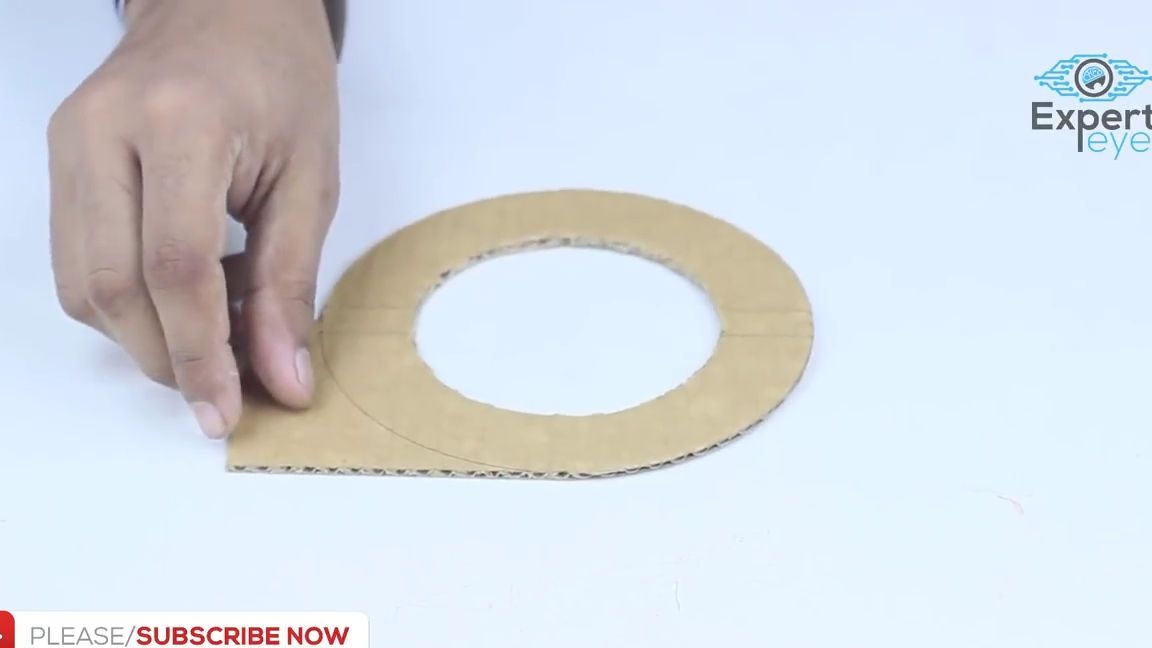
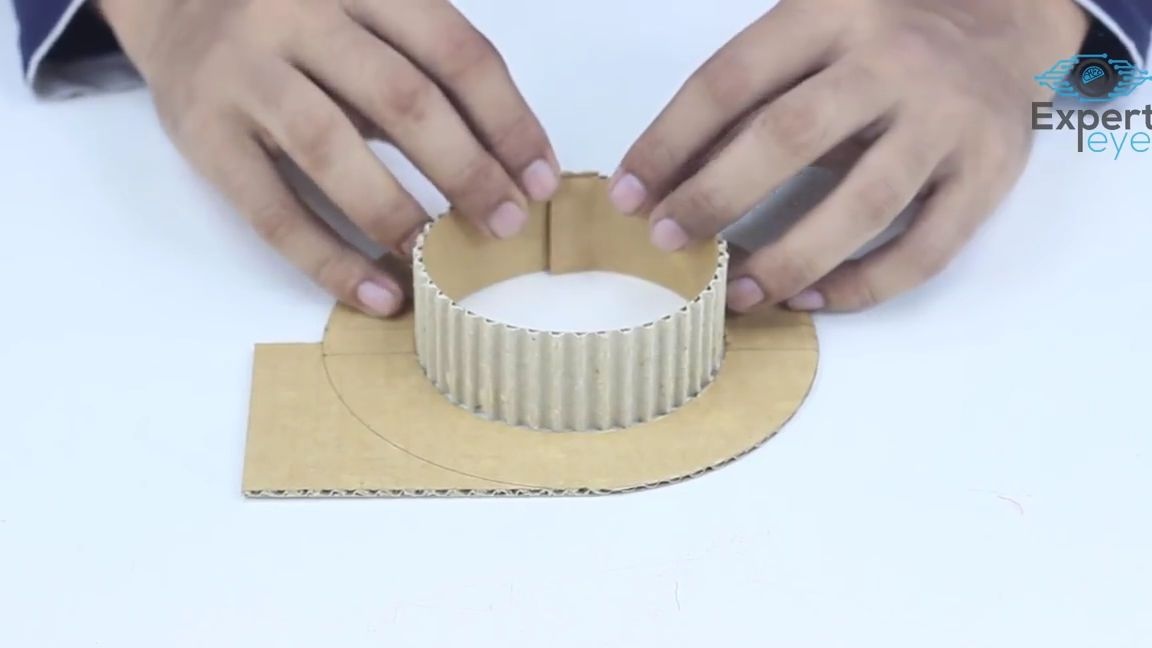
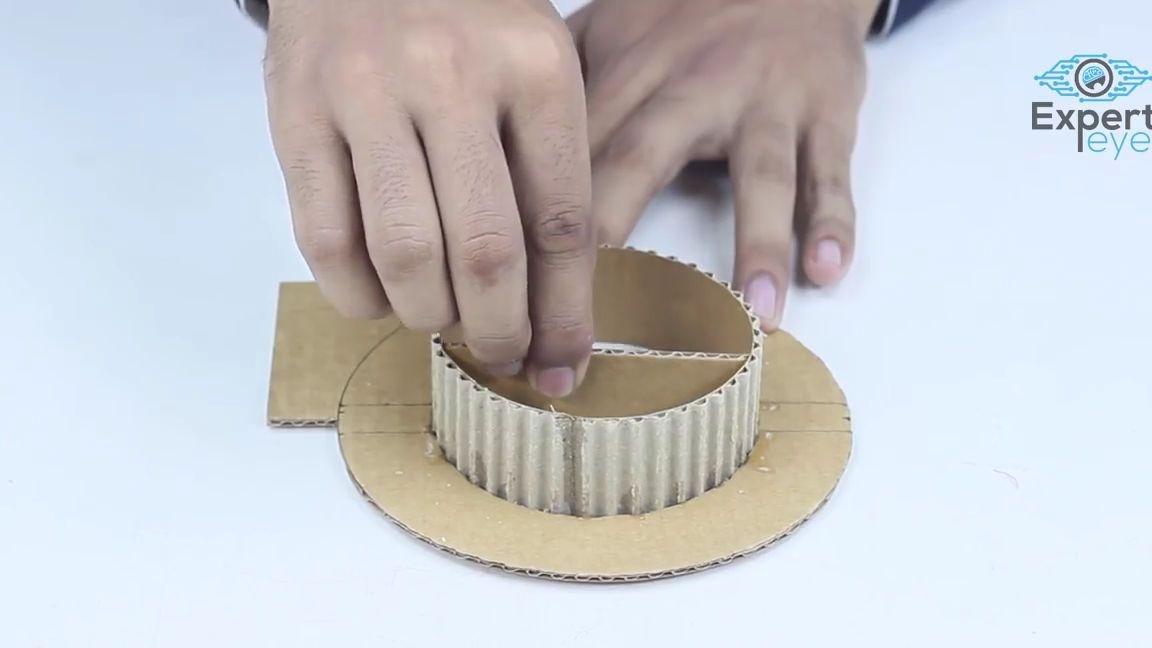
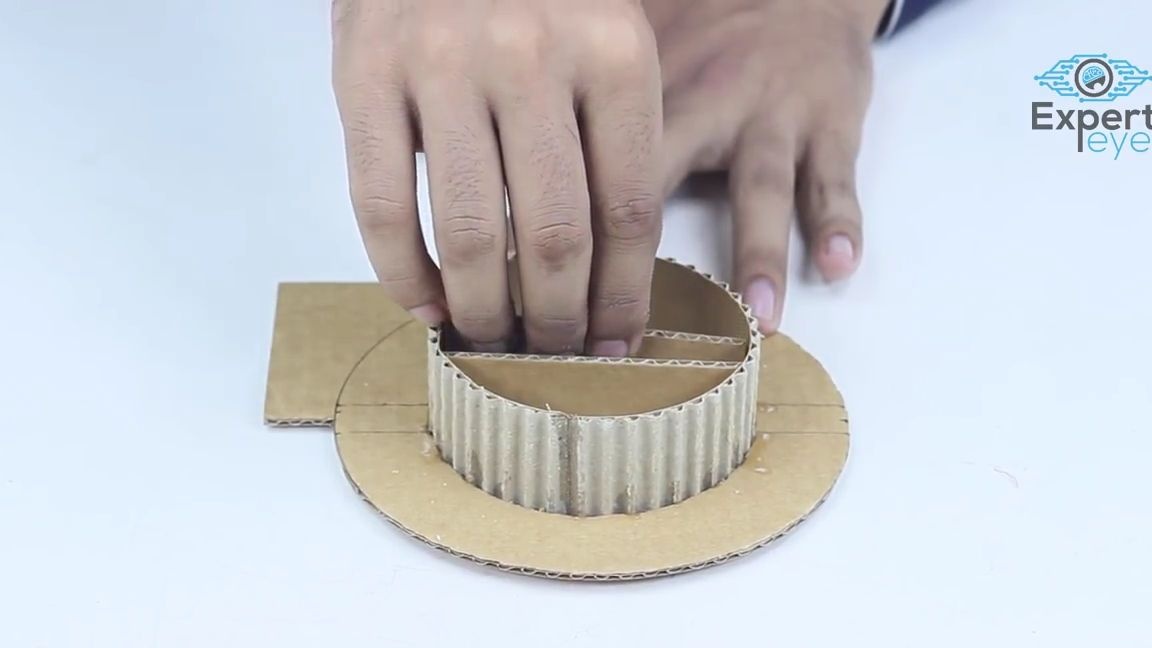
Now we cut out the part from the same corrugated cardboard, as in the photo below. In total, you need two such details:
Then we cut out a small strip of cardboard and remove the top layer of cardboard from it, so that it becomes more elastic and can bend freely. This strip must be glued laterally to the part that was done previously. After that, inside, you need to insert and glue two elongated rectangles from corrugated cardboard. You need to do everything as in the photo below.
All you need to do two similar mirror blanks:
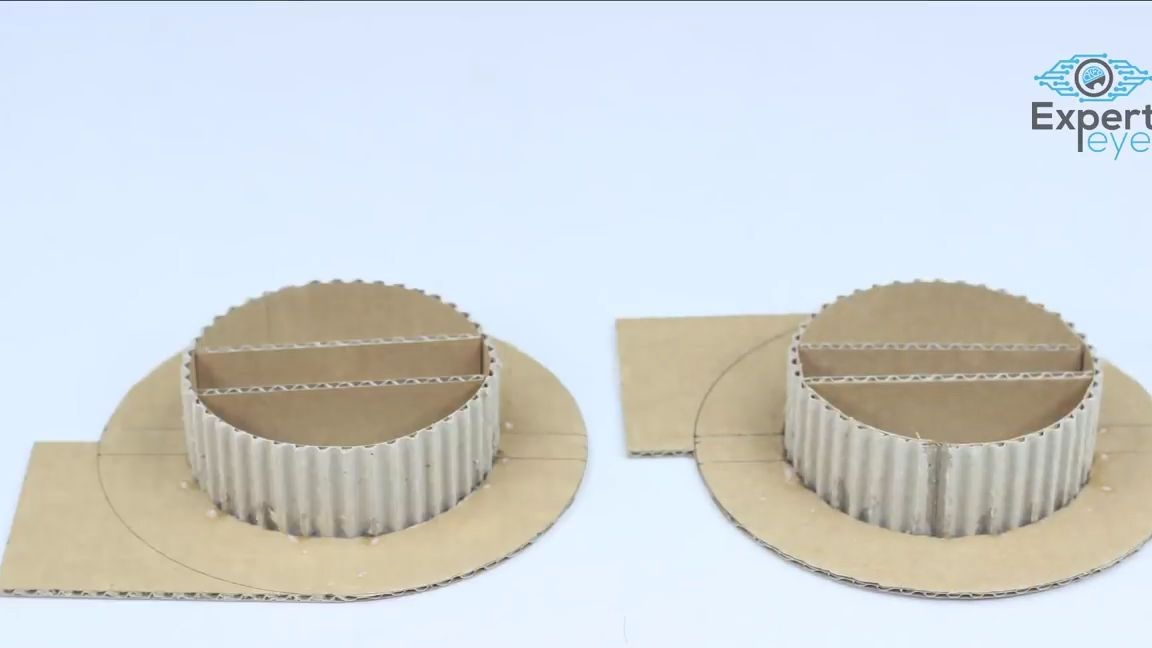
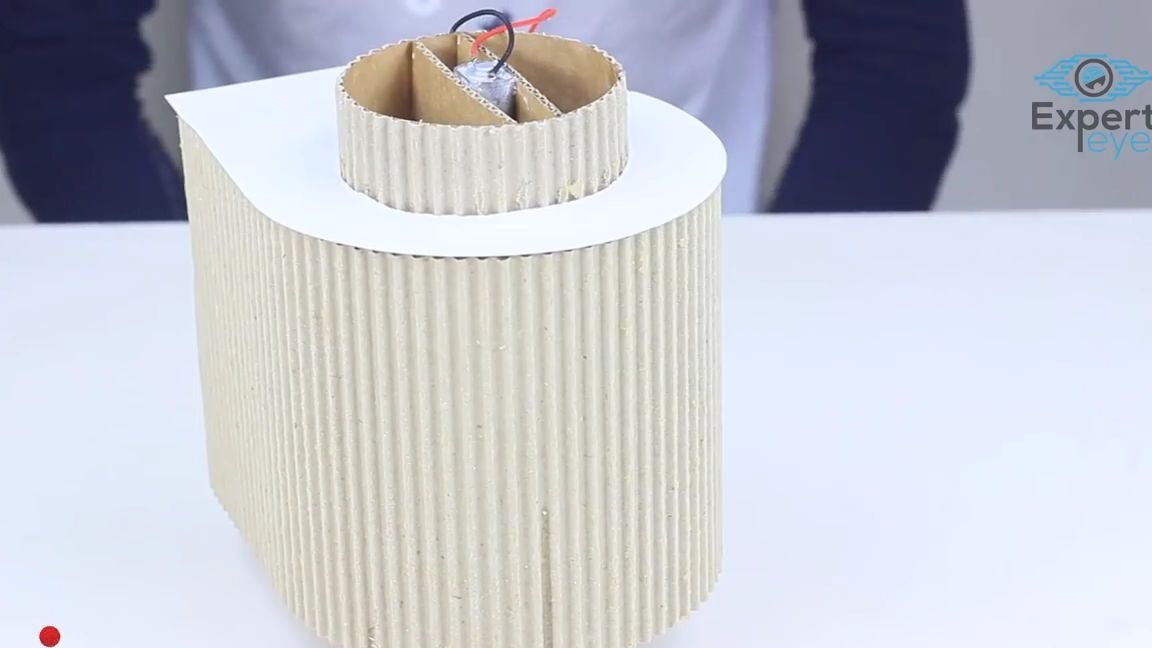
Around one of the parts we wrap and glue a large sheet of cardboard with the top layer removed, for elasticity. Glue so that the hole remains in front:
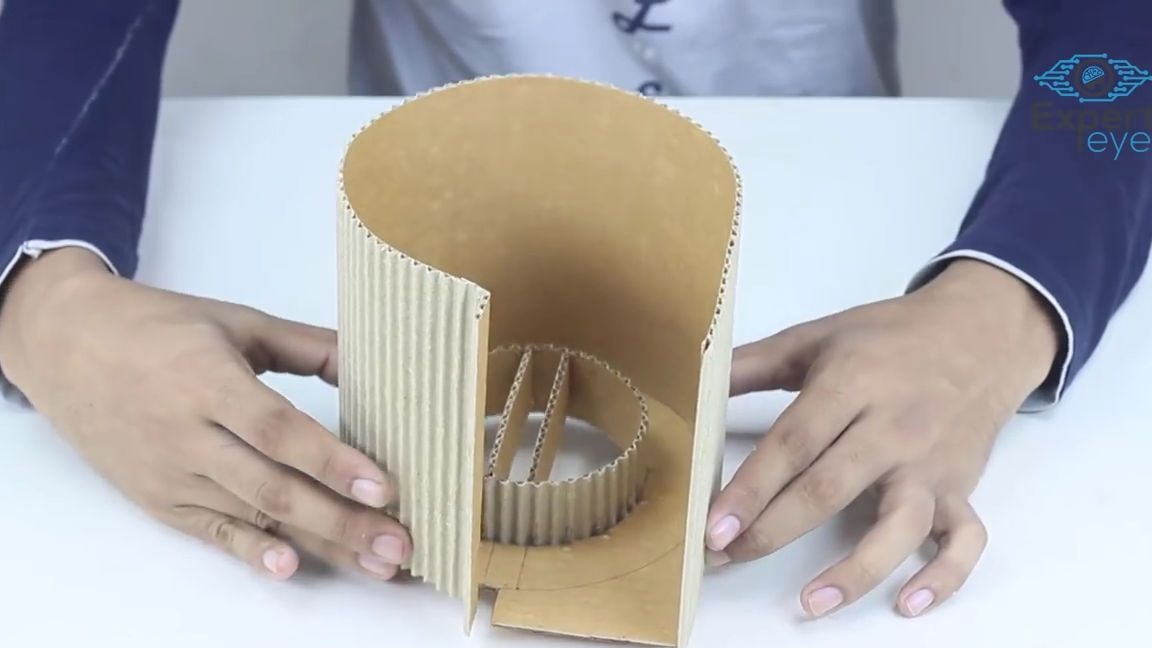
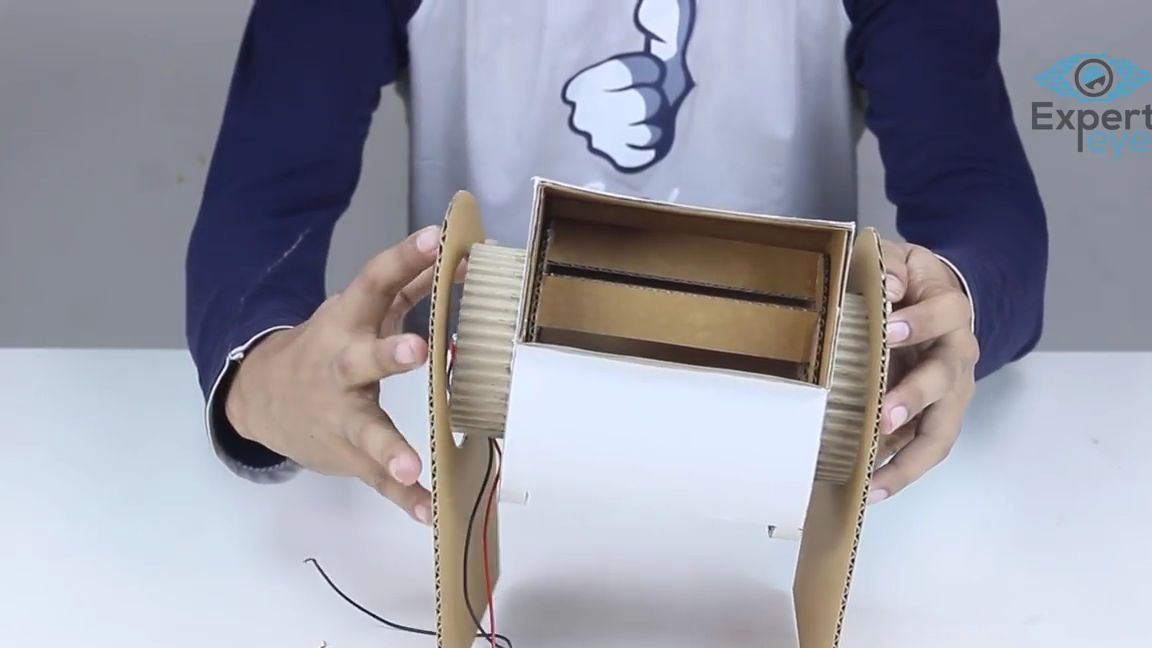
We take an electric motor and insert it between two cardboard inserts and naturally glue it. Then we install the fan itself on the motor axis and also glue it to the motor axis. After that, all this construction must be covered with the remaining mirror part, which we also naturally glue:
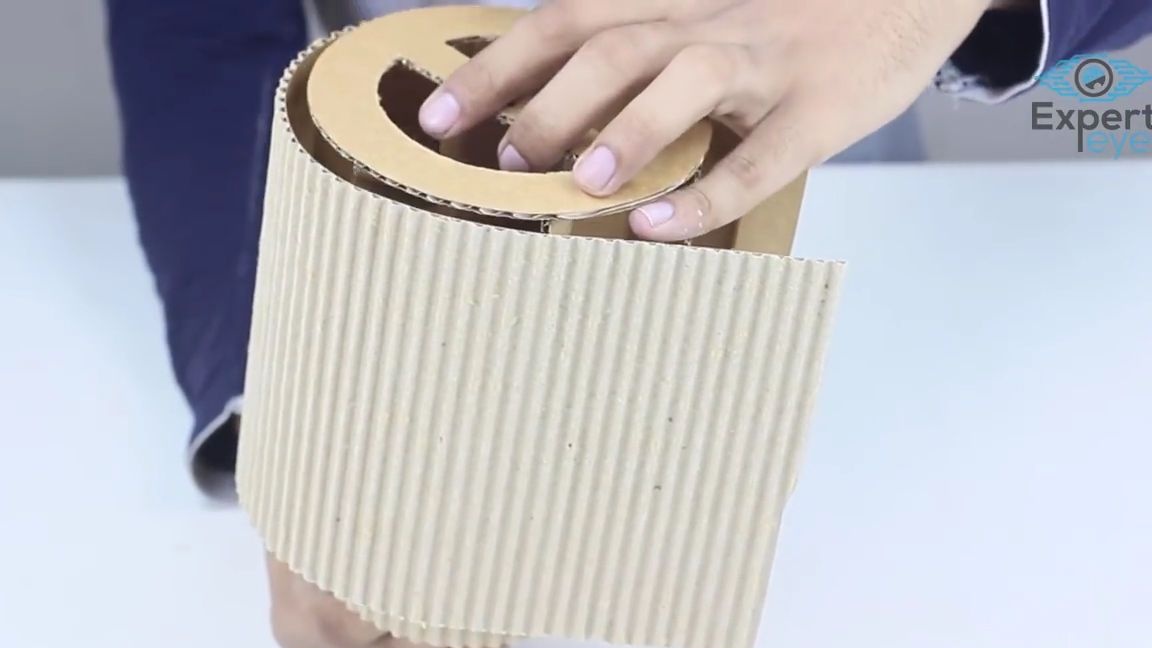
We treat this workpiece with a thin layer of foam for thermal insulation. By the way, the fan, which was previously installed on the motor axis, must be movably fixed on the opposite side with the other axis, so that it can rotate normally:
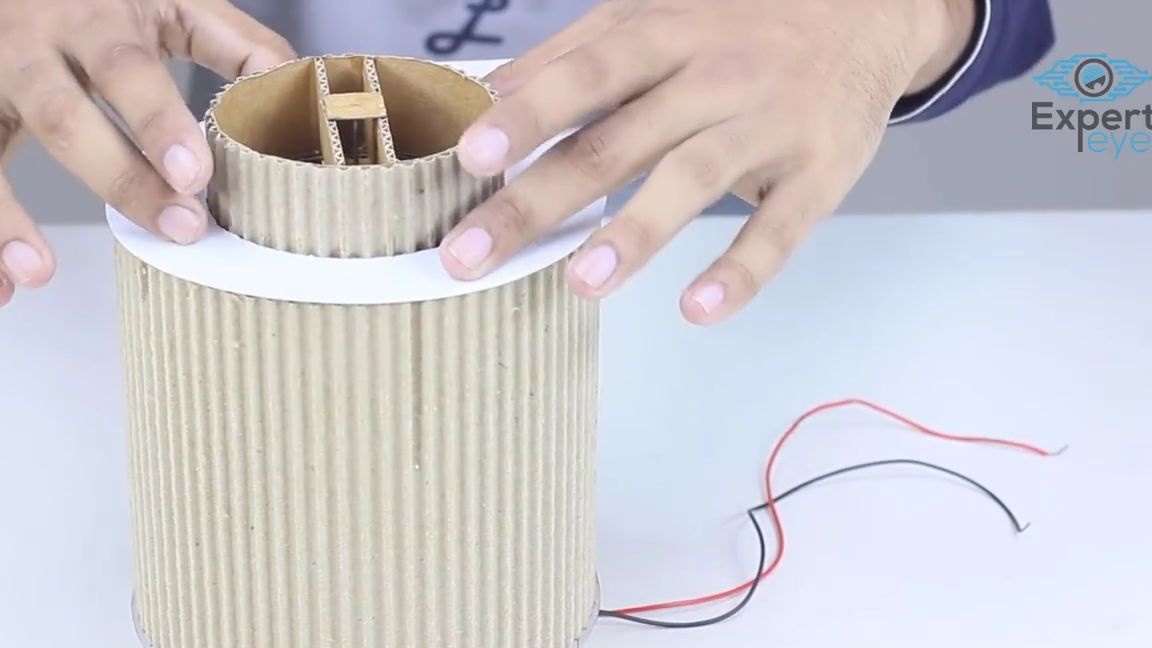
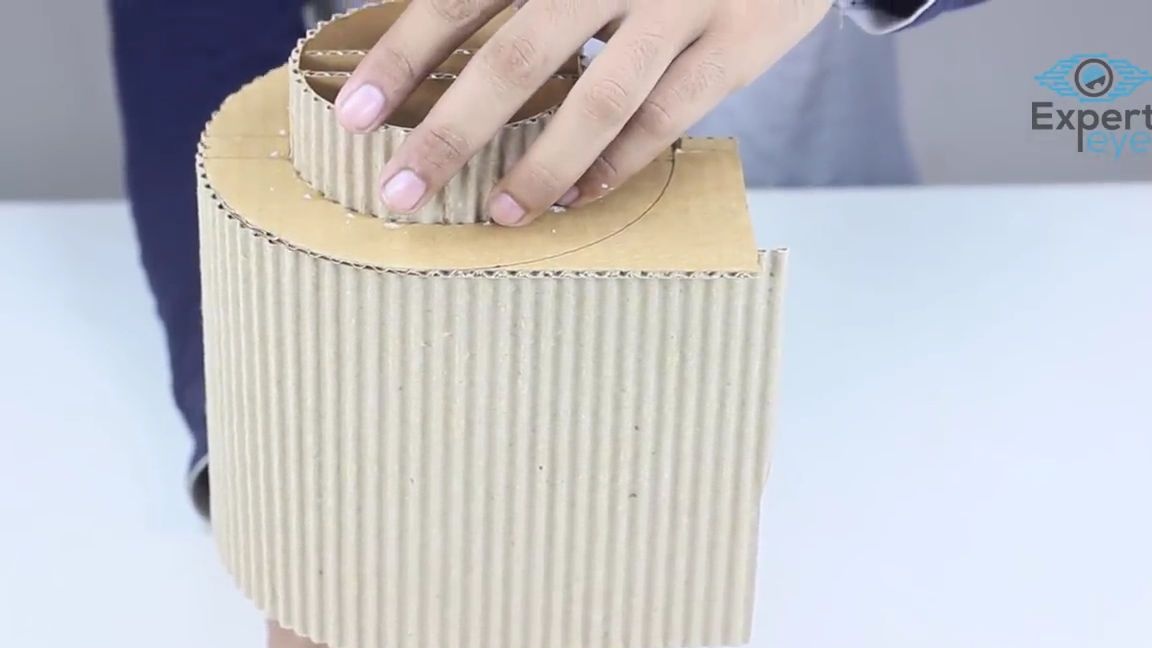
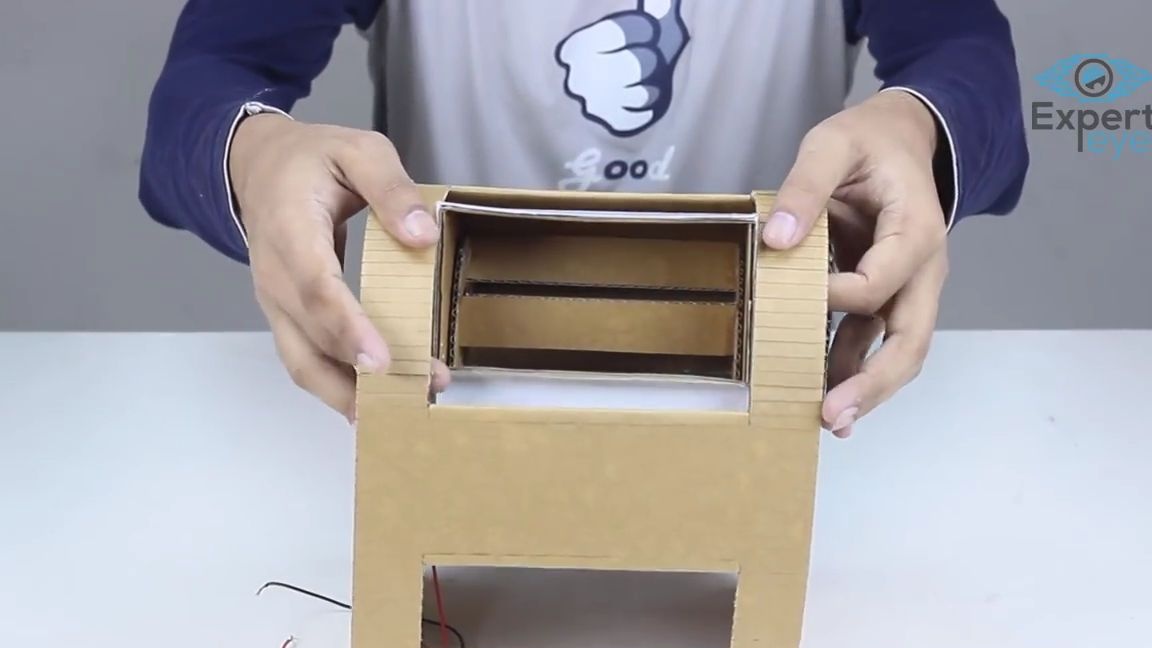
We take a clerical knife and use it to cut a large hole in the part where the foam is not covered in the photo:
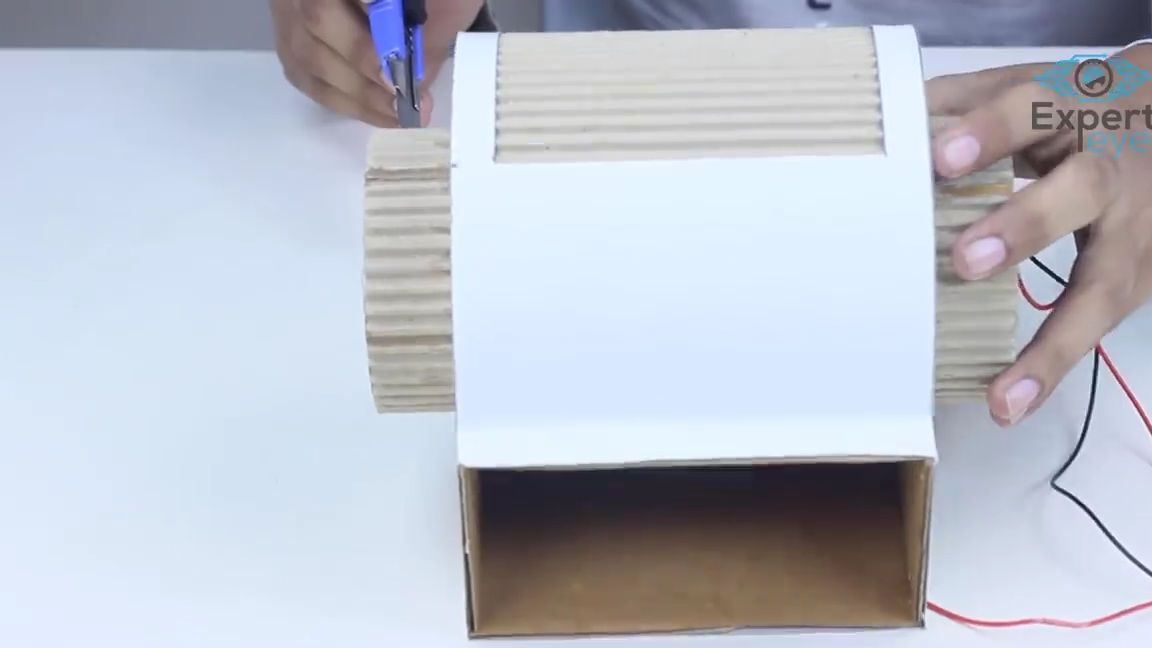
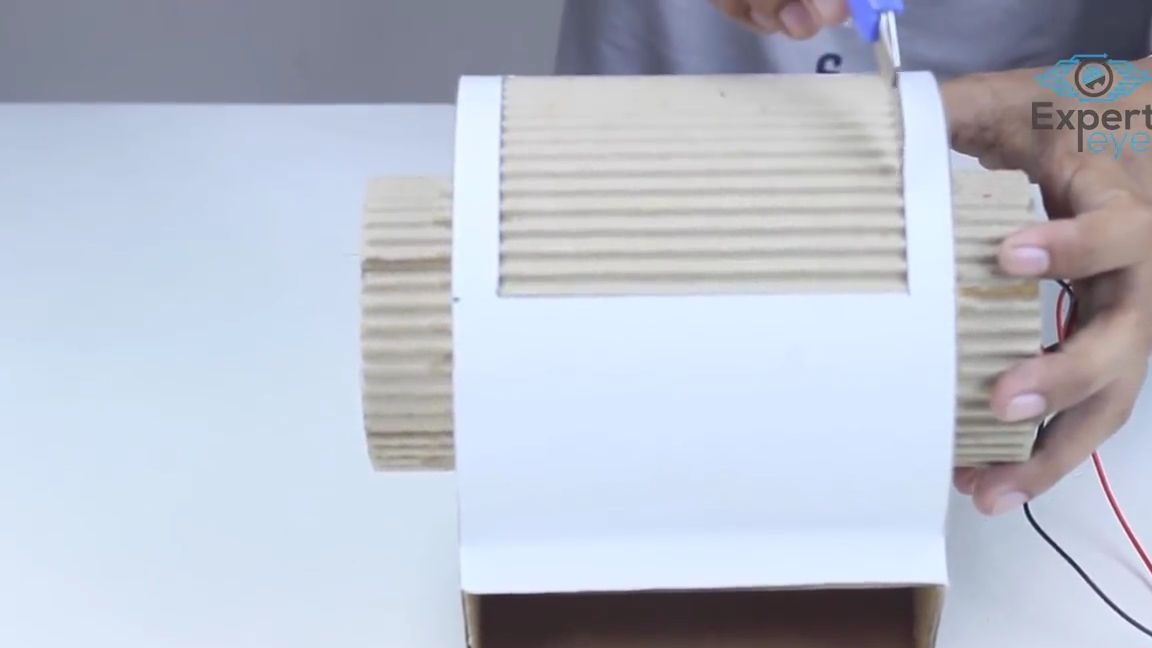
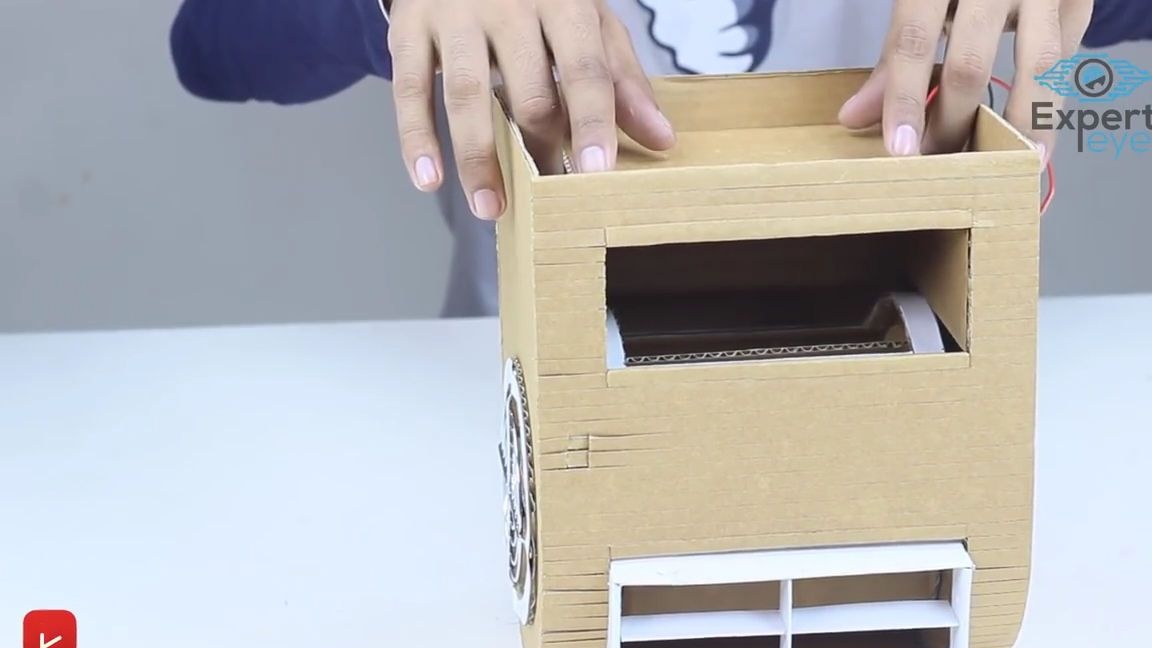
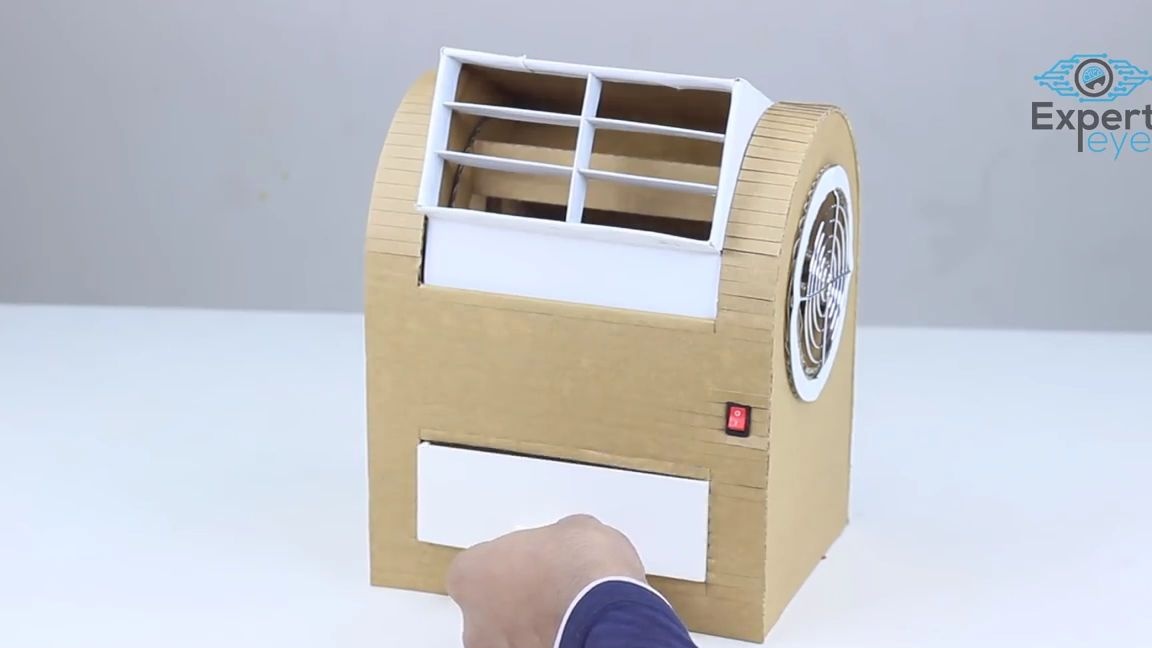
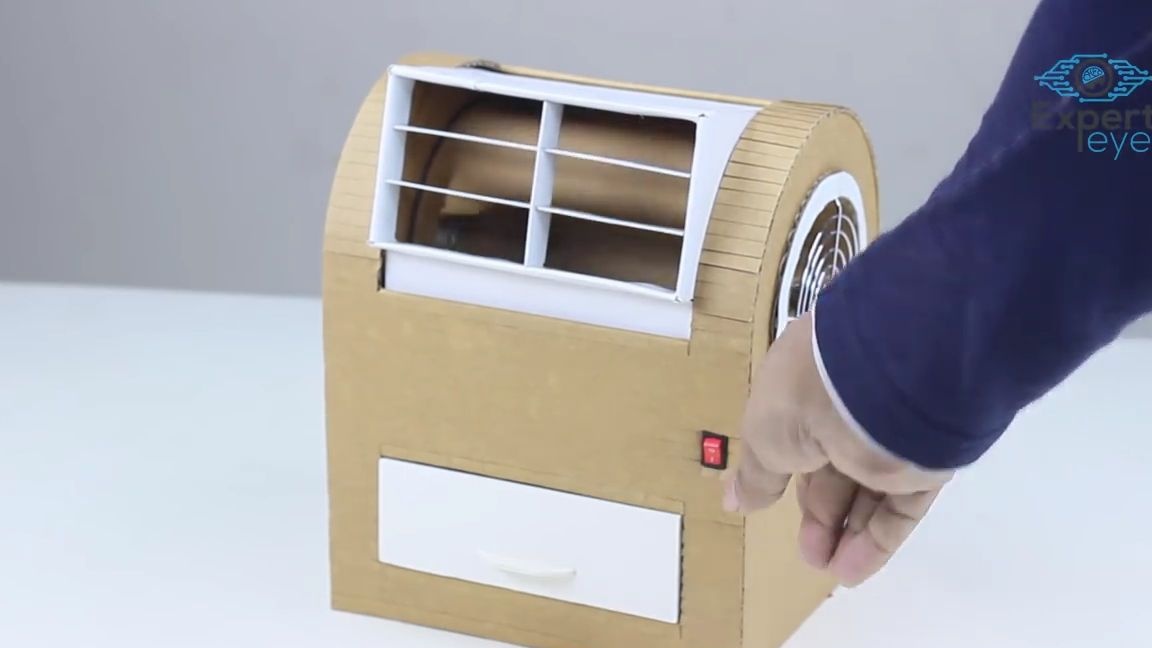
Now we cut out two more large parts from corrugated cardboard, which should also be the same. We put these parts on and glue on the workpiece, which was done earlier. On the front part, we also put on and glue a large cardboard part, as in the photo below:
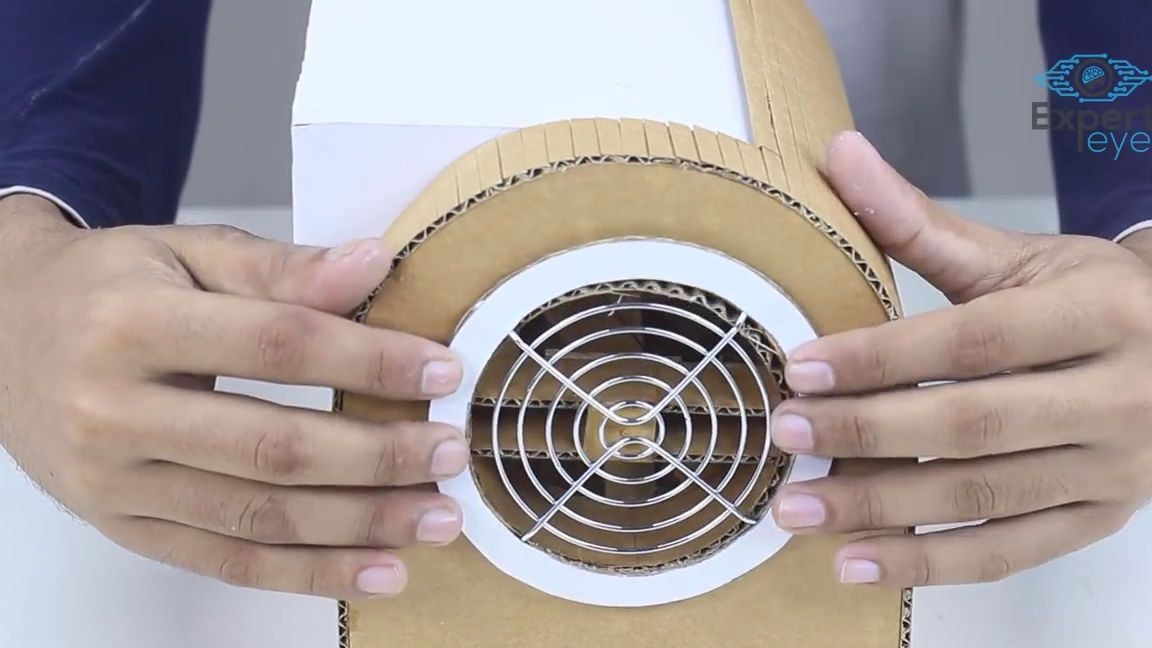
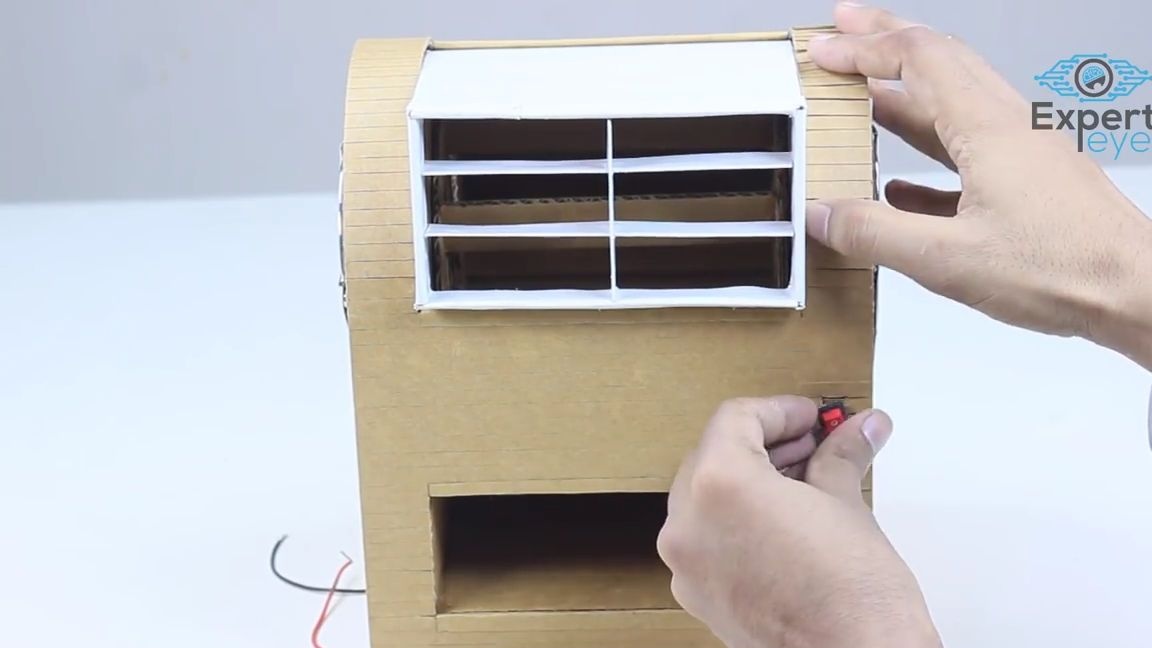
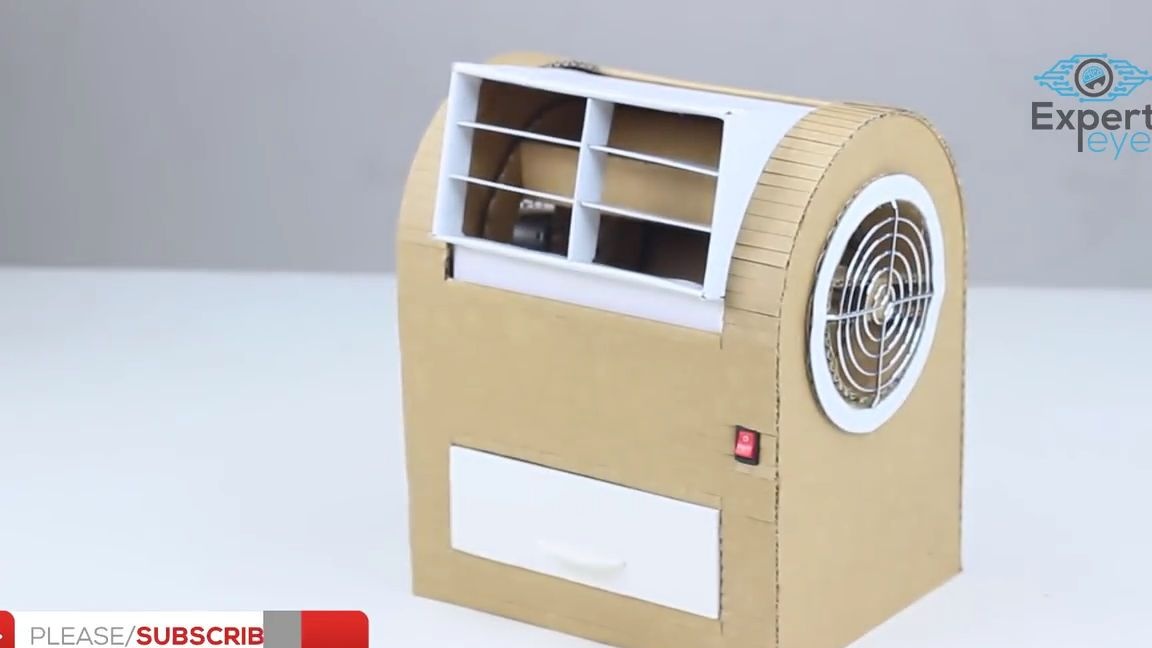
We draw and cut out a small ring from corrugated cardboard onto which we glue the metal grid from the computer power supply. On top of this blank we also stick foam
oval ring.
This blank must be glued to the side of the overall structure:
We test how well the fan rotates and pumps air, for this we simply supply electric power, which we plan to use in the future for this air conditioner. If the fan rotates freely and blows well, then you can continue:
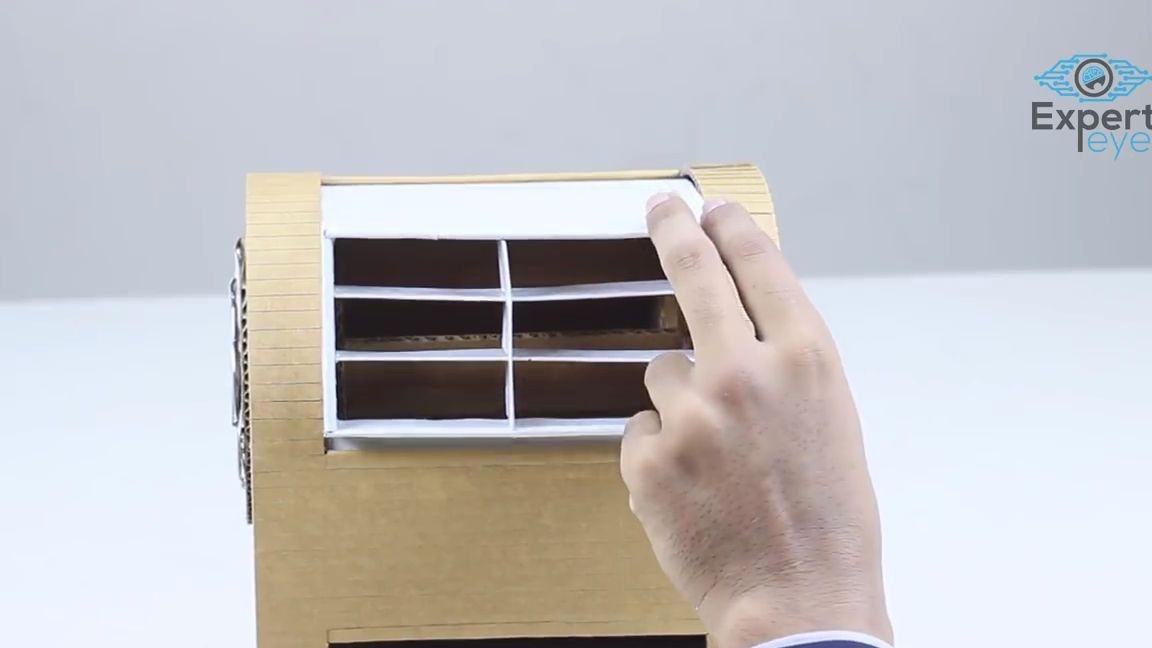
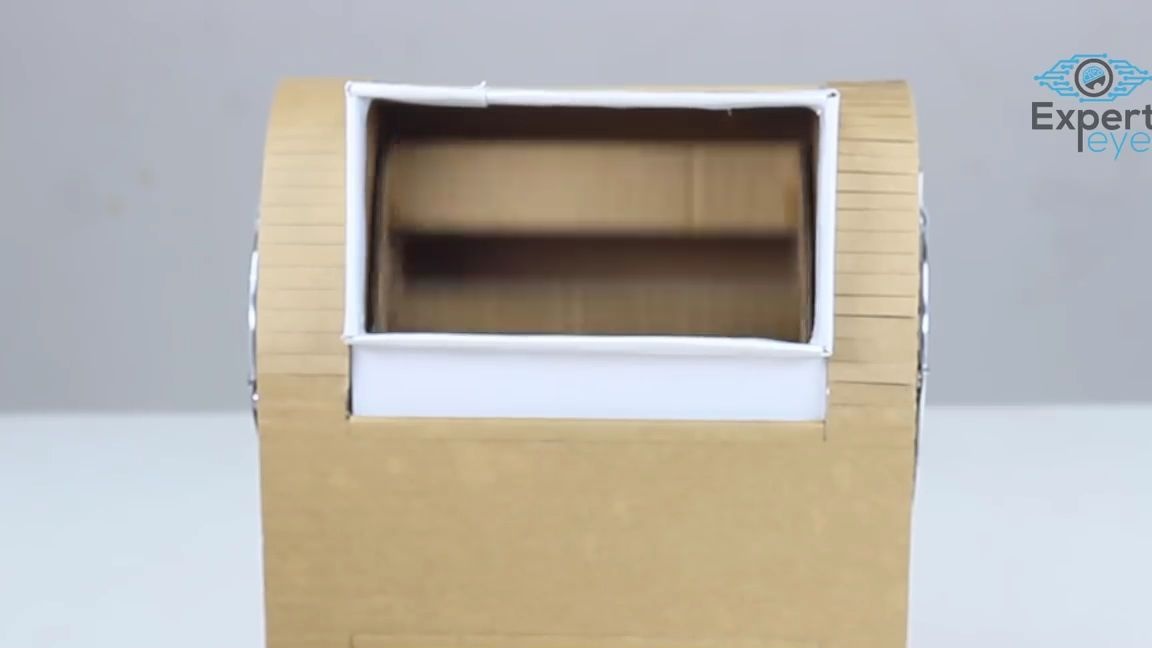
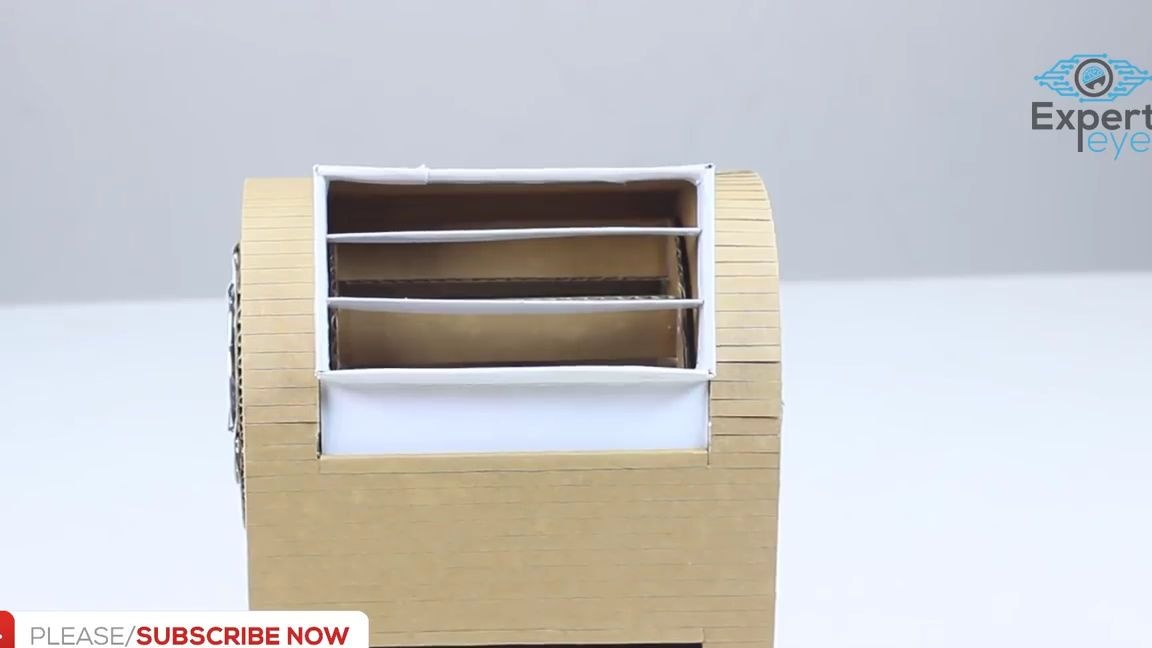
We cut out how many partitions from the foam and form a certain lattice, in the place where the air stream comes from. As you can see, this part of the structure can move up and down vertically:

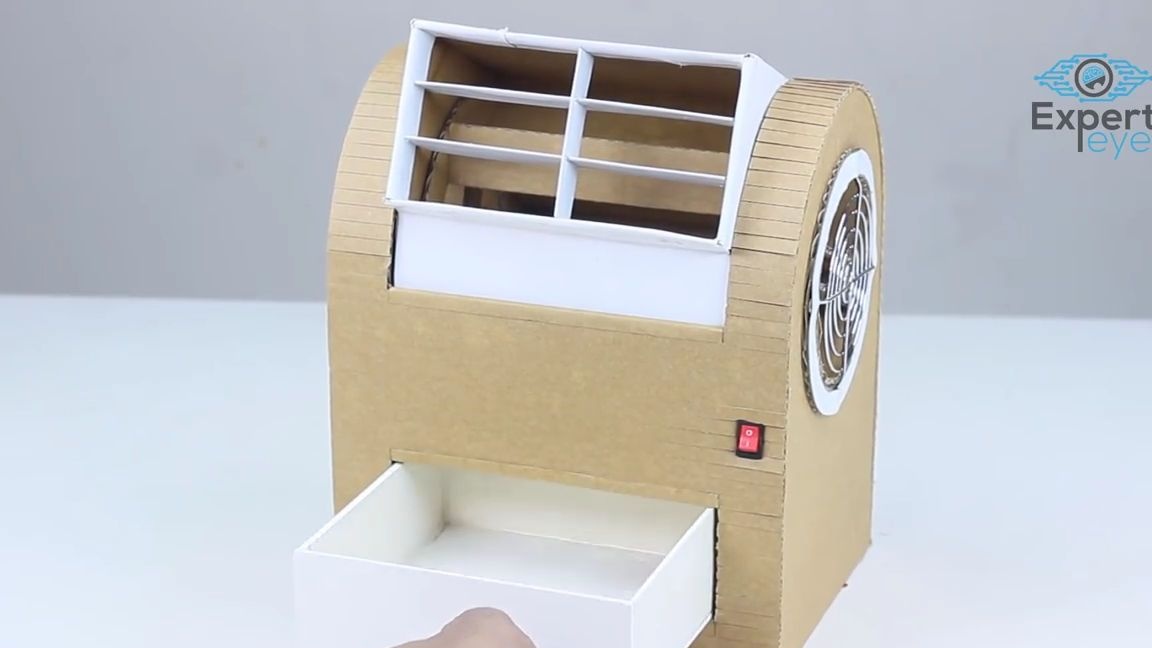
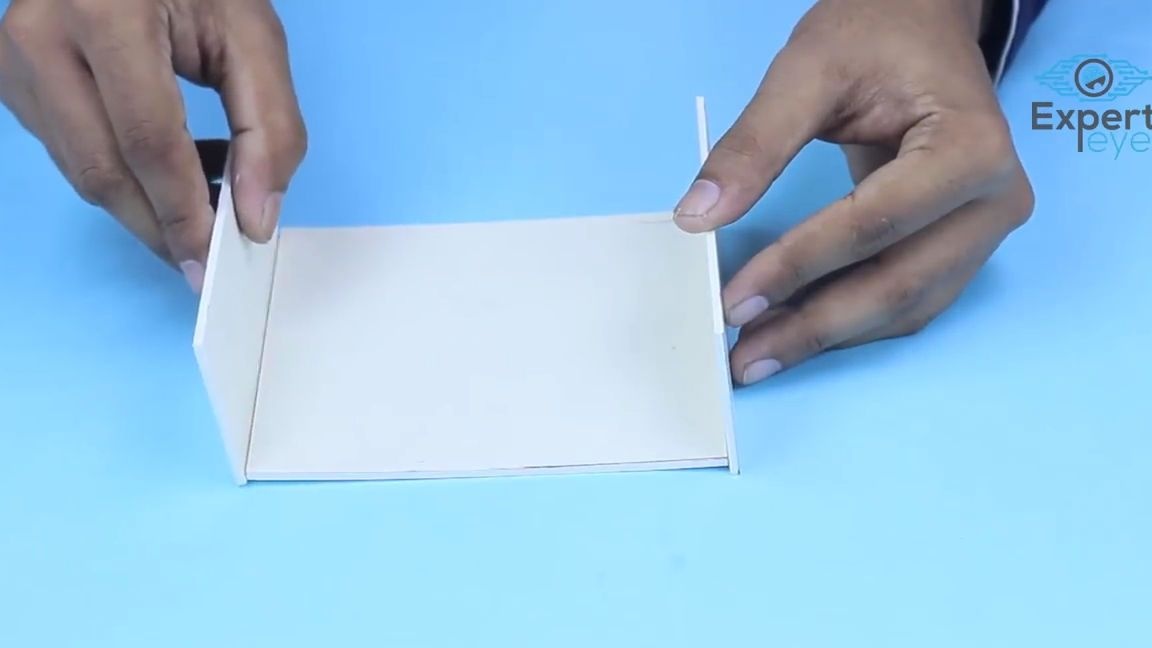
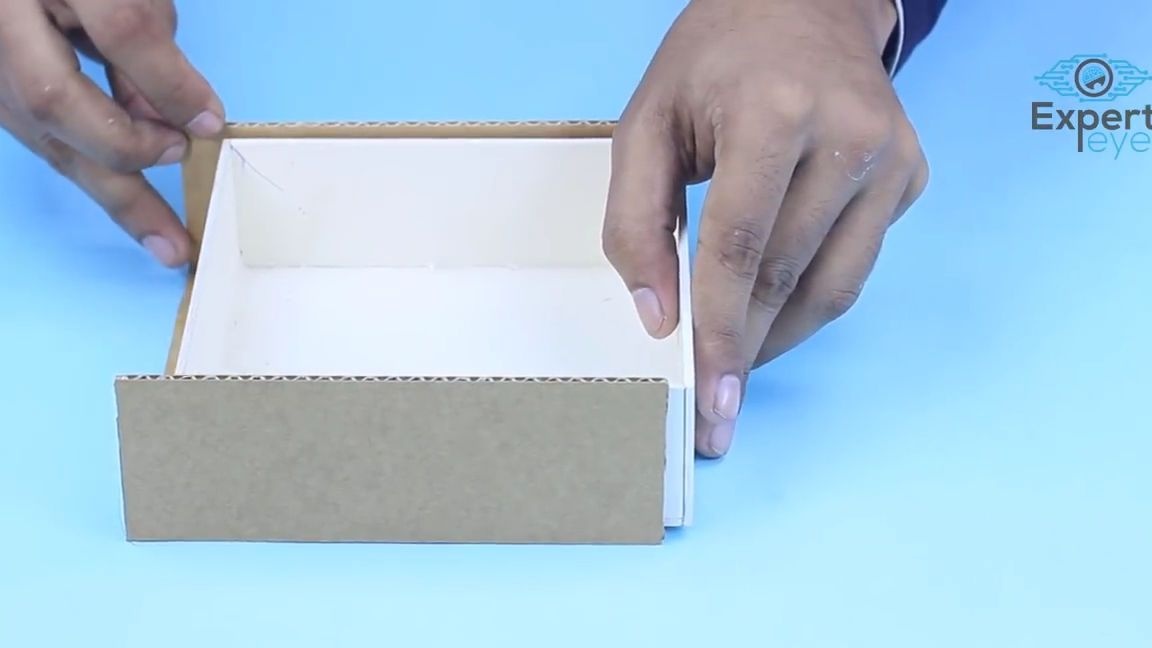
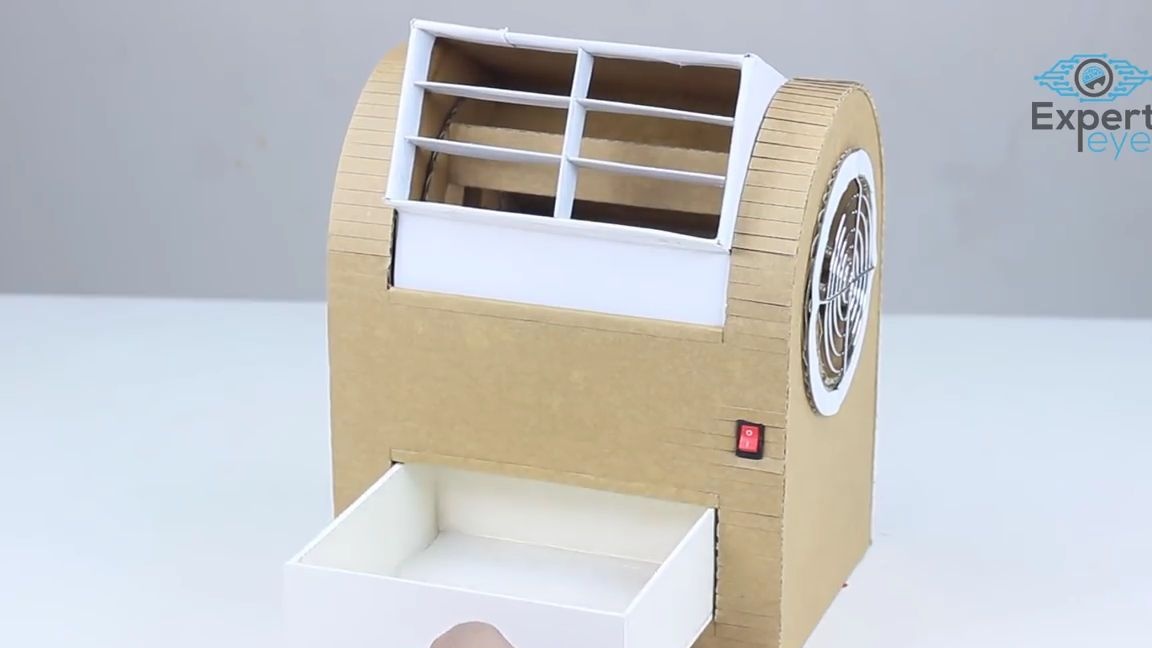
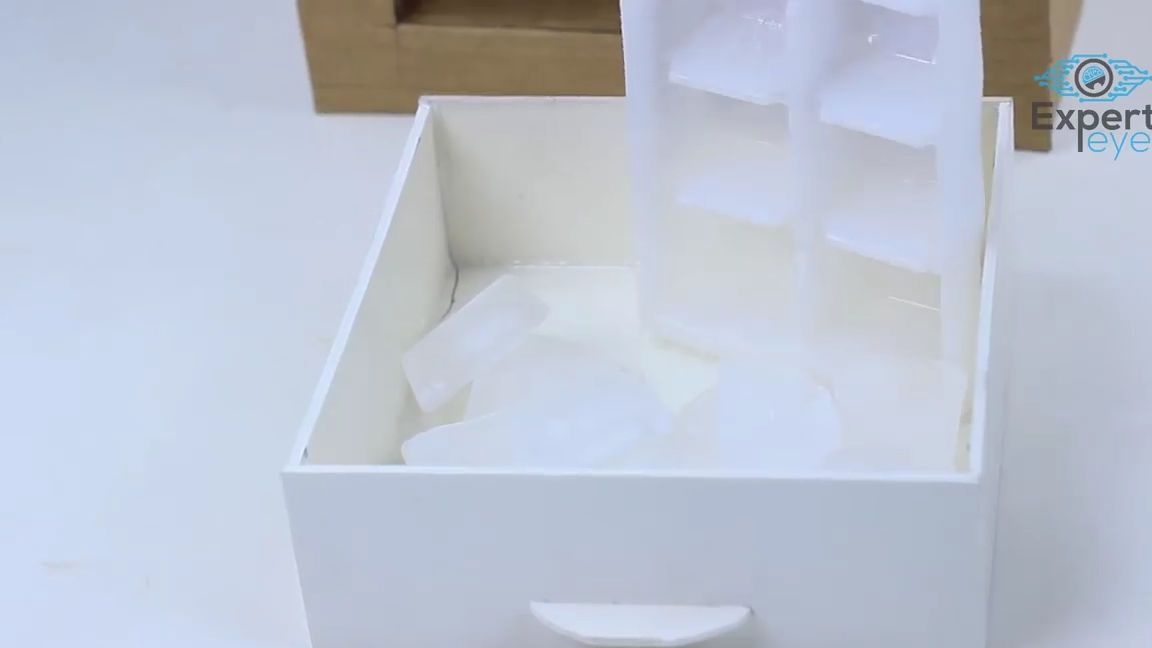
We glue a small box of thin foam. From corrugated cardboard, it is also necessary to glue the groove for this box.
We insert the foam plastic box into our groove and at the back we glue the back of the box groove:
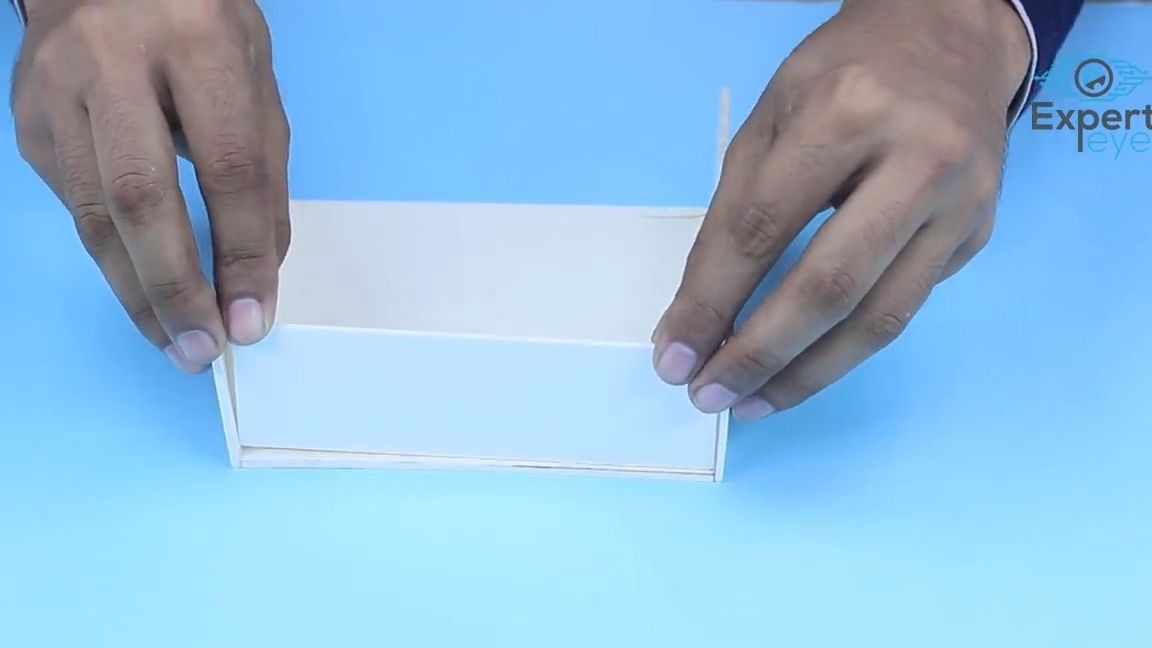
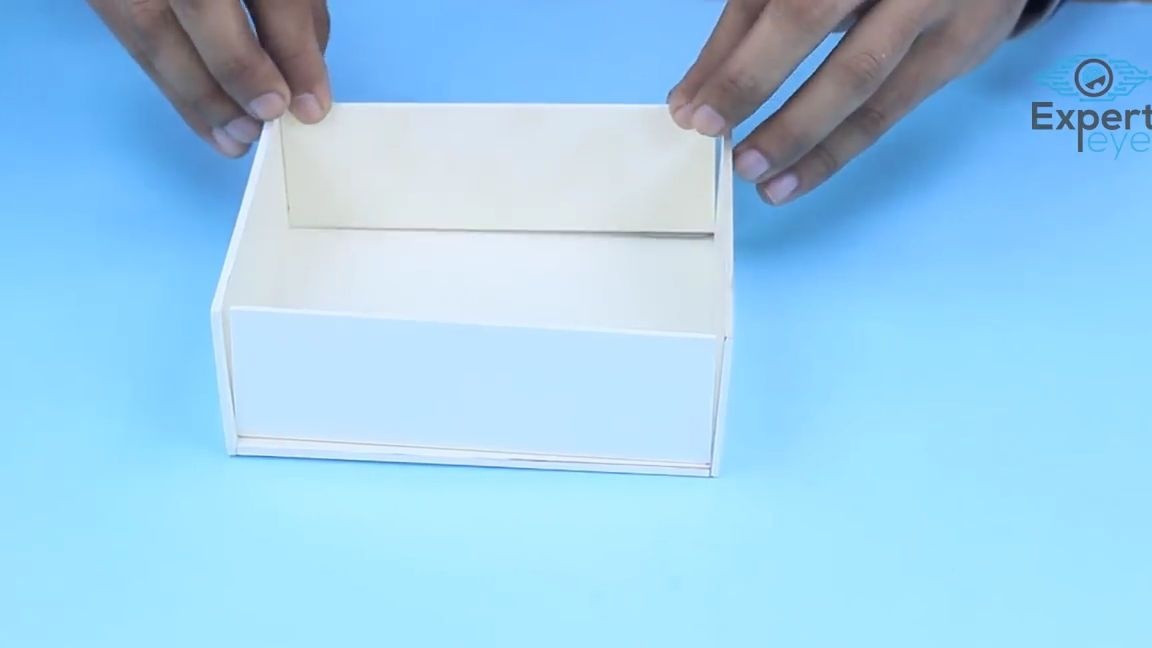
Set the groove for the box to the bottom of the structure as shown in the photo below:

We take the switch and insert it into the hole made under it, with the wires inside:
At the bottom of the structure, you need to glue the 18650 battery box, then you need to solder everything electronic components into a single simple electrical circuit. We solder the power source with one wire to the switch, and the second to one of the motor wires, from the motor we solder the remaining wire to the switch. It is necessary to solder so that when the circuit is turned on, the motor starts to work and it is also important to observe the power polarity so that the fan blows air from the main opening of the structure:
We close the lower part of the structure with a rectangular corrugated cardboard part:
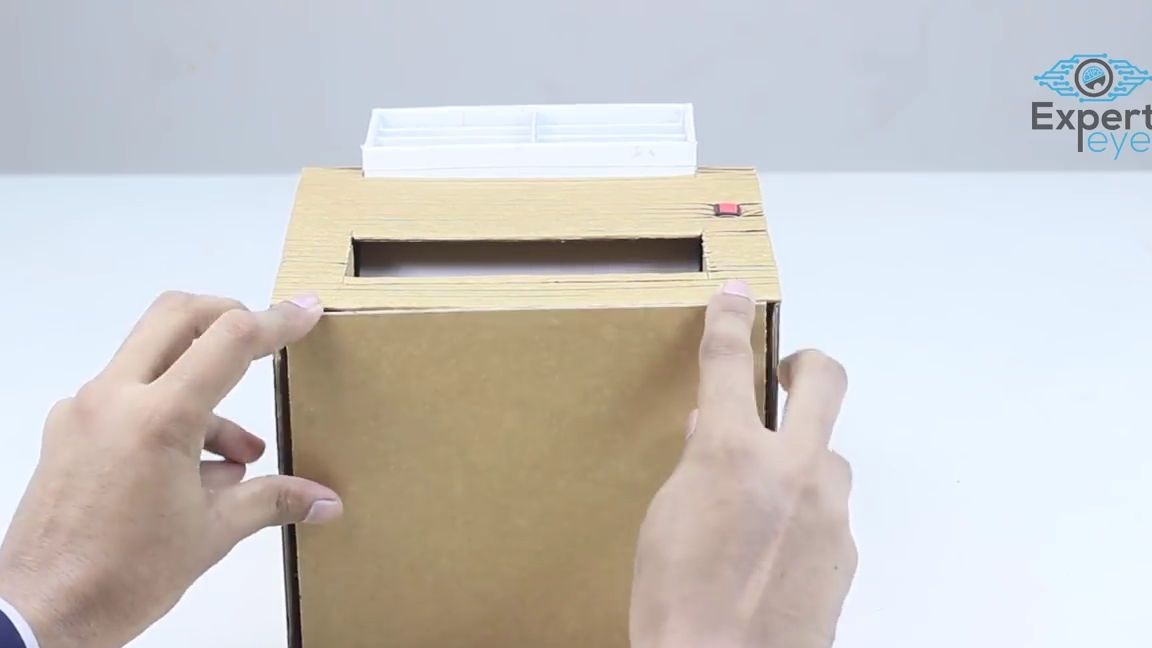
Insert the foam box into your groove:
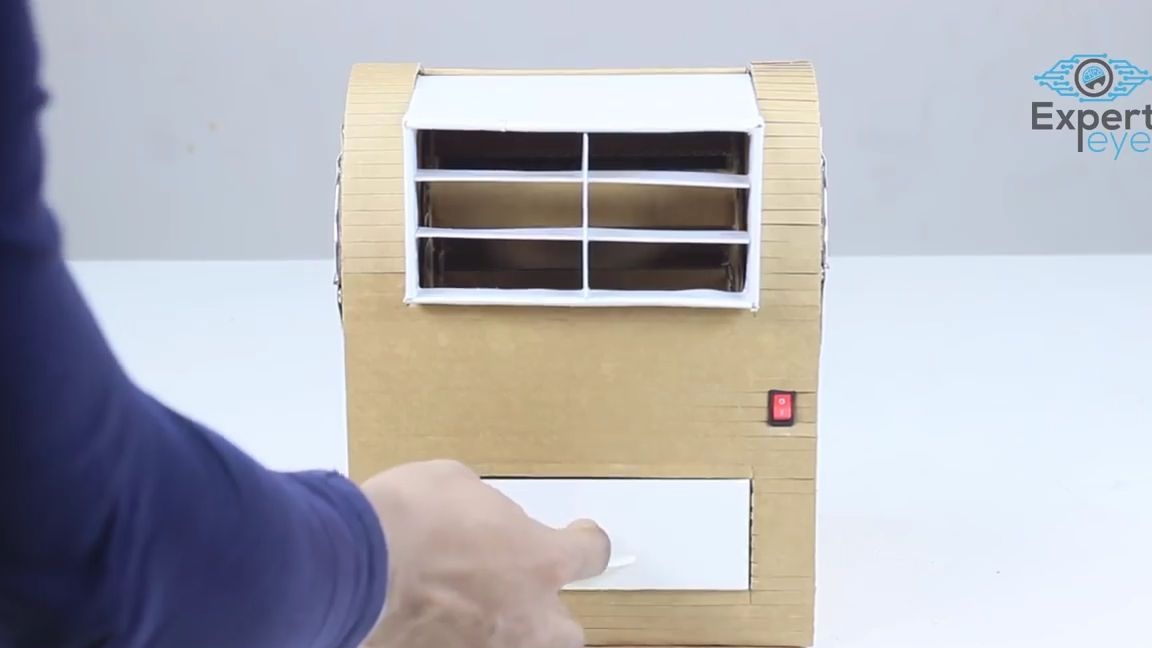
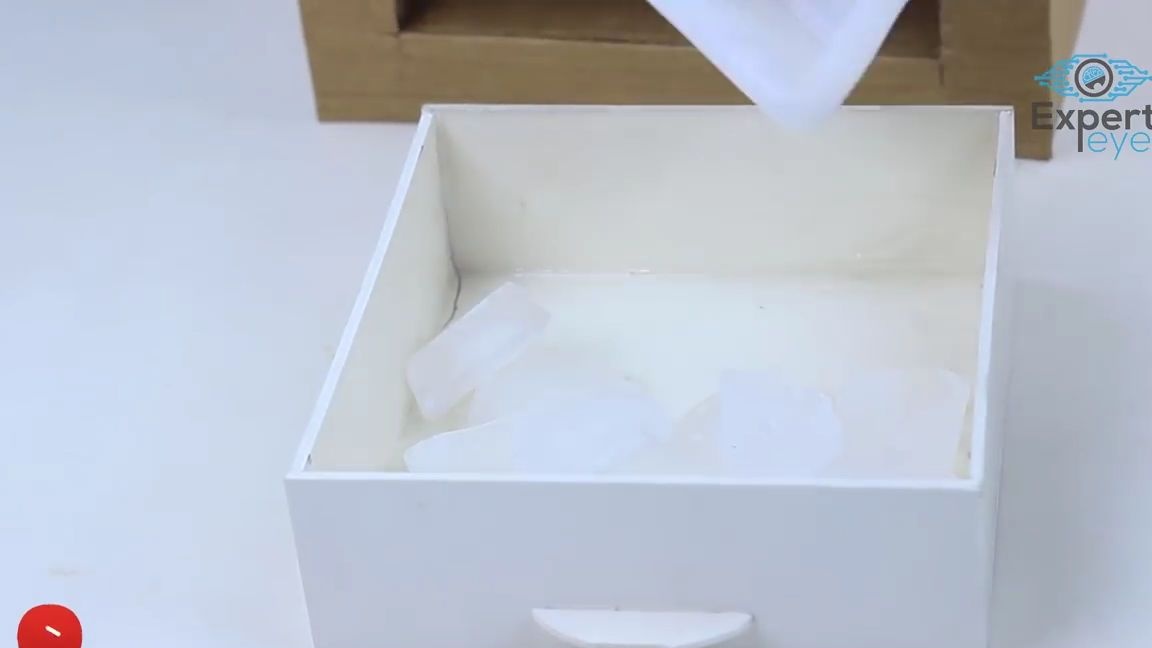
That's it! A simple but effective corrugated cardboard conditioner is ready and you just have to test it. To do this, take ordinary ice, put it in a foam box and put it back in place, then turn on the air conditioner itself and enjoy the coolness. The fan will drive air through the ice, thereby cooling it.After the ice has melted, just change it. By the way, the foam box should be hermetically glued so that the melted ice does not leak. I think many will like this homemade product.
Here is a video from the author with a detailed assembly and testing of this homemade product:
Well, thank you all for your attention and good luck in future projects!