
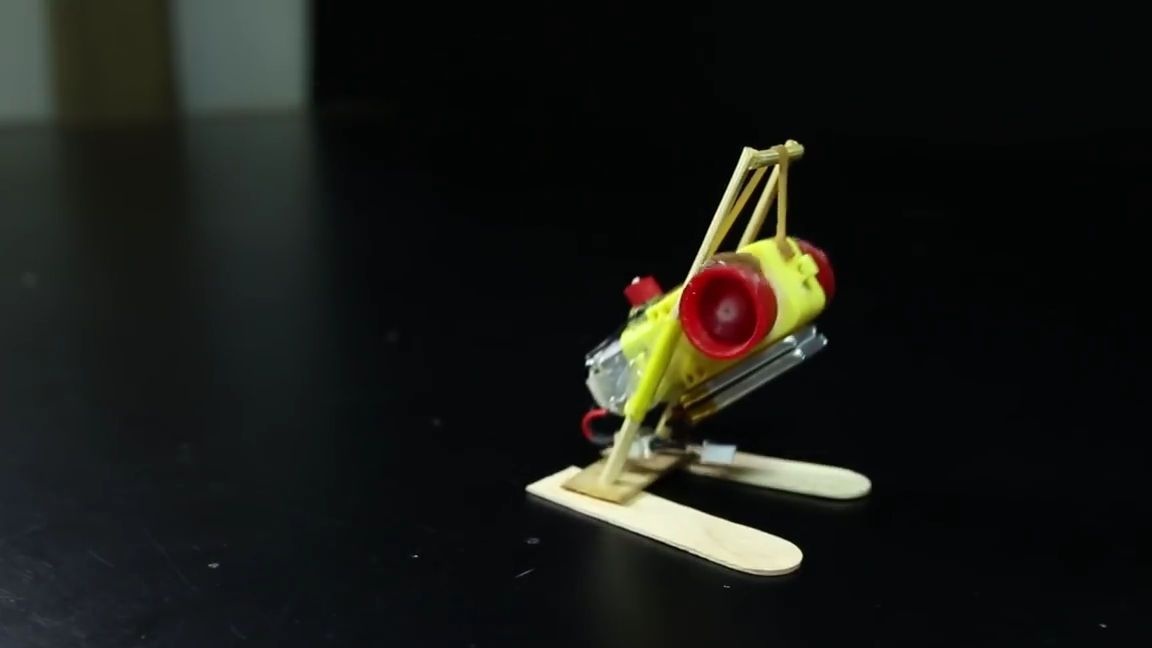
Good day to all dear friends! In today's article, I would like to share with you a very interesting idea of a simple homemade. This homemade product, although simple, but very funny and I think many will want to make a similar toy. By the way, this homemade product is ideal for beginners, but experienced craftsmen may also like it. In general, today we will consider how you can make a simple "robot" jumper from available materials do it yourself. This "robot" uses a very common gear motor, which many often use.
Well, let's not pull with a long introduction, let's go!
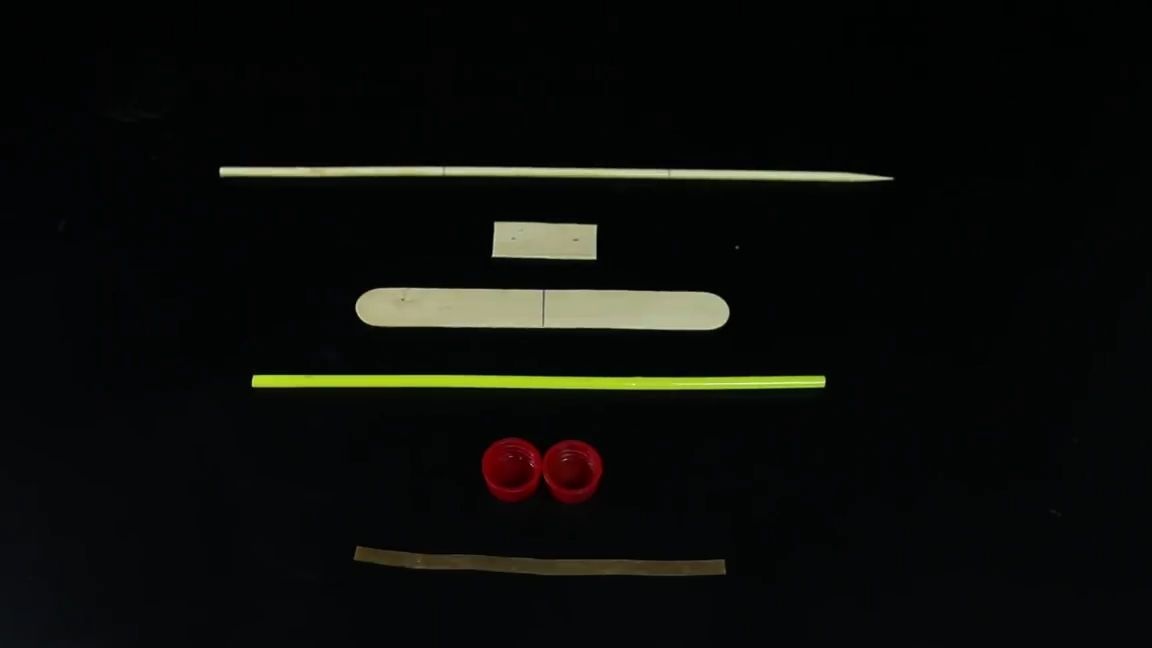
And so, for this homemade product you will need:
barbecue skewer
cocktail tubes
wooden spatula
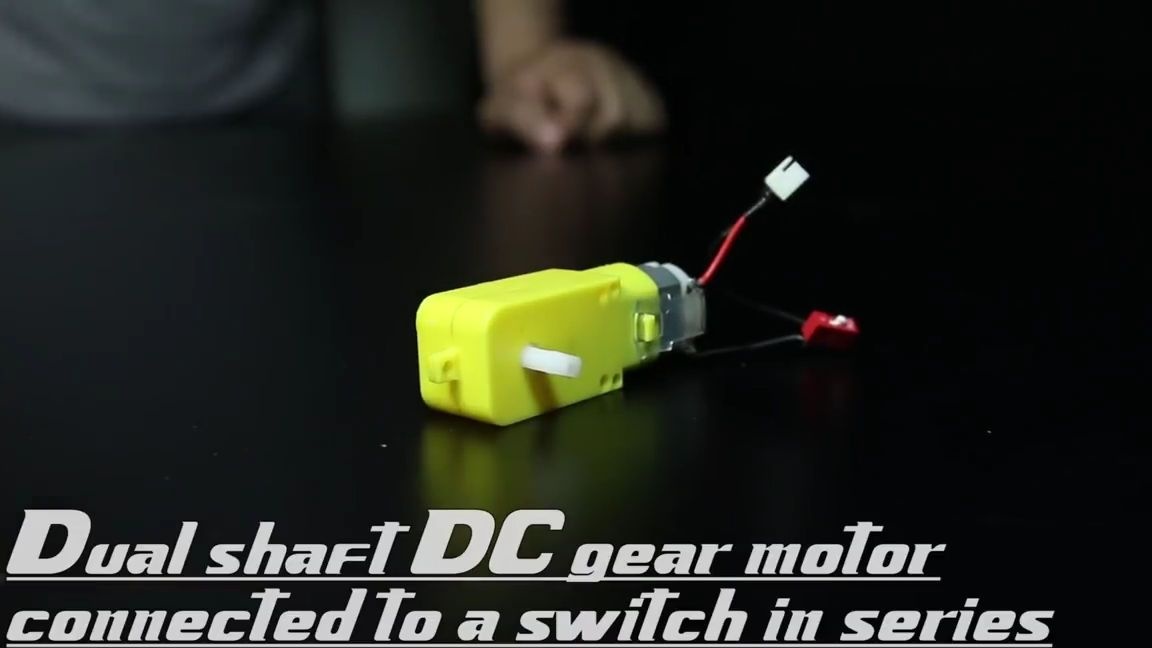
gear motor from China
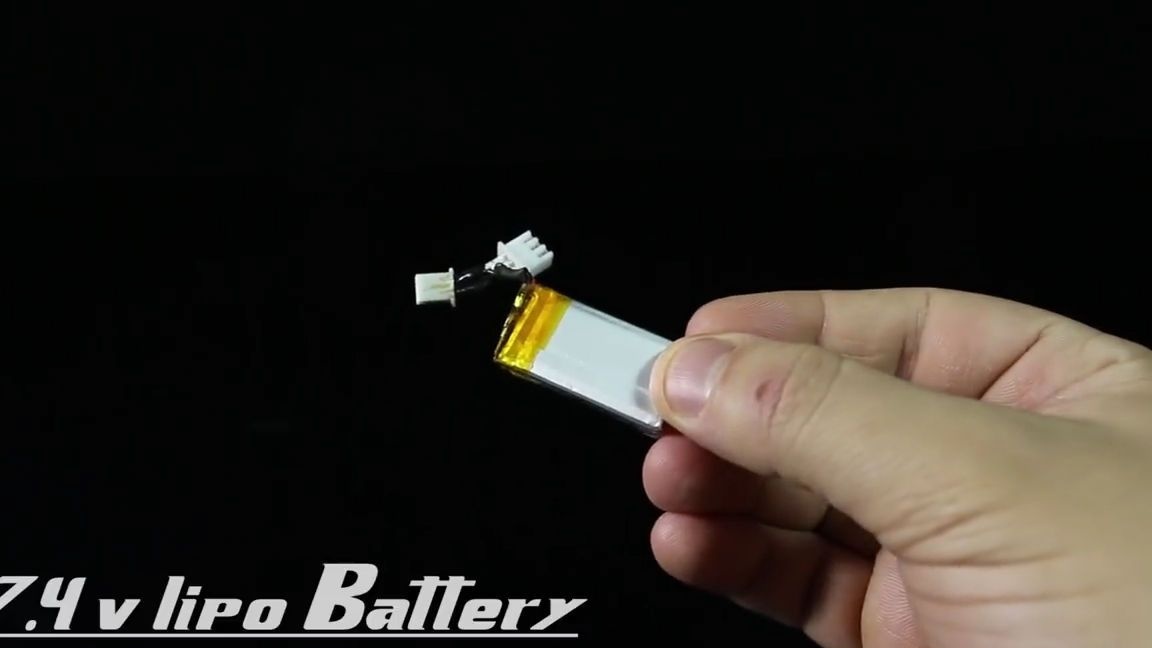
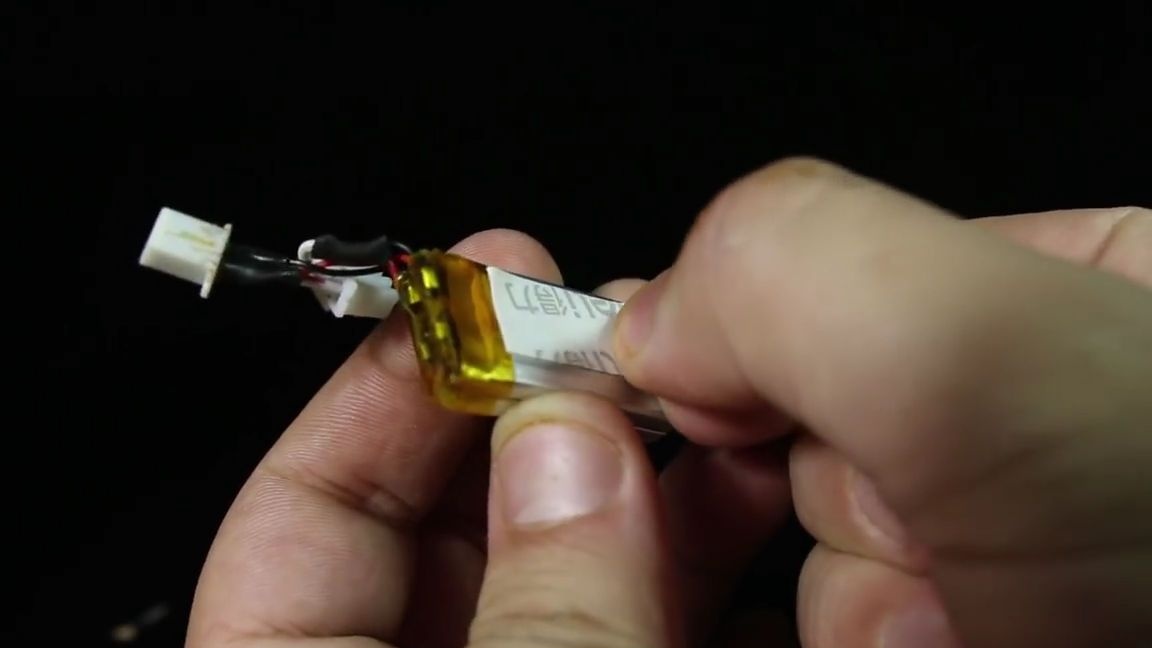
7.4 volt mini battery
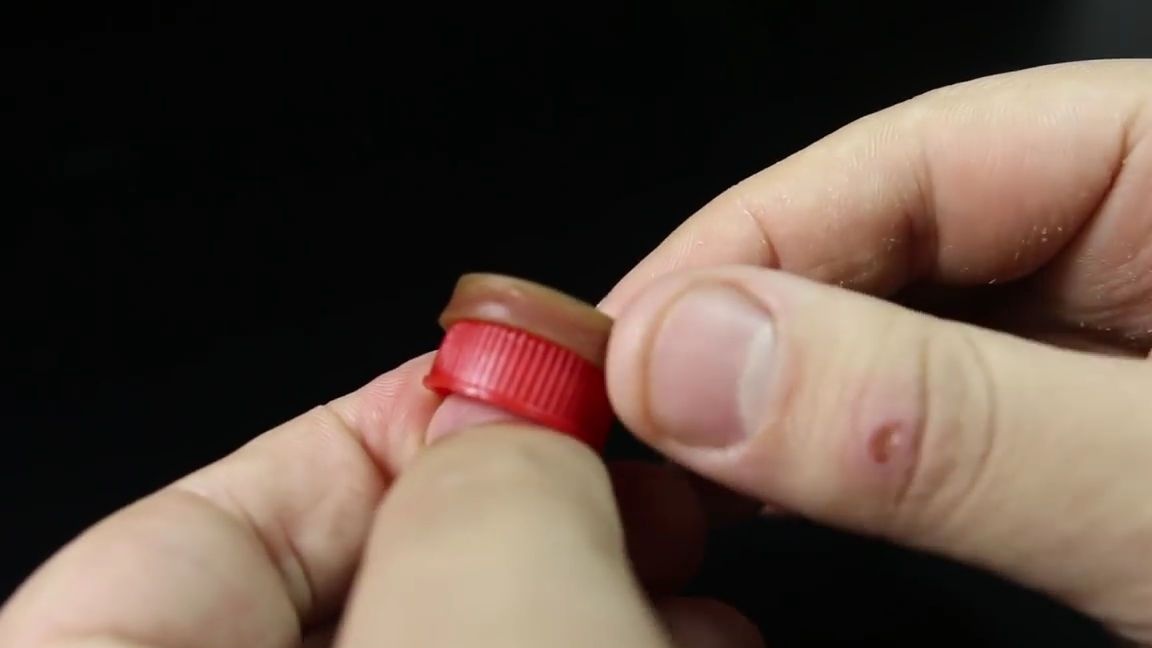
-Two caps from tubes with ketchups or minez
small gum
wire
-switch
battery connector
From the tools you will also need:
hotmelt
soldering iron
nippers
-scissors
screwdriver or electric drill
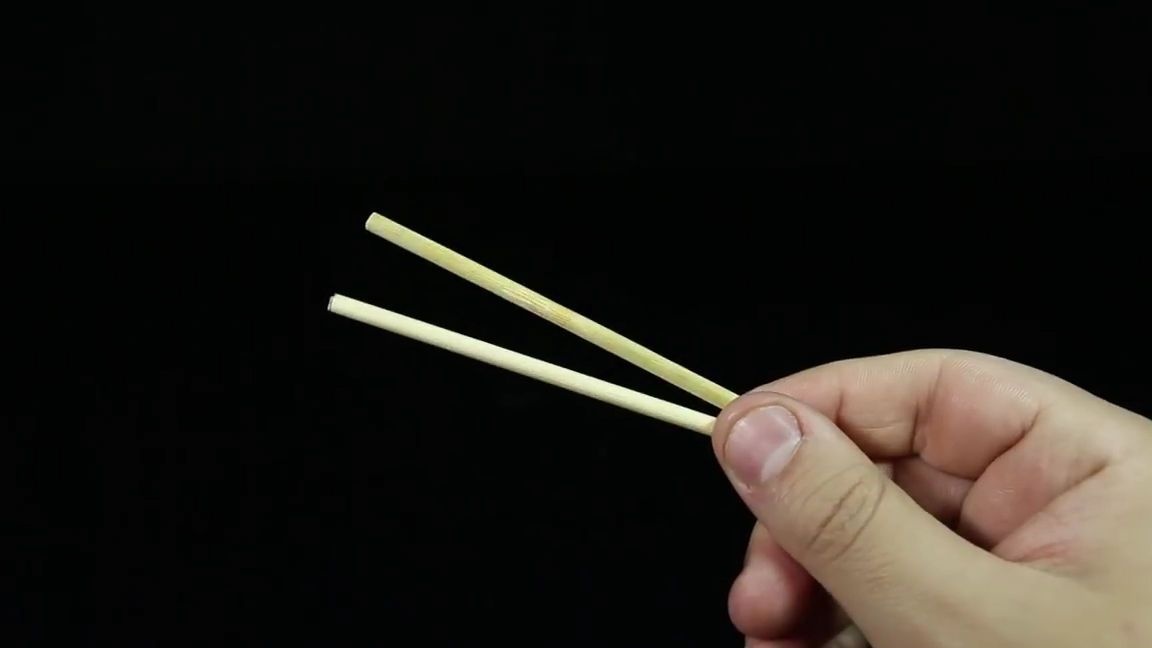
The first thing you need to do for a barbecue skewer is to cut two equal, but not very long pieces. This is best done with ordinary wire cutters:
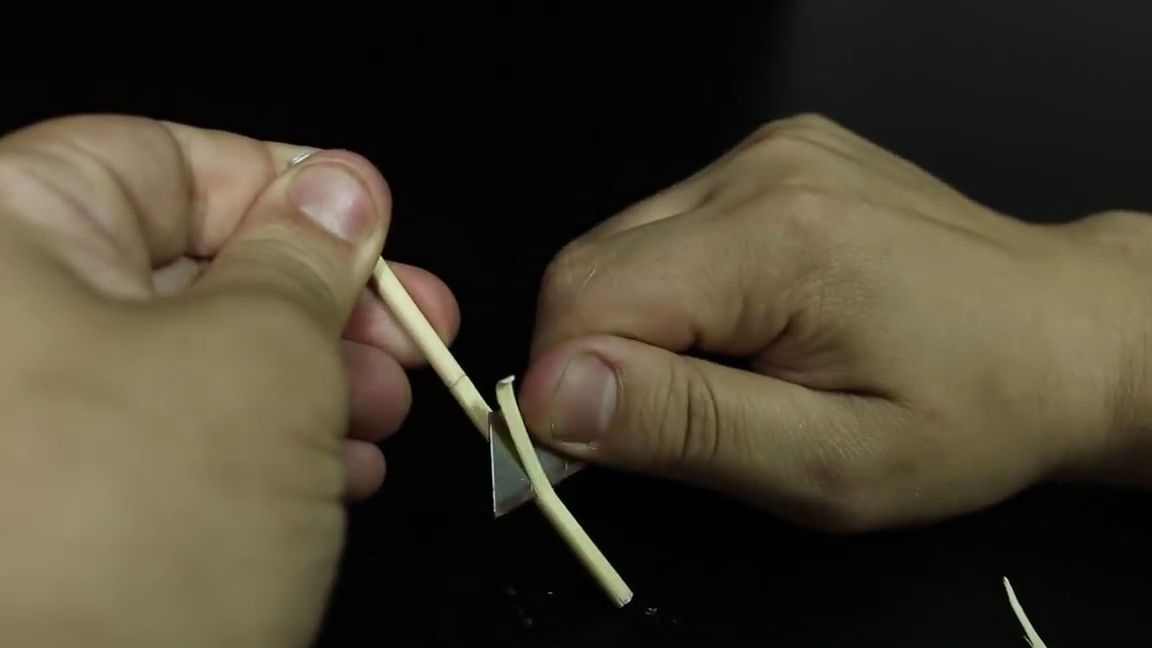

Now we take these two blanks and with the help of an office knife we grind them to half. How it should look can be seen in the photo below. It is necessary to grind very carefully, so as not to break the workpiece itself. So with all accuracy we take and grind:
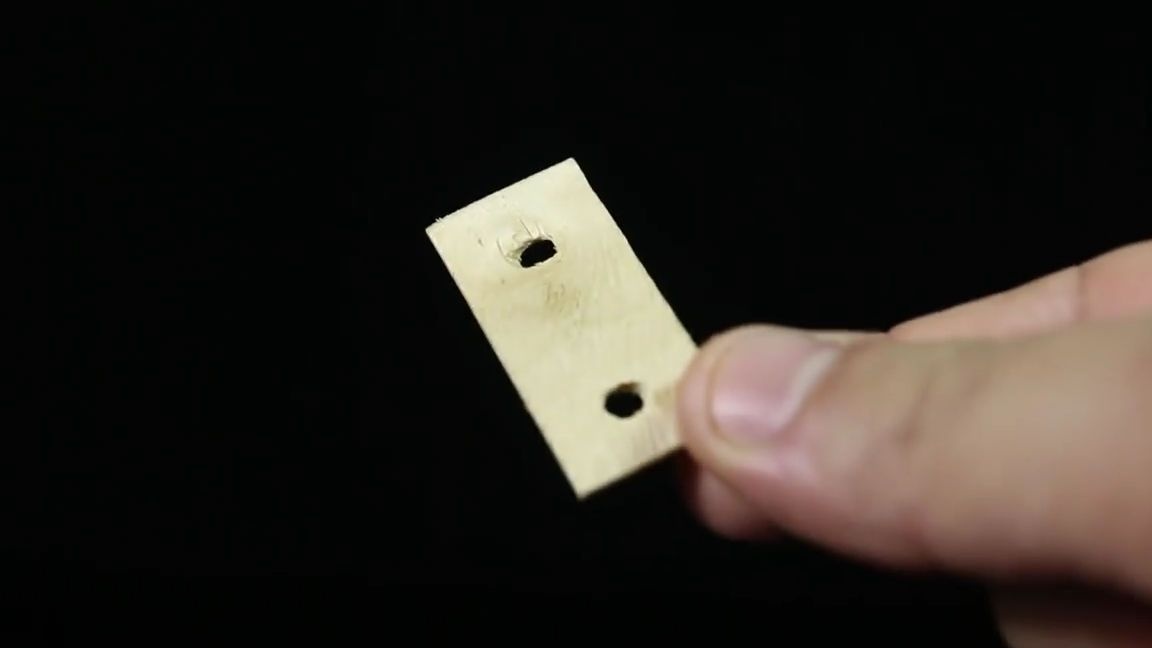
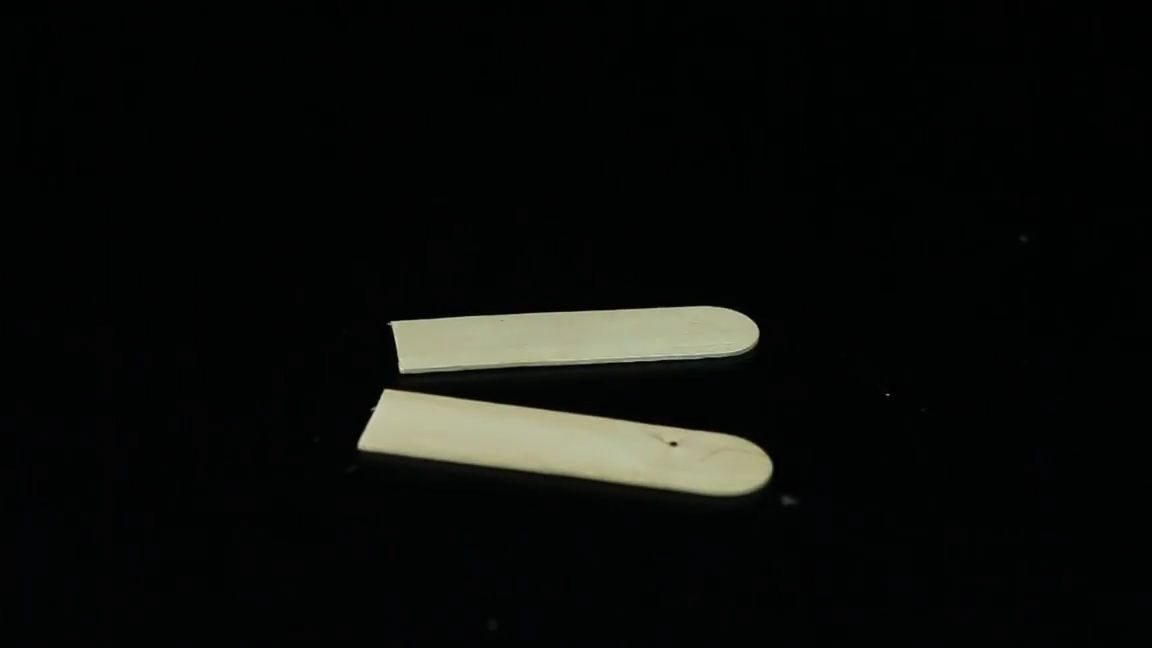
From a wooden spatula cut a small even piece, as in the photo below. Then, using a screwdriver or a mini eclectic drill, we drill two through holes on the sides of the part. Drilling is also necessary very carefully so that the part does not break:
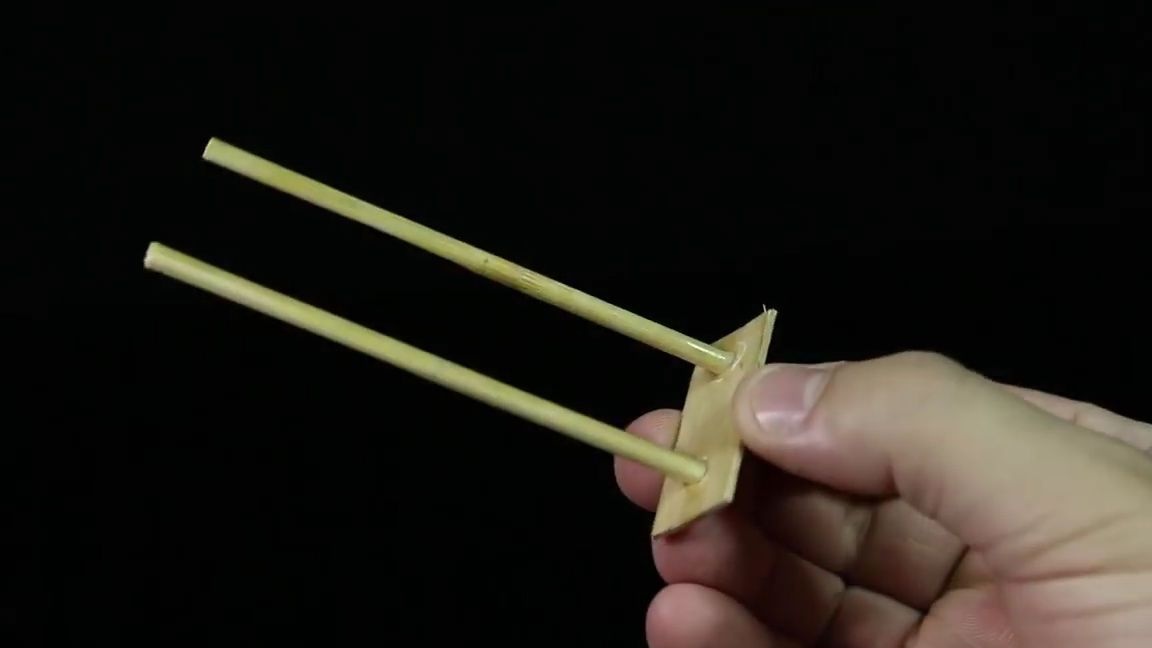
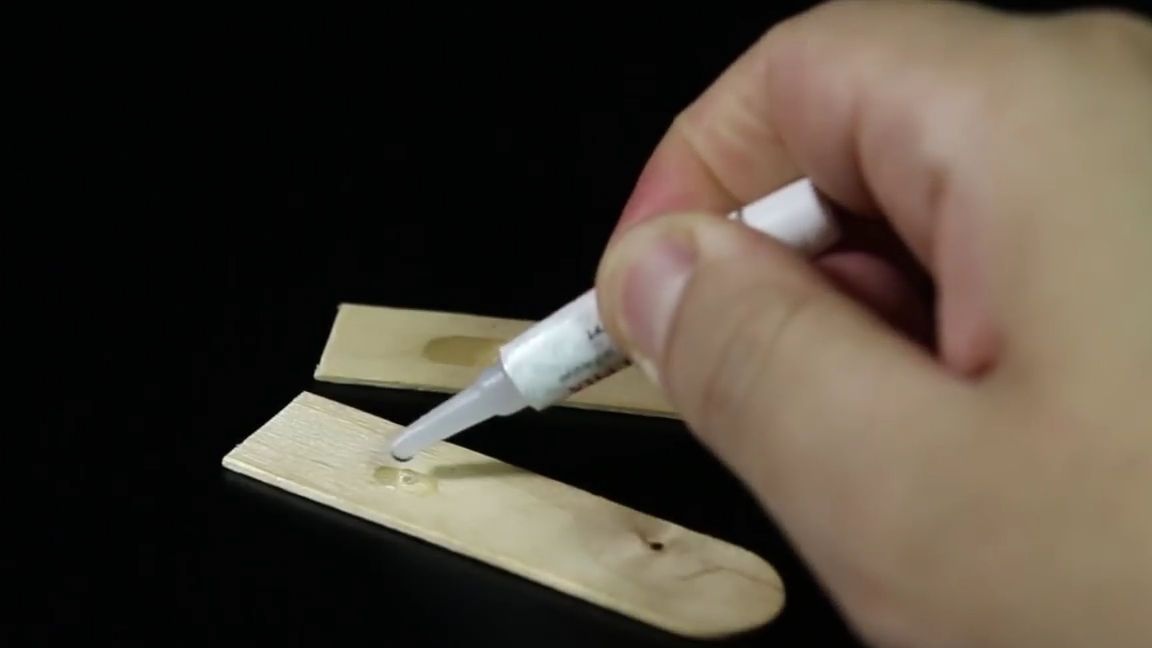
Using super glue, you need to glue the pieces of the barbecue skewers and the rectangular part from the spatula, which was done earlier. To do this, insert the pieces of skewers at a slight angle into the holes of the part from the spatula and glue.You can replace what you insert into the holes of the part, it is necessary that side of the segment of the skewer, which is not sharpened:
Take another wooden spatula and cut it exactly in half. Then we glue the previous workpiece to both parts. You can stick it with super glue and with hot glue, I think you can even use PVA glue.
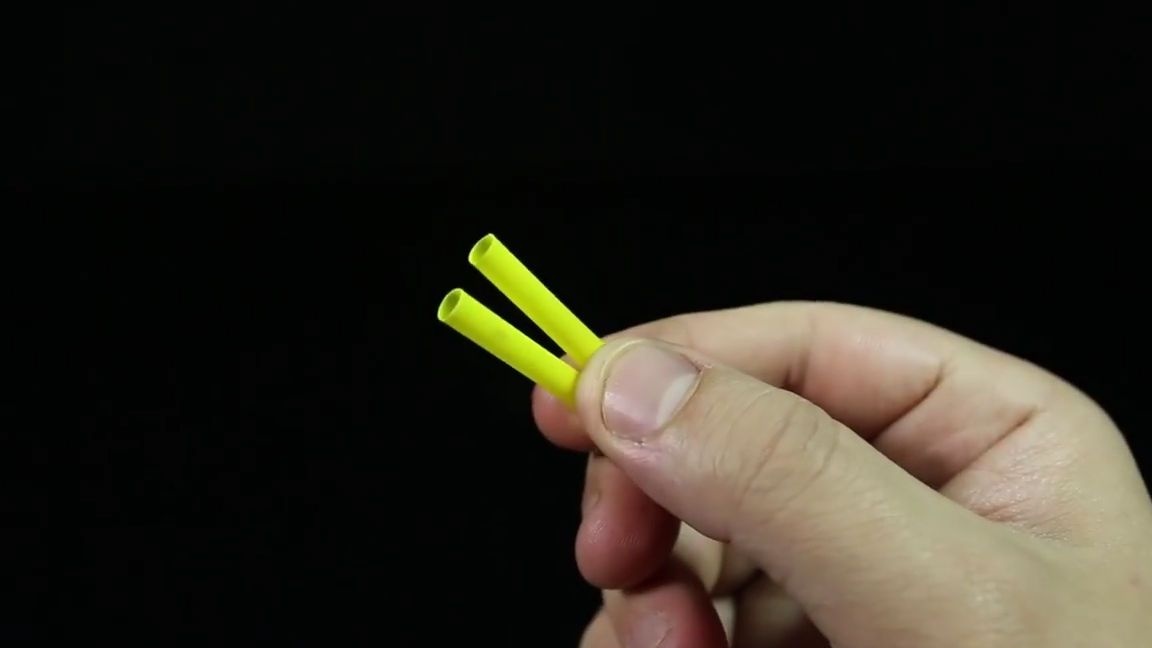
Then cut two small pieces of equal length from the cocktail tube. They need to be put on one piece for each skewer. In general, as shown in the photo below:
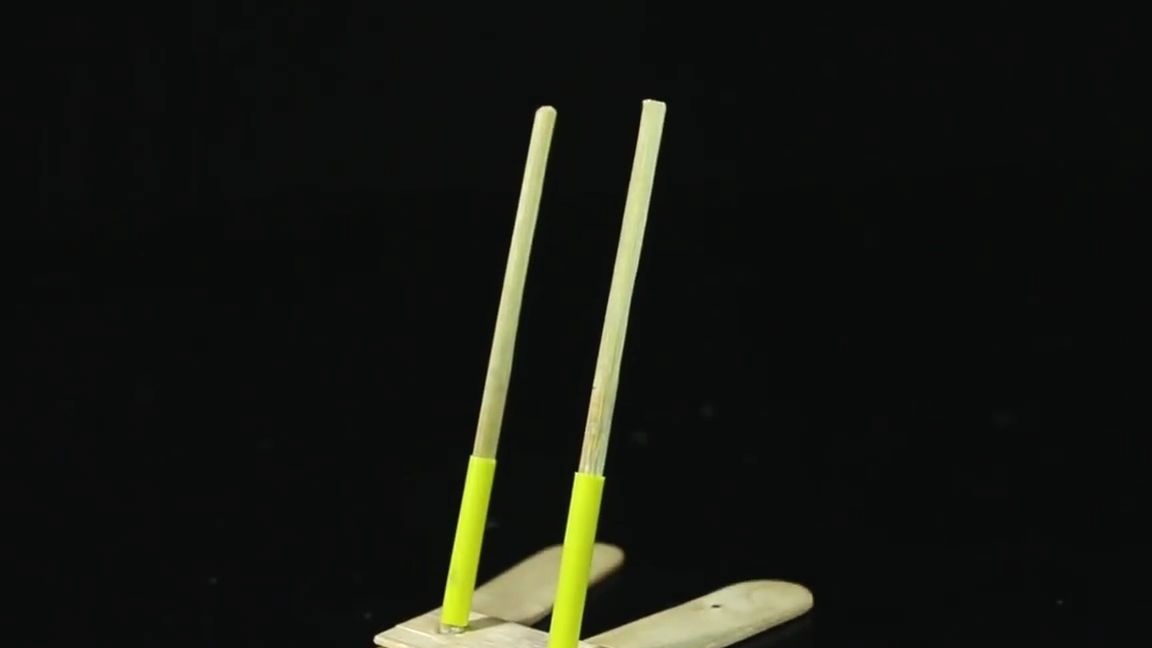
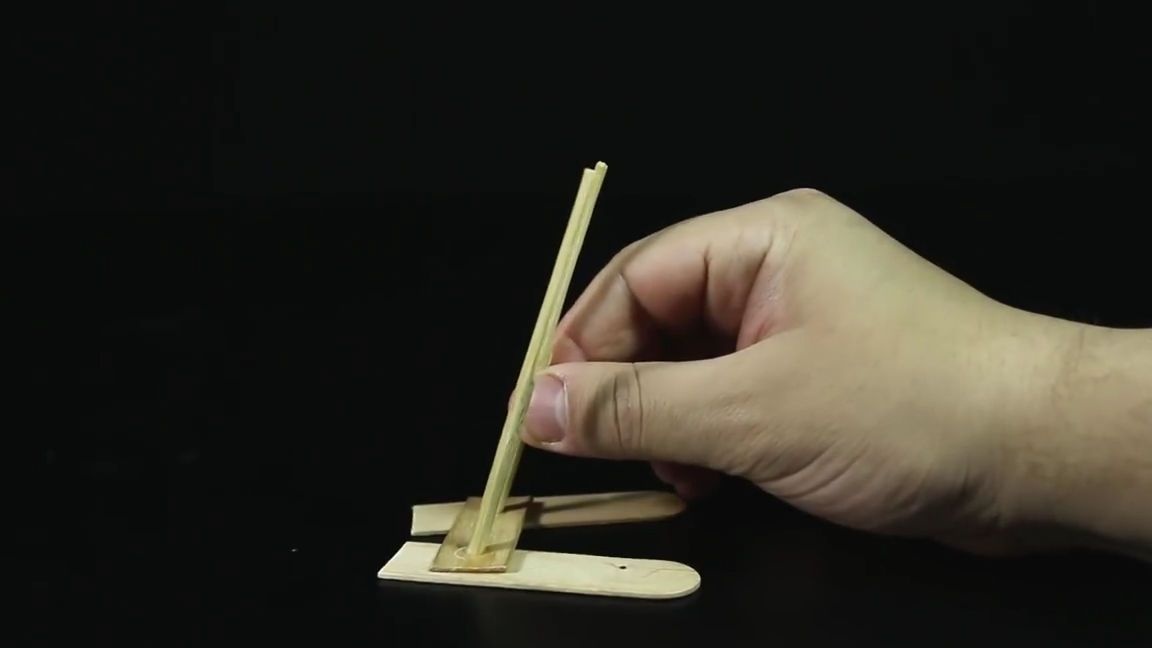
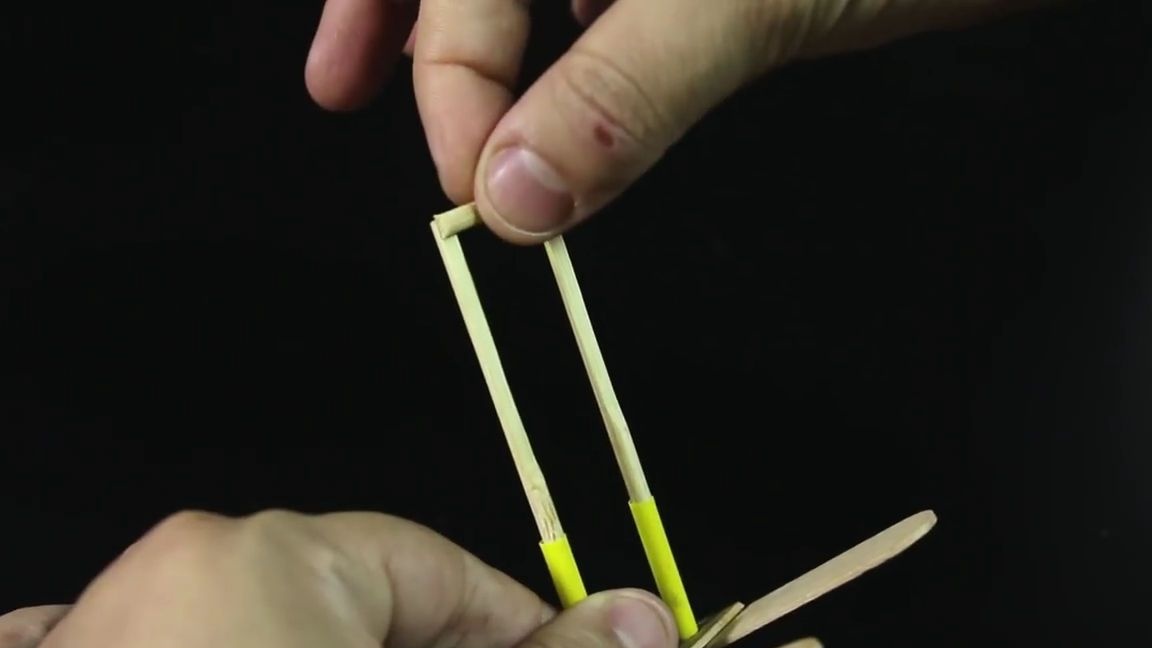
We connect the upper ends of the skewers together with the help of another small piece of the skewer from the barbecue. Gluing naturally with super glue:
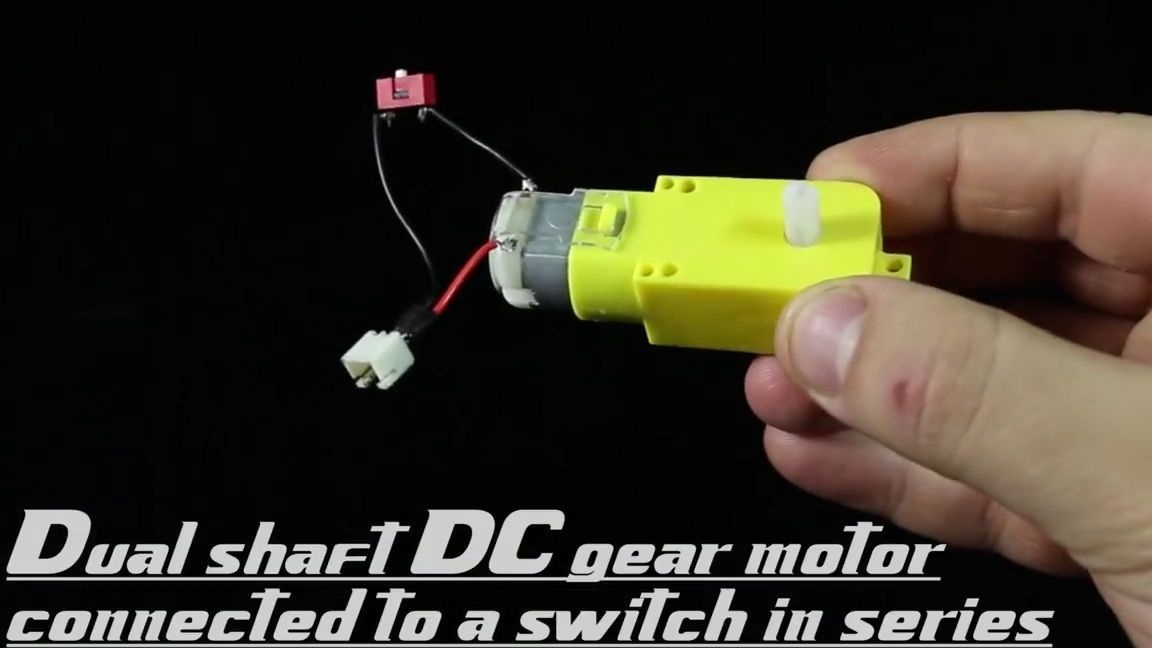
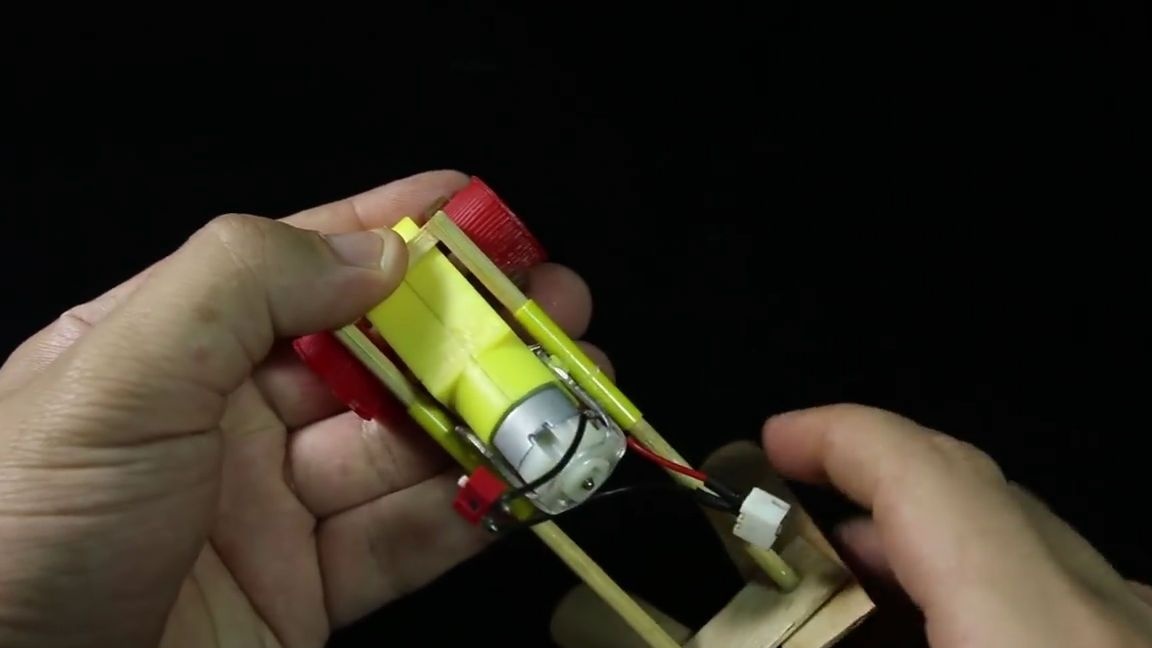
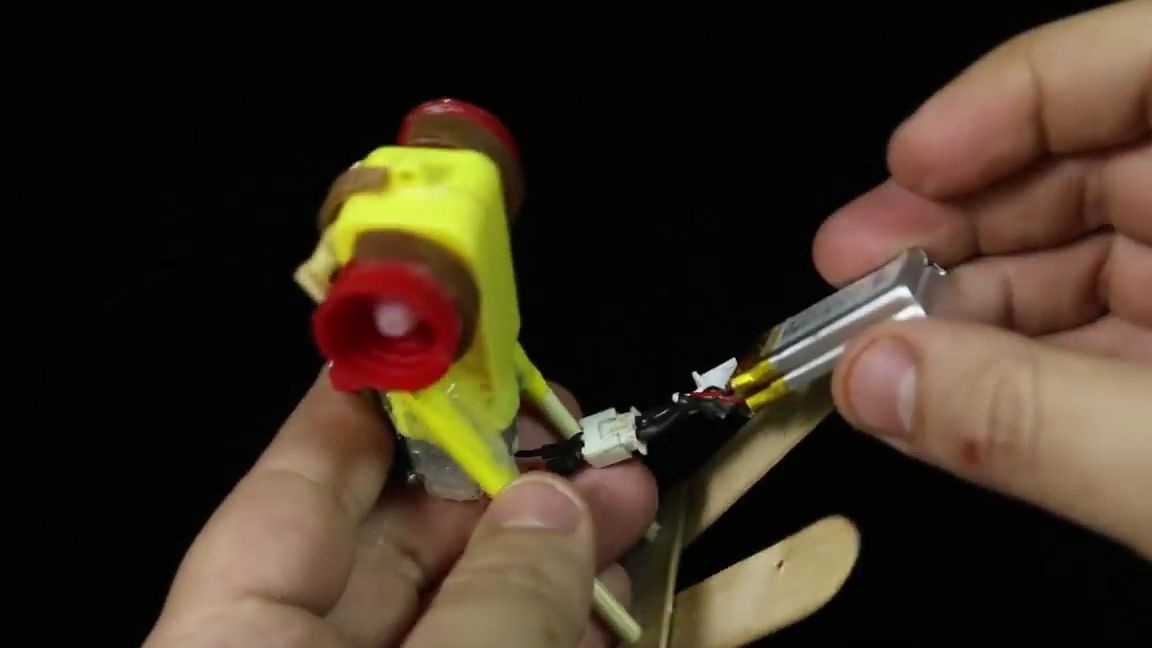
Now you need to take the motor gearbox, by the way, I often use it myself in my various projects and homemade products, it’s really worth it, so I advise you to buy it, besides it doesn’t cost very much, so go for it.
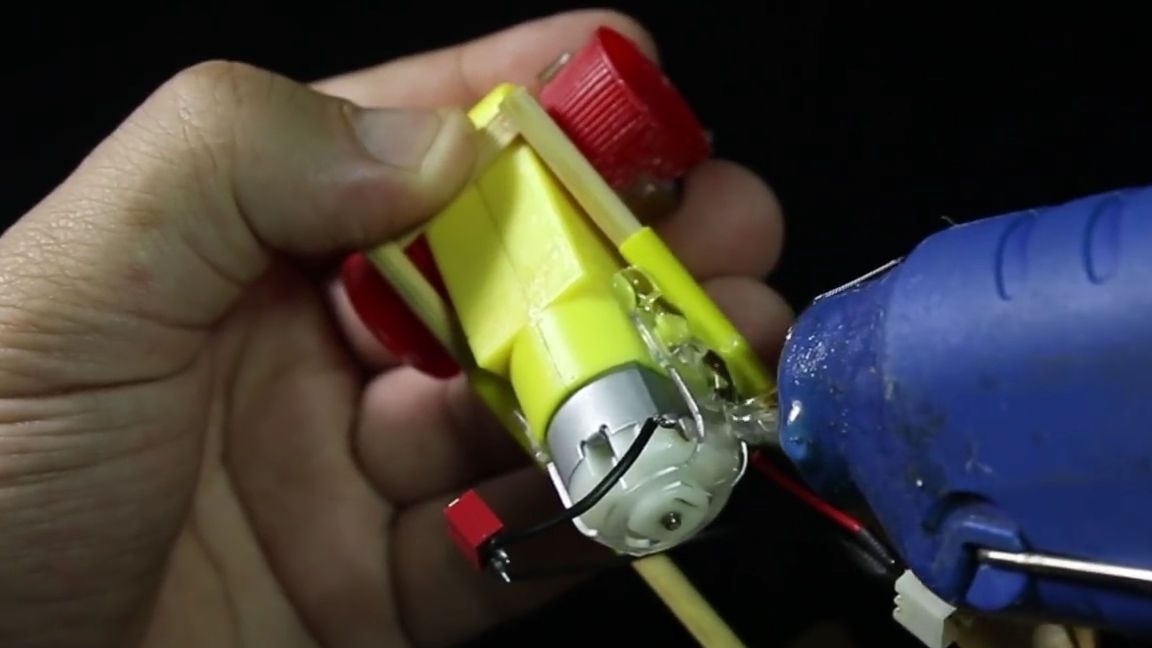
It is necessary to solder the mini-switch and the connector for the battery that you are going to use to the motor. There is nothing complicated in soldering these components, the circuit is simple. It should turn out so that when you connect the battery and turn on the entire circuit using the switch, the gear motor should start to work. If so, then everything is done correctly and you can continue on. By the way, the junction of the elements and the place of soldering must be insulated using heat shrinkage, electrical tape or, at worst, with adhesive tape. By the way, adhesive tape has very good insulating qualities.
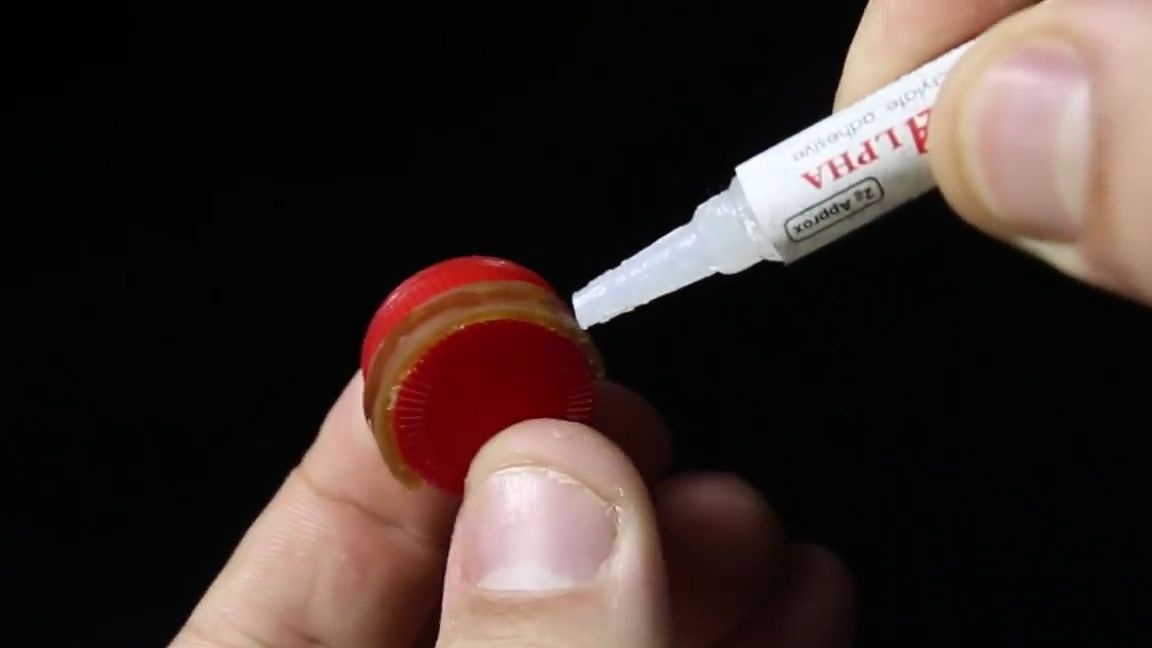
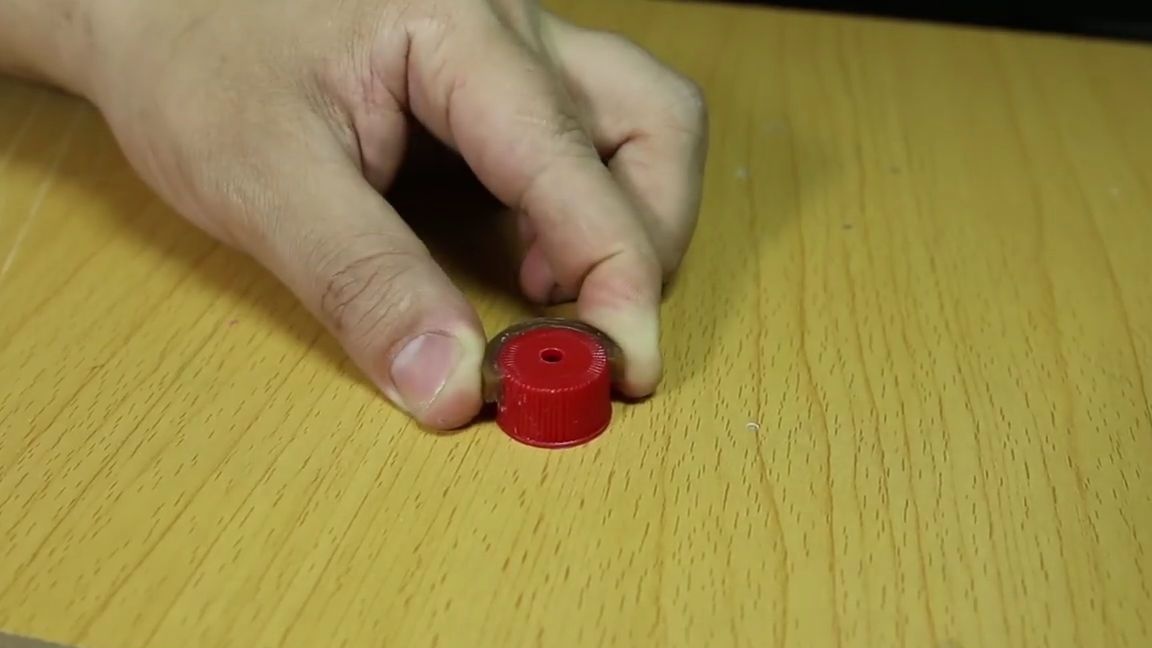
Then we take lids from ketchup, put a little super glue on it and glue a small piece of gum. Then, on top of the gum that was glued earlier, apply a little more super glue and glue another same piece of gum.
All the same must be done with the second cover. In total, two blanks should turn out:
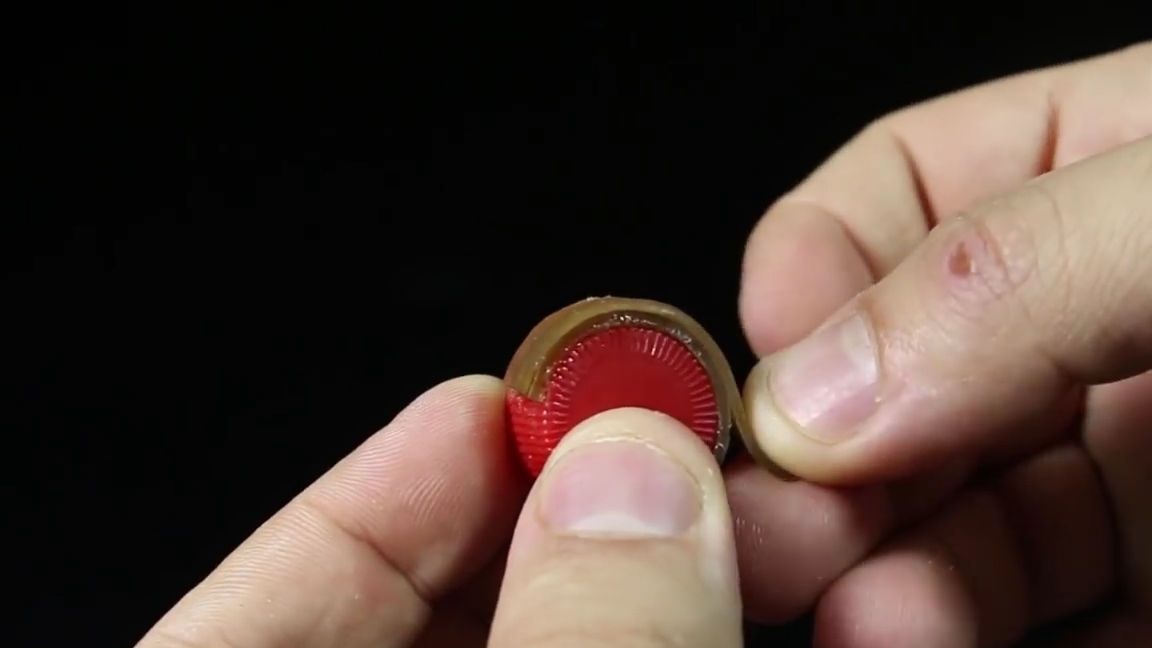
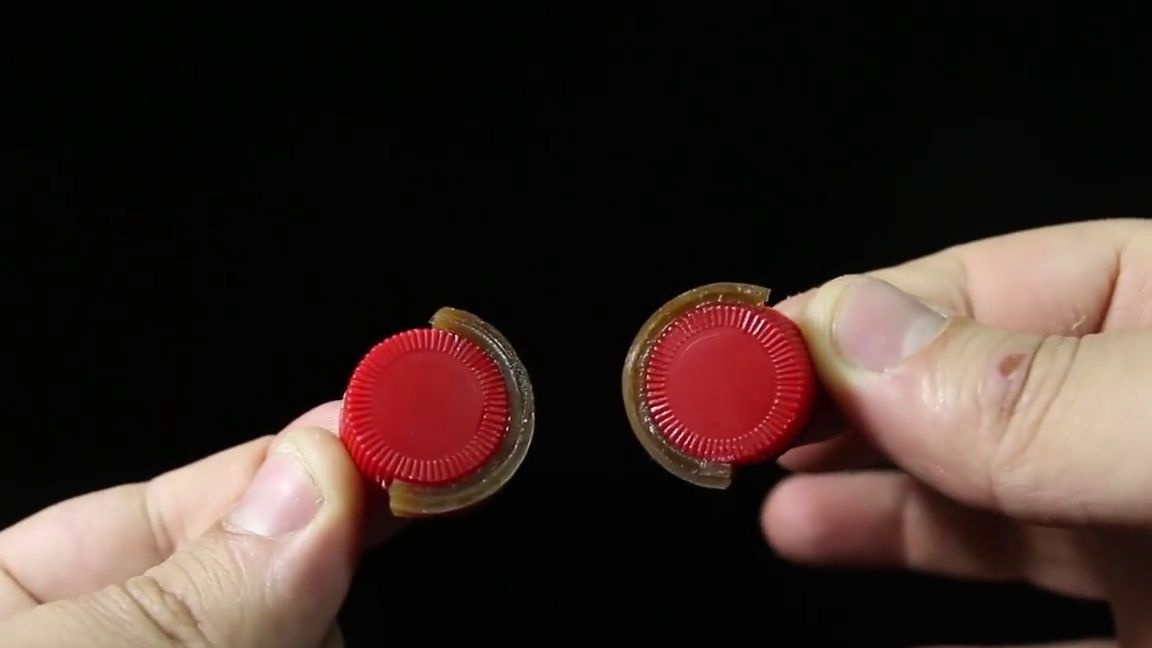
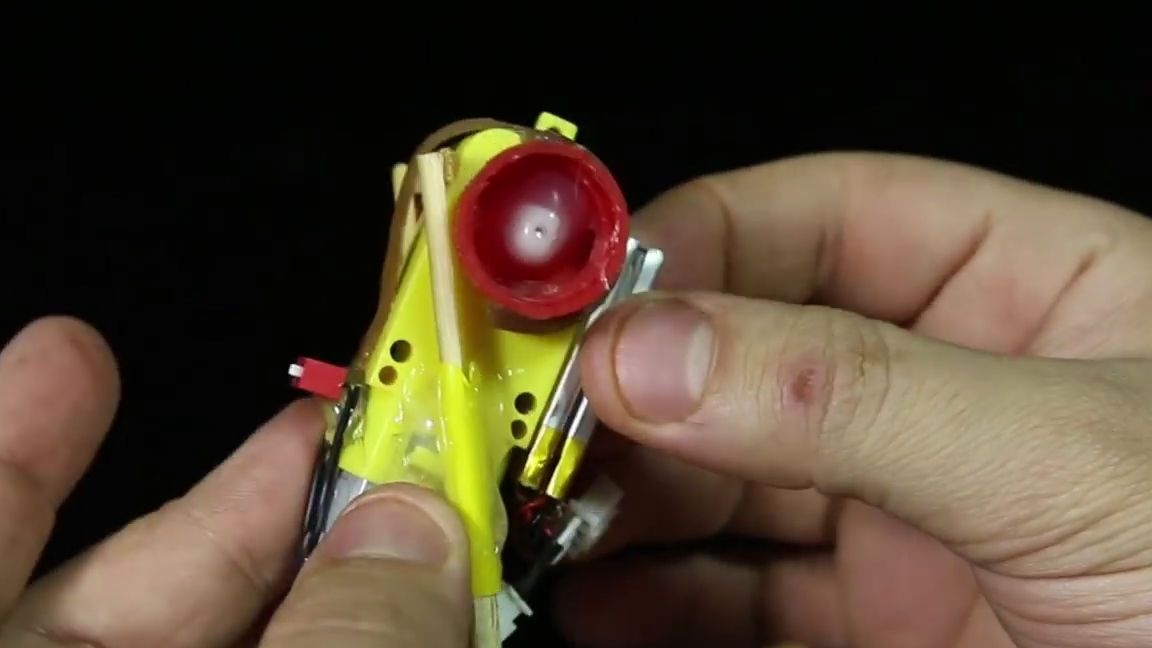
In the center of the workpieces that were previously made, it is necessary to drill one through hole:
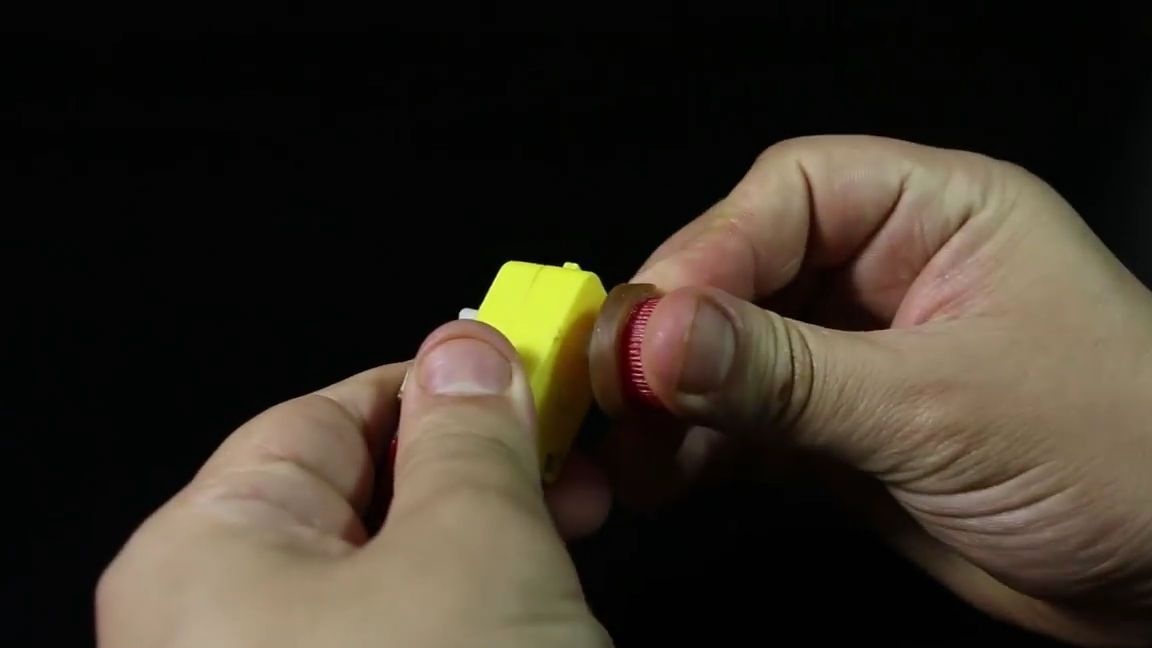
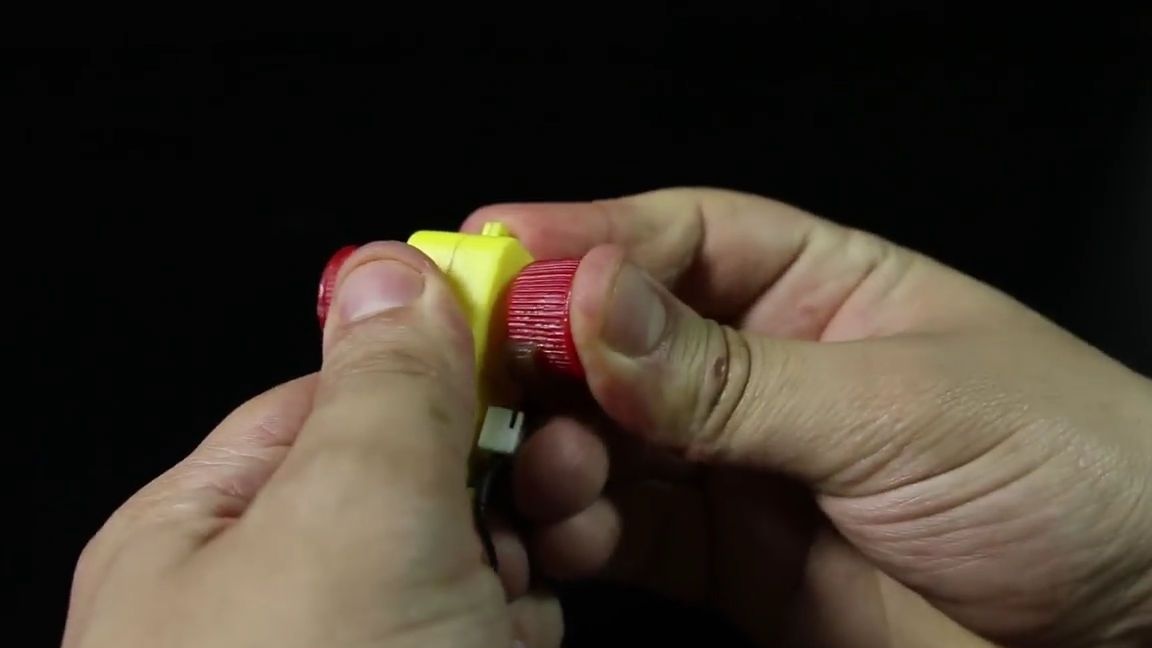
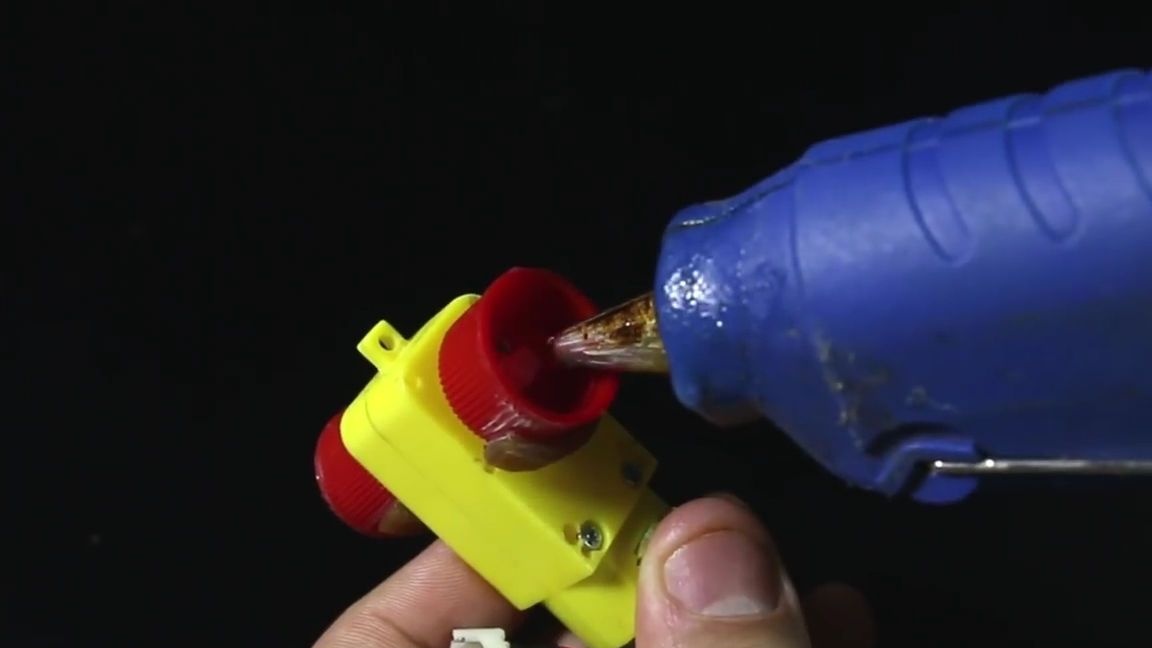
Now we put the blanks on the axis of rotation of the gearbox, as shown in the photo below. Then naturally glue them with hot melt glue:
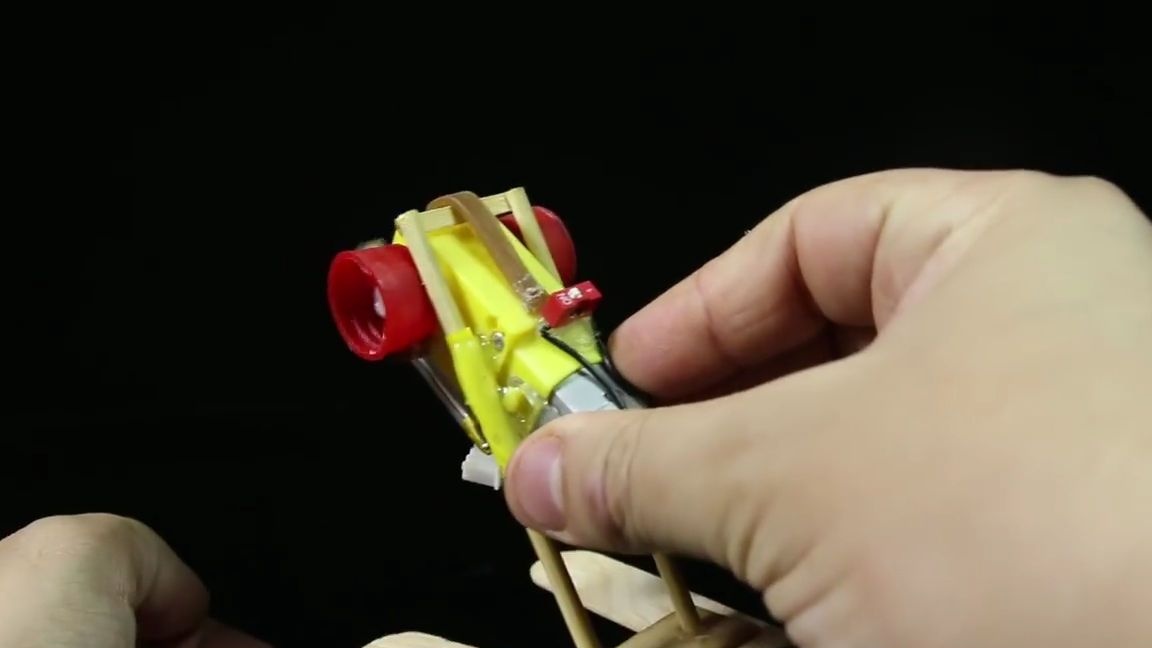
Glue the workpiece from the gear motor to the workpiece of skewers and spatulas. Gluing them together is necessary at the location of the segments of the tubes from the cocktails.
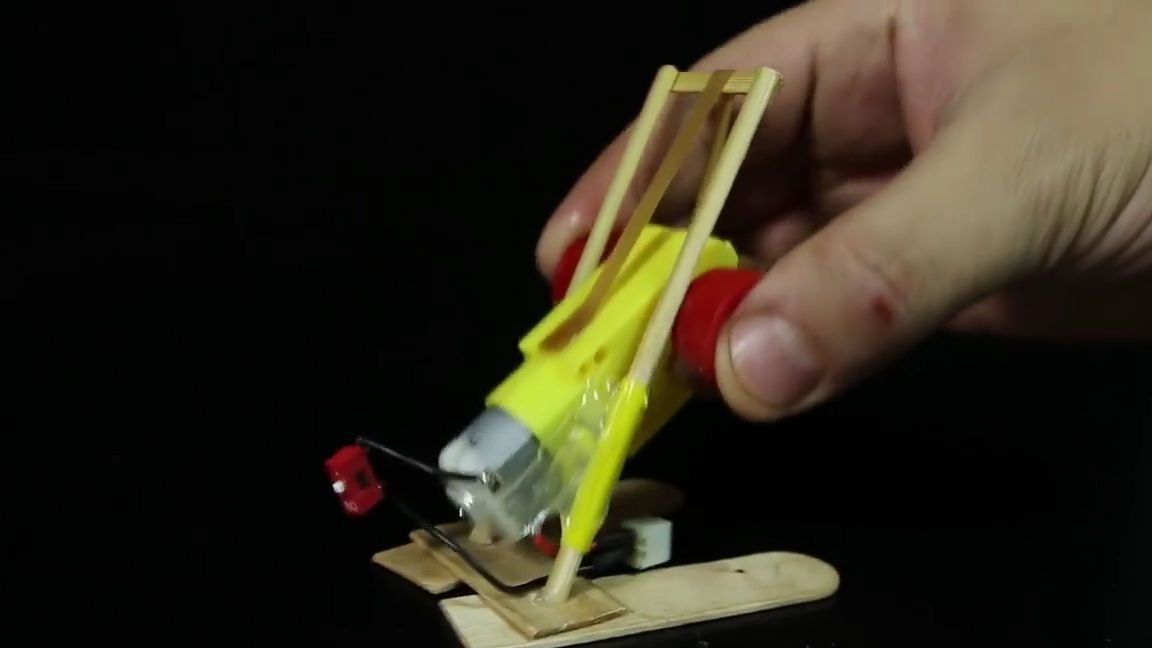
After gluing, the gear motor should move freely along the “rails” of the skewers:
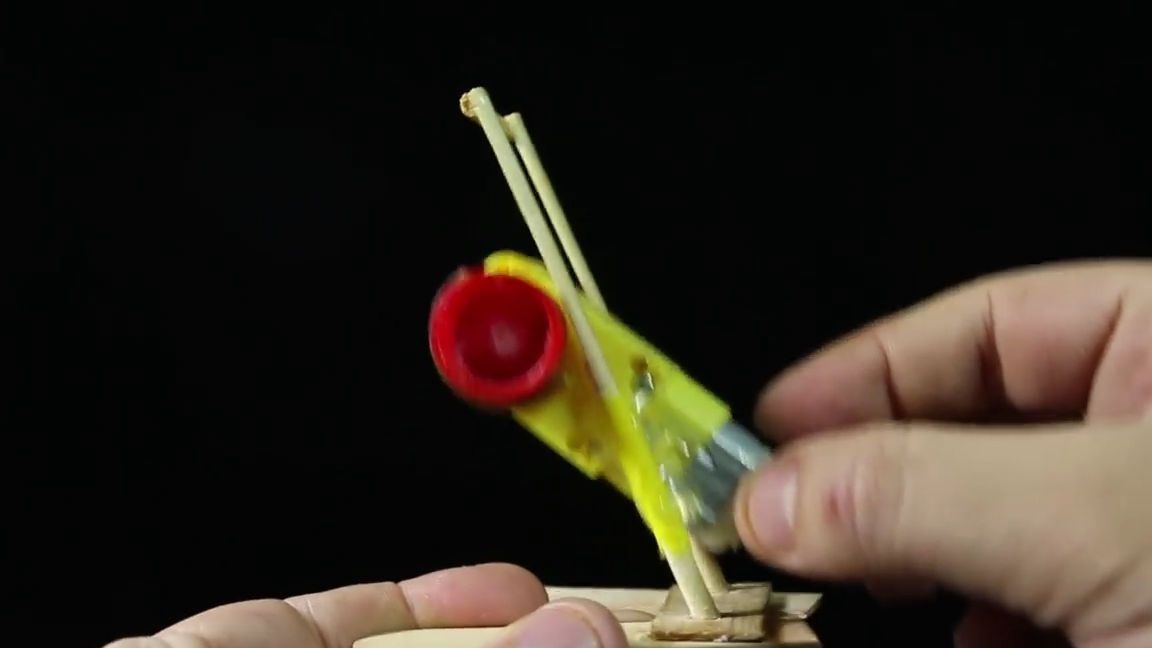
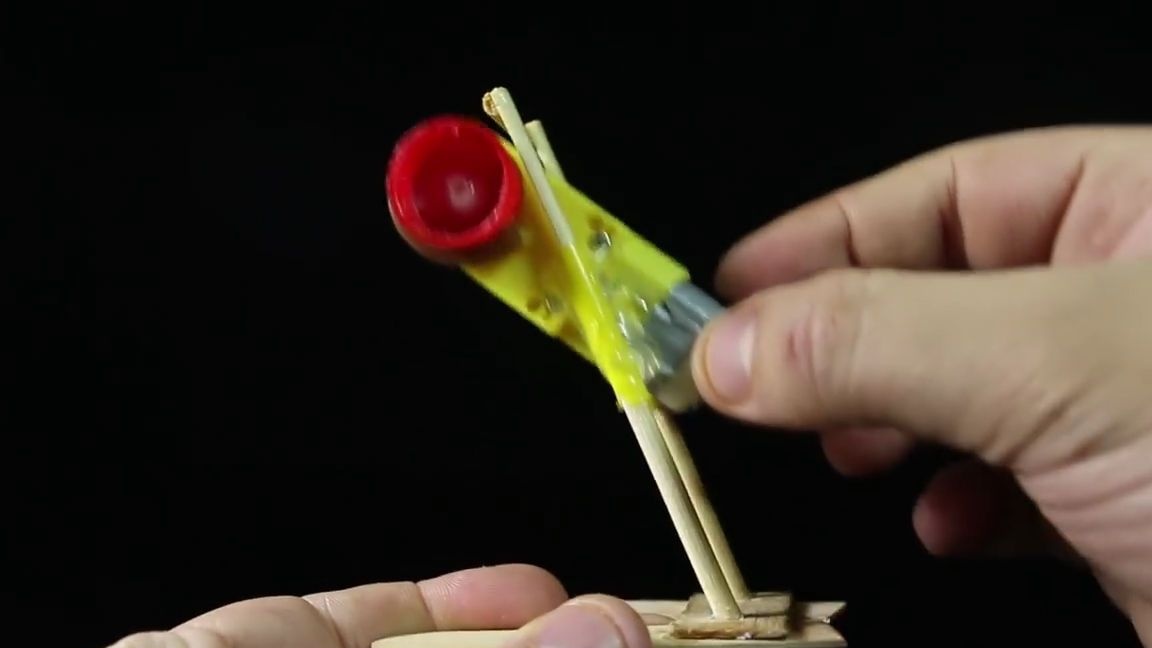
Now you need to pass through the upper skewer, which connects the two main skewers, a small piece of gum, after which its two ends must be glued to the gear motor. Everything needs to be done as shown in the photo below:
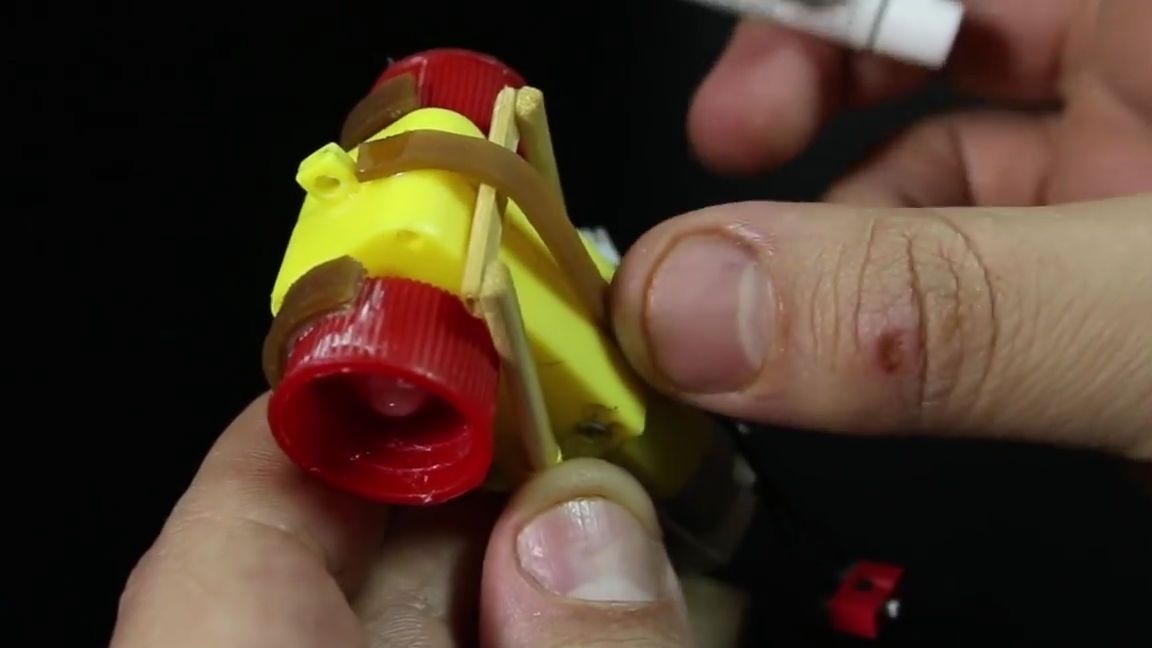
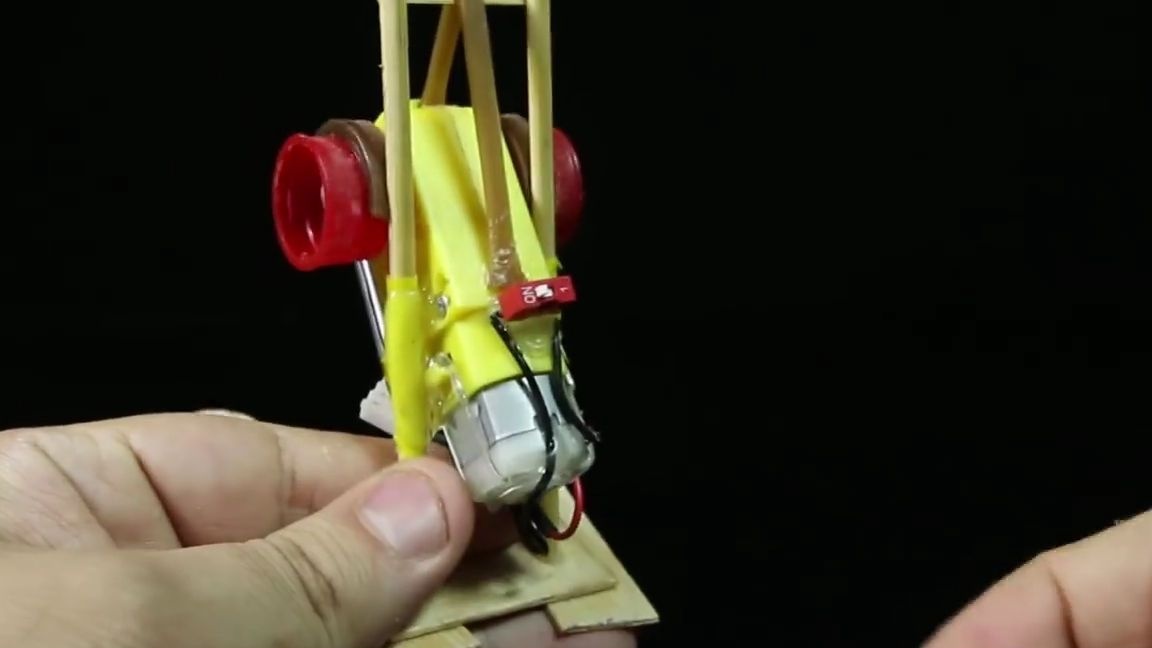
Also, on the motor, it is necessary to carefully place and glue the switch, so that it is convenient to turn the "robot" on and off:
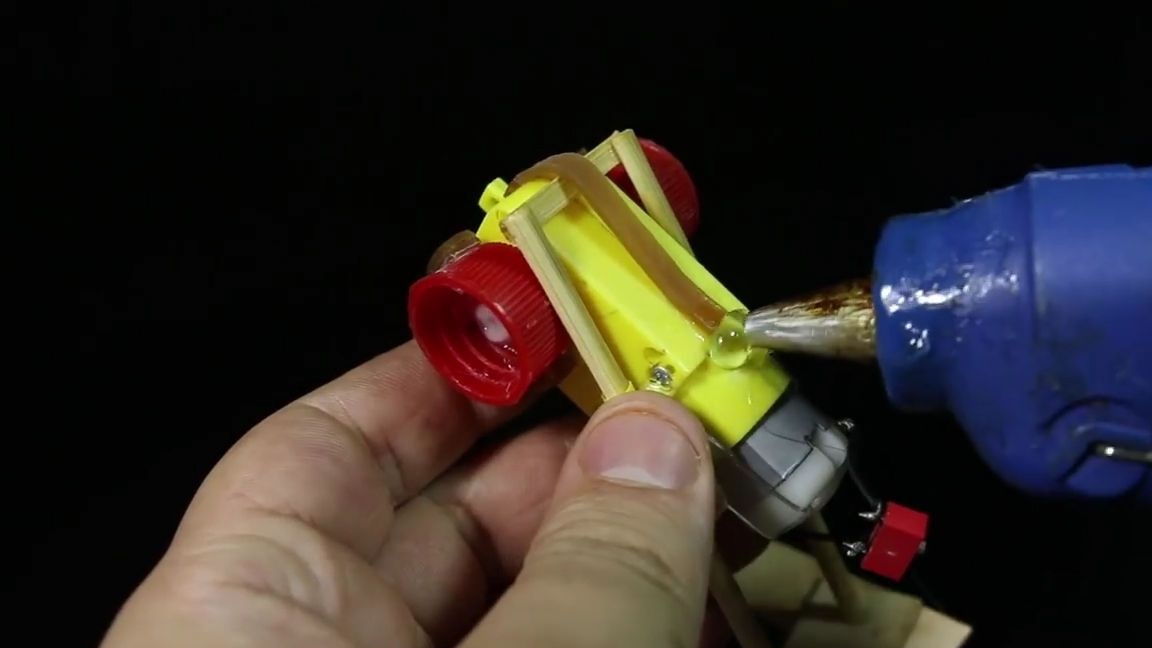
We take the battery and glue two-sided tape on its back. Then we glue the battery onto the lower part of the gear motor and connect them using a connector between each other.
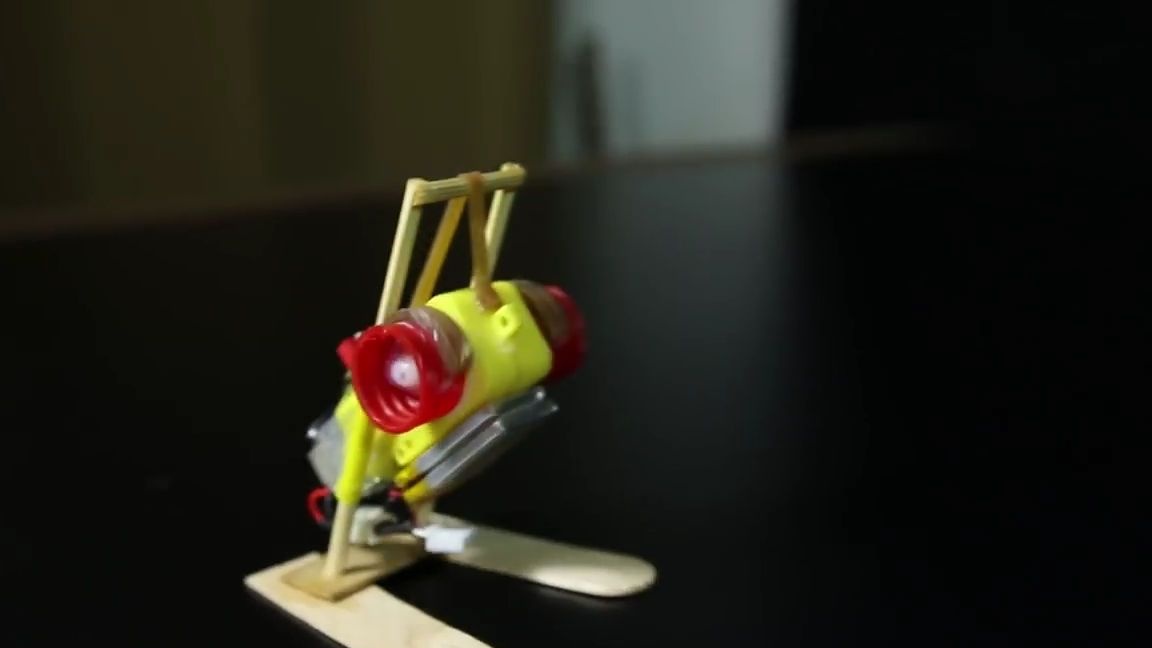
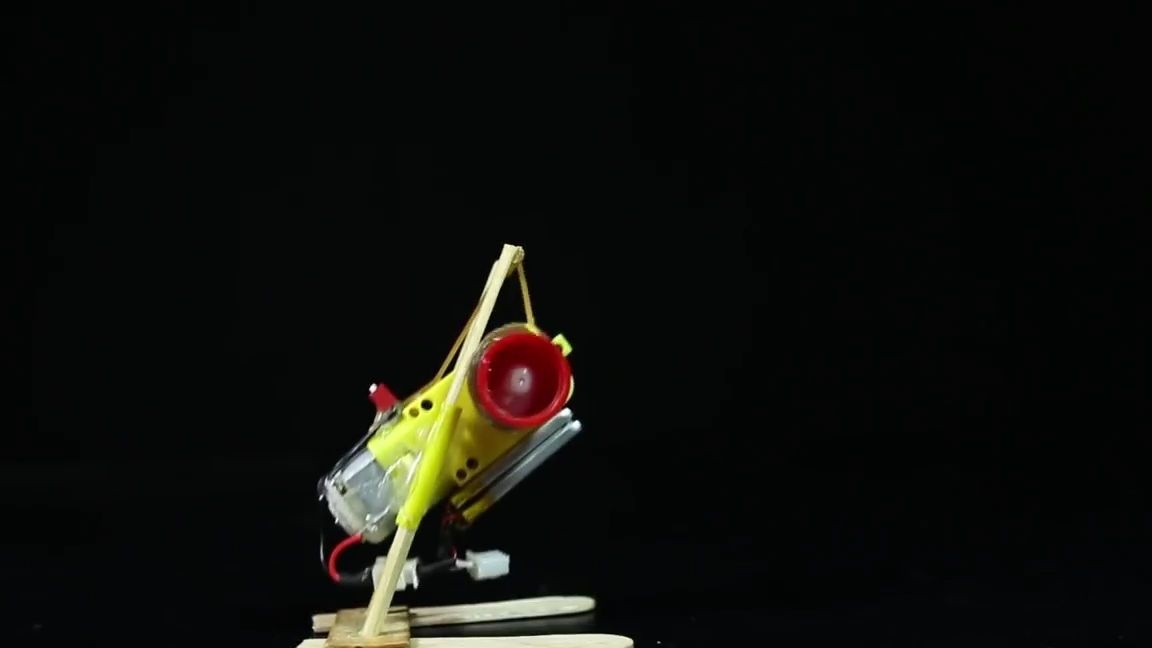
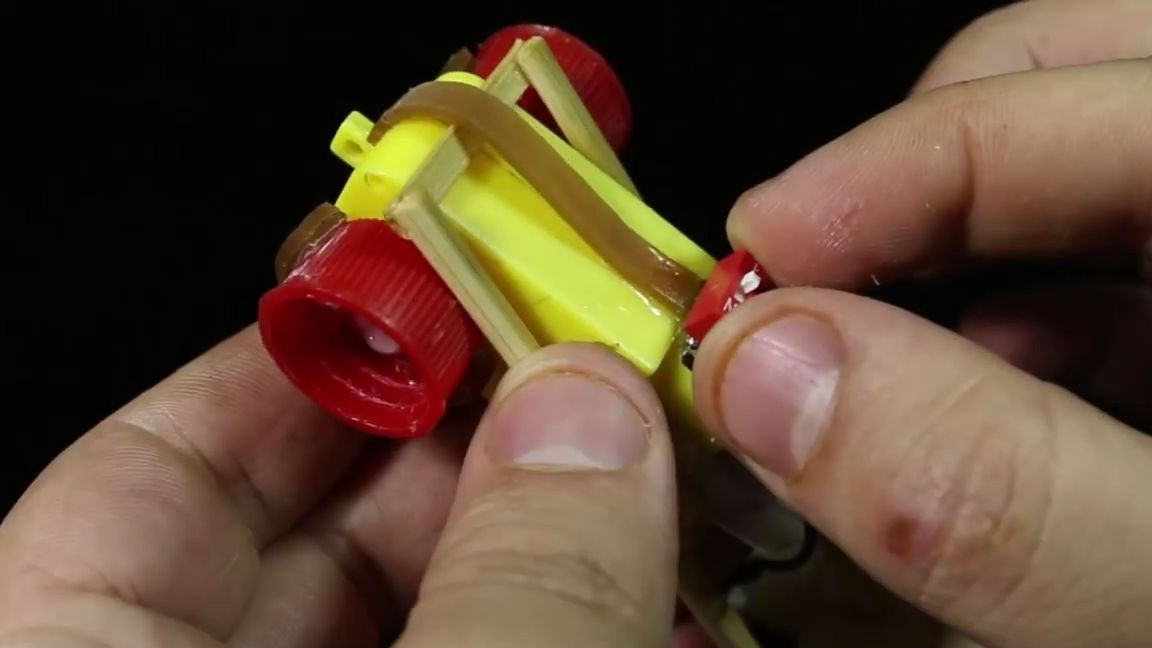
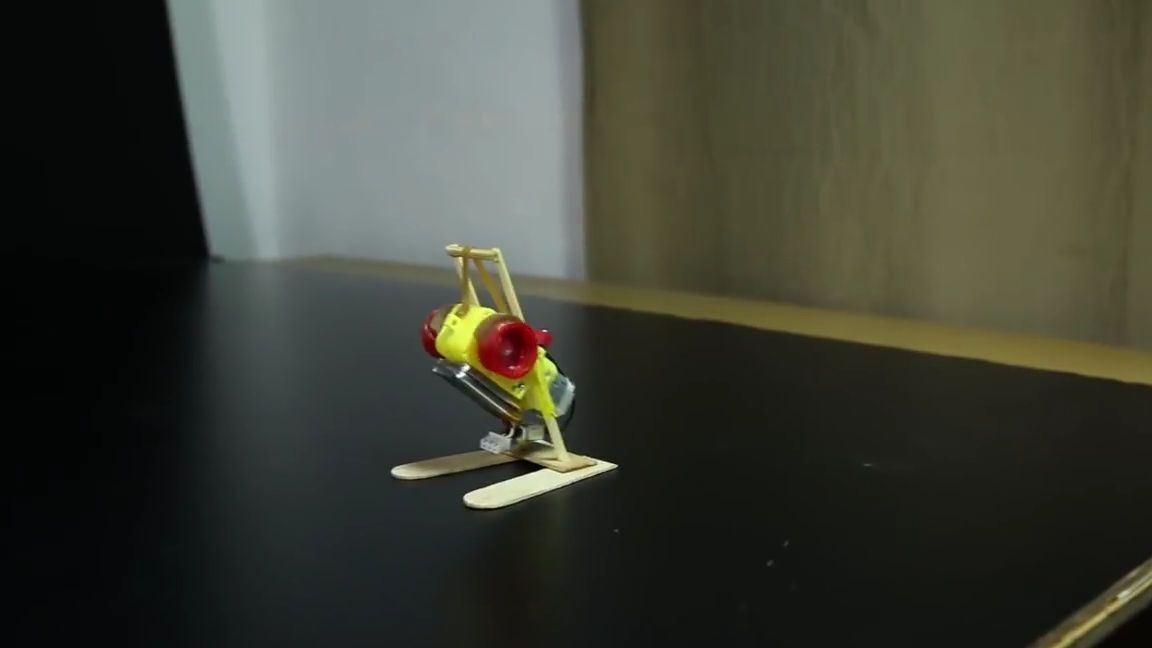
That's it! Simple "robot"the bouncer is ready and it remains only to test it. To do this, just turn it on and put it on a flat smooth surface. After that, the robot will start to bounce forward fun. The homemade product is very interesting and funny, so I think many will like it.
Here is a video from the author with a detailed assembly and testing of this homemade product:
Well, thank you all for your attention and good luck in future projects!