
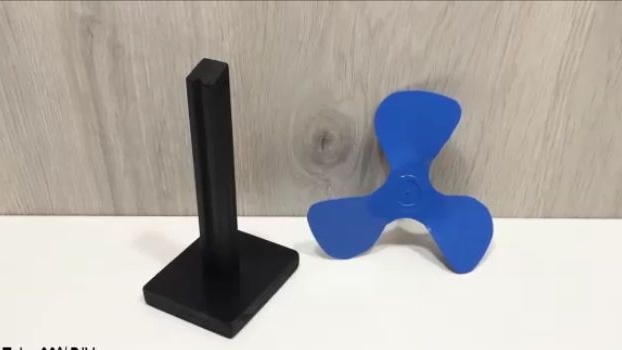
Good day to all dear friends! In today's article, I would like to show you a rather relevant and interesting idea homemade. In recent years, due to the hot summer, it has become popular to make a variety of "air conditioners." But with them you need to bother a lot and look for components, and therefore it was thought up to make the simplest desktop USB fan. This home-made product will not cool the room, but it will drive the air at your workplace thereby giving the very “cooling effect”. In general, the homemade product is very simple and interesting, so let's not waste time, let's go!
And so, for a desktop USB fan, we need:
- DVD disc.
- A cover from a plastic cover.
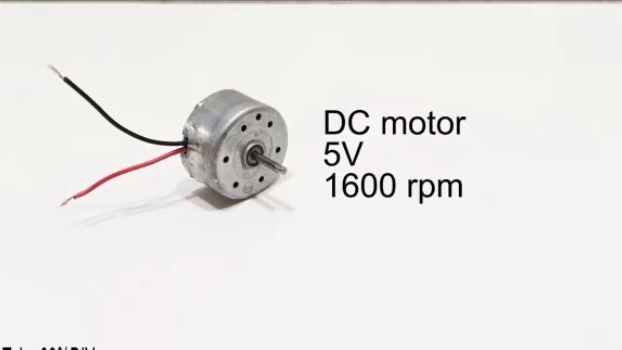
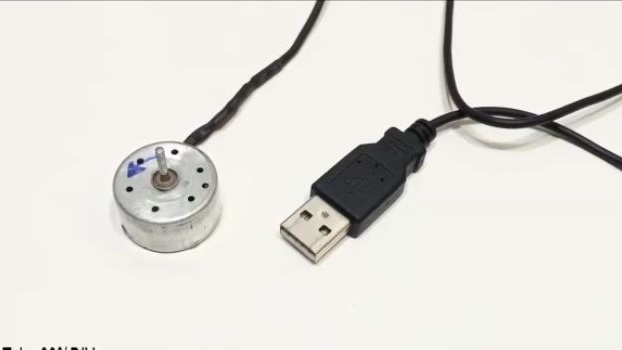
- Electric motor DC 5V.
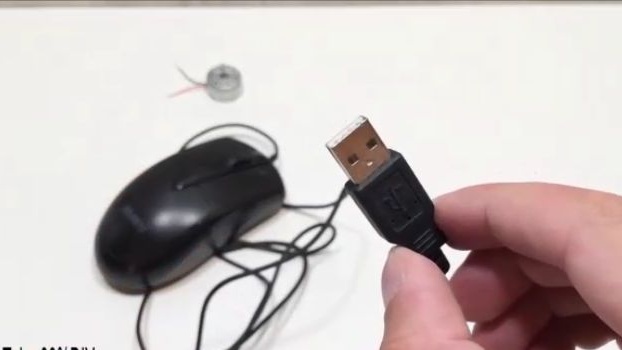
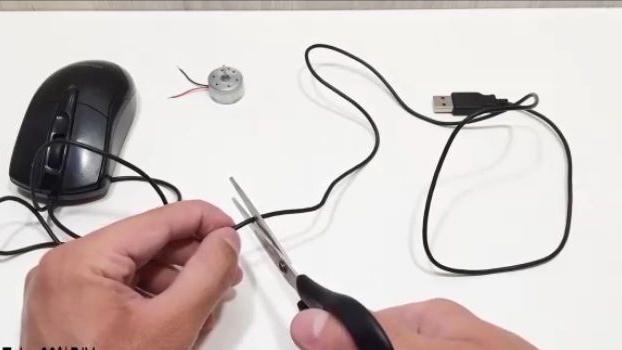
- USB cable (which can be cut from an old computer mouse).
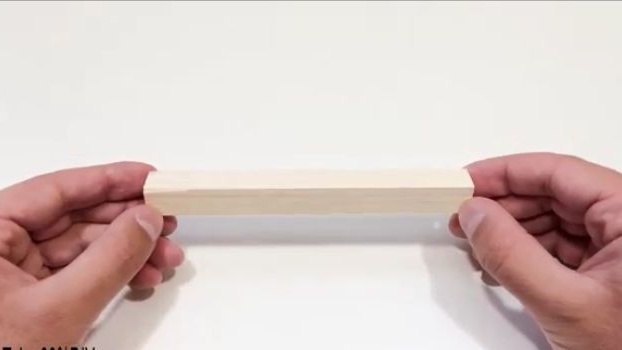
- A small wooden block.
- Wooden flat square for the base.
- Self-tapping screw.
- Plastic screed.
From the tools, you will also need:
- Stationery knife.
- Awl.
- Marker.
- Super glue.
- Compass.
- Ruler.
- Scissors.
- Lighter or matches.
- Shrink.
- Hacksaw for metal.
- Insulating tape.
- Sandpaper.
- Drill.
- A screwdriver.
- Paint.
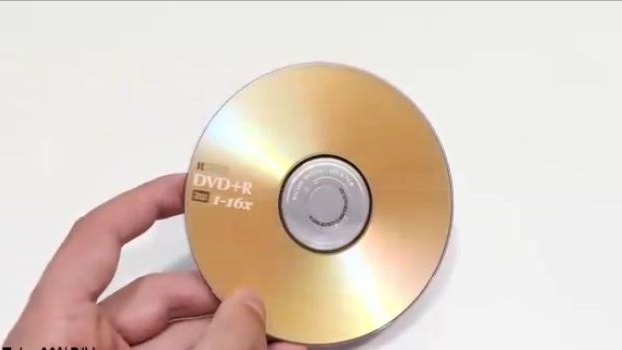
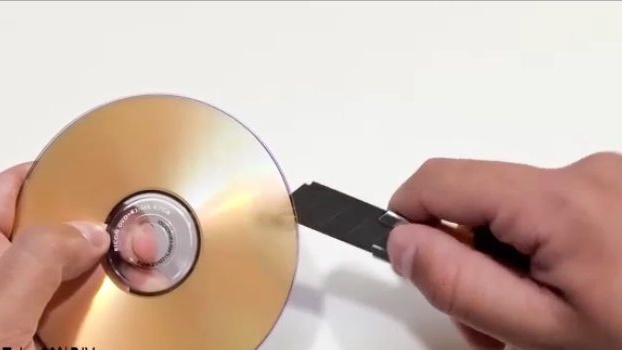
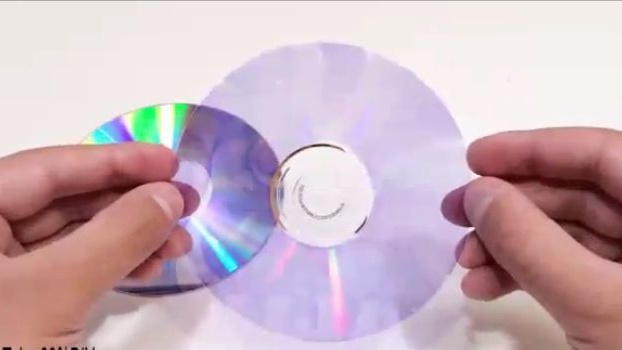
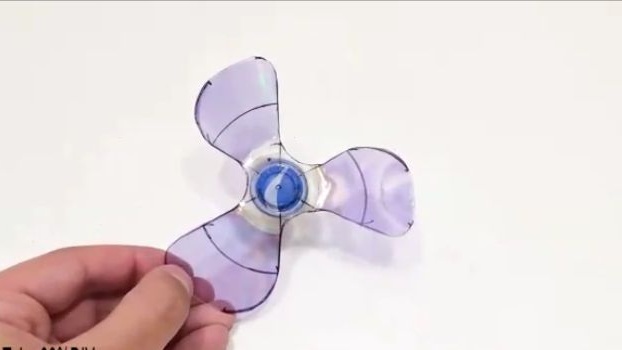
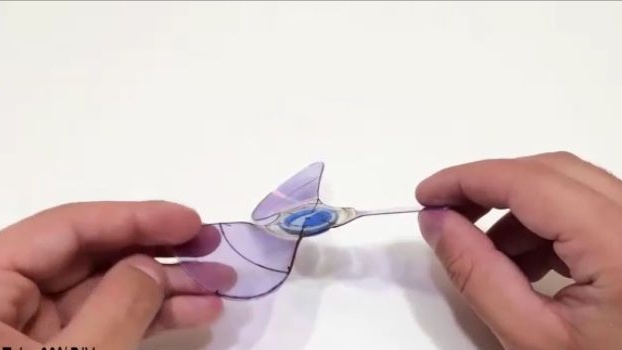
First we need to make a propeller for the fan. For the propeller we need an old DVD disc. First, take a disk and use a clerical knife to split it into two parts. This is not difficult, just follow the sharp end of the clerical knife to press on the rim of the disk since, as shown in the photo below, the disk itself will begin to delaminate. We need a transparent half of the disk
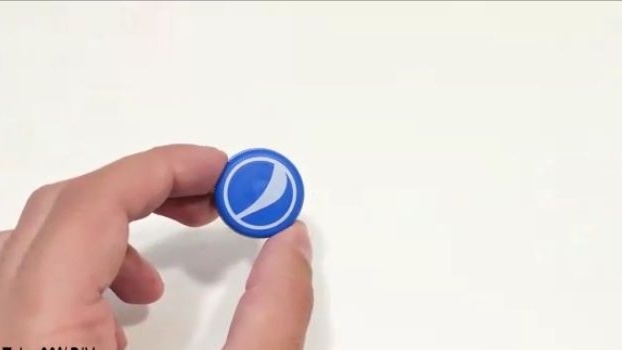
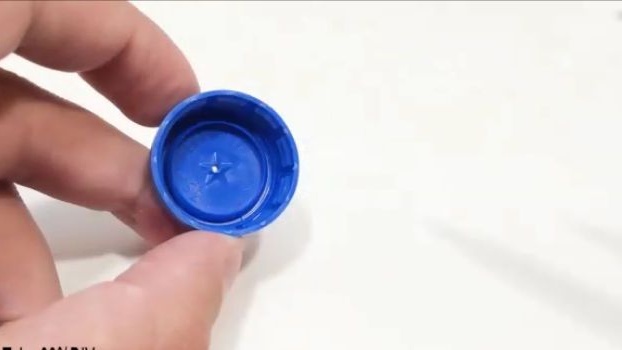
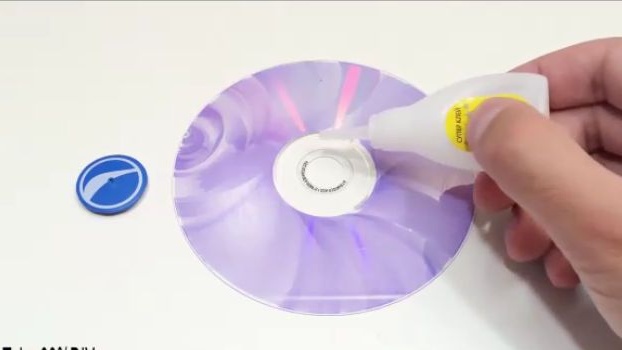
Then take a cap from a plastic bottle similar to the one shown in the photo below. Turning the plastic cover over, we find the center, and in the center with the help of an awl we should make a through hole with a diameter equal to the diameter of the shaft of the electric motor you have taken.

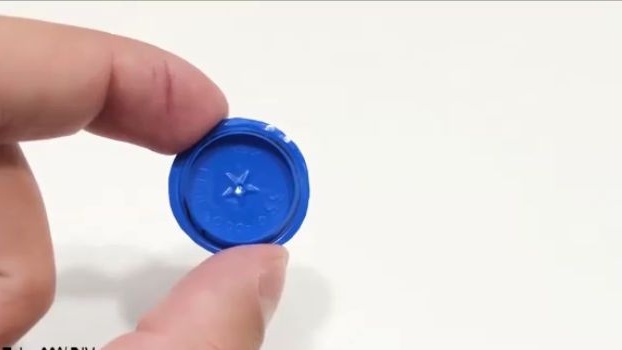
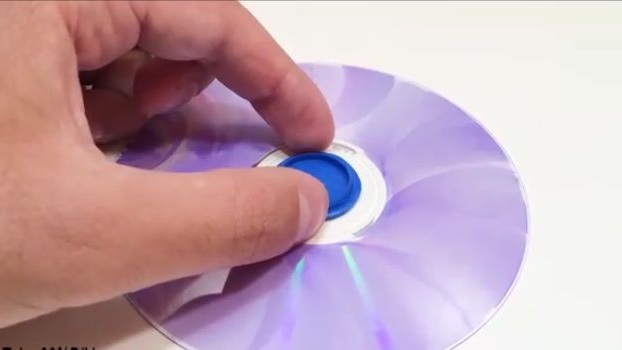
Then, taking a clerical knife, cut out from the plastic wall cover so that we have a flat plastic circle. The newly cut circle should be glued with superglue to the half of the DVD disc that was prepared earlier.
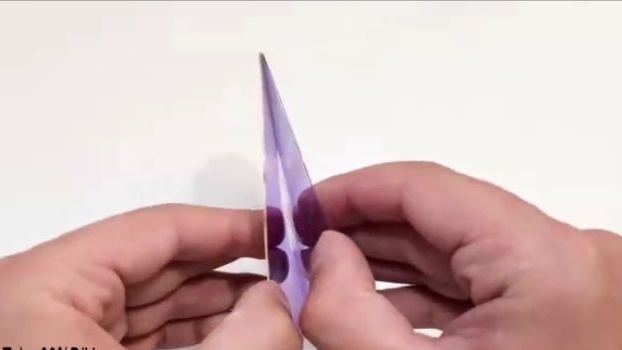
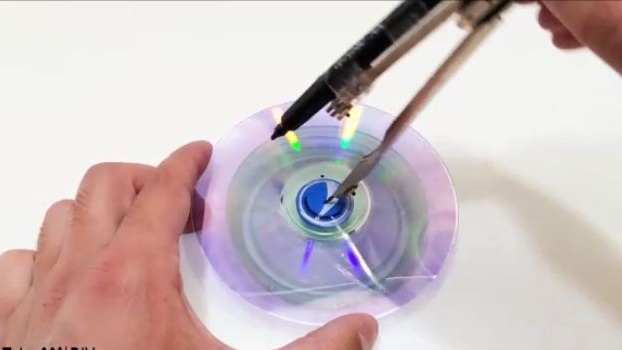
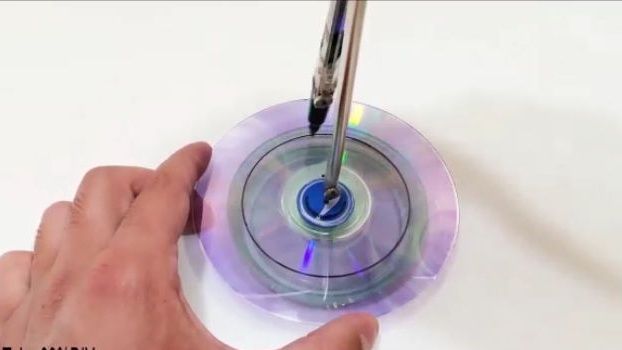
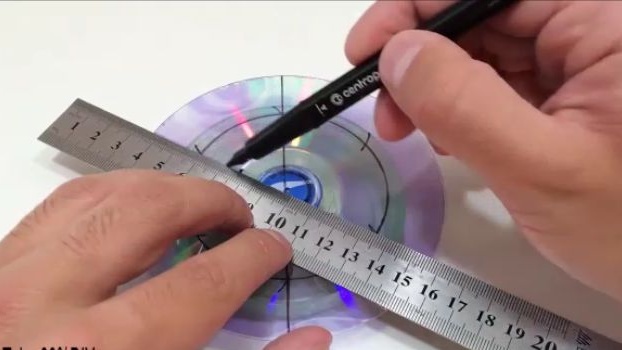
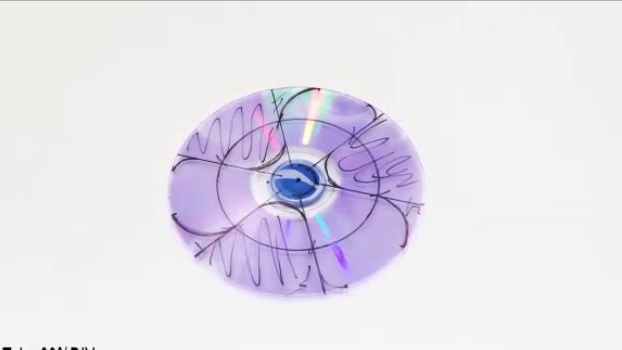
For the next step, we need a compass and a marker. Using a compass, draw a circle with a diameter of about 10 cm. Then divide the circle that we drew into 6 equal segments and draw a dividing line through the center with a marker and ruler. And then we should draw the blades as shown in the photo below.If suddenly you are unable to do this, you can select and download one of the many templates from the Internet, and if you do not have a printer at home, you can simply attach half of the disk to the monitor and draw a template because the transparent disk should definitely work out for you .

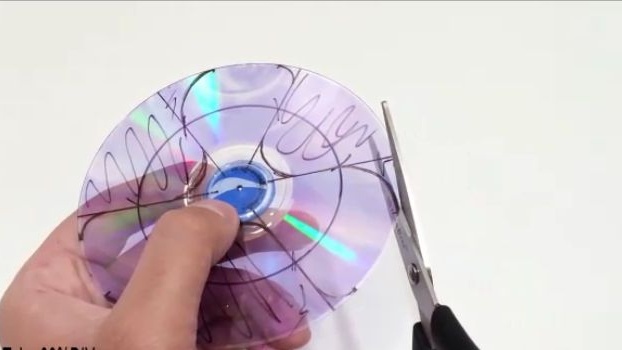
As you probably already guessed, the next step is to cut the propeller. It should be cut with the most ordinary household scissors since, the plastic is soft and does not crack it will turn out to be your demon, of any problems.
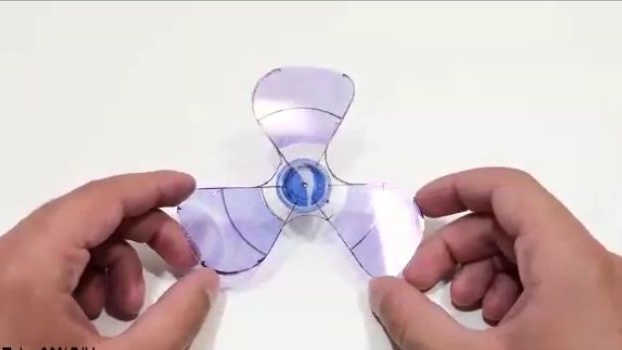
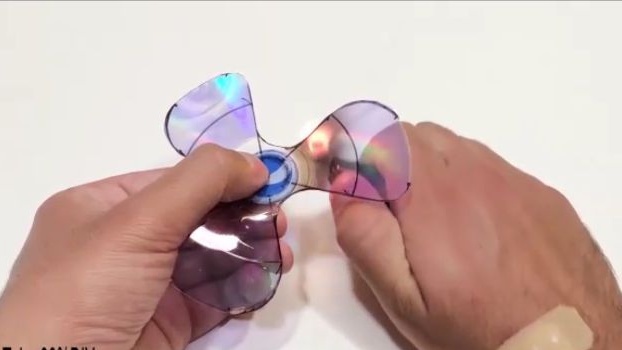
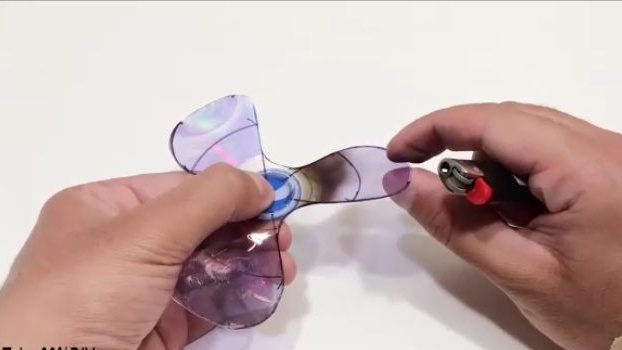
After the propeller has been cut out, we should smooth the edges. To do this, we need matches or a lighter, just briefly bring the burning flame to the propeller. At this stage, the most important thing is not to overheat the workpiece since it can narrow and bend.
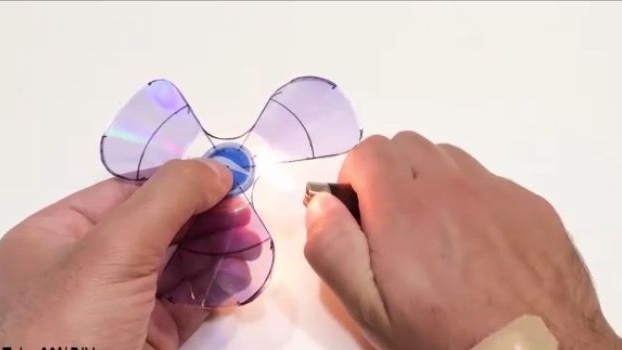
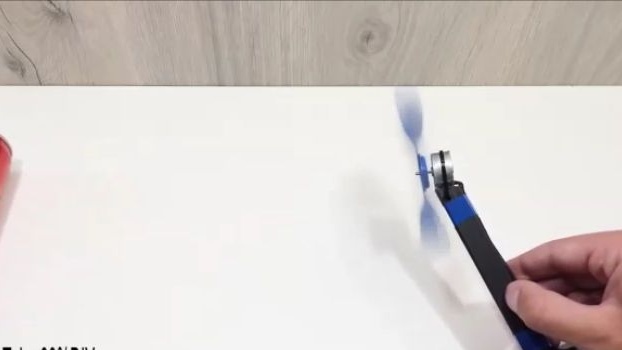
It is clear that the propeller at this stage will not drive air because it is completely flat. In order to bend the blades, they should be heated with a burning flame and manually bent to the side that is shown in the photo below, but be careful as you can easily burn yourself with hot plastic. I do not advise using a hairdryer since, the stream stream is too wide for our purposes.
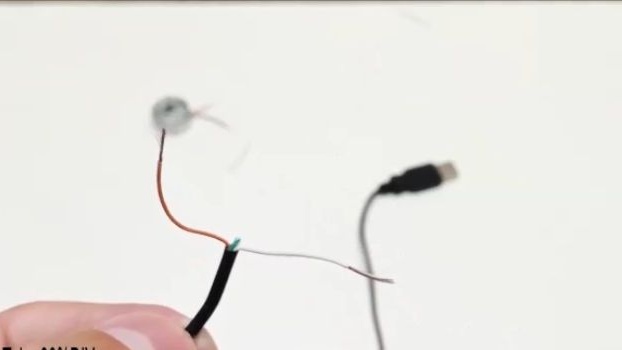
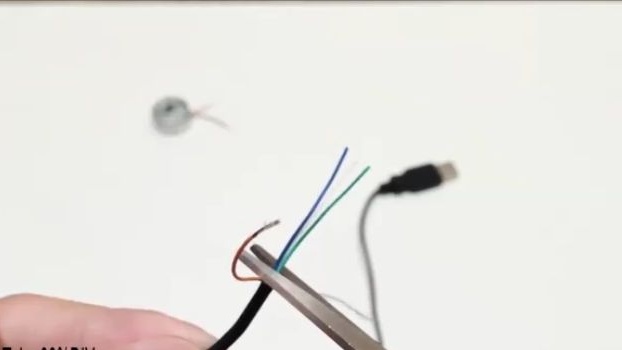
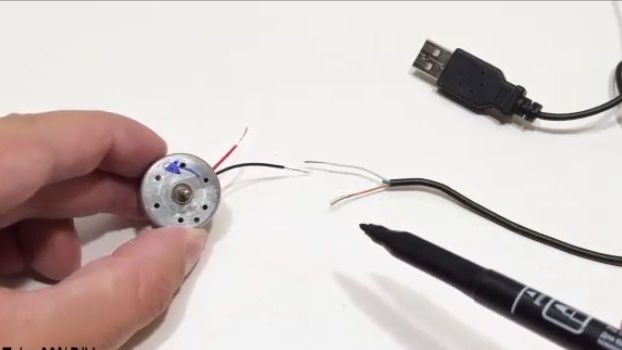
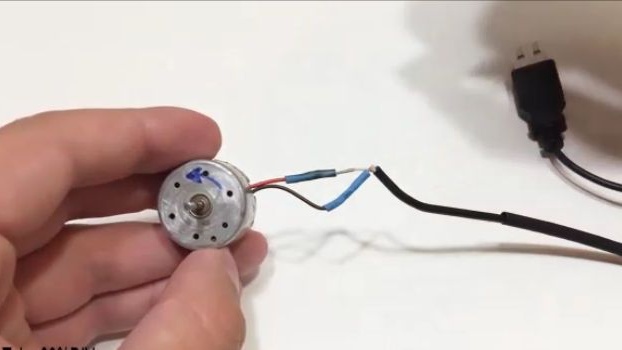
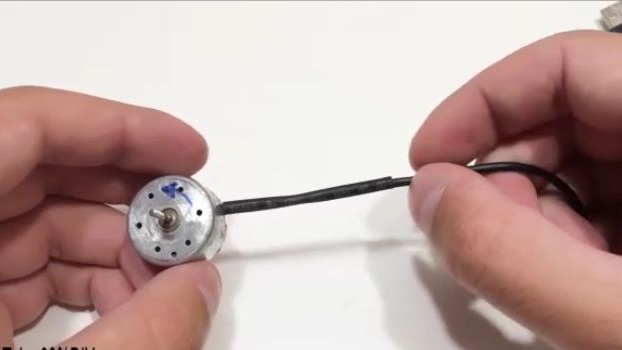
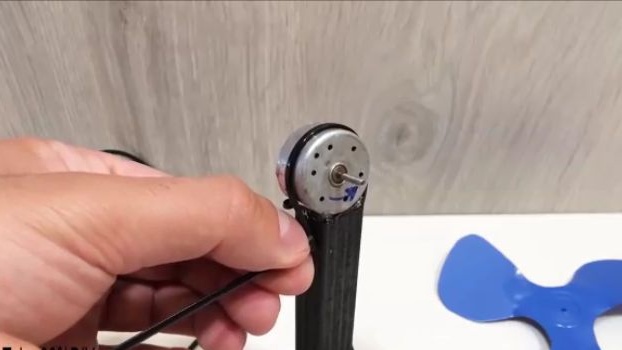
For the next step, we need an electric motor and any USB cable, the author of this homemade product took a wire from an old mouse as a USB cable. We cut the wire from the mouse and see that inside the four more wires in this case we need the white and red wires, and the other two are cut off so as not to interfere. We connect the electric motor with a USB cable, observing the polarity so that the electric motor rotates in the same direction as in the photo. The author decided not to use a soldering iron to connect the wires and decided to do with heat shrink.
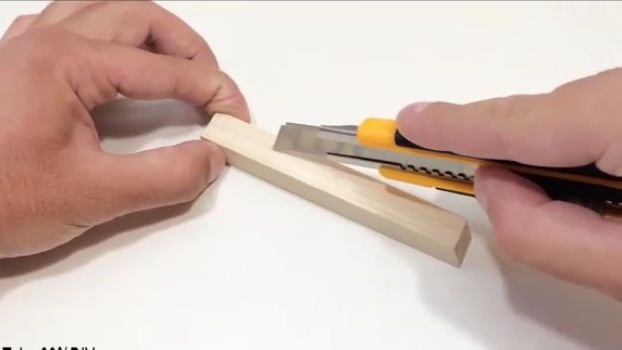
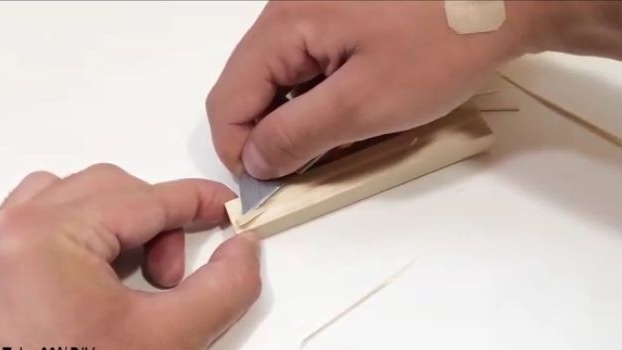
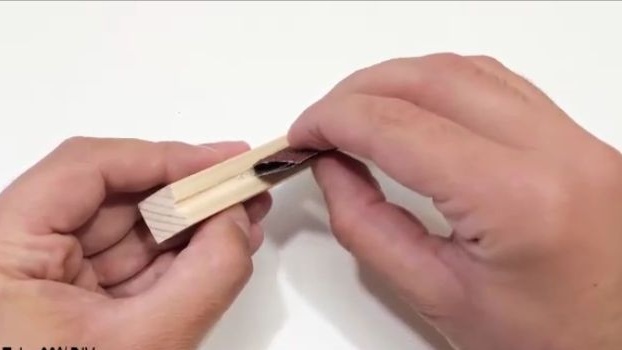
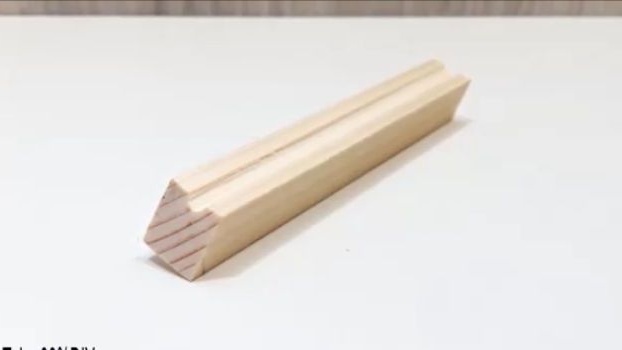
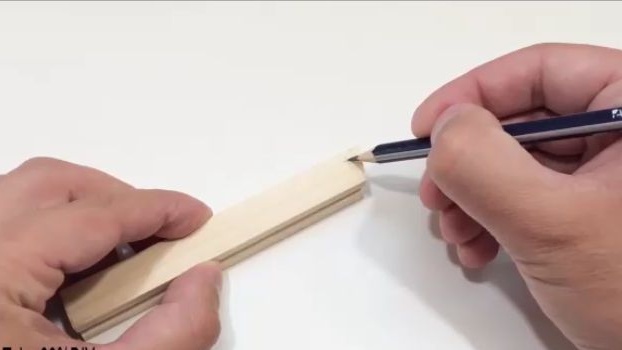
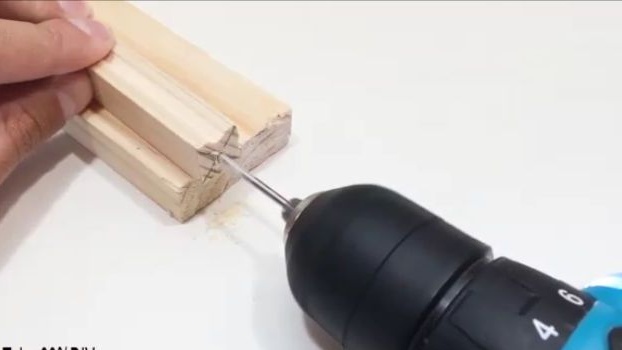
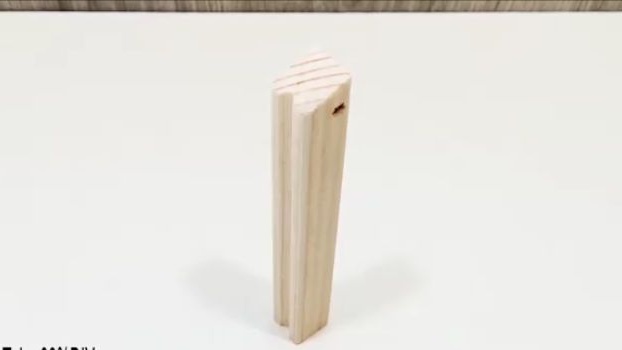
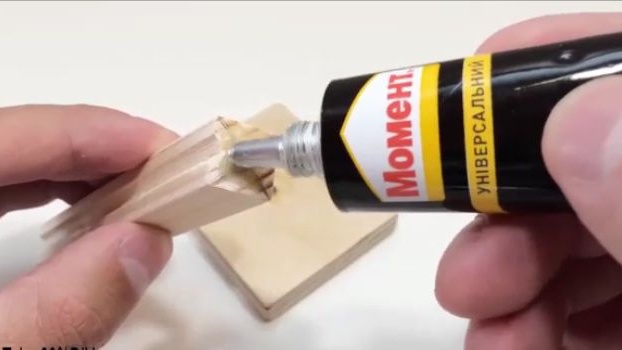
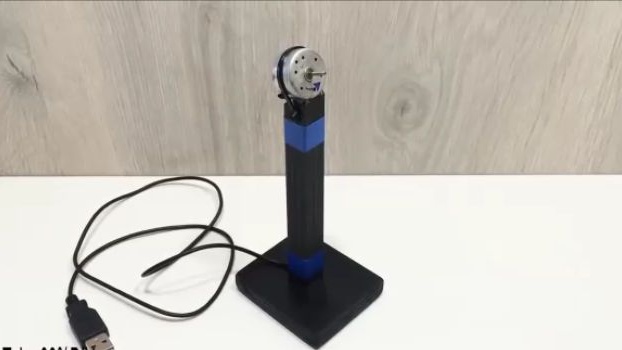
Next, we will make a stand for the fan, for it we need a wooden rail on which we mark and cut the ends as in the photo below. After that, in this workpiece, we should make a groove in order to lay a USB cable in it. To do this, we use a clerical knife and cut out and pick out the groove with pressing movements. And then the groove itself should be processed with sandpaper of medium grain size.

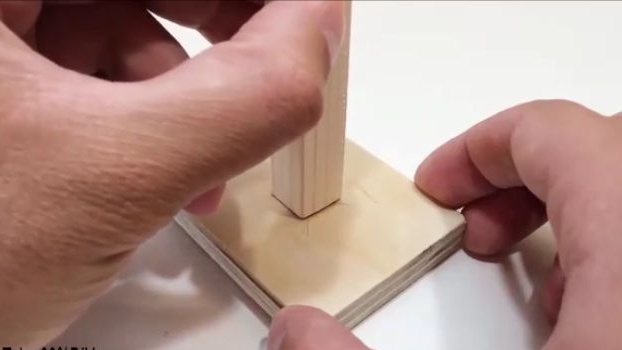
In these places we do not through holes. The lower hole is for attaching the rack to the platform, and the upper hole is for securing the electric motor.
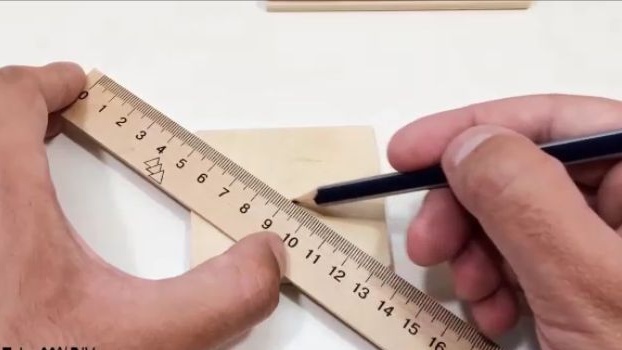
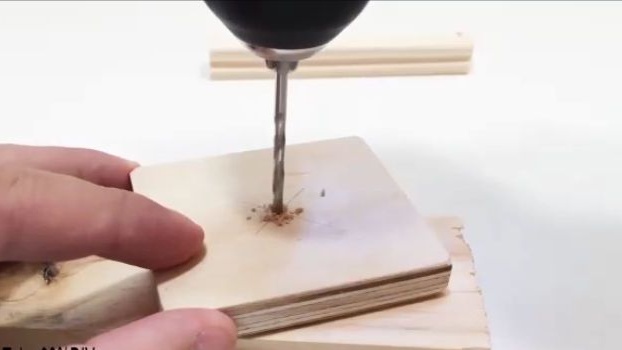
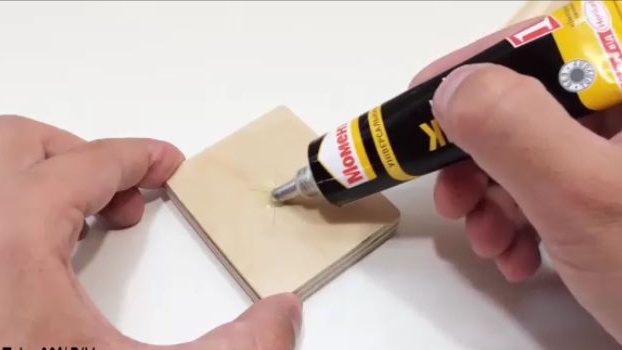
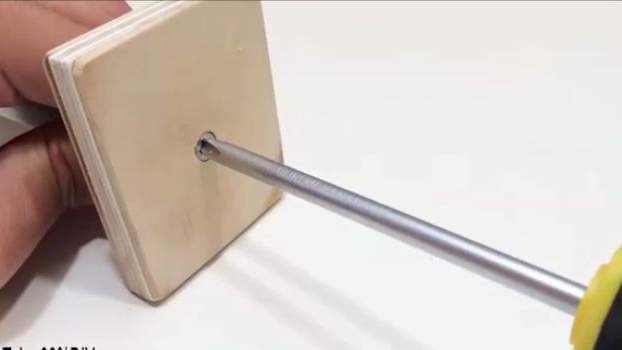
Next, take the platform on which everything will be mounted, and on it we will find the middle and in the middle we will drill a through hole. Then we will connect two wooden blanks with glue and one self-tapping screw.
The next step is to paint the blanks in the colors that you like.
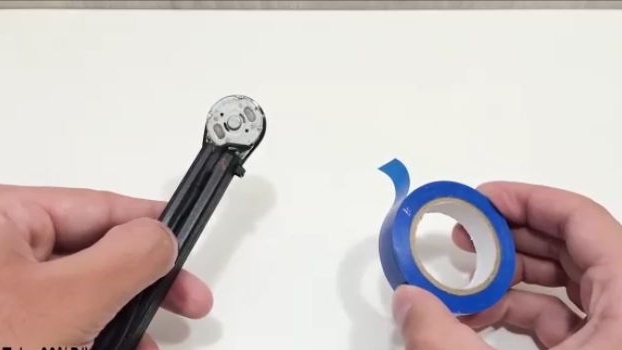
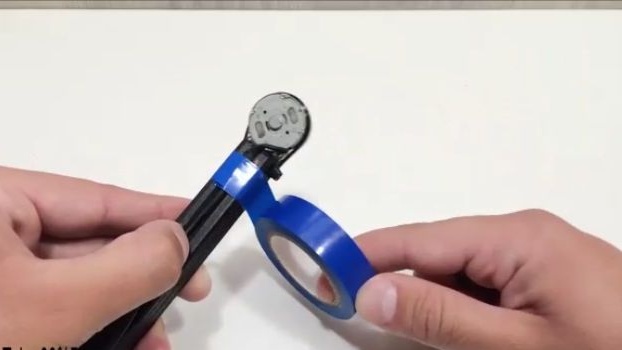
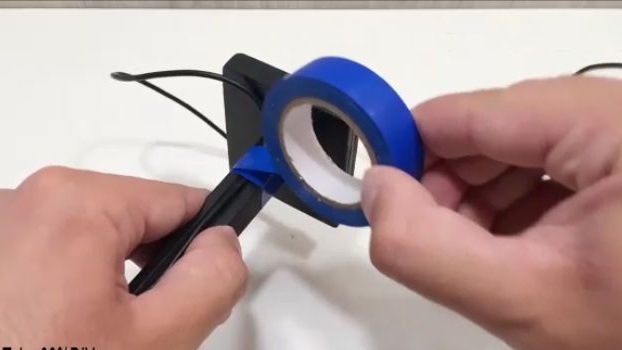
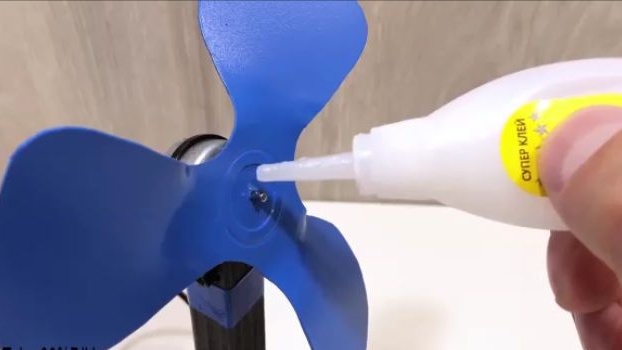
We fix the electric motor, using a plastic screed on the structure. We lay the wire in the groove and in the upper and lower parts we fix the “blue” electrical tape. We put on and fix the screw with super glue on the motor shaft.
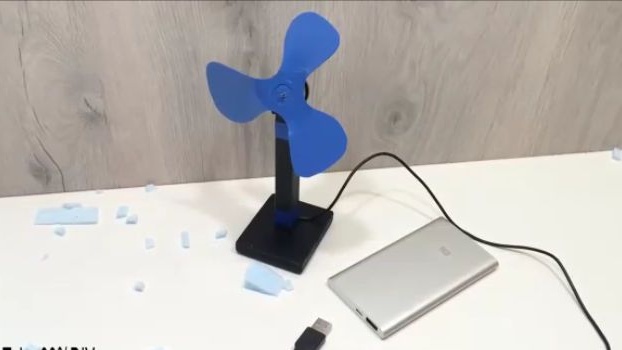
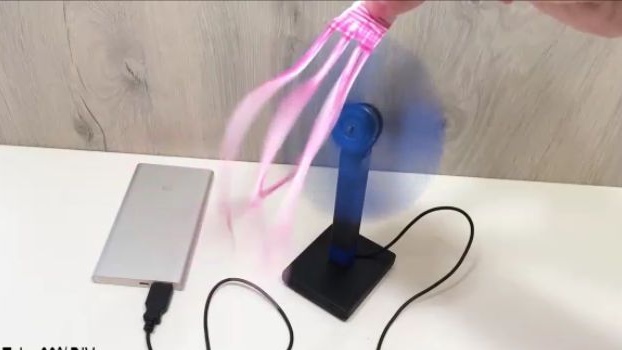
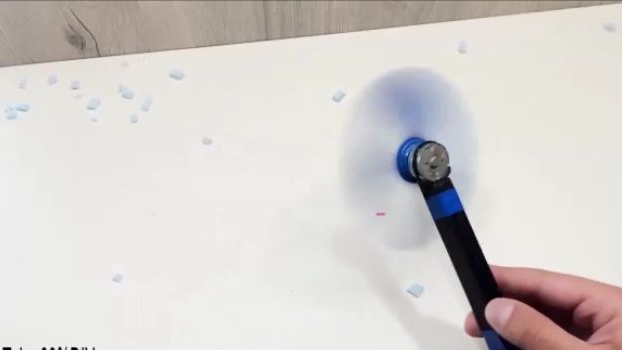
All is ready! It remains only to test and enjoy the newly assembled homemade. The homemade product is quite cheap and easy to manufacture, so absolutely everyone can make it. I hope someone will find this article helpful.

Here is a video from the author with a detailed assembly and testing of this homemade product:
Well, thank you all for your attention and good luck in future projects!