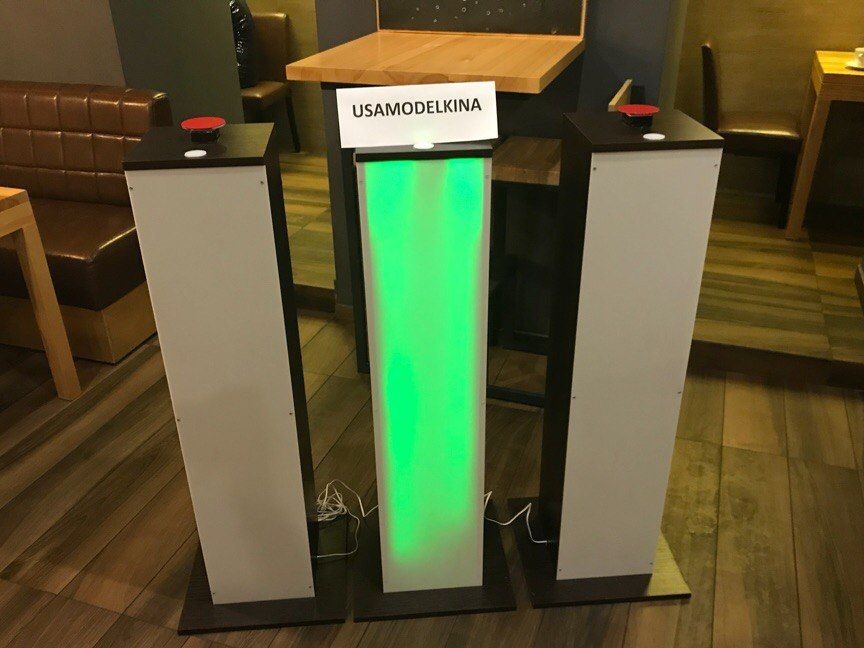
Have you ever heard of BrainSystem. This device is designed to determine the first person who presses the button. For convenience, the device is mounted in special cabinets. You definitely understood what kind of device it is, because these cabinets are often used for various television broadcasts. “Evening Urgant”, “Guess the melody”, “Own game” and this list can be listed for a long time.

The most surprising thing is that it’s not difficult to make such curbstones myself, but after searching for information on the Internet I came across a store where these devices (without cases) were sold at space prices from twenty thousand rubles.
And so, let's begin to manufacture.
We will need:
For e parts:
• Arduino (Nano or Uno models)
• LED strip - 6 meters (2 meters per each stand)
• Buttons (I used doorbells)
• Hook-up wires (for connecting internal contacts)
• Mounting plate for mounting the arduino (optional, you can do without it, but it is more convenient with it)
• 3 small toggle switches and 1 larger (for connecting thumbs and arduino)
• 3 relays (I used ready-made Chinese modules for arduino)
• 3 crown batteries 9 volts (to power the LED strip)
• 1 battery of 4.5 volts (to power the arduino)
• 3 telephone cables of 3 meters (for connecting the cabinets to each other)
• 3 jacks for telephone cables
For enclosures:
• Chipboard sheets (pre-cut according to your size)
• Matte plastic sheets (pre-cut to fit your size)
• Furniture screws
• Plugs for furniture screws
From the tools:
• Screwdriver
• Drills of different diameters
• Soldering iron (and soldering accessories to it)
• Thermo-glue
Let's start creating the device. First, consider the device diagram.
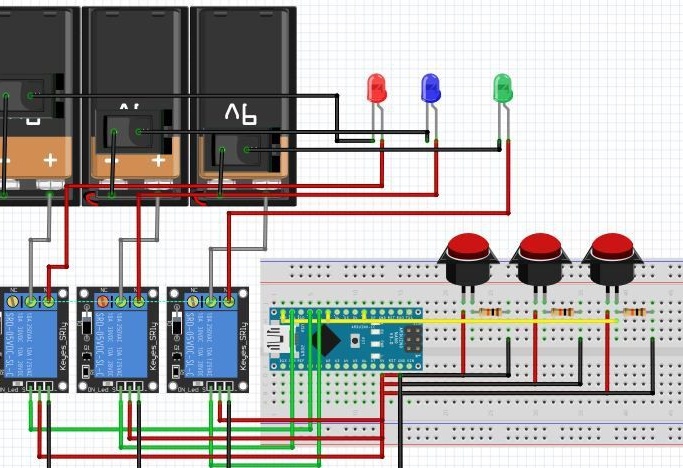
Instead of LEDs, a bright LED strip is used, and instead of simple buttons, doorbells or special large buttons.
You can also use mofettes (powerful transistors) instead of relays. In my cabinets I used ready-made Chinese relay modules, but if there is no time to wait for delivery from China, then you can assemble such modules yourself. You just need to find the circuit on the Internet and go to the nearest radio store.Of course, it will cost 3 times more.
There are two ways to use Arduino. This is either a Powr-bank (wireless charging for the phone) or an assembly of three finger batteries.
To power the LED strip, you can use the crown battery (9v).

We figured out the power, now we need to think about how our cabinets will switch among themselves. There are two options here - wired and wireless. The wireless option can be implemented using the Chinese Arduino modules. These are Bluetooth modules Wi-Fi modules or radio modules. But in my curbstones I made wired ones. I had a lot of ideas with what cables it would be possible to connect the devices. The first thing that came to mind was USB. But I settled on a telephone cable, since it is much cheaper than a USB cable. Also, the USB cable was disadvantageous in that finding it long enough was a big problem. Yes, I found a store where two-meter USB cables are sold, but the price of them strongly bite.

The main points on electronics are discussed, and this means you can transgress to the case. The shape and size of the cabinets themselves is up to you. But before ordering a cut, it would be nice to simulate the design of the pedestals. For modeling you can use any command.
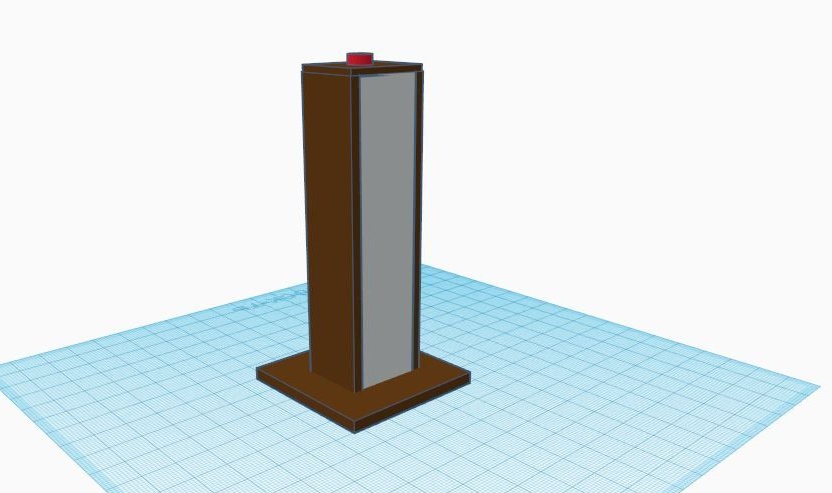
After modeling, you can break to the assembly. I recommend assembling together two or more.
Now you can mount all the electronics inside. Thus, in one cabinet there will be an arduino, a relay, a 4.5 V battery, a 9 V battery, a button, an LED strip. In the other two it will be the same only without arduino and food to it.
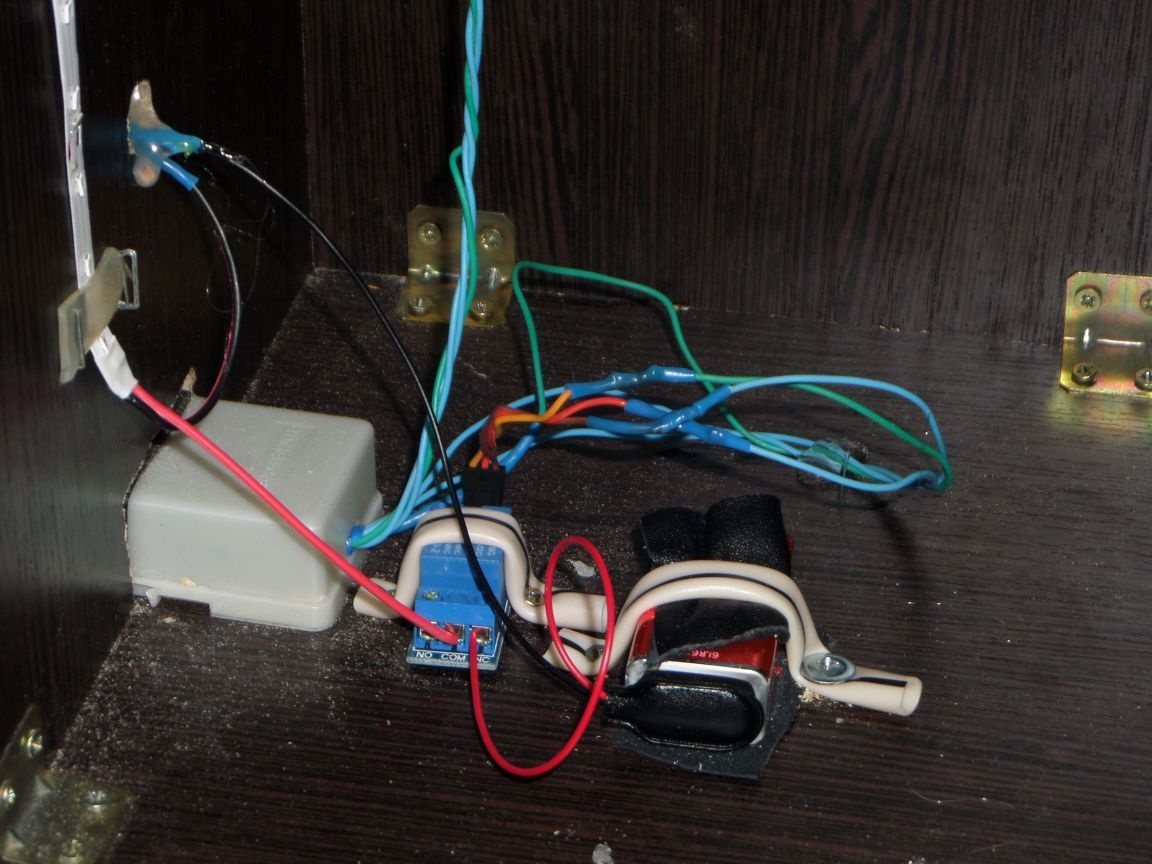
You also need to make a hole for the toggle switches. In my case, in each stand there is a toggle switch that turns on the LED strip, and in the main stand there is another switch that activates the arduino.
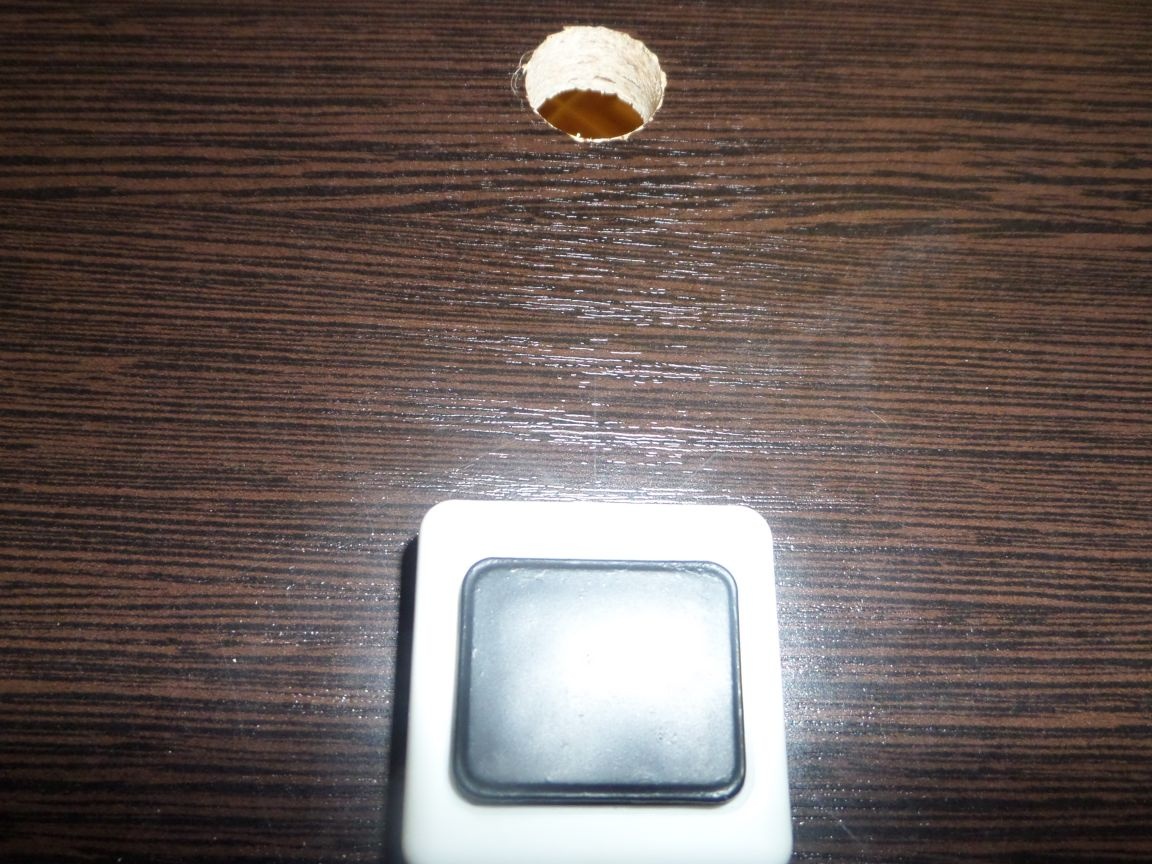
We also make a hole for the button and install it.
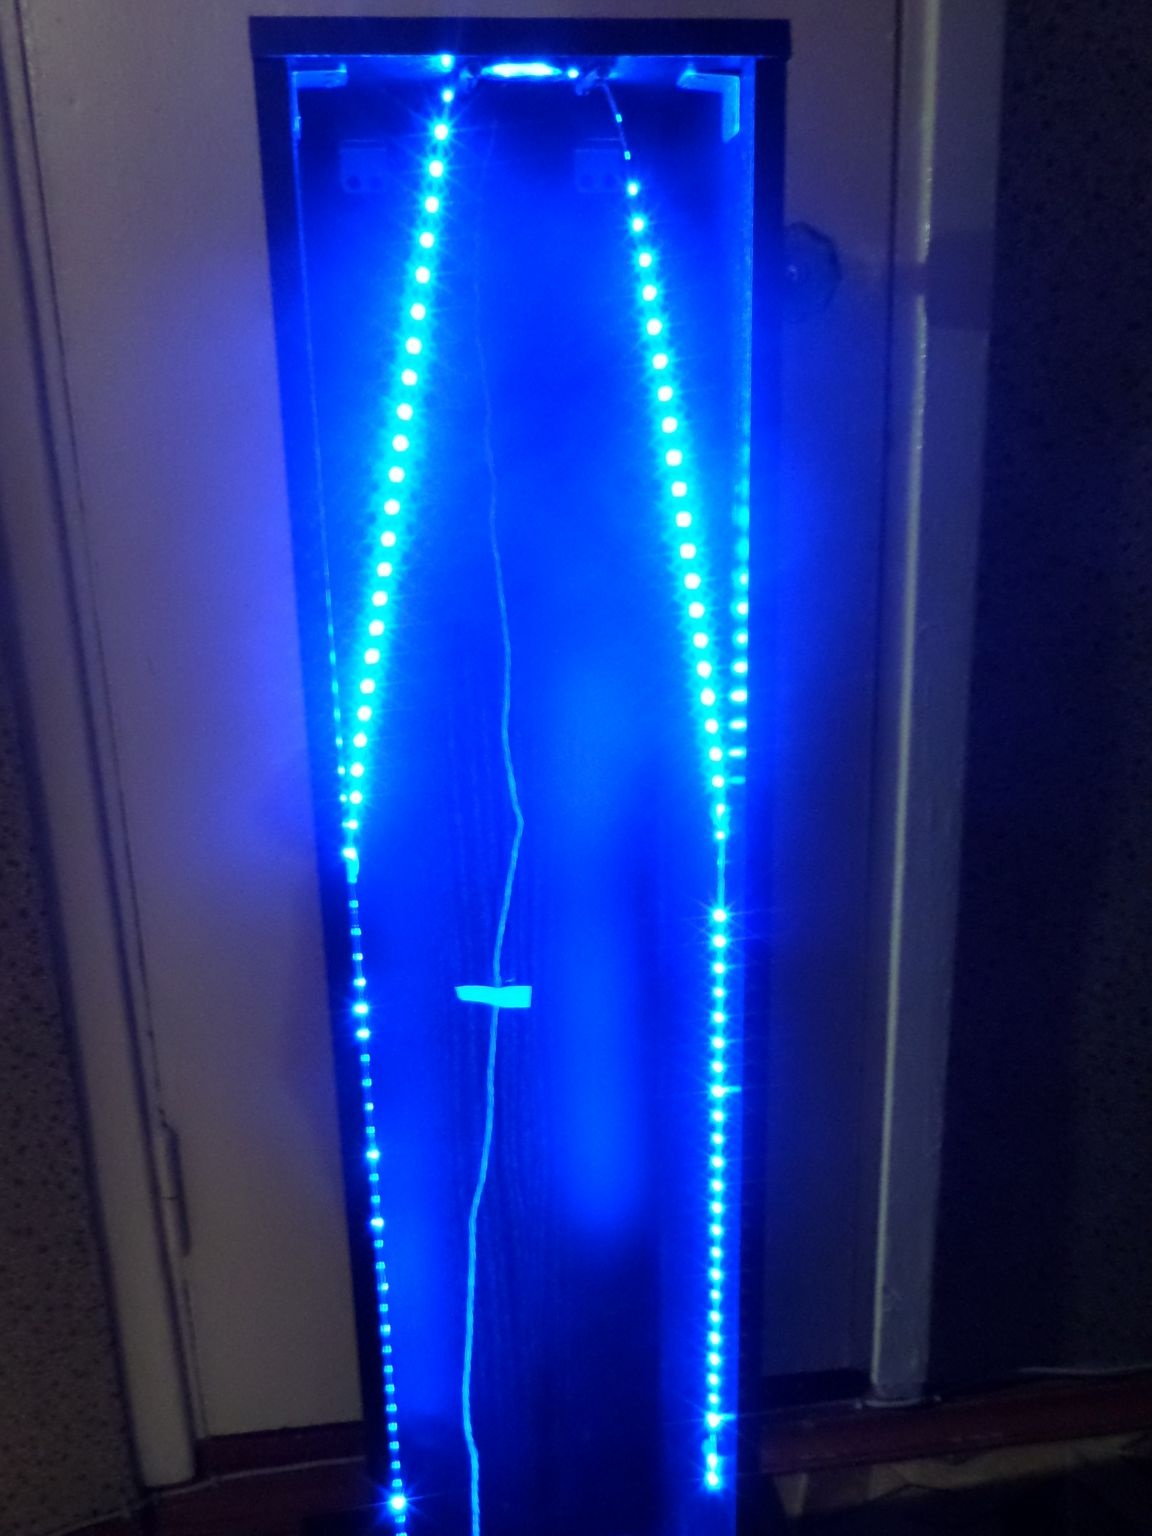
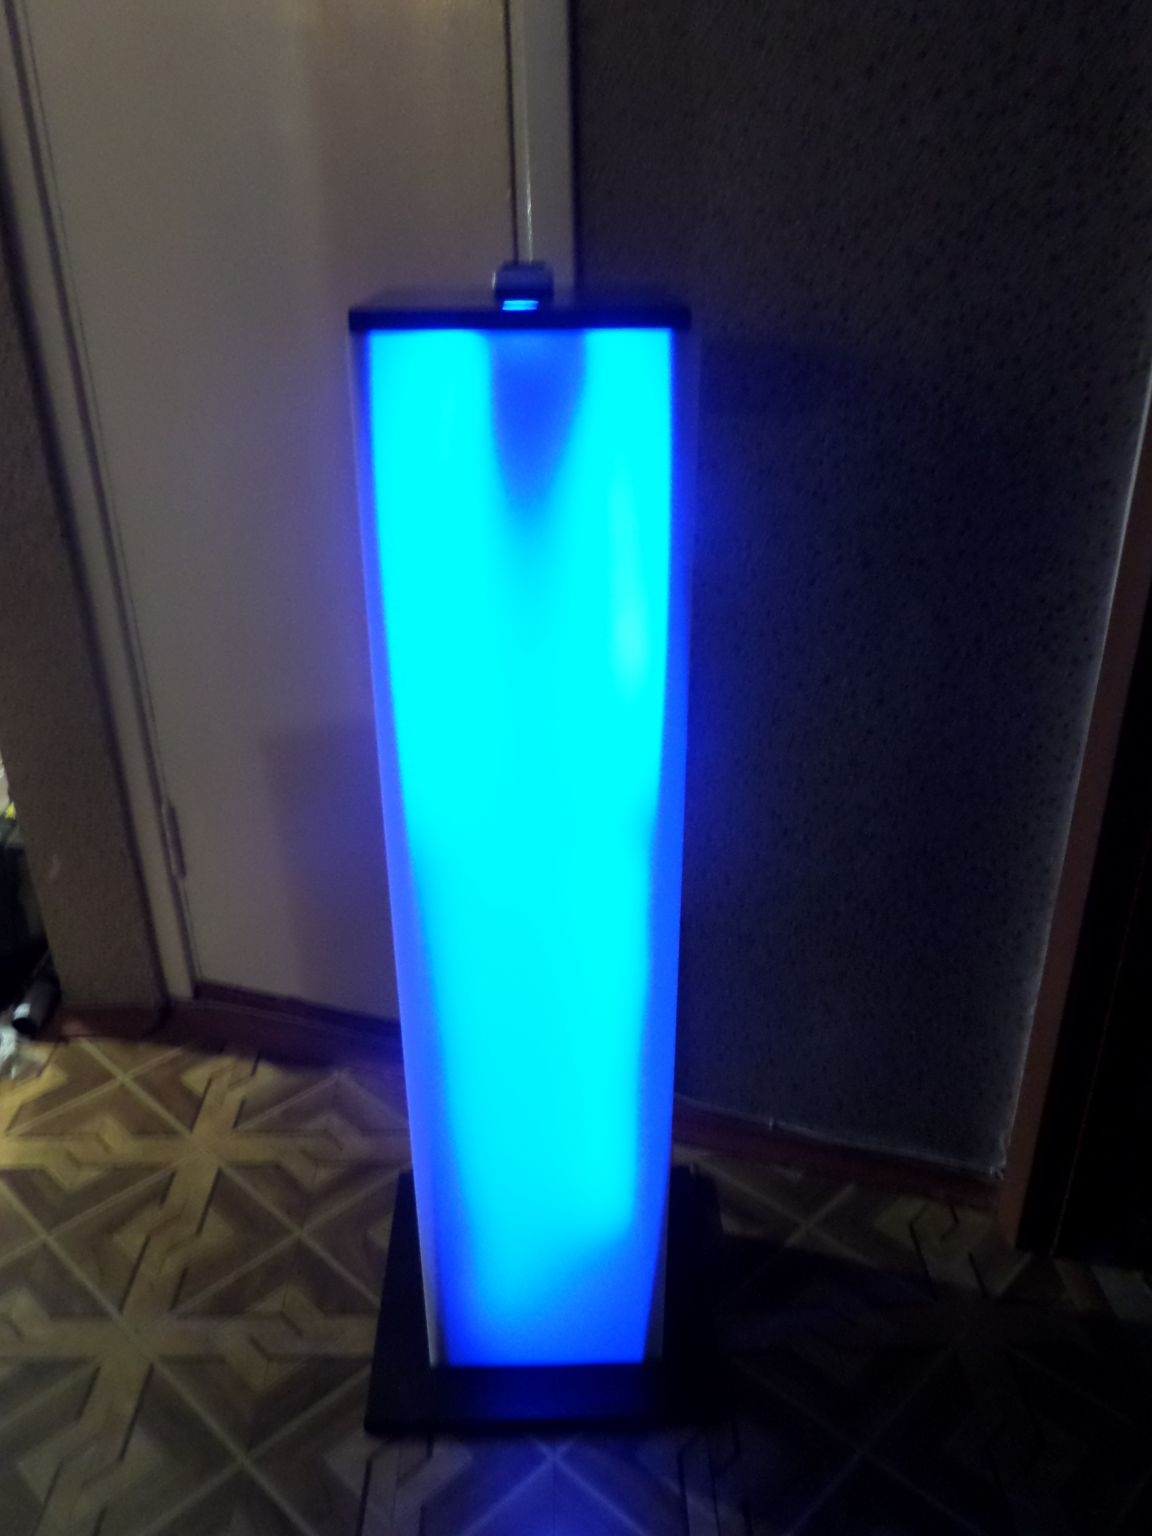
After we fasten the LED strip. In my design, in the top cover, I made an additional round hole and held an LED strip. This is necessary so that the participant in the game himself can understand that it was he who first pressed the button. LED strip can be with different colors and with different fill density.

The penultimate part of the project is firmware for arduino. Let's look at it.
#define PLAYER_COUNT 3 // number of players

int buttonPins [PLAYER_COUNT] = {3, 12, 7}; // input pins for buttons
int ledPins [PLAYER_COUNT] = {9, 11, 8}; // output pins for the signal in the relay

void setup ()
{
  pinMode (BUZZER_PIN, OUTPUT);
  for (int player = 0; player
When everything is already assembled, all the electronics are connected, the code is poured into the arduino and everything works, we attach matte plastic to the front part.

[center]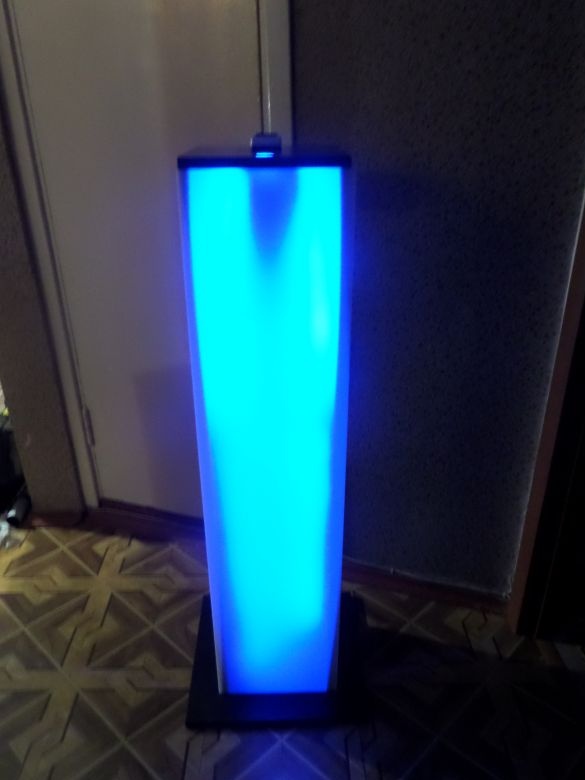
Everything works? Go to entertainment!

In this article, I showed complete instructions for assembling this equipment. At the time of this writing, dozens of events have been held with these tables. Moreover, each of the participants was satisfied. I hope this article was helpful. Put your thumbs up and leave your comments.