
In this instruction we will look at how to make a simple table made of wood cut. At such a table it will be nice to drink tea, coffee and other drinks while reading the newspaper. The table is made quite simple, materials are scarce, as are tools. The peculiarity of such a countertop is that it looks beautiful, natural. This material is also strong, durable, and if you have a good chainsaw or circular machine, you can cut a tree and do it yourself. So, we will consider in more detail how to make such a table!
Materials and tools that were used by the author:
Material List:
- cut a tree;
- bars for the manufacture of the frame;
- glue for wood;
- oil or varnish for impregnation;
- epoxy adhesive.
Tool List:
- grinding machine (tape or orbital);
- a tool for cutting (circular, gas or electric saw and the like);
- milling cutter;
- a chisel and a hammer;
- tape measure and marker;
- drill with drills and more.
The process of making a table:
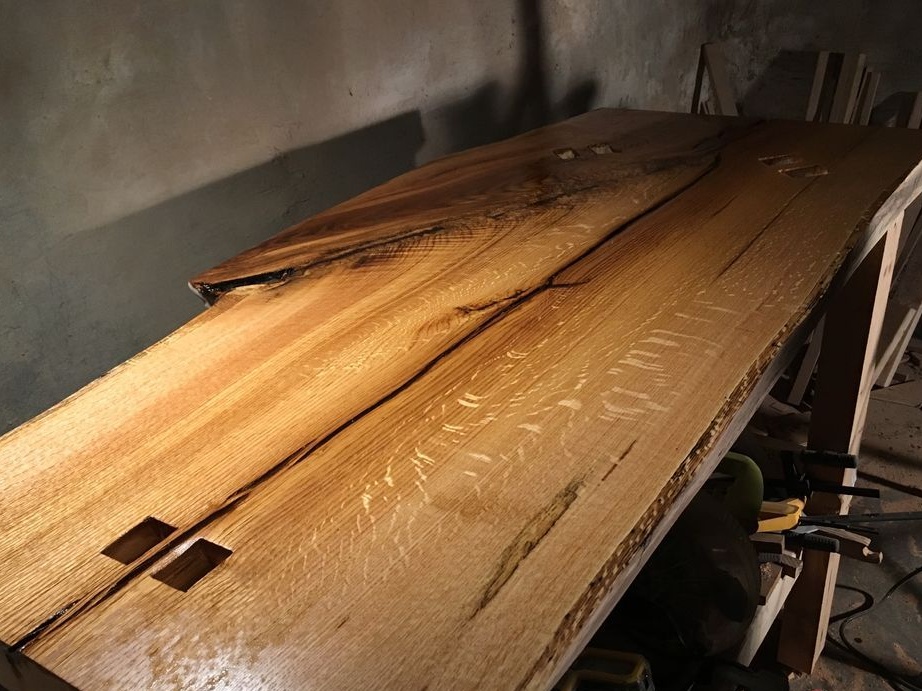
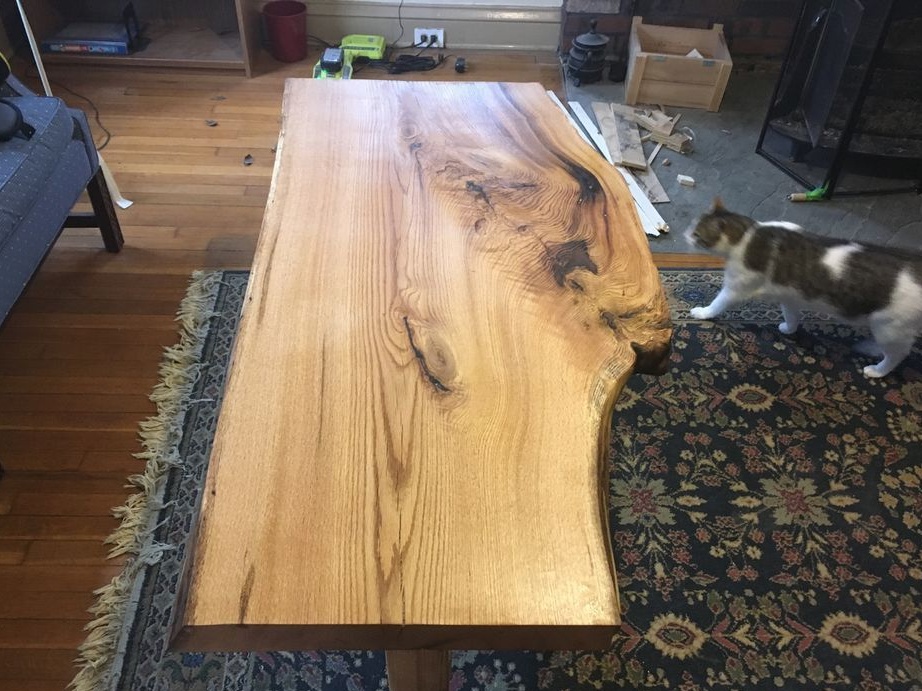
Step one. We prepare the countertop
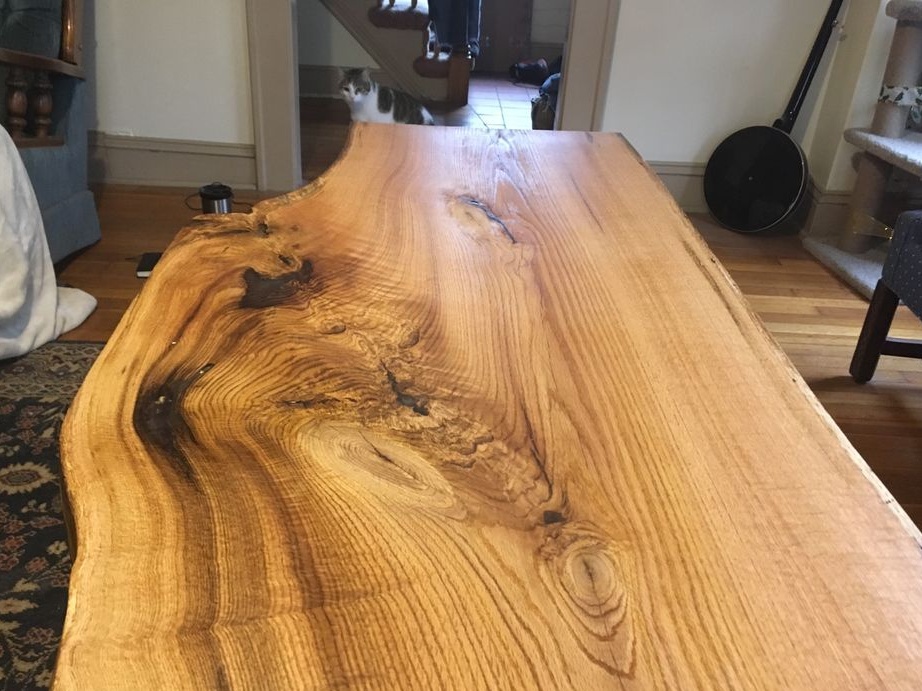
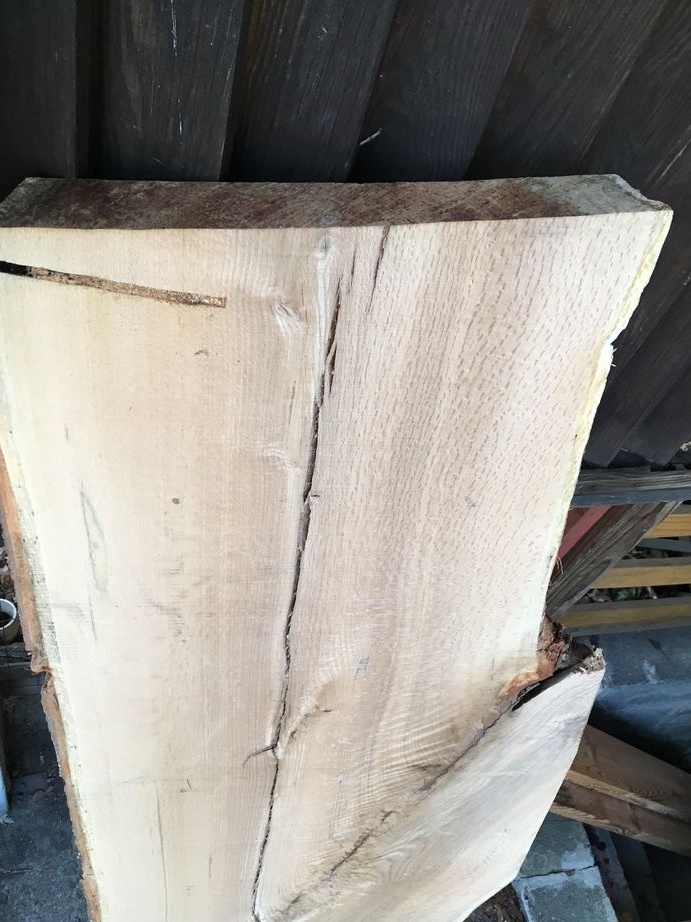
Making countertops is the hardest and most responsible job. First of all, you have to measure and cut the desired piece of material. Well, after that, grinding begins. For the initial rough processing, you can use a planing machine, but here it all depends on the quality of the source material.
For grinding a plane, a manual belt sander is perfect. We put a tape with large grain and get to work. The material should be perfectly dry, so it will be easier to handle. And you can not glue the material and apply varnish if it has not completely dried out.

Step Two Eliminate defects on countertops
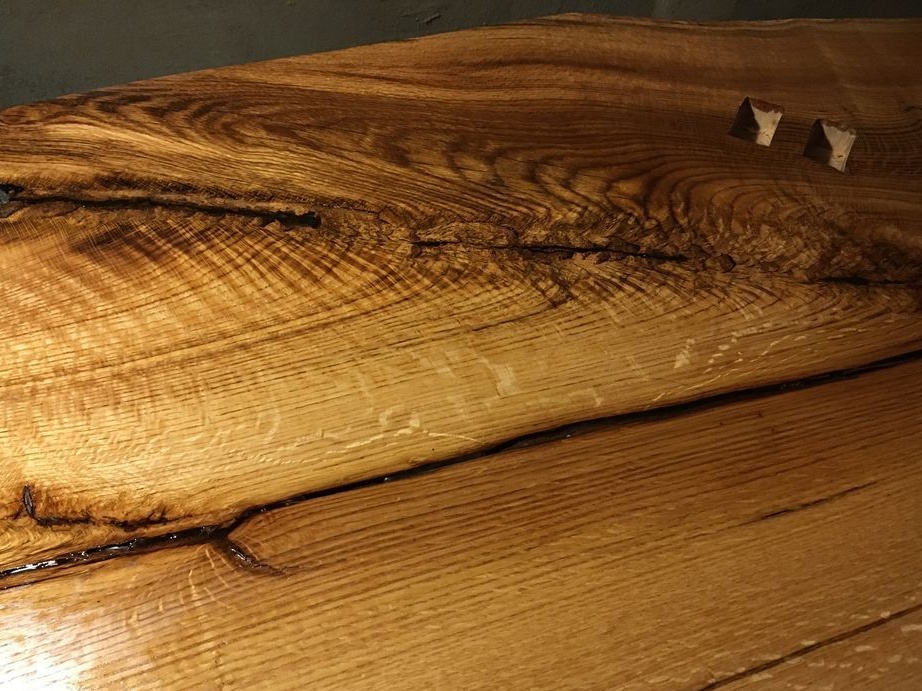
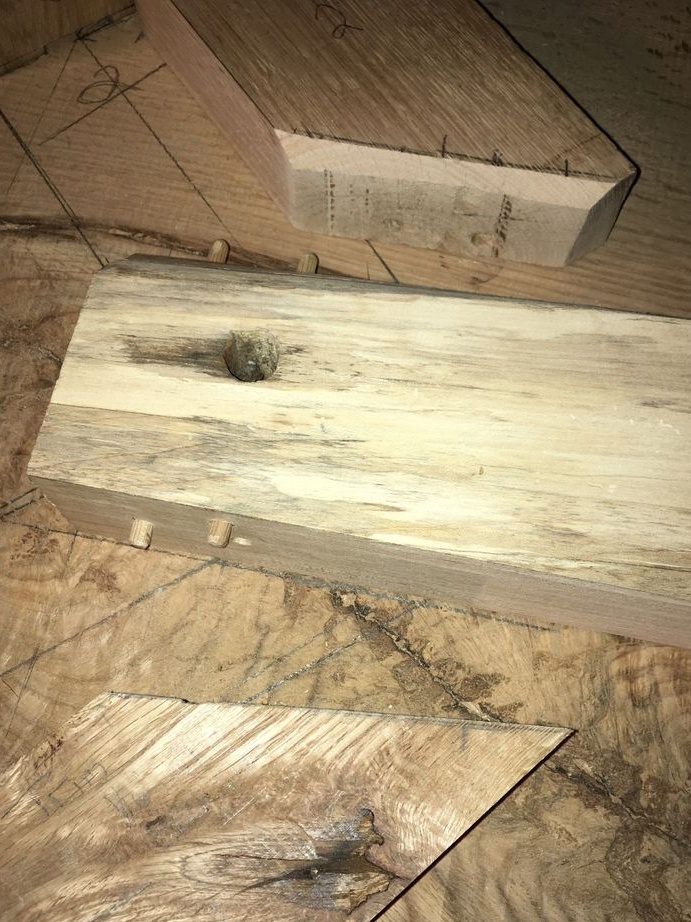
Surely the wood slab will have cracks, chips and other defects that we have to remove. The most important thing is to strengthen the cracks if there are a lot of them and they are deep. To do this, grooves are cut out in the material and jumpers are installed in the form of butterflies, wedges, and so on. Epoxy adhesive is excellent for straightening such defects. Small cracks can be filled with epoxy glue, like other defects.If desired, you can add dye to the glue. If there are a lot of bubbles in the resin, it needs to be heated, the bubbles will come out, since the resin will become liquid. It can be heated with an ordinary hairdryer, burner and so on.
When the glue dries, sand the product again. That's all, now the countertop is ready, you can proceed to the next stage.
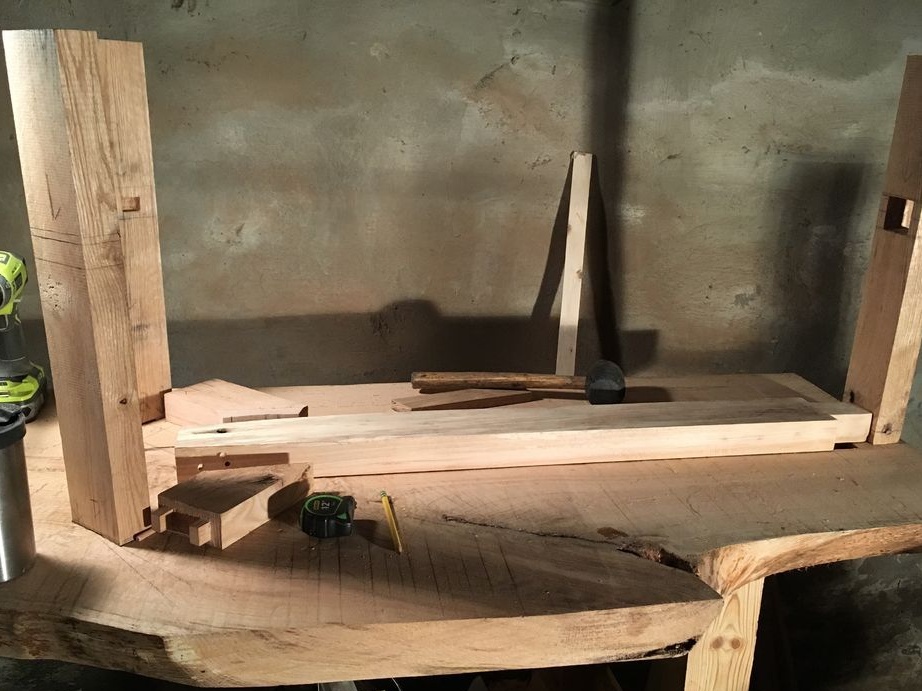
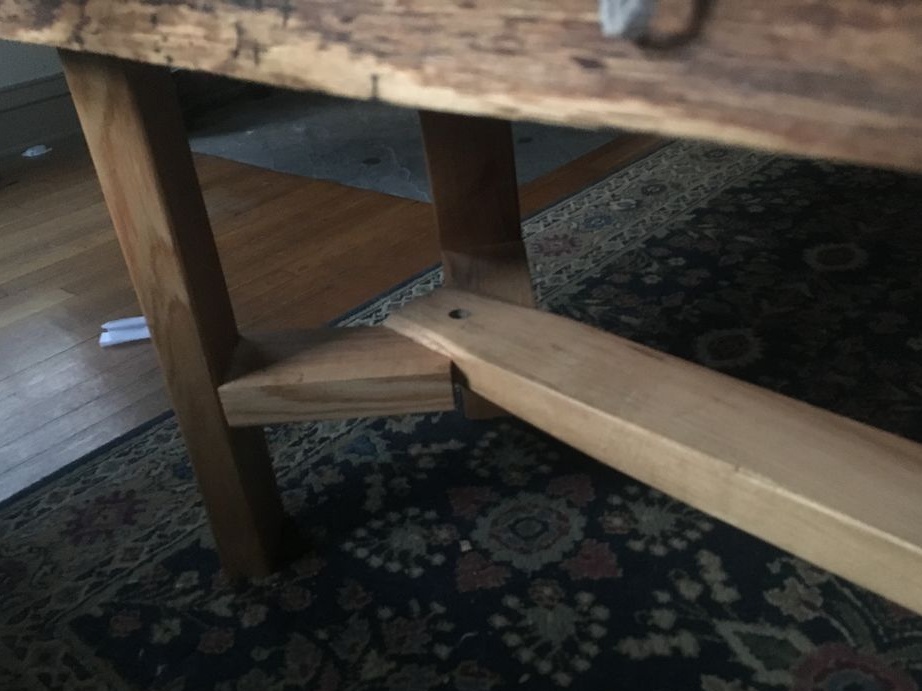
Step Three Cut out the details for the frame
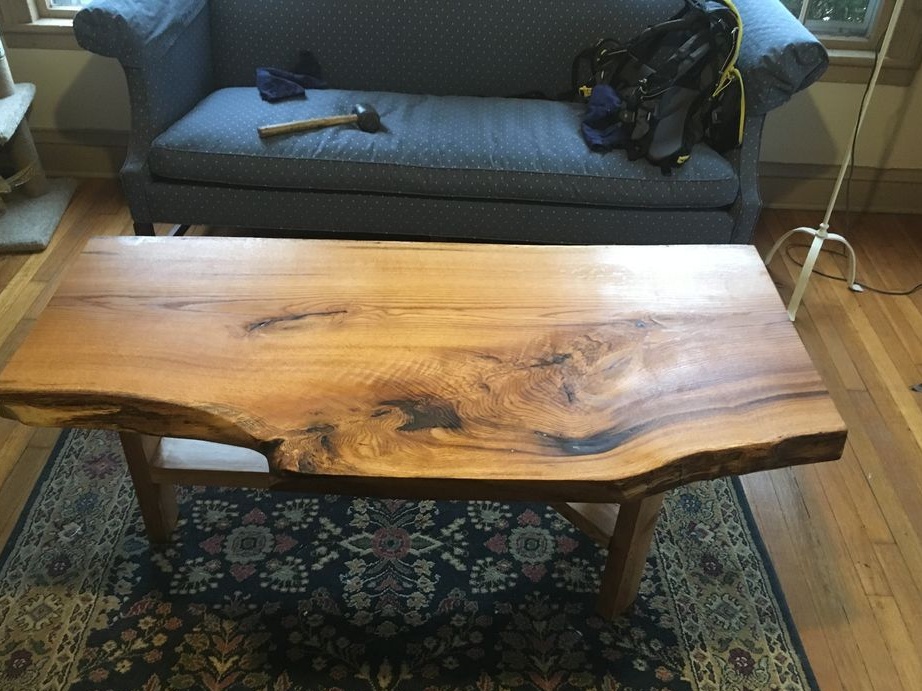
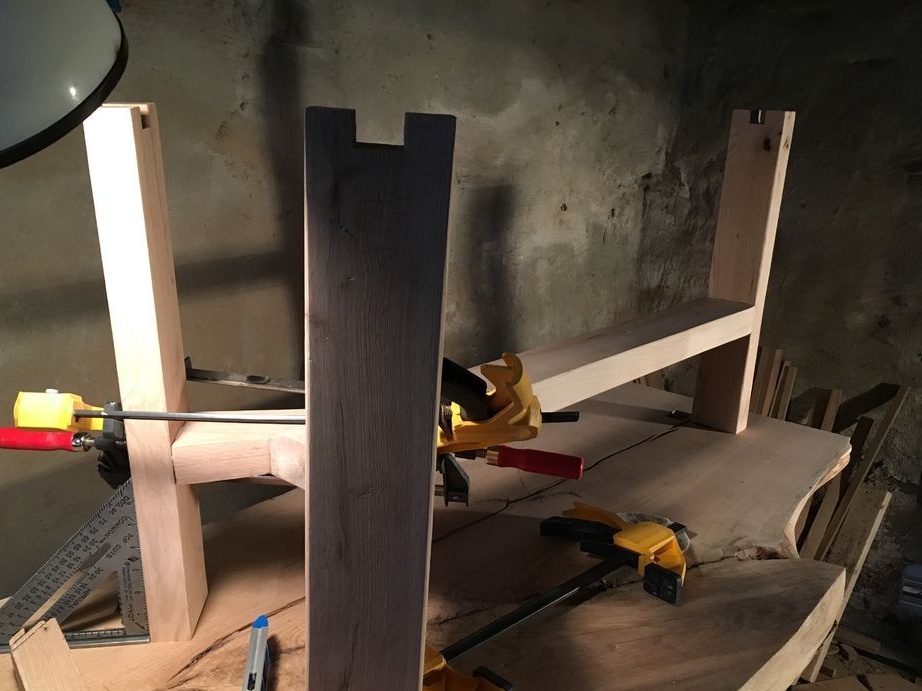
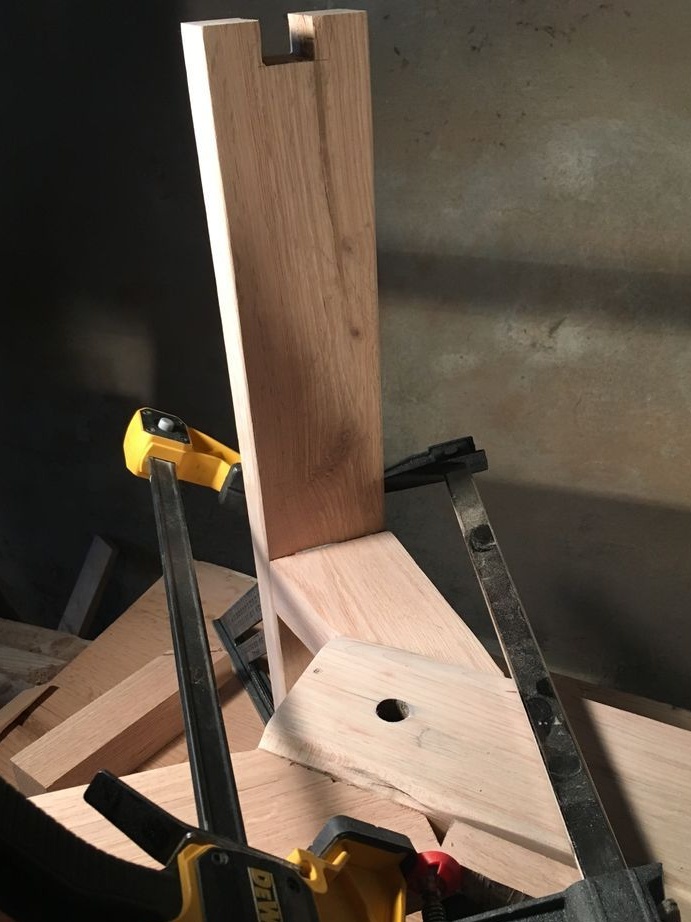
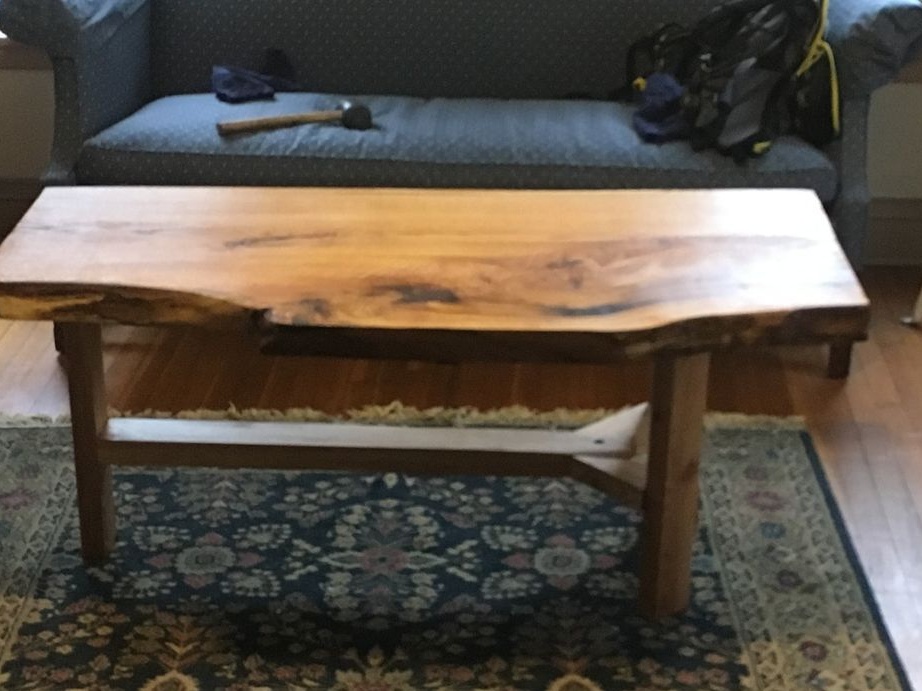
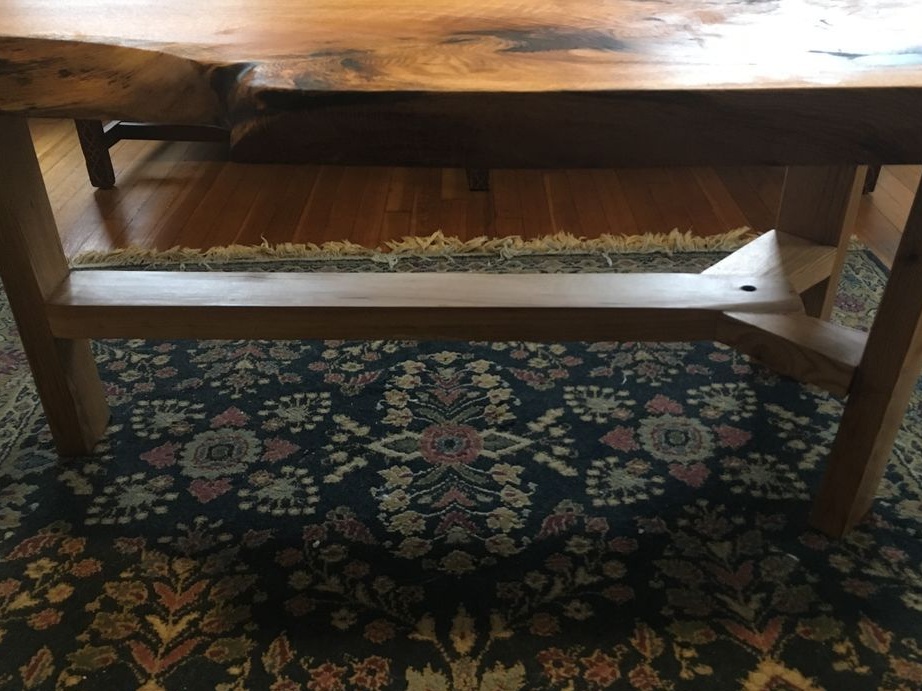
To make the frame, you will need bars or thick boards. It is desirable that the wood be solid, then the table will be strong. The author decided to make an unusual design, the table has only three legs. First, decide on the height of the table, you should be comfortable sitting at it. The author made his height in terms of his sofa. Well, then cut off the necessary pieces. Keep in mind that a few centimeters of length will go to the spikes.
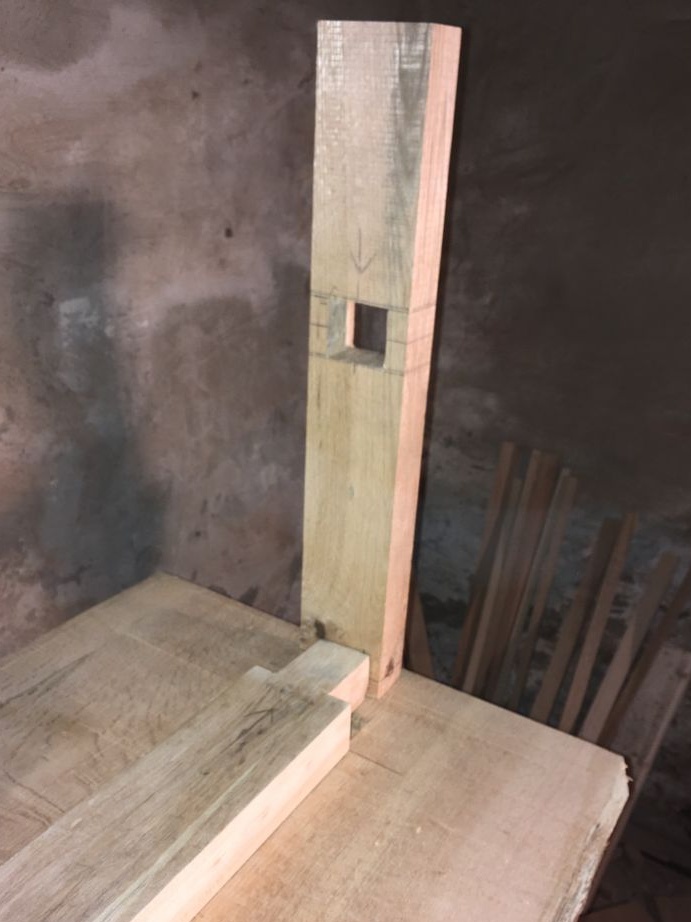
All three legs are connected using one long piece of timber, as well as two small ones. Well, now you just have to cut out the necessary spikes, grooves and try to assemble a table. If everything is going smoothly and reliably, you can proceed to the next step.

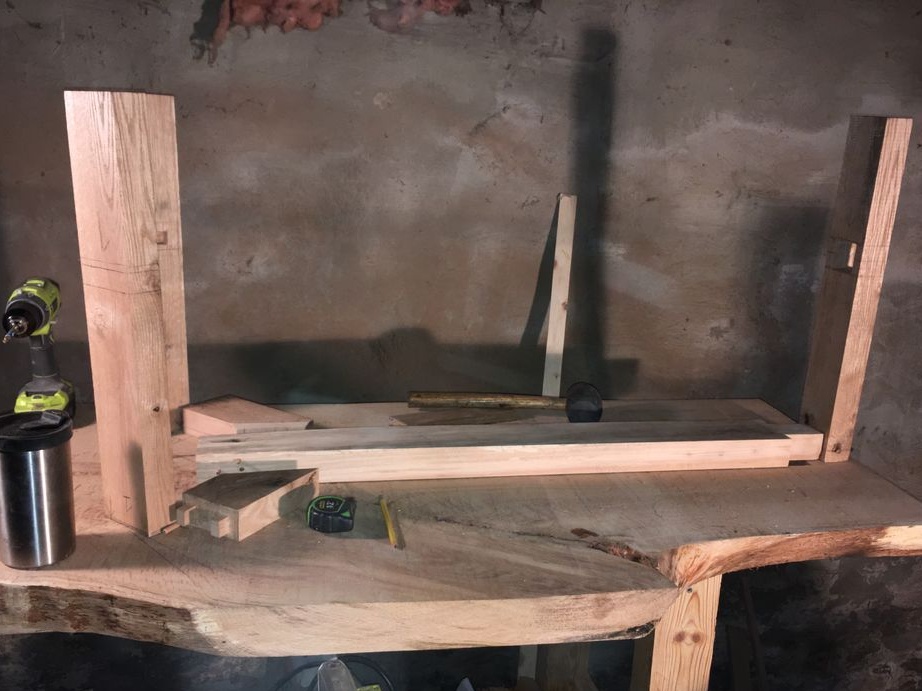

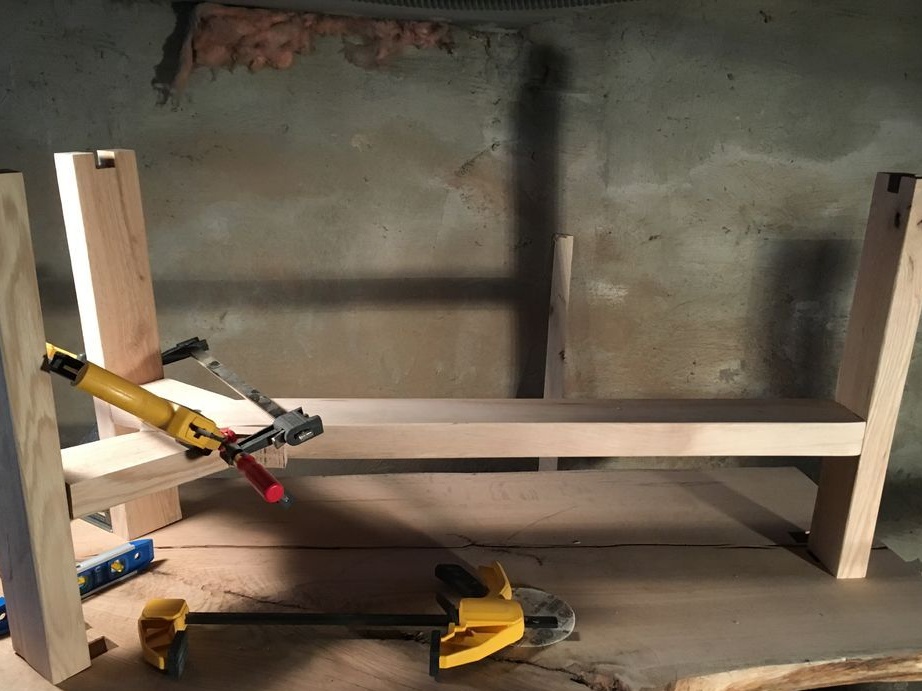
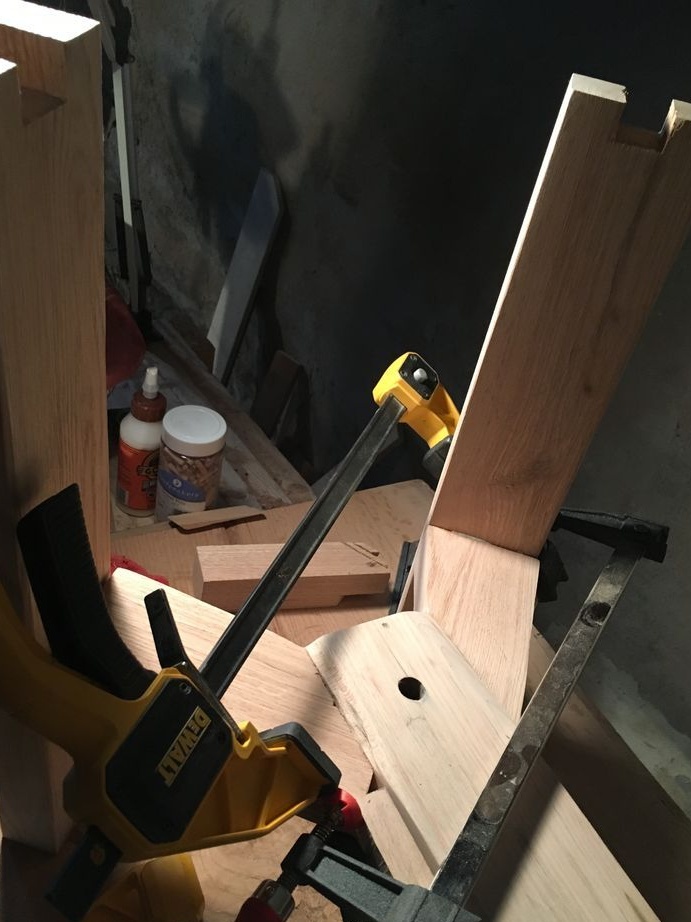
Step Four Glue the frame
That's all, now the frame can be glued. Glue connection will be enough to make the table strong. But if you want to strengthen the structure, it can be strengthened with countersunk screws.
We collect everything on an even plane, fasten everything with clamps. We wait until the glue is completely dry, so that nothing gets distorted anywhere.
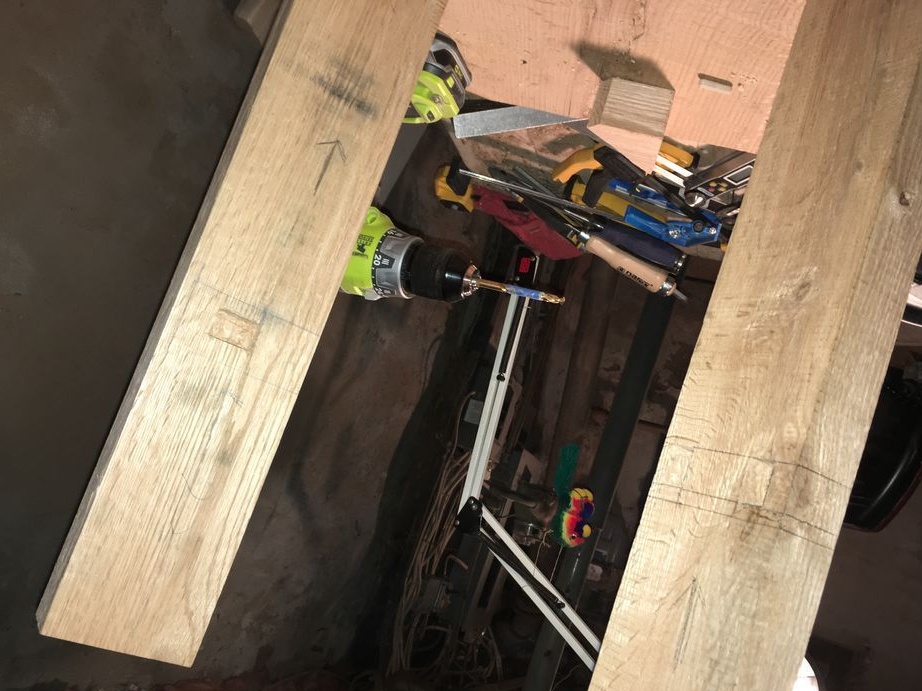
Step Five Install the countertop
Countertop can be installed. For its fastening, the author decided to use a spike connection, this whole thing also sticks together. Under the spikes we cut the corresponding holes in the countertop. Apply glue, center and let the whole thing dry.
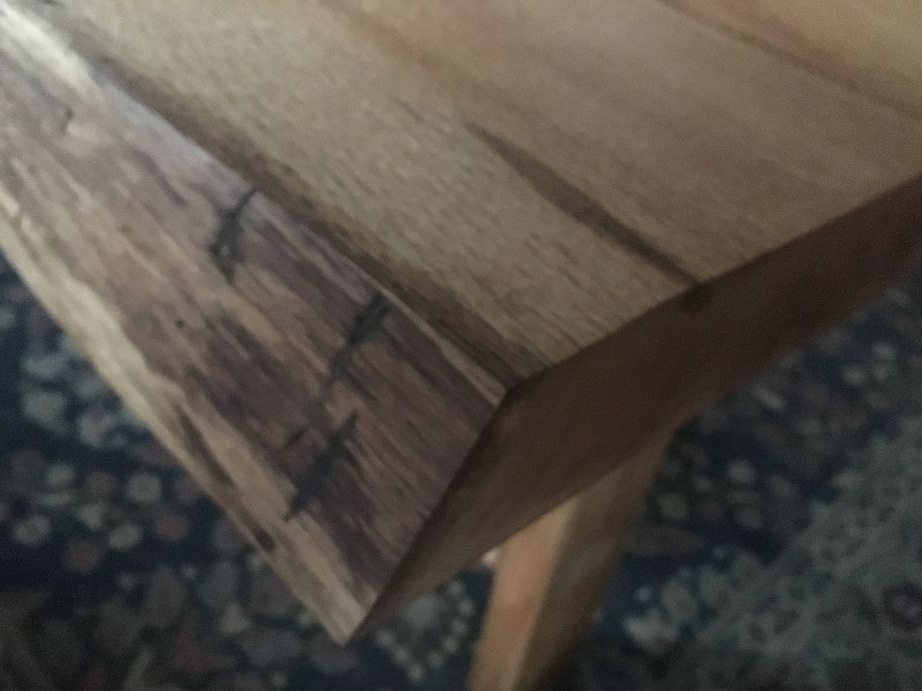
Step Six Final processing
The table is ready, it remains to make only cosmetic treatment. To begin, deal with the edges of the countertops. Many craftsmen leave the bark, with it the material looks very beautiful. But so that the bark does not fall off, it must be covered with epoxy glue or another bonding coating. The author decided to remove the bark, for this we use a chisel and a hammer. Well, then along the contour, you can go through a grinder with a grinding disc.
Next, go to the finish grinding, for this we use a grinding machine. An orbital machine is suitable, but it is better to use a tape machine. The author performed grinding using a tape with a grain size of 60 -> 80 -> 150 -> 320 units.
After polishing, you can apply a layer of varnish, and it is best to use oil, it does not distort, but rather emphasizes the natural look of the material. The author decided to use Danish oil. When the first layer of oil is absorbed and dried, we sand it with 600 grit sandpaper. Next, apply a second layer, and when it dries, the countertop can be polished. The result is a beautiful, natural, reliable table.
That's all, the project is over, I hope you liked it. Good luck and creative inspiration, if you decide to repeat this. Do not forget to share your best practices with us.