
Good day to all, dear friends! In today's article, I would like to show you a rather interesting idea homemade for fun. This homemade product is made of a very popular material at the moment for making homemade products. I think many people know that now many craftsmen make various cardboard fixtures, toys, tools and so on. Some friends even make car models out of cardboard, and it looks very cool to me. In principle, this is understandable, corrugated cardboard is not only a very versatile material, but also very affordable.
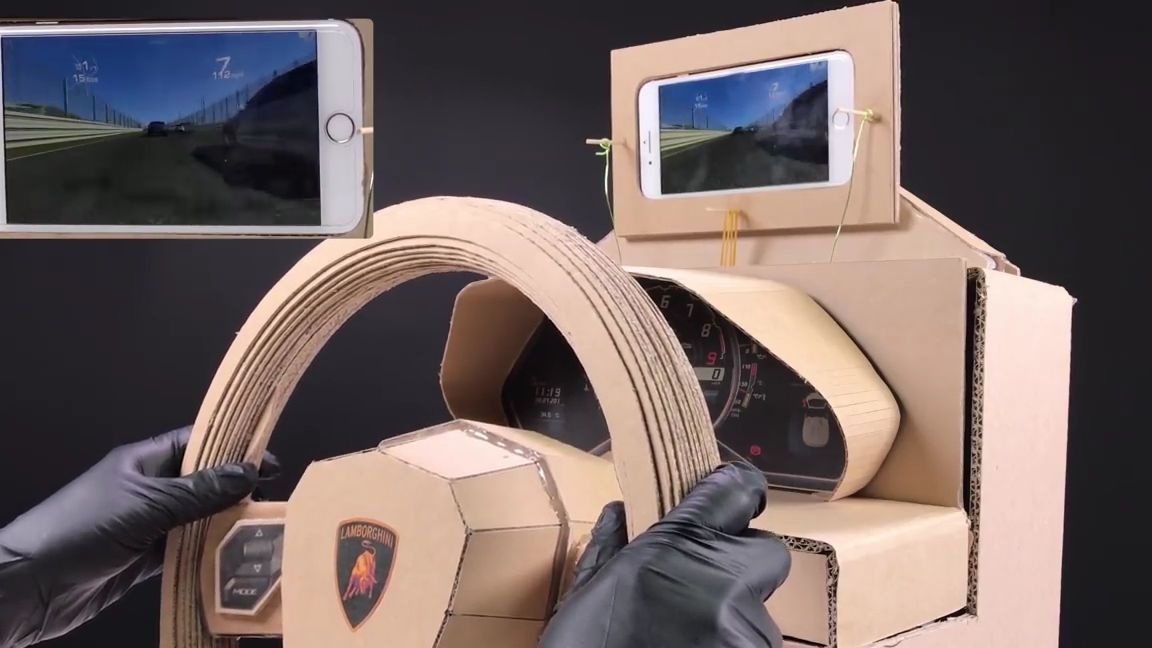
In general, today we will consider how to make a full-sized game steering wheel for a smartphone from corrugated cardboard. With the help of such a steering wheel, you can easily play racing on your phone or tablet.
Well, let's not pull with a long introduction, let's go!
And so, for this homemade product you will need:
-corrugated cardboard
wire (not very thick)
ice cream sticks
Toothpicks or skewers for barbecue
office gum
Cardboard tube made from foil, paper or film
From the tools you will also need:
- a screwdriver or a mini electric drill and a drill of the required size (the drill should be the same diameter as the diameter of the barbecue skewers)
-stationery knife
hotmelt
-scissors
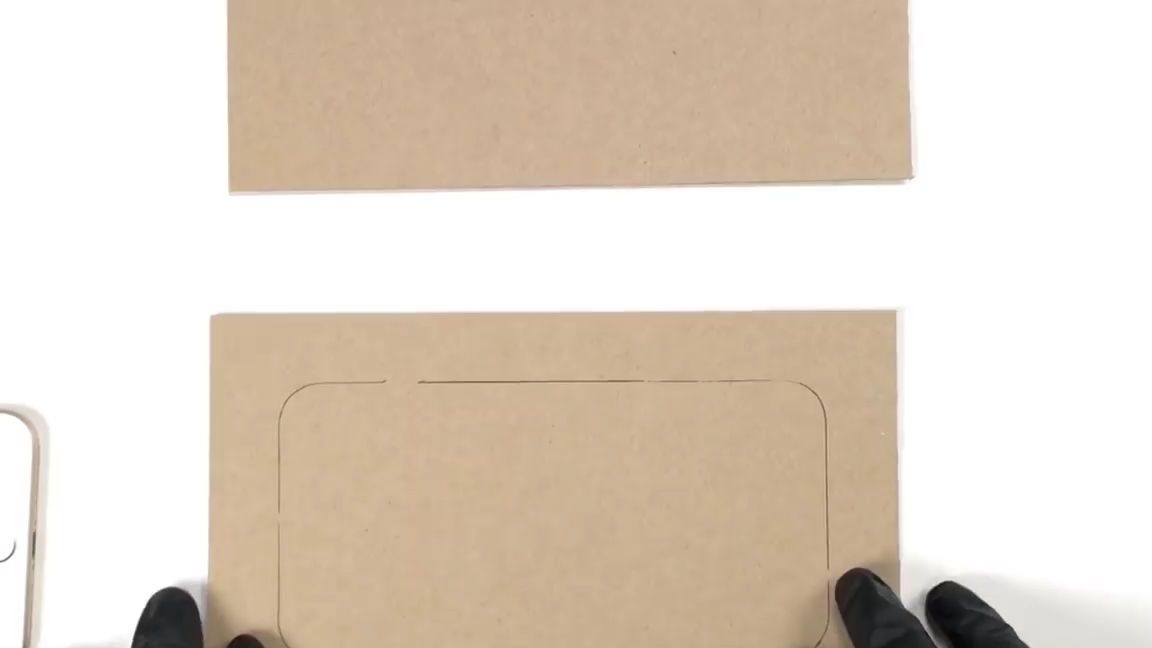
First of all, you need to cut out a lot of identical rectangles from corrugated cardboard, a little larger in area than the smartphone under which the steering wheel is made.
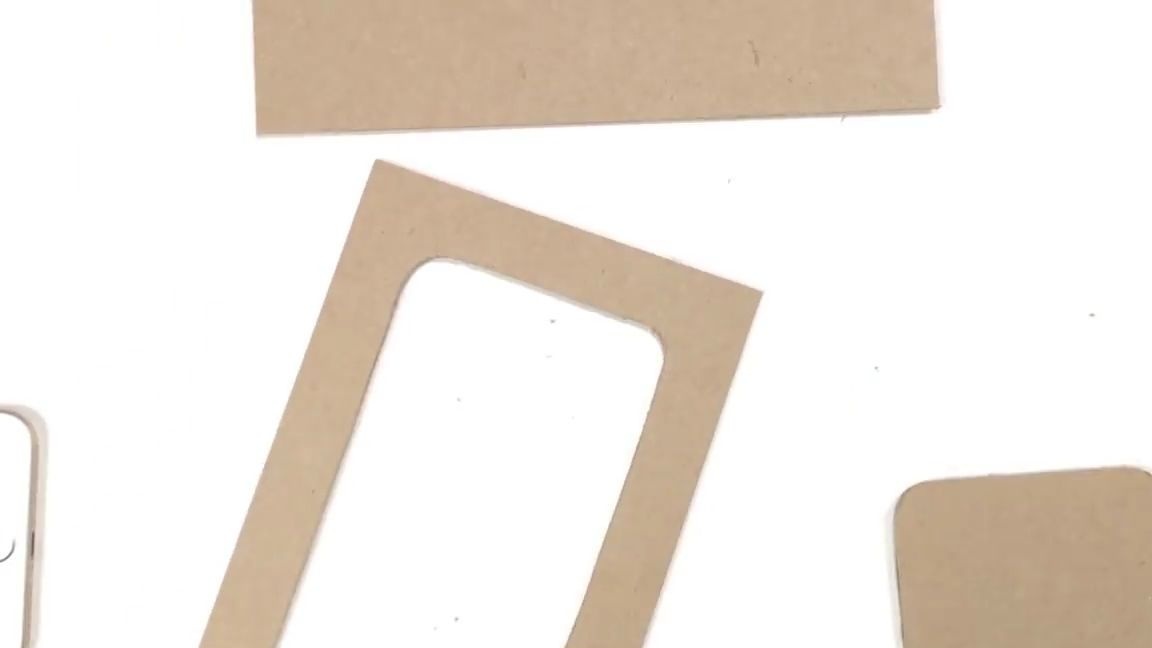
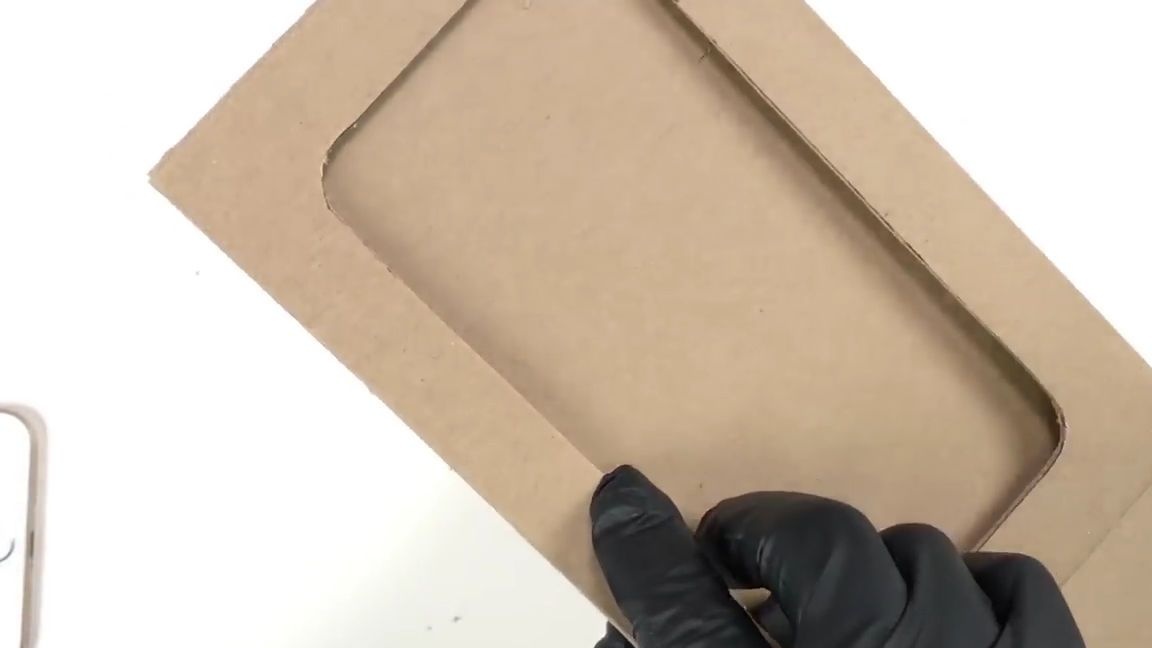
We attach the phone exactly in the center of the corrugated cardboard rectangles and circle it with a pencil, marker or pen. Then cut out. You should get a cardboard frame.
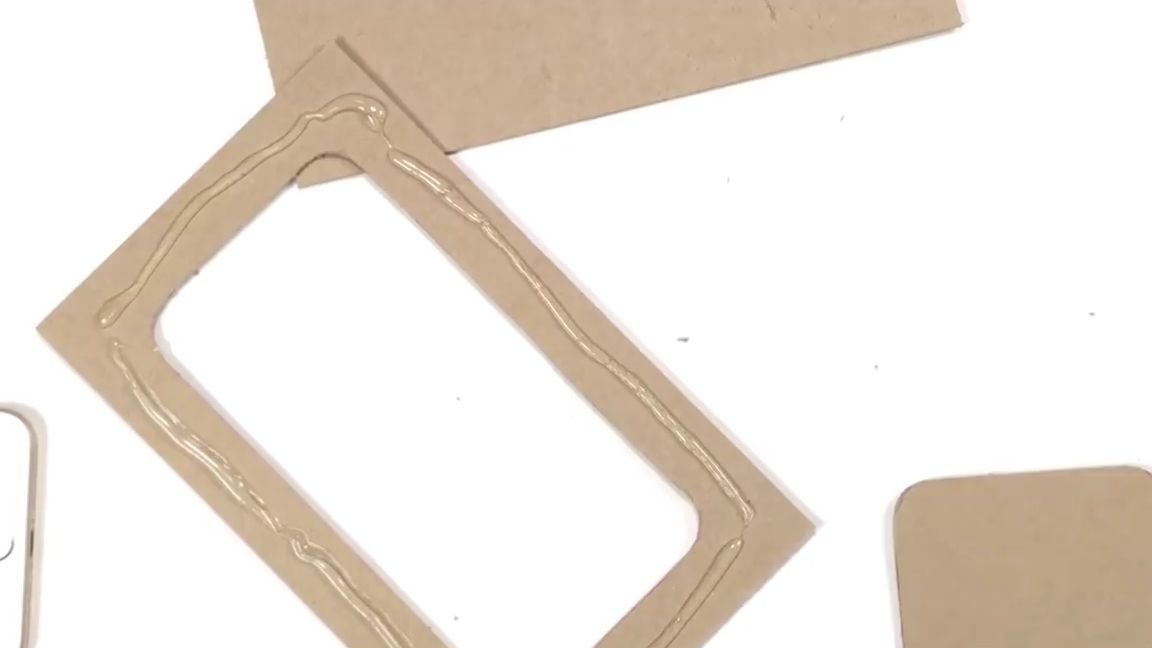
Then we add hot-melt glue to the frame and glue it to a regular rectangle.
Now you need to make a lot of copies of the first frame and start sticking them on top of the first, so that you get many layers of cardboard, glue it best with hot-melt adhesive:

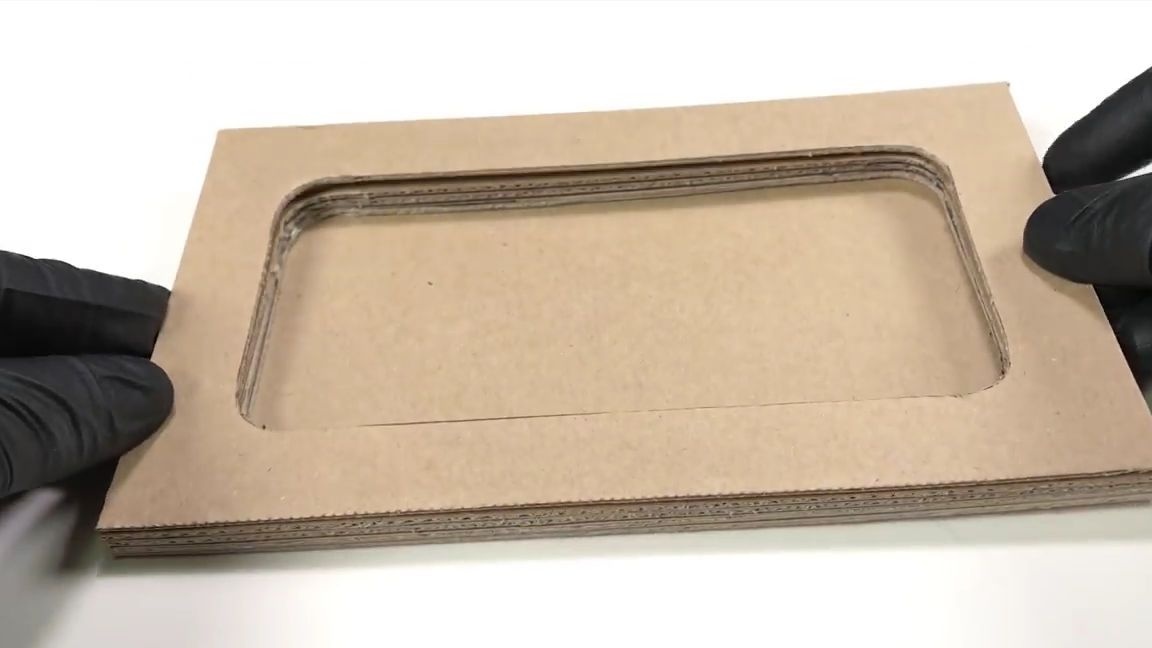
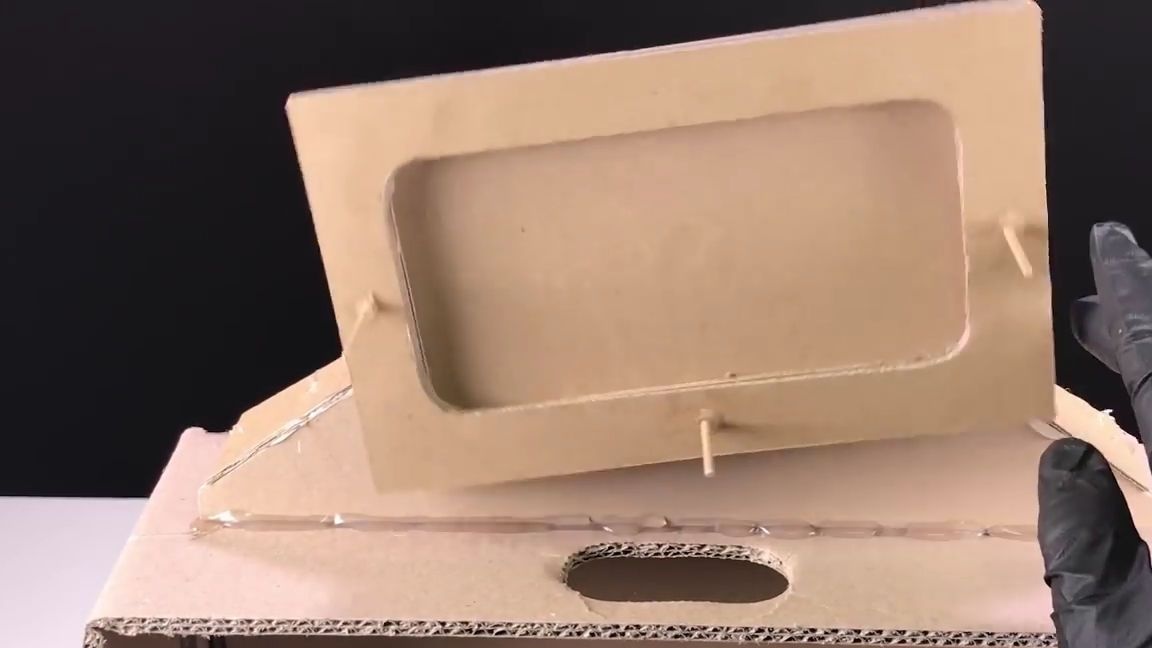
We take the phone and put it in the recess in this blank, if it lies tightly there and does not fall out, then everything is done correctly and you can continue:

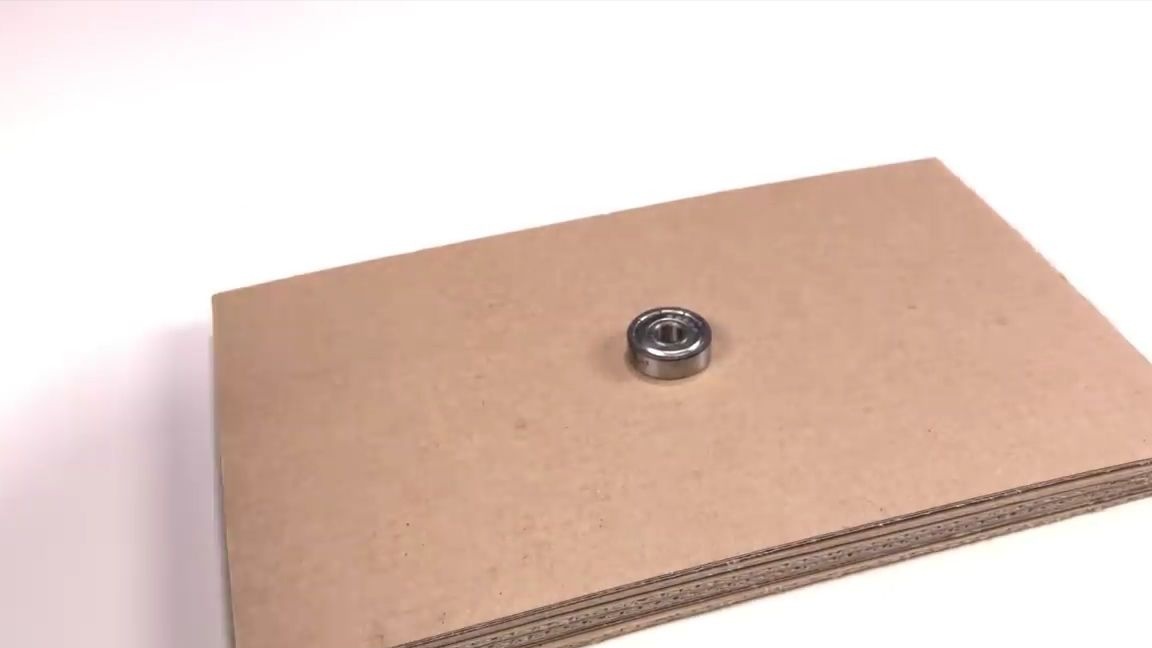
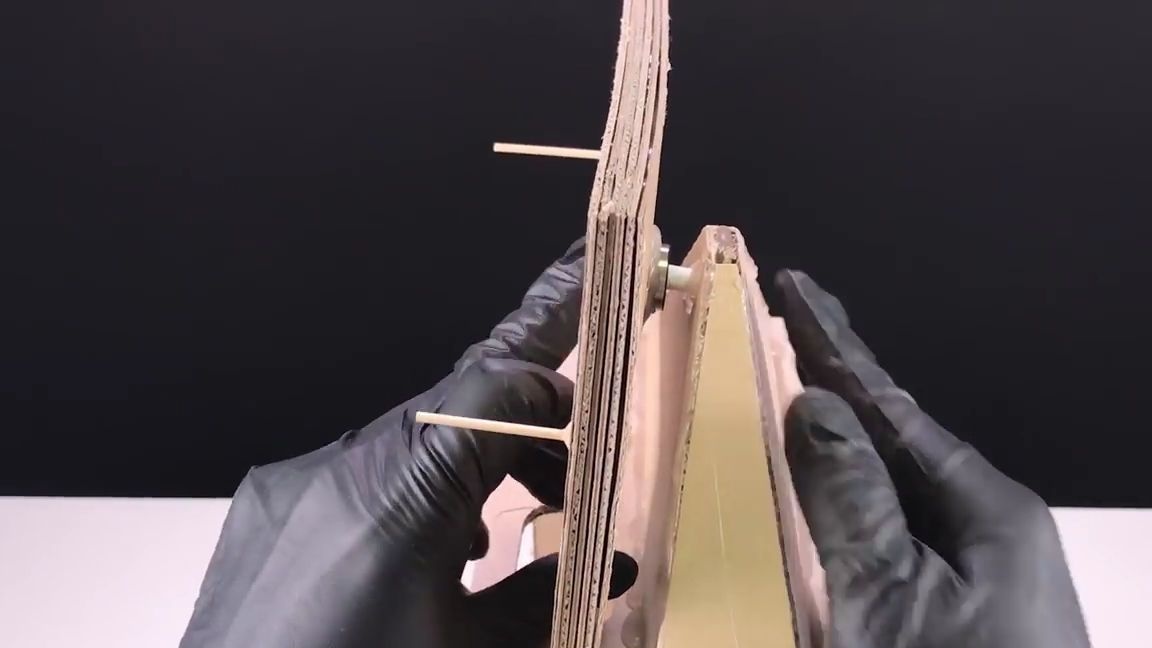
On the back side of this workpiece exactly in the center (this is important) we glue an ordinary small ball bearing:
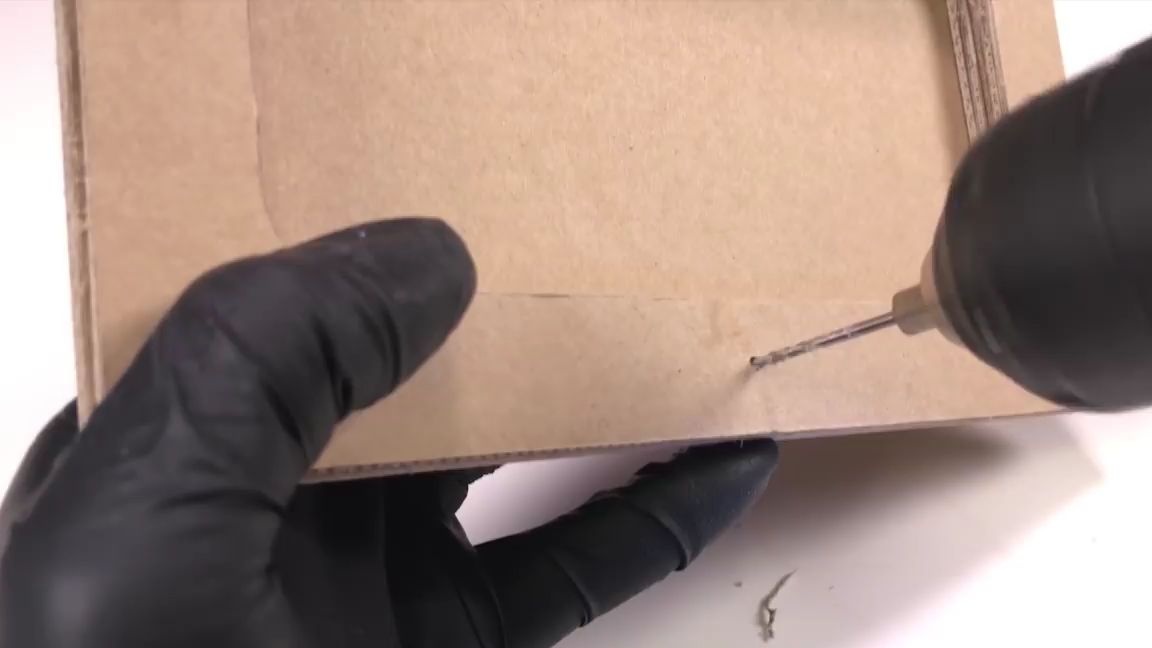
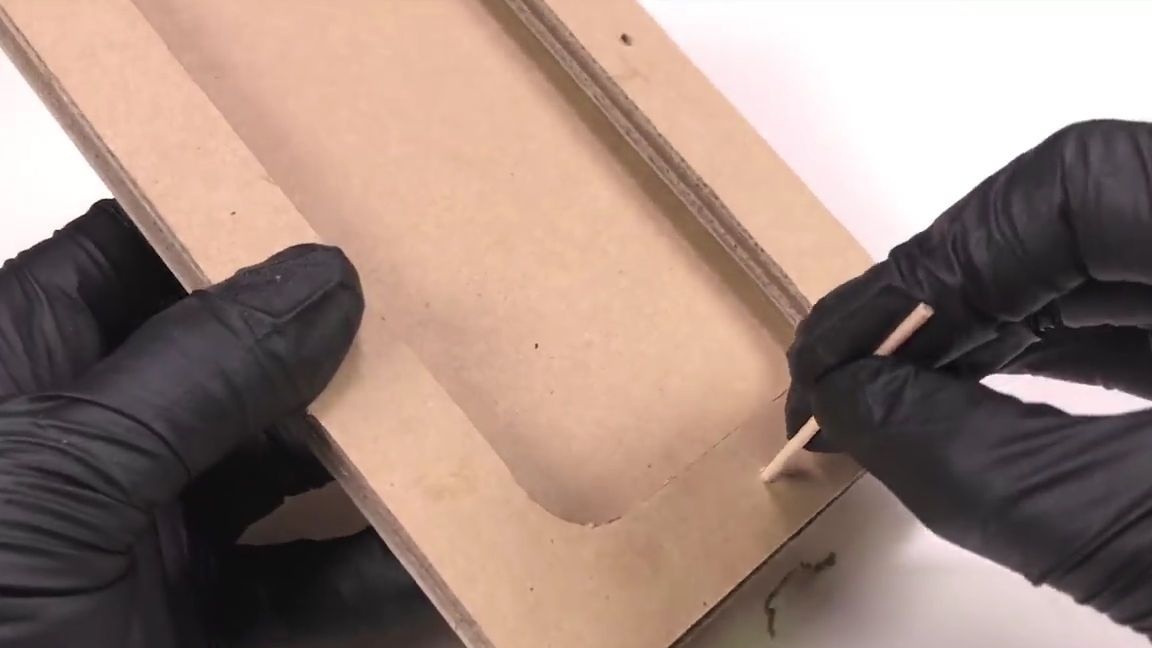
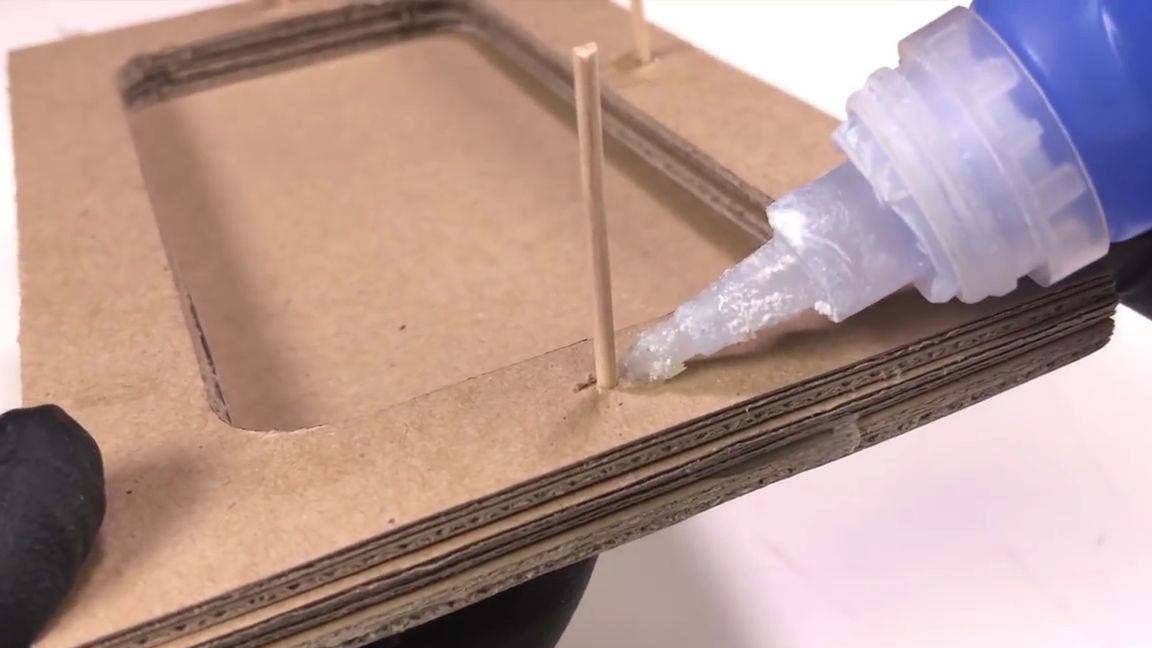
We take an electric drill or a screwdriver and drill 4 holes in the workpiece, that is, one on each side exactly in the center. The more evenly you do it, the better.
Then we insert into the resulting holes one piece of sticks from the barbecue, or toothpicks. Then you need to fix them with super glue:
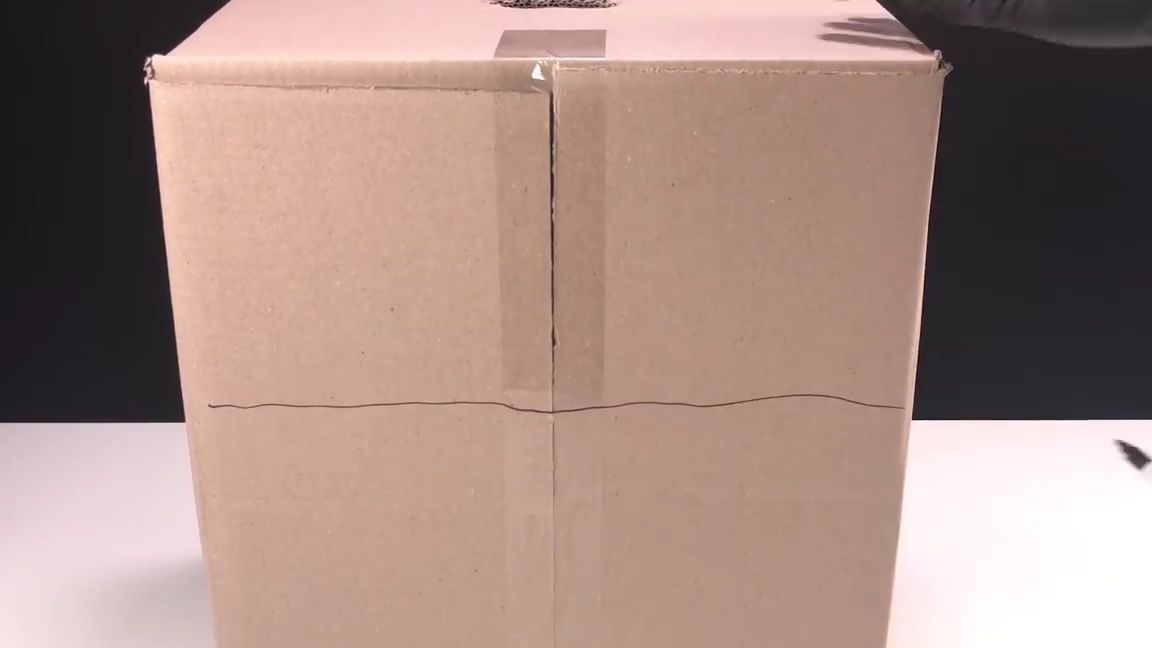
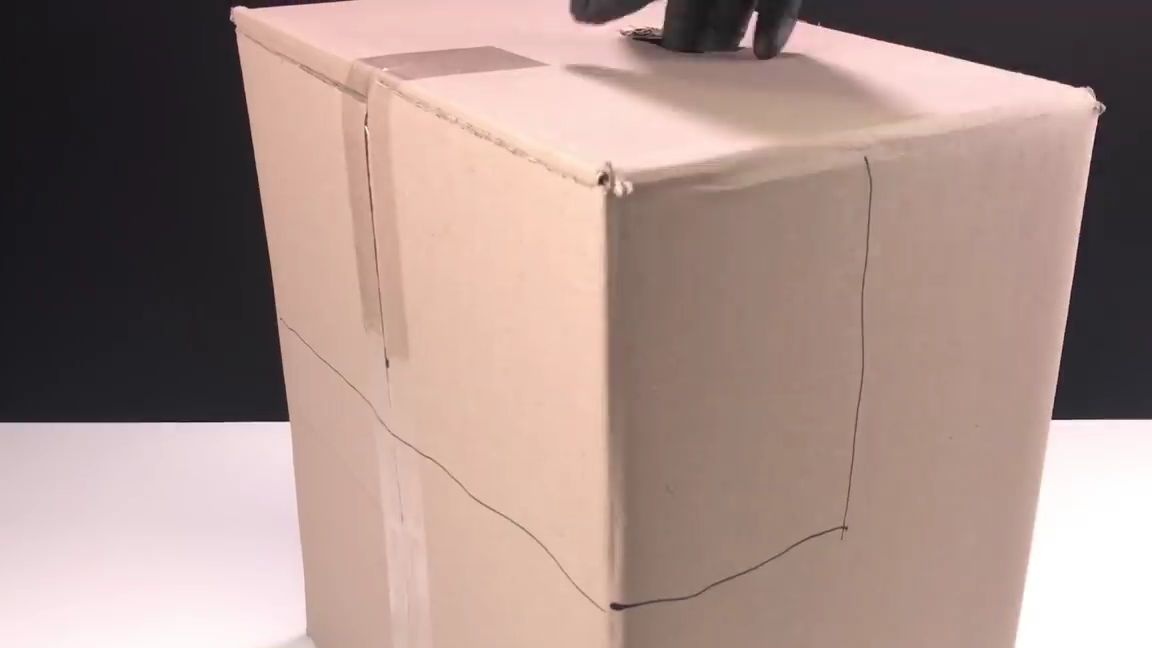
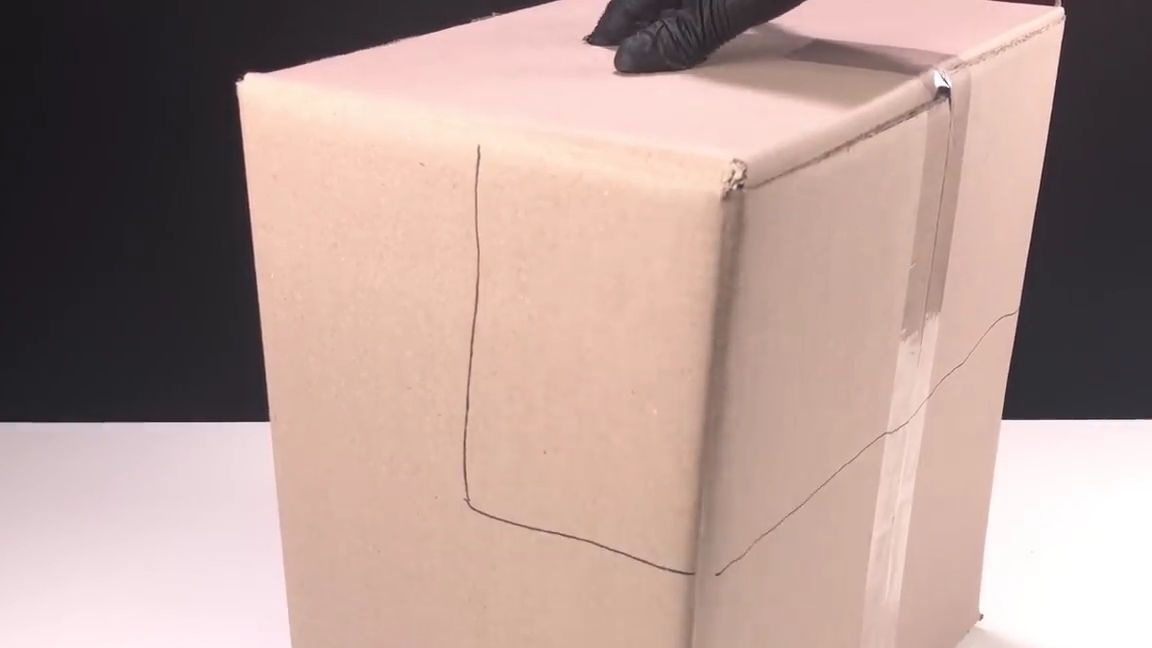
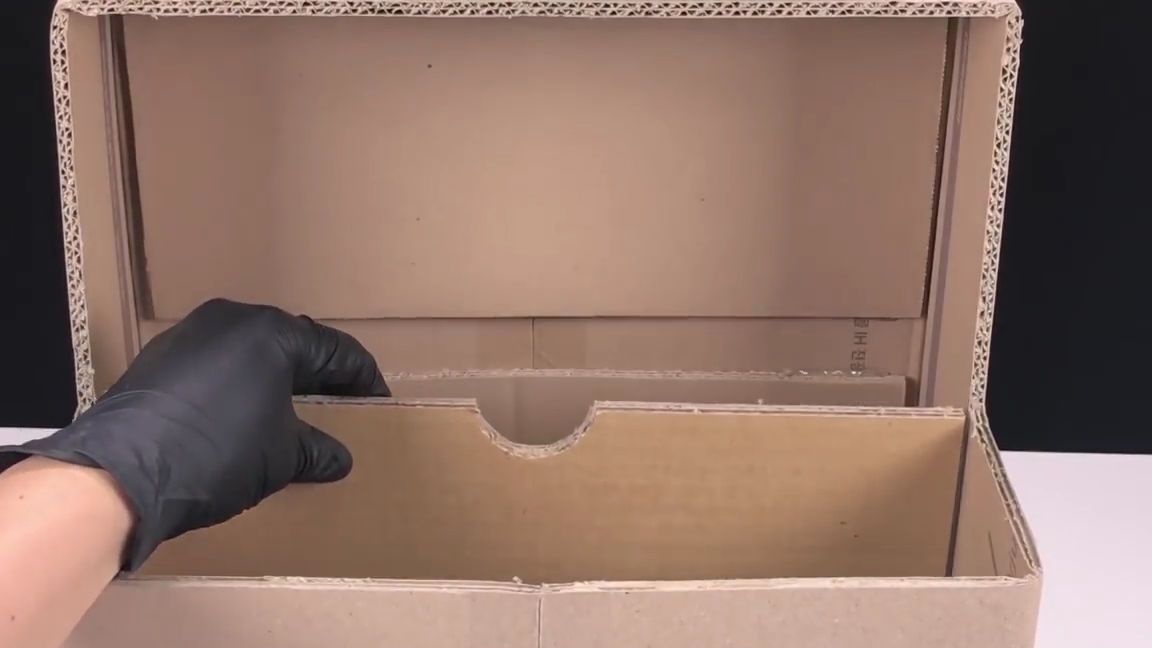
Now you need to take the whole cardboard box, which is glued around all the edges. Then we do the marking using a felt-tip pen or a helium pen. The markup must be done as shown in the photo below.
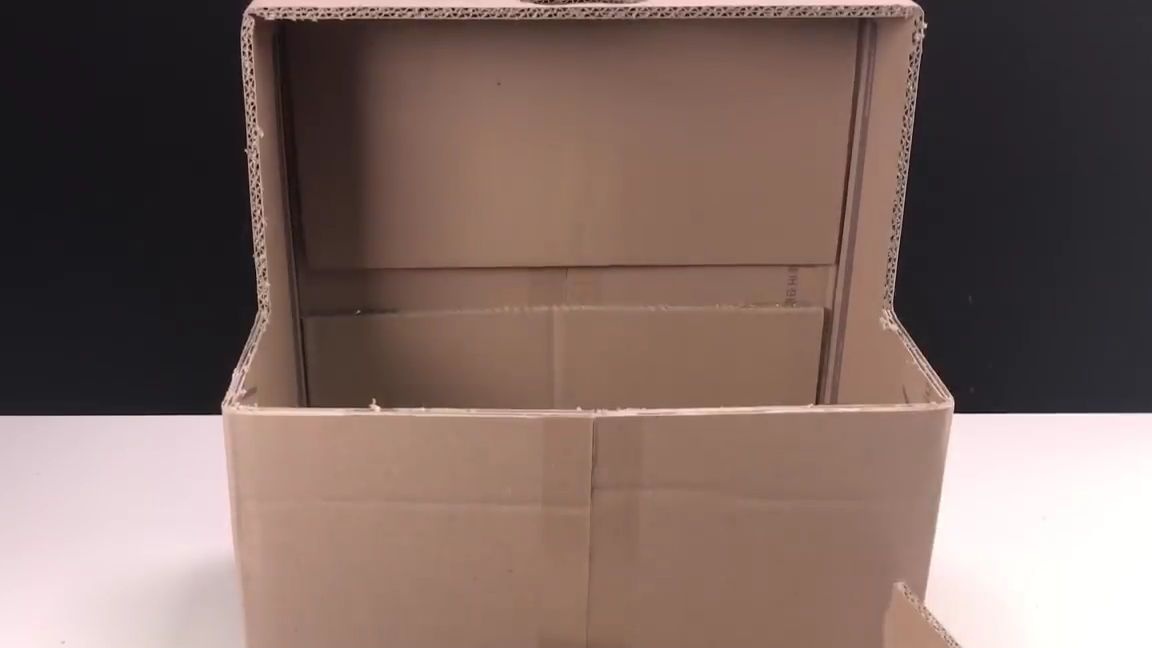
After you make the markup, you need to cut this piece out of the box:
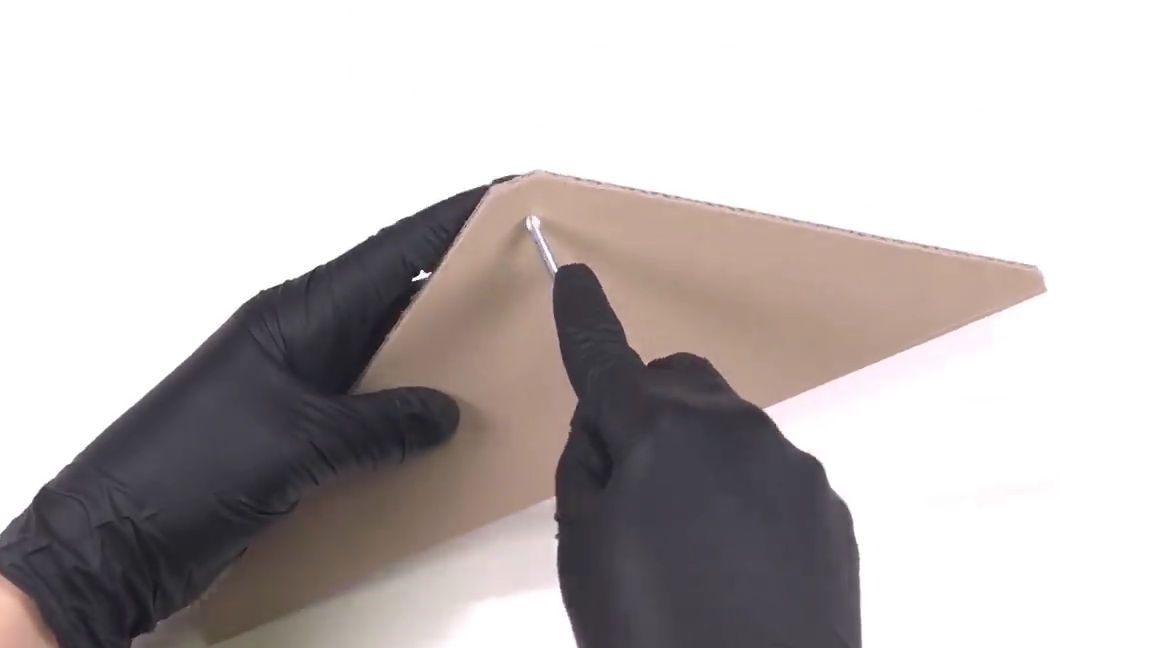
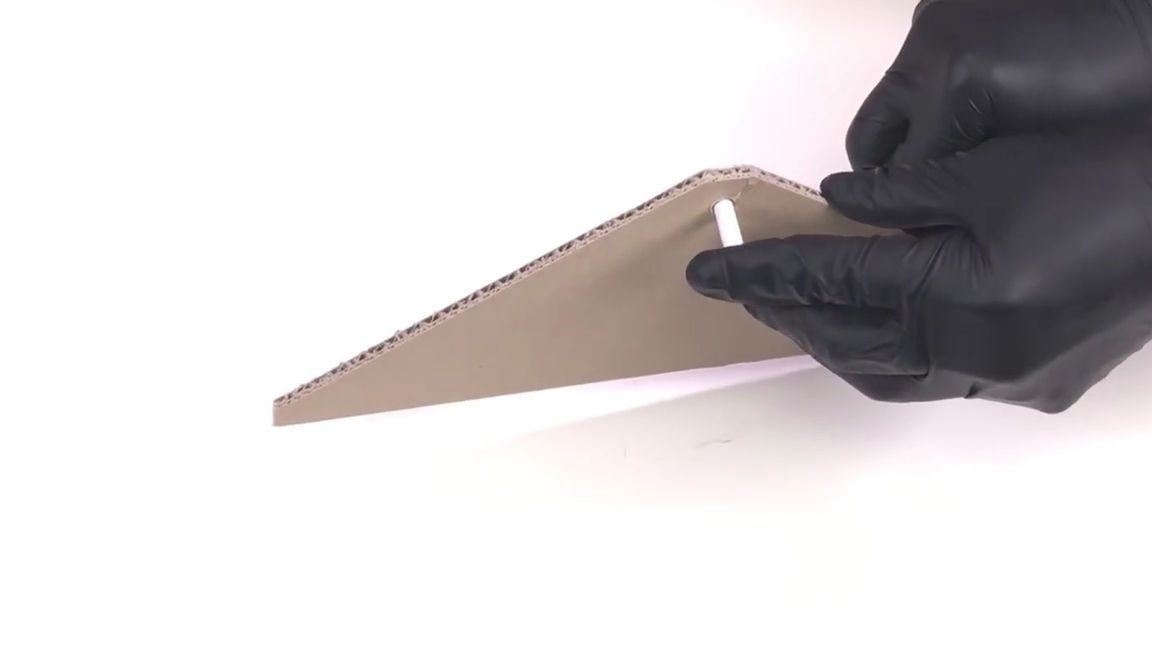
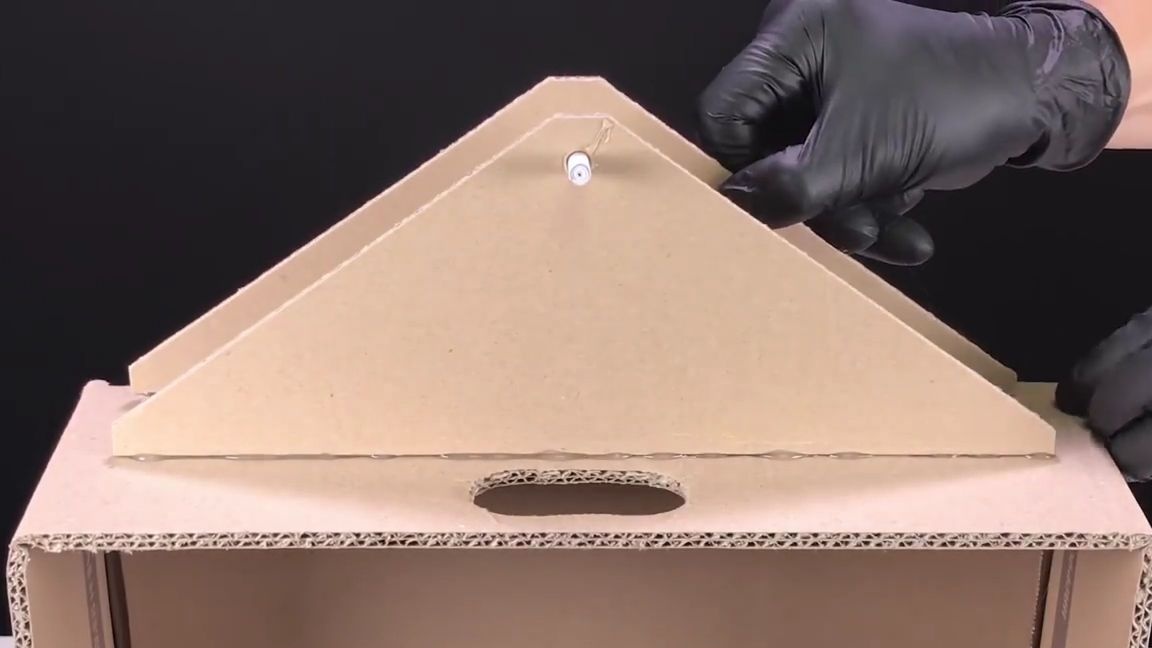
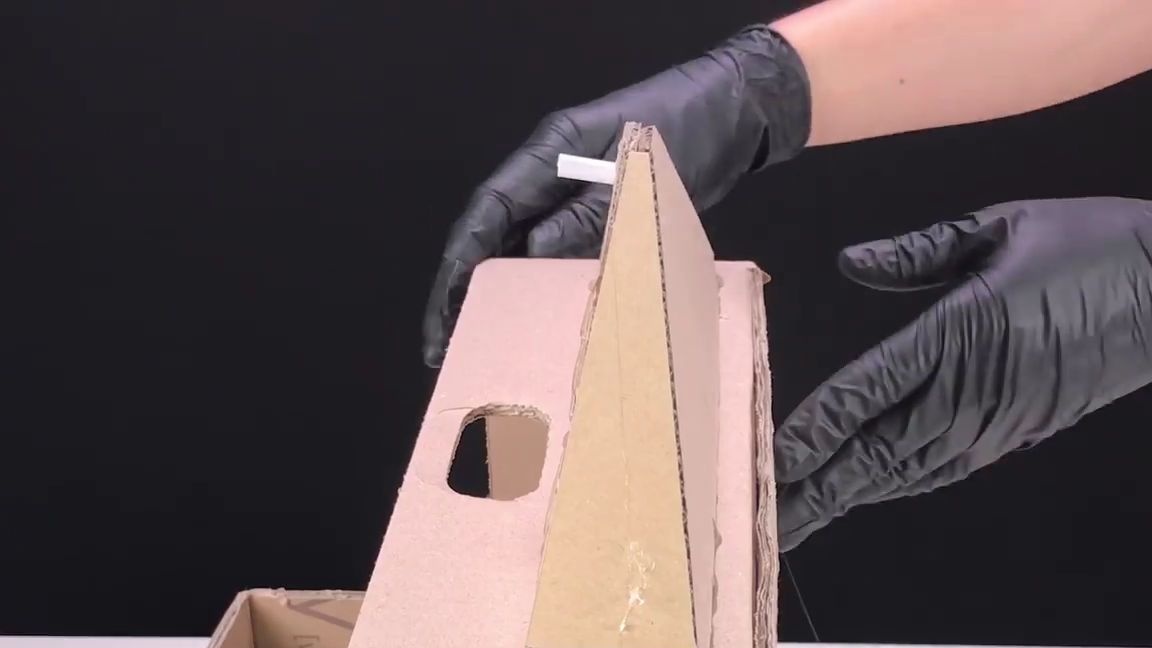
All of the same corrugated cardboard we cut out an isosceles triangle with cut pieces of edges. At the top of the triangle, make a small through hole with a Phillips screwdriver.
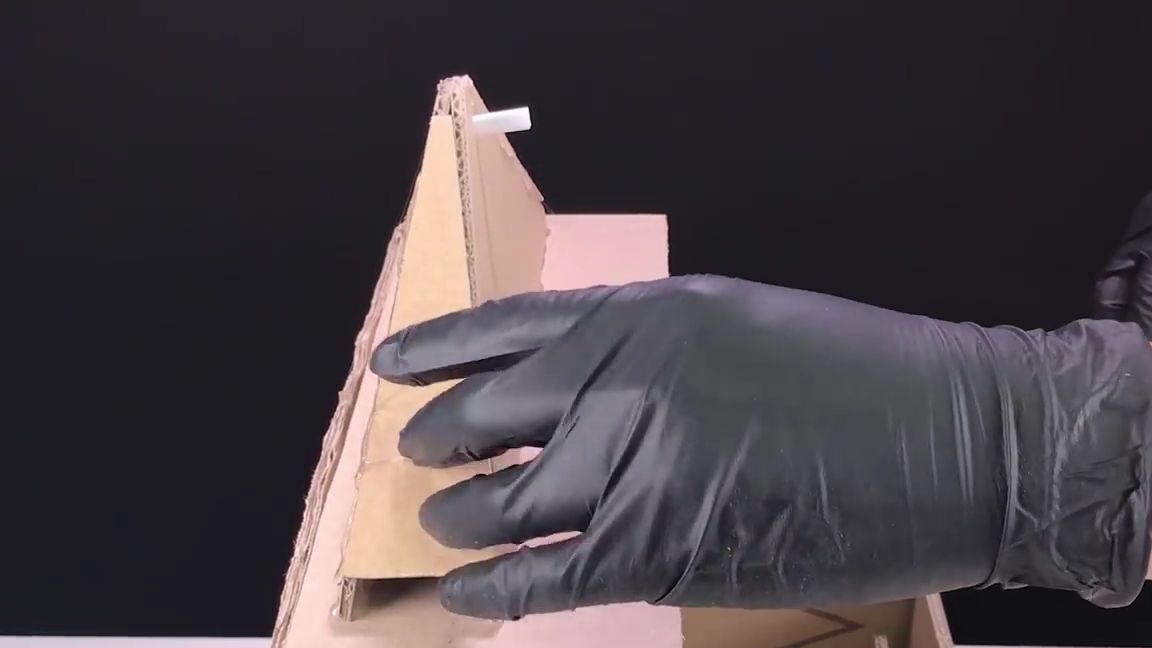
Now we roll out a small tube from paper, in which there should be many layers of paper. We cut off the necessary piece of the tube (by the way, so that this part is much stronger, you can soak it a little with super glue, or with PVA glue) and insert it into the hole made earlier, after which, of course, glue it there. Everything must be done as shown in the photo below:
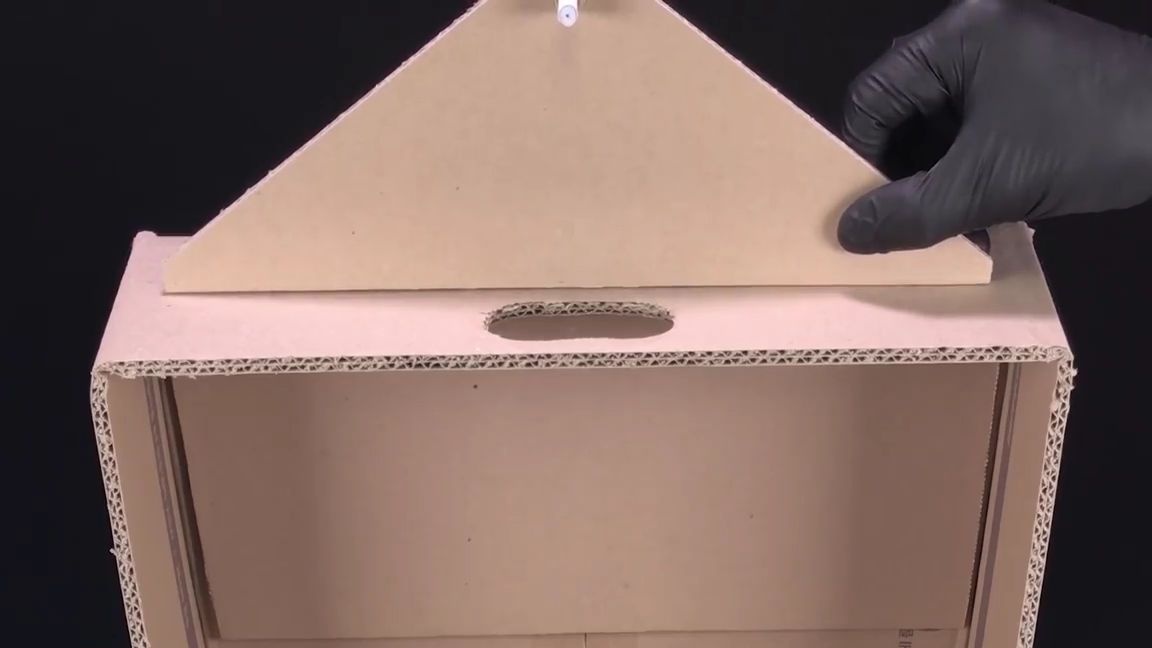
We install and glue the cardboard blank with hot melt exactly on top of the cardboard box, from which a piece was previously cut. Also, under the paper tube, you need to cut an oval hole in the cardboard box, as shown in the photo below.
A few centimeters behind the first triangle, set the second, after which we combine and glue them at an equal angle, making something similar to a pyramid.
Then we glue on each side on a cardboard wall, but they naturally need to be drawn and cut first:

We take the previous blank, which is needed to hold the phone. We put this workpiece with a hole in the center of the bearing on a paper tube, and then add a little glue to fix it.
Testing:
The workpiece should rotate freely around its axis. It is very important that glue does not get into the ball bearing, otherwise it may either rotate poorly or cease altogether:
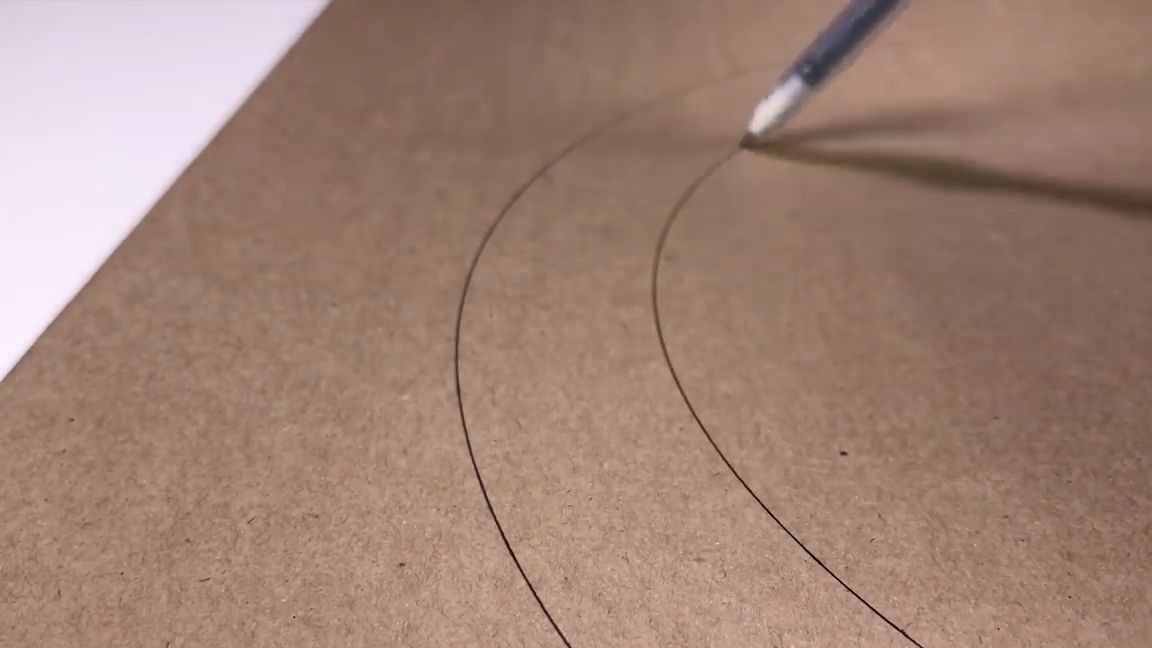
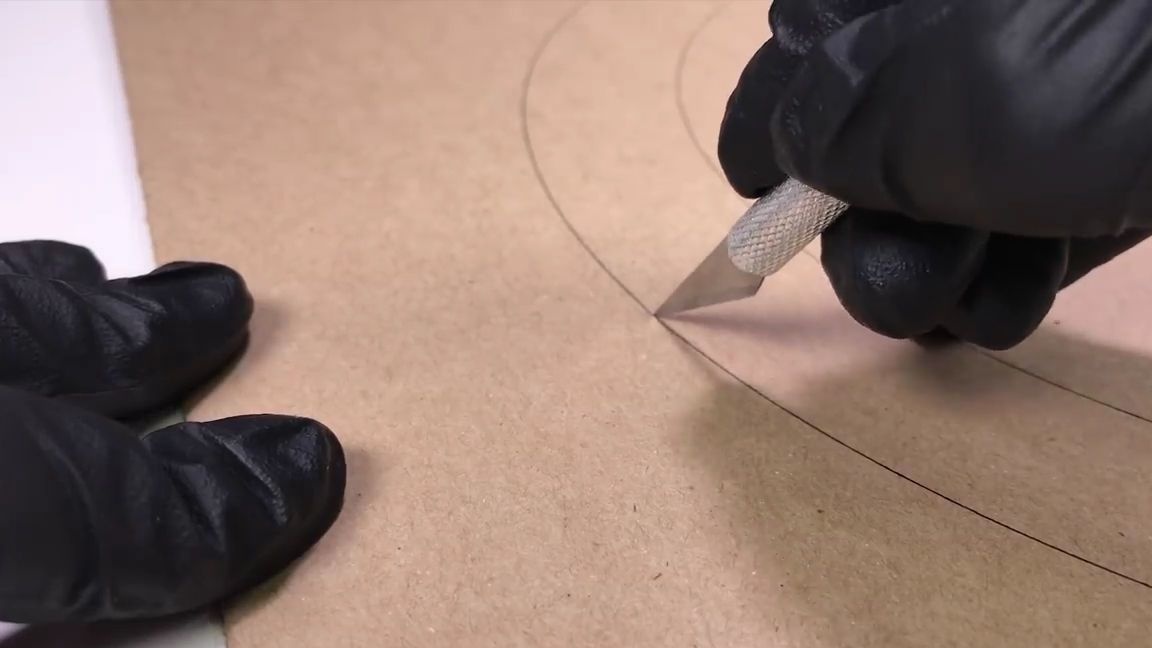
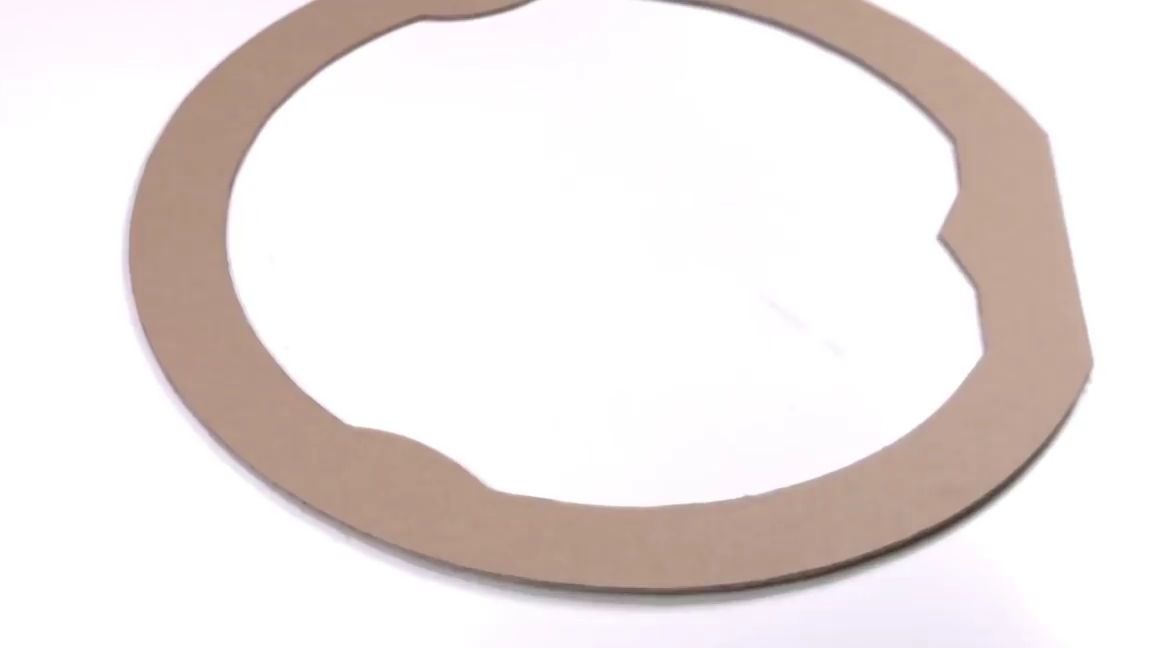
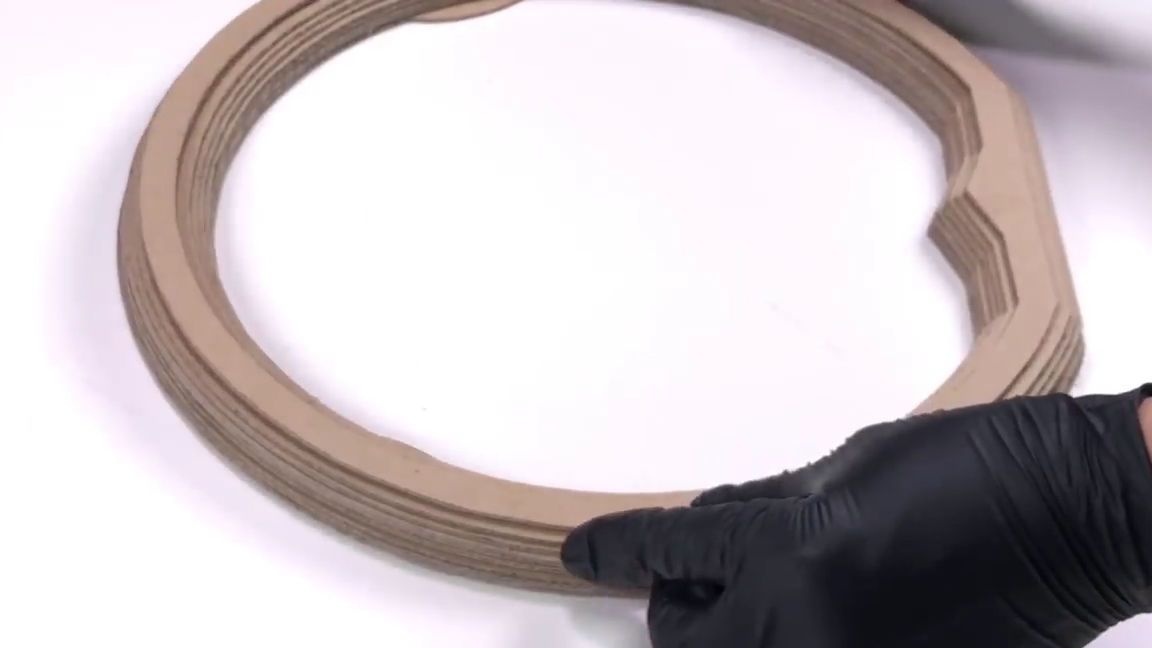
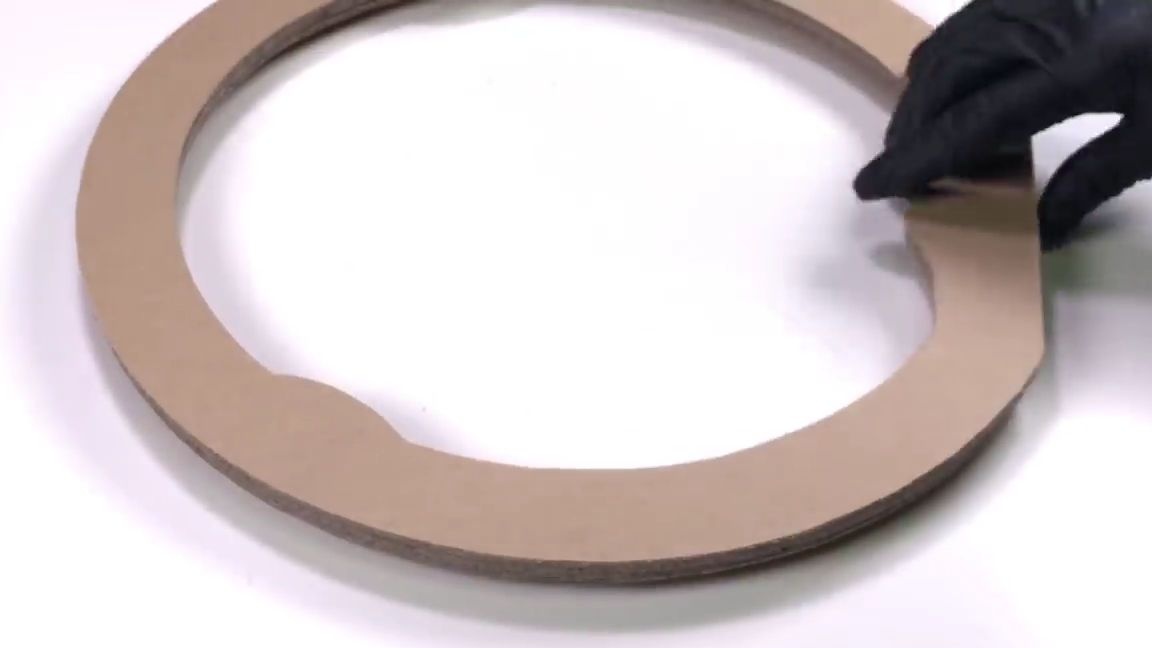
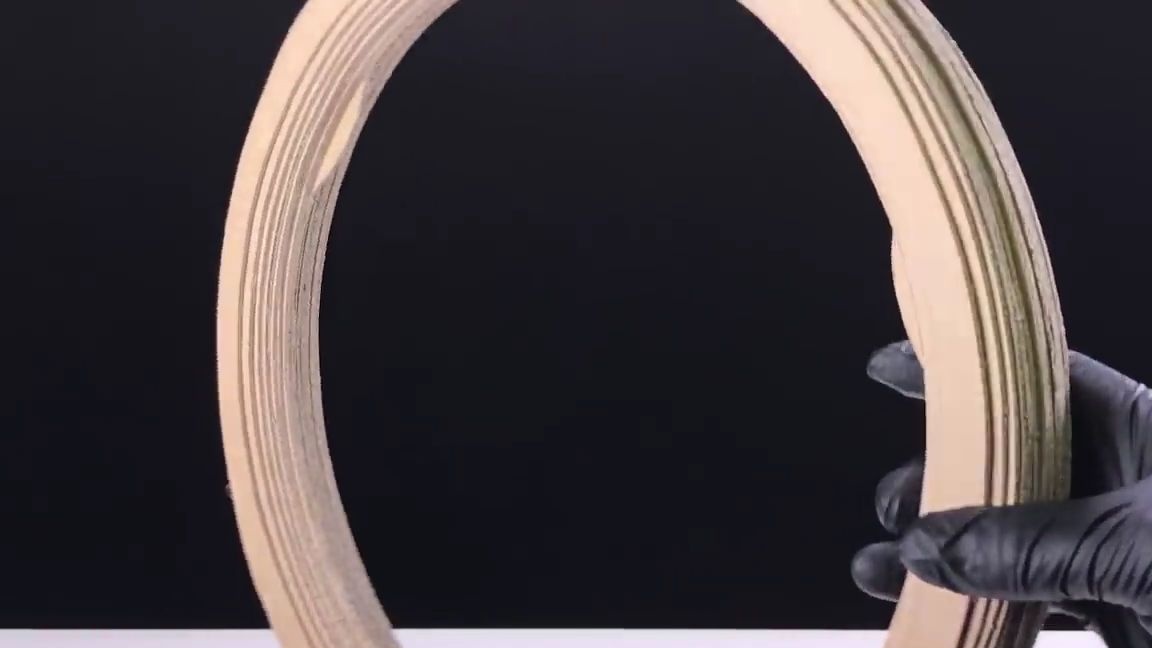
We draw a large ring on a large sheet of corrugated cardboard, its size should be close to the size of the steering wheel that you want to make. Then we cut out this ring with the help of a clerical knife, or a special “scalpel”, which is designed specifically for this purpose. It is necessary to cut very carefully and evenly. It should turn out as shown in the photo:
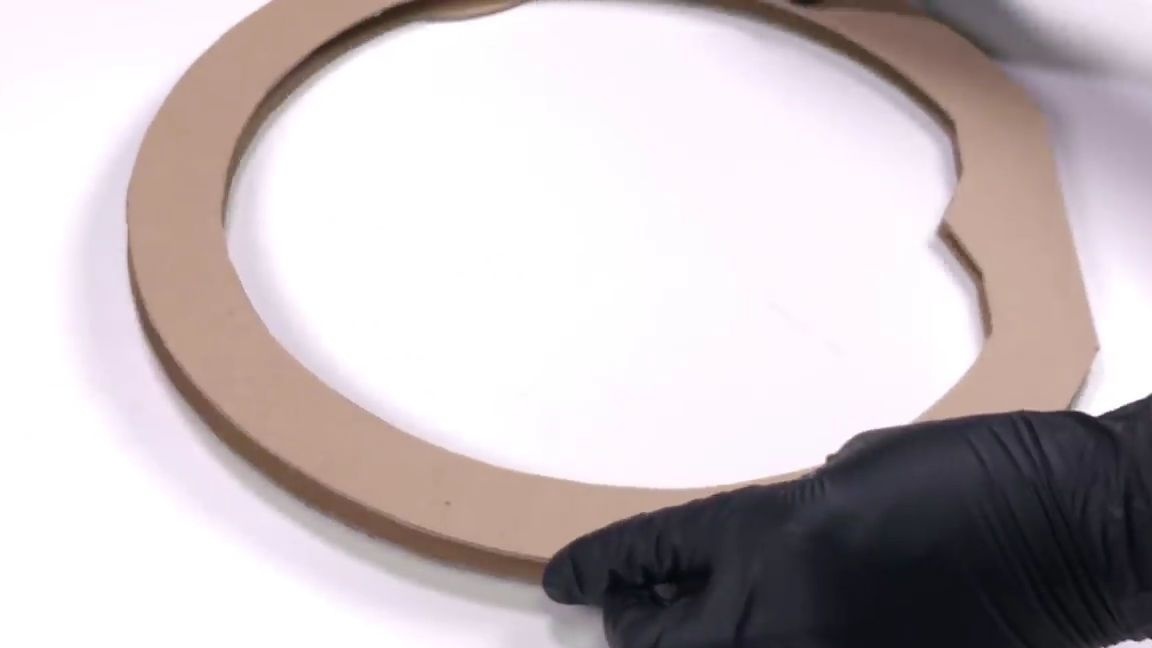
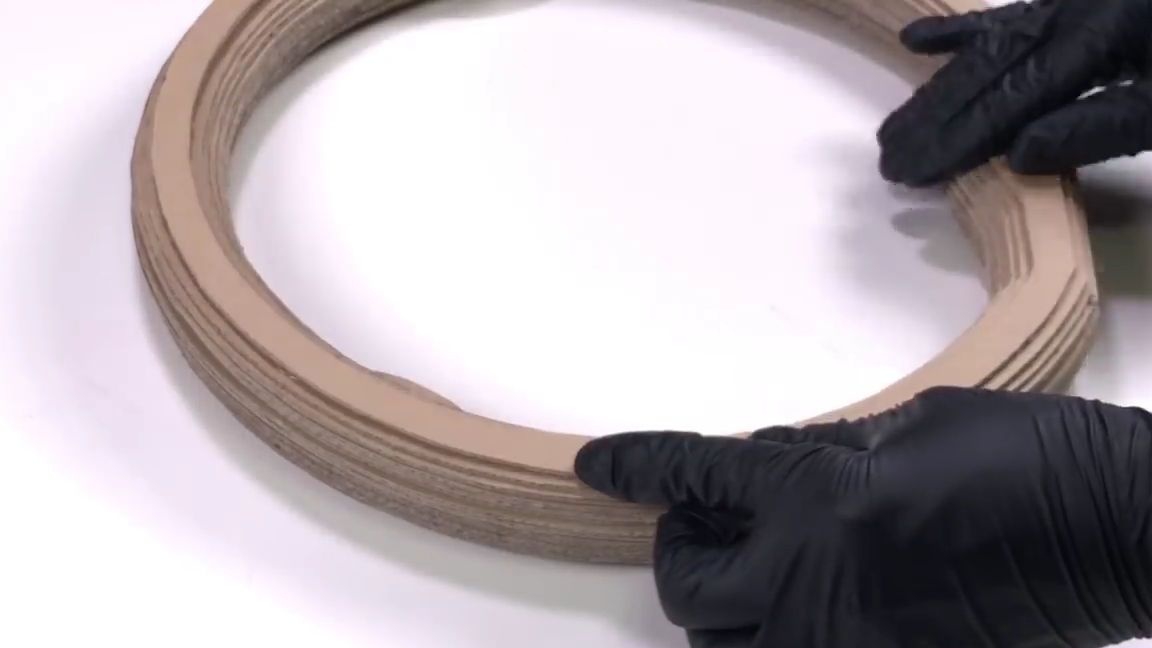
Glue the second, then the third, fourth, and so on over the first steering wheel ring. Each subsequent ring should be thinner than the previous. We do everything, also as shown in the photo below:
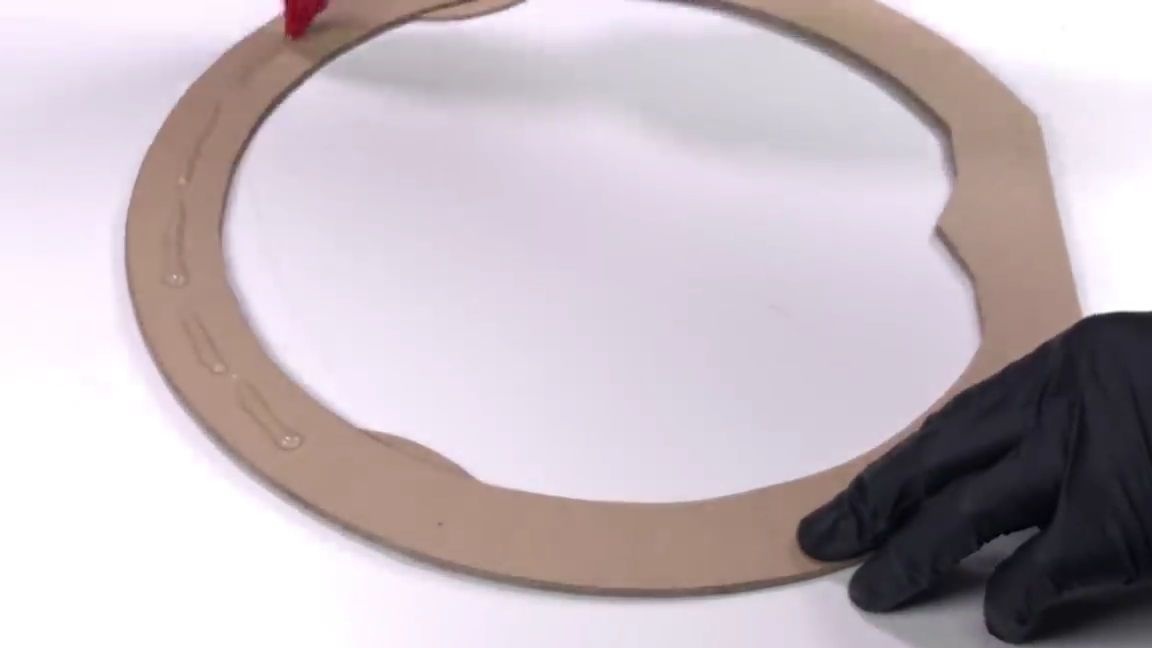
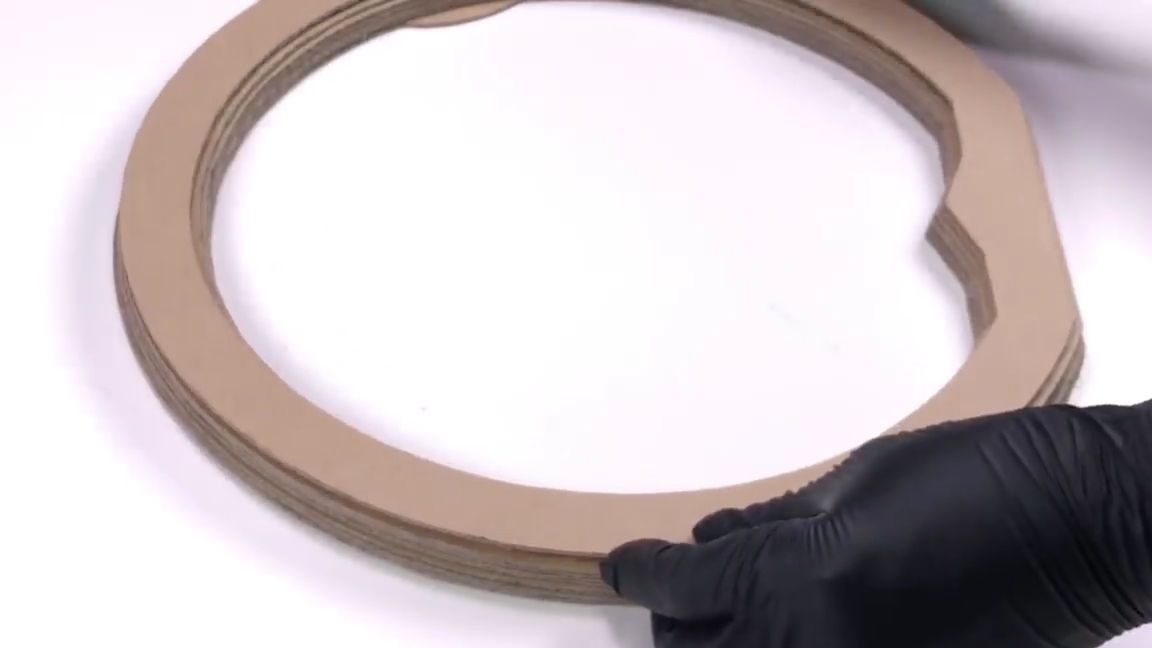
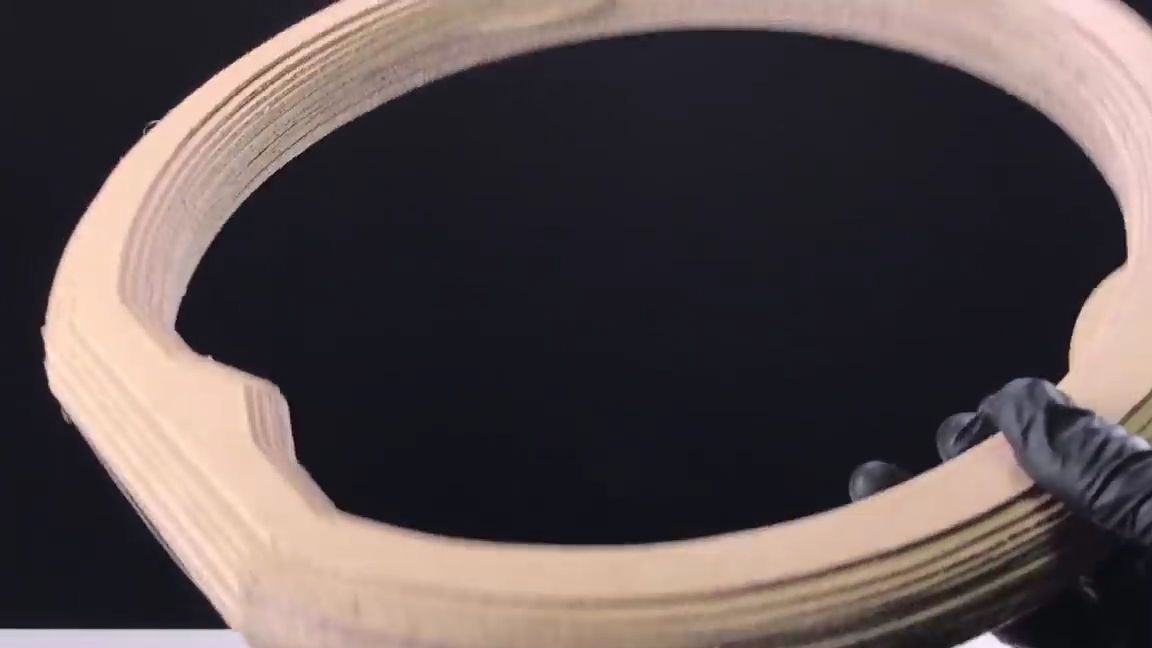
We turn over the workpiece and repeat the actions that we did previously. After gluing the last layer, a rounded rudder should turn out, a reduction in the thickness of the ring was done specifically for this. By the way, the edges of the game steering wheel can be sanded with sandpaper, so it will be smoother and more round, but you need to do this very carefully, without damaging the cardboard:
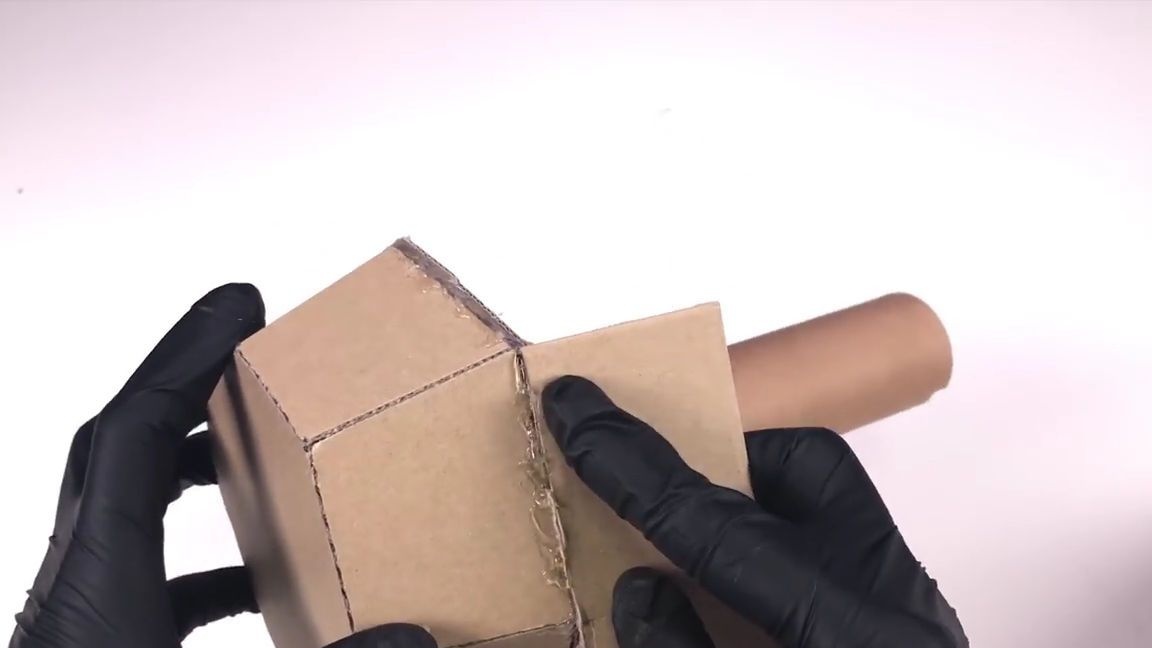
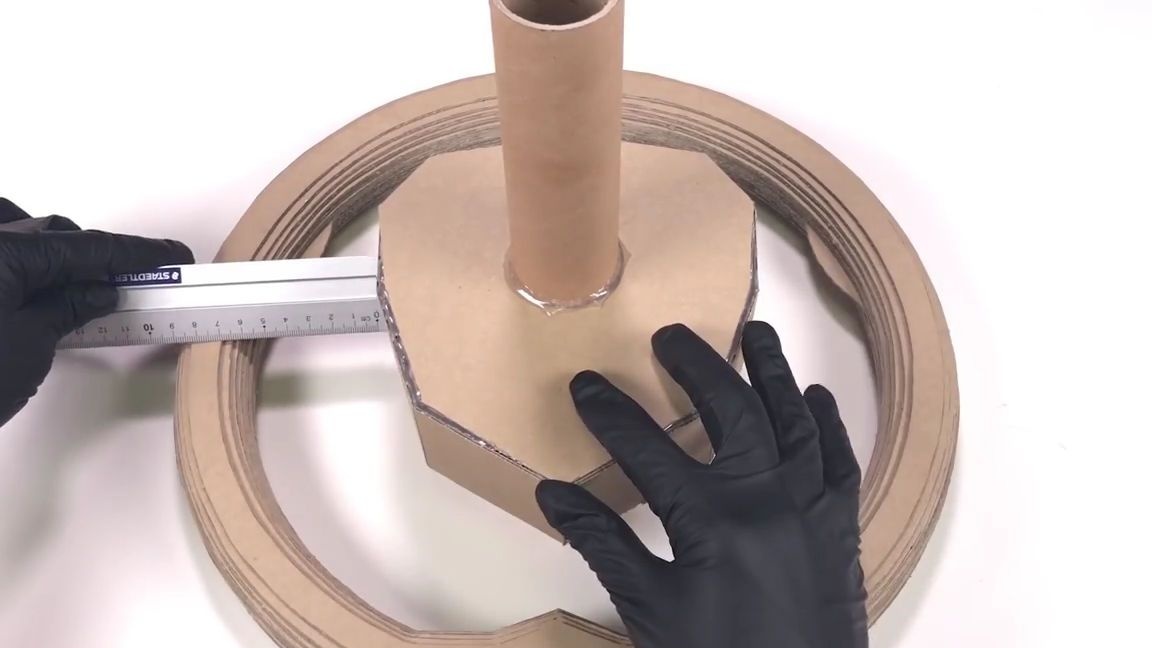
From the corrugated cardboard we cut the same part, as shown in the photo below.
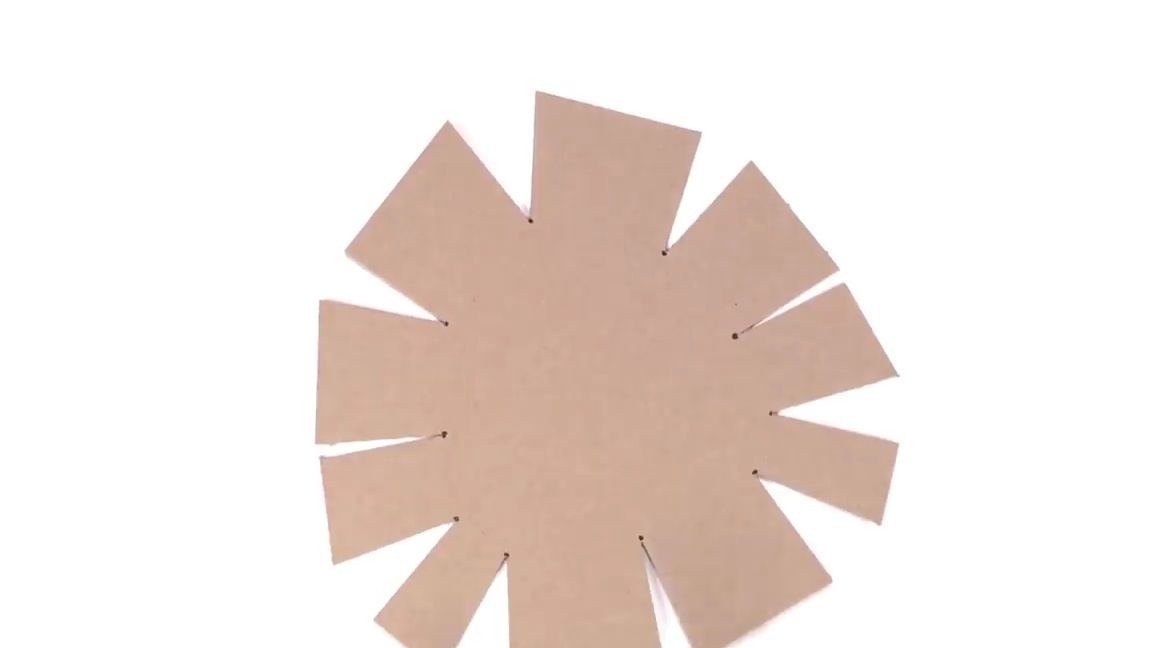
In places of bending of the "rays" of the part, it is necessary to make non-through cuts of the top layer of cardboard. This is necessary so that the cardboard bends better.
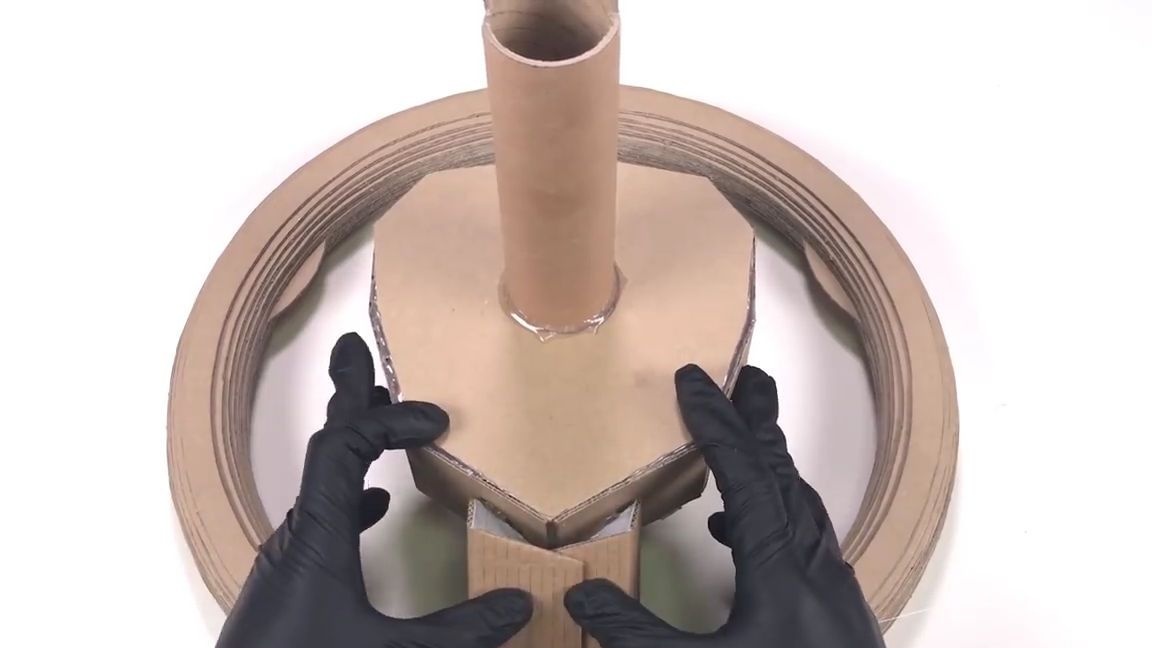
We bend the "rays" of the part and glue them with hot melt adhesive.
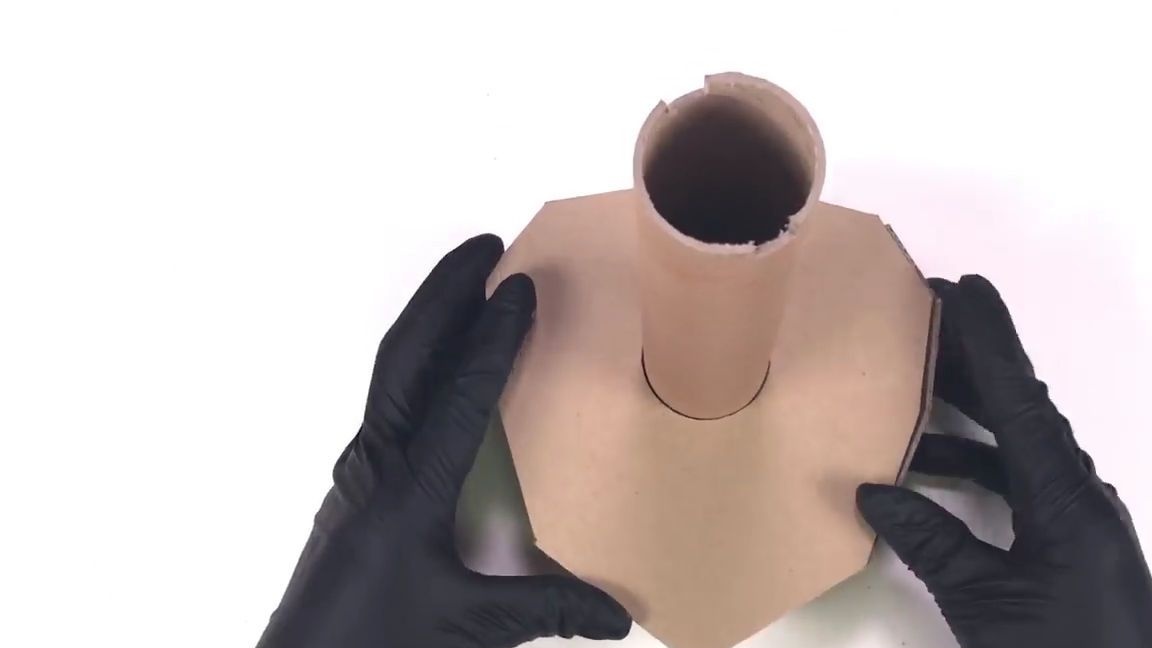
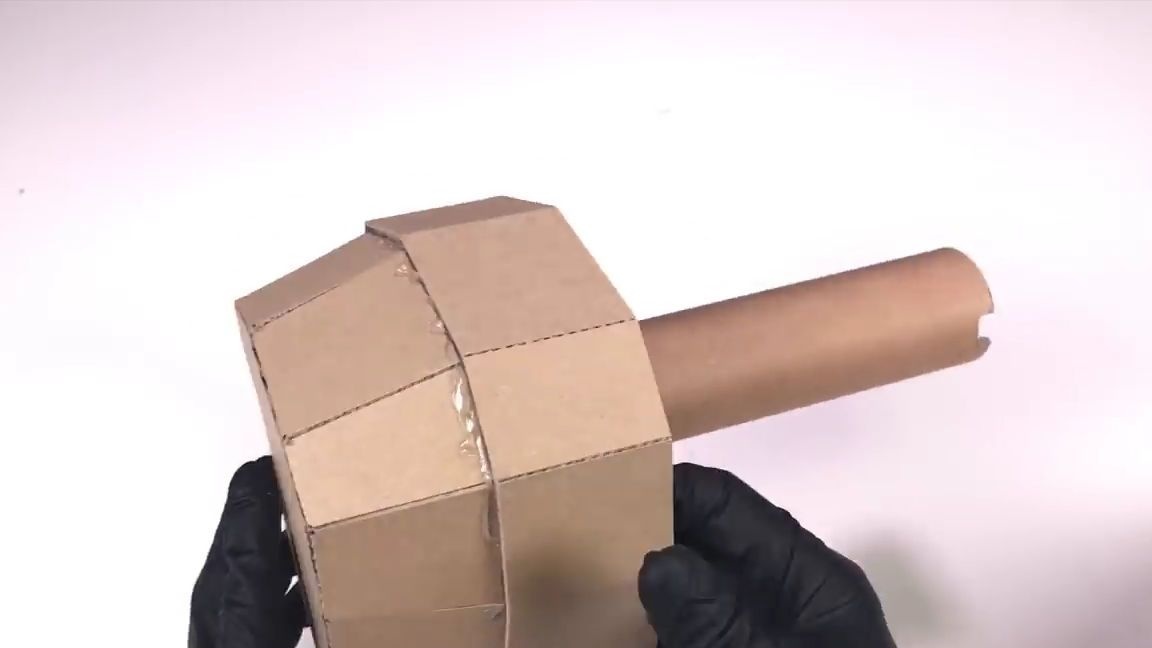
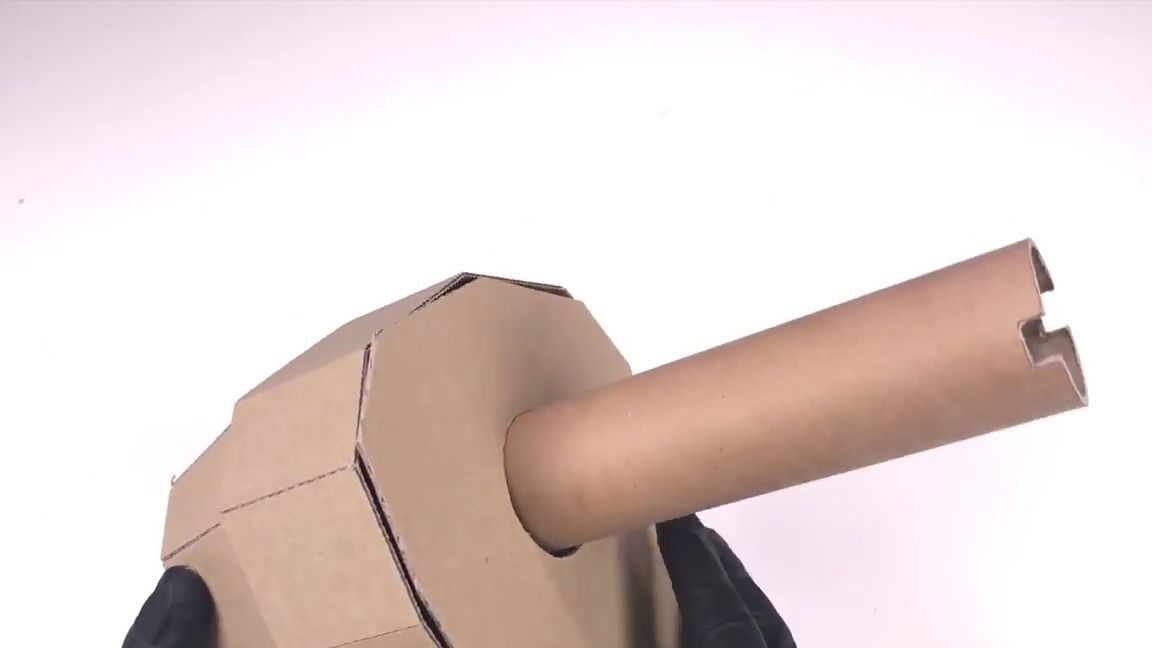
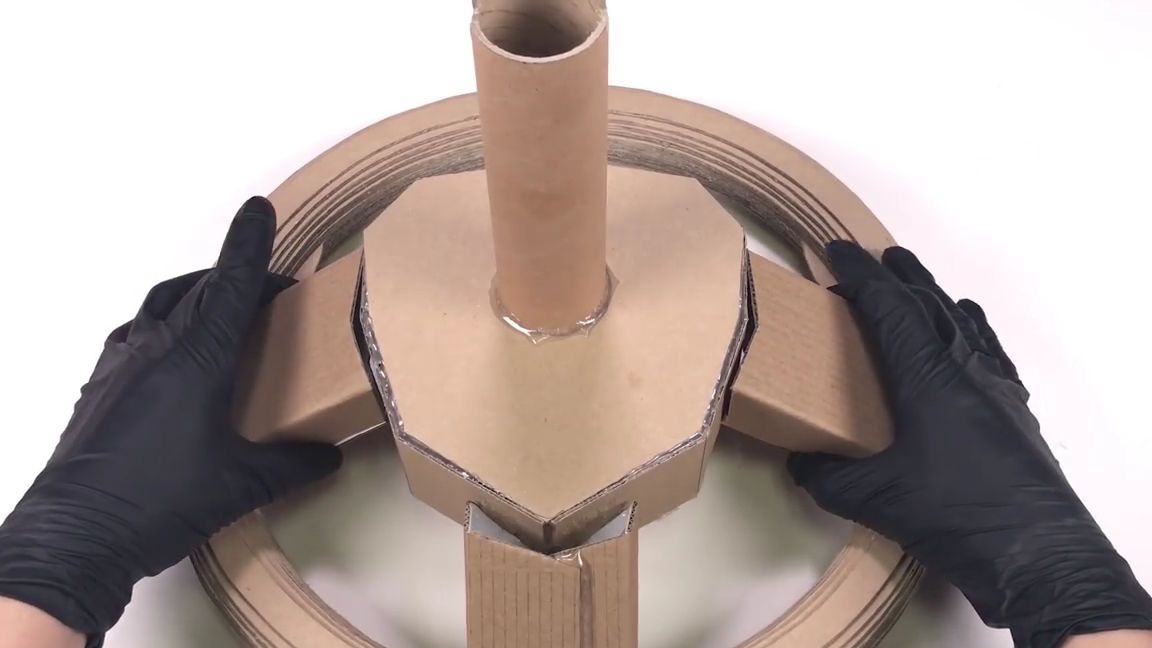
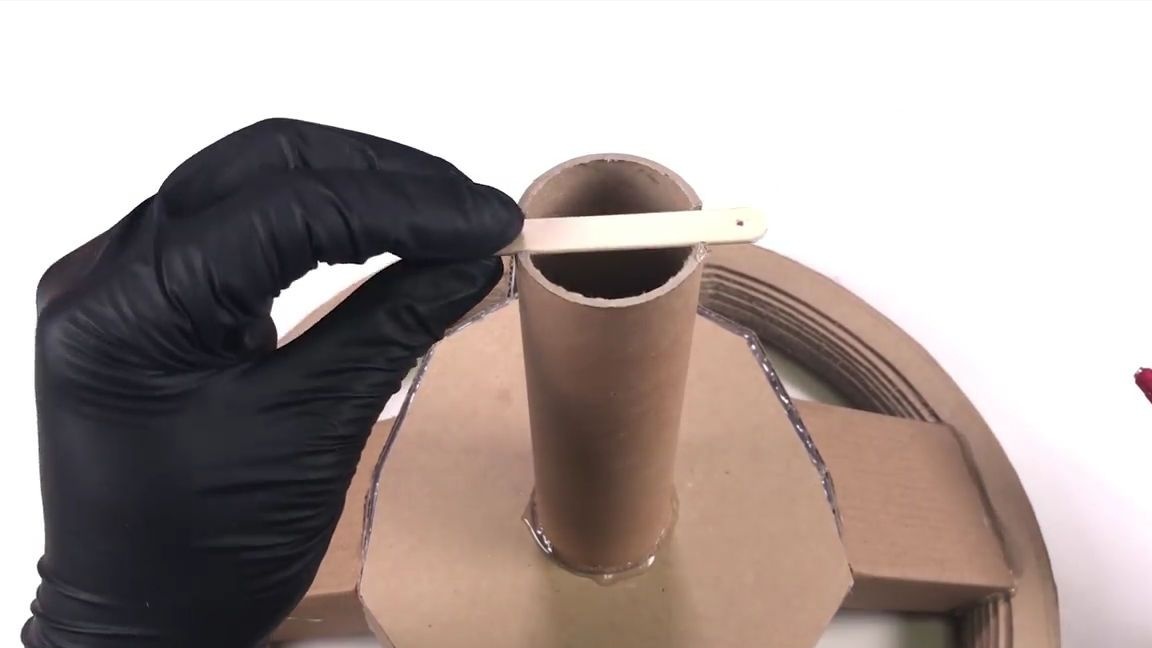
Now we cut out all of the same cardboard a flat part, in shape as the bottom of the workpiece, which was done earlier. In this part, you need to make a round hole in the center and insert a cardboard tube there. Then glue this part to the bottom of the workpiece. The cardboard tube also needs to be glued to the part with hot-melt adhesive, but before that you need to make two even grooves in its upper part, symmetrical to each other:
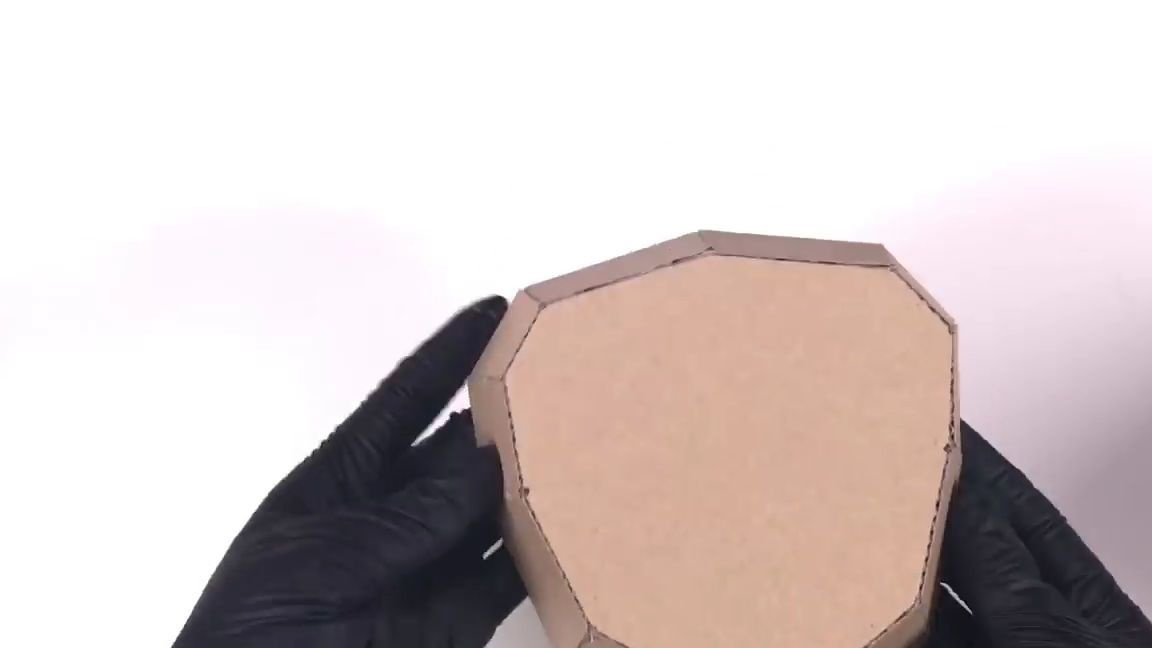
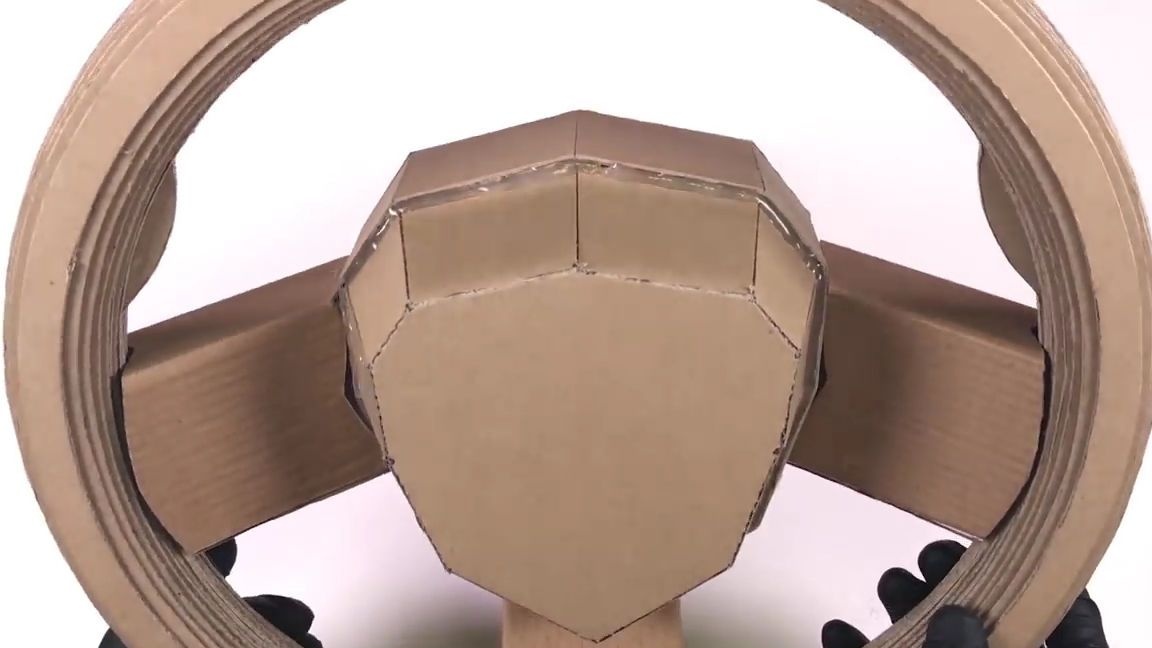
Around the blank we wrap and glue another cardboard part with cuts in the top layer of cardboard, and then glue another bottom at the back. Everything must be done as shown in the photo below:
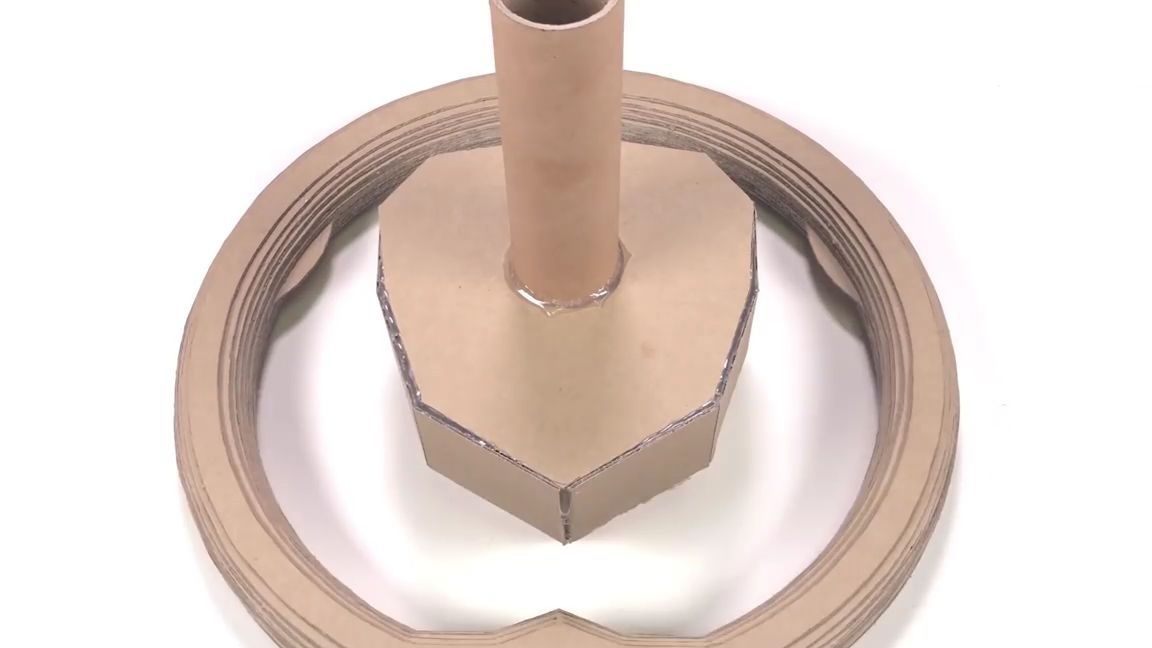
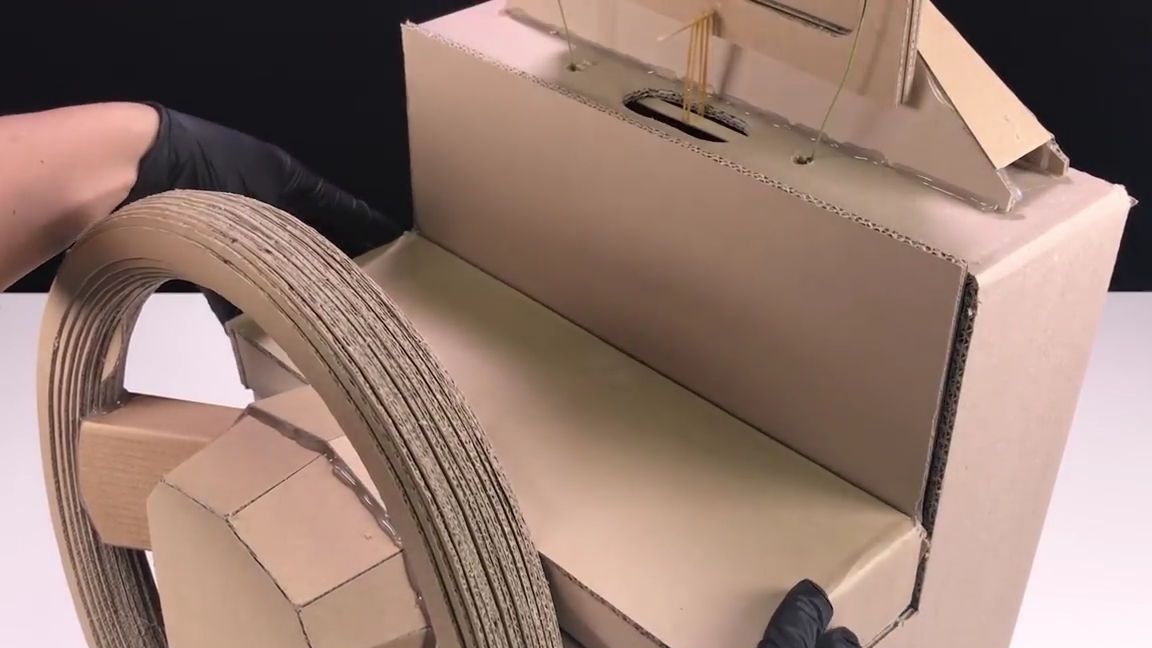
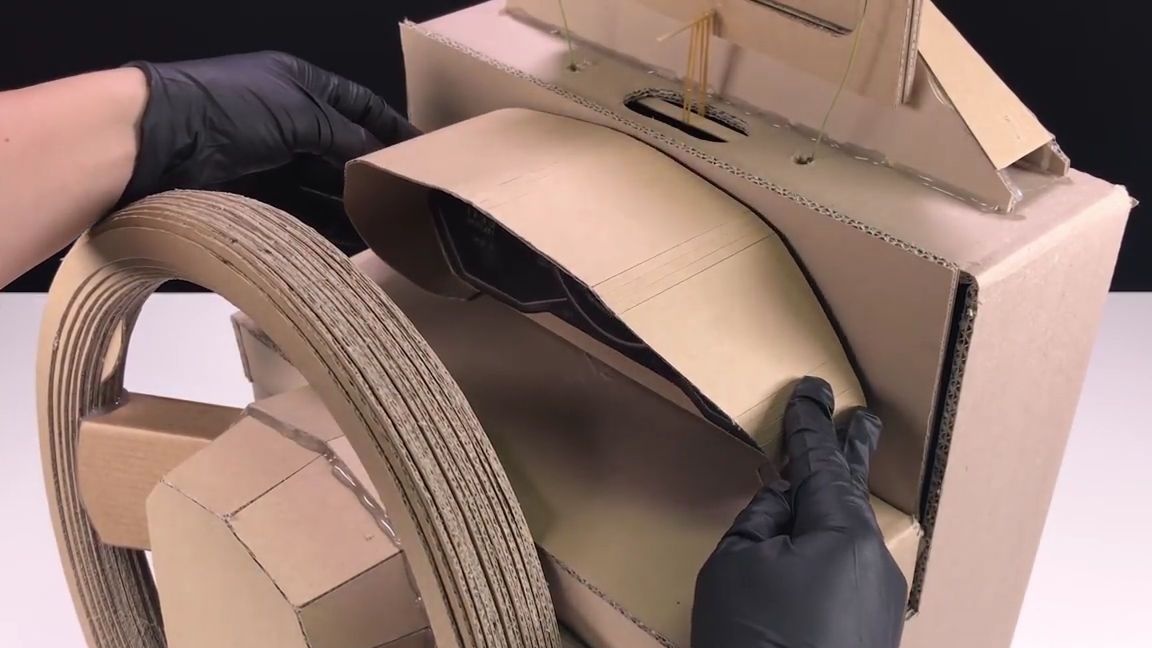
We set this workpiece in the center of the game steering wheel and align it with a ruler.
Then with the help of two identical and one lower bottom they did, we connect both blanks and turn them into an already full-fledged steering wheel. It is best to stick together with the help of a thermolay. Everything should turn out as shown in the photo:

We take an ordinary ice cream stick and drill one thin thin hole through its edges. Then glue this workpiece into the grooves in the cardboard tube, which were done earlier:
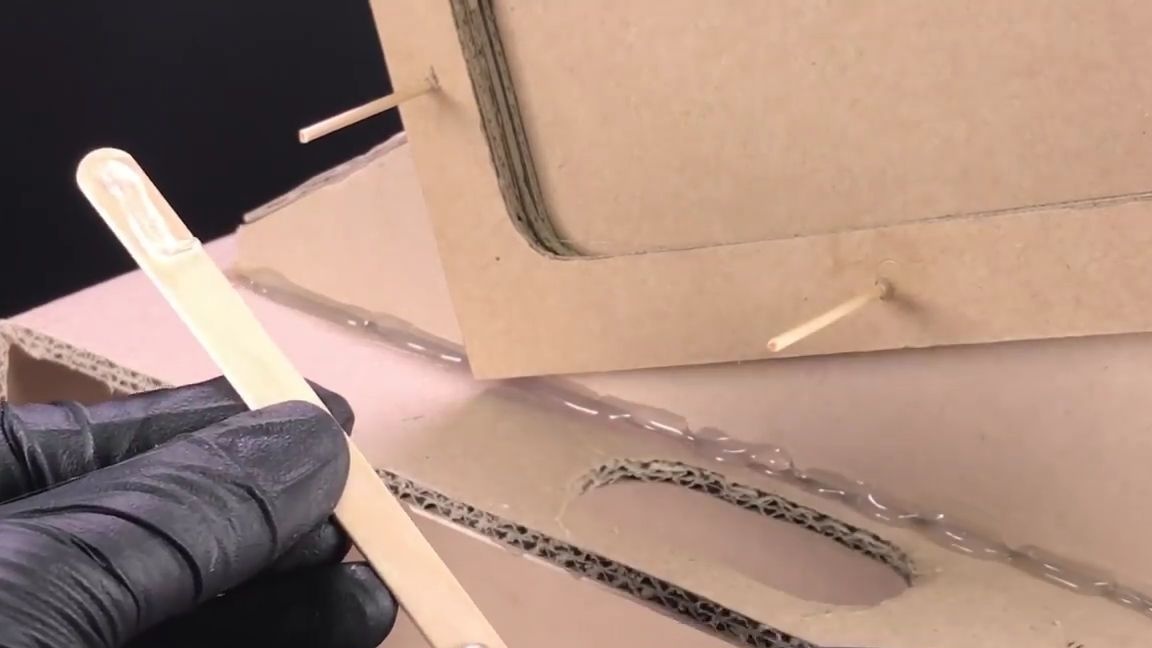
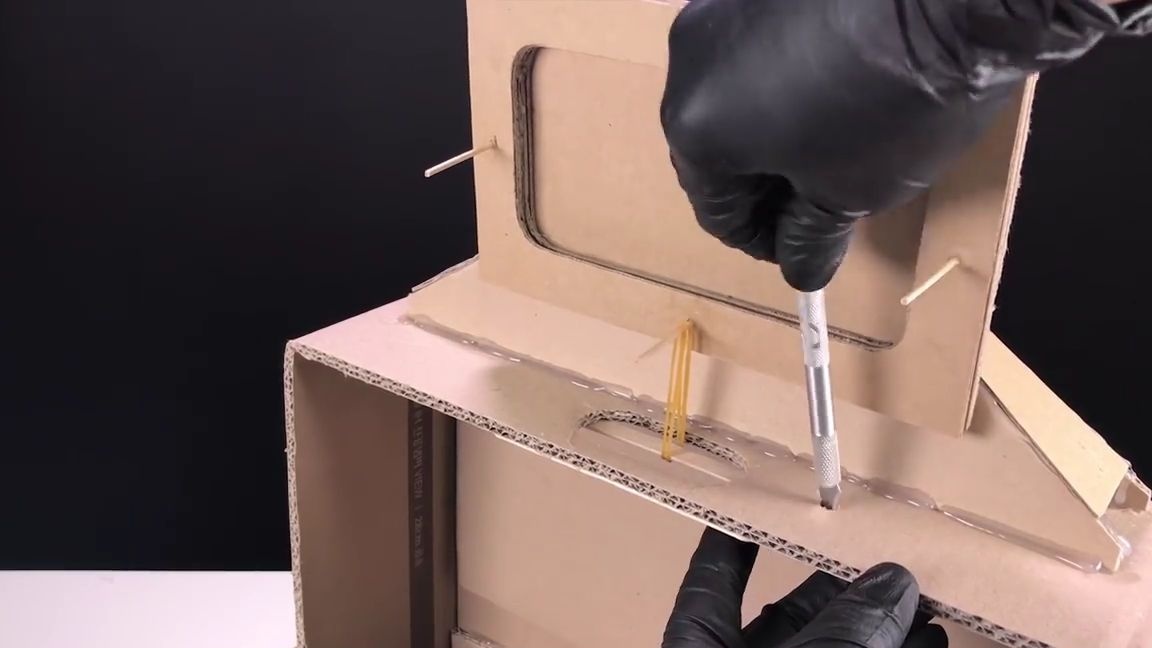
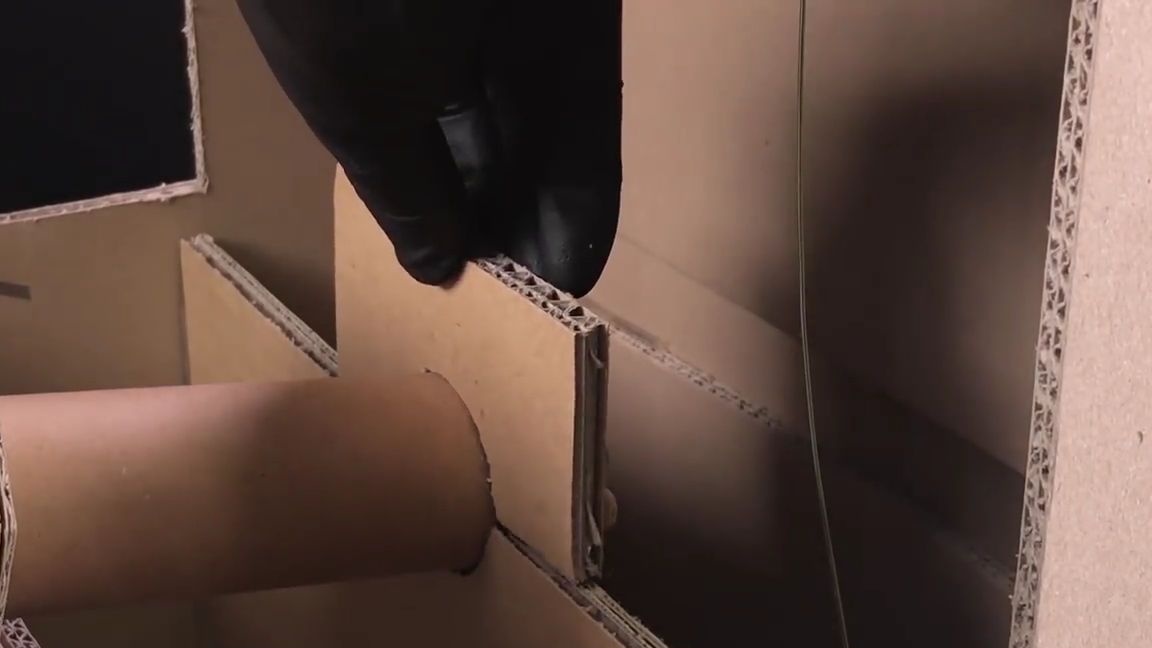
In a cardboard box, we install a partition with a slot in the center under the cardboard tube. Then glue with hot glue. We do everything as in the photo:
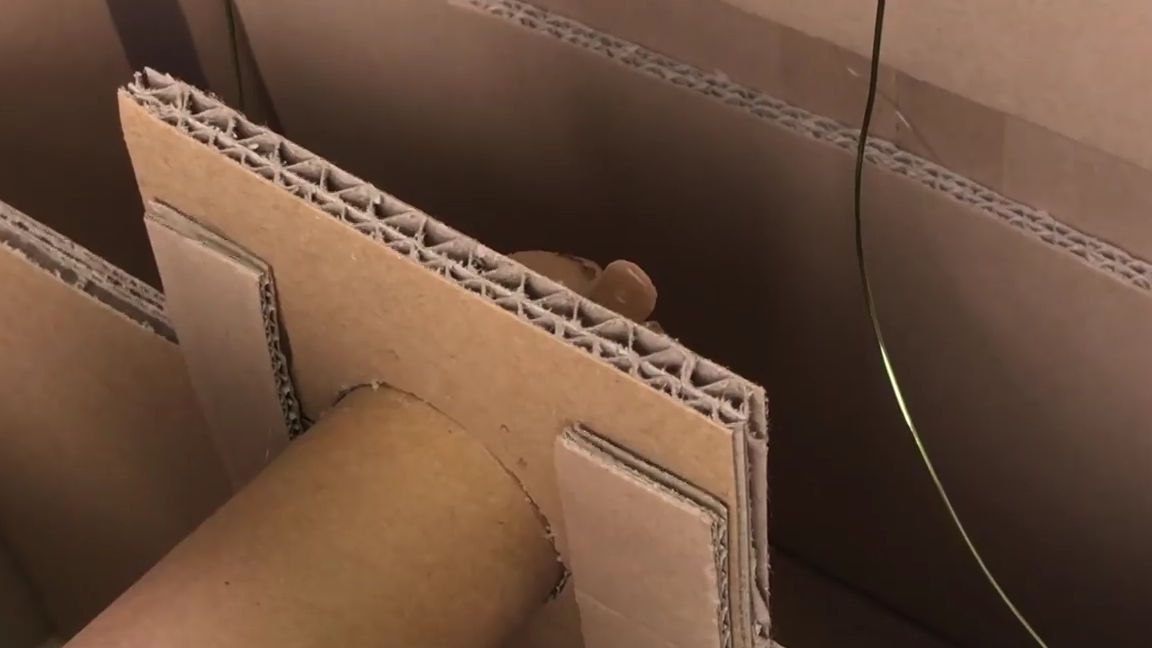
On a long ice cream stick, apply a little hot glue along the edges and glue it under the hole in the cardboard box. There should be an empty space on the sides of the stick:

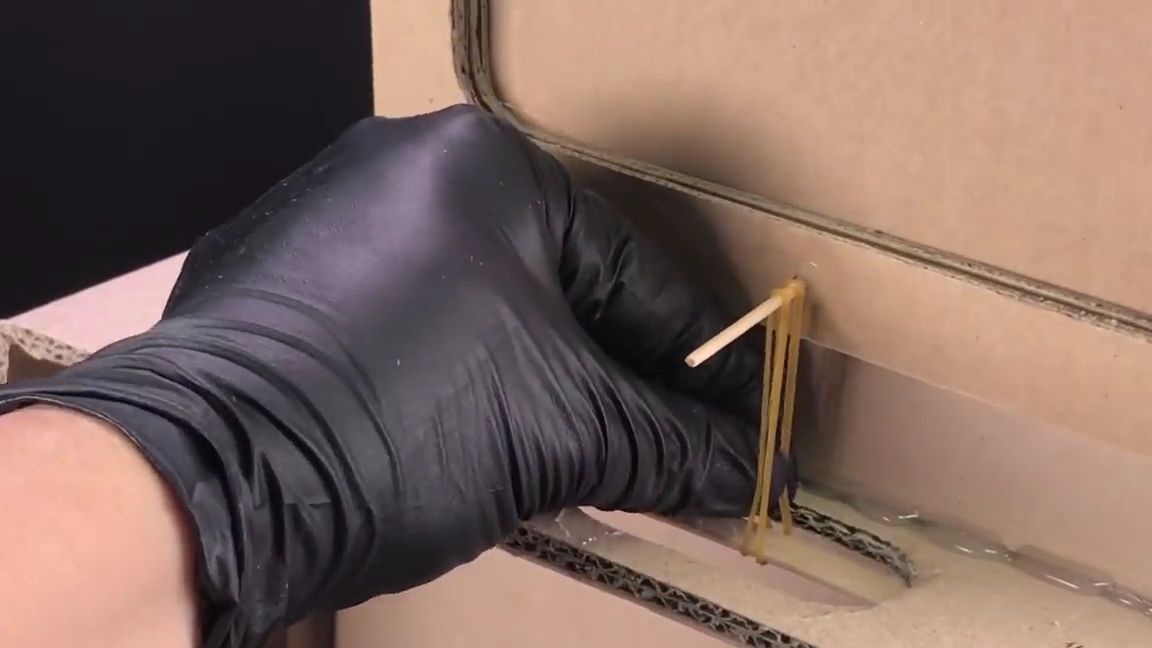
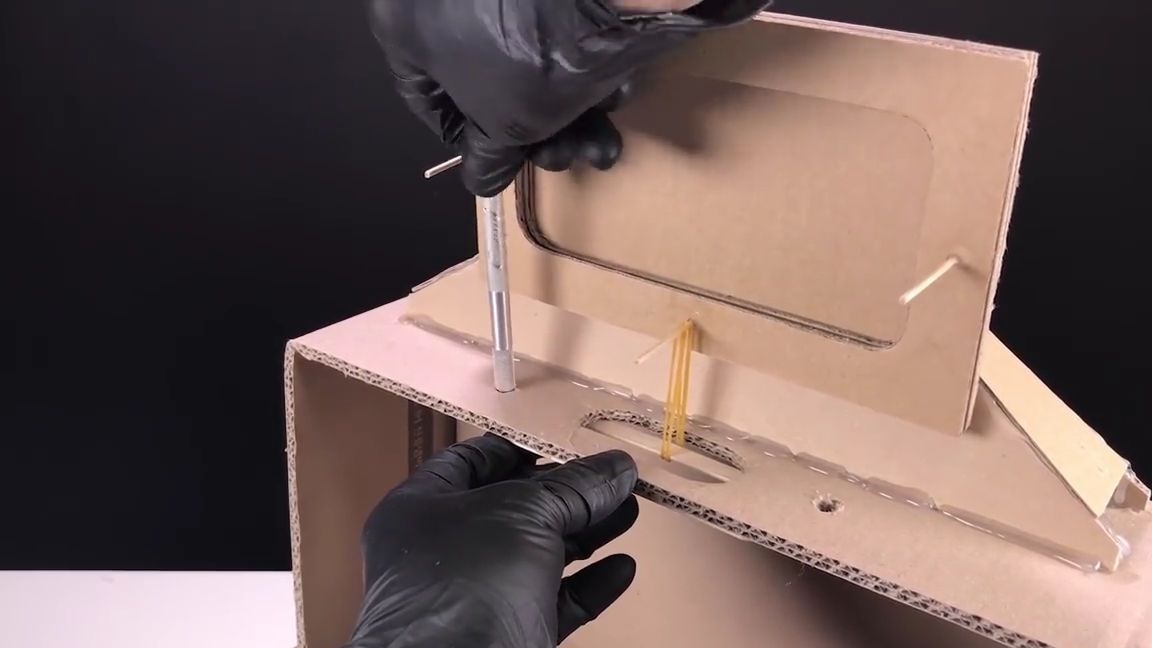
We take the stationery gum and put it on the central section of the barbecue skewer, then we pass it under the ice cream stick and put the opposite end on the same segment of the skewer, the gum should be fixed in this position. The phone holder should lock in a level horizontal position.
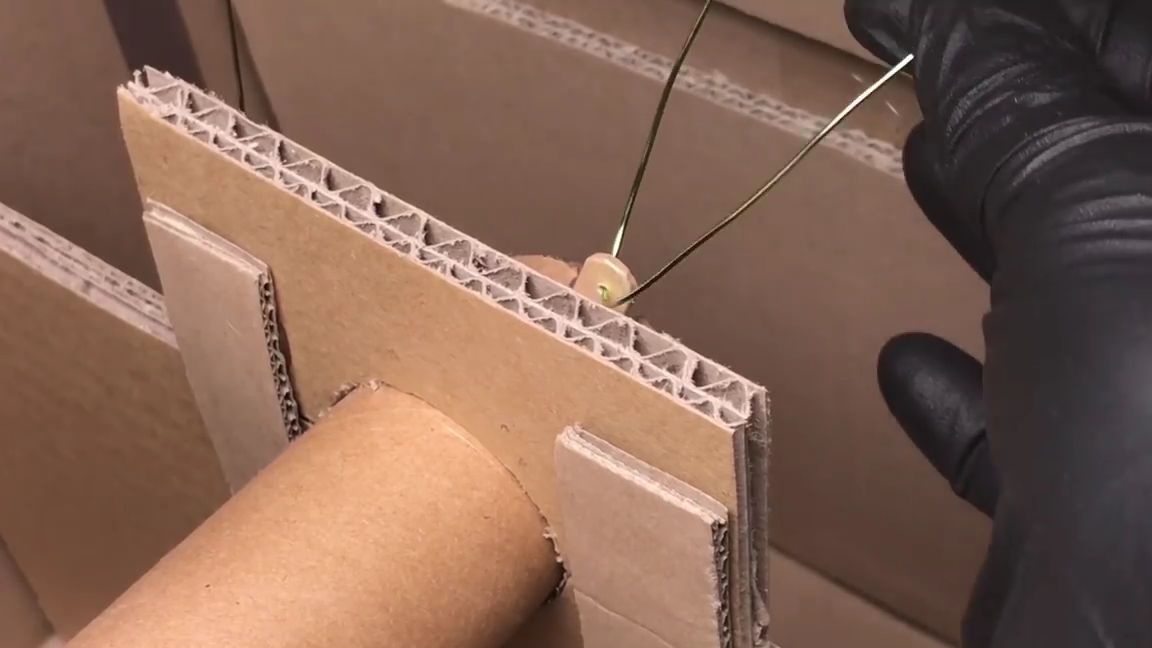
On the sides of the large hole we make two more small ones.
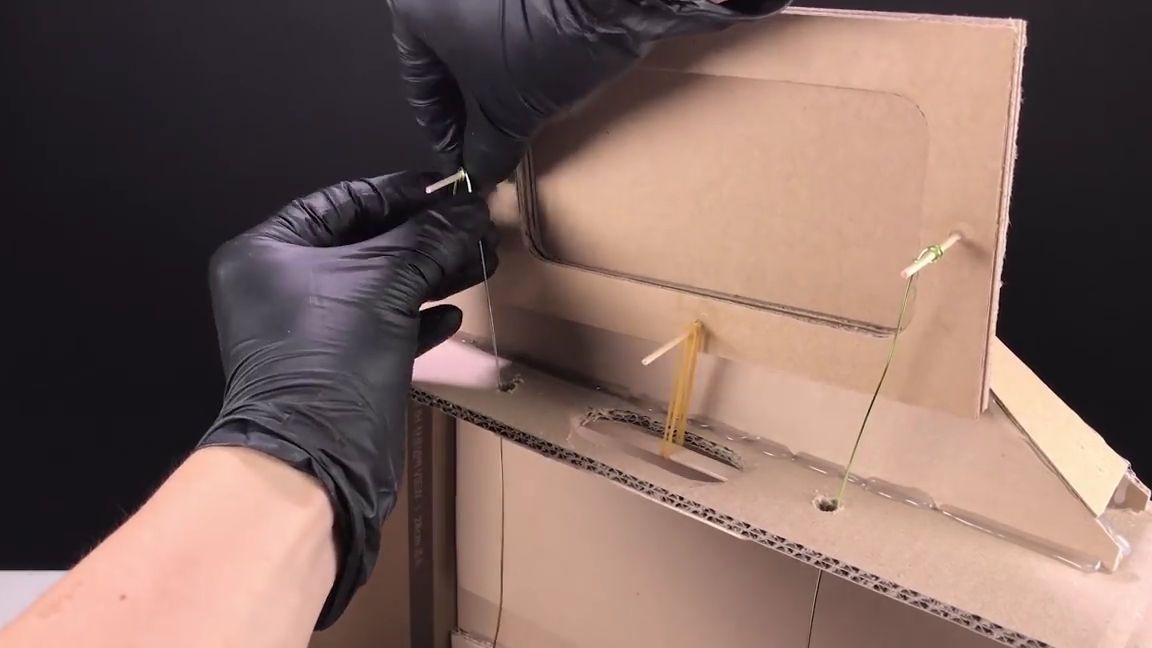
Now we take the wire and fasten one end of it at one of the side segments of the skewer, after which we pass the other end through the hole under the segment of the skewer to which it is connected. We do the same with the opposite side:
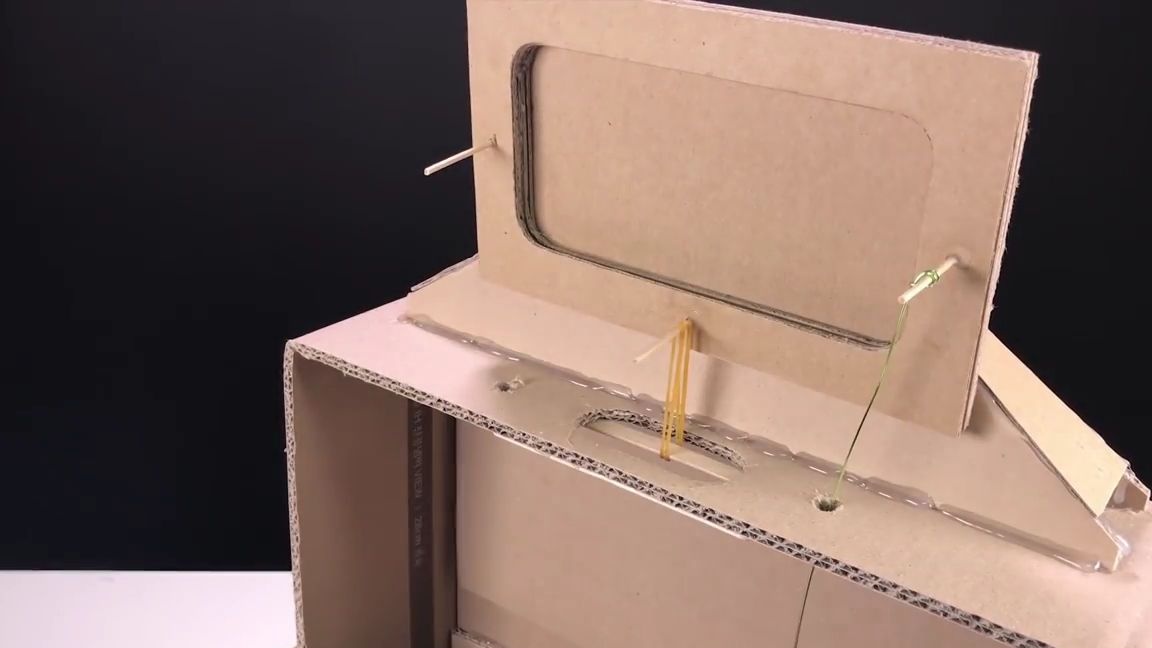

We install the game steering wheel in our groove and fix one more detail with a slot on top. Then naturally glue with hot glue.
We connect the opposite ends of the wire to the ends of the ice cream sticks, which were previously glued to the tube of the steering wheel. We do everything as shown in the photo below:
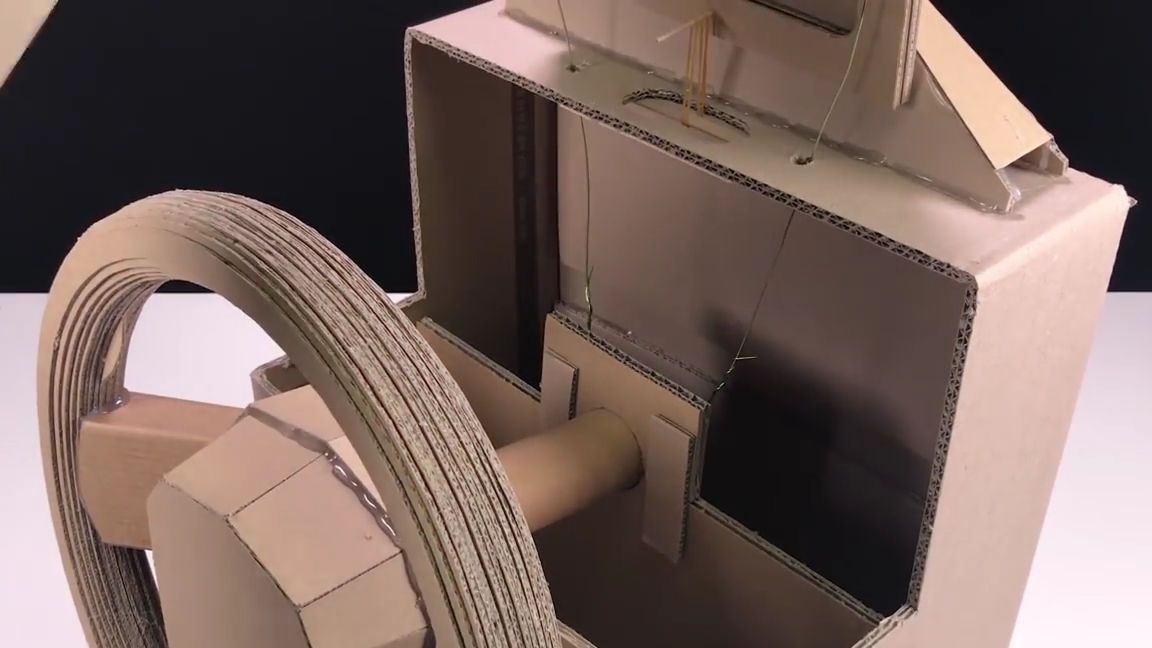
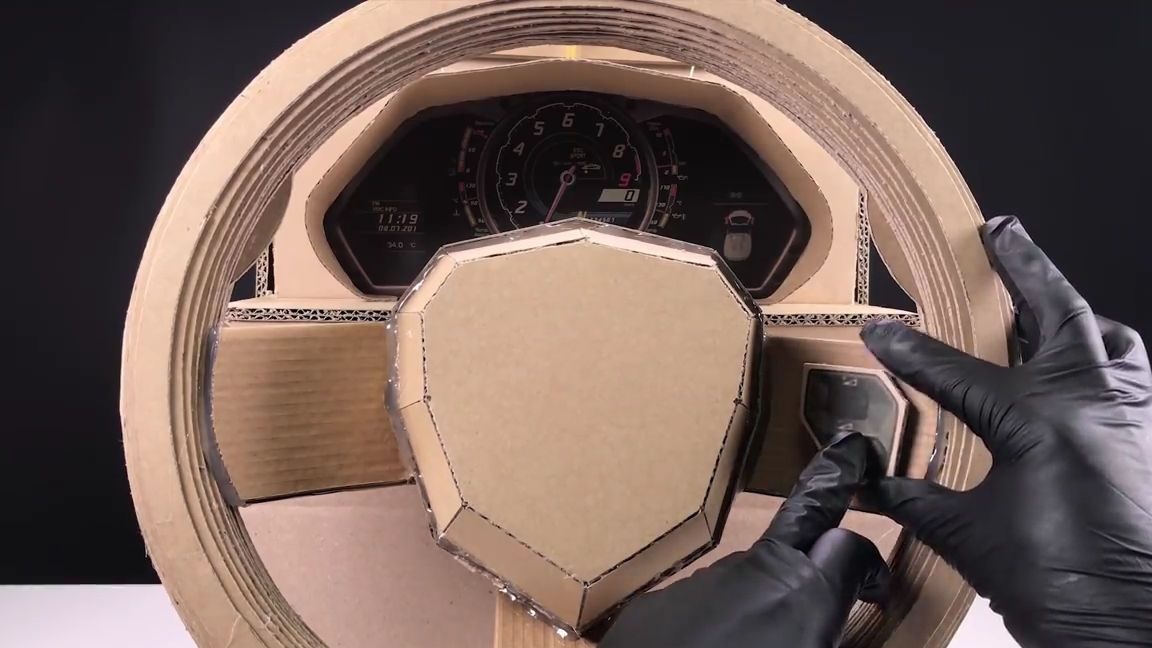
Now you need to close the open area of the cardboard box with another cardboard piece:
Well, we decorate:
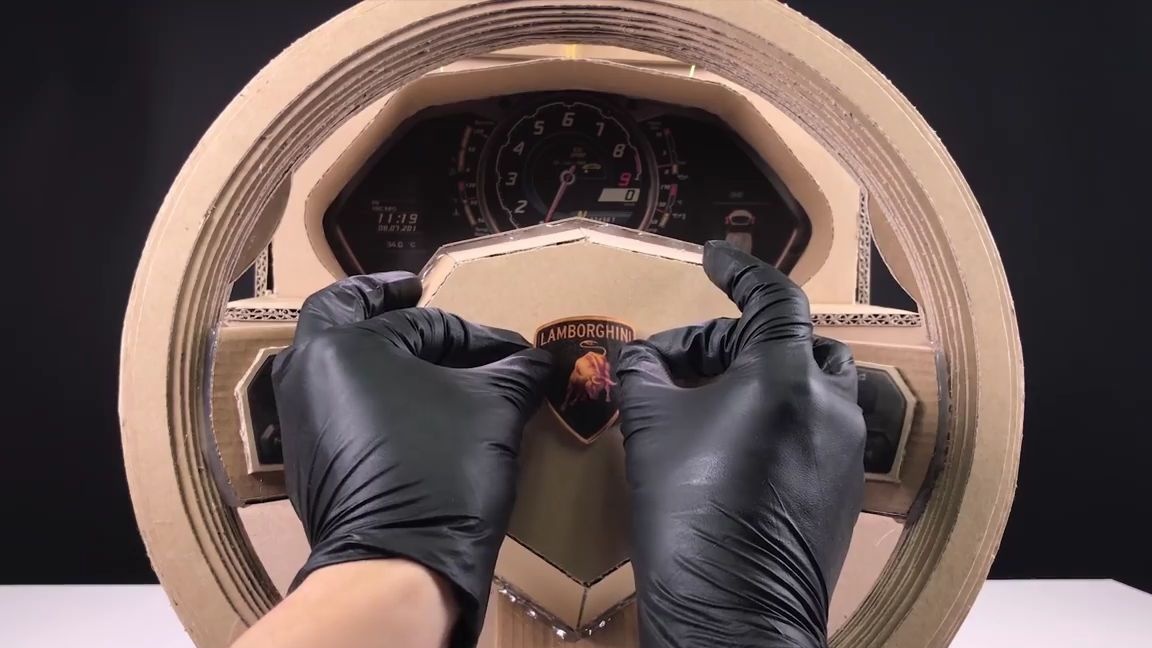
That's it! A simple game steering wheel for a phone made of corrugated cardboard is ready and it remains only to test it. To do this, put the phone in its groove (it is important that it keeps well there and does not fall, you can also fix it with stationery gum), turn on any race in which there is control through the screen rotations, set the steering wheel in a level position and start the race!
For turns, you only need to carefully turn the steering wheel in the right direction.
I think such a homemade product is ideal for children and to take leisure.
Here is a video from the author with a detailed assembly and testing of this homemade product:
Well, thank you all for your attention and good luck in future projects, friends!