
Good day to all dear friends! In today's article, I would like to show you an interesting idea, namely a home-made “slicer” for slicing garlic. Sometimes when rolling various salads into jars for the winter, you need to chop a lot of garlic. And surely everyone knows that chopping garlic by hand is not very convenient because it is small and sticky.
We will also use the materials at most available to simplify and reduce the cost of assembly. Well, let's not waste time and proceed to the assembly of the garlic slicer.
For this homemade we will need:
- A sheet of plywood (enough sheet 1 * 1 m).
- Clerical knife blade.
- Round wooden stick.
- A round wooden stick of slightly larger diameter than the first.
- Wooden kebab skewer.
Of the tools we will also need:
- Hot melt adhesive.
- Hammer and nails.
- Black helium or capillary pen.
- Ruler.
- Compass.
- Electric jigsaw and manual jigsaw.
- Drill and drill.
- Square.
- Nippers.
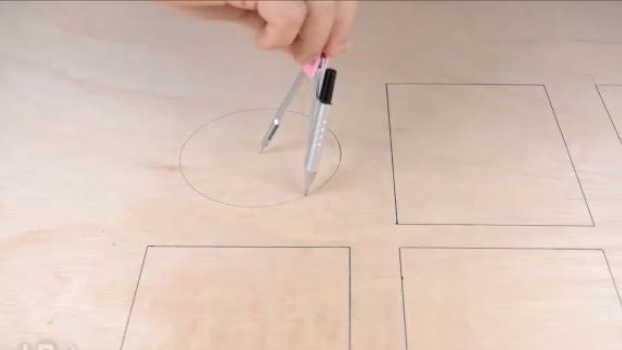
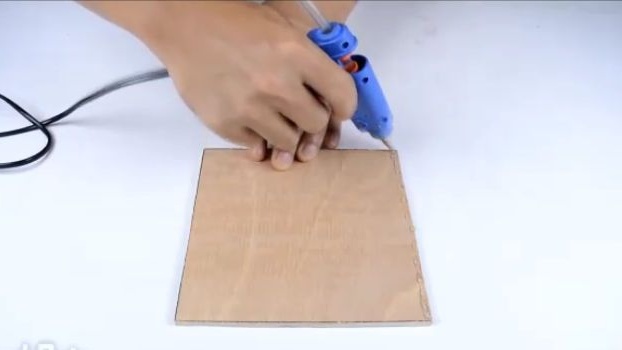
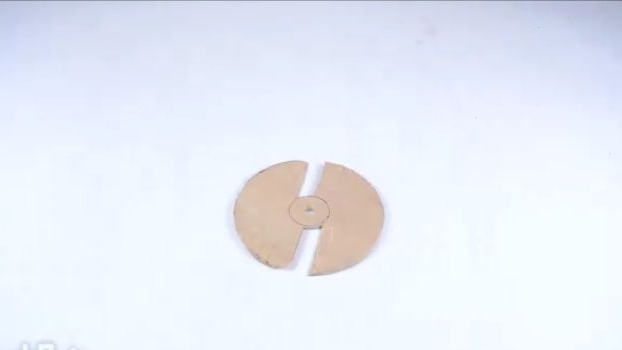
To begin with, on a plywood sheet, we should draw a circle with a diameter of about 12-15 cm with a ruler and a black helium or capillary pen. And cut the blank just drawn with a jigsaw.
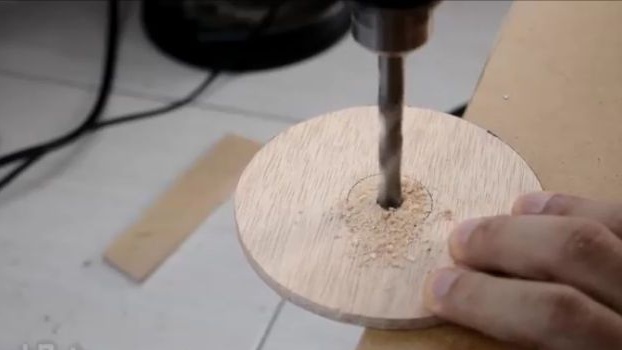
First, take a circle and drill a hole in the center with a 5-7 mm drill. We draw and cut out two similar rectangles with a hand jigsaw so that you get exactly, as it is shown in the photo below. Note that you need to cut at an angle of about 45 degrees.

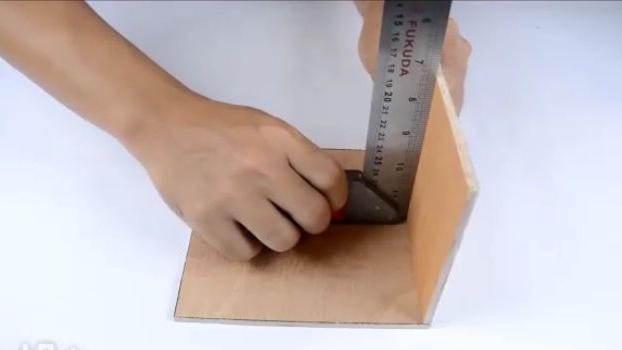
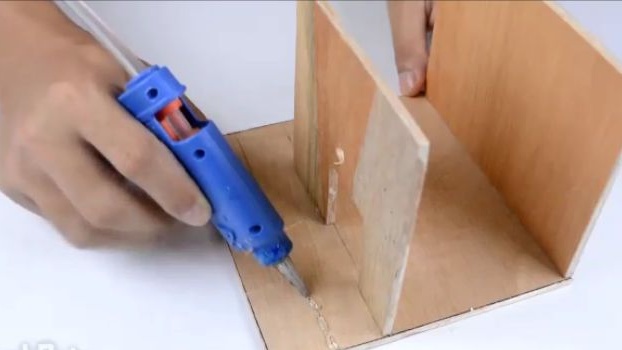
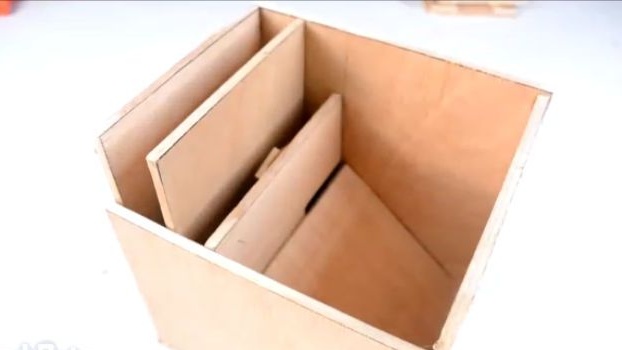
The next step is to cut a square from a sheet of plywood, which will serve as the basis for the design. To this basis, using a hot glue, glue a rectangle as long as the base itself, and a height of not more than 18 cm. Glue should be glued at a right angle, to achieve a right angle during glue hardening, use a square.
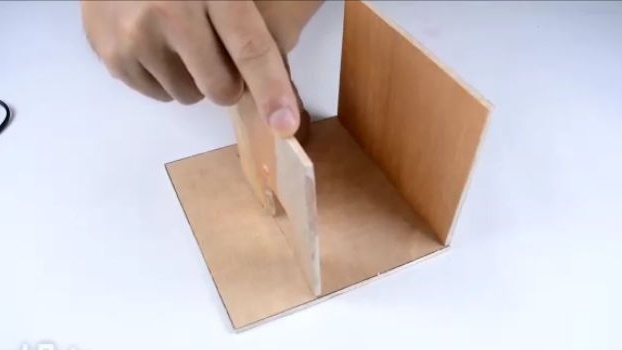
Next, we will make a rectangle the size of the previous rectangle, but only with a window approximately the same as in the photo below. And just stick to the base.
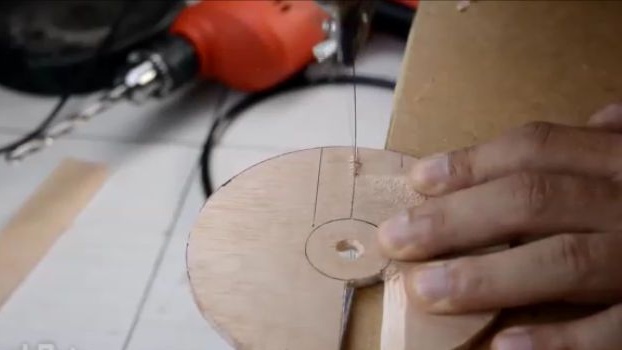
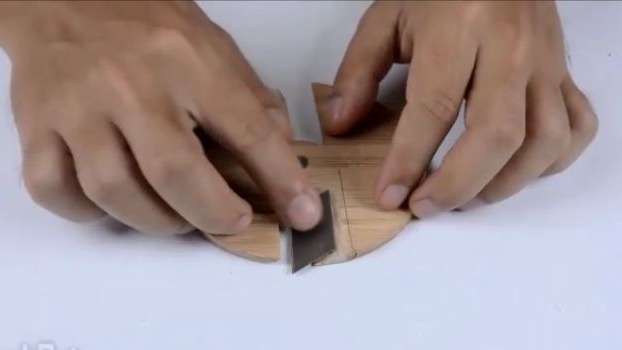
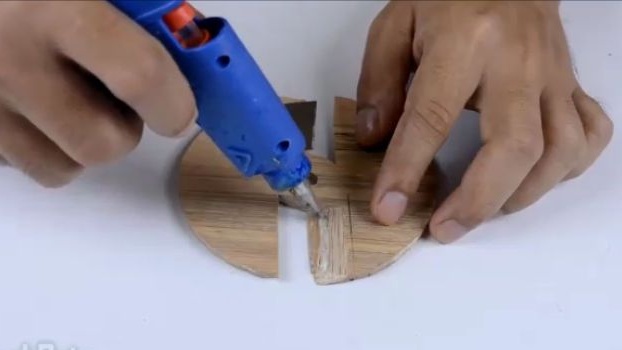
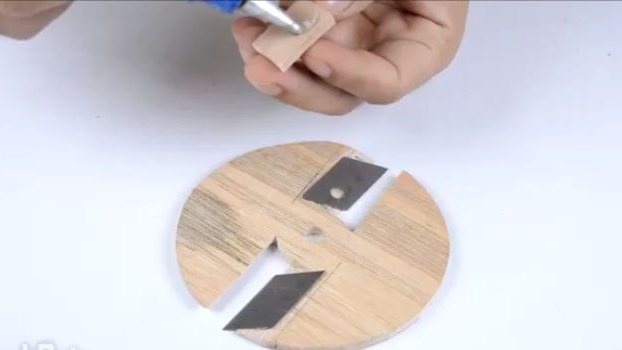
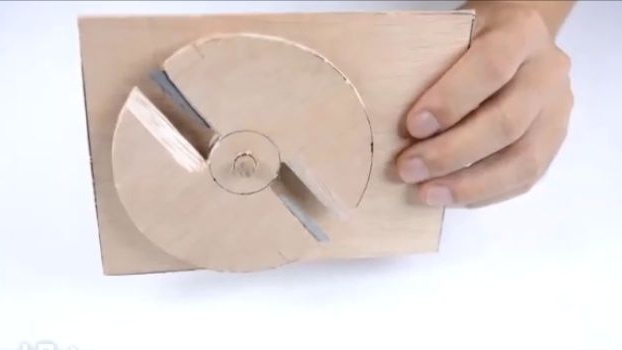
For the next step, we need a blade from a clerical knife and a circle with slots, which we made earlier. Divide the blade from the clerical knife into two identical parts with a length equal to the slots on the circumference. And with the help of hot glue we glue the blades with the sharp side down to the wooden circle so that the blades protrude just a little from the circle.
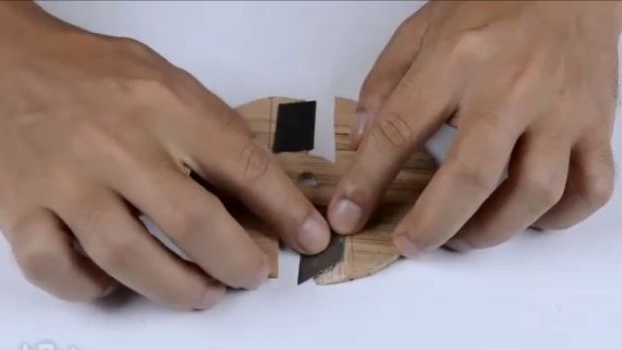
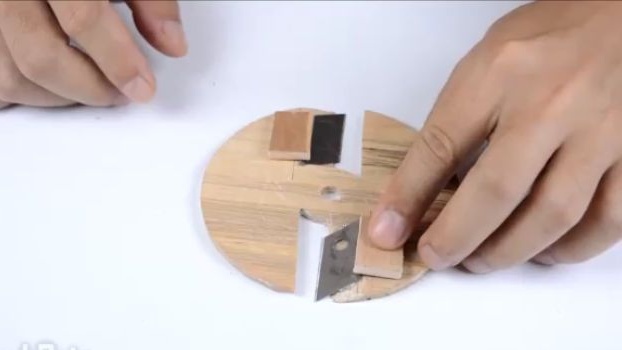
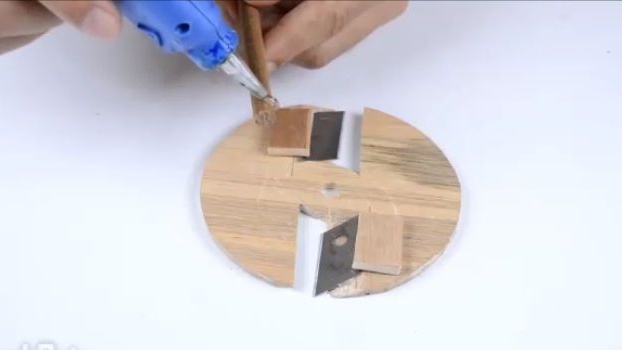
To ensure that the blades do not fly off during the operation of the slicer, we strengthen the fastening of the blades.To do this, cut out two small rectangles from plywood and glue them, as shown in the photo below.
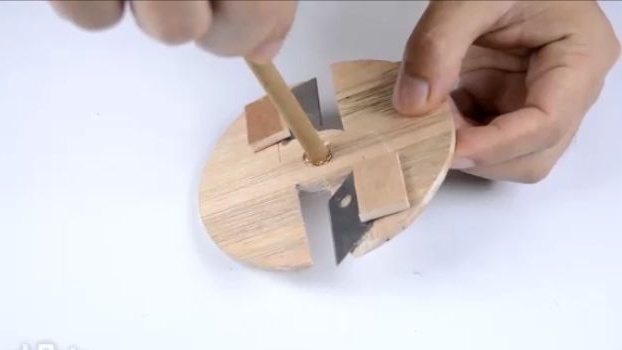
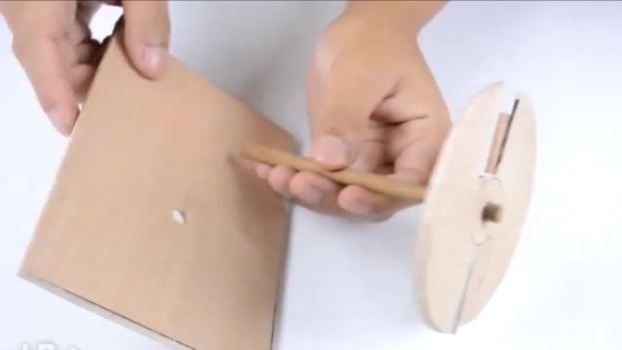
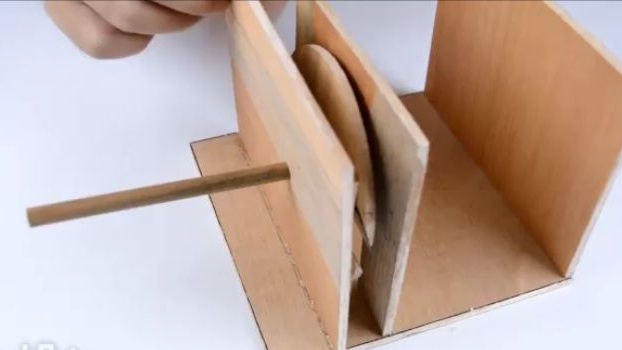
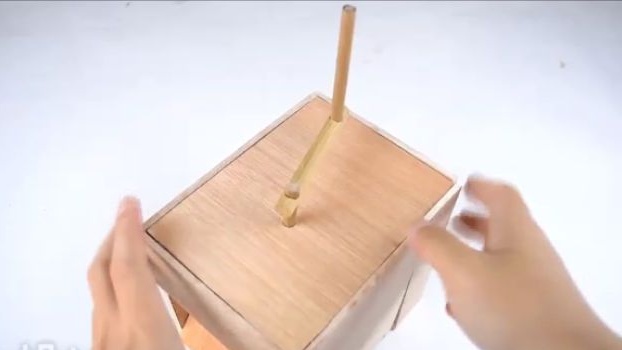
Next, we should take a wooden round stick, it will serve as the axis for the structure (you can use a round wooden pencil) and insert it into the center of the circle so that it protrudes 1-2 cm from the other side. And we fix it with hot glue, strengthening the connection with a plywood disc.
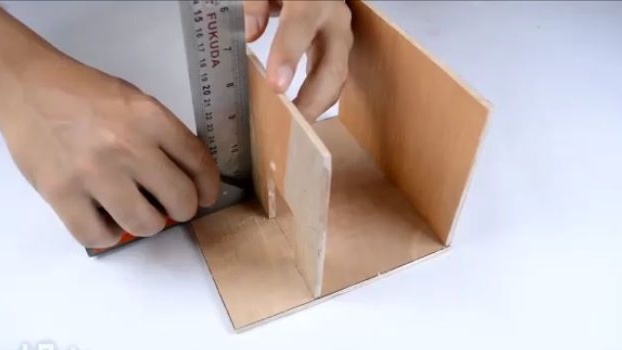
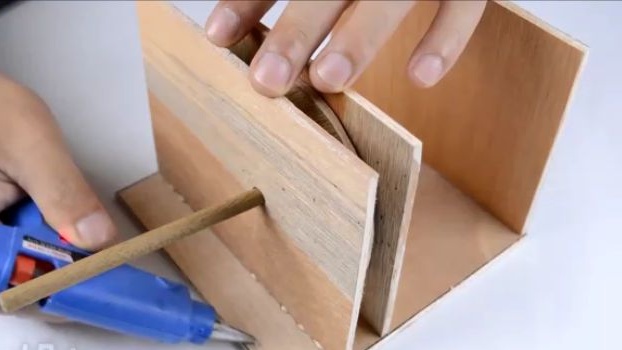
Cut another rectangle of plywood equal in size to the first and second rectangle. But with a hole made under the axis of the structure. The hole should be at such a height that the rotating circle is dense with the base, but does not touch it. We connect the two workpieces just made and glue them to the indicated place in the photo, but after making a hole in the previously installed wall with a diameter equal to the axis and parallel to the previously made hole.
Cut the next rectangle exactly the same as the last cut rectangle. And we install it on the edge of the base, it will serve as a wall of homemade.
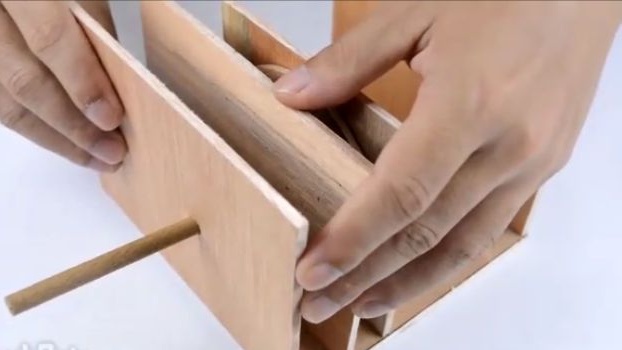
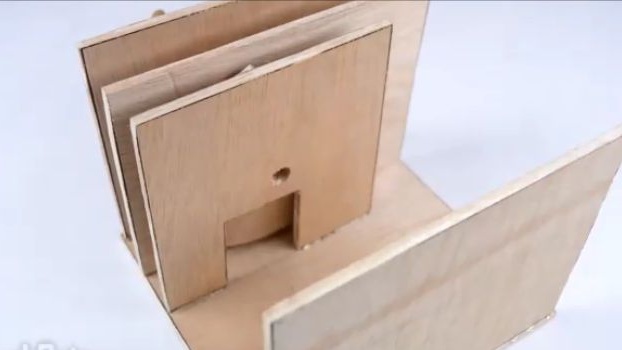
Next, we will need to make a "bunker" where garlic will be poured. To do this, we need to cut out a square or rectangle (depending on the size of the workpieces you have chosen) and glue it to the specified place at an angle so that the garlic itself falls through and falls under the slicer blades.

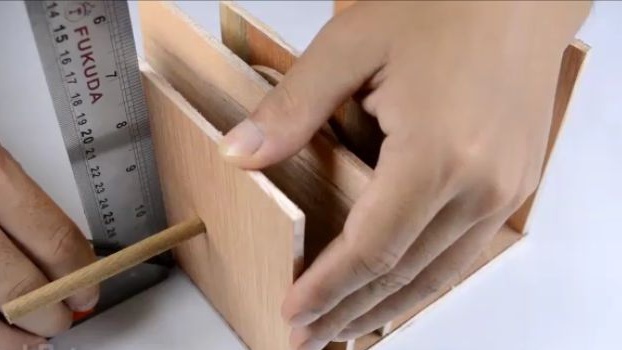
Then we cut out a plywood rectangle with a long equal base but slightly smaller width so that a small hole (no more than 5 cm) remains in the lower part. And glue the just made four square exactly, as it is shown in the photo below.
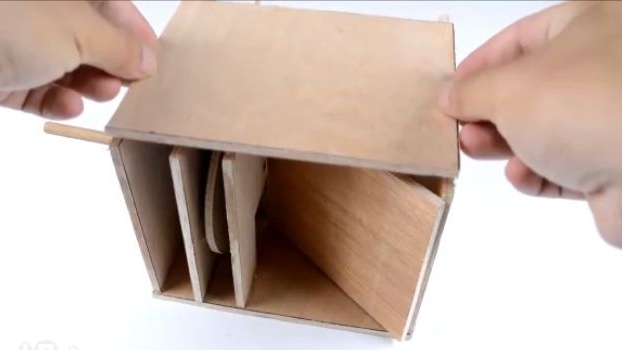
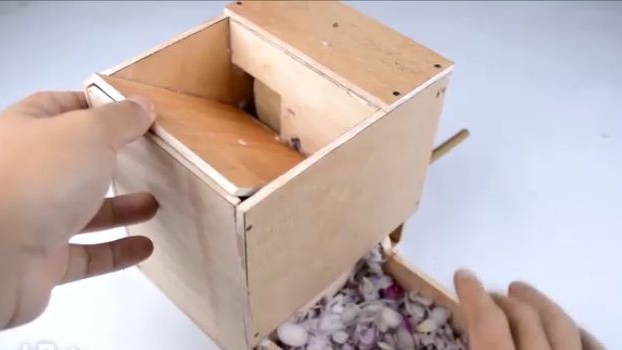
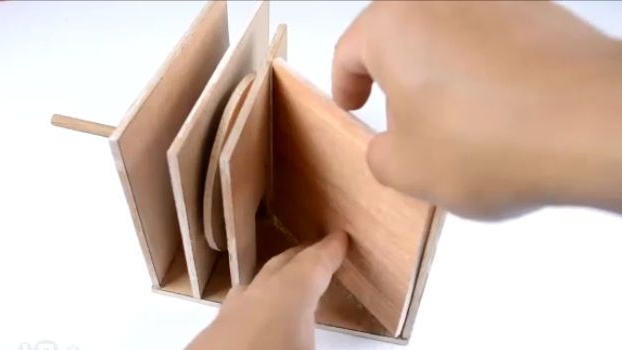
Turn the structure over with the hopper up and cut out the rectangle in order to close the insides
design and make homemade more aesthetic.

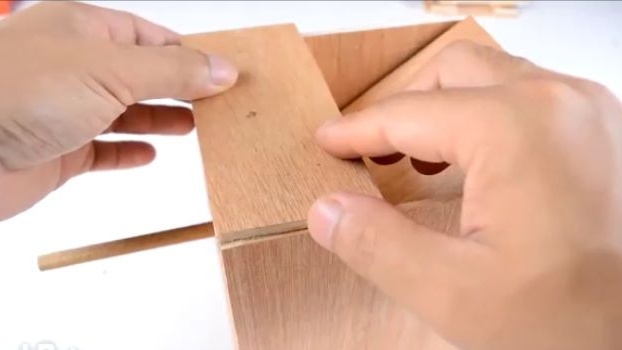
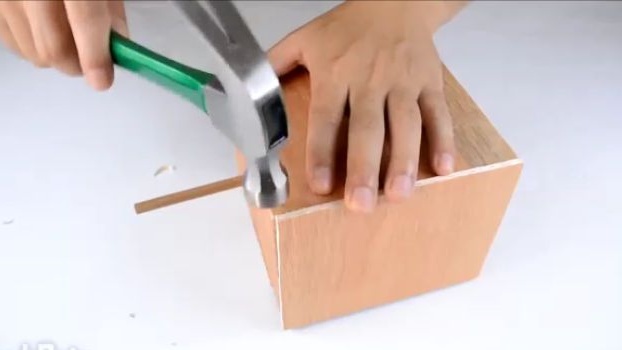
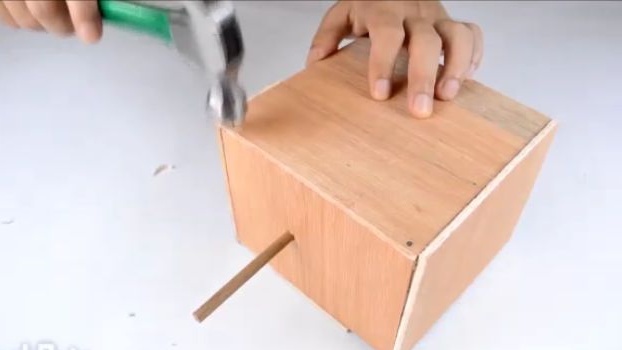
Again, turn the structure upside down and glue the bottom of the plywood. In order for the homemade product to serve for a long time and please you, it should be knocked together with small furniture nails in places where it is required.


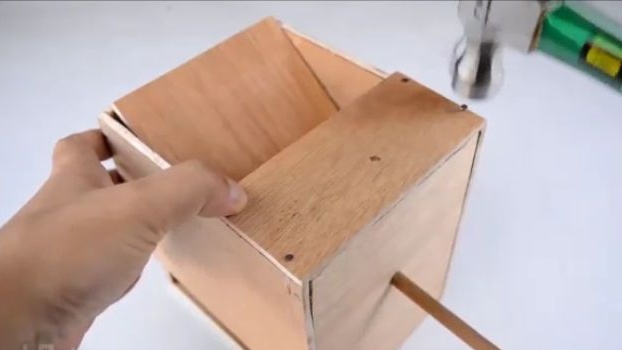
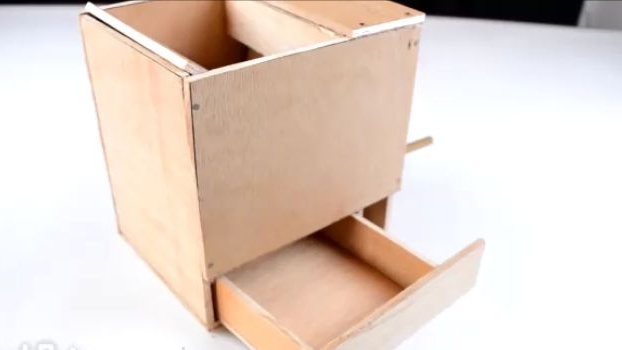
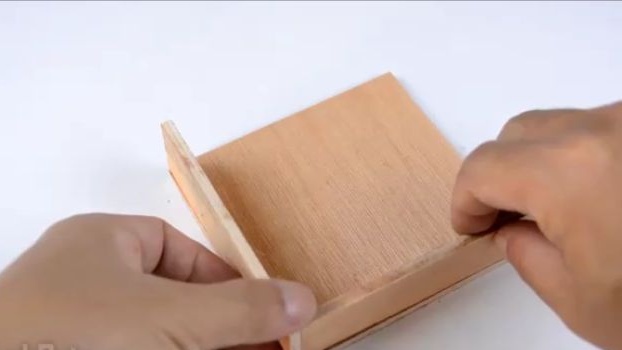
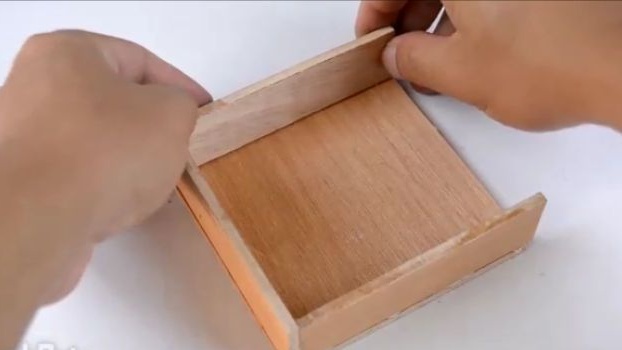
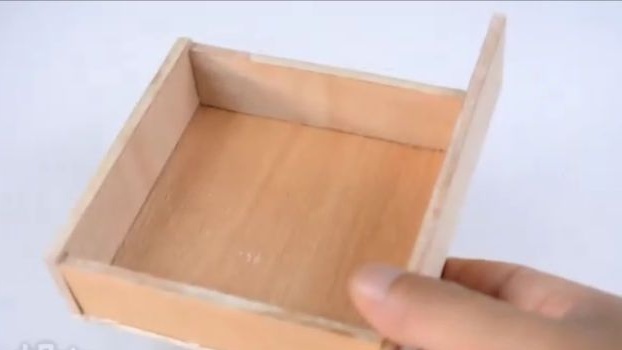
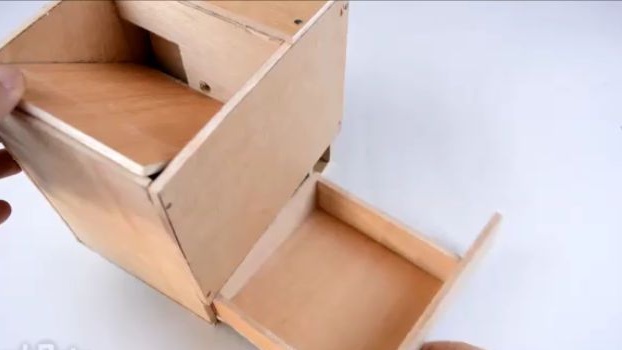
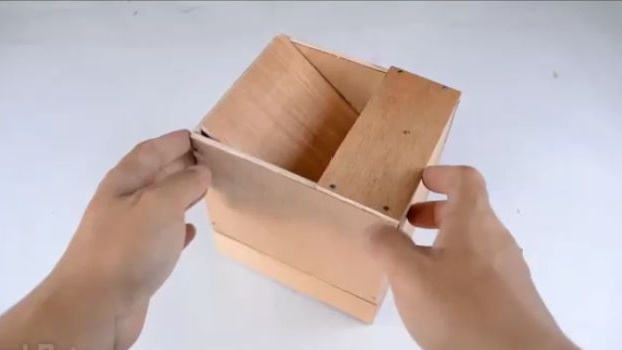
The next step will be making a box for already chopped garlic. To do this, we need to cut out the base with a width equal to the width of the first and second glued walls, and the length should be equal to slightly less than the width of the entire structure. Next, for the box, we should cut the sides. With the length of the sides of the box, everything is clear, but what to do with the height? But in fact there is nothing complicated, the height should be such that the box could fit into its place. But it should be noted that one of the sides will serve as a facing panel for the entire structure, and its width should be equal to the width of the homemade product and the side should be glued so that the facing part of the box stands exactly in the gaps.
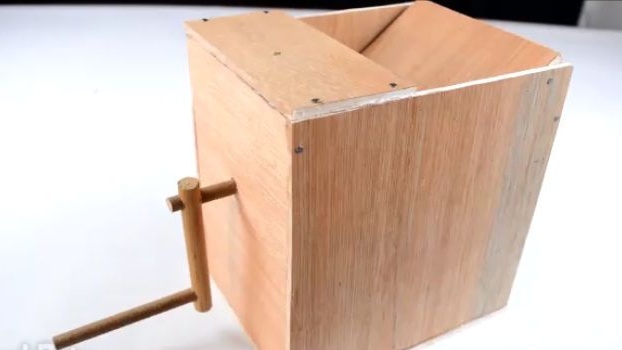
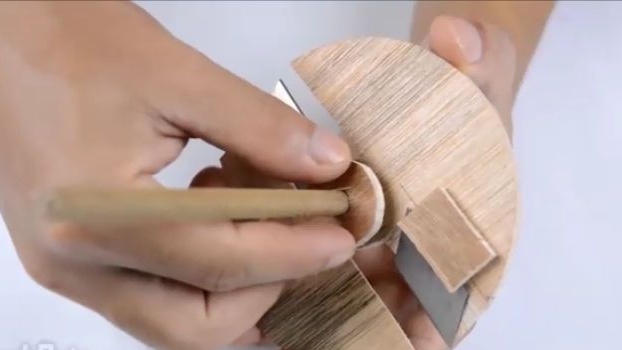
We proceed to the manufacture of handles for the axis. There is also nothing complicated. We will need another wooden round stick with a larger diameter, along the edges of the just taken stick two holes should be made, the diameter of which will be waged to the diameter of the main axis. And we just put the workpiece on the axis and cut off the excess from the axis. And in another hole we insert a stick with a diameter, like the main axis 6-7 cm long.

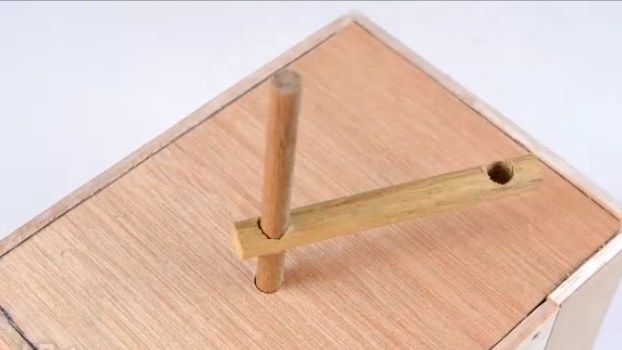
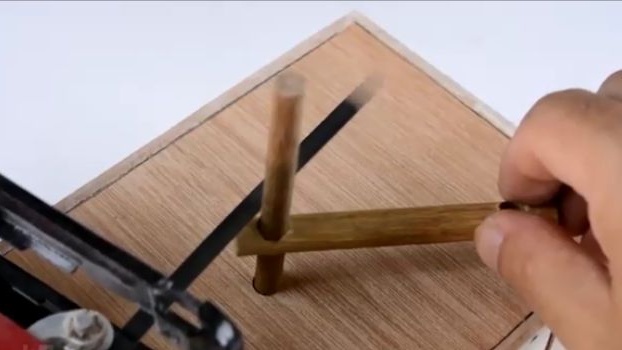
In the indicated place we make a hole with a 2 mm drill (no more) and hammer a skewer skewer into the hole. Using nippers, bite off the extra part of the skewer.
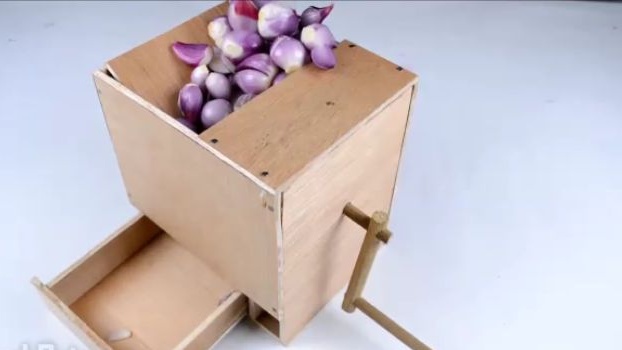
All is ready! It remains only to test the homemade. Pour the peeled cloves of garlic on top, twist the handle in the right direction and get chopped garlic from the bottom in the box. As a result, we got a simple slicer for garlic, which can come in handy when preparing canned food for the winter.

Here is a detailed video from the author with a detailed assembly and testing of this homemade product:
Thank you all for your attention and good luck in future projects, friends!