
Hello everyone, I present to you an interesting Viking-style hatchet, which you can easily make do it yourself! It looks pretty beautiful, original, and is made from an ordinary ax. You can use the old ax for these purposes. The pattern on the ax is made by etching, you can come up with your original drawing. The author also covered the ax with brass, in the end everything looks generally amazing. Let's consider in more detail how to make such an hatchet with your own hands!
Materials and tools used by the author:
Material List:
- an ordinary ax;
- handle to the ax (you can redo the old one if the wood is good).
Tool List:
- a welding machine (or a powerful power supply for etching);
- electrolyte and capacity (ordinary salt, water);
- a brass brush for a drill (completely brass, with a dusting will not work);
- grinder;
- drill;
- paint;
- a drill.
The manufacturing process of the Viking hatchet:
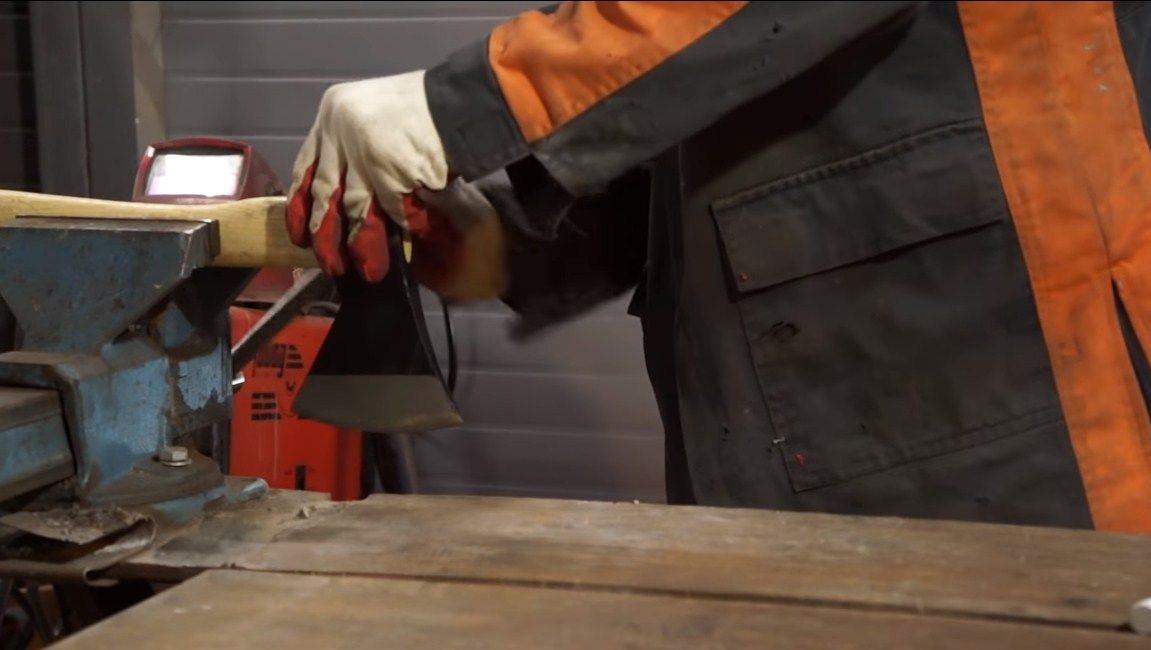
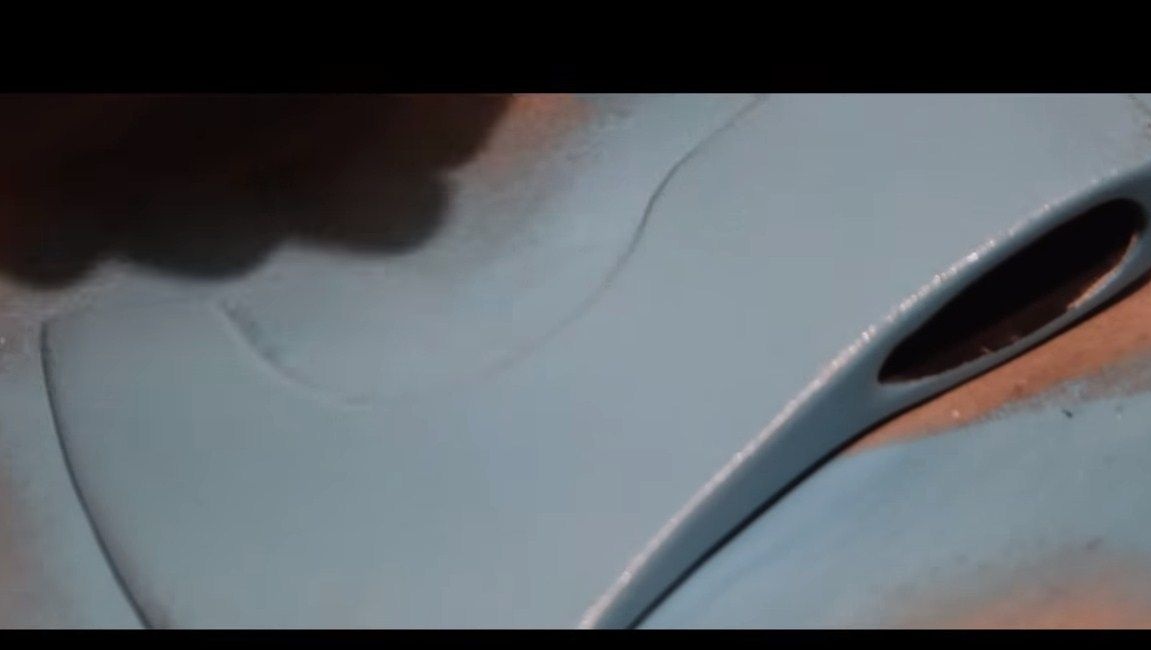
Step one. Cut the desired profile of the ax
First, we need to come up with the desired shape of the ax. We draw the desired profile directly on the prepared ax with a marker. Well, then proceed to cutting. Clamp the ax in a vice and work as a grinder. Hurry is not worth it, the metal is quite thick and is not cut quickly. Concave sections are cut into pieces.
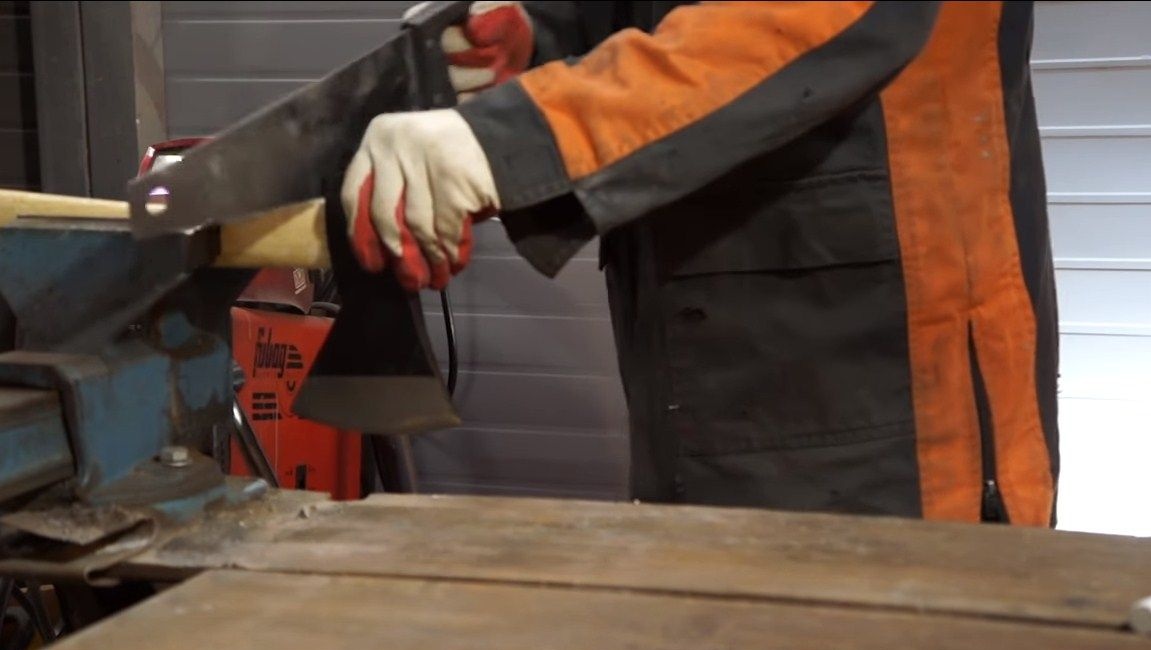
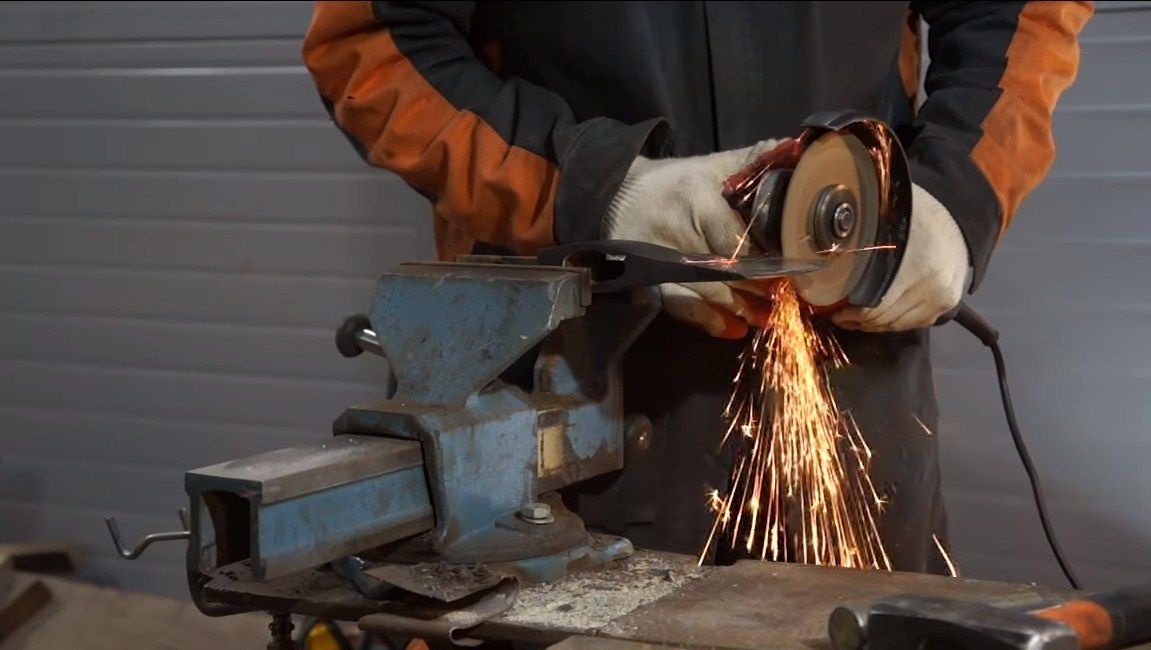
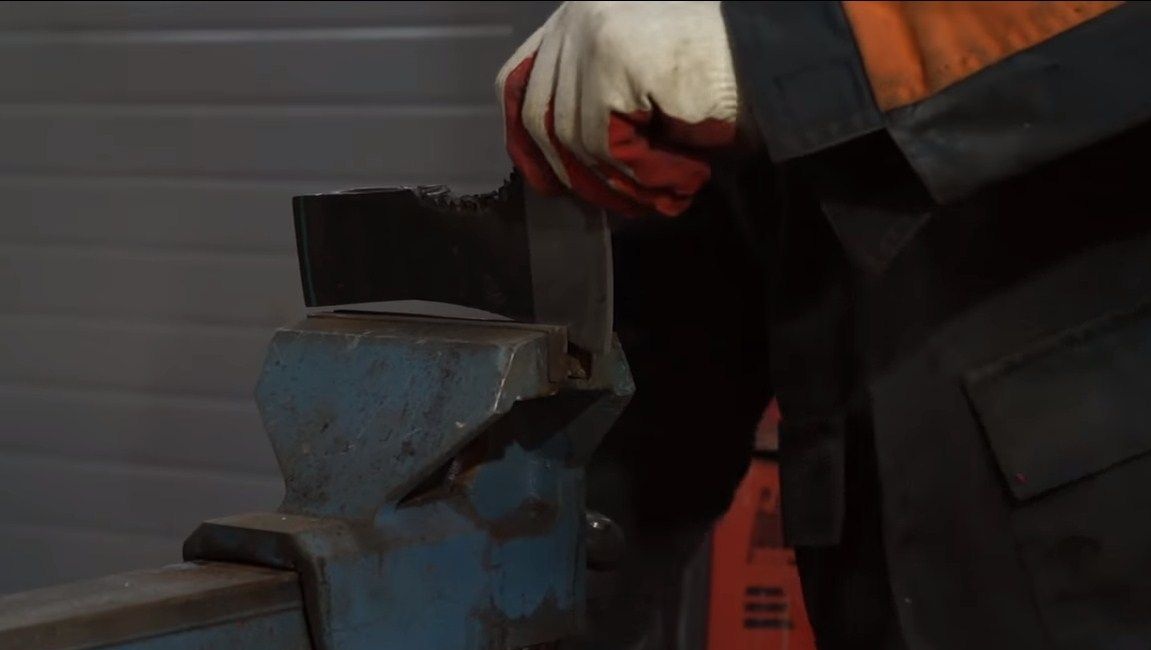
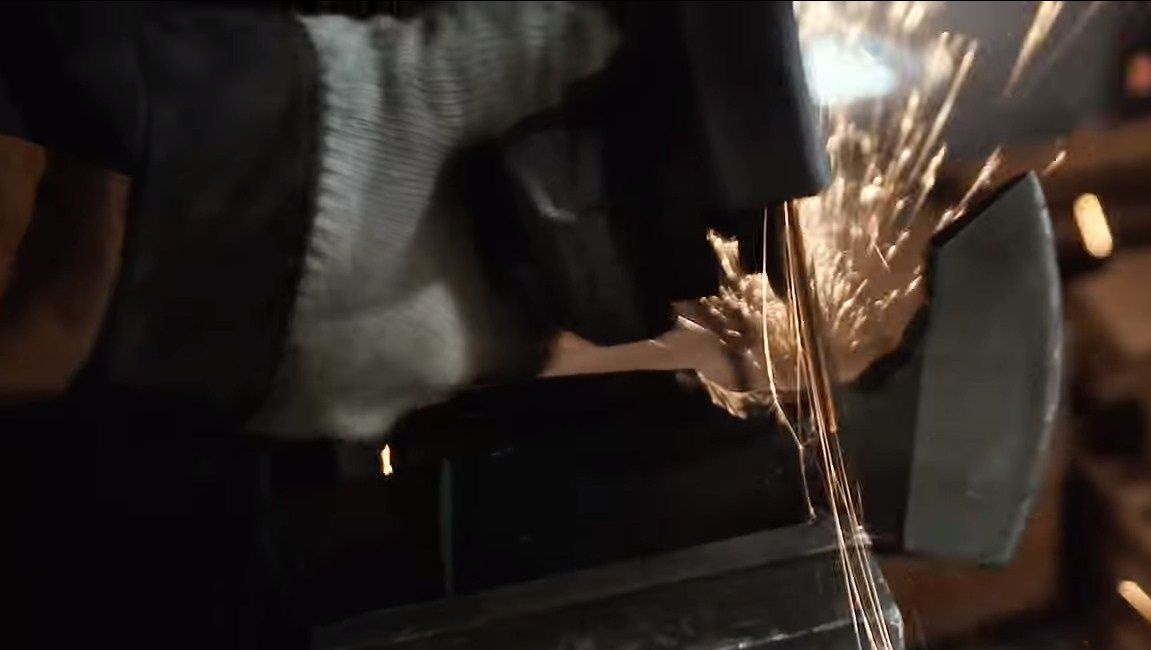
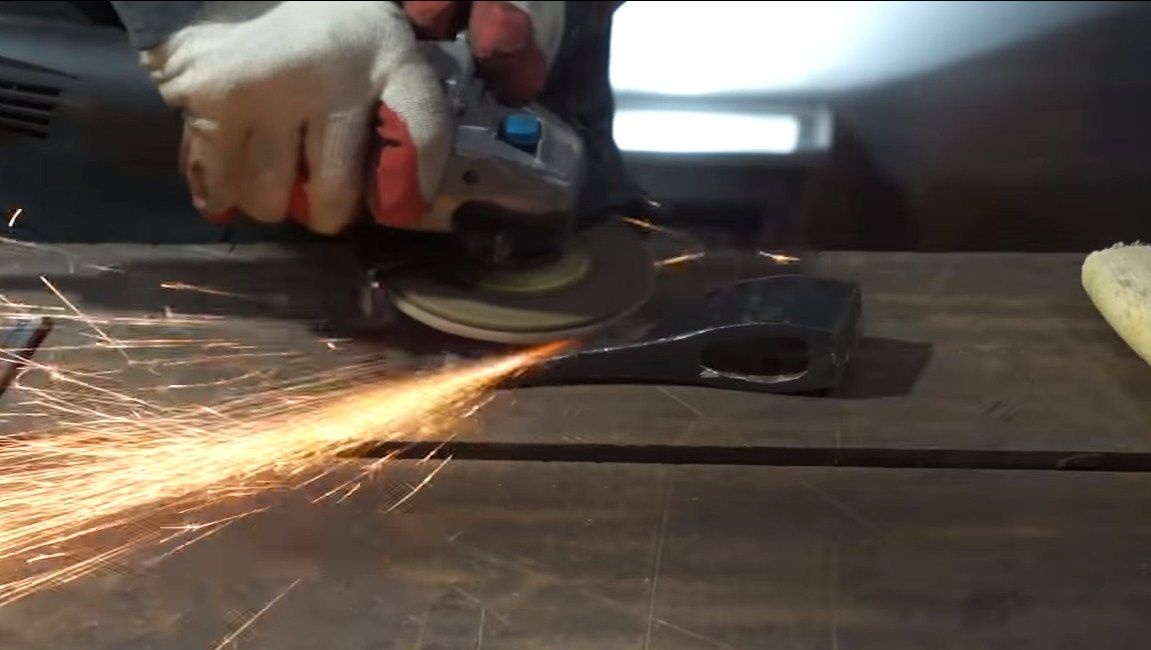
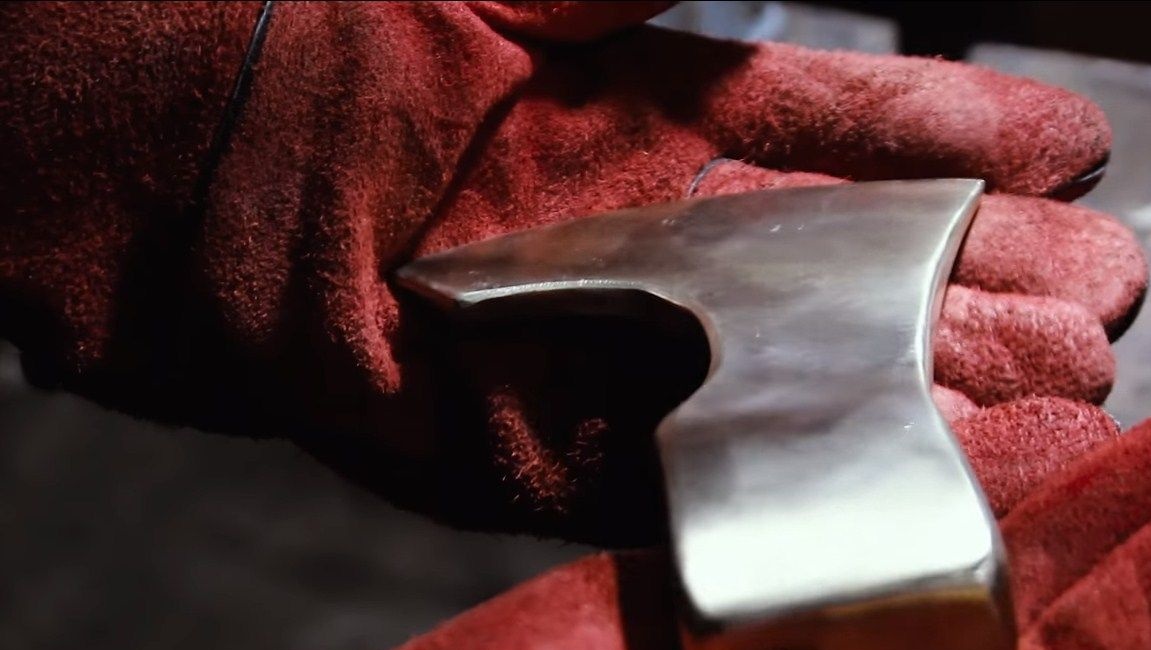
Next, the profile is processed manually to get the final result. We work with metal files. But this can not always work out, since the metal is usually hardened and annealing is necessary for this procedure. Also, we need to trim the butt with a grinder, make it already, since the ax itself has already become. At the end, we carefully grind the ax, we need to clean off all the rust and other contaminants that will interfere with the etching and surfacing of brass. The author makes grinding using a grinder with a petal grinding disc.
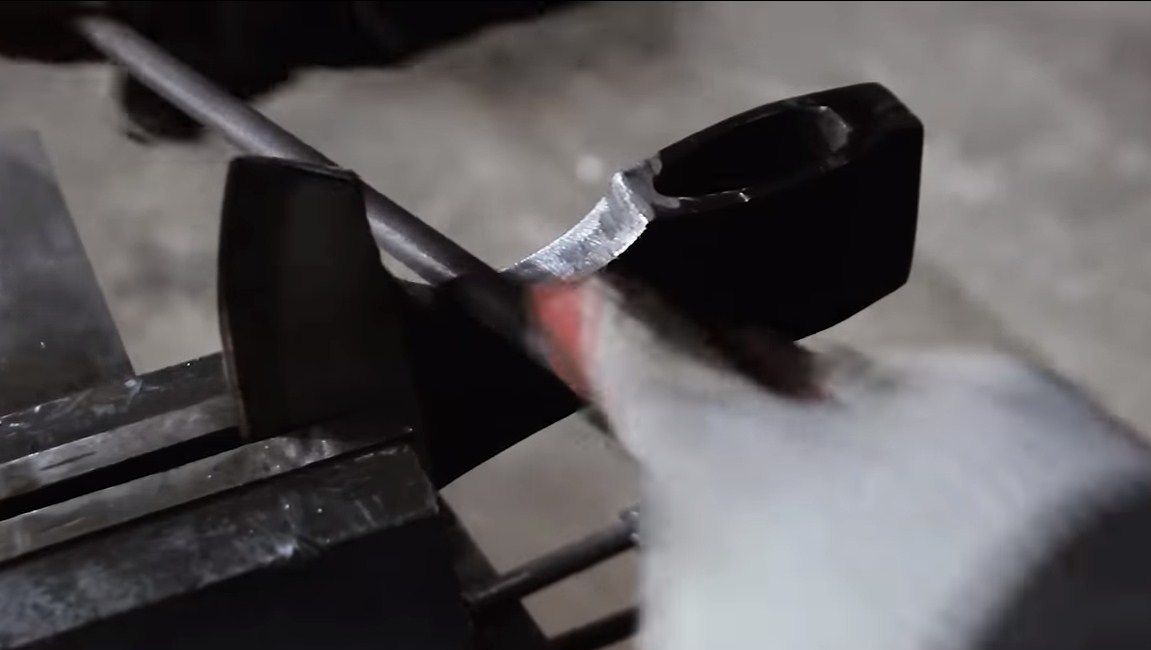
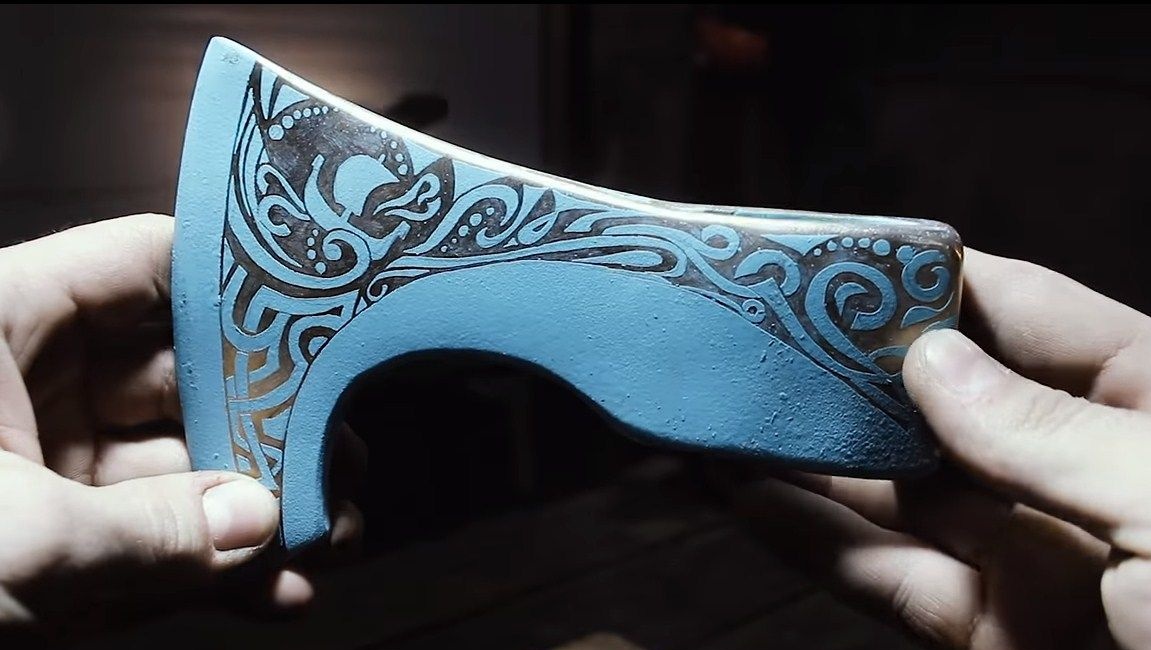
Step Two We cover the ax with brass
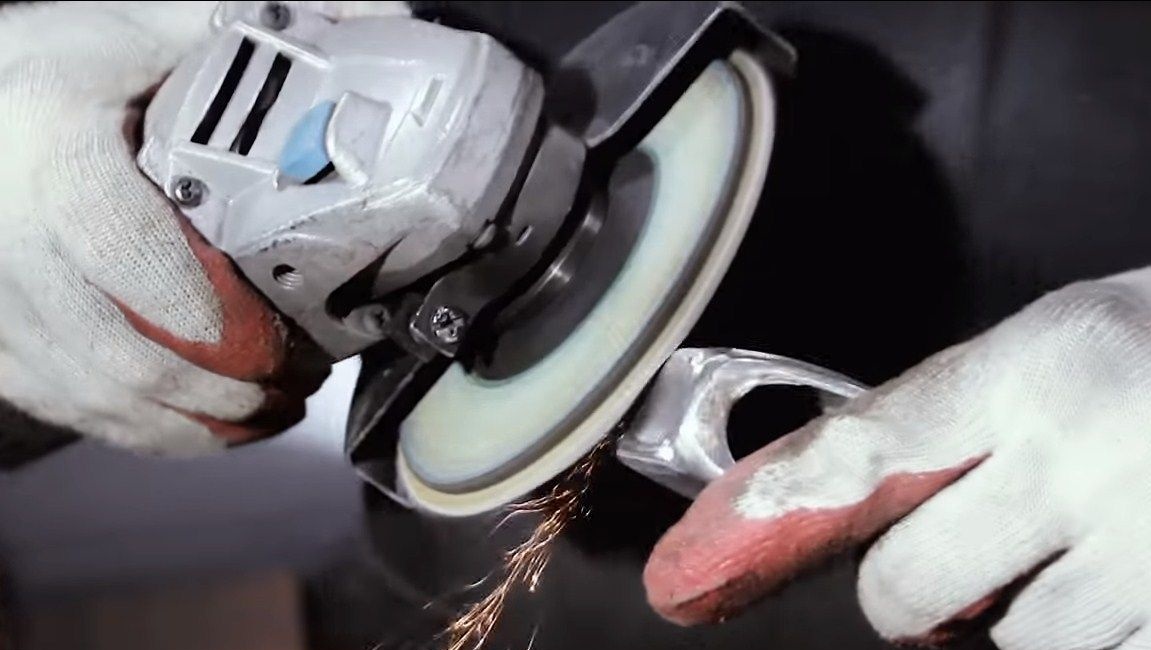
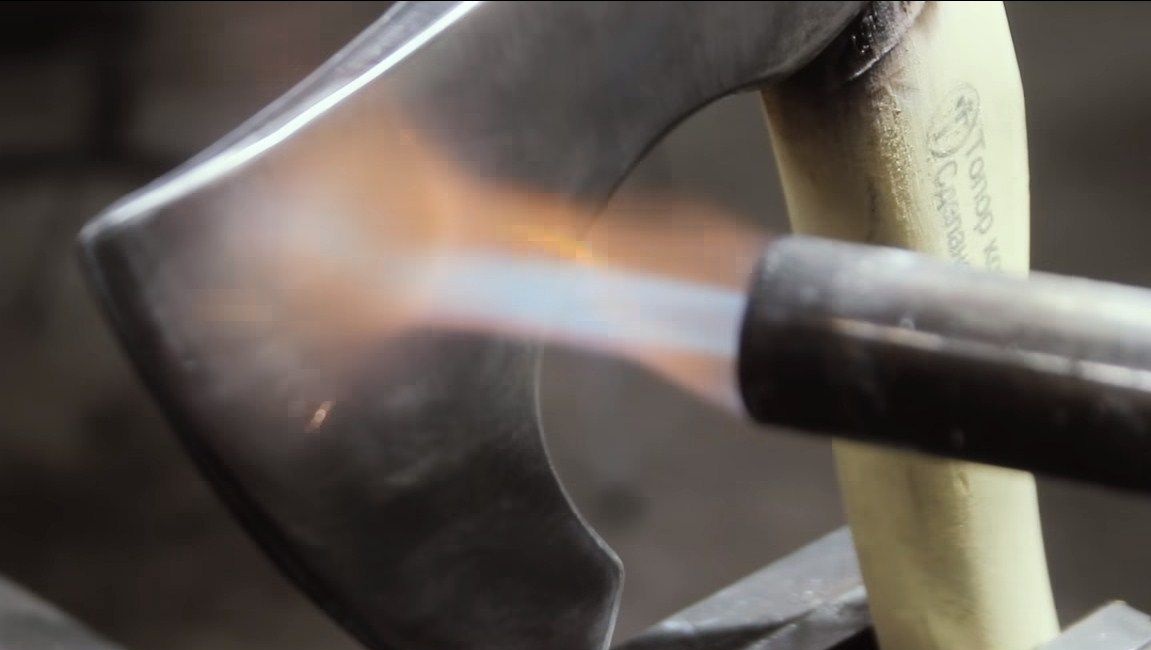
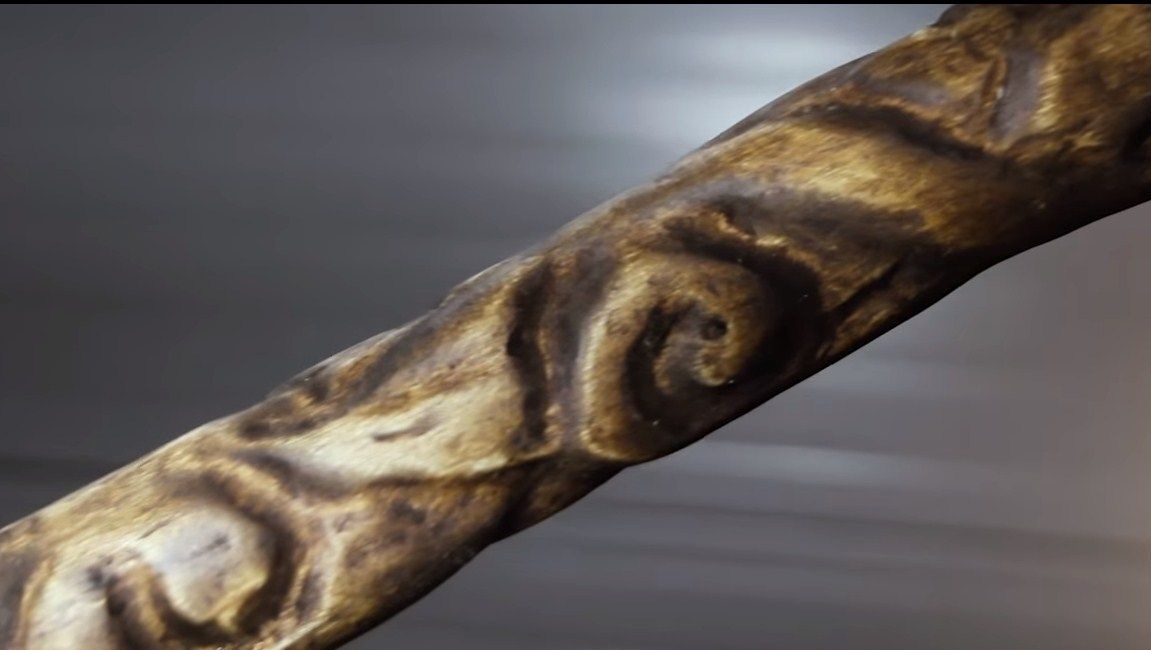
Now you can cover the ax with brass, the author used a unique method for this. First, take a gas burner and heat the ax to about 150 degrees Celsius.Next we need a brush made of brass, which is fixed in the drill chuck. The bristles should only be made of brass, a brush with a touch of brass is not suitable. And then we process the ax with this brush, the brass coating will remain on it. In general, even at this step, the ax already looks very beautiful, it is golden in color. This coating will no longer rust. There are several layers to apply, we do it evenly so that the coating holds well.
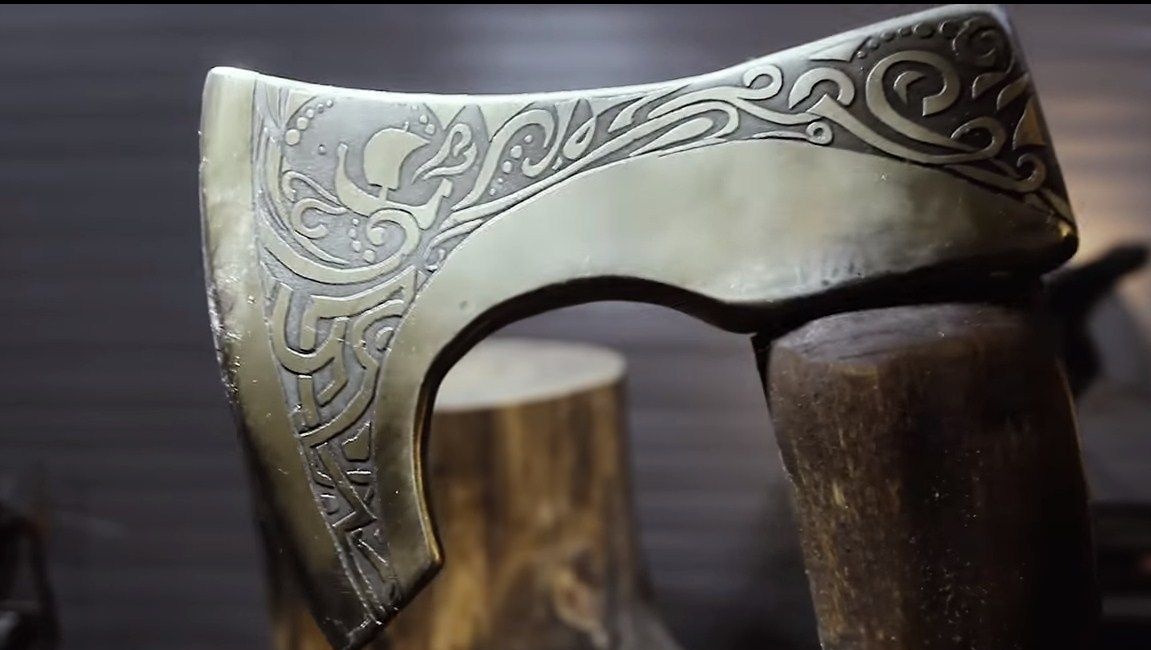
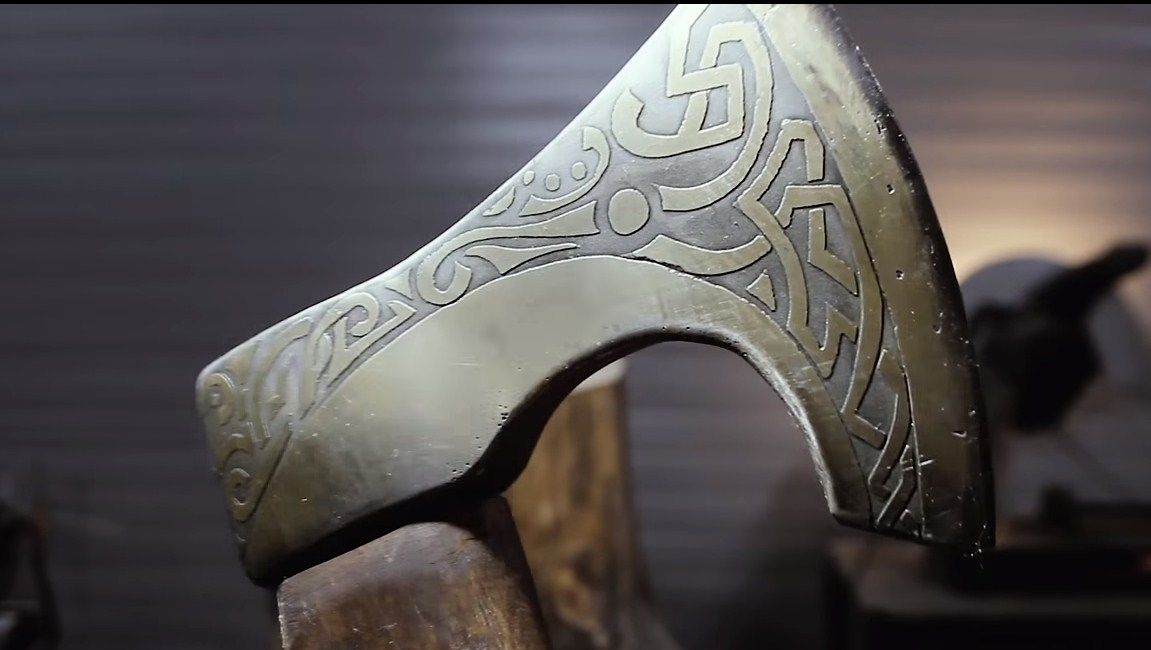
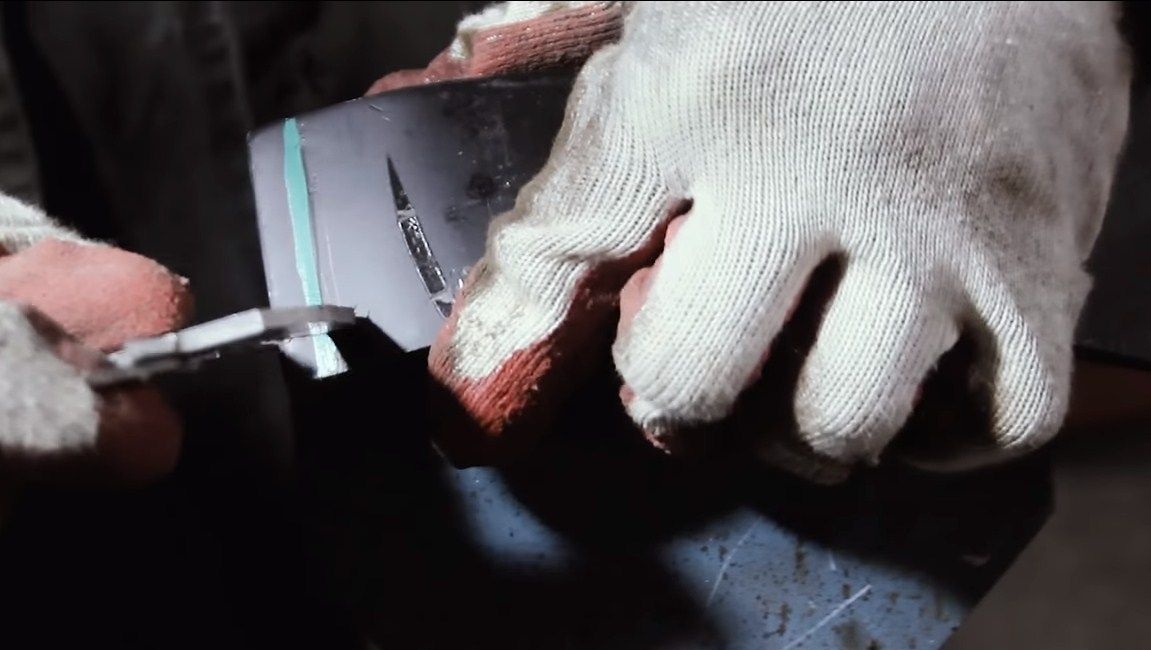
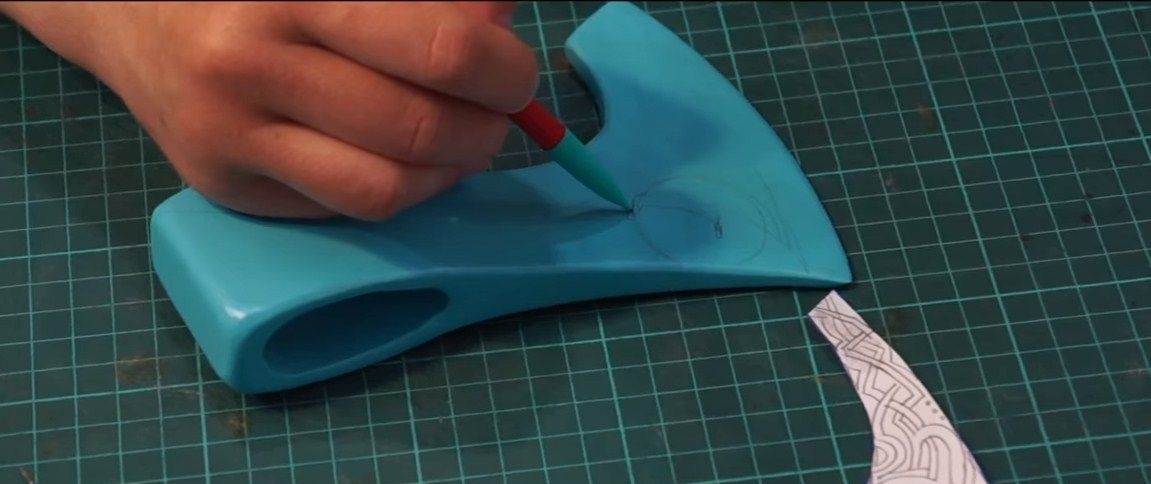
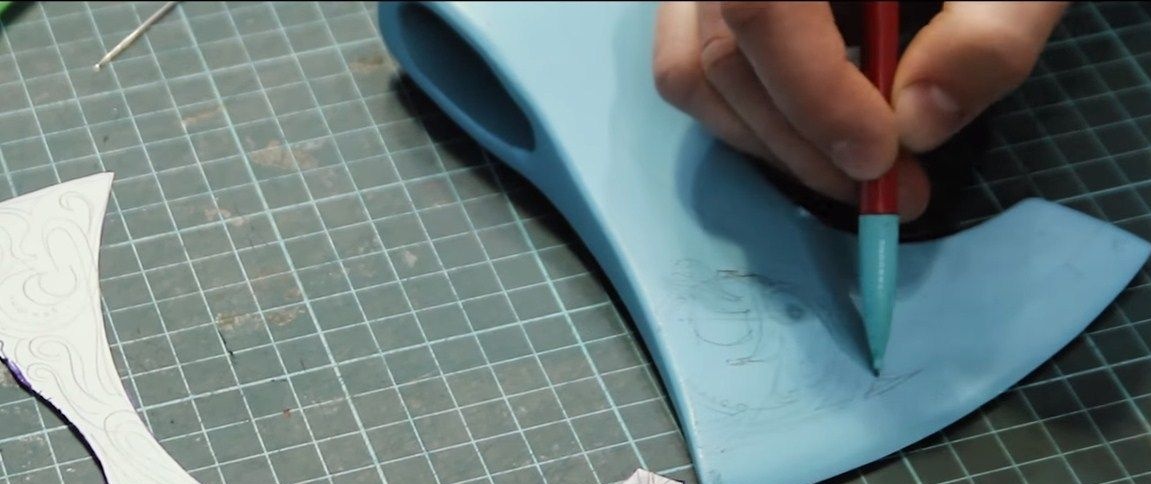
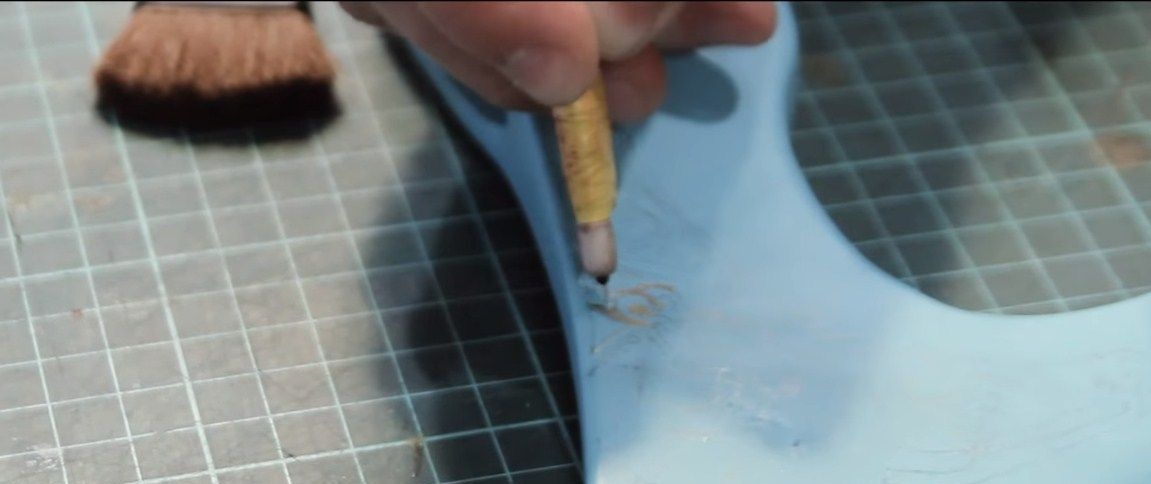
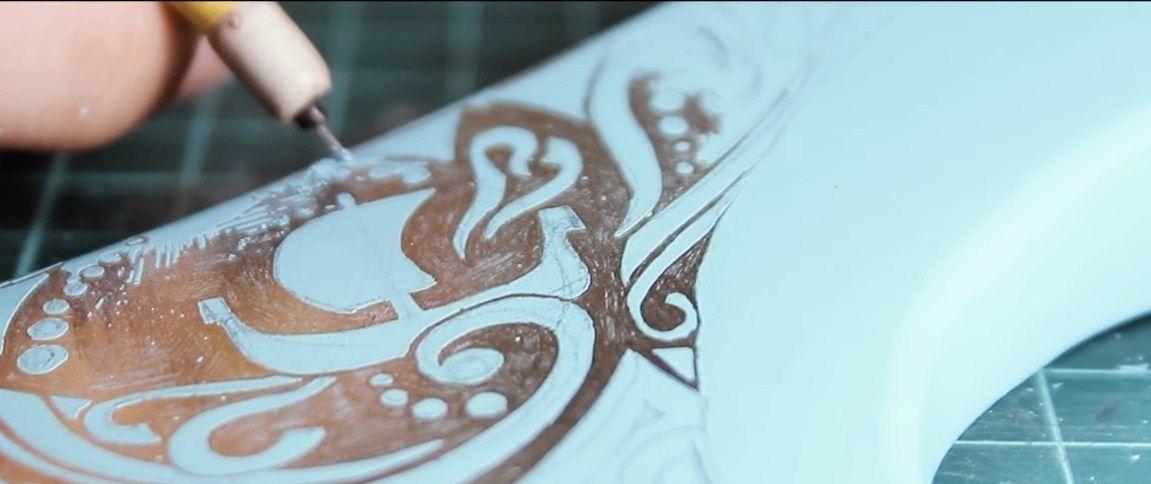
Step Three We apply a drawing and proceed to etching
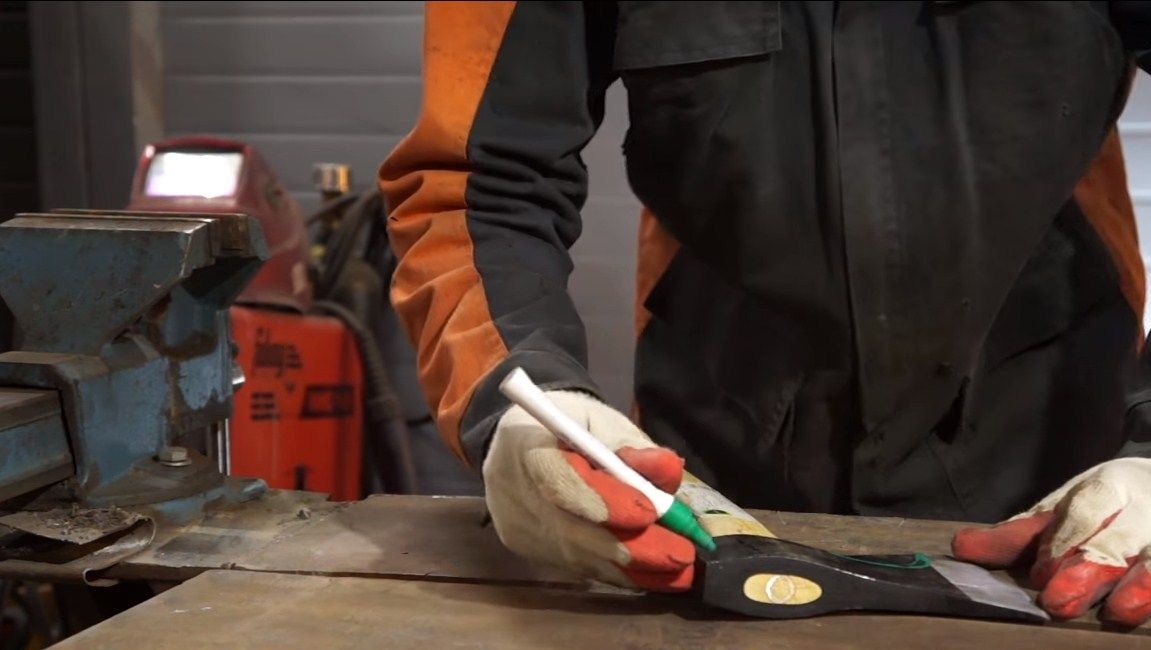
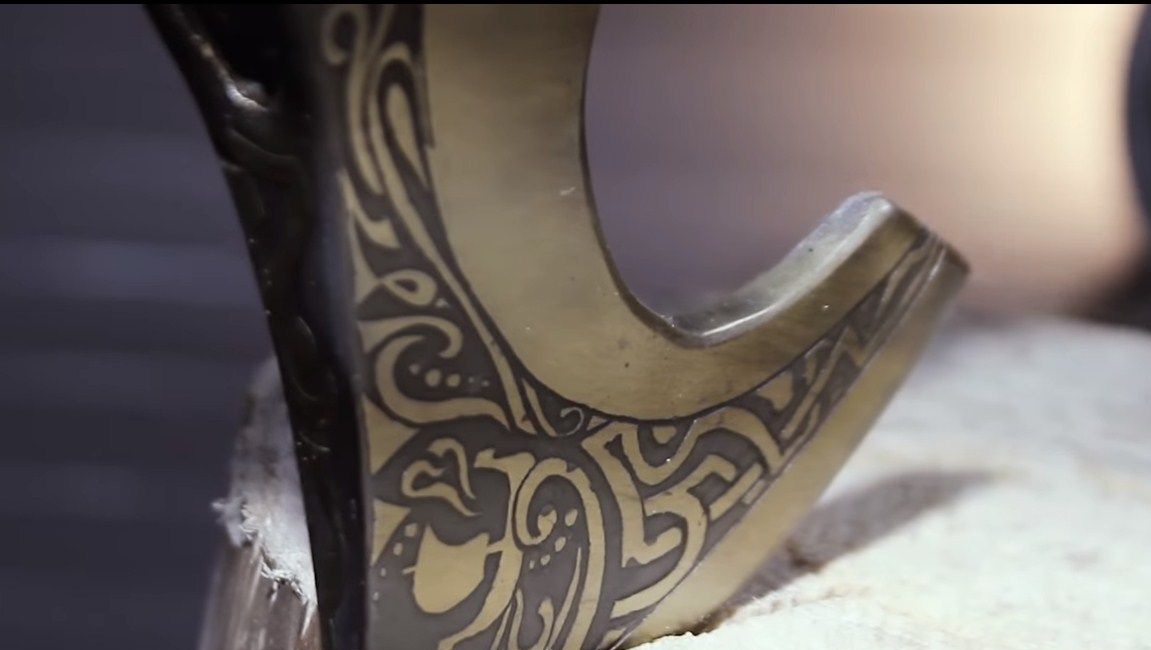
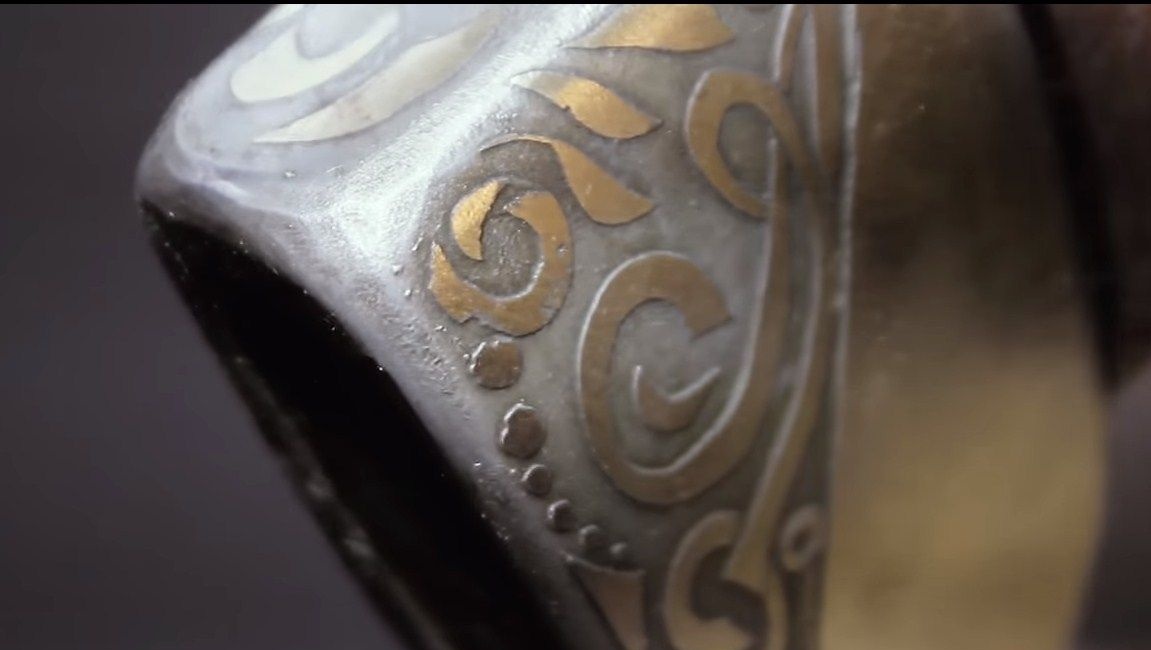
To apply and etch the desired pattern, paint the ax with oil paint. Those areas that we then clean will “burn out” during electrolysis. When the paint dries, you can draw on it the desired pattern. Next, take a sharp little knife and cut out the desired pattern. In these places, the metal should be well cleaned.
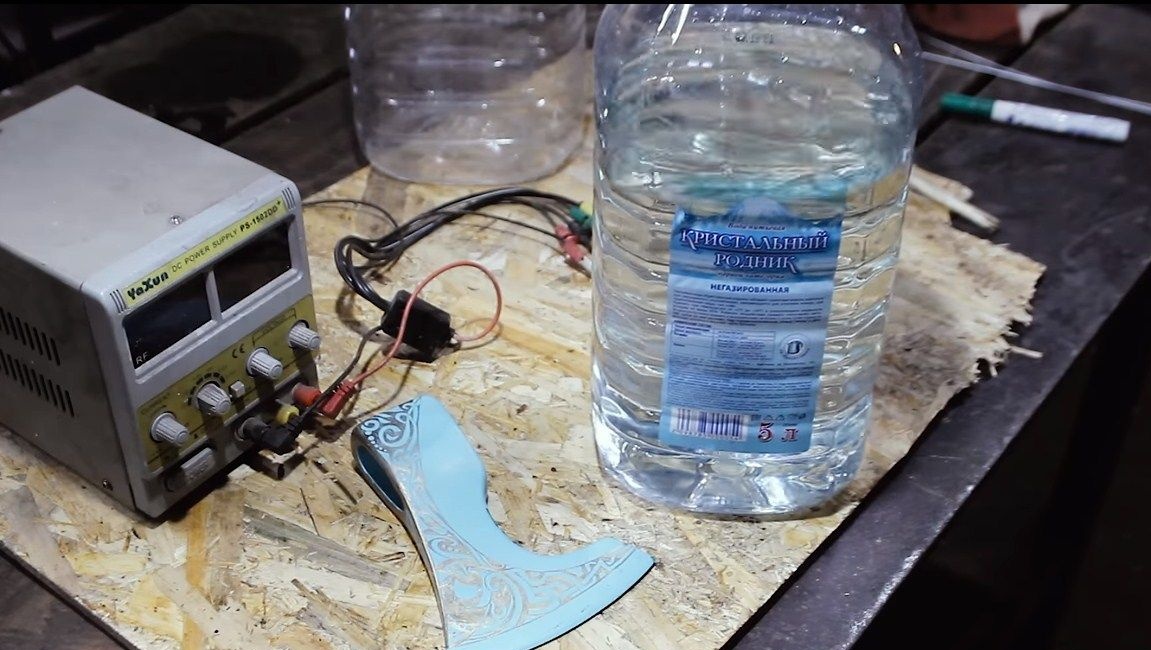

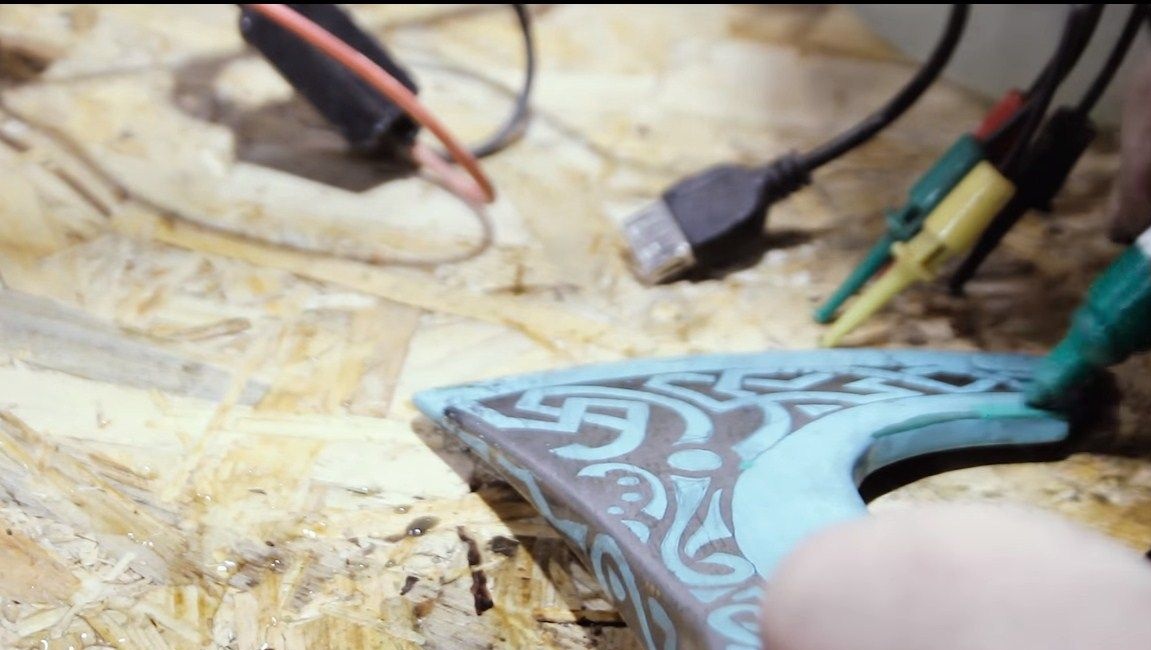
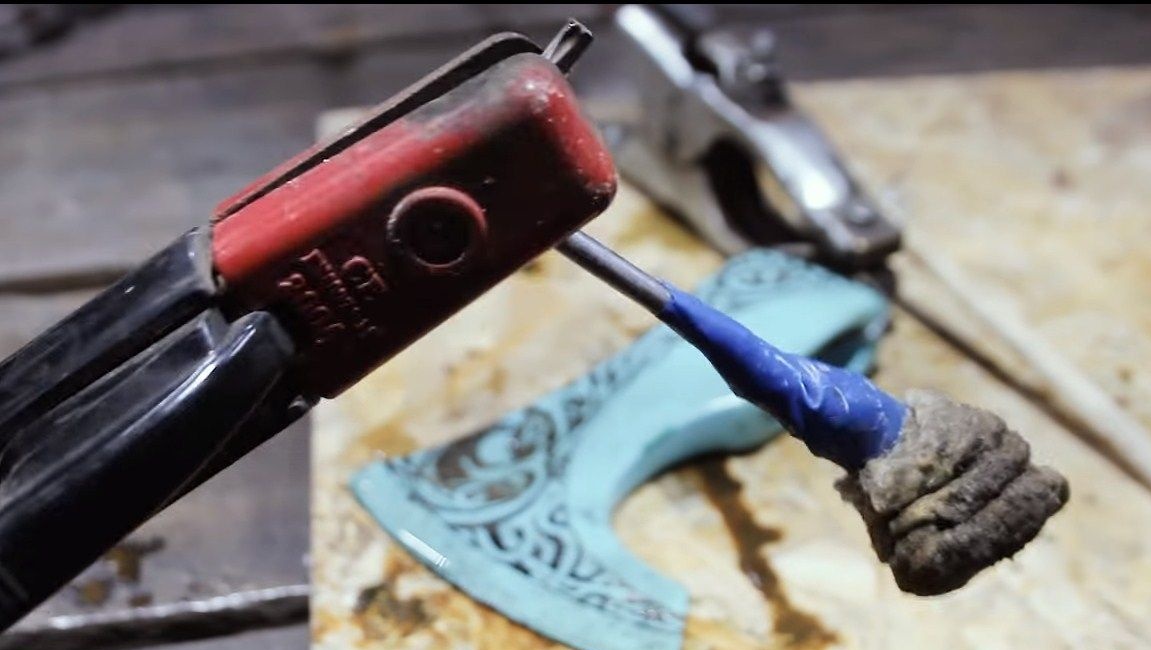
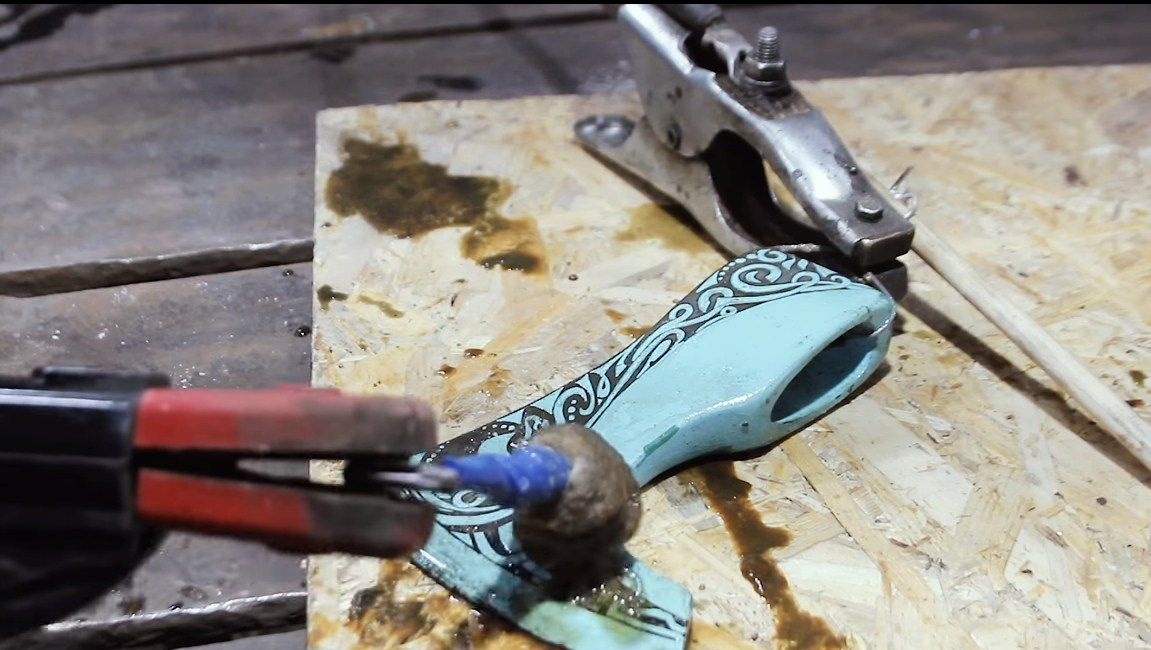
Well, now you can start etching. We immerse the ax in a container with electrolyte and apply voltage from the power supply. The author uses salt and water as an electrolyte. Do not breathe vapors, they are harmful to health, and they are explosive!
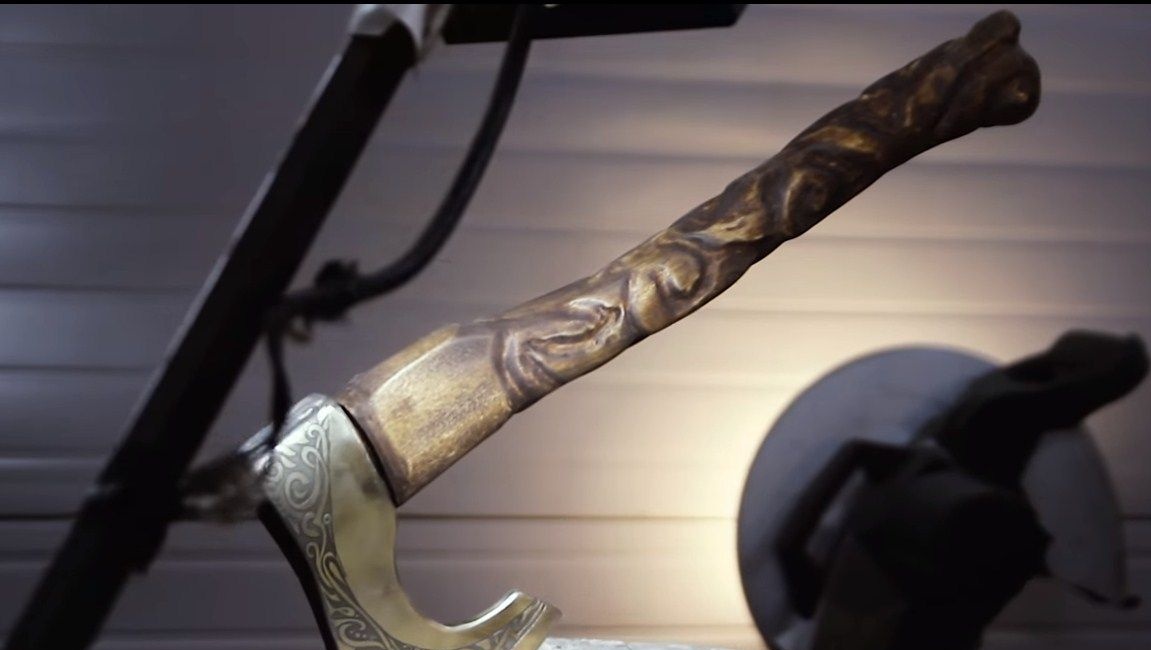
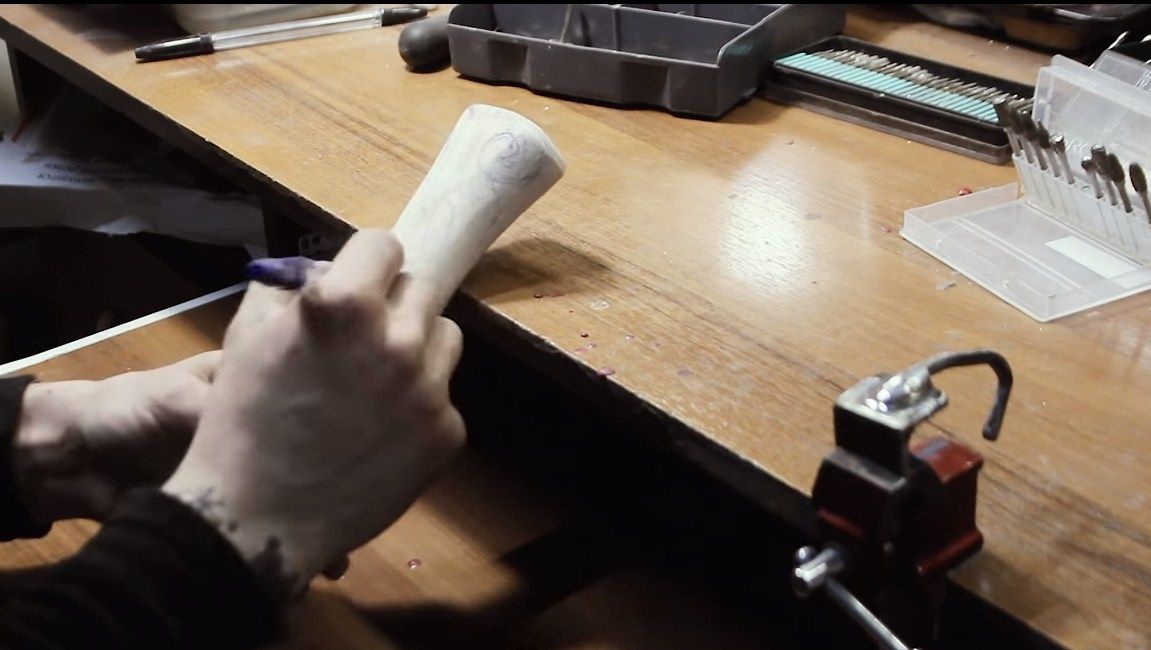
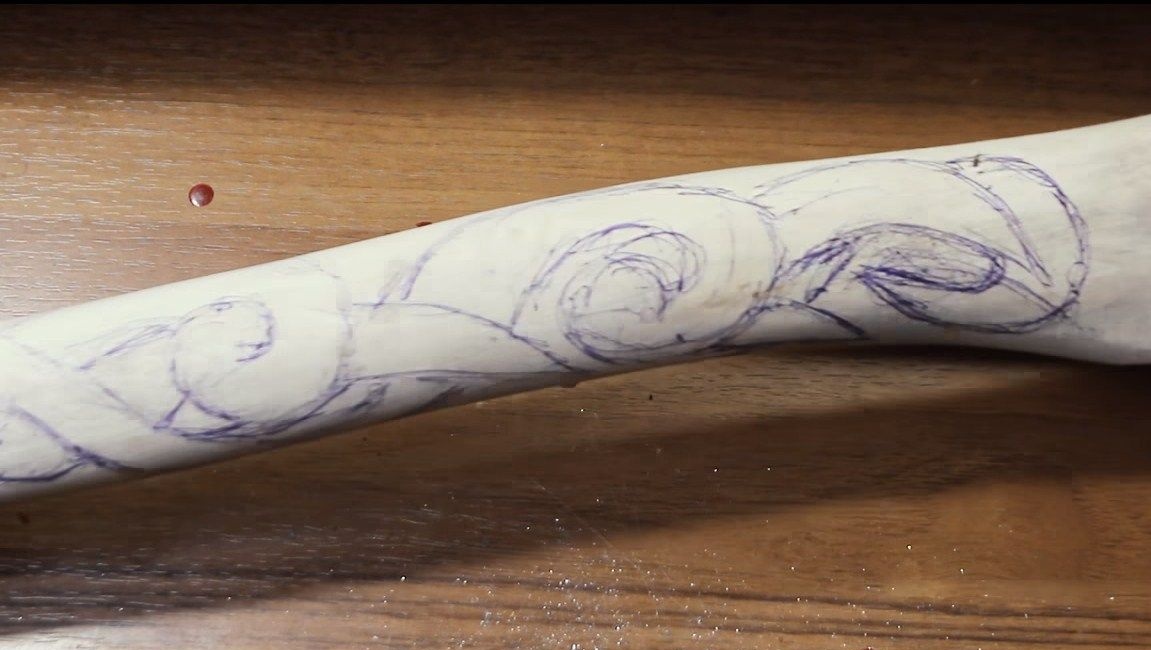
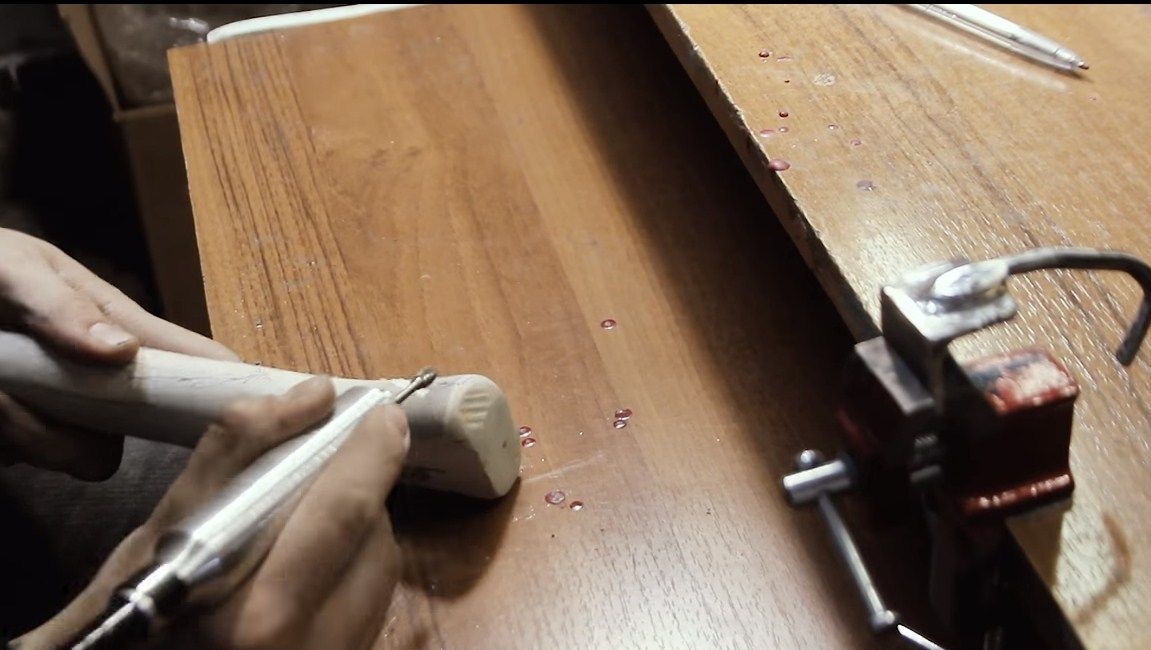
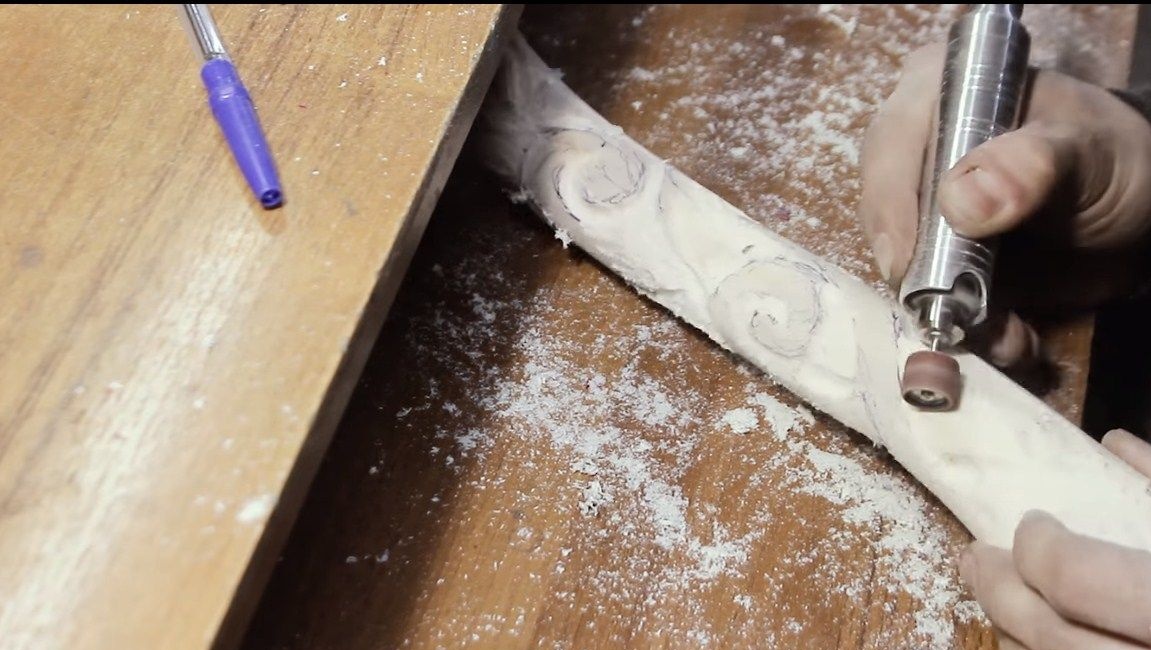
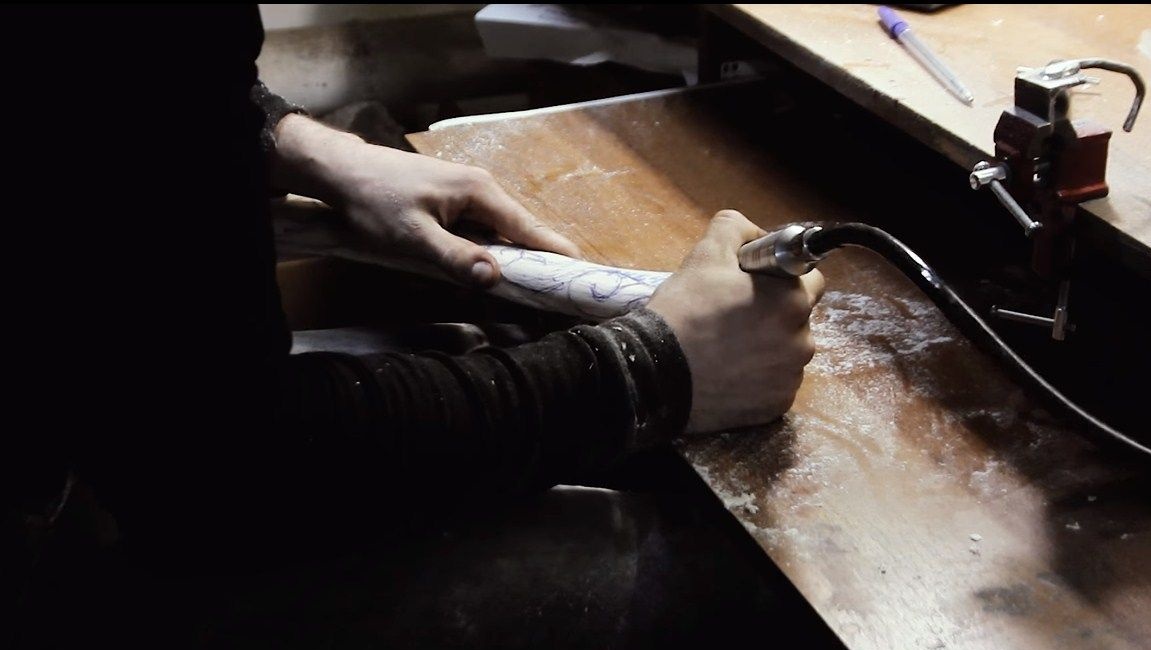
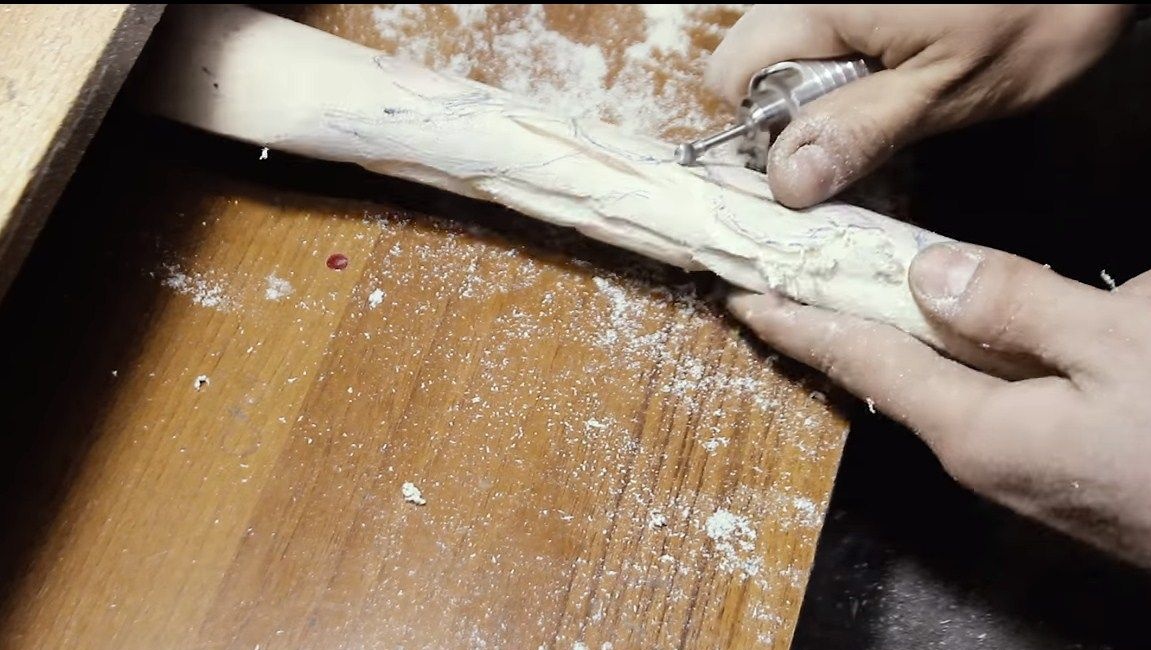
Step Four A pen
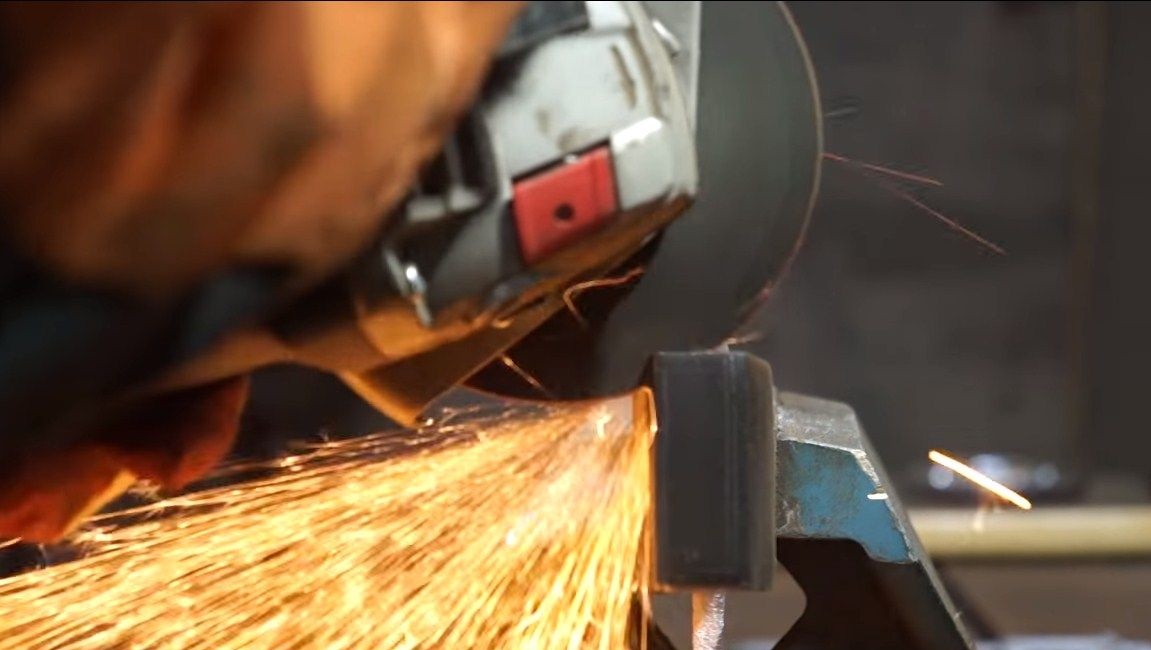
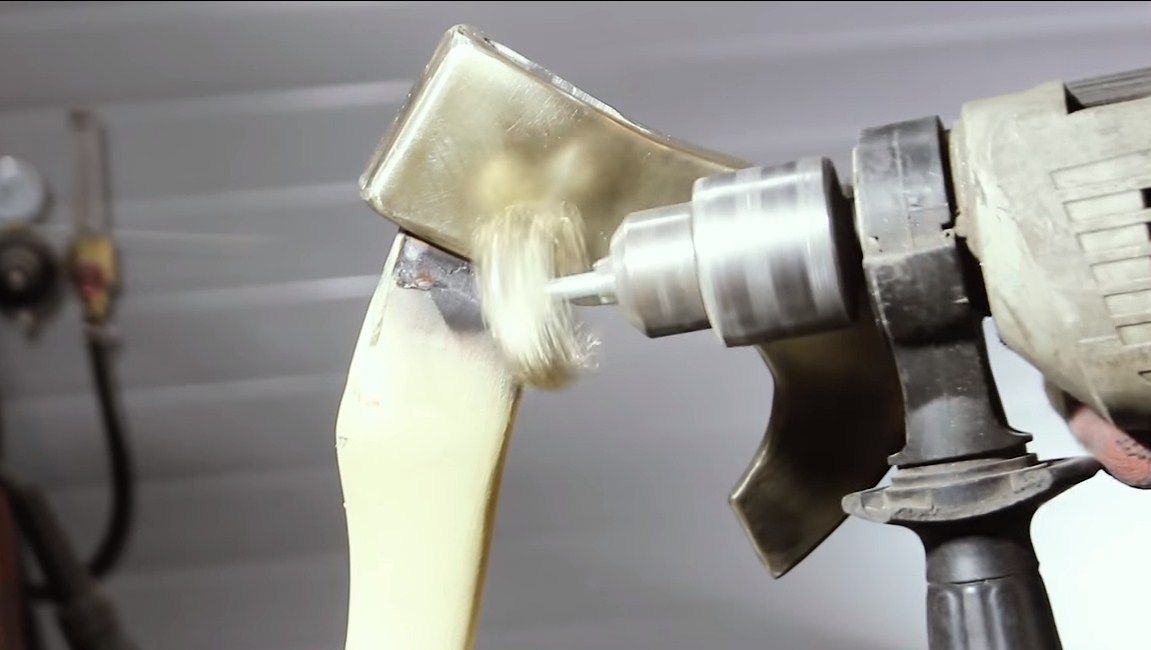
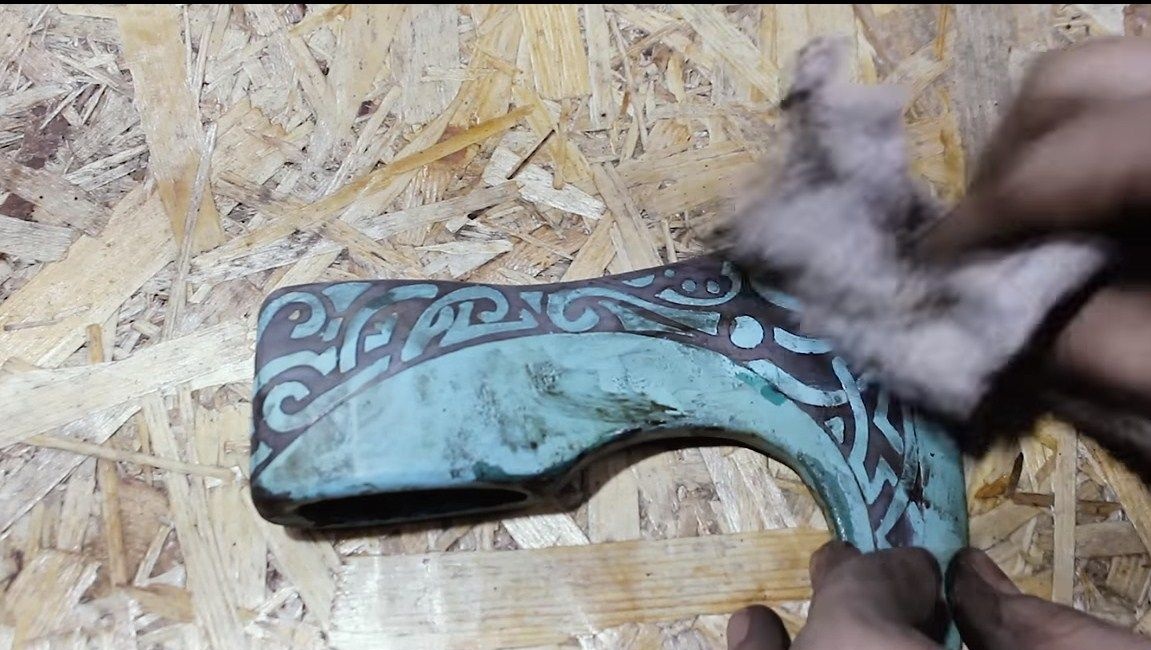
While the etching is in progress, let's handle it. On it, too, draw the desired picture. Then you can start cutting, for these purposes you will need a drill. First, we work with a nozzle for milling, and then we grind the parts using a nozzle made of sandpaper. In the process, the author looks at the ax, tinting the places where the paint exfoliated, with a marker.
Step Five Second Etching Attempt
The first etching attempt was unsuccessful, as the author had a weak power supply. To solve this problem, a welding machine was used. First, the author tried to etch the drawing with a current of 100A using a tampon, moistening it in an electrolyte. But cotton wool began to catch fire over time. Further, the author again placed the ax in a container with electrolyte, but used a welding machine as a power source. And then a miracle happened, the etching went as it should.

Step Six Putting an ax together
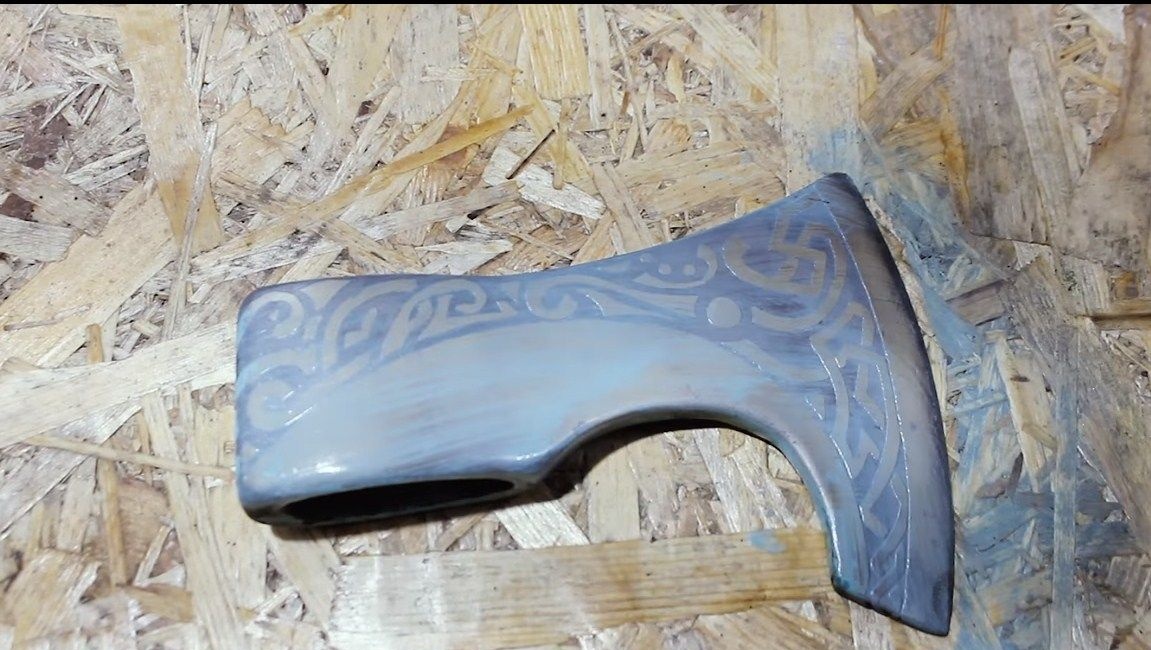
The ax is ready, it remains to install the handle, from the author it turned out a bit unprofessionally. Soak the handle with oil to protect it from moisture and dirt. You can also make the handle black by firing it. Thanks to firing, the handle will last longer. The ax itself is cleaned of paint with a solvent and lightly polished. In this case, do not overdo it so as not to remove the plaque of brass.
That's all, our wonderful ax is ready! I hope homemade You liked it, and you found something new in the material for yourself. Good luck and creative inspiration, if you want to repeat it. Do not forget to share your homemade products with us!