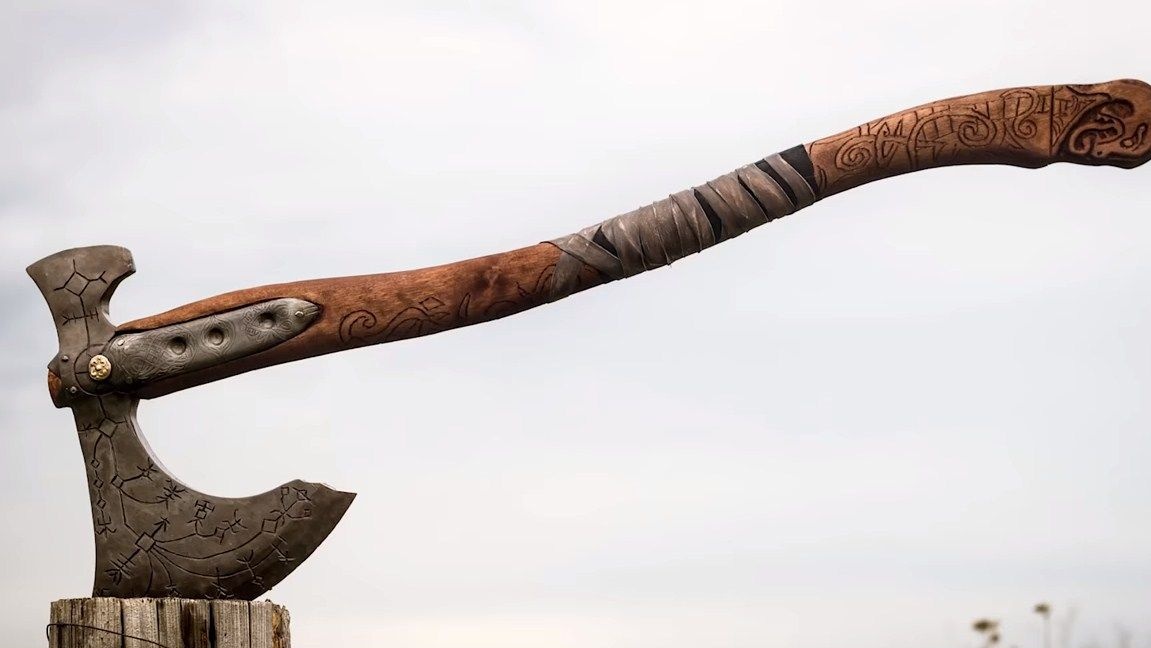

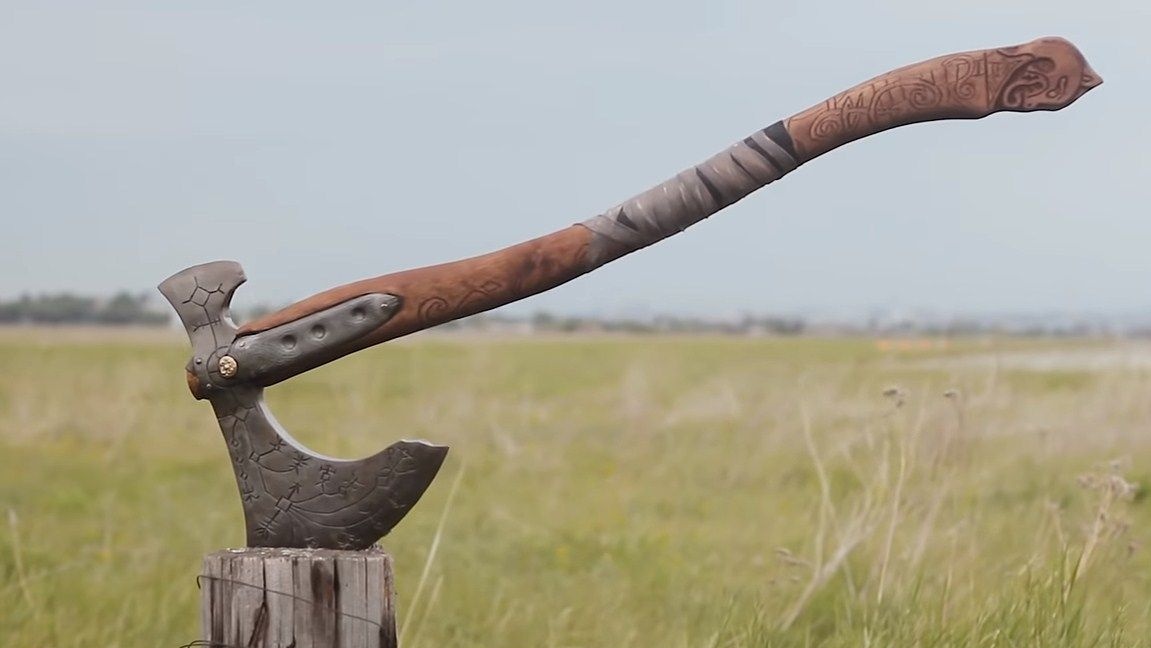
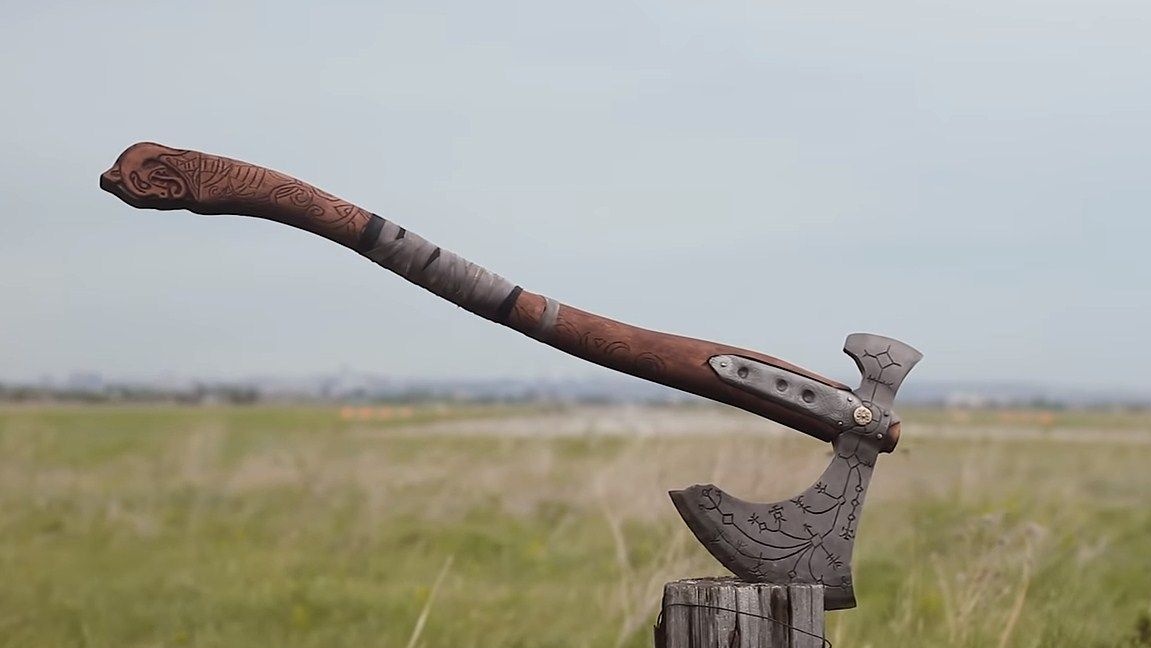
I welcome fans to cut and cook pieces of iron. I present to you an interesting homemadeyou can do do it yourself. It's about the legendary ax of Kratos - Leviathan, which is found in the game God of War. Our author decided to repeat this product, and it turned out pretty well. In addition to its interesting appearance, the ax is also strong and can cope with its functions. With it, you can surprise your friends by taking with you to nature and so on. Similarly, you can make an ax with any other design.
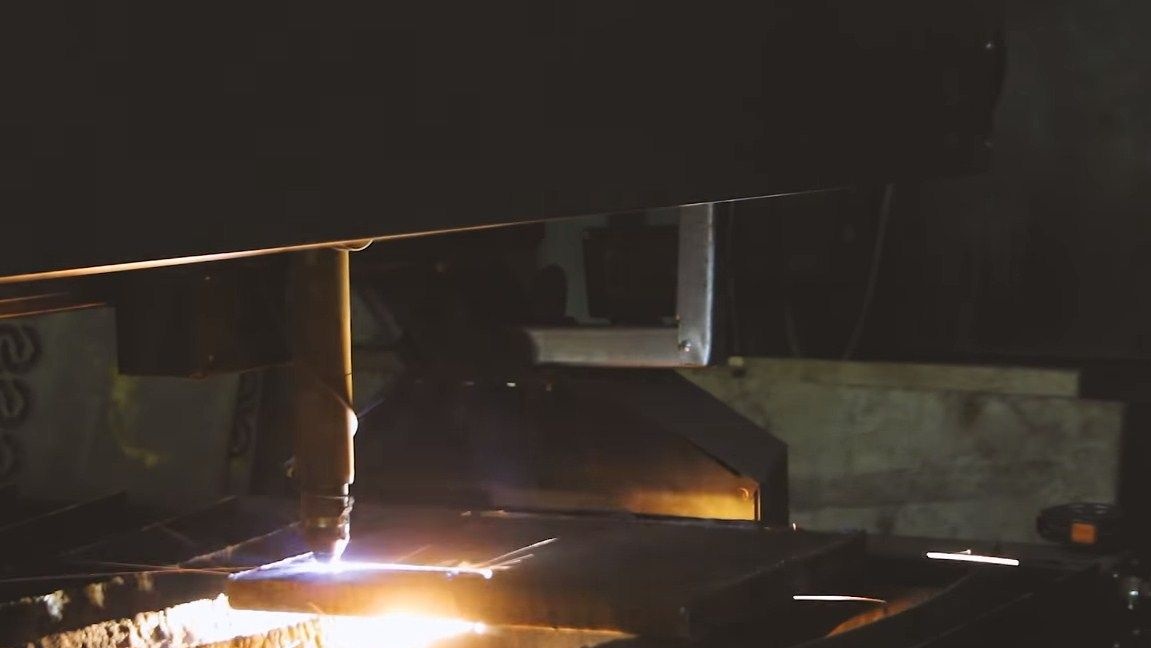
As a material, the author used sheet steel, the thickness of which was as much as 26 mm! Of course, to cut an ax out of such steel, you will need special equipment, for which the author used a CNC plasma cutter. Of course, the bravest can try to cope with the help of a grinder, but you need a good supply of strength and cutting wheels. So, we will consider in more detail how to make such an ax!
Materials and tools used by the author:
Material List:
- sheet steel 26 mm thick;
- sheet steel 2 mm thick;
- brass (rivets will be cast);
- a piece of thick pipe;
- bar for the handle.
Tool List:
- CNC plasma machine (or other cutting tool);
- grinder;
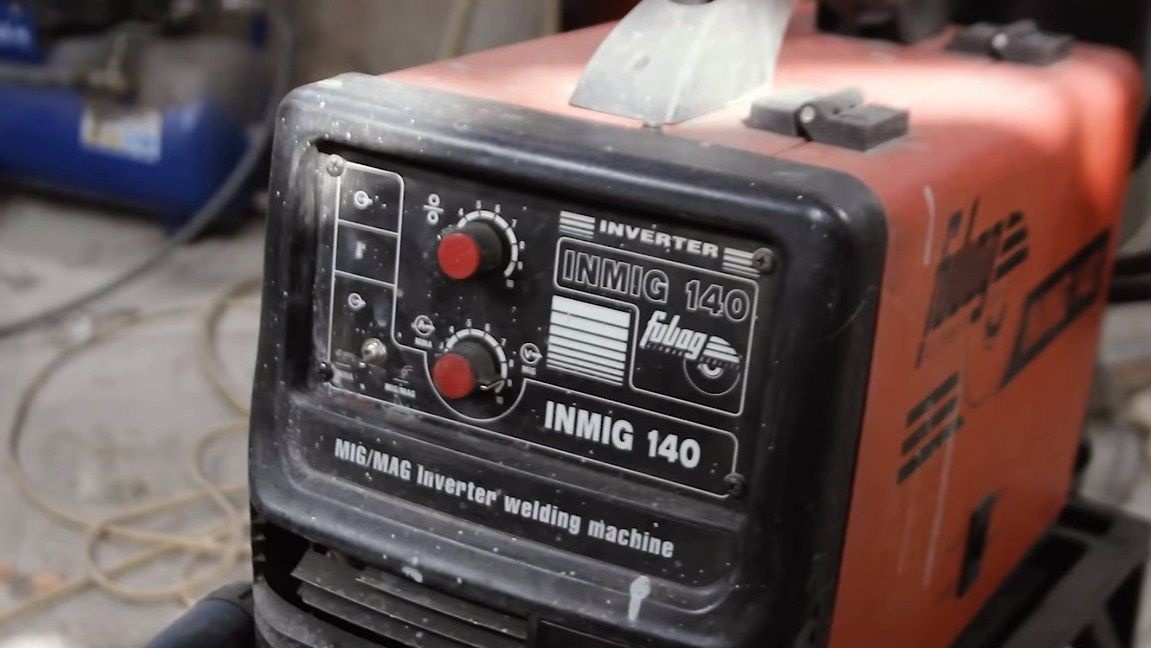
- welding machine;
- furnace for melting metal;
- soldering accessories;
- tools for etching the pattern;
- jigsaw;
- sandpaper;
- drill;
- marker.
Ax manufacturing process:
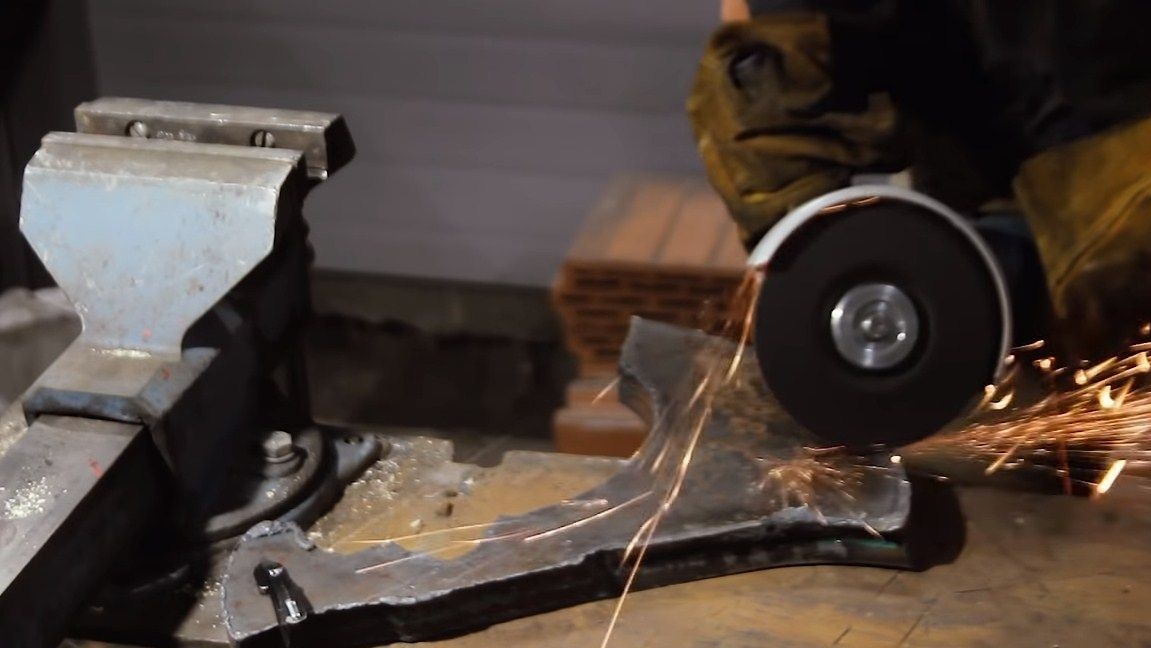
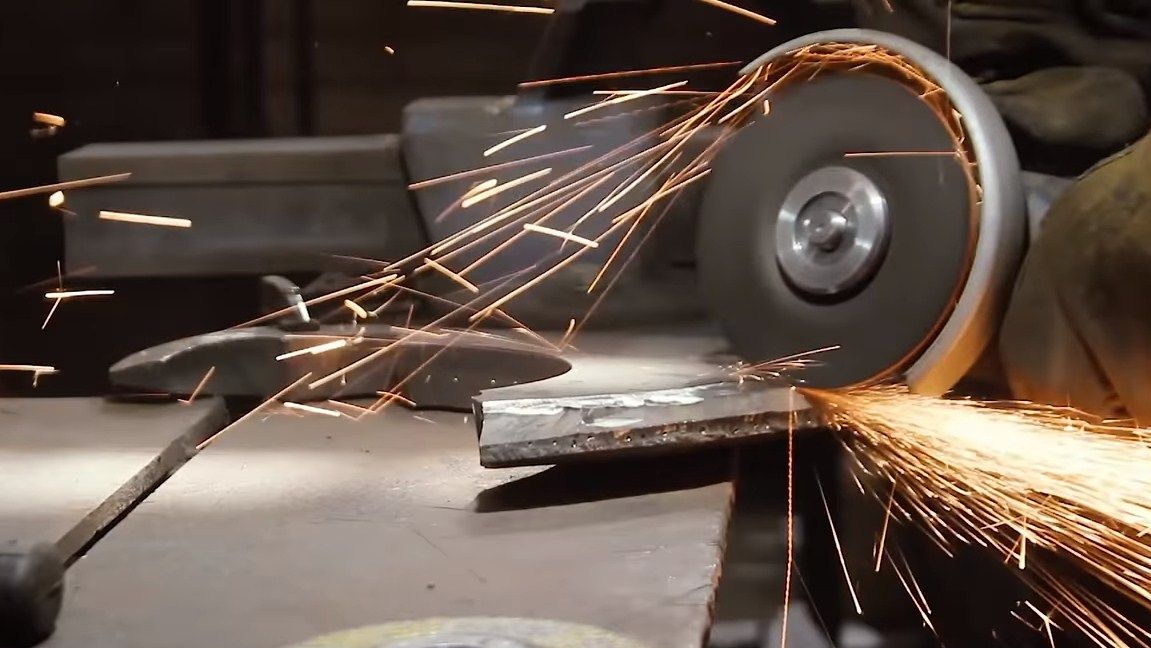
Step one. Profile cutting
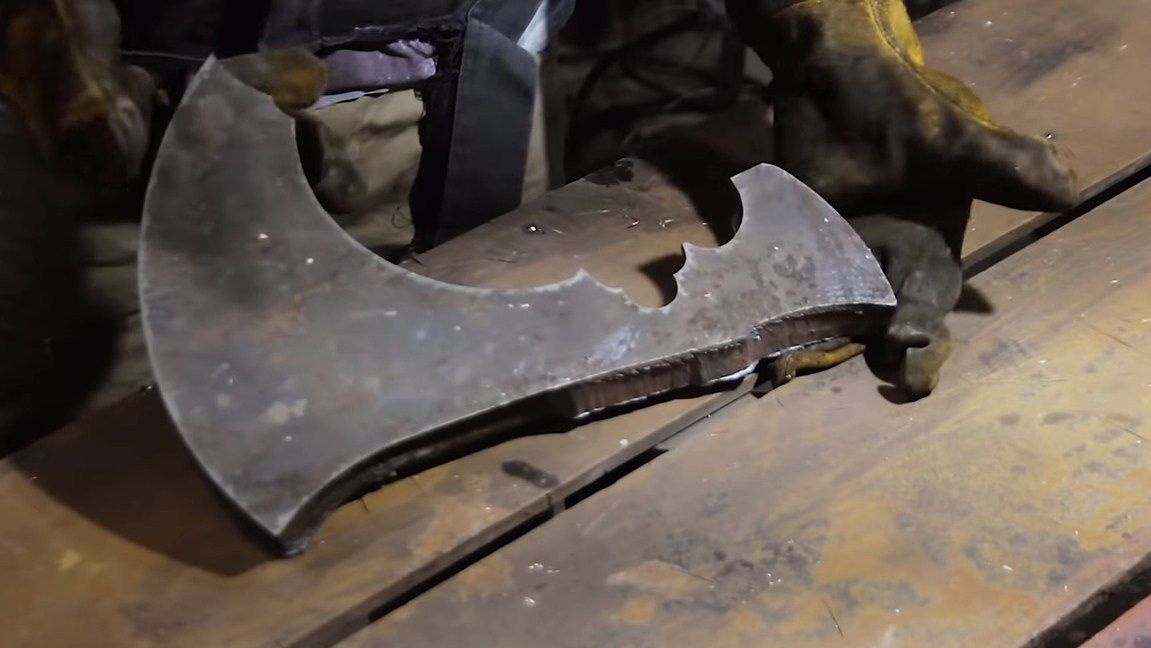
The author cut the main profile of the ax with a plasma cutter. This is done quite quickly when compared to cutting with a grinder. If the machine is equipped with CNC, this is generally excellent, the desired template can be cut out completely.

Step Two We form the slopes
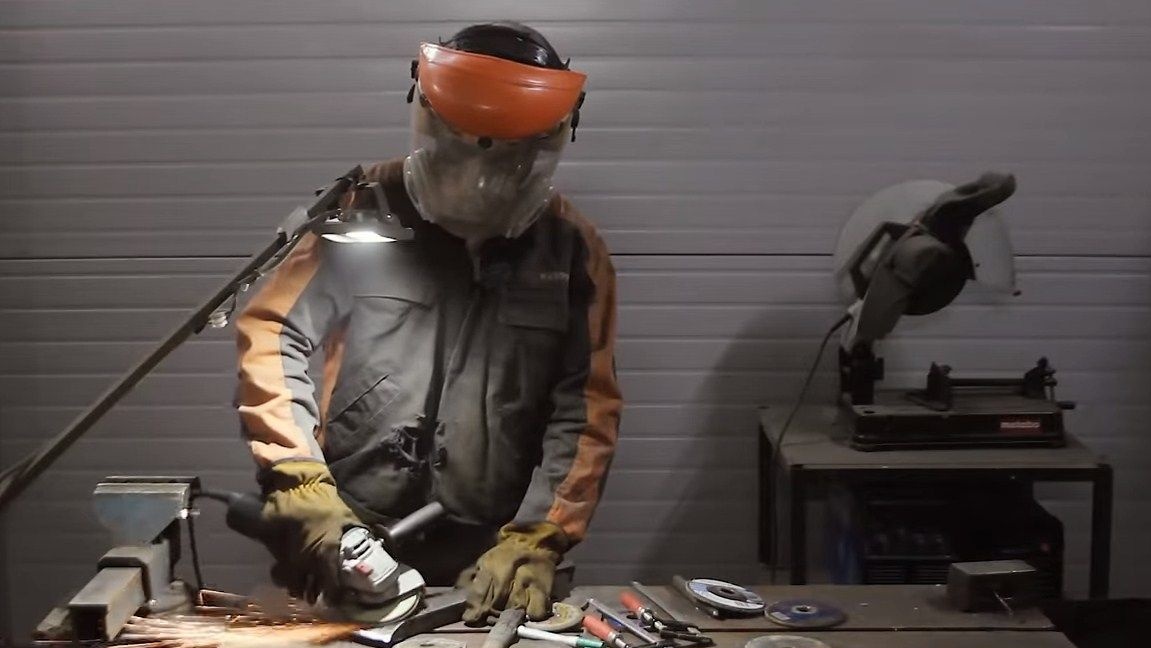
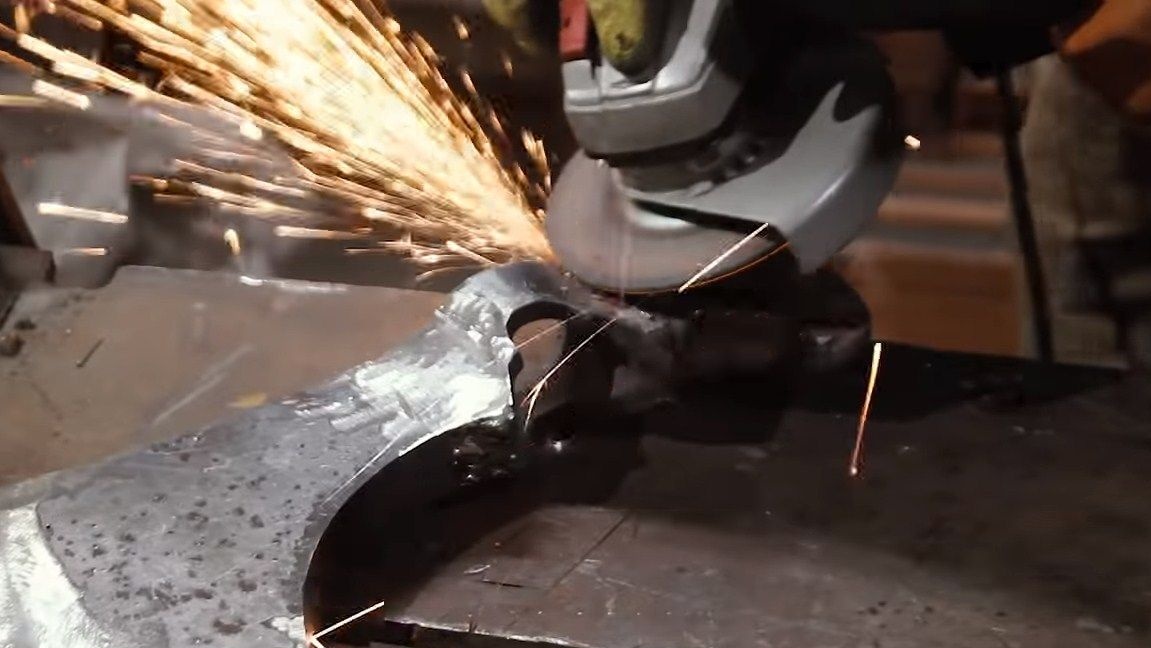
After cutting, there will be many bumps that need to be removed. For all future works, the author uses a grinder with a cleaning disk. We go through it along the contour, and then proceed to the formation of the slopes. We note in advance the width of the slopes, so that it is clear how long you need to remove the metal. Well, then we remove the metal with the same cleaning disk.
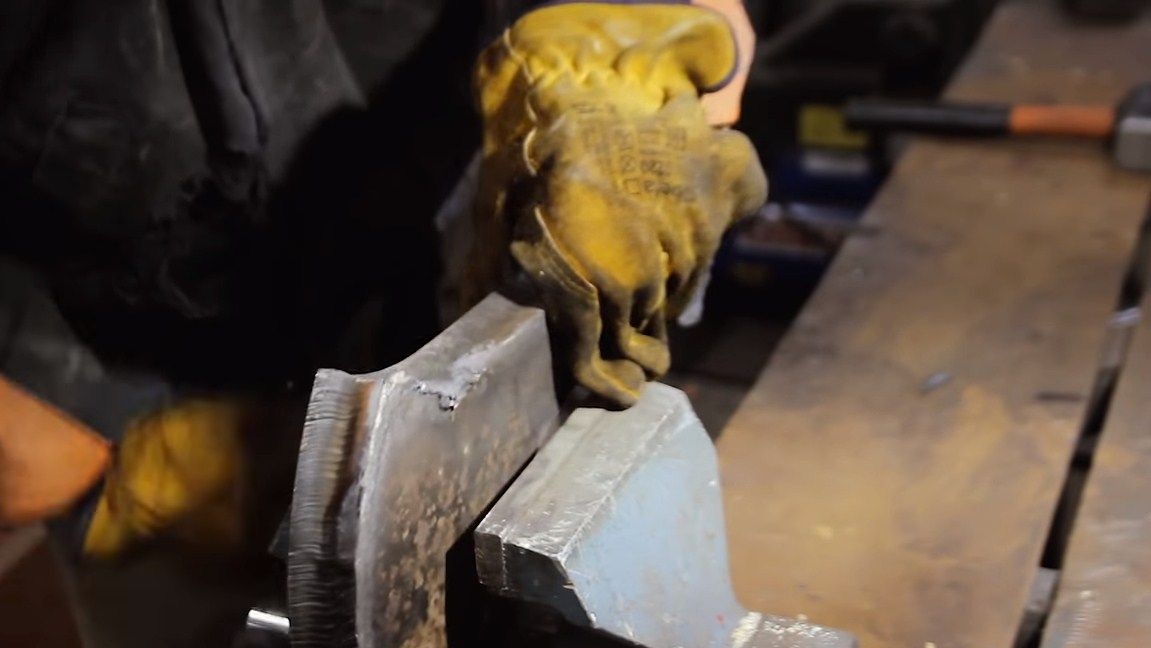
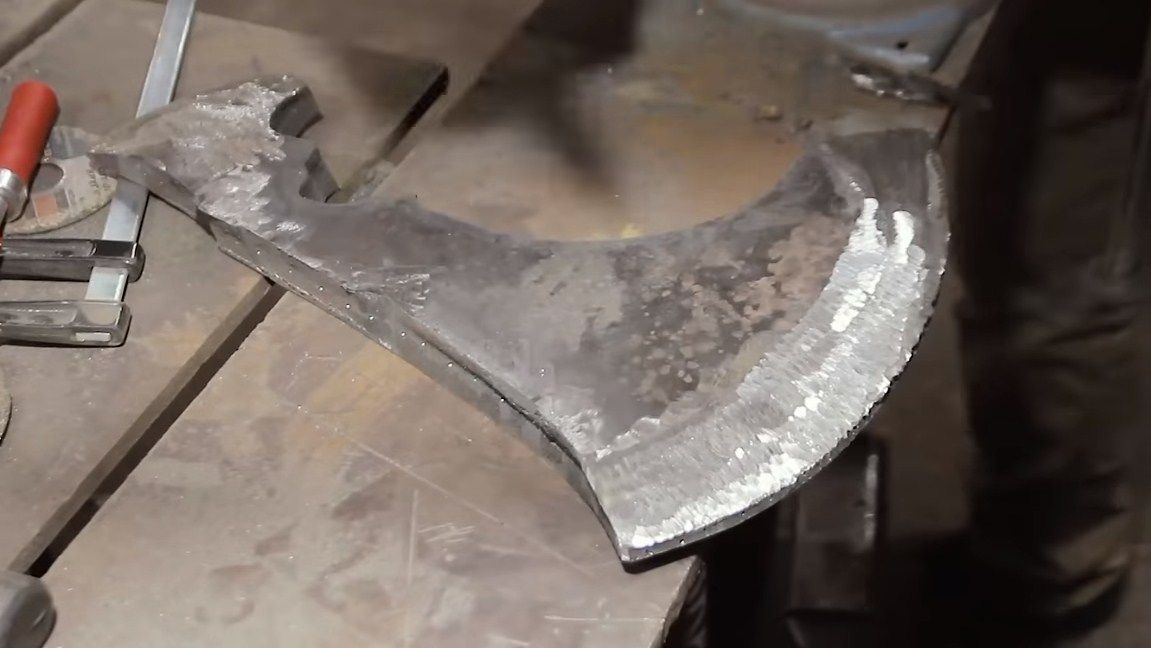
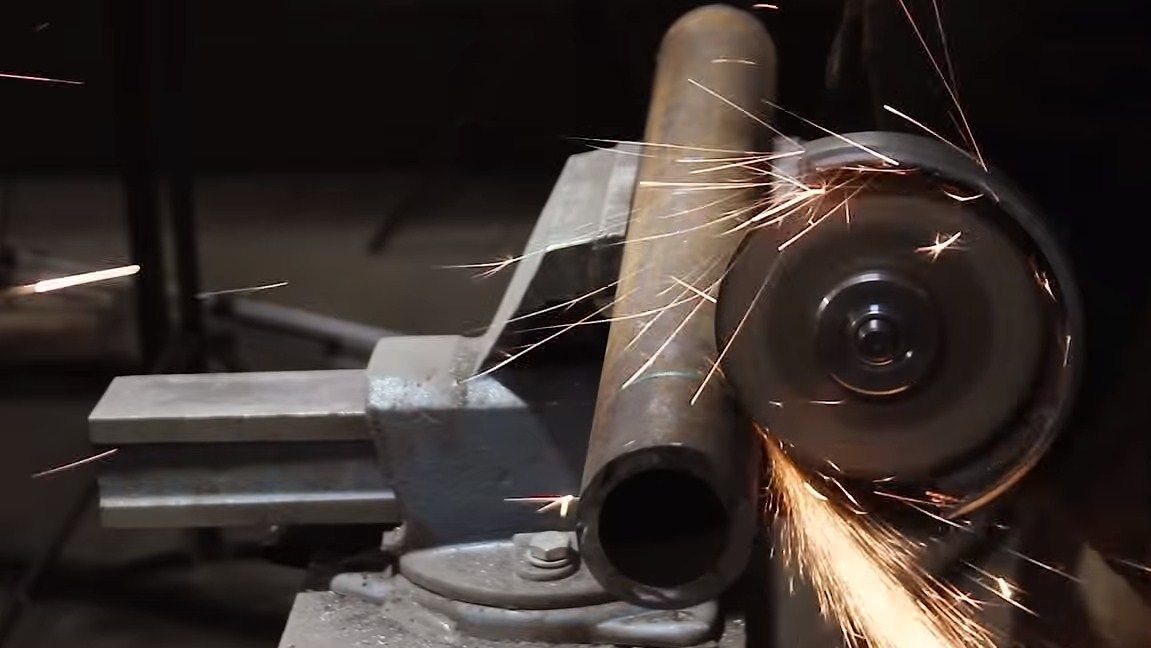
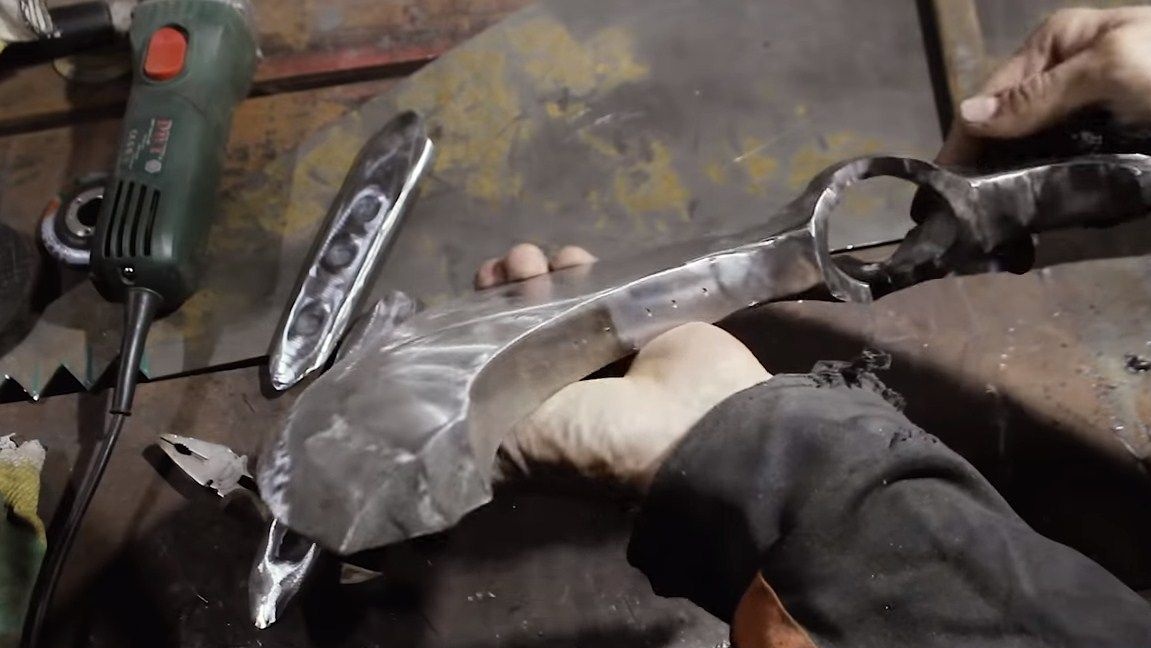
Step Three Weld the eye
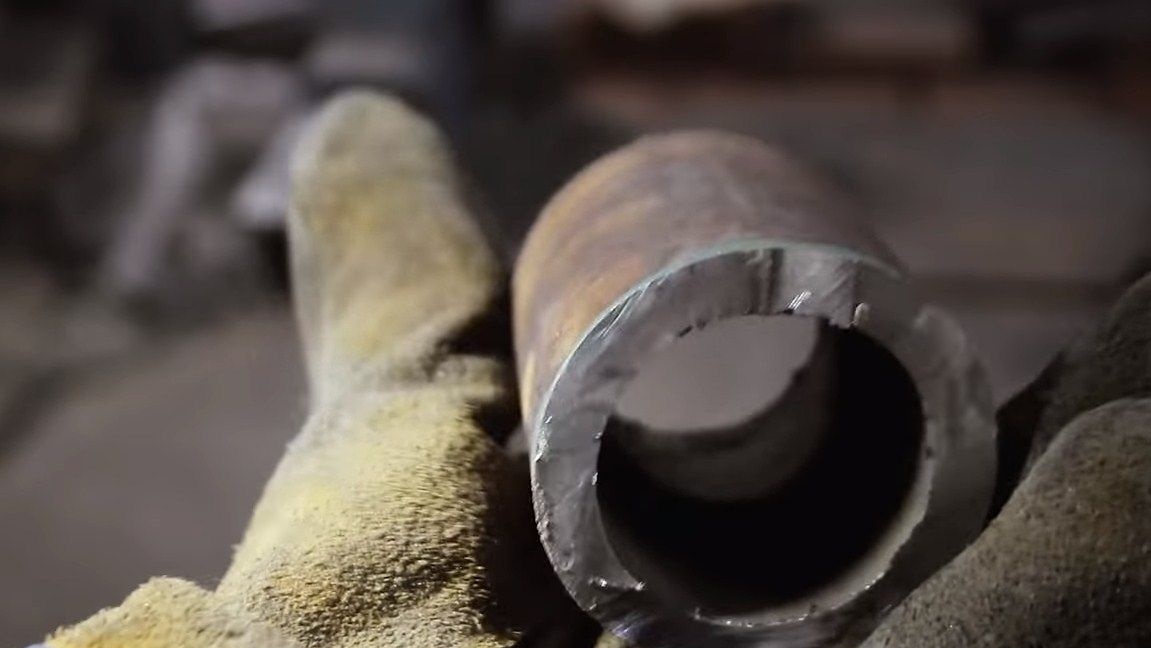
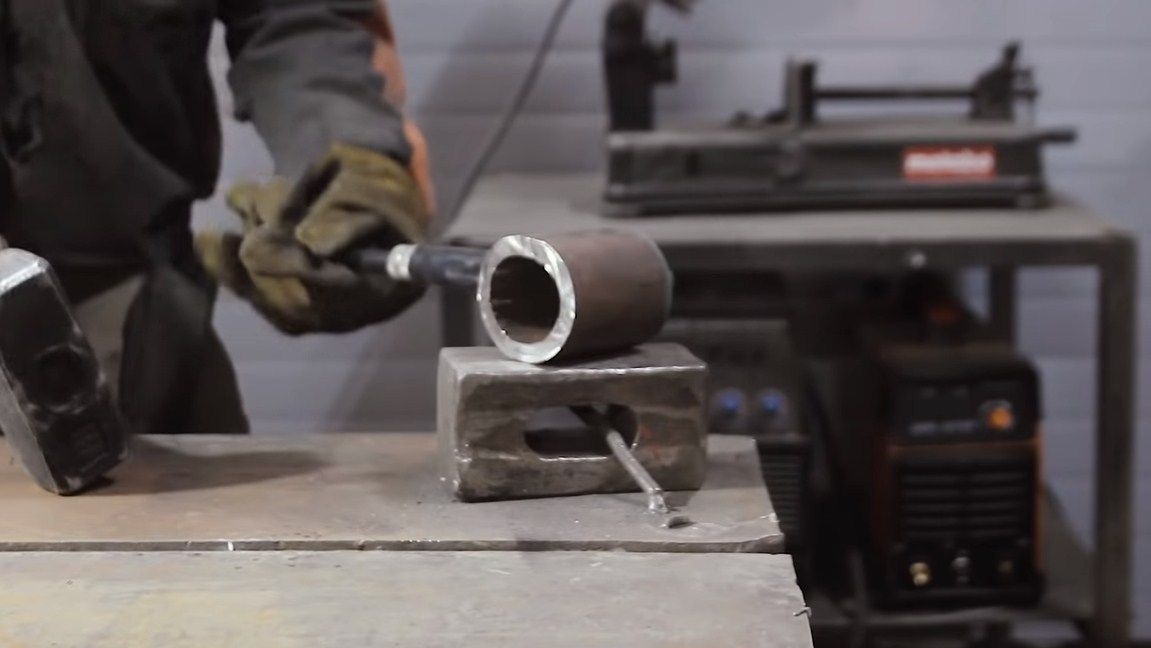
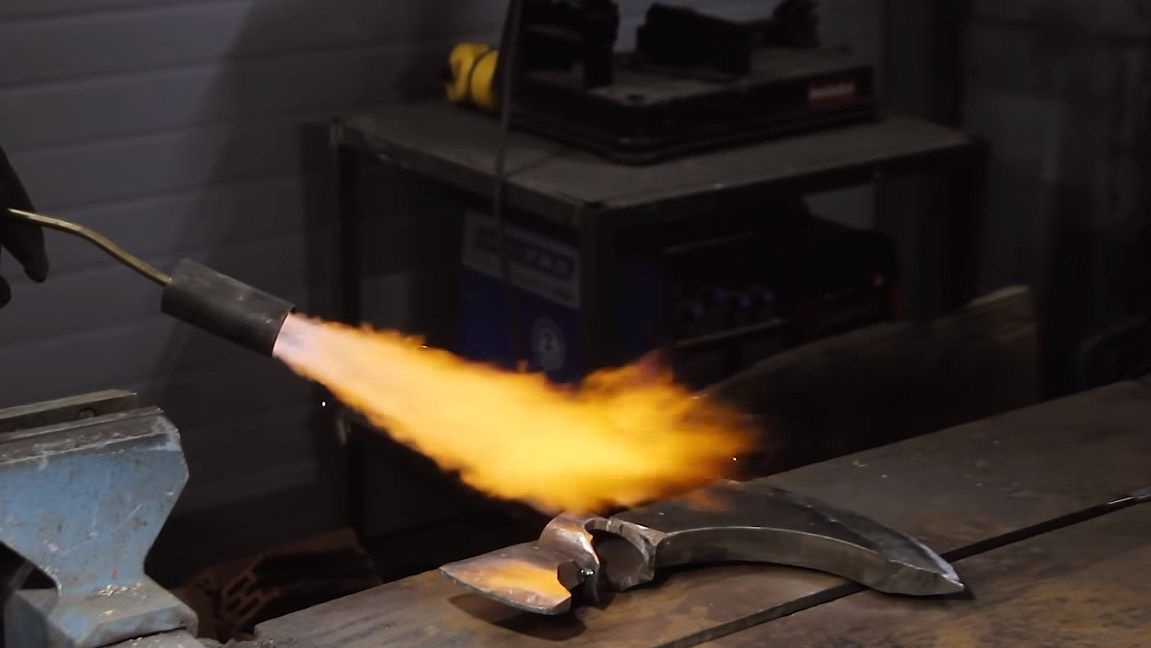
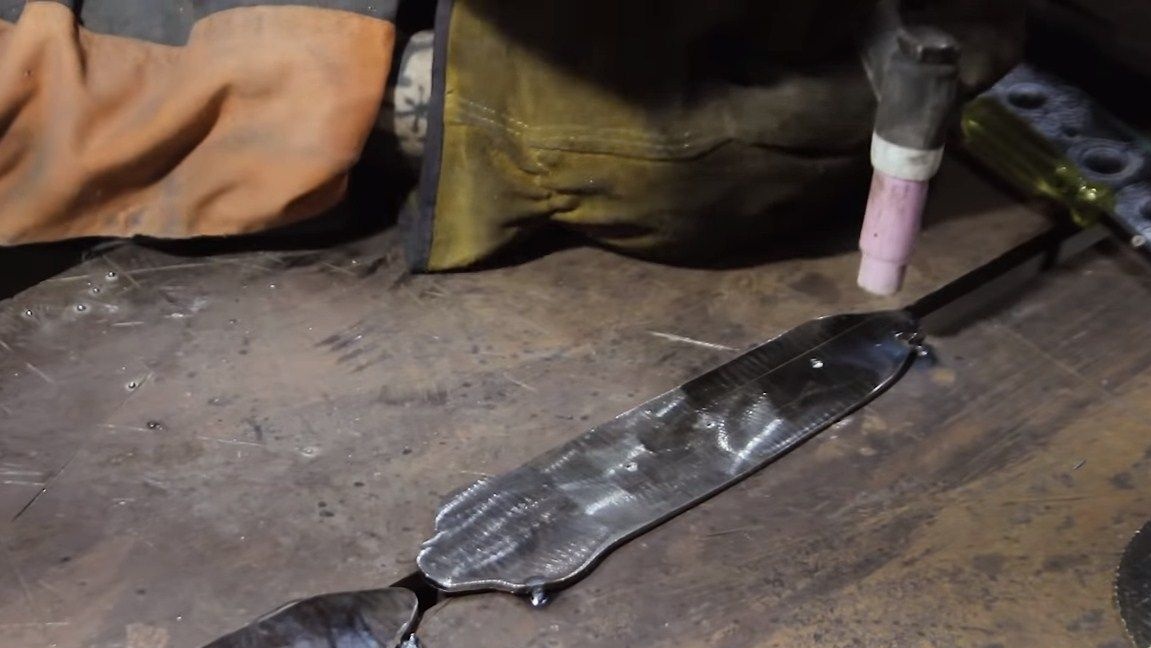
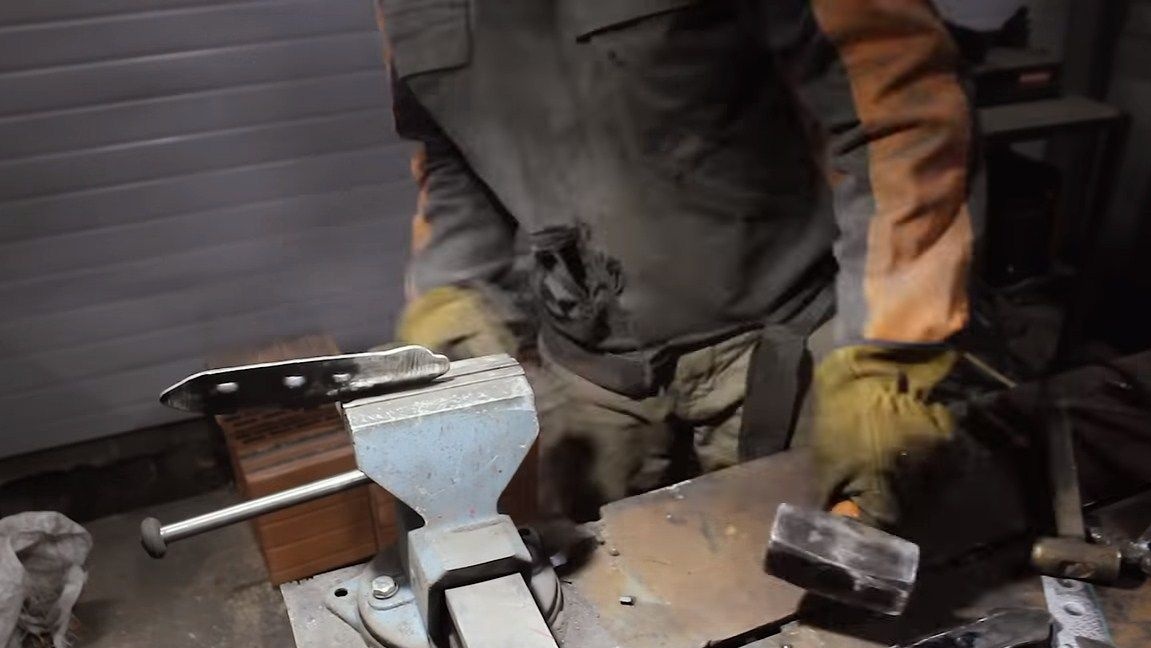
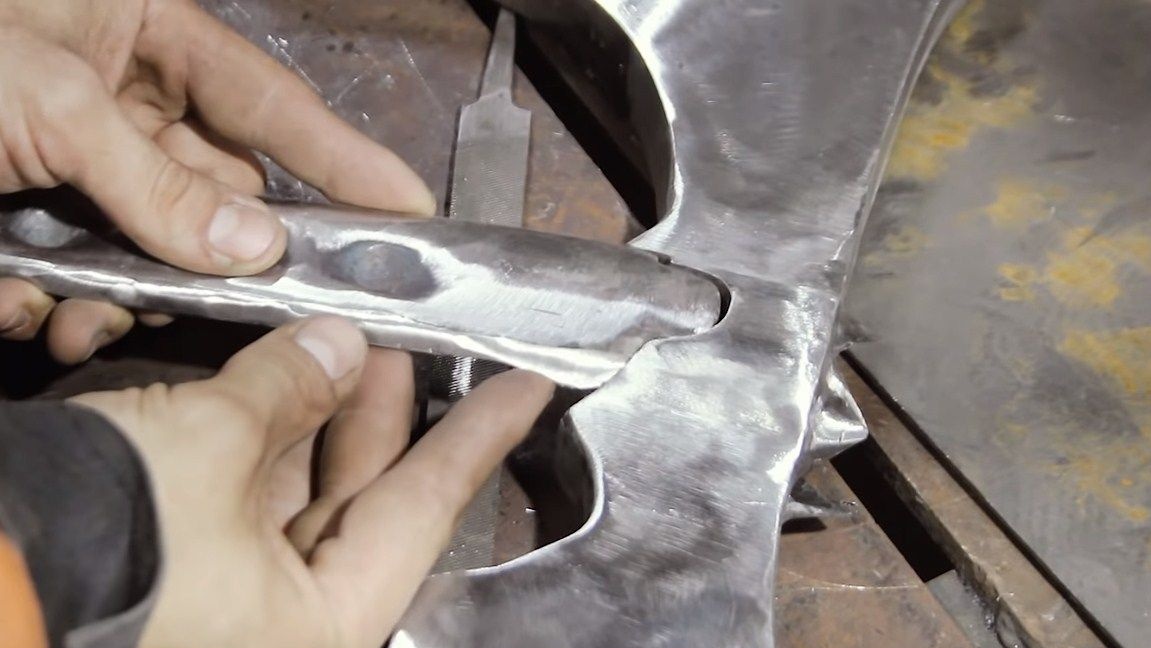
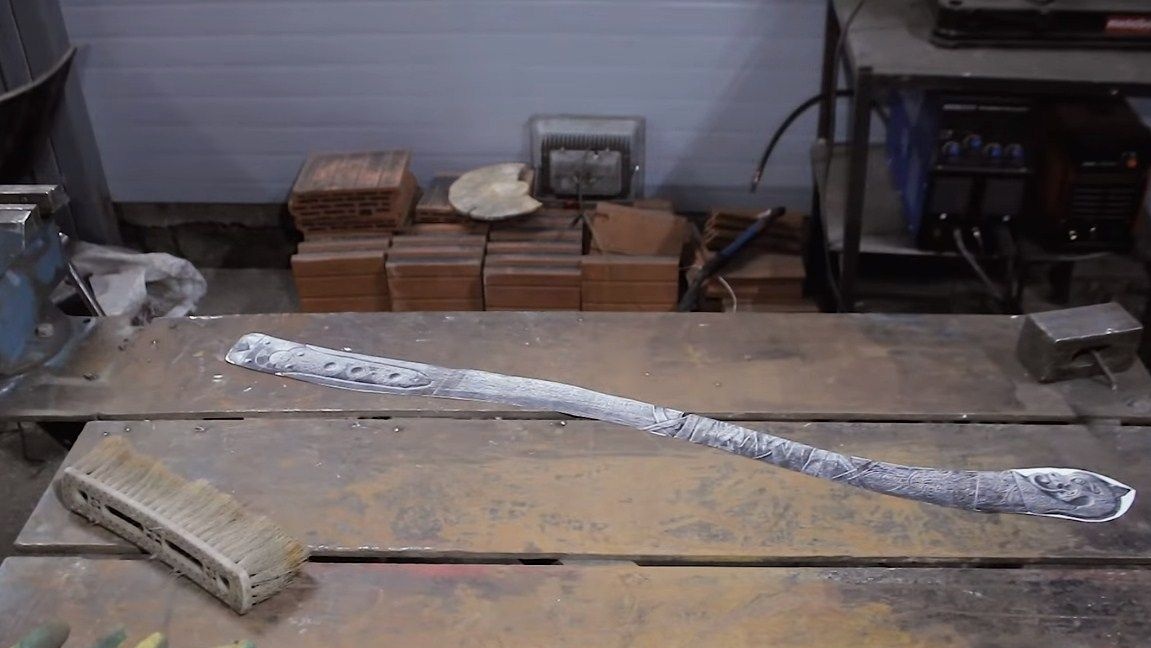
The ax is large and heavy, so it should be fixed on a handle that is appropriate in size. The author makes an eye out of a piece of thick-walled steel pipe.Having cut off the desired piece, we beat it with a sledgehammer to get the desired shape. If the metal does not give in, you can heat it in a blacksmith furnace. Next, cut off the necessary part from the ax and weld our eye. To weld everything qualitatively, be sure to remove the chamfers. Well, then proceed to welding. If you are thinking of using an ax, you need to boil it securely, as deep as possible. Since the power of the welding machine is too small for the author, he preheats the product using a gas burner.
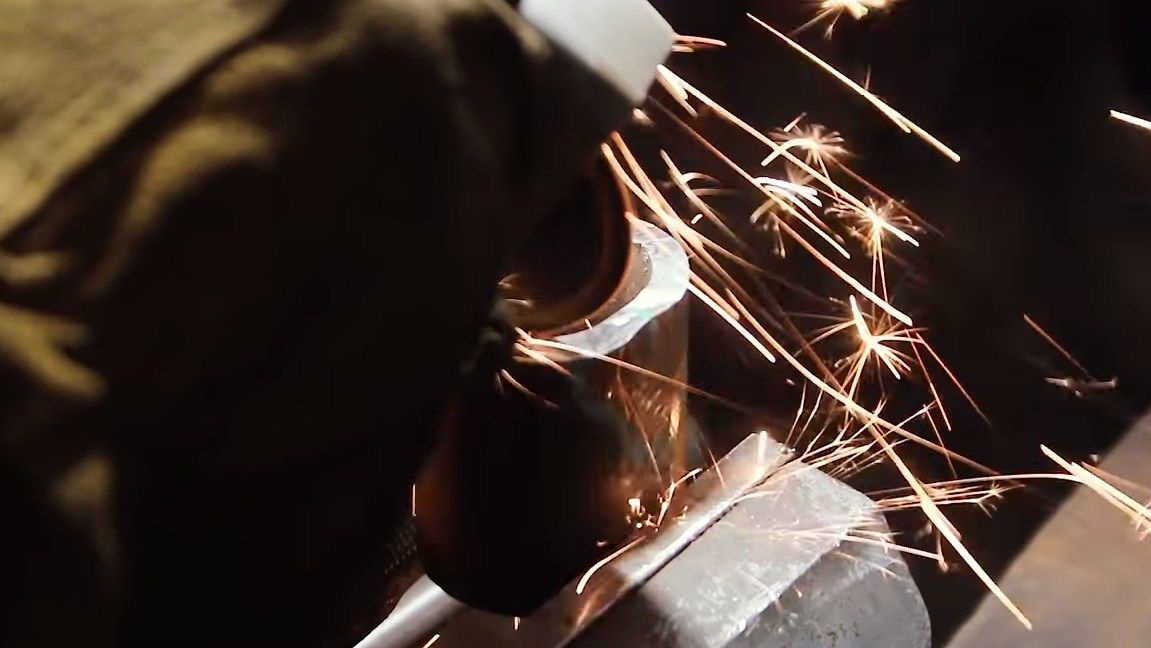
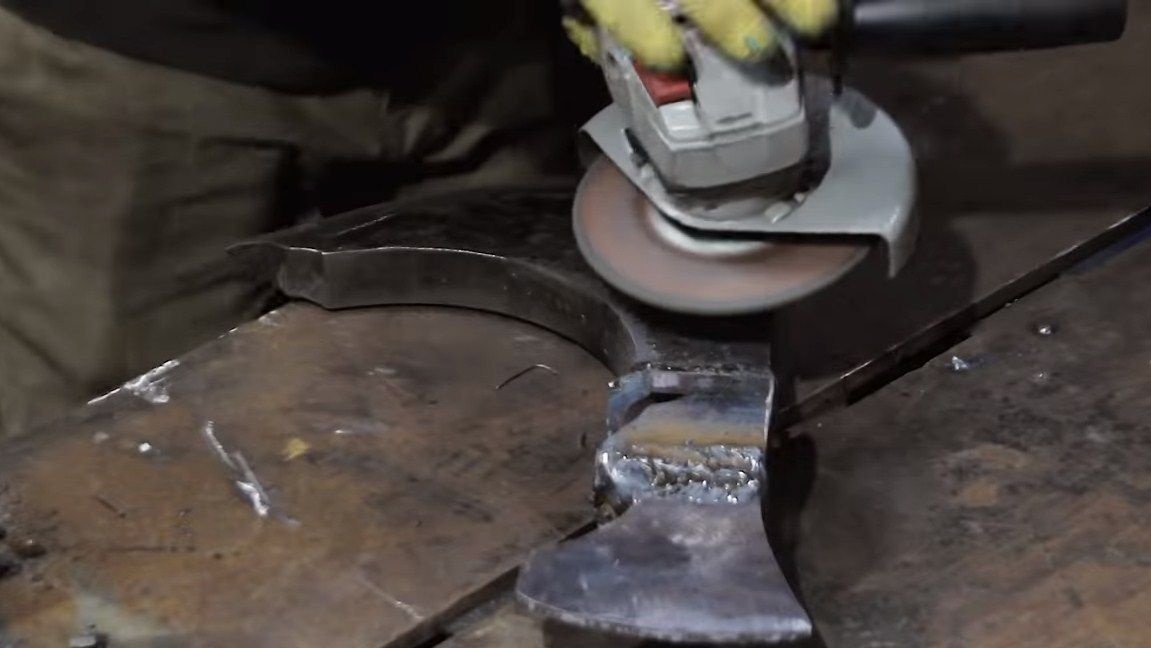
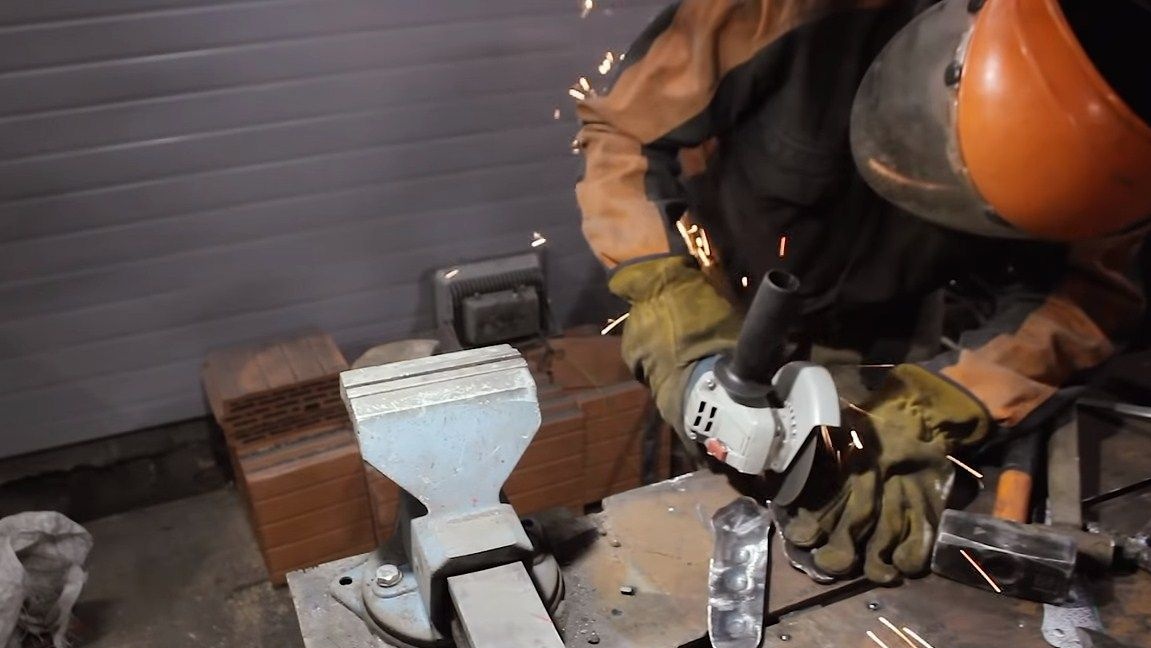
Next, we proceed to grinding the welds. We work with a grinding disk or a petal disk. At the end, you can also polish the entire ax and sharpen it.
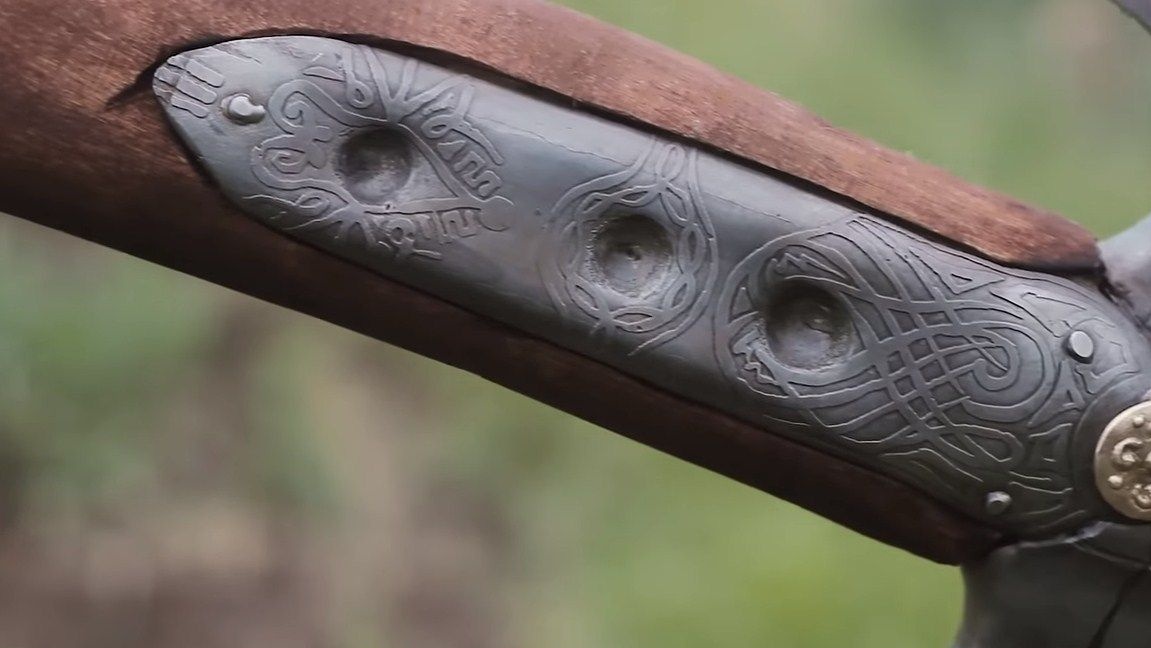
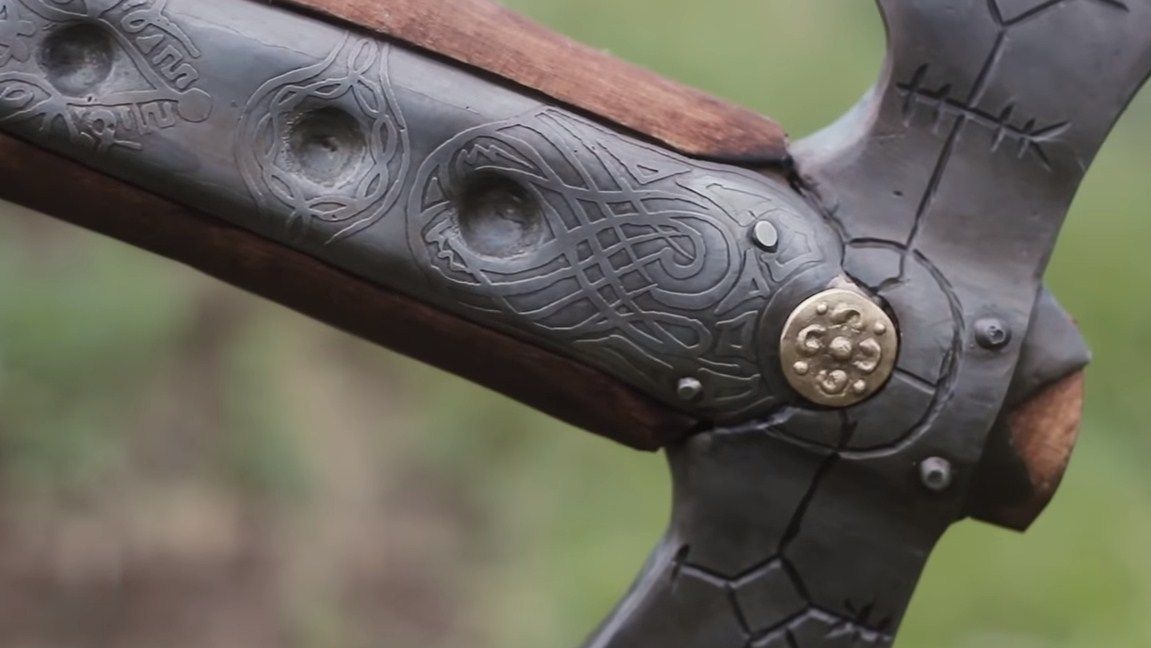
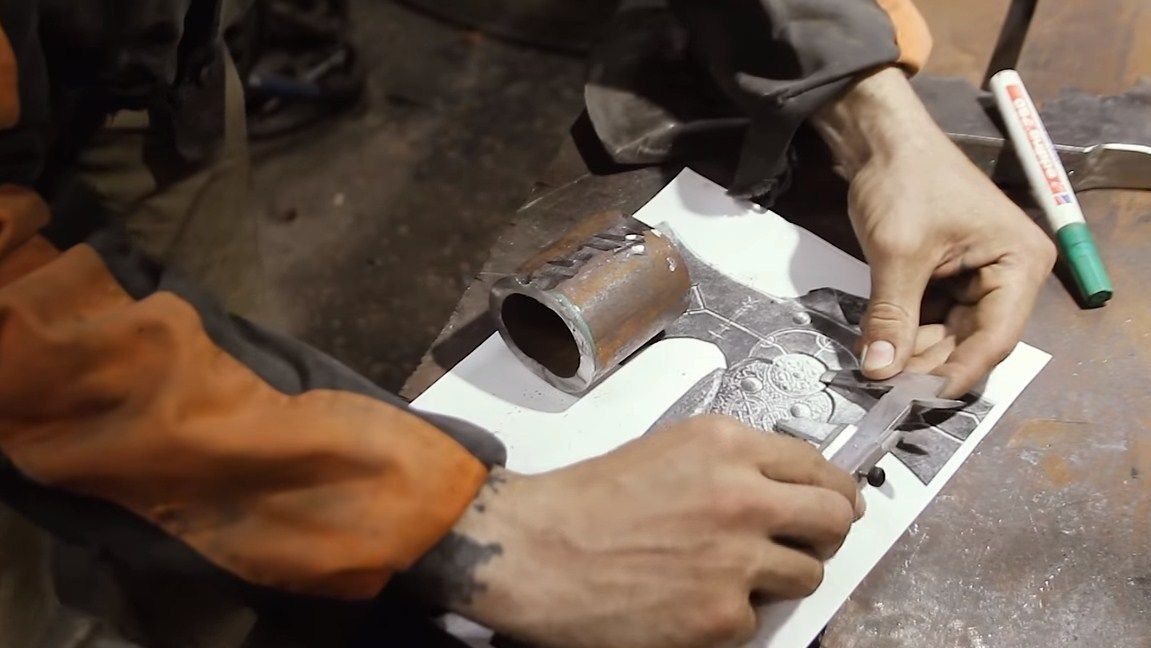
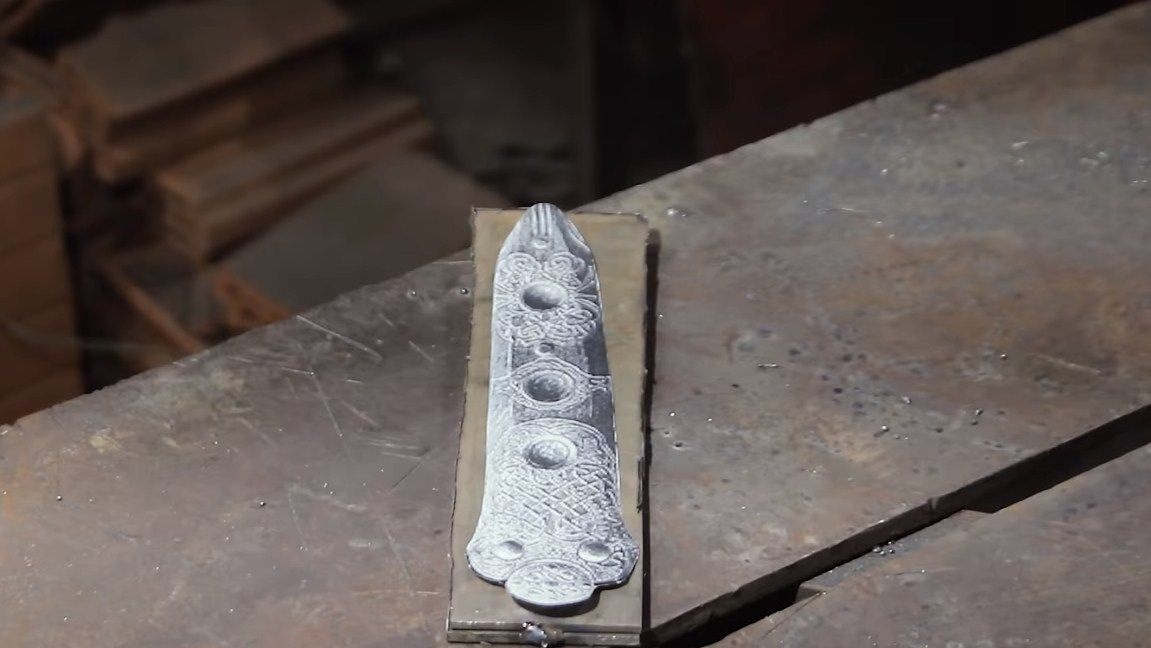
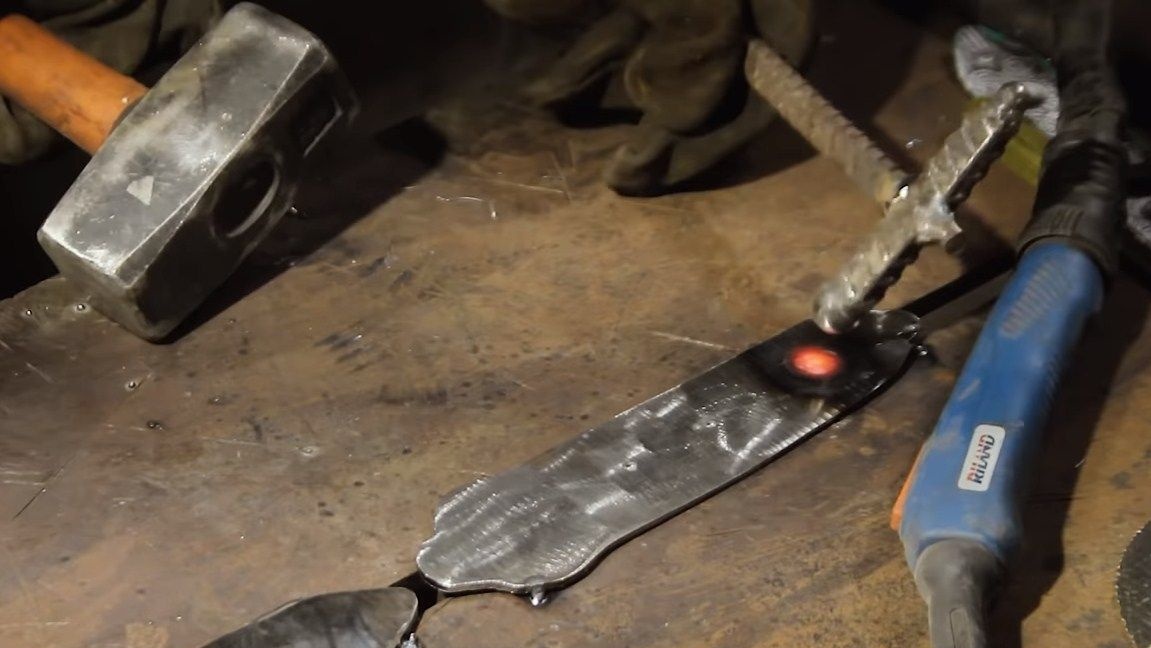
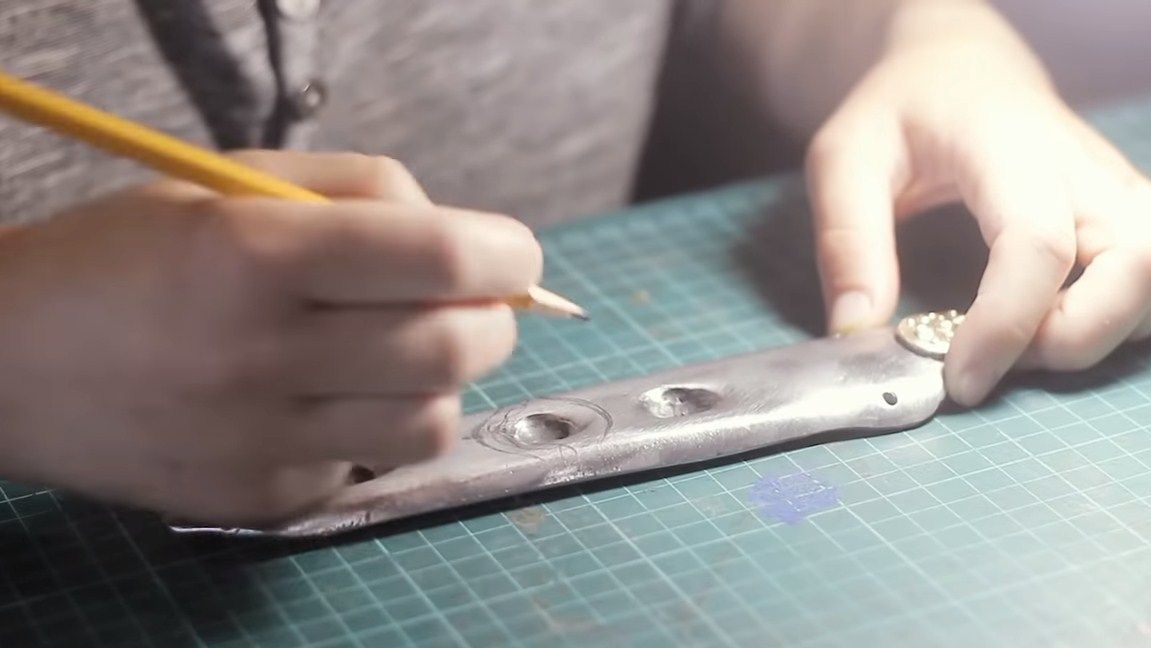
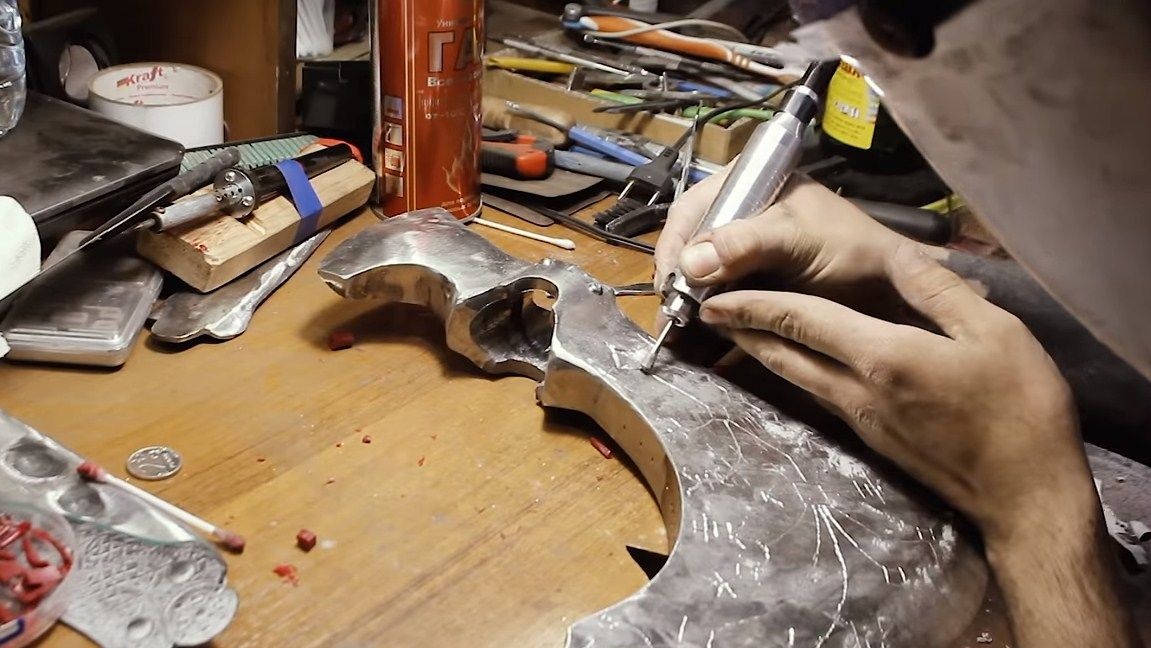
Step Four We make pads
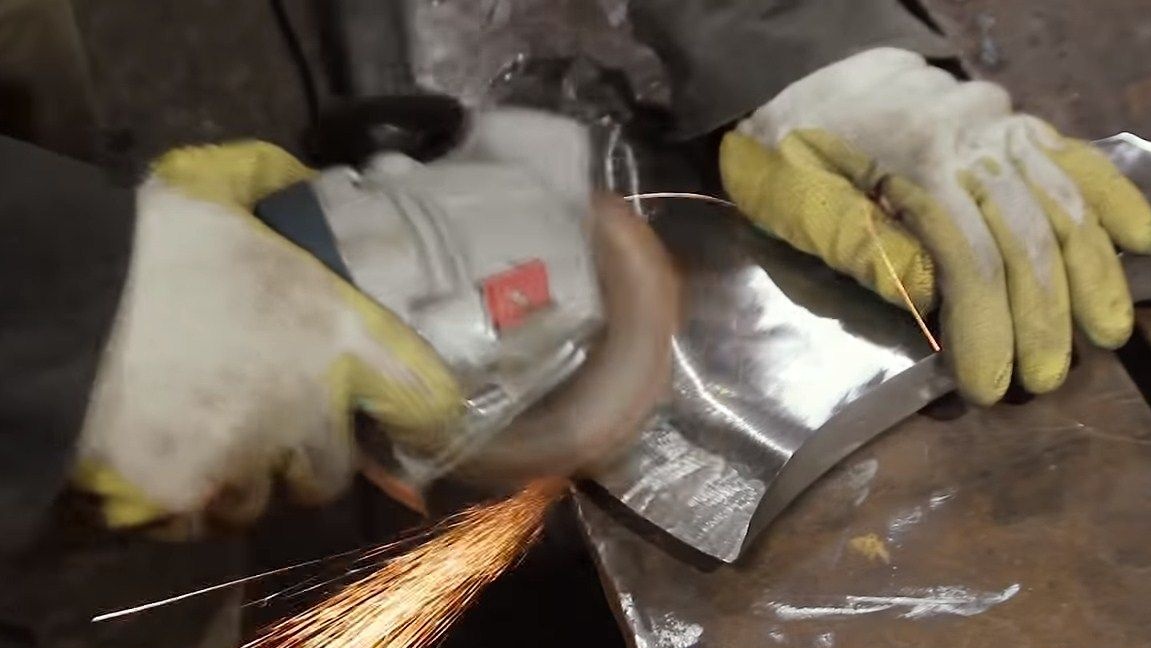
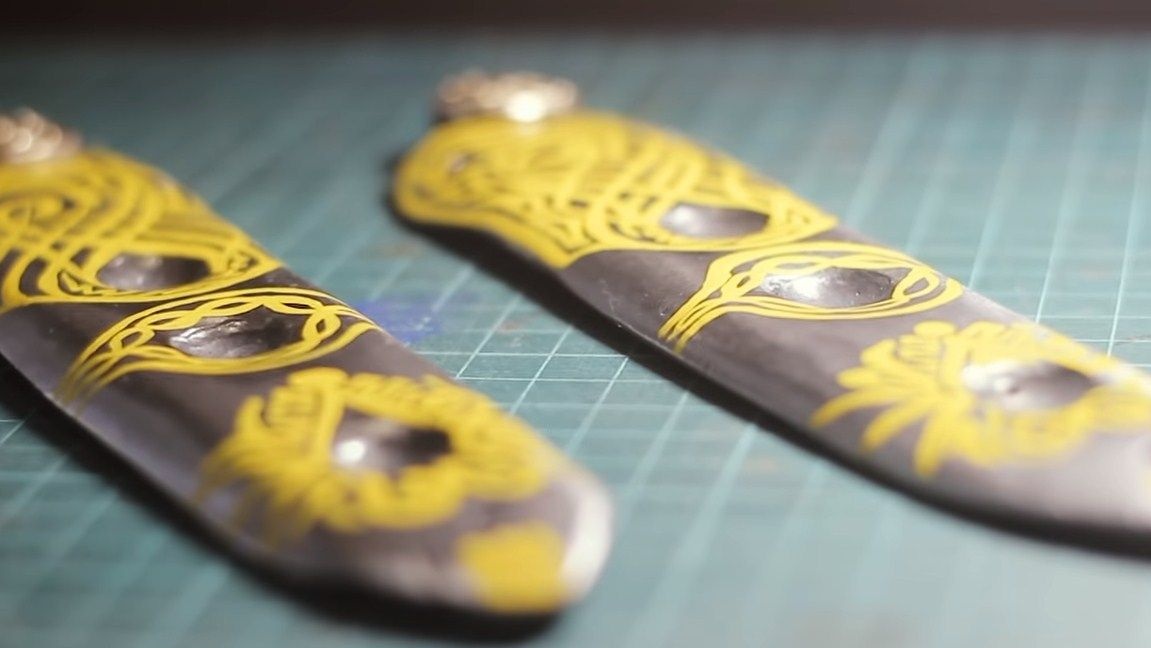
The ax has two pads, print them on a printer and cut them out of sheet steel. The author used steel 2 mm thick. To make both products the same, weld two pieces together, and then cut two pieces in one fell swoop.
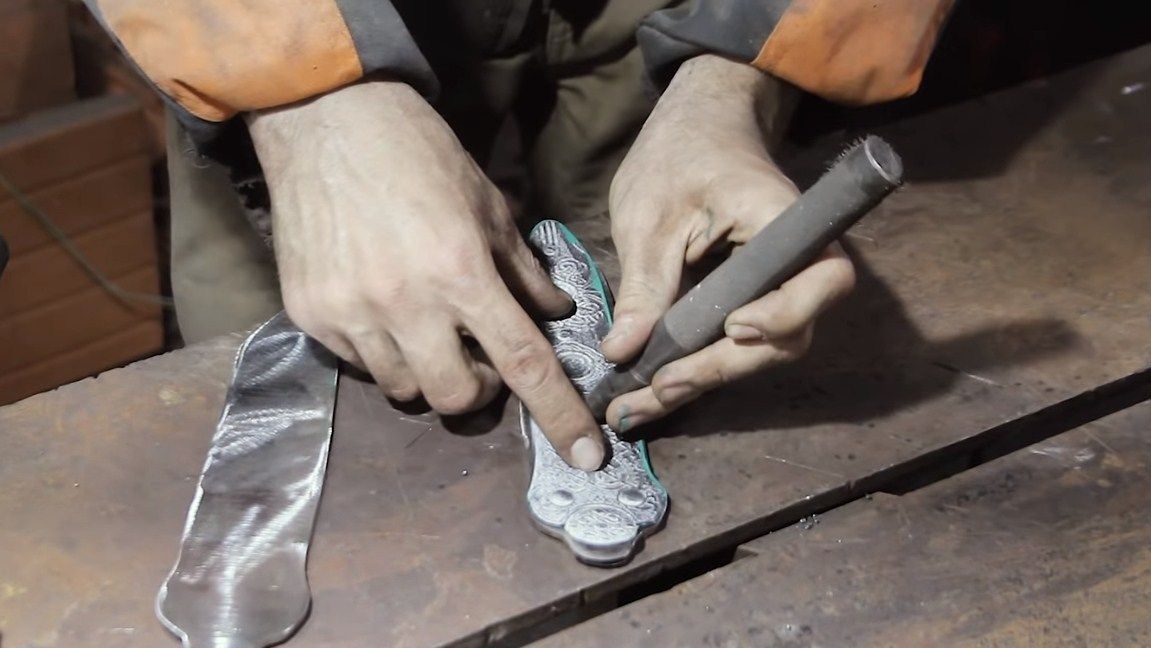
According to the idea, there are recesses on the overlays. To make them, the author warms up the necessary places by welding, and then, using a special tool and a hammer, makes dents on the metal.
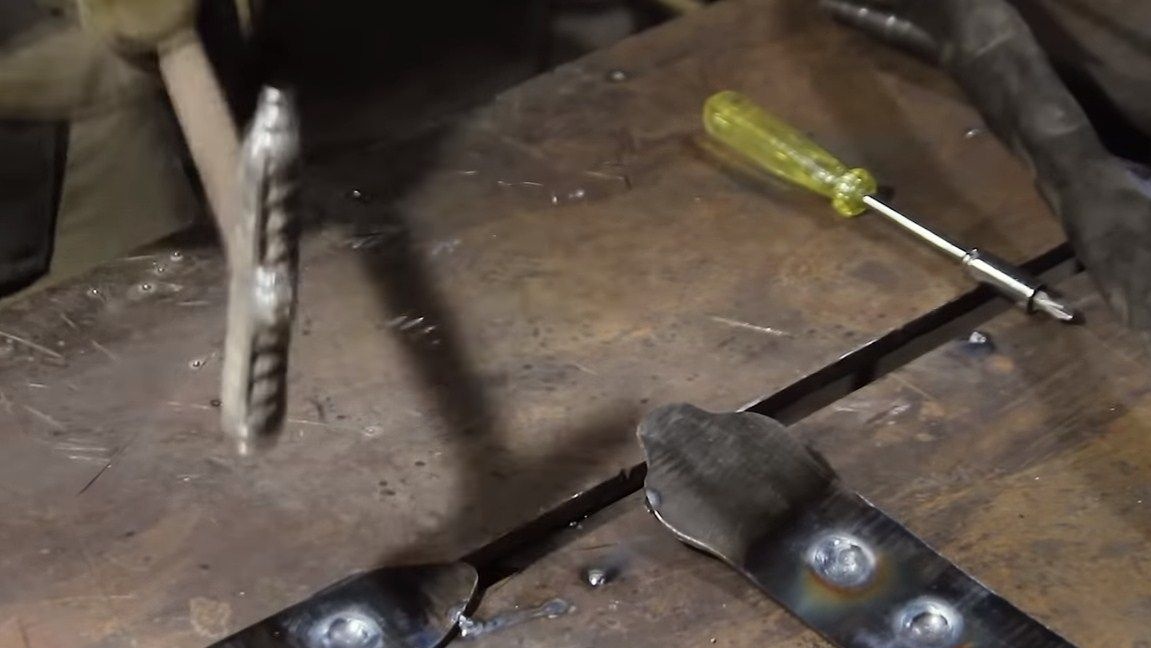
When everything is ready, the pads will need to be bent, for this the author made cuts along the grinder along them and bent them in a vice. Then we weld these cuts so that the product becomes solid again.

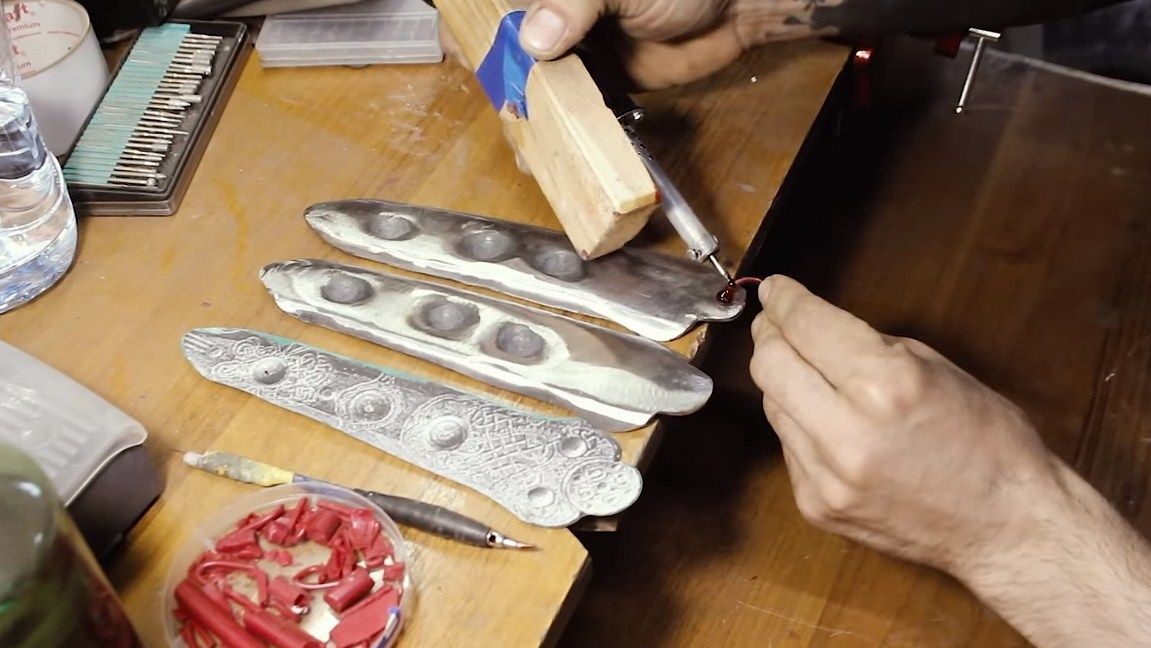
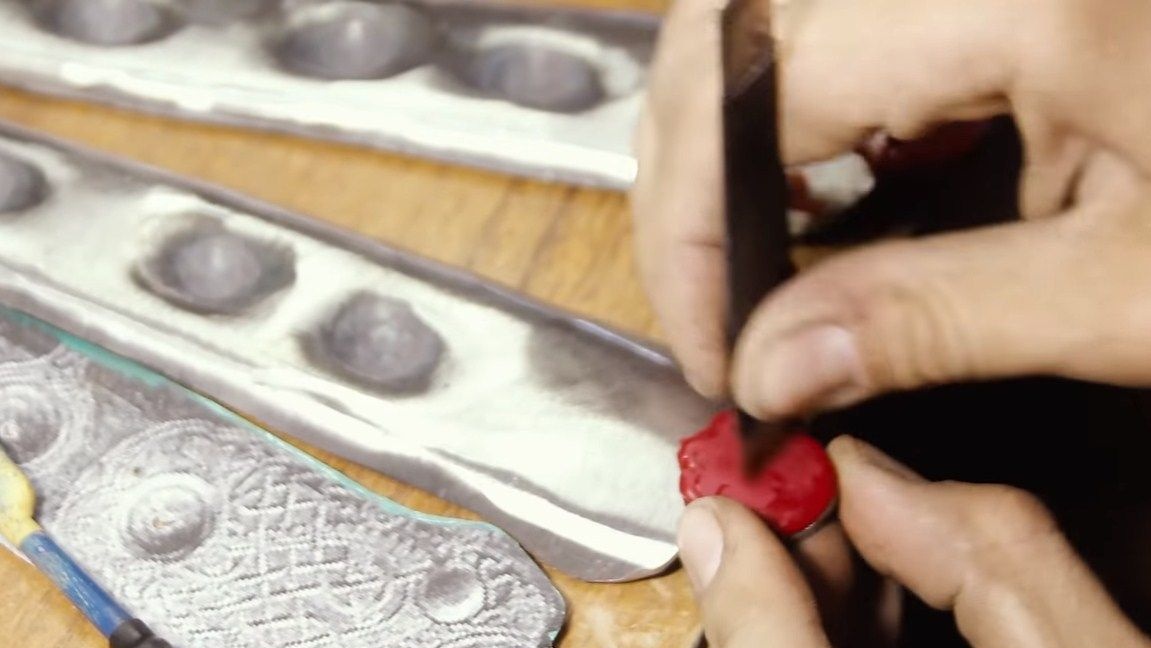
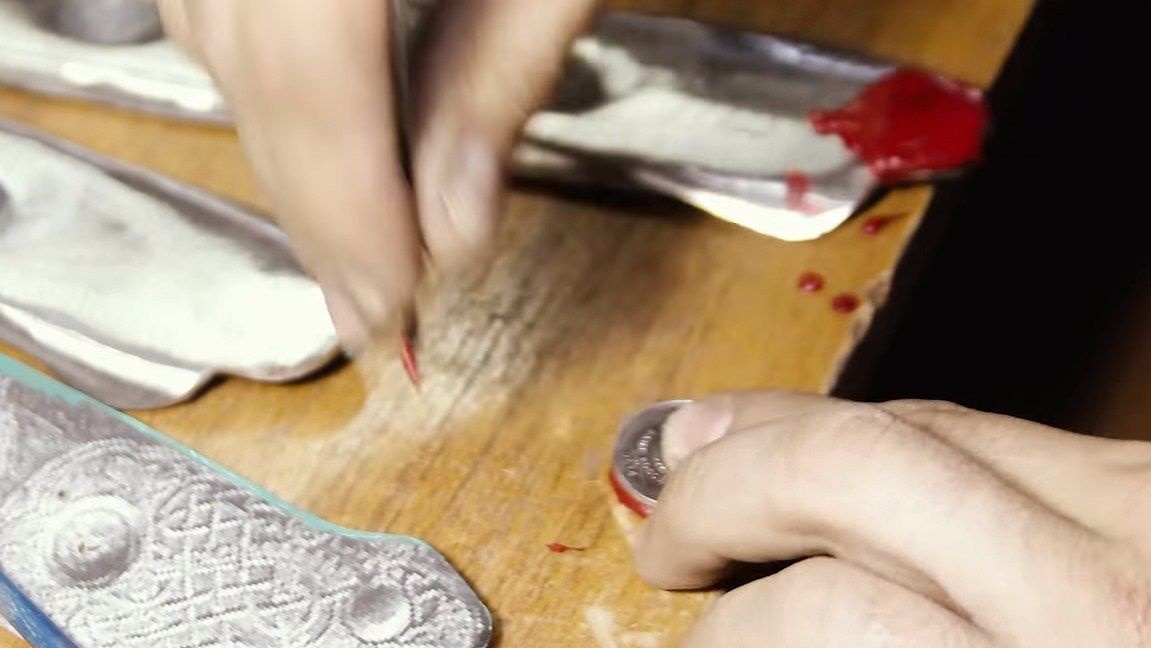
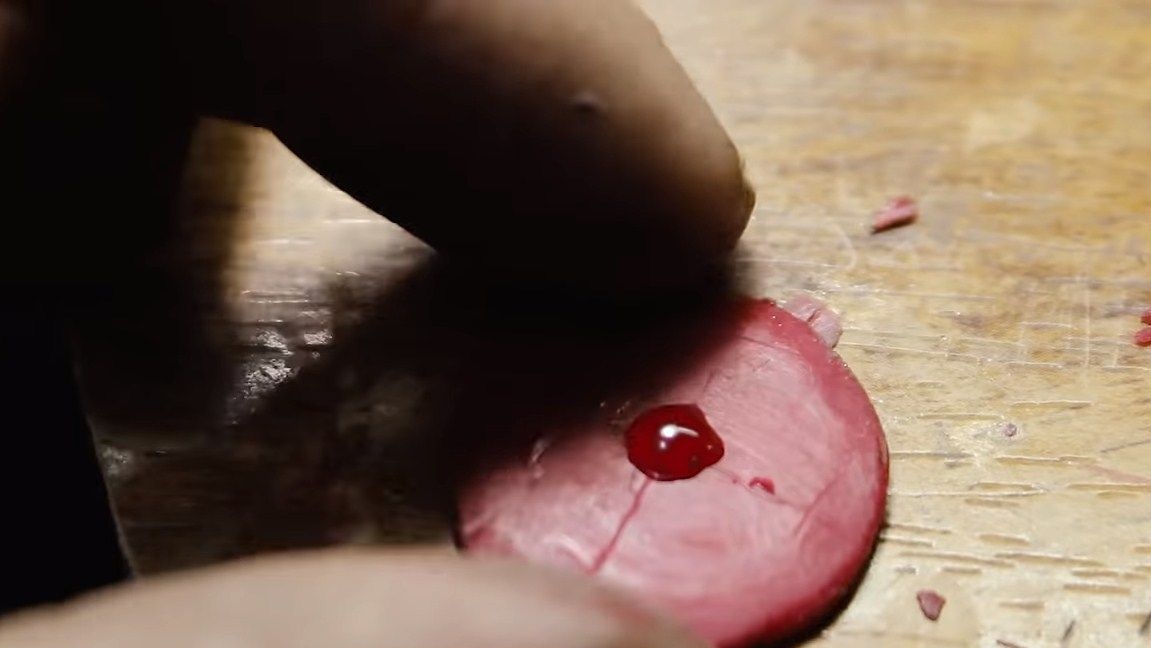
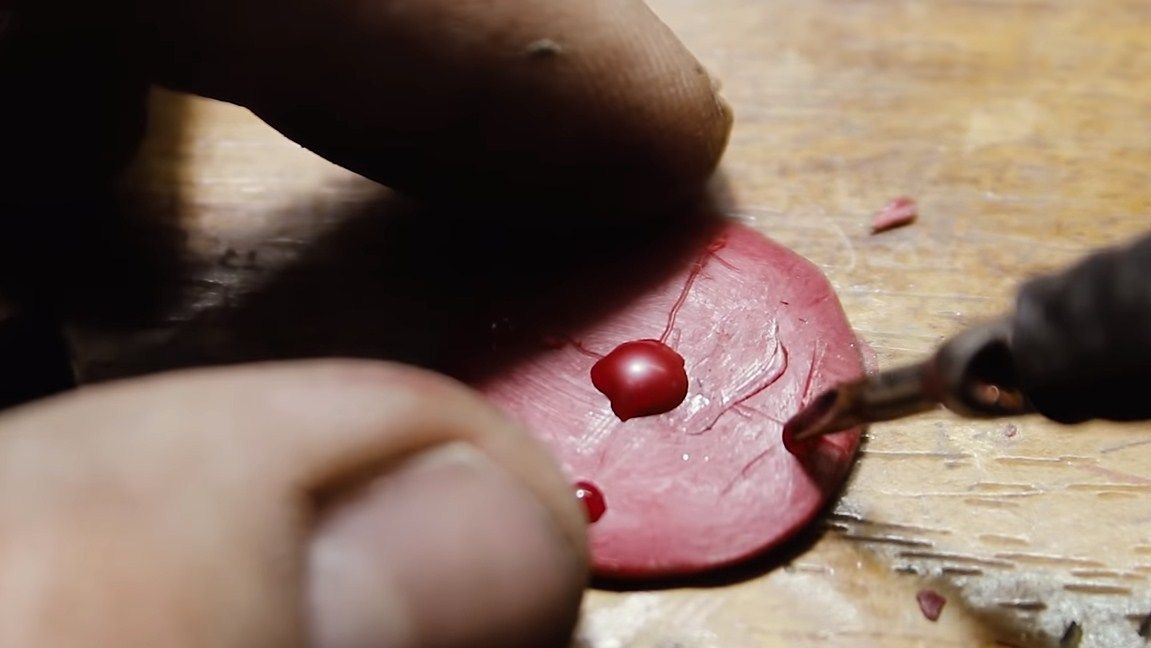
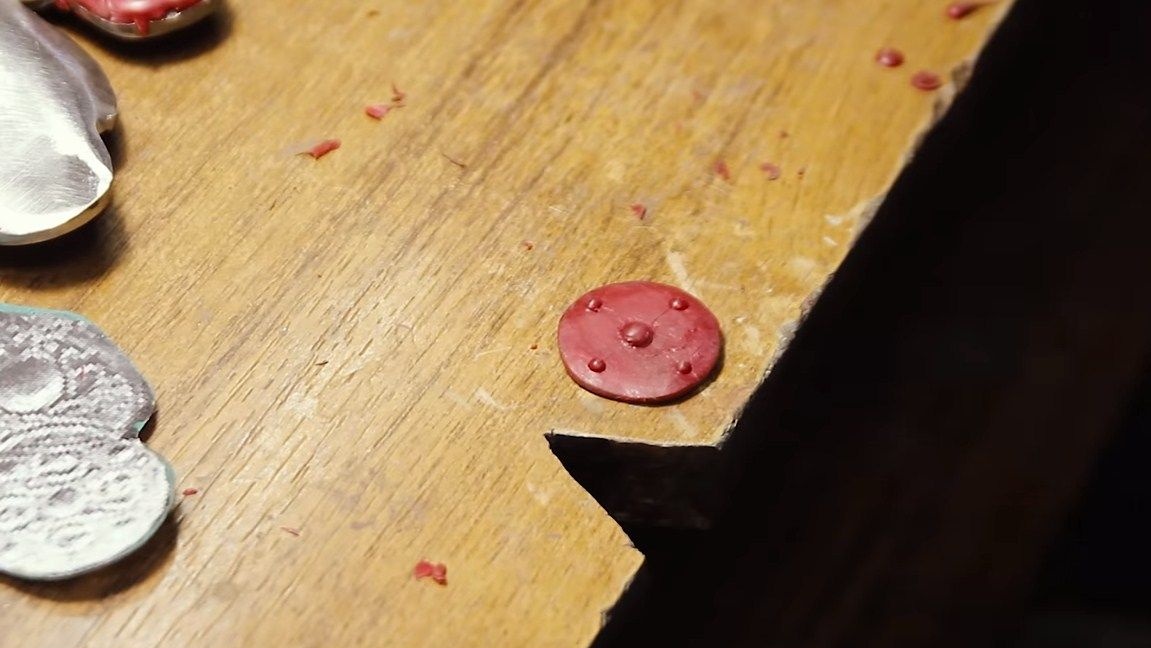
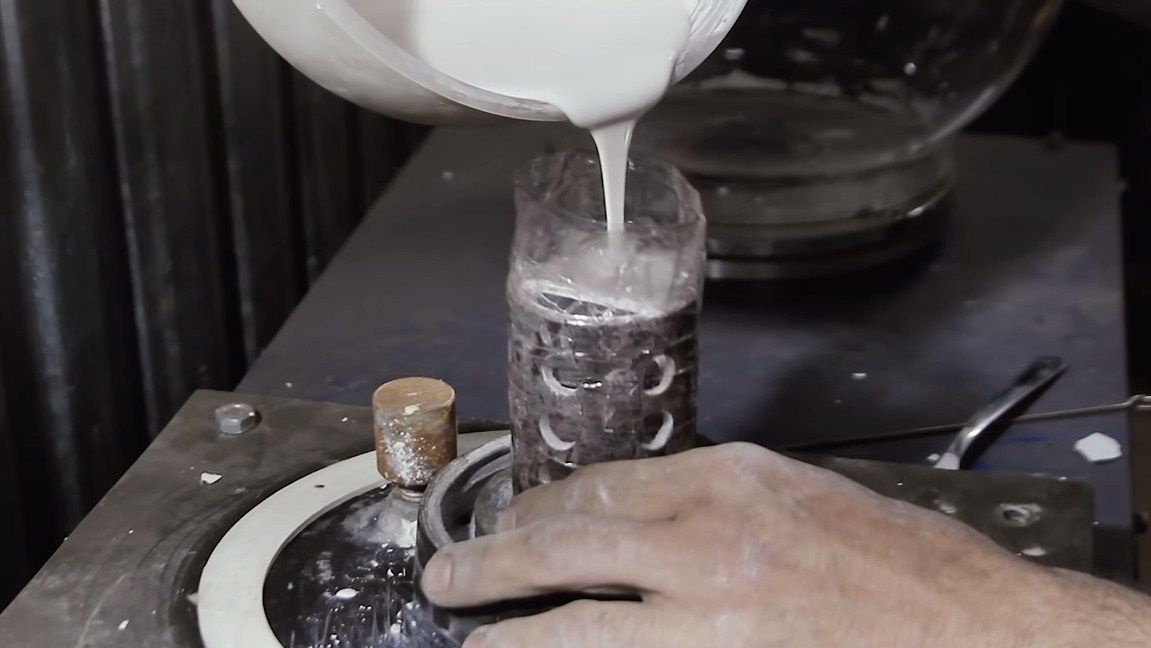

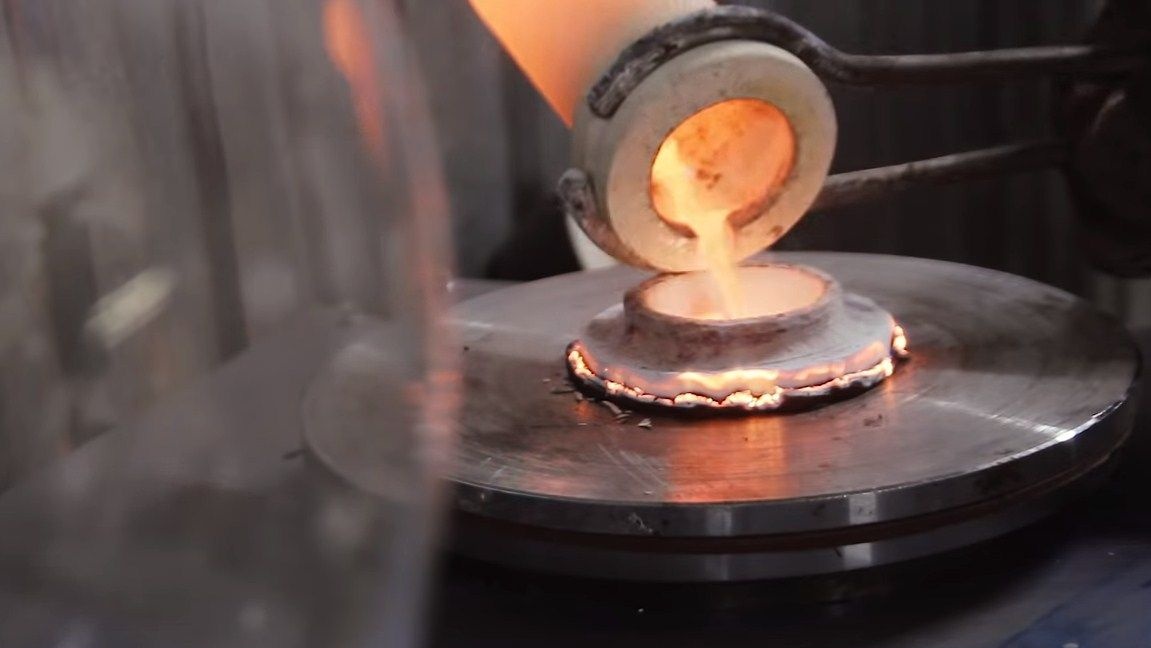
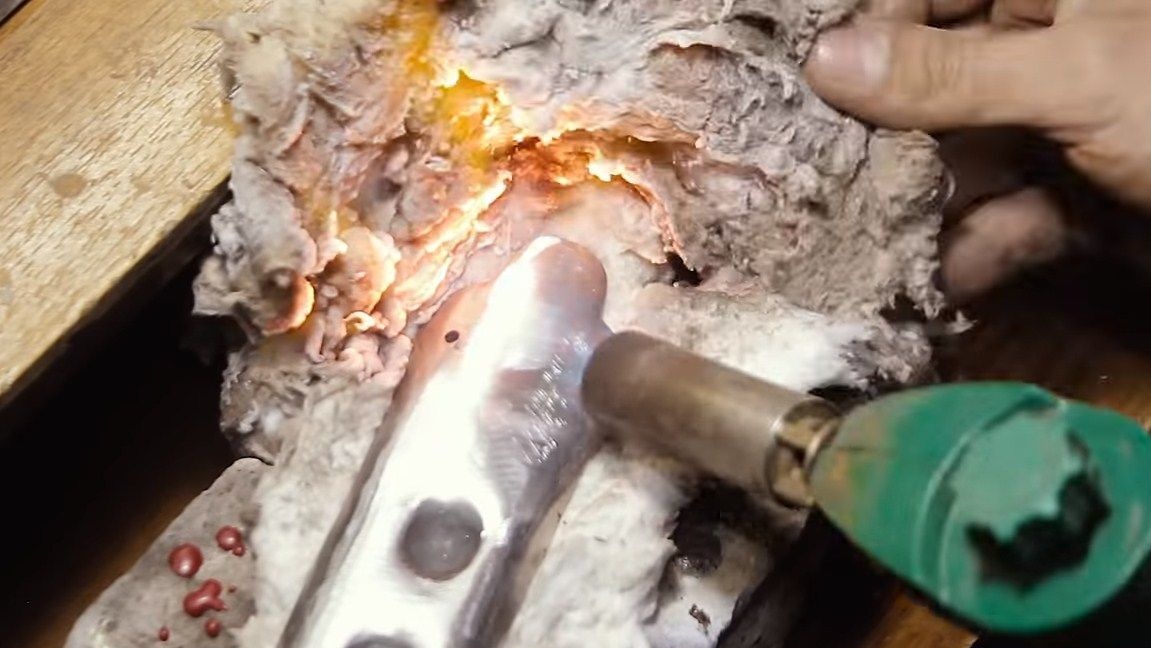
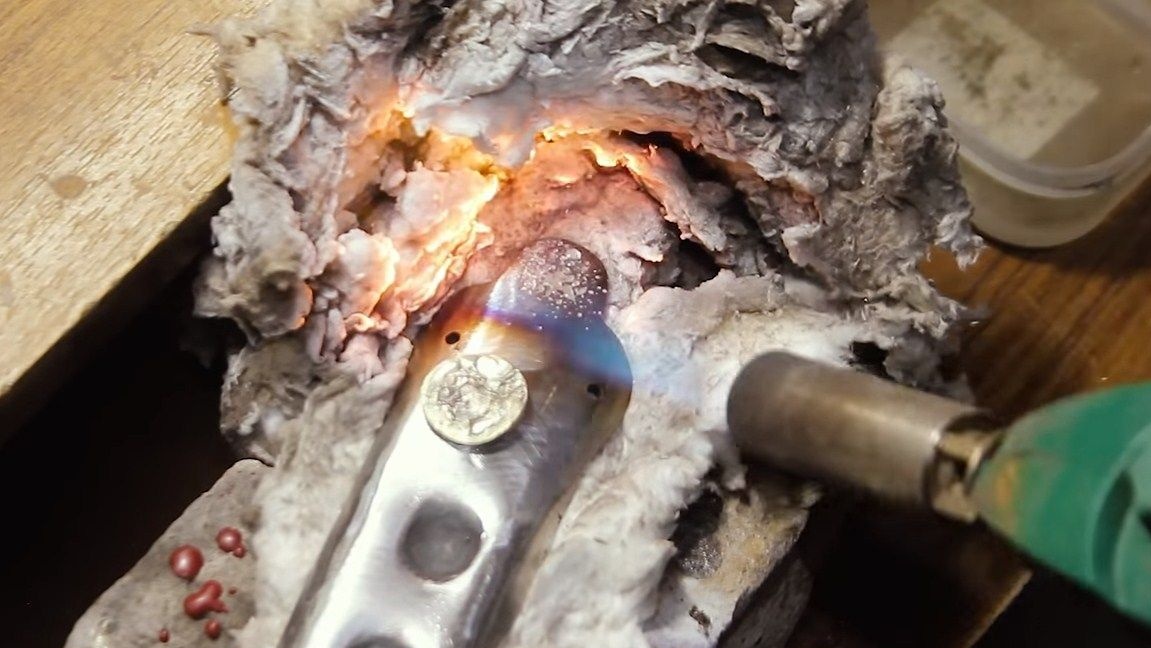
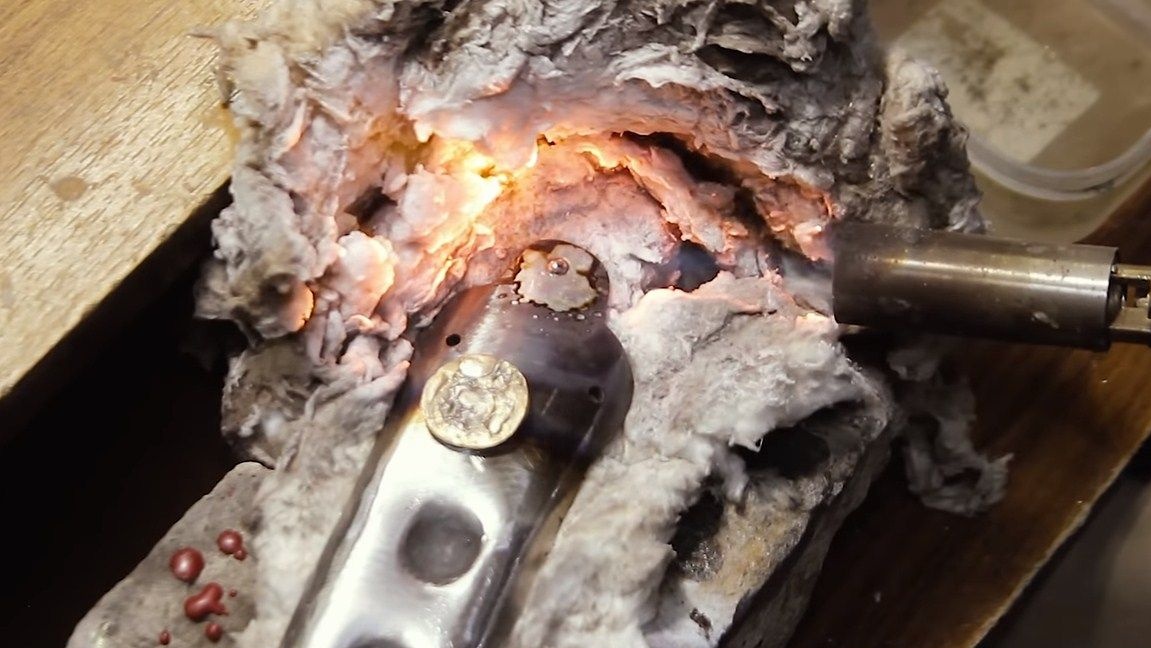
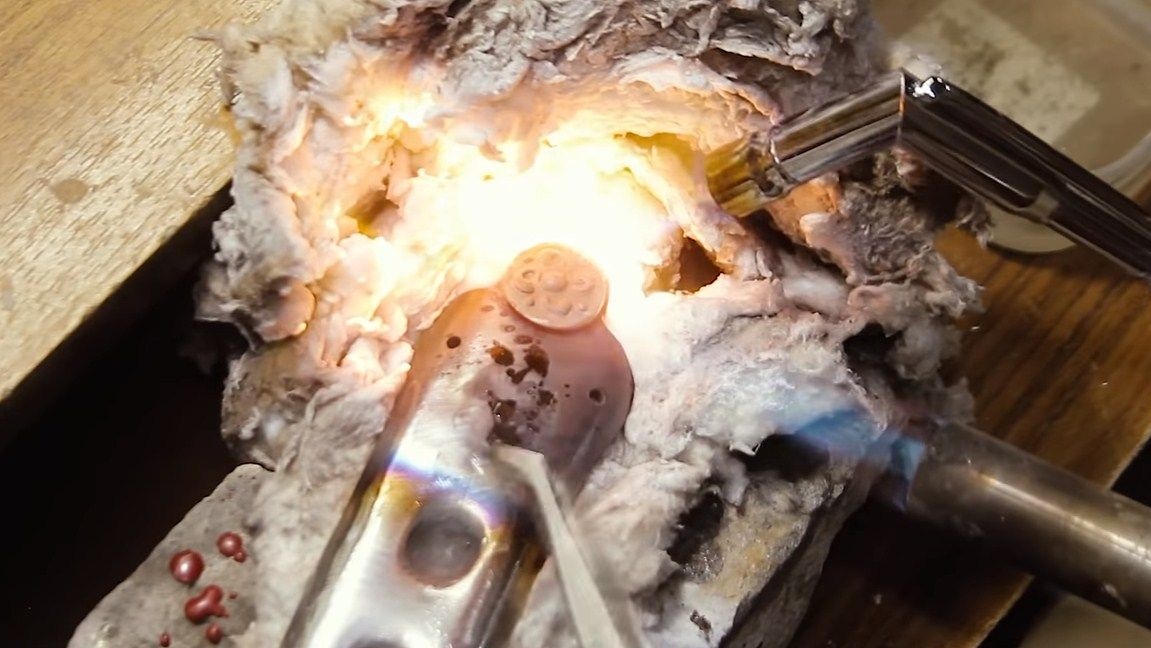
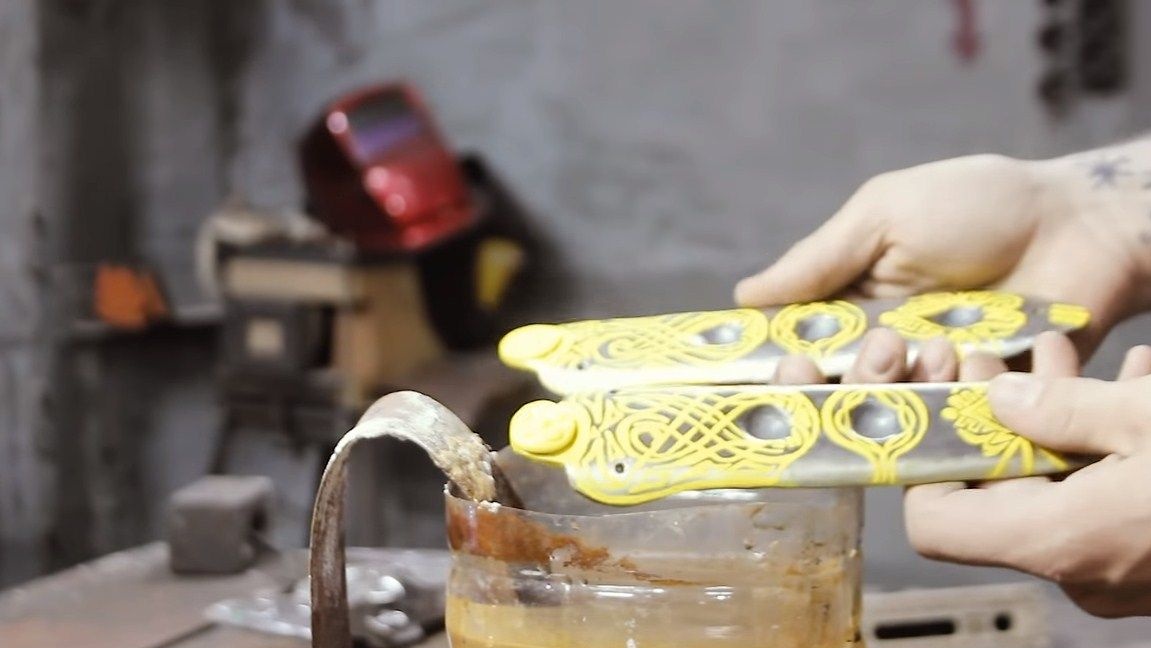
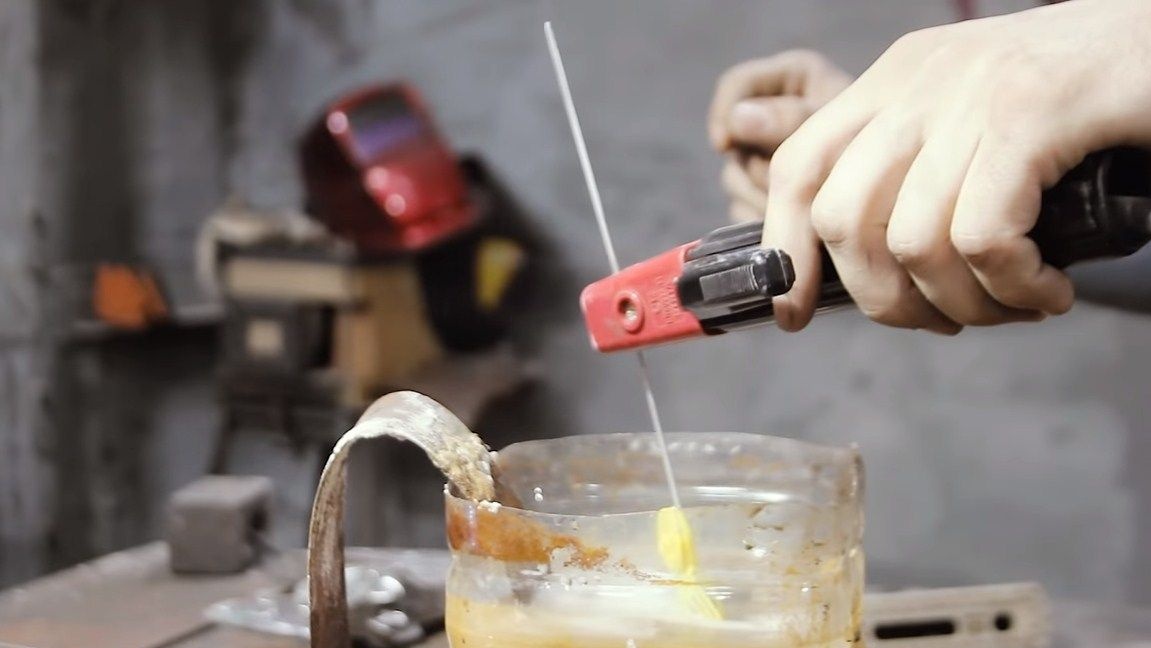
It is time to cast and install brass rivets. To begin with, the author creates their models using wax, focusing on the drawing. Well, then we melt the right amount of metal and cast the products in plaster. After that we grind, polish and solder the parts. We use lead-tin solder in combination with flux. The author used as many as two gas burners to solder the products to the plates.
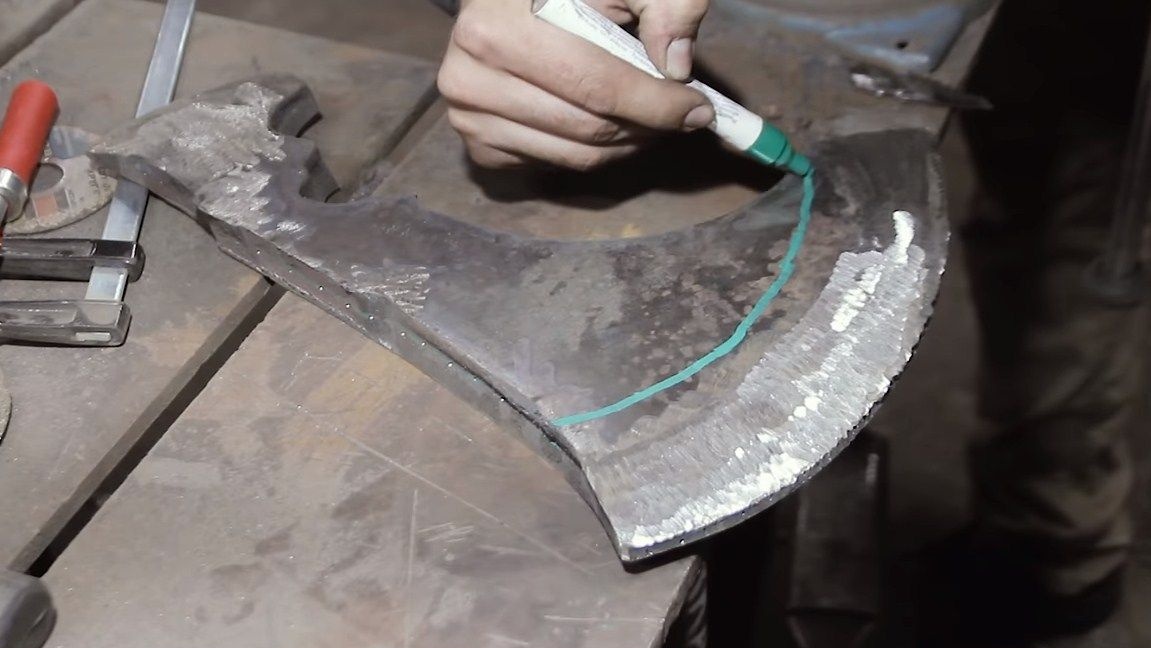
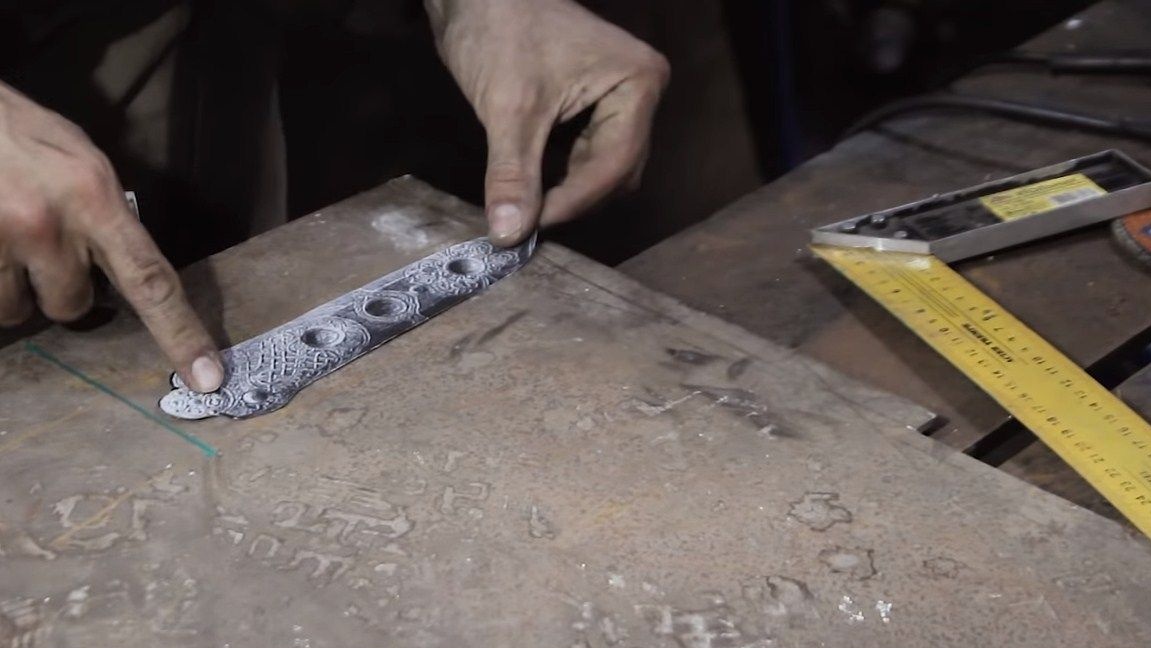
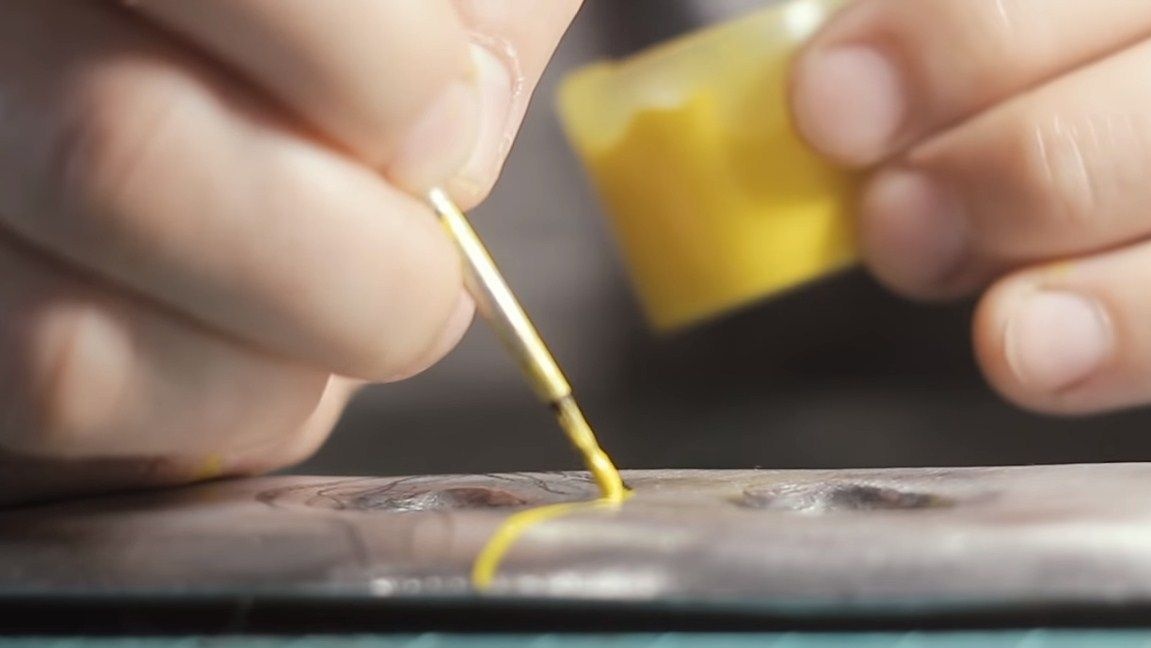
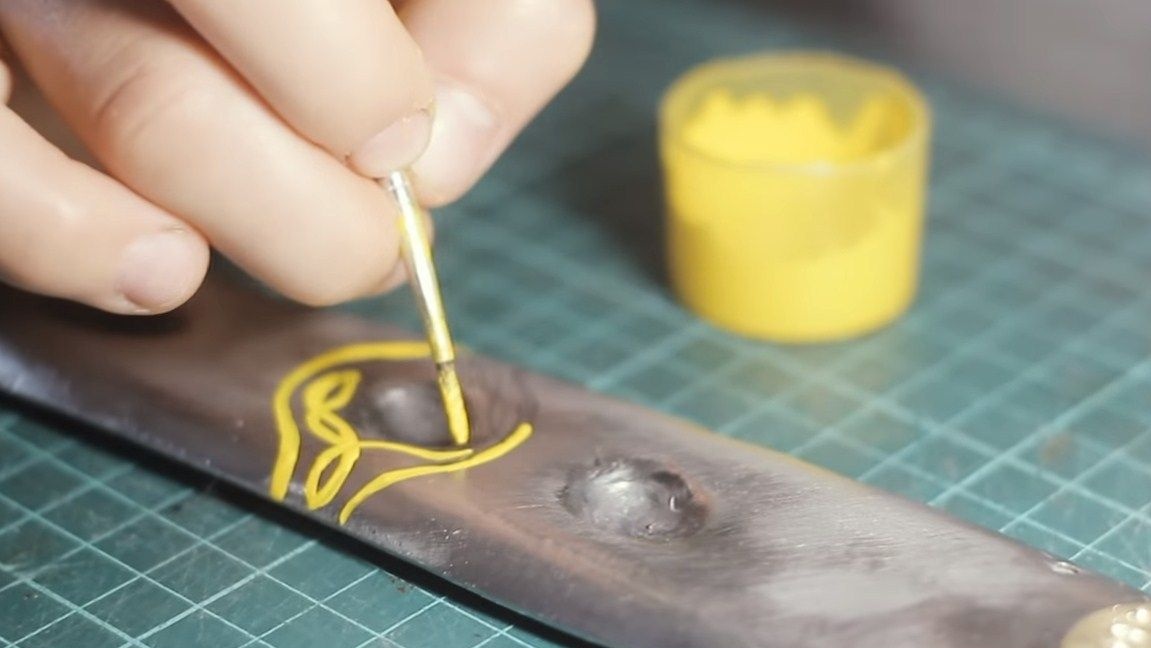
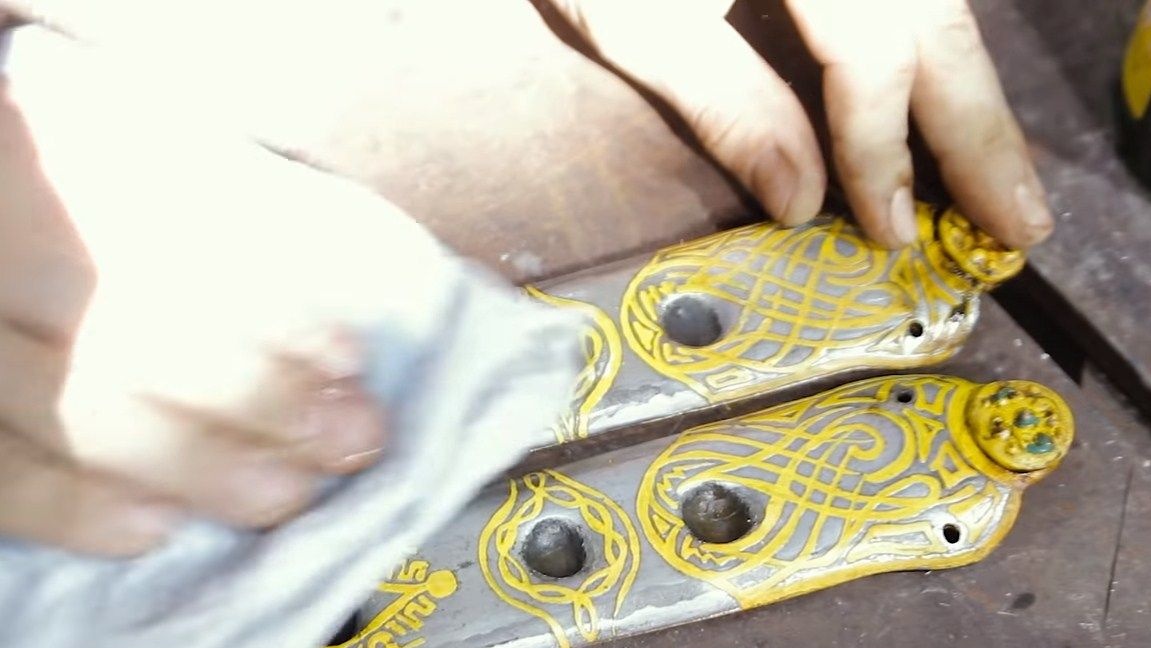
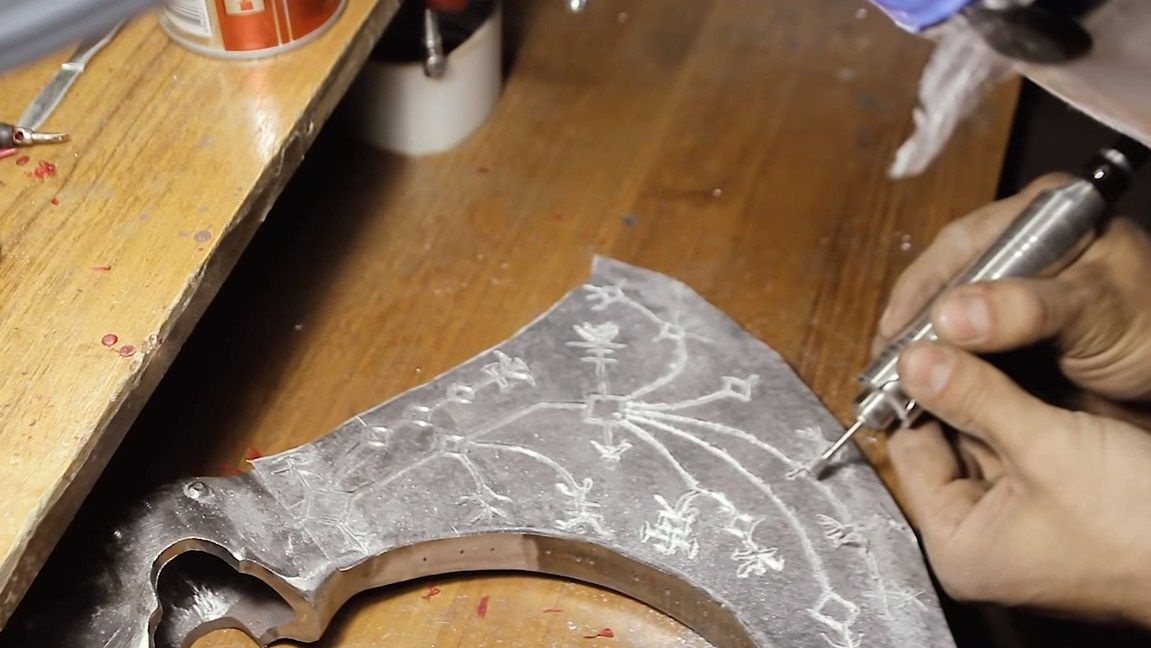
Step Five Lining Etching
There is a specific pattern on the overlays; we will derive it by etching. For these purposes, we apply the image with oil paint on the lining, these places will not be touched during electrolysis. As an etching device, the author used a welding machine and an electrolyte from water and sodium chloride. We give a plus to the electrode, and connect the minus to the pads. Be careful at the same time, since we have a large current and sparks can form that can ignite the hydrogen released during electrolysis. Due to this high current, etching takes 5 minutes. Then we wash off the paint with a solvent, wash my linings and we get great products.
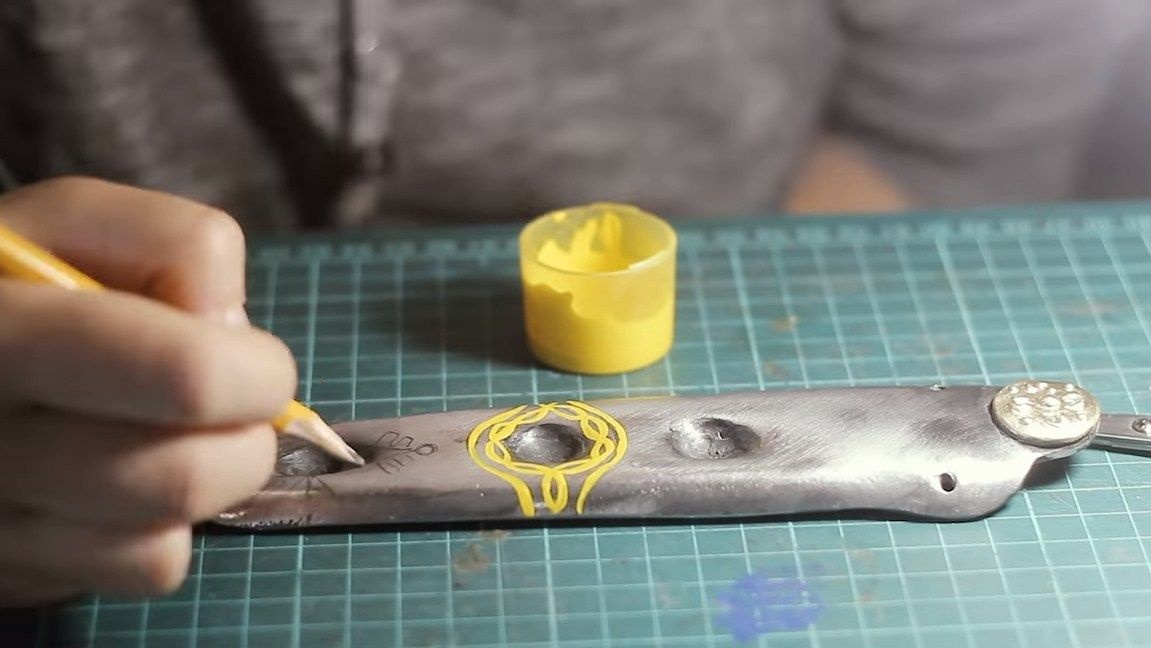
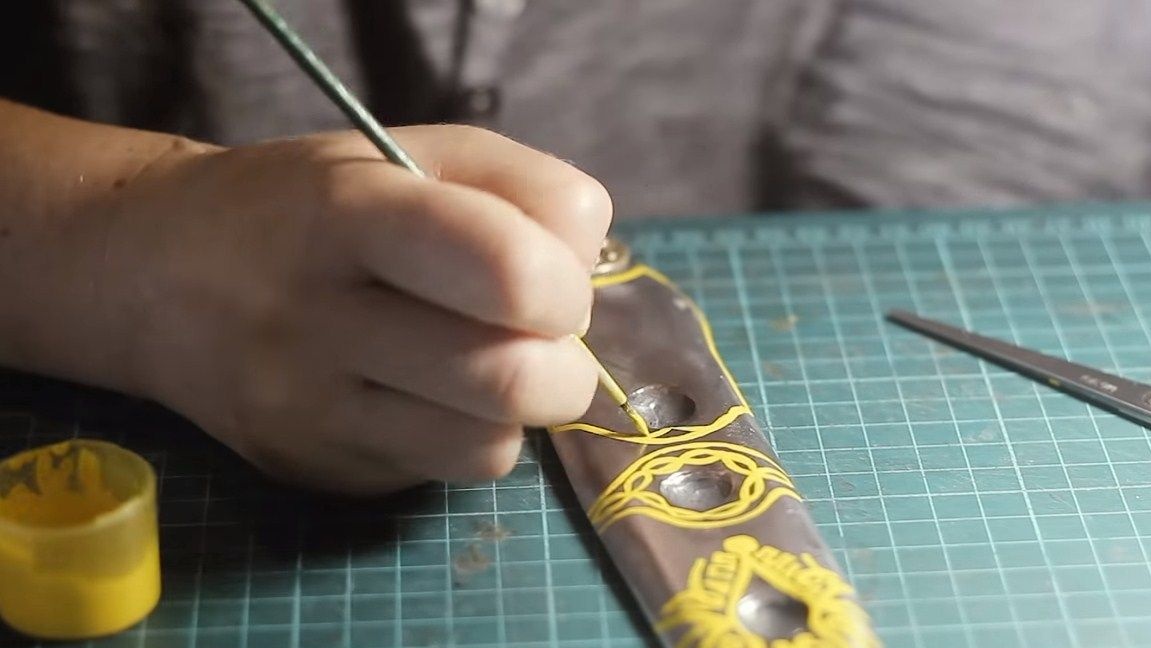

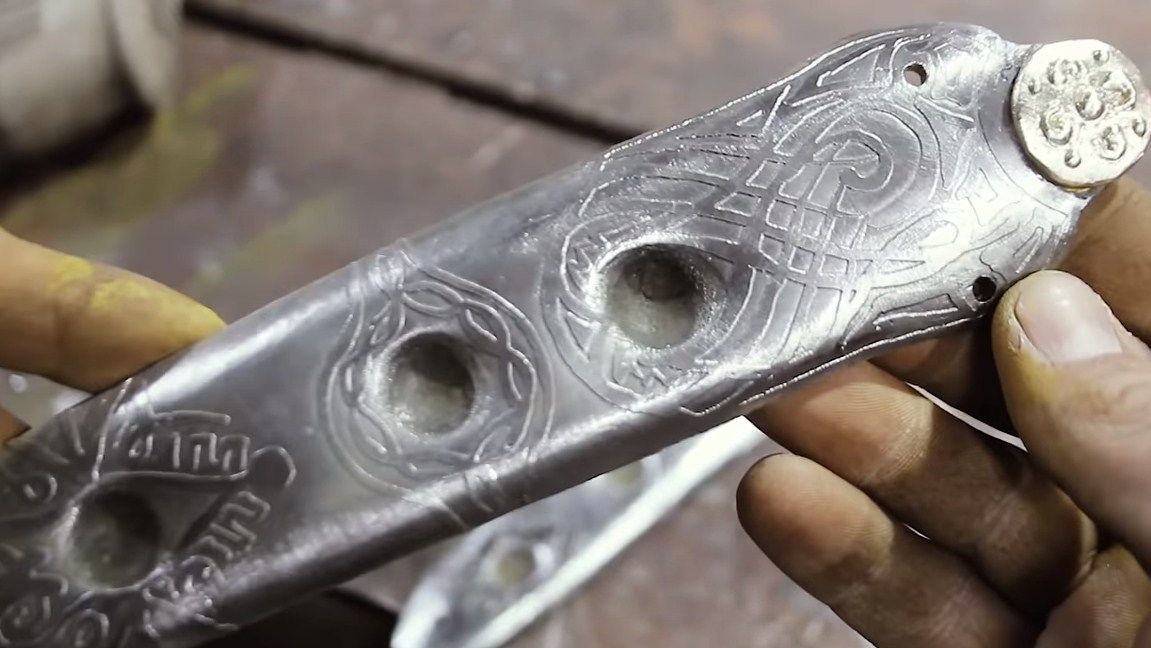
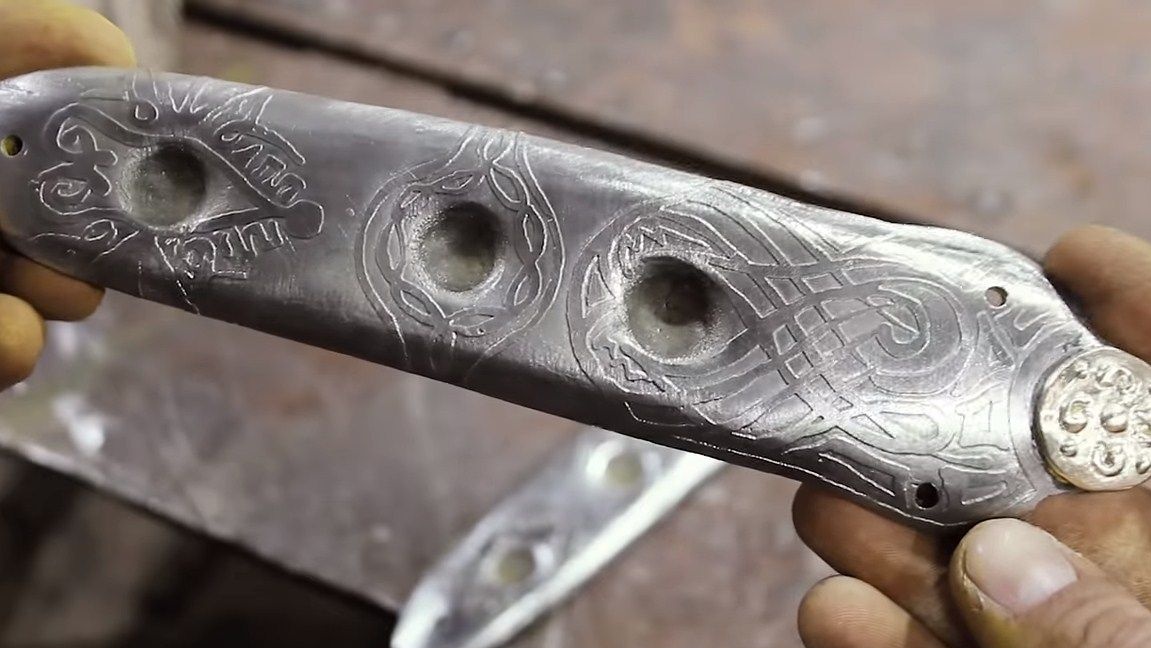

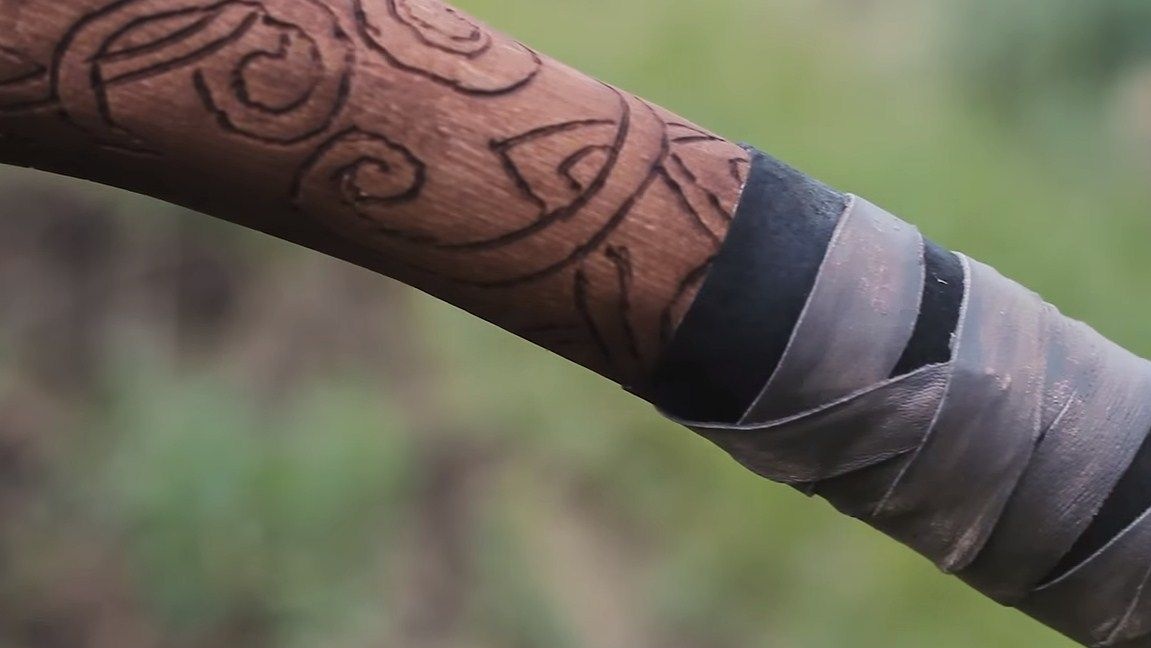
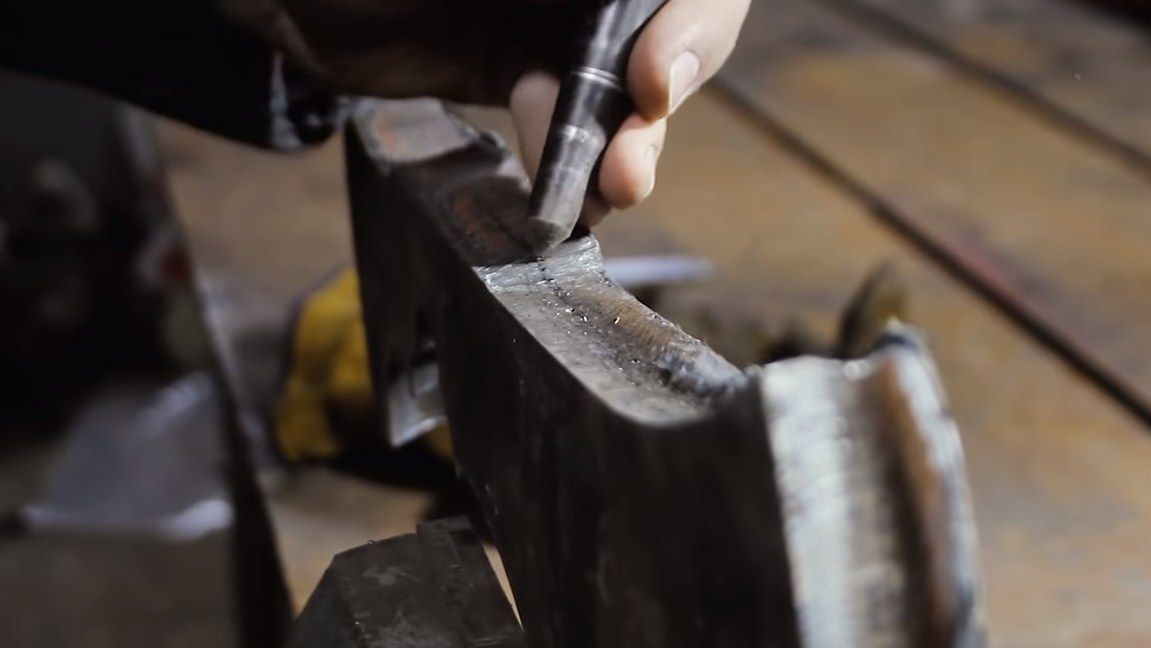
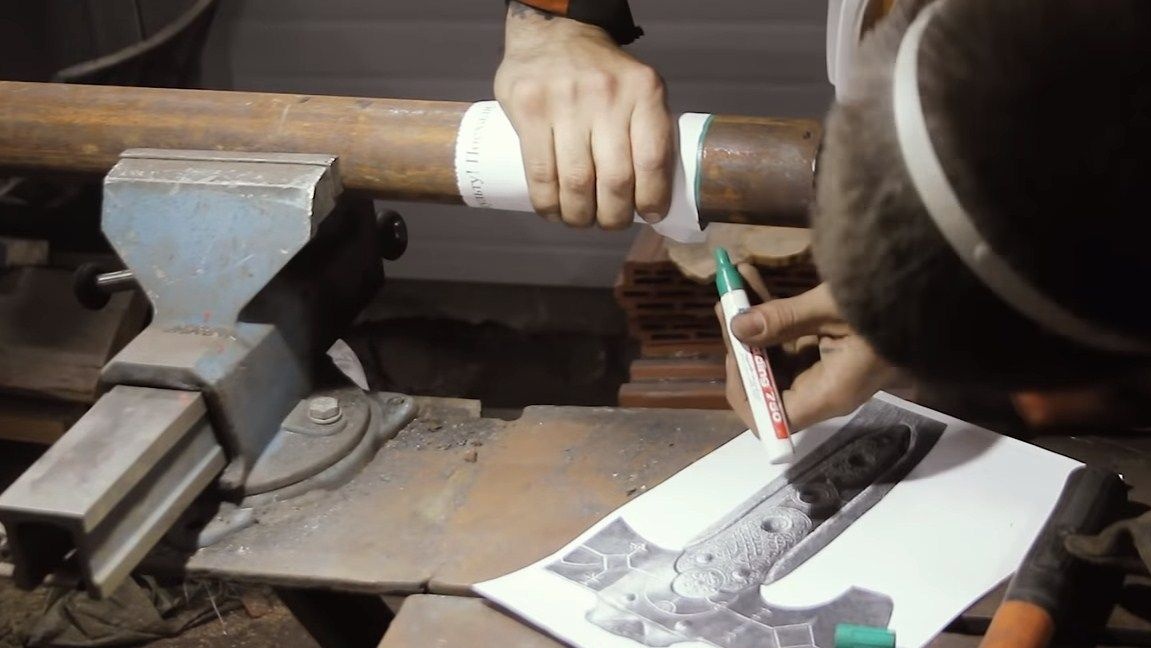
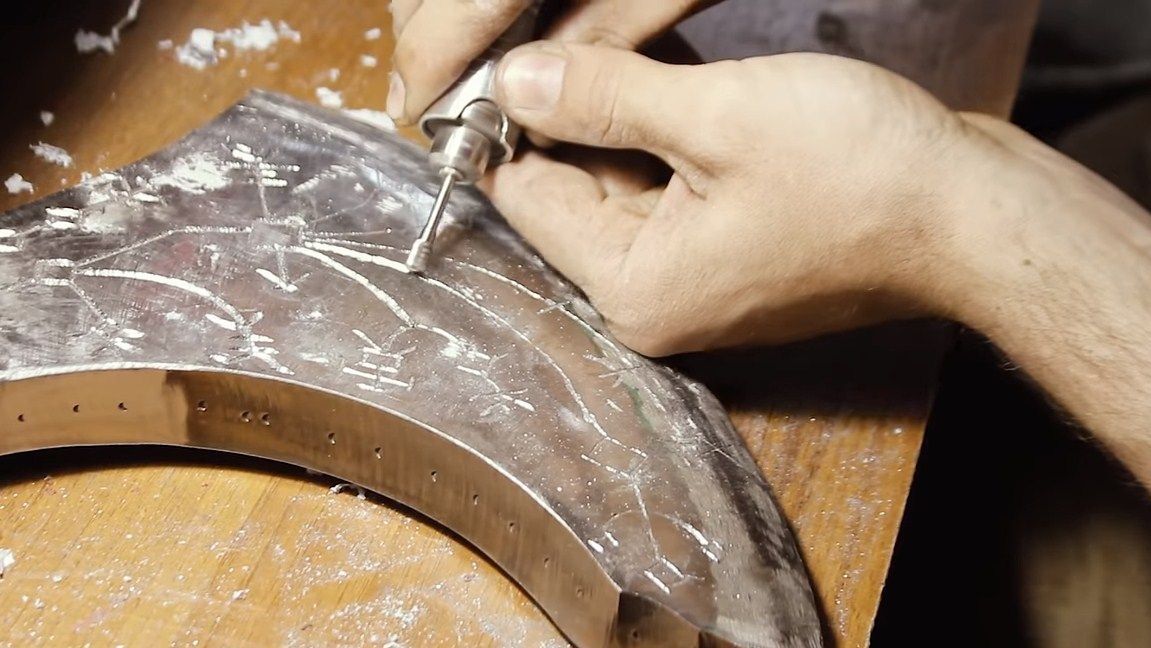
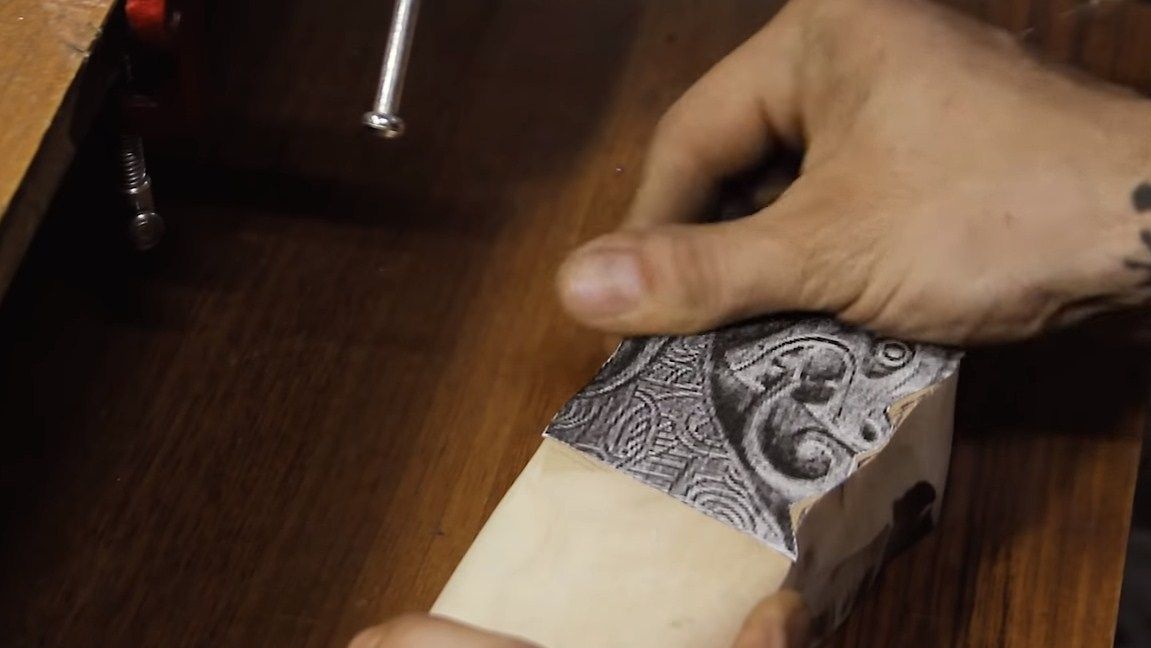
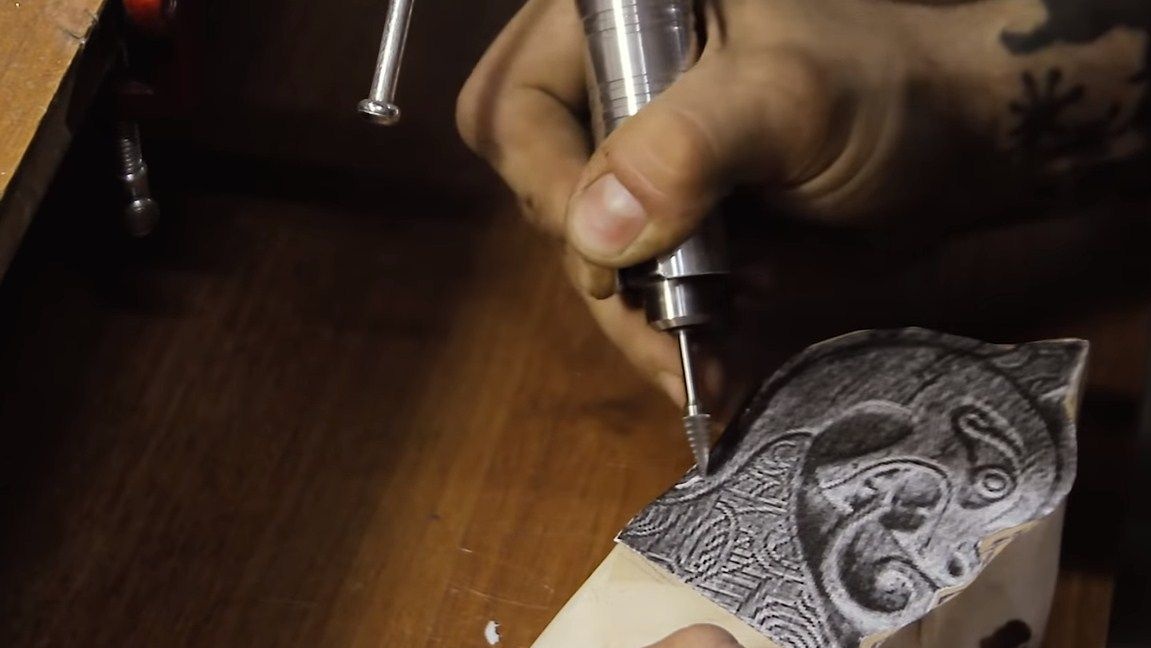
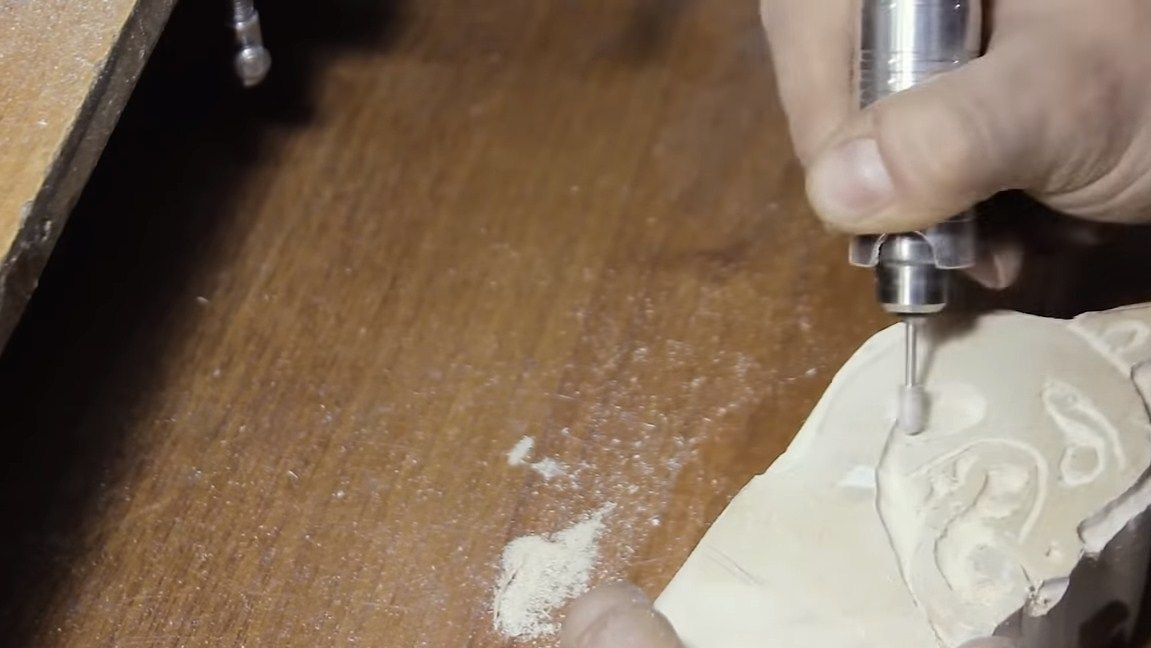
Step Six Engrave the picture on the blade.
For these purposes we use a drill. First print the picture and glue it to the ax. We draw a line on the patterns and remove the paper. That's all, now we proceed to full engraving.
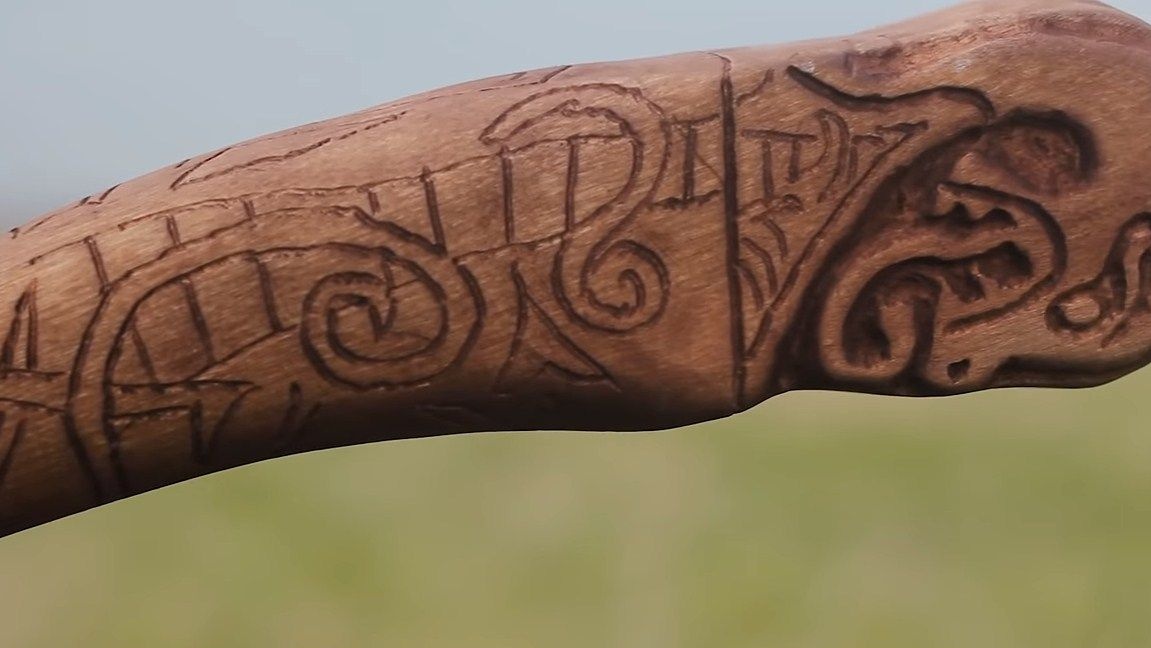
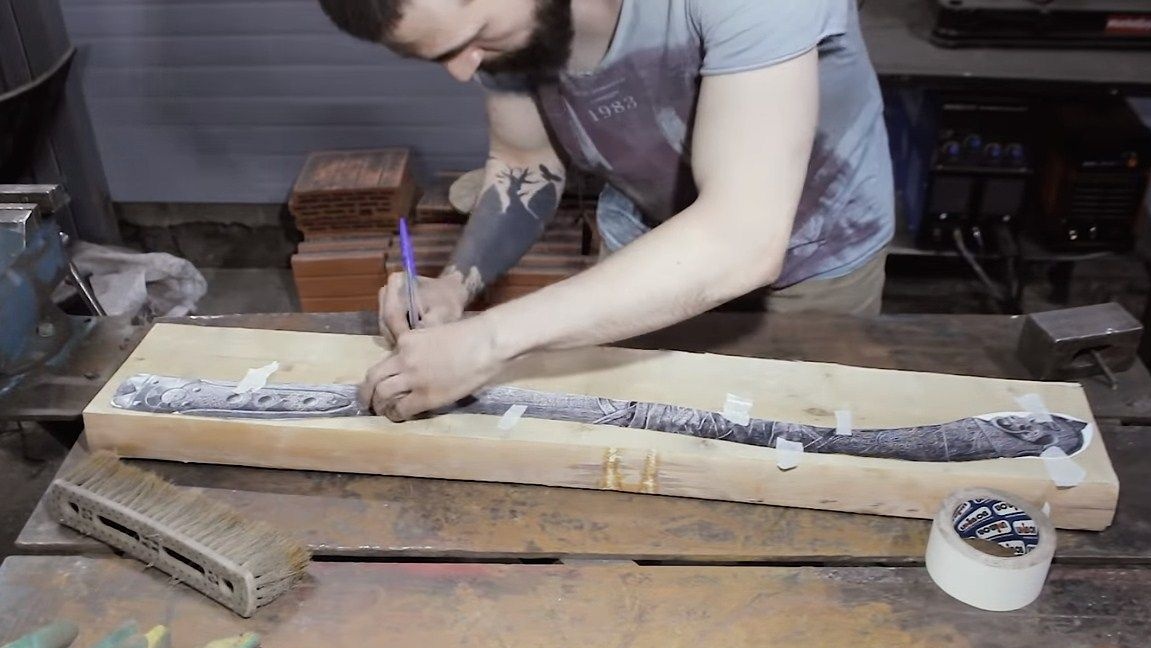
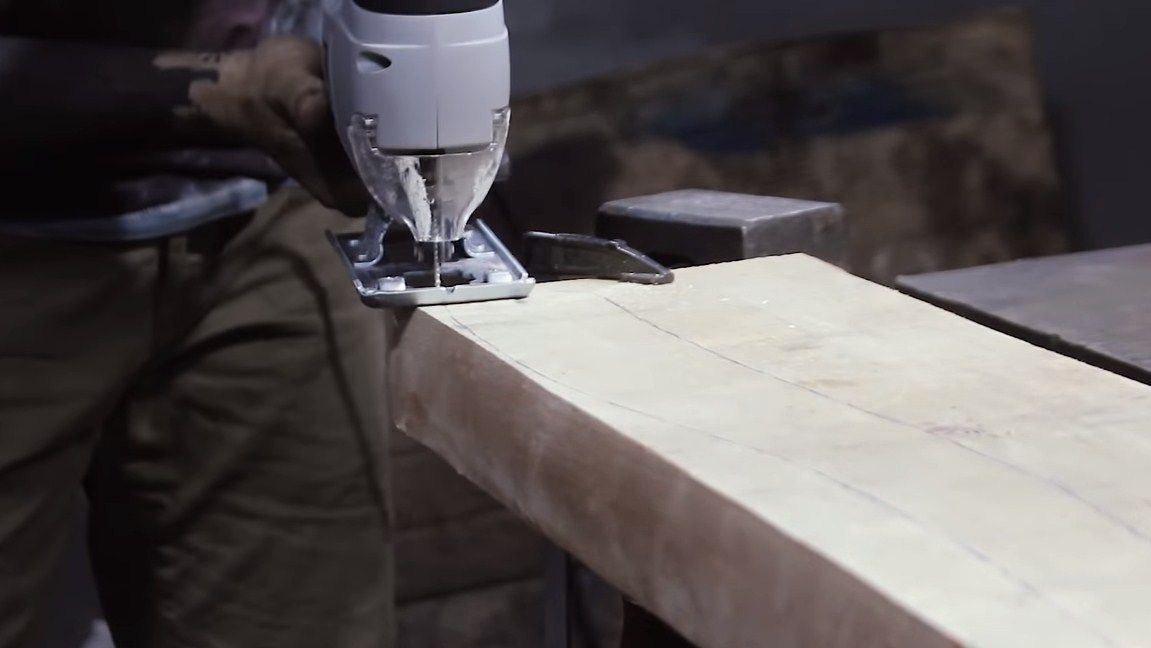
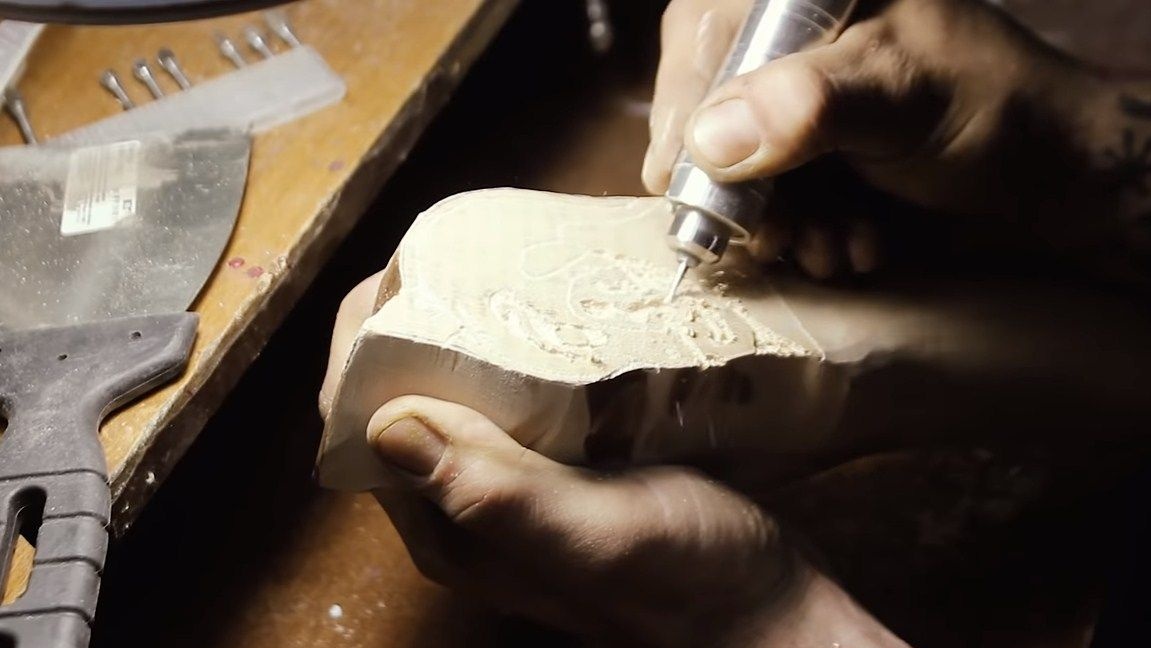
Seventh step. Ax making
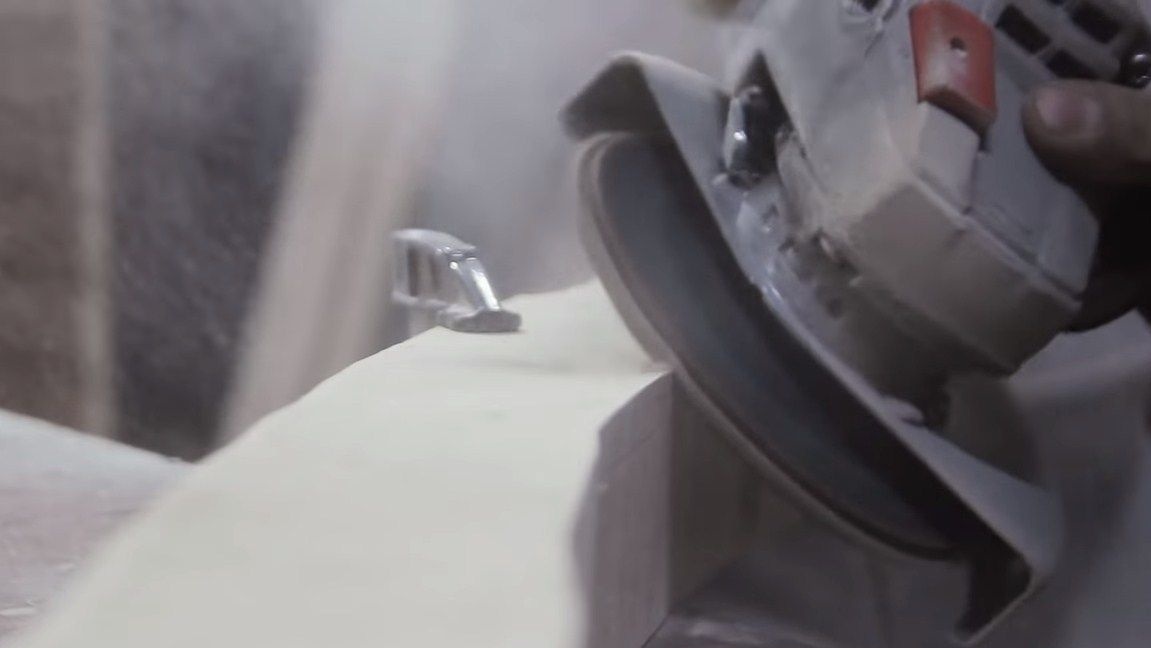
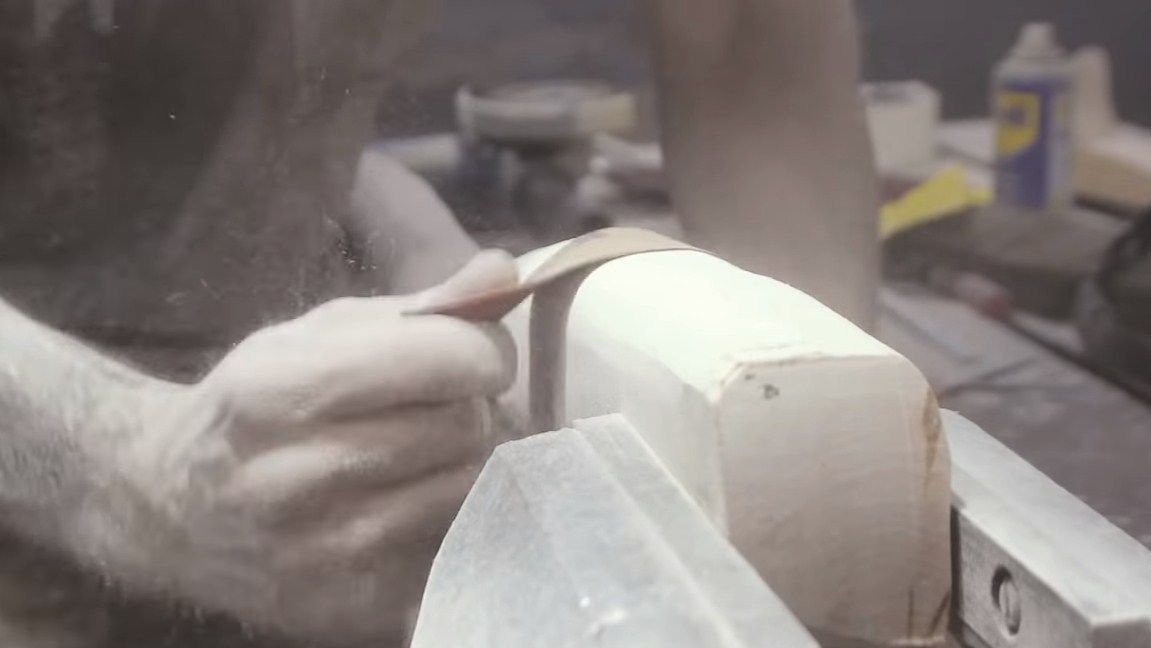
For these purposes, we select a suitable piece of wood. It is preferable to use birch or something similar for an ax. Hardwood, such as oak, may crack when chopping. We attach our template, circle with a marker and cut out using a jigsaw. Well, then we arm ourselves with a grinder with a grinding disc and process the ax. There will be a lot of dust, we use a mask. At the end we go through the petal nozzle, they are also suitable for profiling, we use with the largest grain.
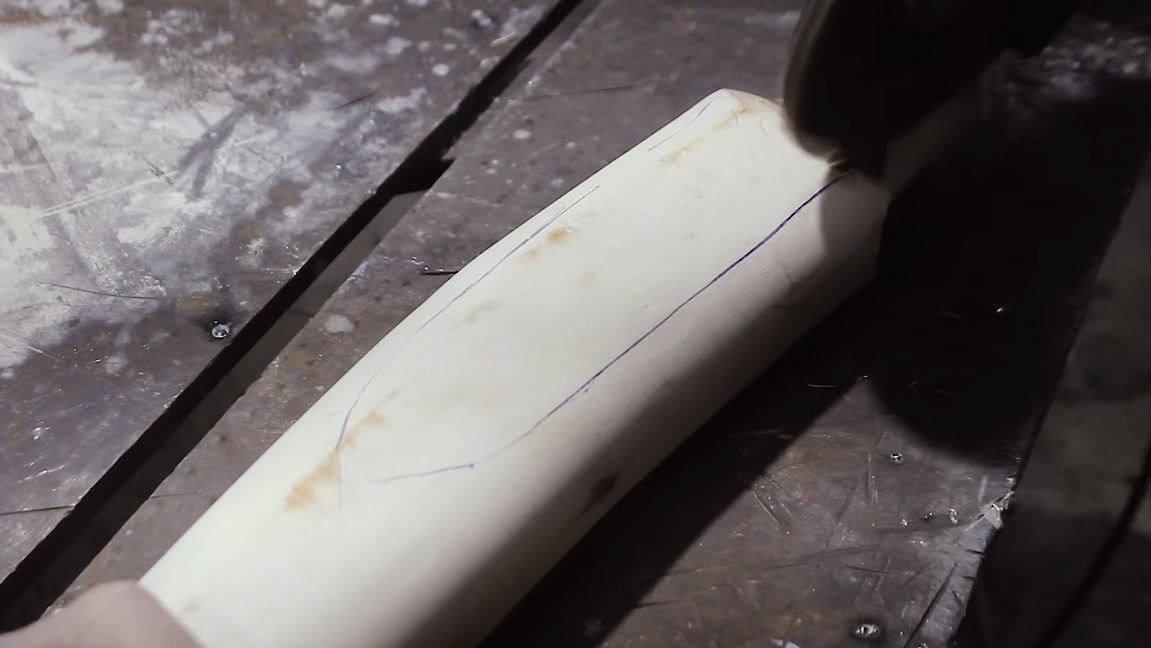
At the end, we need to engrave the drawing, here again the drill comes to the rescue.


That's all, now the ax can be assembled. The further the author processed the ax to get a similar color, it remains a mystery. Probably, the pen was impregnated with stain, and even better to soak it with oil, this will reliably protect the wood from moisture. You can also burn the pen, and then soak in oil, so it turns black. As for metal, how the author got such a dark color remains a mystery. Perhaps this is the result of using some kind of reagent or just paint.
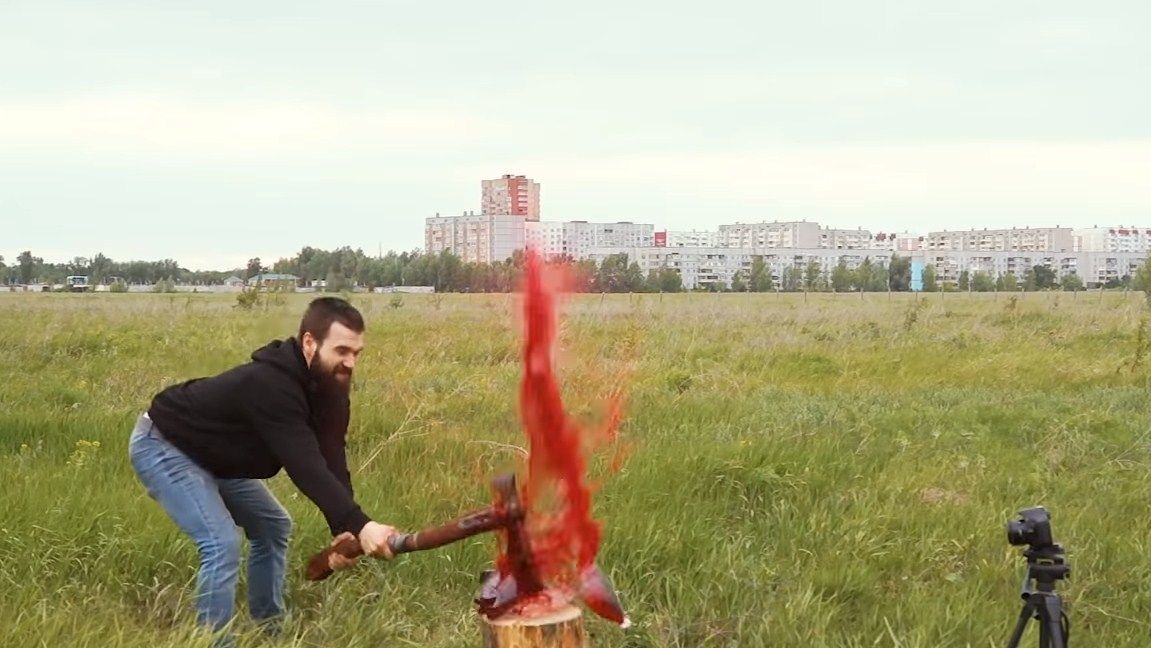
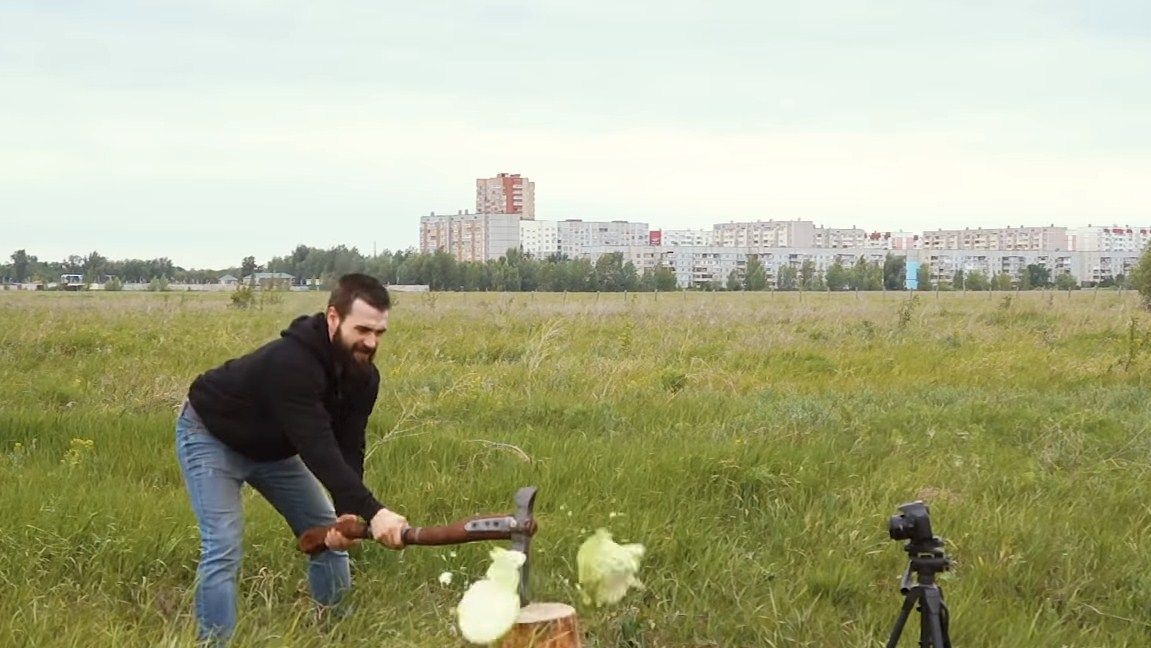
Step Eight. Testing
Of course, in severe conditions, the ax was not tried, but when chopping bottles with red water and cabbage everything turned out pretty enchanting. Of course, he can easily cope with cutting wood, but this is a masterpiece of art and we are unlikely to use it for such purposes.
That's all, the project is over. Good luck and creative inspiration, if you want to repeat it. Do not forget to share your best practices and homemade work with us.