» Fixtures "Do-it-yourself auto-feed of solder wire

DIY solder wire feed


Greetings to fans to craft. I present to you a very useful homemadeif you often have to solder something. We will talk about an automatic feeder of solder, in our case, this is a finished solder wire with flux. Now the soldering process will be very simple, for soldering you just need to press the button and now the soldering iron tip already has the right amount of solder. Going homemade is very simple from the available materials.

Let's consider in more detail how to assemble such a homemade product!

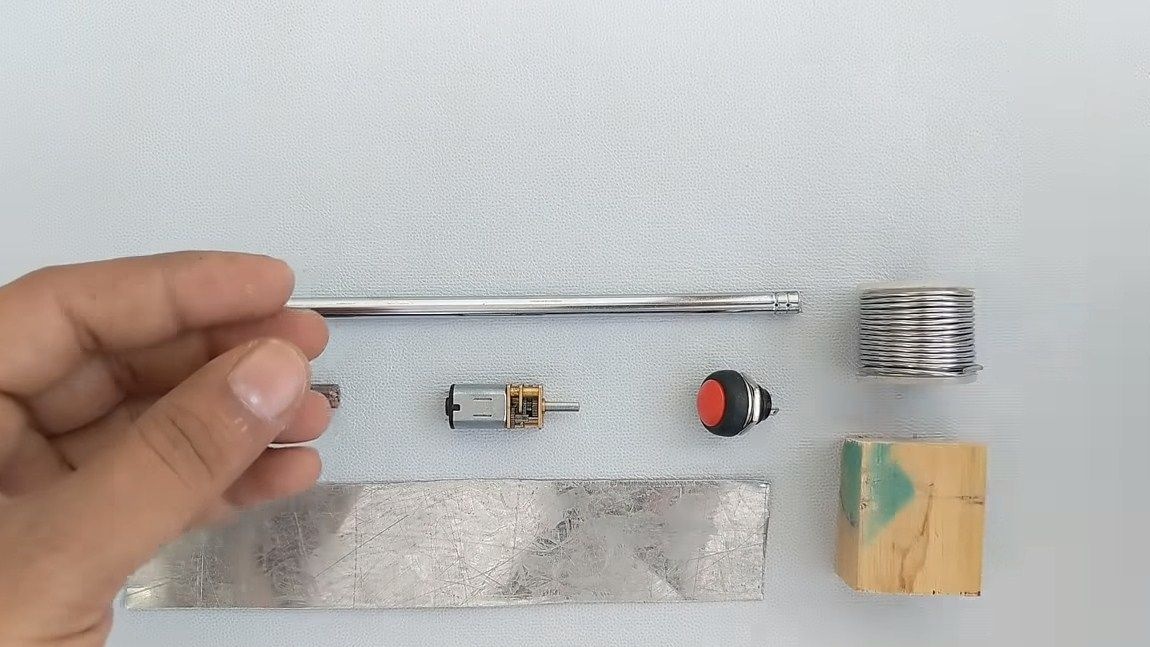
Materials and tools used by the author:

Material List:
- ;
- button;
- a piece of board;
- sheet metal;
- reel with solder wire;
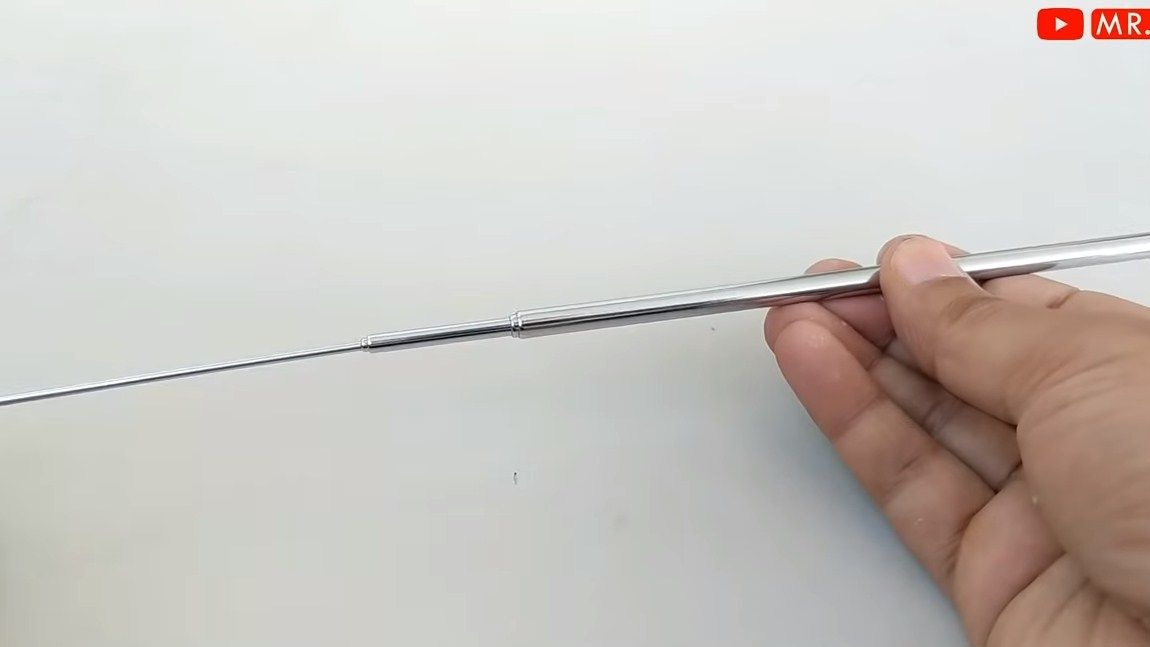
- the antenna from the radio (or other suitable tube);
- a nail;
- pieces of tubing made of rubber or the like;
- good glue (quick-drying epoxy or the like);
- self-tapping screw.

Tool list;
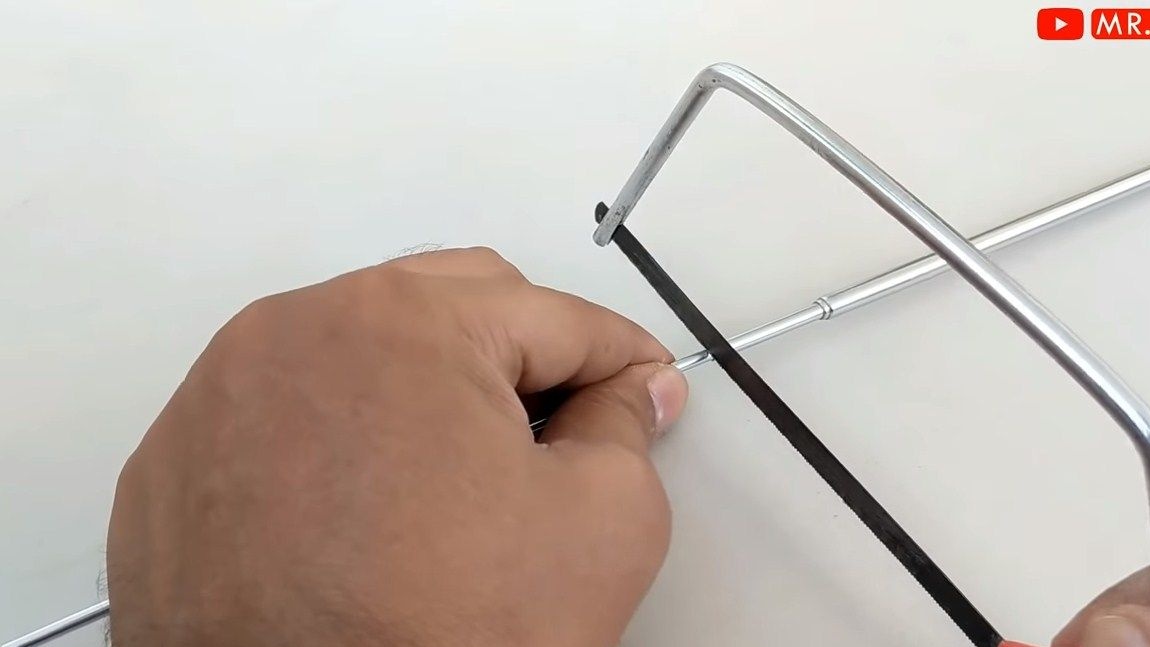
- a hacksaw for metal;
- soldering iron;
- drill;
- a screwdriver.

Homemade manufacturing process:

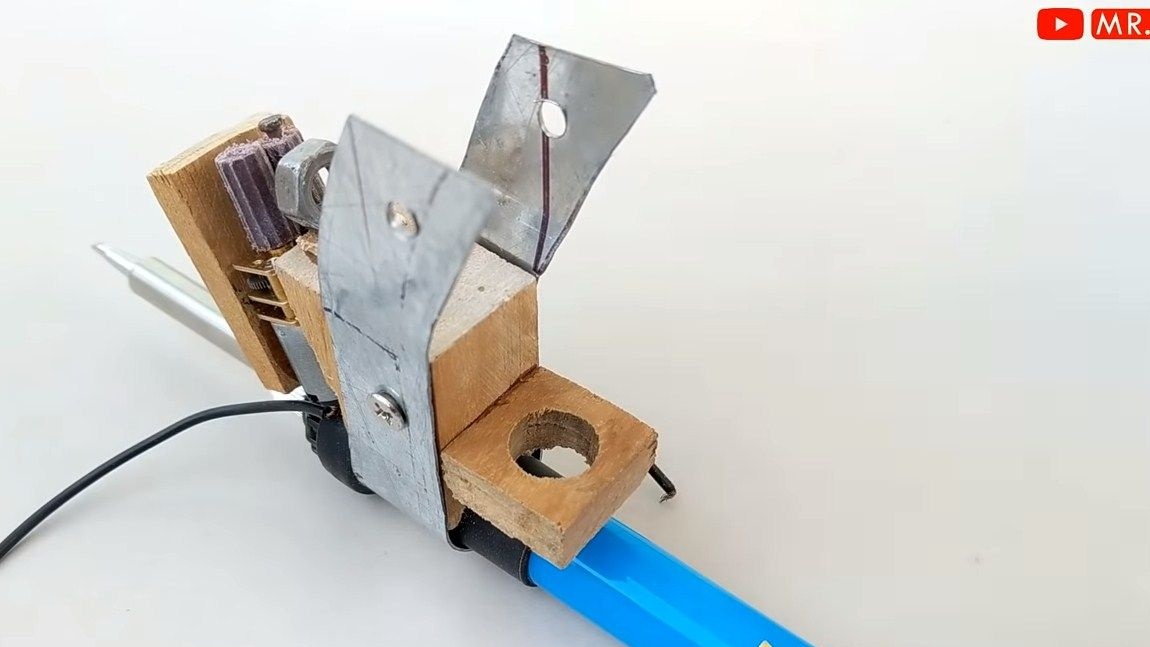
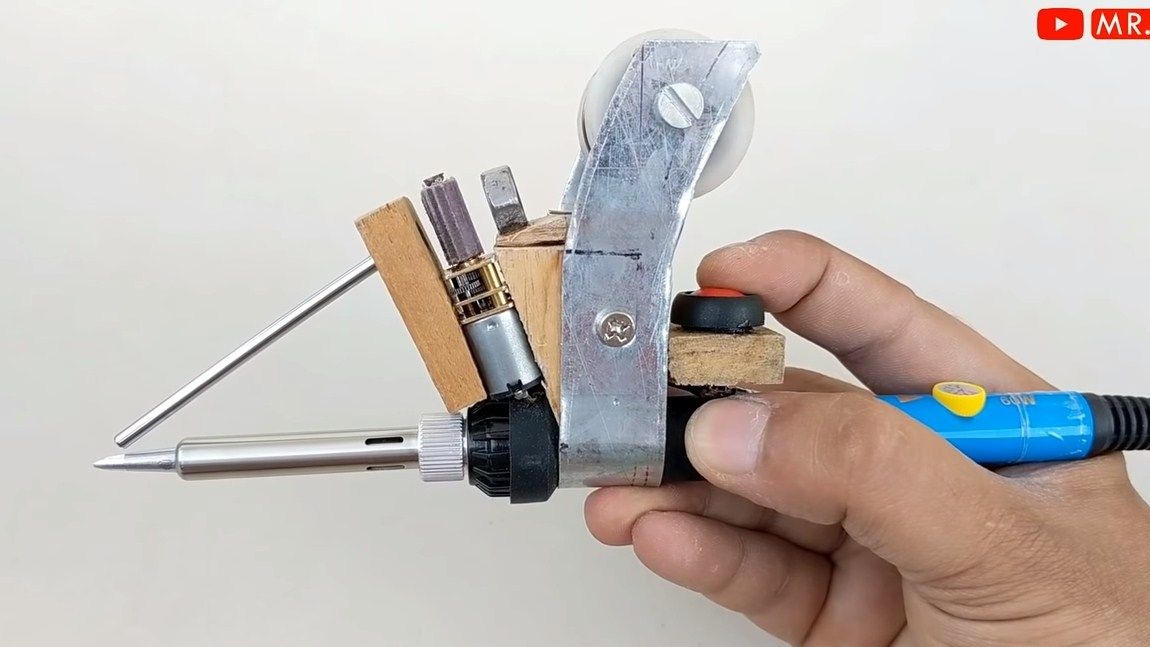
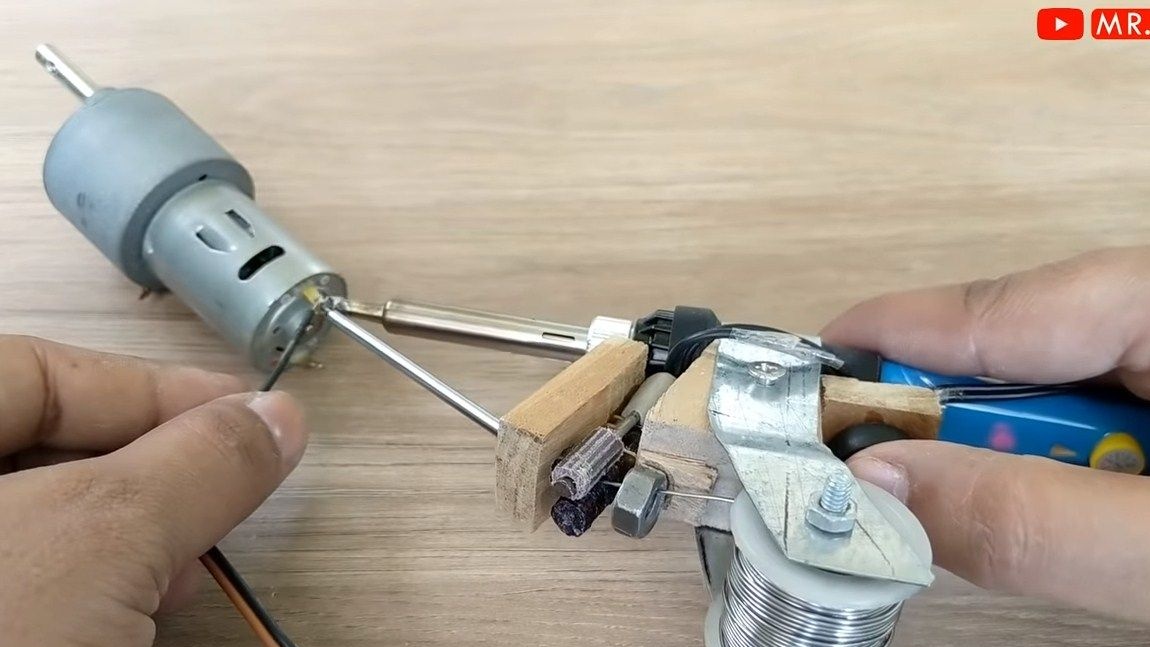
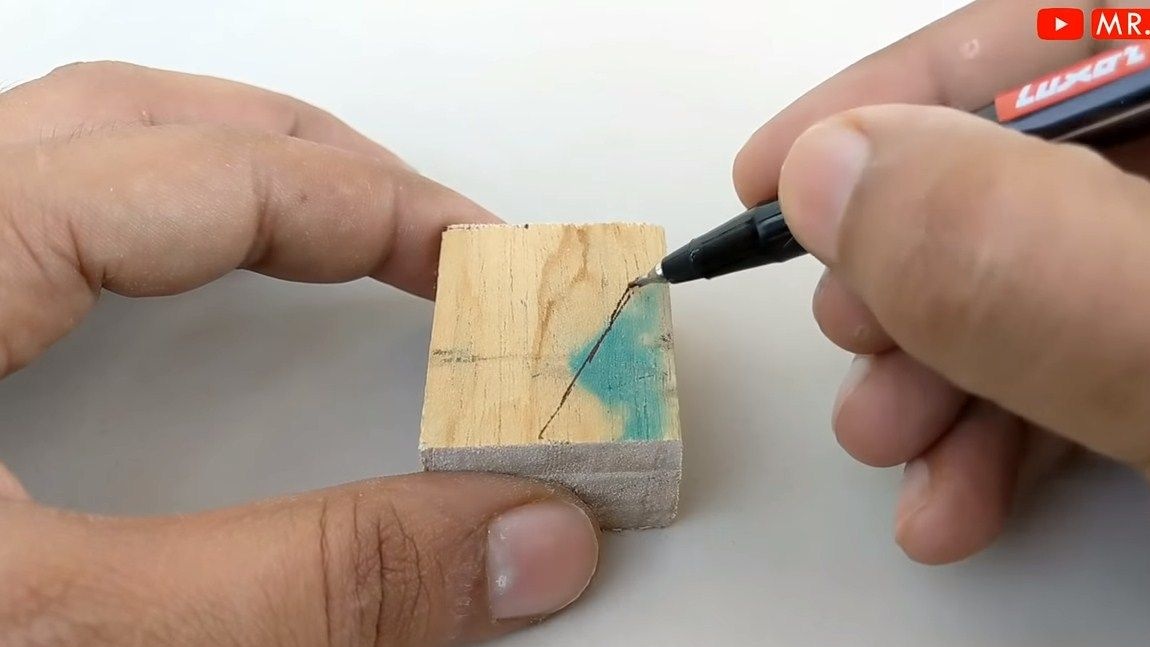
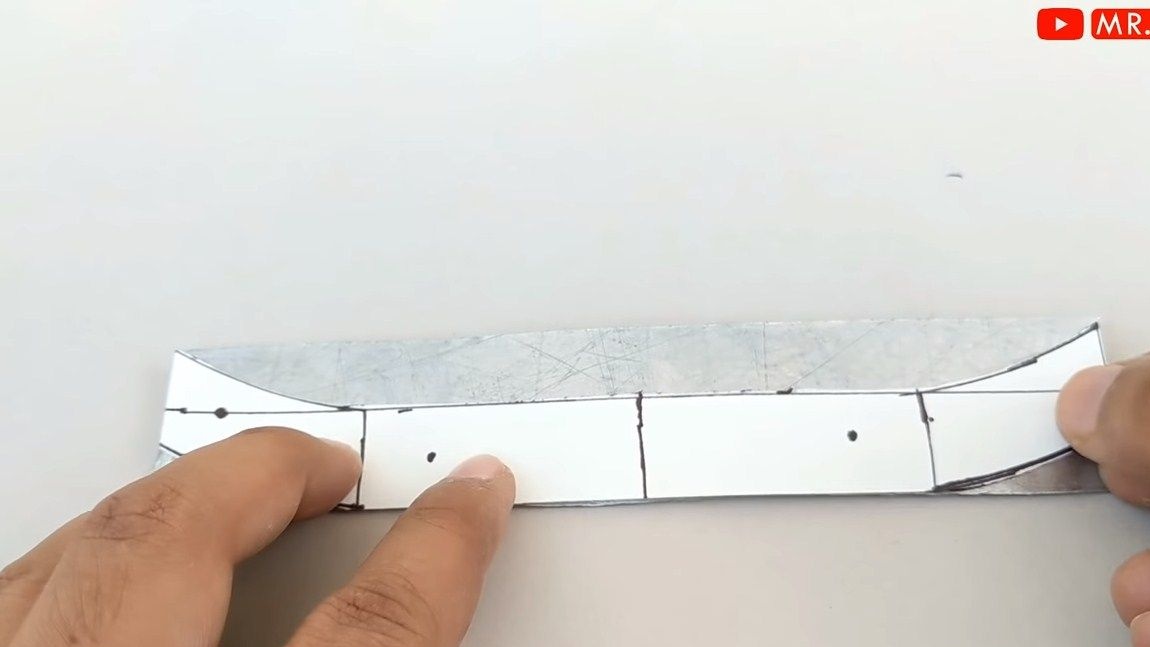
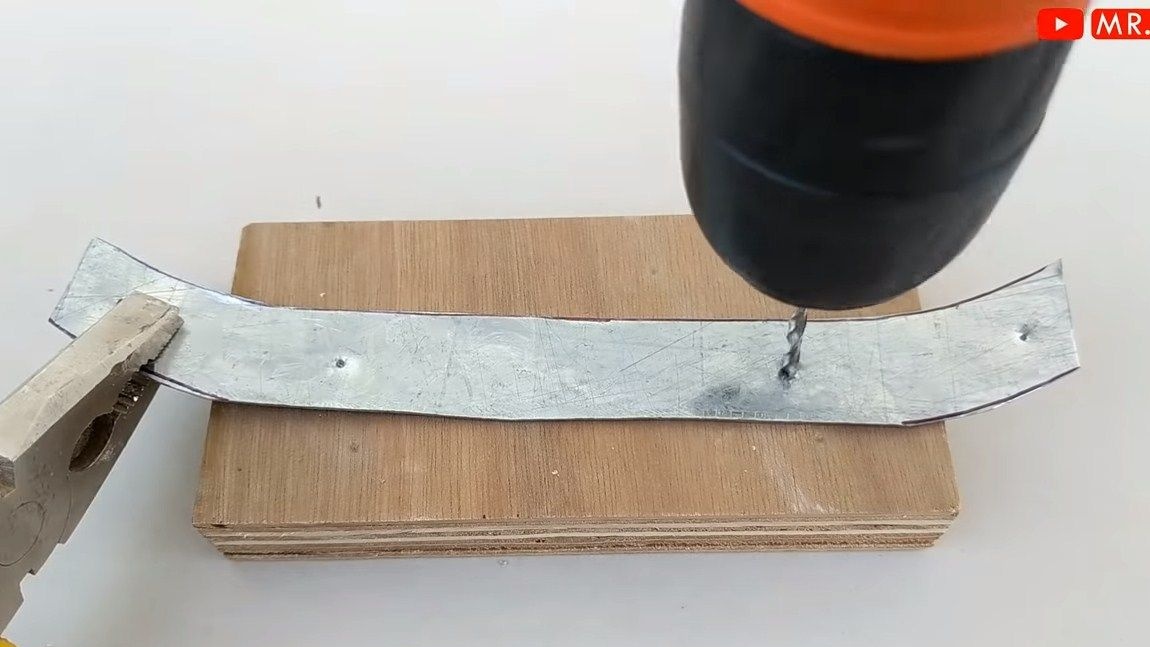
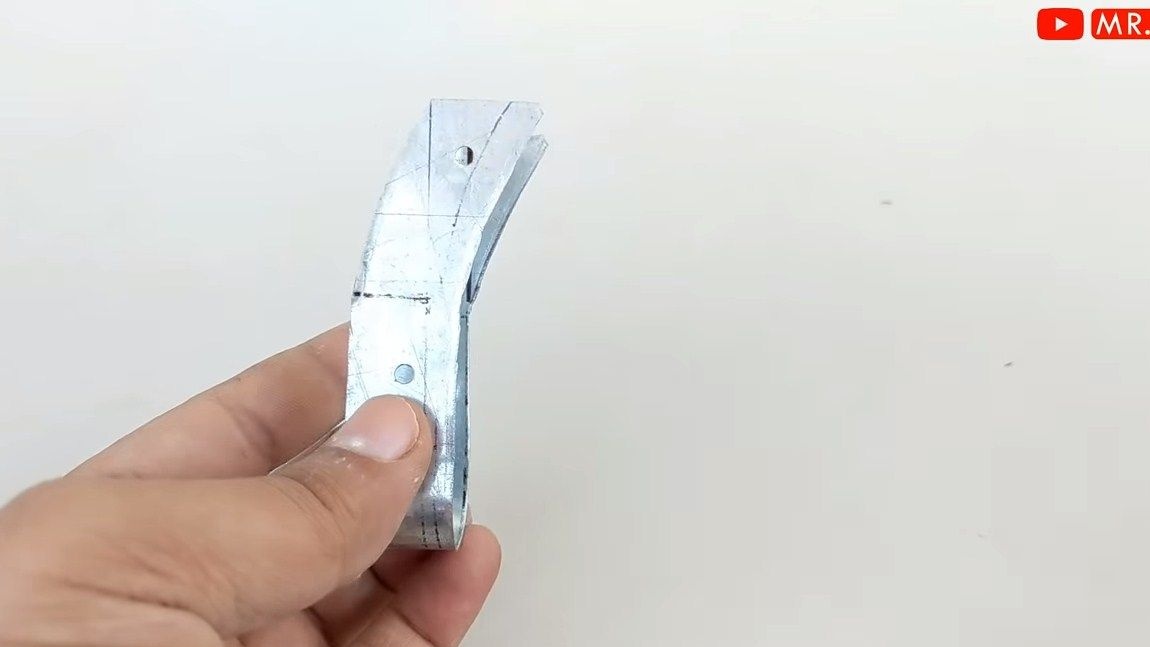
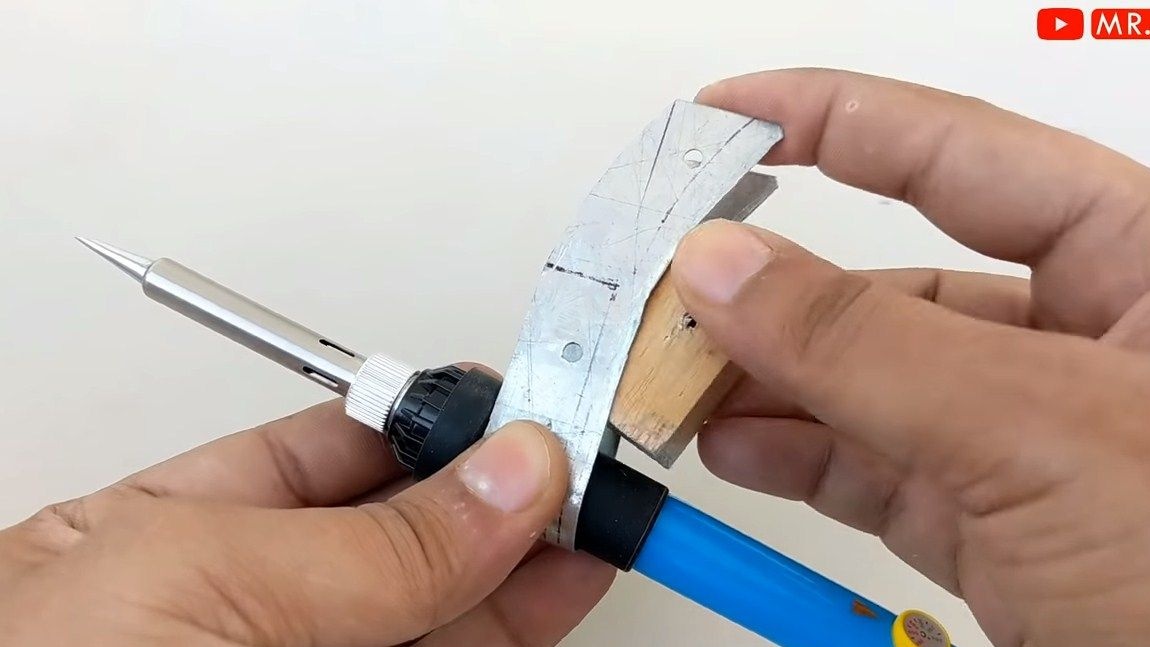
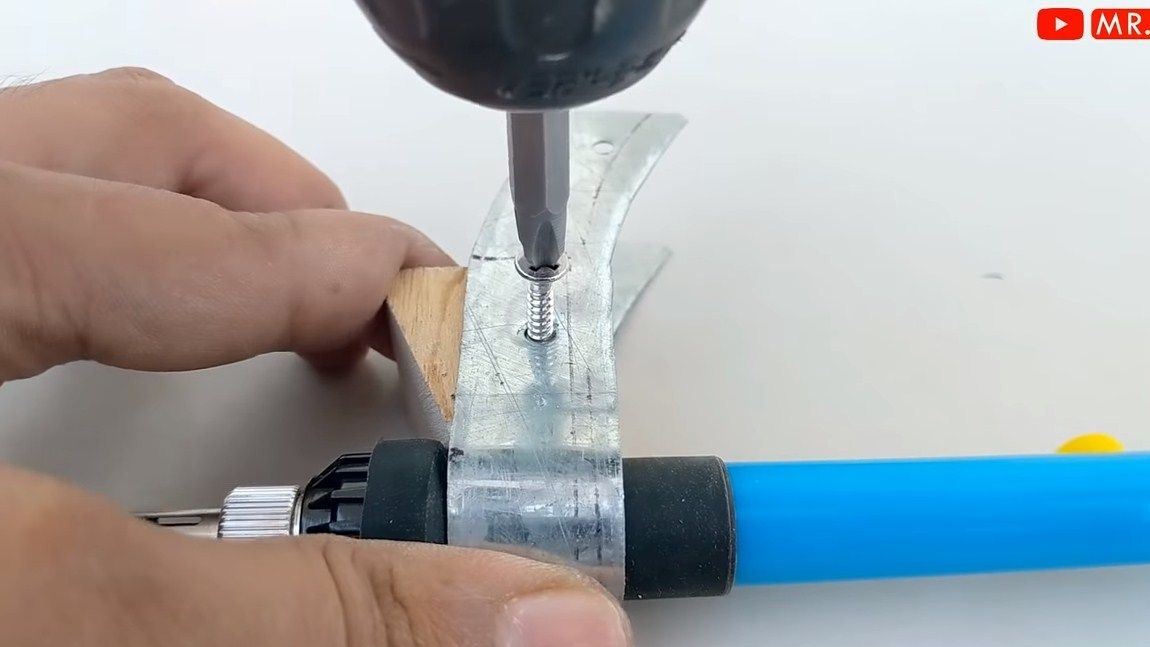
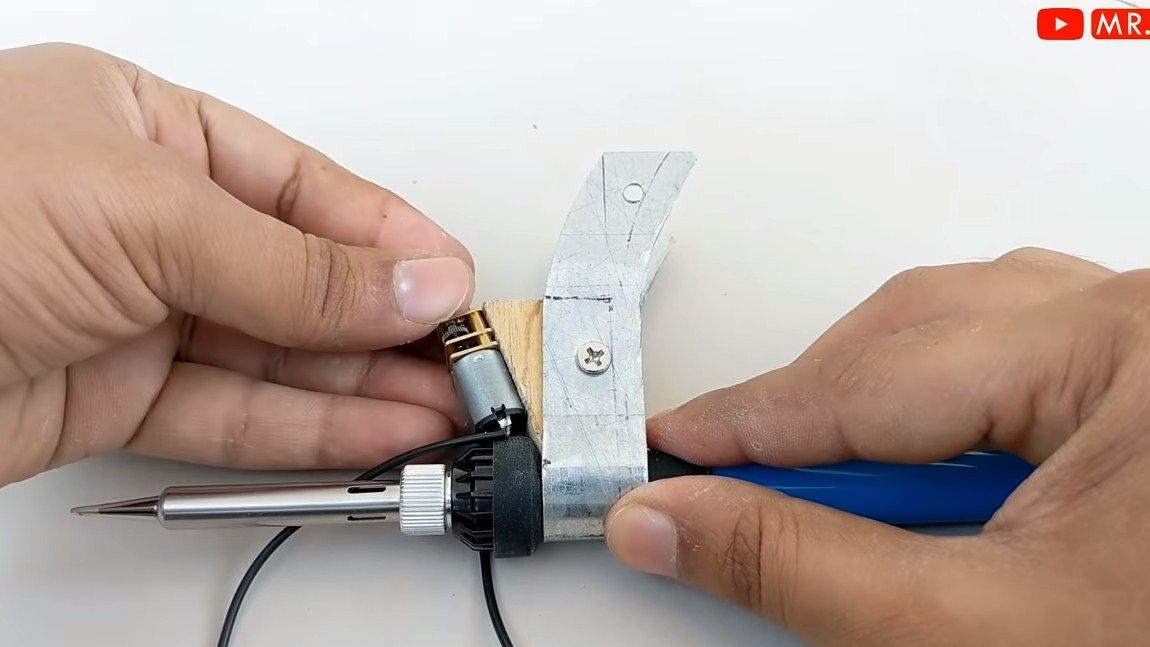
Step one. We make and install the frame
As the frame we will use a piece of board or plywood, as well as sheet metal. We cut the workpiece from metal, as the author in the photo. Next, drill holes and bend the desired shape bracket. He will have to clamp the soldering iron. And now just install the frame on the soldering iron, screw the screw. Half the battle is done, move on.


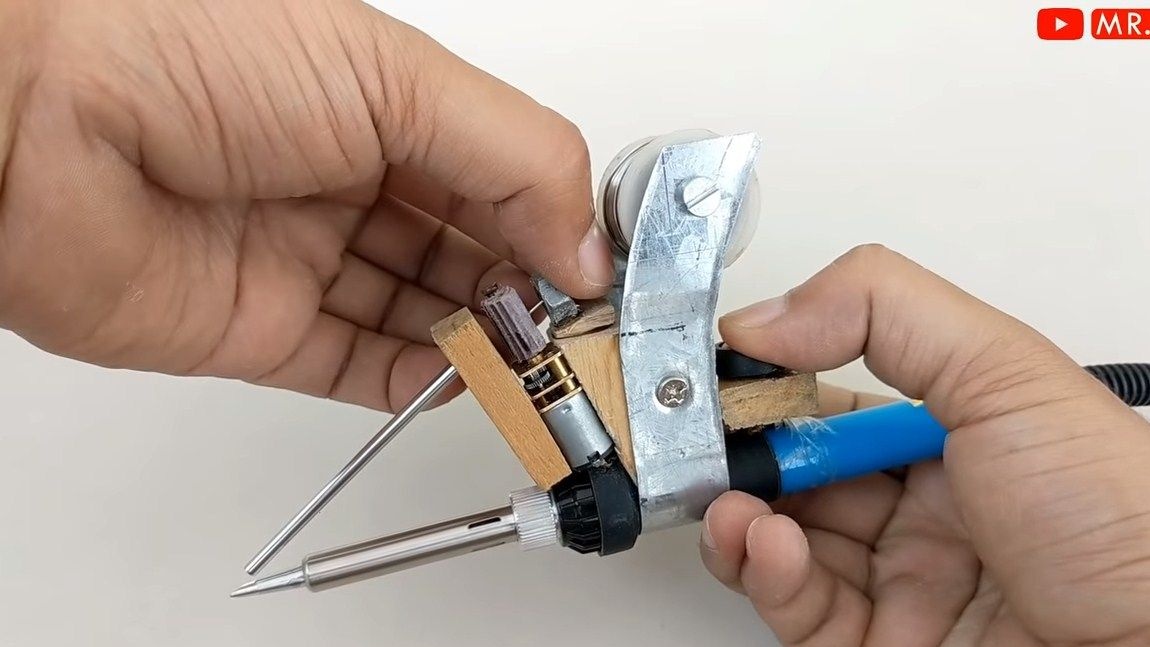
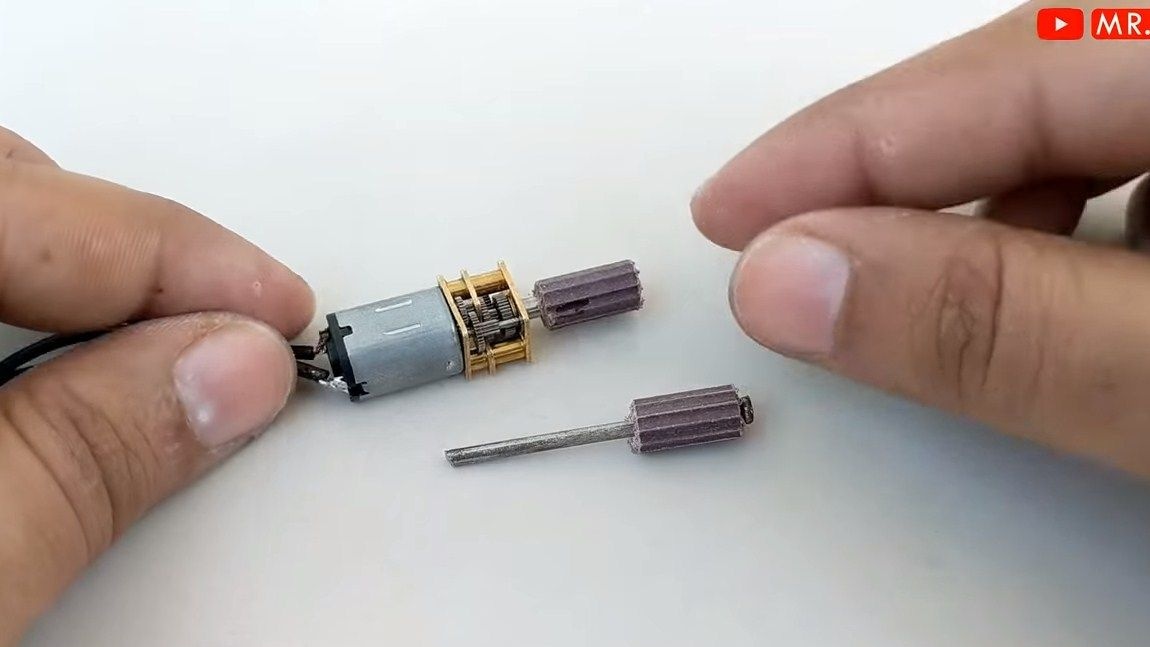
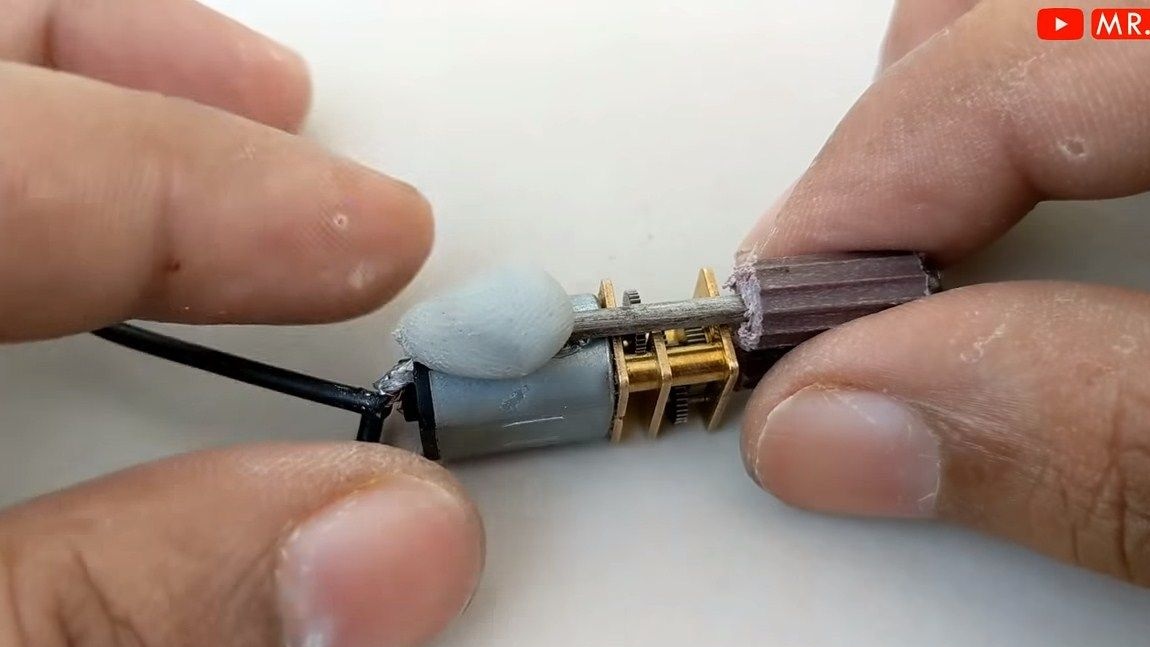
Step Two Install the engine
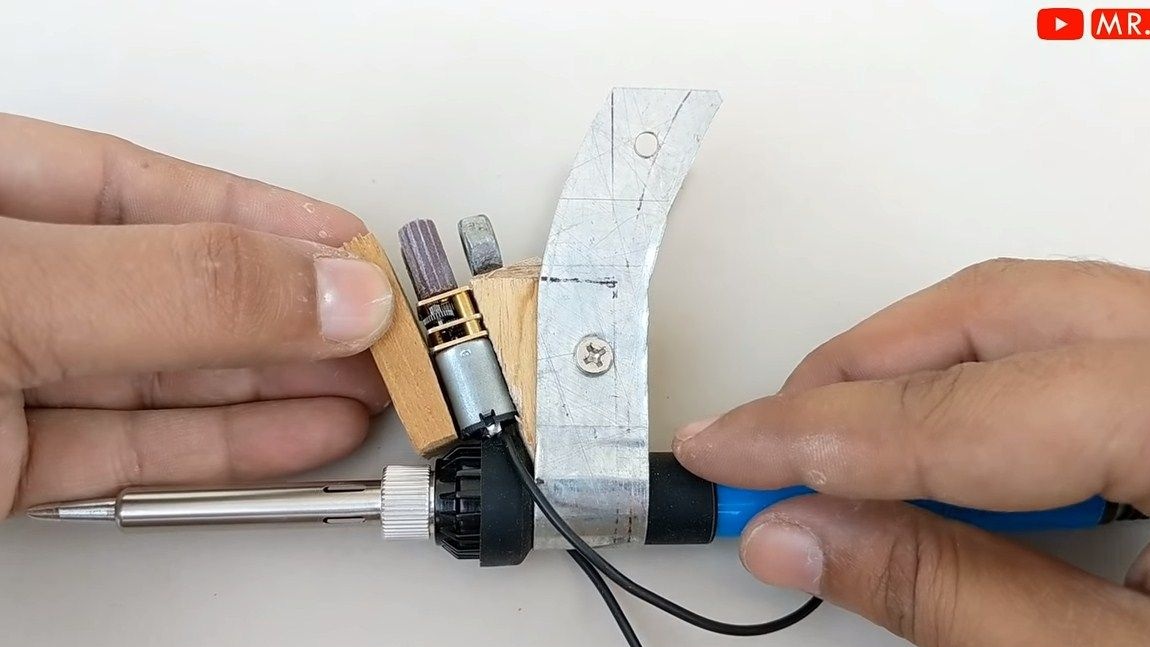
The engine is mounted on the wooden part of the frame; it is glued to good glue. On the engine, you need to assemble the wire feed unit. It consists of a nail that adheres to the engine, as well as two rubber tubes.
To the other side of the motor, we also glue the board and drill a hole in it for the wire, more precisely, for the tube along which this wire will go. Also, on the other hand, glue the nut, which will work like a loop for a wire.


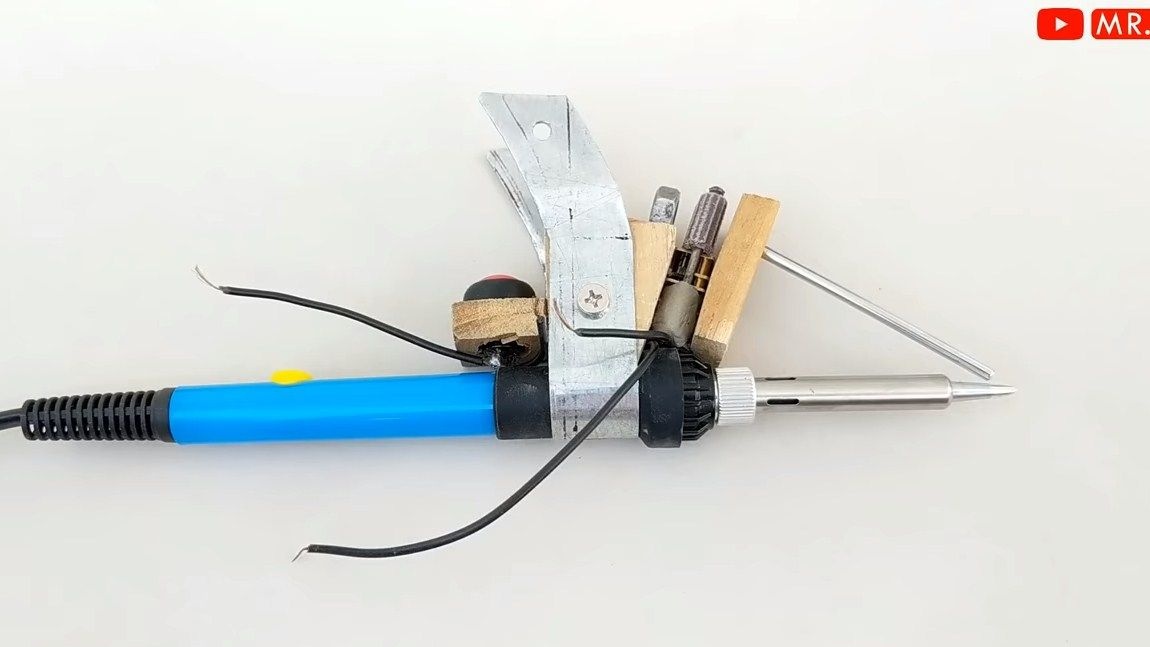
Step Three Further assembly of homemade
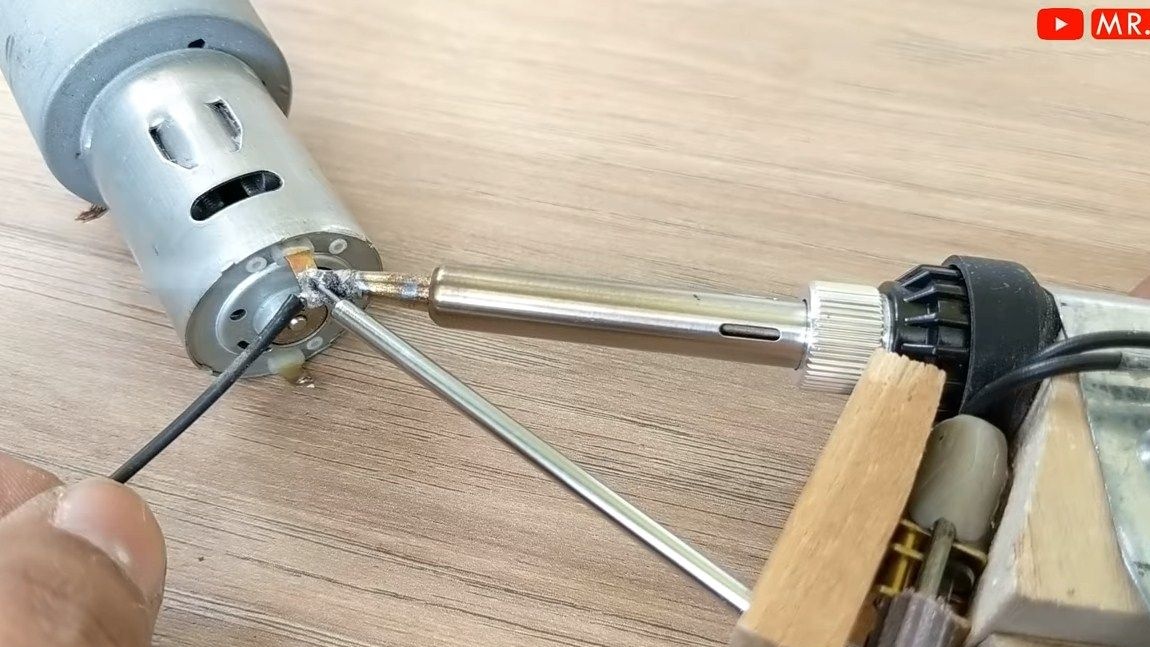
Next, install a tube along which the wire will go to the sting. This tube can be glued. And we also need to install the button, fix it with glue in a convenient place to press with your finger. Solder the necessary wires.

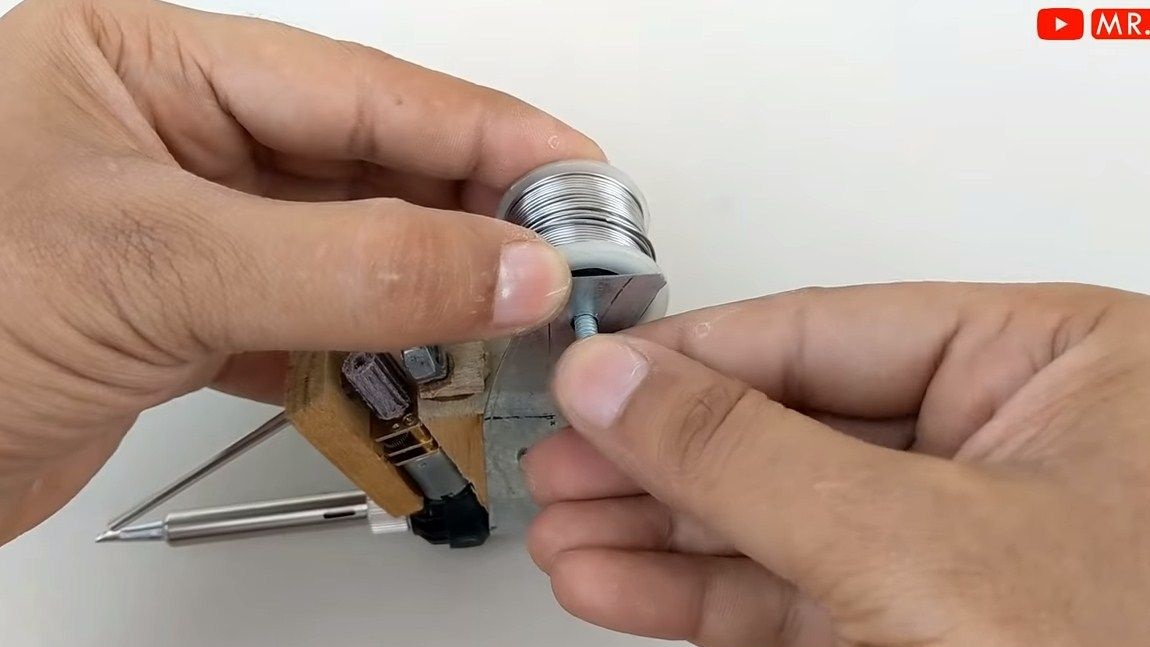
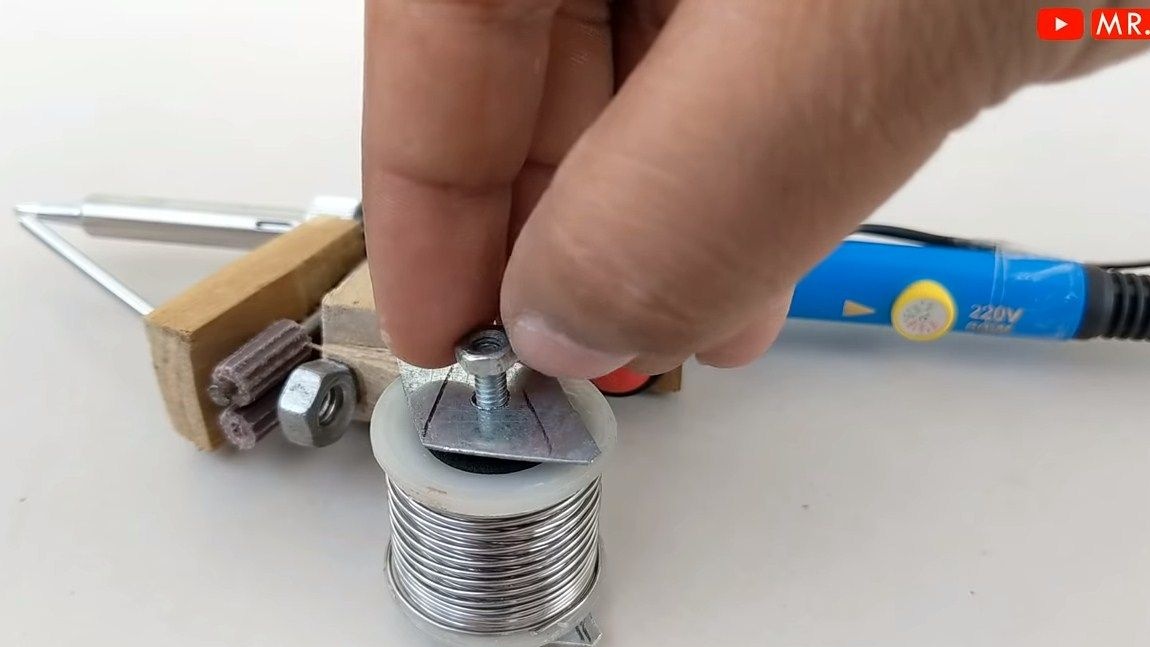
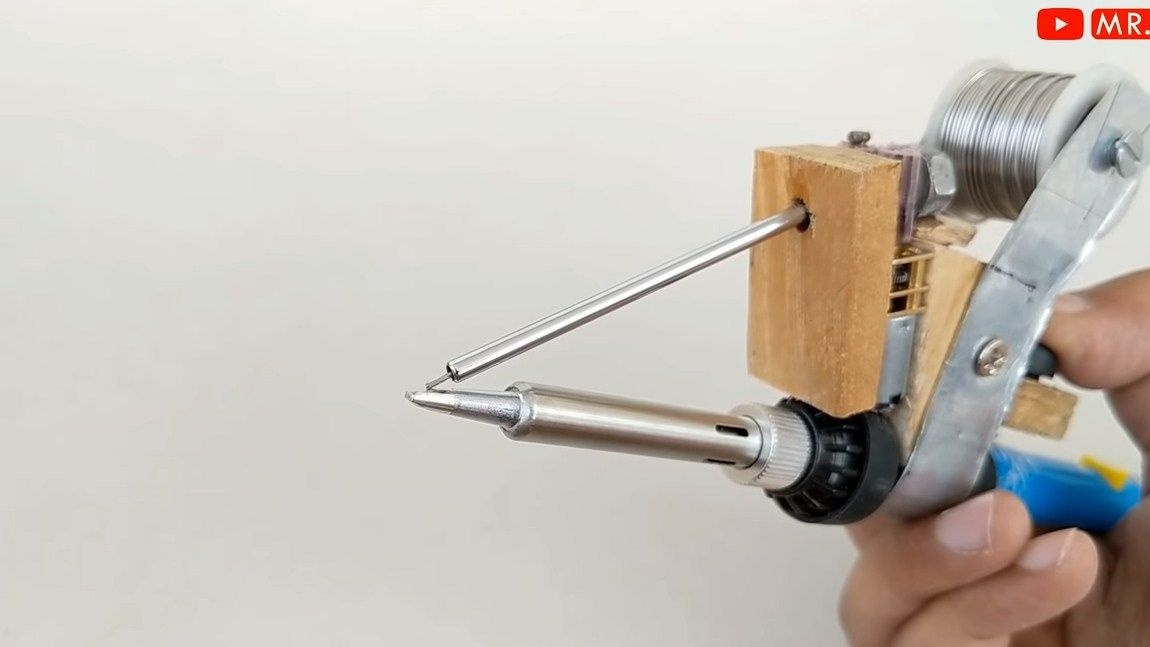
In the end, it remains for us to install a coil with solder wire. We fix it with a screw and nut. That's all, we supply power to the motor, we pass the wire and our homemade product is ready for use.

I hope you enjoyed the project and found useful information for yourself. Do not forget to share your best practices and homemade products with us!


4.5
5
3.3

Add a comment

    • smilesmilesxaxaokdontknowyahoonea
      bossscratchfoolyesyes-yesaggressivesecret
      sorrydancedance2dance3pardonhelpdrinks
      stopfriendsgoodgoodgoodwhistleswoontongue
      smokeclappingcraydeclarederisivedon-t_mentiondownload
      heatirefullaugh1mdameetingmoskingnegative
      not_ipopcornpunishreadscarescaressearch
      tauntthank_youthisto_clueumnikacuteagree
      badbeeeblack_eyeblum3blushboastboredom
      censoredpleasantrysecret2threatenvictoryyusun_bespectacled
      shokrespektlolprevedwelcomekrutoyya_za
      ya_dobryihelperne_huliganne_othodifludbanclose
6 comments
Yura Bot
Transfer the structure to the table and to the soldering iron, supply the extension with a Teflon tube as on a 3D printer. And do not listen to the idiots who solder 2 wires and are glad we do not need anything. Do not go through the forest.
Quote: Igor Ovcharov
The idea is good!
What good How can this really improve the soldering process?
Quote: Igor Ovcharov
As rightly many have noticed, it needs to be improved:
Who noticed this? Here, as I understand it, no one thinks so: it is pointless to improve the unnecessary.
You, as the defender of this craft, can explain where it is possible to use it with benefit?
The author himself proved the stupidity of the craft with his video: if he can solder, then using his pribluda he could not do a single normal soldering, and if he can not solder, then why undertake to improve a process that he does not understand?
Plus, the reteller also messed up: he came up with some kind of "solder wire."
The idea is good! BUT ... As many have rightly pointed out, it needs refinement:
1. Lightweight construction
2. Optimization of the placement of the feed mechanism. Use as a mover of lighter materials, for example, a vibrator engine from a cell phone with the necessary reduction in speed. Or use a screw feed wire. Where to use the M3 thread mounted on the vibrator motor shaft (solder, glue, coupler) as a screw, and a suitable tube inside which the screw with the feed wire will be placed as a shell.
3. It is possible to remove the skein, and use pieces of wire (like a glue gun), with the aim of general simplification of the design, or maybe copy its design.
Something like that! :-))
Quote: Brawler
In my opinion, a rather stupid craft.
You said it very softly. It is likely that the author would not be offended for wasted time.
Quote: Brawler
Few people have an assembly line at home
They do not solder on the assembly line.)) But in essence you are right again: in mass and large-scale production high-performance technologies are applied that have nothing to do with the presented product.
I completely agree with you! I always tried to choose easier soldering irons! Even the supply wire is always replaced with a softer (MGTF). Yes, and hold in your hand (see photo number 1) is not convenient. The video clearly shows that the author cannot normally make the simplest soldering
In my opinion, it’s a rather stupid craft. Few people have an assembly line at home, and a similar shift in the center of equilibrium, I don’t think it will affect the soldering iron at all, but I’m completely silent about the micromotor and gearbox, it is lying around in every kitchen.

We advise you to read:

Hand it for the smartphone ...