
Good day to all dear friends! In today's article, I would like to tell you about a rather interesting idea, namely how to make a miniature circular saw.
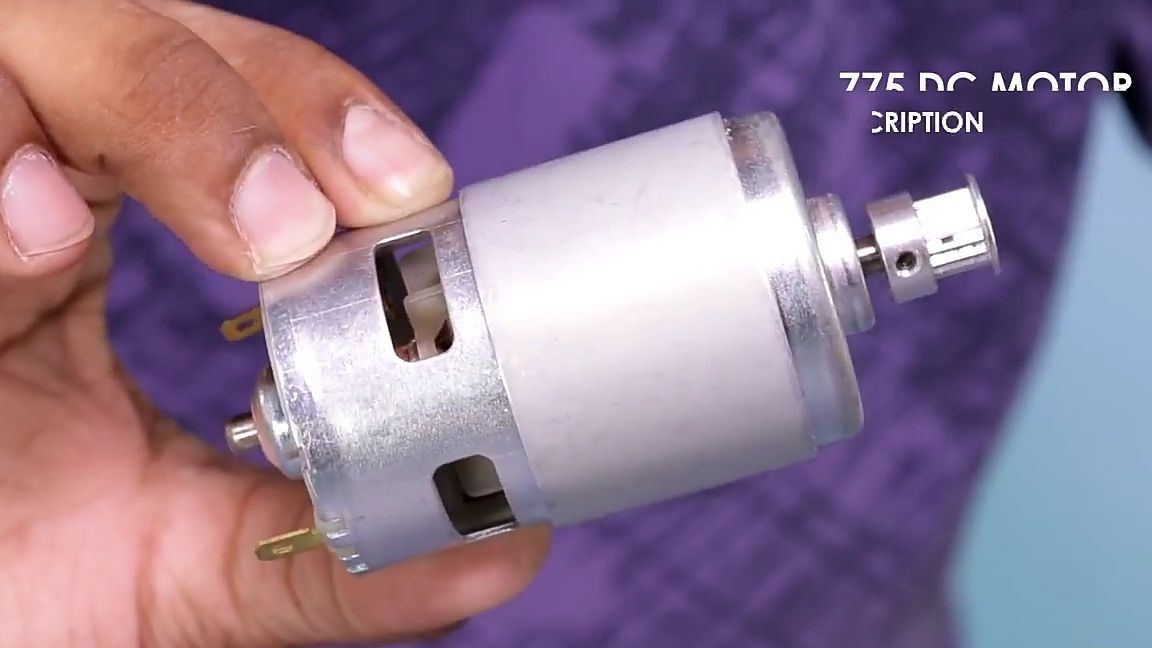
The name miniature does not mean that there will be little power. The saw will be built on the basis of a 775 class electric motor. What is installed on drills and screwdrivers. Power of this homemade will be enough to cut any wooden workpiece of a suitable scale.
This homemade product will probably come in handy when creating small wooden homemade products and will make your life a little easier. She will definitely take an important place in your workplace.
Well, enough of the long introductions, let's move on to the homemade assembly.
And so, for this homemade product you will need:
- MDF panel
- A pair of bearings of a suitable size
- Electric motor 775
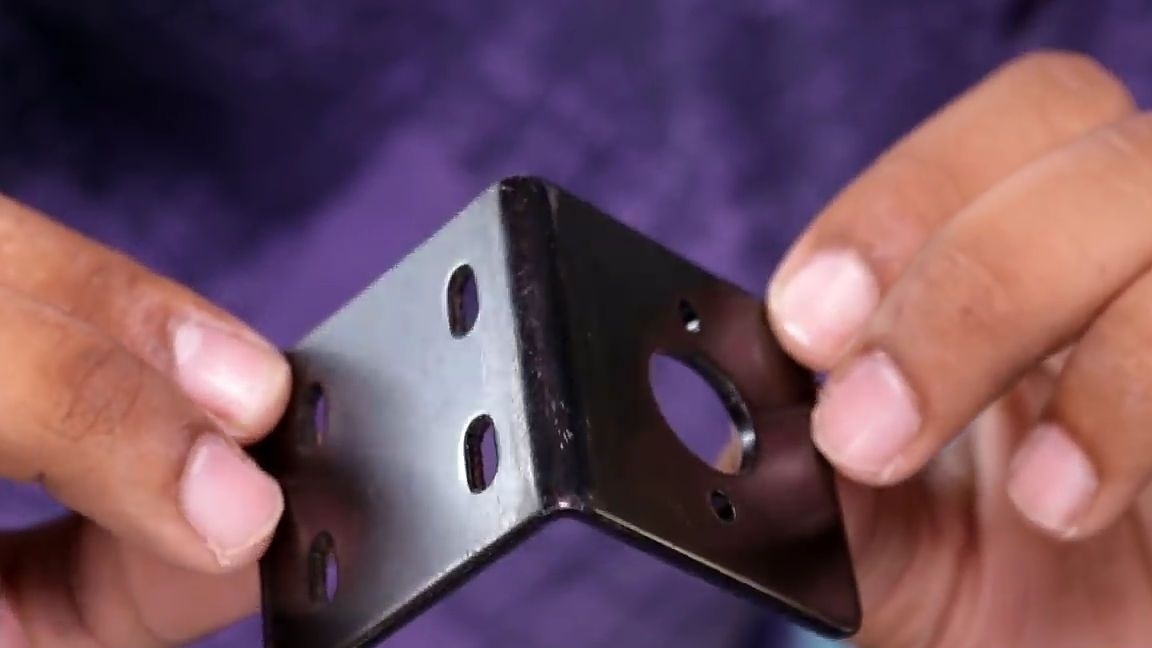
- Motor mount (mount) for 775 electric motors
- Self-tapping screws
- A shaft of suitable diameter (you can use the housing from a simple ballpoint pen)
- Axis for the main pair
- The main pair of "spur" and "pinyon" (gears for belt drive)
- Adapter for circular saw blade
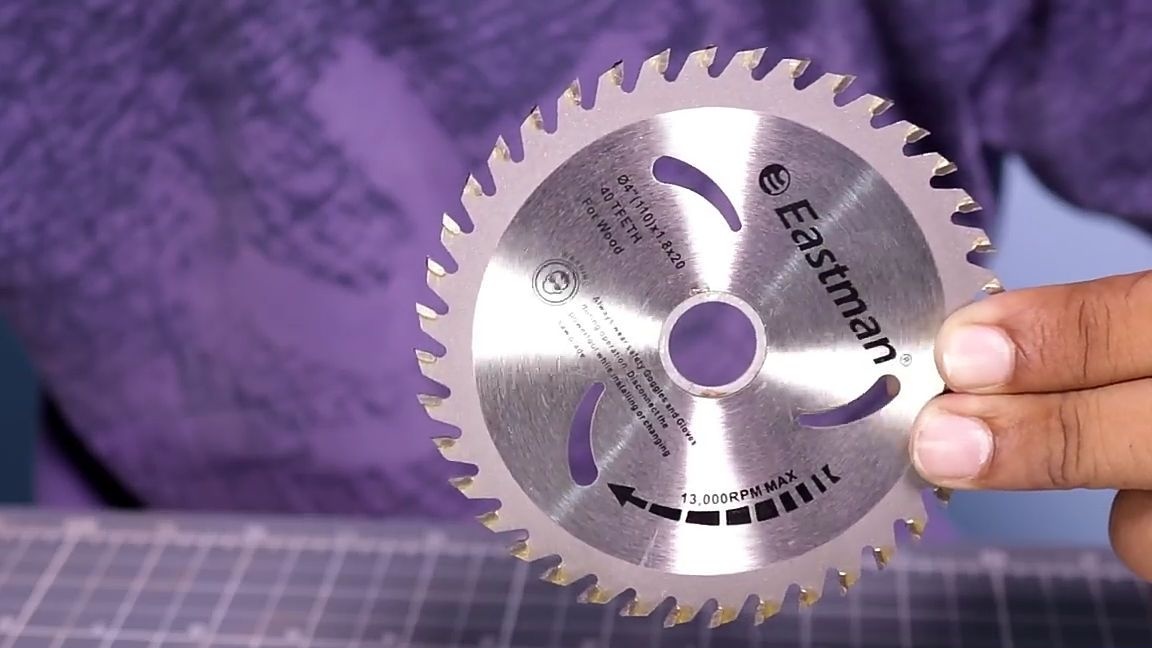
- Circular saw blade suitable size
- belt
- wires
- The switch.
From the tools you will also need:
- Hot glue
- soldering iron
- Drill and drill
- screwdrivers
- Corner
- Ruler
- Marker.
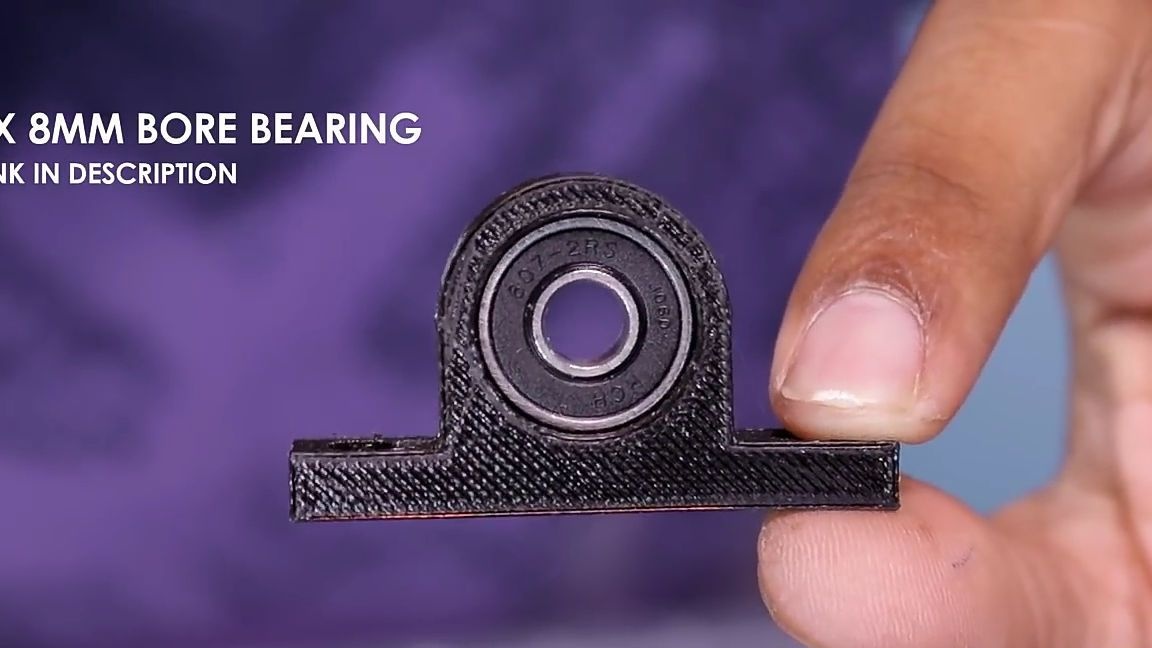
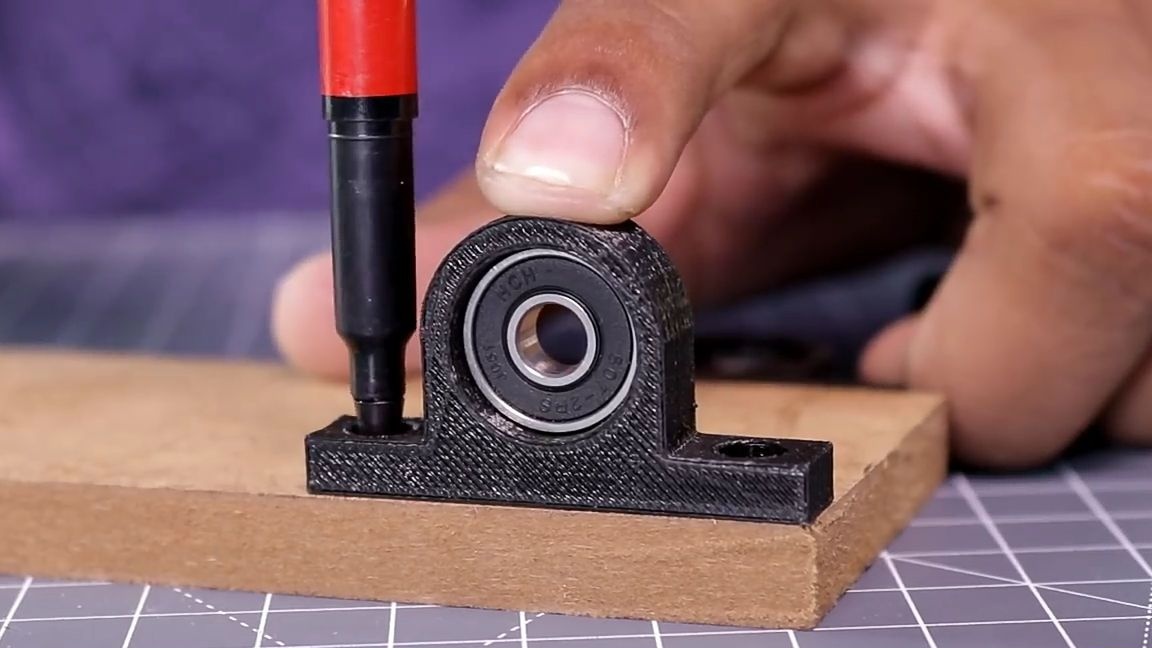
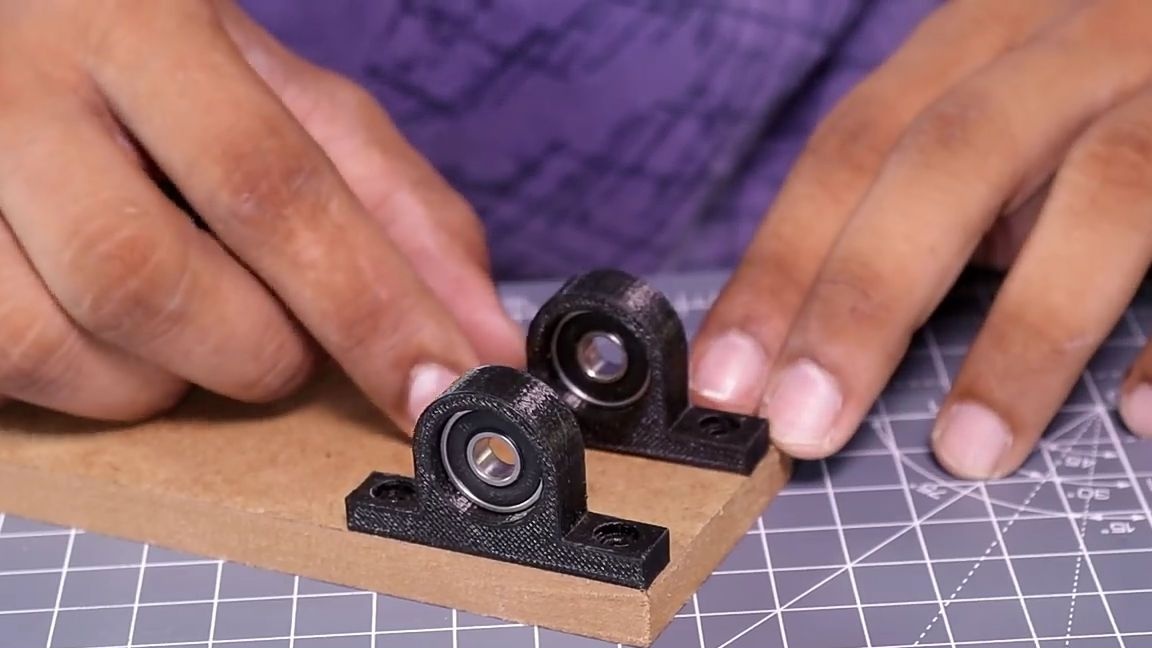
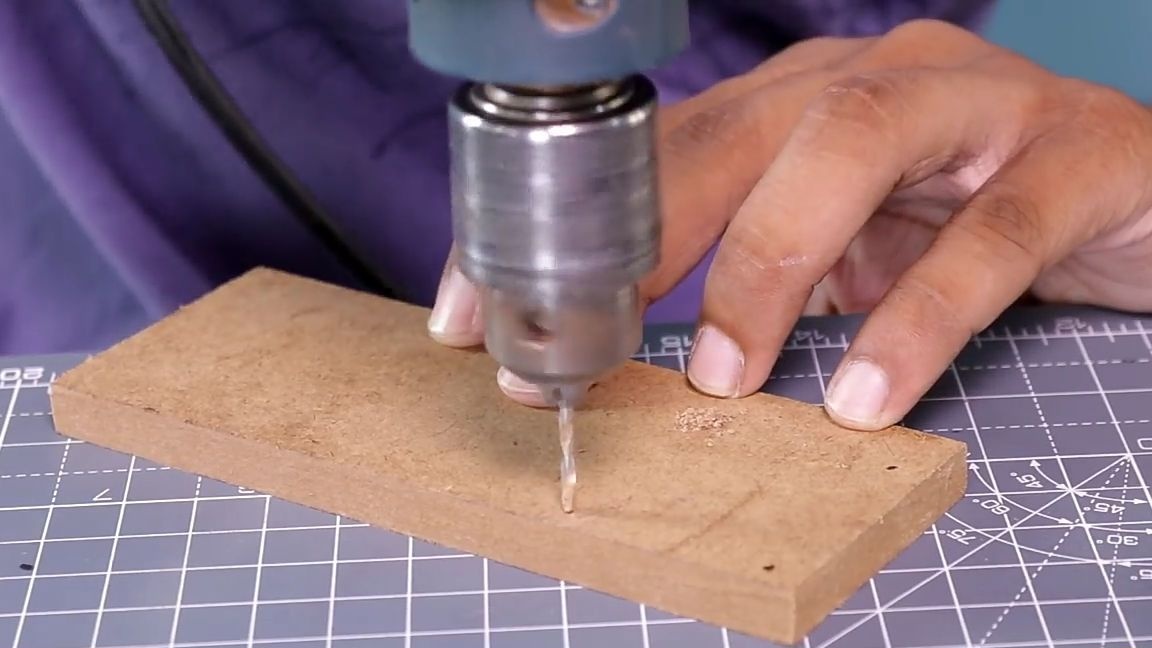
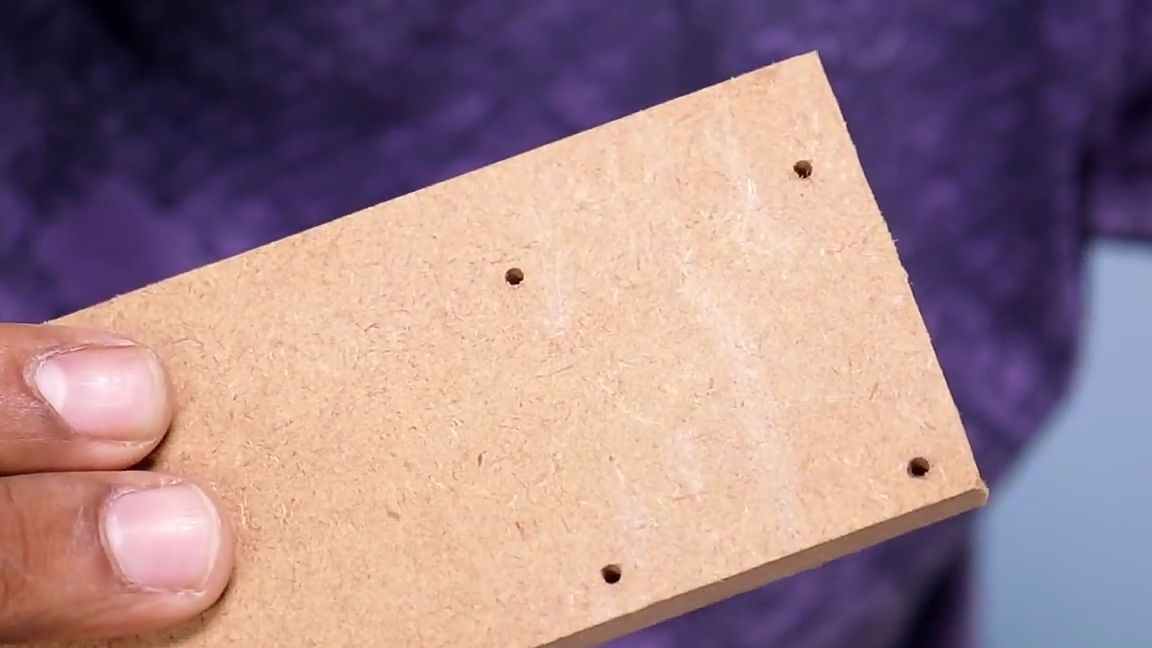
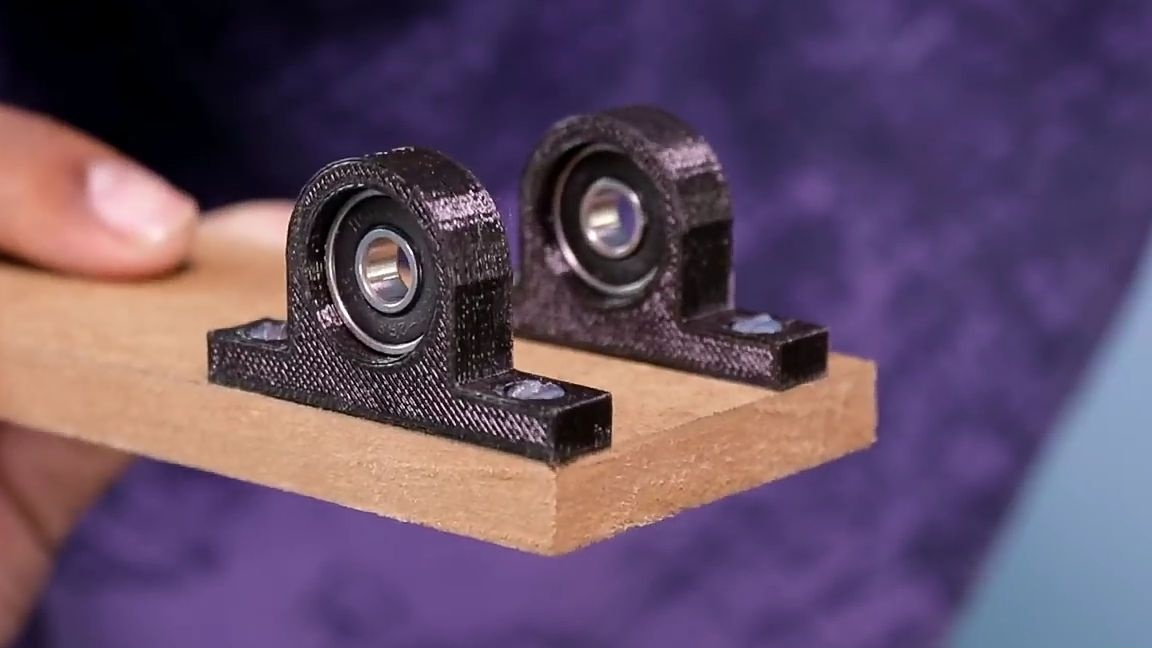
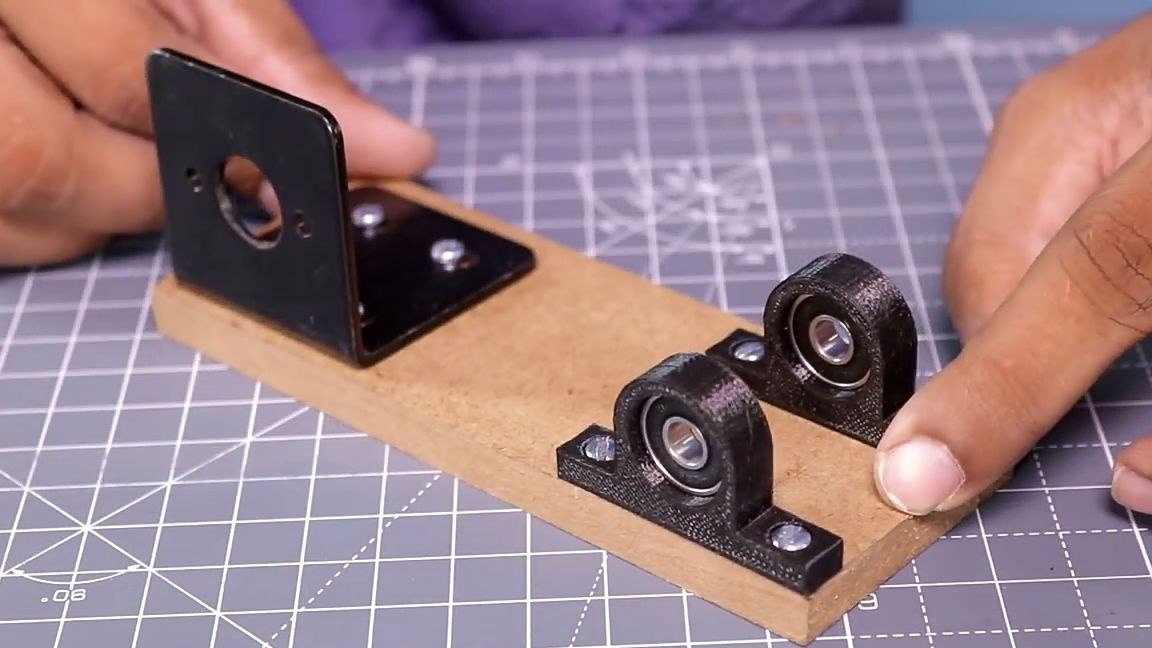
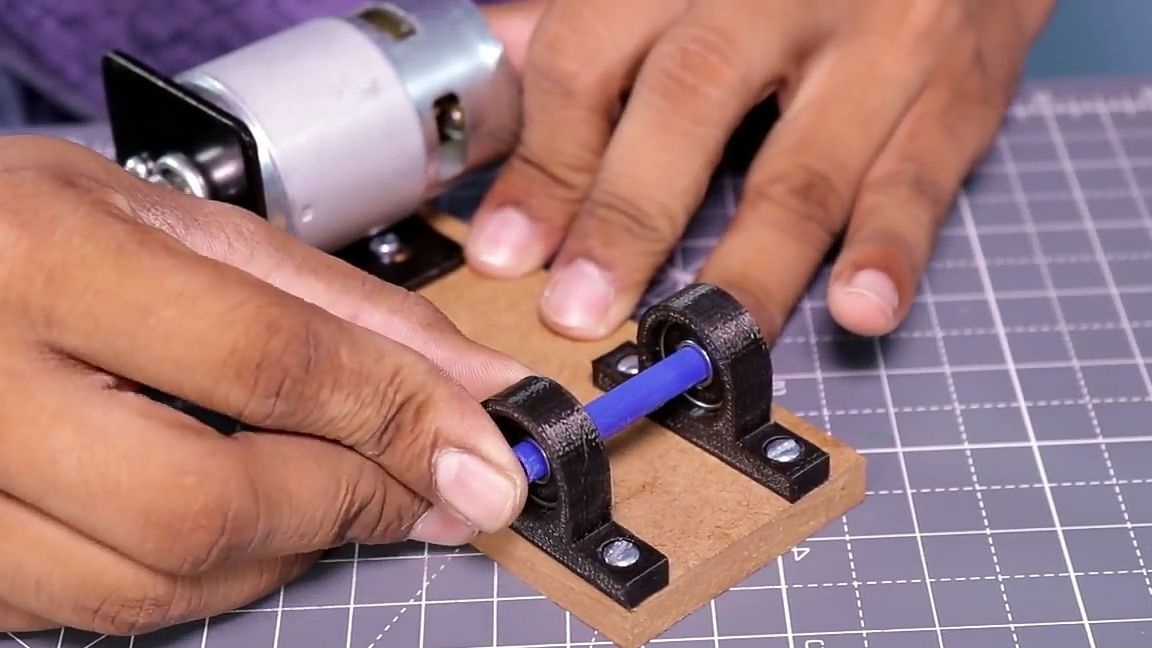
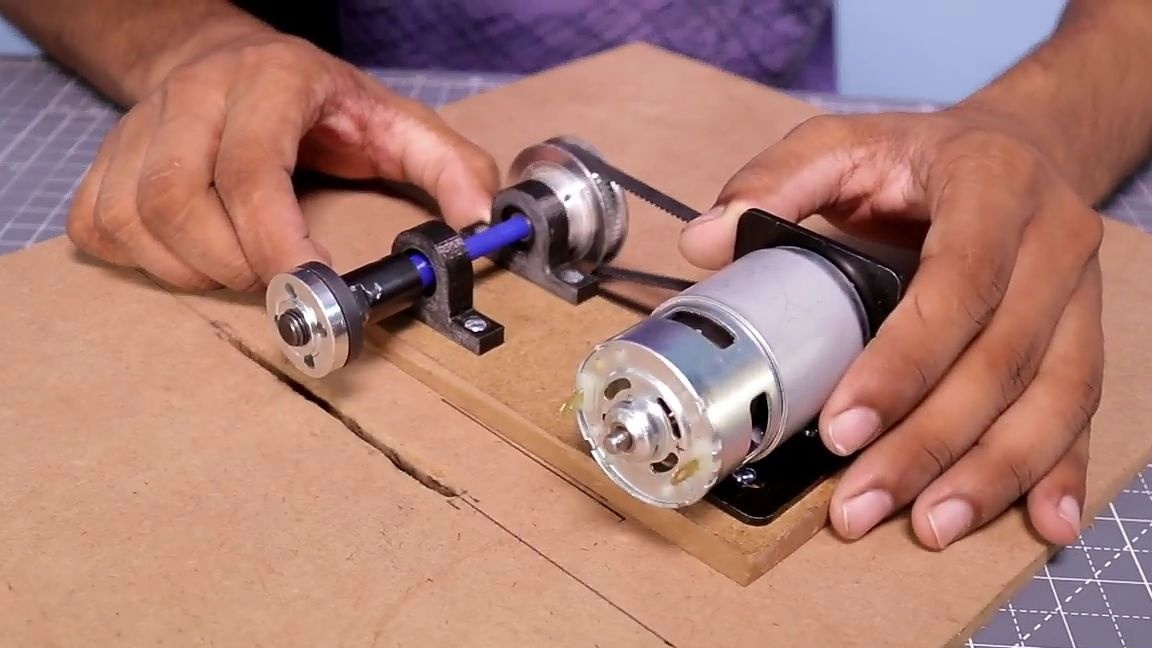
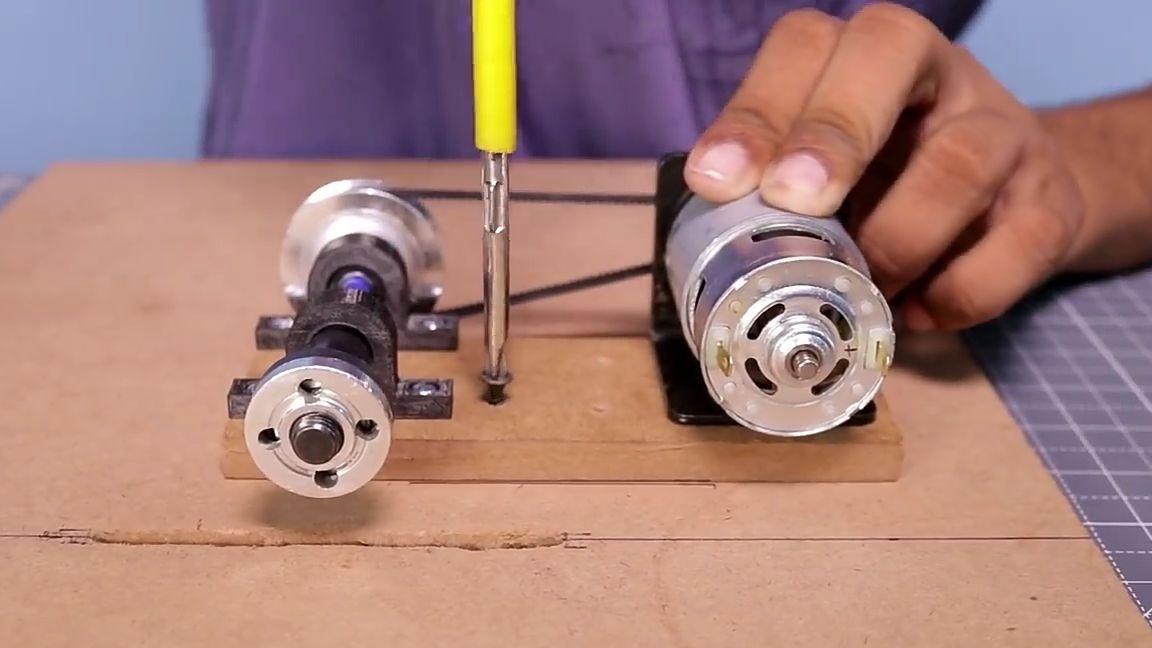
For starters, from a MDF panel, we should cut a rectangle with a side size of 16 × 6 cm, it will serve as the basis for mounting the electric motor. Then we need to take and install two identical bearings on the MDF panel. The inner diameter of the inner ring of the bearing should be 5-6 mm. For reliable mounting on the MDF bearing panel, the author printed on a 3D mounting printer. To fix the mounts, install them in their place (see photo), leave marks with a marker and drill through holes with a thin drill. After the holes have been drilled, we fix the bearings together with the fasteners on the screws to the base.

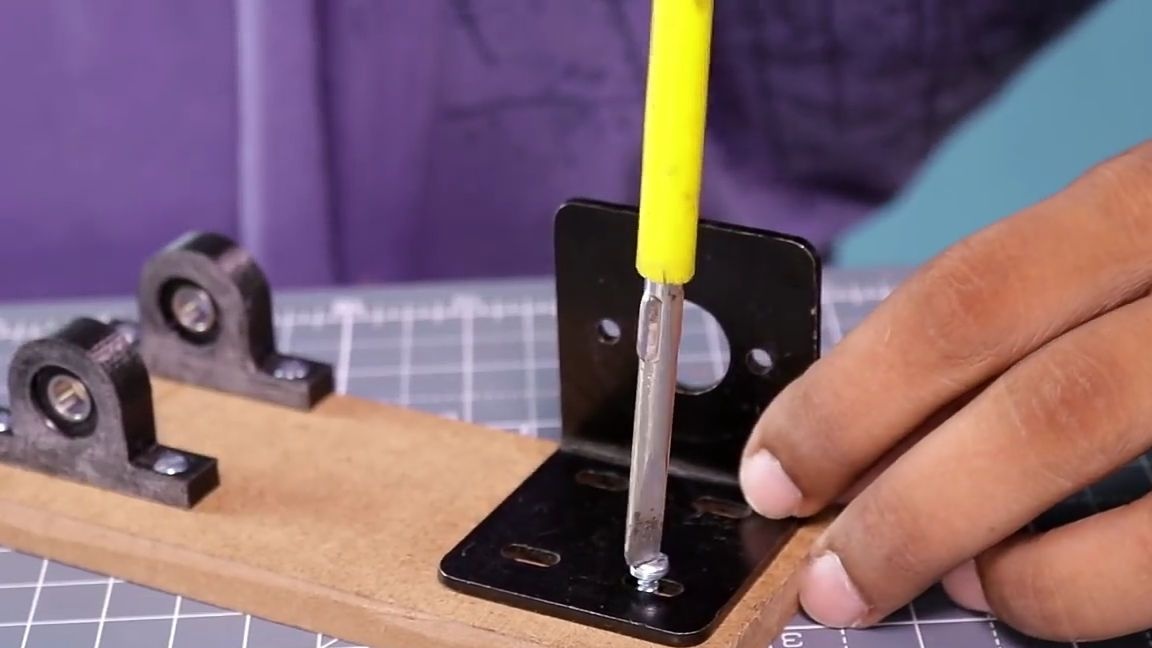
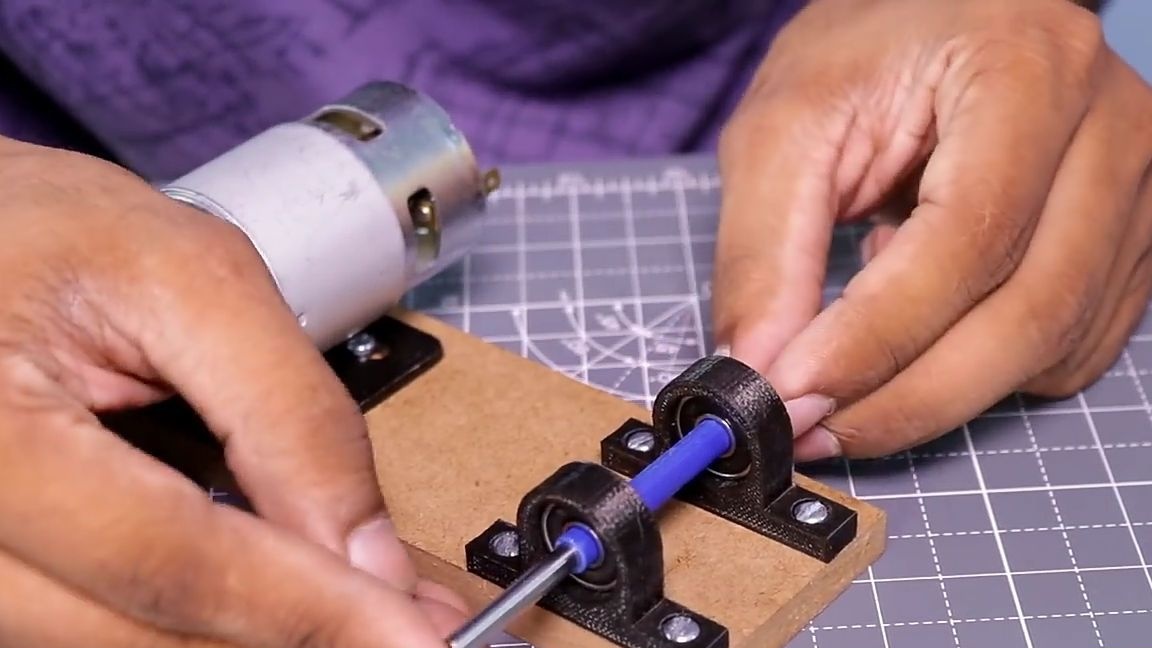
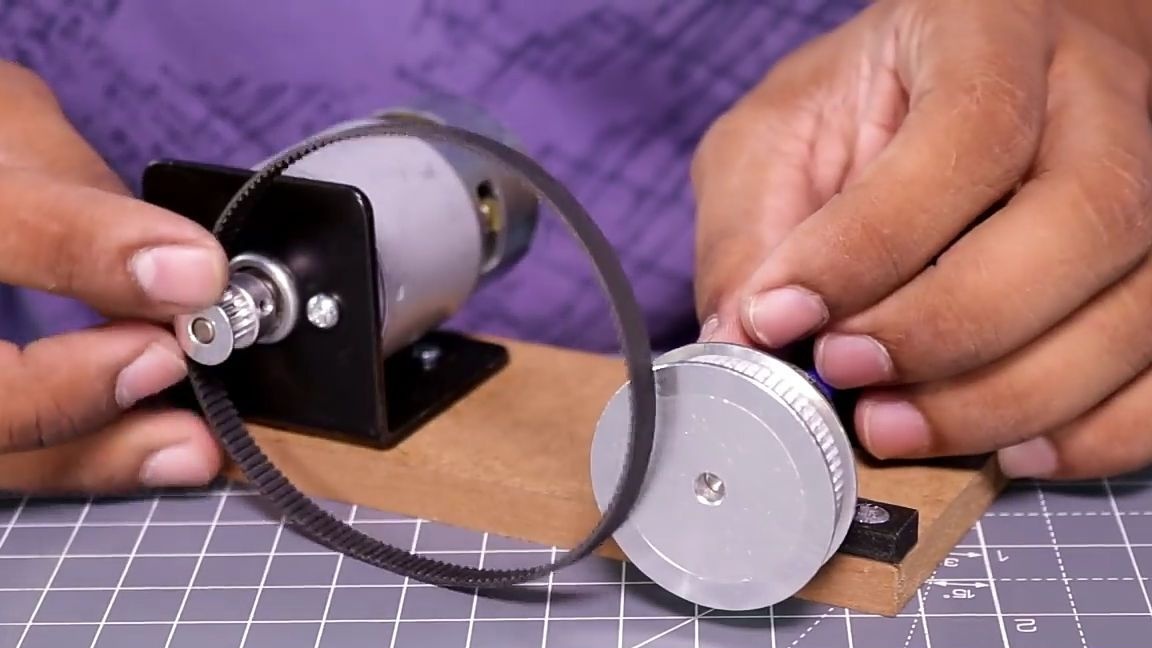
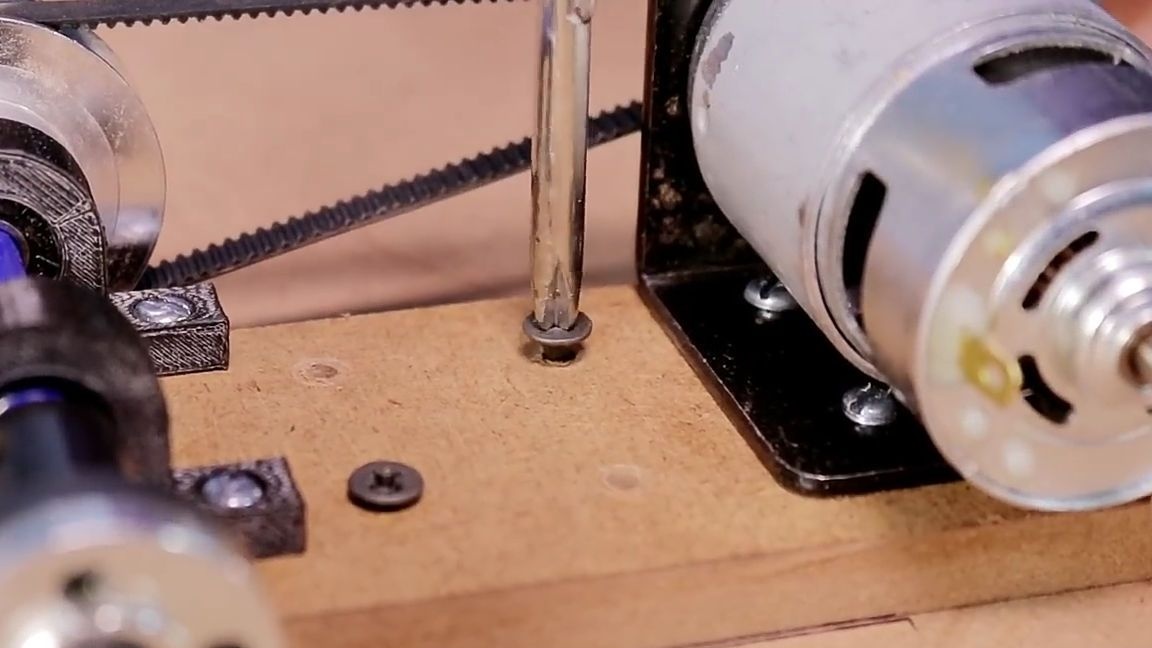
The next step we will need an electric motor, which should be fixed to the base. I advise you to choose the most important element of homemade products carefully. It is advisable to use an expensive 775 class motor with a small number of turns and the motor shaft should be on bearings, not on bushings. I advise you to purchase this electric motor in a store of radio-controlled models.In the same place, get an engine mount (the so-called attachment of the engine to the model frame) for mounting the electric motor. As you already understood, we will fasten the engine to the base with the help of an engine mount, first we fasten the engine mount to the base, and then the electric motor itself to the engine mount.
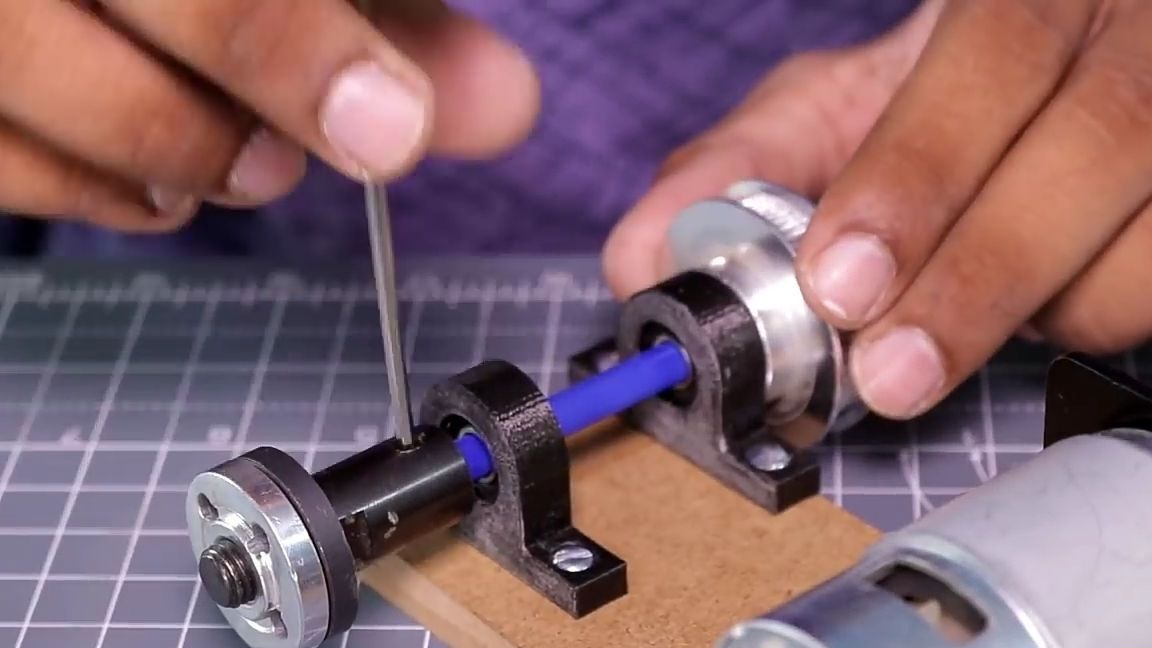
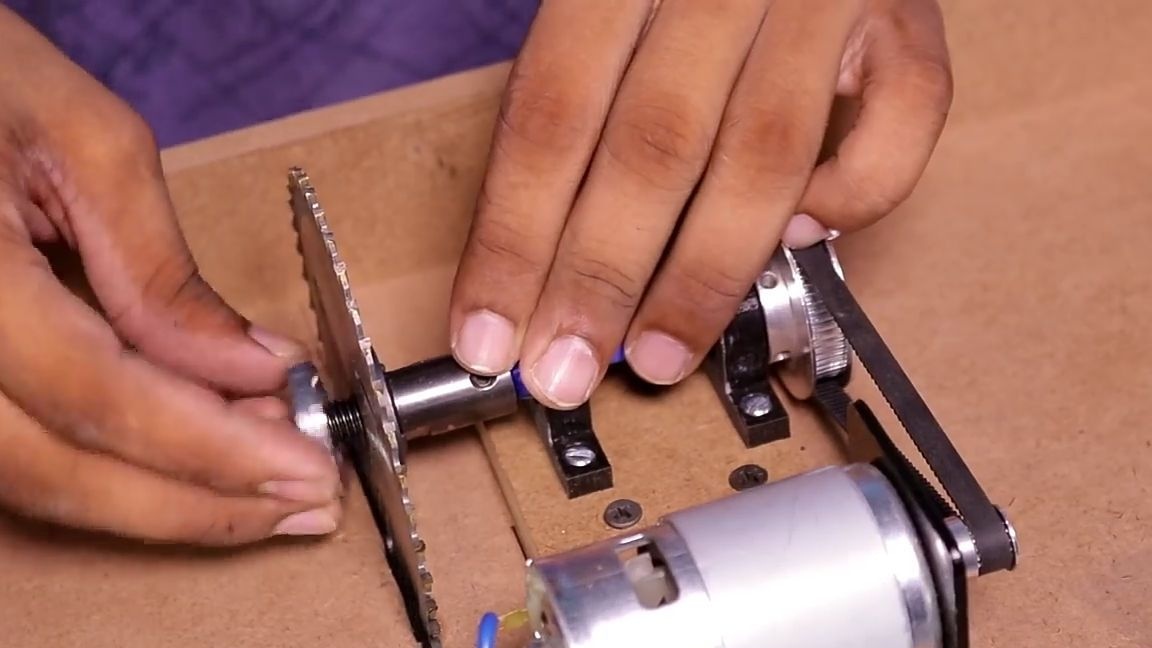
Then we need a plastic tube, it will serve as a seal between the main axis and the installed bearings. For a better result, the author decided to print the tube of the desired width on a 3D printer. But you can use anything as a sealant, such as paper. We install our sealing tube in its place, and inside we install the axis itself (this axis can also be purchased in the store of radio-controlled models), the axis should fit tightly.
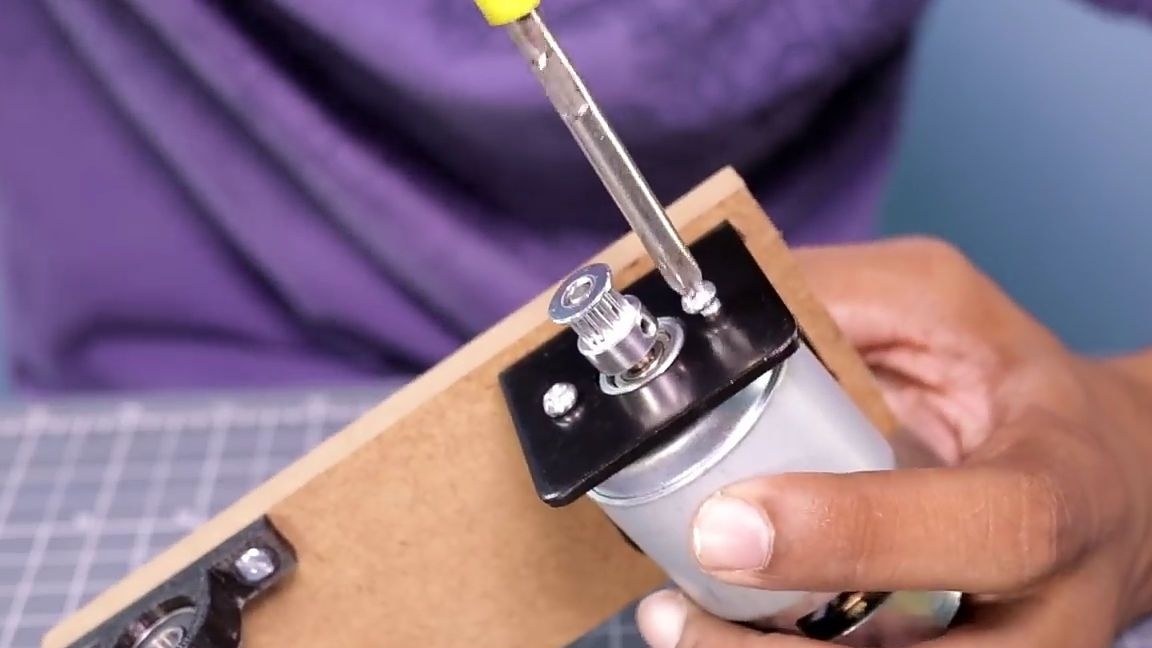
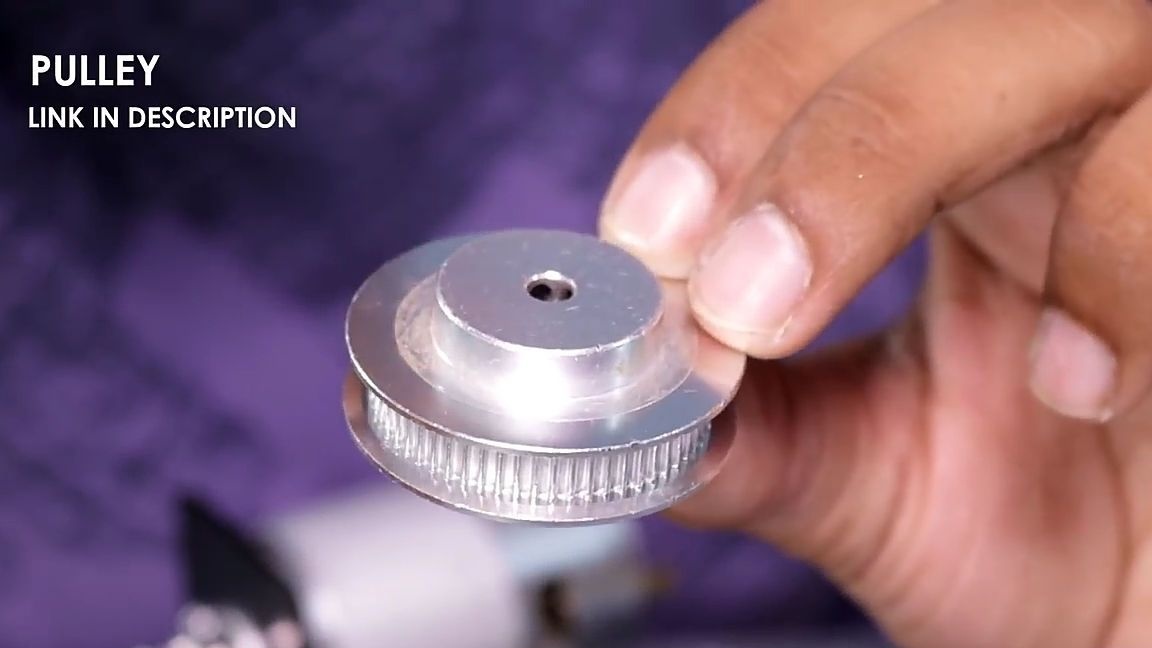
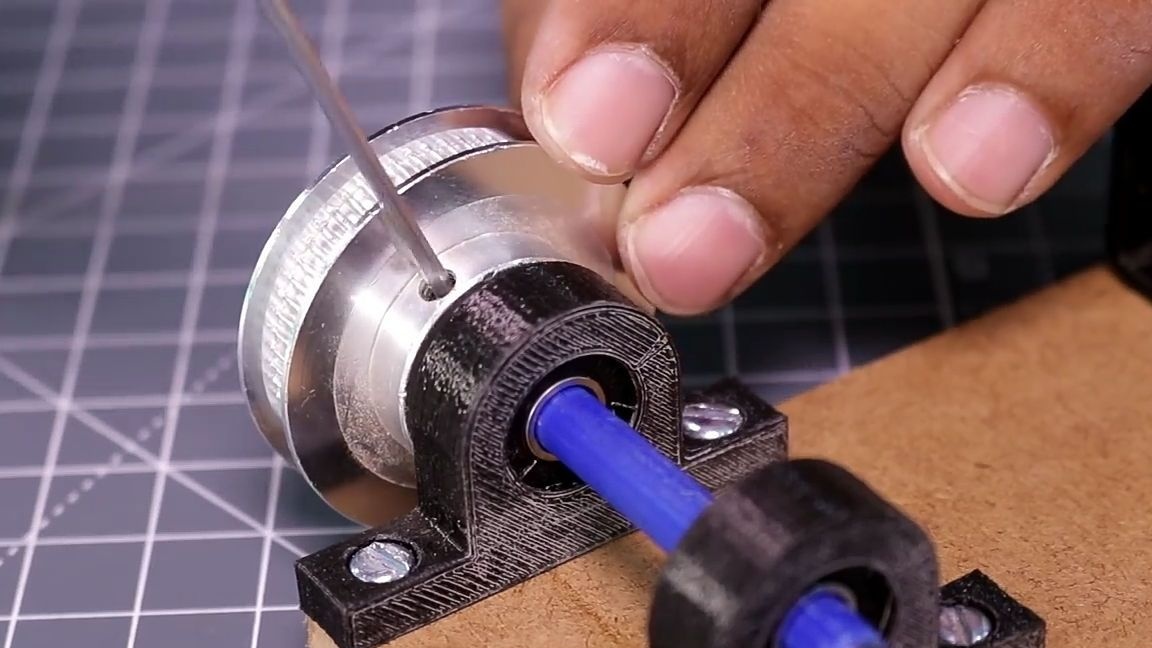
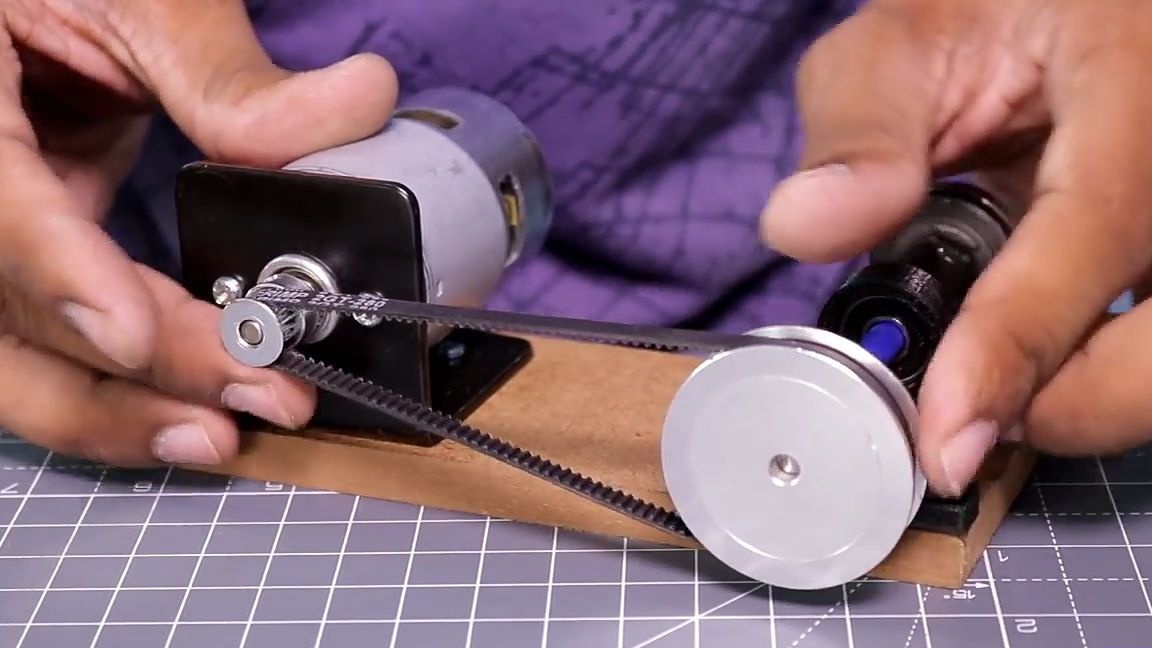
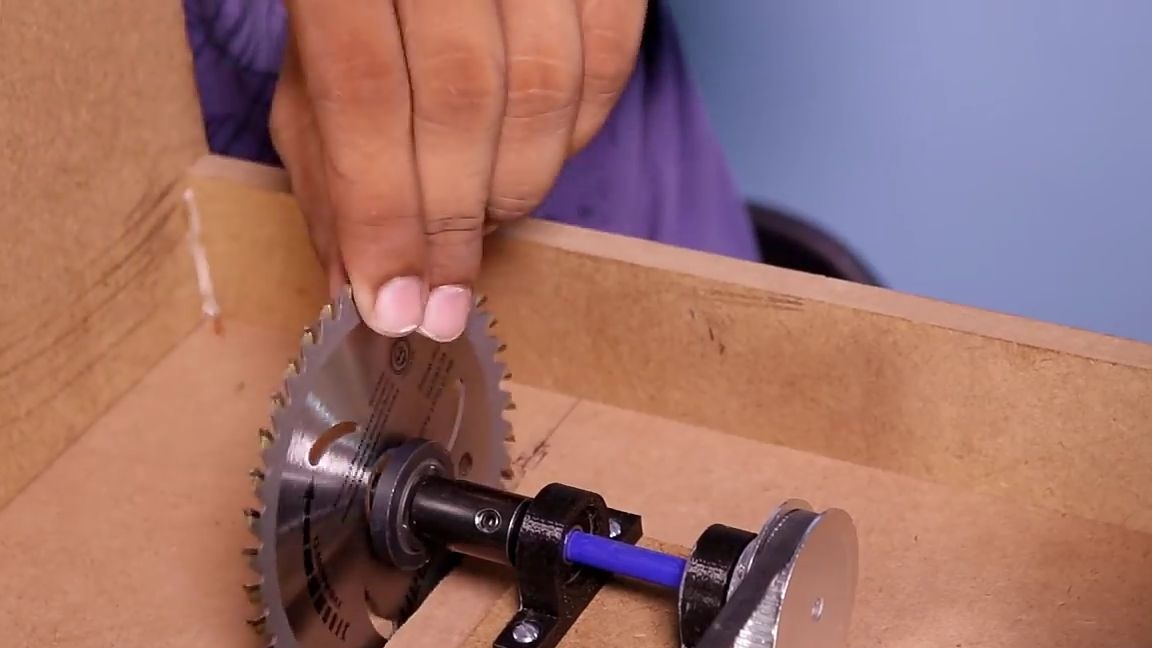
After that, on the newly installed axis, set the “spur” (large pinion gear) from the “pinyon” (small pinion gear) of the electric motor. The main pair of large and small gear can be purchased at the store of radio-controlled models, and you can also play with the gear ratio by choosing the dimensions of the main pair. And on the back of the axis we will install an adapter for the cutting disc. And install the belt on the main pair.


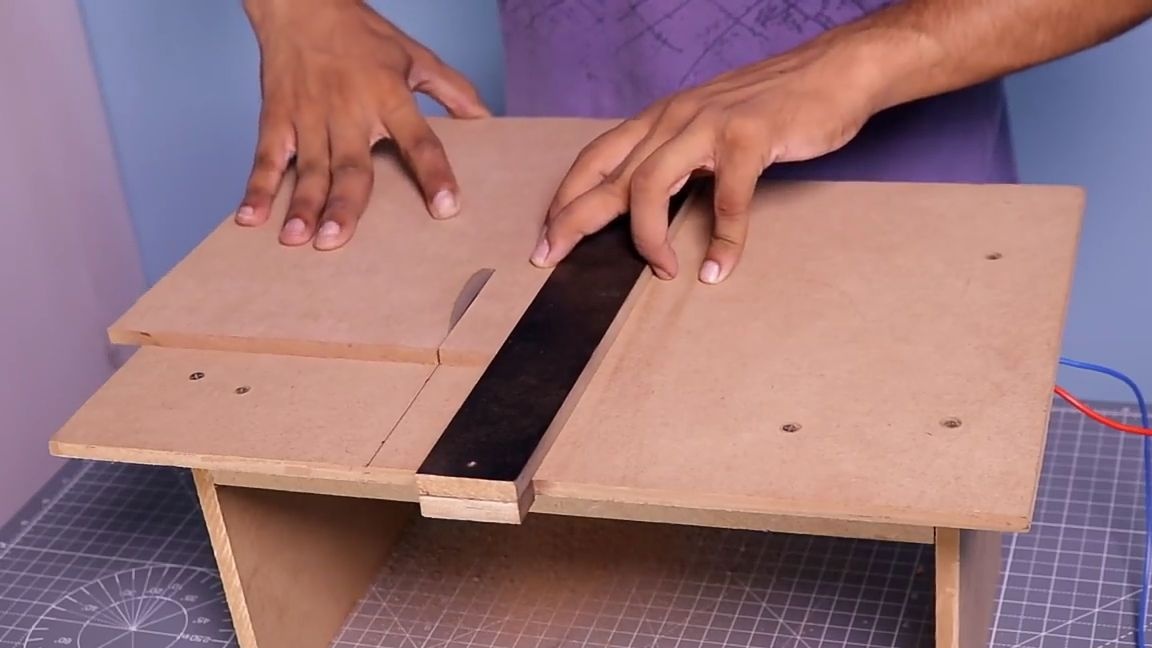
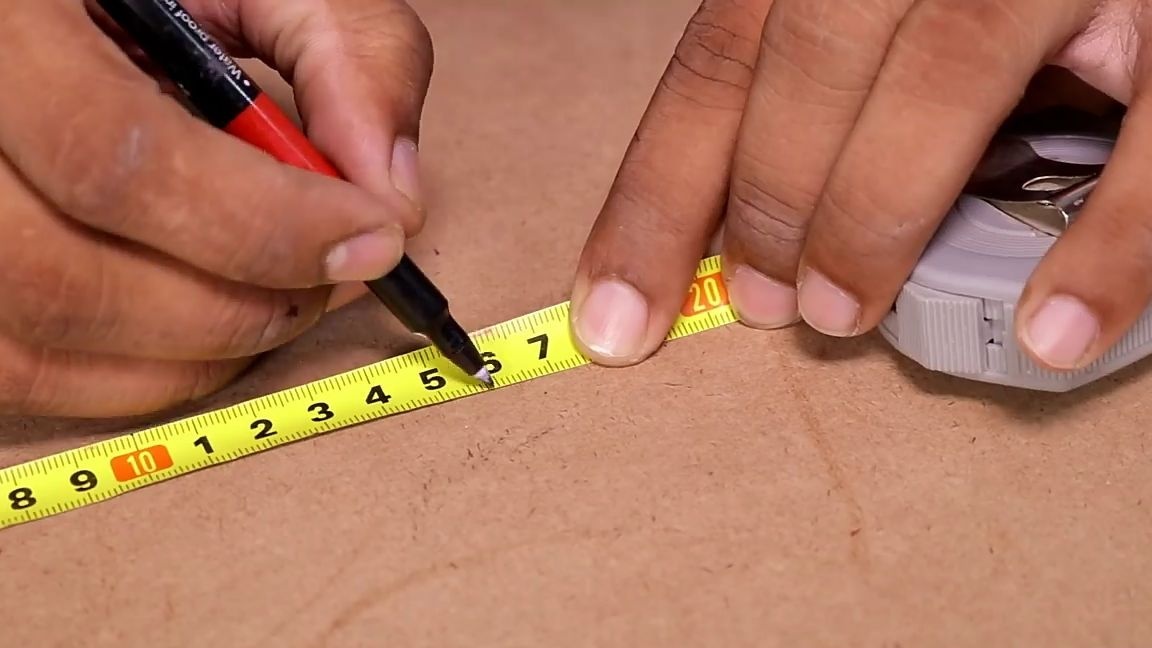
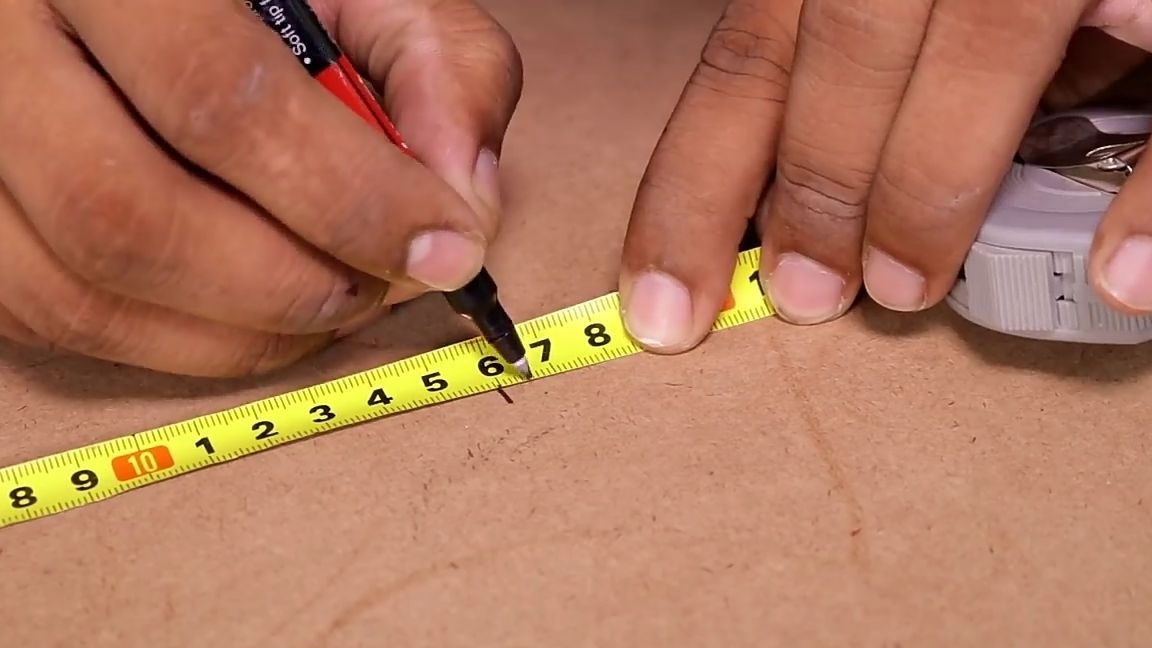
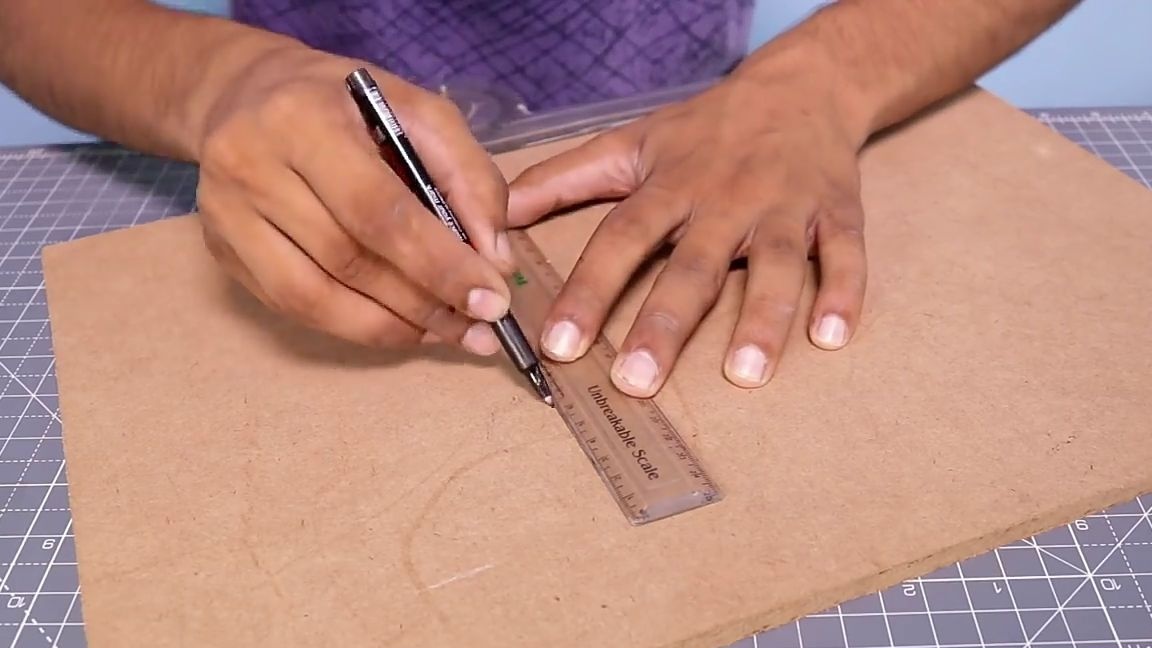
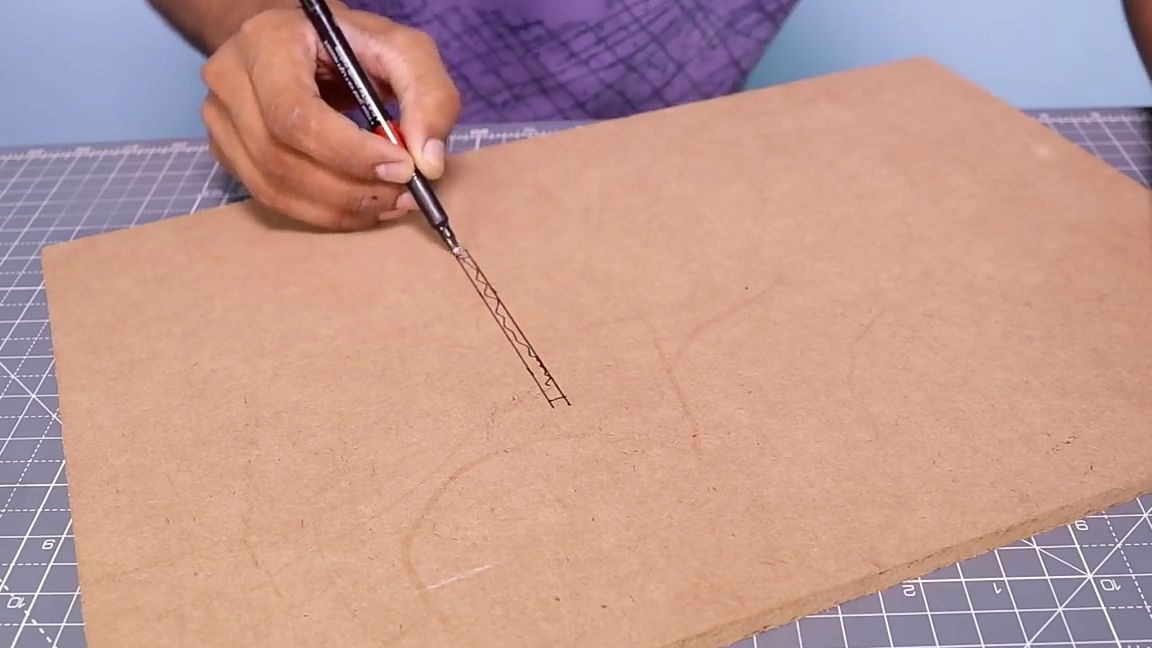
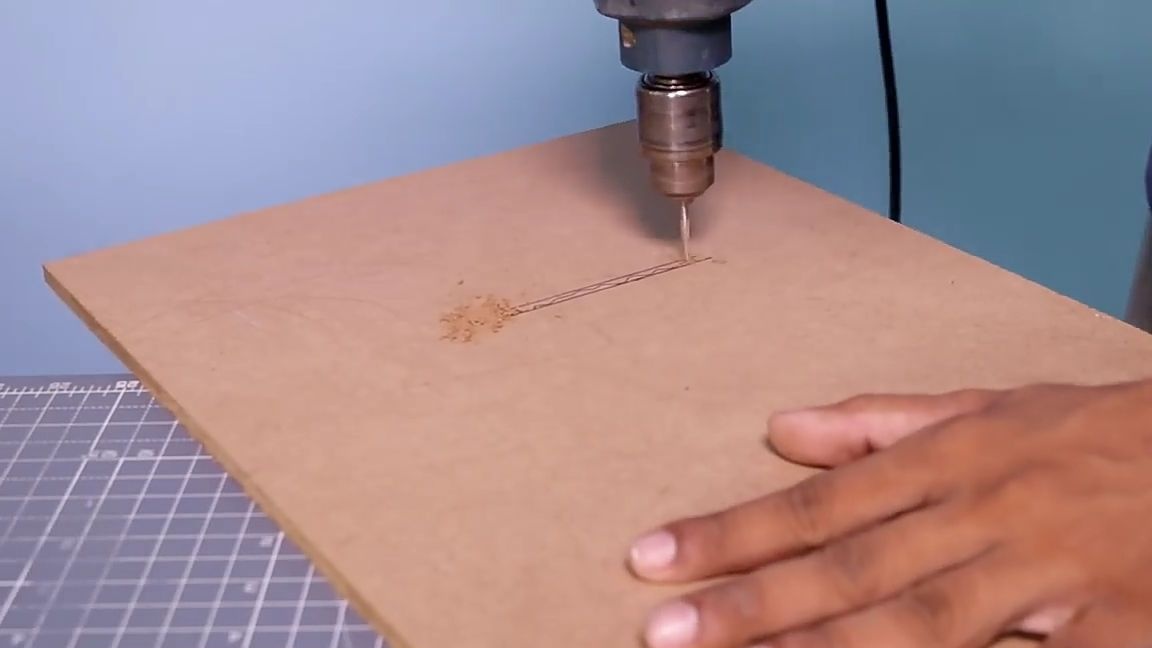
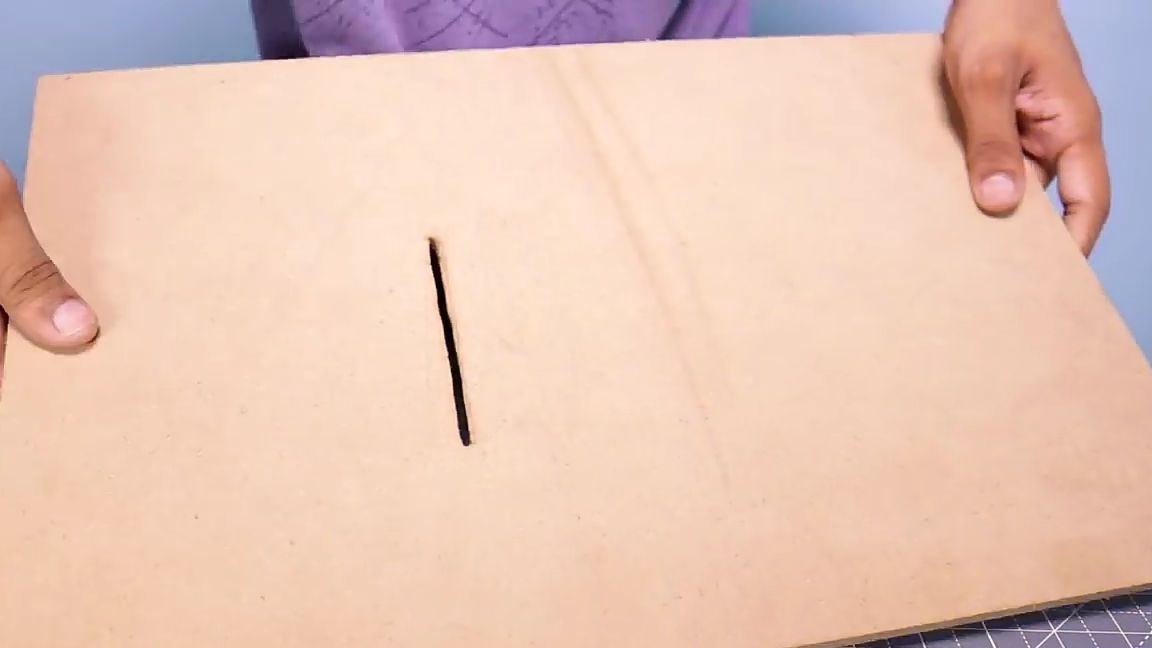
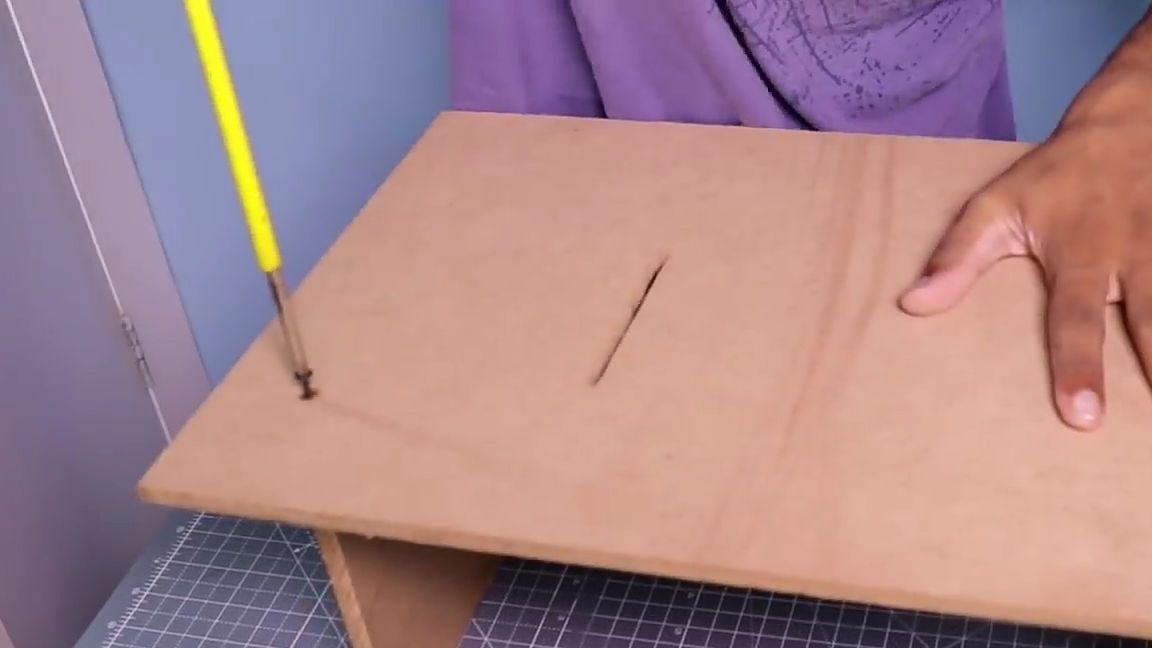
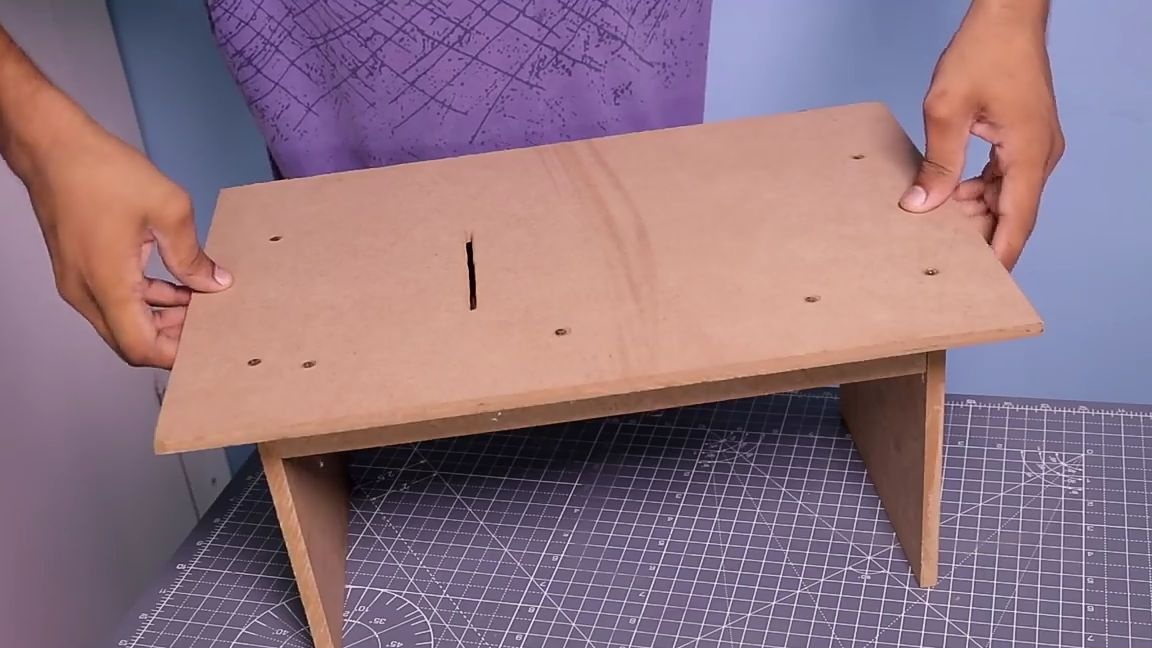
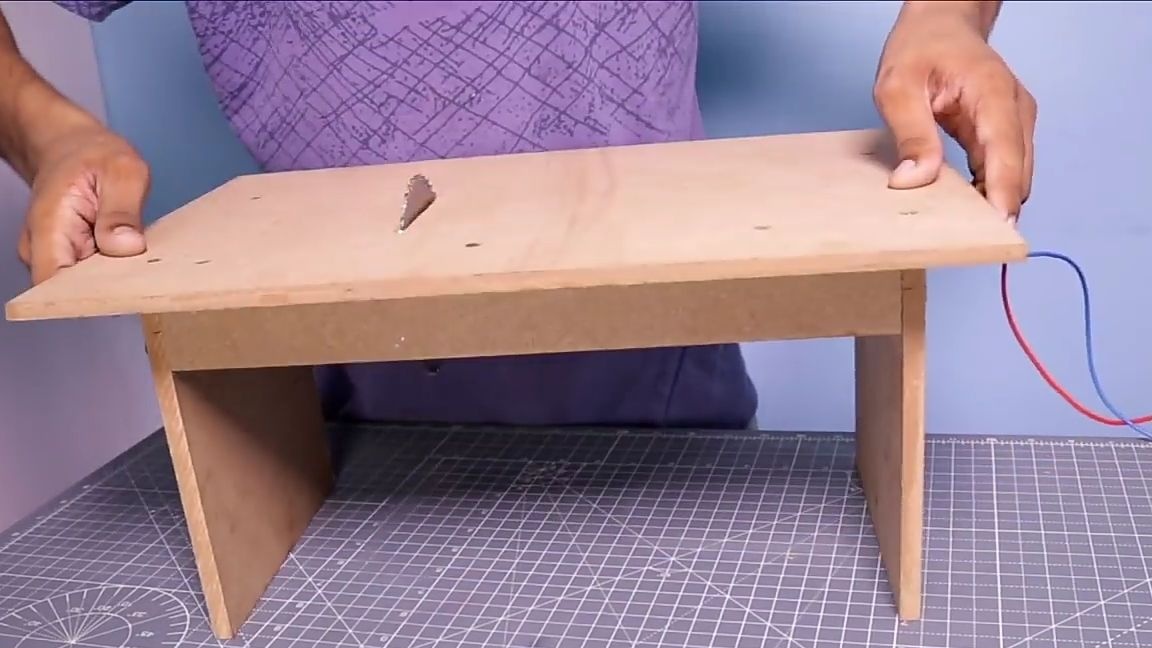
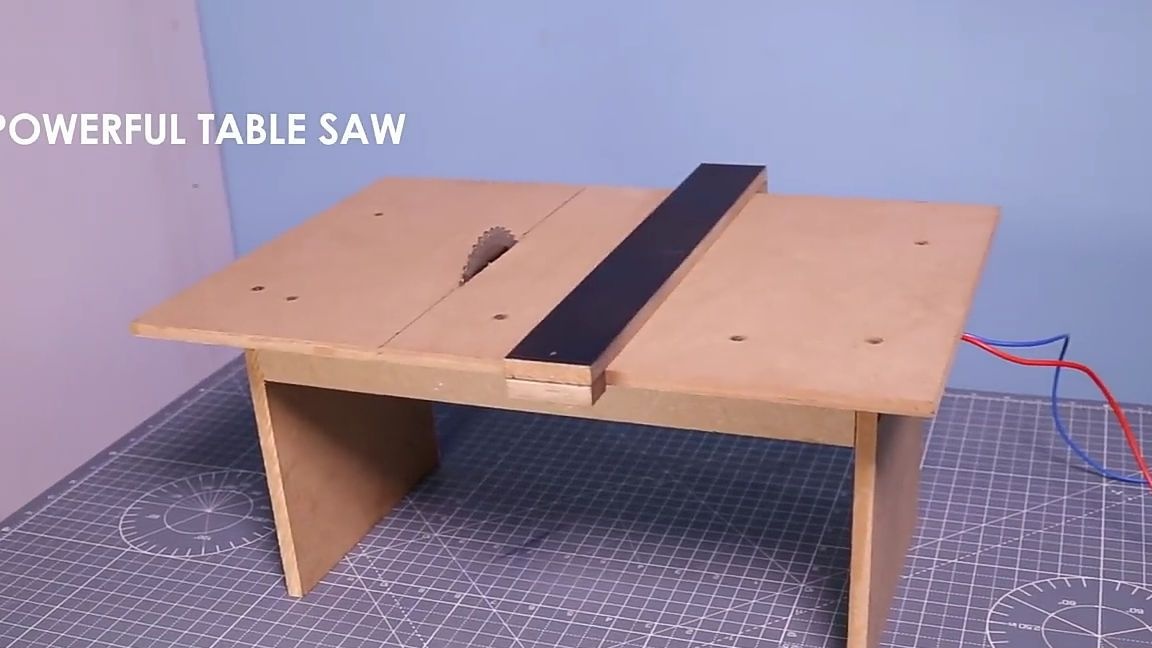
The most important part of the homemade product is ready. But it is useless without a special table, so let's make a table. To do this, you need to take an MDF panel with dimensions of 46 × 31 cm. On the panel you took, you should cut a hole for the cutting disc. To do this, we retreat 16 cm from the edge and put a mark, departing from the mark just made another 5 mm, put another mark. Using a marker and a square draw two parallel lines as shown in the photo below. Using the marks just made, drill a hole with a 5 mm drill, drilling between parallel lines, exactly in the middle. As a result, we should have got a window for the cutting disc.

Next, we need to connect the newly created countertop with the engine so that the adapter for the disk is exactly in the center of the newly made hole. And we connect the two workpieces using self-tapping screws, having previously drilled holes with a thin drill.

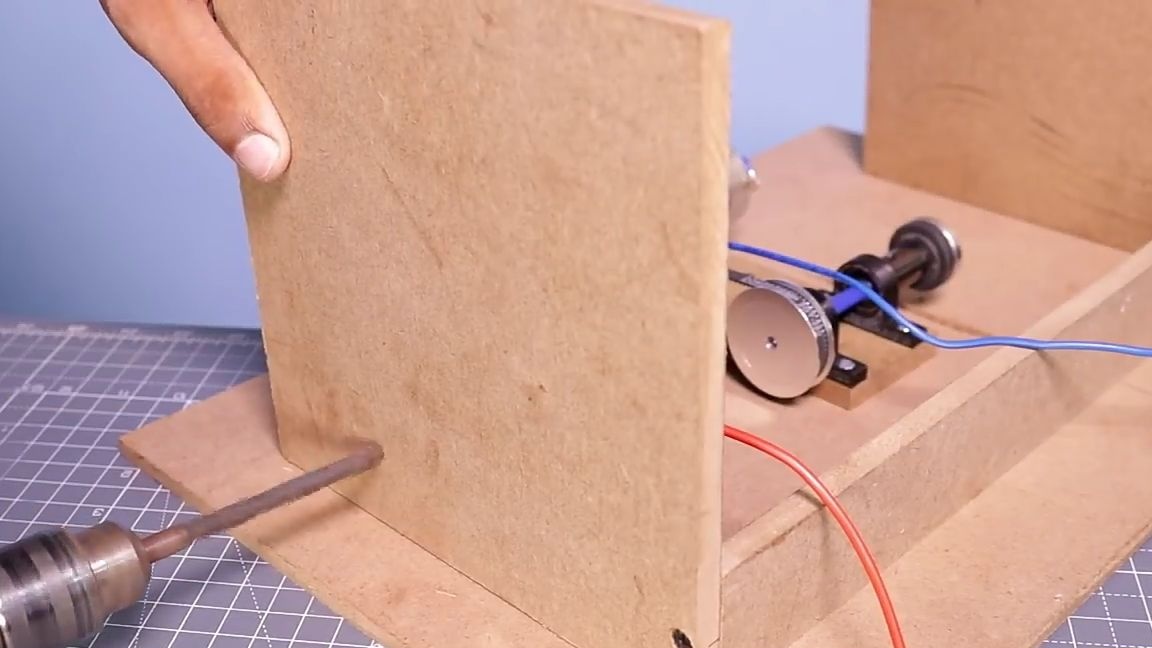
The worktop was done, now you need to make legs for it. To do this, we cut out two identical squares with an MDF panel with side dimensions of 20 × 20 cm. And so that the legs of the table do not move apart, you need to make a kind of brace by cutting out a rectangle with sides of 35 × 5 cm. Now we twist it all together with screws.


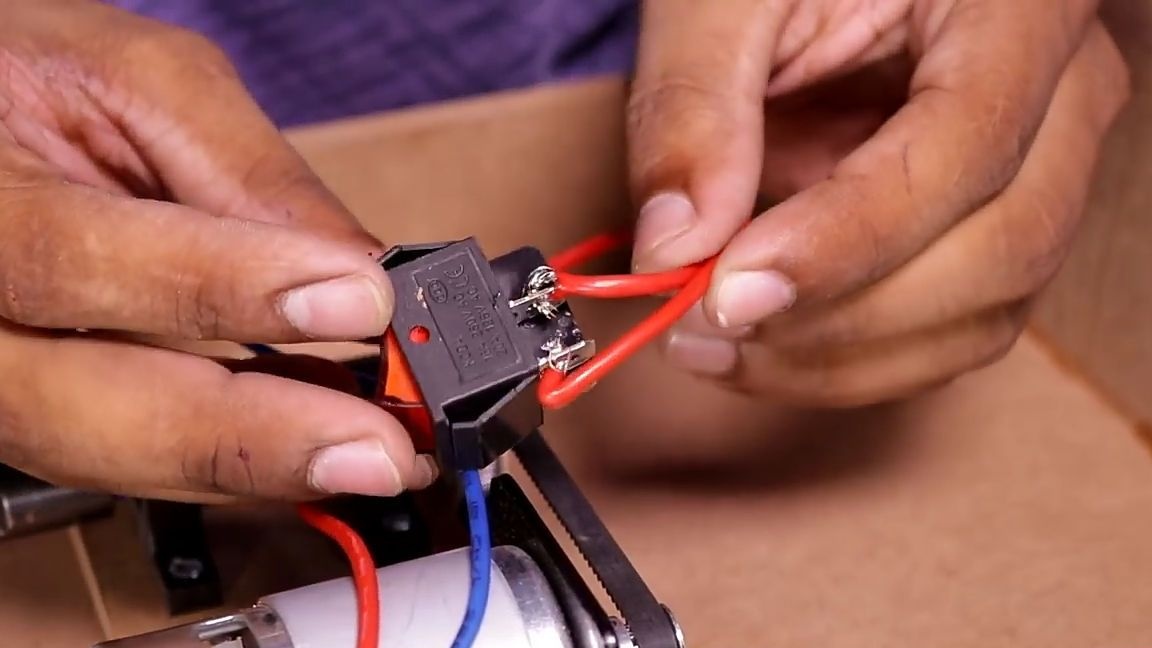
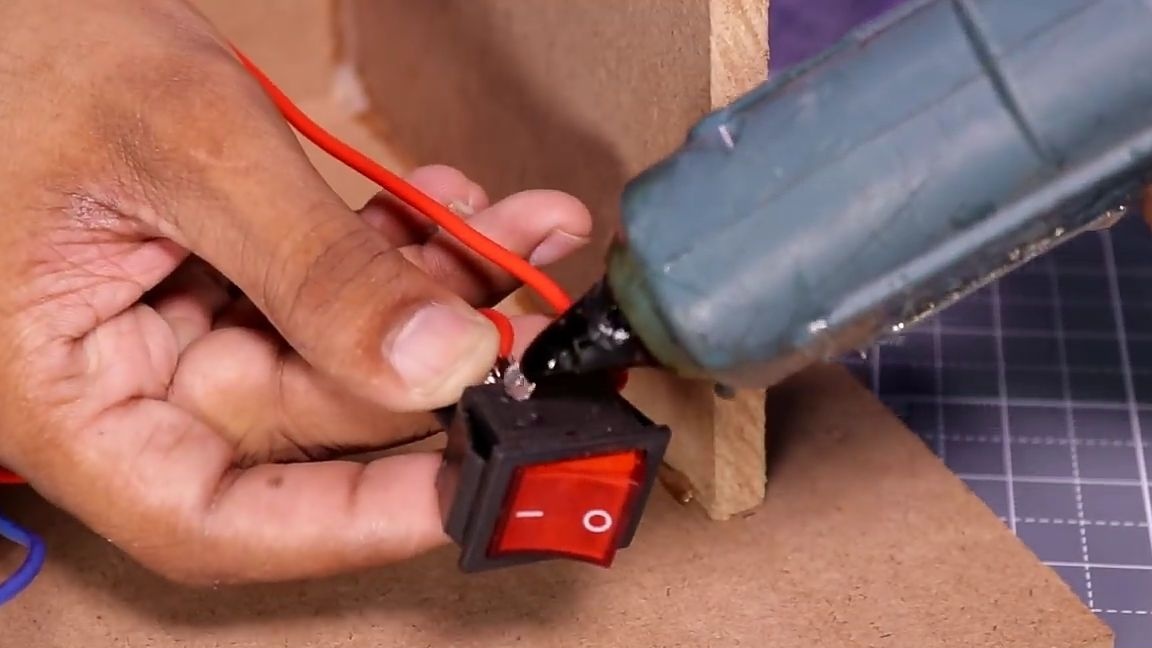
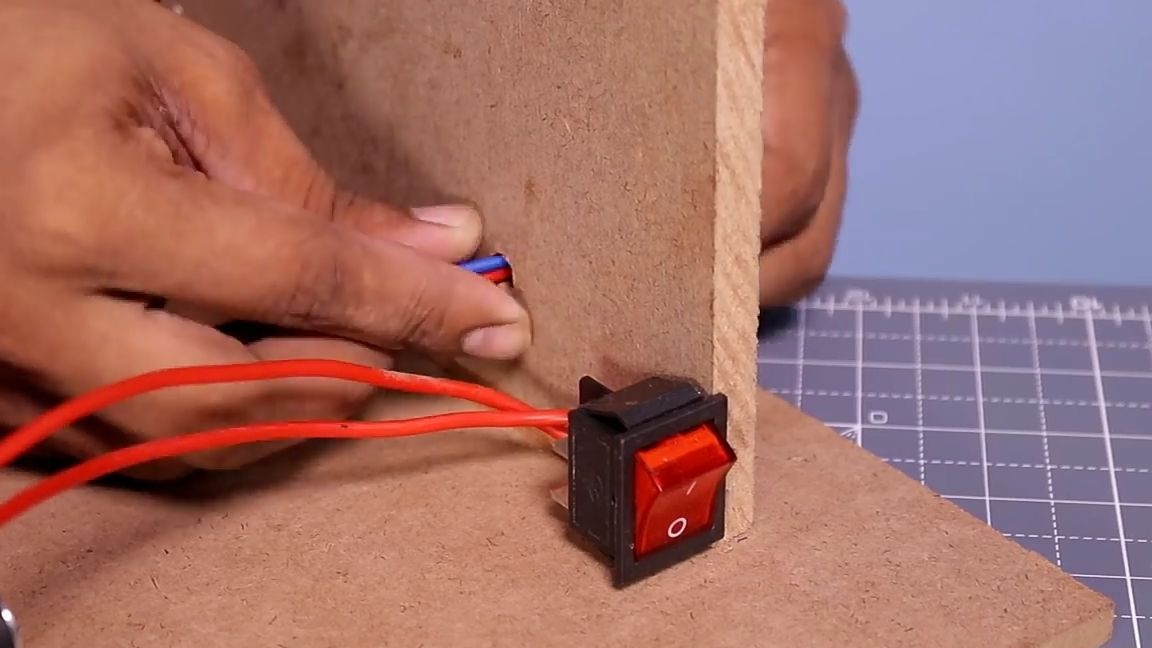
Then, for more convenient use of the circular saw, a switch should be installed. To do this, take a pair of wires and solder one end to the motor contacts, the other end to the power source, and the second wire should be soldered to the power source through the switch. Using the hot-melt glue, the switch itself will be installed in a convenient place.


A through hole was drilled on one of the legs in order to insert wires through it to the power source. But you can also install a connector there for connecting the power supply (if you have one).
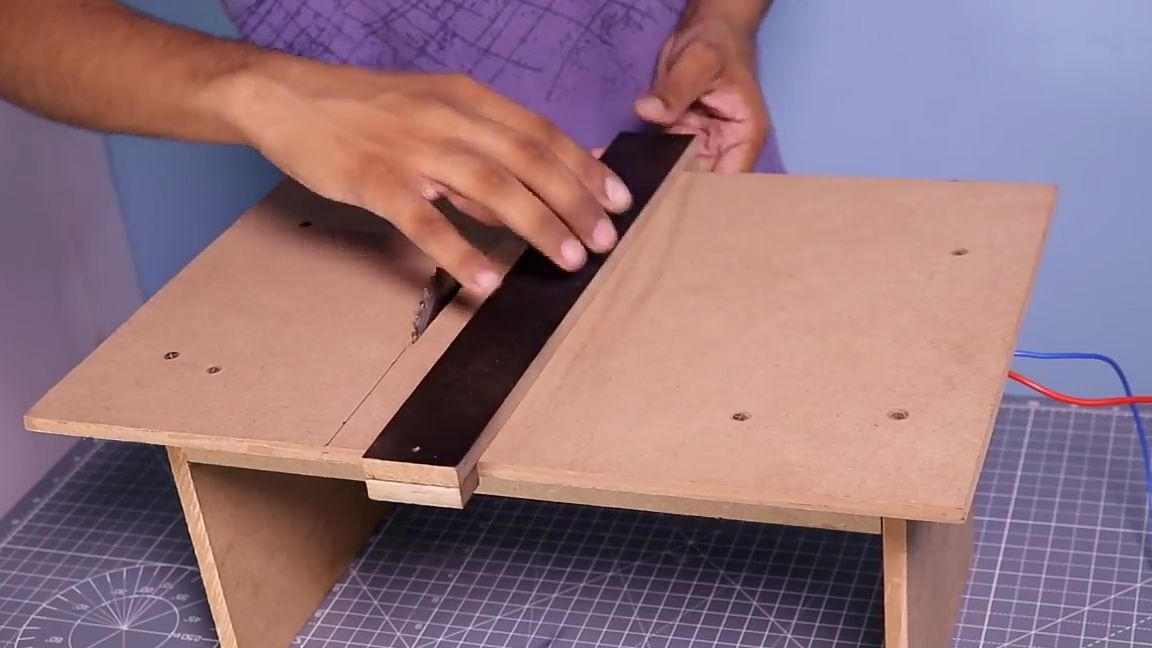
Then install the cutting disc. The drive will use a 4 inch. It should be noted that the disk must be installed and rotated in the same direction as indicated on the disk or in the application instructions for it.
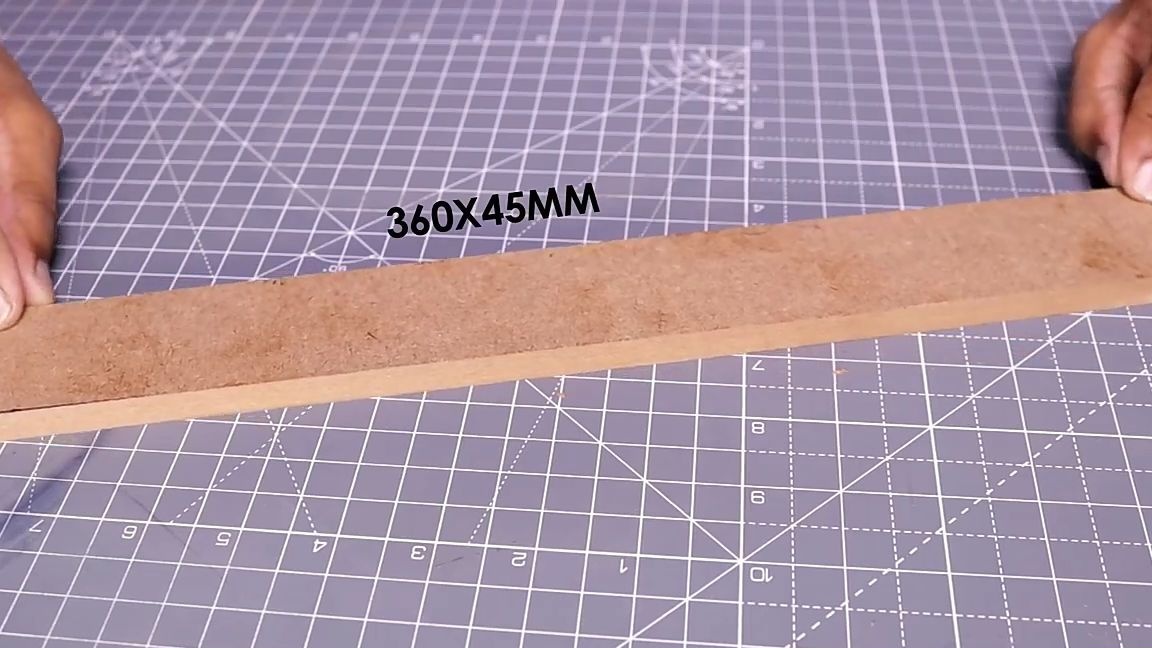
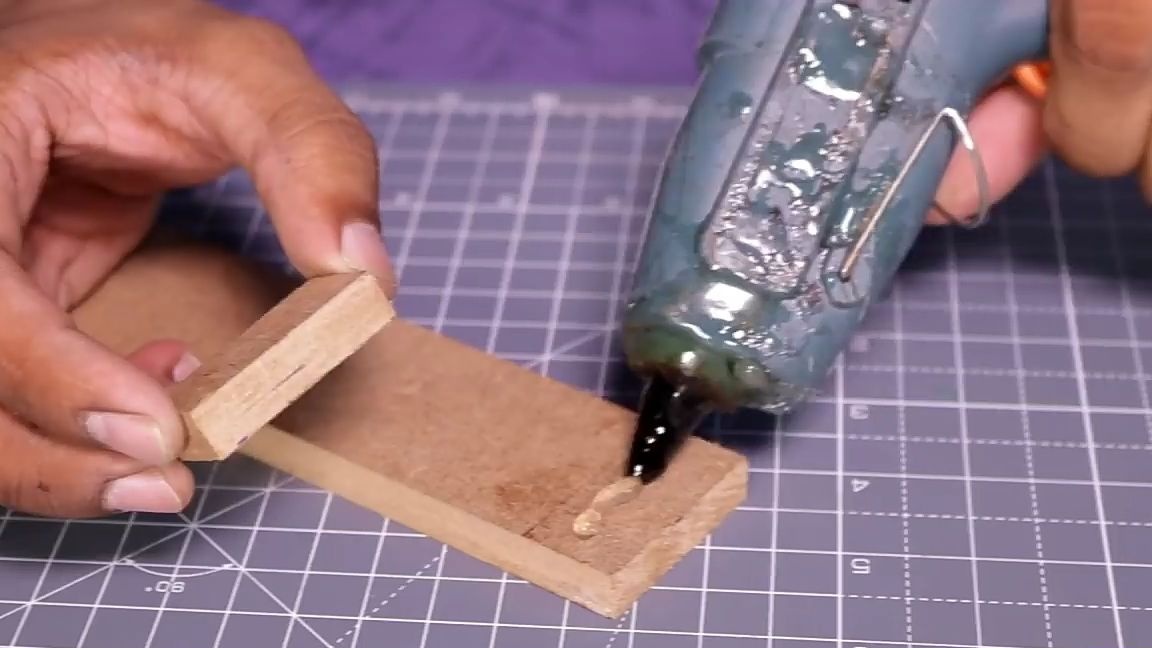
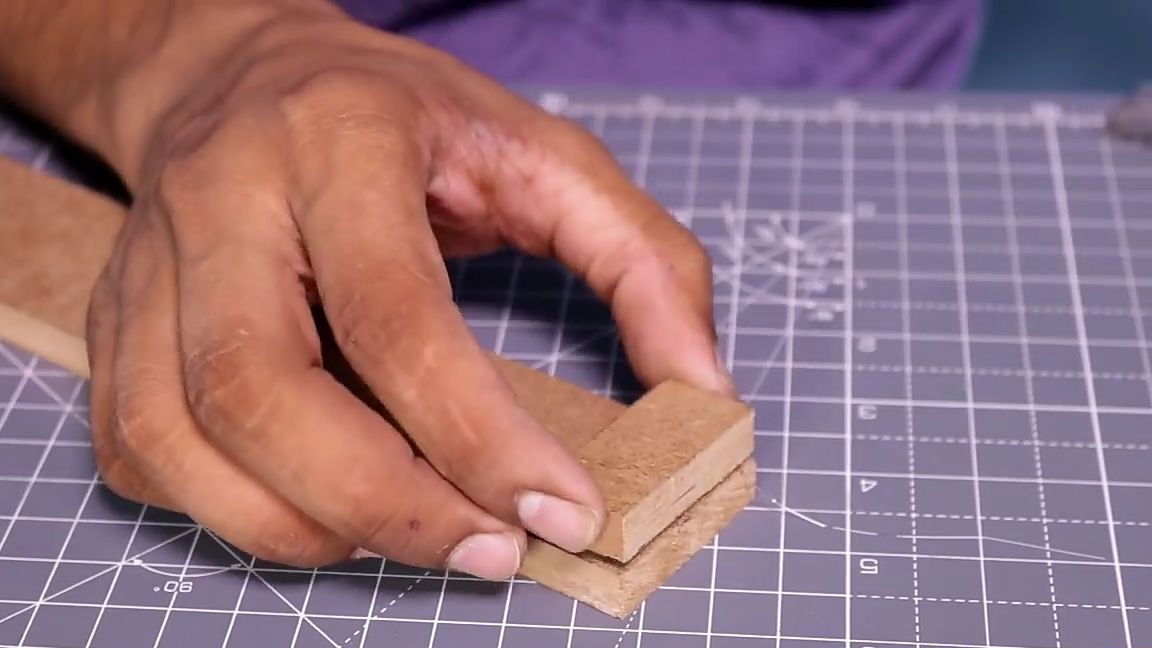
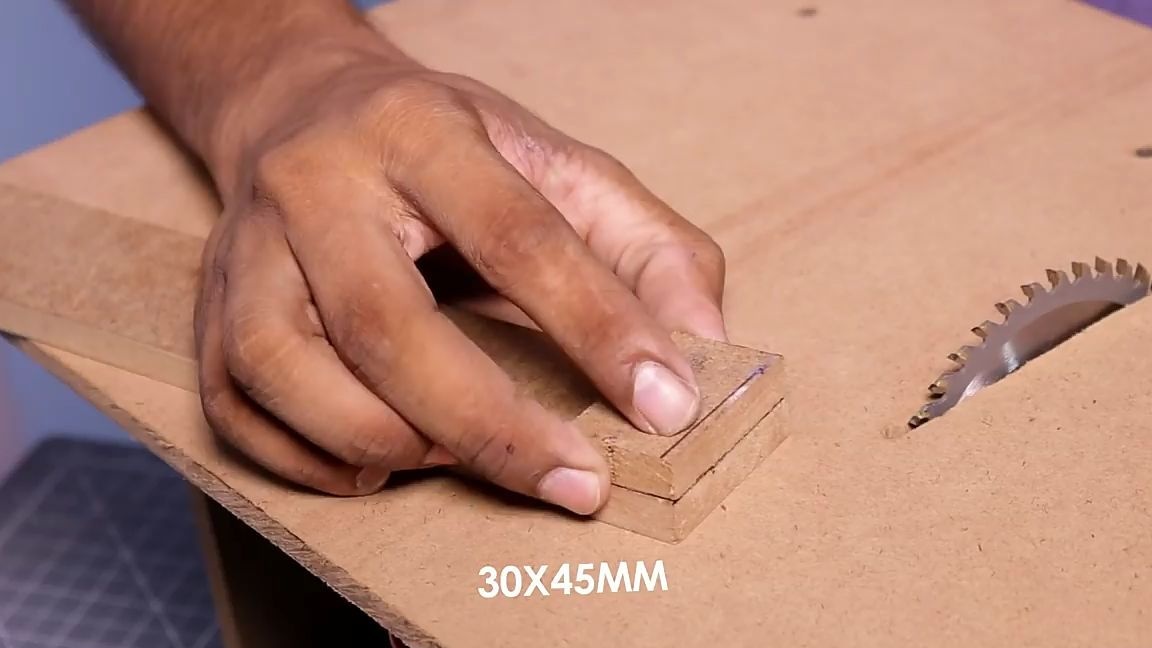
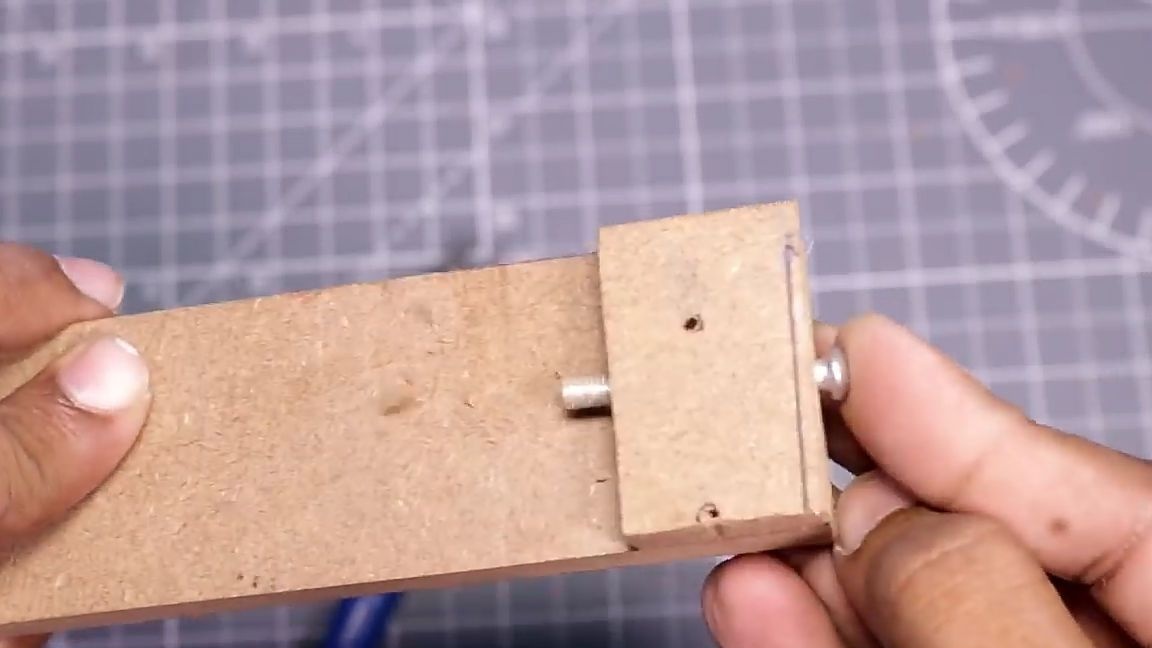
The saw itself is actually ready, but one important part is missing, the one that usually helps us to cut the parts smoothly and accurately. To make it, we need to cut out rectangles with the dimensions 36 × 4.5 cm, 2 × 4.5 cm and 3 × 4.5 cm from the same MDF panel. The three blanks just made should be joined together with hot-melt adhesive, as shown in the photo below.
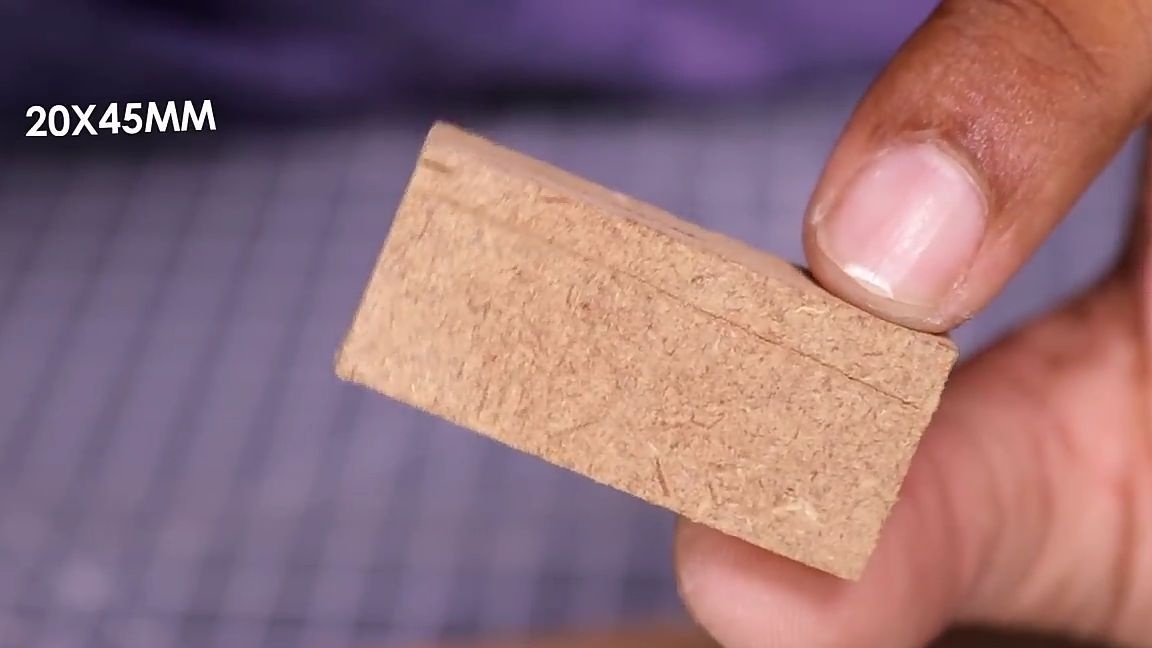
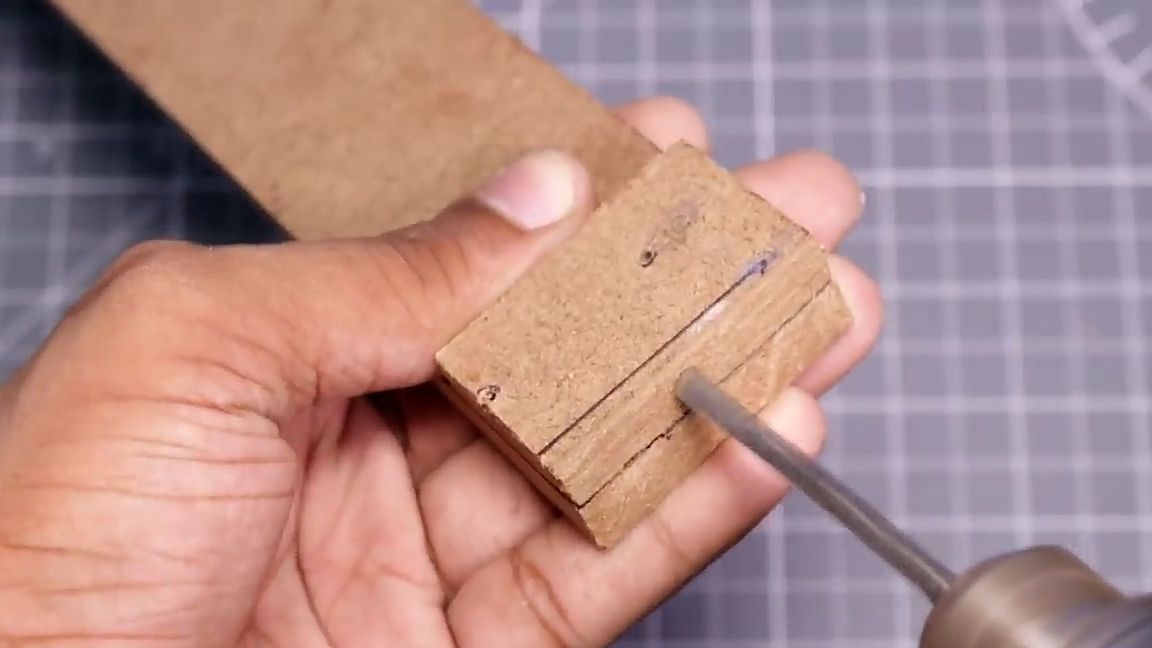
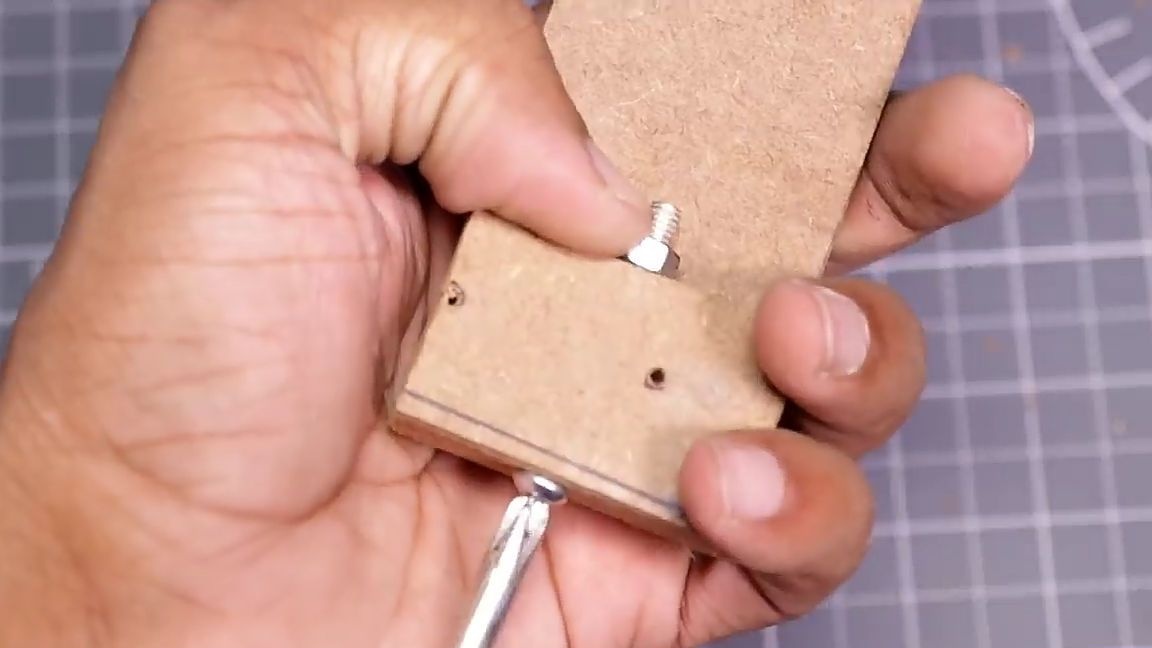
Then drill a through hole for the clamping screw. Insert the screw into the hole just made and clamp it with a nut.
All is ready! As a result, we got a cool circular saw, which is useful for small jobs and does not take up much space.
Here is a video from the author with a detailed assembly and testing of this homemade product:
Well, thank you all for your attention and good luck in future projects!