
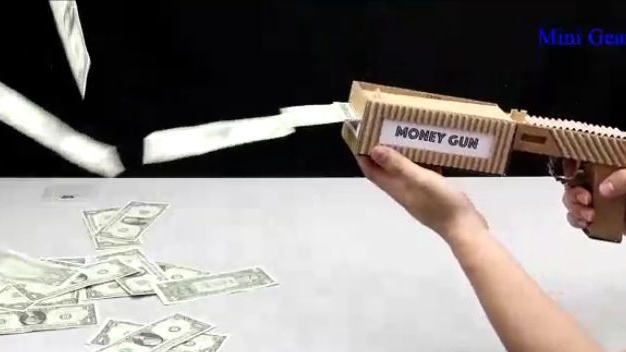
Good day to all dear friends! In today's article, I would like to tell you about a rather interesting idea homemade. Namely, how to make a gun that shoots money. Yes, of course, there is very little benefit from such a homemade product, even not at all, but this homemade product is quite interesting and “fashionable”, it will probably come in handy for you at any home holiday, and you can easily amuse your friends and family with rain from the money. Homemade work as usual will consist of the most simple and easily accessible materials that absolutely anyone can assemble it, and there should not be any difficulties during assembly. Well, let's not waste time and proceed to assemble the gun firing banknotes.
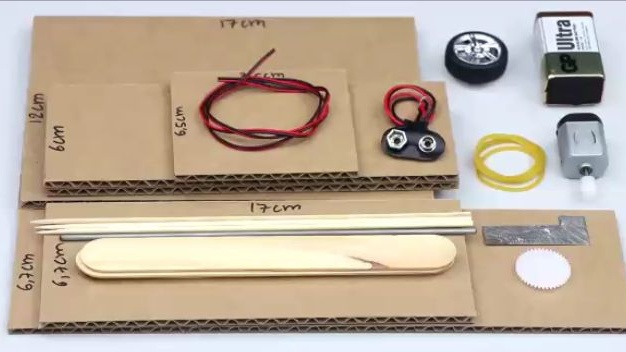
For this homemade product we need:
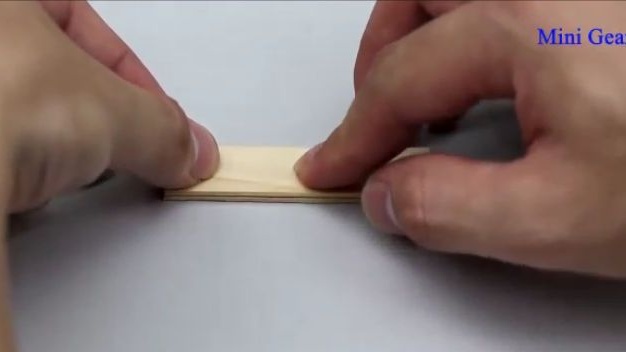
- A sheet of corrugated cardboard.
- Barbecue wooden skewers.
- Wires.
- Connector for the battery format of the crown.
- The battery is the format of the crown.
- Elastic.
- electric motor
- Wheel from a scale model of a car (1: 26-1: 36 scale).
- Plastic gear.
- Wooden sticks for ice cream.
- Axle for the wheel.
- A small metal plate.
- A small piece of sponge.
Of the tools we will also need:
-Thermokley.
-Soldering iron.
- Scissors.
- Stationery knife.
- Black helium or capillary pen.
- A syringe.
- Super glue.
- Ruler.
- Drill and drill for her.
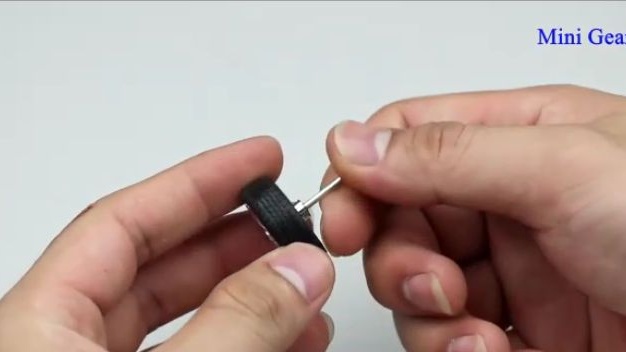
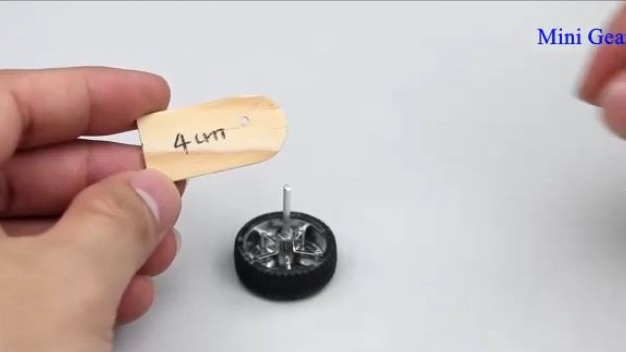
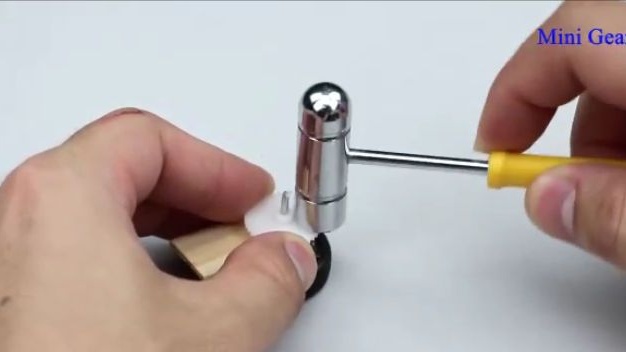
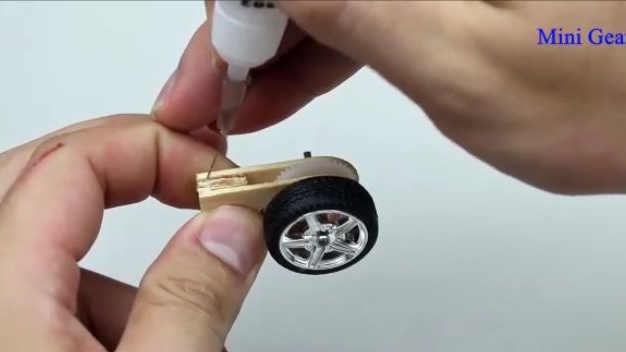
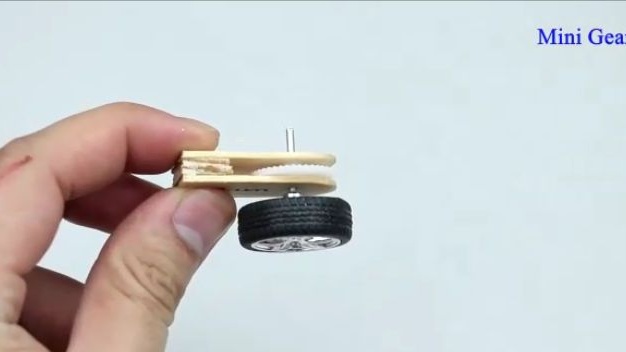
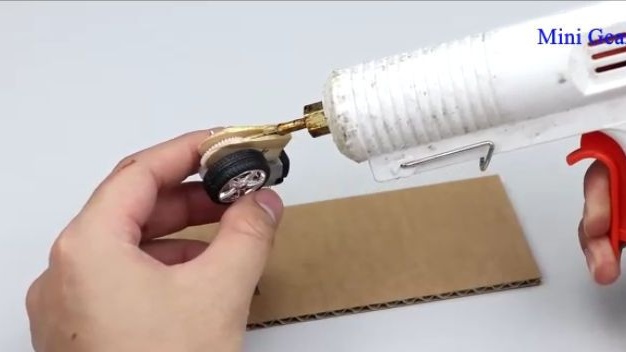
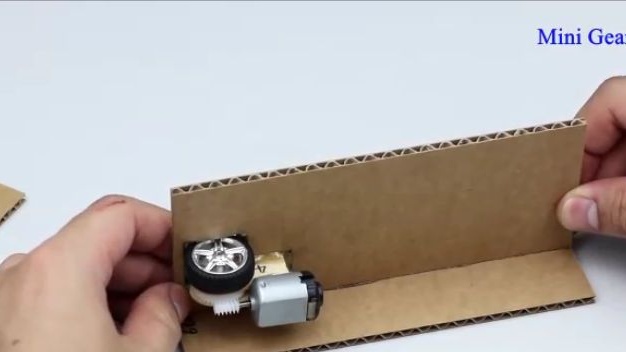
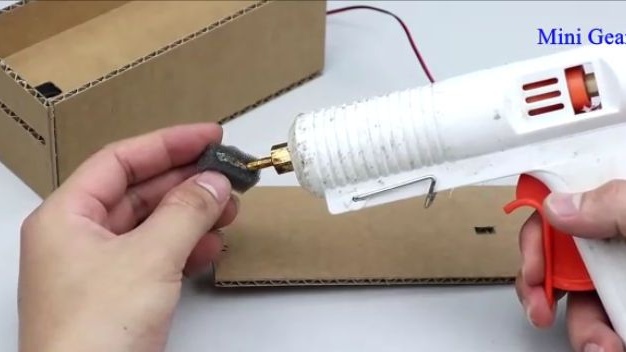
To begin with, we should make a mechanism that will release money. To do this, take the wheel from a scale model of the car, it is desirable that the wheel is rubberized, otherwise the money will not cling to it and the mechanism will not work. We put the wheel on the axis, so that the axis sticks out about 1.5-2 cm. So that the axis does not fly out and does not scroll, it should be put on super glue. Since the elements are quite small and sticking to something is not too difficult, the author came up with an ordinary medical syringe to fill with super glue. Using a needle, applying glue to small objects is much easier.
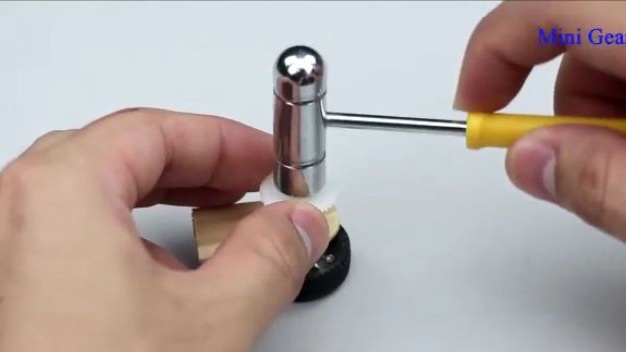
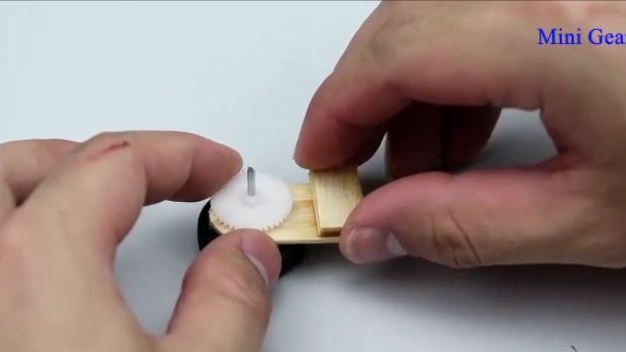
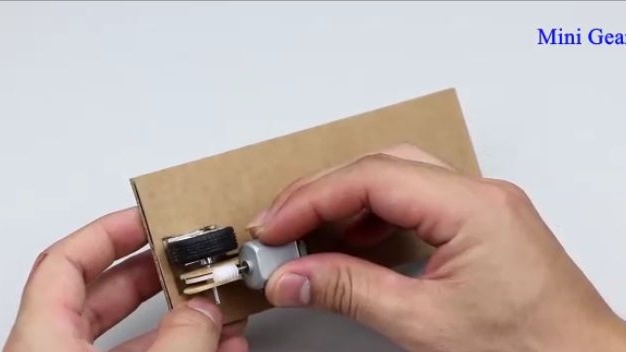
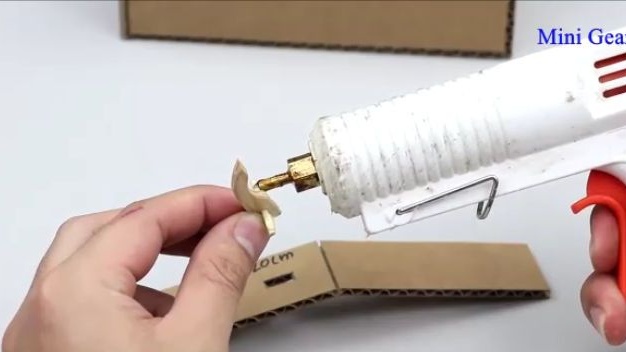
The next step is to take a wooden stick and cut off 4 cm from its edge. In the freshly cut workpiece, make a through hole, the diameter of which will be equal to the outer diameter of the wheel shaft. And we put the workpiece just made on the wheel shaft, and then on the same shaft we put the gear.Ideally, as in our case, the gear should not simply and easily climb through, but should be “pressed in”. Since we have a miniature and plastic gear, you can get by with a small hammer. Drive the gear so that there is space between the gear and the newly installed wooden stick.
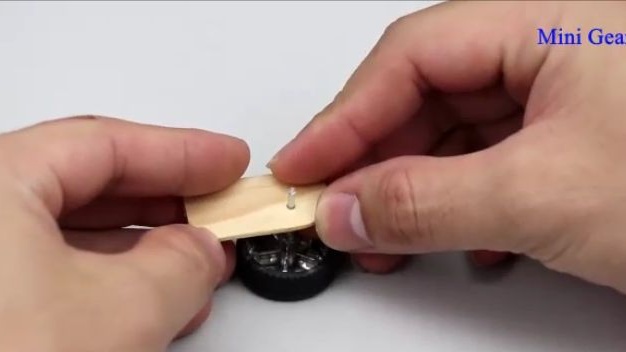
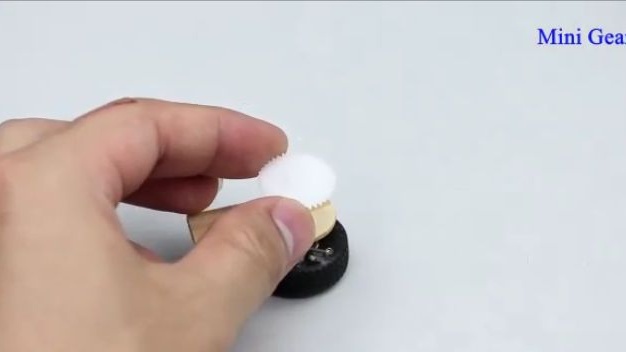
Take a wooden stick from under the ice cream. We saw off two small squares from it and glue them together with super glue. Next, we glue the resulting sandwich with the same super glue to the edge of a wooden stick that is already installed on the wheel shaft. Then on the wheel shaft we will install exactly the same wooden stick, which we did at the very beginning and glue it with super glue (see photo). As a result, we should succeed so that the shaft, wheel and plastic gear rotate separately from the wooden part.

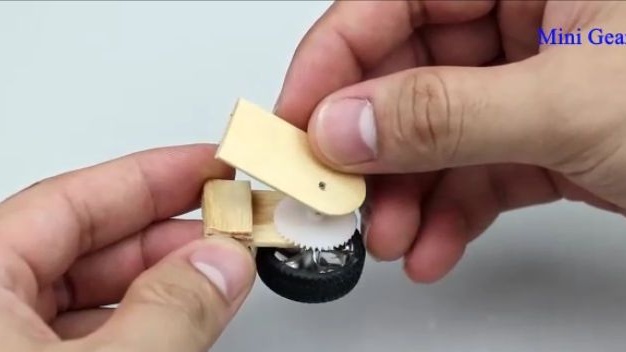
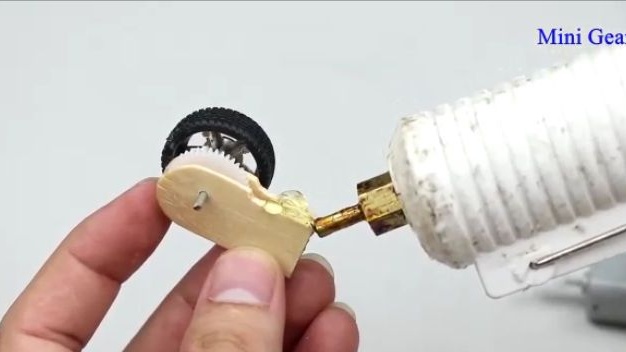
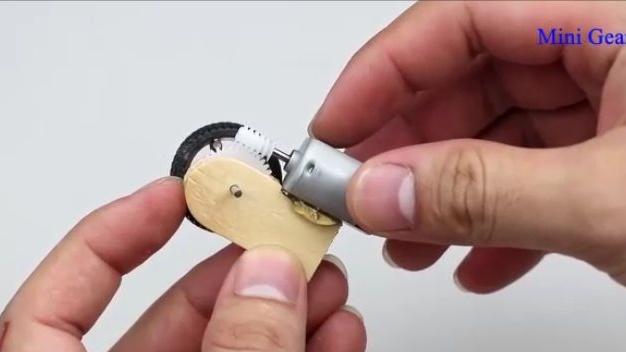
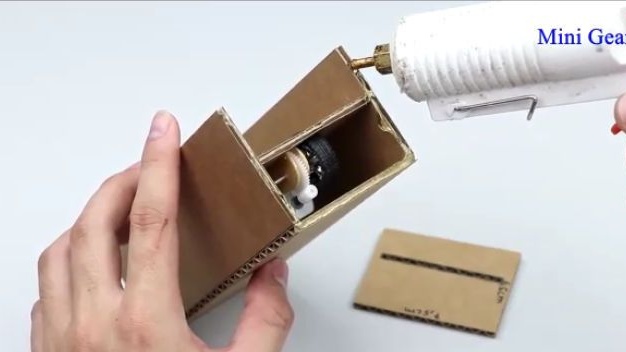
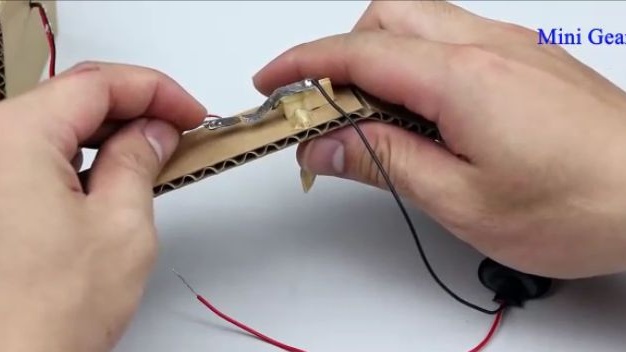
For the next step, we need an electric motor with a spiral drive gear mounted on its shaft. This motor should be installed on a newly made wooden part of the mechanism. To do this, simply apply hot-melt adhesive to the location indicated on the photo and glue the electric motor so that there is not a large gap between the gears. If there is no gap at all and the gears will be pressed against each other, it will be more difficult for the engine to rotate them, and if the gap is too large, then the gears will simply turn over quickly, simply.
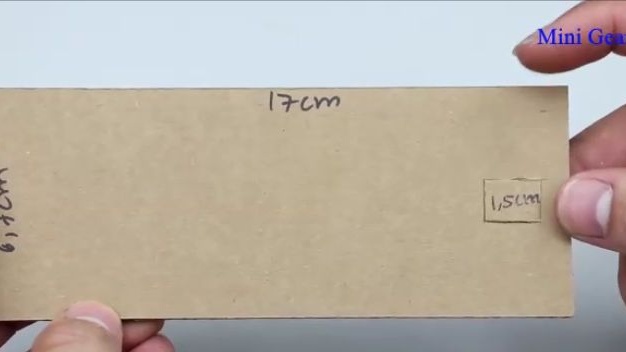
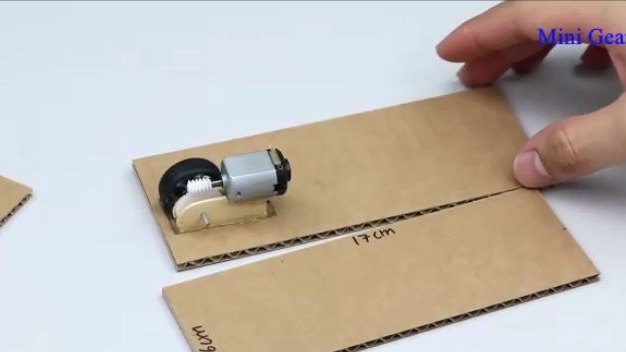
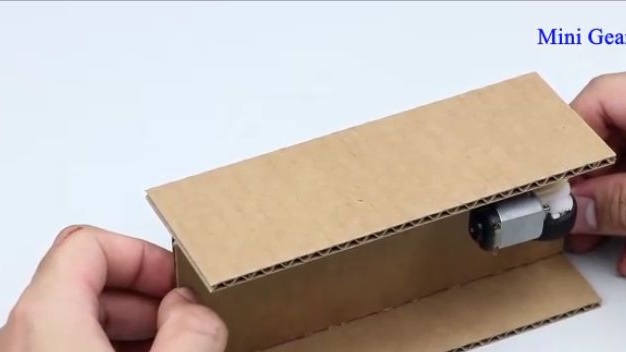
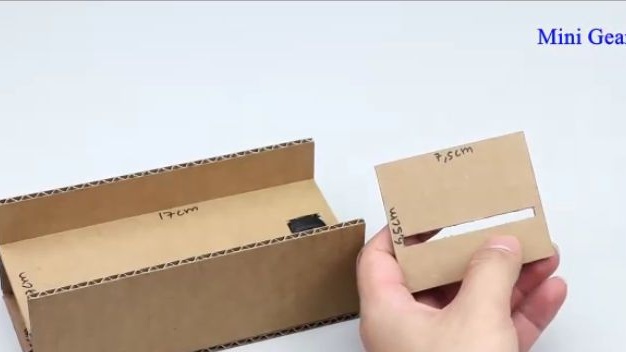
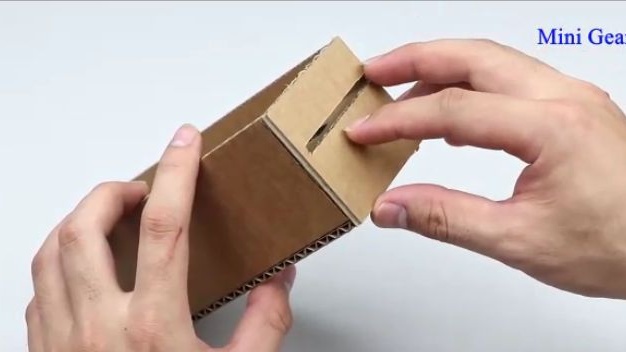
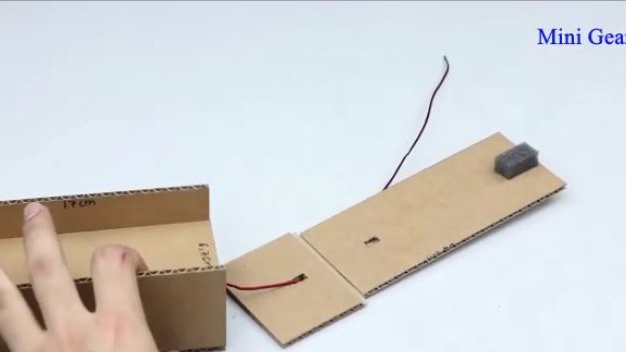
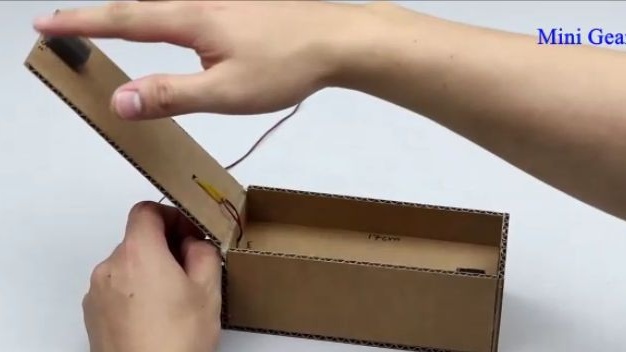
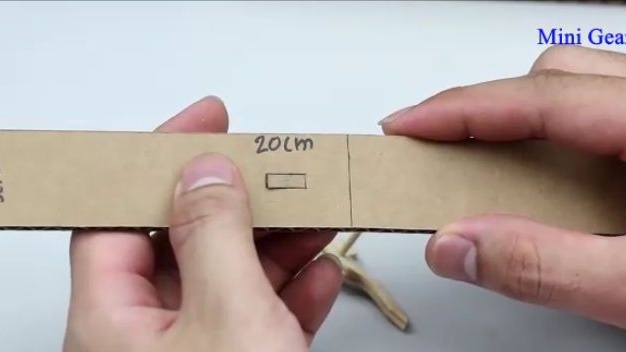
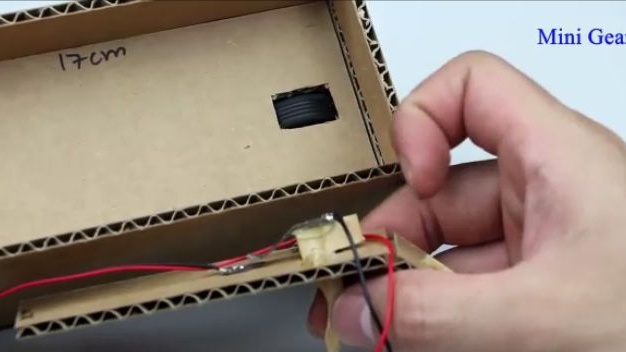
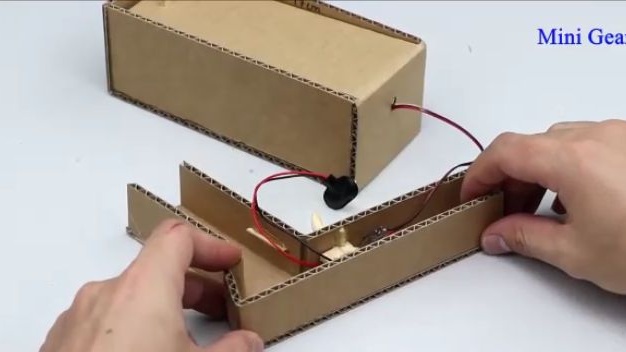
Then we need a sheet of corrugated cardboard from which a rectangle should be cut, the sides of which will be equal to 6.7 cm and 17 cm. The box after the rectangle was cut out, a small rectangular hole should be cut on it. To do this, we retreat 1 cm from the edge of the short wall and cut 1.5 cm holes per 1 cm in the center of the relatively small walls (see photo).
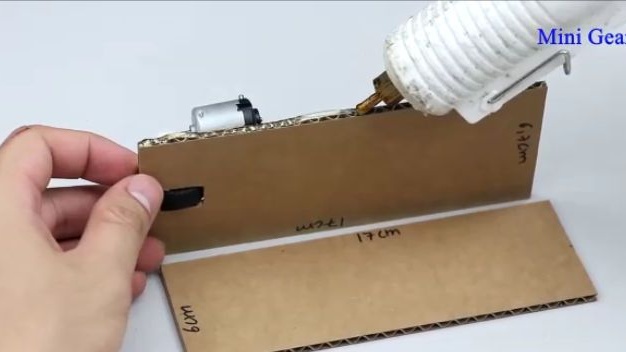
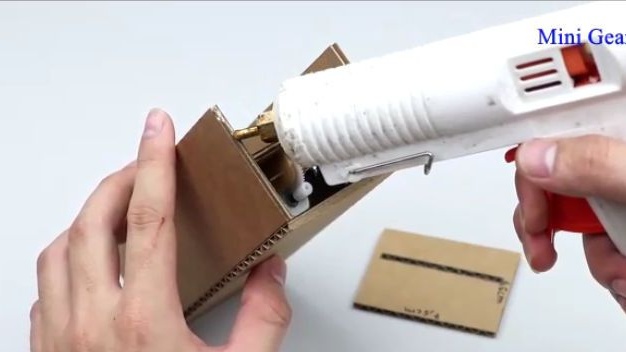
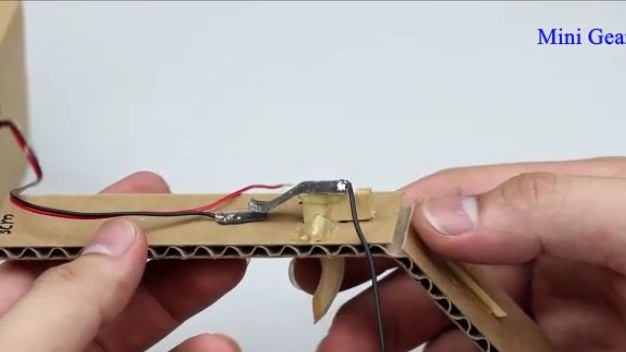
Then we connect the mechanism and the cardboard rectangle using hot-melt adhesive. It should be connected so that the wheel is exactly in the center of the cut hole and protrudes slightly from the other side.
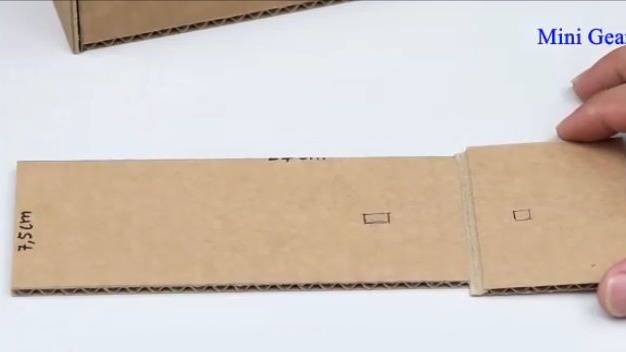
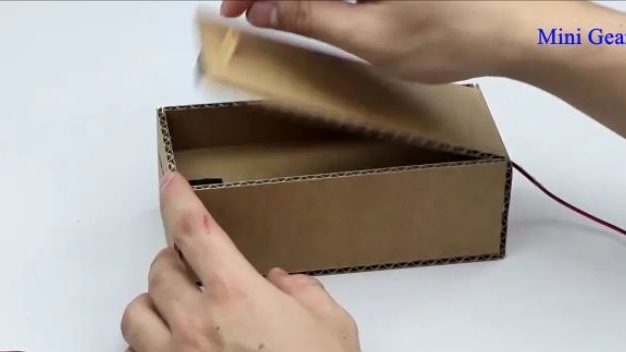
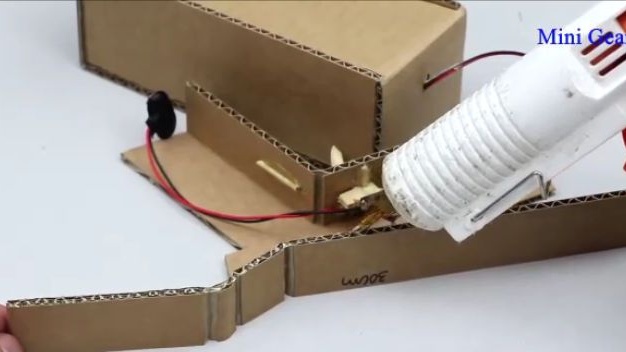
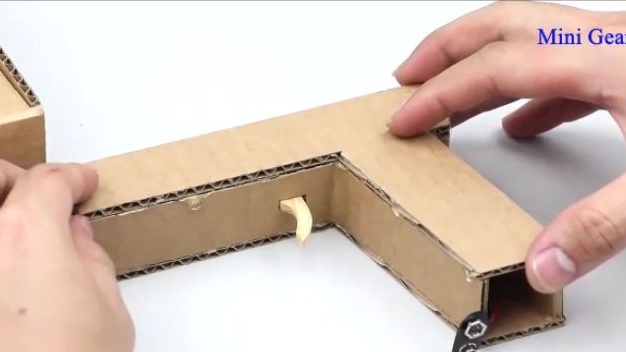
From the same cardboard, two more rectangles should be cut only with sides of 6 cm and 17 cm. Three rectangles should be glued together so that we get an “H” shaped design (see photo).
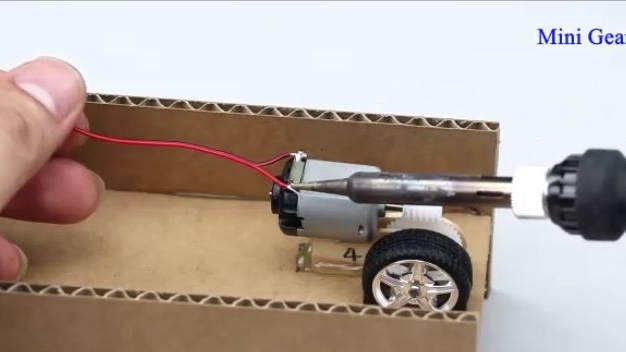
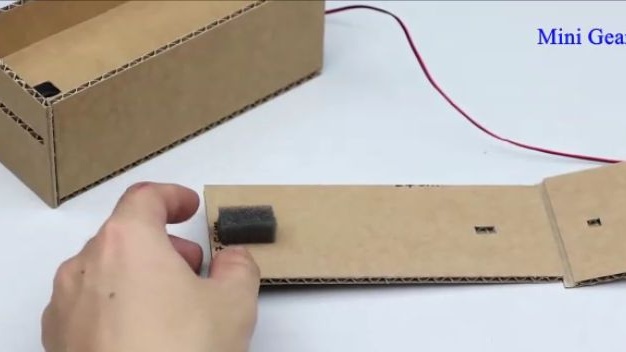
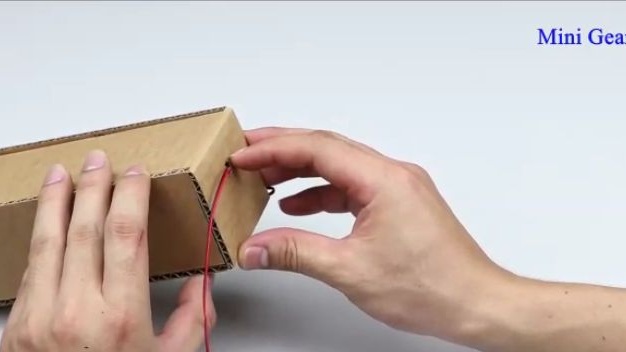
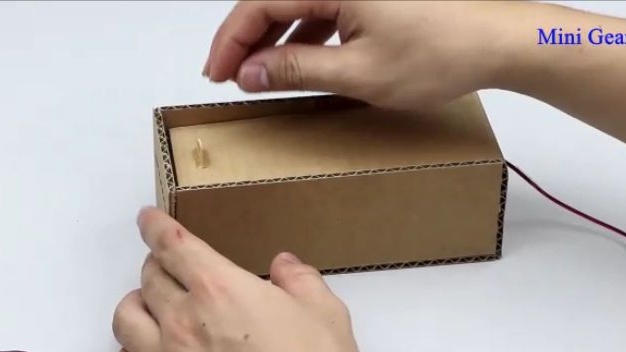
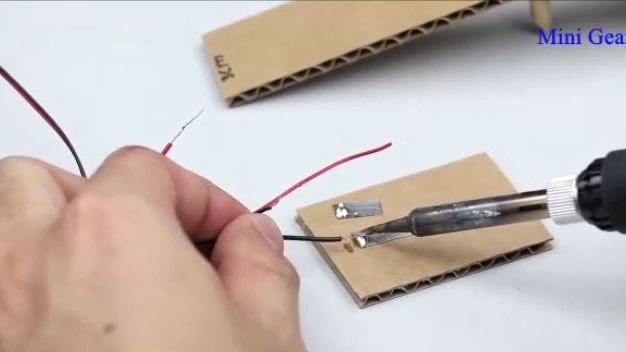
After we solder the wires to the contacts of the electric motor, and then glue another cardboard rectangle with sides of approximately 7.5 cm and 17 cm to close the mechanism.
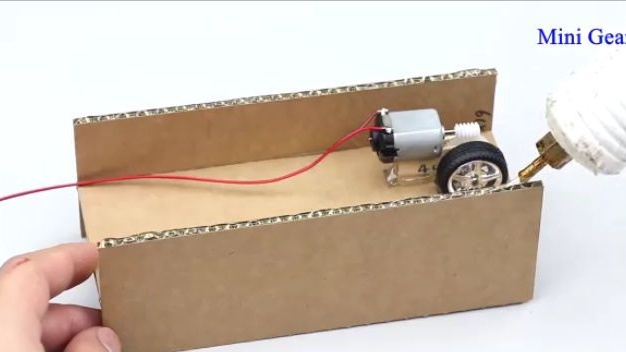
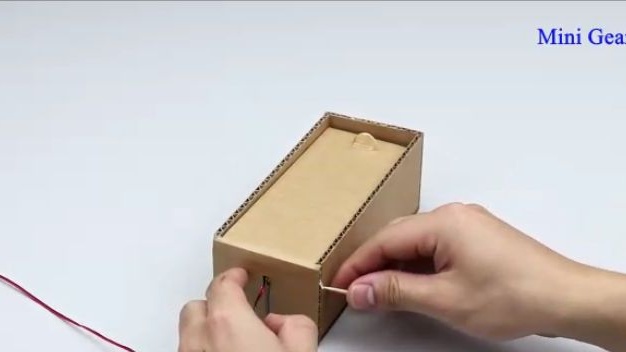
Then we cut out another rectangle from corrugated cardboard, the sides of which will be equal to 7.5 cm and 6.5 cm. In this rectangle, a rectangular hole should be cut, the length of which will be equal to the internal width of the structure, and the width is not more than 5 mm. And glue it on the hot glue so that the rectangular hole goes flush to the side where the wheel sticks out.
Next, we should make a clamping mechanism, which in turn will squeeze the money and prevent them from falling out of the gun. To do this, cut out a shape similar to the one shown below from cardboard, that is, its length should be equal to the length of the entire money tank and also its height. Where the height of the rectangle is wider, this is necessary in order to glue this part to the structure. A longer part should not be much longer in order to be able to go inside (then during assembly you will understand why all this is necessary).
In the indicated places in the photo below, we make holes with a clerical knife.
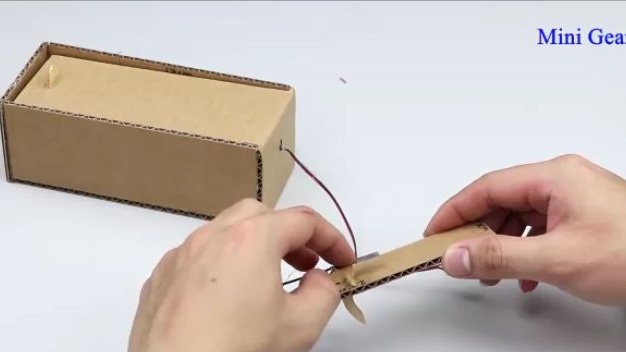
Glue a small piece of sponge on the edge of the narrow part. Through one of the holes we push the wires from the electric motor and glue the cardboard blank to the structure as shown in the photo. Opposite the second hole, we stick along the barbecue wooden skewer, putting on an elastic band (see photo). And then we repeat the actions in the photo, so that in the end we get so that the lid closes itself and snaps tightly.

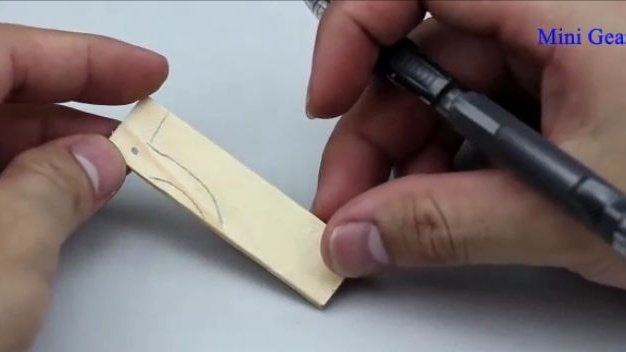
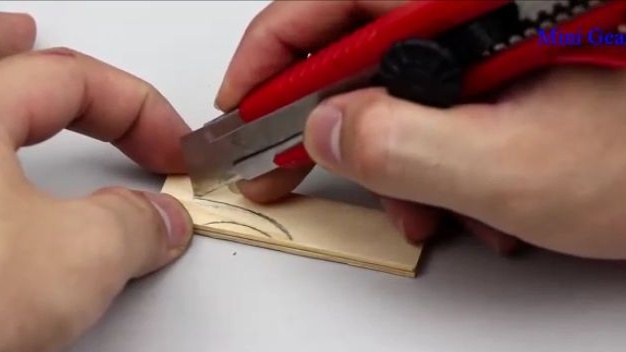
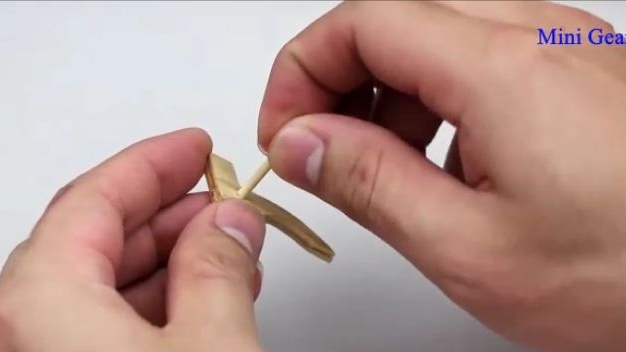
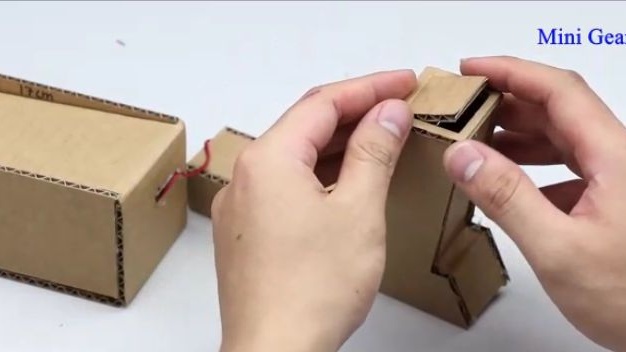
Now we need to make the trigger when pressed, which closed the circuit, and the engine began to work. To do this, take two wooden sticks, cut off the rounded parts and glue them together using super glue. Draw and cut the trigger. We make a hole in the indicated place and insert a small segment of the skewer into the hole.
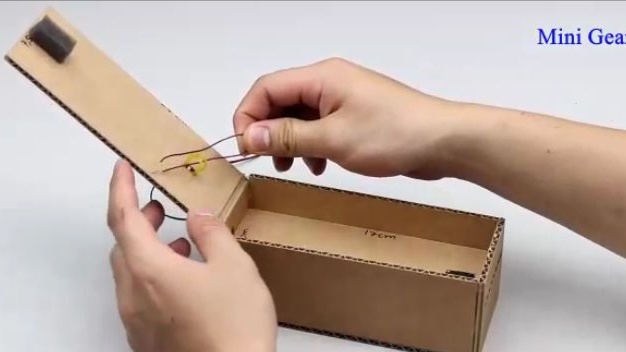
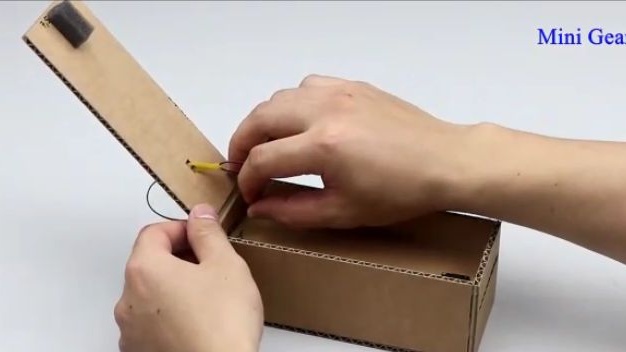
Again, cut the cardboard blank according to the dimensions indicated below and install our just made trigger. After that, to trigger the trigger, repeat the same manipulations as in the photo. And we check the operability of the structure by connecting power to it, that is, not forgetting to solder the connector for the crown-format battery (solder the connector so that the wheel rotates in the direction of the hole from where the money will fly out).

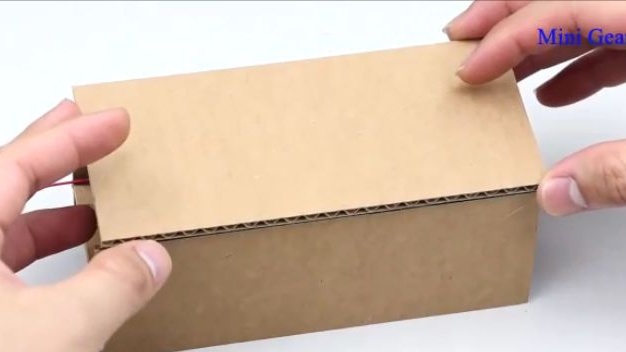
The next step is to finish the cardboard case. Here you can already show your imagination and make any body. And decorate our homemade product.

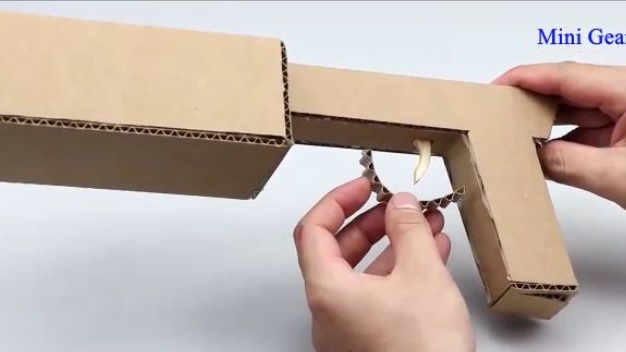
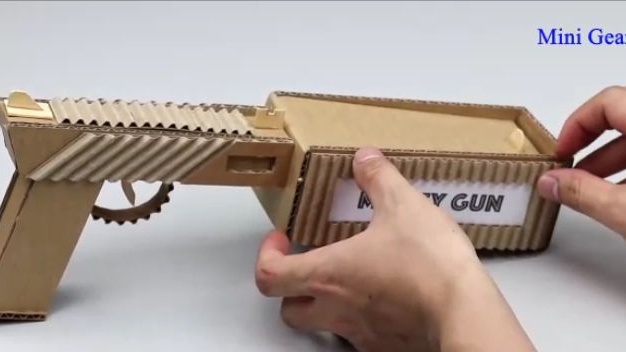
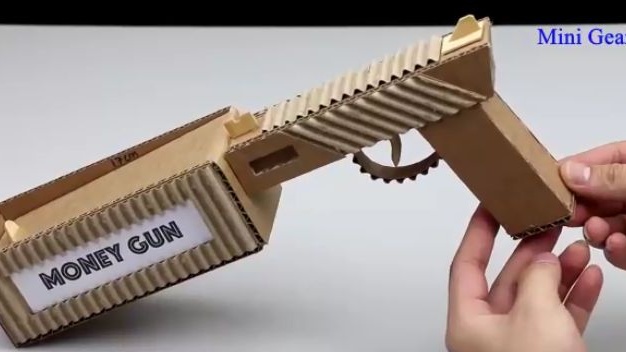
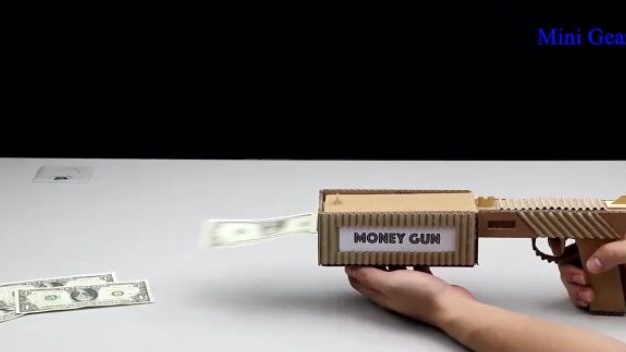
All is ready! It remains only to test, for this we take and refill the money of the joke bank (well, if there is such an opportunity, then you can fill in real banknotes) in the tank. We pull the trigger and shoot. As a result, we did not get an ordinary and funny homemade product.
Here is a video from the author with a detailed assembly and testing of this homemade product:
Well, thank you all for your attention and good luck in future projects, friends!