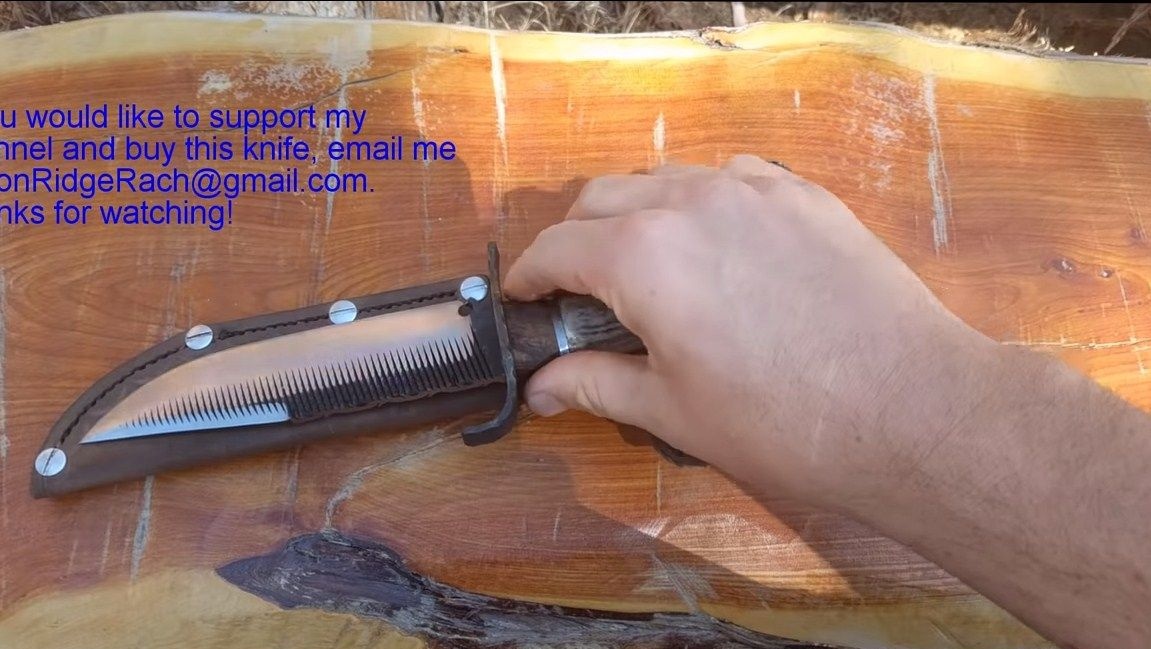

Greetings to lovers of quality knives. I bring to your attention a good sturdy knife that you can make do it yourself. As a source material, the author used the old rasp. This steel was perfect for making a strong knife. After all, the file metal is so strong that it is easy to process metals, our knife will be similarly strong, if it is made correctly.
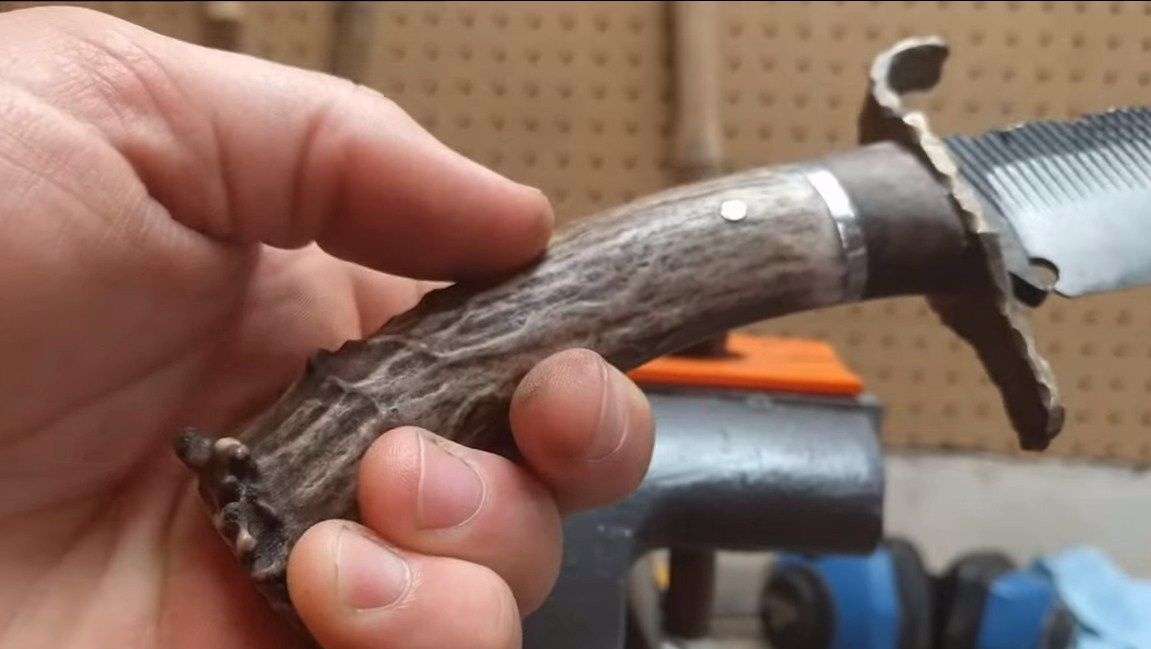
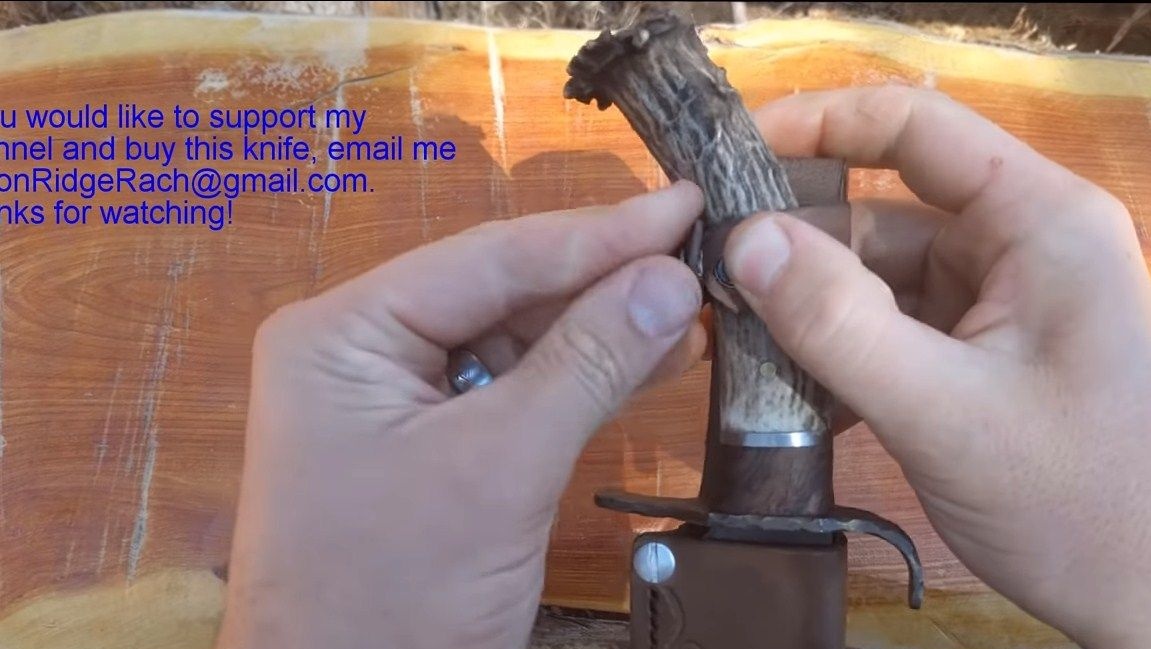
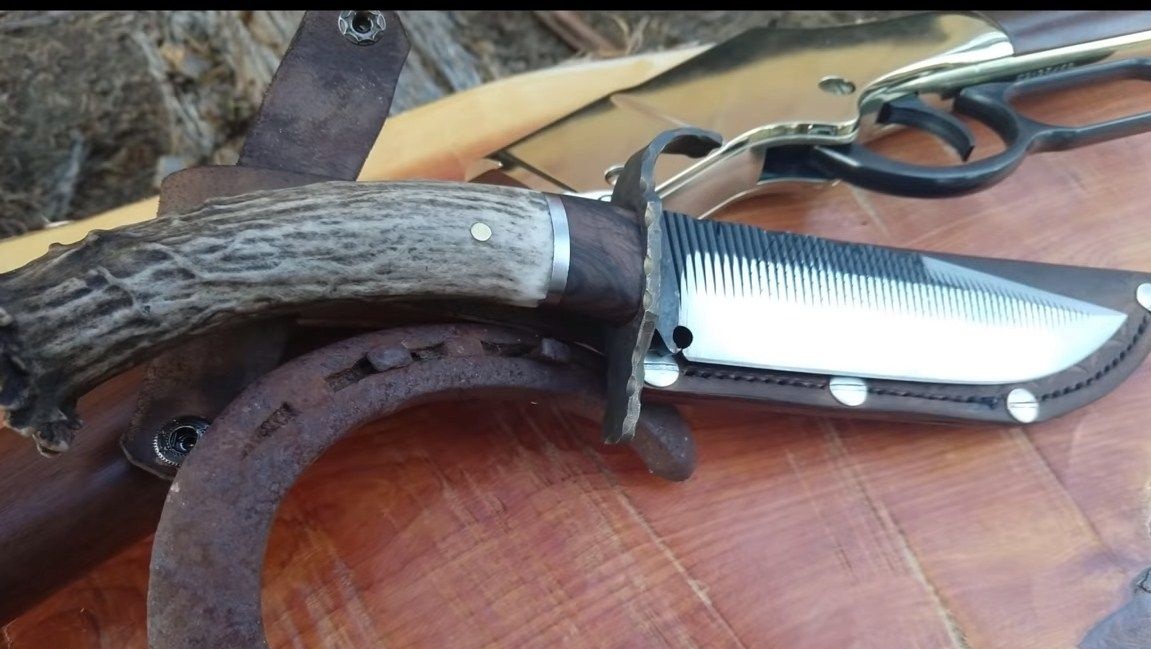
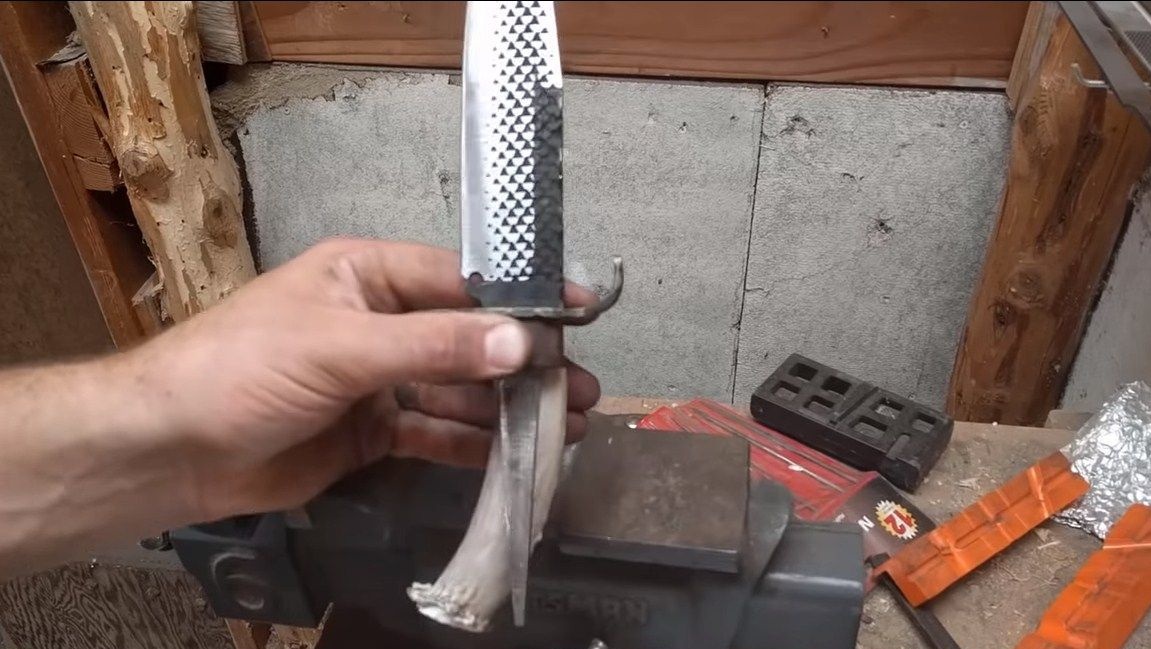
The style of the knife resembles hunting or hiking. In general, this is a universal knife and it can be used everywhere. The author made the handle of a knife from a deer antler, which makes it unique. The author also made comfortable and beautiful scabbard for a knife from leather, making it convenient and safe to wear on a belt. So, we will consider in more detail how to make such a knife!
Materials and tools that were used by the author:
Material List:
- rasp;
- horn for the handle;
- epoxy adhesive;
- sheet metal for the guard;
- leather for sheath;
- brass rod (for the pin);
- oil for wood impregnation.
Tool List:
- belt sander;
- drill;
- vise;
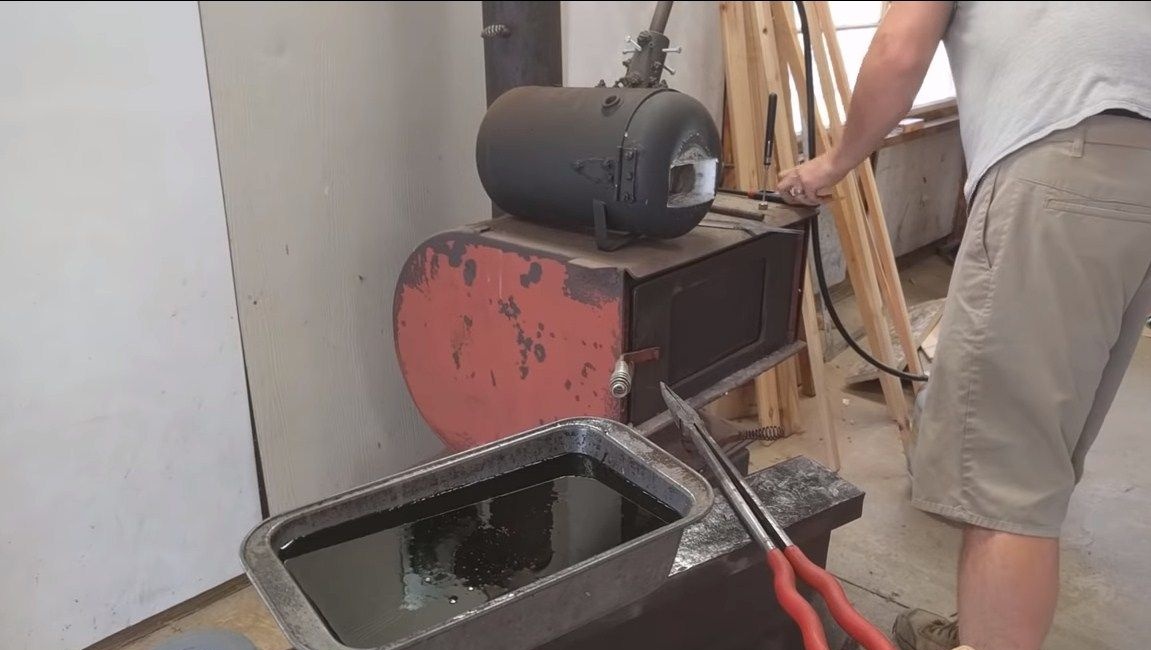
- forging furnace and tools for hardening;
- grinder;
- marker;
- drilling machine;
- clamps;
- drill;
- tape cutting machine;
- grinder.
The process of making a knife:
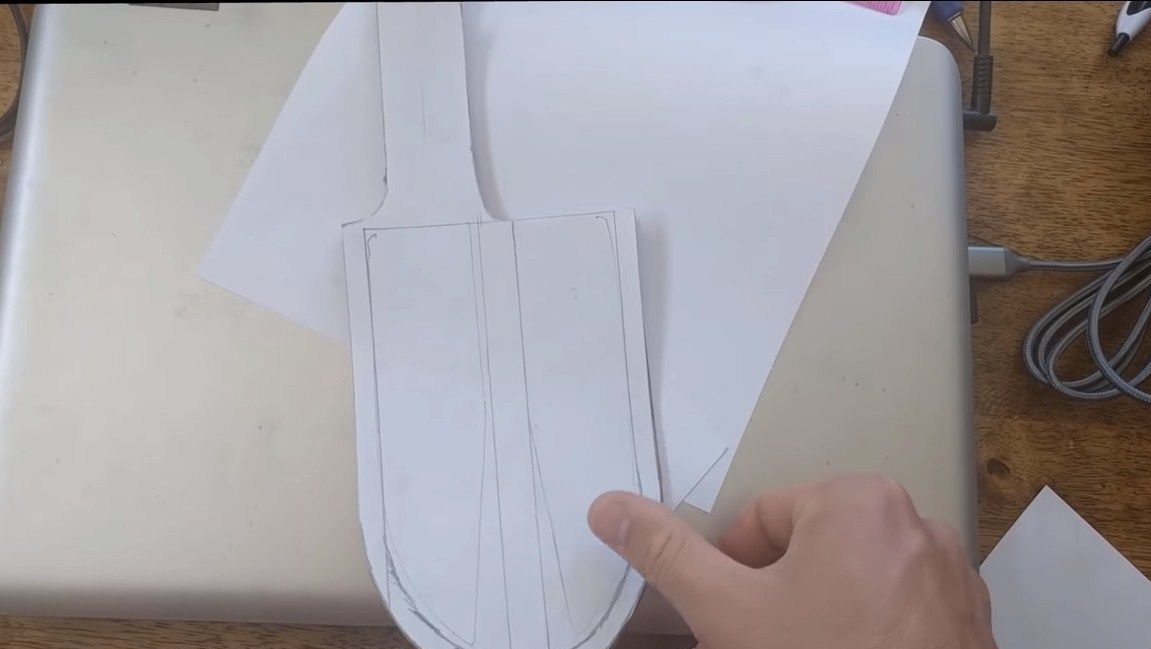
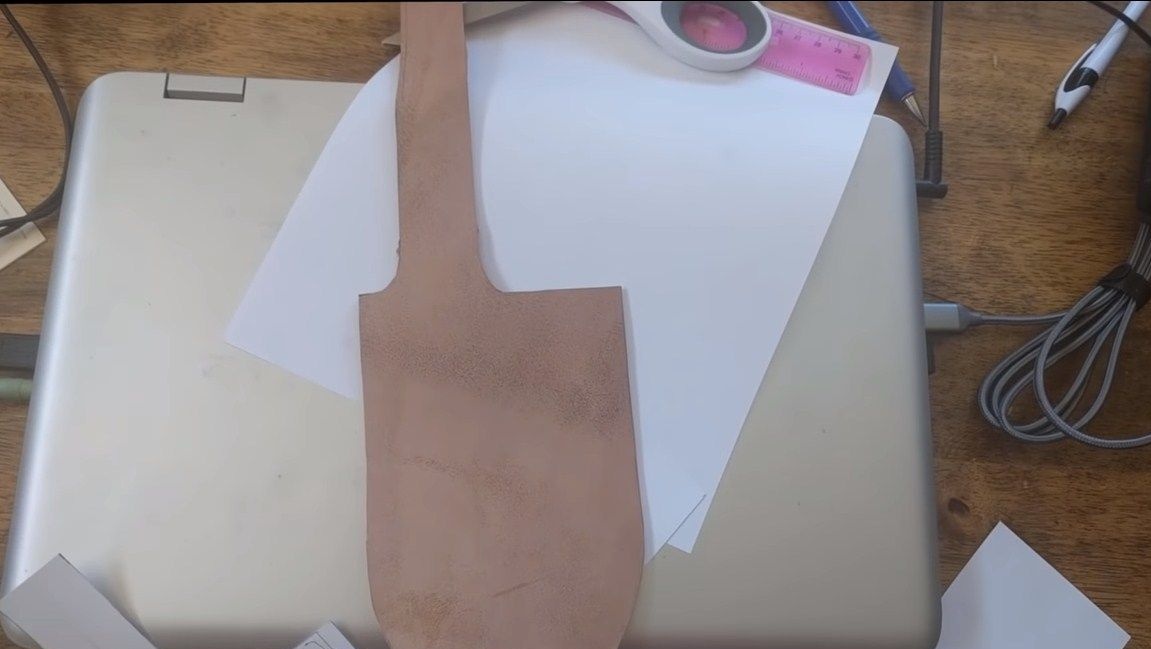
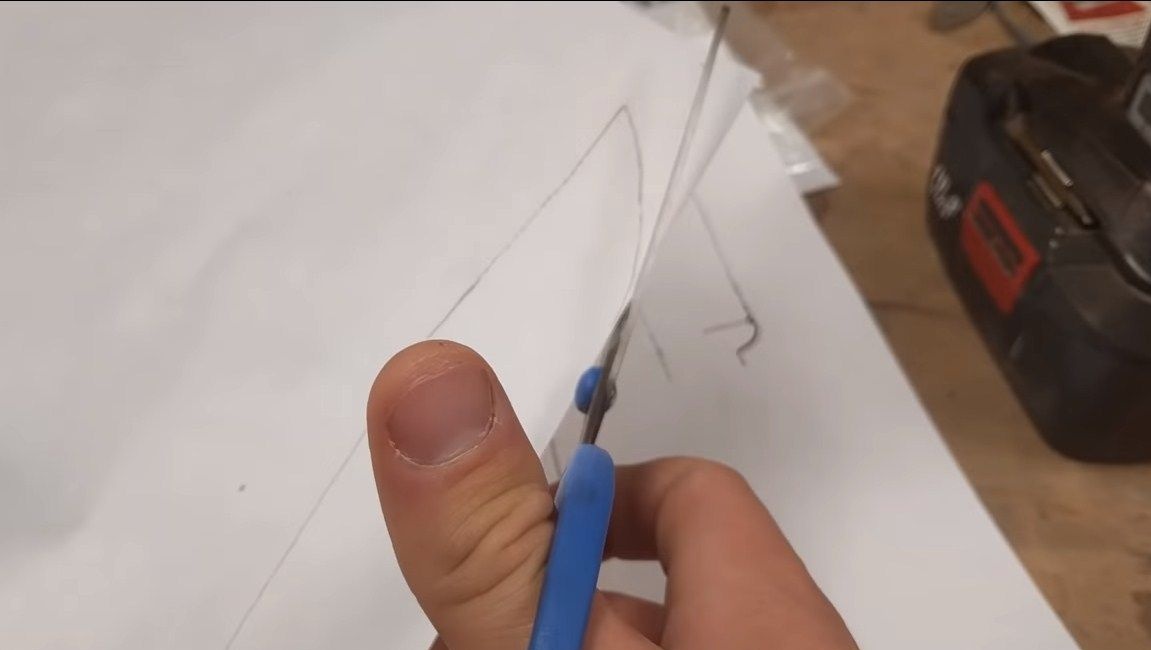
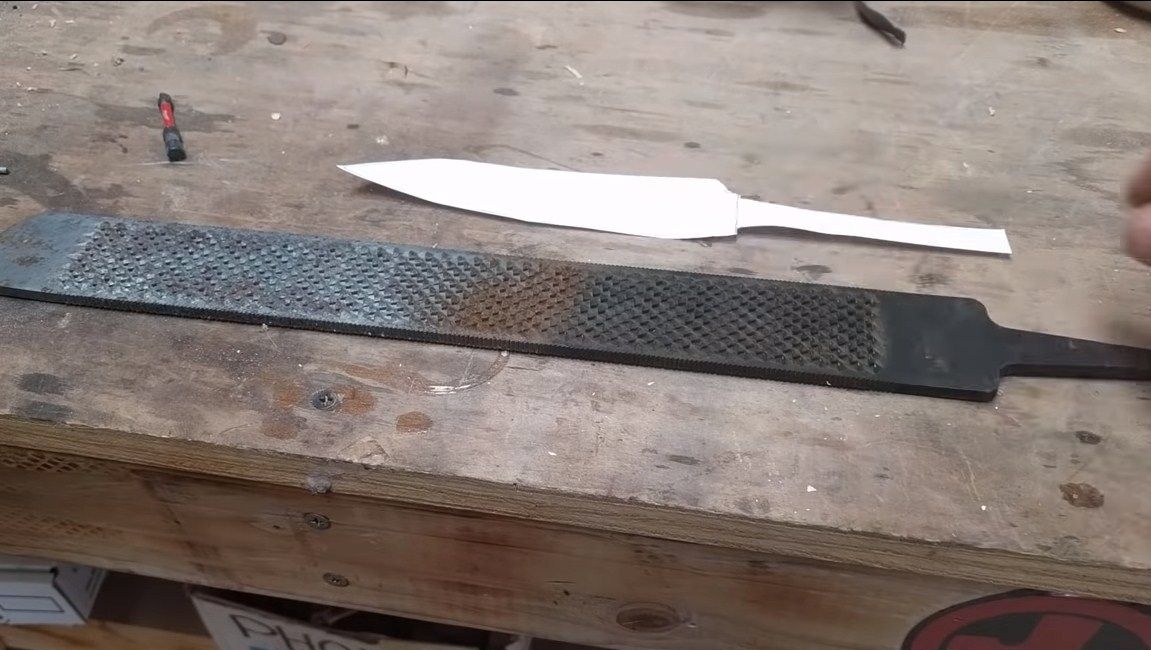
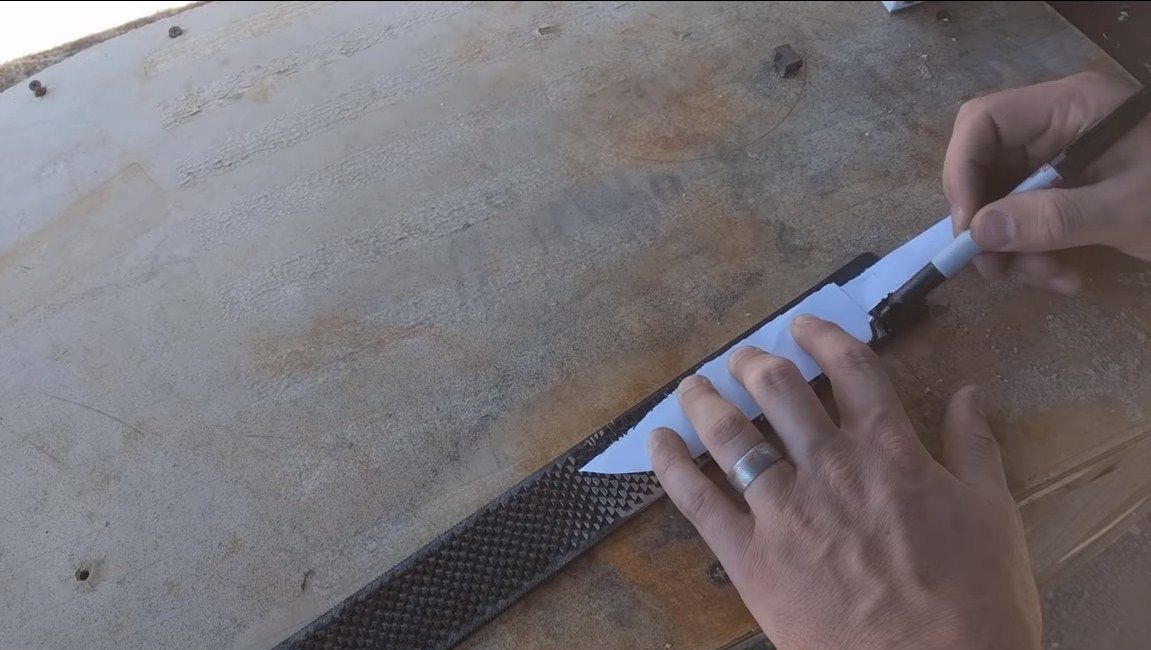
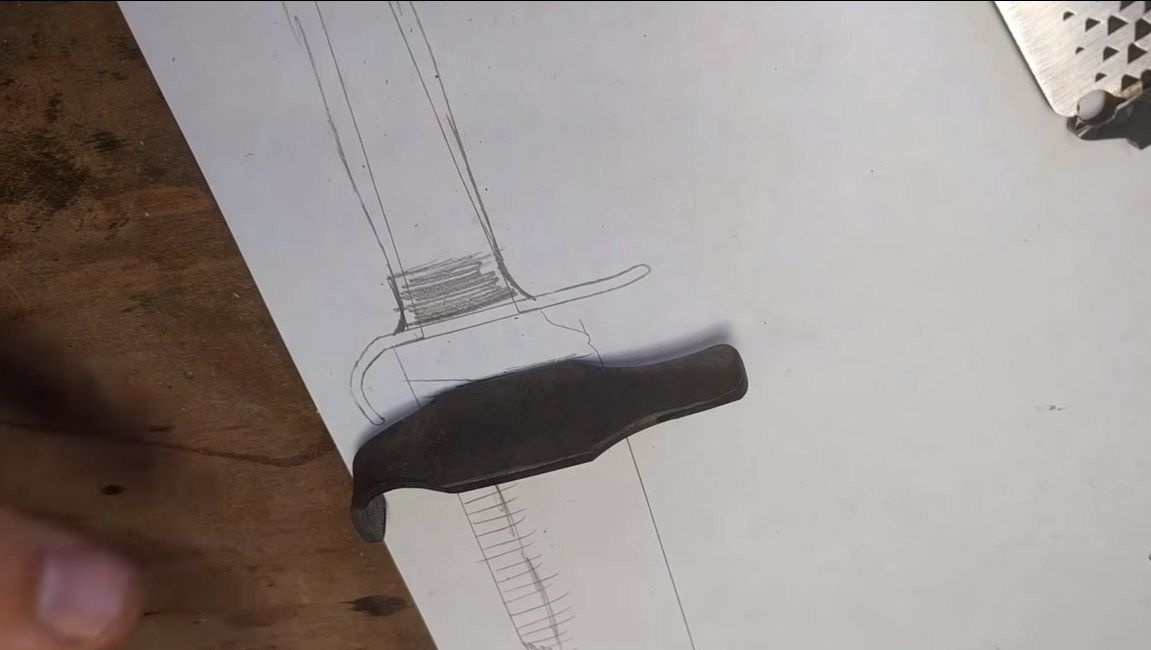
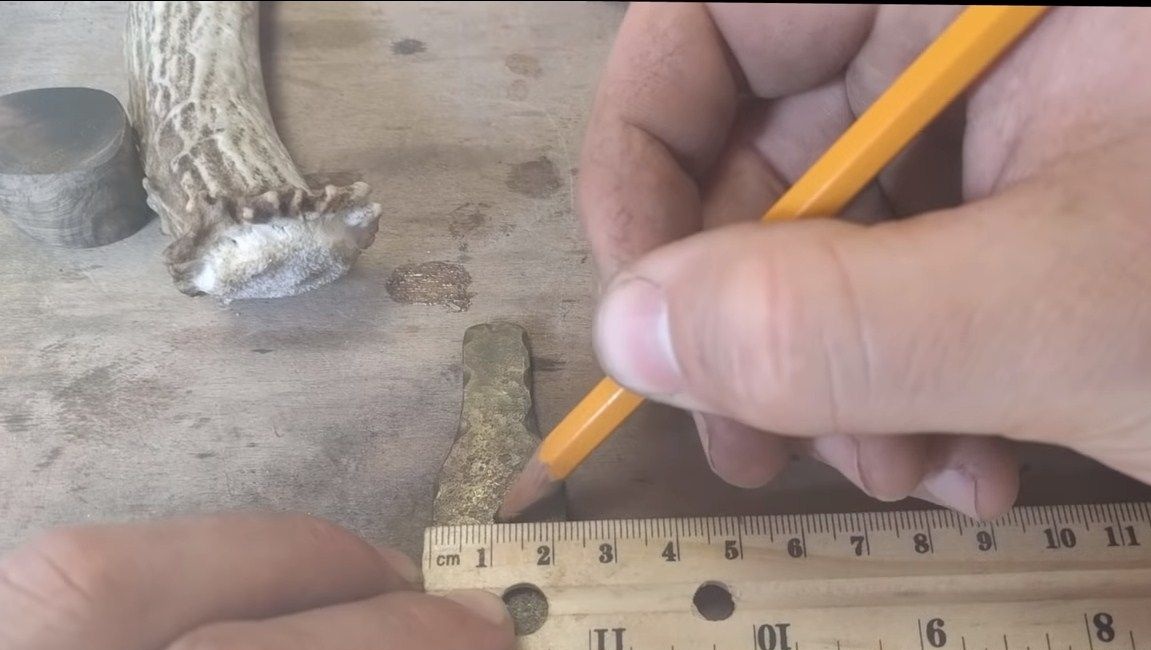
Step one. Cut the main profile
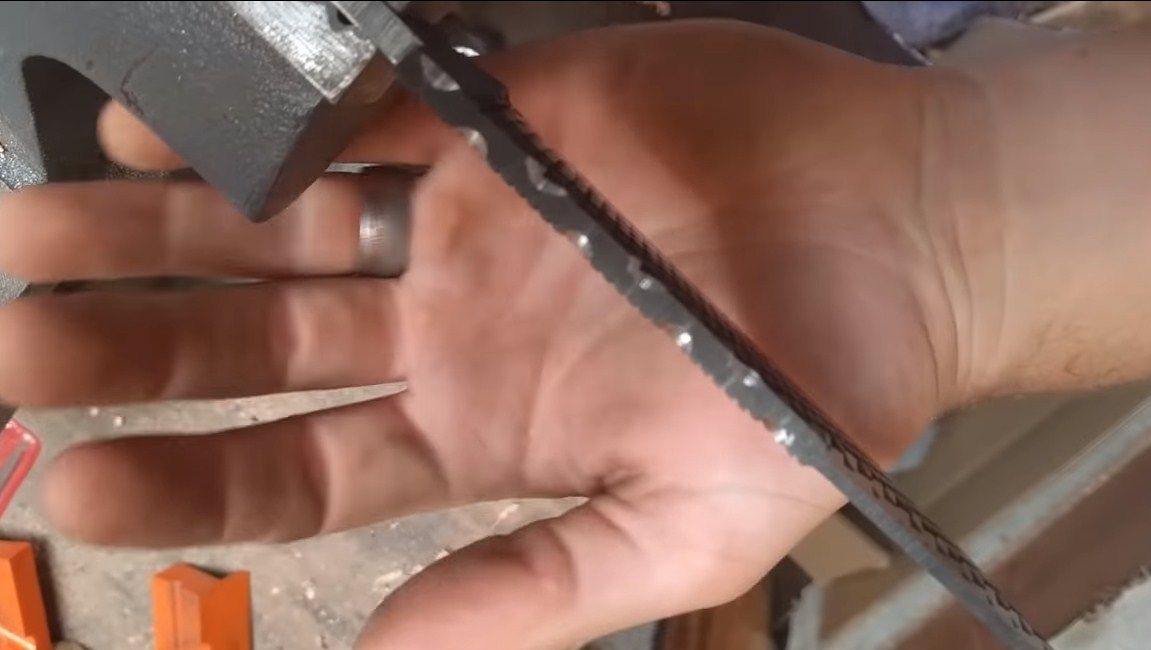
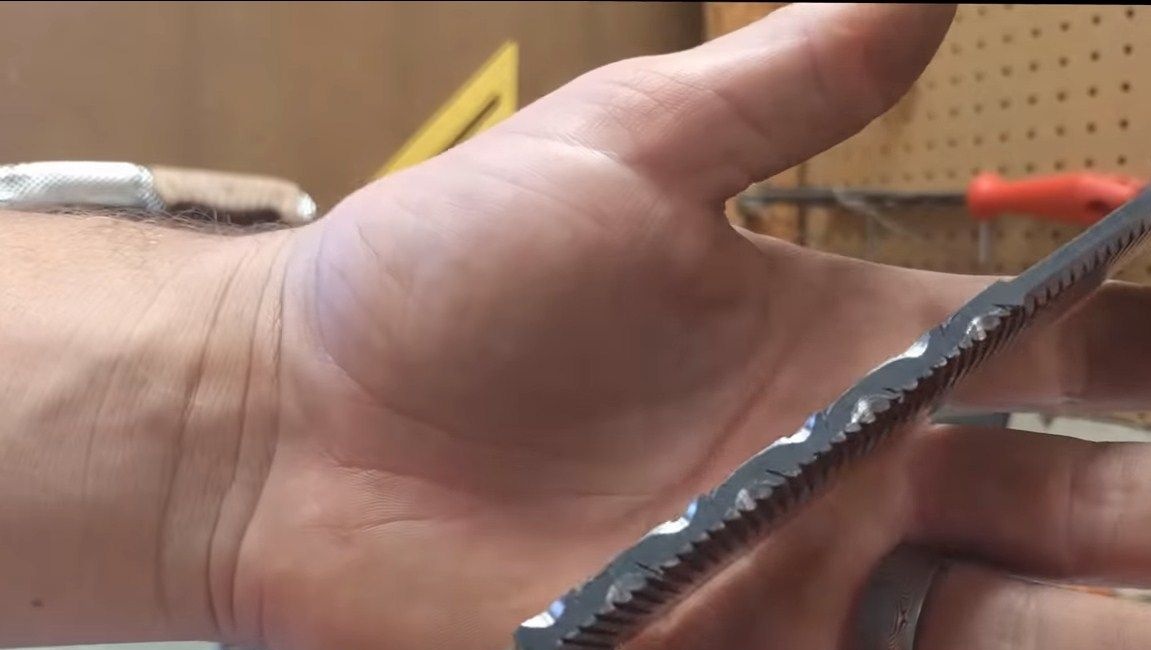
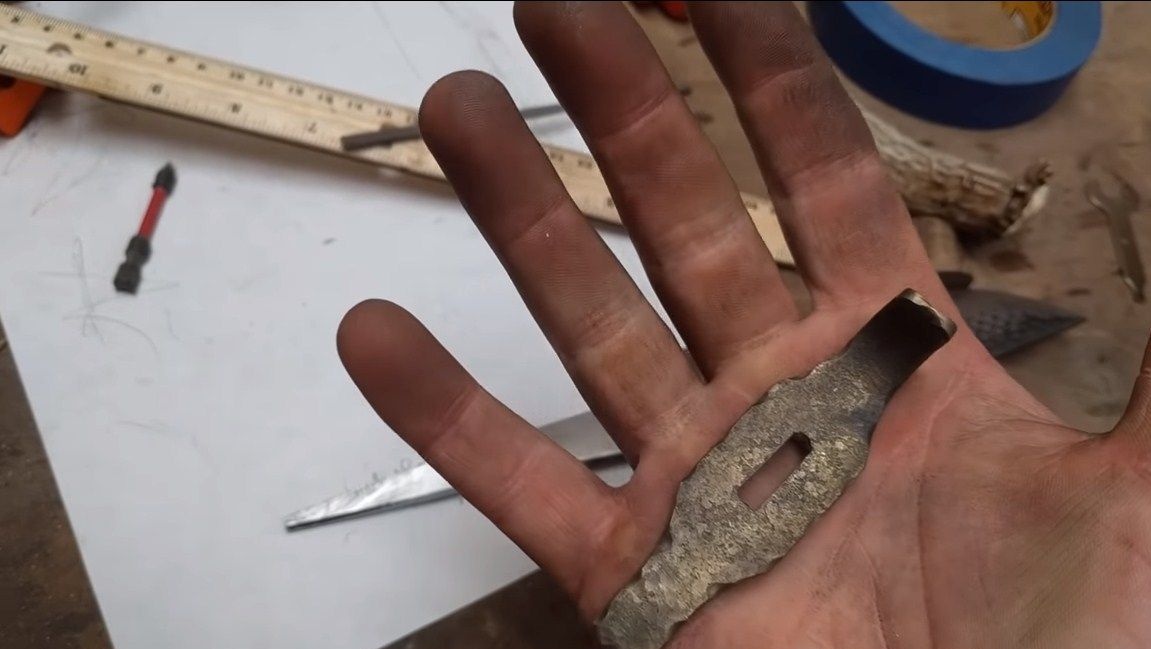
First you need to make a template, according to which we will make our knife. We draw it on paper and cut it out with scissors. We prepare the file, clean it to a shine, so that it is convenient to draw on it. Next, apply the template to the rasp, and paint over the entire area around with a black marker. In the end, we will need to cut everything black. We clamp the file in a vise and proceed to cutting. Then the author used a grinder. Problem areas are cut in parts.
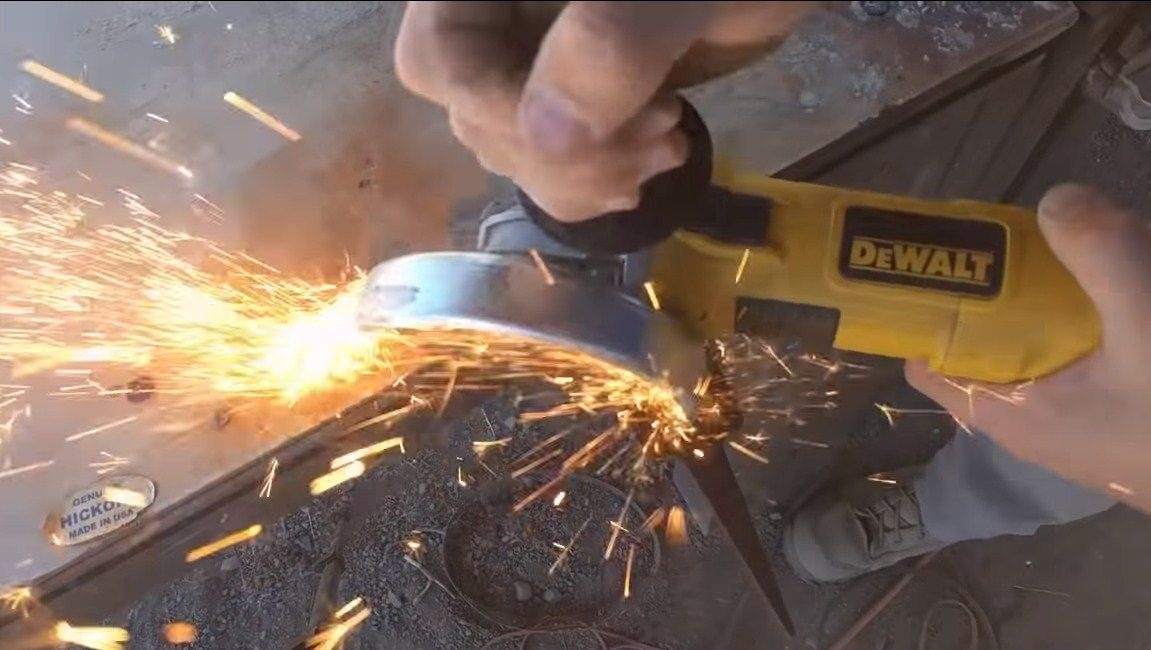
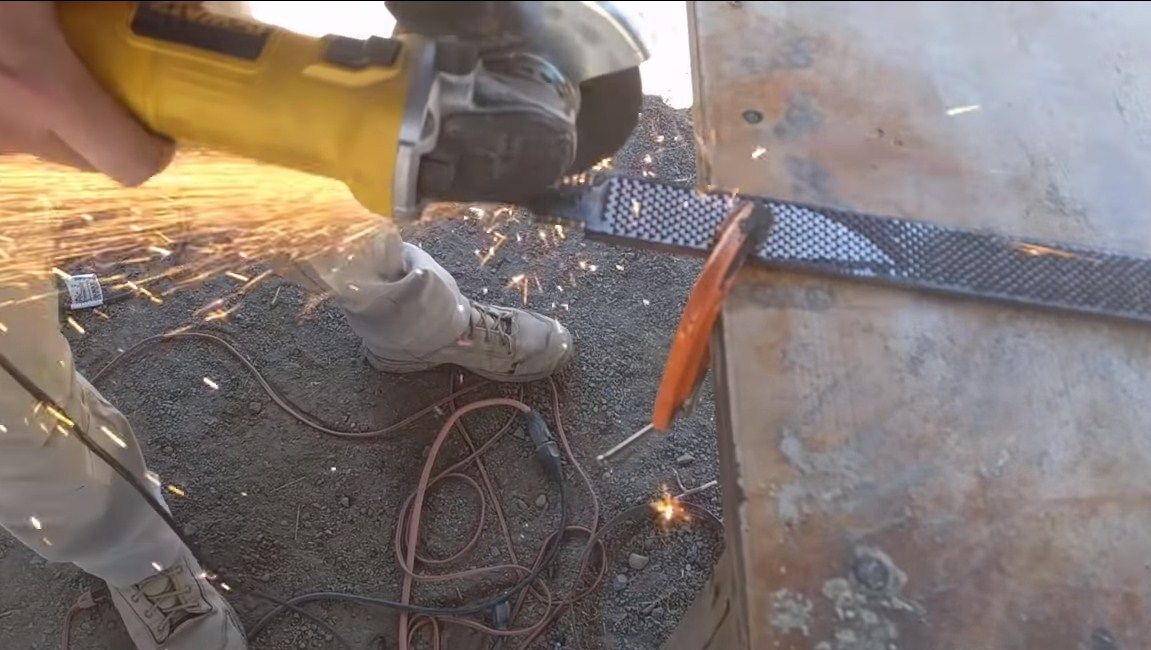
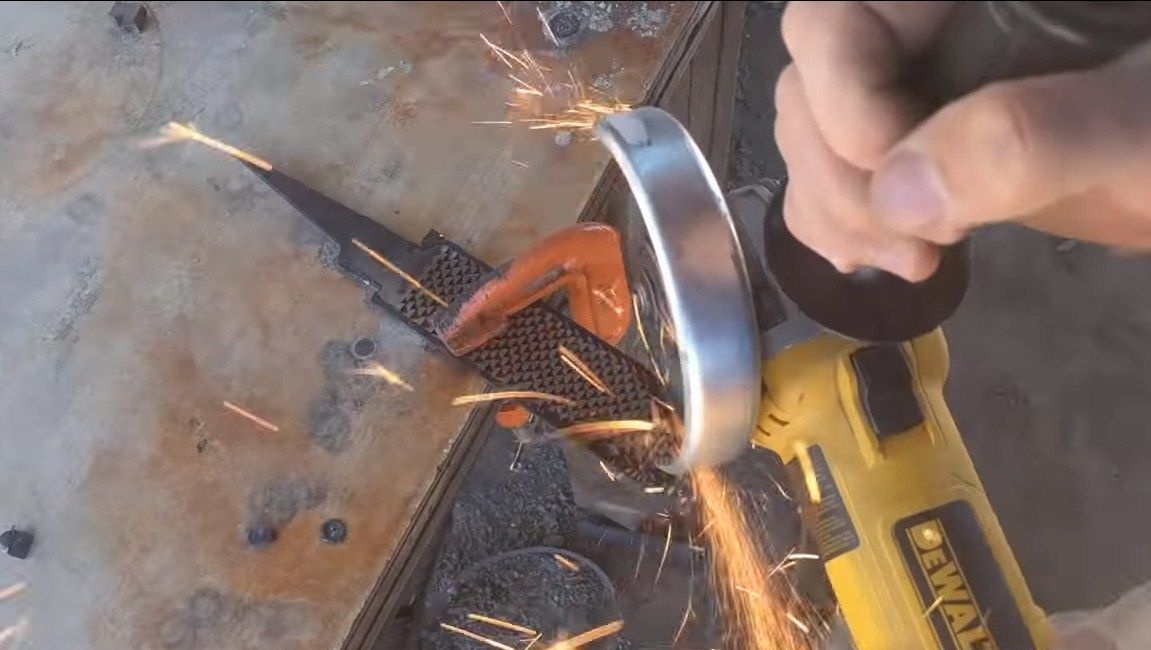
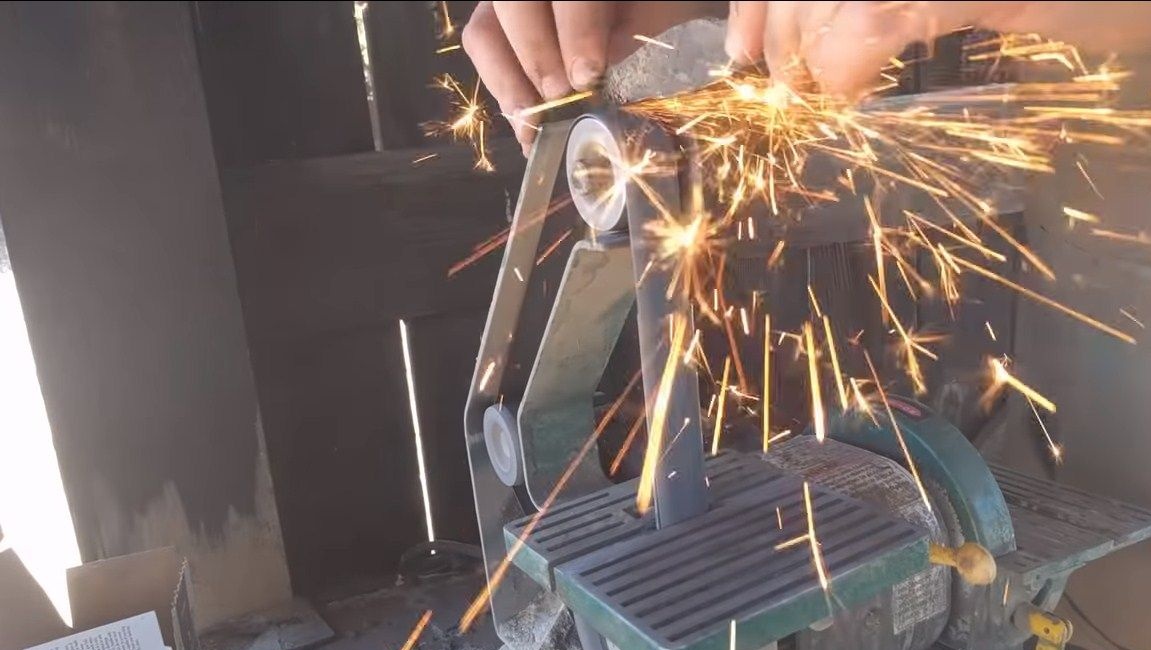
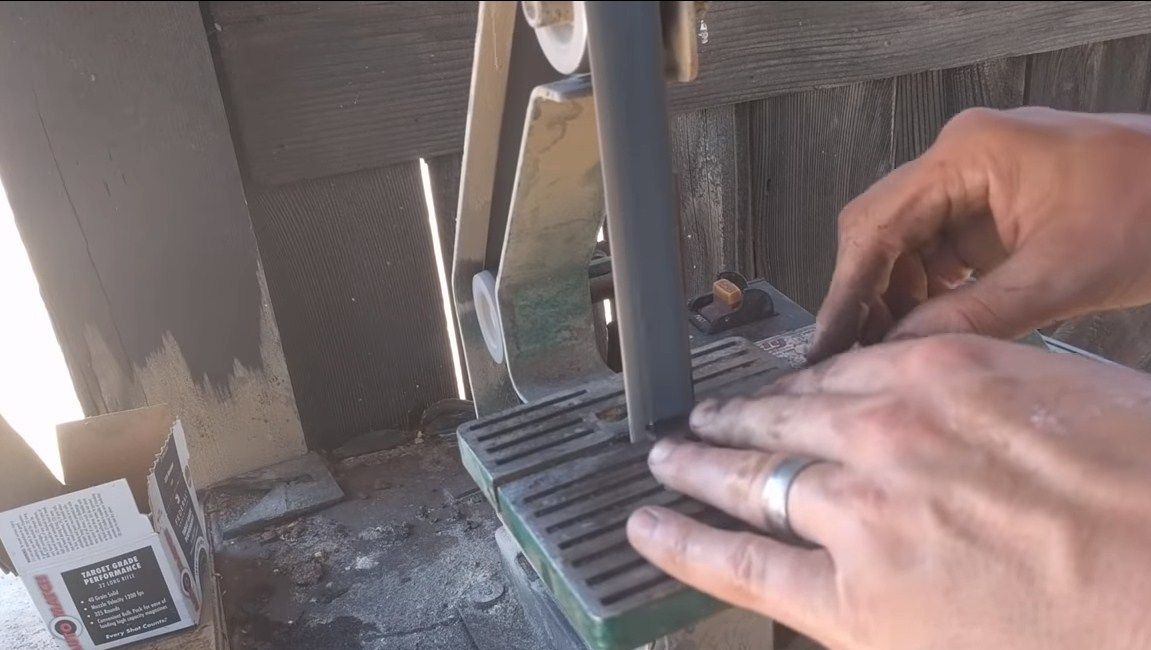
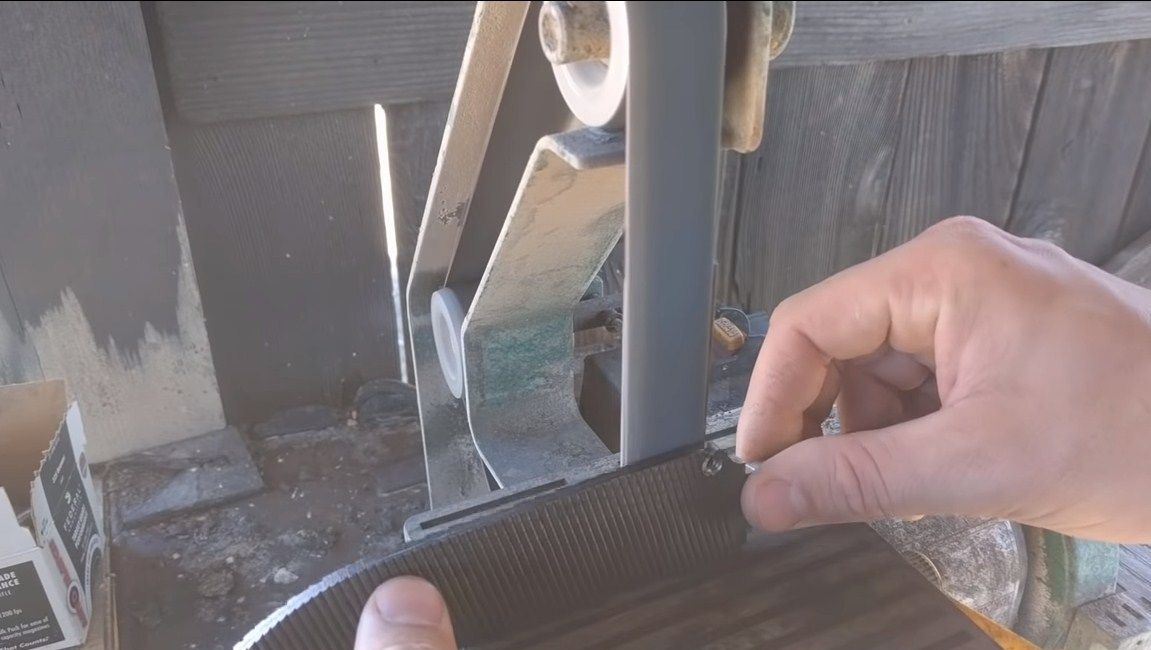
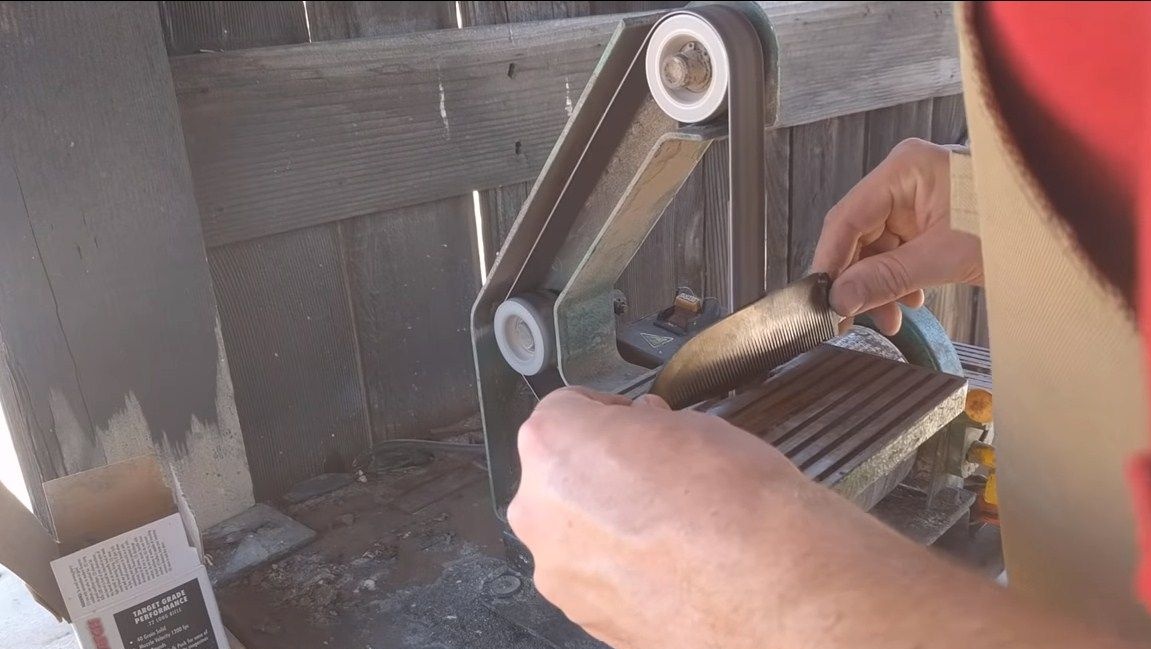
Step Two Grinding work
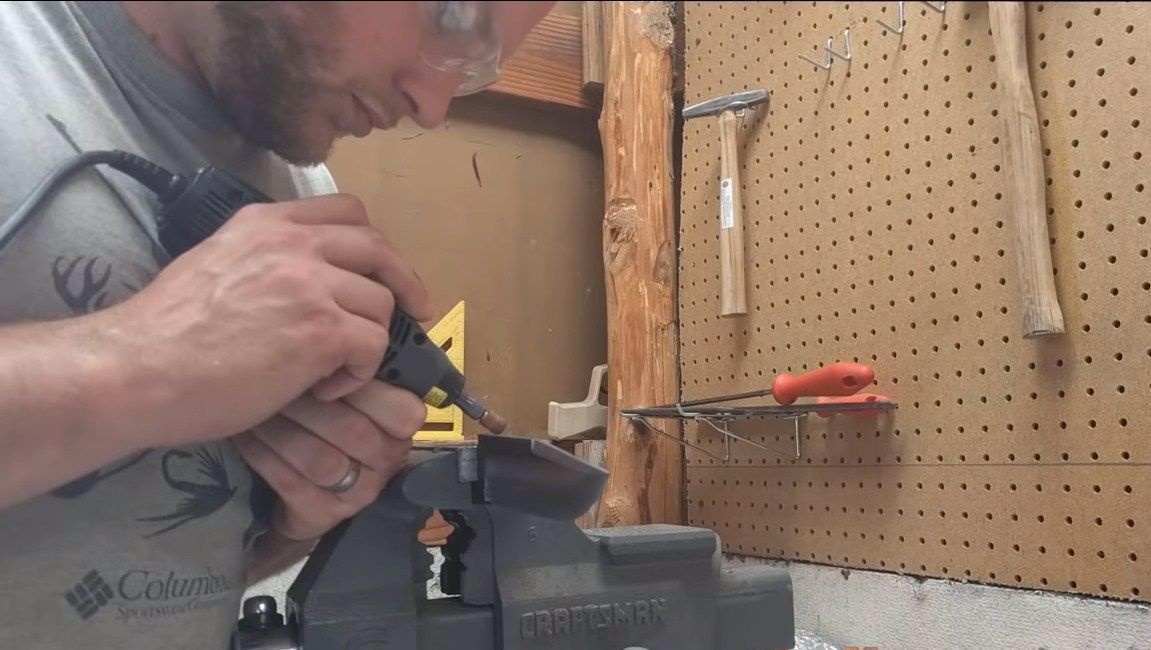
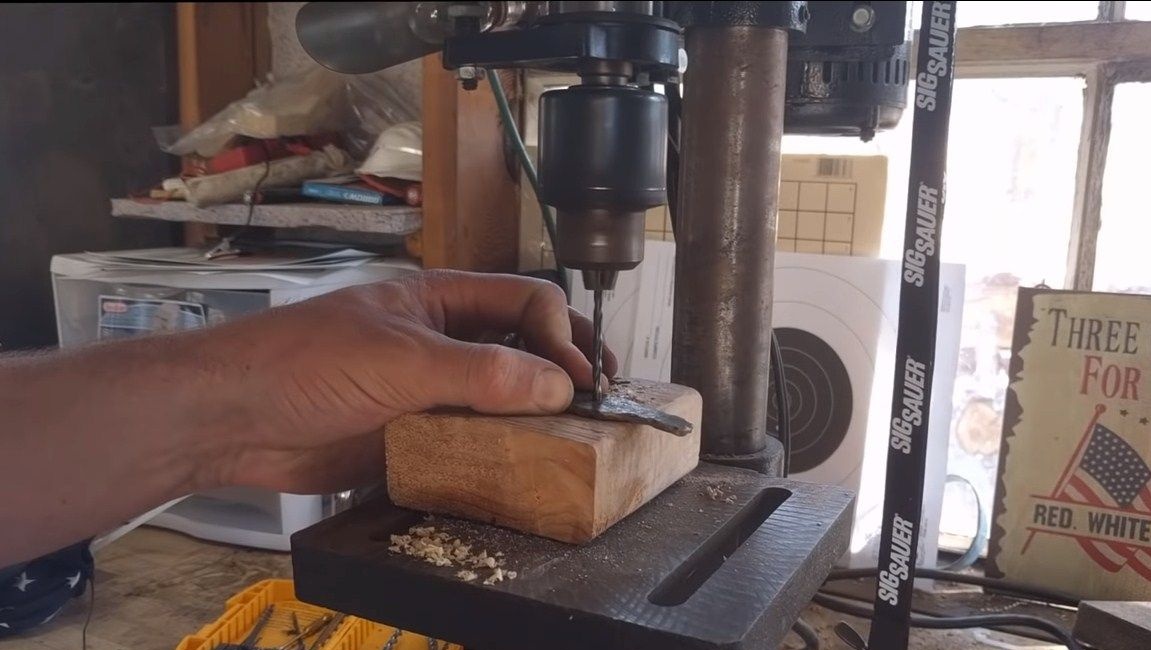
When the main profile is cut, you need to grind it along the contour. Here the author used a belt sander, a grinder or grinder with a grinding disc is also suitable. In hard-to-reach places you can work with a drill, you can’t do anything manually, because the file steel is hardened.
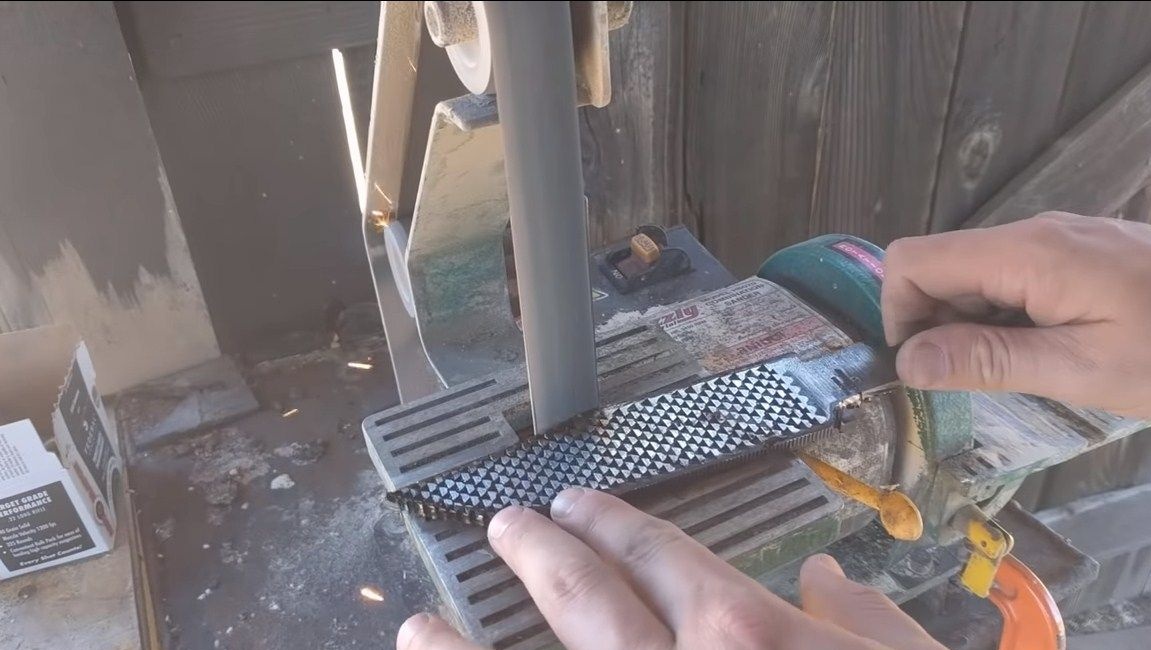
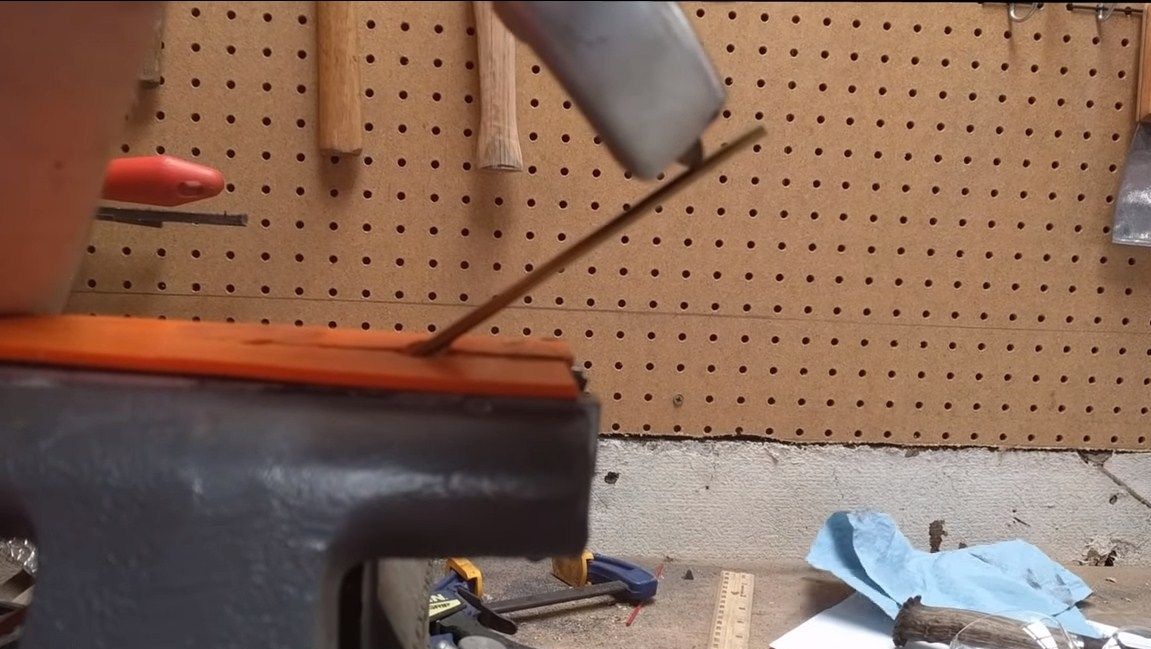
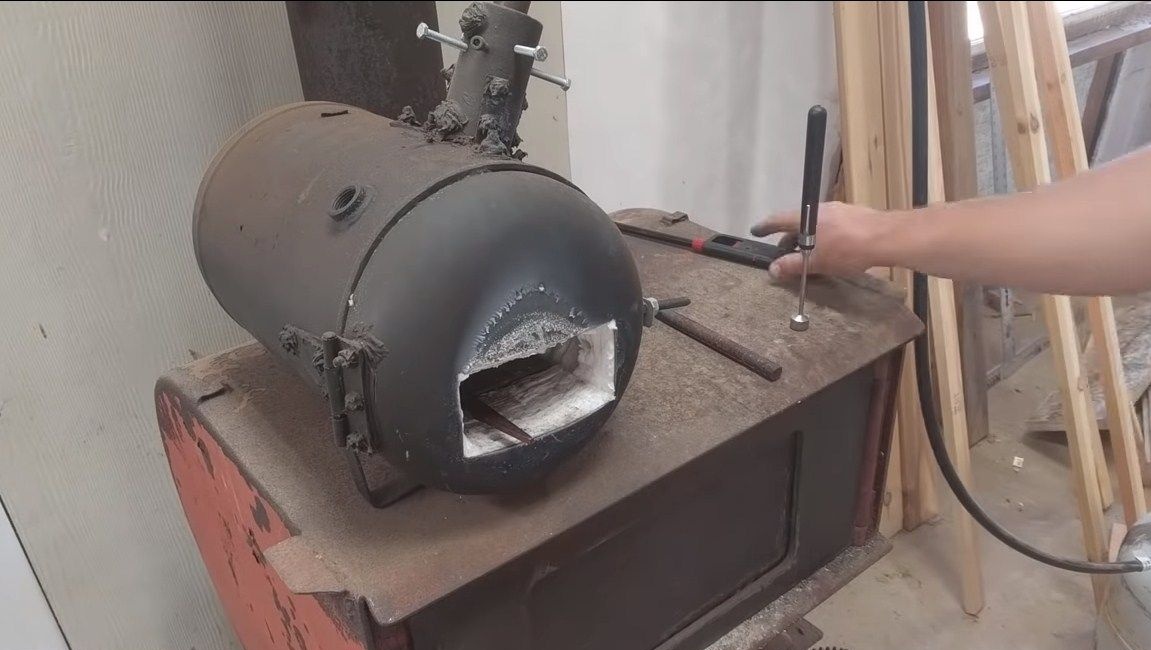
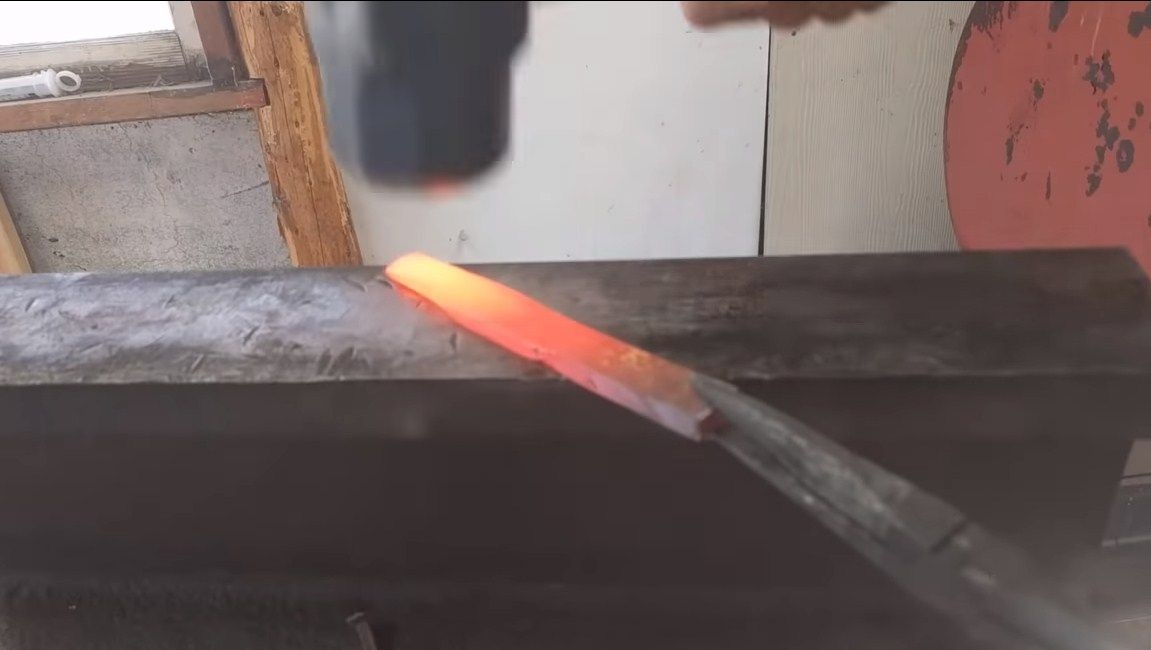
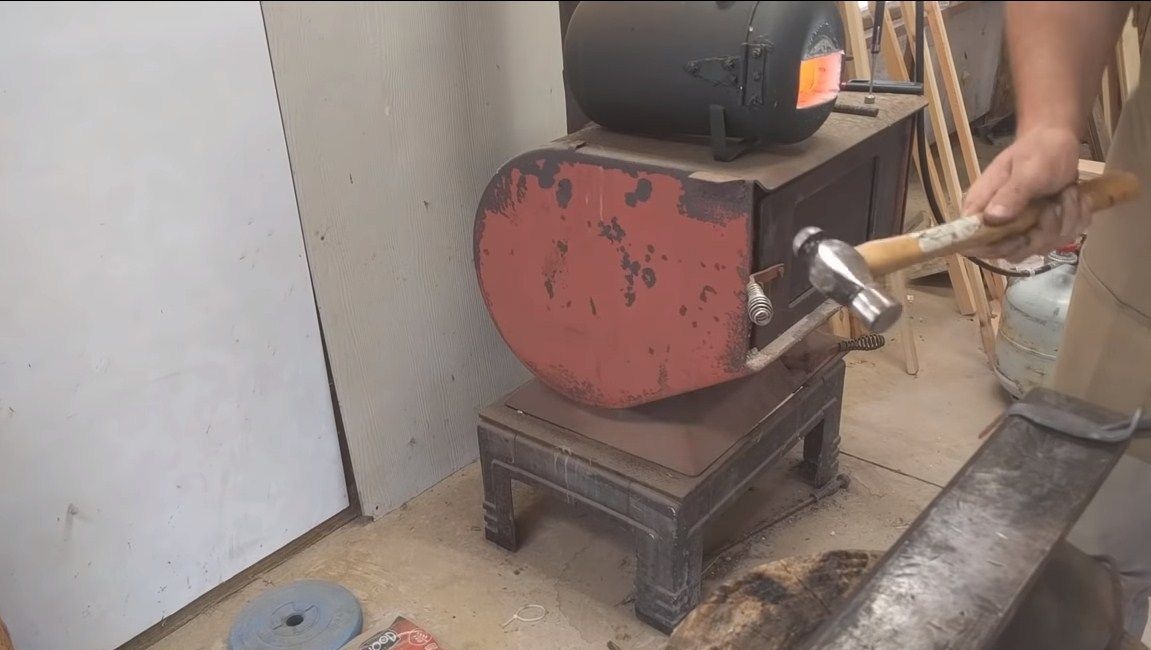
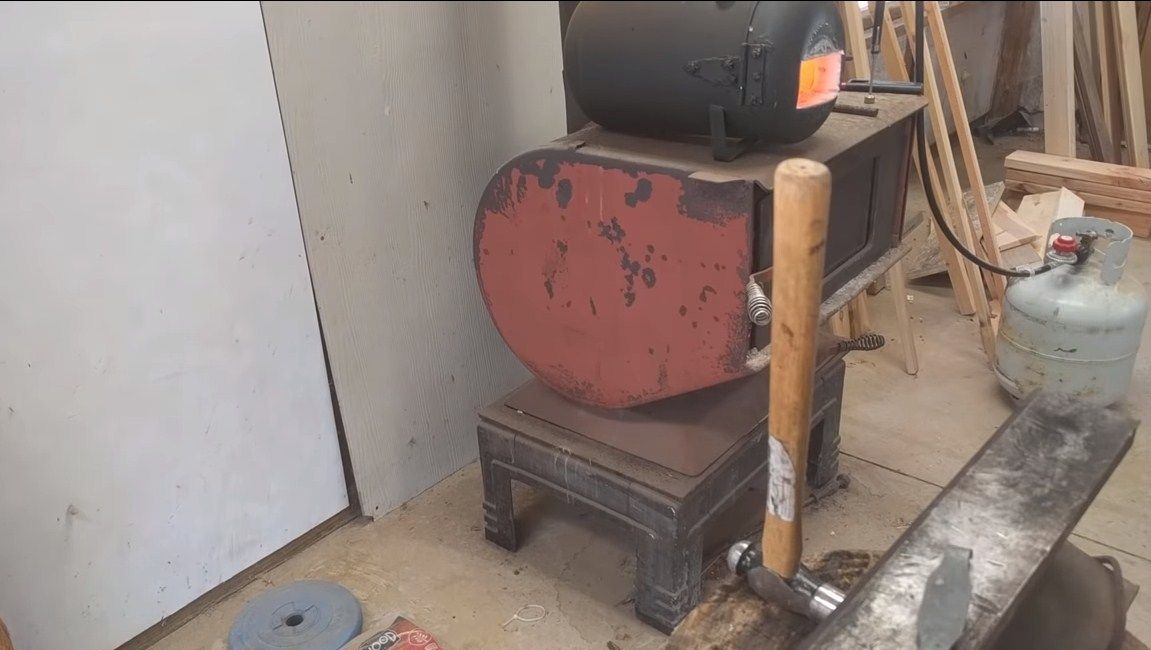
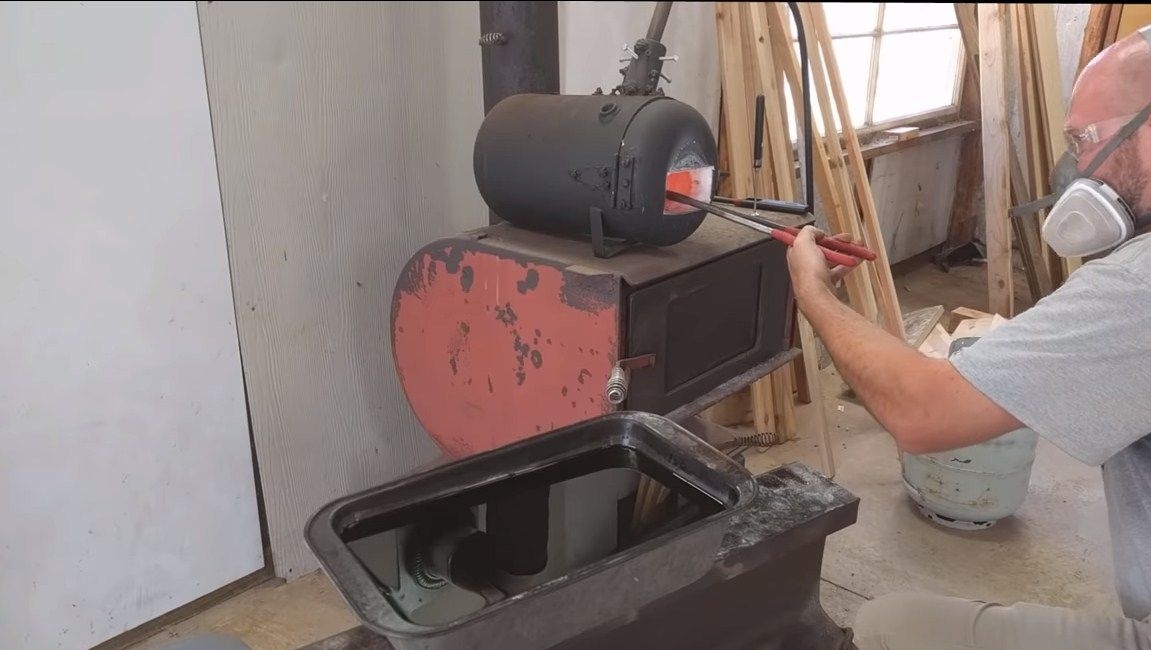
Step Three Metal tempering
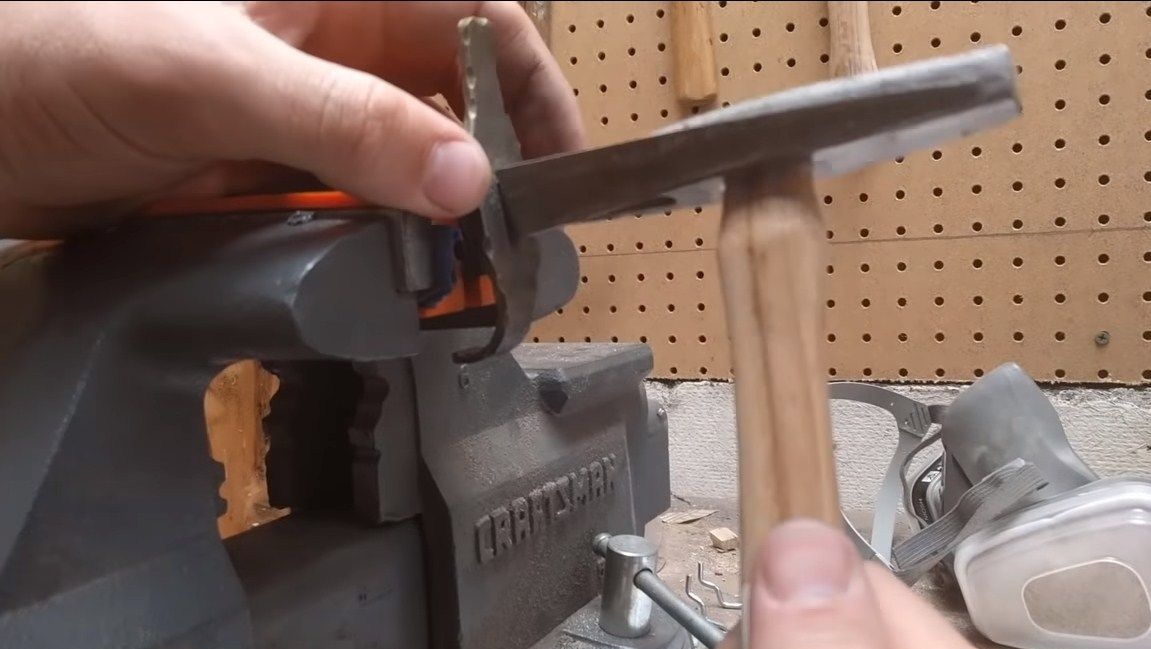
In order for the blade to be finalized manually, including drilling holes, we need to let go of steel. For these purposes, you need a blacksmith furnace. We redden the file red and let it cool smoothly.When heated, the file may become deformed, it’s okay, we trim it with a hammer.

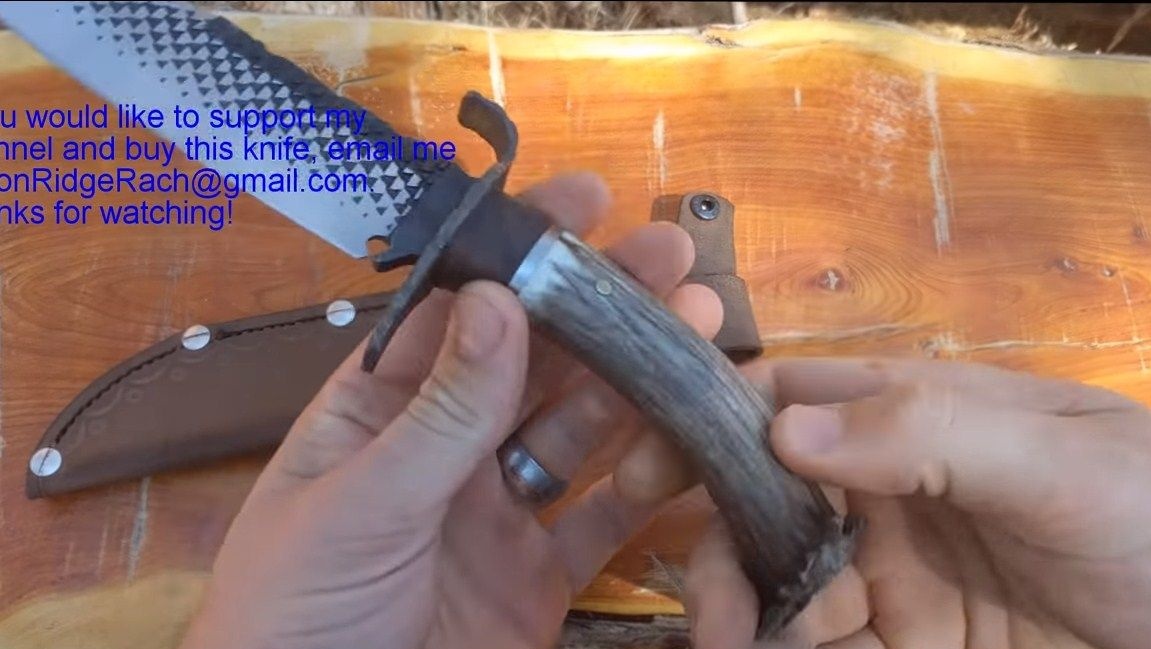
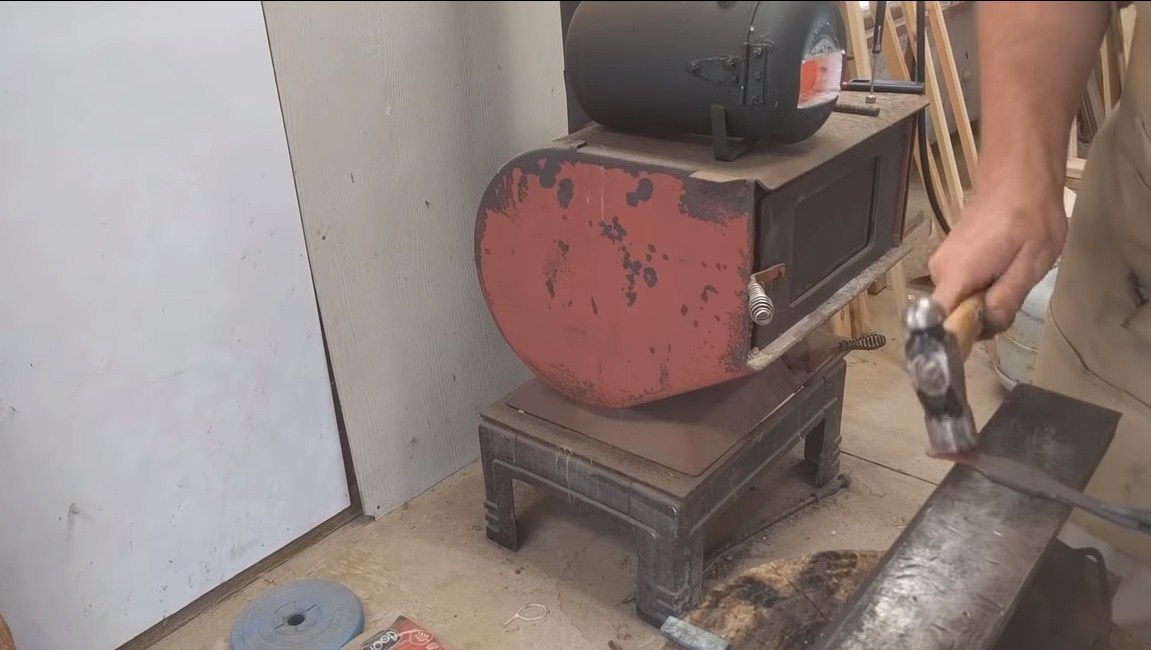
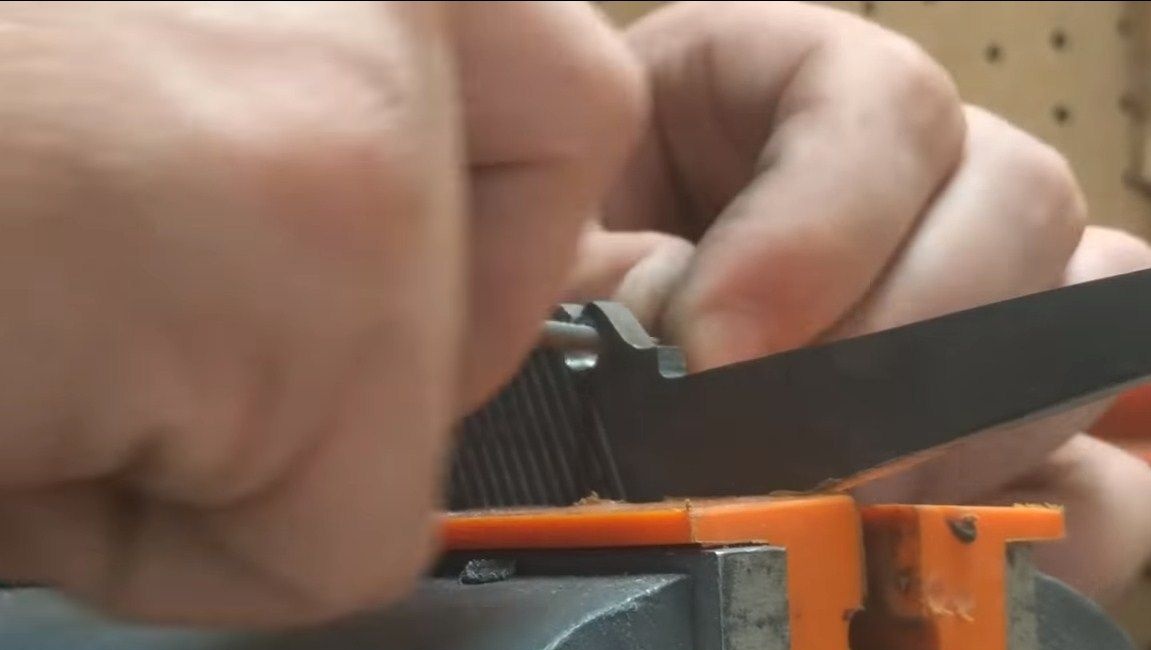
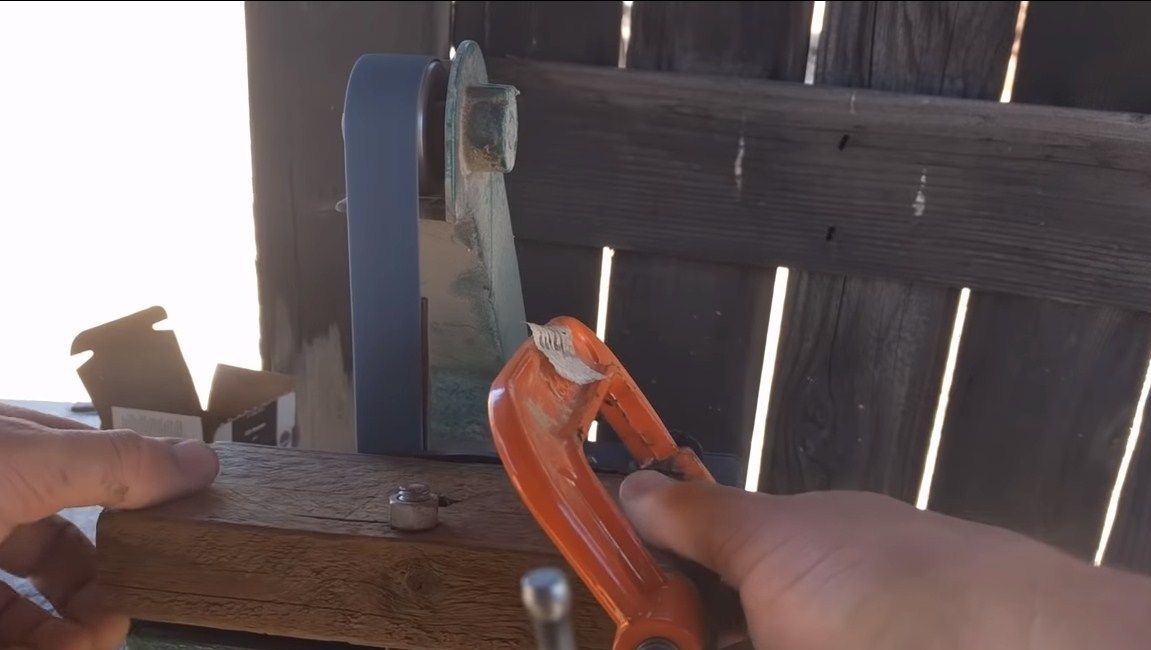
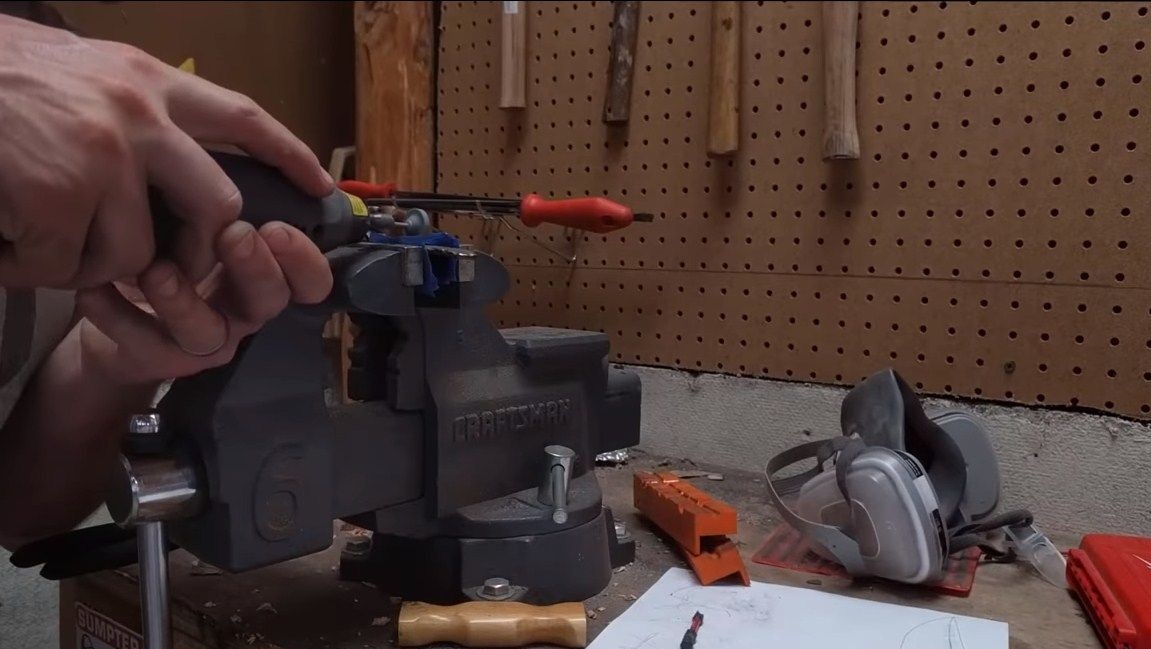
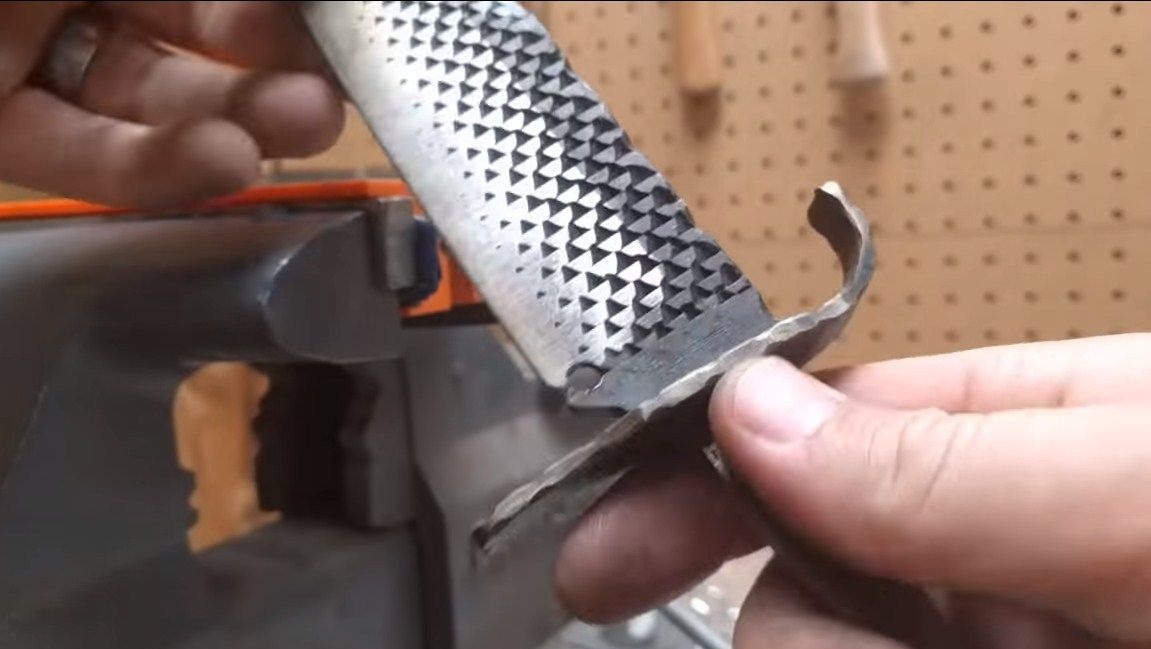
Step Four Making guards
The author decided to make an interesting forged guard for his knife. For these purposes, we need to find a piece of steel, and then we warm and work with a hammer. Grind the product on a belt grinder, remove defects.
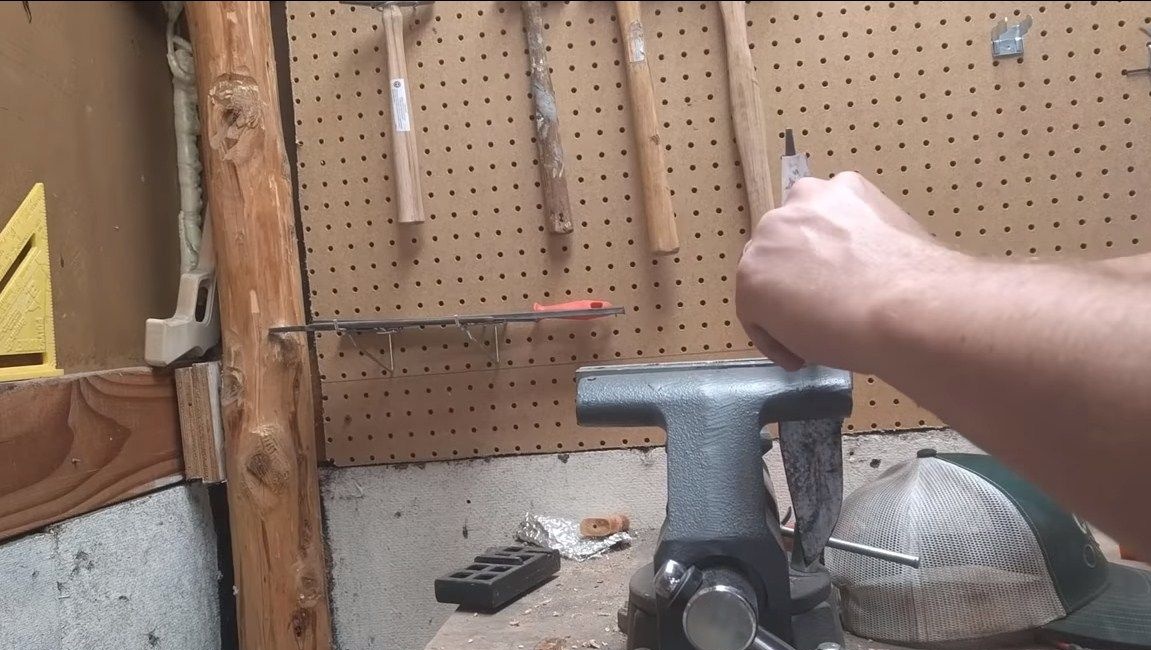
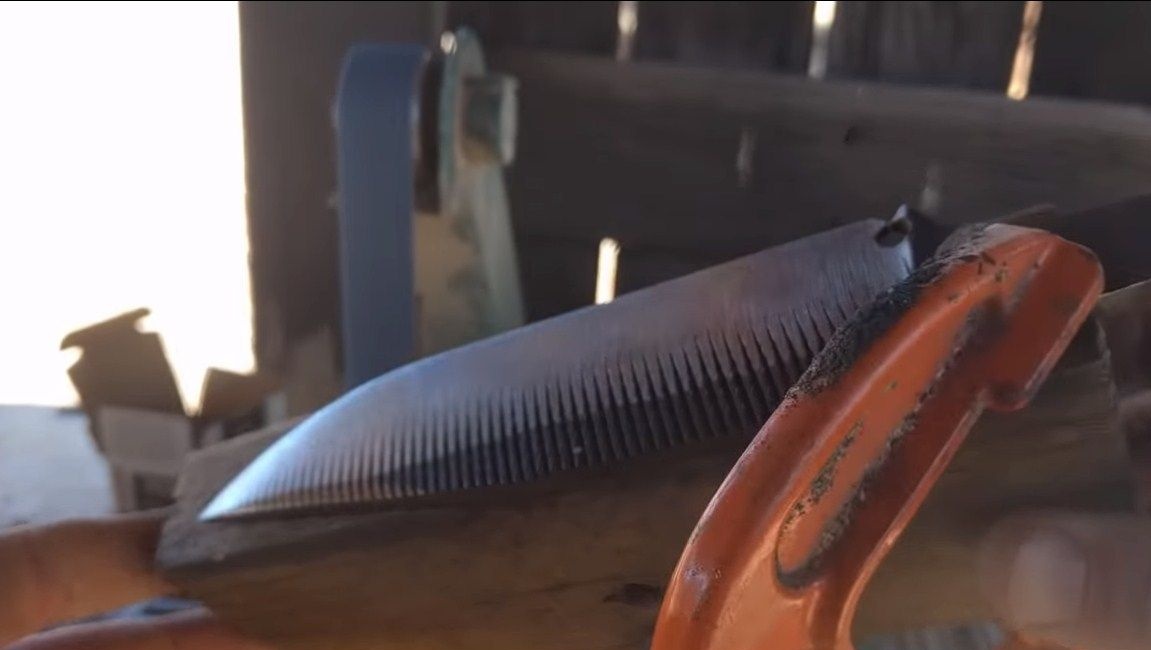
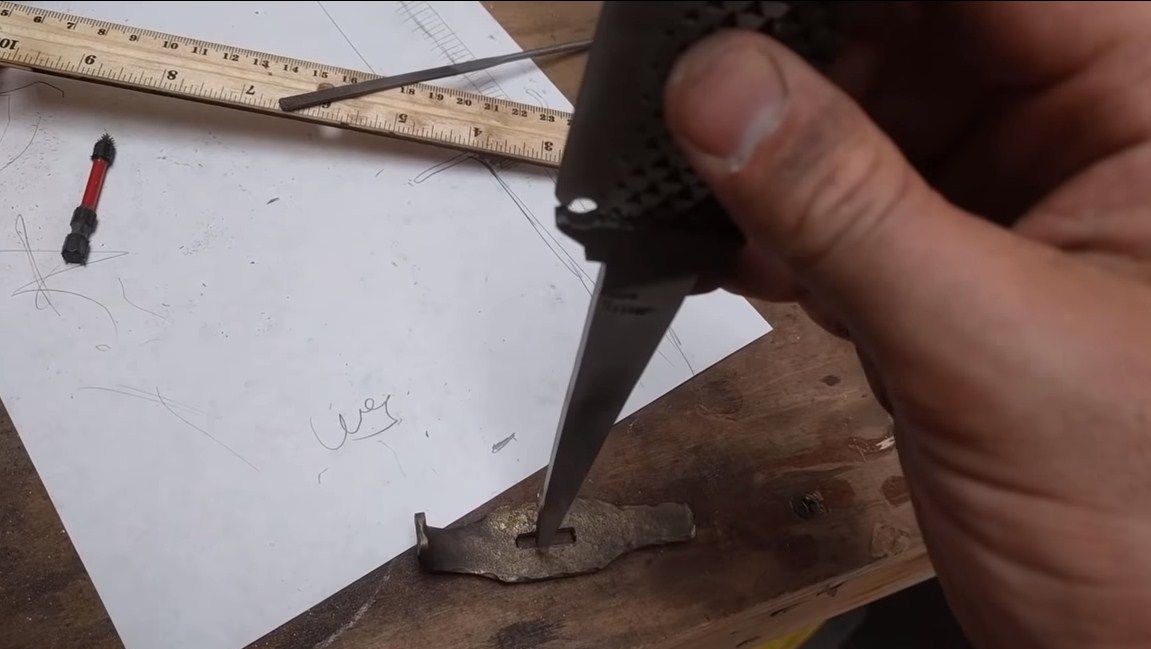
Step Five Modifying the blade
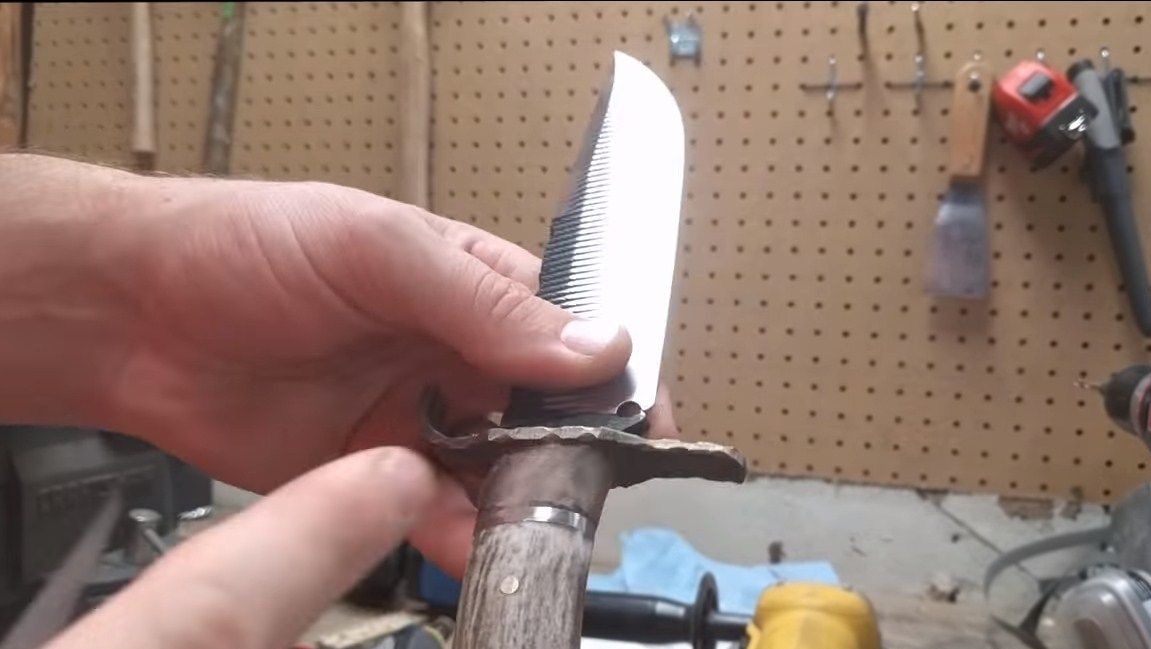
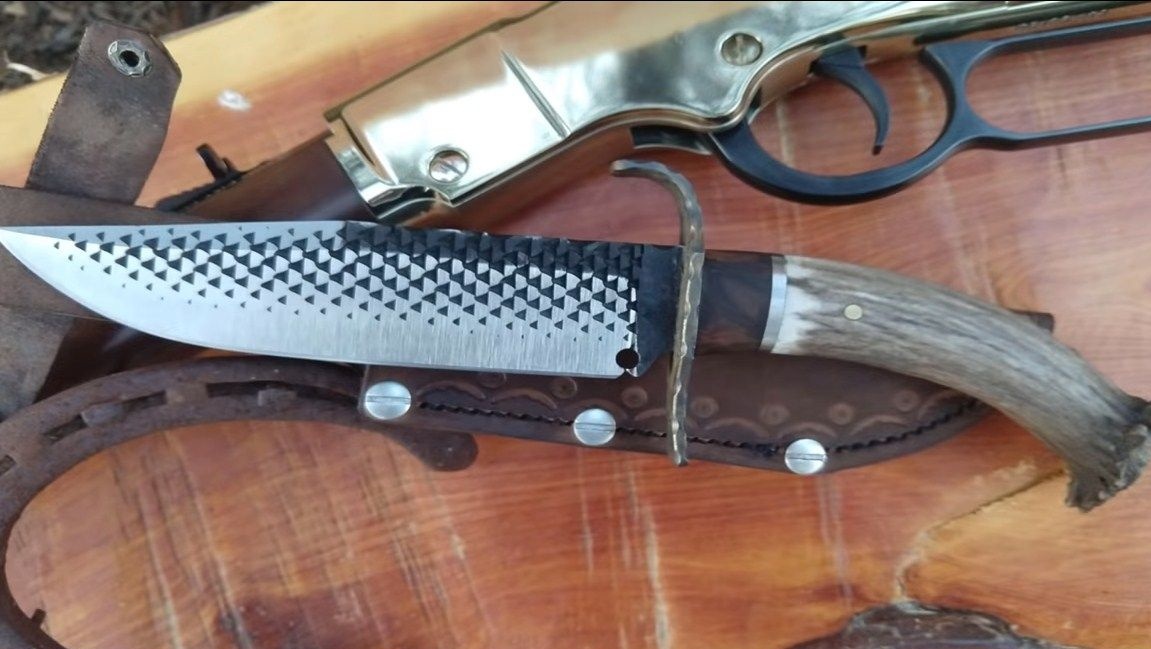
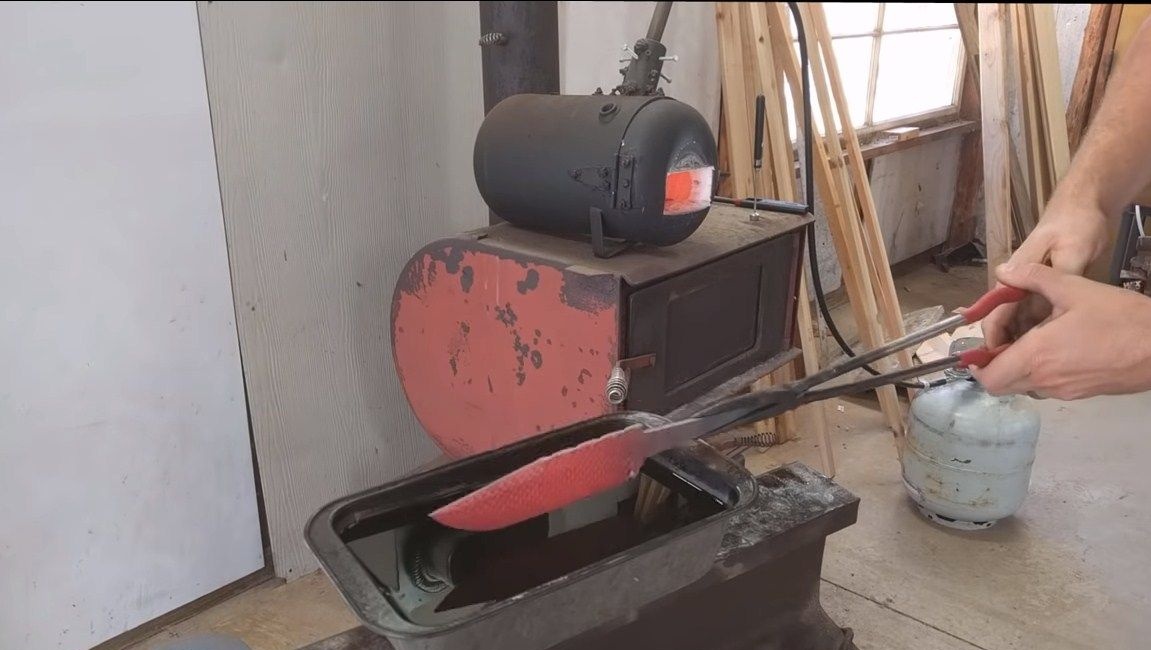
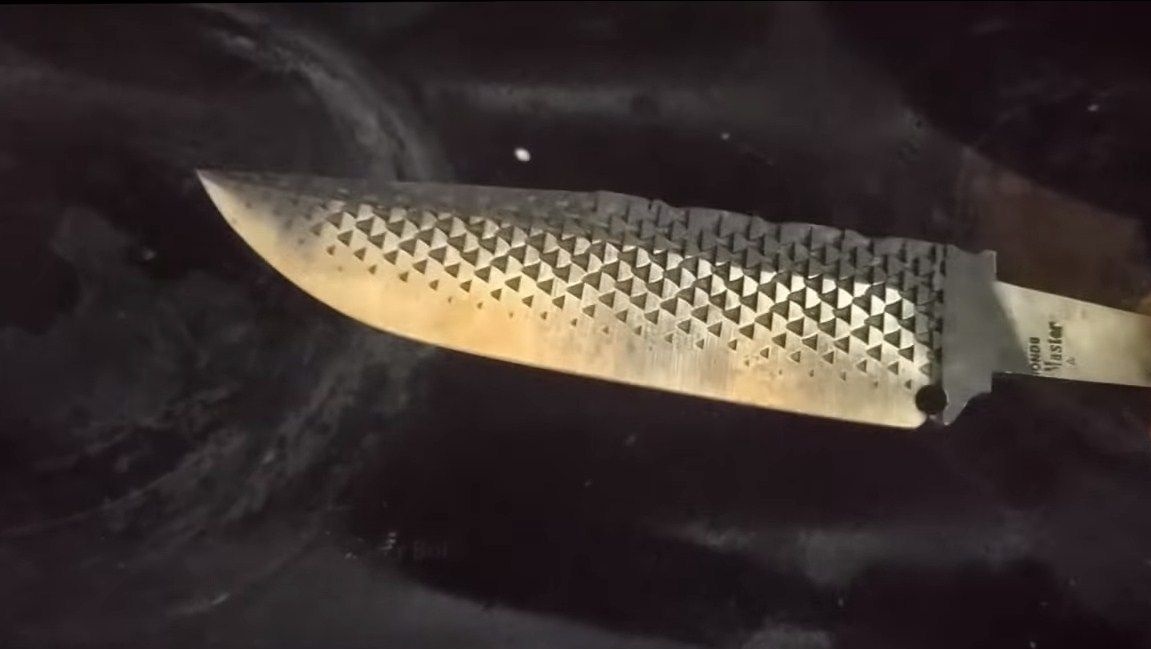
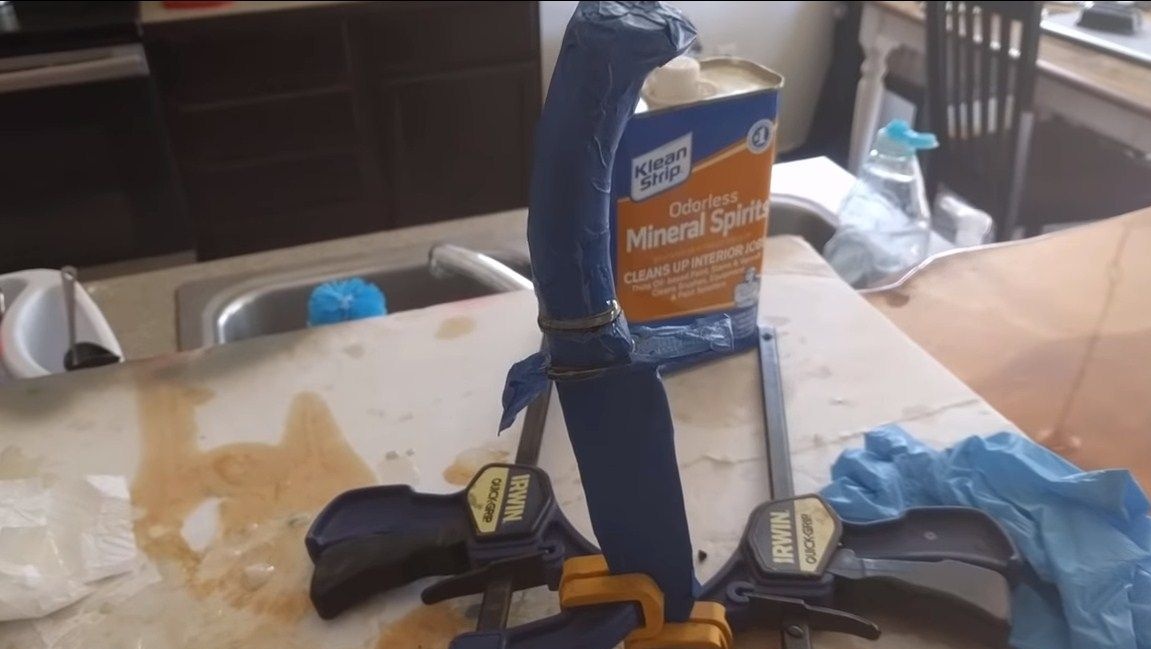
Now that the blade is released, it can be modified. The author decided to drill a tactical hole, and also made a notch on the blade with a file. Also at this step we form the bevels on the blade, but so far we have not sharpened it. For hardening, steel should not be thinner than two millimeters, otherwise alloying components may burn out. The blade will heat up quite a lot, it is better to fix it on a bar with clamps.
In addition, the author made an interesting pattern on the butt of the blade. This is all done with a drill.
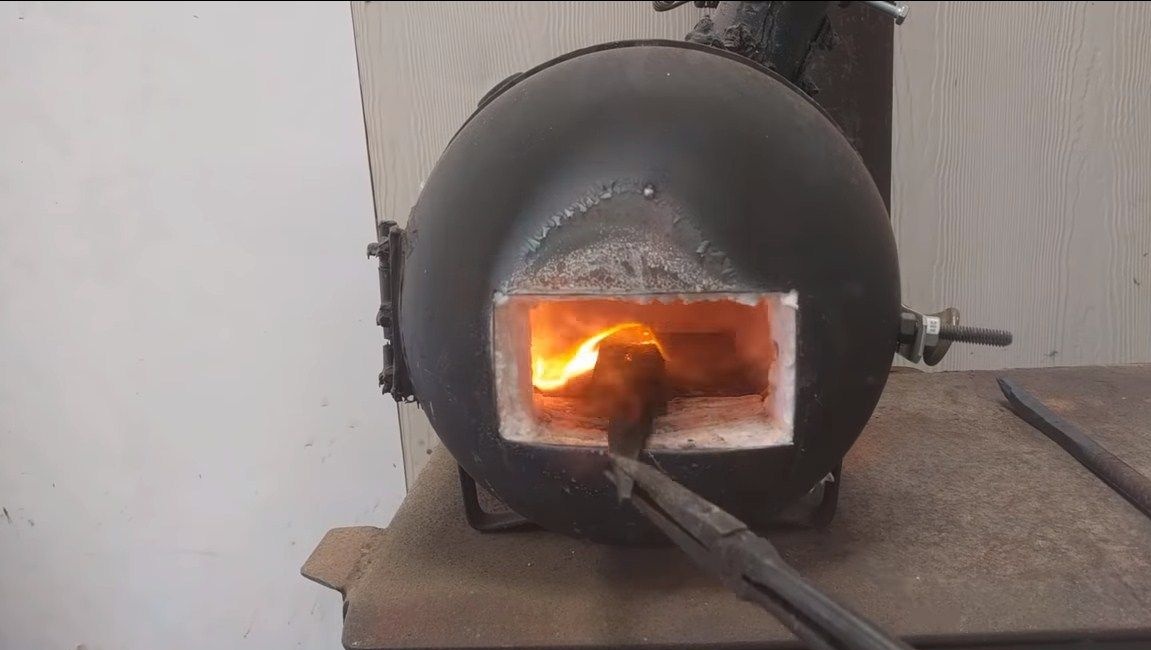
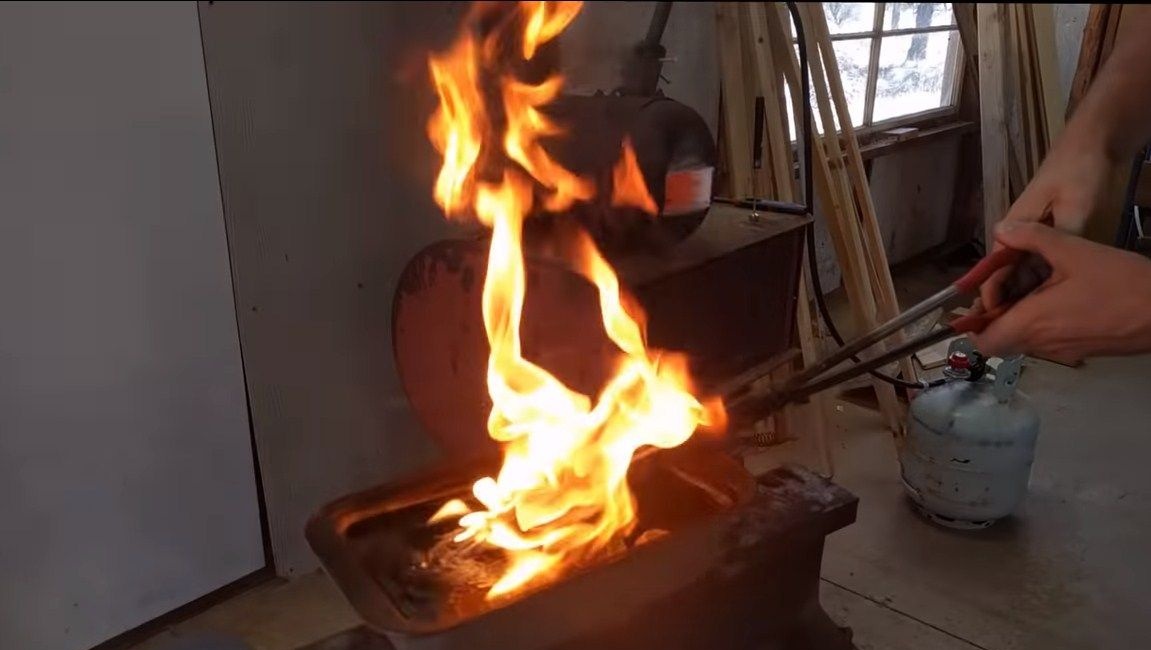
Step Six Blade hardening
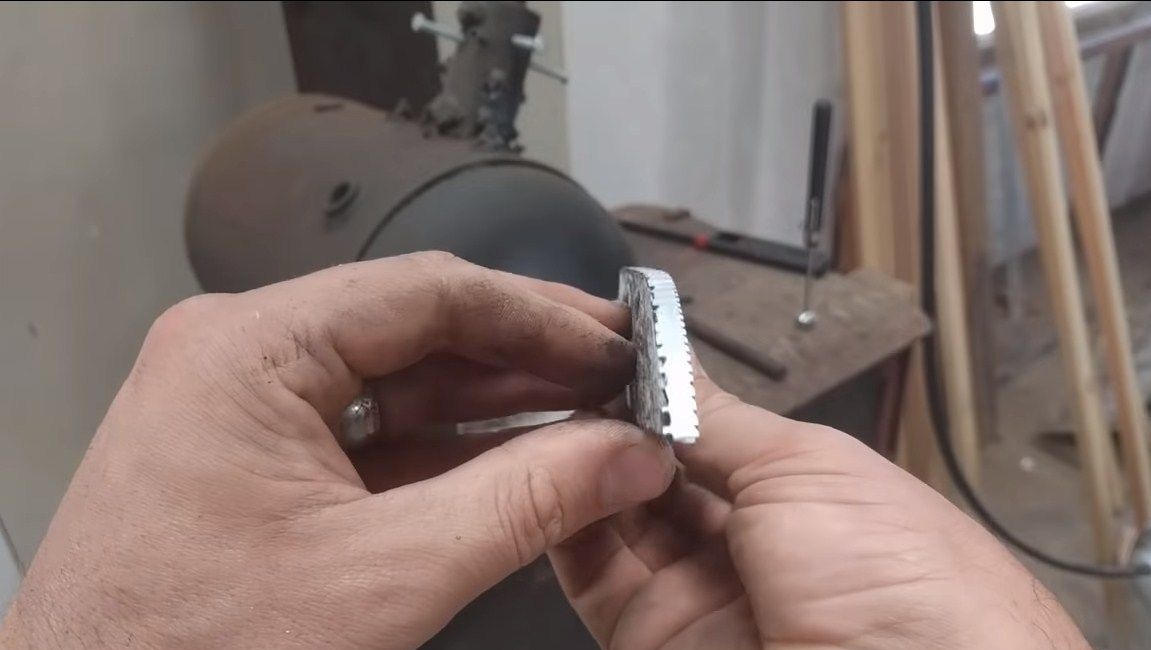
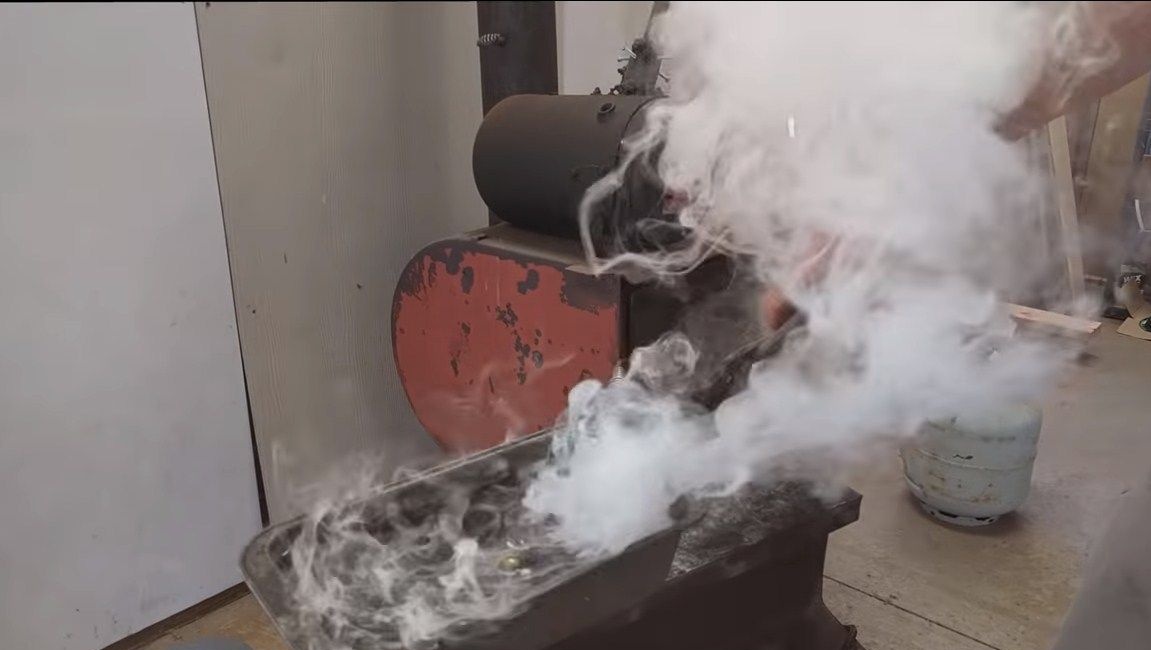
You can harden the blade, then we need a blacksmith furnace. You need to warm the blade exactly until it ceases to be attracted by a magnet. Auto It is periodically checked during heating. If the steel is overheated, carbon may burn out and the steel will turn into raw. Next, immerse the blade in oil and you can check the hardening. We try to scratch the blade with a file, if there are no scratches, everything worked out, the blade is hardened. Handle it carefully afterwards, the metal will be brittle.
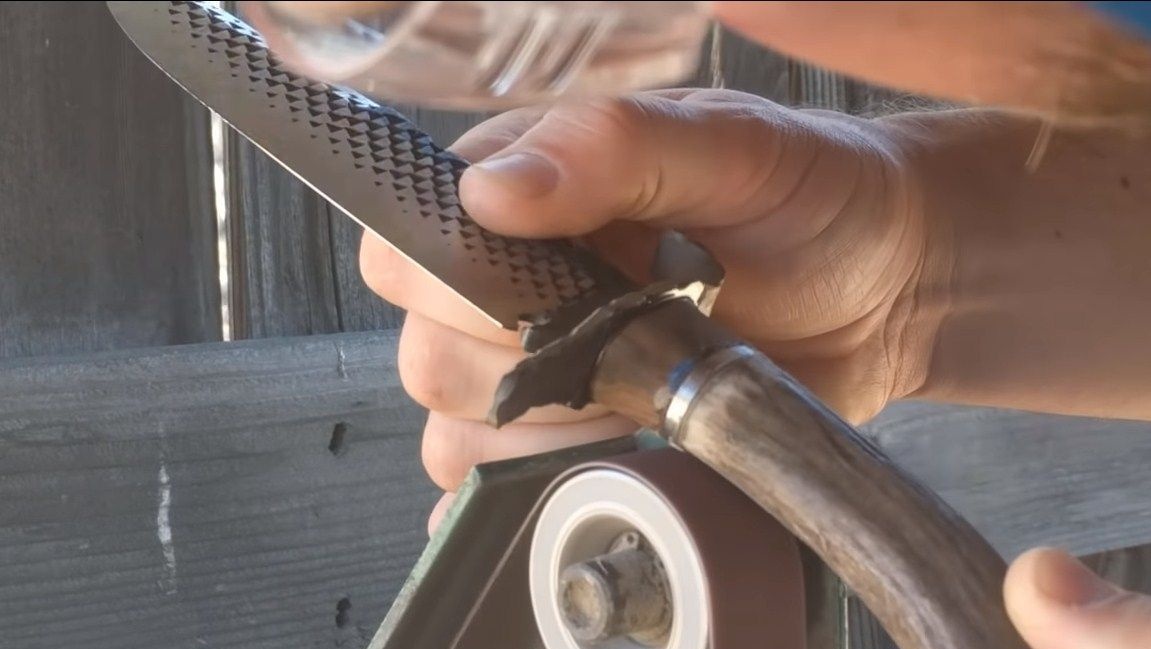
Seventh step. Making a pen and modifying a guard
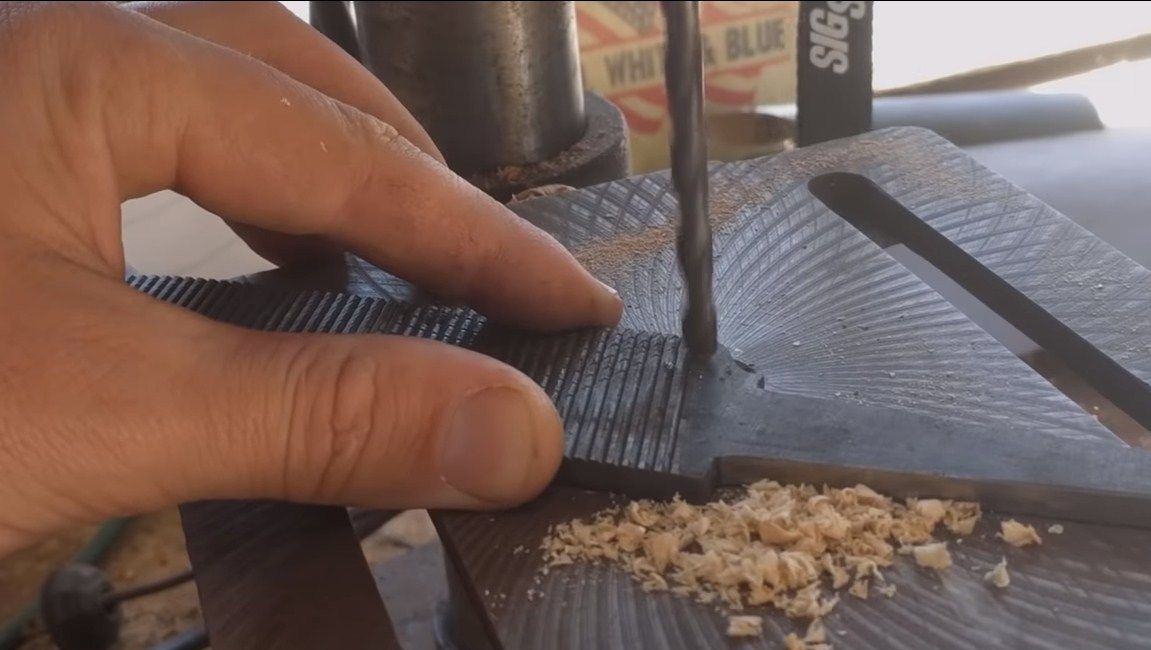
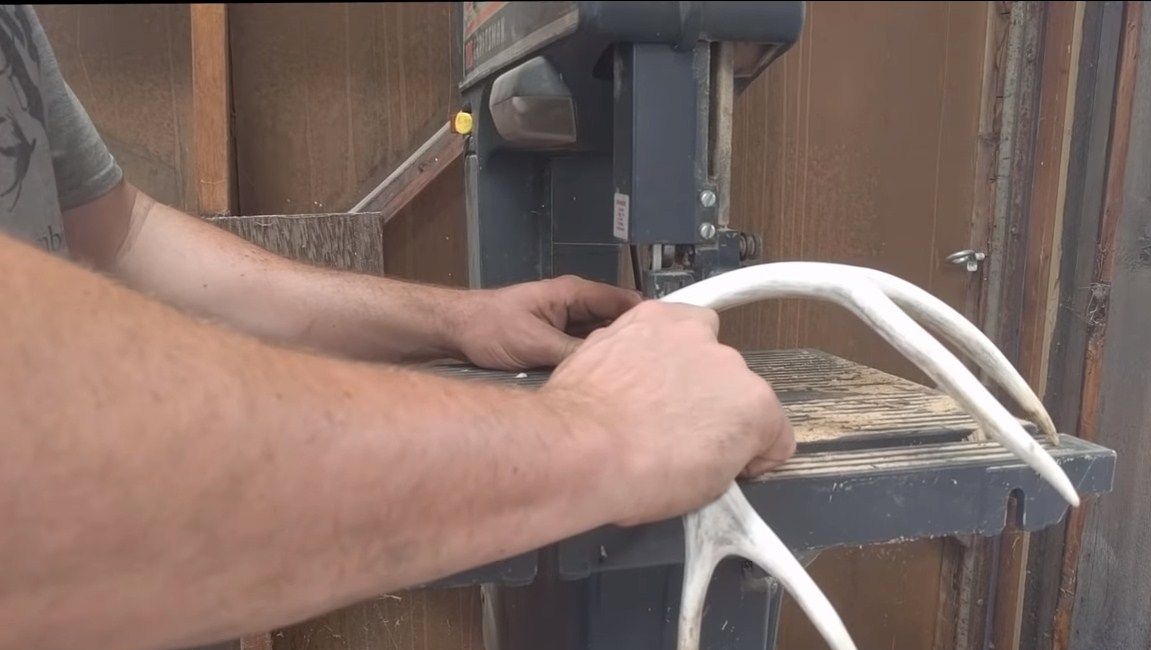
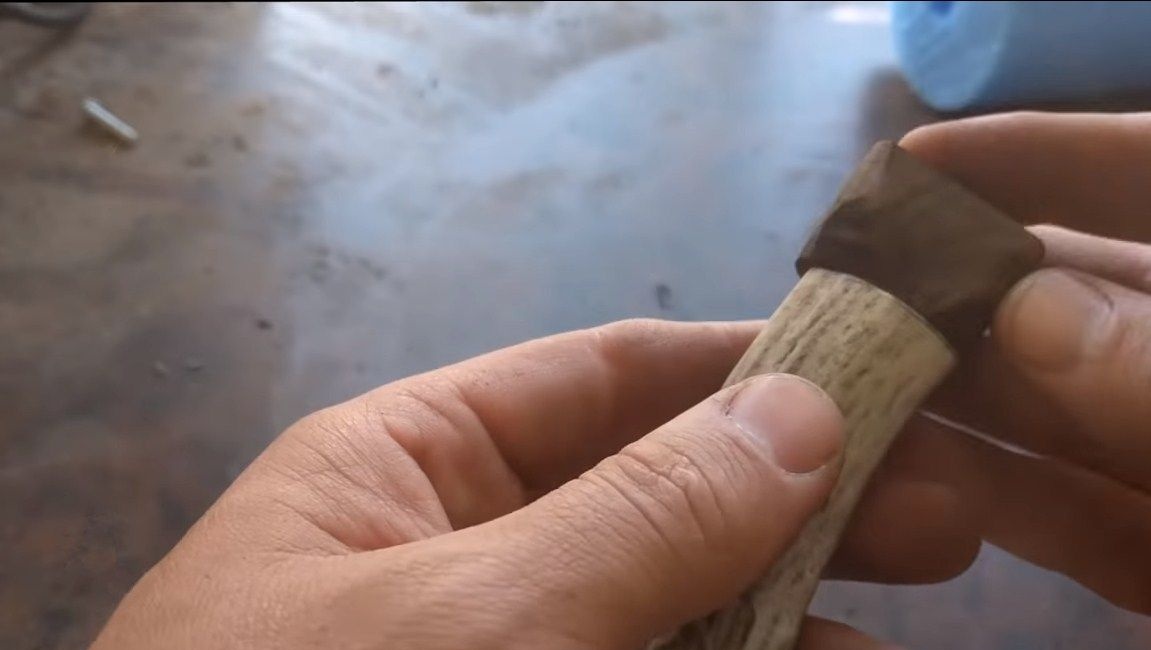
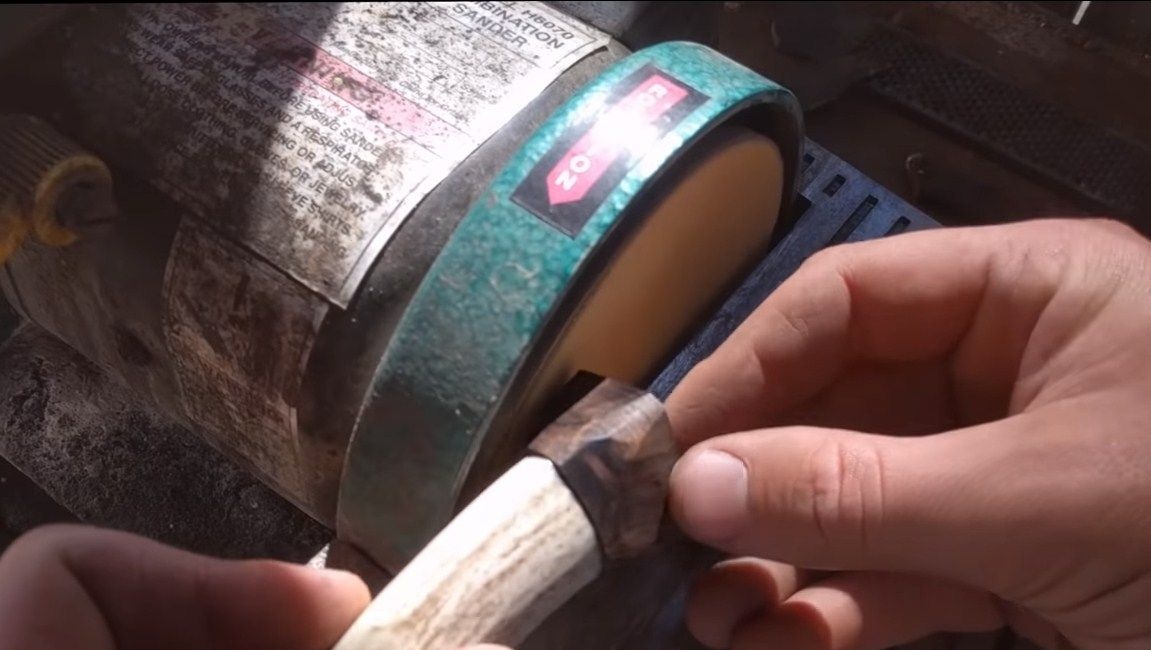
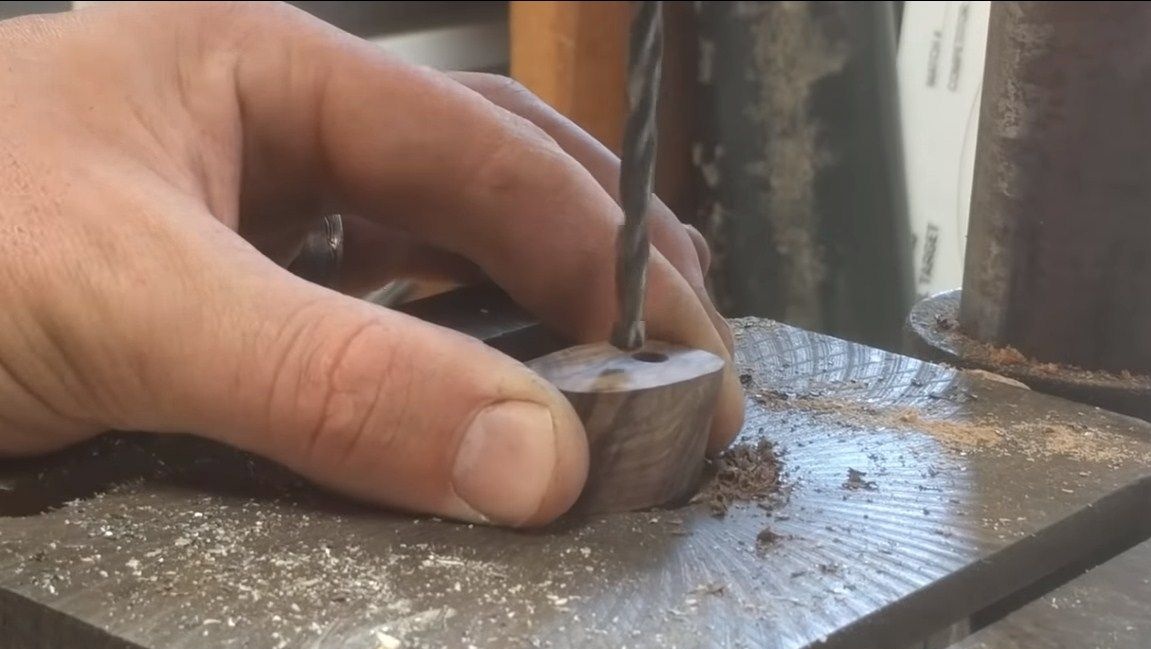
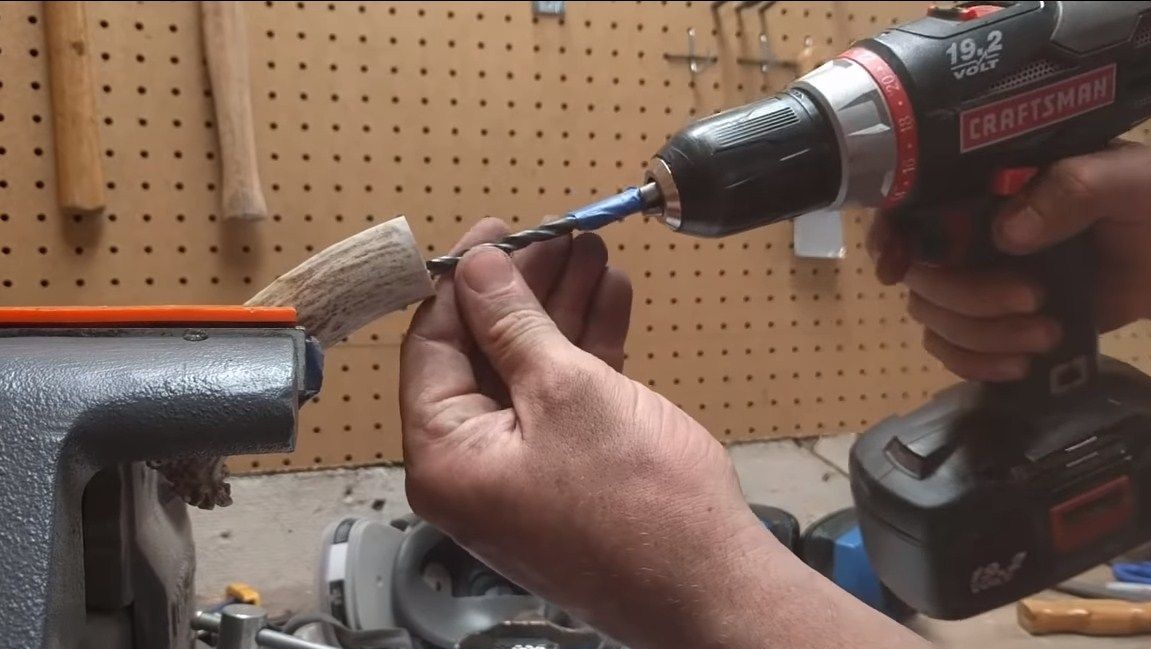
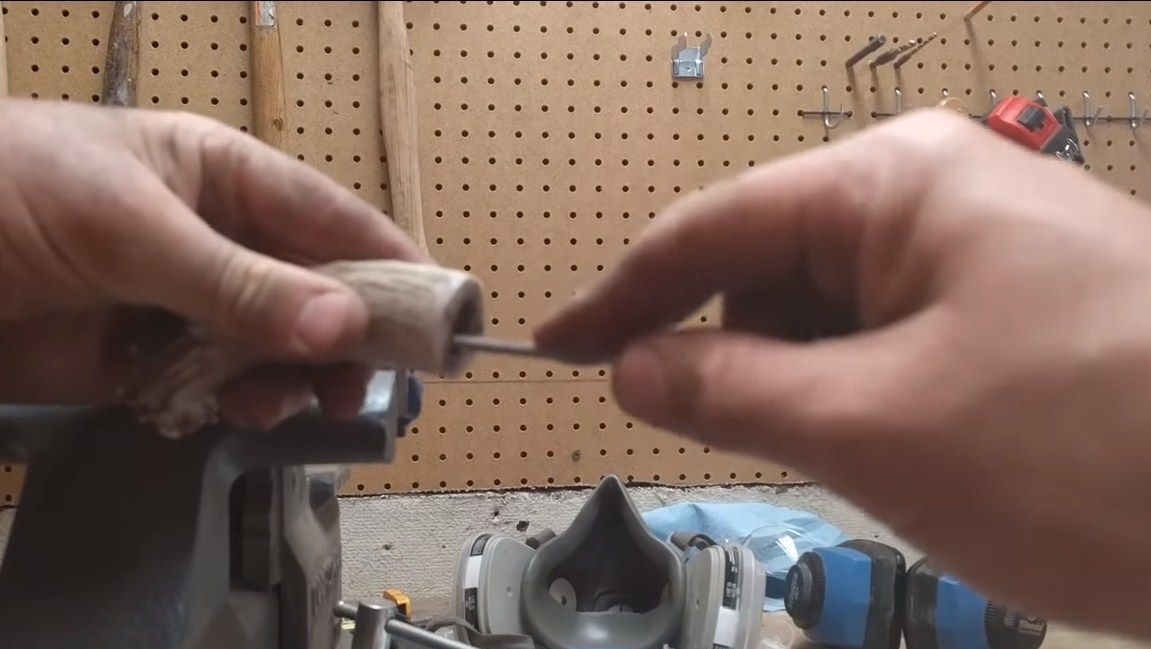
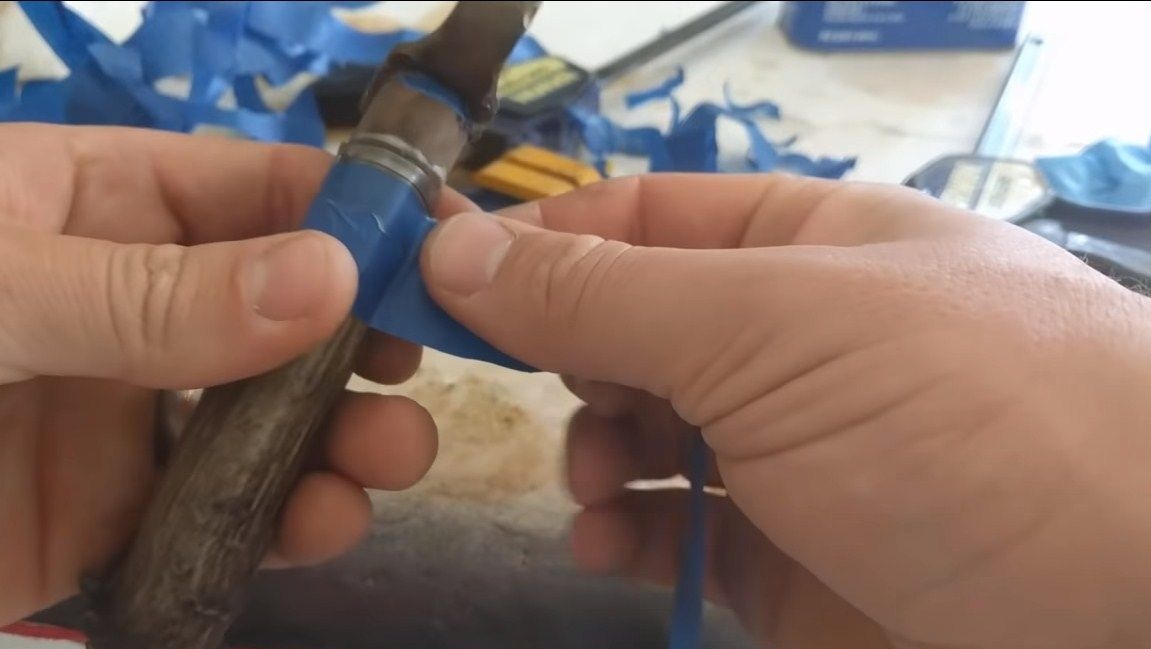
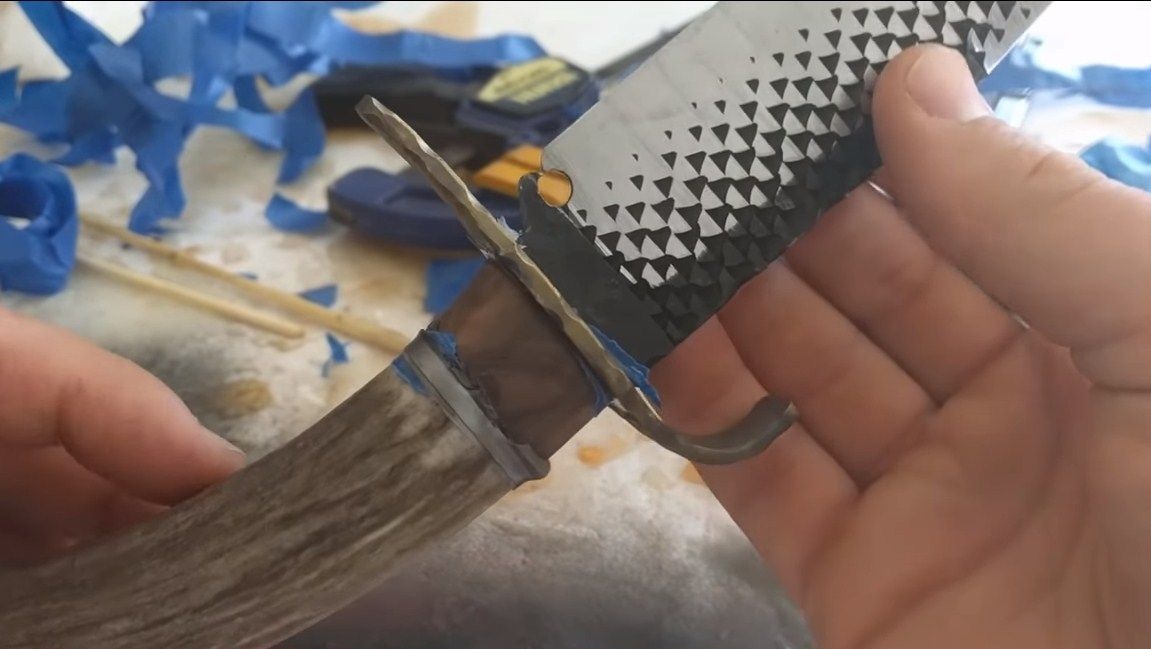
The author decided to make a pen from a deer antler, and there are also inserts made of wood and metal. Cut off a piece of the horn with a band saw or with a hacksaw. We also cut a piece of wood and glue the workpiece to the horn using superglue. Now we grind all these parts together, and then this part can simply be beaten off with a hammer. We also drill a slit hole in the horn under the knife shank. First we drill with a conventional drill, and then we bore a file.
For the final stage, we make a slot hole in the guard. This can be done with a drill and needle file, or you can still use a drill with suitable nozzles, like our author.


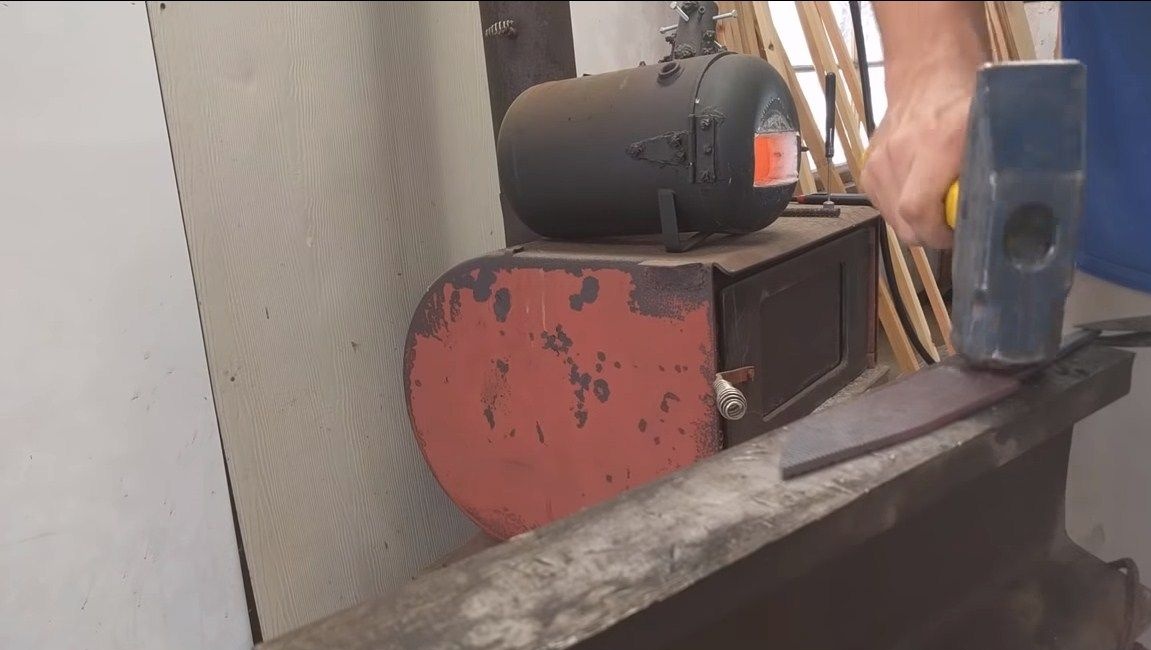
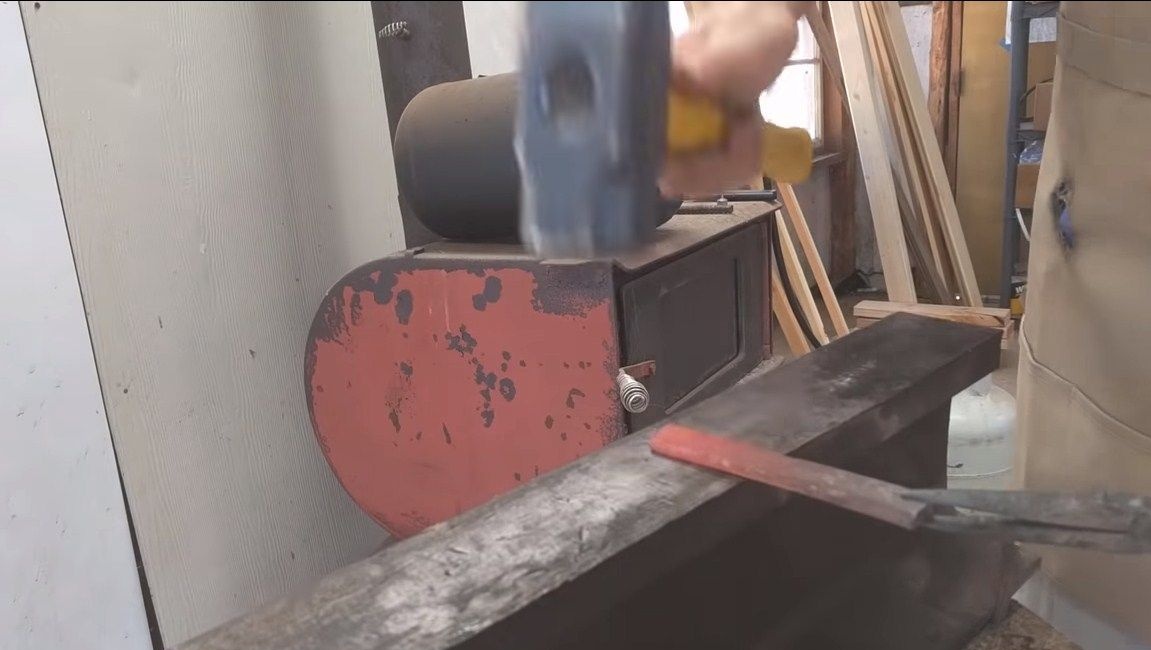
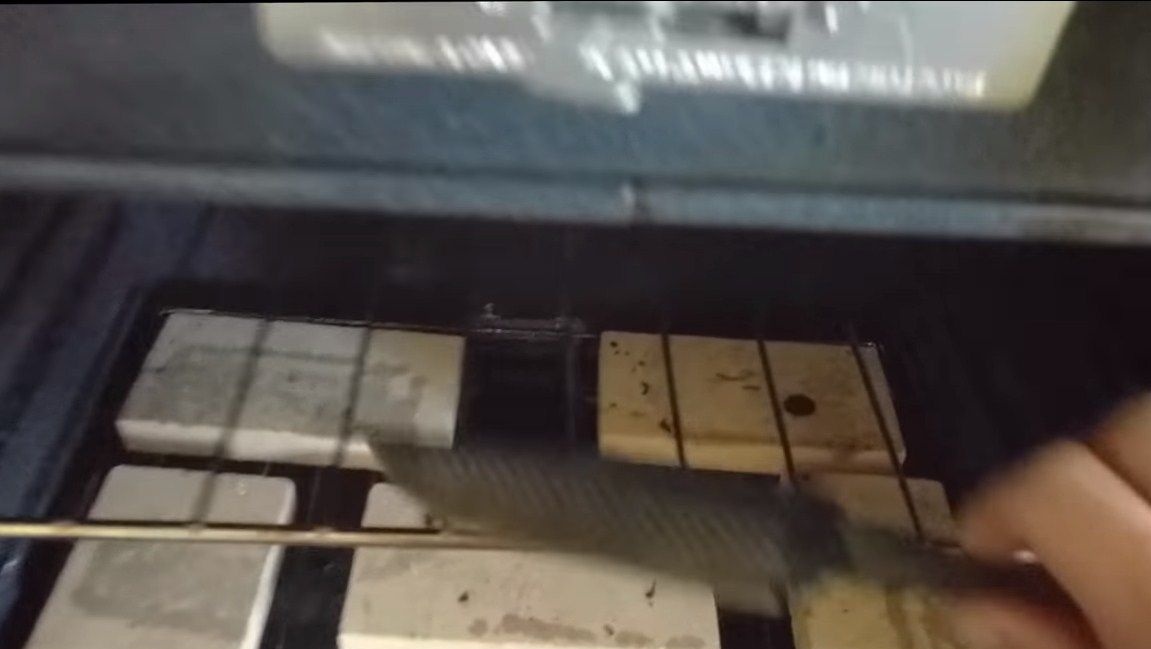
Step Eight. Metal tempering
We hardened the blade, after which it became very durable, but fragile. In order for the knife to withstand large bending loads, the steel must be released. To do this, we need a domestic oven, fry the blade in it at a temperature of 200 degrees Celsius. After an hour or two, the metal should become a straw color, this will indicate that the steel is tempered. Turn off the oven and let it cool with the knife in the closed state. That's all, after that we get a blade of excellent quality.
Step Nine. Collect the knife
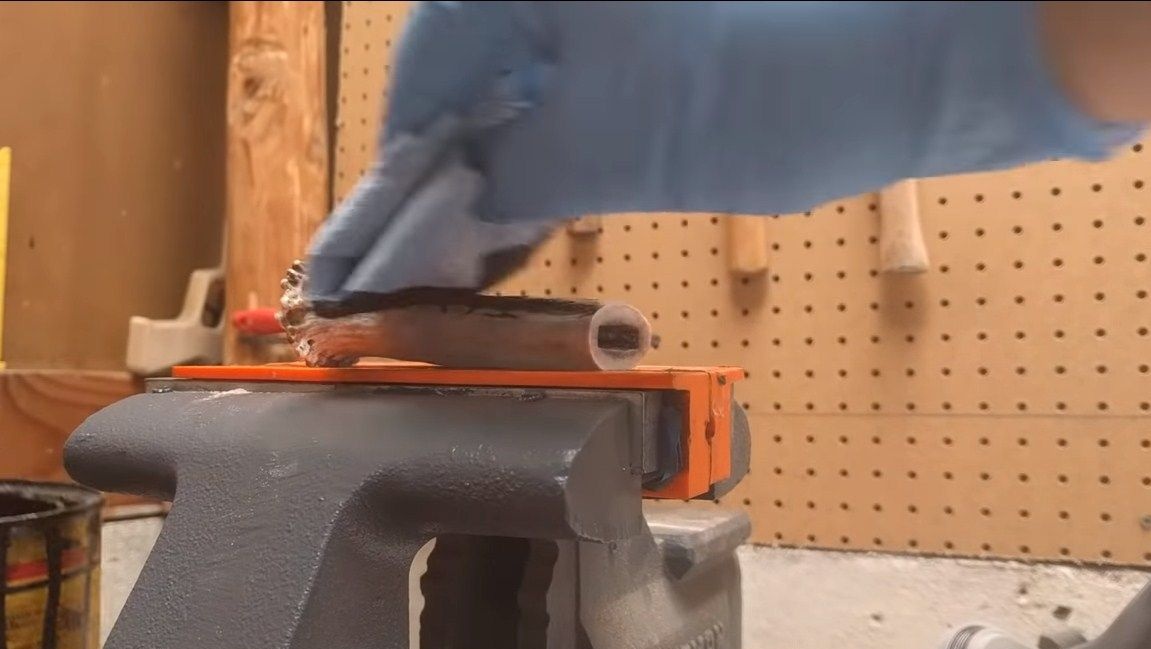
Almost all the details are ready and you can collect the knife. For assembly we need epoxy glue. We carefully clean all glued surfaces with rough sandpaper. We sharpen the blade and then wrap it with electrical tape so that the glue does not get into it, and also so as not to cut ourselves when assembling the knife. First we fill the guard, followed by the bushings and then the main part of the handle from the horn. Between all layers we apply glue. The exposed glue residue can immediately be wiped off so that you don’t have to grind much later.
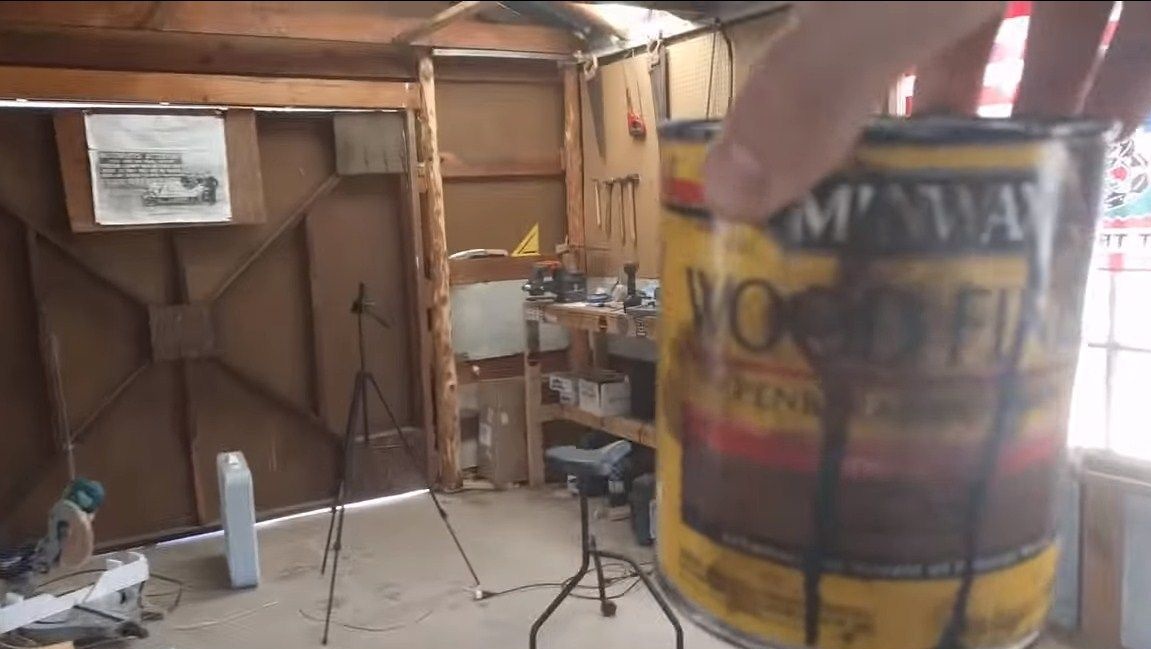
As soon as the handle dries, you can remove the electrical tape and go through the joints where the glue came out on the belt grinder. For more accurate processing, it is better to use a drill with a grinding nozzle. When the knife is completely ready, cover the handle with oil. Thanks to such a coating, we will protect the handle from moisture and dirt, moreover, with oil the handle will look much more beautiful.
The author also decided to install a brass pin. In this way, you can securely fix the handle to the shank.
That's all, the knife is ready. If desired, it can be sharpened to the state of the blade, here you will need Japanese water stones or other sharpening tools. To make the knife safe and convenient to carry, we make a template and make the sheath.For this we need dense skin. There are many ways to connect the skin, you can use bonding, stitching or riveting. However, you can use all the methods at once. That's all, the project is over, I hope homemade you liked it. Good luck and creative inspiration, if you decide to repeat it. Do not forget to share your homemade products with us!