Hello everyone, this time we will consider a convenient, reliable gas furnace, which you can assemble do it yourself from inexpensive and affordable materials. With this simple furnace you can easily forge, harden steel, and you can also melt some non-ferrous metals. This furnace works on gas, it can be fed from a gas cylinder.
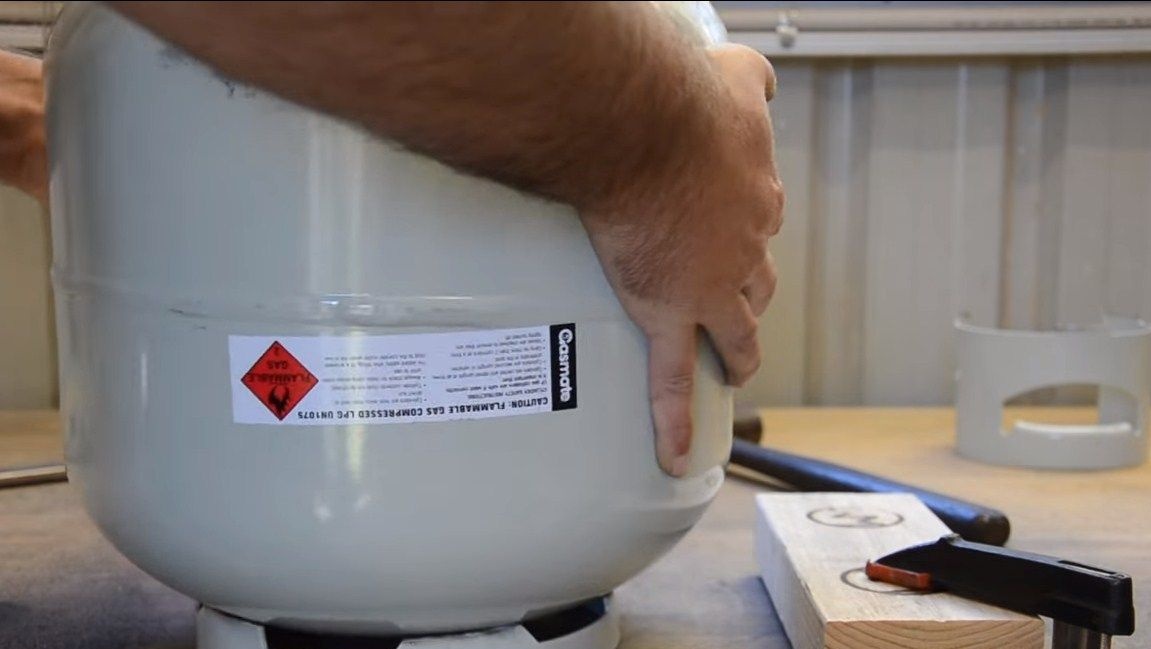
The author used a small gas cylinder as the basis for the furnace, and the gas supply system was made of plumbing parts. So, we will consider in more detail how to make such an oven!
Materials and tools used by the author:
Material List:
- a small gas cylinder;
- an insulator (fiberglass or the like);
- gas cylinder with gas and hose for connection);
- corner (for the legs of the furnace);
- heat resistant composition;
- heat resistant paint;
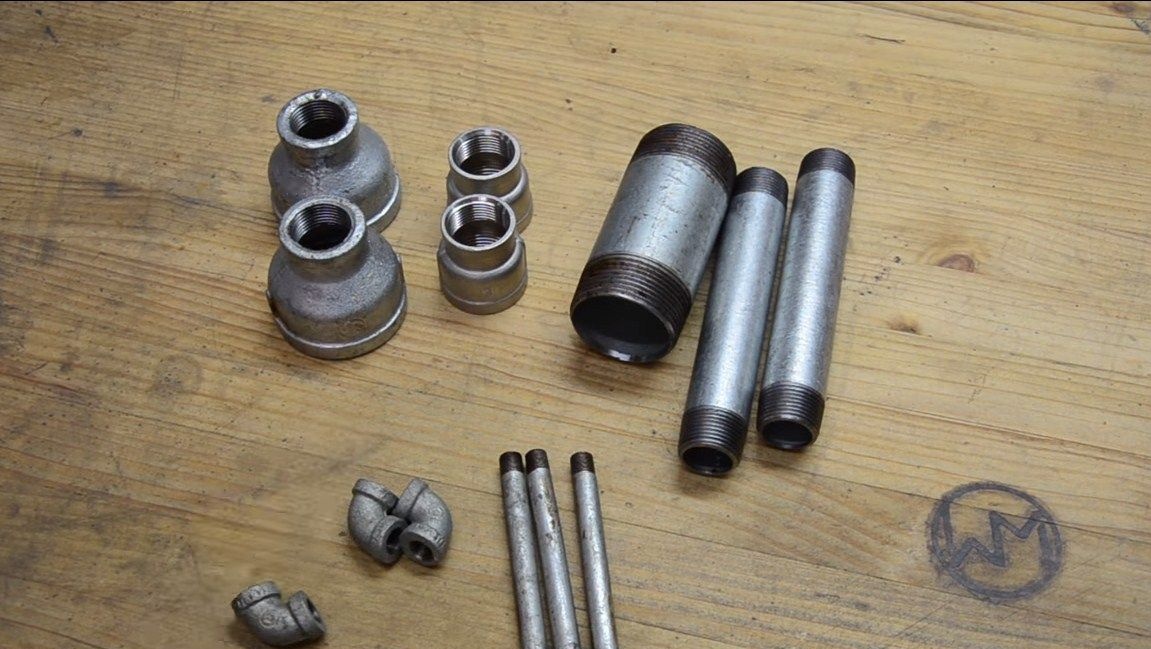
- tubes, angles, tees, cone-shaped parts, etc. (for gas supply system);
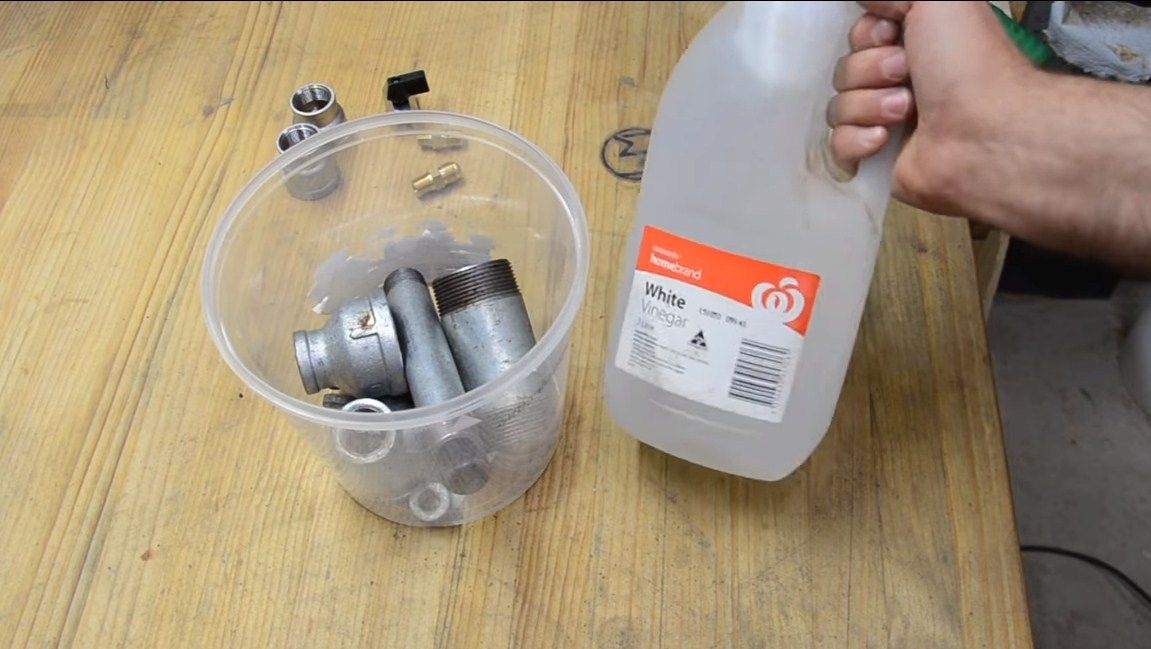
- vinegar or similar acid (what to remove zinc from products);
- sheet metal;
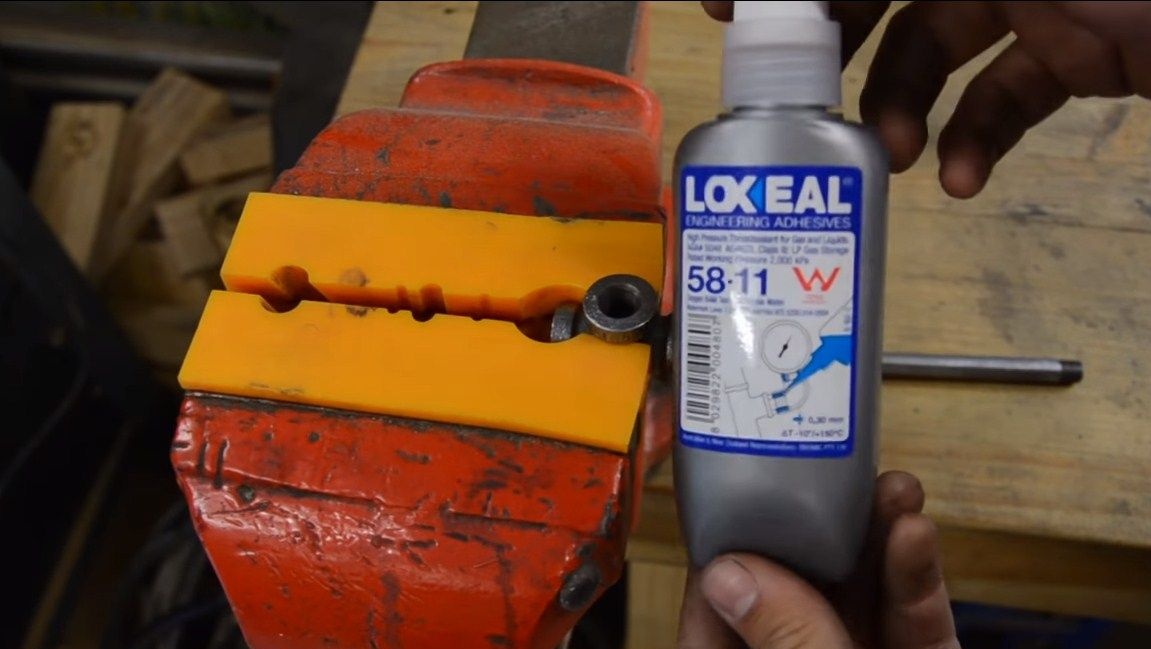
- threaded heat-resistant sealant;
- bolts, screws and other little things.
Tool List:
- a grinder with cutting discs and cleaning nozzles;
- welding machine;
- drill with a suitable size crown;
- gas key;
- belt sander and band cutting machine (optional).
Furnace manufacturing process:
Step one. Prepare the balloon
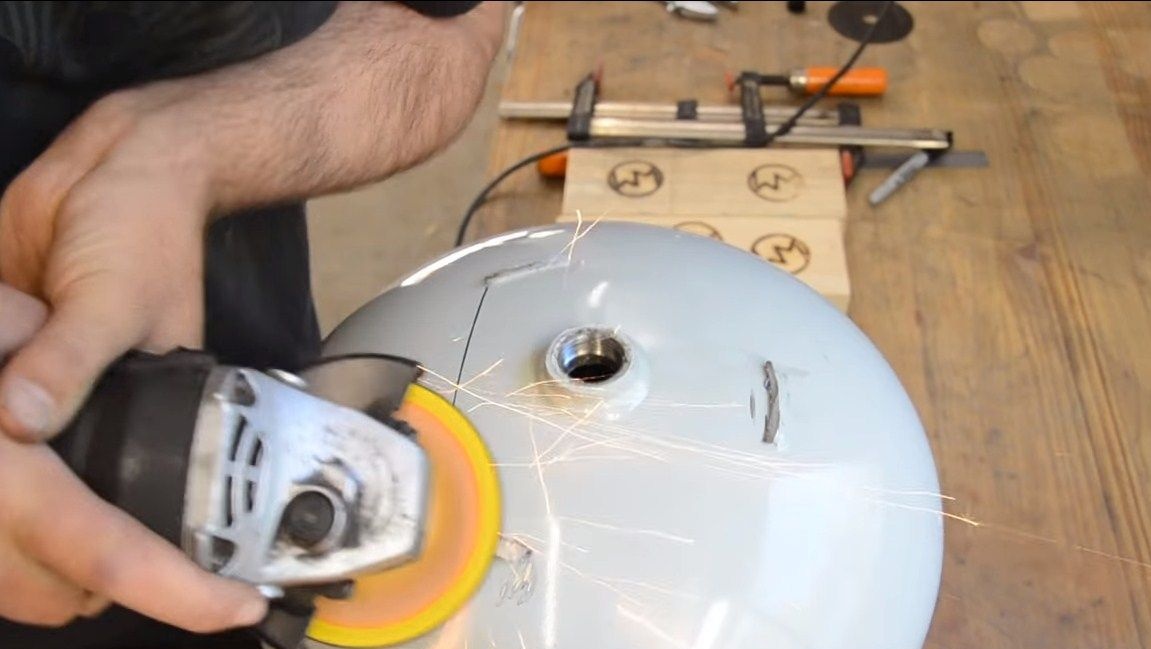
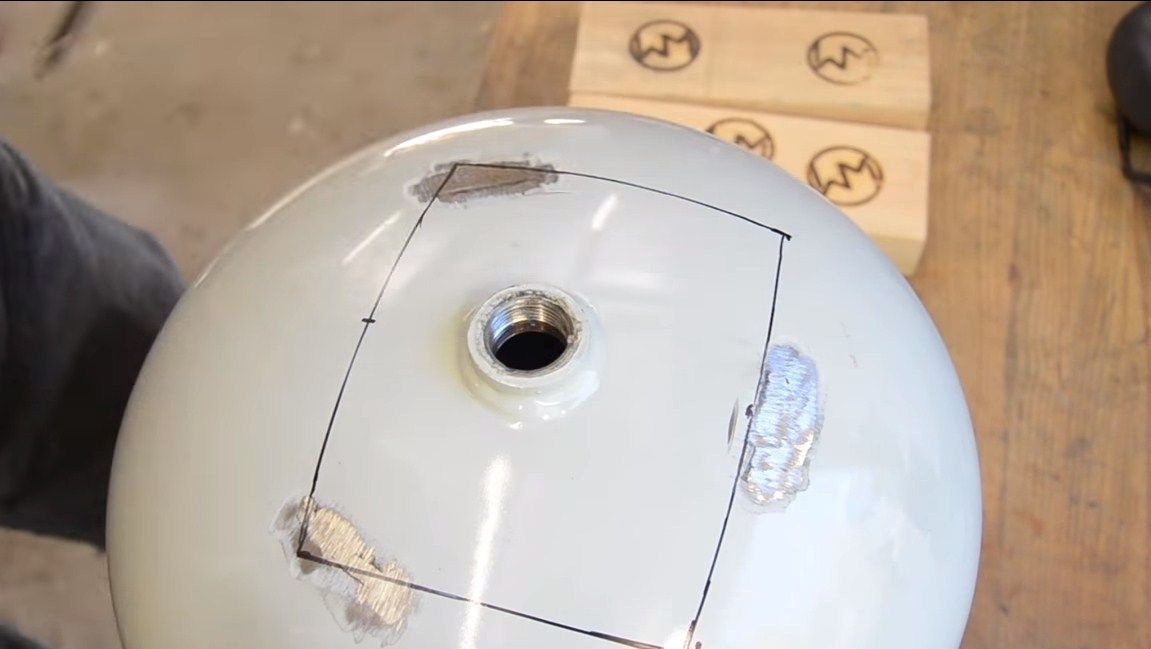
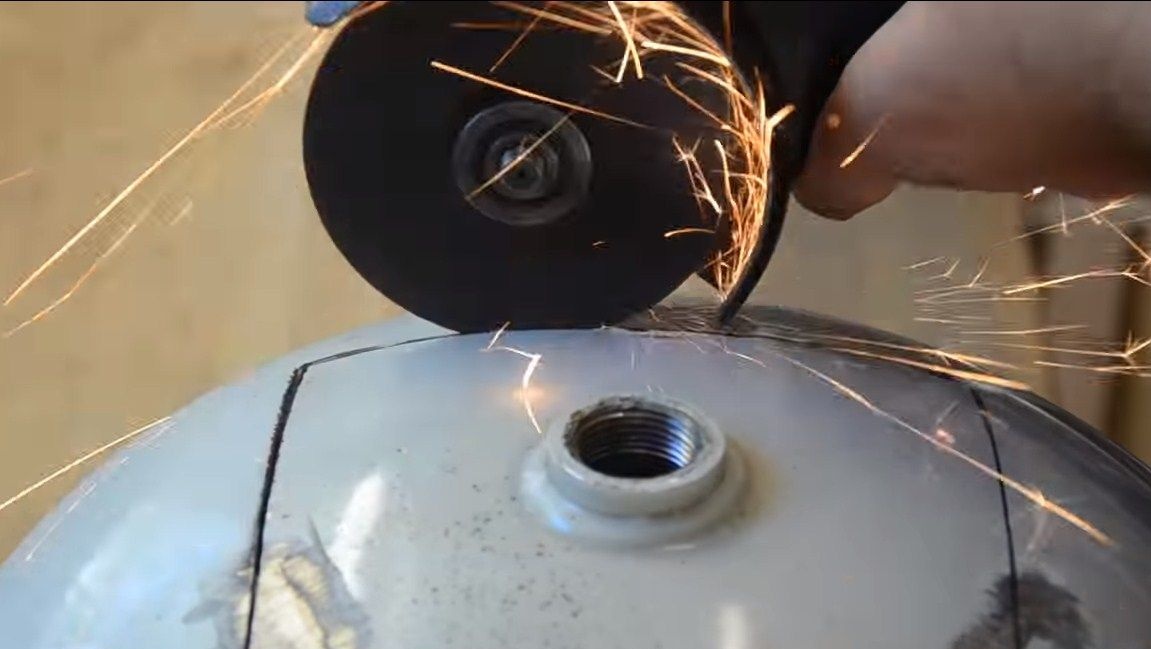
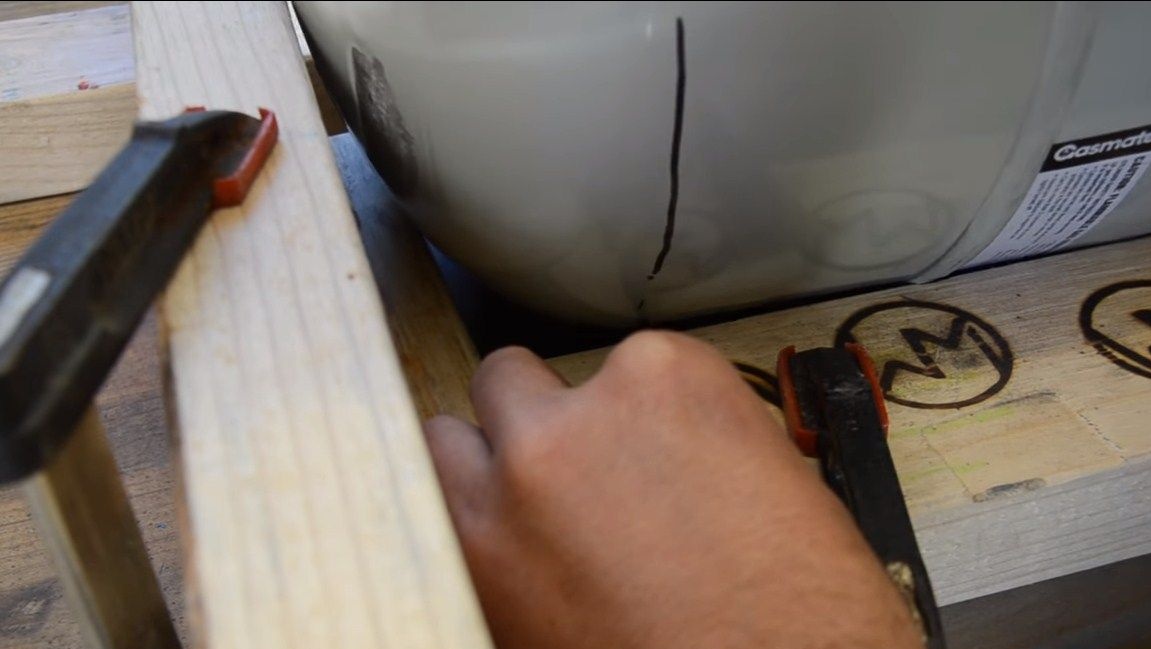
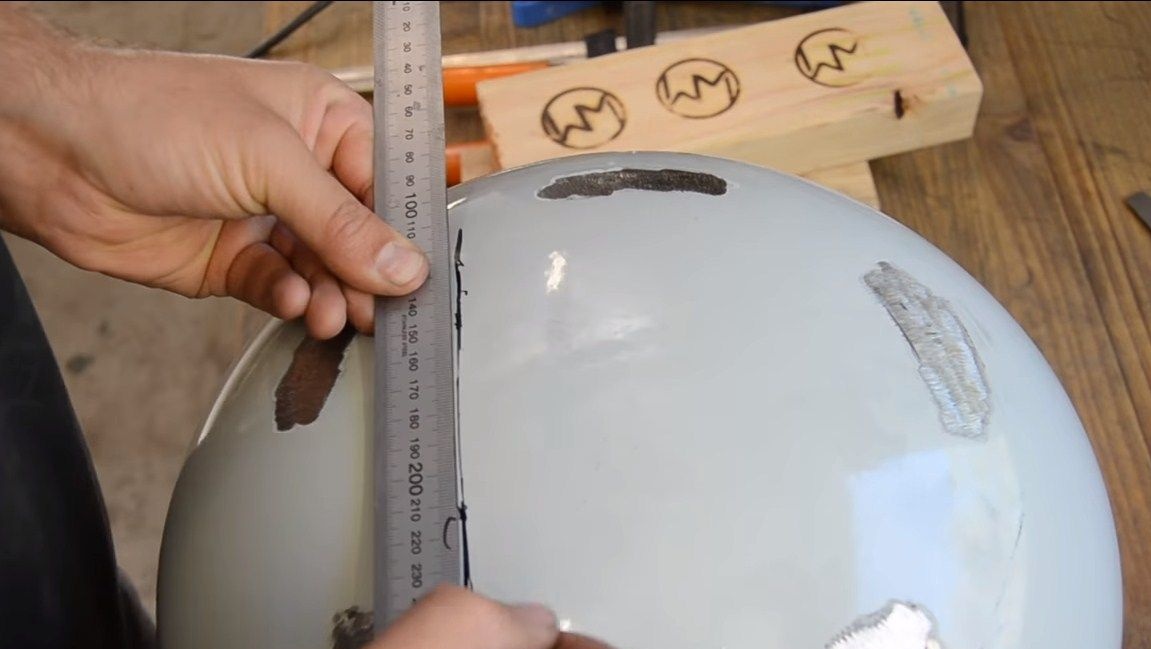
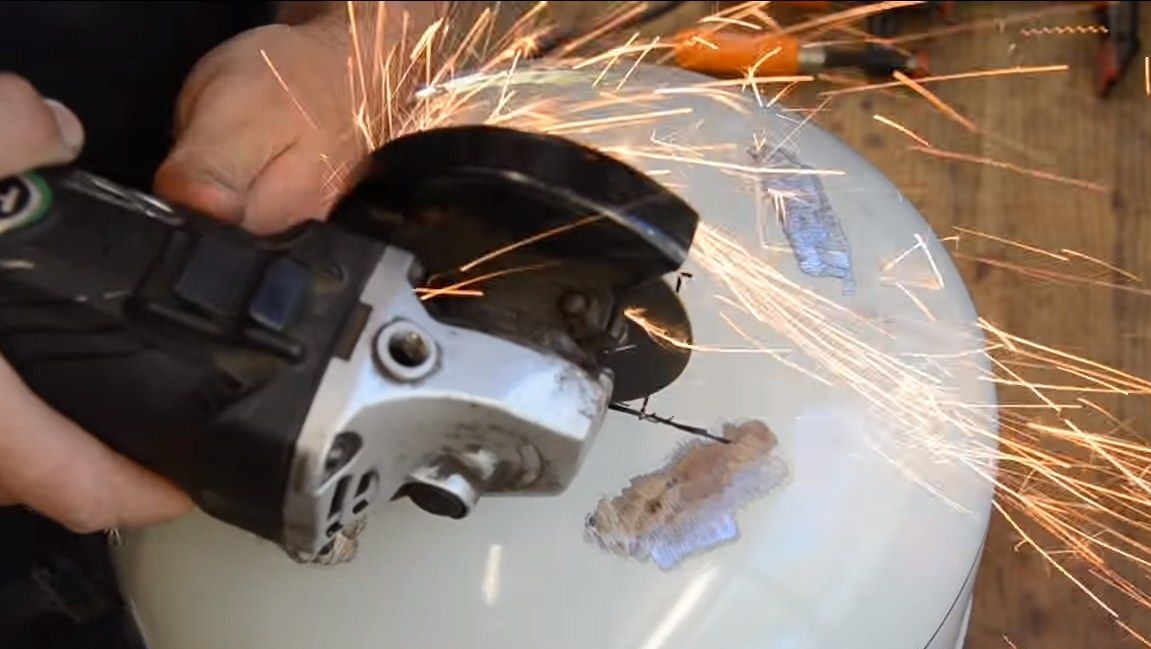
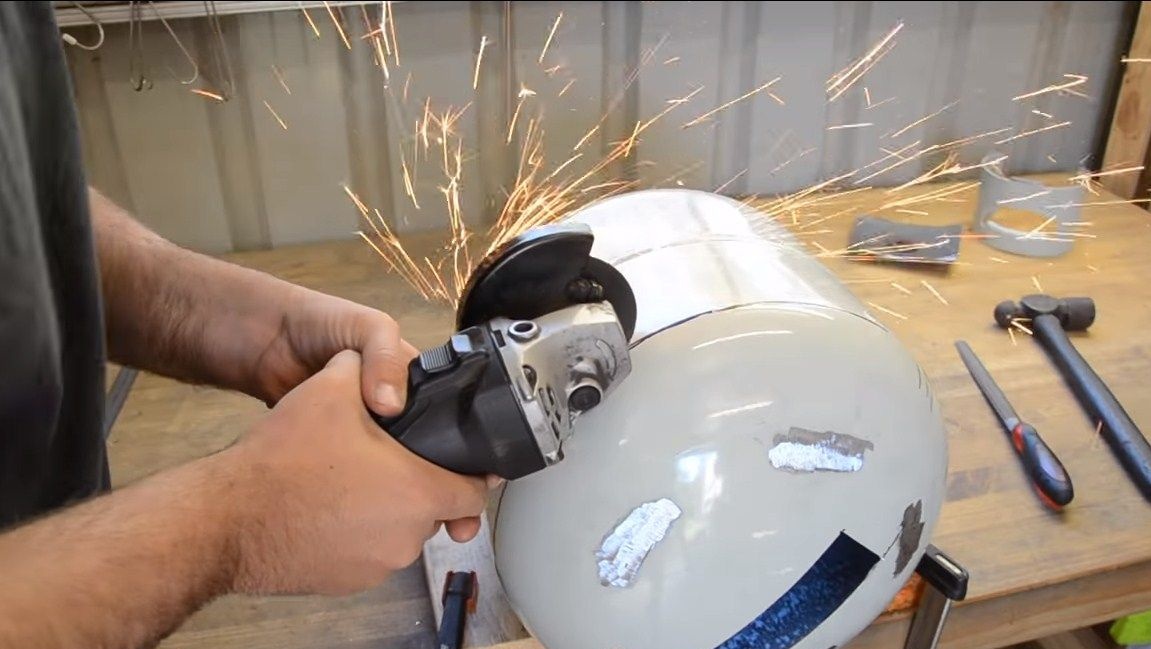
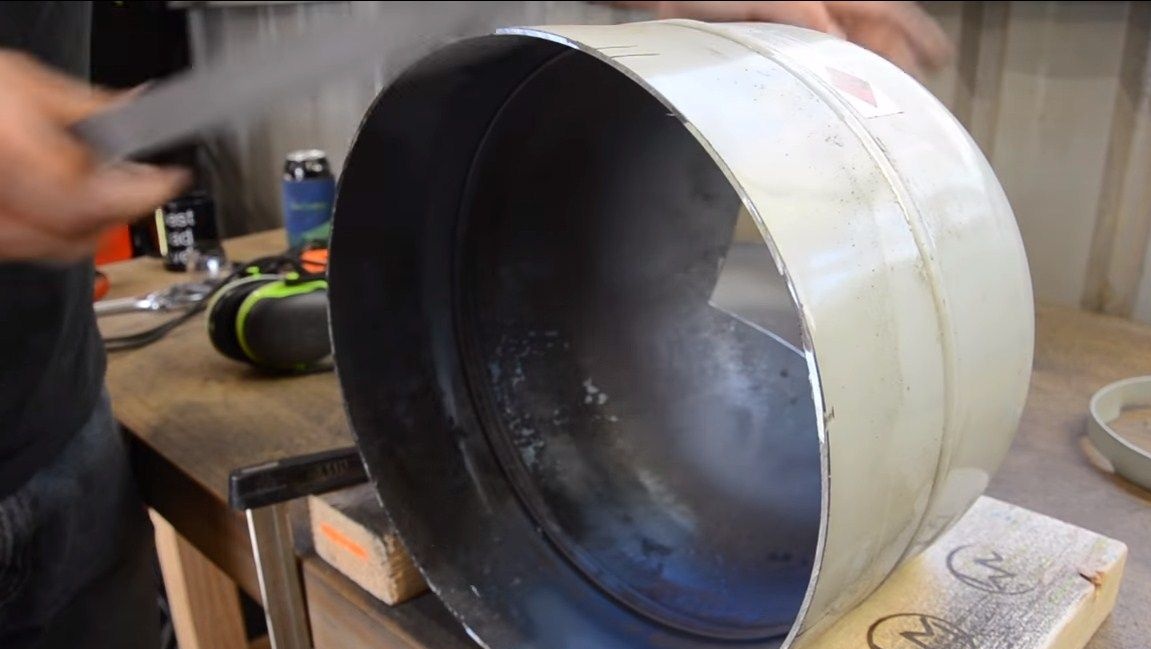
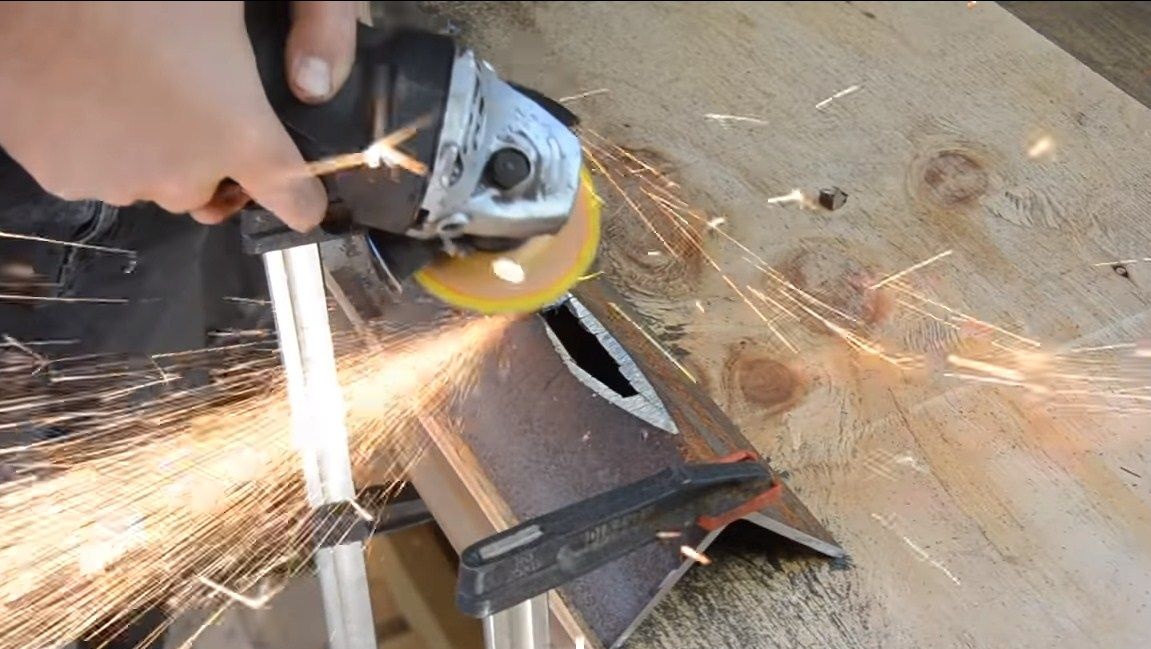
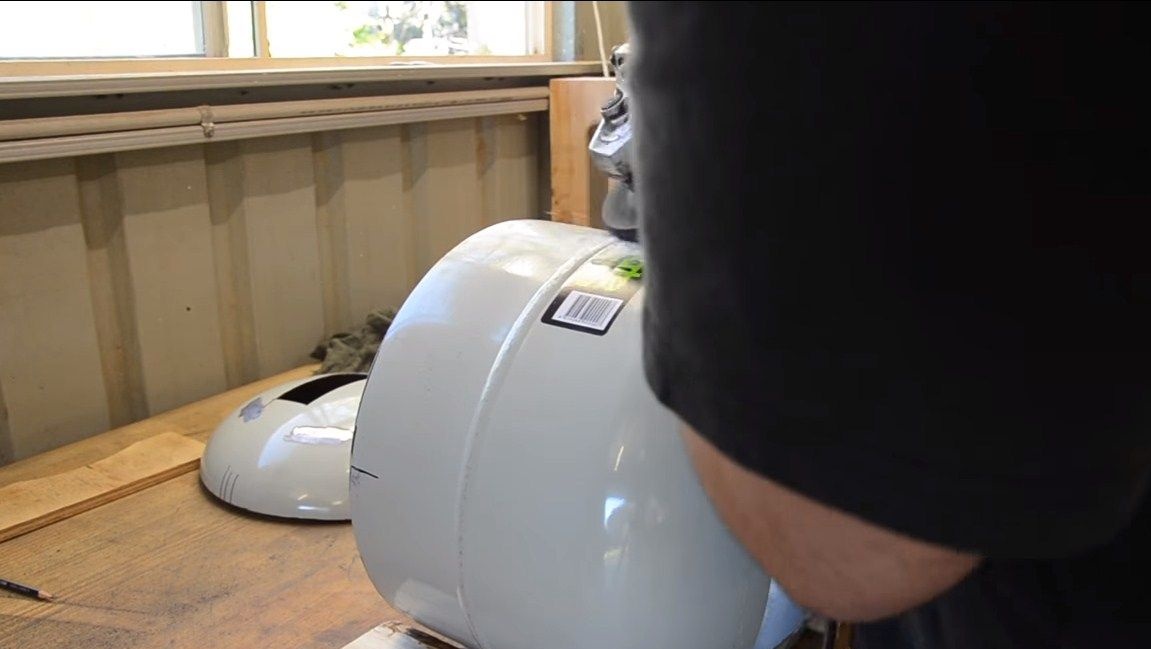
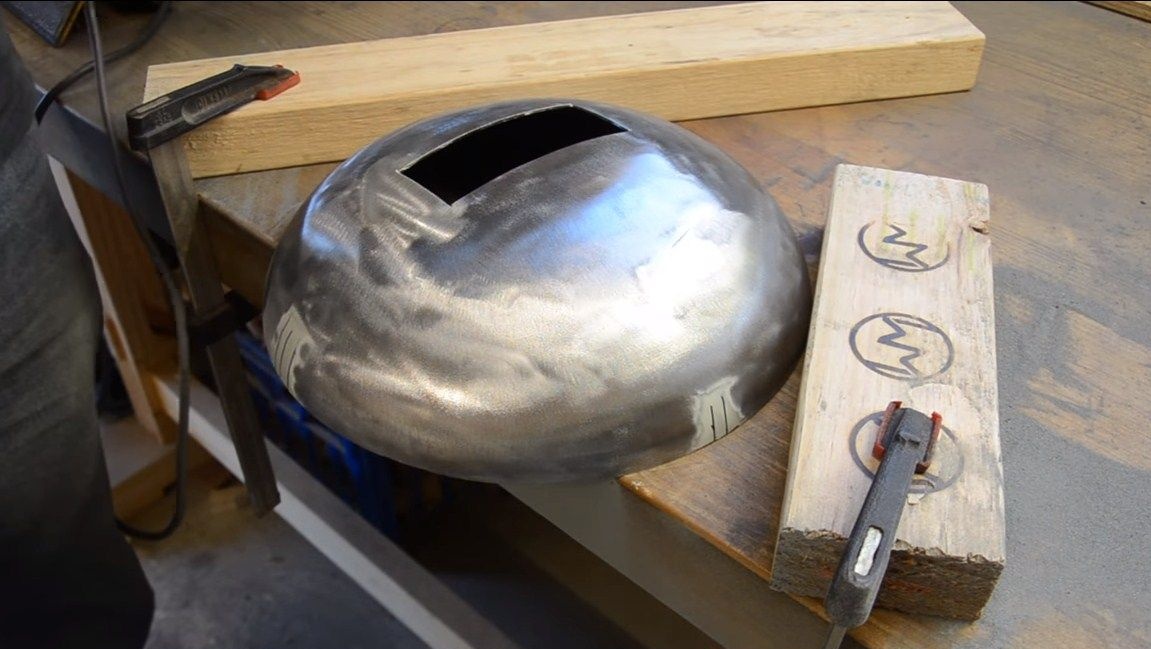
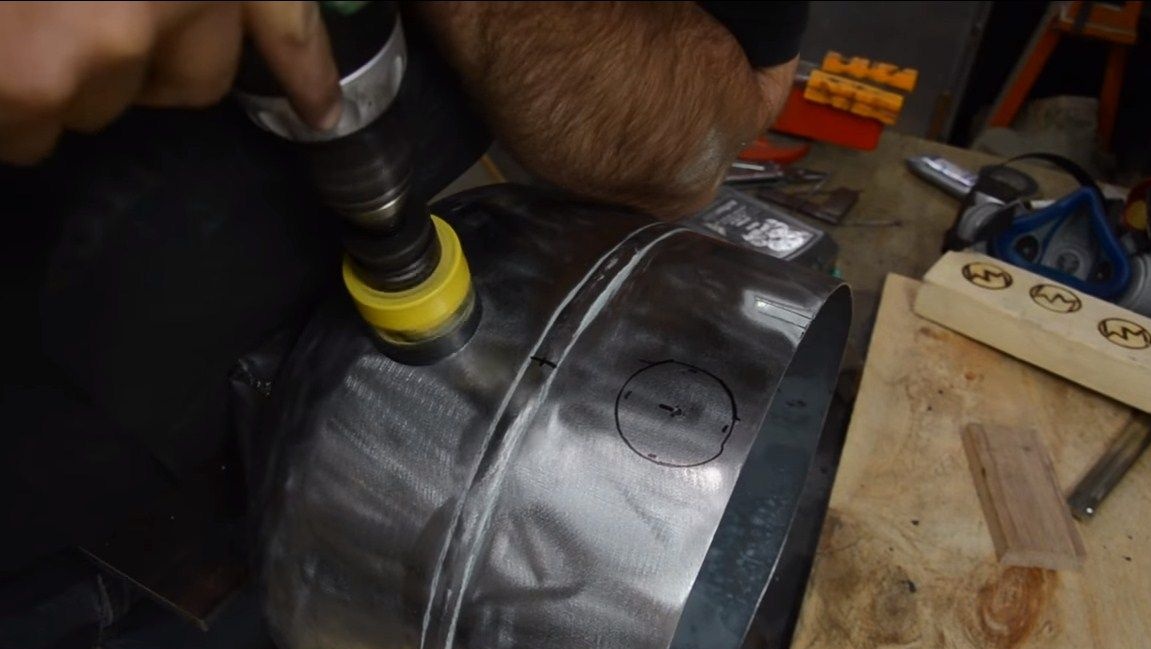
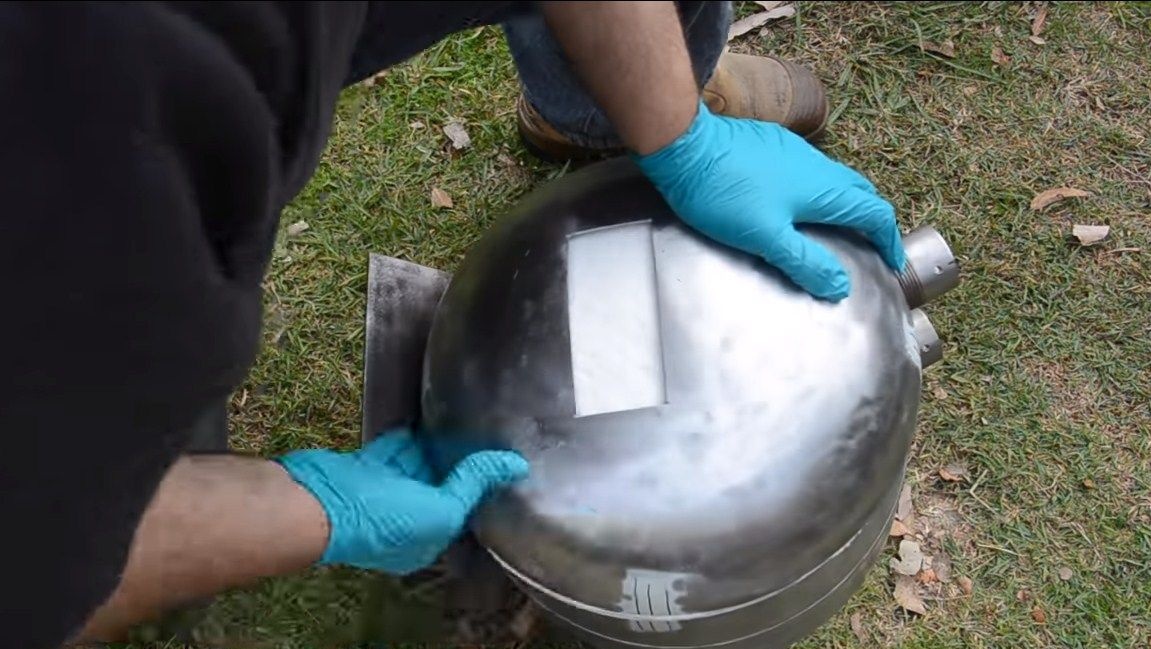
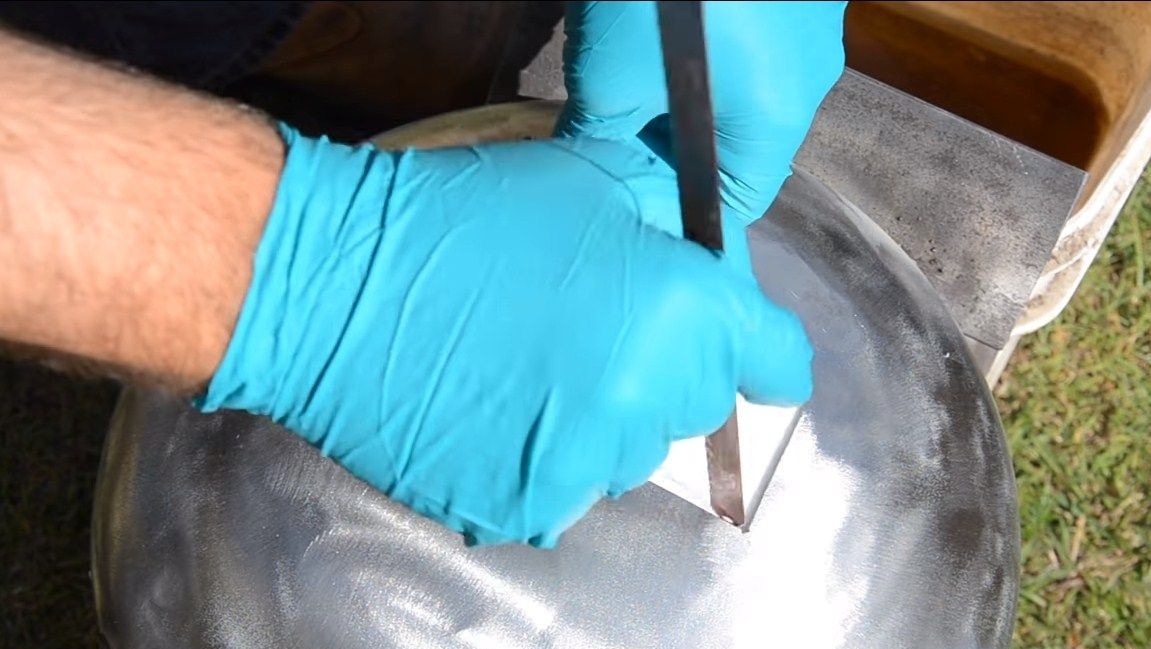
To get started, take the balloon and cut out the necessary windows, as well as cut the stand of the balloon. Be extremely careful and adhere to all safety rules if the cylinder is not new and has ever had gas in it. Carefully unscrew the tap and rinse the cylinder several times with warm water. Only after this you can start cutting, otherwise an explosion may occur. We cut out the main working hole, and also cut out a small window at the back of the cylinder so that you can control the temperature, let in additional air and so on. The author of the work holds a grinder.
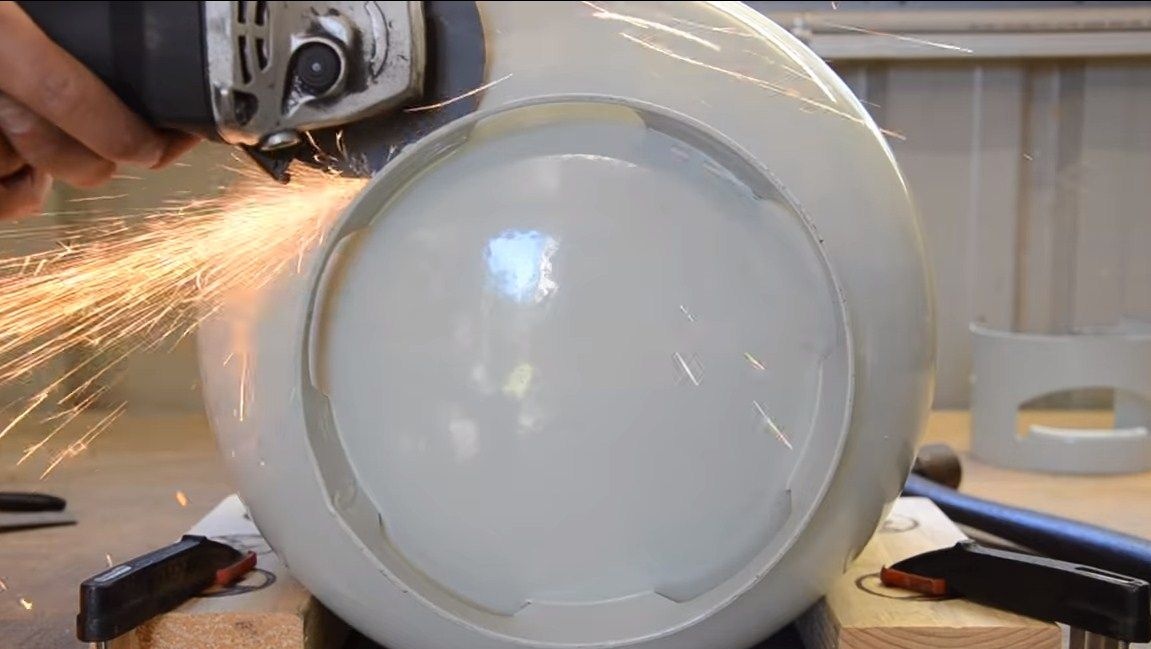
To assemble the furnace, you will also need to cut the bottom off the cylinder. In the end, we clean the paint cylinder well, since we will need to paint the oven with heat-resistant paint, and this one will burn. Here you can use a grinder with a wire nozzle.


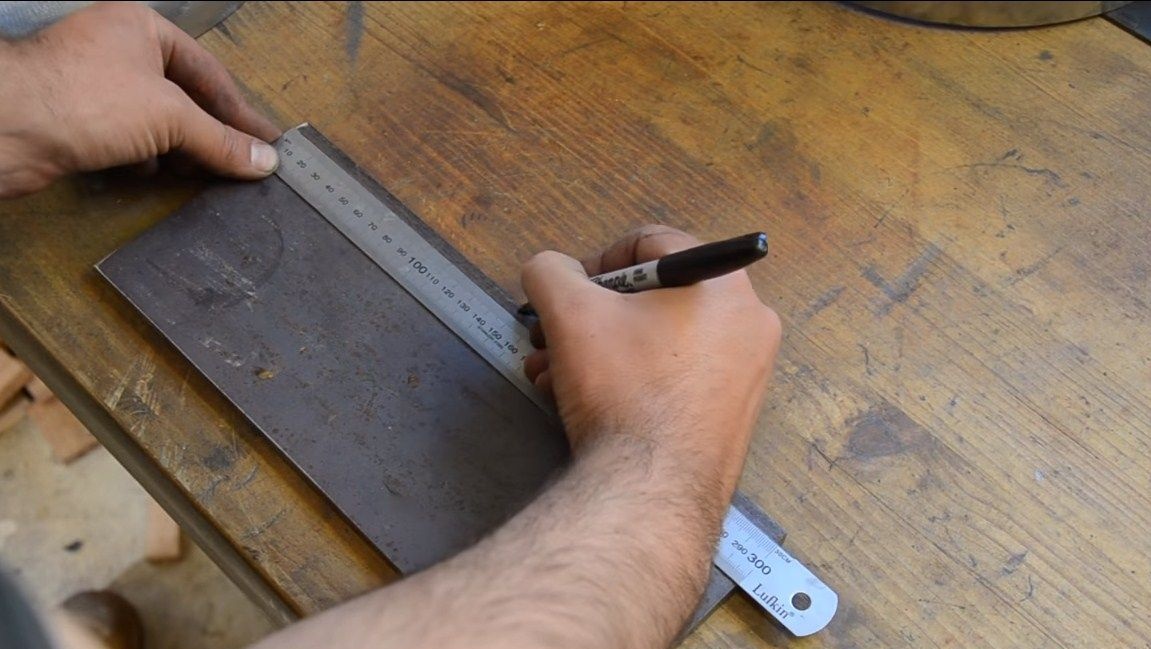
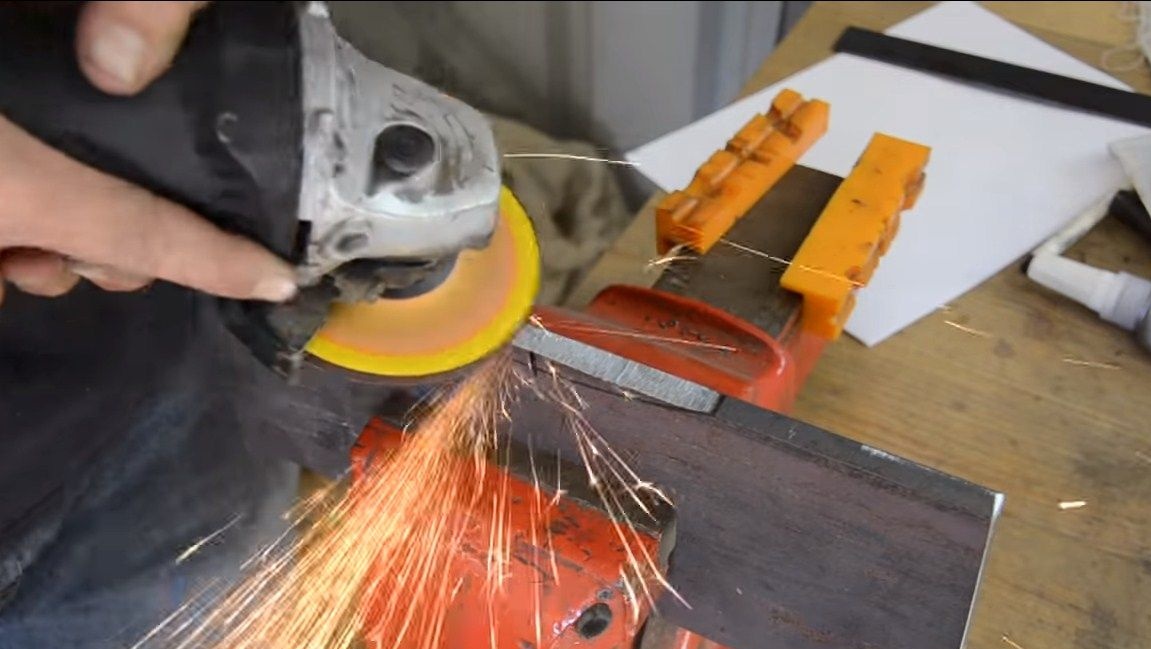
Step Two Making oven legs
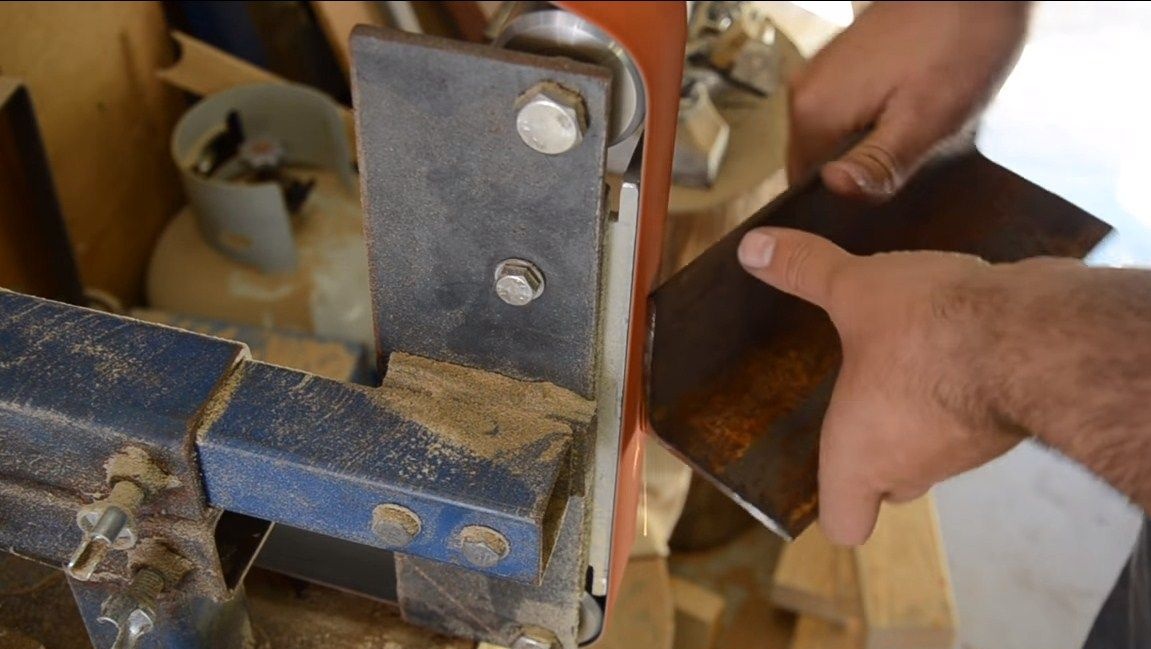
A good foundation is needed for the stove so that the stove does not roll off during operation, which is very dangerous. As legs the author used two metal corners. We take the necessary measurements and cut off the edge of the corners so that the cylinder rests well on its legs.
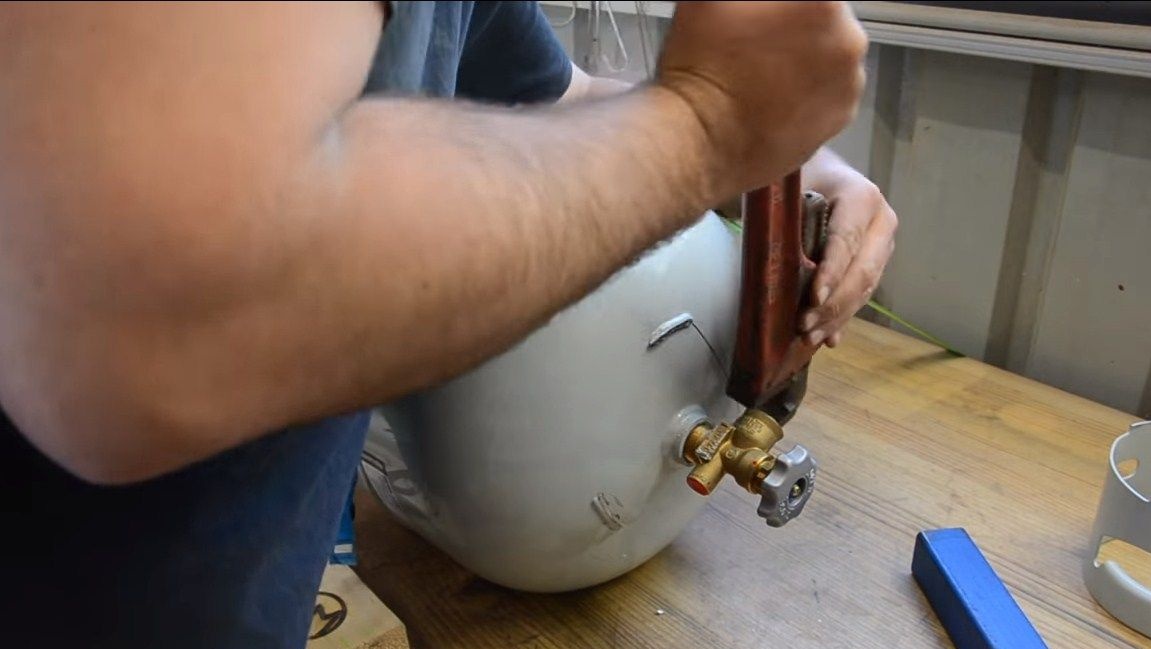
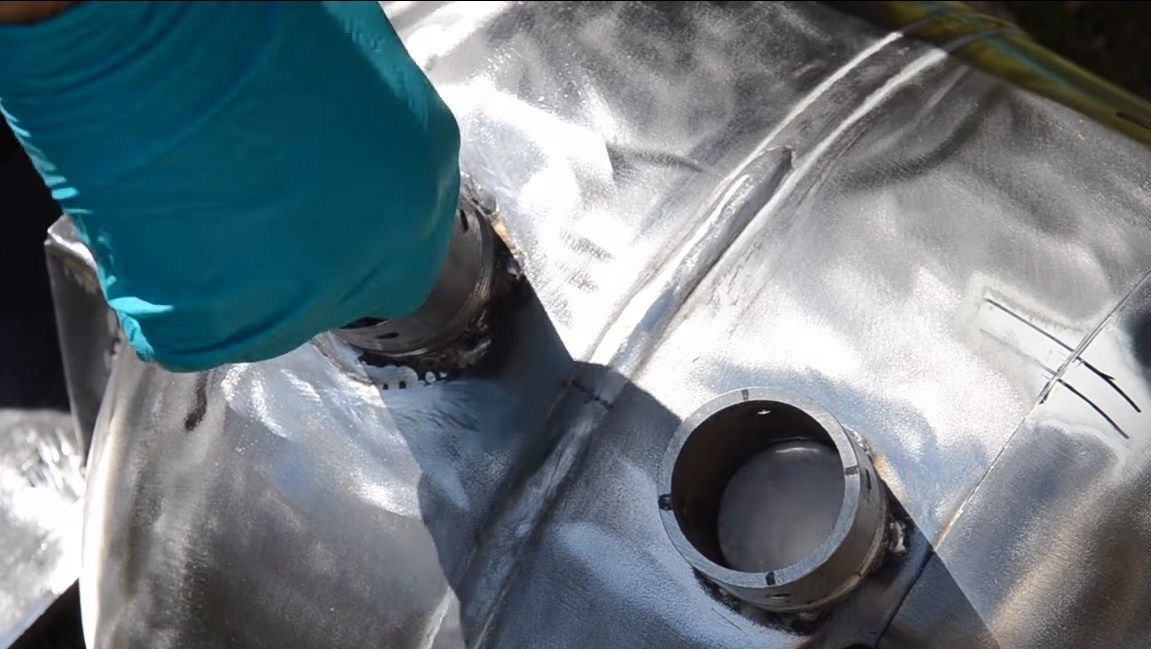
Step Three Assembling the fuel supply unit
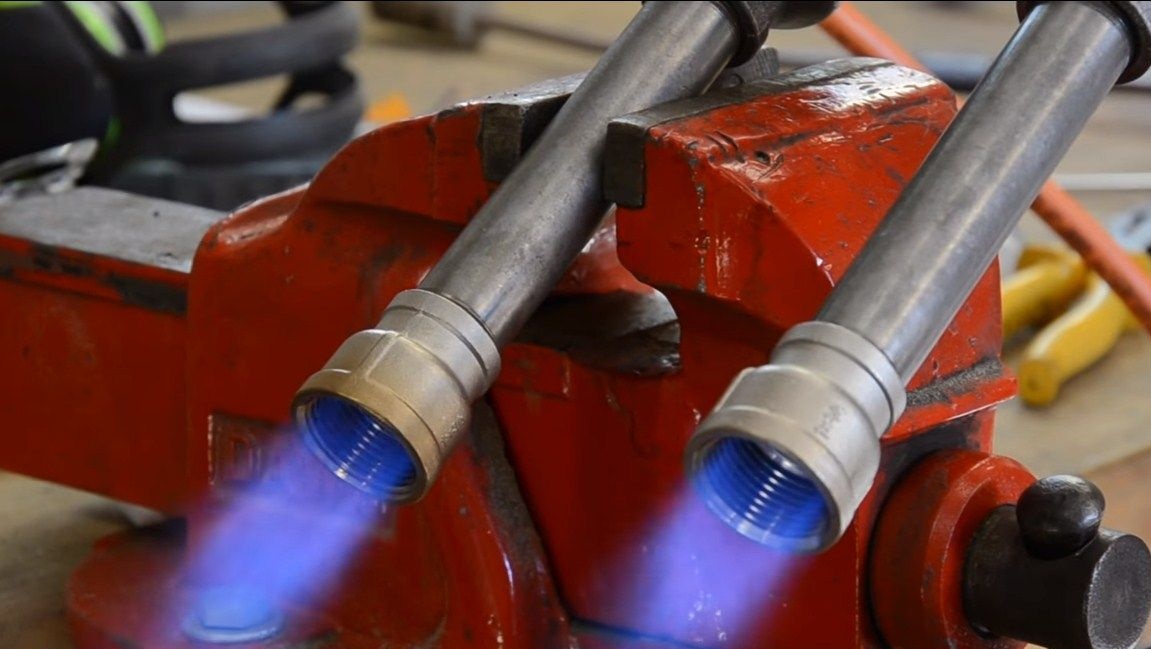
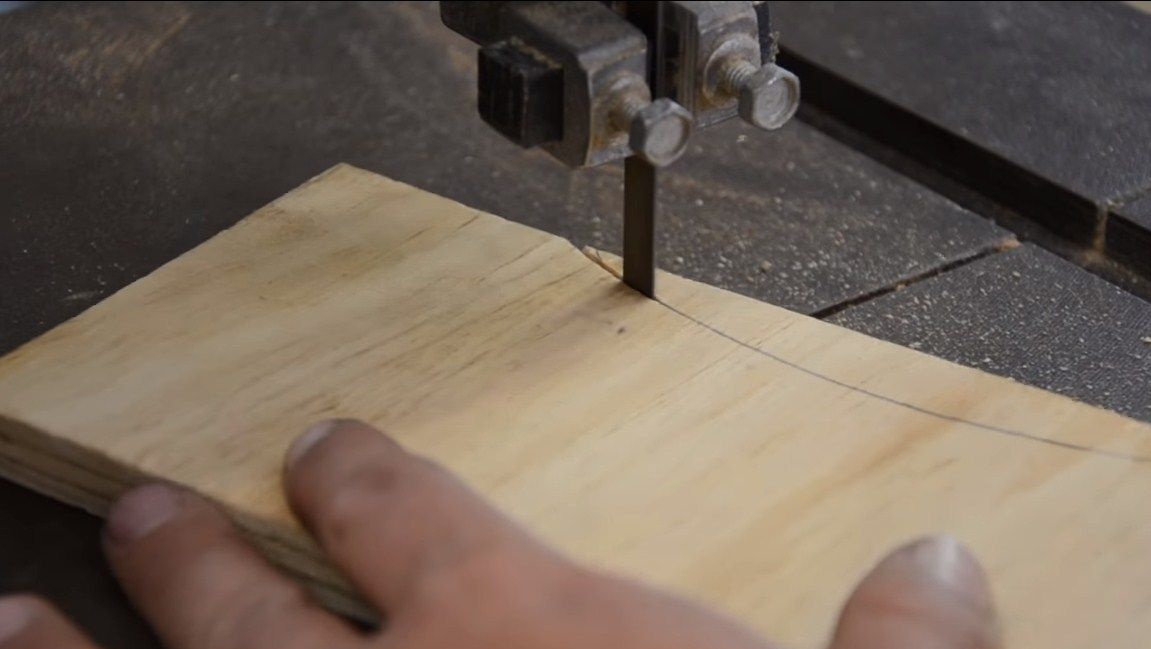
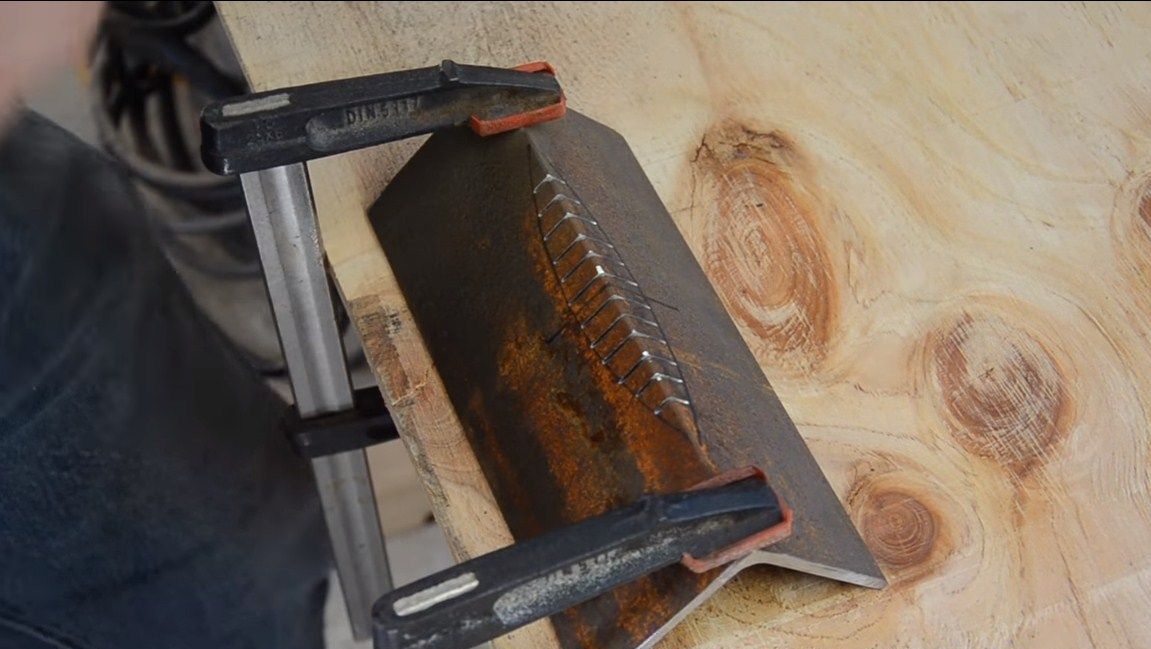
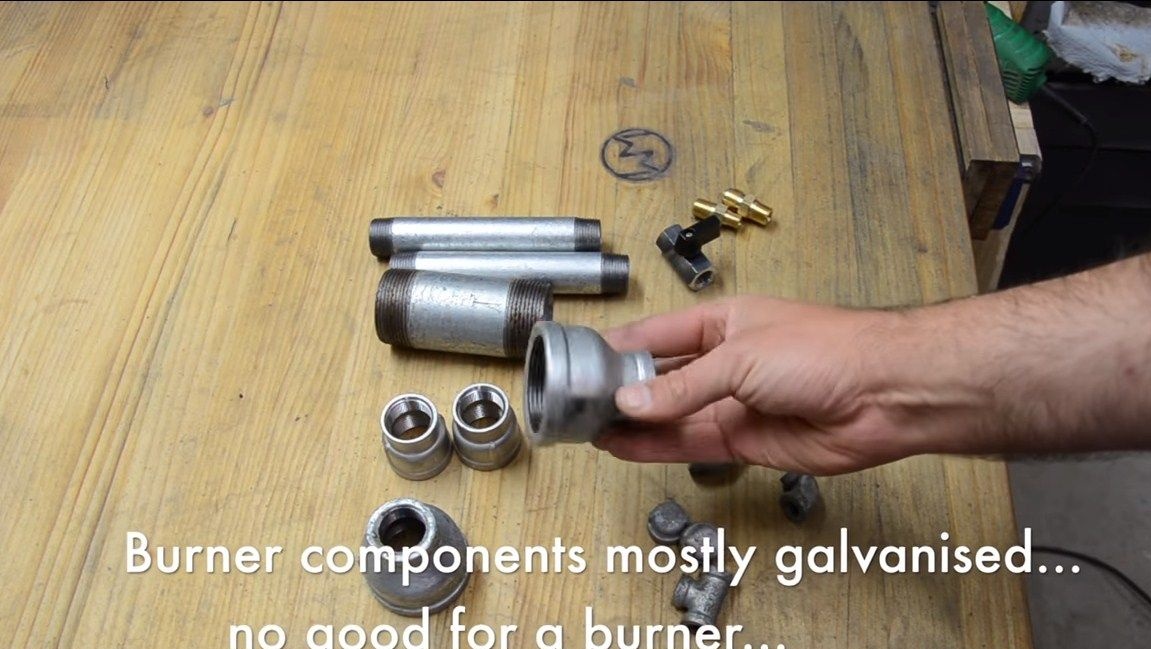
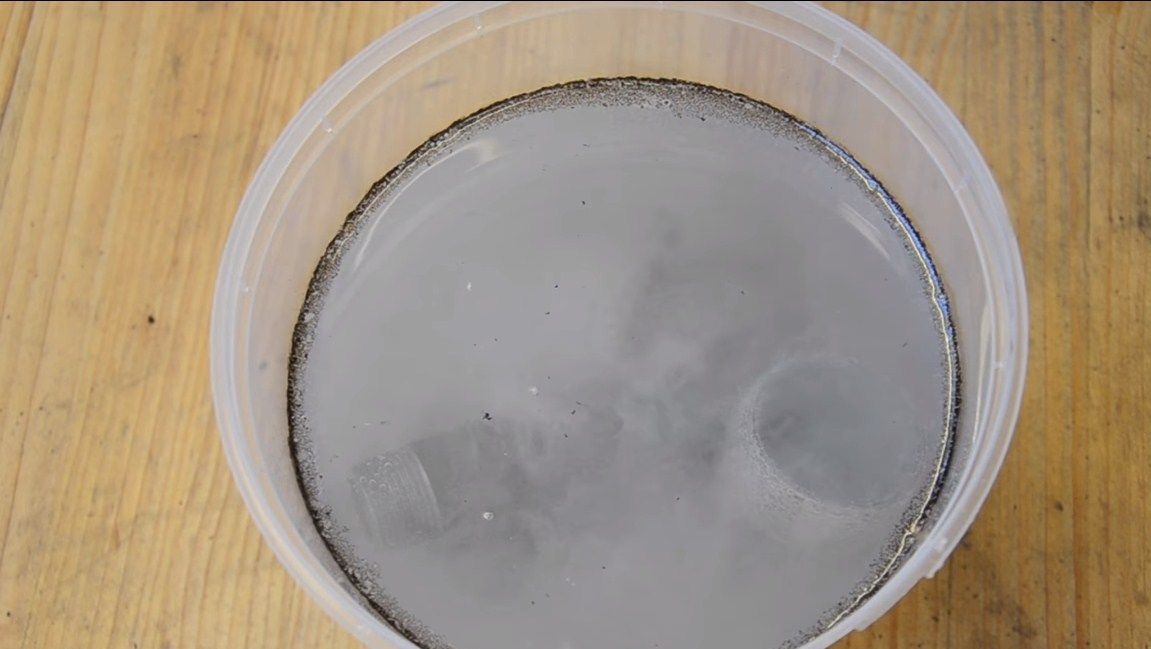
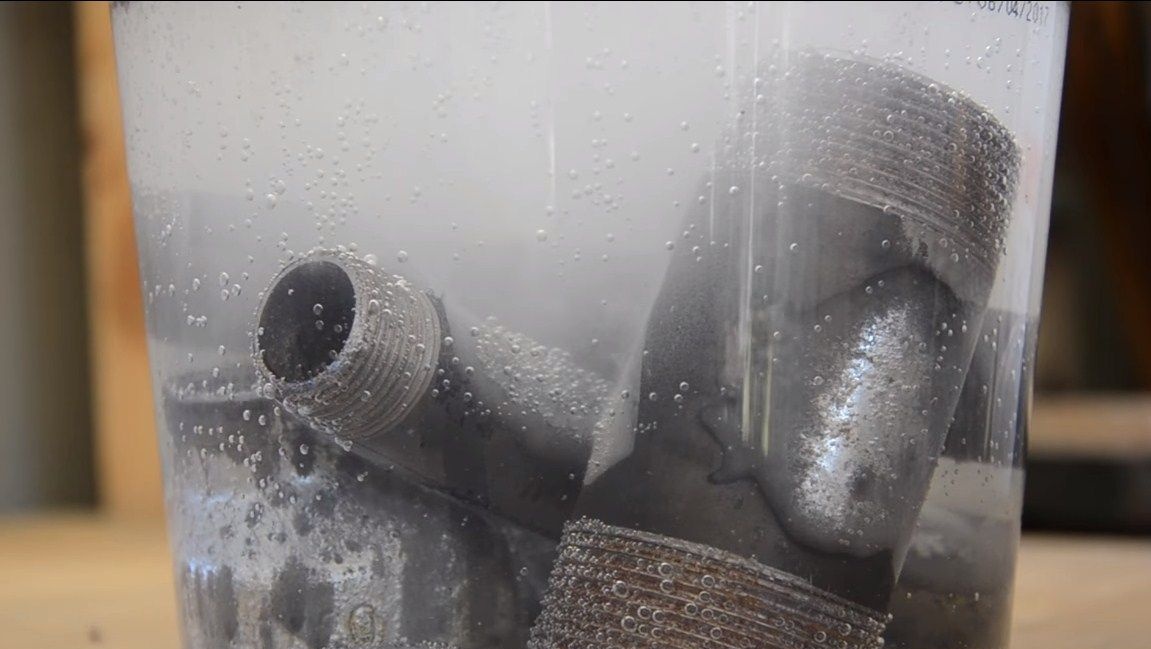
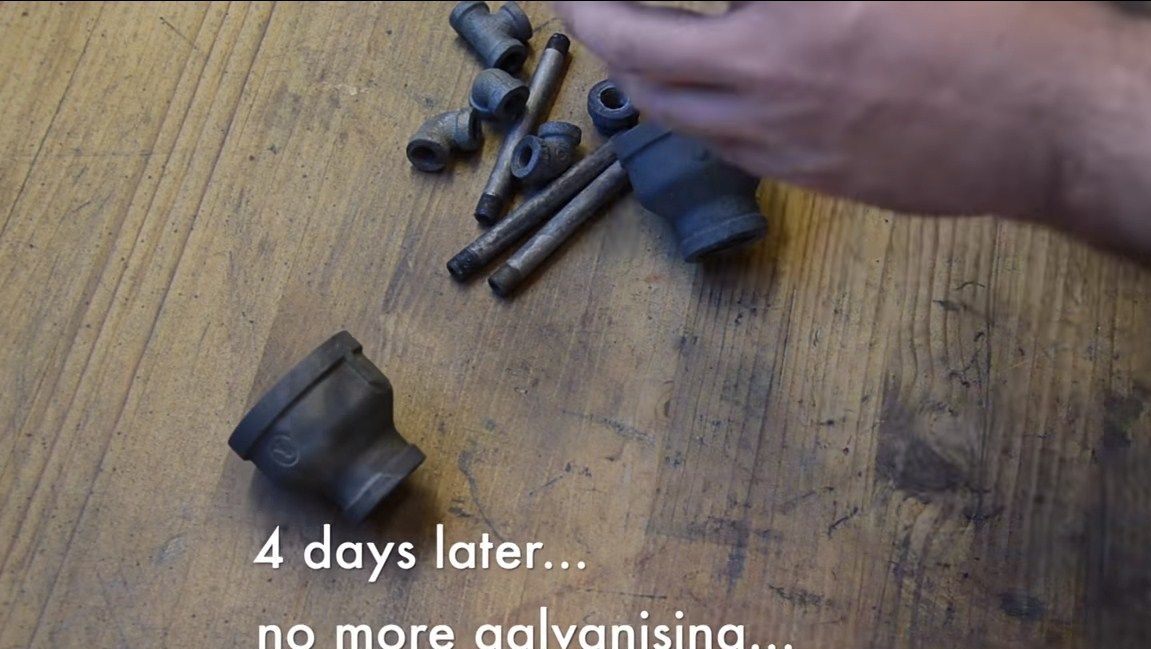
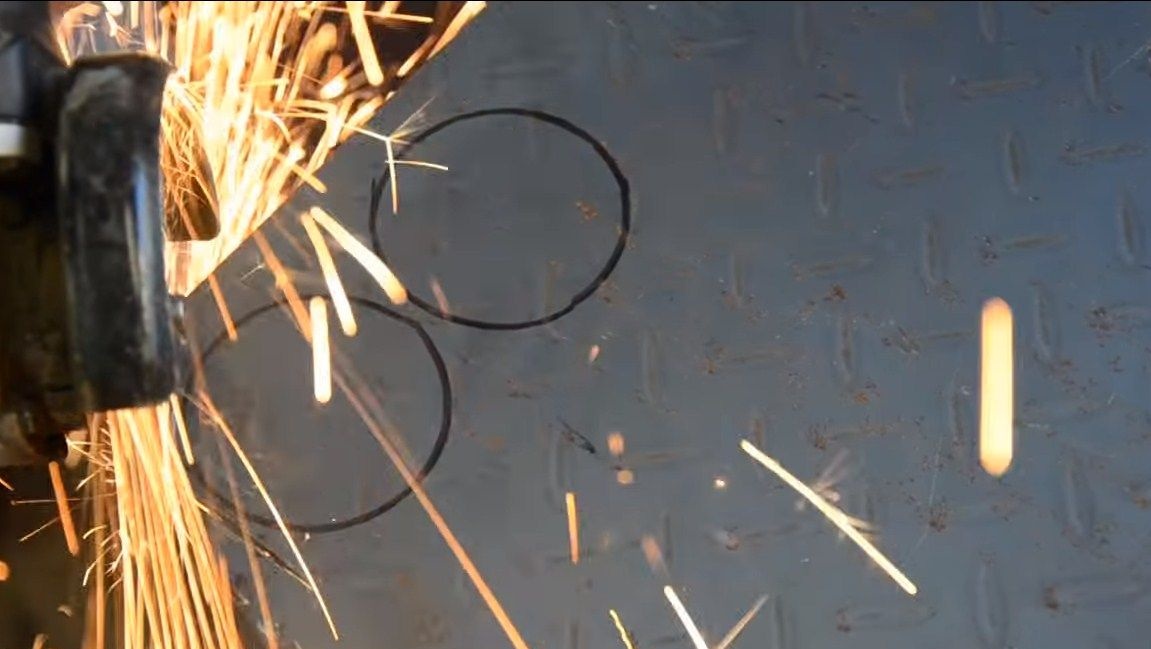
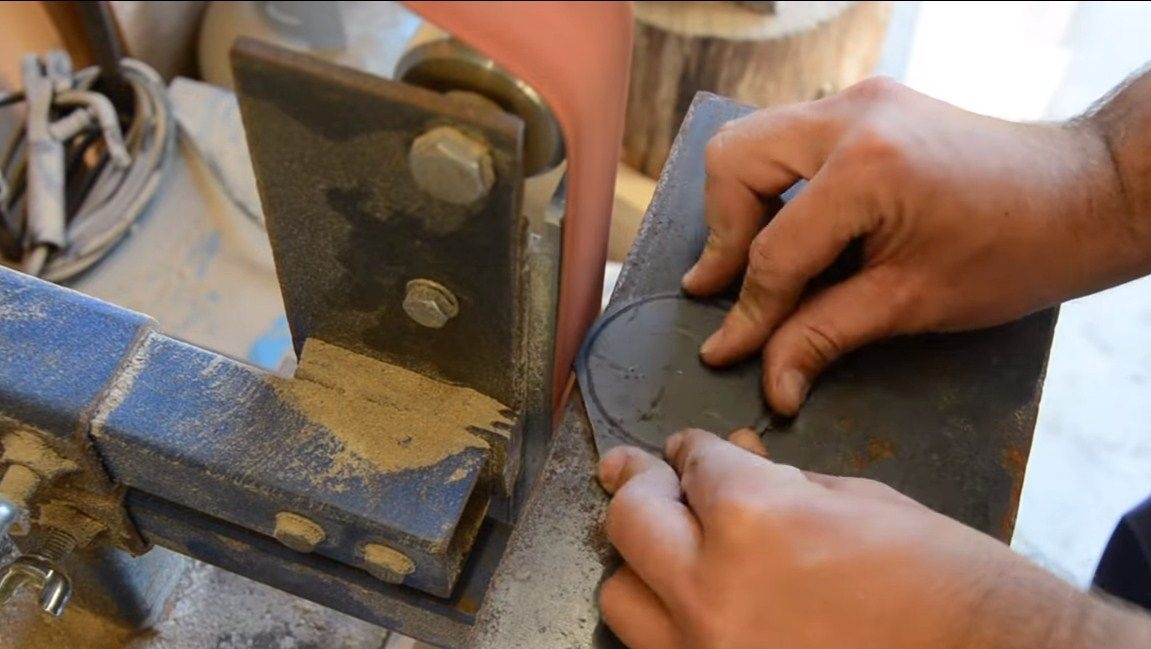
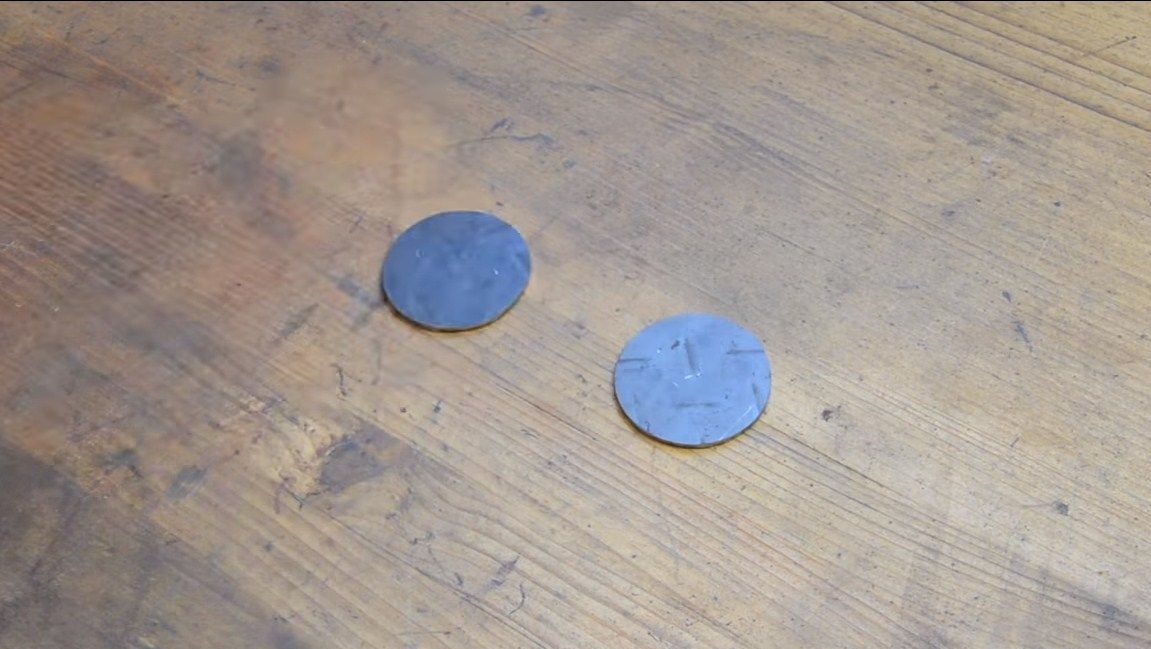
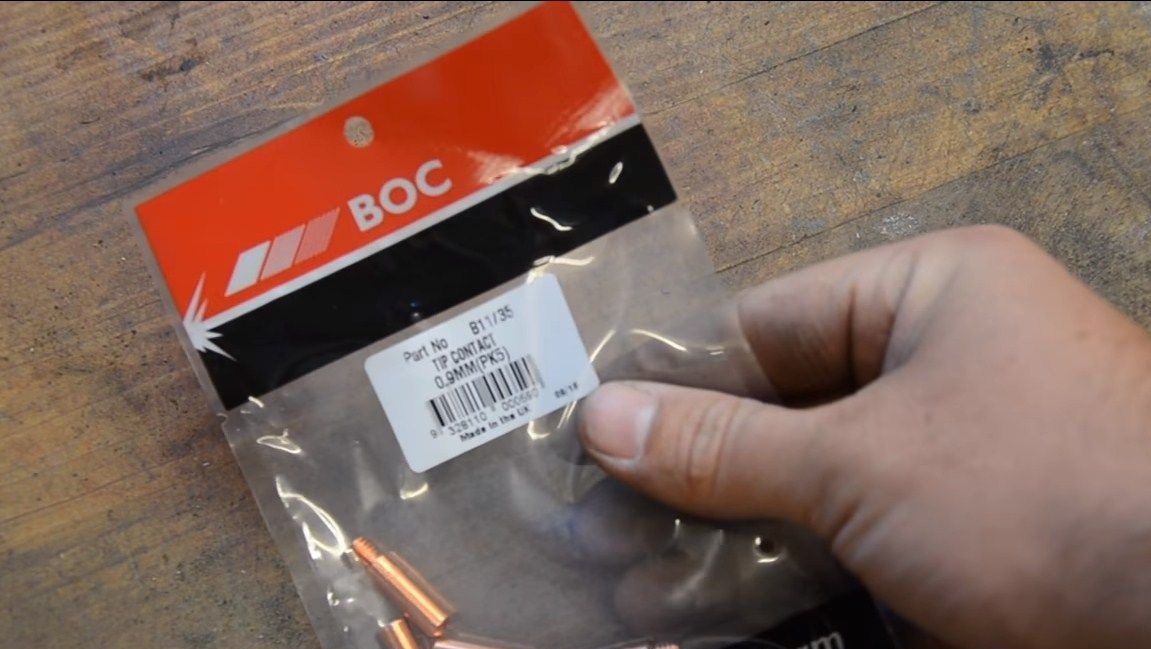
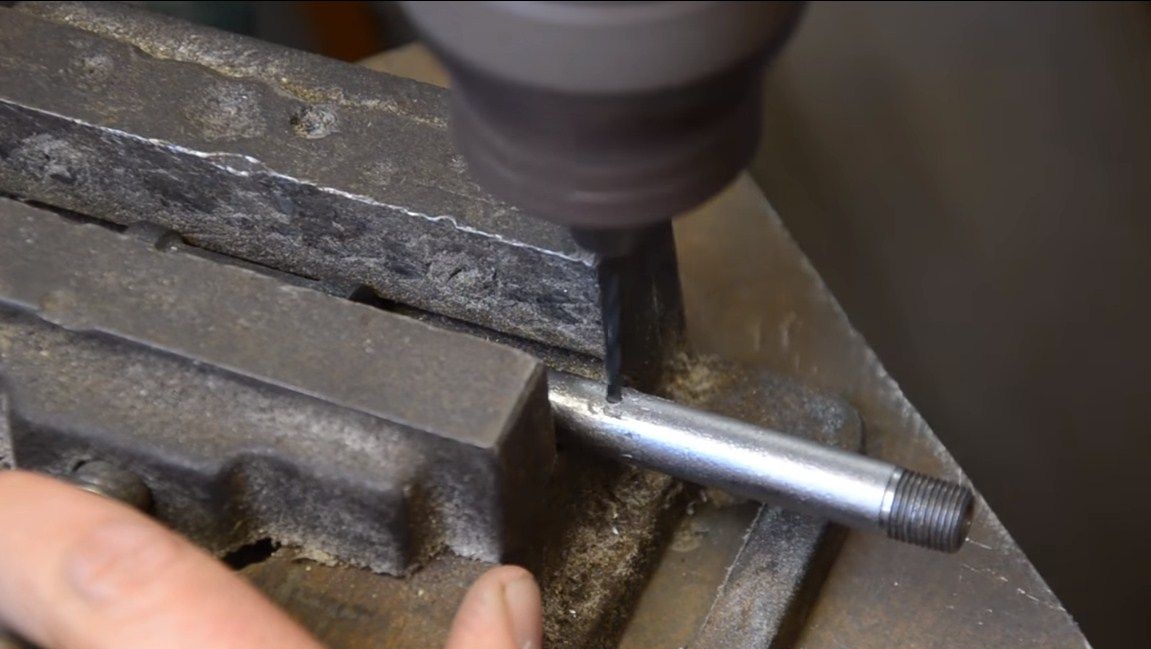
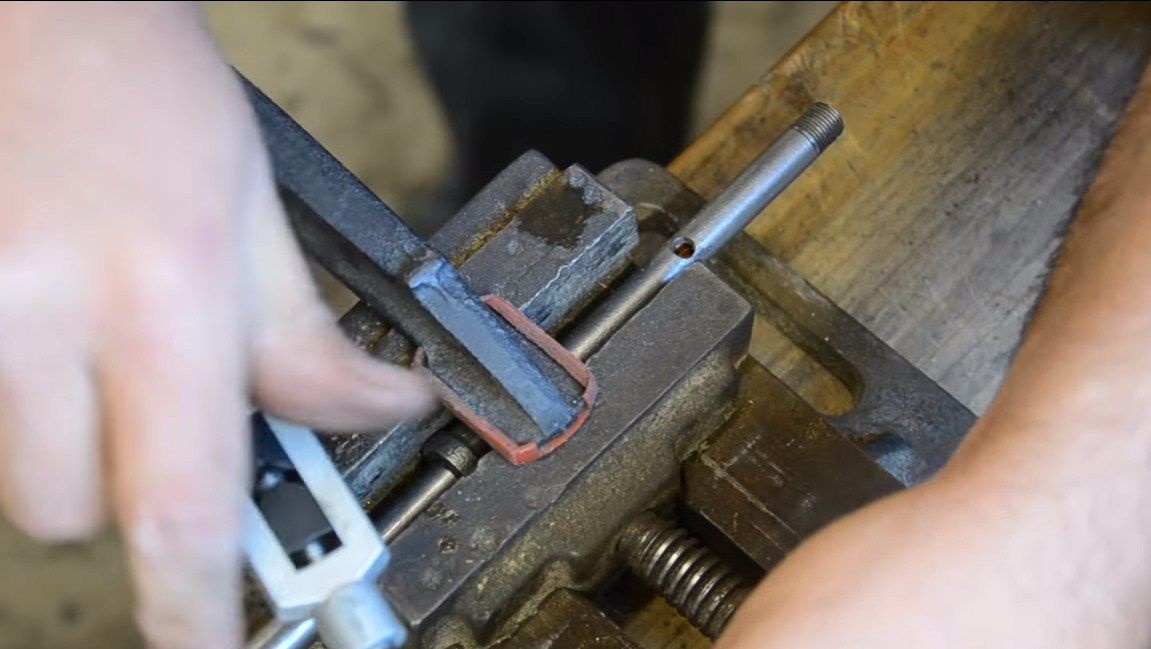
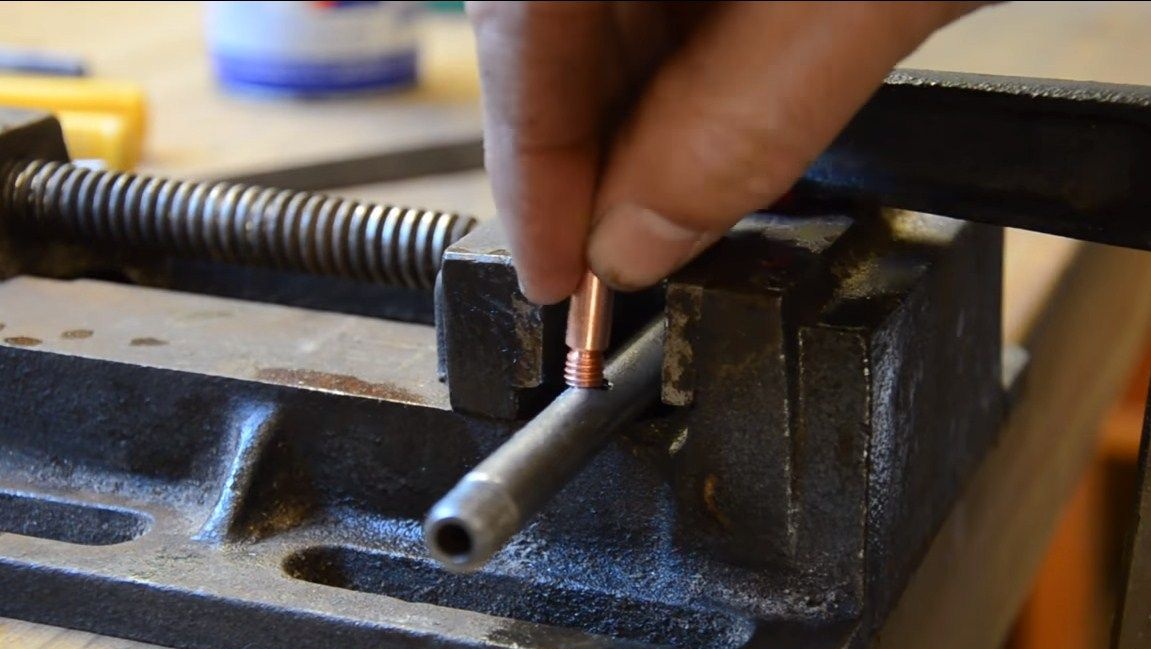
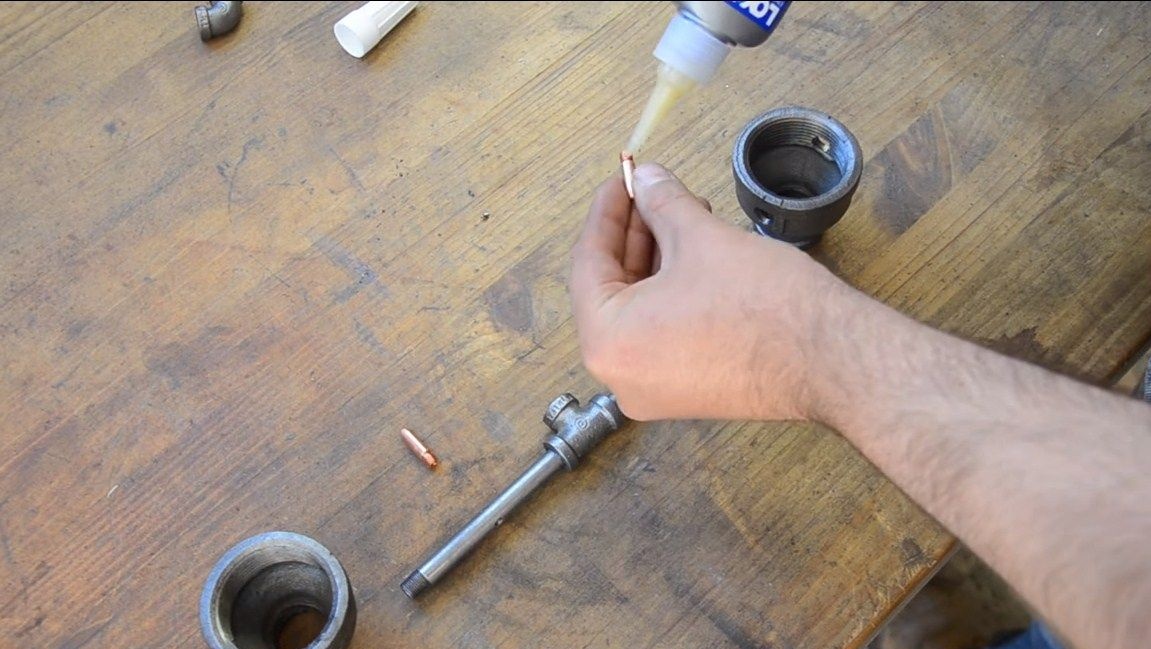
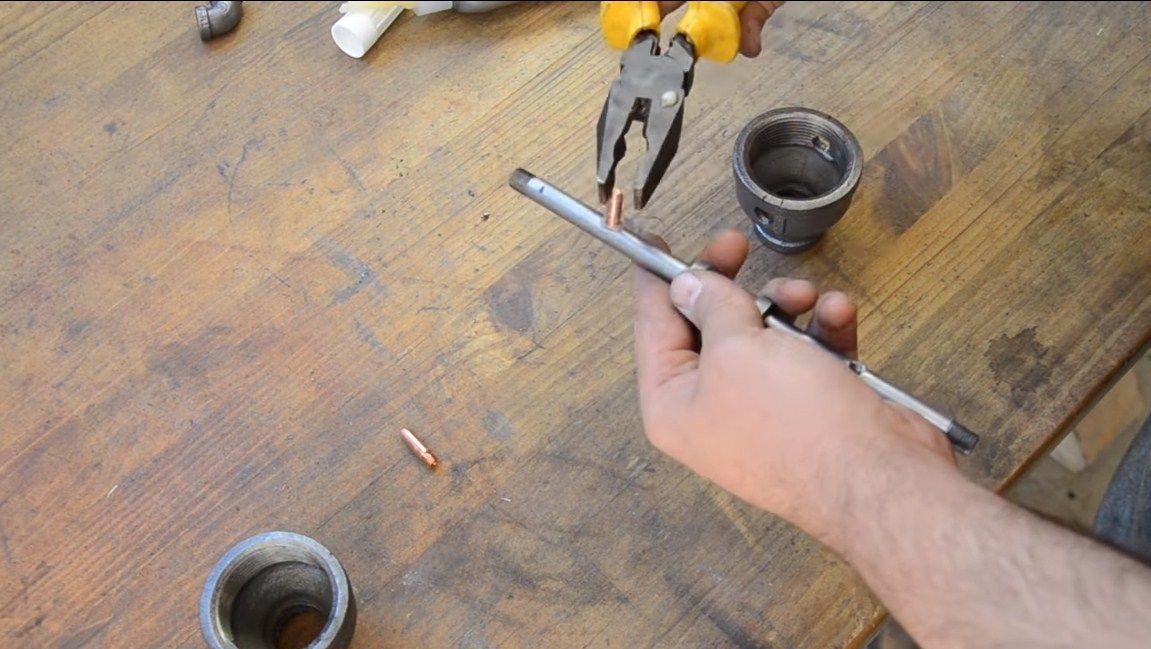
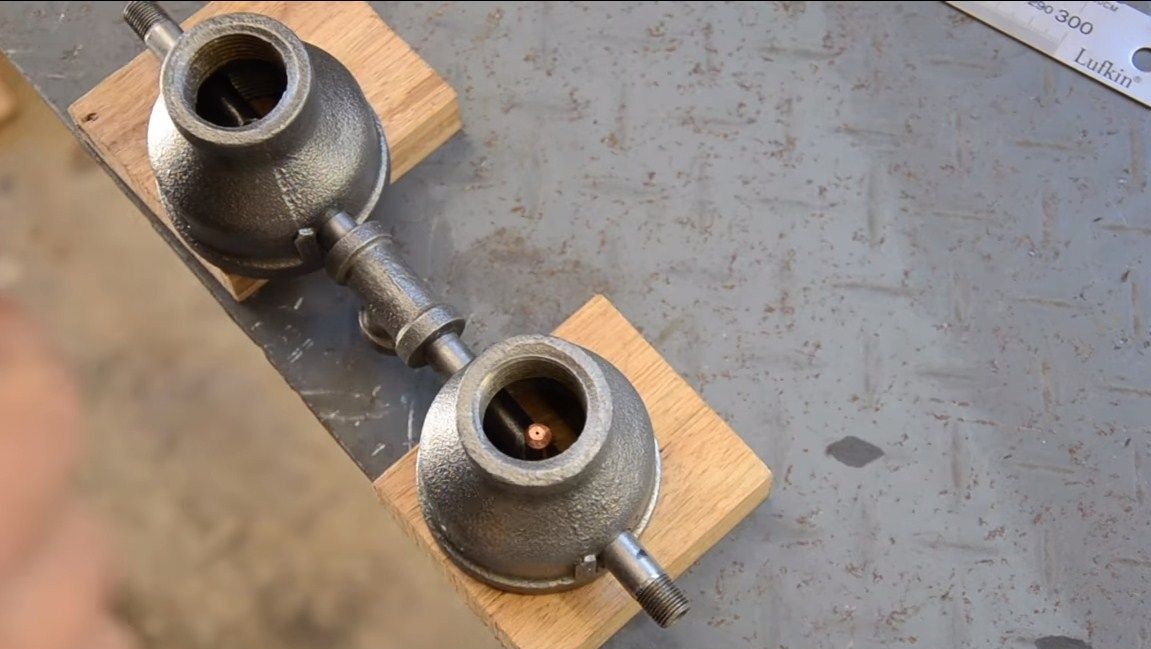
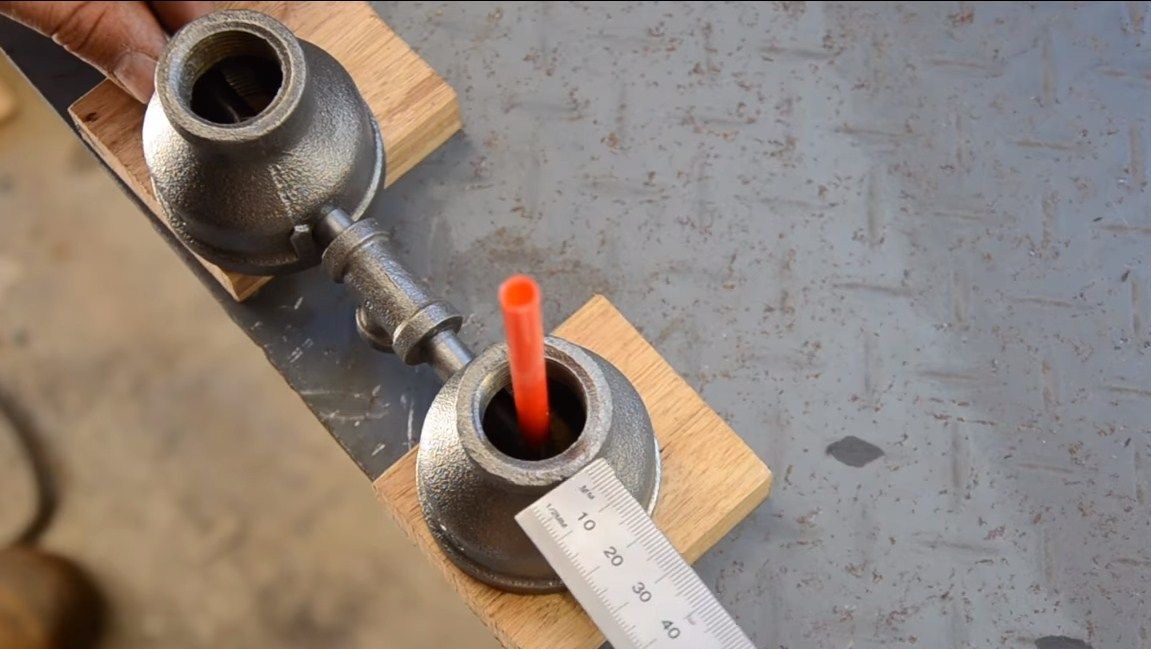
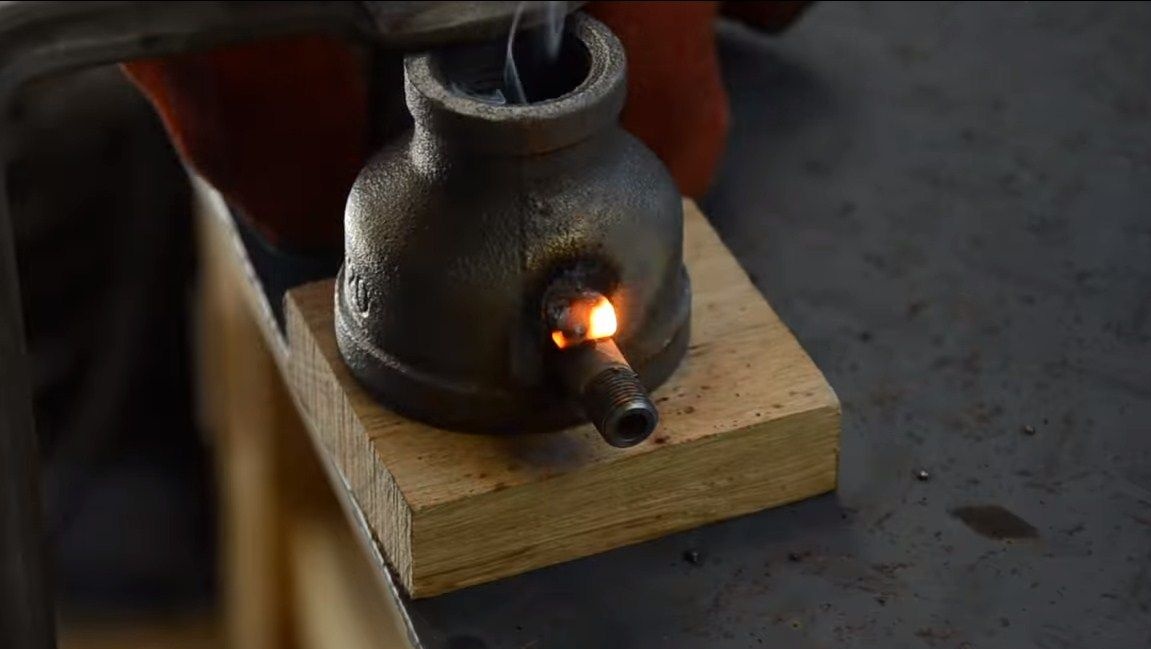
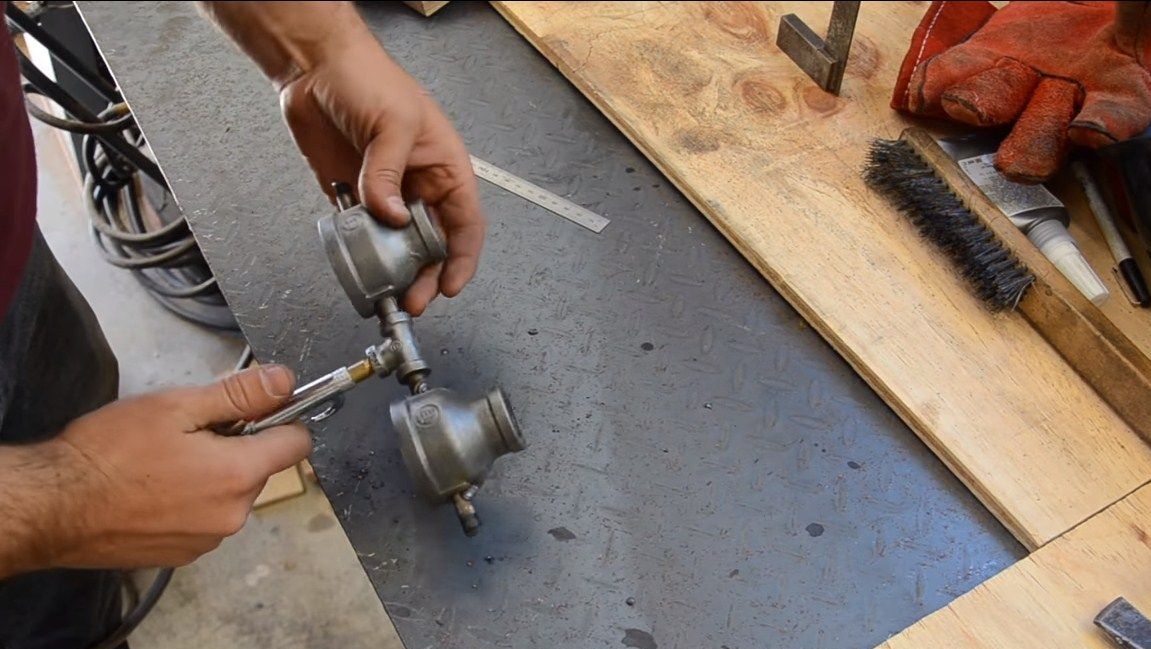
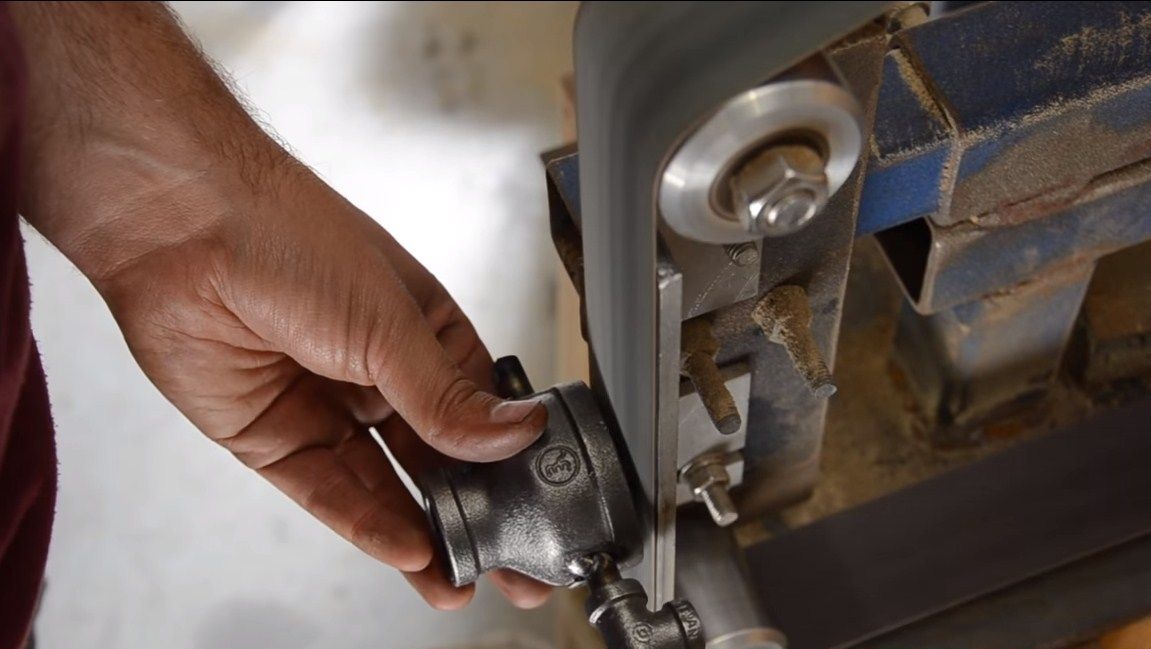
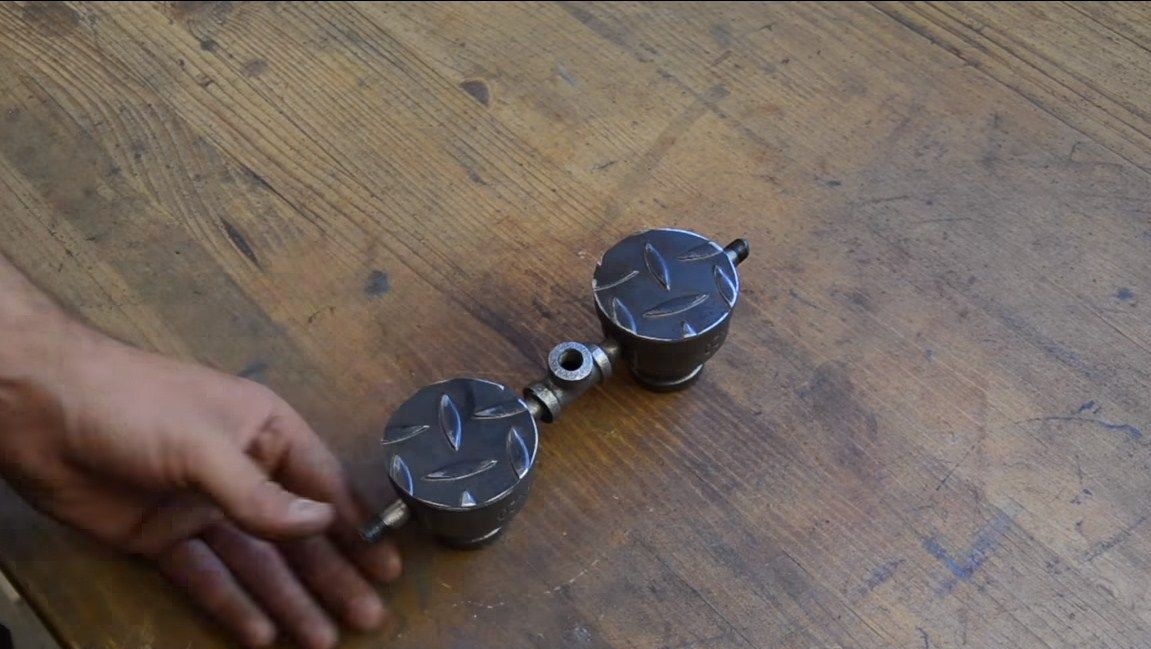
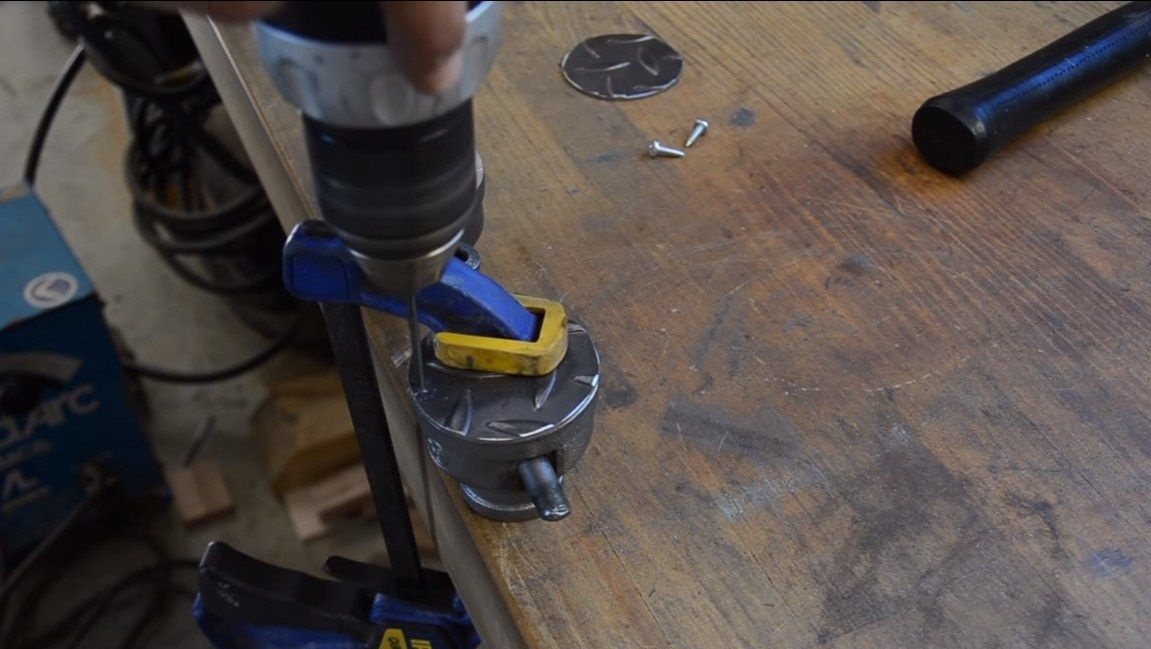
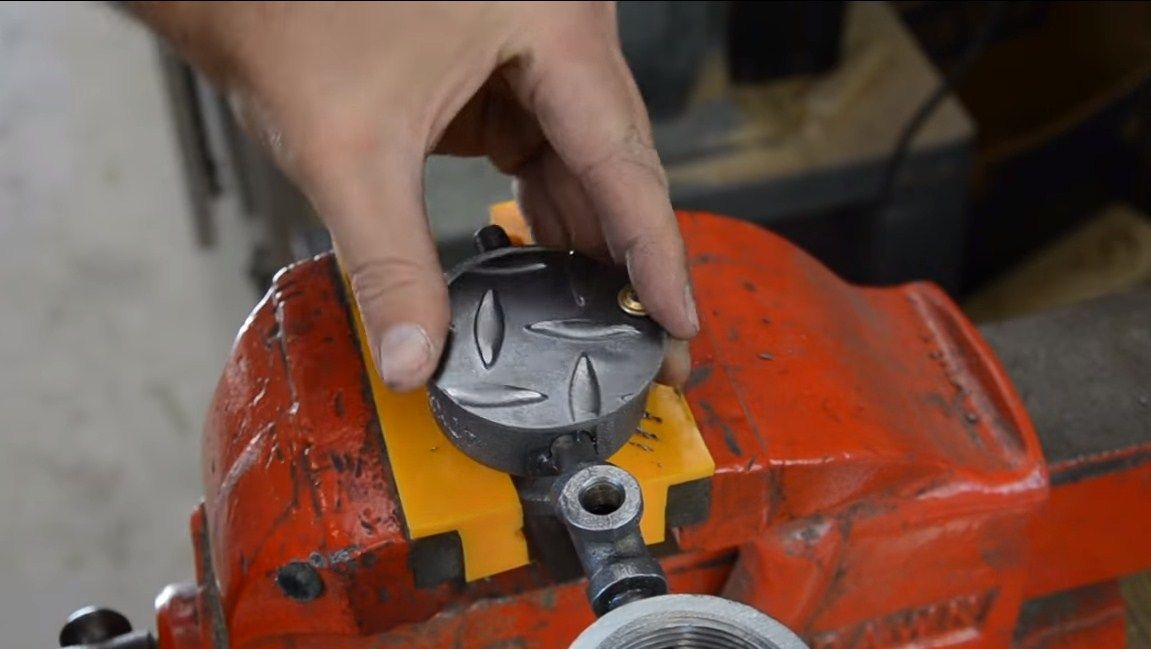
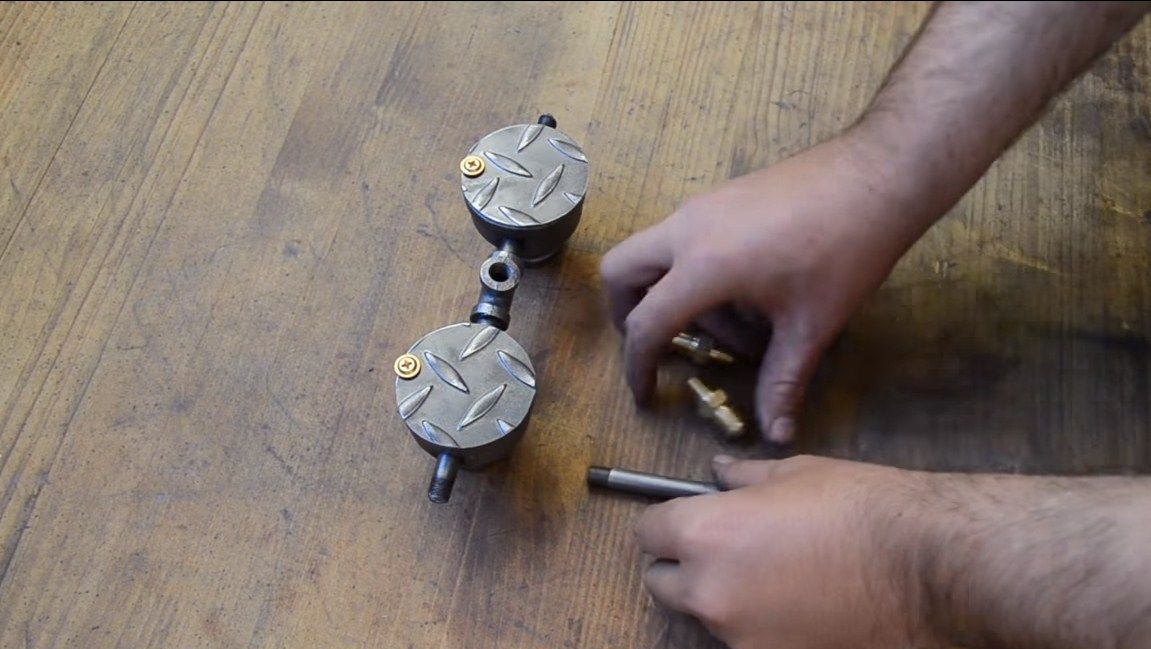
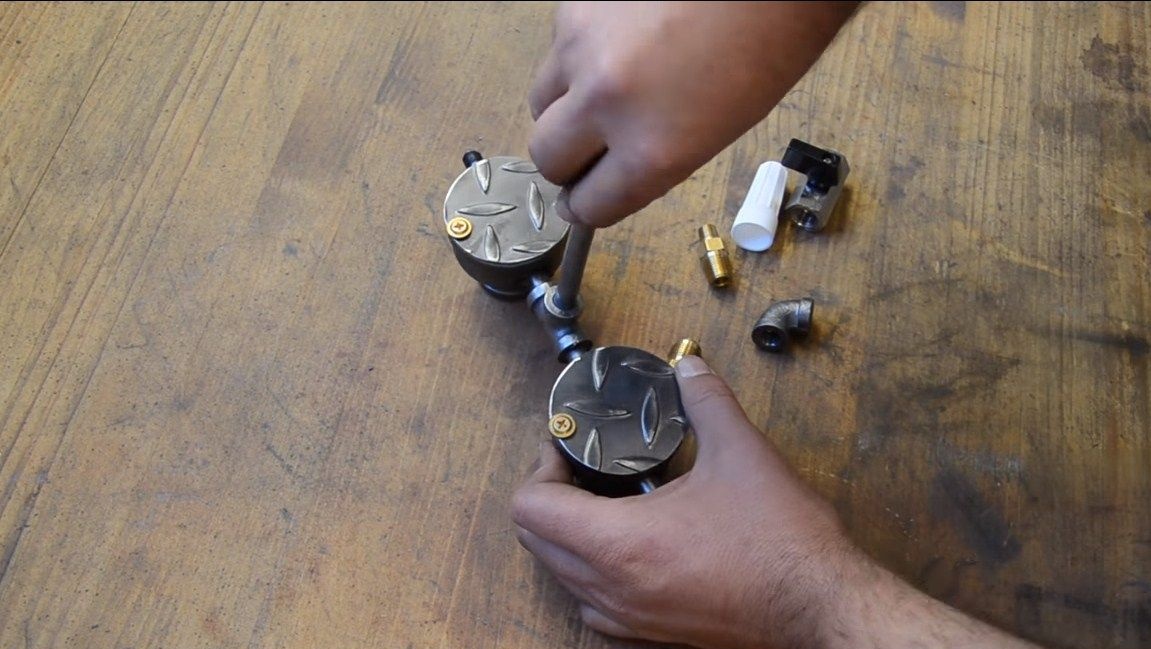
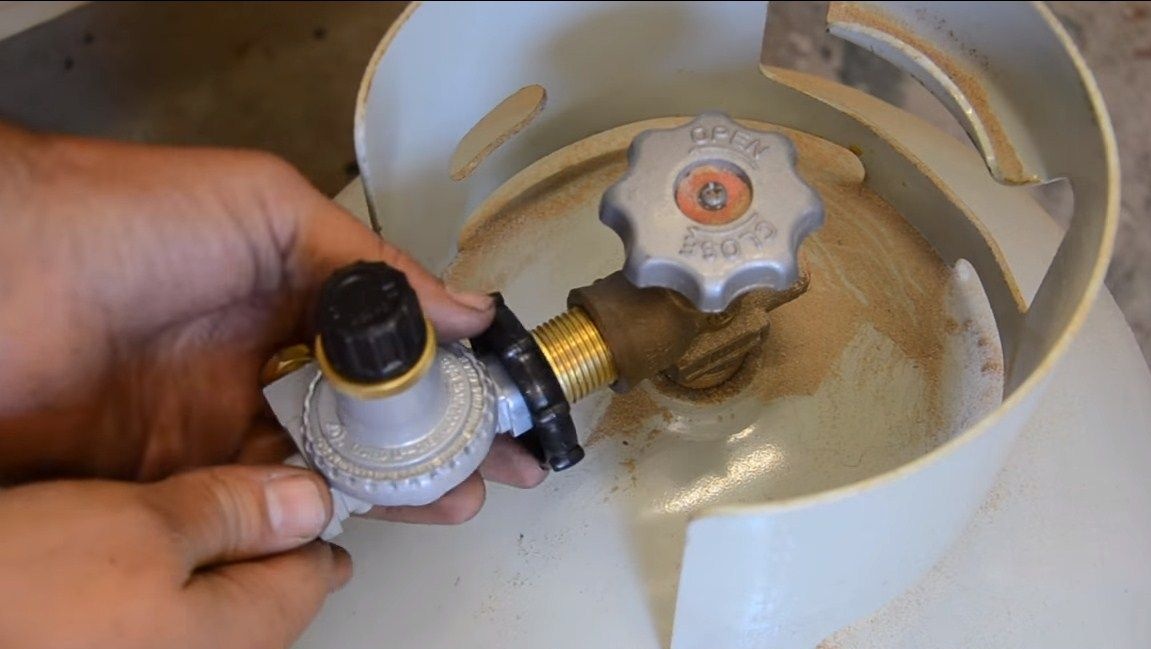
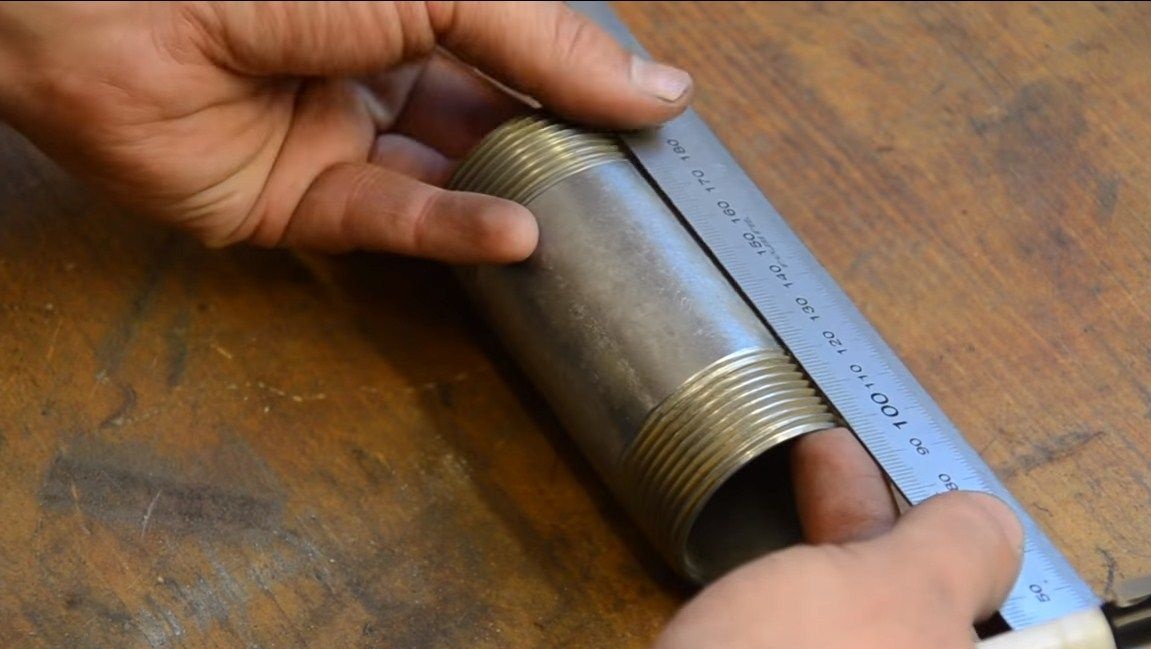
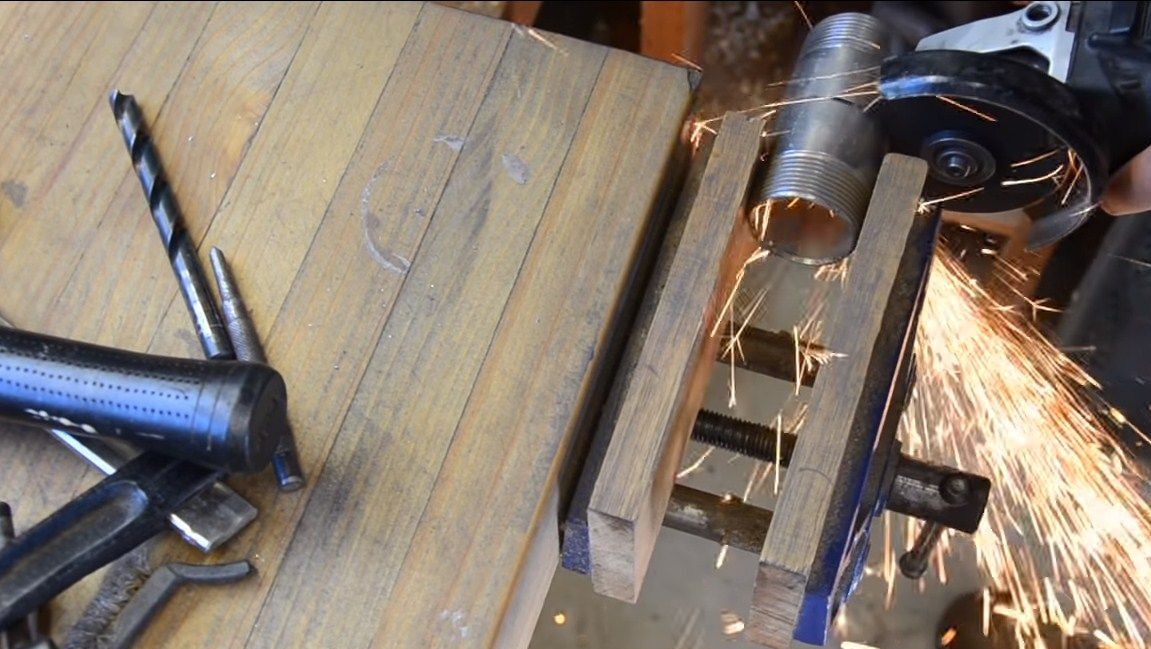
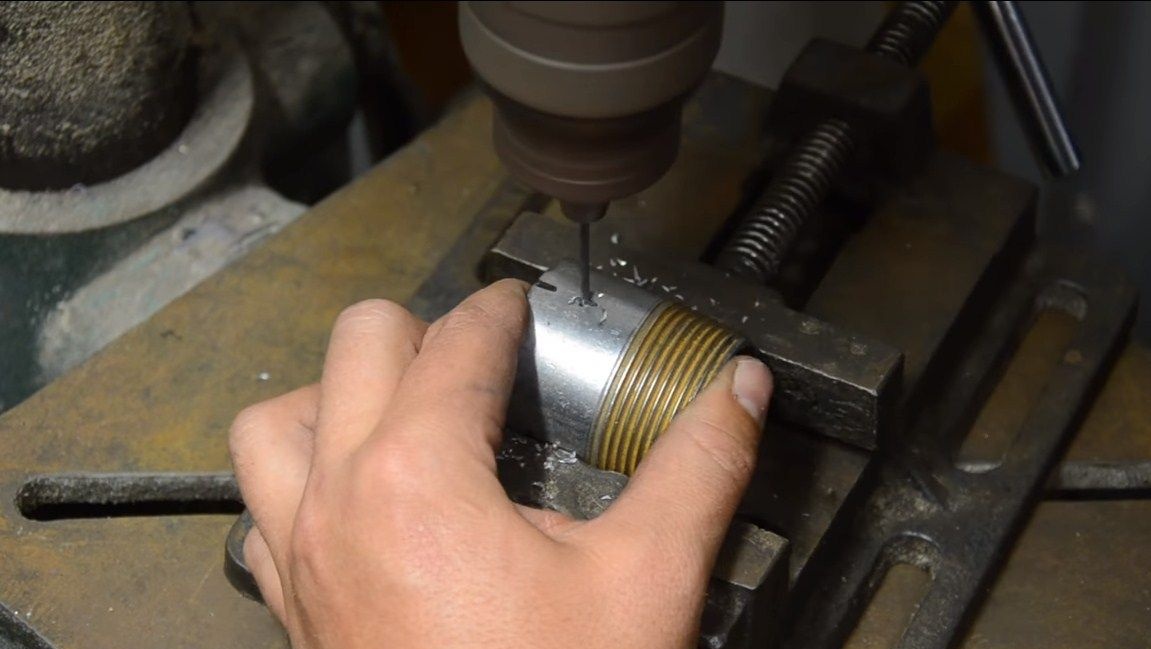
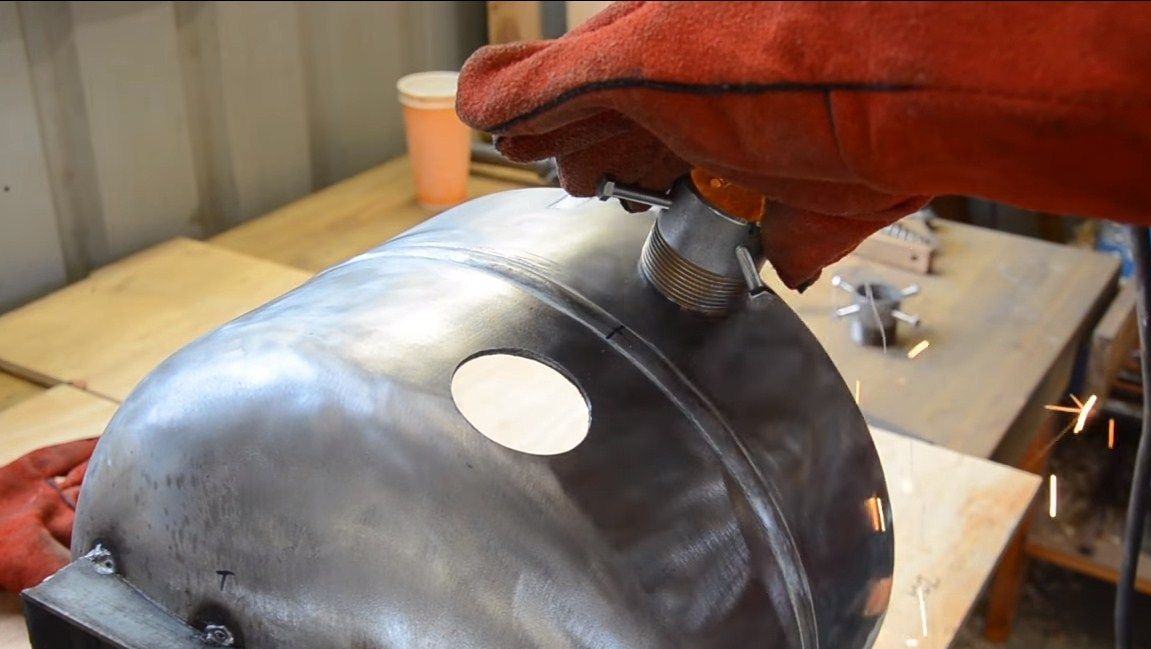
First of all, we take all the details and throw them into vinegar or other similar acid. We need to make zinc come off the metal. The fact is that this coating emits toxic gas when heated. Well, then you can get to work. To begin with, we take two cone-shaped parts, there will be dampers with which we will control the air supply. The dampers are made of sheet steel, just cut the round logs of a suitable diameter. The shutters are pivotally mounted on the screws.
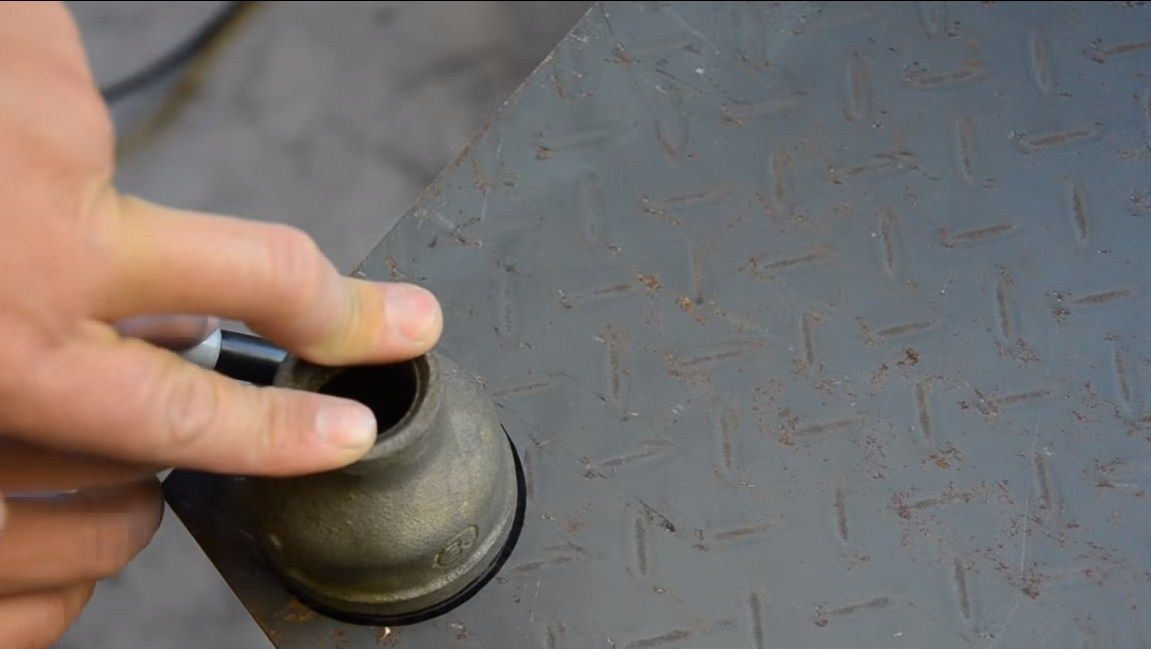
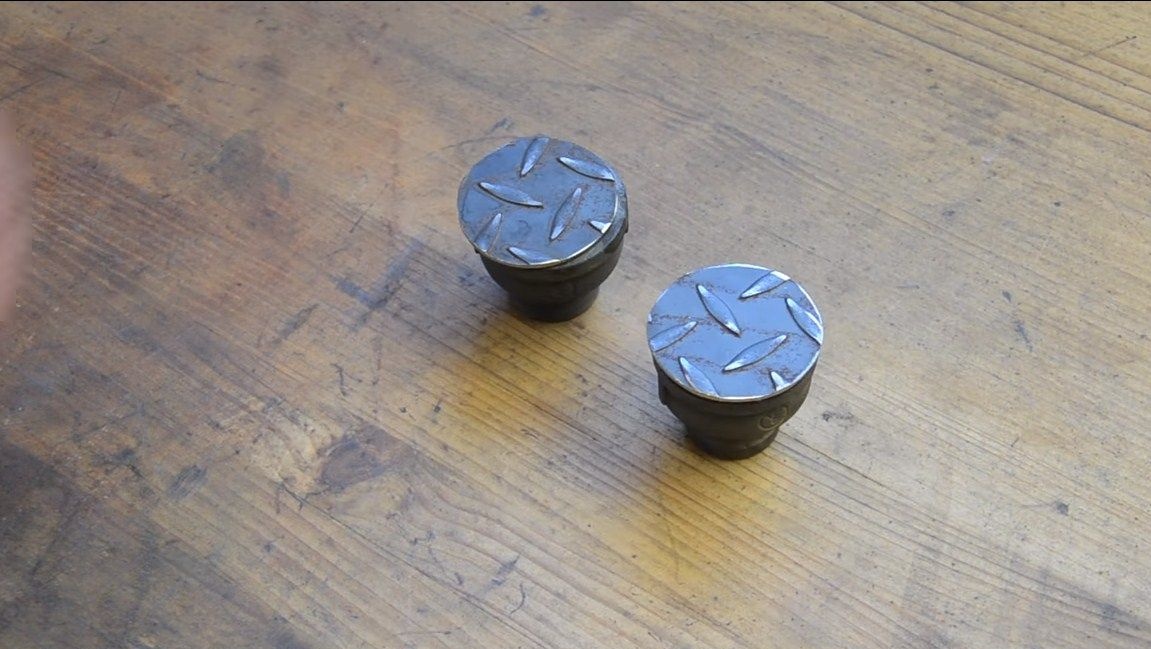
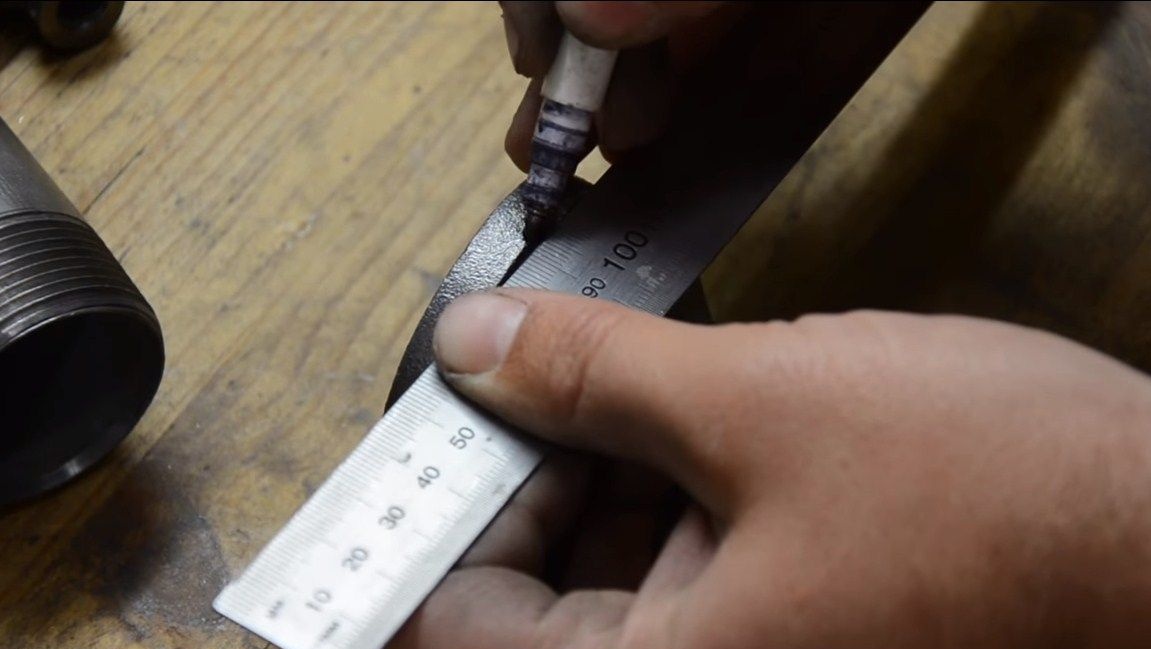
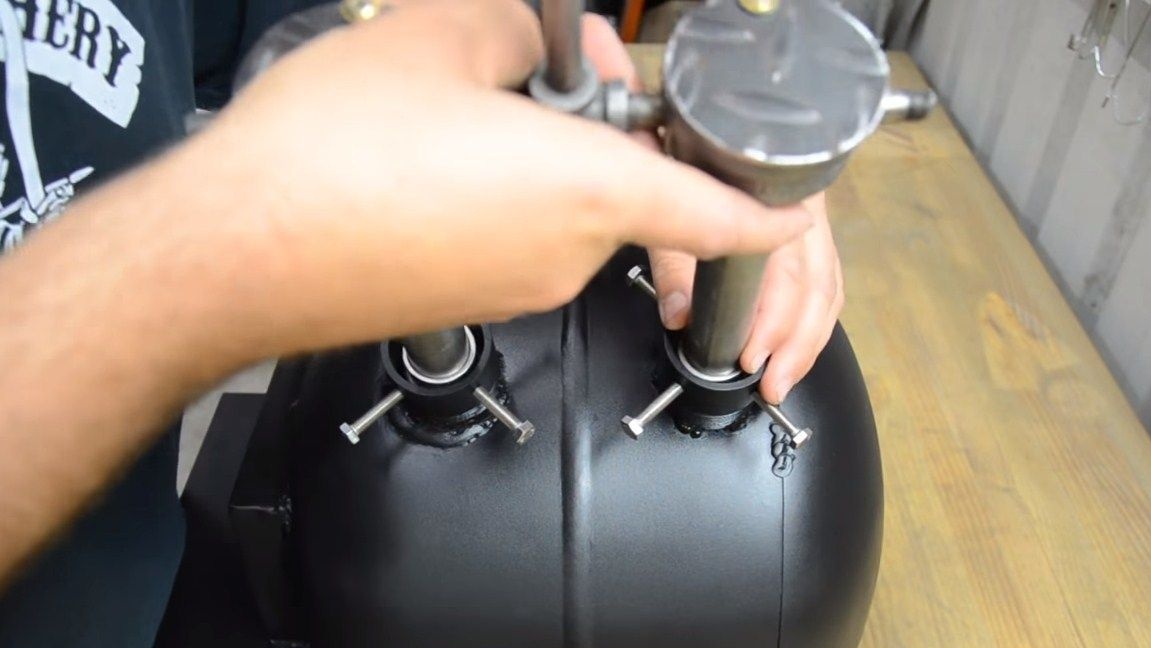
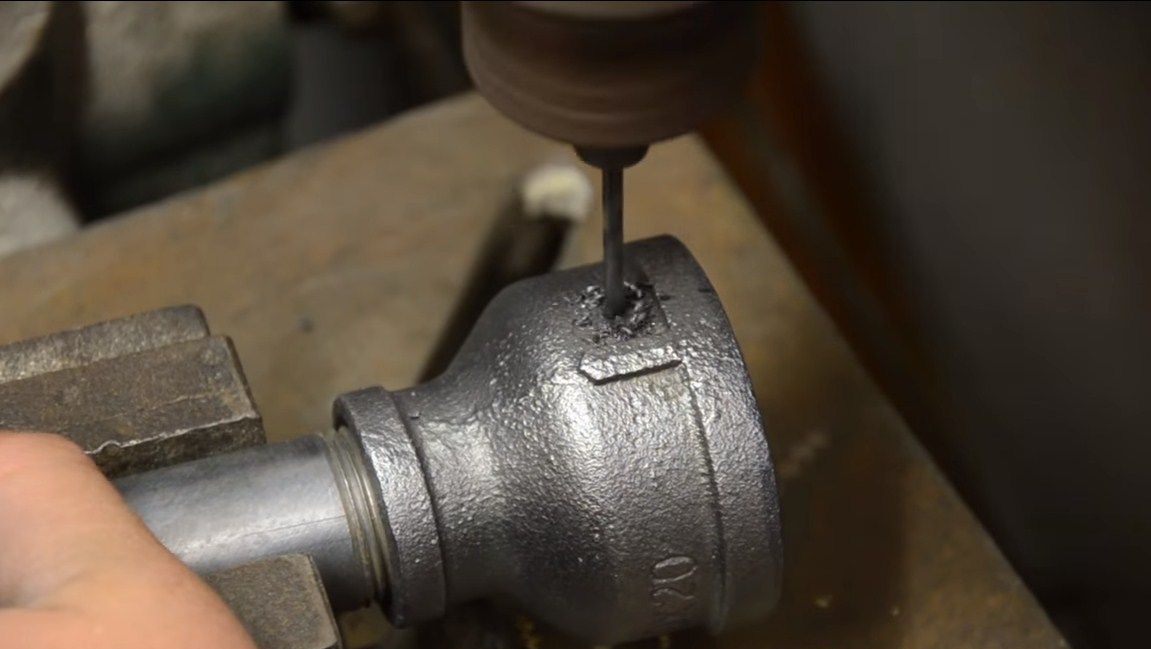
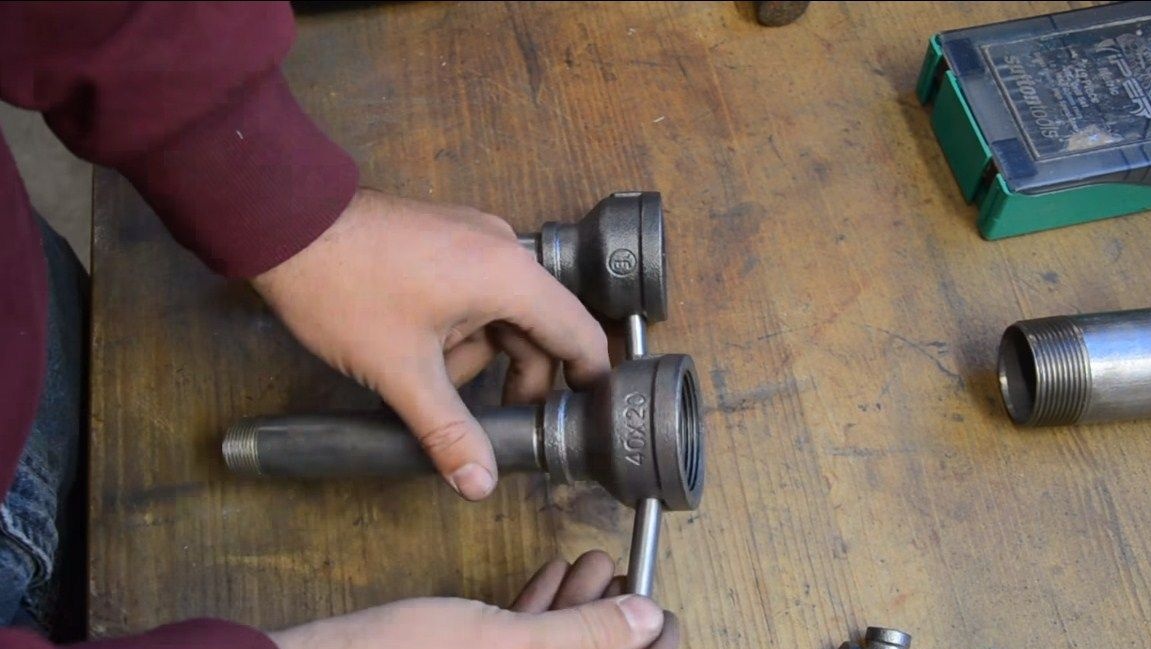
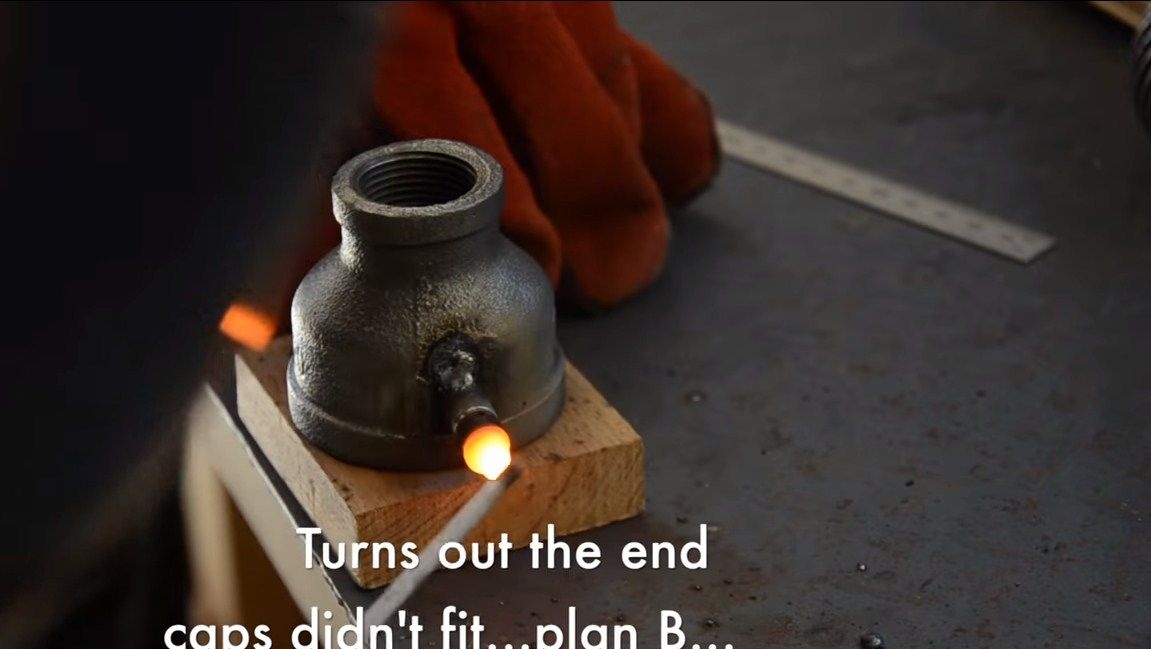
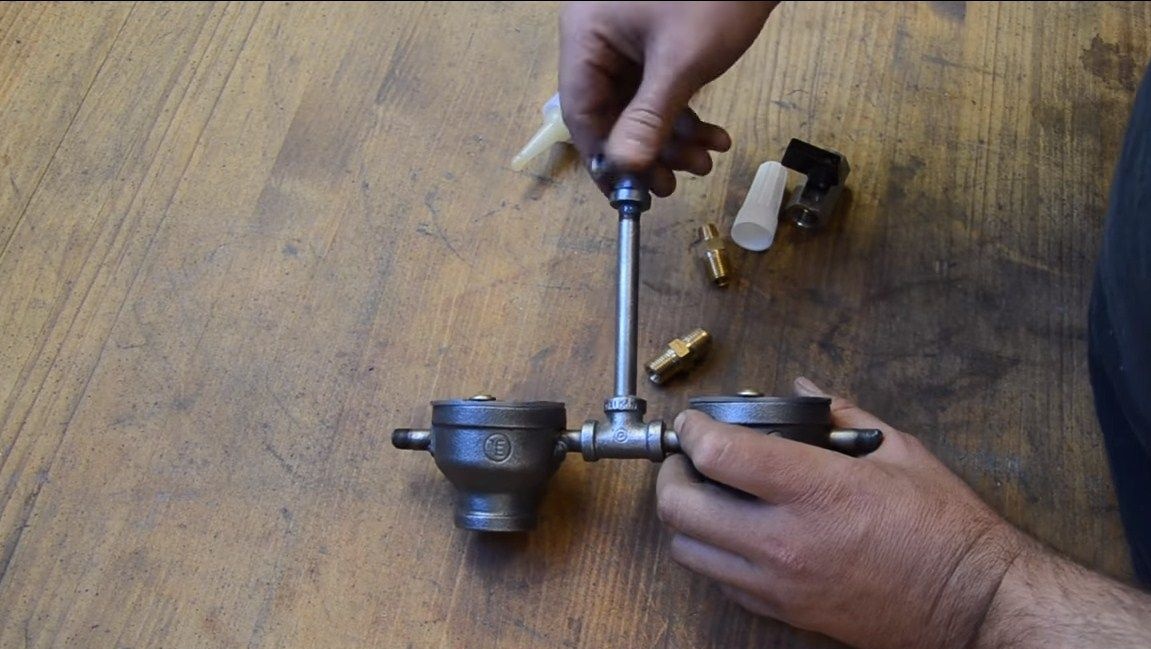
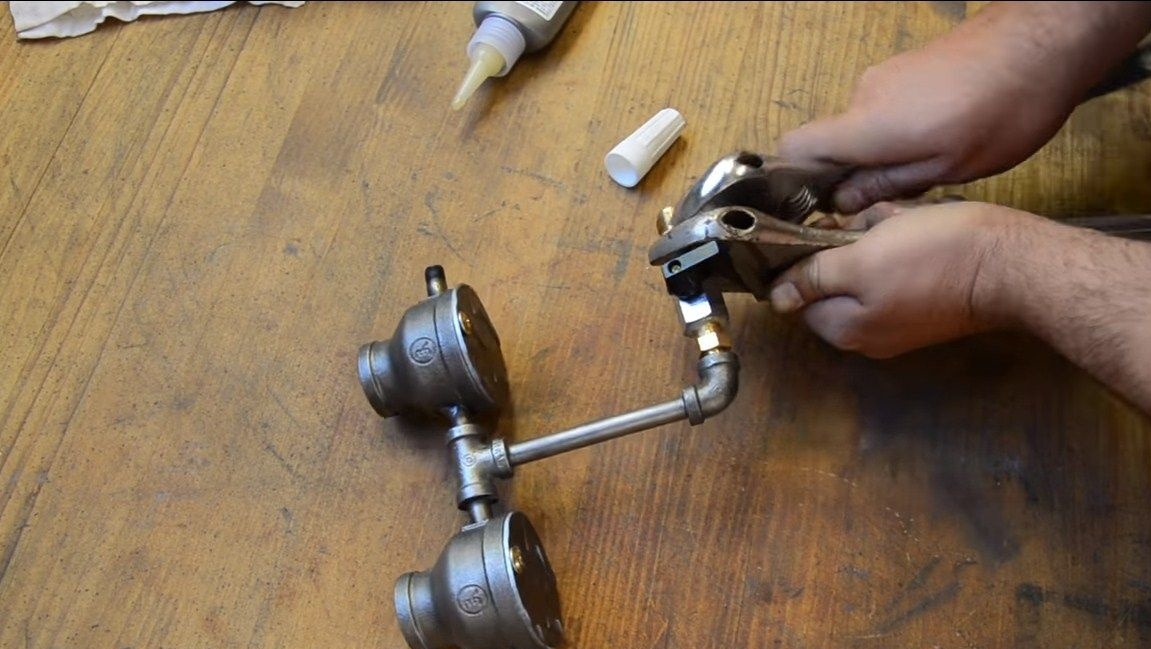
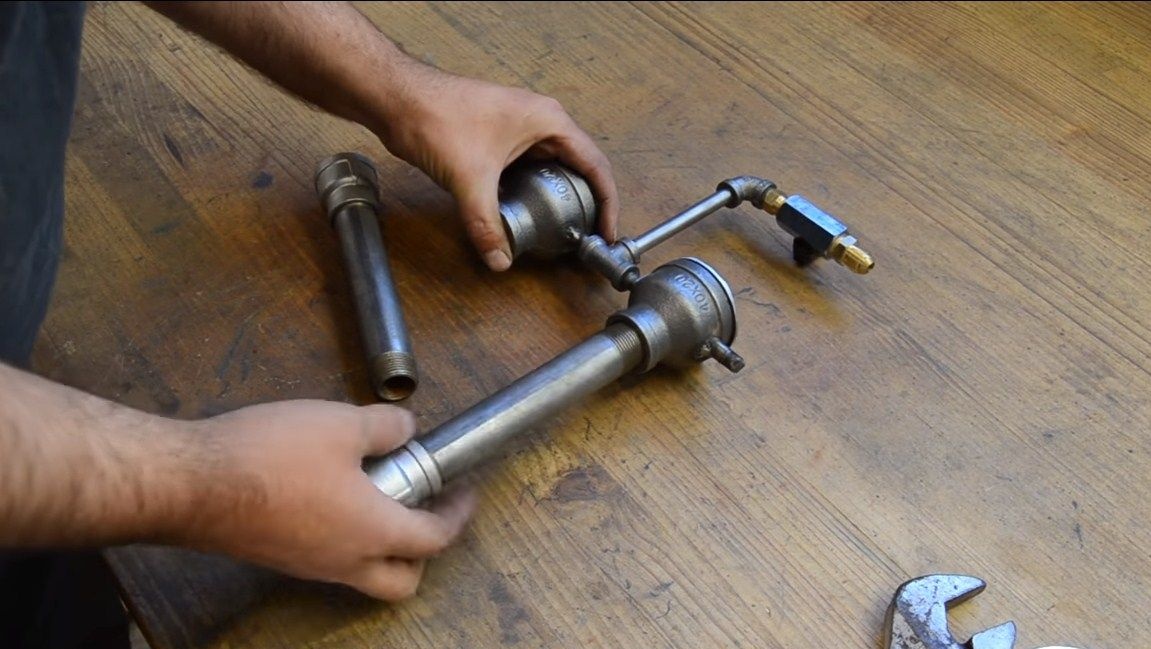
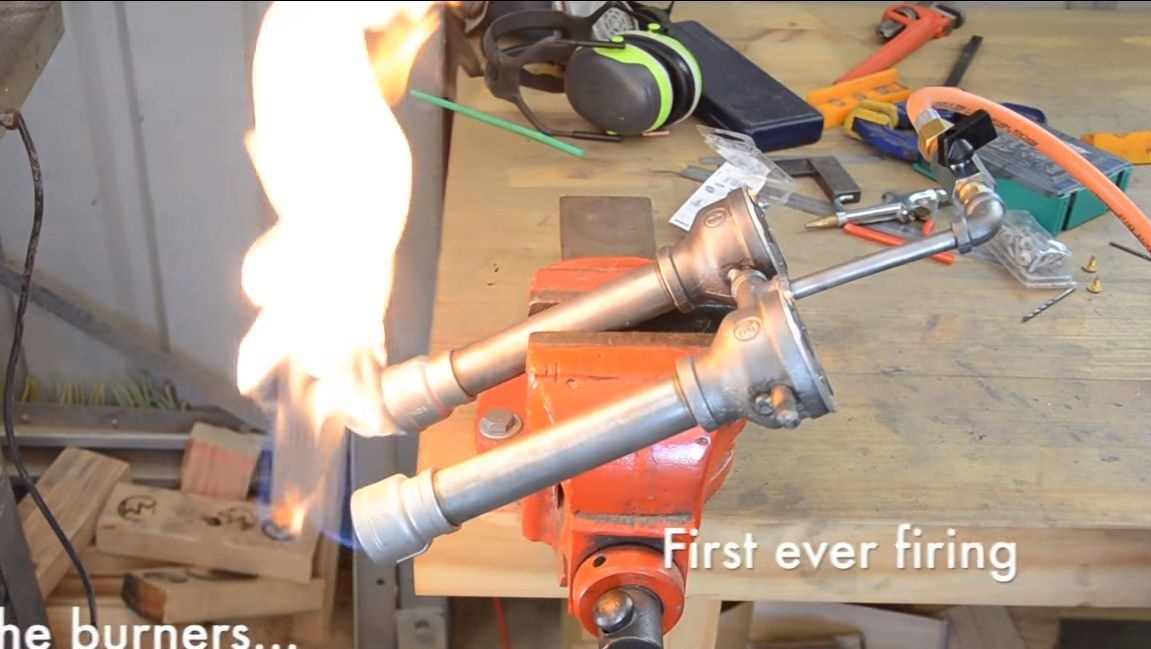
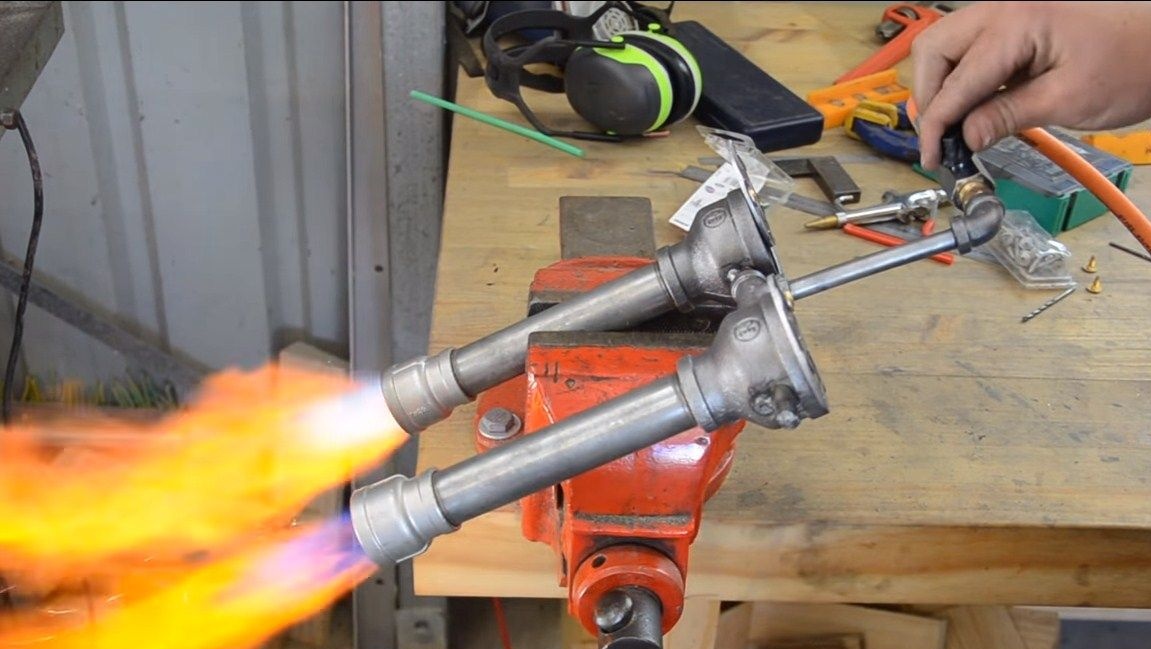
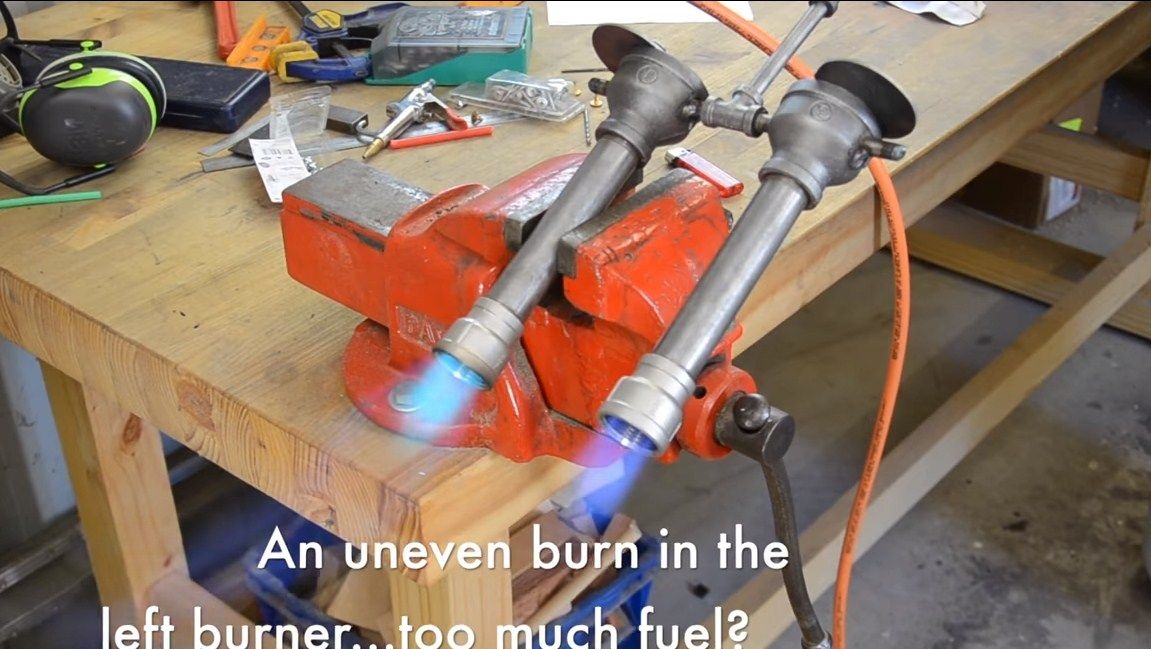
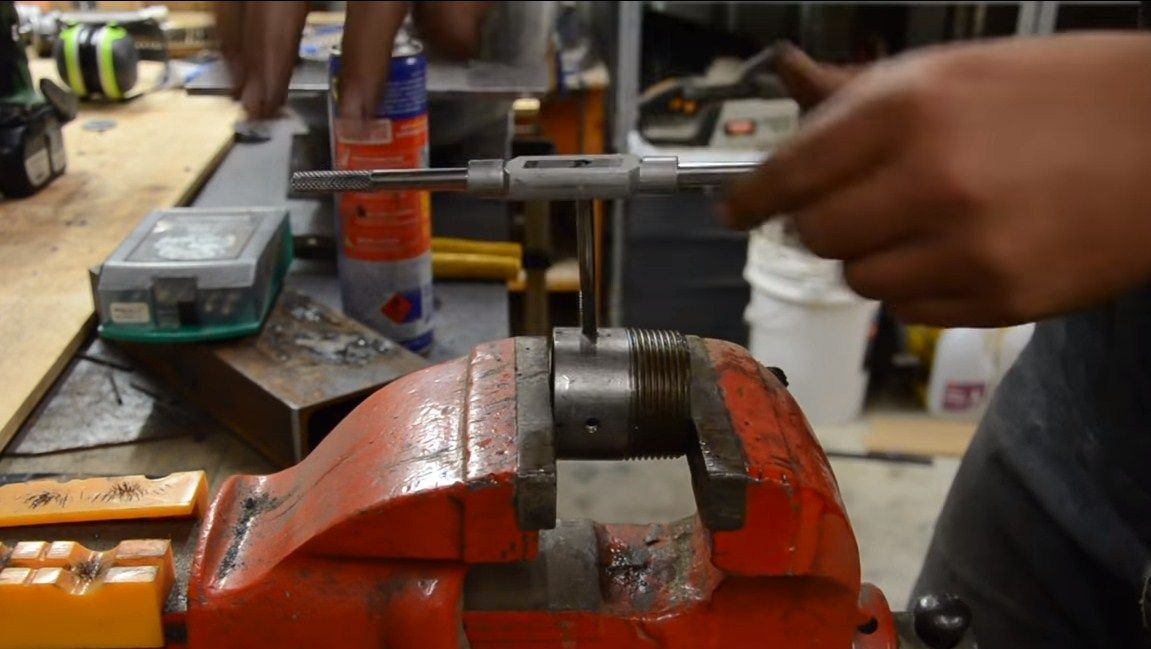
Next, it will be necessary to install a tube with nozzles into the manufactured parts through which gas will enter. We drill holes under the tube and then weld it. The author’s nozzles are purchased, made of copper, drill holes under the bottom and cut the threads. In the center of the tubes is a tee. It remains for us to screw a tube into the tee, install a faucet and we can connect the hose from the gas cylinder. That's all, this node is ready, it remains to verify it in practice. We start the gas, set it on fire. We adjust the gas and air supply so that the gas burns in blue, so the highest combustion temperature is obtained.


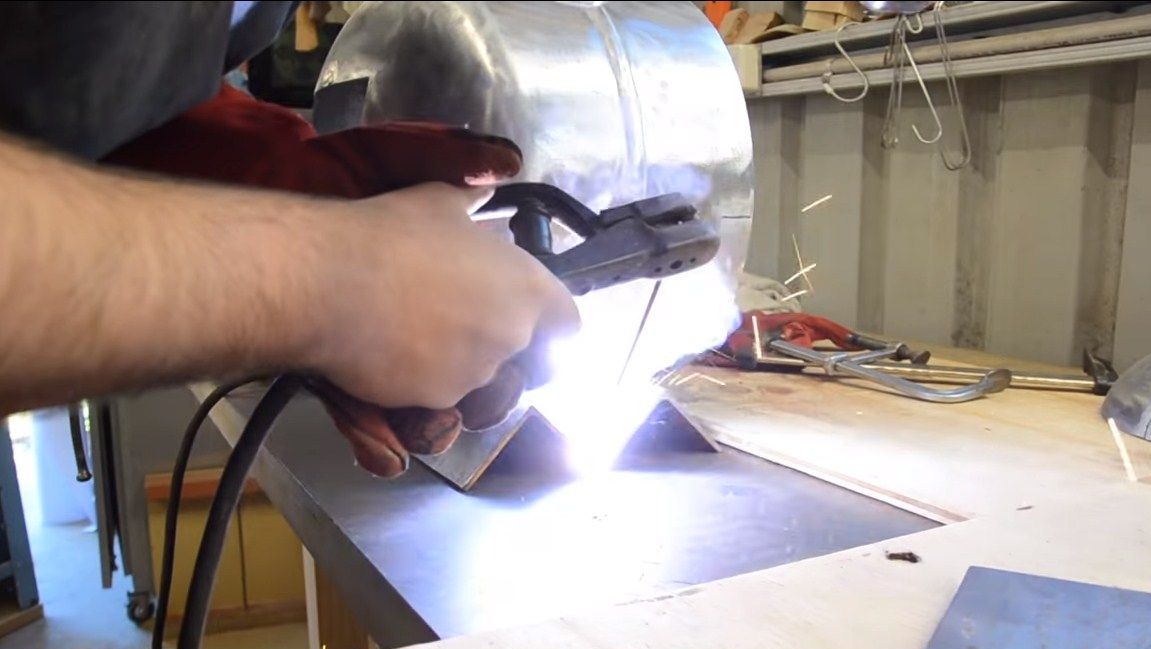
Step Four Assembling a stove
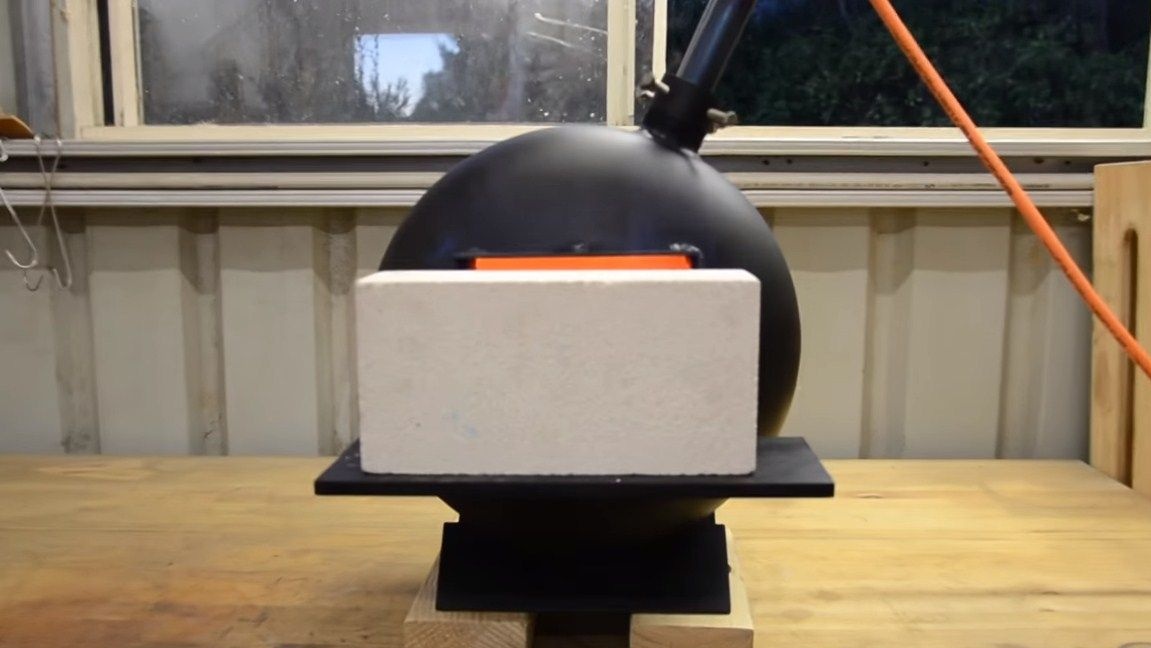
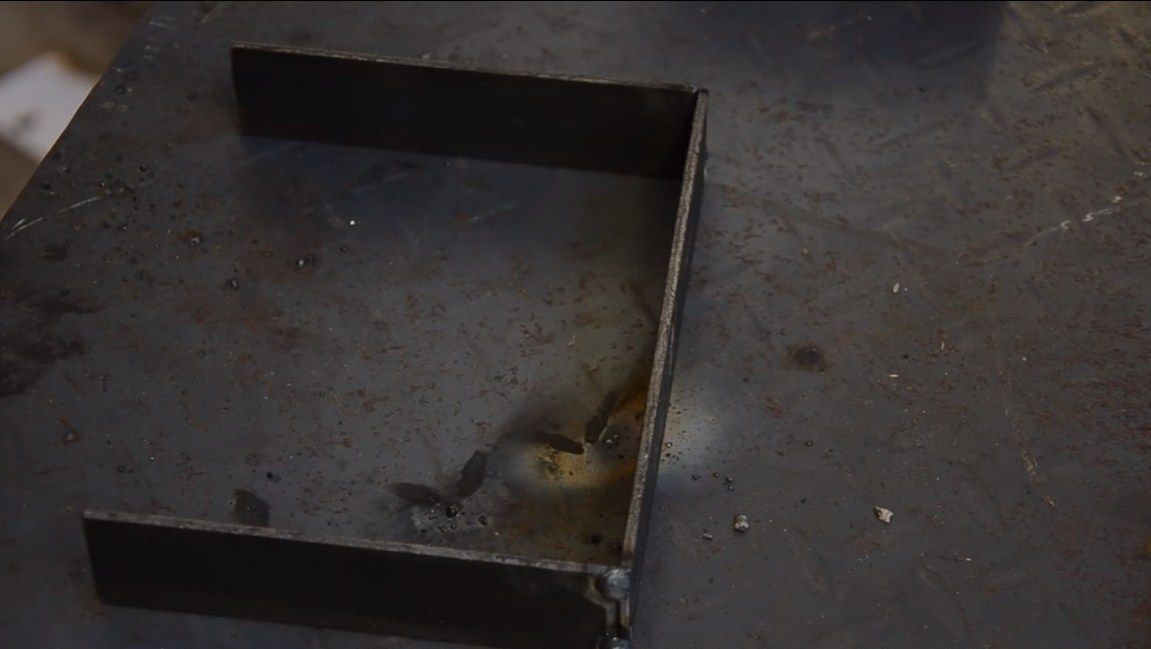
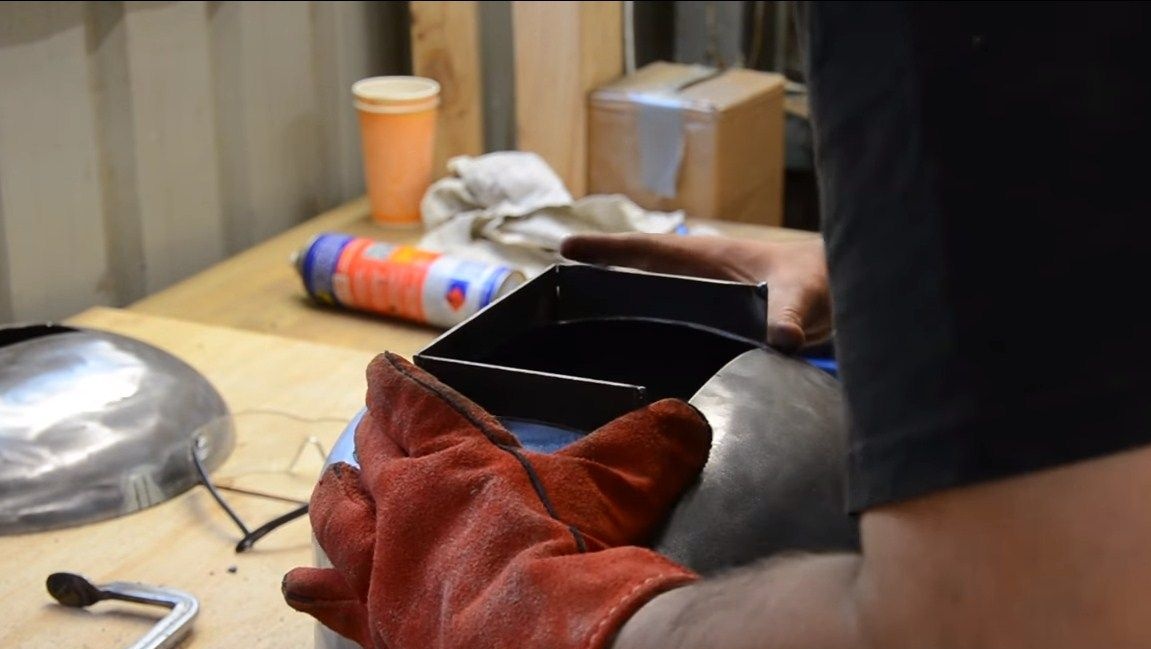
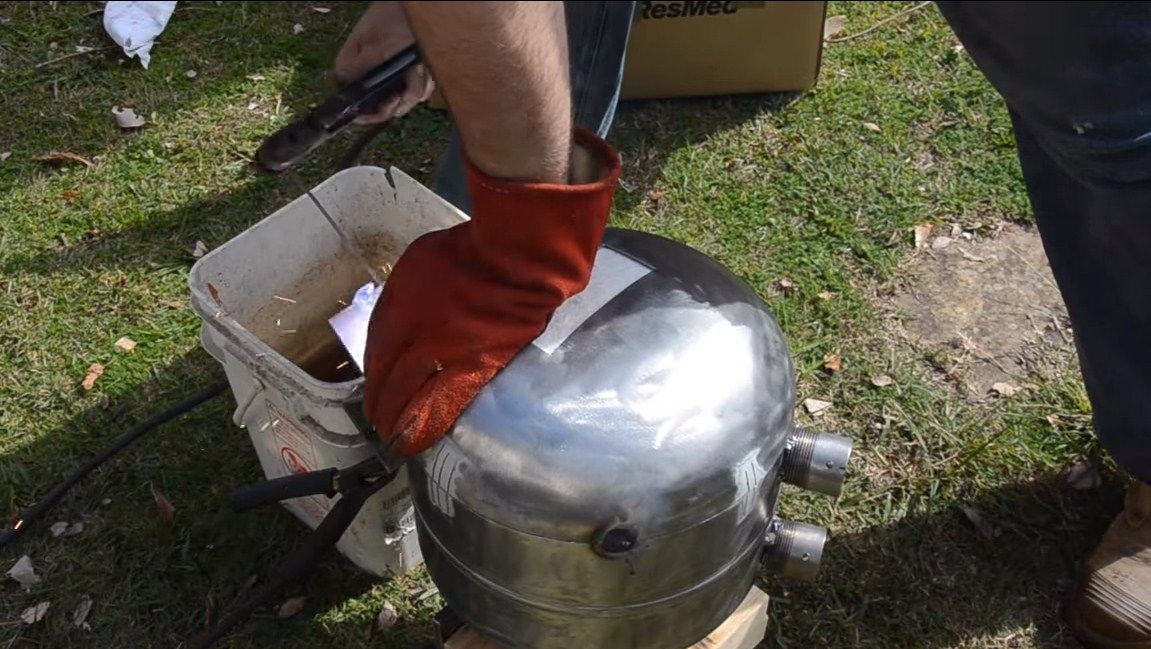
The oven can be assembled, we weld legs to it. We also need to weld a frame around the window of the furnace, its author made of sheet steel, like a table.


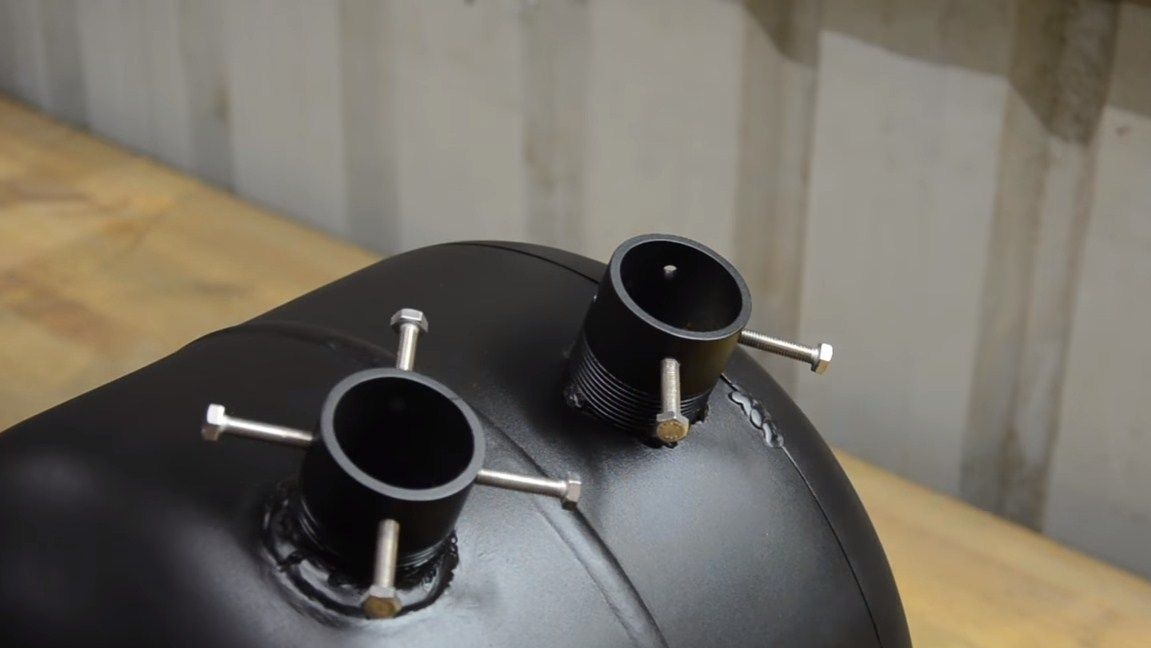
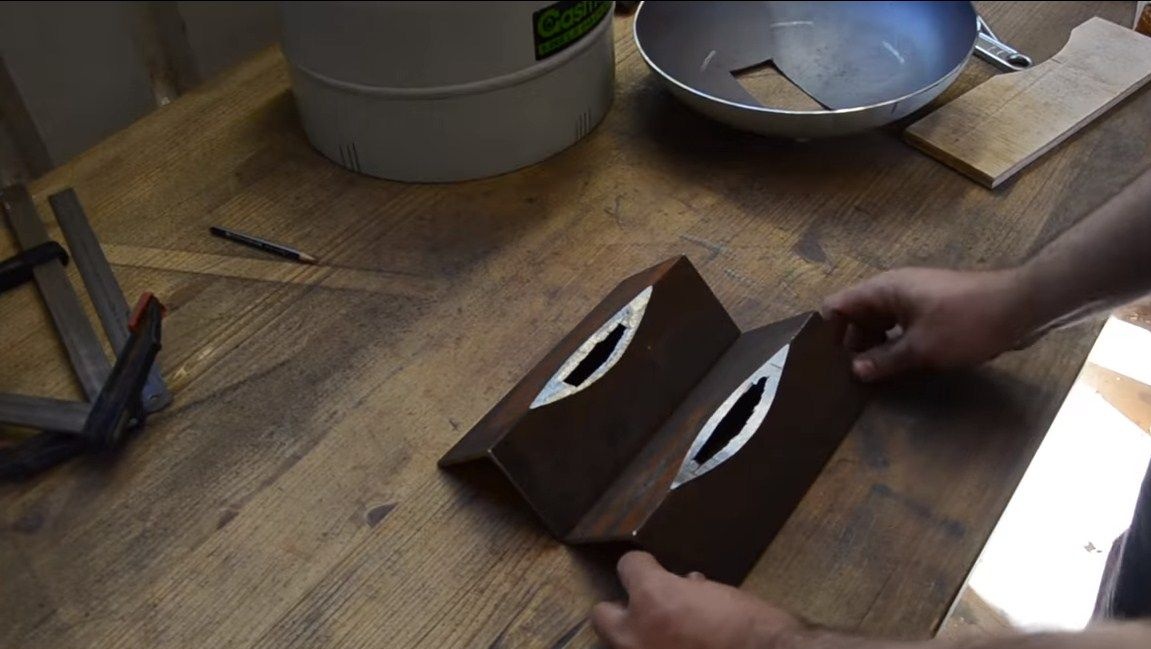
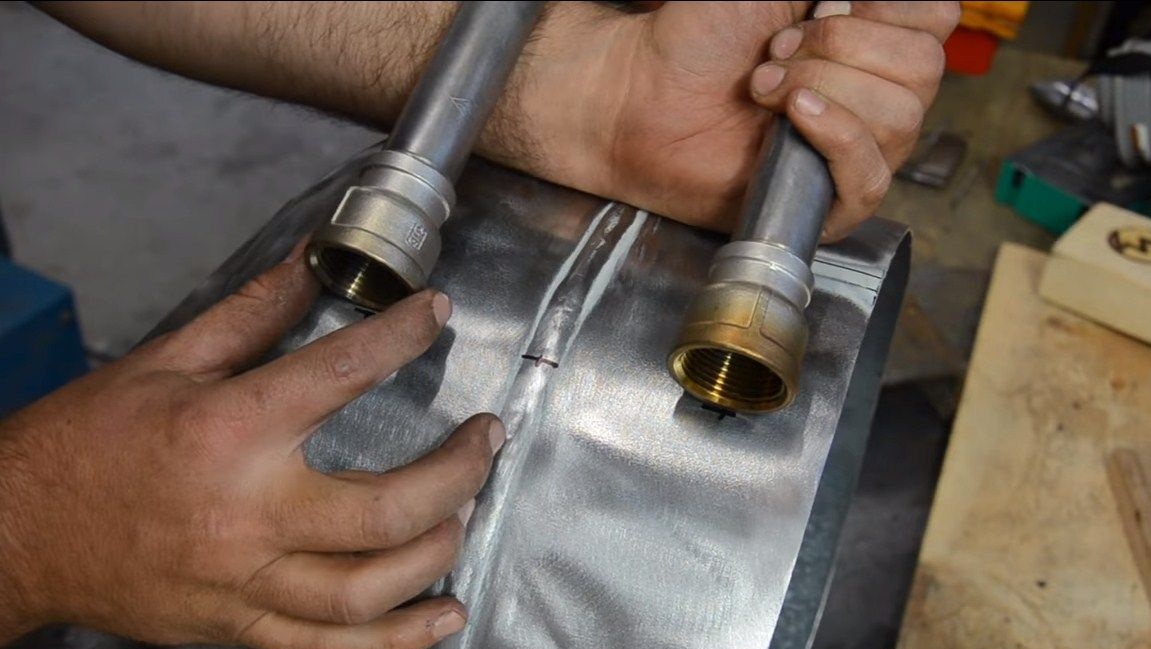
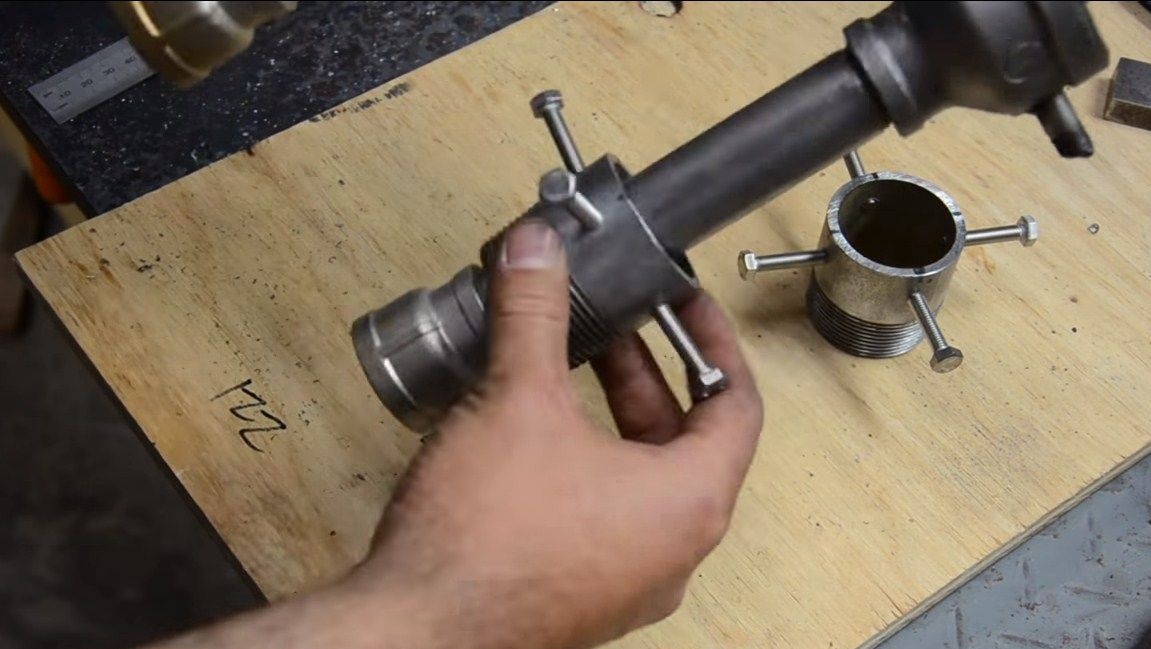
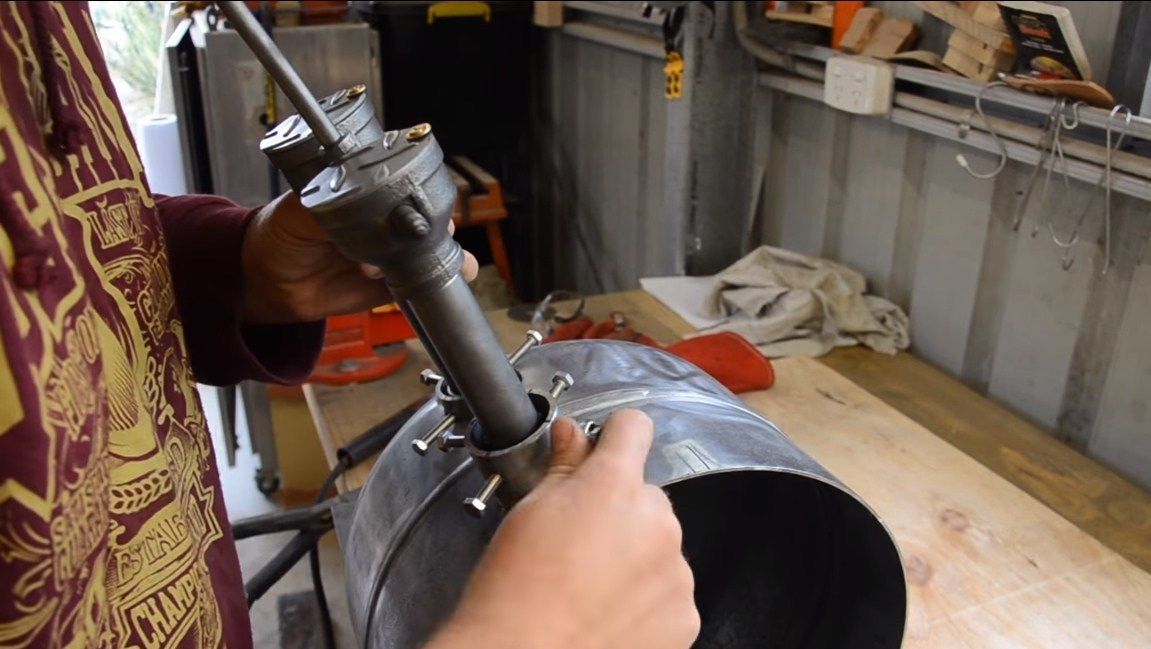
Next, you need to weld the clamps that will hold the gas supply device. Here we will need pieces of pipes of such a diameter so that the output tubes of the gas supply device come into them with a small gap. Under them we cut holes in the oven and then weld. At the end, in each fixture we drill four holes and cut the thread. We also need eight bolts, with the help of them we will fix the device.
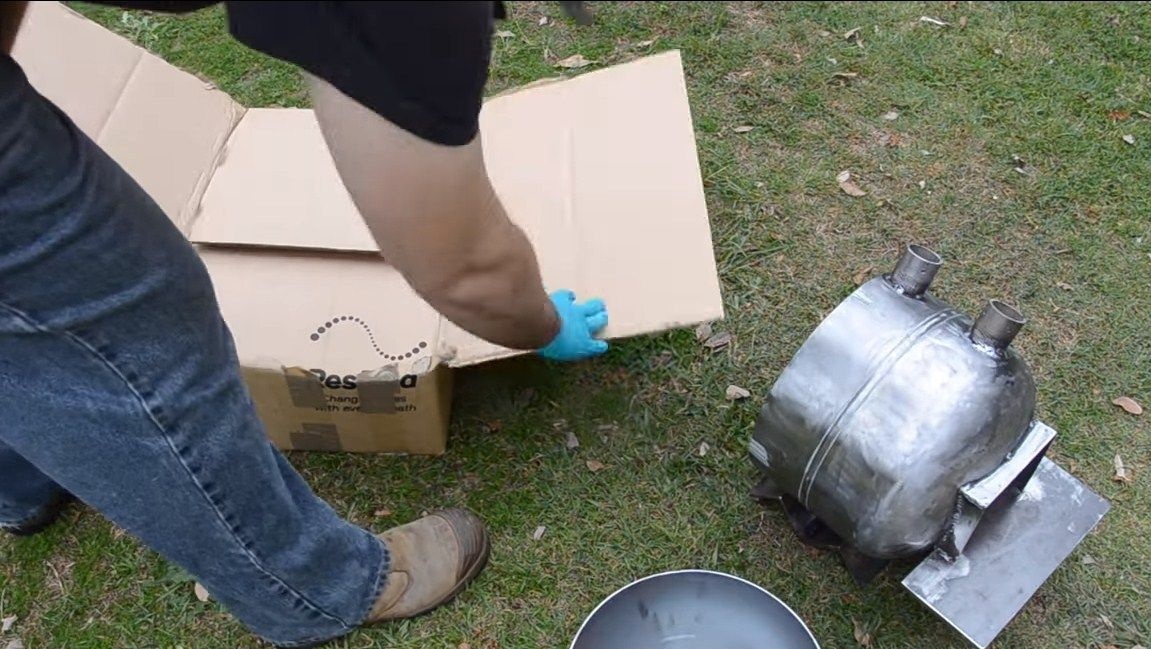
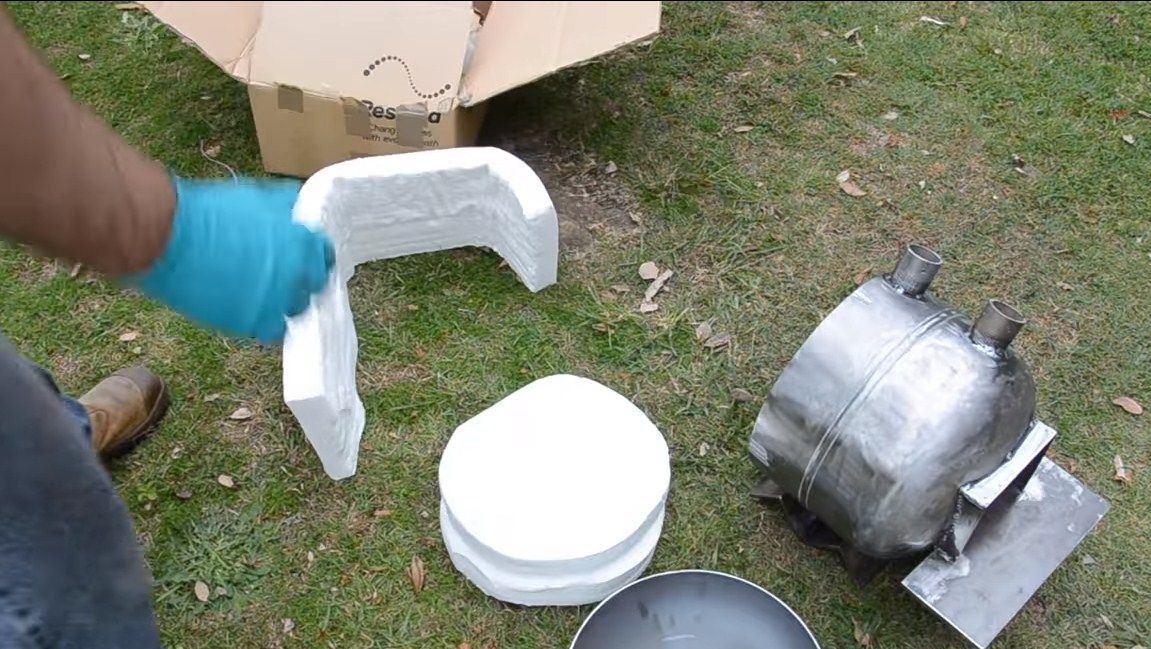
Step Five We isolate the furnace
Further, the furnace can be insulated so that the cylinder itself is not heated, and heat is not lost. You can use fiberglass or something similar that is not afraid of high temperatures. The author has a sheet insulator, he puts it inside the furnace, avoiding open spaces. When the material is laid, you can weld the bottom to the furnace. Strong cooking is not necessary, everything will hold on anyway, but if necessary it will be easy to replace the insulator.
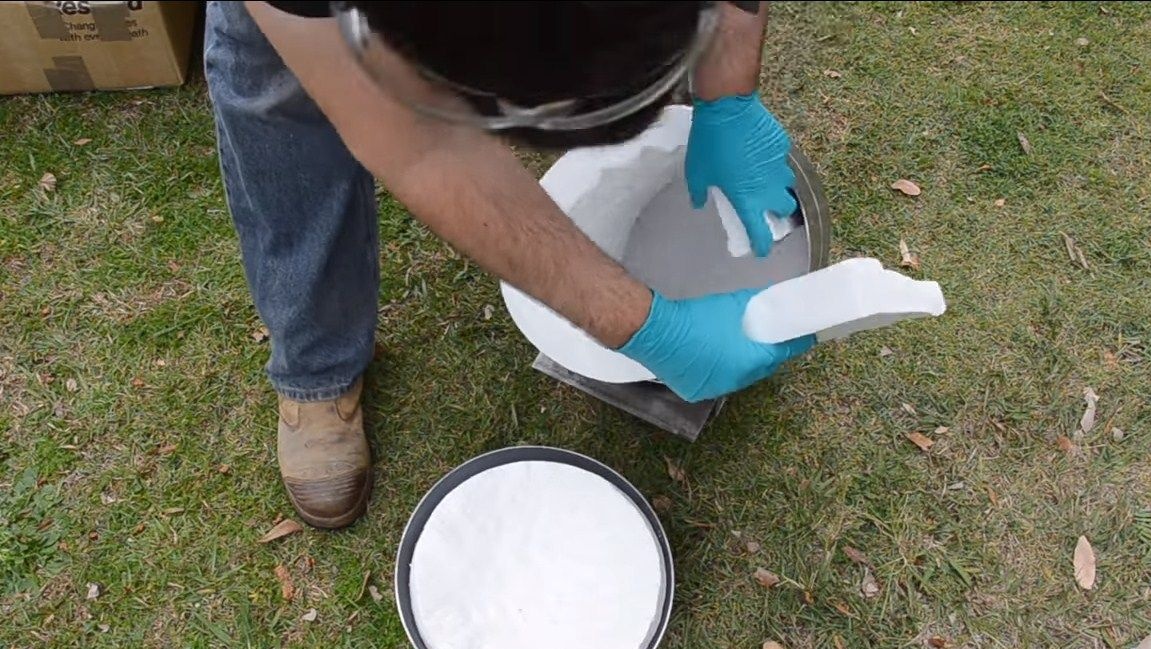


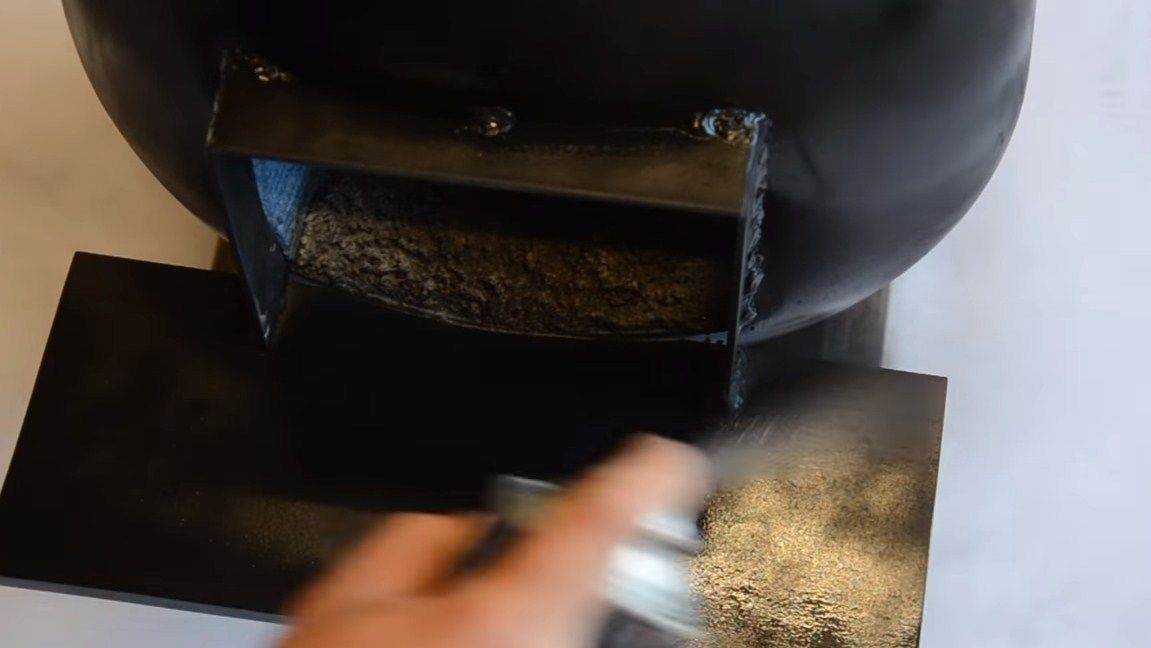
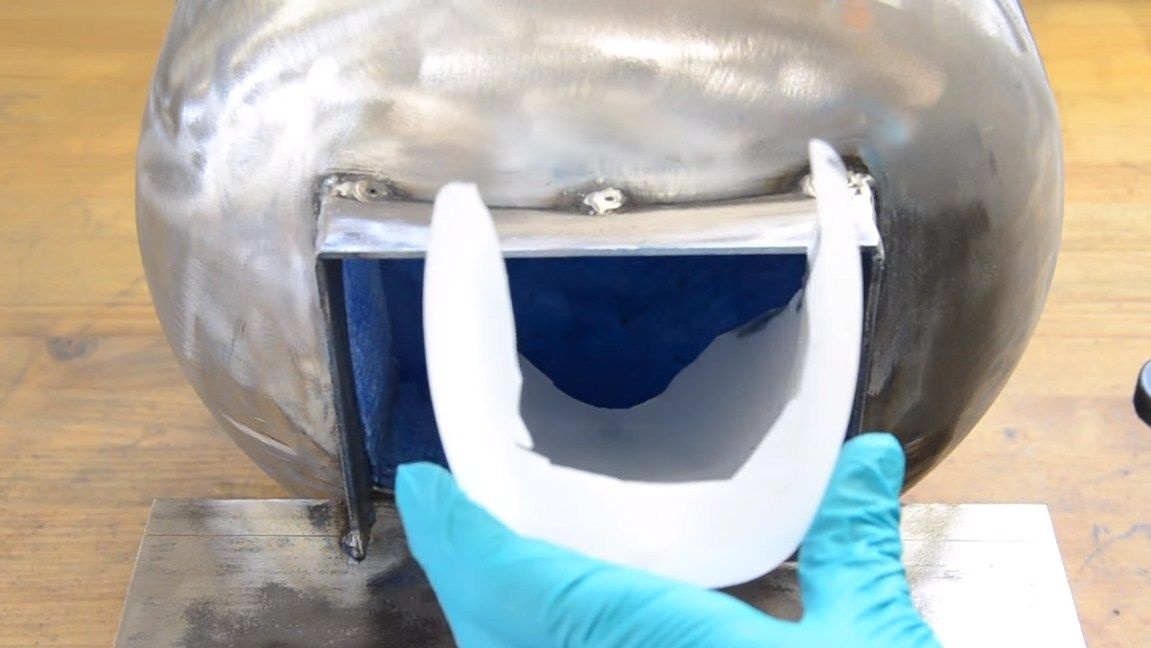
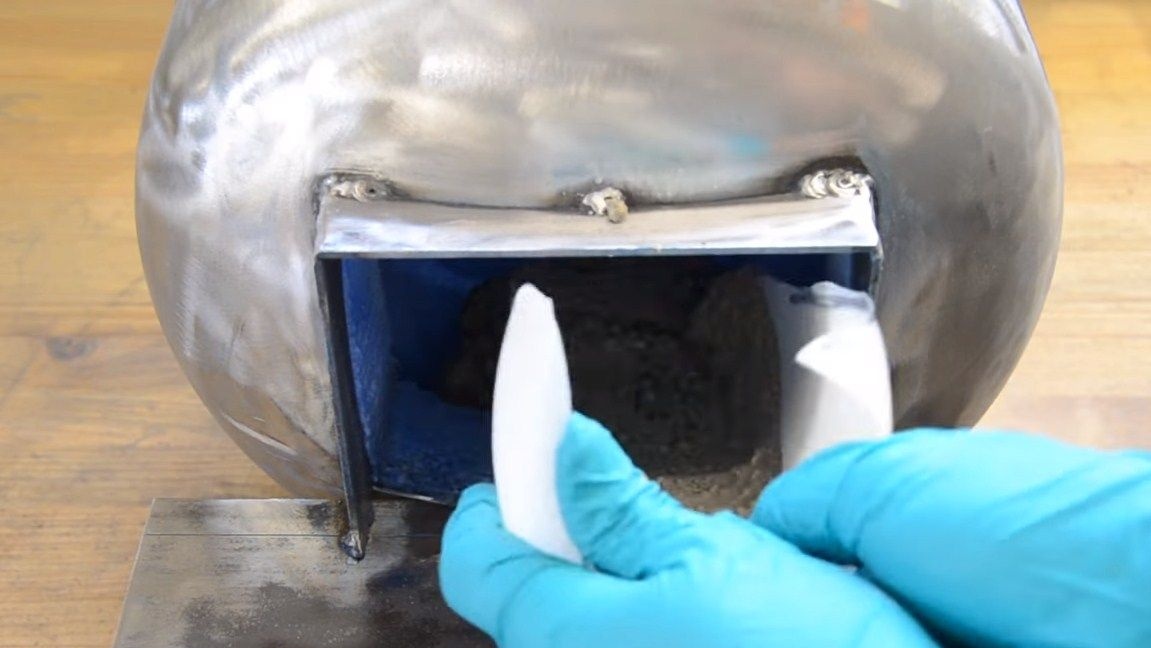
As soon as the insulator is laid, we cut holes in those places where the material blocked them for us. Here the author used a hacksaw blade from a metal saw. We cut round holes with the same crown. Inside, the author decided to paint the insulator, then you need a heat-resistant paint.
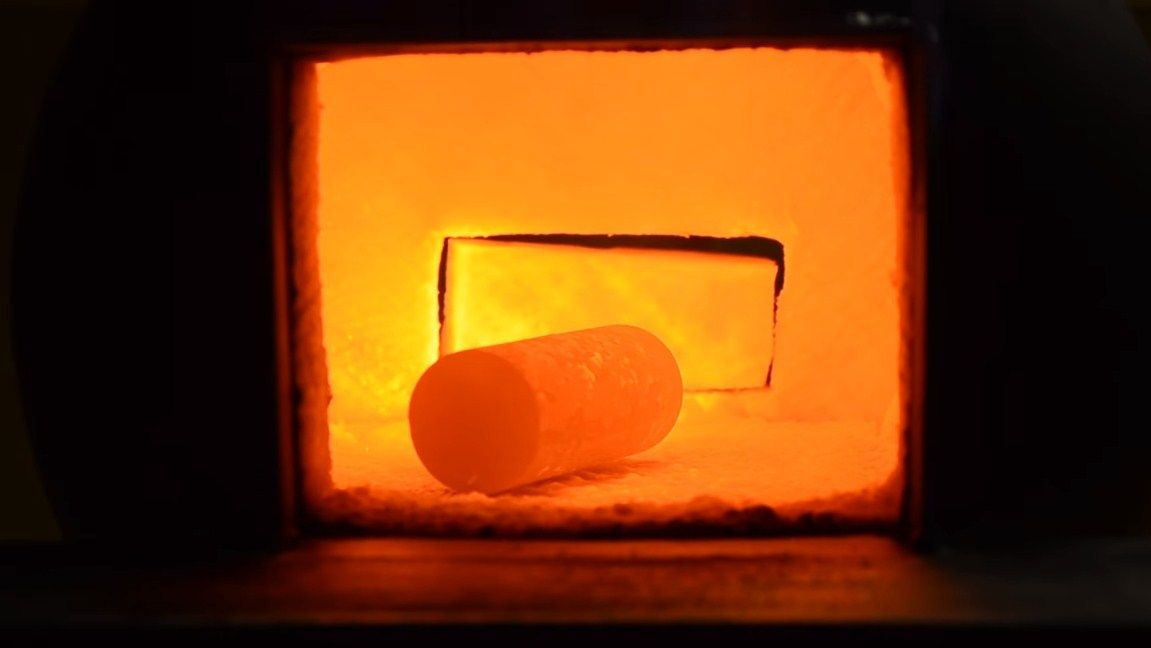
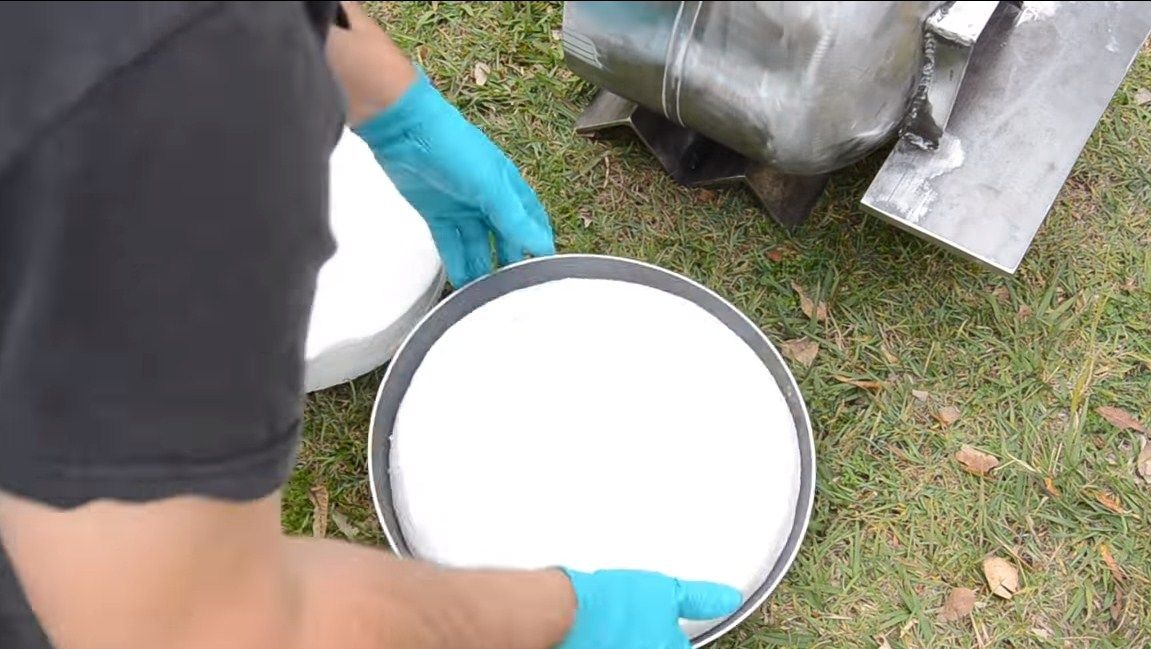
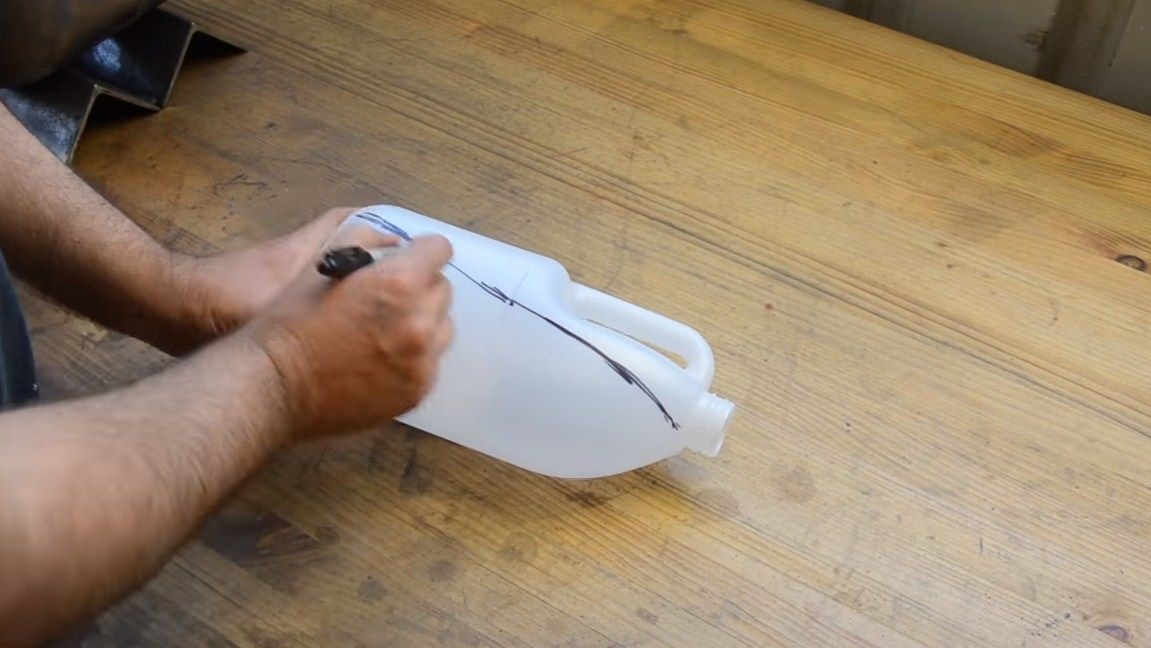
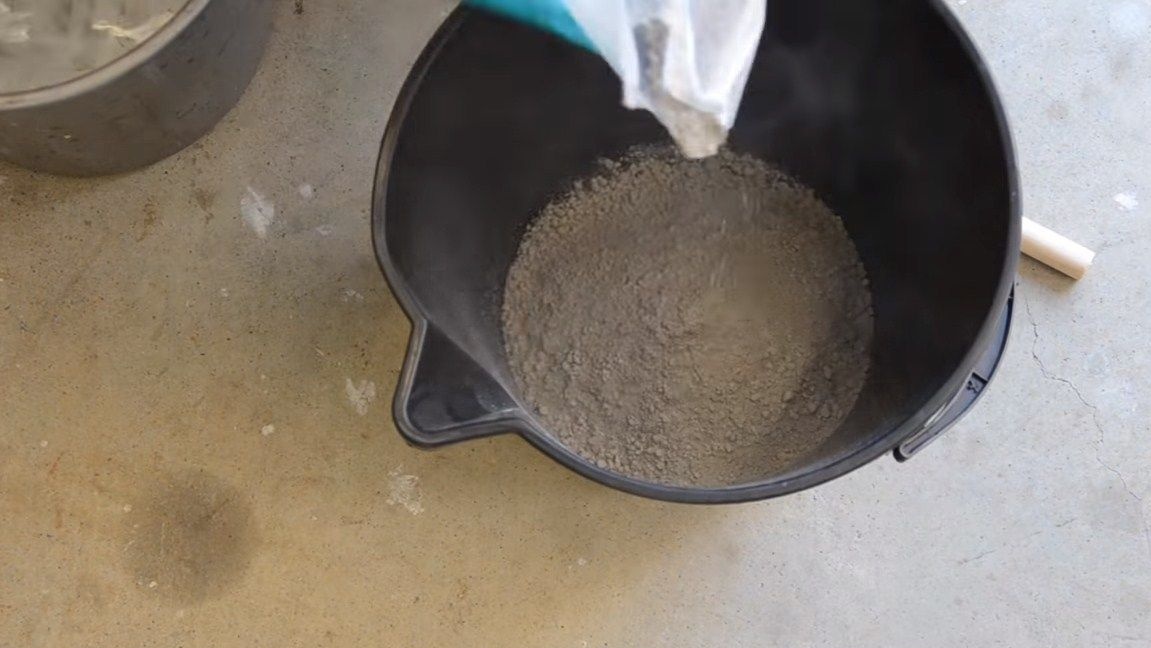
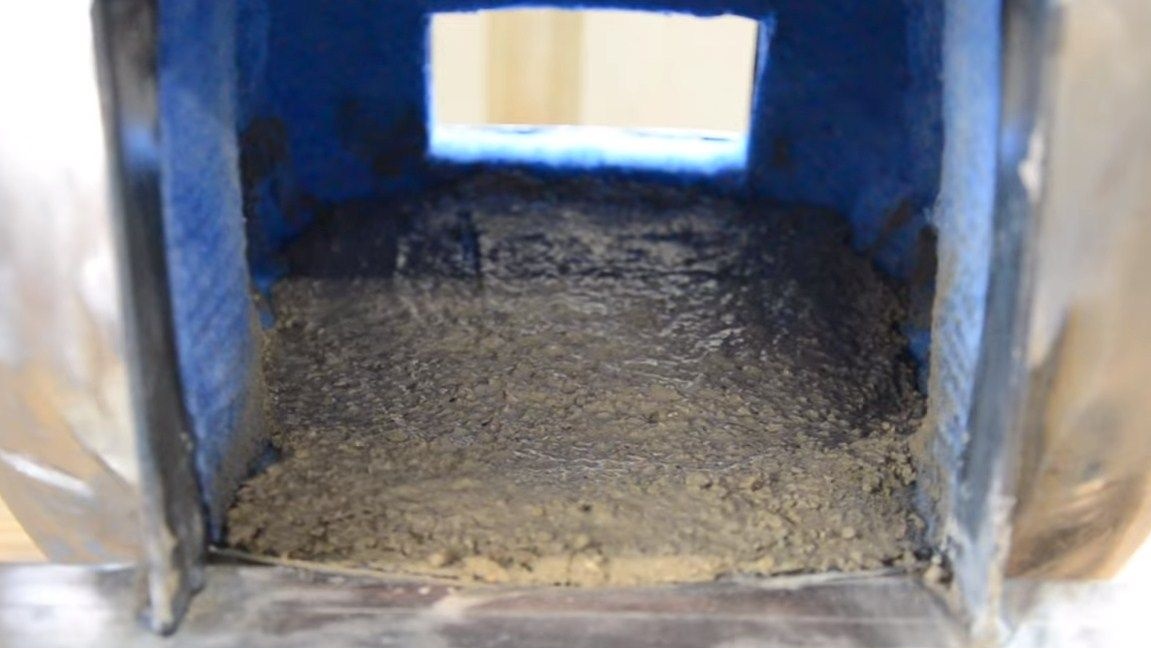
In conclusion, the author made a floor inside the oven. Firstly, it does not allow the bottom of the furnace to overheat, because the fire hits almost from top to bottom. It is also convenient to leave products for heating on this floor. For such purposes, you need a heat-resistant composition, you can buy in a hardware store. The author poured the solution through a gutter, which he made from a plastic canister.

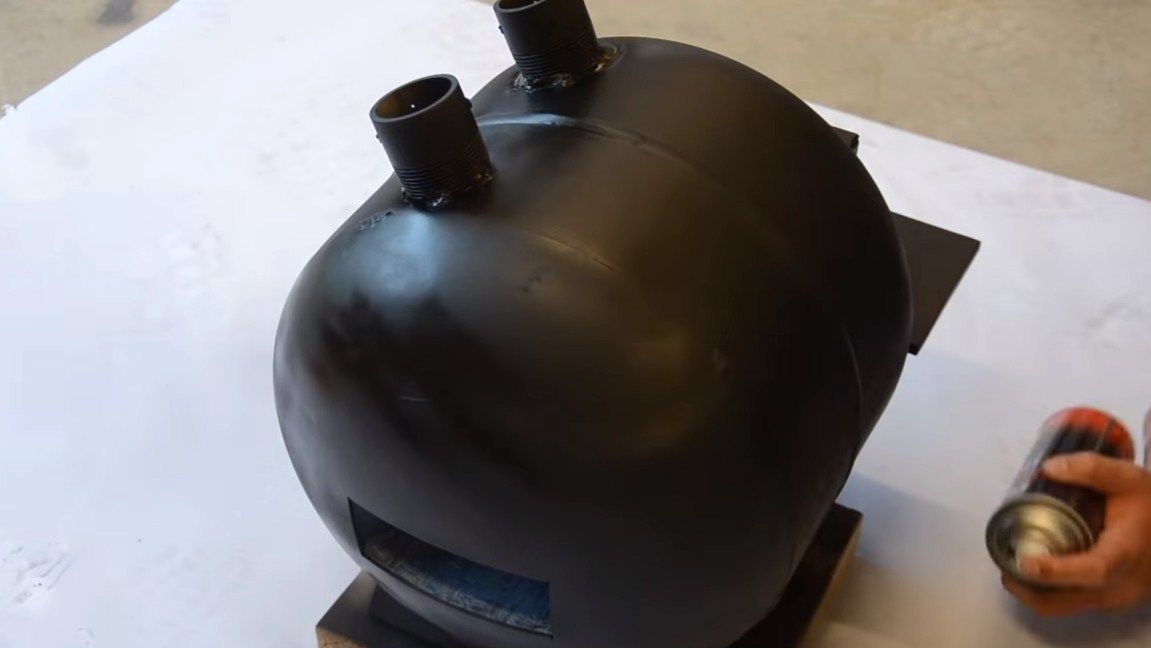
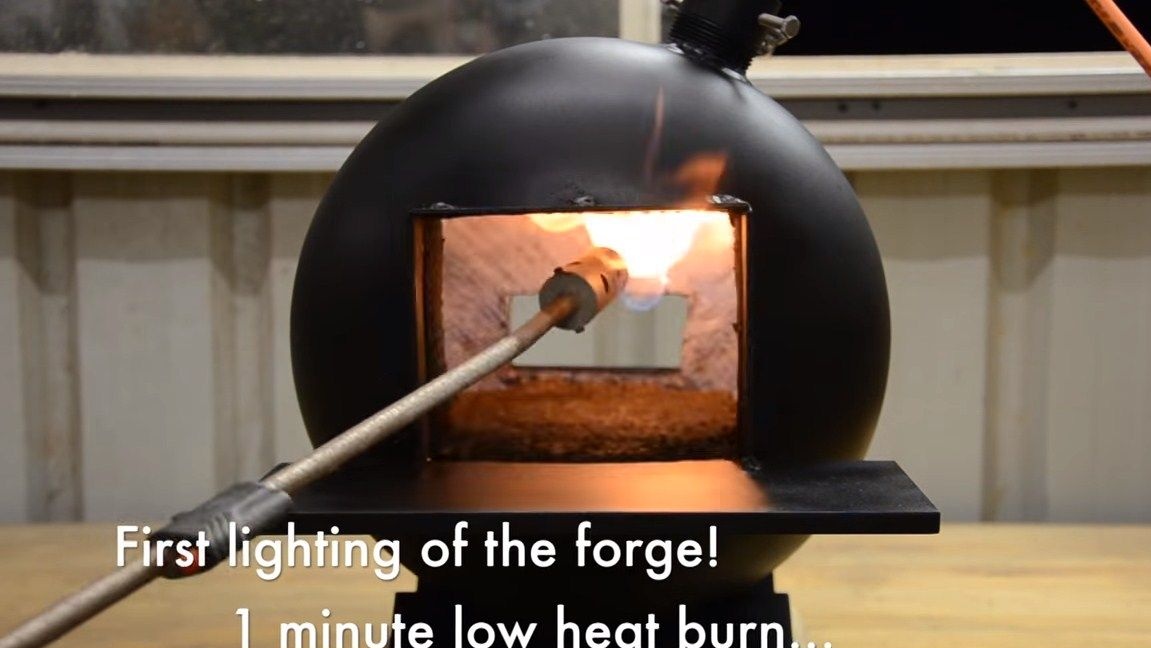
Step Six We paint and experience
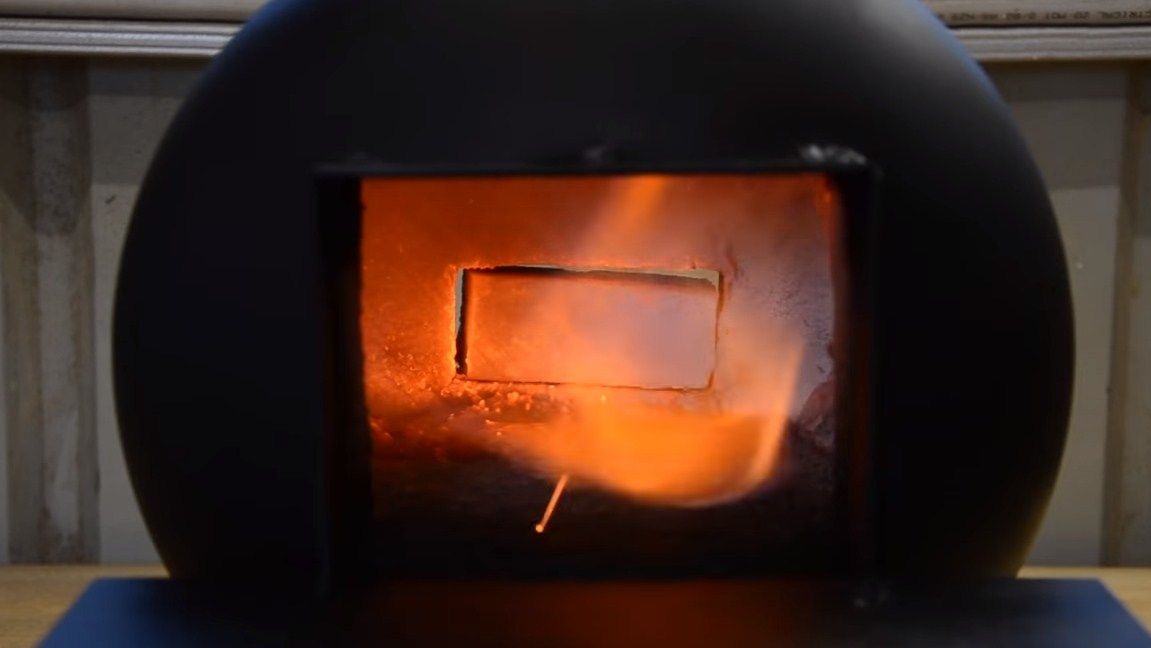
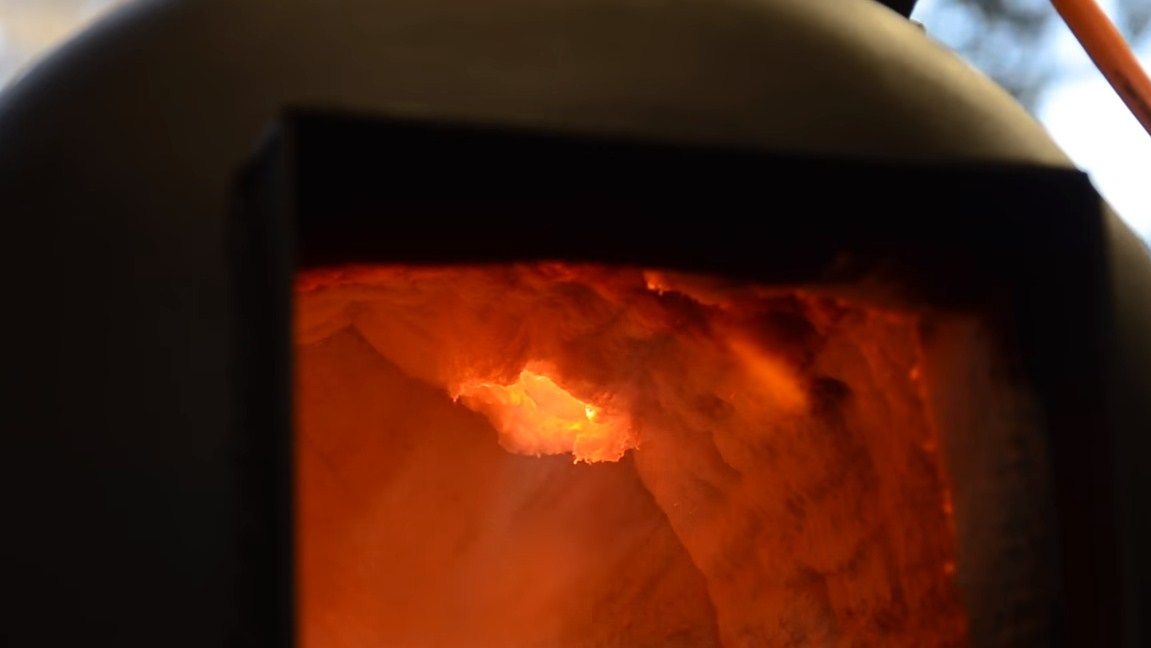
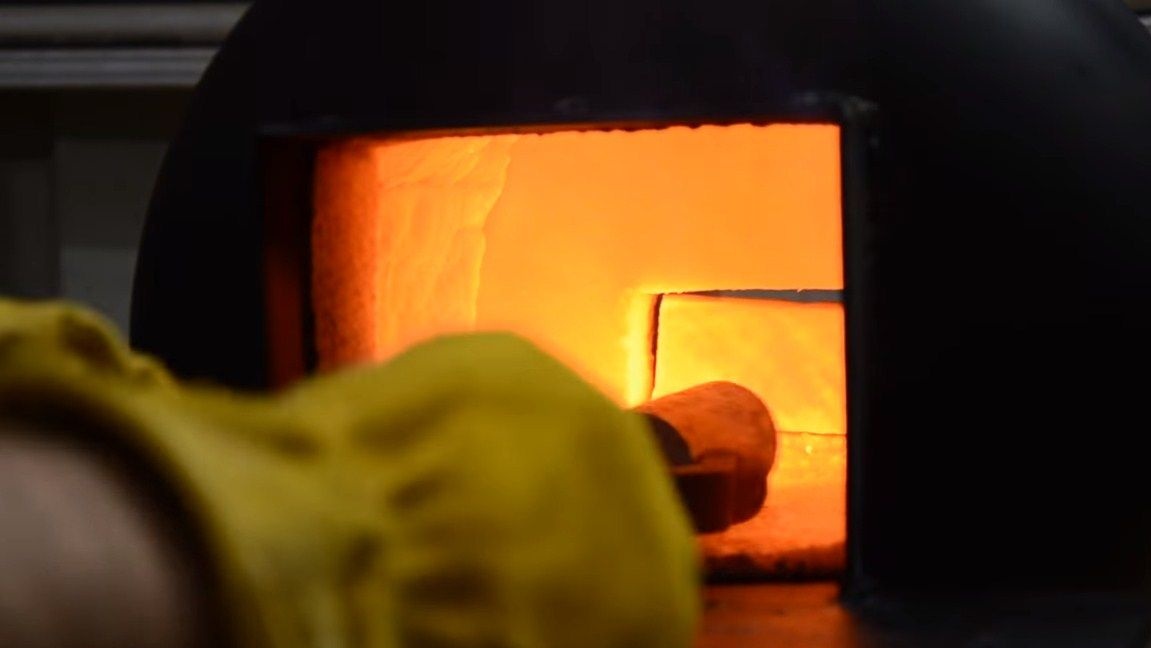
As a conclusion, we only have to paint the furnace so that it looks beautiful and does not oxidize, which quickly occurs with an increase in the temperature of iron. Paint will need heat resistant. That's all, we can proceed to the tests. We warm the stove, at the first start it may be smoke, everything superfluous will burn out, then everything will work perfectly. The author warmed up the furnace and tried to heat the metal. A rather massive piece of iron was heated red-hot in just 10 minutes.
That's all, the project is over, I hope you liked it. Good luck and creative inspiration, if you decide to repeat it. Do not forget to share your homemade and best practices with us.