

This early spring, thinking about the coming summer, I took care of humidification in my own house. If you woke up in the middle of the night with a dry throat, then you roughly understand what I'm talking about. In mid-June, an ultrasound head came to me in a plastic case, a prototype humidifier was quickly made from an office basket, and most of the summer was finalized, it worked as it should.
But an accident happened, the smell of burnt plastic spread around the house, the ultrasonic generator melted, fortunately, there was enough water in the basket.
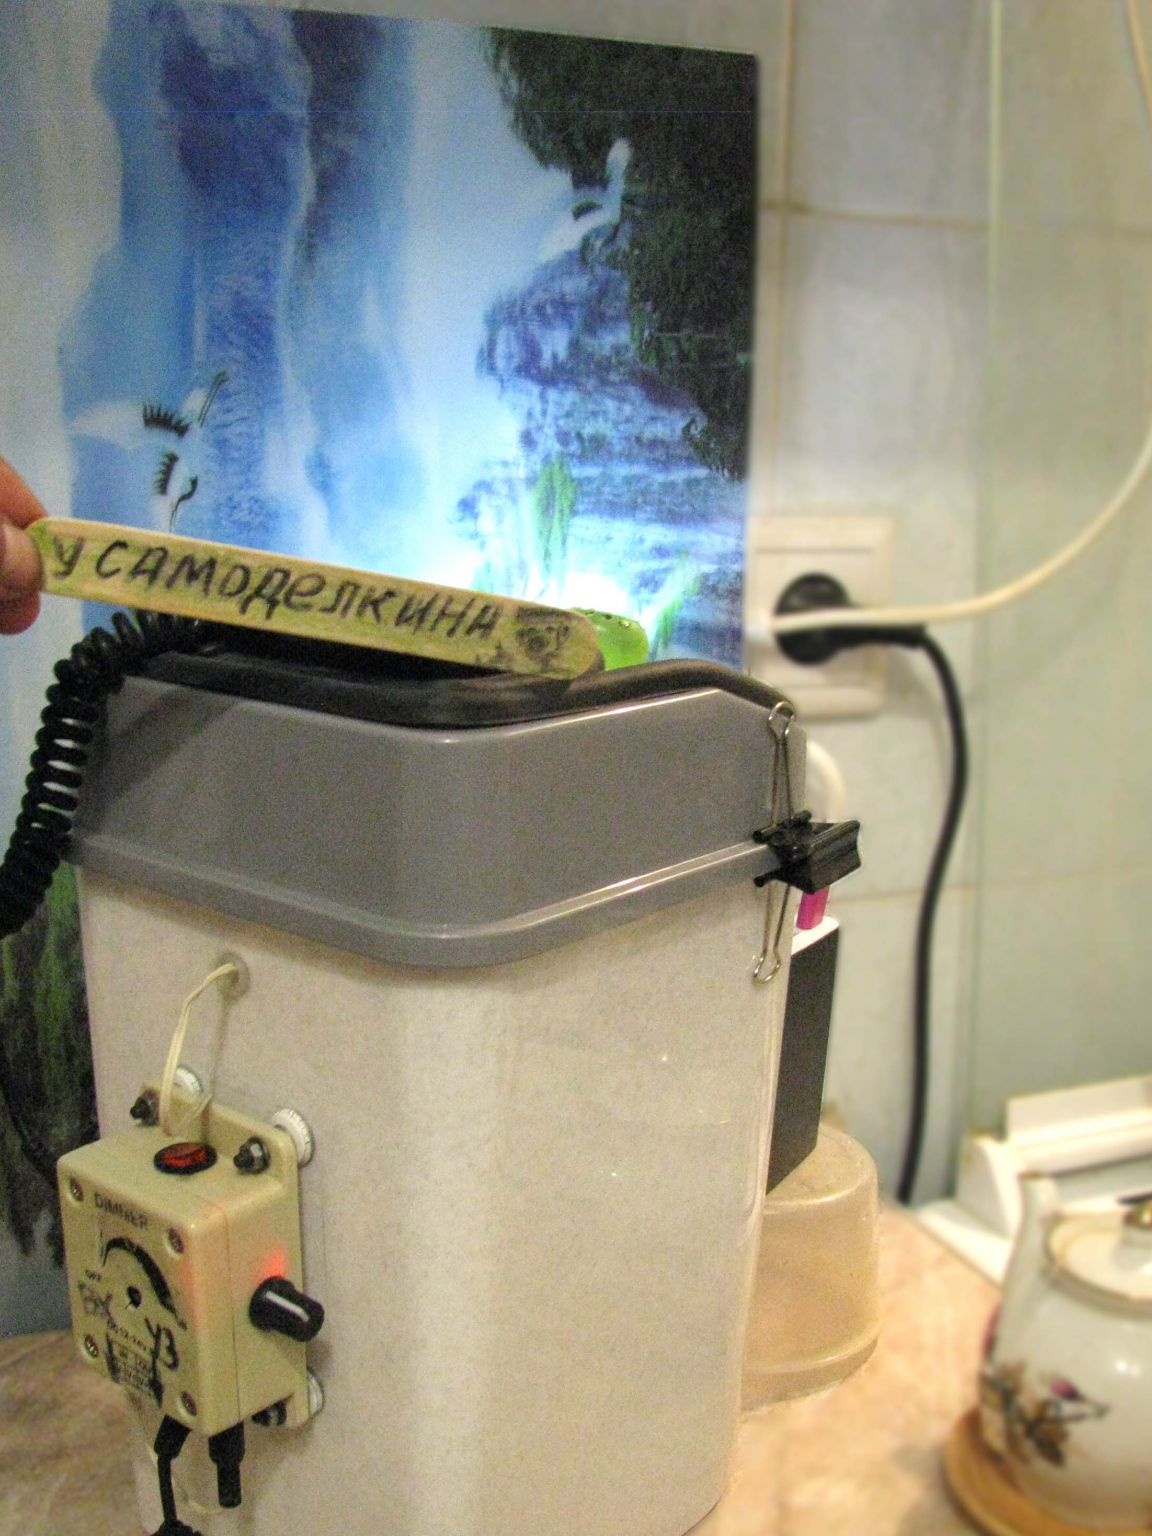
Since winter was in my nose, at the end of August, this time I ordered a fog generator in a metal case, and, therefore, before the reincarnation of the whole structure, I had to disassemble and reassemble it, and once I had such a case - this time on camera =)
Set "do it yourself":
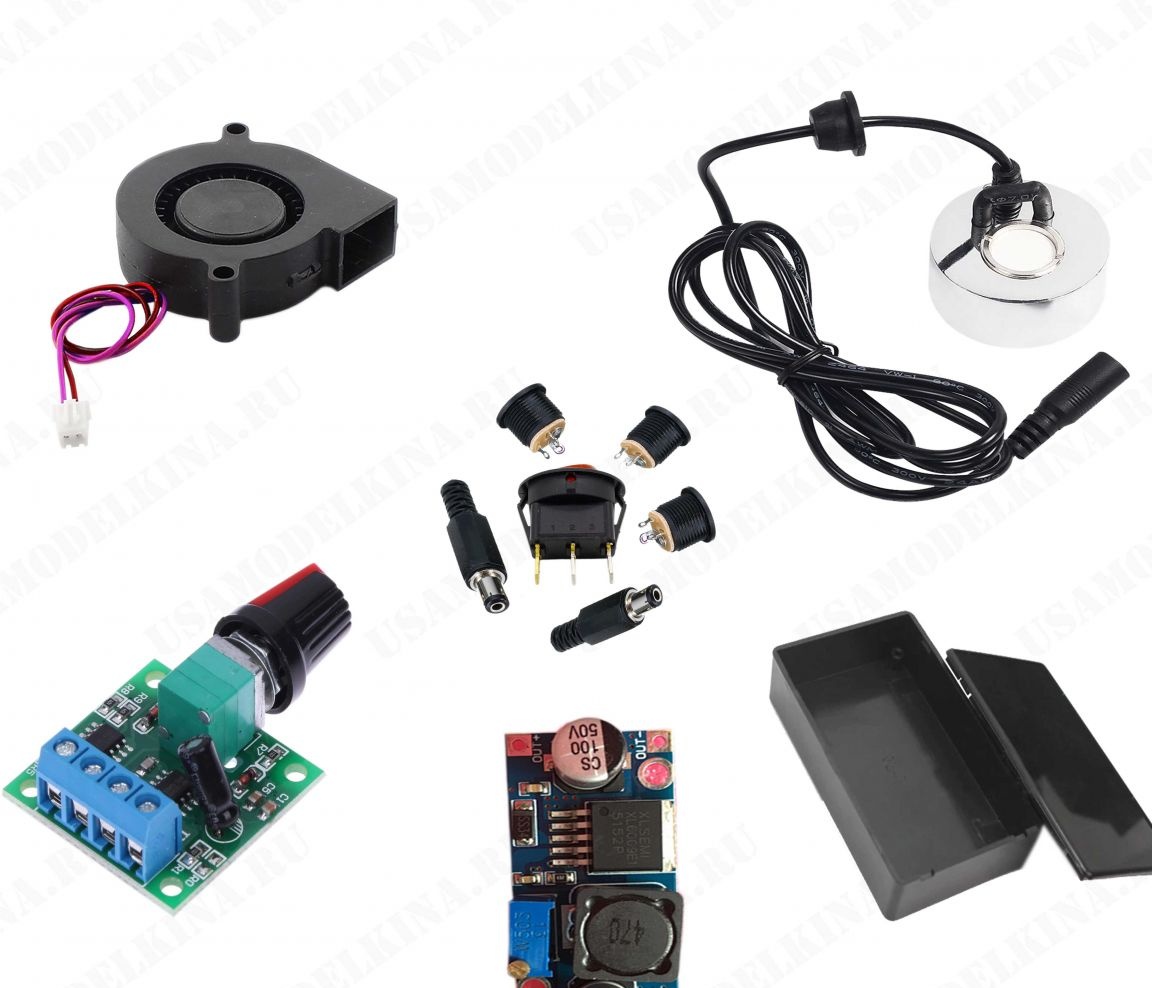
Available should be:
- office bucket with a capacity of 10 l;
- power supply for 12V;
- ultrasonic atomizer in a metal case;
- black mounting box with dimensions 100 x 60 x 25 mm;
- any boosting module, I had the Xl6009 module;
- speed controller 12V;
- turbine;
- power switch, several sockets and plugs to them;
- improvised little thing appeared in the assembly process;
- And also - the case from a faulty speed controller - you will see it later.
Visual connection diagram.
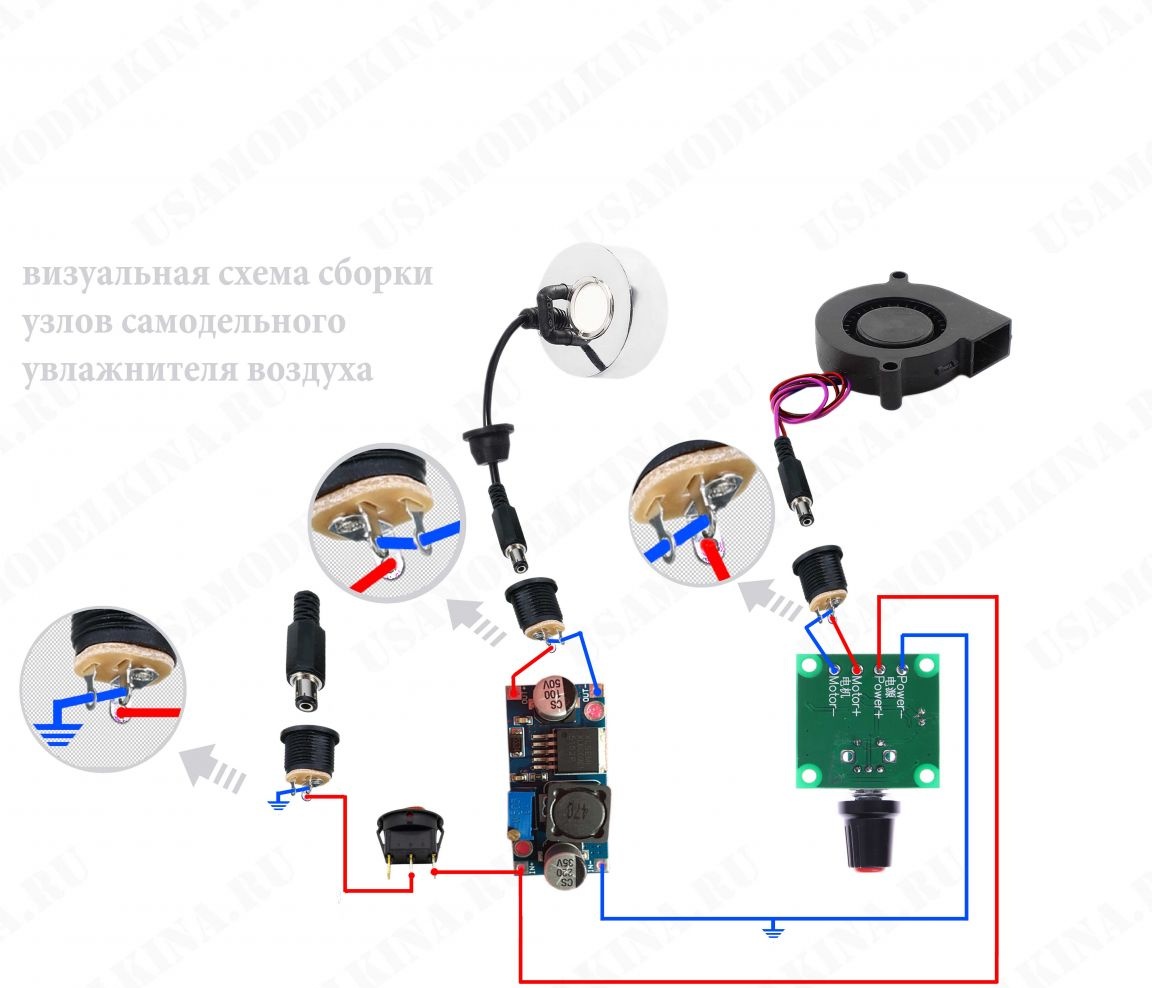
- to the same socket (via a switch), a module increasing up to 22V is connected, the voltage from which is supplied to the fog generator;
- the speed regulator with the fan as a load is also connected to the socket;
- Thus, both the input jack and the switch are common to both modules.
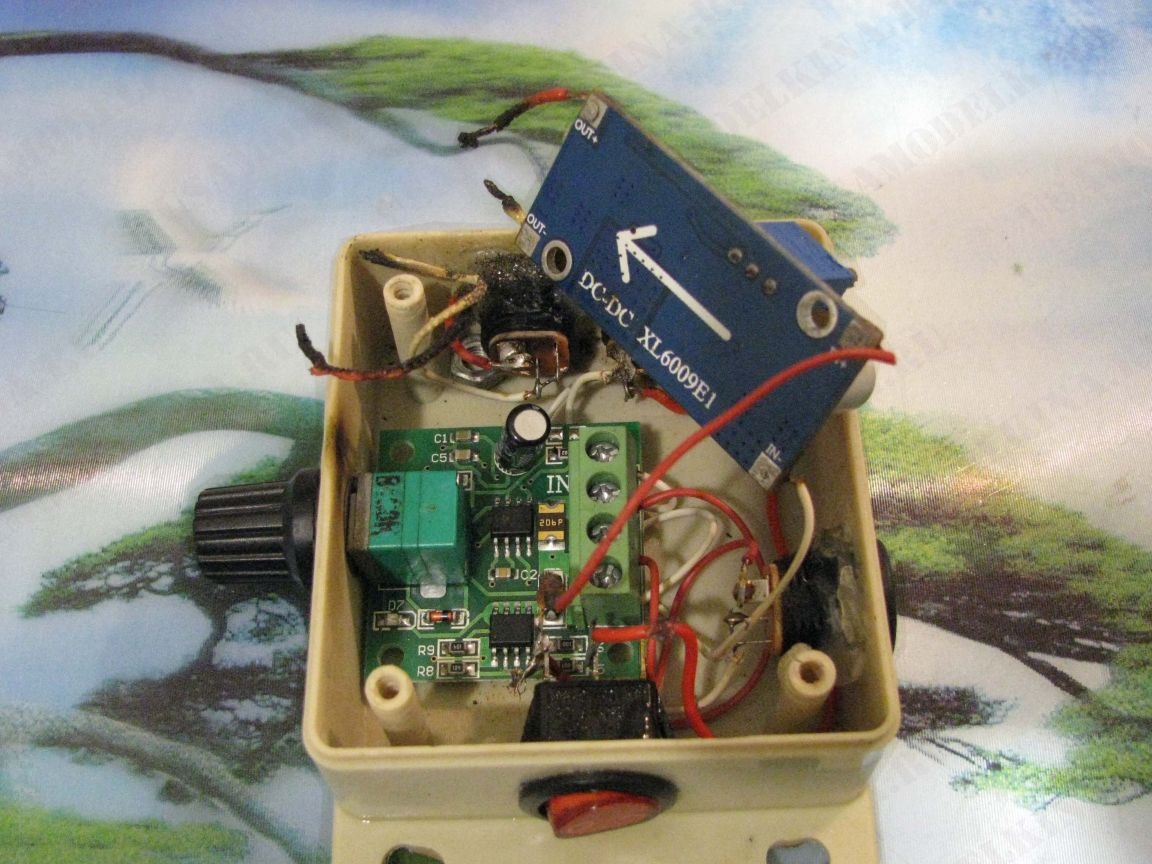
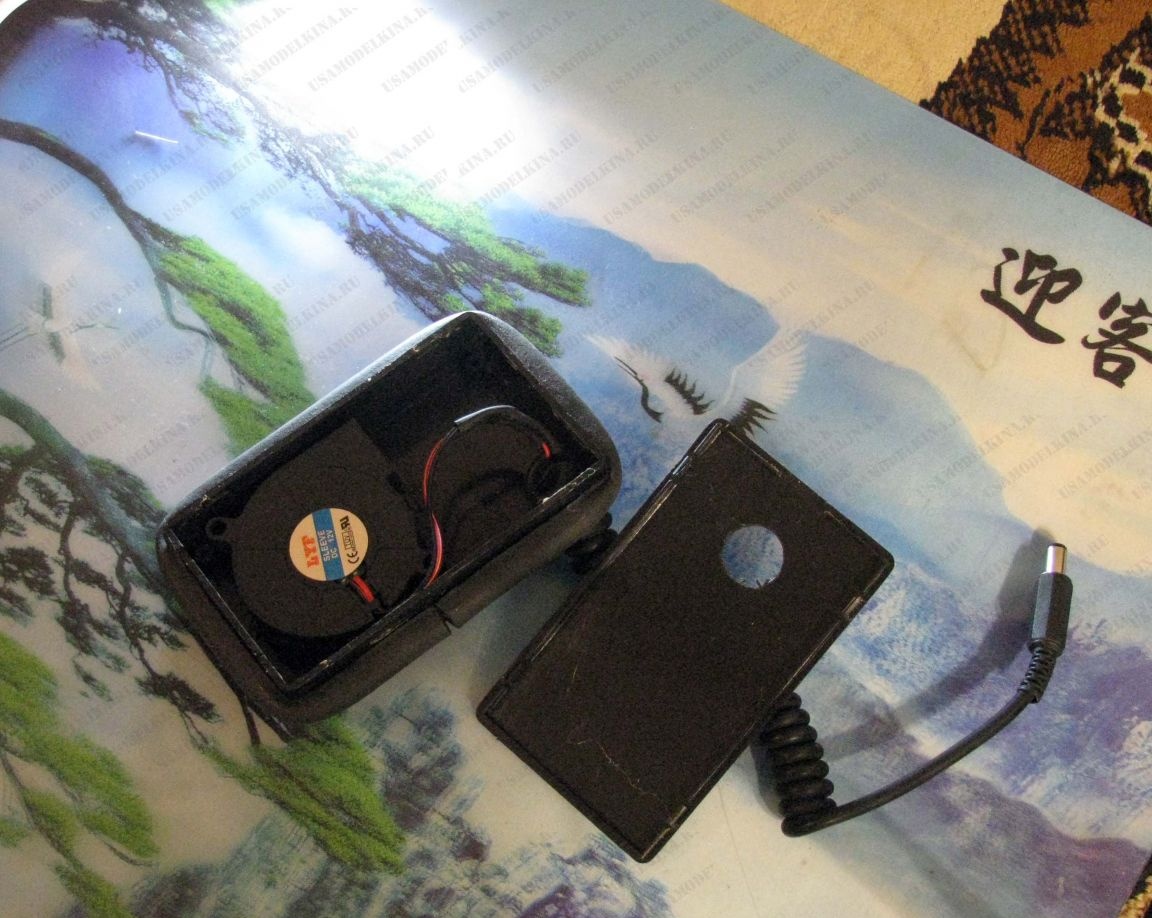
You see the filling of the control unit which was located in the ready-made speed controller bought in the winter, it was initially faulty, but the case that remained from it did not disappear, but went into business.
You can also see that some wires simply melted, but to my amazement, both modules are operational =)
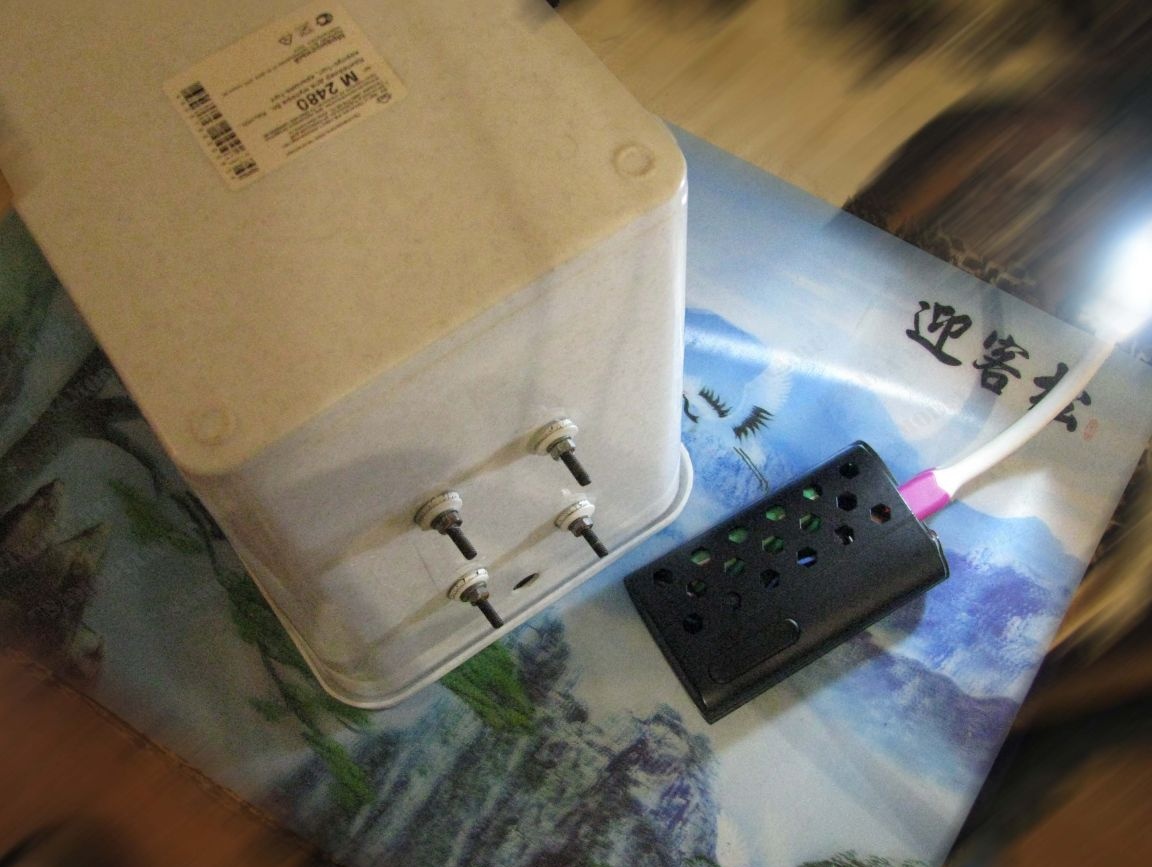
On the flat side of an office basket - i.e. from the rear, 4 mounting holes were made into which 4 mm diameter screws were inserted. It is on them that a box with e stuffing. Even lower, you see a through hole - it is designed to route conductors inward to the float and fog generator assembly.
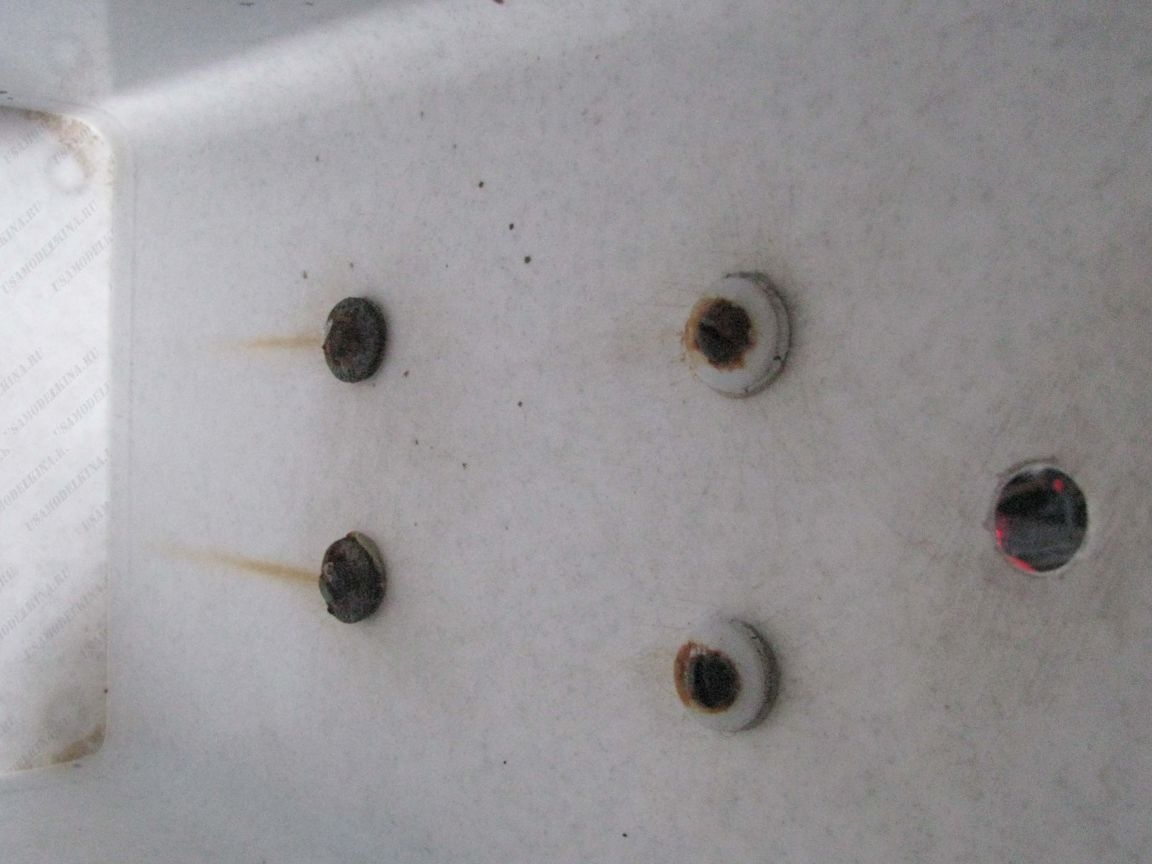
On the back of this screw fastener, streaks of rust are visible, as I was in a hurry, and then I was lazy, and if it had not been for the accident, everything would have remained. But now I had to moisten the rust with a food lemon and, after cleaning and drying, seal the screw heads with acrylate glue.
Fan compartment
The compartment must be protected against splashes and, if anything, have a free opening for condensate drainage. On the front side, there is a hole for the turbine inlet window. The turbine itself is hermetically glued to the casing. I used short-edged double-sided tape based on.
On the housing cover, on the side diagonally opposite to the fan inlet window, there is a BLOWING hole. Due to its location, even in the most difficult case, splashes arising from the spraying of water cannot reach the turbine.
On the outer perimeter of the resulting assembly, a hermetic tape was applied which is used to seal plastic windows. Hot glue sealed the soldering of the wire leads of the turbine and the length of the twisted cord.
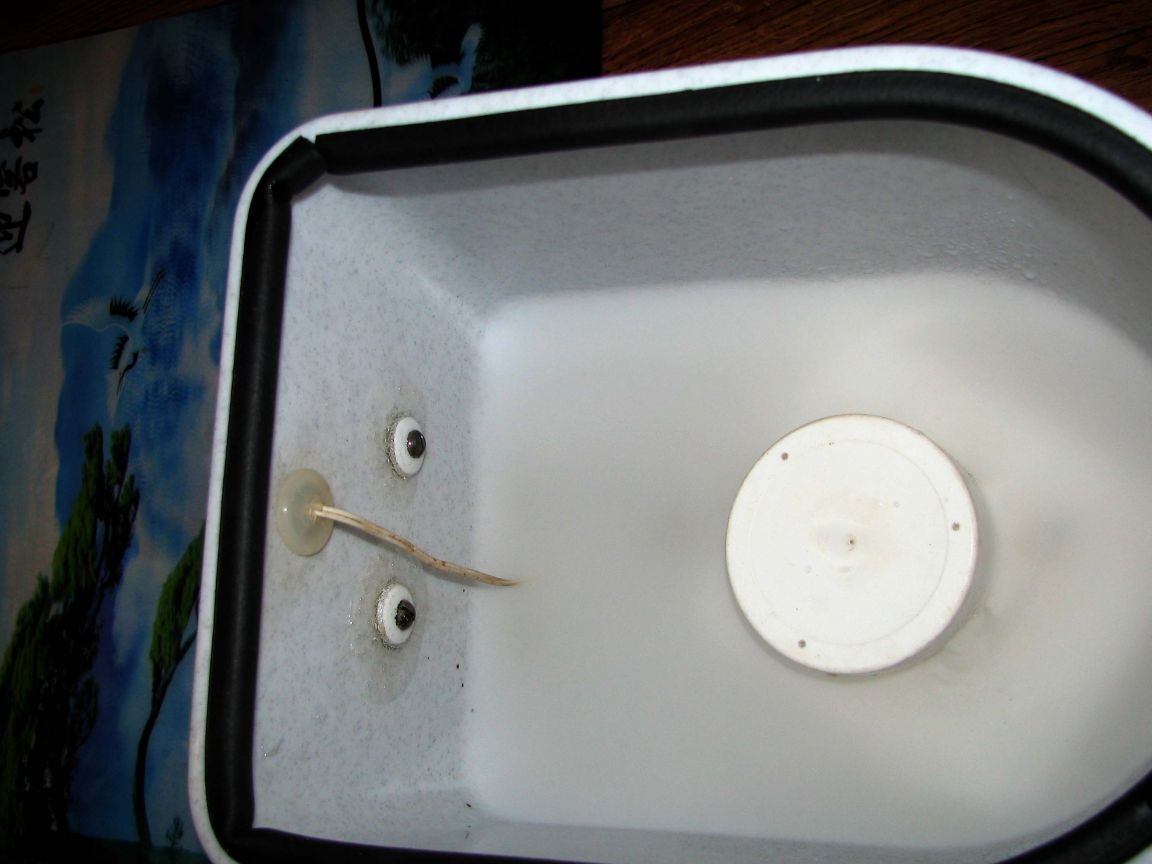
Office basket lid.
Back side.
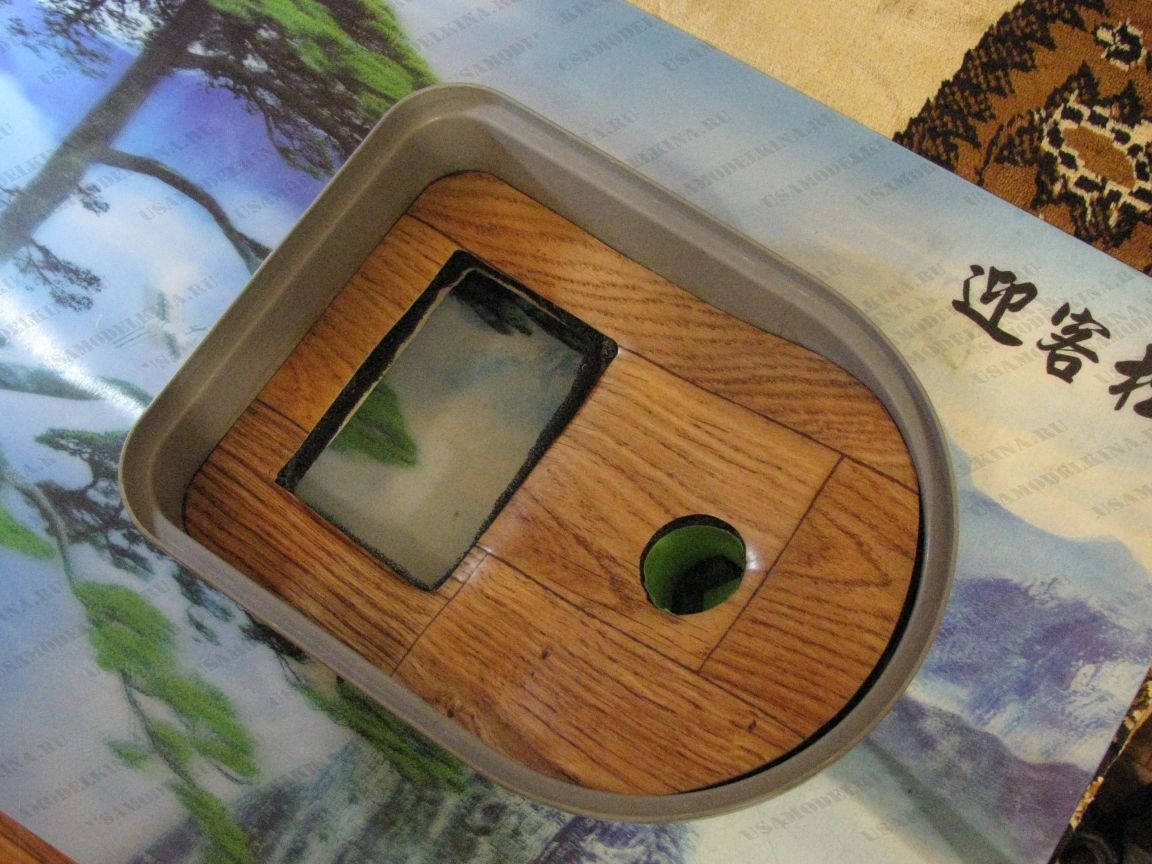
As you know, the lid of the office basket is crowned by a rotary valve and I had to tinker with it, however, now it seems to me that it is not entirely successful. But more about that in the end.
- First, a hole should be made for the outlet of the sprayed water;
- FloMaster (i.e. I) cut out a rectangle for installing a fan unit;
- a pattern of dense foam was pasted on the inside of the cover over its entire available area;
- glued foam pad, had to be impregnated with glue, to give it steam-repellent properties;
- on top, on this collective farm a pattern was planted from a piece of linoleum and also, on glue =);
Front side.
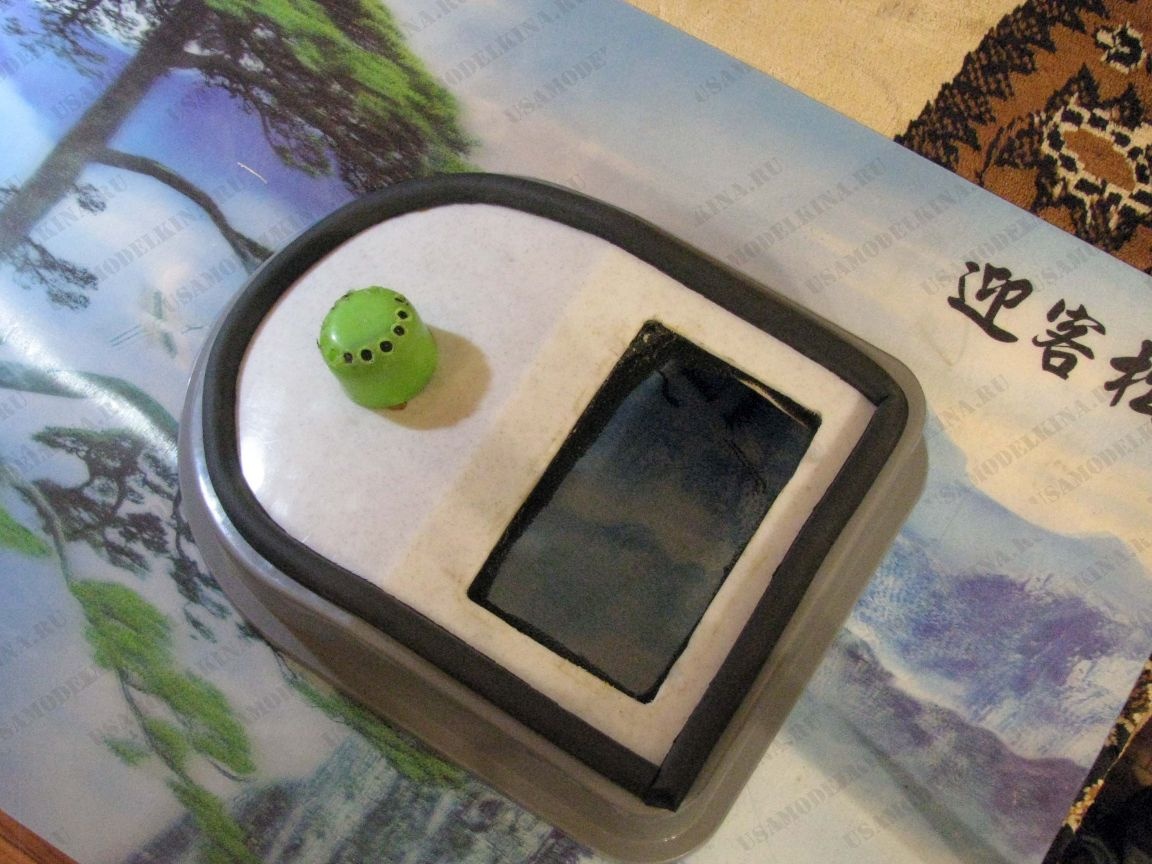
One second chocolate egg is inserted into the outlet =)
Try to make a hole of such a diameter that the rim of the half of the egg with the strain, but rotates. Outlets, do not like me in a circle chamfering an egg, but only on one side.
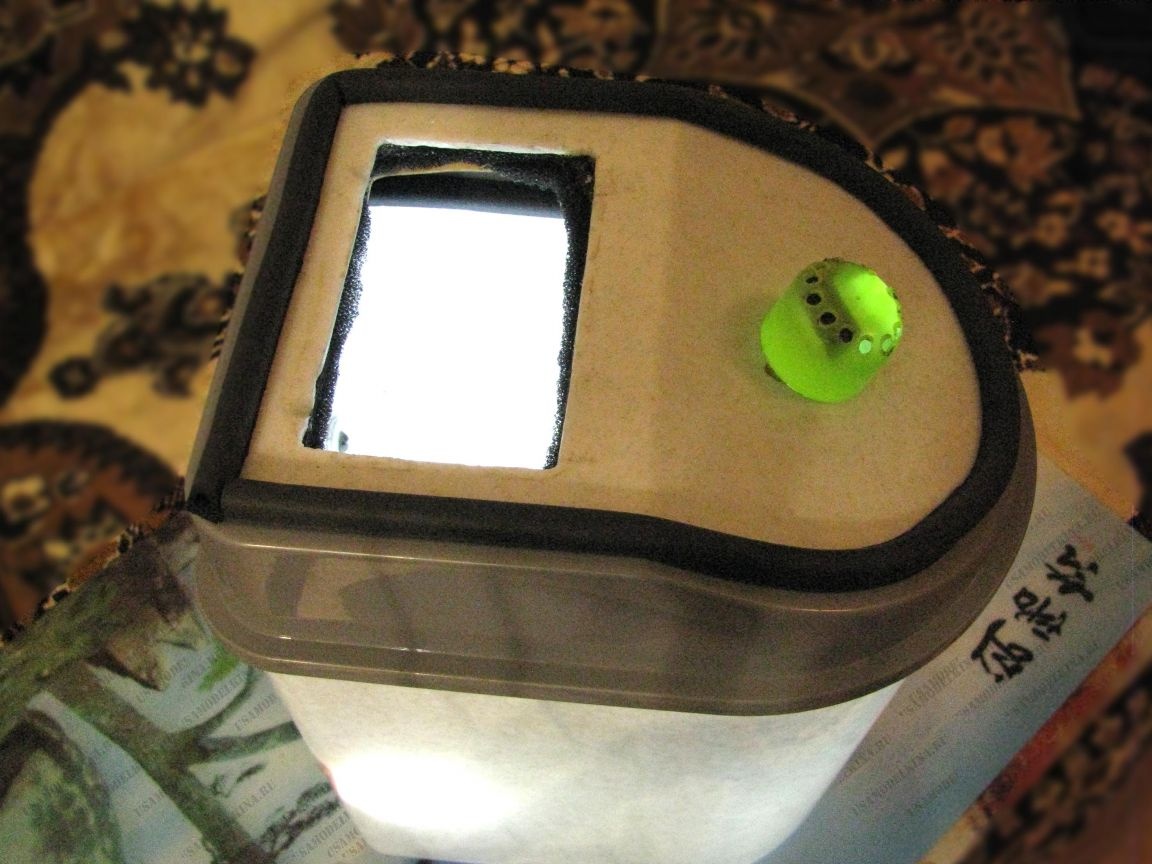
The gap between the valve and the main body of the top of the basket, albeit sealed on the back with glued foam, but before the photo shoot, I pasted on it a piece of the same pressure cord.
I hoped that this would give the appearance less curvature, but now I have some doubts whether this design has become not just a collective farm, but a mourn-collective farm? =) If colored hermetic tapes exist in nature, it is better to use them; I haven’t found colored ones.
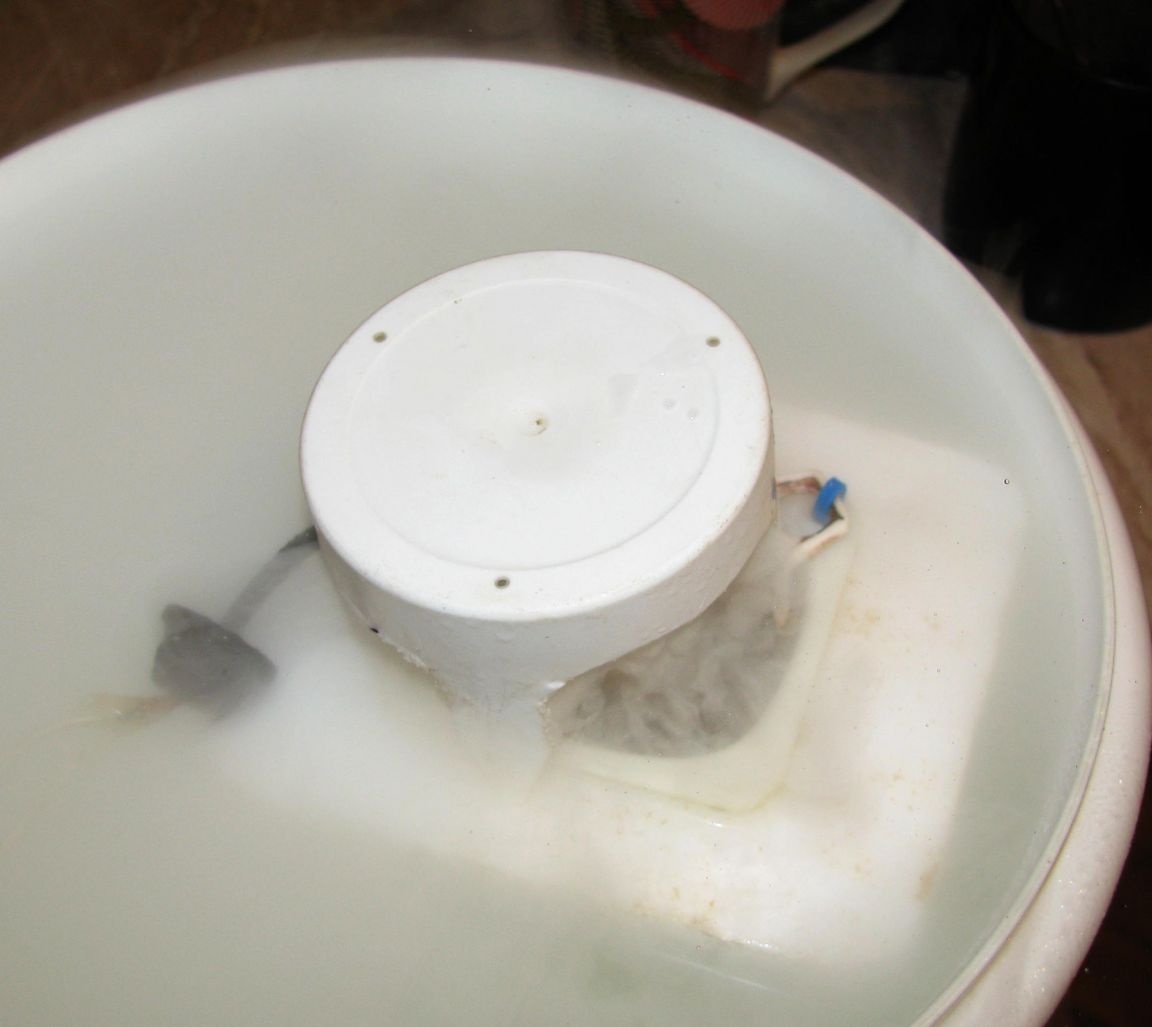
Float.
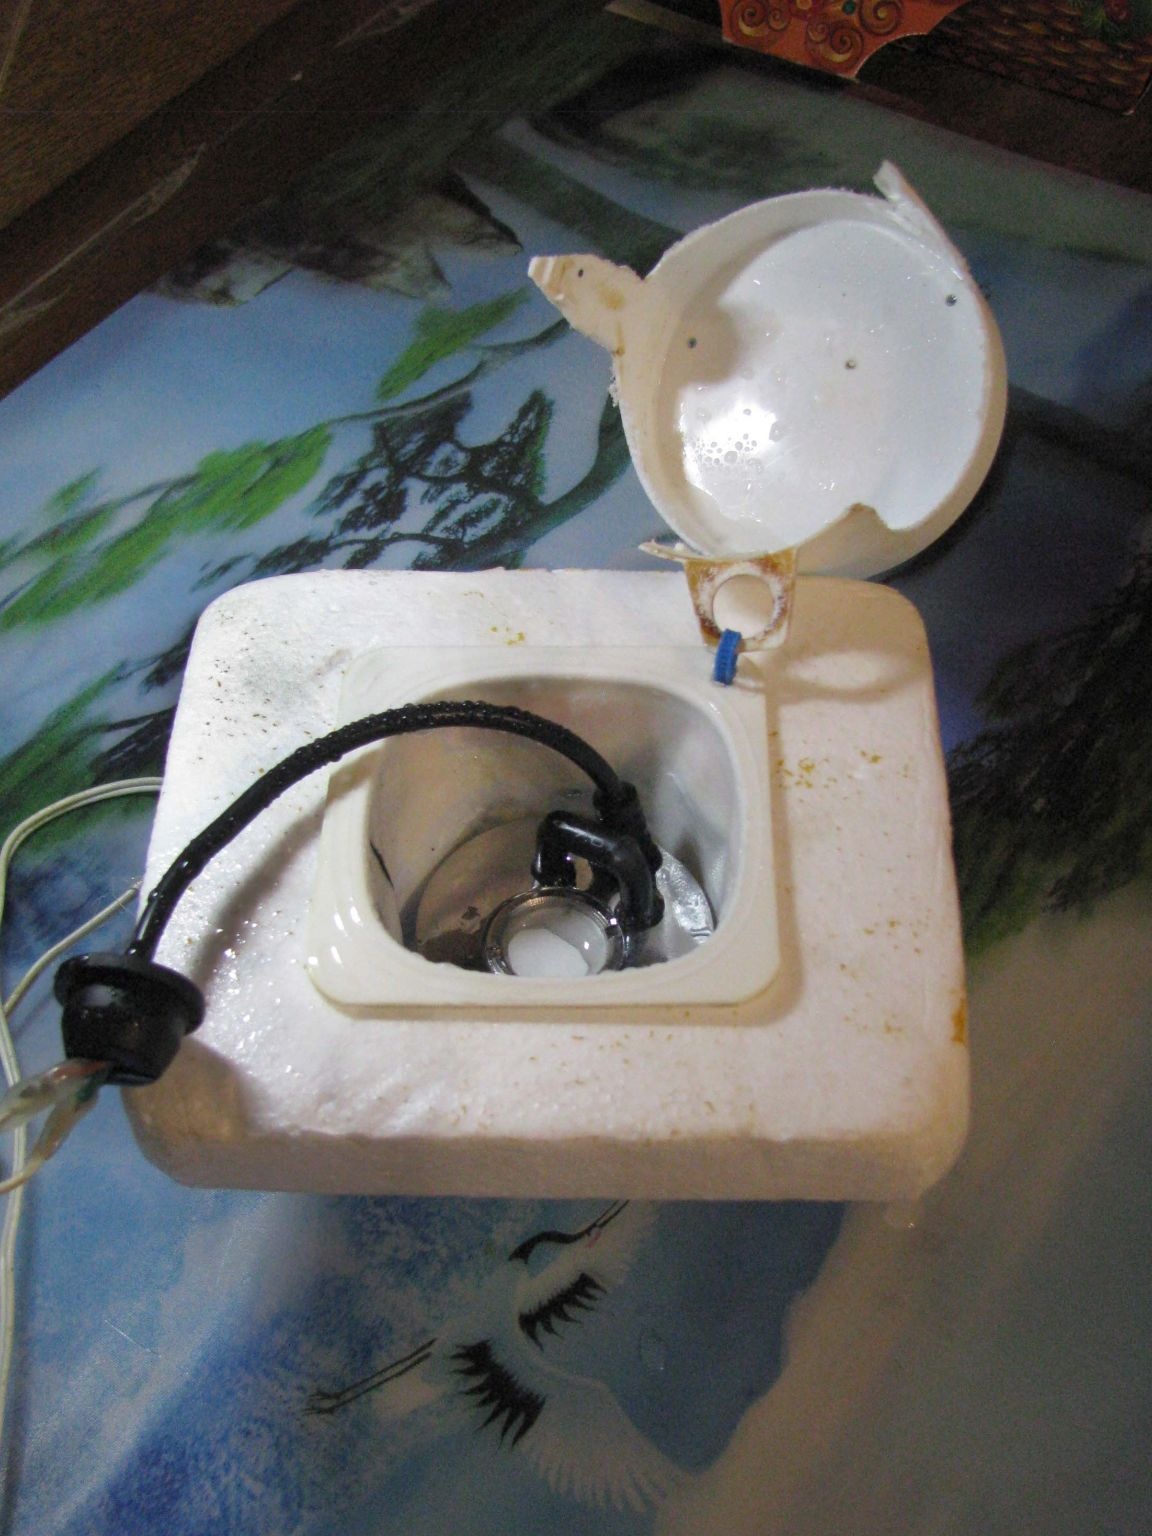
I did not have any available material except polystyrene with positive buoyancy. The float platform is made of a foam cover 24 mm thick and almost square - 100 by 115 mm. Most likely, you will not have such a finished one, make a platform from a suitable piece of foam, but be sure to melt the corners of the platform so that it does not cling to the inner walls of the basket.
For the fog generator, I picked up a suitable yogurt glass, but the diameter of the generator did not allow it to be inserted to the bottom of the glass. Over the spout of a boiling kettle, soften the lower part of the glass and quickly push the generator all the way in. Smelt the holes on the bottom of the glass and along its height.
Total recombination.
Reassembled electronic node.
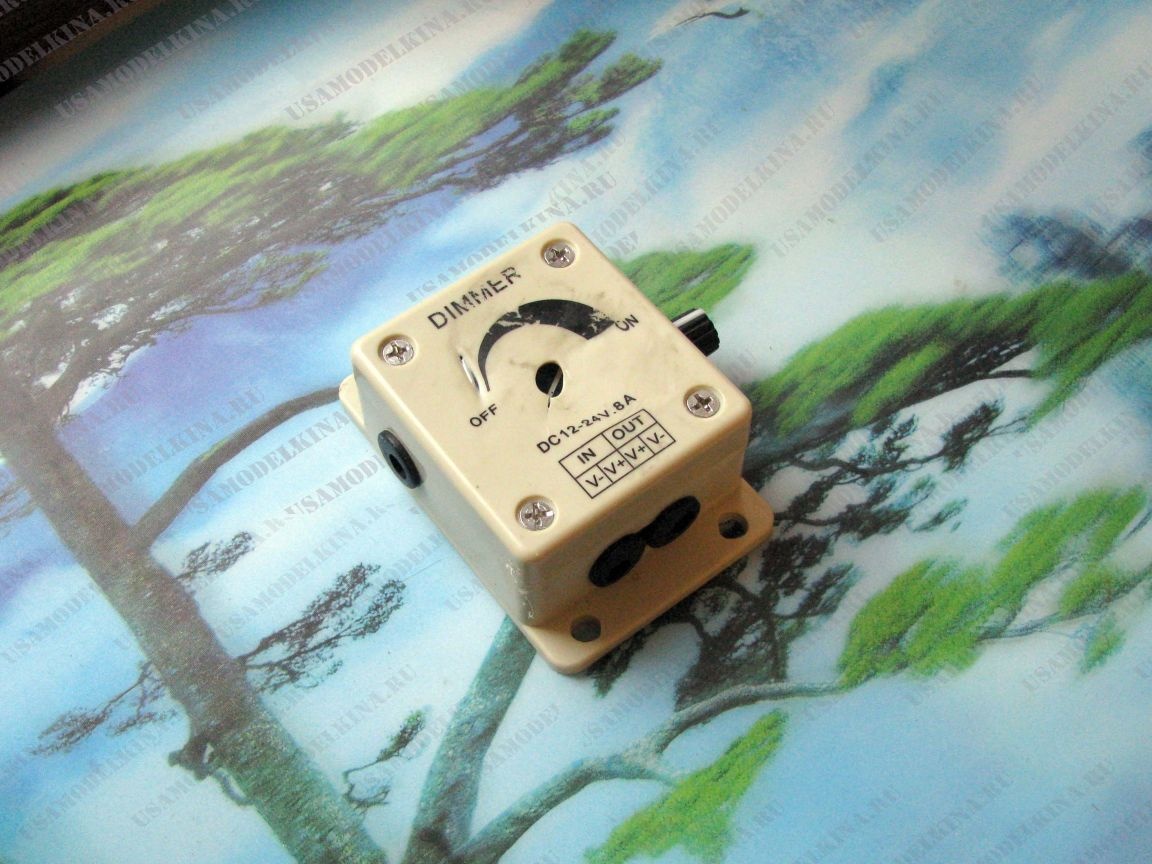
- the left upper socket on the control unit - access to the fan unit;
- the lower left socket is for connecting the power supply;
- lower right nest - exit to the float unit;
Water spray system.
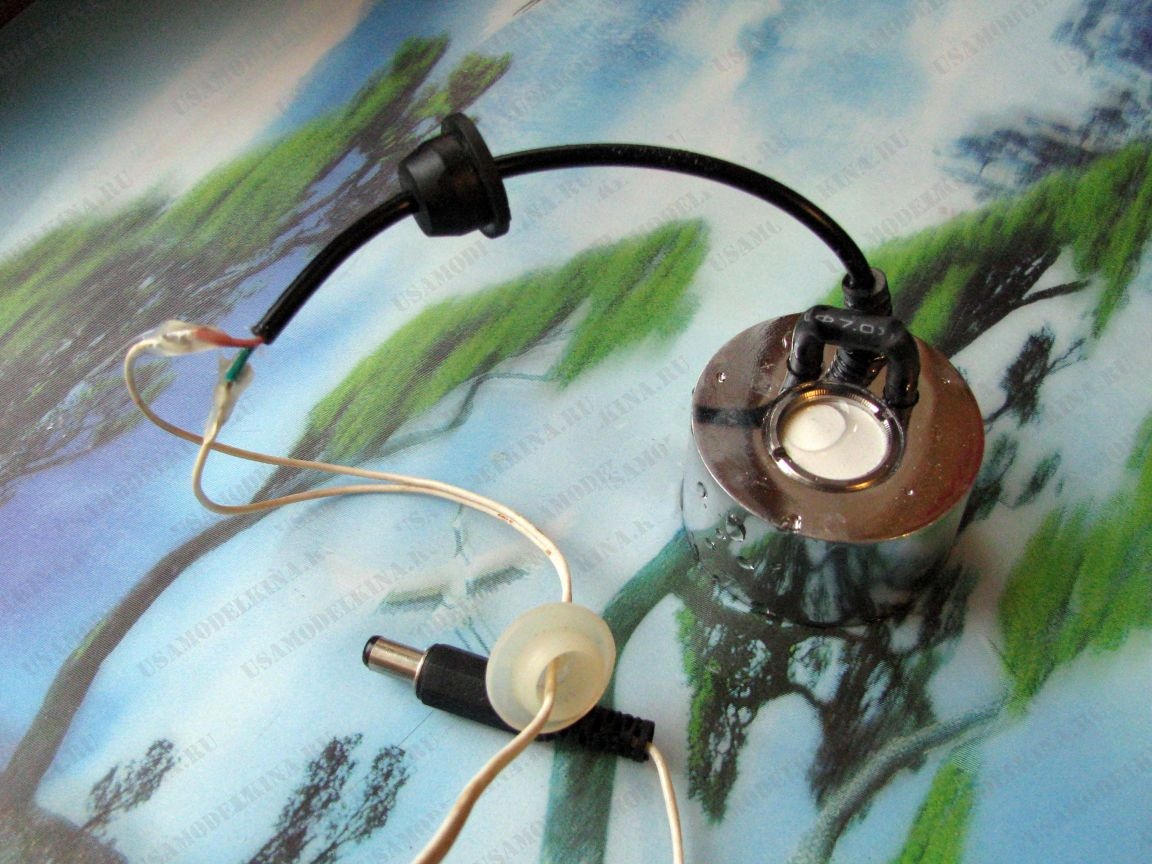
The generator set wire was cut and spliced with flexible thin wires in a silicone sheath. Do not hope that the standard wire is useful - it is dubbed, and prevents the platform from being freely on the surface of the water.
Pick up the cork from the antibiotic bottle, and before splicing the wires, or when soldering the plug on the other hand - it doesn’t matter - pass the wire through the center of the cork. It will be inserted into the corresponding hole in the office basket. As always, seal the weld points with hot glue.
Trial run.
He showed that the drops intensively fly out from the center of the fountain, reach the back surface of the lid (linoleum sticker) and drop in, drop out.And although the welt on the inner surface of the neck of the basket partially solved this issue, but it was a question of preventive dropping.
I made a cushion suppressor from the cylinder cover with mounting foam.
And as you can see, this straightforward and unpretentious adapt, effectively copes with its new purpose =)
Water passed through a pitcher filter was poured into the office bucket, a plug was inserted through the hole at the top of the bucket, and the plug from the antibiotic vial was pressed in the center of which the cord leading to the fog generator was passed. The float was lowered to the surface.
Measurements showed that the entire system consumes less than two amperes from a current source.
That’s what I’m thinking of how to do it now.
- it is better not to mess with foam rubber and linoleum, but to immediately cut from the sheet of plastic a false bottom according to the size of the side of the lid with which it lies on the neck of the bucket. Thus, in addition to making the right choice, we will have additional space under the rotary valve. Here, you can place a fan.
In the same place, you can place a humidity module that disables and enables the control unit itself when the threshold humidity level is reached.
- double reservation, - I think it will not be superfluous. The previous generator was melted due to the fact that the water level sensor did not work in it, therefore, it is desirable to install a similar sensor outside the basket by gluing it to one of the side walls at the required minimum level. Such sensors are called touch sensors. In this case, the role of the finger will be played by a column of water in the basket. A link to the touch sensors I will give.
- last thing. The step-up module may be different and should be cheaper, and the speed controller can be based on a simple home-made voltage regulator. It was my whim to use exactly what you eventually read =)
About hygiene.
It is advisable to use water at least passed through a jug filter. When passing through it twice, I did not notice any visible calcium plaque. Of course, this does not mean that he is not.
Therefore, it is better to use distilled water. It is not necessary to buy it, the other day, on YouTube, I saw a video of an English-speaking dude, which I did by connecting a hot water hose directly to the teapot spout. This is the most intelligible version of a home distiller. Several ways under the spoiler.

Other Whatever water you use, spores, bacteria, mold and algae will fall into the tank - it does not matter, with or without a fan. Because there would be no mucus, put a silver object on the bottom of the basket. A spoon, a fork, that is.
I strongly do not recommend buying the so-called "silver cartridges" which are used in branded humidifiers at a speculative price. It’s better to buy a meter of silver wire at a price one and a half times less than usually only one such cartridge costs. I will give a link.
The approximate cost of the entire set:
- office basket - $ 2.5;
- – $5.6;
- Xl6009 boost module, which can - $ 0.80;
- – $1.43;
- 100x60x25 mm - $ 1.08;
- finished - $ 1.32
not necessary:
- meter - $ 3.23
- touches - $ 1.5
Total: without wire approximately and without sensors $ 12.
Everything else I had was available.
I believe that this homemade not claiming to be the center of the festive table as a samovar, nevertheless, it has all the necessary consumer qualities, which for the money most likely cannot be found in the finished version.
Thanks for attention.