

Good day to all dear friends! In today's article I would like to consider a very interesting idea homemade. And it is precisely today that we will collect a rather unusual and rather original piggy bank cache. As you already understood, this homemade product can be used as a piggy bank, as well as a cache. This piggy bank cache can easily surprise your loved ones. Of course, this homemade product can not be used as some kind of safe or cache, from which nothing can be obtained. This homemade product can be considered as an idea and you can assemble it from other available materials, for example, such as plastic or aluminum. Well, let's not pull with a long introduction, we drove.
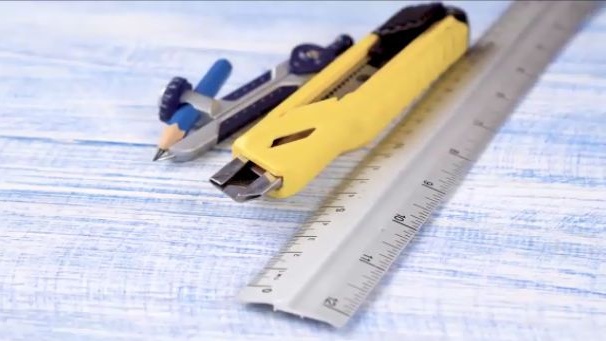
For this homemade product we need:
- A large sheet of thick corrugated cardboard
- Wooden sticks from under ice cream.
Of the tools we will also need:
- Stationery knife
- marker
- A simple pencil
- Ruler
- Compass
- Hot glue
- Super glue.
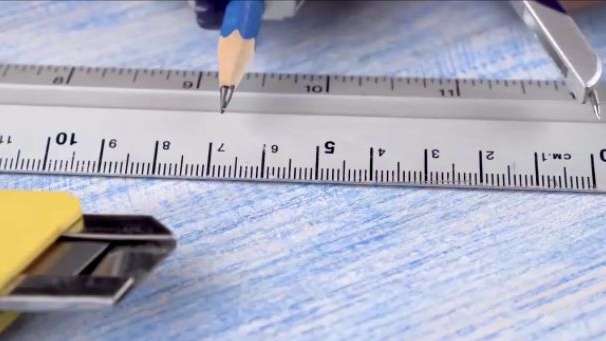
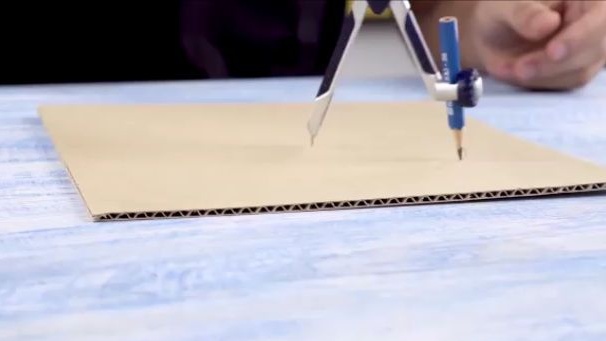
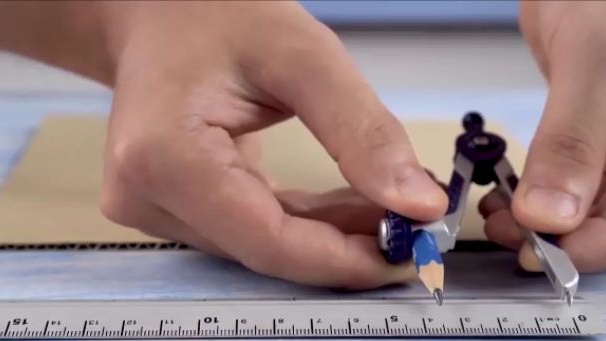
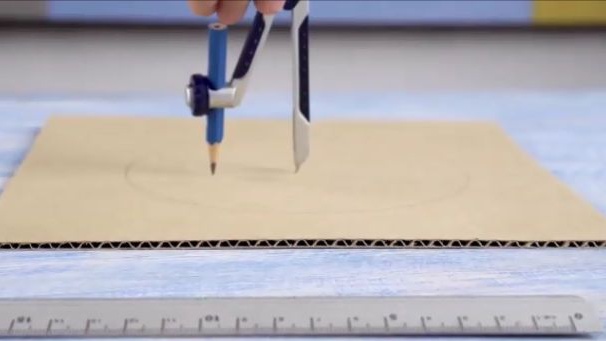
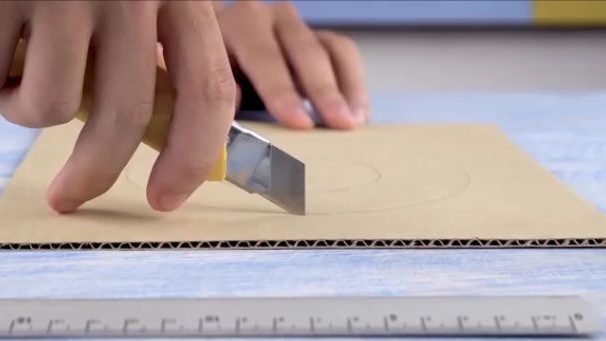
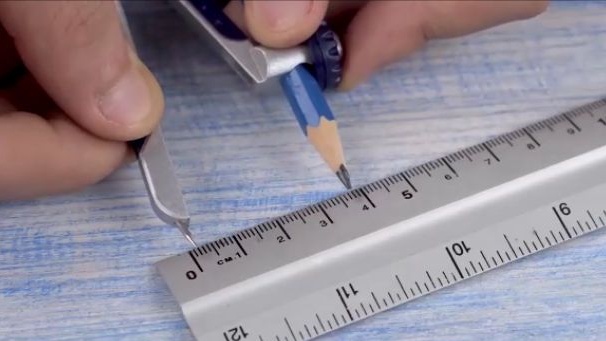
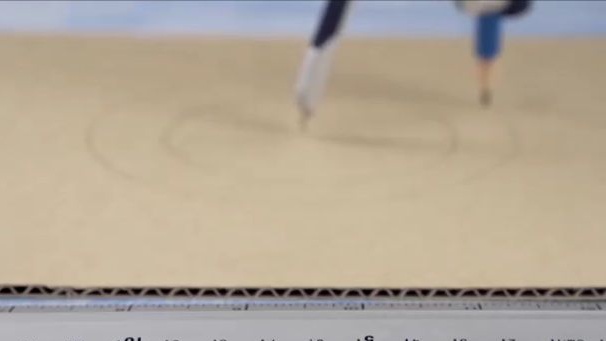
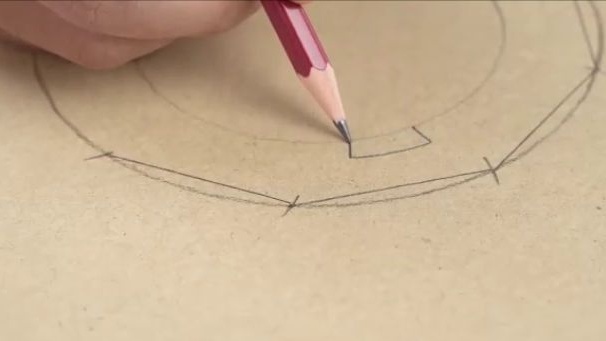
First, take a sheet of cardboard on which to put the following labels. To do this, we need a compass with a simple pencil, a clerical knife and a ruler. Using a ruler, set the span of the compass to 7 cm, and draw a circle. After that we expose on a compass 3.5 cm and draw a circle inside the circle just drawn. We draw the outline along the contour using an office knife. Then we will make a ring with exactly the same diameter and from the same cardboard, but only without a hole in the center.

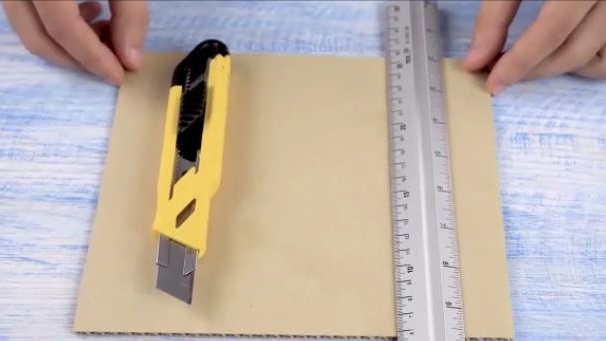
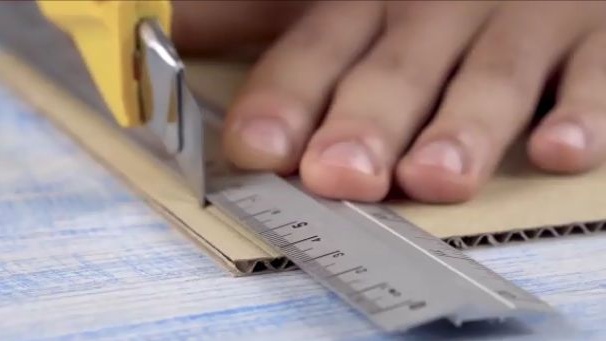
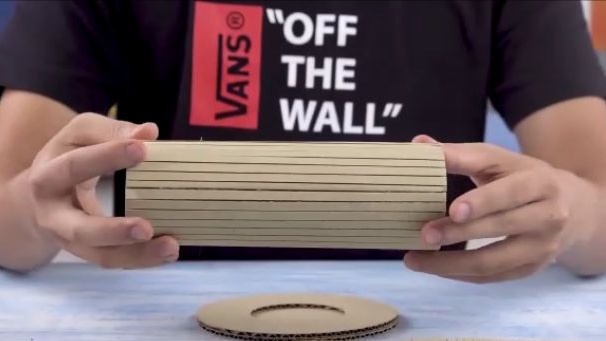
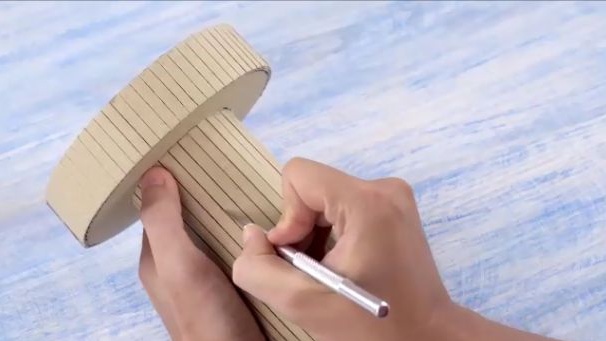
The next step is to take a cardboard rectangle, the width of which should be equal to the perimeter of the inner ring of the cut blank, and the length of this rectangle is already chosen arbitrarily, that is, the longer, the greater the piggy bank capacity. Having cut out the cardboard rectangle we need, we should do the following, namely, with the help of a stationery knife and a ruler, make non-through cuts along the cardboard lines. This is necessary so that the cardboard rectangle can curl into a tube and not crumple. In the same way, we make a cardboard strip, the length of which should be equal to the perimeter of the outer ring of the circle, and the width of 2-3 cm.

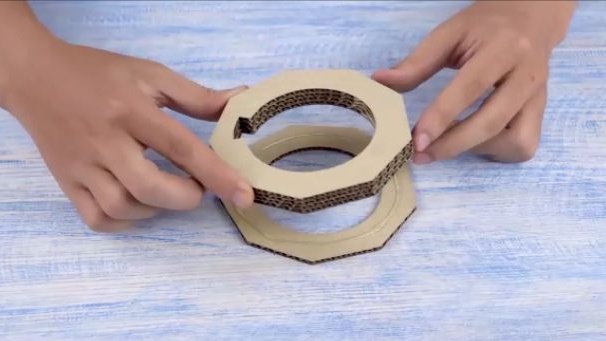
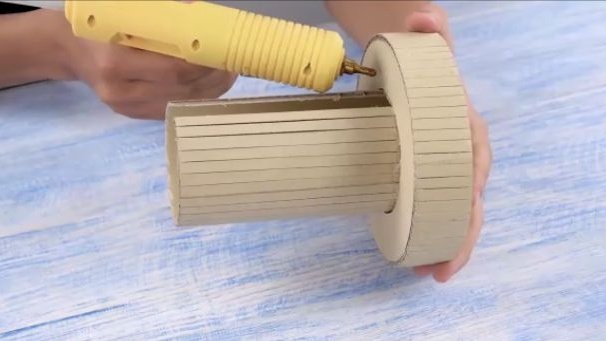
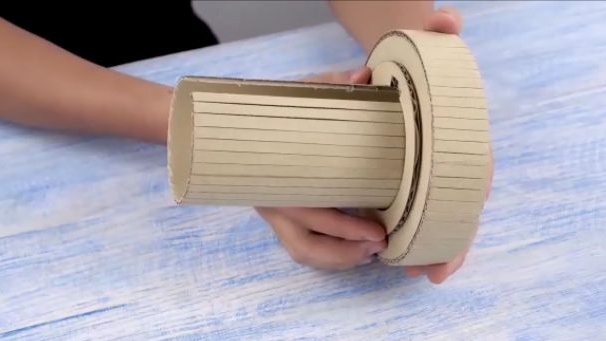
Now, newly made cardboard blanks should be interconnected. To do this, take a cardboard rectangle and roll it so that we get a cylinder.We put the resulting cylinder into a cardboard ring and put this thing in the center of the circle (on the one without a hole in the center). Two circles should be at a distance that is equal to the thickness of the cardboard strip. We wrap a strip around the disks (or rings, to whom it is convenient). And we fasten all the details with hot-melt adhesive.
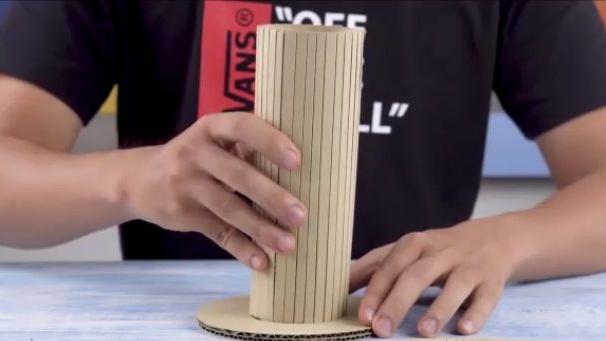
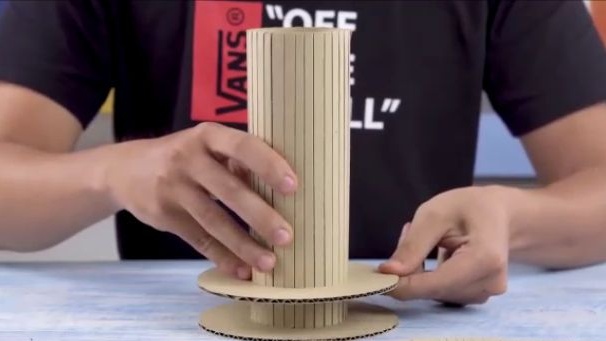
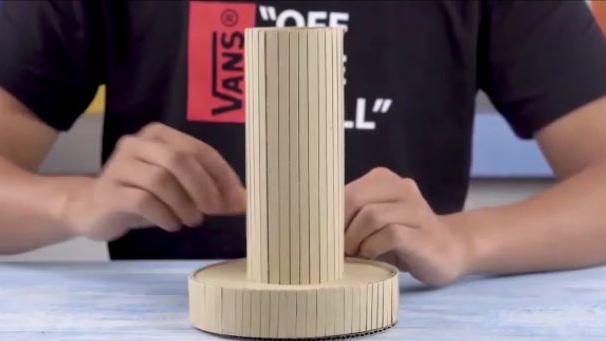
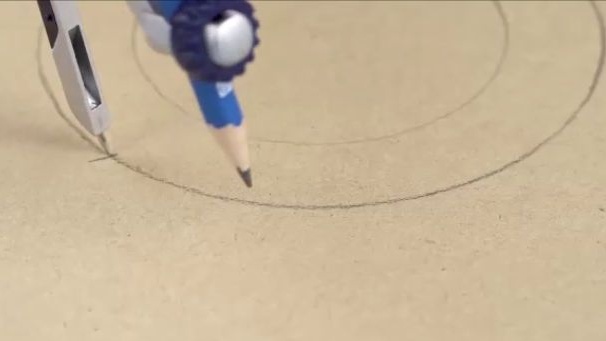
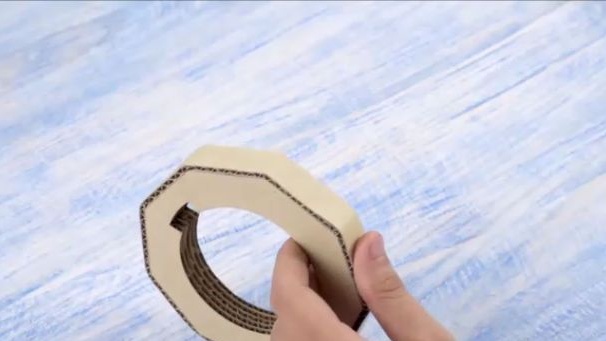
After all the above actions, we should repeat them. But so that the inner diameter of the ring of the cardboard disk is 5 mm (i.e. 4 cm.) Larger than the previous one. You should get it as it is shown in the photo below, that is, so that one workpiece goes inside another workpiece. And she could calmly come in and go out.
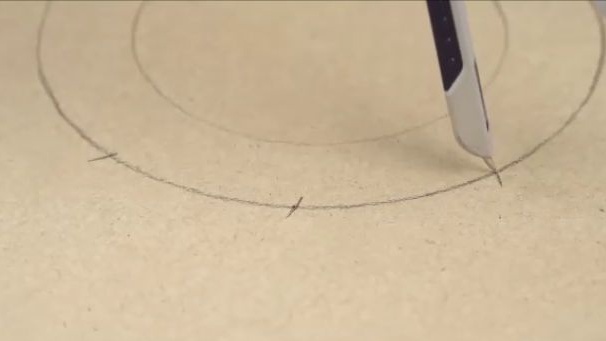
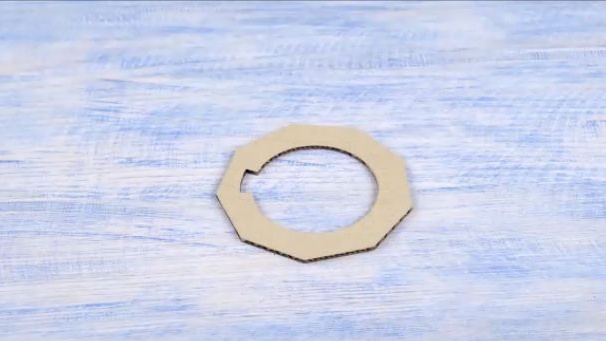
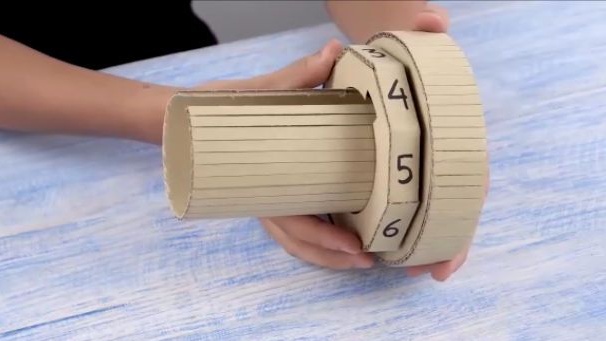
Go to the next step. We draw a circle whose diameter is 4 cm, as well as a circle with a diameter of 6 cm (it should turn out so that the small circle stands exactly in the center of the large circle). On a circle whose diameter is 6 cm, marks should be made. Marks should stand around the perimeter at a distance of 4 cm from each other. Then, using a ruler and a simple pencil, draw segments from one mark to the other closest to it. Inside the disk, on the contour of a small circle parallel to one straight line (any straight line), you should draw a trapezoid shape exactly the same as in the photo below. And cut the workpiece with a clerical knife. We should do 5 such pieces.
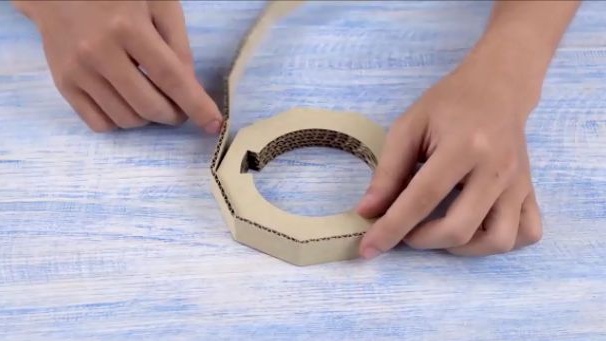
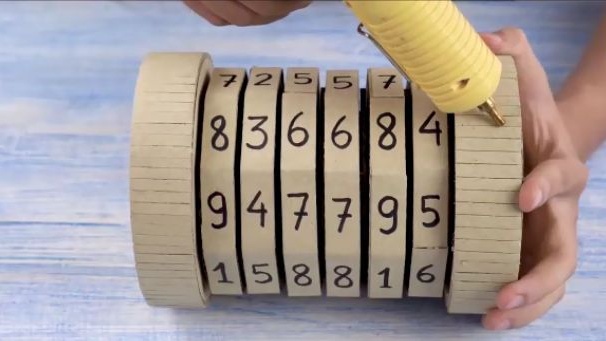
Having cut out these blanks of an unusual shape, they should be connected together as a sandwich. Joining cardboard, as you probably already know, is best done with hot melt adhesive. Further, in order for this workpiece to last longer and its edges not to wrinkle quickly, you should make a cardboard strip whose length should be equal to the perimeter of the workpiece just made. In order for the cardboard strip to be able to wrap the workpiece and not wrinkle, but bend nicely, for this, cuts in the form of triangles should be made in the places of bending from the inside. And glue two blanks, as shown in the photo below.
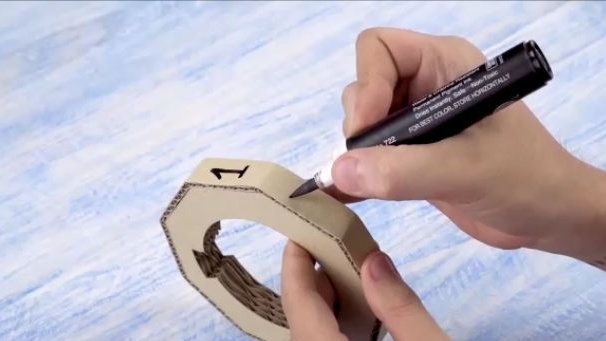
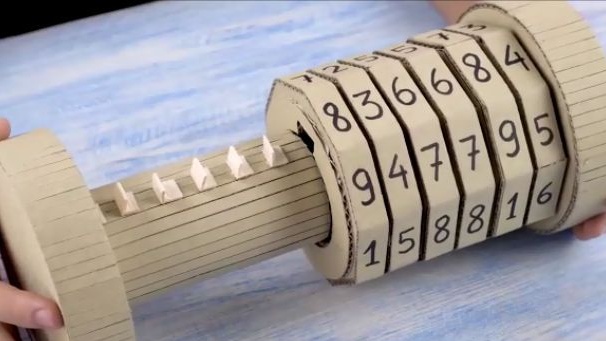
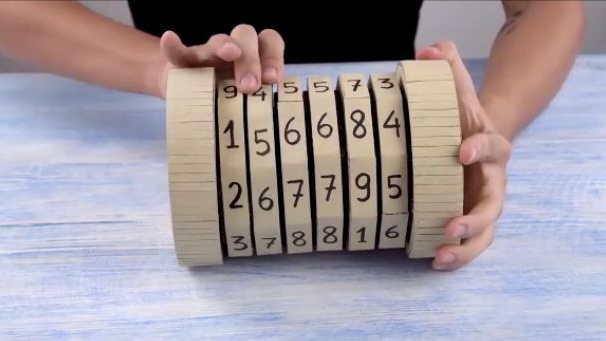
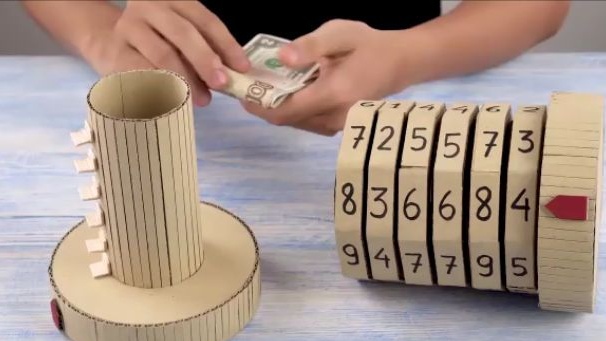
On a blank just made, with a marker, put numbers. I want to note that the numbers should go in order and start from different sides relative to the trapezoidal notch. Actually, the password of the future piggy bank depends on this. Now attention! such a blank that we did, in our case, should be repeated 6 times, that is, our password will consist of six digits. The amount of these blanks directly depends on their size and on the size of the piggy bank itself.
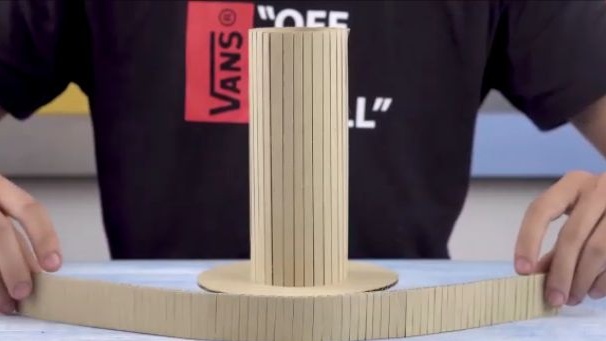
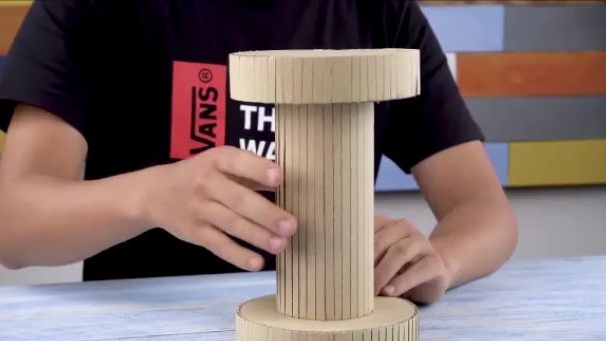
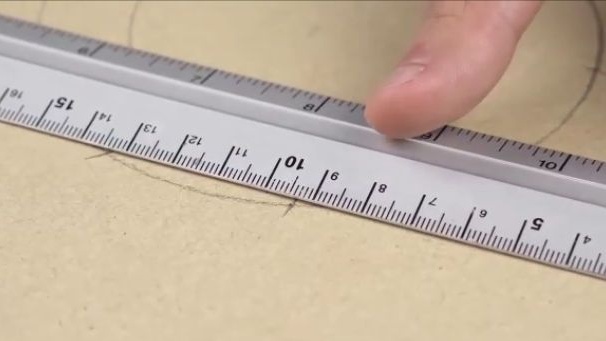
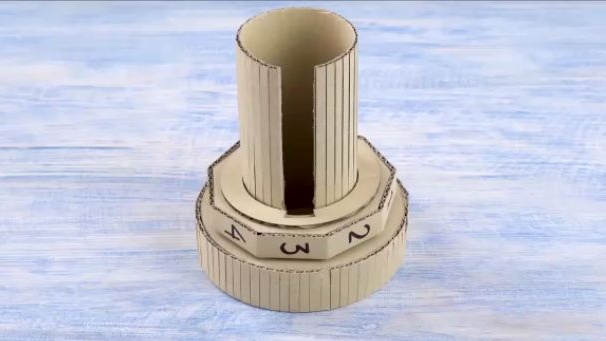
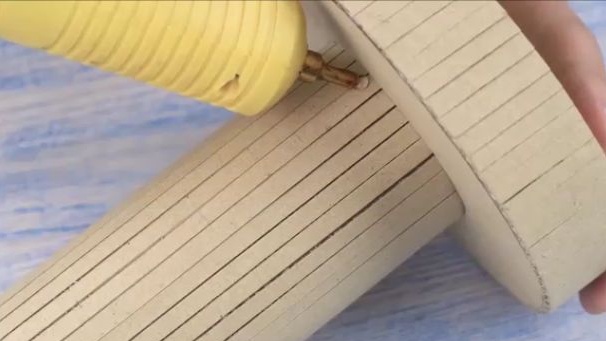
Now we should take those two blanks that we did at the very beginning, namely, we need to take the blank with a larger cylinder diameter. Cut a strip with a clerical knife that is a length of the entire cylinder, approximately two lines wide (see photo.).

Washers should be made from the same cardboard that will slightly help the operation of the mechanism. The inner diameter of the washer ring should be equal to the inner diameter of the previous workpiece, and the outer smaller than the previous workpiece. Trapezoidal slots should also be present on this washer. We should make 7 such washers. Glue the first washer in the specified place. The slot on the washer should coincide with the cut strip on the cylinder. Then we put on the cylinder a workpiece with the numbers drawn on it, and then again the washer. And we continue to alternate so until the blanks are over.
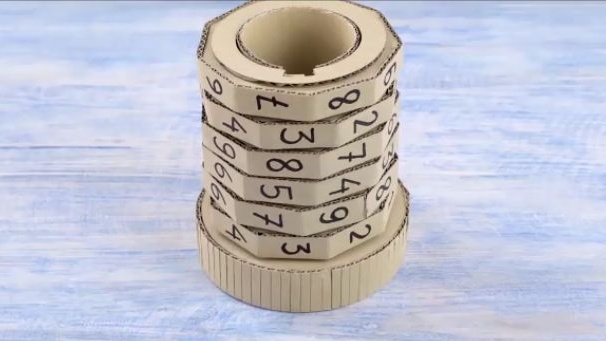
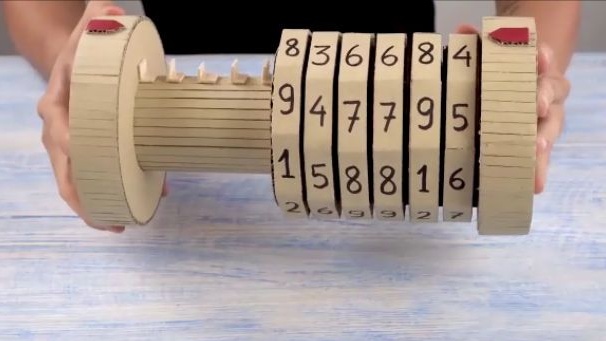
Then we return to the part whose cylinder diameter is smaller. For it, we should make the following blanks, namely, cut 12 identical squares from the sticks and connect them together so that we get “G” shaped parts. Connect the squares with super glue. As a result, we should have exactly 6 identical “G” shaped parts. Construction details should be glued to the cylinder at least, using hot melt adhesive.They should be glued to the places indicated on the photo and as indicated on the photo.


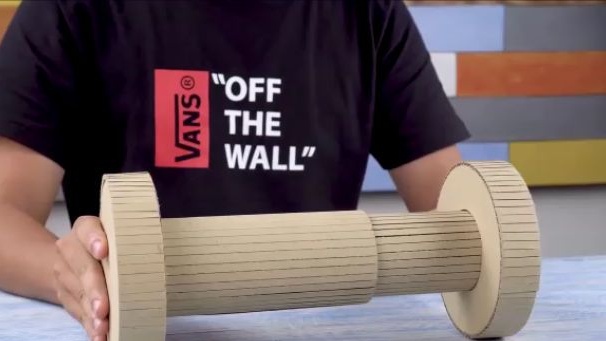
We connect the two halves of the piggy bank by inserting one into the other, and check the operability of the device. We mix the numbers and try to separate the two halves and see what we can’t do, and then set the number that was originally. And again we are trying to separate the two halves and see that we can do this with ease. You probably already understood the principle of operation of the piggy bank lock, that is, when all the slots are in a row, nothing prevents us from separating the halves, but when at least one of the slots is not correct, we will not be able to open the piggy bank.
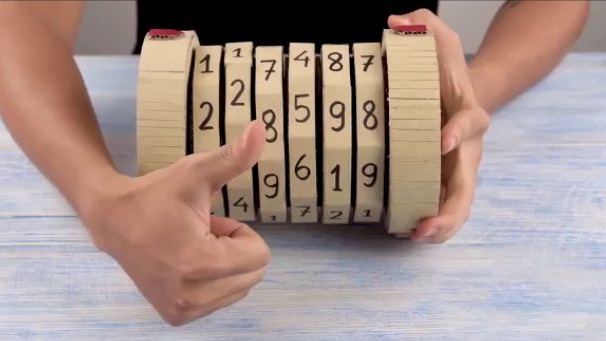
In conclusion, add two red arrows opposite each other, so that they point to the series of numbers that should be made to open the piggy bank.
Well, here you are! As a result, we got a cool homemade product in which you can hide something from others or use this homemade product as a game, for example: you hide some kind of gift inside the piggy bank and the person guessing the password receives a surprise inside.

Here is a video from the author with a detailed assembly and testing of this homemade product:
Well, thank you all for your attention and good luck in future projects, friends!