
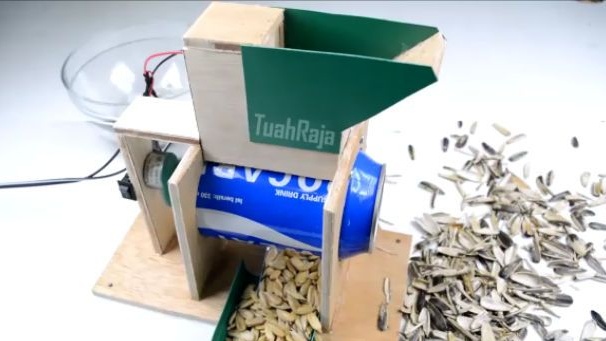
Good day to all dear friends! In today's article, together with you I would like to consider a very interesting homemade. Namely, in this article we will consider how to make a combine for cleaning the sunflower seeds from the shell. This combine can be useful to those who love kozinaki and want to make them yourself. Of course, in grocery stores you can find peeled sunflower seeds, but not everywhere they are. And if you also did not find peeled seeds and yet the desire to make homemade gozinaki does not leave you, then this homemade product is for you. As always, the most affordable materials for assembly will be selected so that anyone can make this homemade product. In general, the homemade product is very interesting, so let's not pull with a long introduction, let's go!
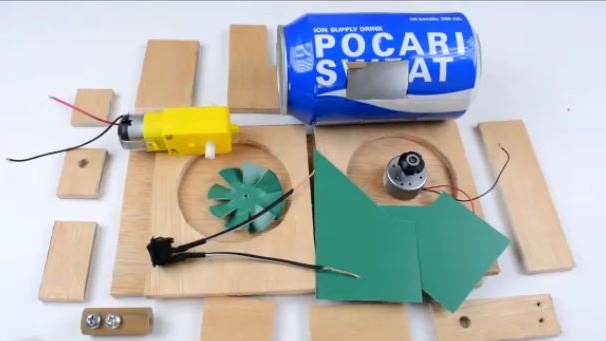
For this homemade product we need:
- Large sheet of plywood
- Round wooden stick (e.g. from a wooden clothes hanger)
- Self-tapping screws
- Aluminum can from cola
- Not a large sheet of thin plastic (such as plastic from the document folder)
- Electric motor from DVD drive
- The electric motor with a reducer (which is completed to arduino)
- switch
- Furniture nails.
Of the tools we will also need:
- Ruler
- Black capillary or helium pen
- Compass
- Electric fret saw
- Manual jigsaw
- Drill and drill
- Hacksaw
- Medium sandpaper
- Stationery knife
- scissors
- Hot glue
- Shrink
- Hammer
- Super glue.
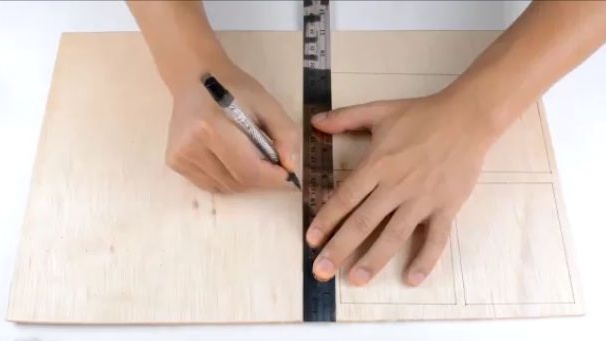
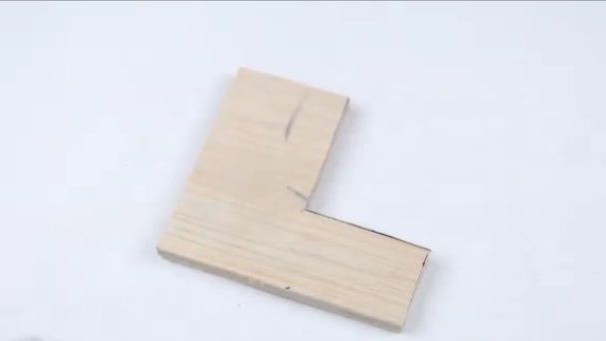
To begin with, we should cut out all the parts we need from plywood. To do this, we need a ruler and a black helium or capillary pen, mark out all the necessary elements on a plywood sheet (see photo). More information about each item will be described below. Having noted all that we need to cut out the elements with a jigsaw or an ordinary manual one.

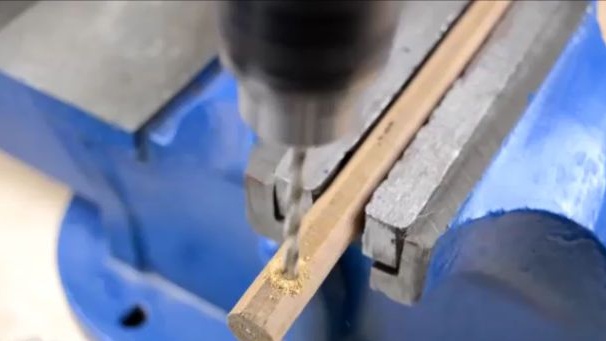
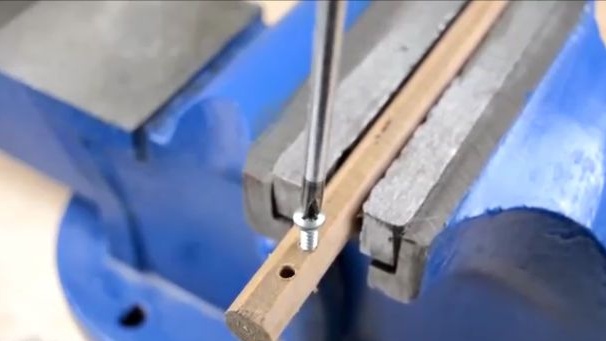
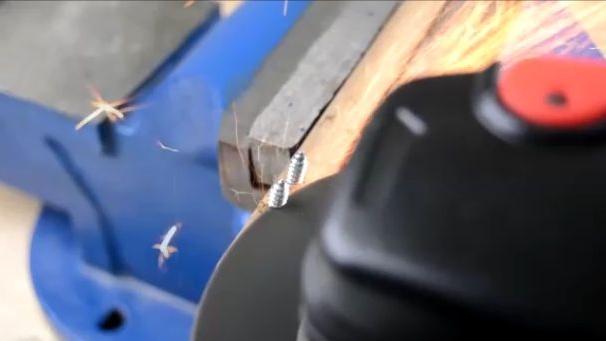
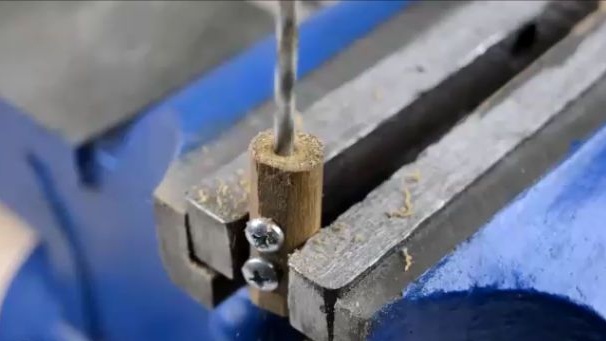
Then we should probably make the most important part of homemade work, namely the threshing shaft. A shaft that will crack sunflower seeds. To do this, we should take a round wooden stick (for example, from a wooden coat hanger from clothes). In the stick you took, two through holes should be made at a distance of about 5 mm from each other.We screw two small self-tapping screws into the holes just made, then, on the other hand, the protruding part of the self-tapping screws should be sawed off with a hacksaw for metal (well, or a grinder, as, for example, the author of the homemade made). From the stick itself, we saw off a segment with self-tapping screws of about 5-6 cm, and then we make a longitudinal hole (see photo).
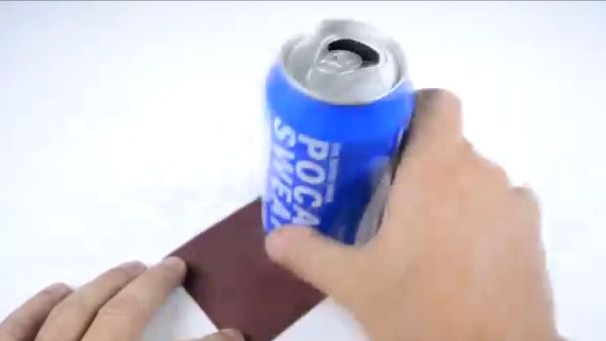
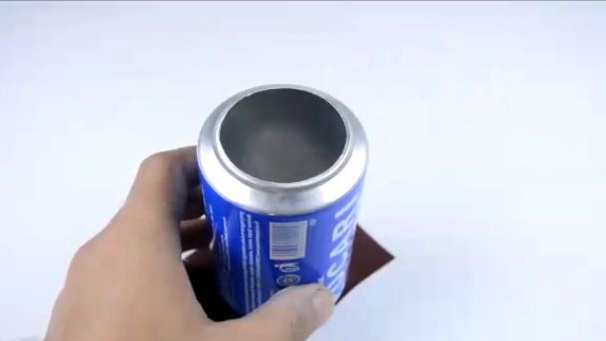
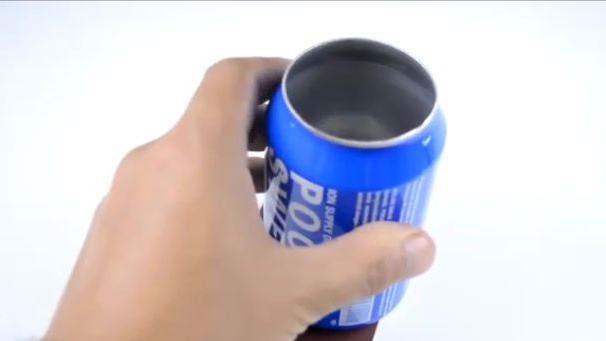
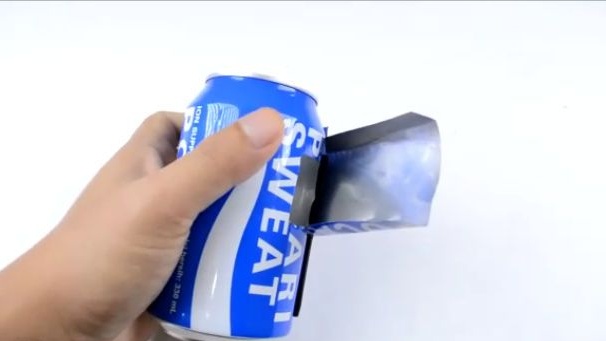
We continue to produce blanks for the assembly of homemade products. For the next step, we need an ordinary aluminum can from some cola and sandpaper of medium grain size. We take the can and three it on sandpaper from the ends on both sides, so that the upper and lower parts of the can are disconnected from the main part of the can.
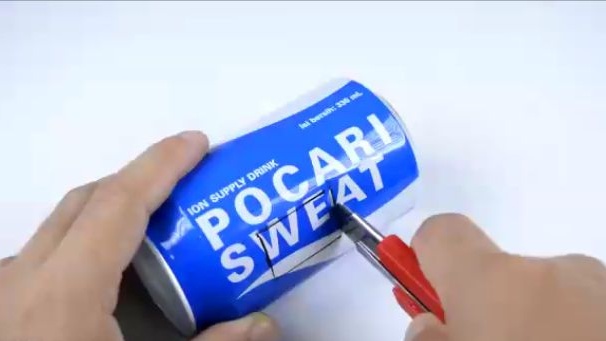
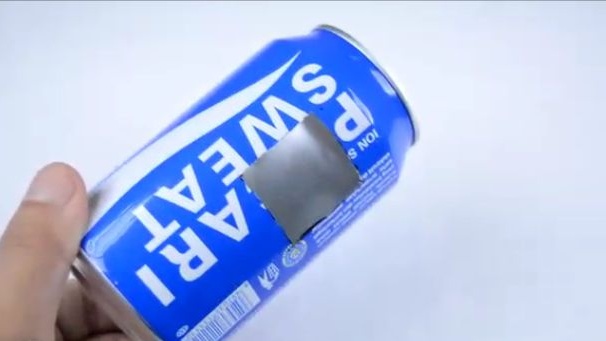
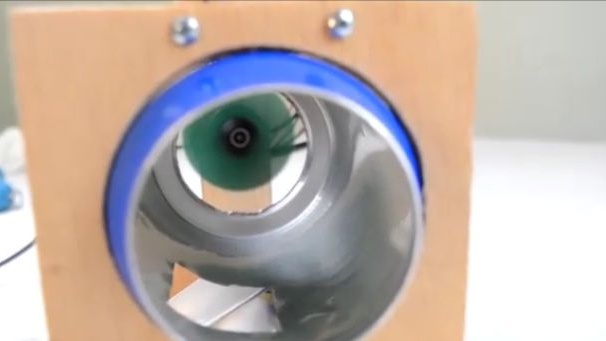
Then, a square hole should be made on a cylinder of freshly made aluminum can. In order to make a hole in an aluminum cylinder, use a clerical knife and make a hole exactly the same as in the photo below.
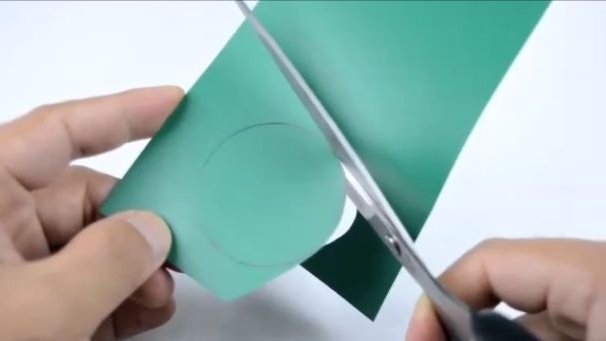
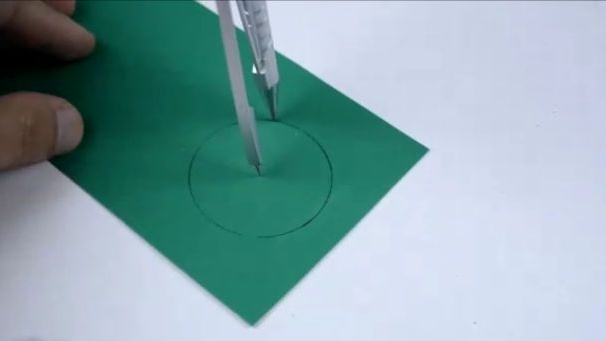
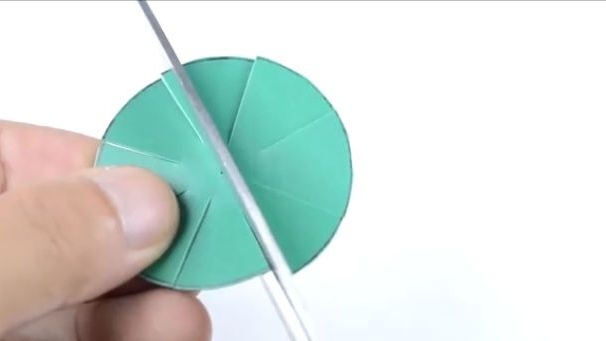
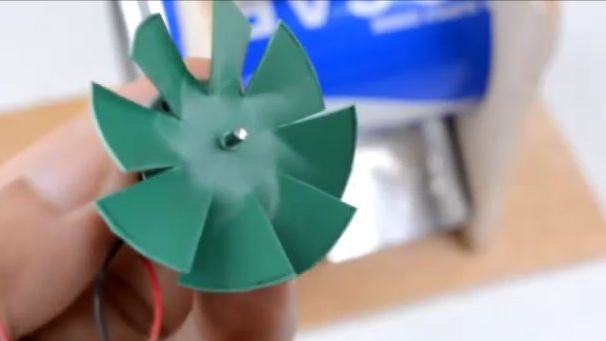
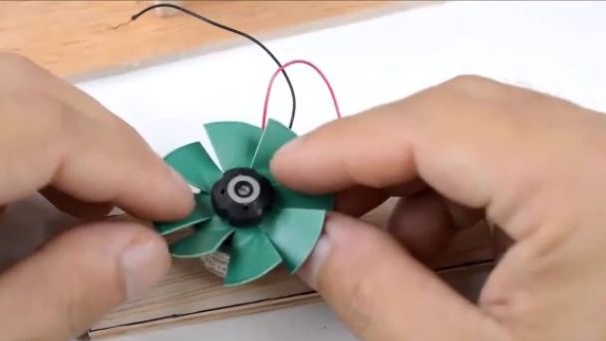
The next blank will be the propeller. For the manufacture of the propeller, we need not a large piece of thin plastic, which can be cut from the cover of the document folder. To do this, take a compass and set it on such a scale that the diameter of the circle it received is equal to the diameter of the hole in the aluminum cylinder. We cut out the drawn circle with ordinary scissors, and also apply longitudinal cuts so that in the end we get 8 blades. Cut blades should be bent to one side.
Having prepared the basic elements, we begin the assembly. To begin with, an auger should also be glued to the aluminum cylinder, which should also be made from an aluminum can. To do this, cut the can along and unfold it in order to get a smooth aluminum plate. Then we cut a rectangle out of an aluminum plate using ordinary scissors. We bend the edges of the cut rectangle so that the flying seeds do not fly over the edges. You can glue two aluminum blanks using super glue or using double adhesive tape, as the author of the homemade product actually did.
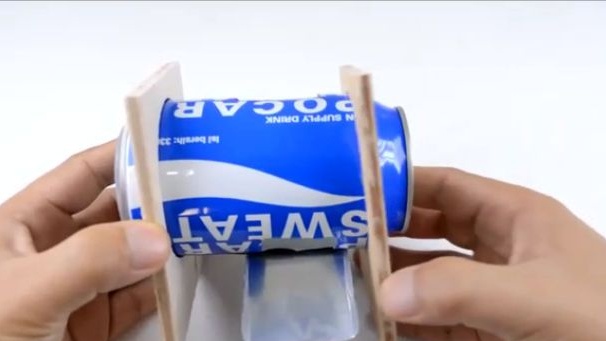
Next, we need two plywood parts that we made at the very beginning. Namely, we will need two rectangles with holes in the upper part, the diameter of which coincides with the diameter of the aluminum cylinder. We connect the aluminum billet with plywood billets as shown in the photo below.
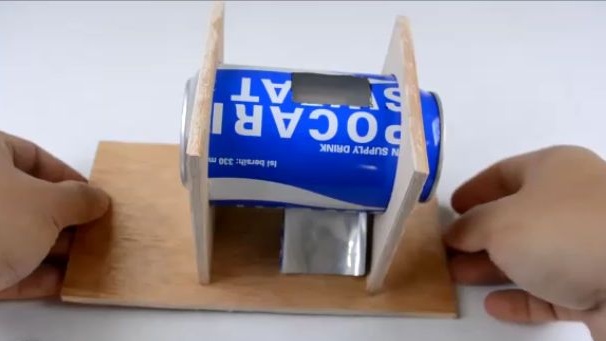
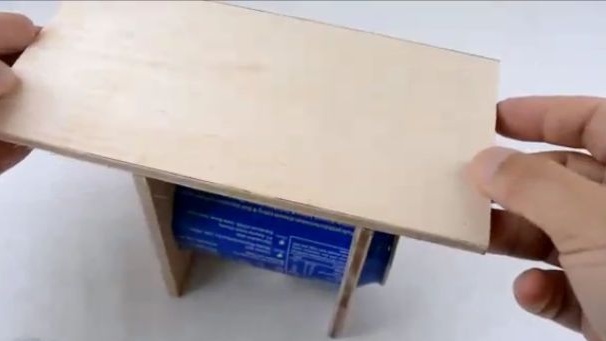
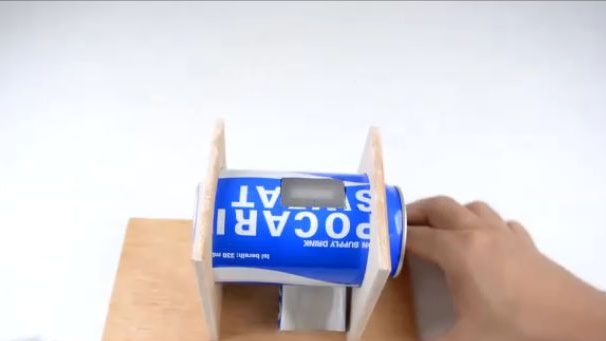
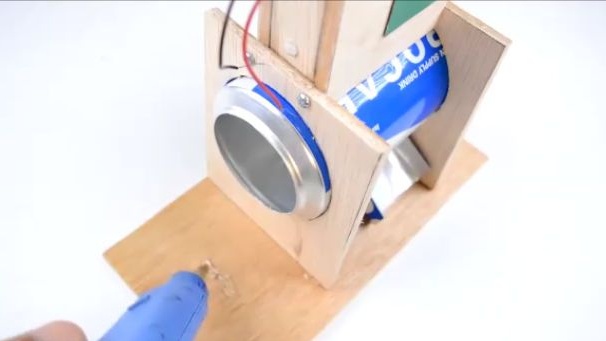
After which we will need the largest plywood rectangle, it will serve as the basis of the homemade product. Using a hot-melt adhesive, glue the blank just made to the plywood rectangle. But the usual connection to hot melt alone is not enough, so you should strengthen the connection with furniture nails.
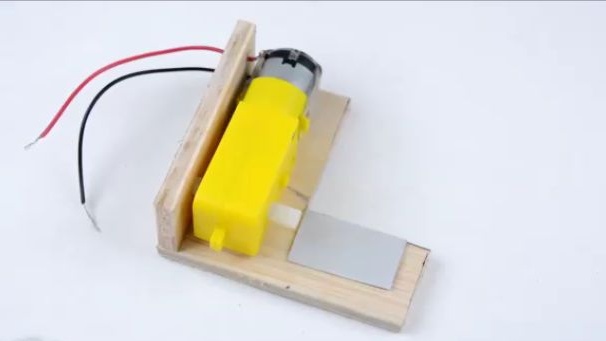
The next step is to produce the main part of the structure, and more precisely the most important. Take the “G” shaped part, which we cut at the very beginning. A small aluminum rectangle should be glued to this part at the location indicated in the photo. On the same part, the wall should be glued to the long side, in which we will install the wall, a hole should be made under the motor shaft. It is needed for the shaft on the opposite side, as we need the shaft on only one side, but not on the other, therefore, to save space for installing the motor close to the wall, this hole is needed. We glue the wall and the electric motor with the gearbox close to it. On the gear shaft we put on the workpiece to which the screws were previously screwed.

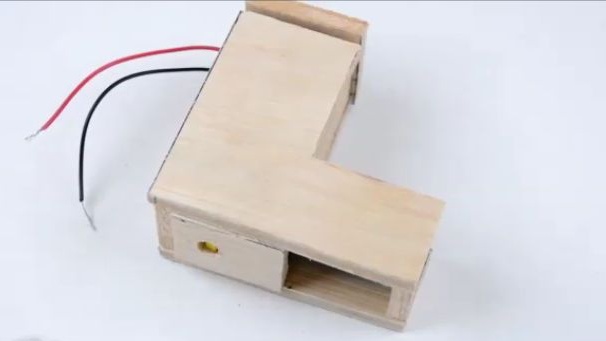
We finish the rest of the walls, leaving a hole at the bottom for seeds to exit, and a hole at the top for seeds to enter. Glue a certain “bunker” to the same design where the seeds that have not yet been peeled will be filled. To do this, glue the rectangle at an angle to the side indicated in the photo, and take some pentagonal figures (see photo) from thin plastic as side walls and cut them out. And glue the walls to the mechanism.
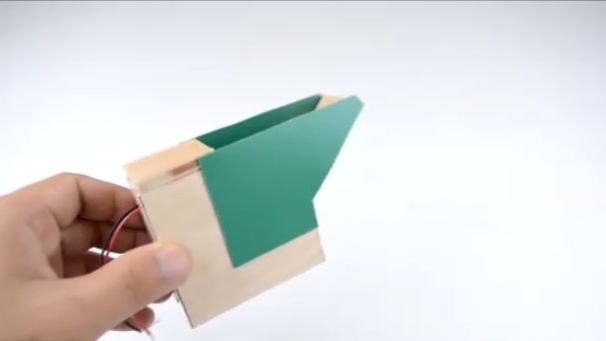
Using the hot-melt adhesive, we just glued the mechanism to the workpiece made earlier. And securely fix it with self-tapping screws.
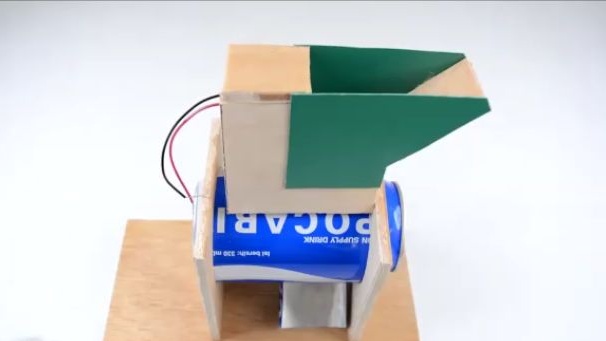
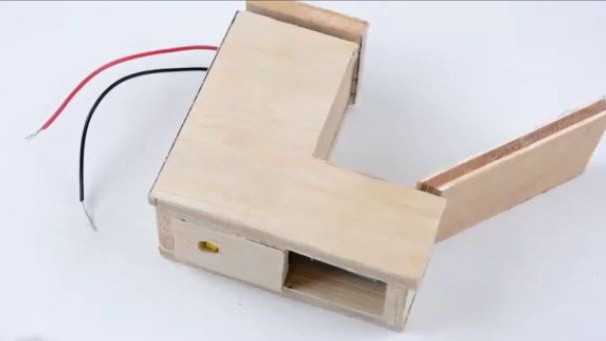
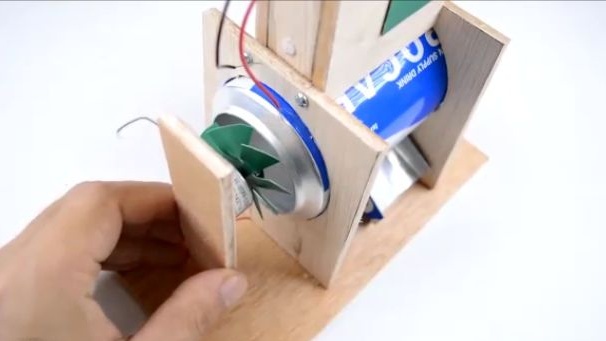
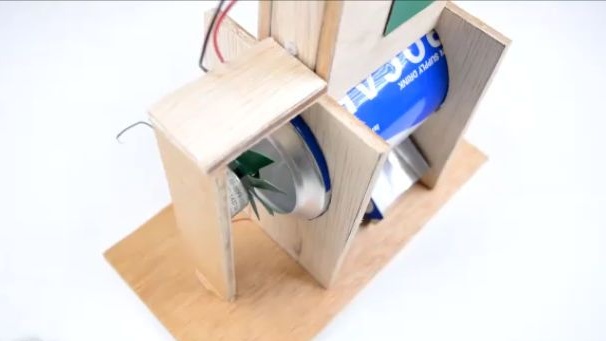
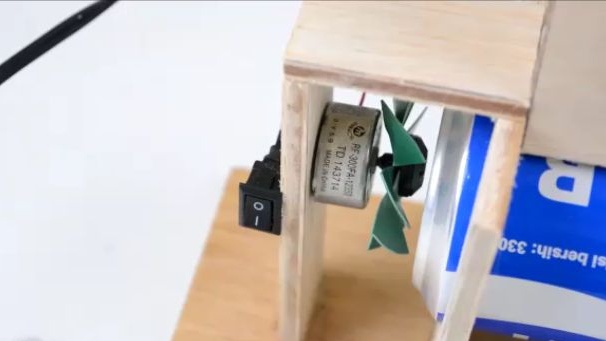
Then we take the electric motor from the DVD drive and install the propeller made earlier on its shaft.We attach this electric motor to a rectangular plywood board. And we will install the plank opposite the hole in the cylinder so that when the motor shaft rotates, an air flow is created that will blow out the husk from the sunflower seeds from the cylinder. Then, so that the newly installed plank does not fall off, glue the spacer between the plank and the wooden base of the cylinder.
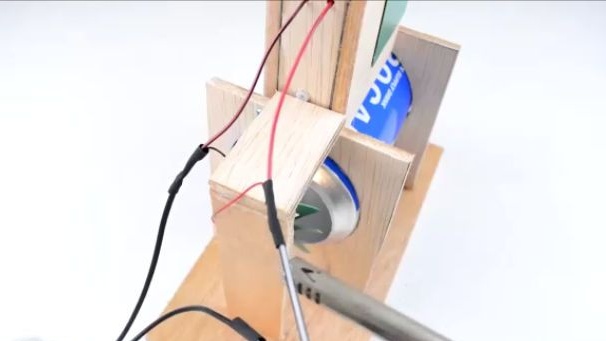
Then you should solder the whole electronic part of the structure. Namely, in parallel, connect the electric motors so that the gearbox shaft rotates towards the aluminum reinforcement inside the mechanism, and the propeller creates an air flow towards the aluminum cylinder. And all this to power through the switch, which should be glued to the structure.
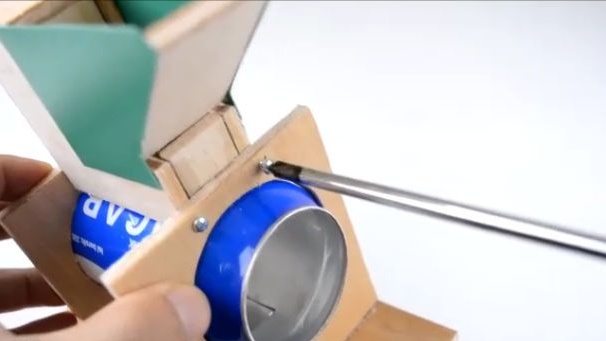
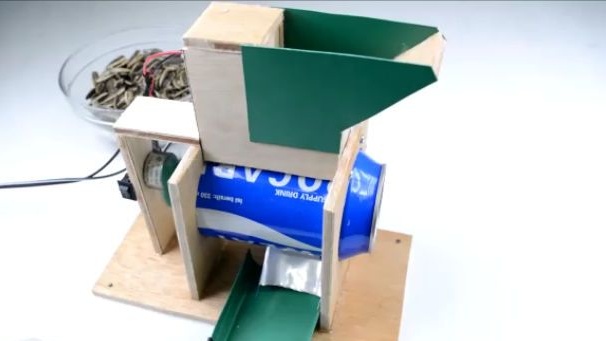
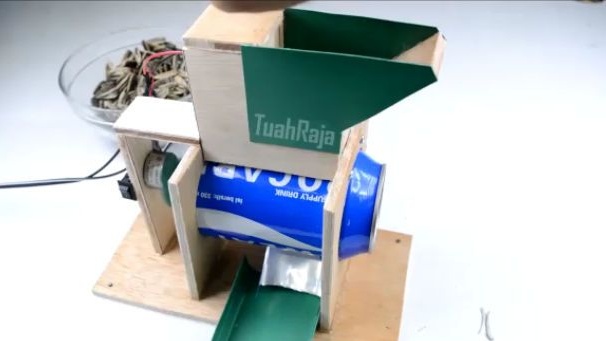
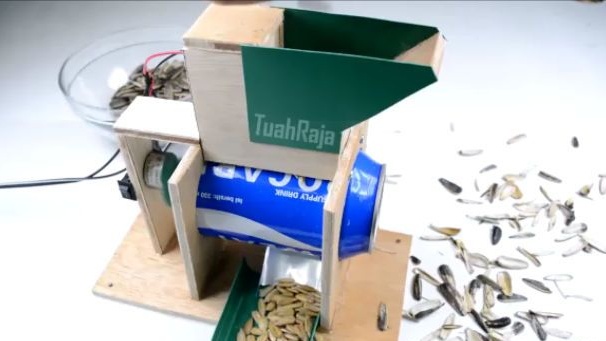
All is ready! It should also be noted that the author of the homemade product decided to lengthen the screw, and made an addition to it from the plastic used in homemade products. It remains to connect the power to the homemade product from 9-12V and begin to thresh sunflower seeds. This homemade product should be “calibrated”; for this, we twist and unscrew the two self-tapping screws inside the mechanism with a screwdriver. The principle of operation is this, you turn on the harvester and begin to gradually fill in seeds from above, the seeds, getting inside, crack and separate from the shell. Then they fall down, where there is a stream of air that blows the shell to the side, and heavier nucleoli fall down.
Here is a video from the author with a detailed assembly and testing of this homemade product:
Well, thank you all for your attention and good luck in future projects, friends!