The wood stove in the house, in addition to the vulgar heat generator, also has a special atmosphere and comfort in the house. There is something attractive in the daily ritual of fussing with laying firewood, kindling and adjusting the stove. The crackling of firewood, the steady roar of flame, the noise of a kettle on the stove - no, your will, all this is an important component of being. Sometimes you feel like Prometheus, sometimes you think about the fragility of human existence, which requires many conditions, almost the most important of which is heat. You do not delegate this right to someone alien and incomprehensible, yourself, with your gold ones. In addition, a live fire in the hearth, appeals to the instinctive, apparently removed from the caves, a sense of security and a sort of correctness. If someone close to esoteric turned out to be nearby, he would also tell about fiery energies.
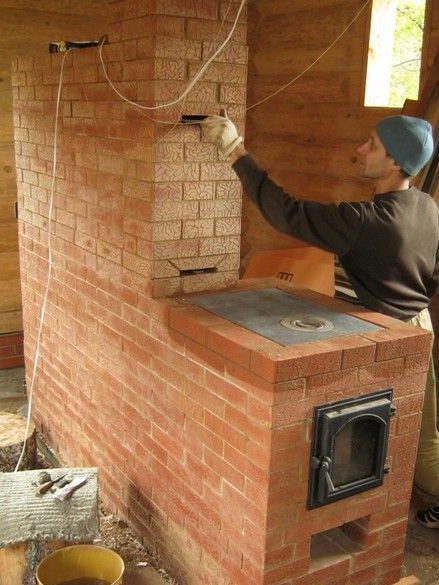
The history of this stove is as follows: in a town near which we live, our friends came from a big city, got a piece in the private sector and, to begin with, built a small log cabin to use in the future as an utility room and a bathhouse. Now, until the main house is built, they will live there. The head of the family is Mikhail, he is in the photo above - please love and favor.
Formulation of the problem.
Misha is a great connoisseur of all kinds of camping romance and traditional values mentioned above, in a word - a sparrow shot, you won’t take it for chaff. I decided to start a wood stove, real, brick. The stove will be used for heating in the initial period of construction, after which, in the “bath” mode, it will remain, a metal bath stove will be connected to its pipe.
Focusing on the final “bath” layout, we found the most convenient place, and we picked up a finished design with orders. Folding the stove, the landlord decided with his own hand. There were no furnace skills, but there was enthusiasm, hard work and a willingness to learn, but it was worth a lot. Your humble servant was called as an assistant consultant - to “put” the basic skills, to participate in difficult and critical moments. And this is what we got in four hands.
General description.
The stove we built was wood, brick, heat-resistant.According to the purpose - heating and cooking, structurally - a stove-wall, with a remote stove of reduced size. Convective system - bell type. Pipe pipe. The lining of the firebox with refractory bricks is provided.
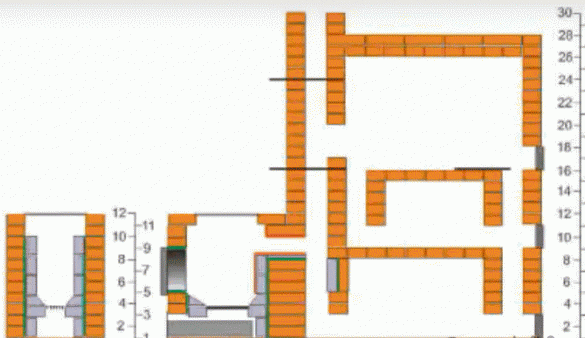
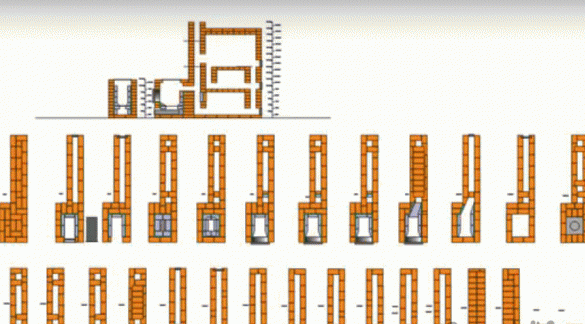
Scheme and order of the furnace.
The arrangements here are pretty small - the picture is cut out of the training film, for those who want more and more in detail, I recommend that you turn to them, to the films. Their addresses are given at the end of the article.
What was used in the work.
The main tool of the stove-maker is a special trowel or trowel. It is more convenient small and narrow. Certainly a cutting machine (grinder) with a diamond disc, a heavy rubber mallet, a rule or a good straight rail a meter and a half long. Protective transparent visor or glasses, headphones. A set of ordinary locksmith tools, marking tools, level, better short and long. Ropes A screwdriver came in handy. Used welding. To prepare the clay-sand mixture, it is convenient to use a powerful low-speed drill with a stirrer attachment. Tanks for soaking bricks, materials, water, clay soaking. A large sieve for sifting sand and rubbing-filtering clay. A good extension cord with a pair of sockets and a carrying lamp will not hurt.
It is clear brick, clay and fireclay, in the right amount. Clay, sand, mortar or a special composition for laying refractory. Basalt cardboard. Steel annealed wire or thin perforated tape for laying in seams. Stove appliances (door, gates), related trifles.
In order.
The foundation of a heavy heat-intensive furnace - traditionally deep, massive and very material intensive. Here, a recessed foundation of a lightweight type was used (two plates with columns between them), similar furnace foundations.
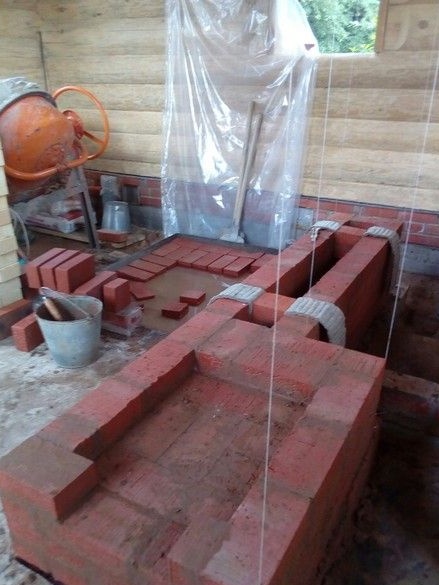
After waterproofing the foundation and marking, started laying front row. Already here the basic furnace skills were “set” - making clay-sand mixture, soaking and laying brick, cutting it with a diamond tool (angle grinder, diamond blade). The plumb line in the photo is the axis of the future chimney.
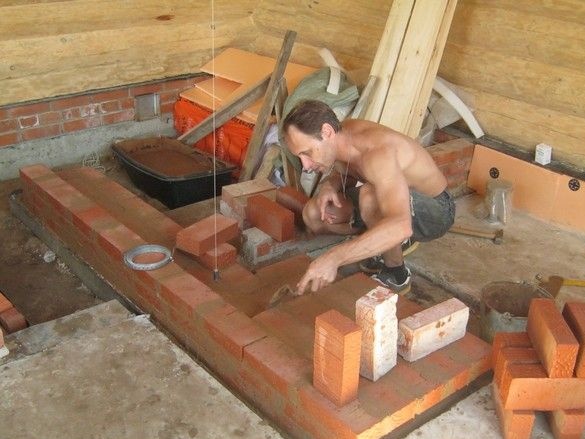
We managed to do it even more reliably - up to the level of the “fair” floor, I had to lay out as many as four continuous rows. It turned out that the initial version of the floor - concrete screed, was replaced by a wooden floor.
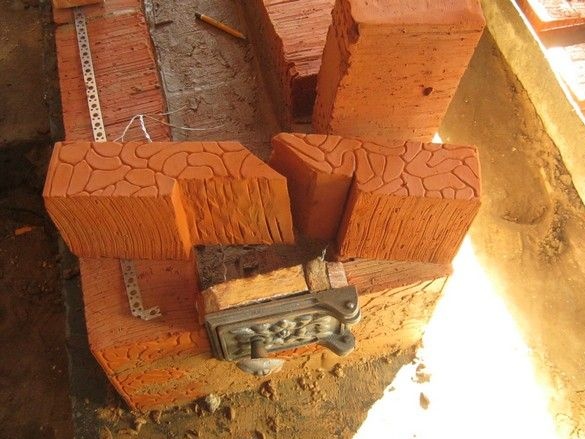
Covering the wiper door. By a strong-willed decision, it is customary to apply standard cast iron stove appliances (doors), with their fastening to wire braces. There are only three doors. Generally speaking, it is recommended to replace them with a half of a brick by an edge, and there is a reason - any door is not tight, and suction of cold air reduces the efficiency of the furnace. In addition - in more complex furnaces, cleanings, sometimes up to a dozen - replacing them with a brick, we will significantly save energy, time and money. A stove with a large number of cast-iron doors looks less aesthetically pleasing.
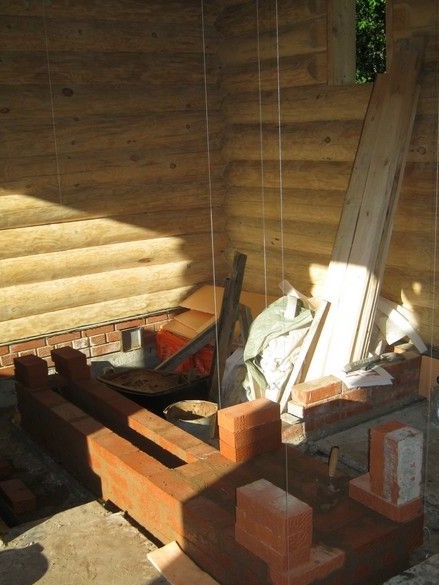
Having laid out the rough “underground” rows, we stretch vertical, carefully calibrated ropes at the corners. In the masonry, they are attached to small cloves hammered into clay seams. So that the string stretched by a string does not raise the brick above itself, we load it. By the way - in addition to the ropes, use long thick bars or boards. Practice, however, shows that the ropes are much simpler; laying with them is more accurate and more convenient.
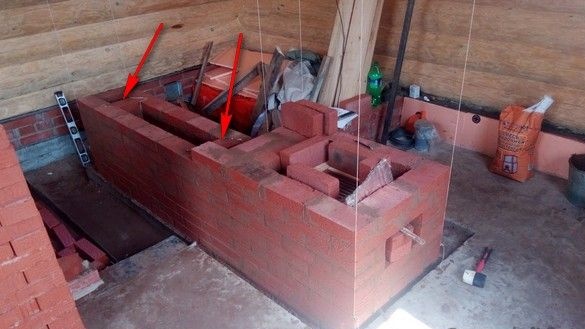
An interesting point - jumpers in caps. The fact is that the brick located entirely inside heats up much more, leaving one side outward, respectively, expanding more - bursting and bulging. With the proper implementation of such a place, bricks that heat up very differently should be joined through a soft refractory gasket.
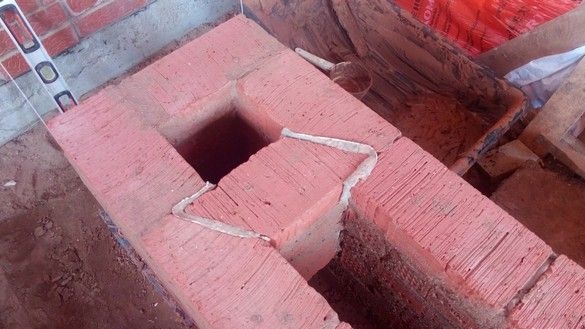
Pay attention to a convenient insert of bricks of a jumper into a wall. Such an insert is performed every three to four bricks. The rest (halves) stand on the embedded.
Fuel oil - the most heat loaded and therefore the most critical part of the furnace. The installation of stove appliances in the firebox has always been the most critical place in terms of reliability. As a rule, the closure of the furnace door is the first to be destroyed.When executing a firebox, the most errors are most often made, here they are most critical.
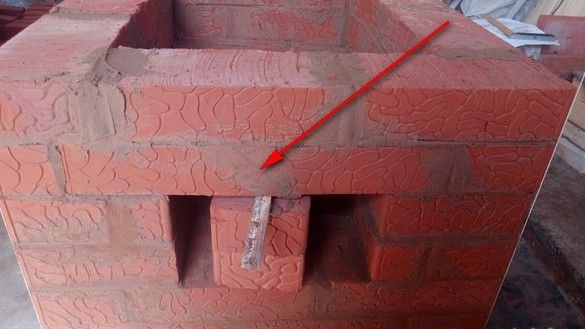
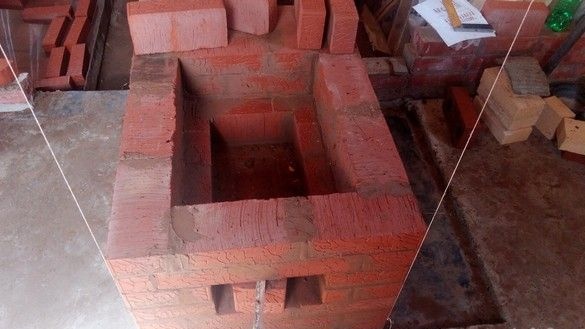
In our furnace, an ash box is used, which has many advantages compared to a traditional door. Overlapping the ash pan In any case, the same - the ends of the bricks have an oblique cut at an angle of 45 ° and one brick supports the other. Bricks should never rest on the metal frames of the stove appliances, they are pressed to them through a layer of elastic fire-resistant material (basalt cardboard, asbestos cord soaked in clay mortar).
Refractory firebox finish, greatly increases the survivability of the furnace - clay bricks from the inside burn out and gradually collapse. A few years later, repairs are required, the complexity of which depends on the design of the furnace and can be quite high. Refractory lining allows the use of "high temperature" combustion in the furnace, which occurs at temperatures up to 1000 ° C and has many advantages. There are also disadvantages - chamotte brick has a higher thermal conductivity and degree of expansion during heating than ordinary clay brick - ligating them is a gross mistake. The laying of the firebox from one refractory brick is fire hazard - the external walls quickly and very hot. For a long reliable, and most importantly safe service, the chamotte “core” is folded inside the clay firebox, and there is no connection between them, the design of such a lining is kind of like a “floating screed”. The gap between the walls (about 10 mm), is filled with basalt cardboard, or remains empty (for the time of masonry, it contains packing corrugated cardboard that is removed before installing the slab).
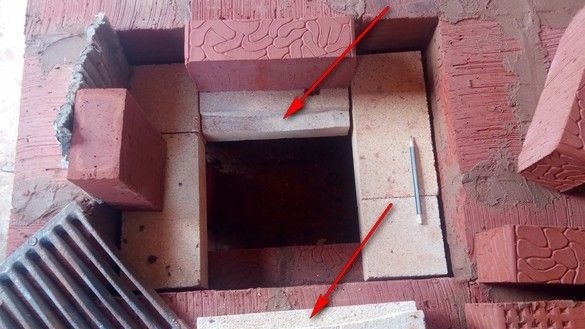
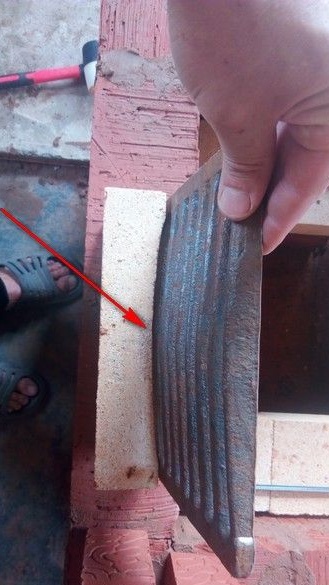
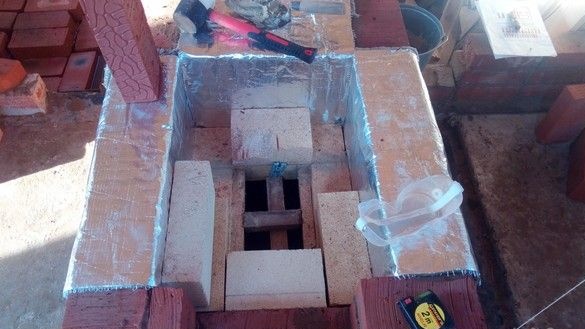
In the photo - the beginning, the bottom of the refractory lining. Sawing out a place for a cast-iron grate. The grate should be installed freely, with a small gap, so that when heated, it does not spread the bricks. To the wood, a flat side should be facing with relatively narrow slots, otherwise, coals will get stuck in the grate. The grate slits, it is very desirable to arrange along the firebox - across, it is inconvenient to wield a poker. The walls of the brick firebox are lined with basalt cardboard - here we have a basalt refractory quilted mat foil from one side (for thermal insulation of metal chimneys). The outer wall of the firebox, it is better to fold almost completely, to the stove, then from the inside, the lining is laid out. Usually, the height of the plate is small - just enough to reach over the edge to the bottom.
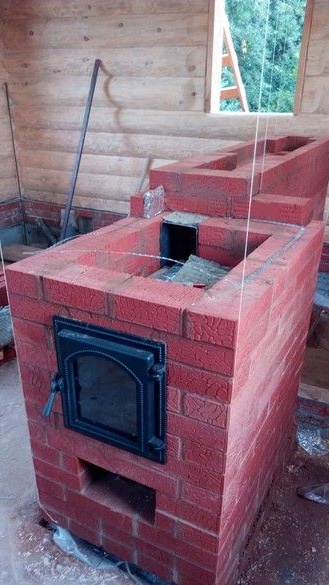
The closing of the furnace door. The owners themselves really wanted the door with glass, I had to run to search and even go after it to the nearest major city. The door is a miracle how good it is - a wide convenient flange, a sealed design, a convenient closure, and a large size. They decided to do the closing tested, a wide front flange, made it possible to make a simplified stainless steel box.
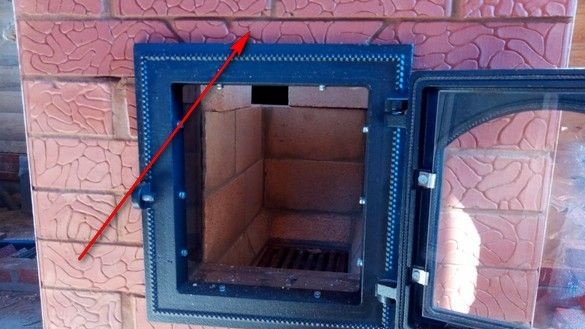
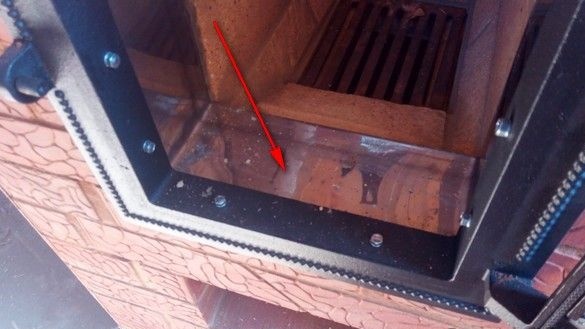
Pay attention to the brick overlapping the furnace door, it relies on adjacent bricks, but not on the piece of iron. Everything is metal, separated from the brick by a layer of basalt mat - it has much to expand when heated.
Inside the firebox, bevels are visible to the grate so that the coals roll down to the grate.
Overlap of the first cap - as conceived by the designer of the furnace, it is made unusually - with a whole brick lying at both ends on the walls, so it’s probably more reliable than usual, although it requires more cutting. External with internal is connected through a strip of basalt mat.
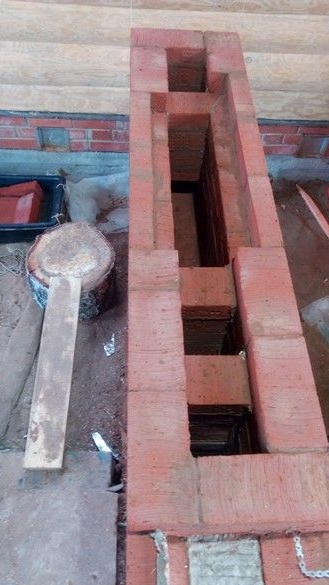
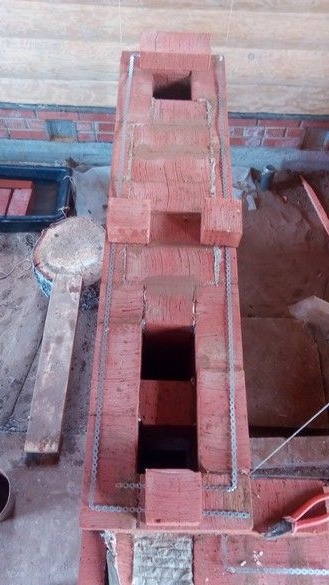
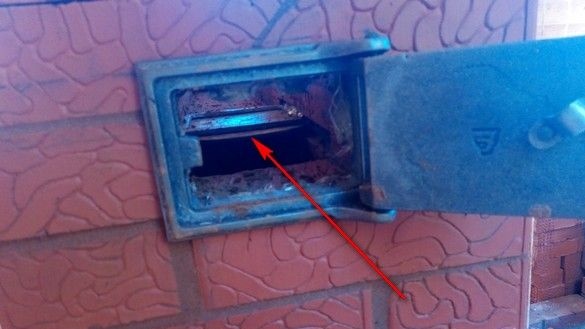
On the 16th row, a dubious place is a bolt inside, opening through a clean door. This made it possible to concentrate both furnace devices in one row. We did not immediately realize and did it in order, however, it was possible to execute this place more traditionally, for example, to transfer the valve to the side.By the way - it switches the place of predominant heating - in the closed state, it is mainly lower, in the open - the top is also warmed up. It seemed to us that the frequency of use of this valve would be extremely small.
The “tongue” was cut off at the implanted valve; in the remainder, we drilled a hole and screwed a long M5 screw with a nut and a stopper - for it, it is more convenient to pick up the valve with one finger.
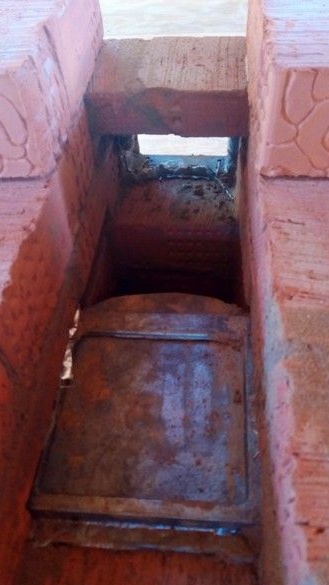
Heat exchanger we implanted the purchased one - round and flat, stainless steel, it appeared too late for rational installation - we placed it under the overlap of the last top hood. Its task is to warm a little water for household needs. More literate, it would be to install it under the top of the first, lower hood. Oh yes, there he also got in the way of the future sauna stove, in a word - they did it like that.
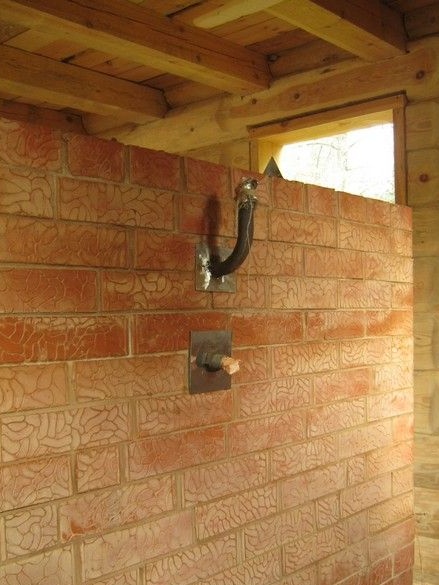
The heat exchanger was a kind of flat pancake, with short conclusions ¾ inch. We welded the elongations to them, so that everything merged from the lower tube, and all the air came out of the upper one. On the extensions, four plates are welded to hold the heat exchanger in the masonry, similar to that in bath stove.
Cast iron plate installation last thing happened - for a long time they could not find the right one - Misha really wanted with a big hole in the middle to put a semicircular bottom of the existing cauldron in it - so that pilaf, ear, shurpa, almost like a fire. Not found nearby, picked up a standard double with a single hole. In length, I had to cut it a bit.
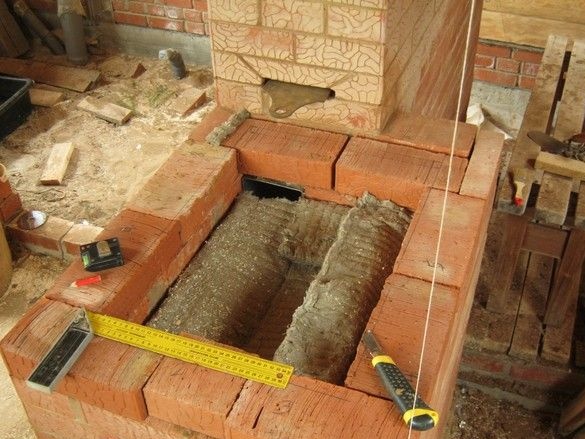
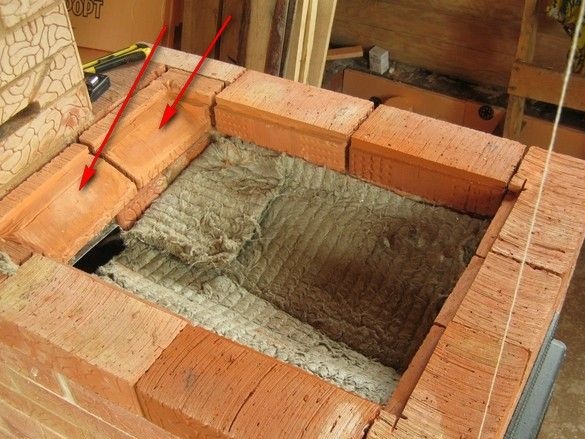
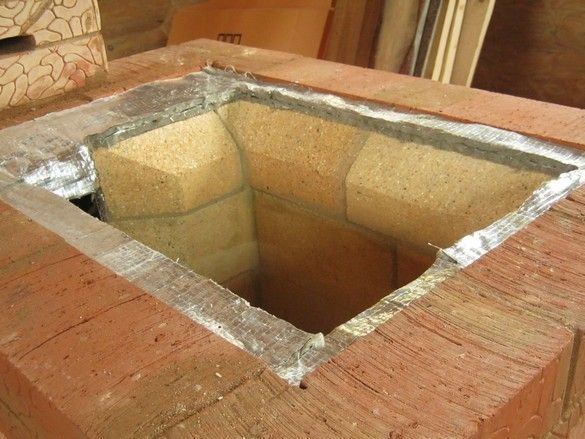
We marked and sawed out a nest for installing a cast-iron plate, with a gap on the sides it is clear - about 5 mm to the side. The bricks indicated by the arrows were designed to expand the heating zone of the stove, however, having walked around and scratched the back of the head, we decided not to use this part of the stove anyway - they laid these indentations with a basalt mat. A small part of the stove on top will only heat up from the heat transfer through the piece of iron, and it’s not bad - it’s very convenient when you can put the teapot or saucepan from a hot to hot so that it does not boil, but does not cool.
Refractory bricks of the upper row are beveled to the edge to expand the area flushed by the flame. The lining was made not reaching the cast-iron floor 15 ... 20mm so that it had a place to expand upwards.
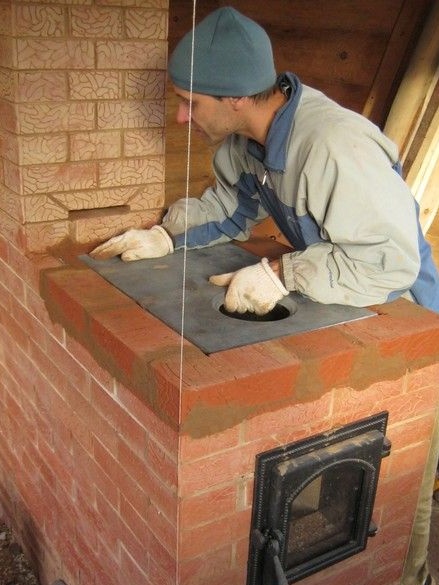
Misha tries on a plate after trimming.
Voila! There was a chimney left, about which later.
Educational films of the designer of this furnace
Beginning, theory, justification
Answers on questions
Furnace orders, their interpretation


