The chimney is one of the most important elements of the furnace, the correct operation and operability of which determines the reliable operation of the furnace, especially in critical conditions (for example, kindling), and the fire safety of the entire structure. Most of the chimney is mostly hidden from daily look - the attic, as a rule, is not the most visited room, but meanwhile, it, the pipe, requires regular inspections and, in general, the closest attention to its serviceability.
General Provisions
The fact is that it is the chimney that creates the draft - air intake from below, by raising the hot gases up. And if in the furnace itself, with its furnace, a slight rarefaction and any leakage is created, it threatens us only with a deterioration in the efficiency of the unit, then in the chimney, the pressure is already positive, and the higher it is from the ground, the more positive. Leaks in the body of the pipe already threaten to throw out hot gas and sparks. This is especially dangerous near wooden structures - in the place of passage of ceilings, roof elements.
During the operation of wood-burning stoves, a fair amount of experience has been accumulated, simple structural techniques and measures have been mastered to minimize the risk of fire from the stove. They should be adhered to, about the furnace as an object of increased danger, it is always worth remembering. As for chimneys - for classic brick chimneys, quite safe designs of passages through floors and roofs have been developed. Brick chimneys in the attics, it is recommended to plaster and whitewash - any cracks on such a surface are clearly visible. The laying of chimneys should be performed with particular care, completely filling the joints with clay mortar. Littering the attic space, primarily around the chimney, is not allowed. Regular inspections of the chimney should be made in the attic space.
Structurally, chimneys are mounted (on top of the furnace) and root - standing separately. The latter, much more convenient in the sense of repair. In addition - part of the chimney is located outdoors - the chimney can be performed first of all, say before the cold weather. A stove or stove can be built later in a heated room.
The maintainability of the furnace with a nozzle tube is significantly lower. Despite this, the craftsmen contrived to repair the furnace almost completely by lifting the pipe with jacks.However, there is a little-known constructive solution that can significantly increase the maintainability of the furnace with a tube. For this, a thick reinforced concrete slab is cast on top of the furnace, and a pipe is built on top of it. When repairing such a furnace, one of its corners or walls can be completely disassembled at one time, without dismantling the chimney.
Adjacent to the fire expansion of the masonry - fluffing of the chimney, wooden floor structures, it is recommended to finish it with thin sheet steel, on top of which, felt soaked in liquid clay mortar, is fixed with carnations. it very good trouble indicator in a hard to reach place - when a fistula is formed in the pipe wall, the felt begins to smolder, emitting a sharp unpleasant odor, easily picked up and identifiable, even in large rooms.
Practically formed, safe dimensions during the construction of the furnace are given below.
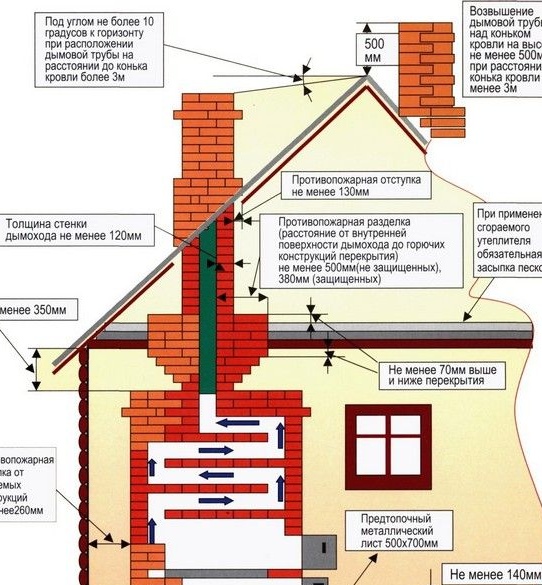
A separate story is the good work and durability of the chimney. There are also several rules here - the height of the chimney must be significant - at least 5 m from the grate, to exclude "wind back up" and, as a result of the stove’s smoke, the pipe must have a certain height above the roof (see figure above). The inside of the chimney should be as smooth as possible - sometimes, the inside of the brick pipe is plastered or a “casing” pipe made of ceramic or stainless steel is inserted into it. This greatly simplifies the requirements for masonry pipes, increases fire safety. In the extreme case, the cross section of the chimney channel of such a pipe can be somewhat reduced - due to the smoothness of the walls, the resistance to the gas flow will not increase.
The chimney of a heat-intensive heating furnace must be “warm” - brickwork, with proper design of the furnace (a sufficiently high temperature at the entrance to the pipe) satisfies this requirement. A pipe made of more heat-conducting materials should be insulated with a non-combustible material with low thermal conductivity. Otherwise, moisture and creosote condenses in it, in the pipe, and both flows into the furnace, destroys the masonry, and causes an unpleasant smell in the room.
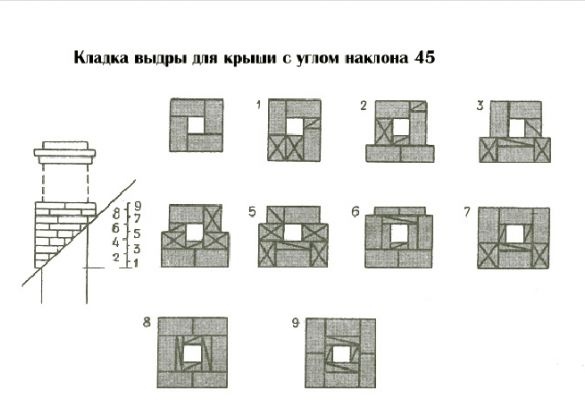
Another important concern when performing a chimney is to ensure a tight seal of the roof around it, preventing precipitation from entering the attic. When the pipe is made of masonry, there are reliable, time-tested designs that combine the fire expansion of the masonry (fluff) and an oblique cornice on the pipe over the roof, under which formed molded sealing elements from a metal sheet are inserted. The item is called an otter.
The passage of the chimney through the beams and rafters should be taken care of even at the stage of placing the stove in the house, while it is best to place the chimney near the ridge of the roof, this will facilitate the sealing of the roof under the otter, reduce the height of the pipe above the roof (its main part will be under roof, which will positively affect the durability of the structure), finally, the view of the house with such a chimney is the most aesthetic.
Recently, very convenient metal insulated chimneys have found application. Their inner part is made of stainless steel, the outer casing can be either stainless steel or cheaper - galvanized. The space between the pipe and the casing is filled with non-combustible thermal insulation. Chimneys meet the requirements mentioned above and are mounted from prefabricated elements, such as a designer. The assortment contains elements similar to fluff and otter, elements for connection to the furnace structure.
Formulation of the problem
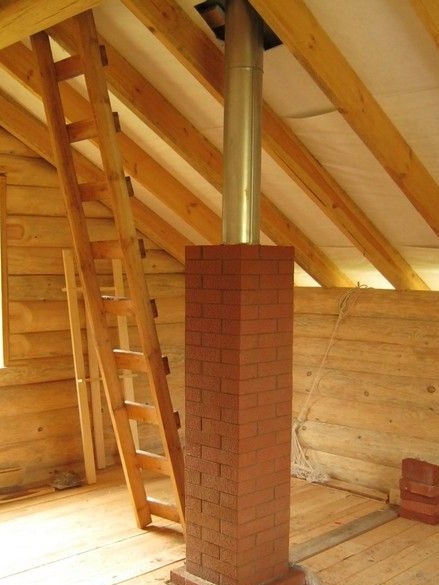
For our wall furnace, they decided to make the chimney combined - under the roof a classic brick one, the conclusion for the roof - with two pieces of a two-layer metal "sandwich" pipe.We canonically make the pipe — lay it completely out of brick, we didn’t have time before the autumn rains, in addition, the outer, higher than the roof, part of the brick pipe has a rather complicated structure and is laid out on cement mortar, and we will probably have to connect it to the existing chimney later one more - a sauna stove.
Chimney arrangements
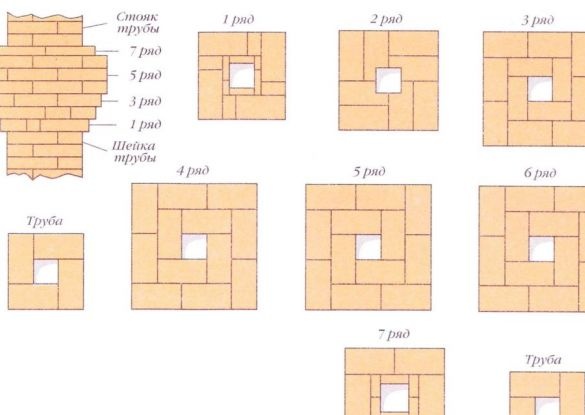
Our chimney is the smallest of the noble family of stove brick pipes - in cross section, only half of the brick is 13x13 cm. The ordering of himself and the fluff with the otter below.
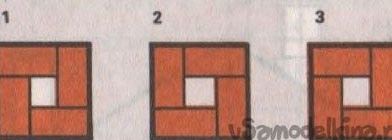
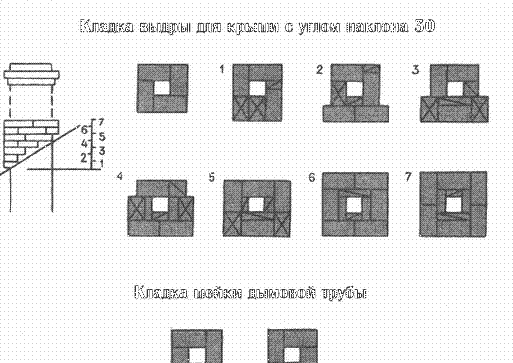
What was used in the work
Instruments.
The main tool of the stove-maker is a special trowel or trowel. It is more convenient small and narrow. Certainly a cutting machine (grinder) with a diamond and ordinary abrasive disc, a heavy rubber mallet. Protective transparent visor or glasses, headphones. A set of ordinary locksmith tools, marking tools, level, better short and long. Ropes A screwdriver came in handy. For passing carpentry, an electric chain saw is very convenient. To prepare the clay-sand mixture, it is convenient to use a powerful low-speed drill with a stirrer attachment. Tanks for soaking bricks, materials, water, clay soaking. A large sieve for sifting sand and rubbing-filtering clay. A good extension cord with a pair of sockets and a carrying lamp will not hurt. To work “upstairs”, you should take care of the stairs, safety ropes in advance, a safety belt is useful.
Materials
It is clear brick, in this case the usual - clay, in the right amount. Clay, sand. Basalt cardboard. Two “joints” of the factory steel insulated “sandwich” chimney of the corresponding section, an “umbrella” to it, a transition piece, for joining with brickwork. Related trivia.
To business.
Unfortunately, the complete flaring of our pipe did not fit - the ceiling beams are installed too often and each in its nest cannot be pushed apart. You will have to wrap the passage through the ceiling in several layers with basalt mat.
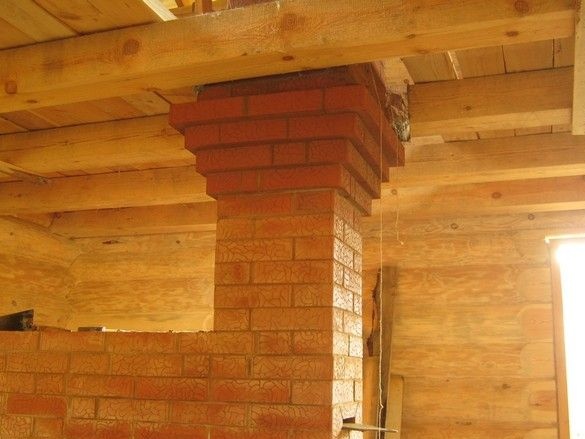
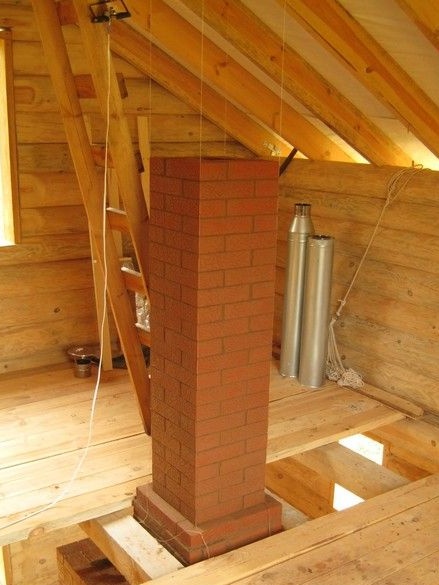
The second attic floor, the height of the brick part of the pipe is chosen so that two standard pieces of “sandwich” chimney, in articulated condition, provide the desired 500 mm above the roof ridge. In the gallery you can see the parts of the metal chimney.
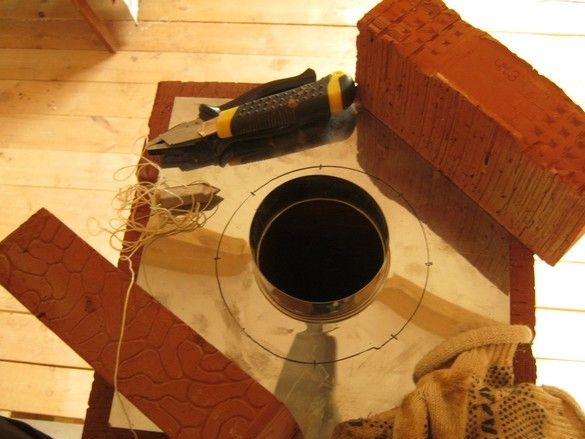
On a steel transition piece, we drew the outer perimeter of our pipe with an alcohol felt-tip pen and divided it into eight parts. These points should be transferred to the roof.
We used a plumb line, the transferred points were connected by a smooth line, we drew approximate cut lines. The task was to make the outward release as dense as possible, with the petals outward. With the help of these petals, improvised tools and a small bend in the stove, we planned to seal the roof at the passage of the piece of iron. Since the metal part of the chimney is very likely to be replaced by full-fledged masonry - it is spent on an additional temporary, moreover rather expensive part, which was considered unnecessary. In the end, an elastic roofing cuff is very easy to install at any time.
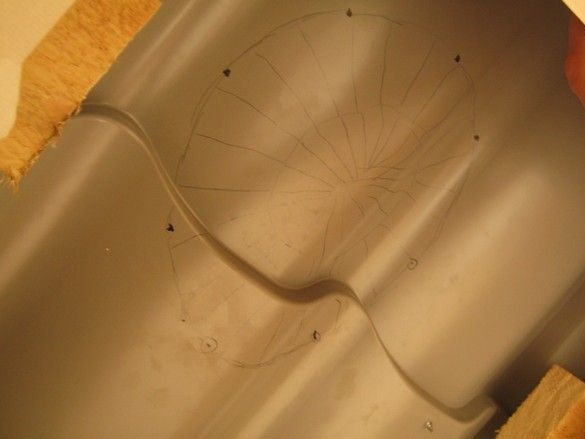
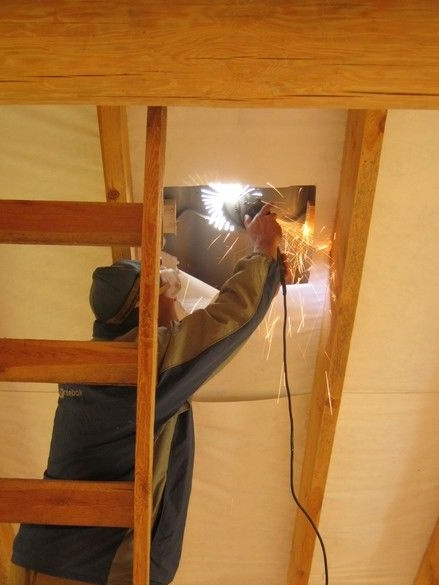
When cutting openings, they encountered unexpected difficulties — lighting from the outside, even on a gloomy cloudy day, was significantly higher than the inside — having cut through a small part, they completely stopped seeing the markings due to contrasting lighting. They worked with a headlamp, then spat and dragged a powerful LED spotlight. With him, the problem disappeared.
Contrary to fears, sparks did not float synthetic vapor barrier at all, even special traces remained.
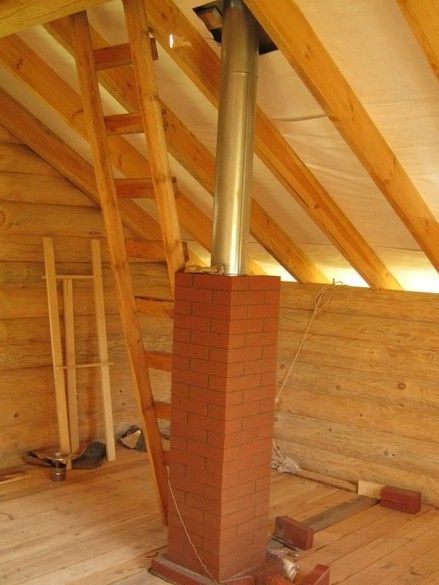
Having assembled the pipe, we put it in place, got up very tightly - it was not in vain that we were busy so much with the markings.
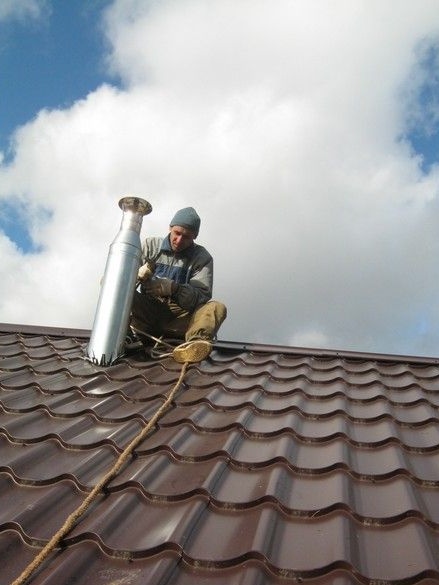
For small high-altitude work, they did not make a special roof staircase - the roof slope was small, in non-slip shoes it was quite possible to walk without it, they only equipped Misha with good rope insurance, and he kept to it, getting to the ridge.
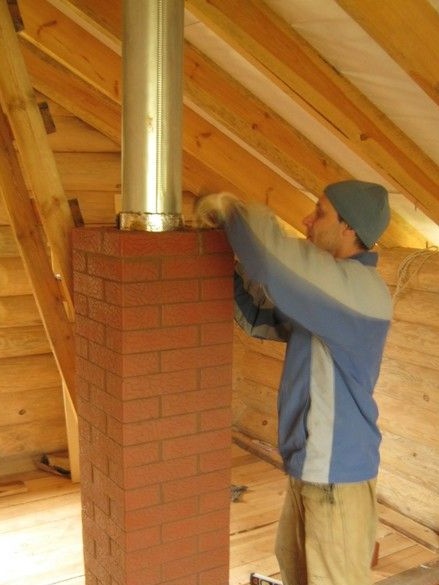
On top of the transition metal element, two more rows of bricks were cut and laid. The gap between the brickwork and the pipe was sealed with a strip of basalt mat - so that no debris would fill up.
It rained that day, and the rest of the work was forced to be postponed until drier time. When the roof dried up, Misha closed a gap in the roof with bituminous sealant with wide aluminum tape.
The second floor this year will be mothballed - they will winter below, near the stove. There will be no insulation under the roof, respectively, in the near future - the place of incorporation is in plain sight. As the doctors say, we’ll observe.
After finishing work.
Our furnace is finished, a week has passed since the end of the work, you can dry it with small and frequent floods. Initially, this is a small hut on the grate of arches in a finger thick. Day by day, the amount of fuel is gradually increasing. The chimney gate must always be open. Drying is performed until the outer surface of the furnace is completely dry. It is often recommended to focus on droplets of condensed water on metal valves.


