» Electronics » Sound and Acoustics »Homemade PVC pipe speaker

Homemade PVC pipe speaker

Today I will show you, dear friends, how to make a column from a PVC pipe with support for Bluetooth, radio and a memory card.


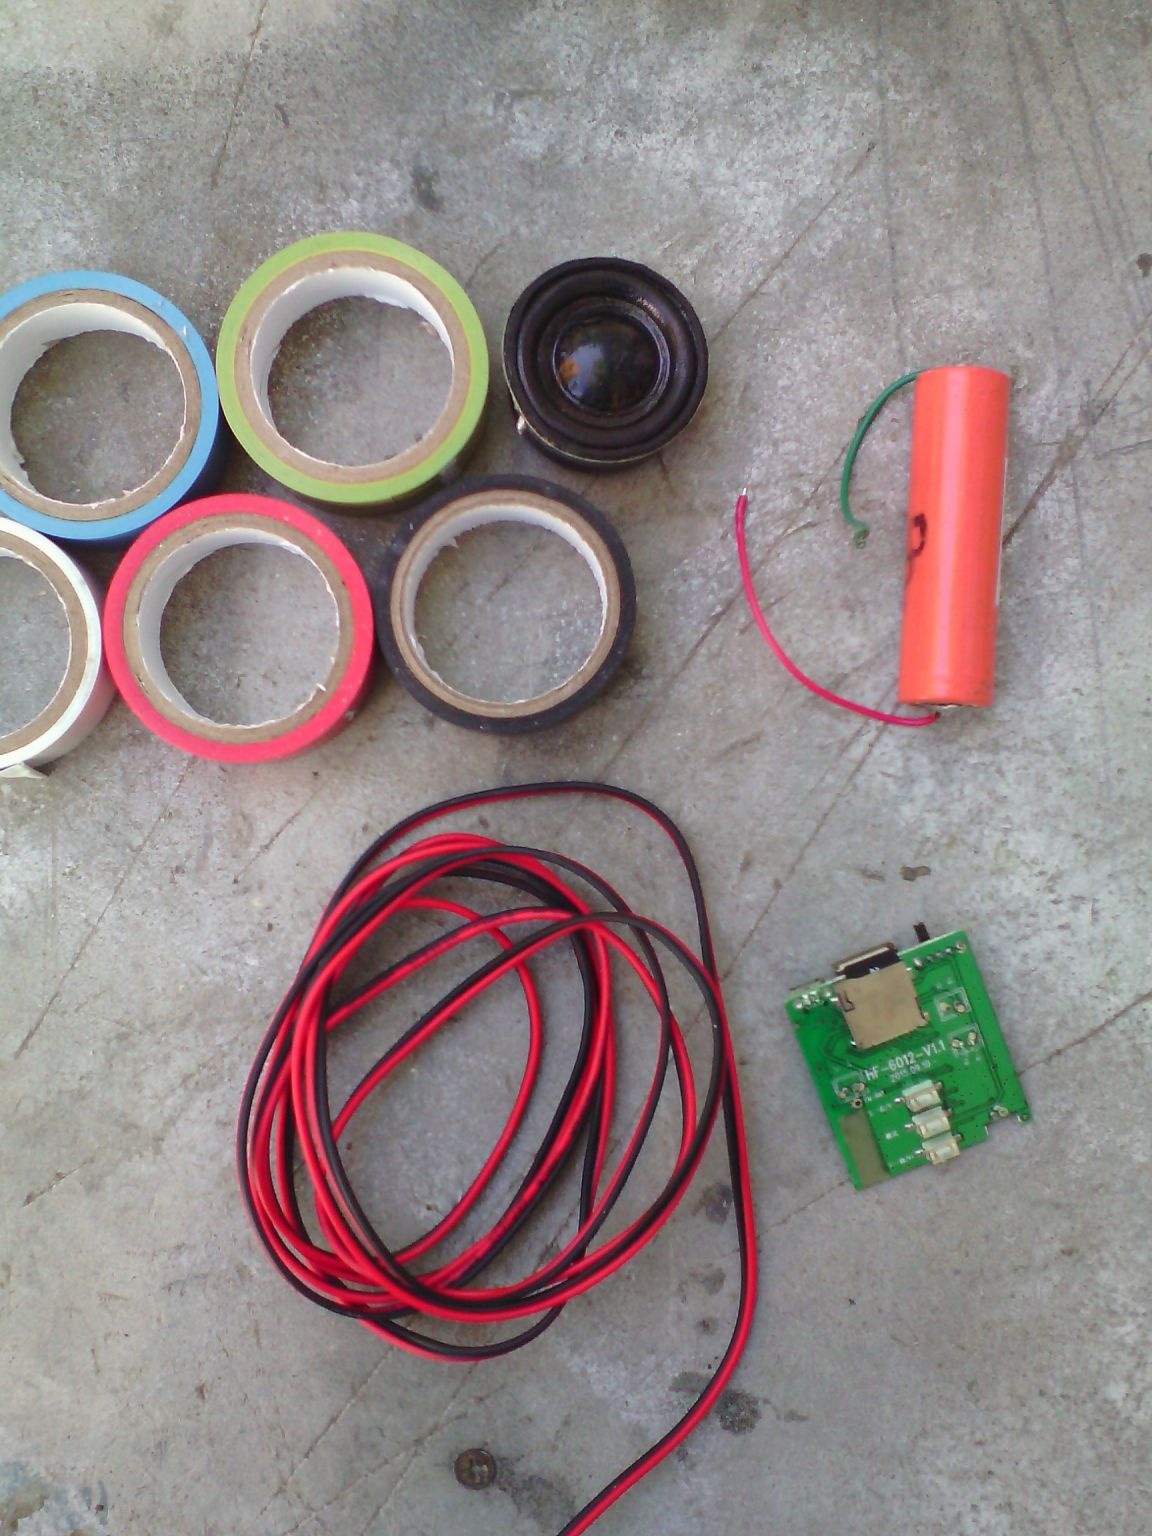
Tools and materials:
- thermo glue
- module with speaker ()
- PVC pipe (with a diameter suitable for the speaker)
- electrical tape and aluminum tape (for decoration and manufacture of the diffuser)
- dense film (for the manufacture of a diffuser)
- battery (I have 18650)
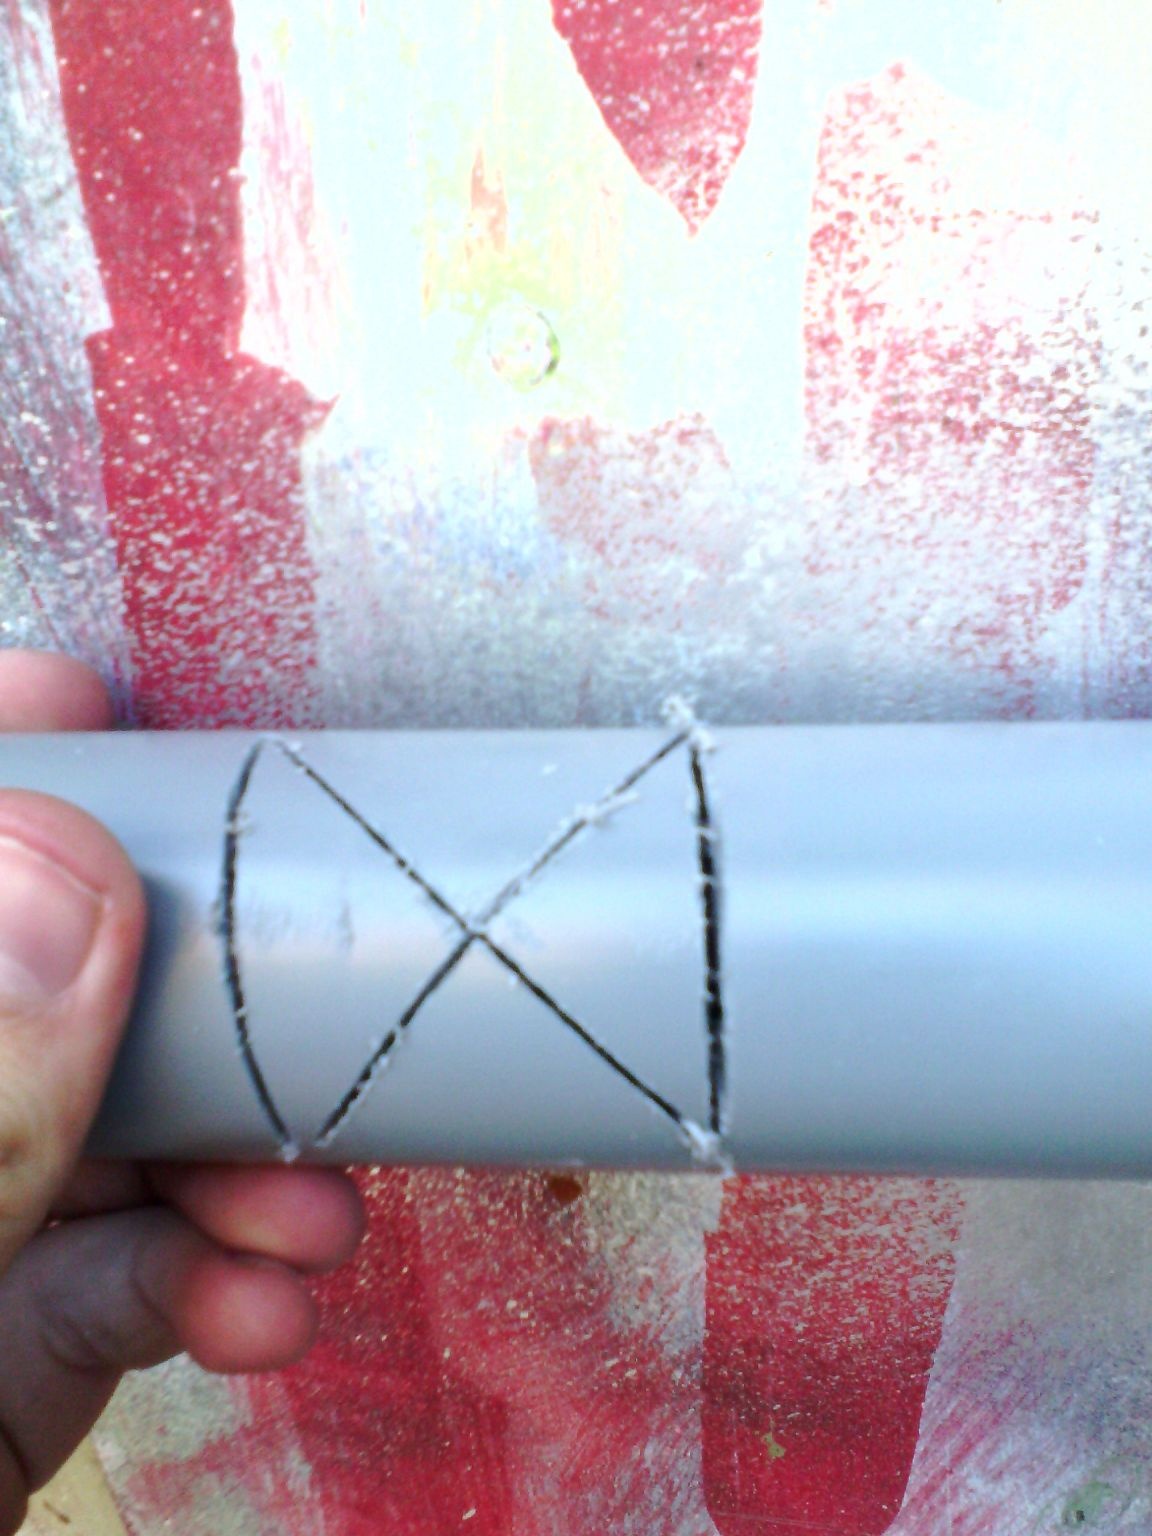


Step 1:
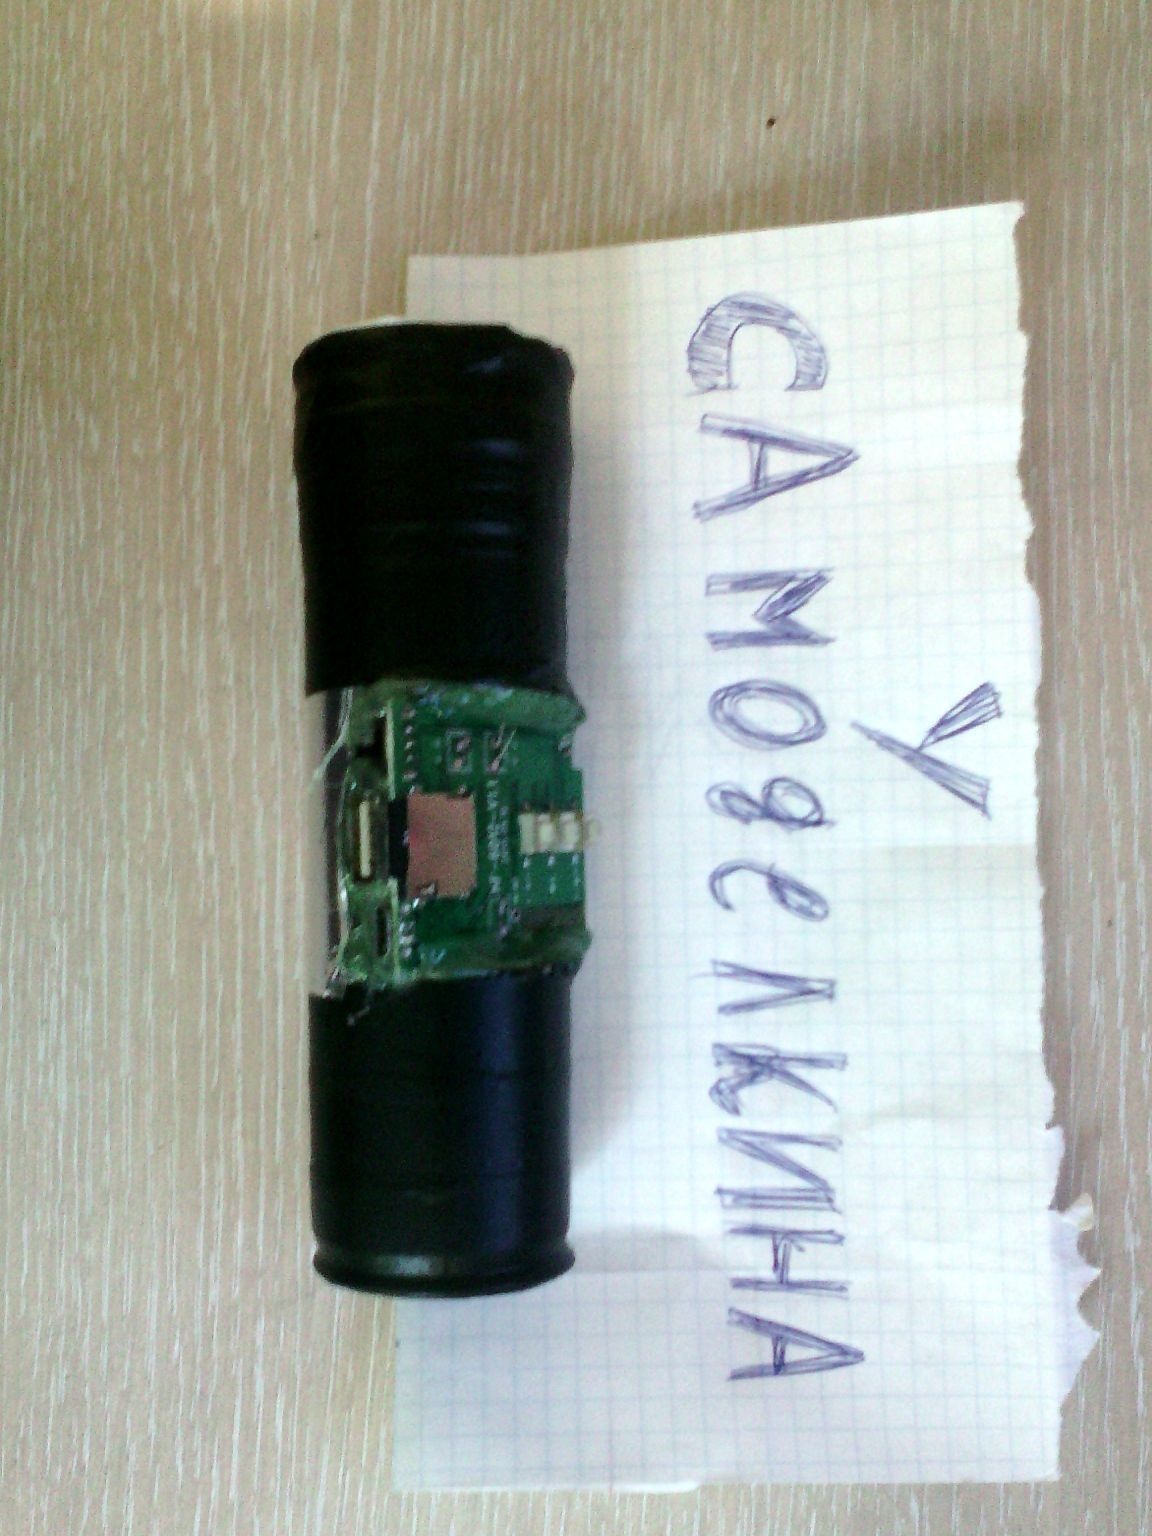
Approximately in the middle of the pipe we make a hole resembling the number 8, we remove the petals resulting from it.
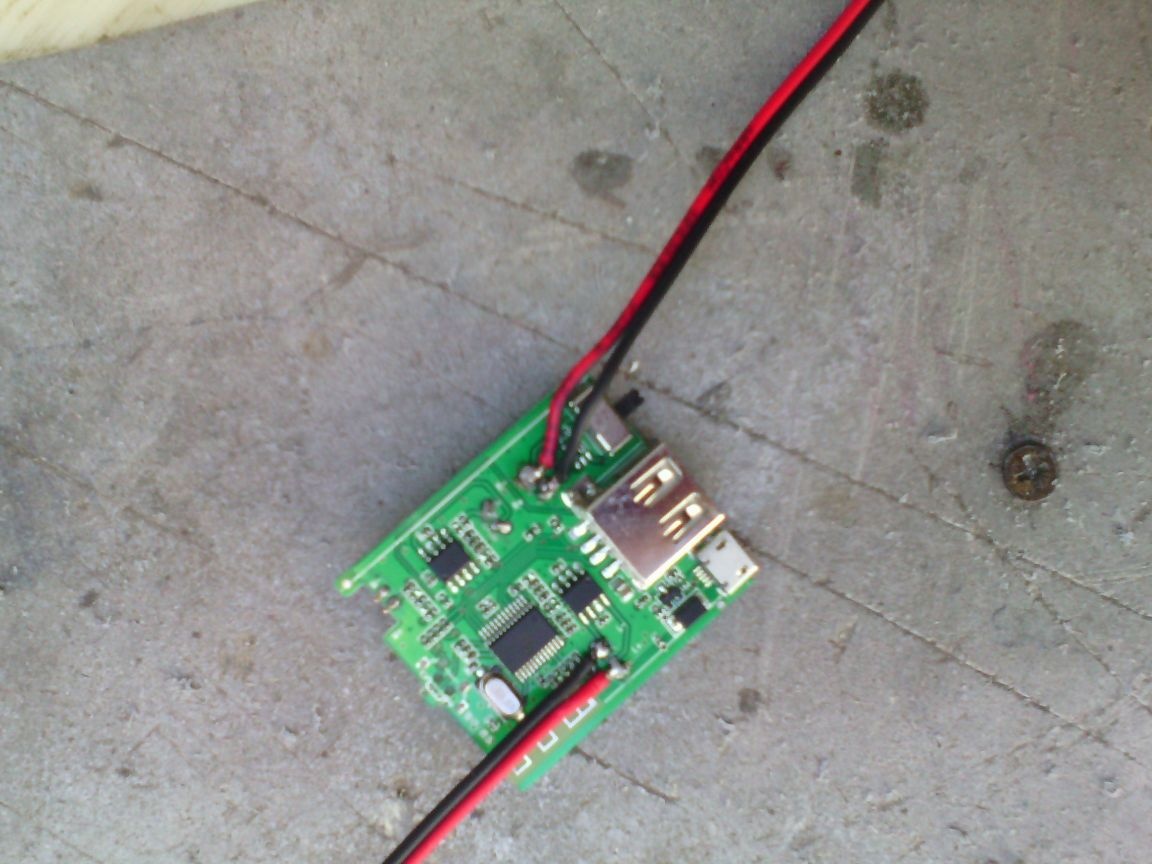
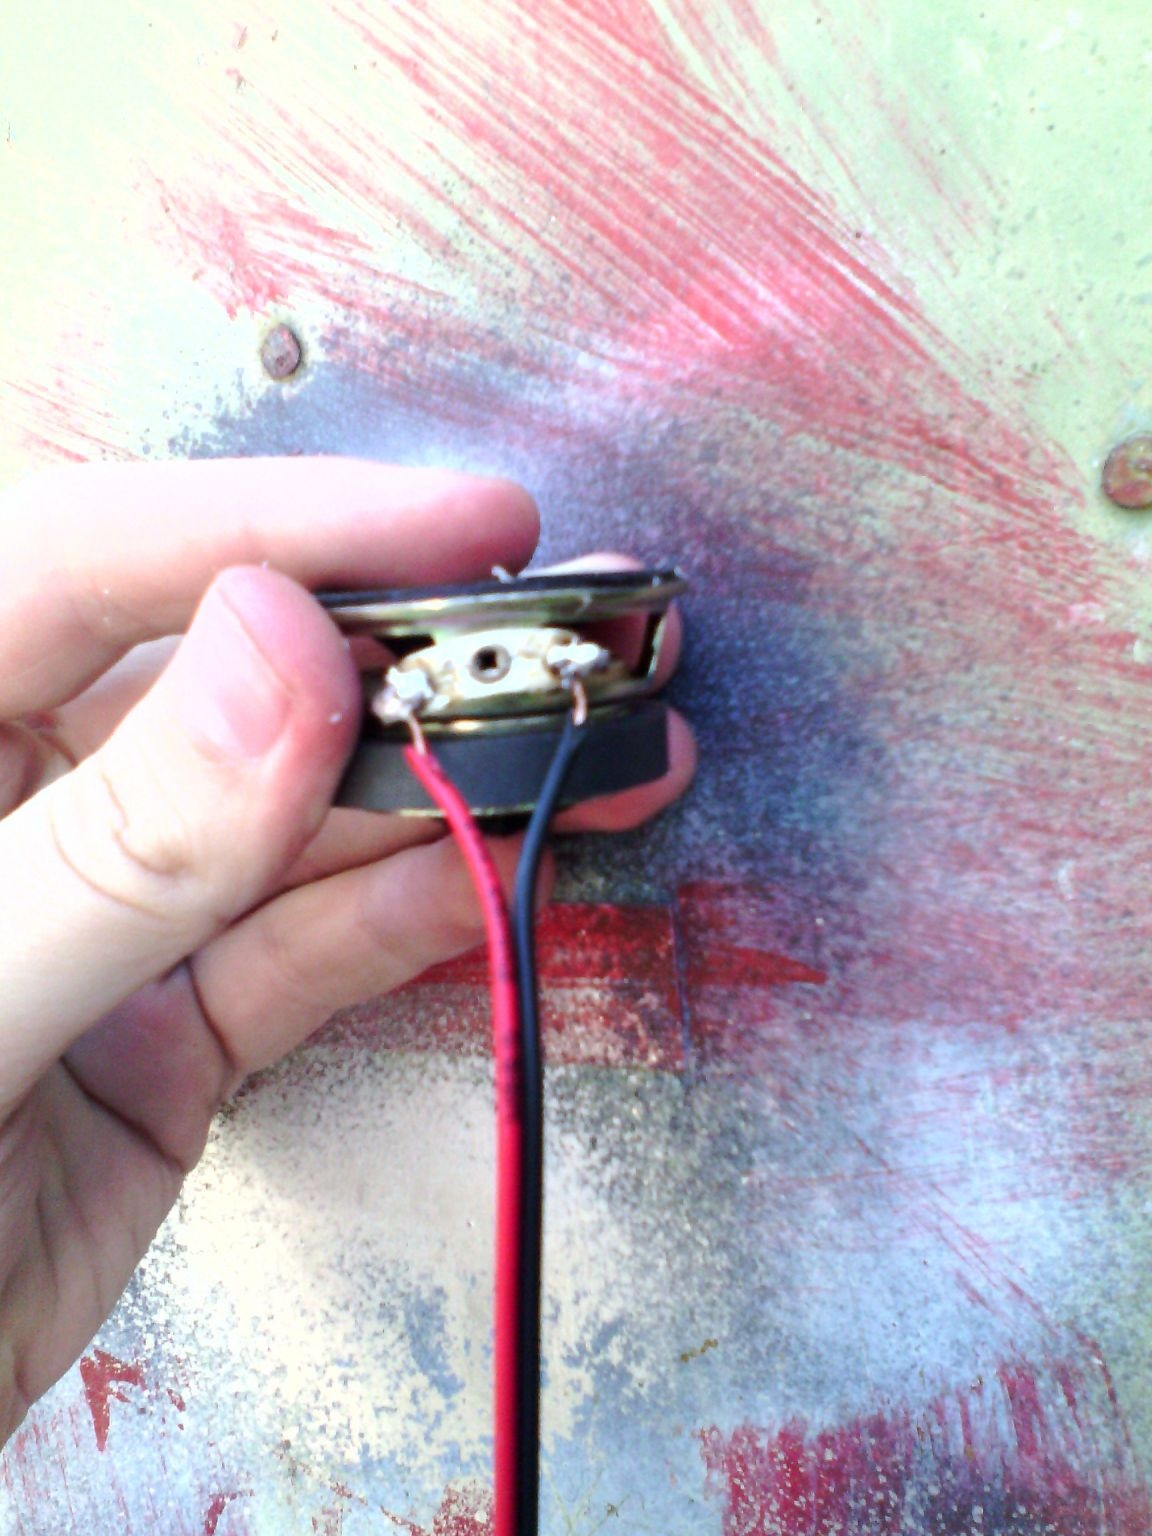
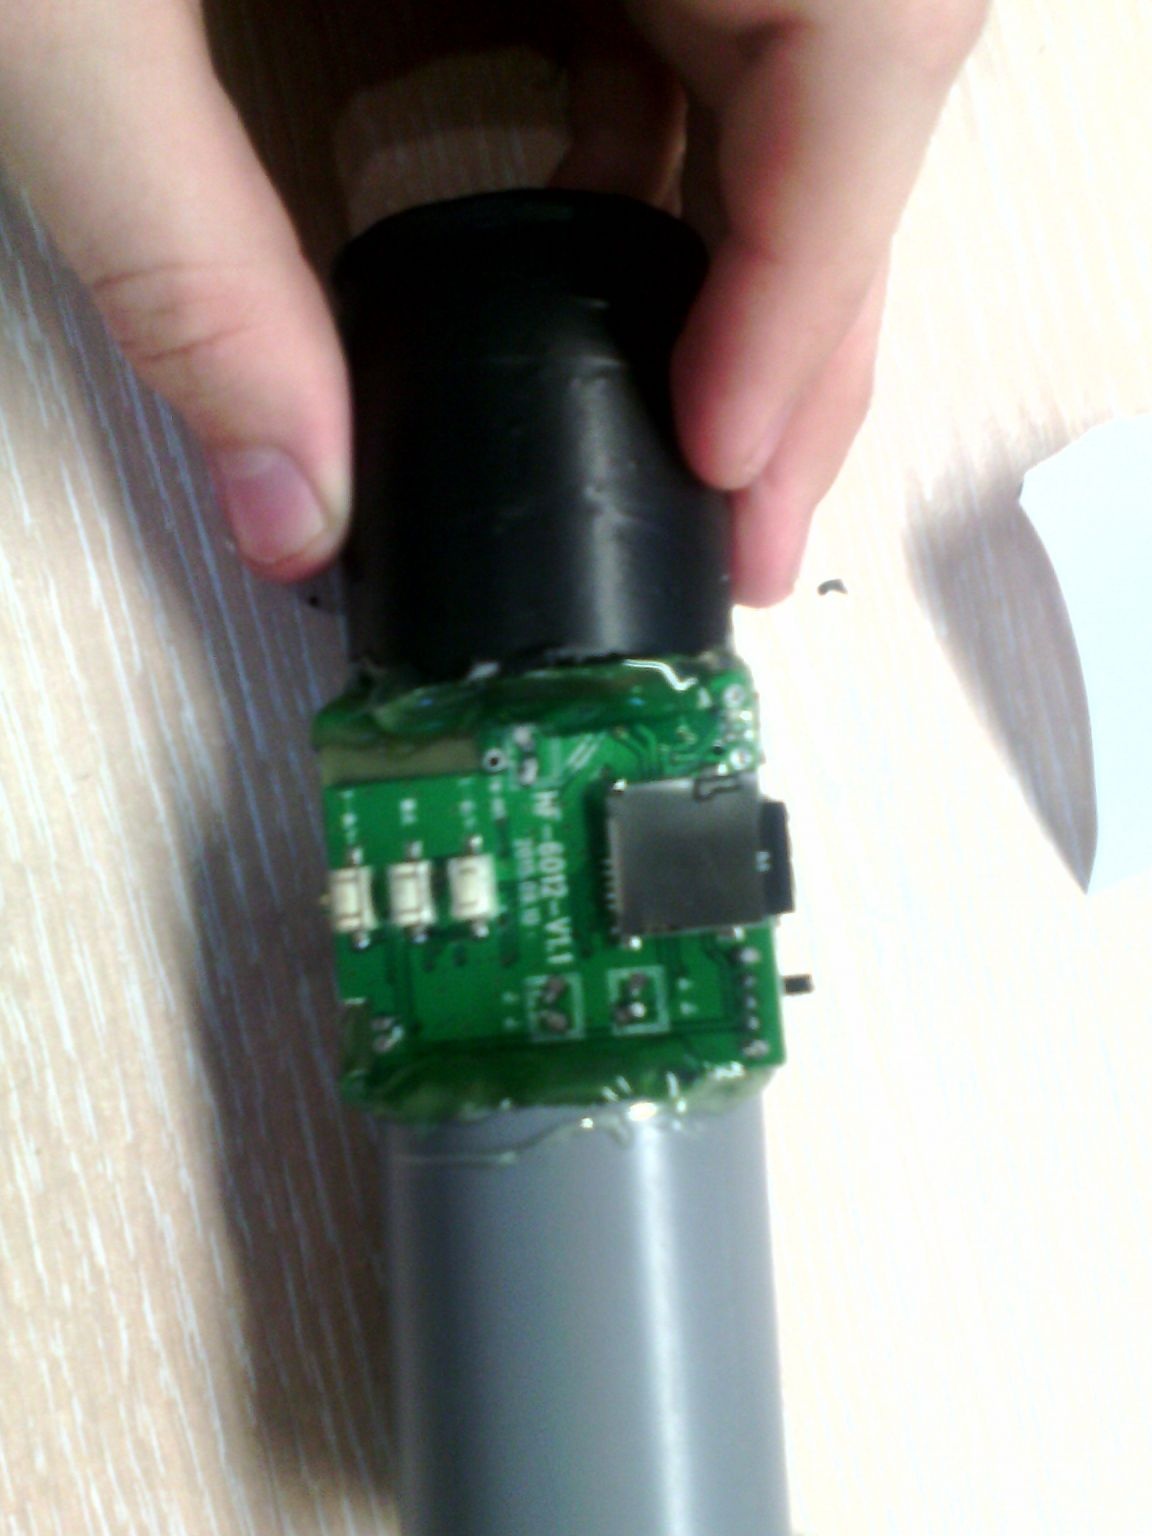
Step 2:
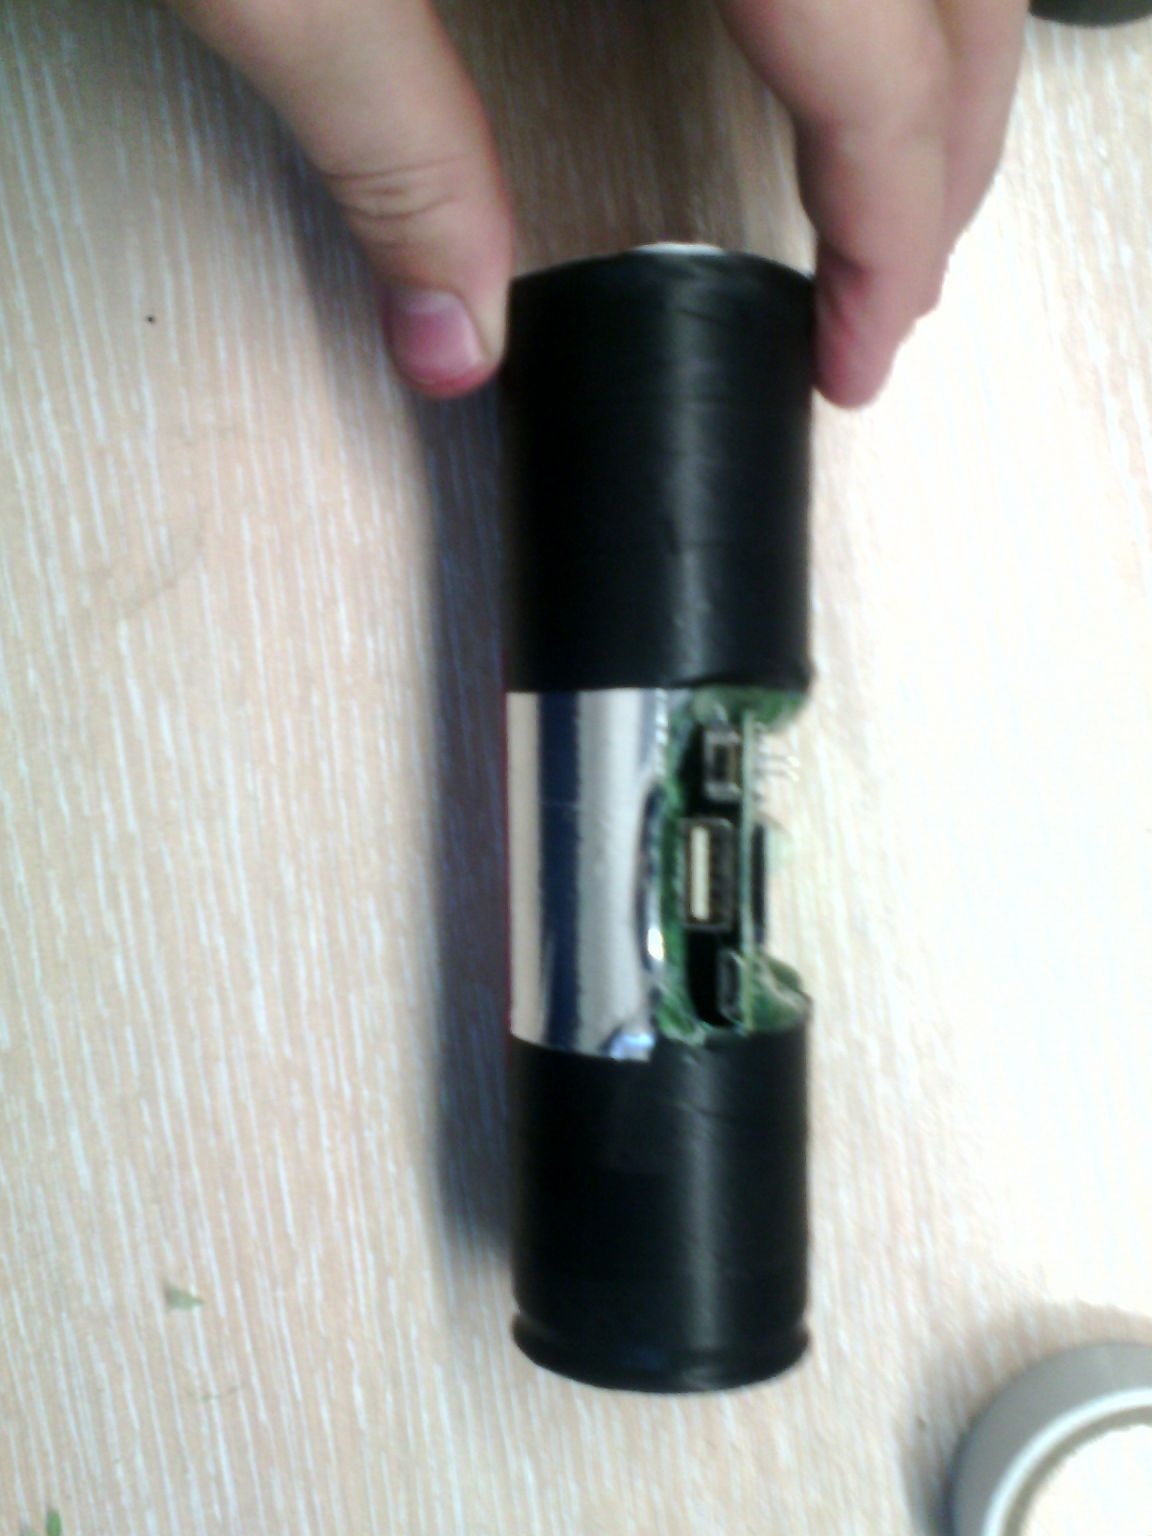
Solder electronics, to the point of horror, just solder the battery to the board, solder the speaker to the board.
Electronics is ready!
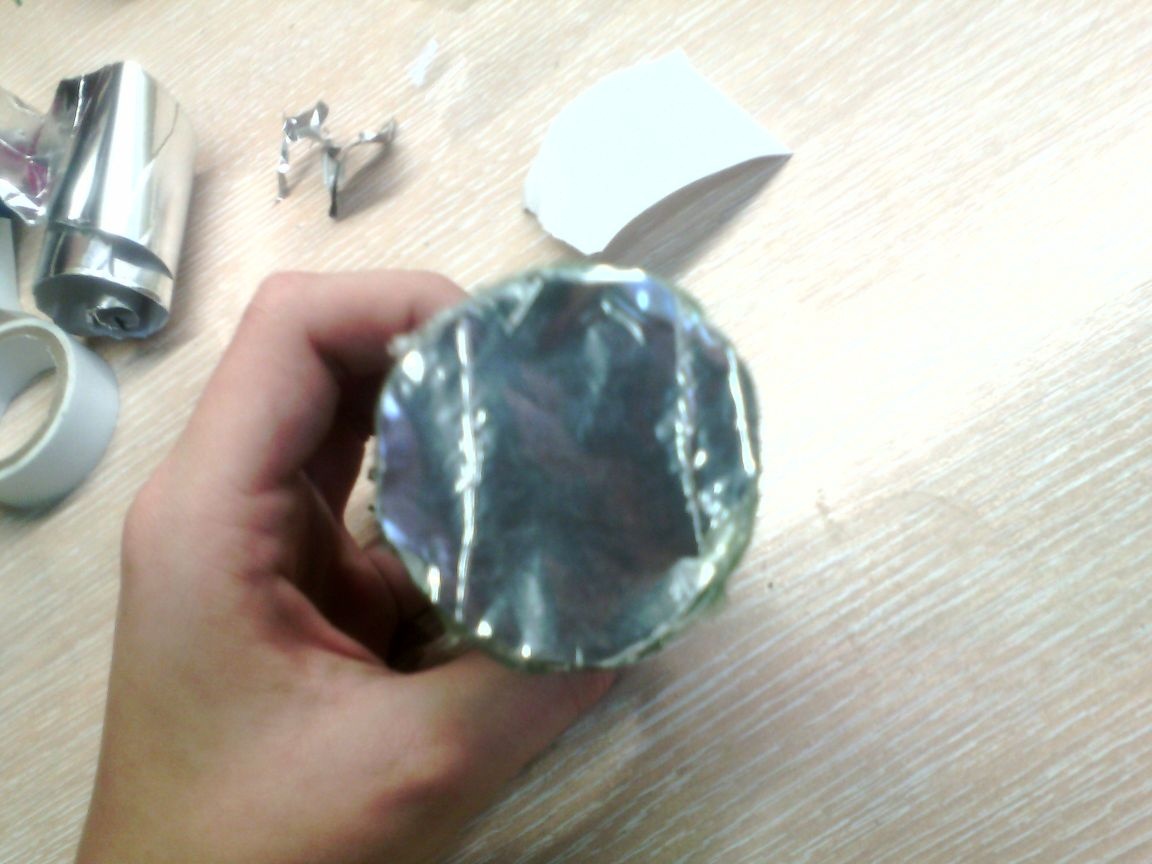
Step 3:
We make a cork-diffuser. We glue a piece of aluminum foil to a thick film (you can also use electrical tape, but I wanted to do this), cut out a circle with a diameter of the diameter of the pipe and glue it to the pipe with hot-melt adhesive, glue the tape on the sides. Self-made diffuser is ready!


Step 4:
We seal all open contacts on the circuit board with thermo glue and put everything together, wind the speaker with tape to the pipe. After assembly, we glue everything with thermo glue.

Step 5:
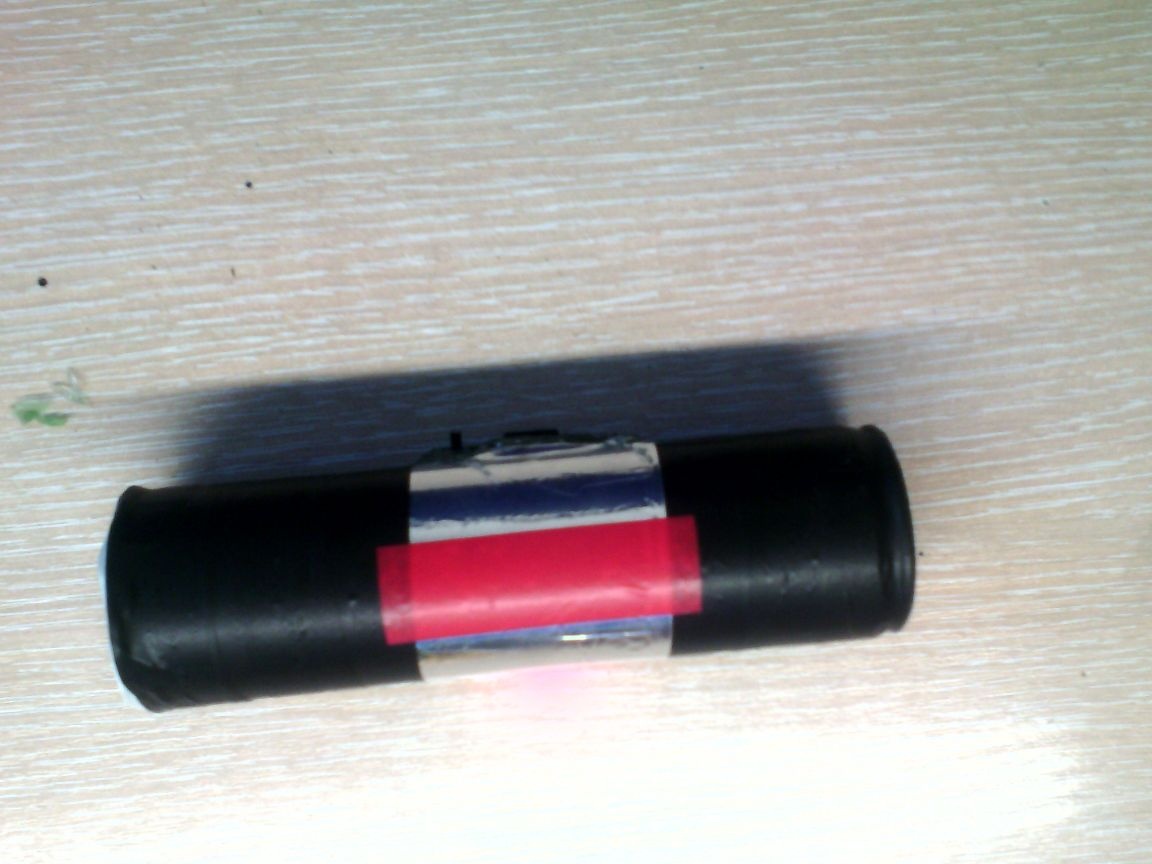
Having gathered all this “column”, we proceed to finishing, somewhere we wind up electrical tape, somewhere aluminum tape, where we glue thermo glue.

Step 6:
We rejoice at the WORKING column, because although it does not look, to put it mildly, it works, and you can say “it's a post-apocalyptic style, you don’t understand” and leave with a happy face in the sunset.


4.2
2.8
2

Add a comment

    • smilesmilesxaxaokdontknowyahoonea
      bossscratchfoolyesyes-yesaggressivesecret
      sorrydancedance2dance3pardonhelpdrinks
      stopfriendsgoodgoodgoodwhistleswoontongue
      smokeclappingcraydeclarederisivedon-t_mentiondownload
      heatirefullaugh1mdameetingmoskingnegative
      not_ipopcornpunishreadscarescaressearch
      tauntthank_youthisto_clueumnikacuteagree
      badbeeeblack_eyeblum3blushboastboredom
      censoredpleasantrysecret2threatenvictoryyusun_bespectacled
      shokrespektlolprevedwelcomekrutoyya_za
      ya_dobryihelperne_huliganne_othodifludbanclose
16 comments
Author
Thank you so much, I didn’t even know about such rivets.
Author
put it not quite right, this is an attempt to assemble the passive myself, but alas, I can’t give a link to the module because it was just torn from an old column, but I can find a similar one.
Here is a link to a similar one, but he needs to solder the 3.5 mm jack connector and solder the wires in his place.
We make a diffuser plug.
What is it? And why is it needed?
That was a long time ago. I fell into the party of avid aircraft modellers (I did not consider myself as such), and admired the highest detailing of copying. A copy aircraft with a wingspan of 1.6-1.7 m, and it has rivets visible on the "flashlight" and the fuselage.
So the author told the story that at some competitions they gave a special prize to another modeler (see from the filing of journalists), because there are more than 3,000 rivets on his plane. And this guy wondered why no one asked him. He says that he stopped counting on the 40th thousand. His plane was just unbelievably cool in copy accuracy. I looked at him for a very long time.
So here. To make “rivets” and imitation sheet metal joints, the wooden model is glued with aluminum foil, then “rivets” are glued.
Rivets are made from sugar syrup. Narrow strips of paper are cut out, similar to Soviet ribbon pistons for toy pistols. Sugar syrup is bred. Try to make drops from a thin needle on paper. When the desired droplet size is achieved, the sugar-water ratio is recorded, and then a series of drops are made on a strip of paper at an equal distance. Again, piston ribbons are very similar to tezhe. Leave to dry. After drying, from the finished tape, the rivets are glued whole next to the desired place. After painting, the convex points are very similar to rivets.
For example, my crafts, which can most likely be attributed to toys.
Although they flew very credibly:

And so they don’t say that I’m a gag in every barrel, a fragment of my participation in the opening of the motorcycle season 2007:
module with speaker
What kind of beast is this? Can you link?
The board has built-in charge-discharge control
Thanks!
Author
The board has built-in charge-discharge control, and the battery was very poorly soldered to the board from the Nokia, which allowed it to simply peel the battery from the wires leading to the board and solder them.
Author
Imitation of welding with thermo-glue and a marker on top of the foil, but I have not heard about rivets with sugar syrup, can I read more?
solder the battery to the board
I would like to learn more about the board, in particular, is it interested in whether it supports the functions of charge control - battery discharge? If not, then detailed disassembly instructions to replace the battery, please! smile
Author
But I haven’t heard about rivets with sugar syrup.
Author
paint on top of the film and imitation of welding with thermo glue
Copywriter model technology? Paint on top of an aluminum film? And will the imitation of rivets be sugar syrup?
Author
By the way, today tomorrow I plan to post a tutorial on finishing everything in a row under worn metal, and after finishing the column looks really cool.
Author
in fact, the blue electrical tape is under the black one, because we are not racists)
The electrical tape should be blue! In post-apocalypse, only the blue electrical tape will survive.
Well, aluminum foil will break through quickly.
nicho so =)
keep like =)

We advise you to read:

Hand it for the smartphone ...