
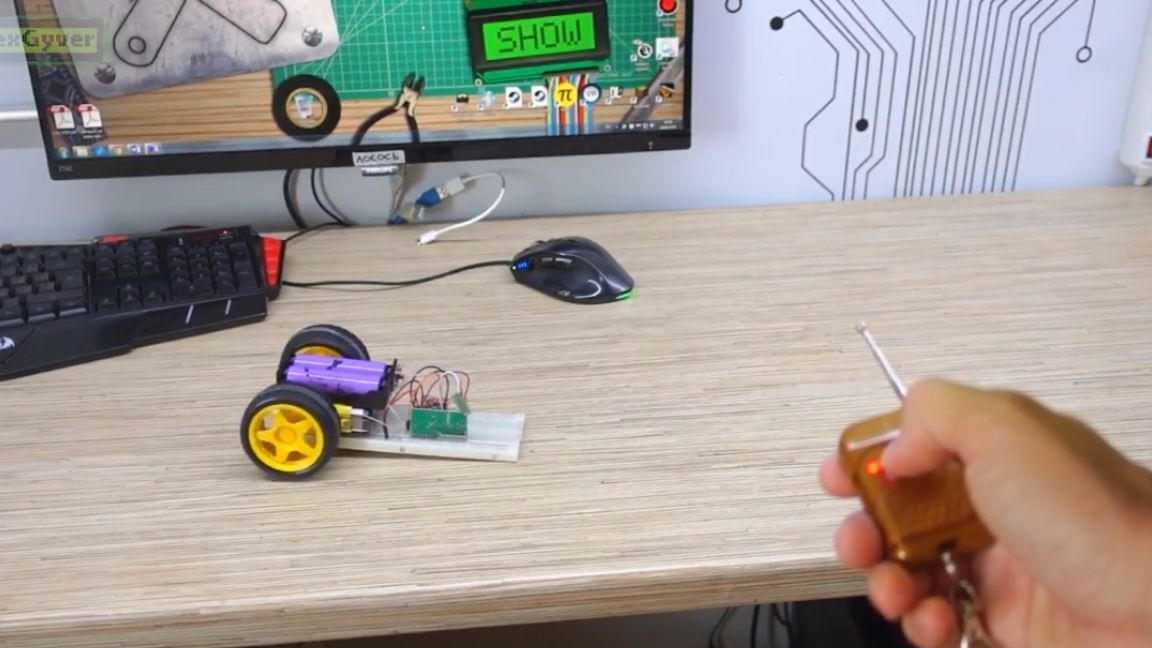
Today we will make a small radio-controlled machine, not just a machine, but a real spy device.
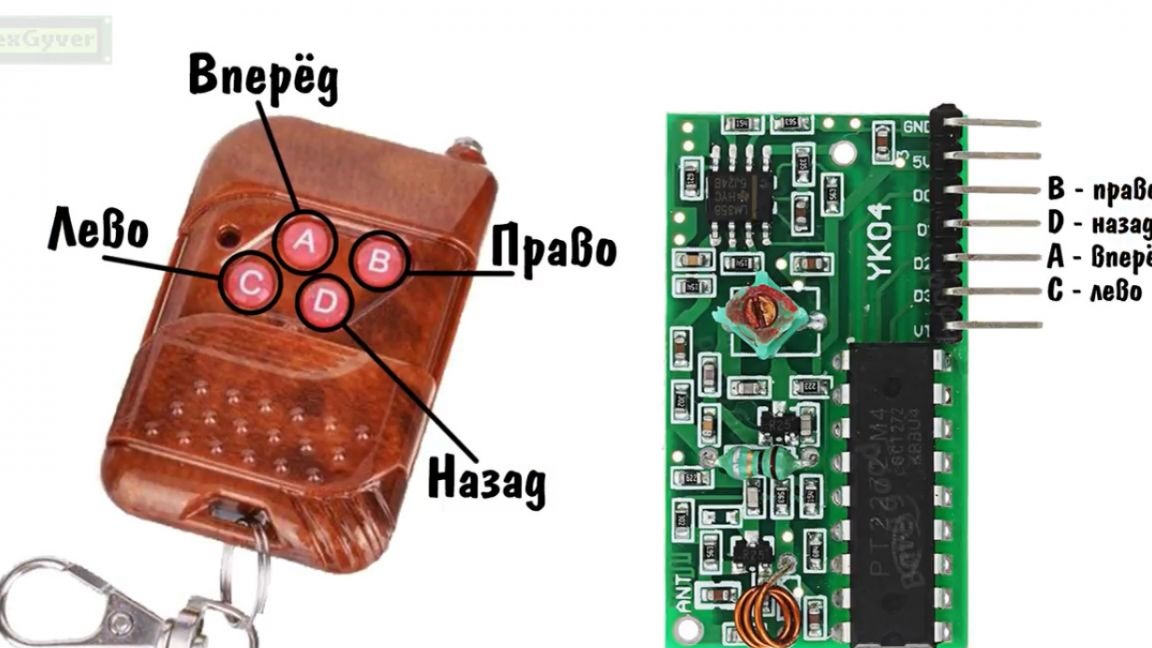
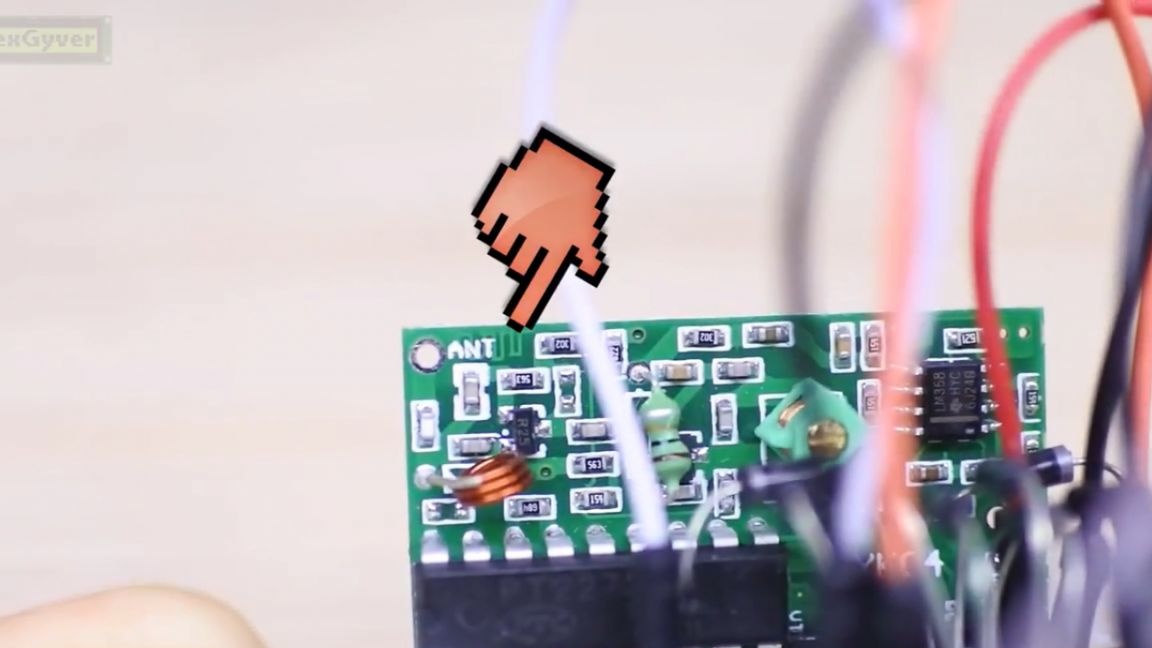
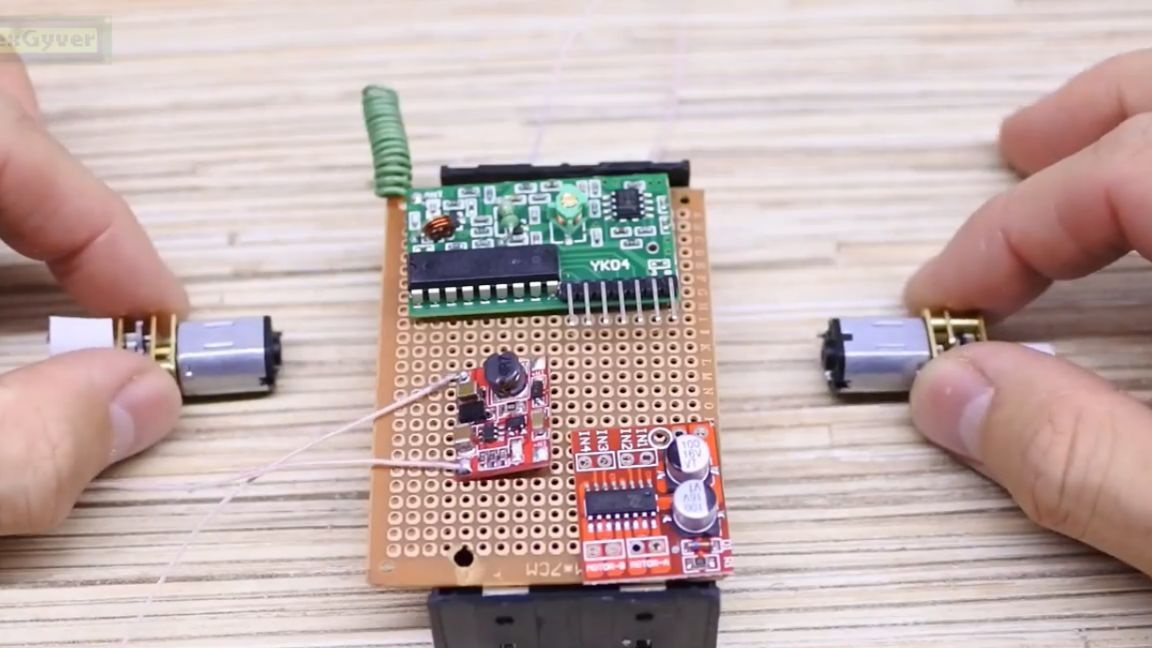
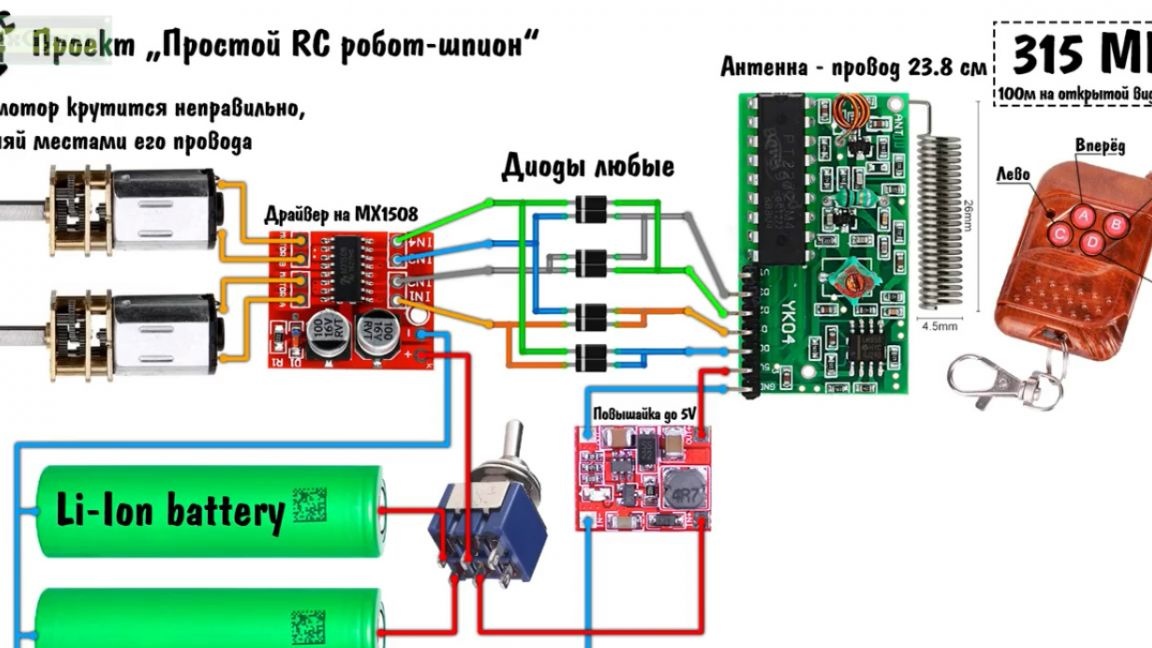
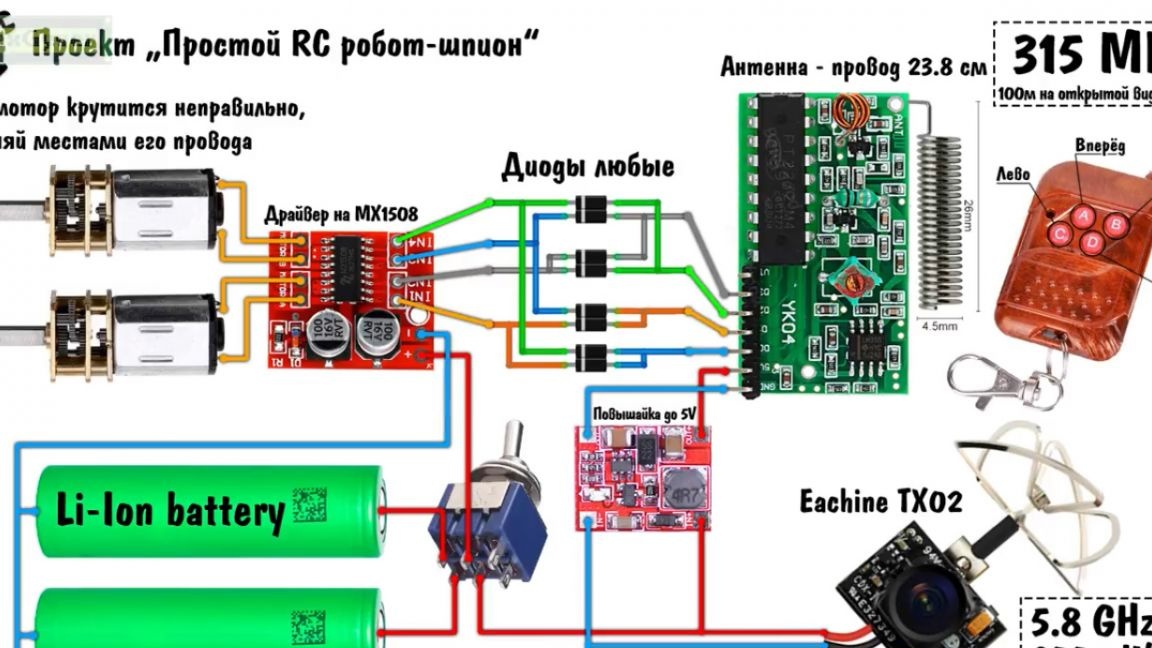
The author of this homemade product is AlexGyver. So let's get started. So look, there is such a 315 MHz transmitter module in the form of a four-button remote control and a receiver with four logical outputs for each button to it.
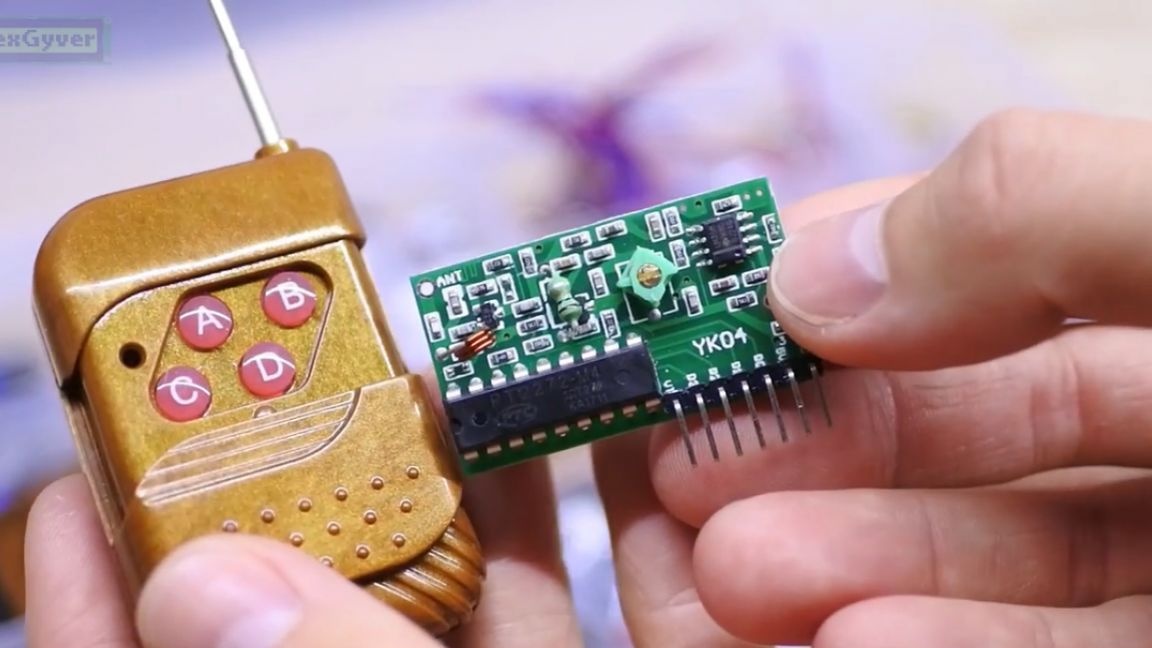
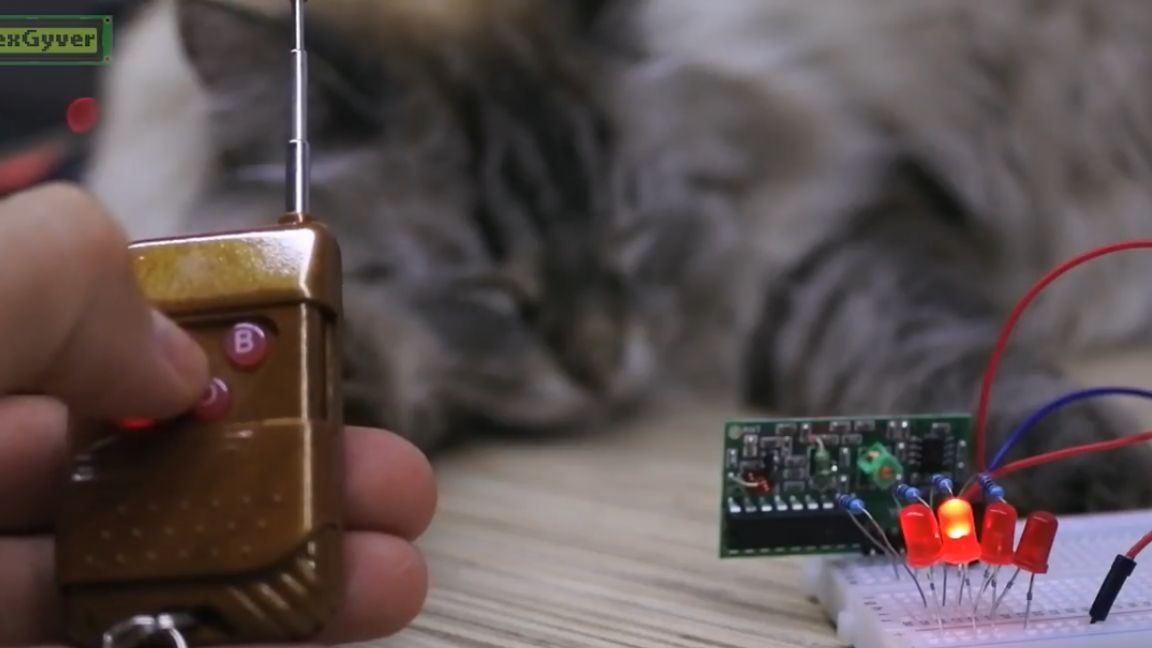
This all works in a very obvious way: they pressed a button of 5 volts at the corresponding output. Already good potential for arduino projects. There is also a driver for 2 motors on the mx1508 chip.
Components for the robot (links to Aliexpress):
FPV:
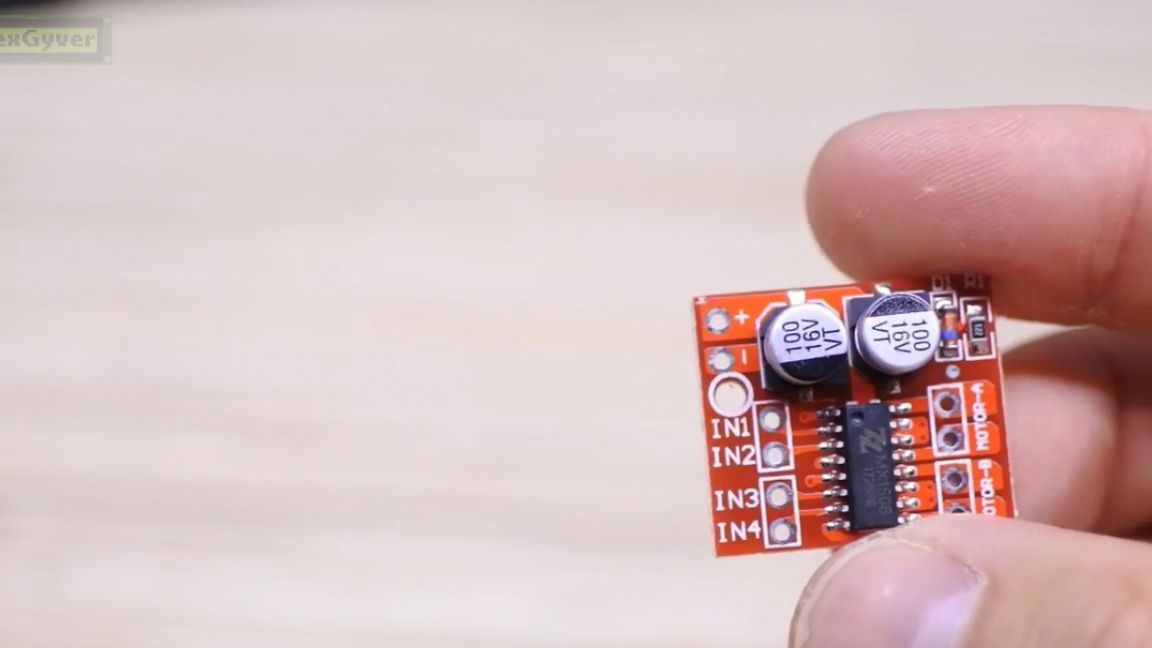
This is a modern almost analogue to the old lame l298. With him, everything is also very simple, we connect 2 motors and, with a logical signal, rotate them in one or the other direction.
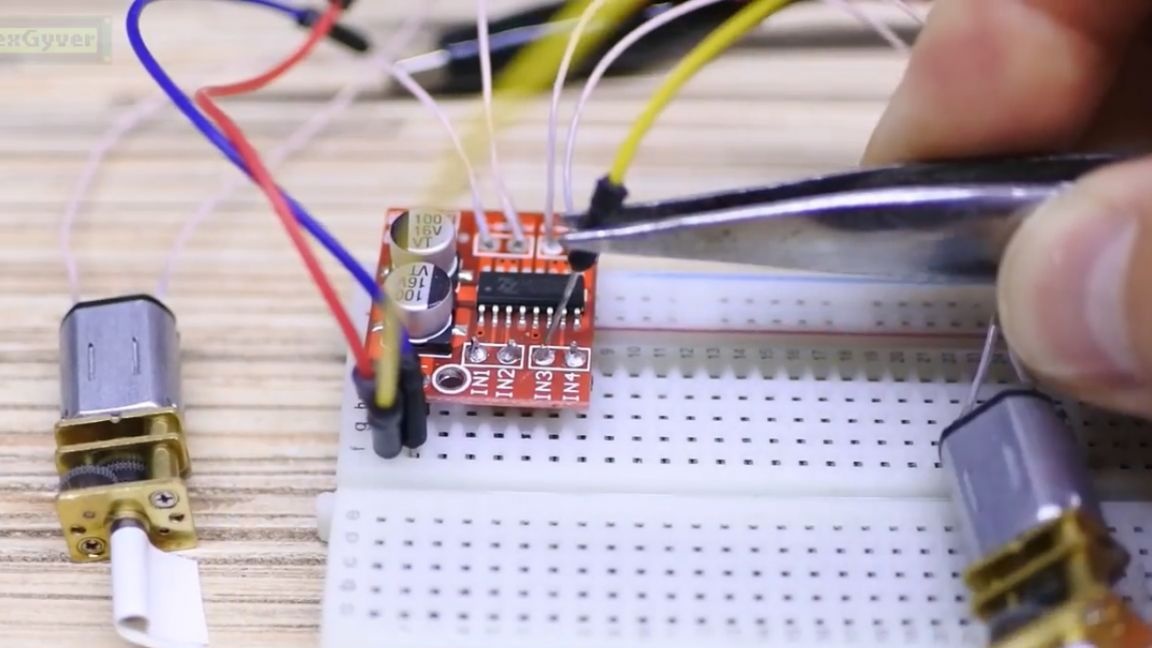
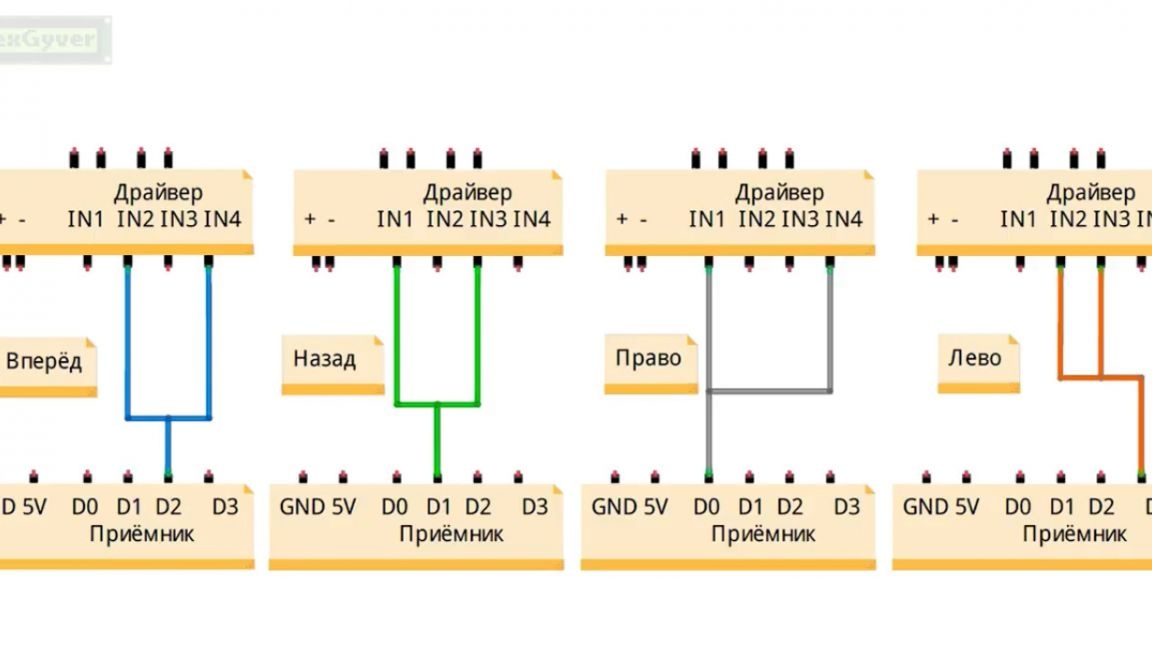
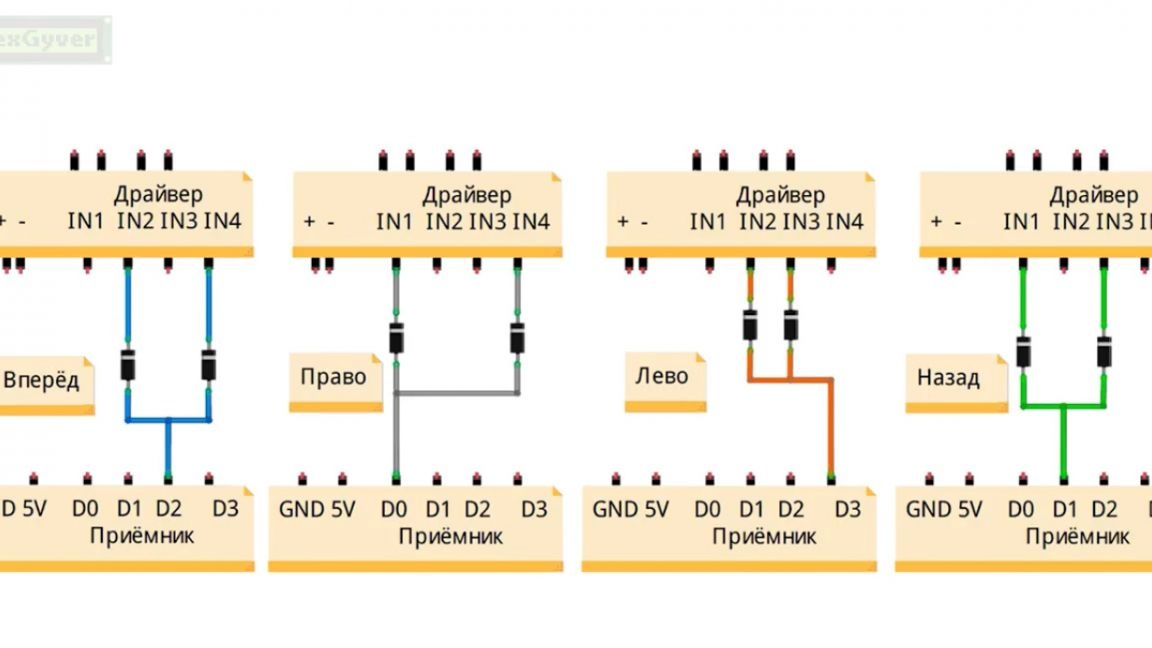
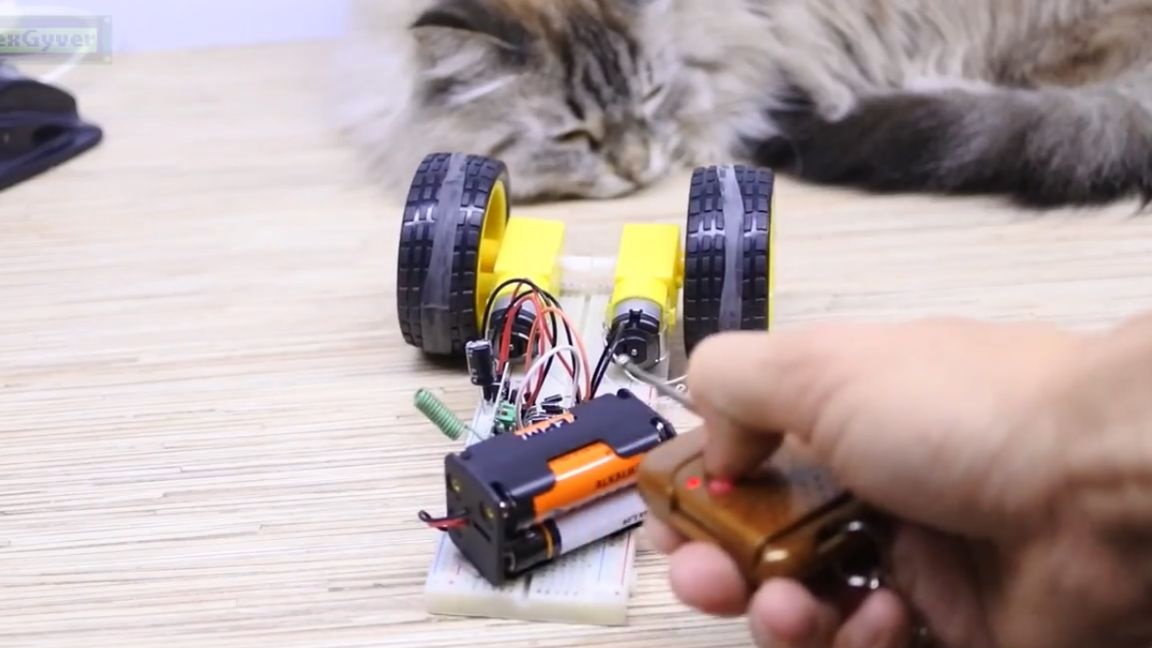
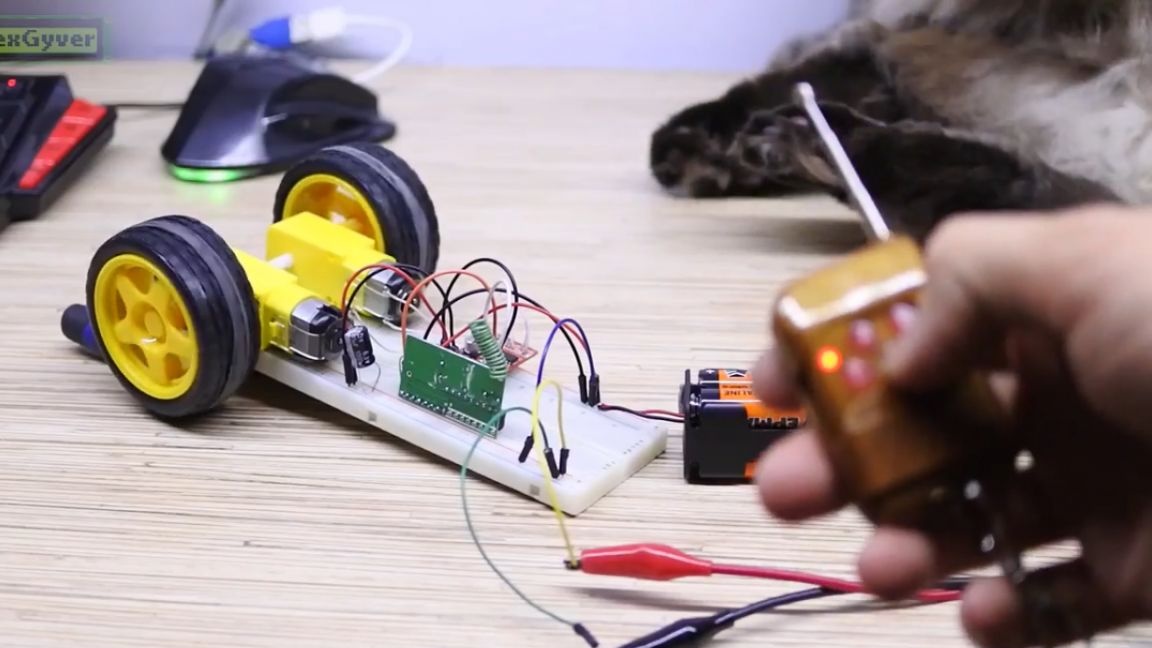
And there is nothing easier than to connect these 2 modules and get control of the machine on a tank scheme. It remains only to figure out how to connect the receiver module of the motor driver so that the engines turn on as we need, that is, the logic of signal transmission should be something like this, corresponding to the buttons on the remote control.
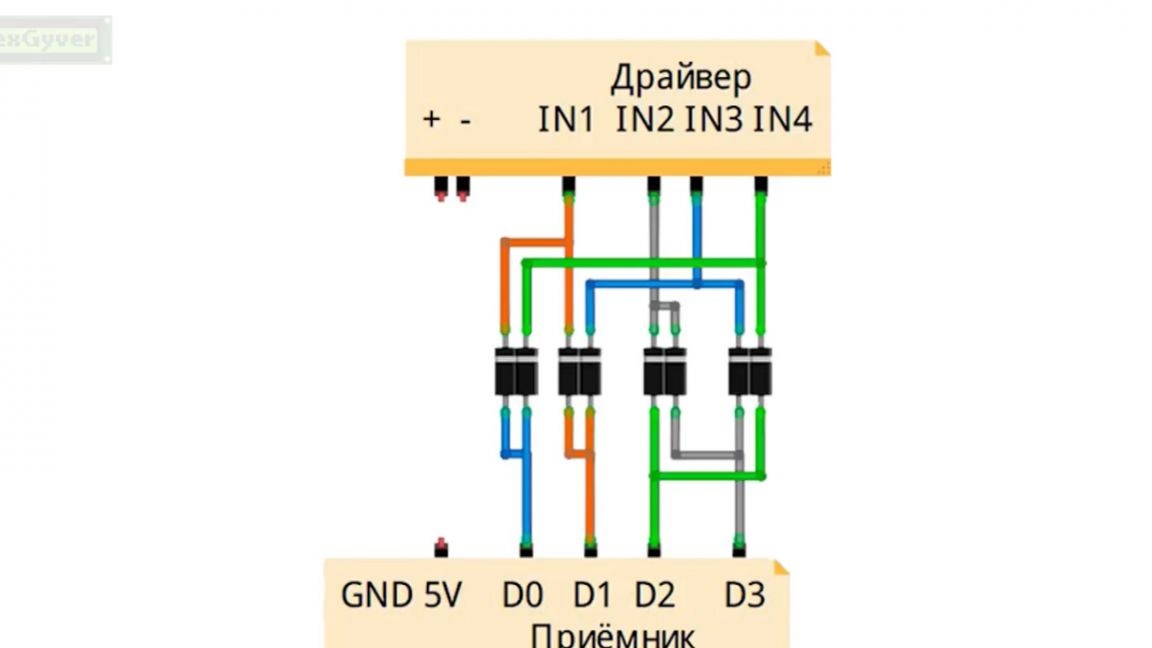
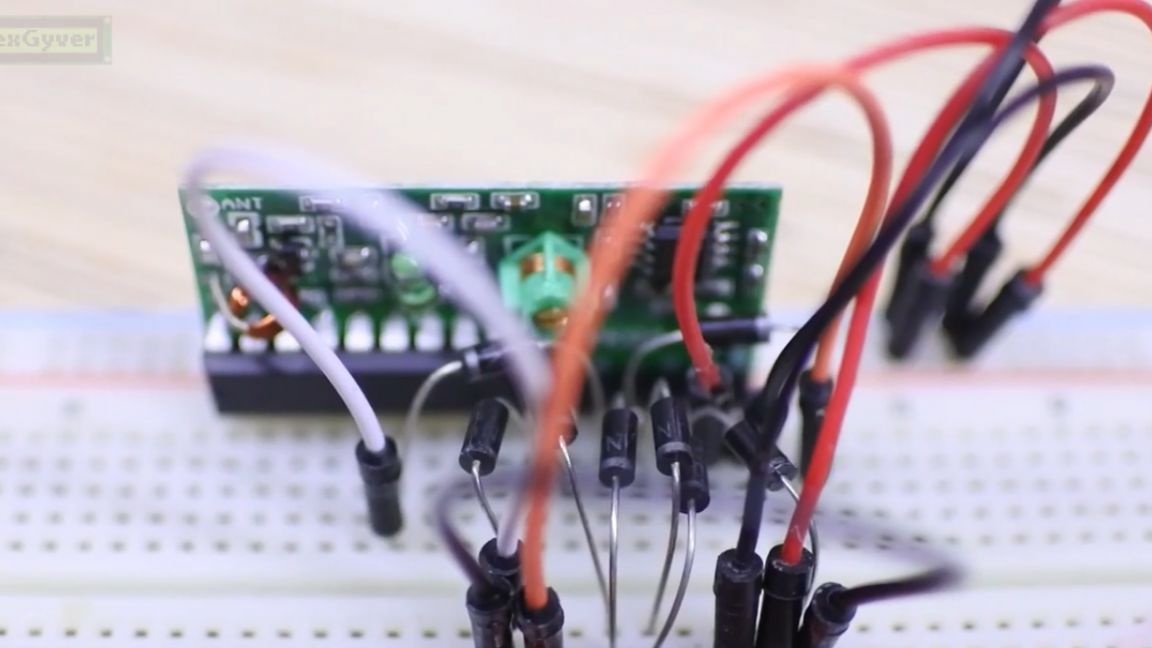
Circuits for channels separately work fine, but I want everything at once. Obviously, it is simply impossible to take and connect all the wires as is, as the control channels will interfere with each other and the motors will simply not spin, if nothing else burns of course. We need to protect the control channels from mutual influence and circuit. And then ordinary diodes that pass current in only one direction will come to the rescue.
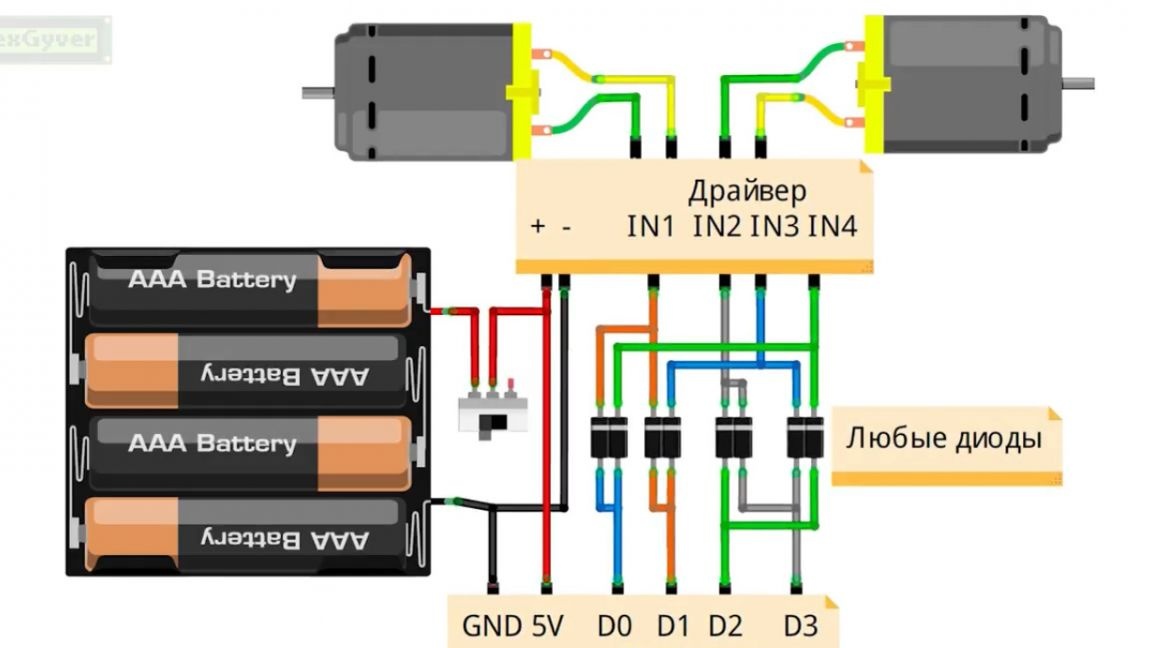
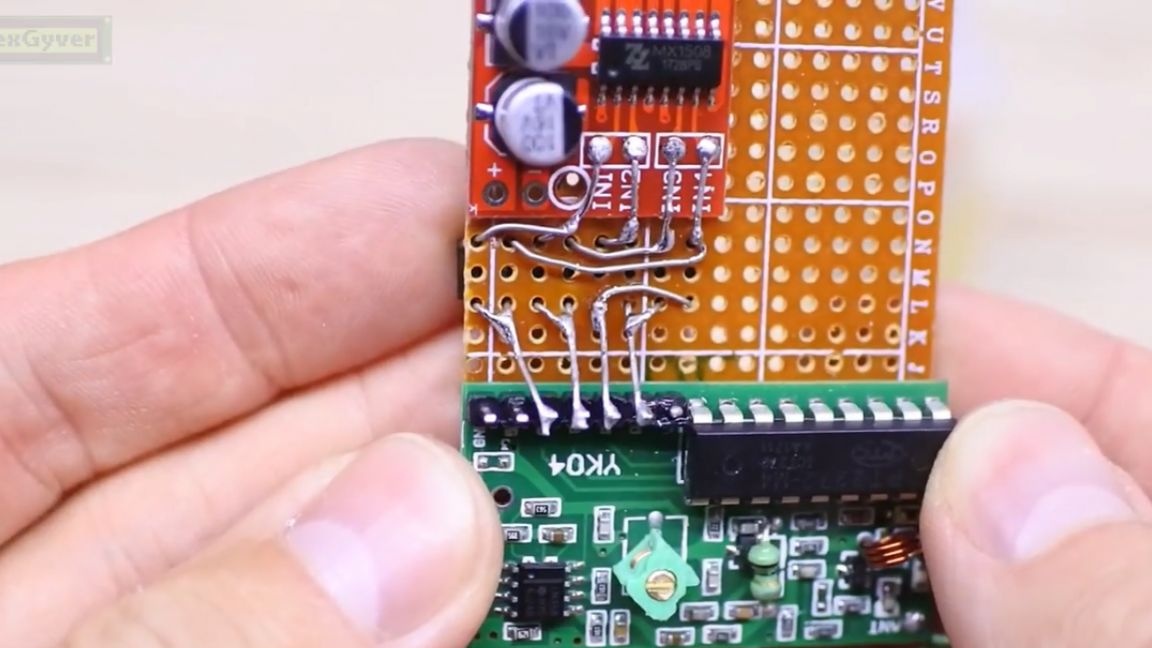
And in this form, the circuit can already be combined. We are slightly optimizing it for compactness and greater visibility, well, it remains for us to connect power, for example, from finger batteries and motors, we can add a switch, but unfortunately, it turned out to be not so simple.
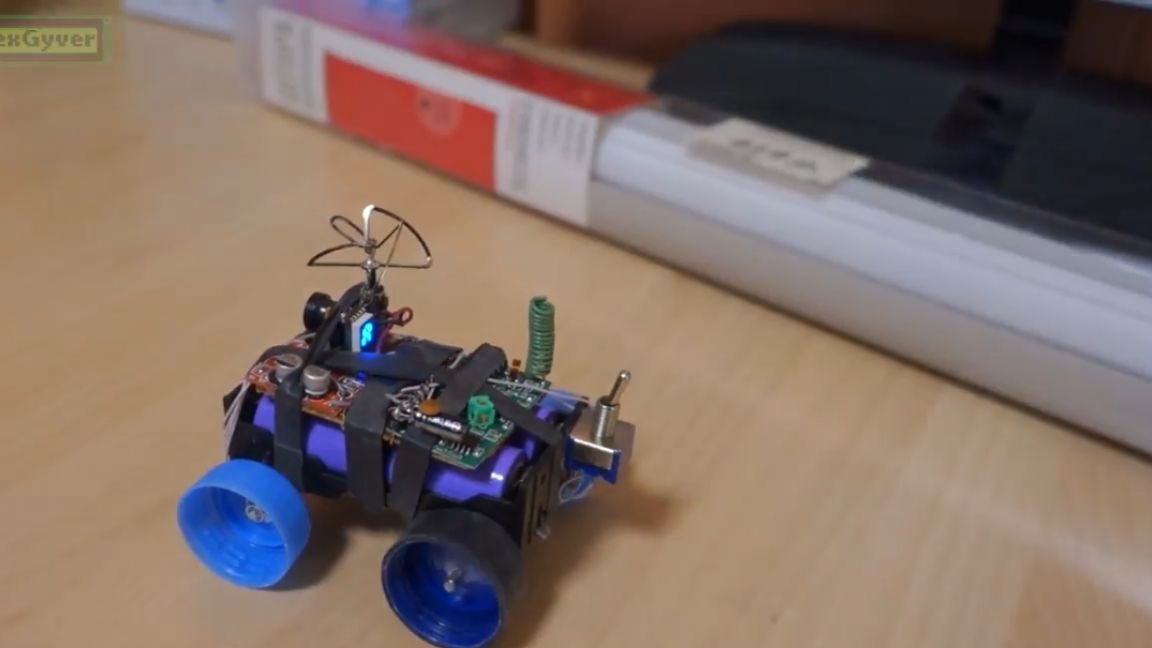
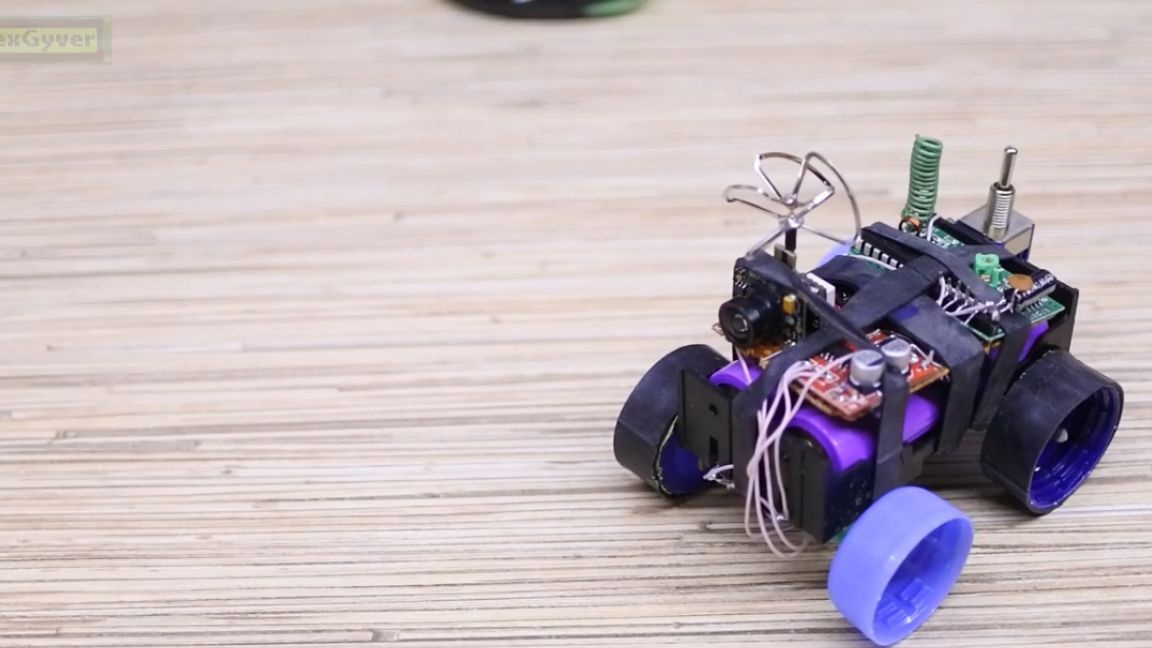
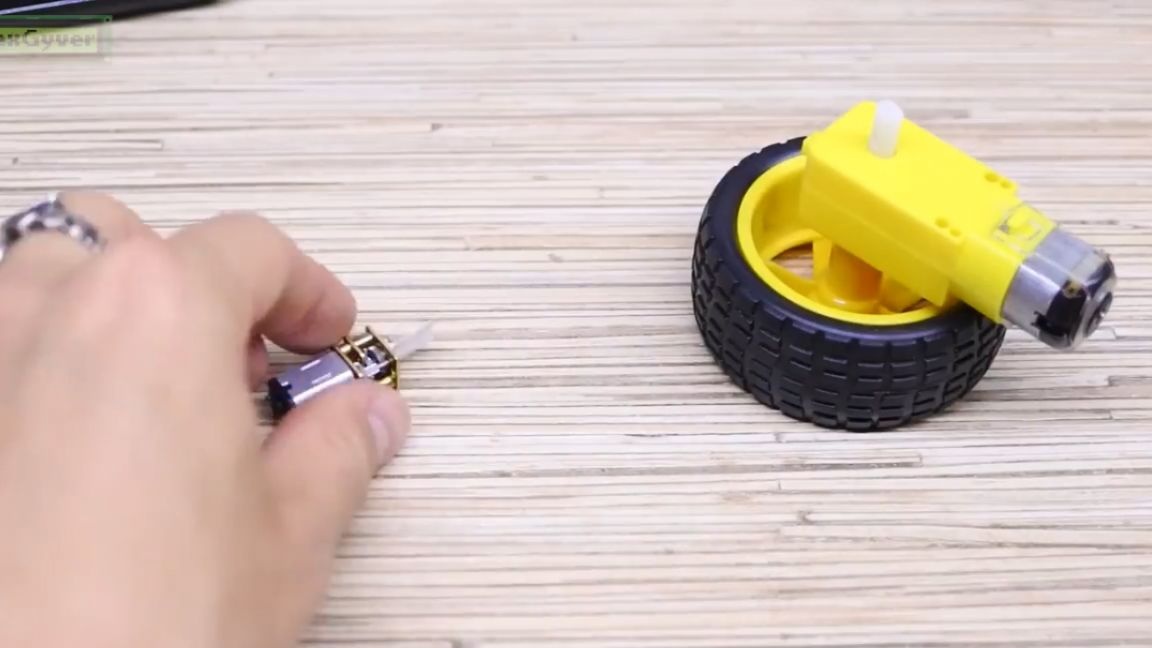
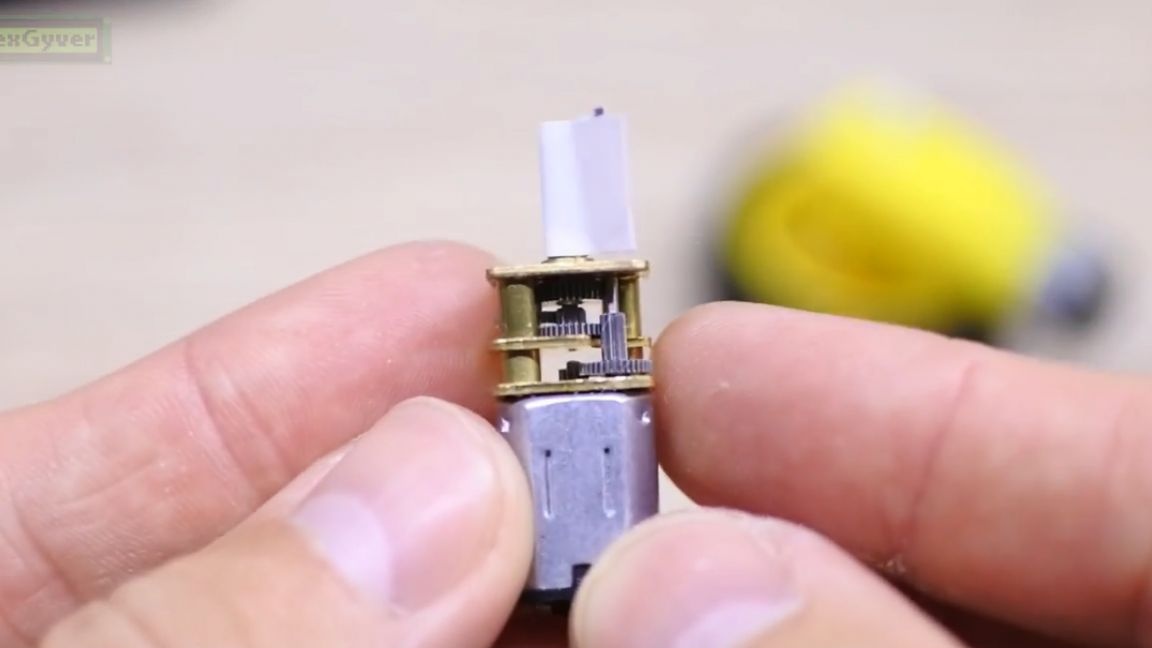
The Chinese have wonderful ready-made gear motors for home-made robots. They are sold immediately with wheels. And there are micro gearmotors, we will use them as we want to make a mini spy robot.
But for the first test, let's solder large motors, and for testing we will assemble a circuit on a breadboard. We take diodes and connect everything according to the scheme.
Well, something like this. We fix the motor-wheels to double-sided tape on the principle and it will do this - this is the same layout.
We will eat from 4 finger batteries. Immediately pull on the wheels anti-slip tires from the rings from the bicycle chamber. Go!
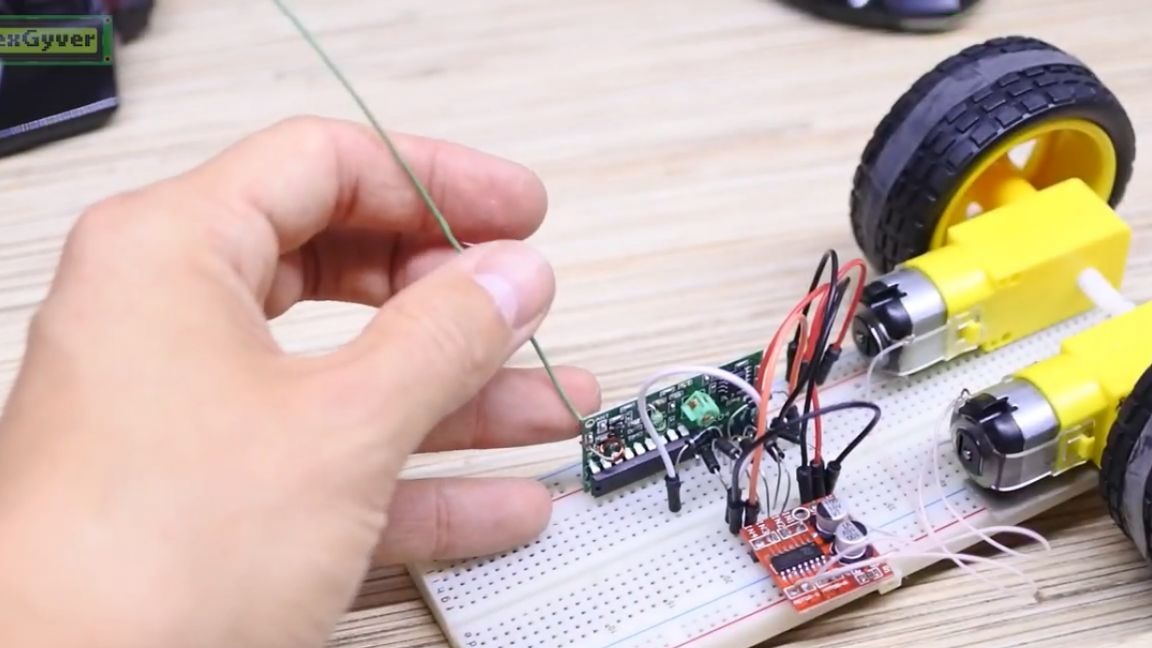
But skis do not ride.While holding the button, the machine moves jerkily, and on the test with LEDs we saw that the signal is constant without jerking, that is, by logic, the machine should go exactly while the button is pressed, but for some reason this does not happen. Let's get it right. To begin with, the Chinese soldered the antenna to the transmitter and did not solder to the receiver. Not, in fact, the antenna is in the form of a track on the board:
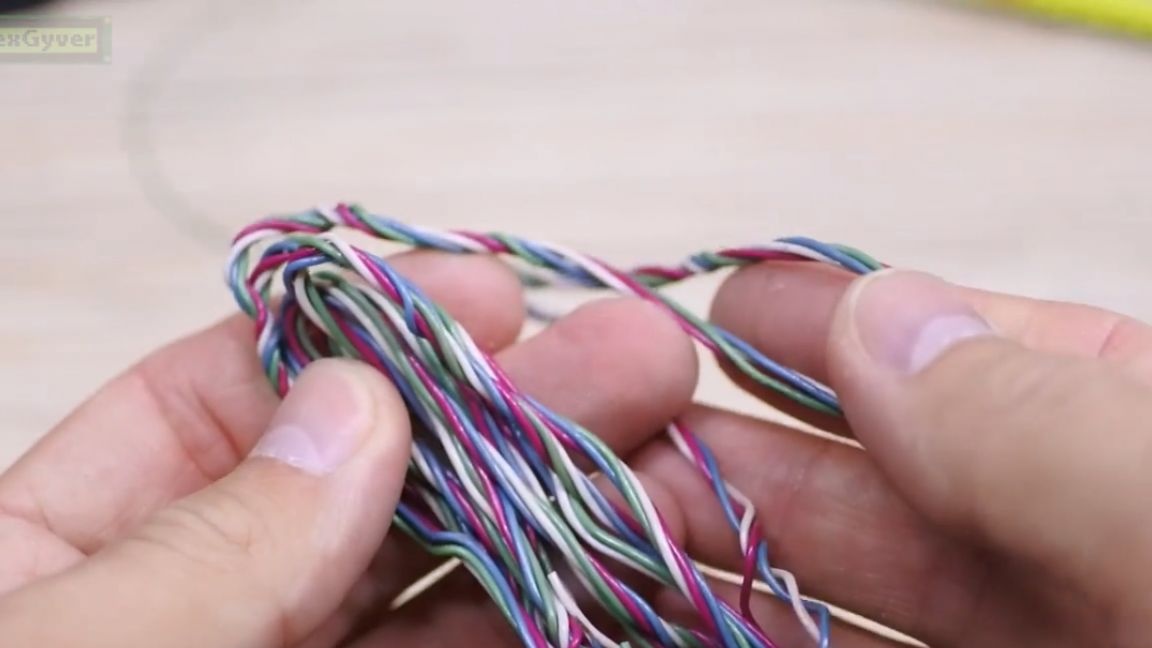
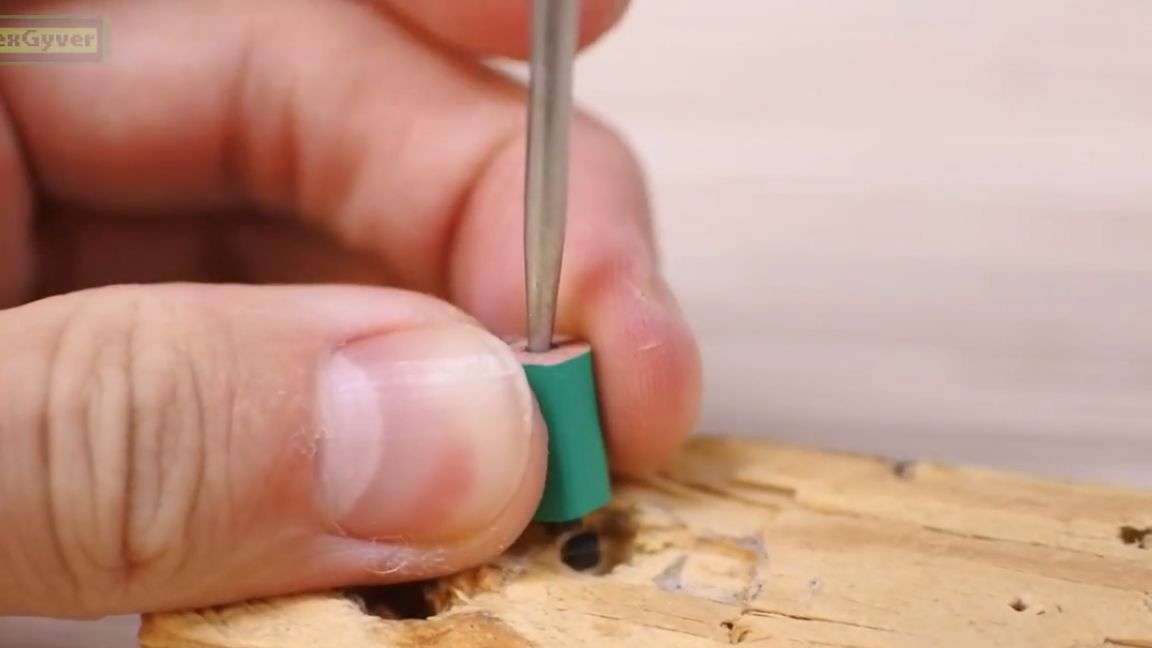
But the antenna is the case when size does matter. Let's make our antenna. To do this, you need a regular wire, for example, from an Internet cable.
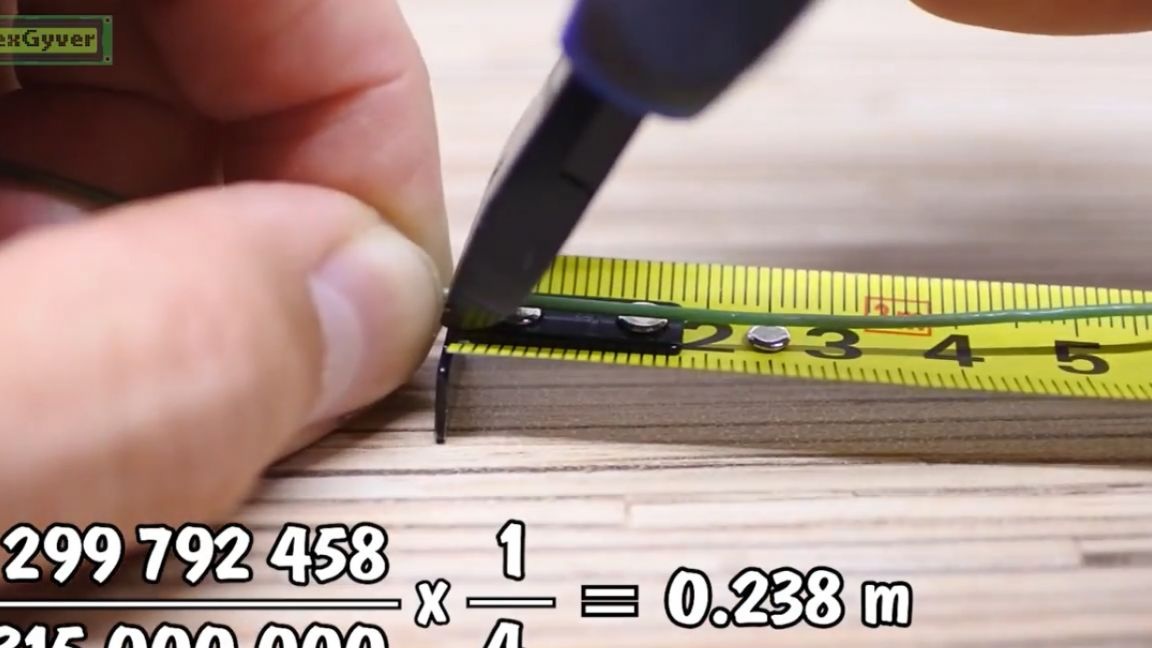
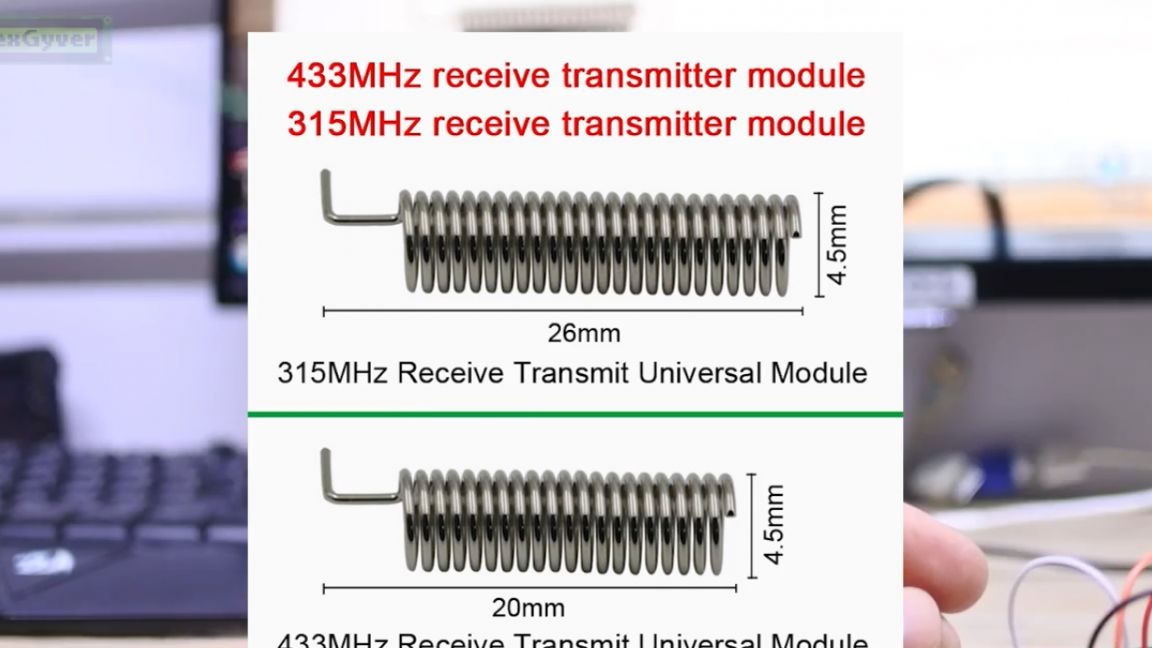
The antenna length is usually taken equal to 1/4 of the wavelength, the so-called quarter-wave vibrator. The radio frequency of the module is 315 MHz, we translate the frequency into the wavelength according to the school formula through the speed of light, divide by 4 and it turns out 23 with a centimeter tail.
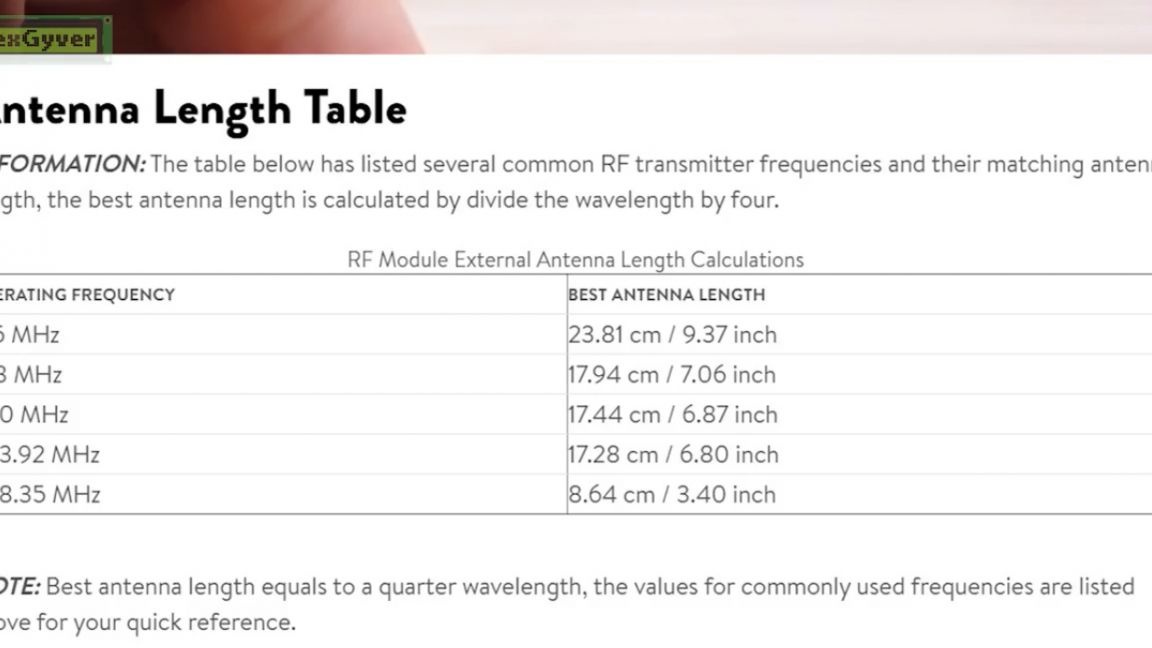
Here by the way, a tablet from the Internet for different frequencies.
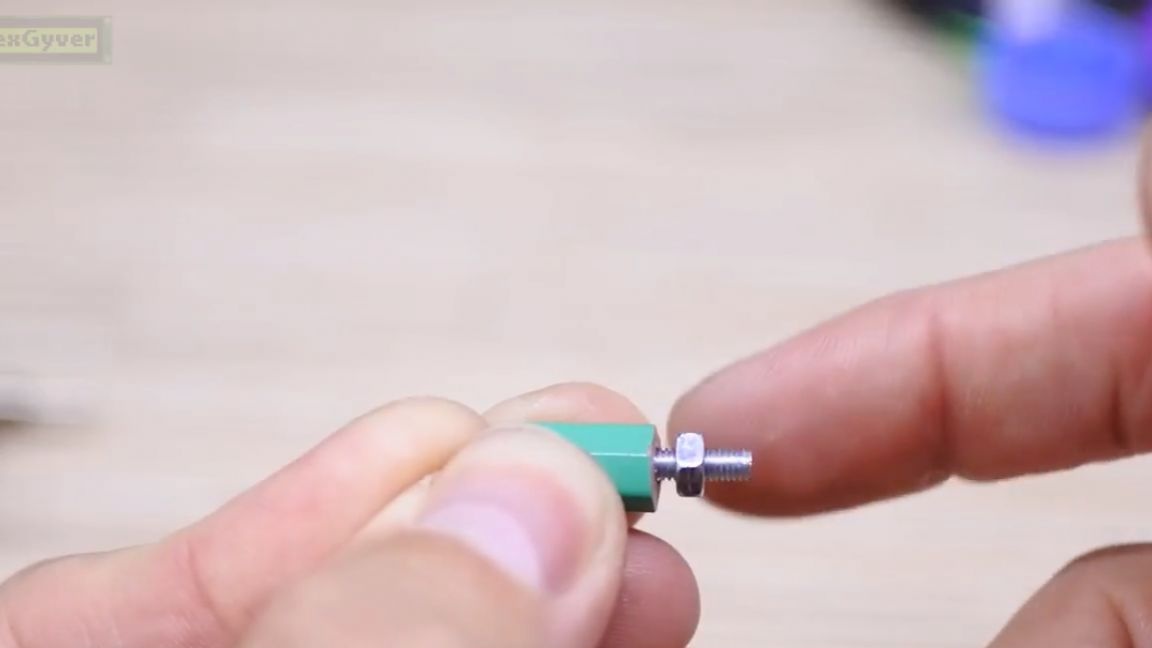
As you can see, we are doing everything right. With such an antenna, ours robot He won’t be a spy, because he will stick out a too long fawn piece of wire.
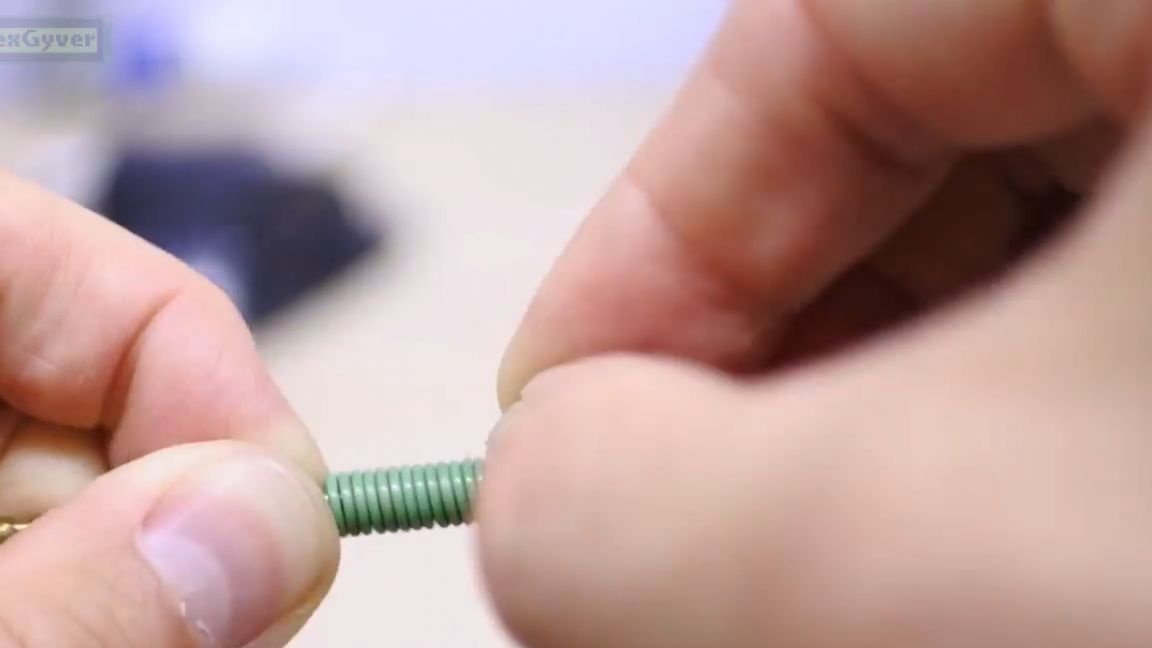
The antenna can be twisted into a spiral. Judging by this picture from the Internet, you can wind it by 4mm.
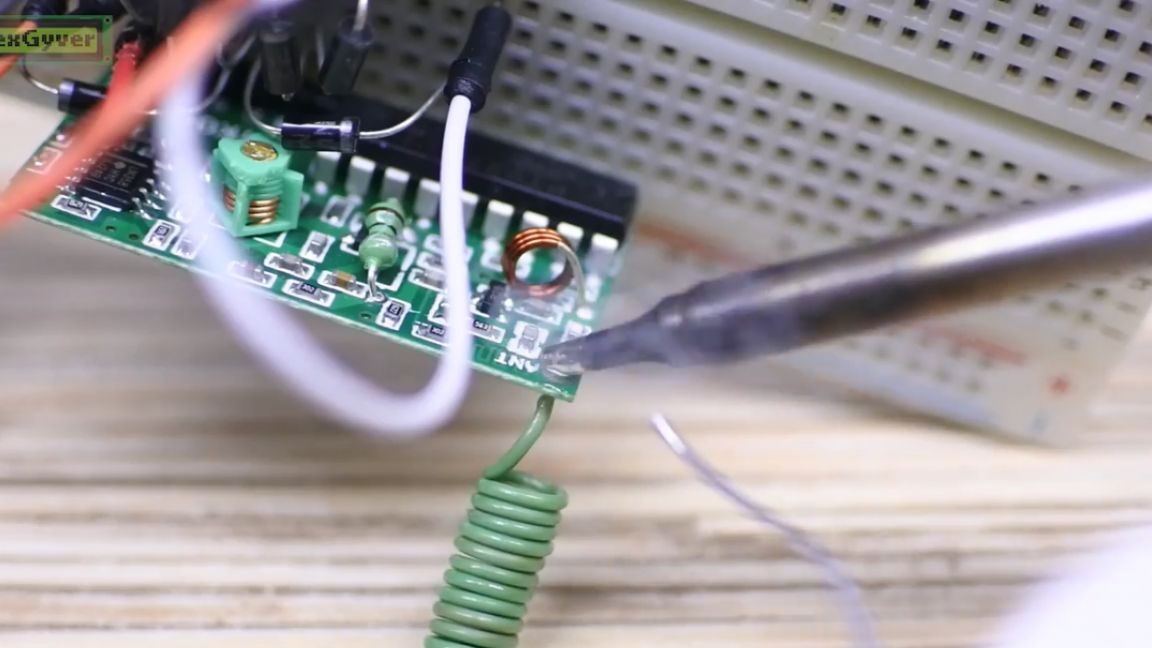
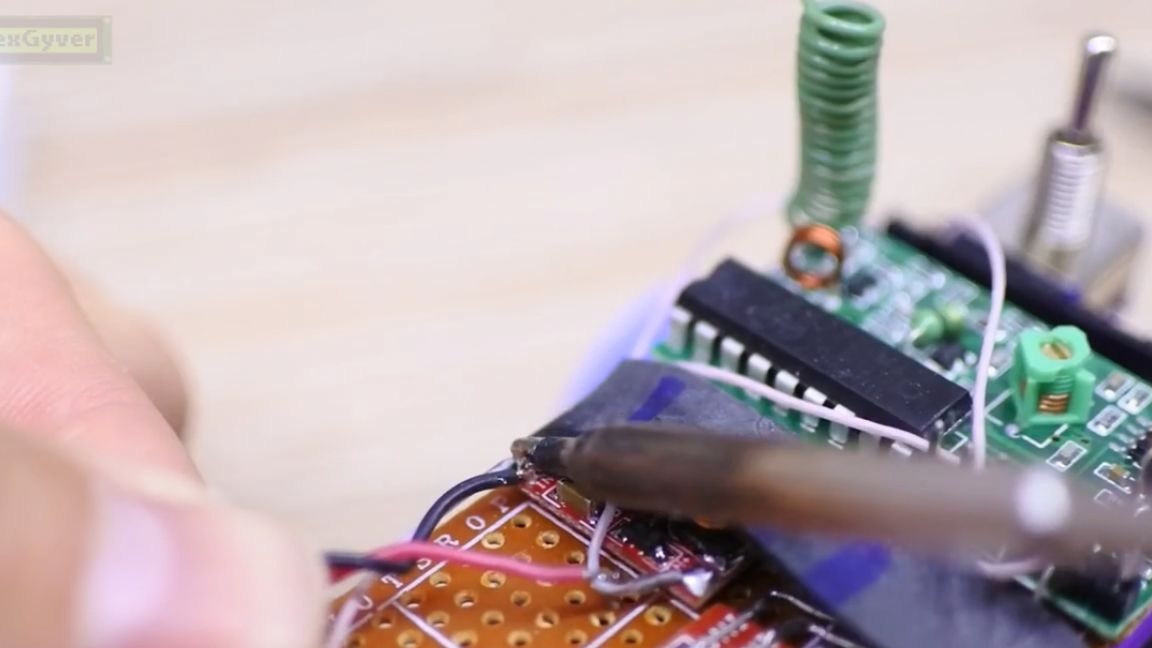
Take a drill of the appropriate diameter and wrap our antenna on it, and then solder it to the board.
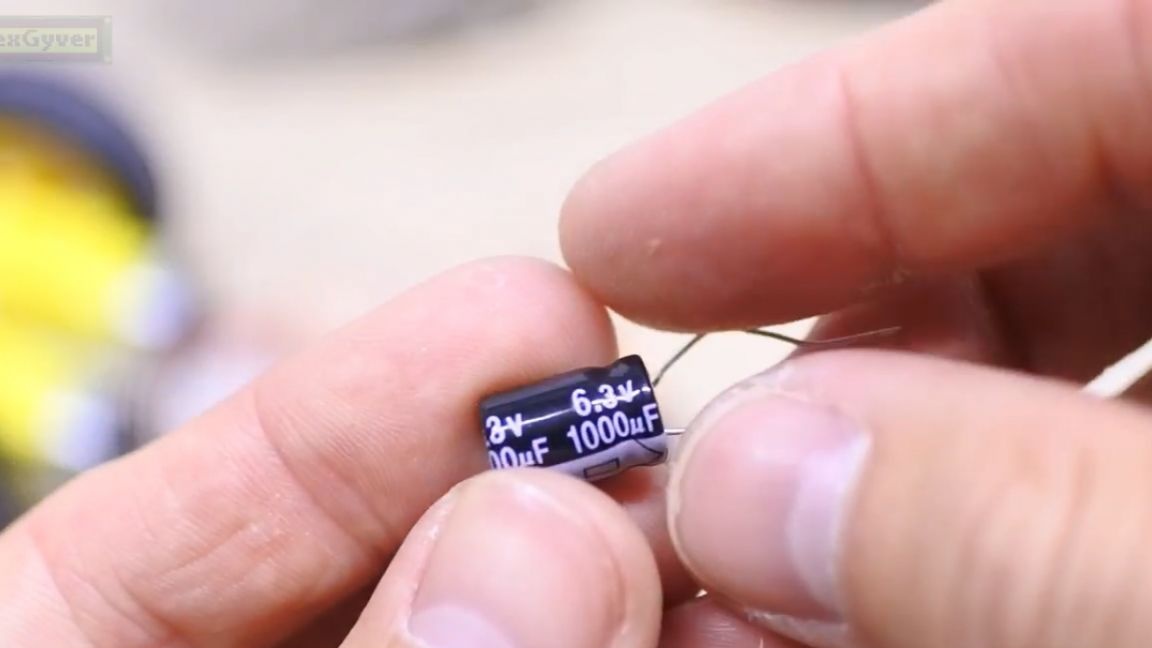
To cope with a high starting current, a capacitor will help us in parallel with the power supply.
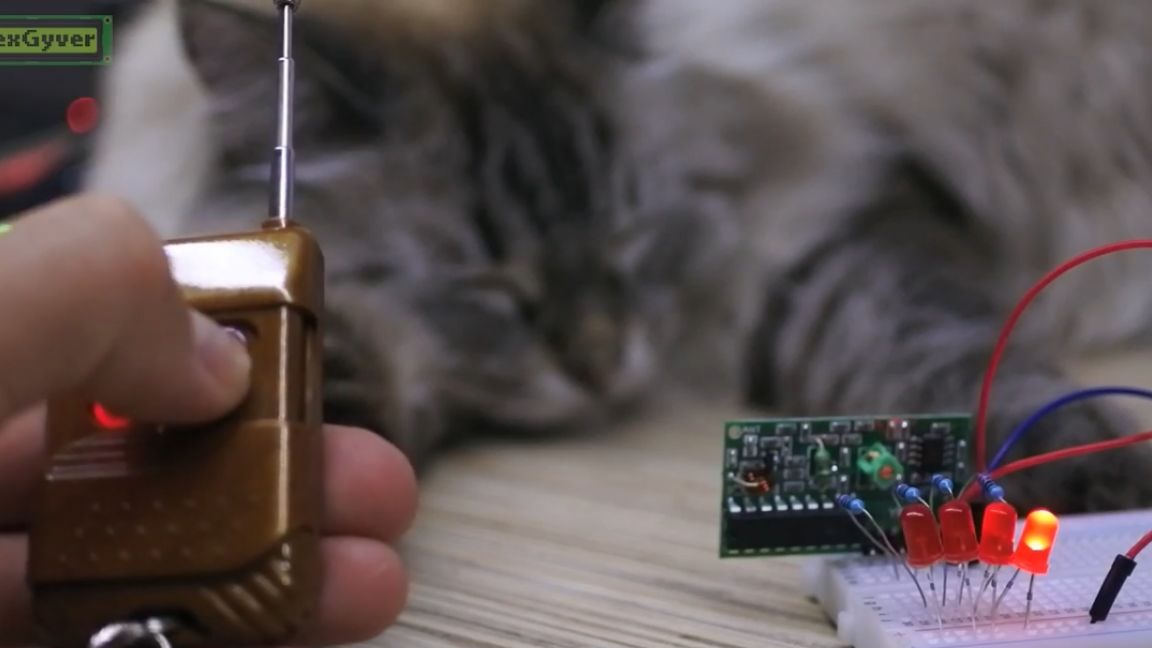
We check.
Close to the antenna, the circuit works stably. Probably, the problem is still in the power supply, there is interference from the motors, since when the motors and the receiver are separately powered, the circuit works as intended.
Add electrolytic and ceramic capacitors to smooth the starting shocks.
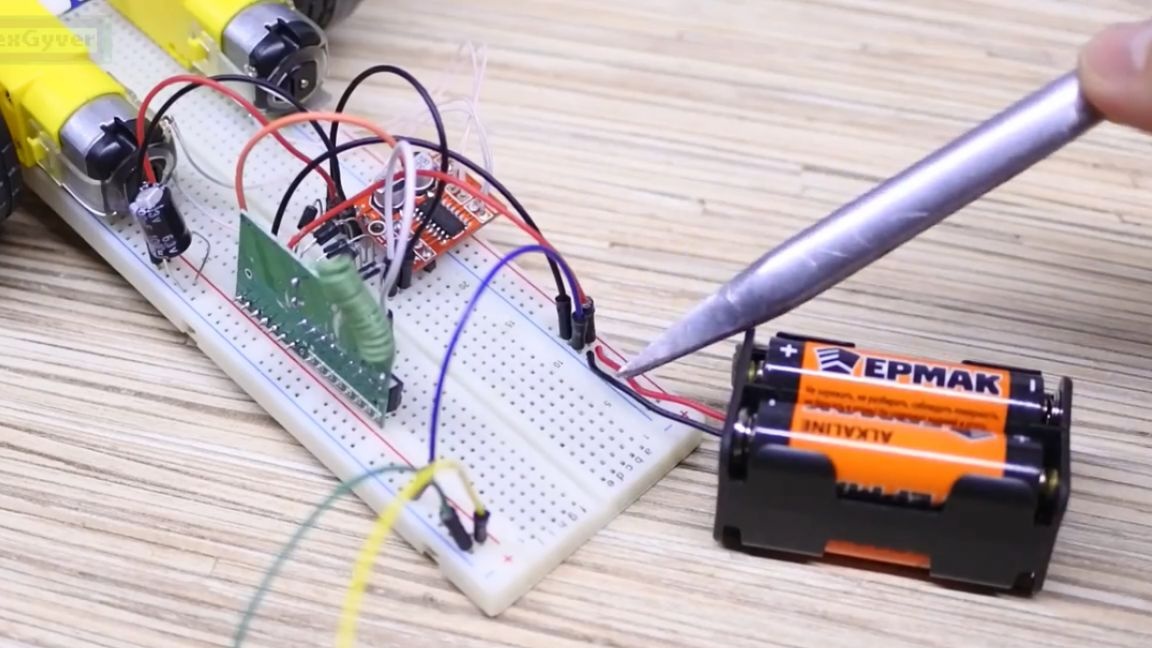
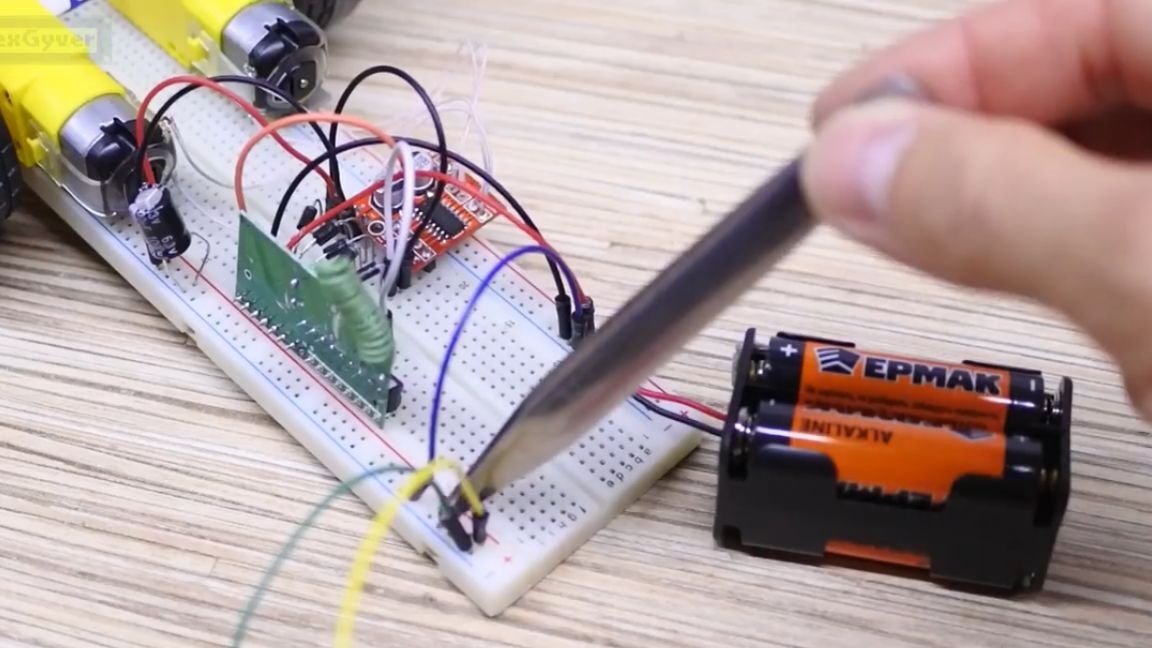
But still, nothing happened. We will do separate meals. One lithium 18650 battery powered by motors and another one powered by a radio. We will also put a boost converter up to 5V, because the radio works from 5V, the battery does not work anymore. To turn on the power, take a double toggle switch.
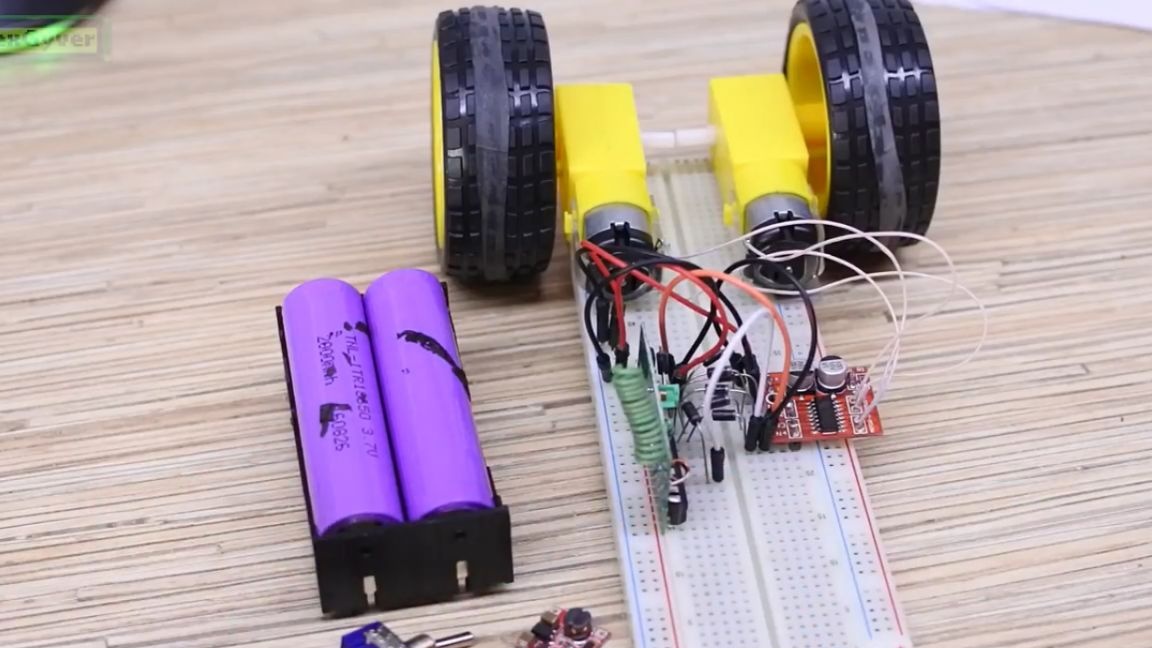
All of these components are sold on Aliexpress. We quickly rebuild the circuit and check it for performance.
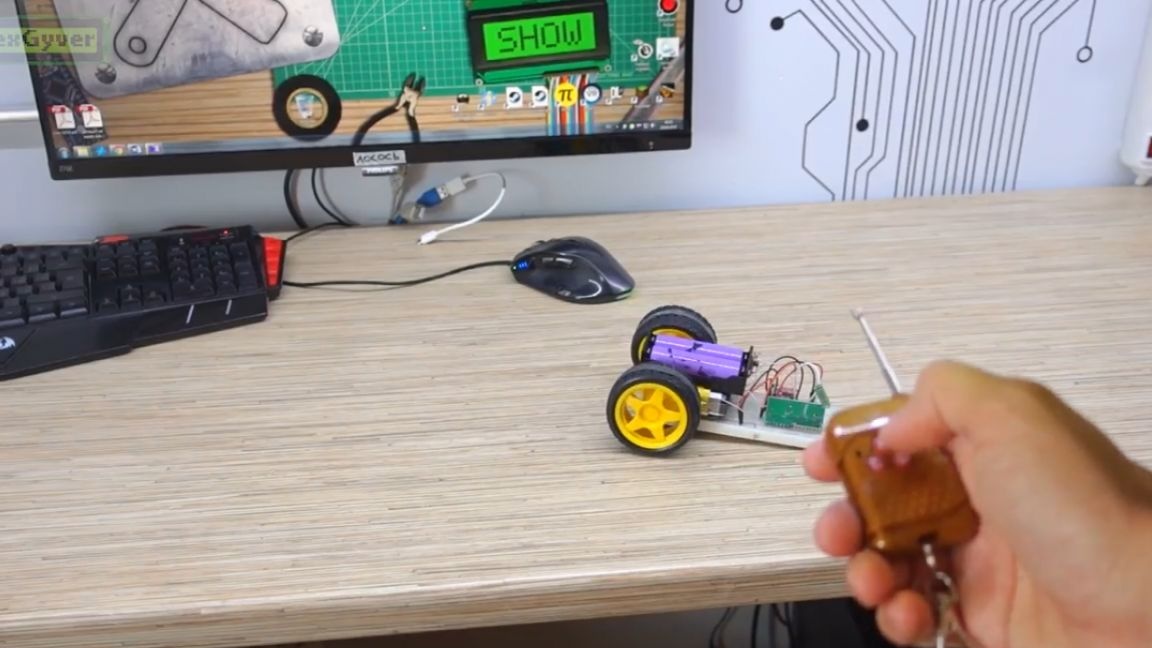
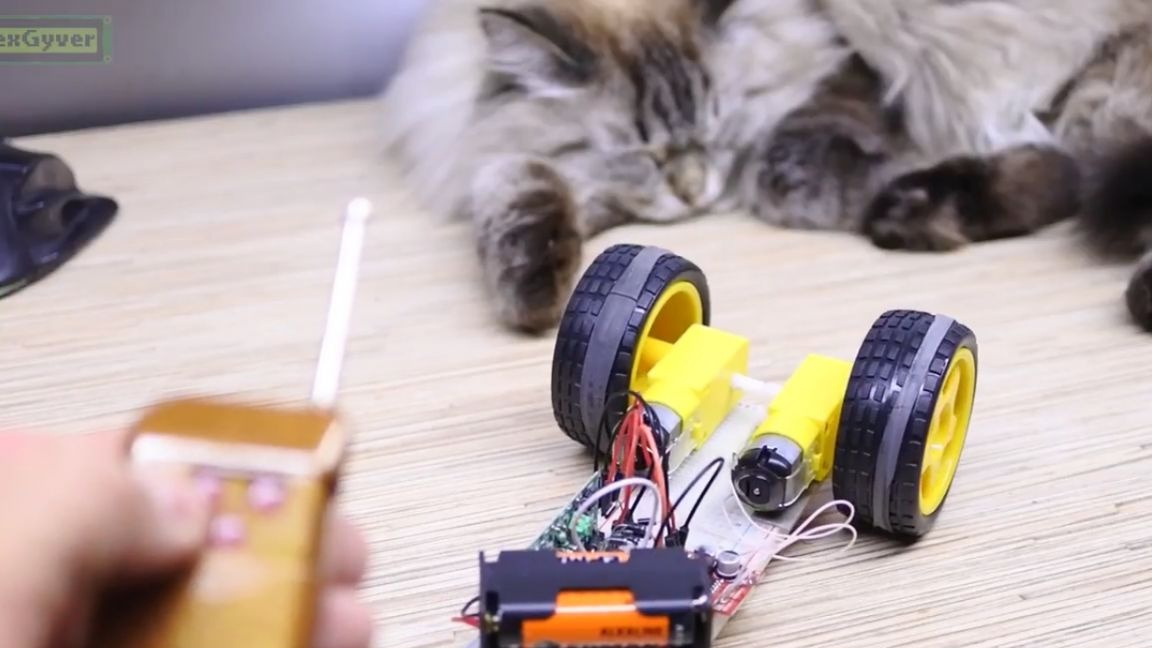
And damn it works. Your attention is presented to the simplest and cheapest home-made machine with a remote control. On the power of the radio module, the author still put a couple of capacitors. It works perfectly.
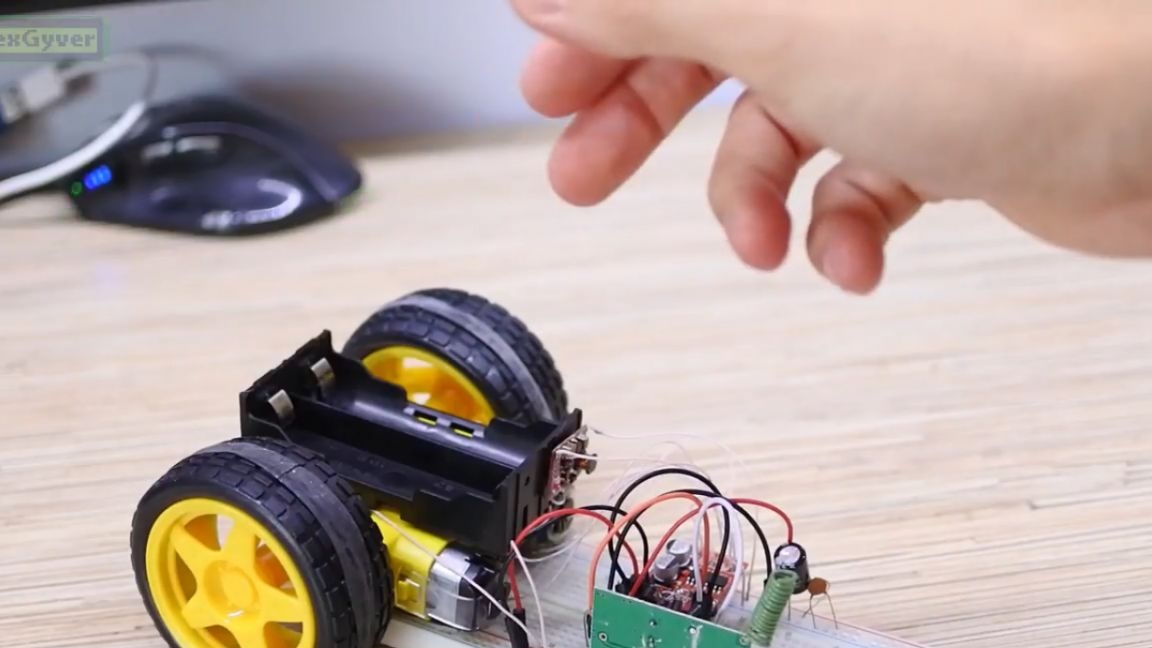
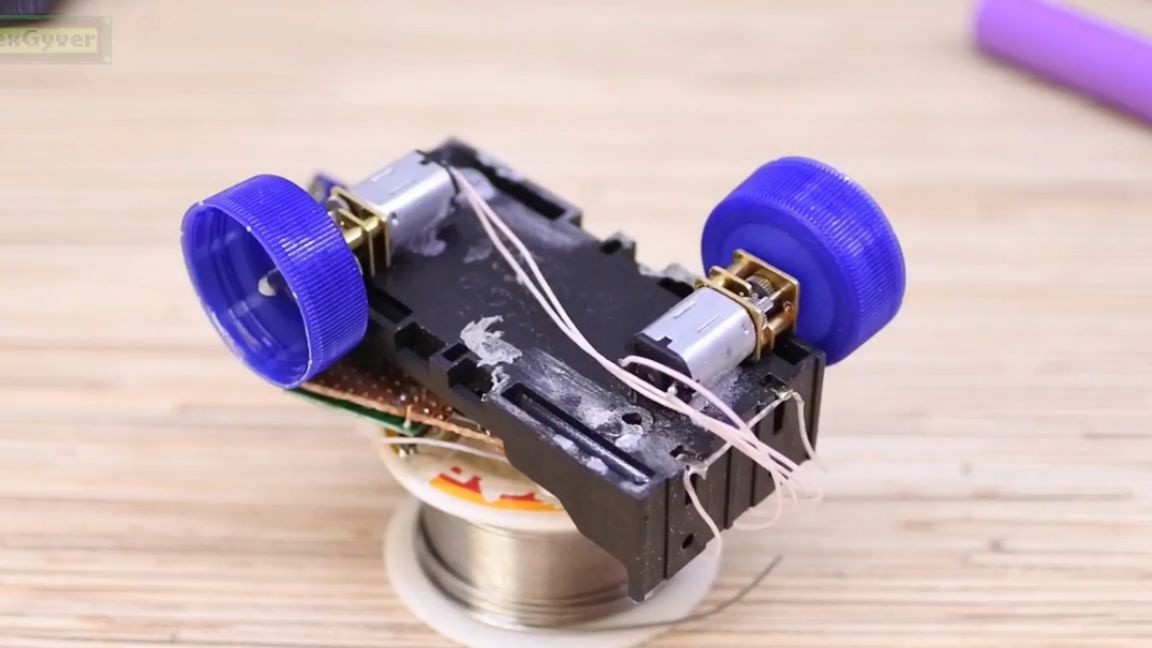
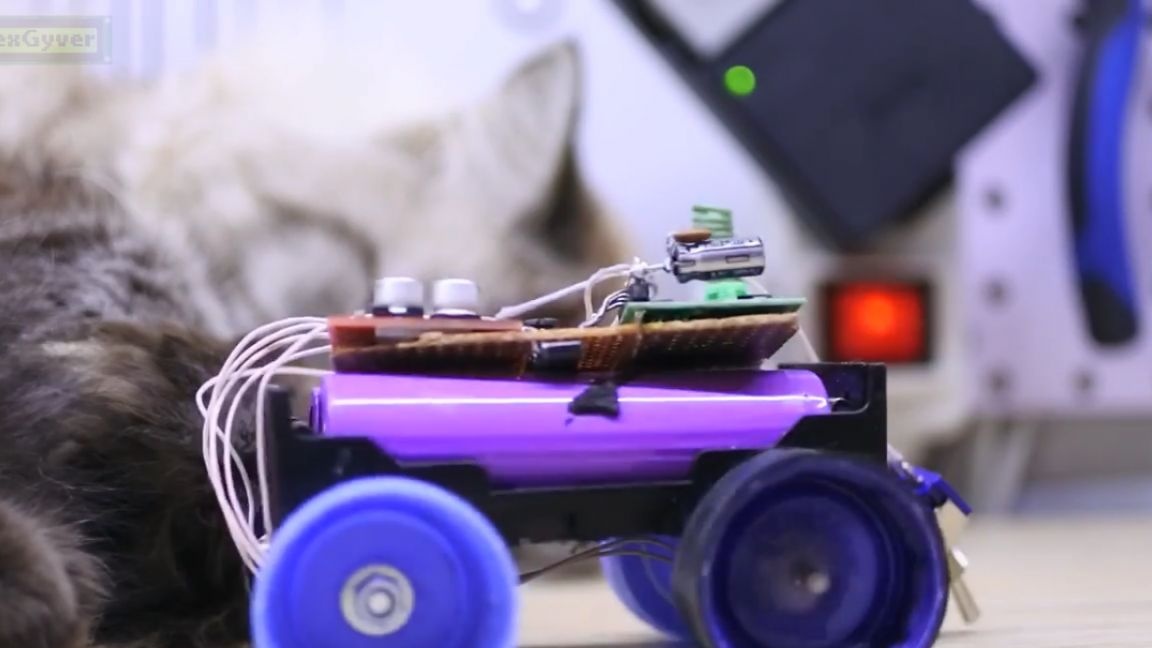
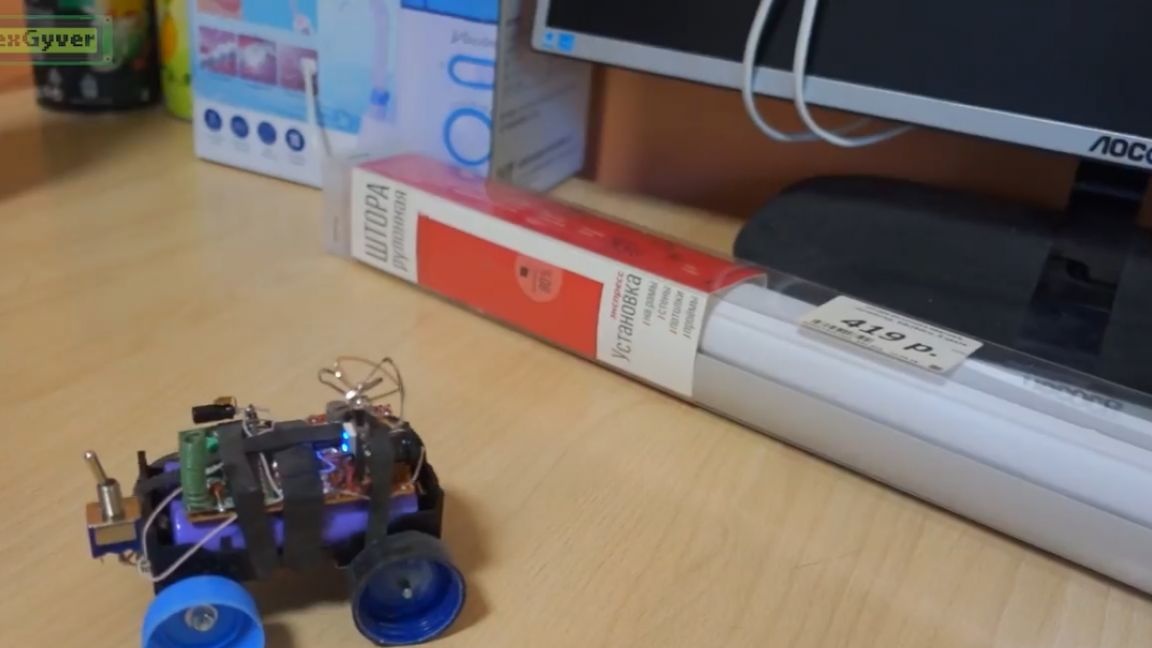
Our robot will be built on the basis of the battery compartment and small motors. The circuit is exactly the same as before, but for convenience we will assemble it on a breadboard.
This assembly, in principle, is simple.
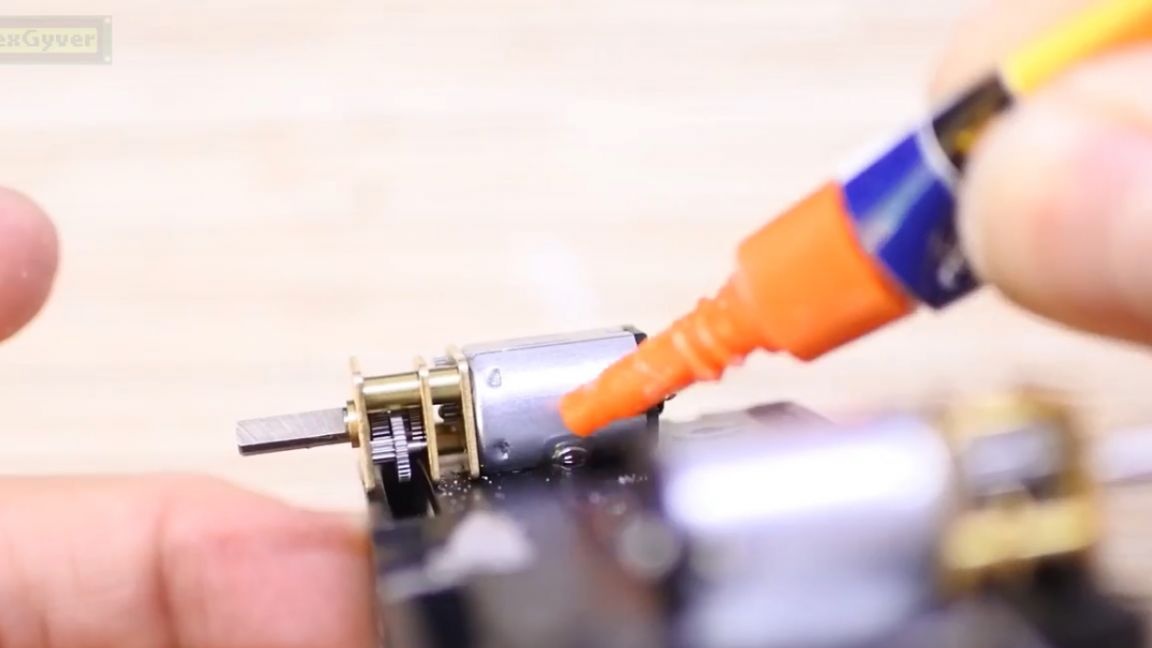
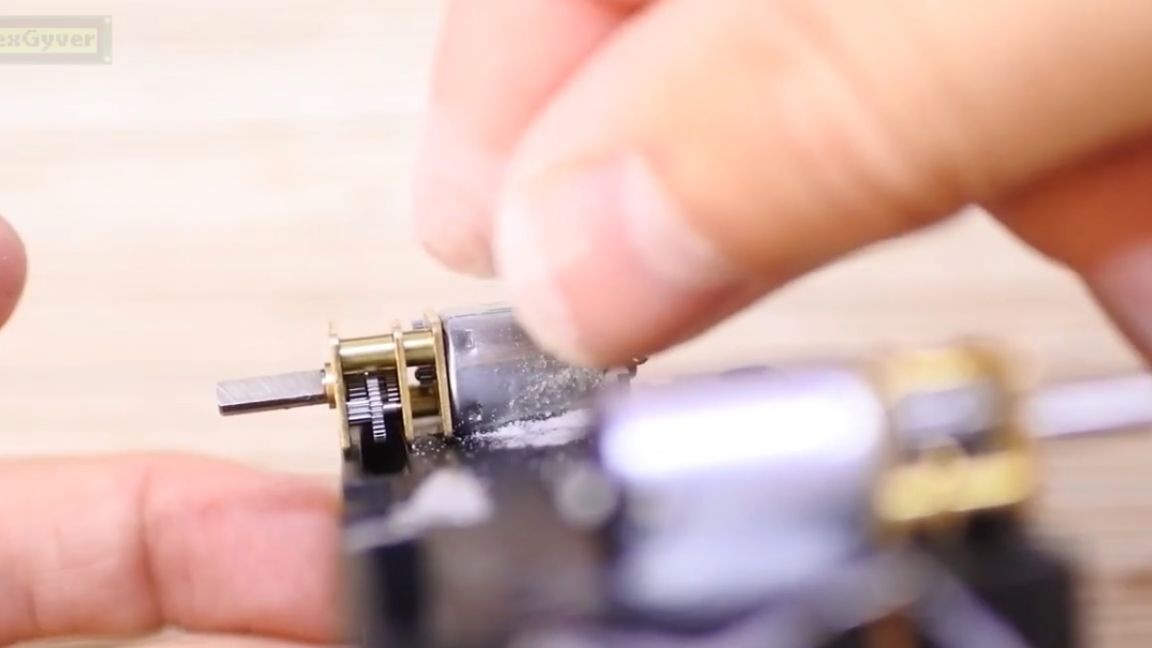
Next, take small motors and glue to the battery compartment. We cure superglue with ordinary baking soda, it immediately hardens and forms a very durable polymer, which is attached very firmly.
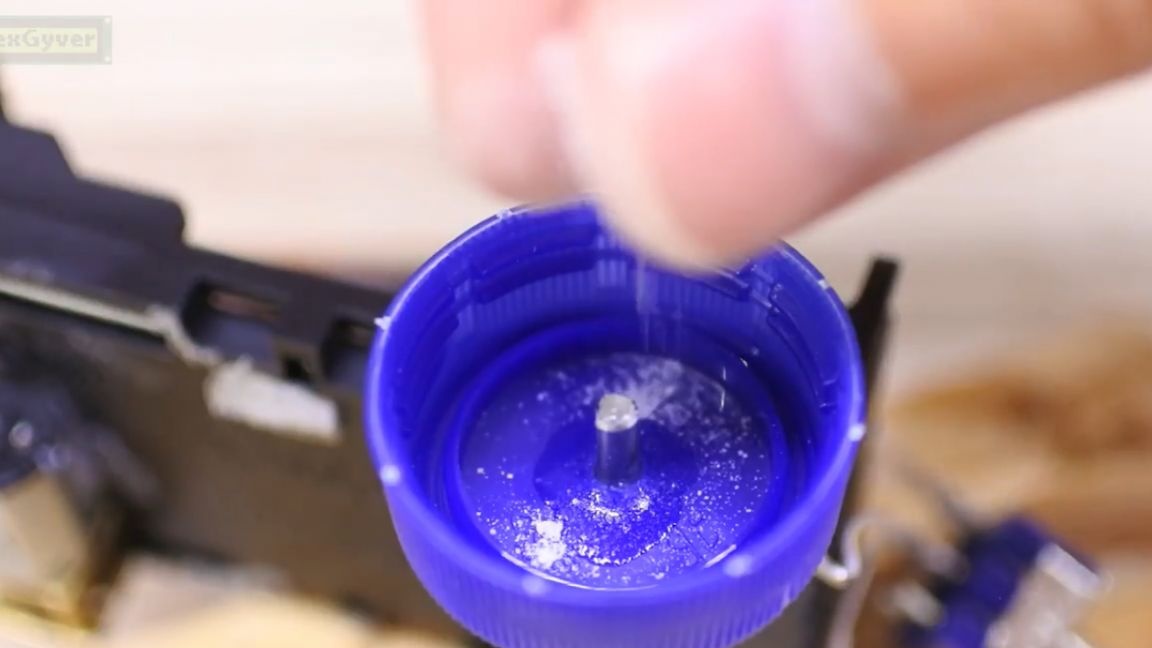
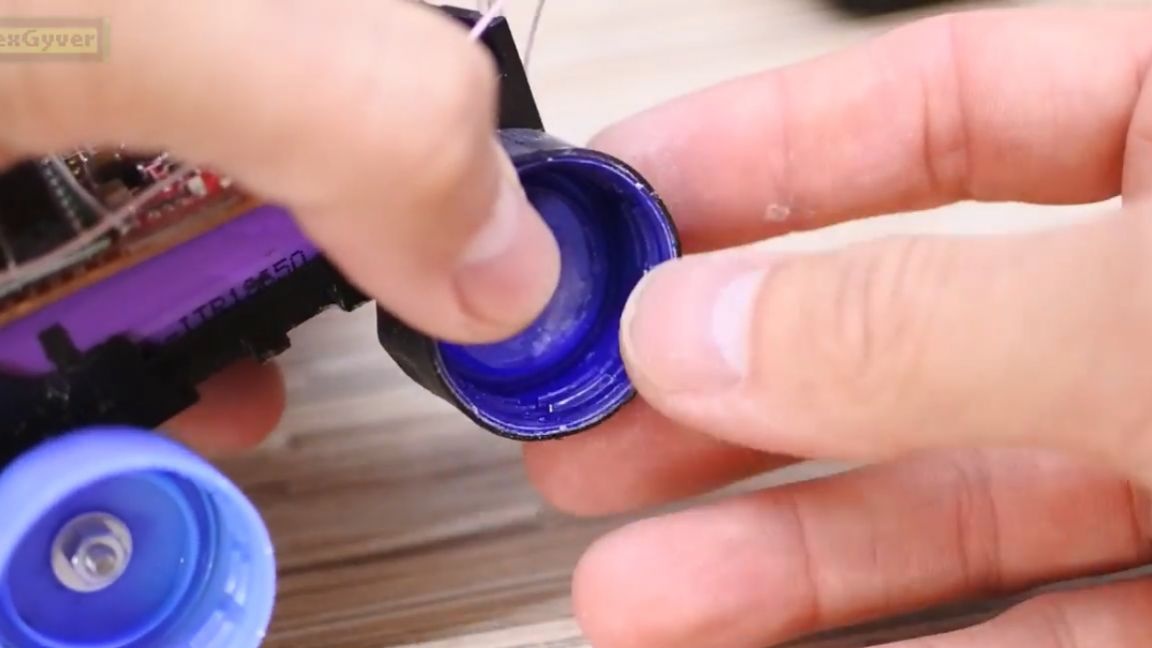
The wheels are ordinary bottle caps.
We will make the driving wheels diagonally, it will be more compact and the machine will turn better, but overcome obstacles worse.
We also need 2 more wheels that will just spin. Fasten them in a sleeve from a pencil, it fit well in size. The axis will be from the m3 screw, so we drill a 3mm hole, assemble and glue it on superglue.
Be sure to make tires from a bicycle camera otherwise it won’t go. We put rubber only on the drive wheels otherwise, again, it may not go.
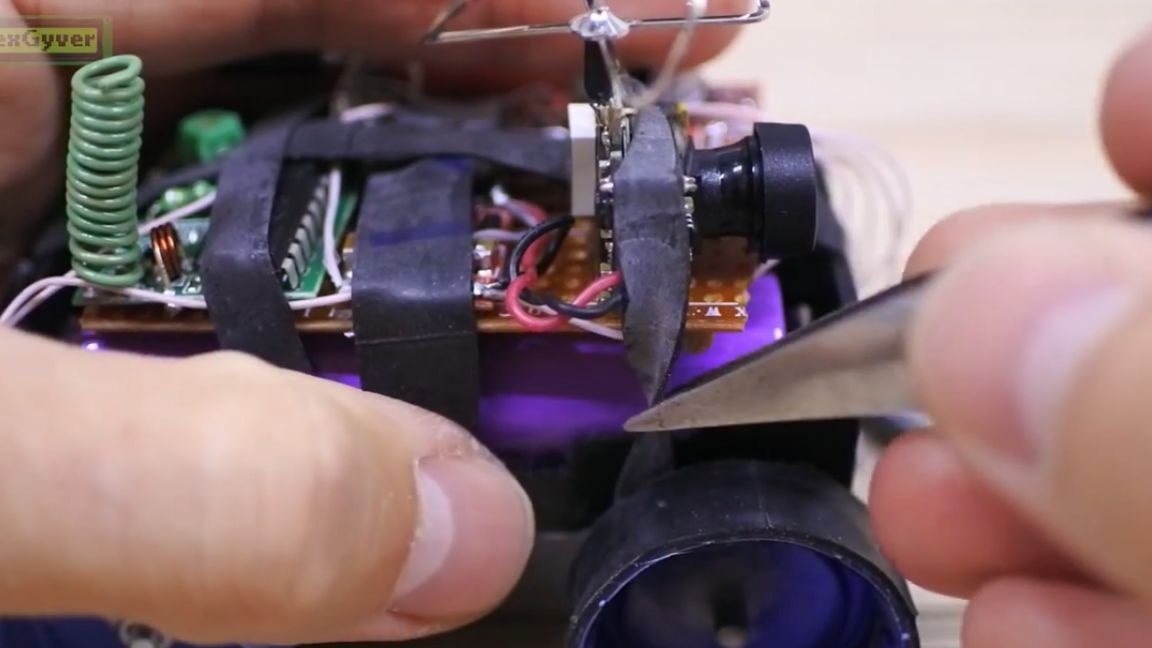
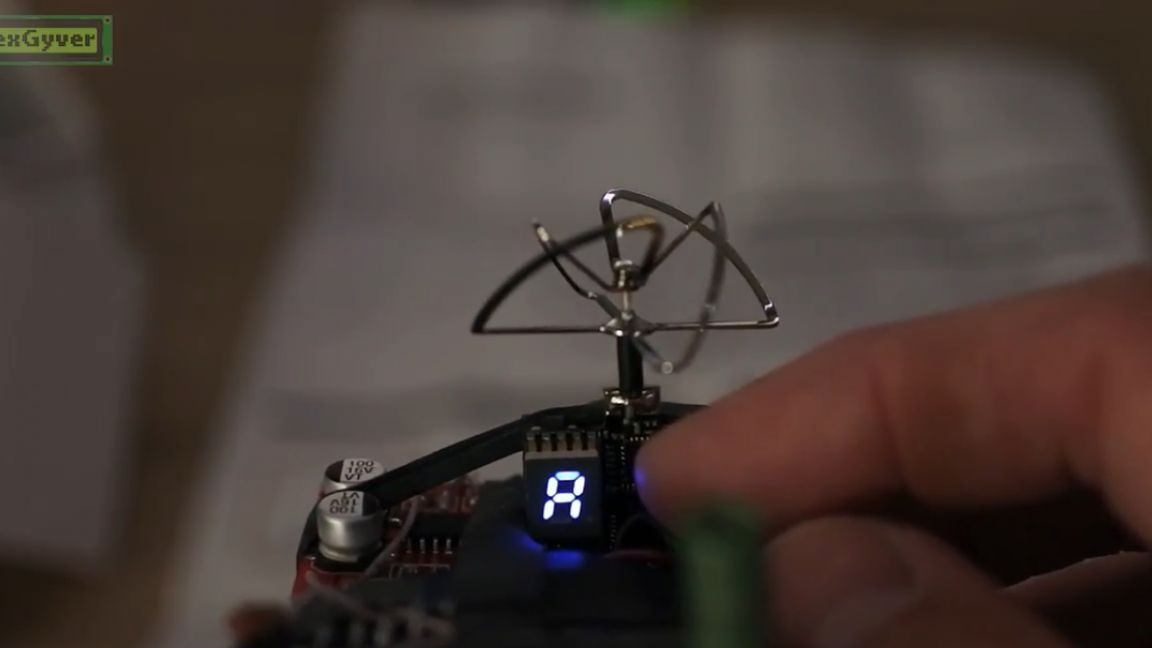
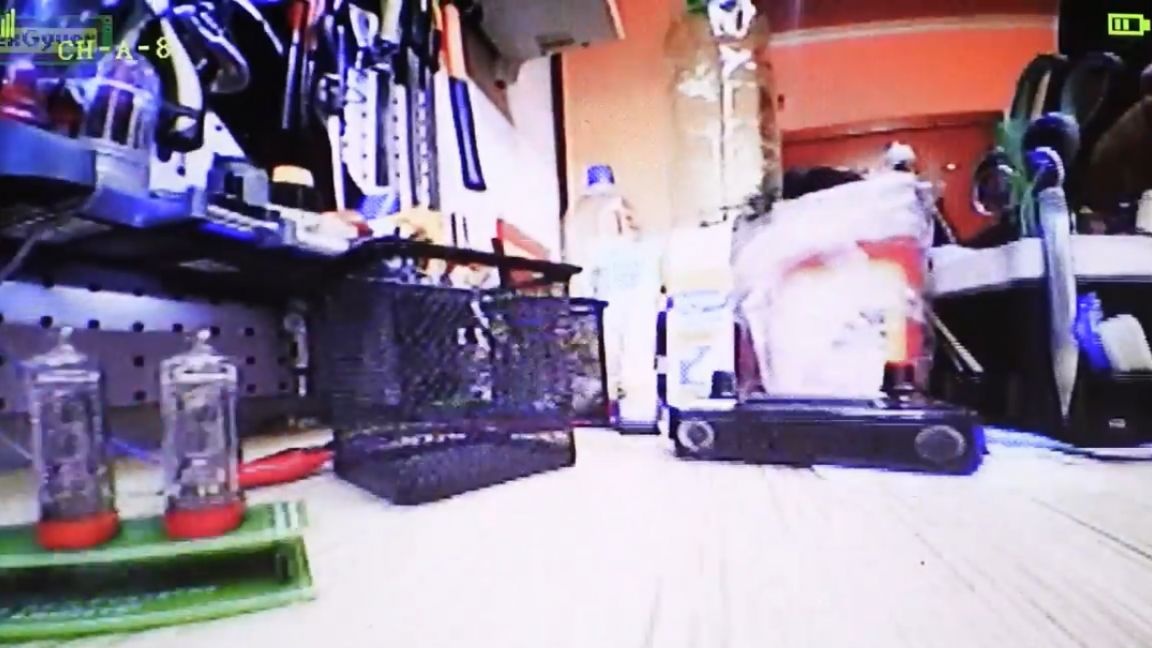
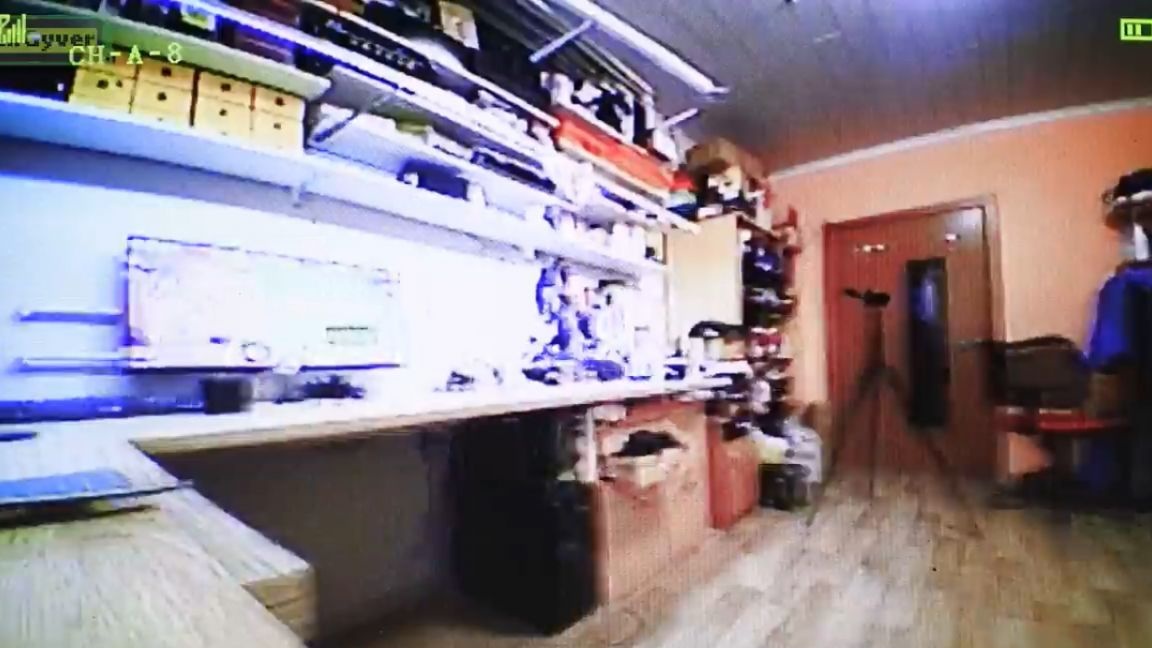
Well, how is our mini spy machine without a mini camera. The author took a mini camera for a quadrocopter and Eachine tx-02 3 in 1 (camera + transmitter + antenna).
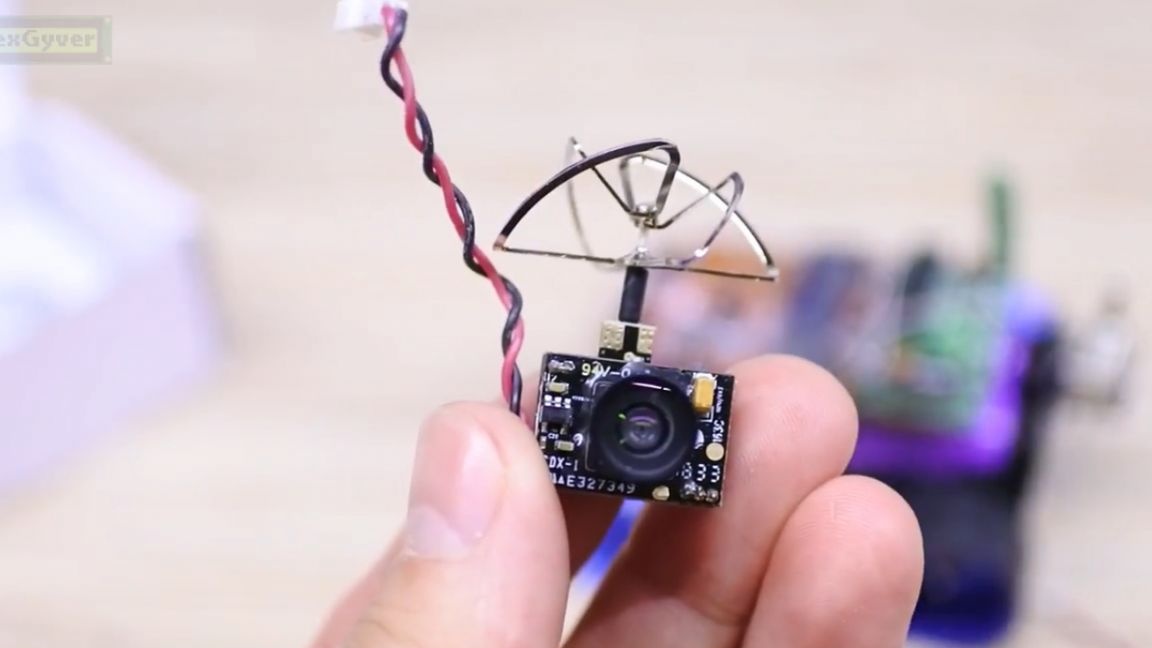
The camera is powered by a voltage of 3 to 5V and sends a video signal at a frequency of 5.8 GHz. We power it from the battery from which the remote control receiver is powered.
Thus, the motors will not interfere with the video signal. Fasten to double-sided tape and rubber band.
You can receive video on several different Chinese devices. There is such a cool display with a built-in receiver and a built-in battery, you can also insert a memory card into it and record on it what the camera takes.

The author, unfortunately, does not have one, but the thing is really cool and comfortable. The second option is slightly smaller, but just what you need for our spy car is direct.
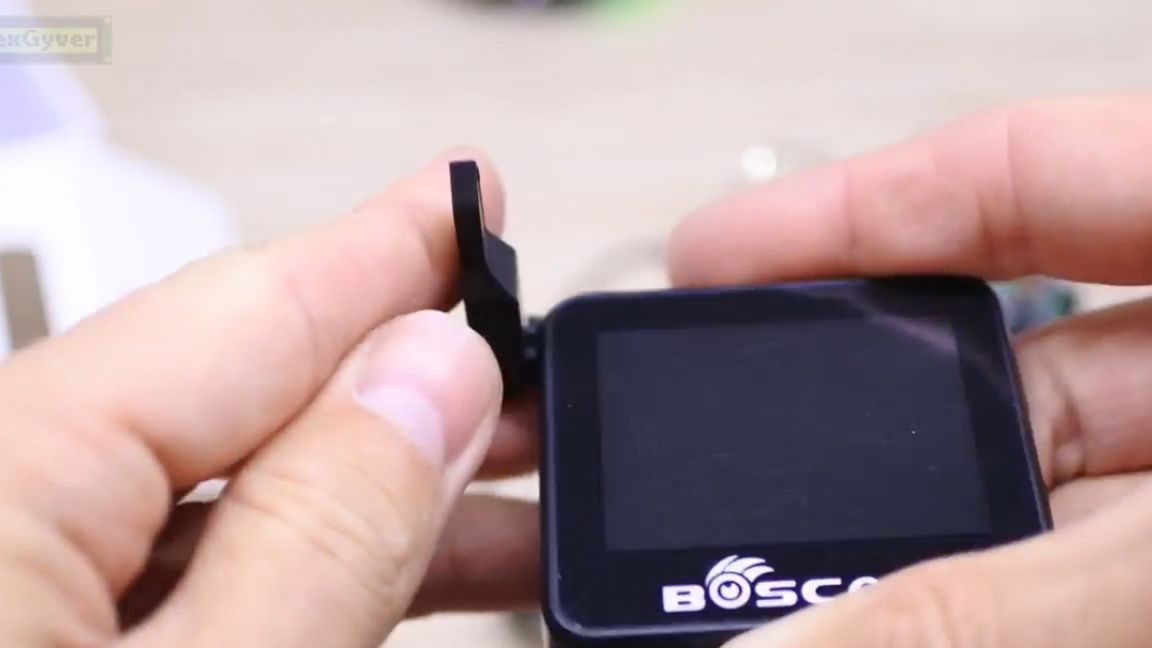
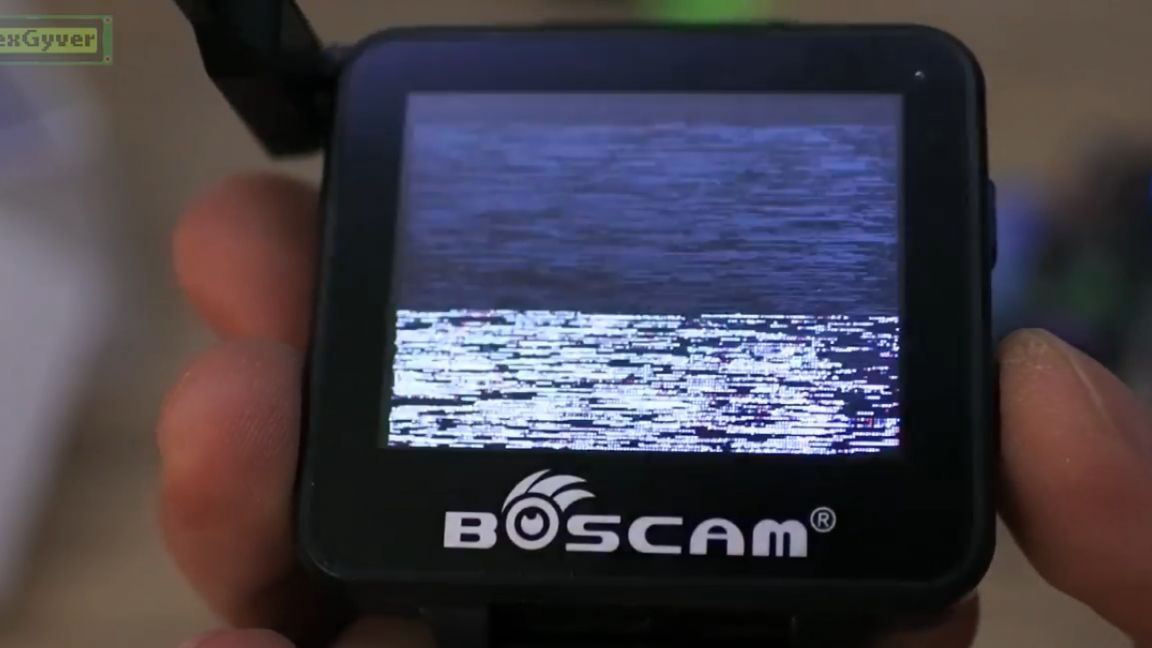
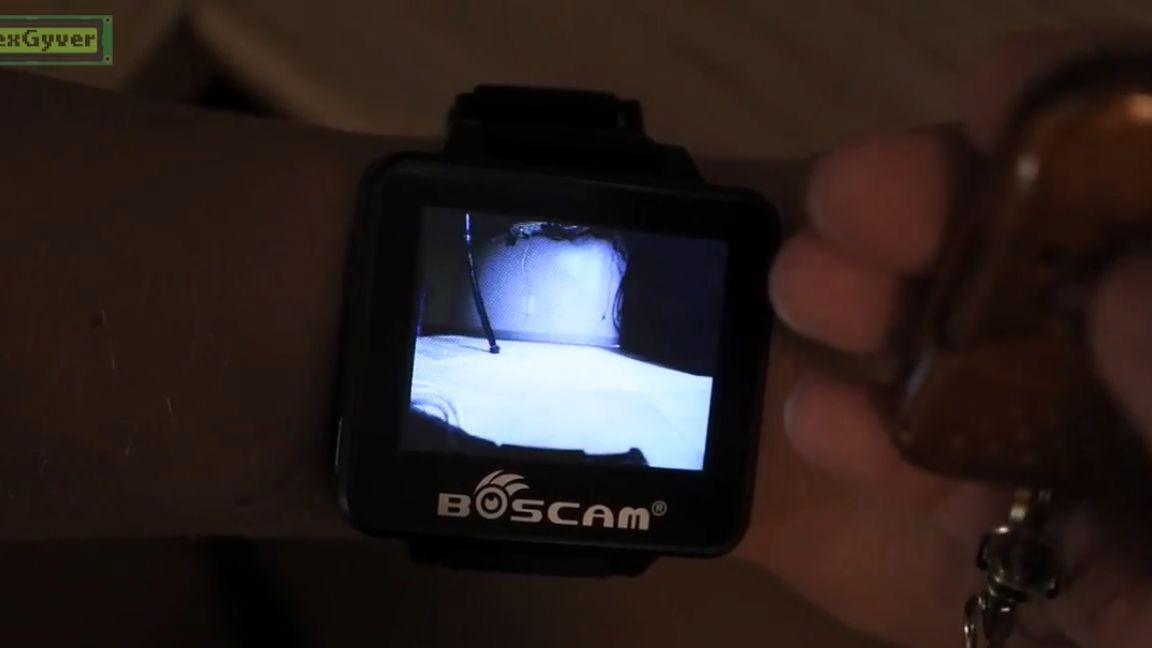
This is a small display with a receiver and battery, and not just a display, but a watch with a 2-inch display. Video link channel tables are encoded in four letters and eight digits.
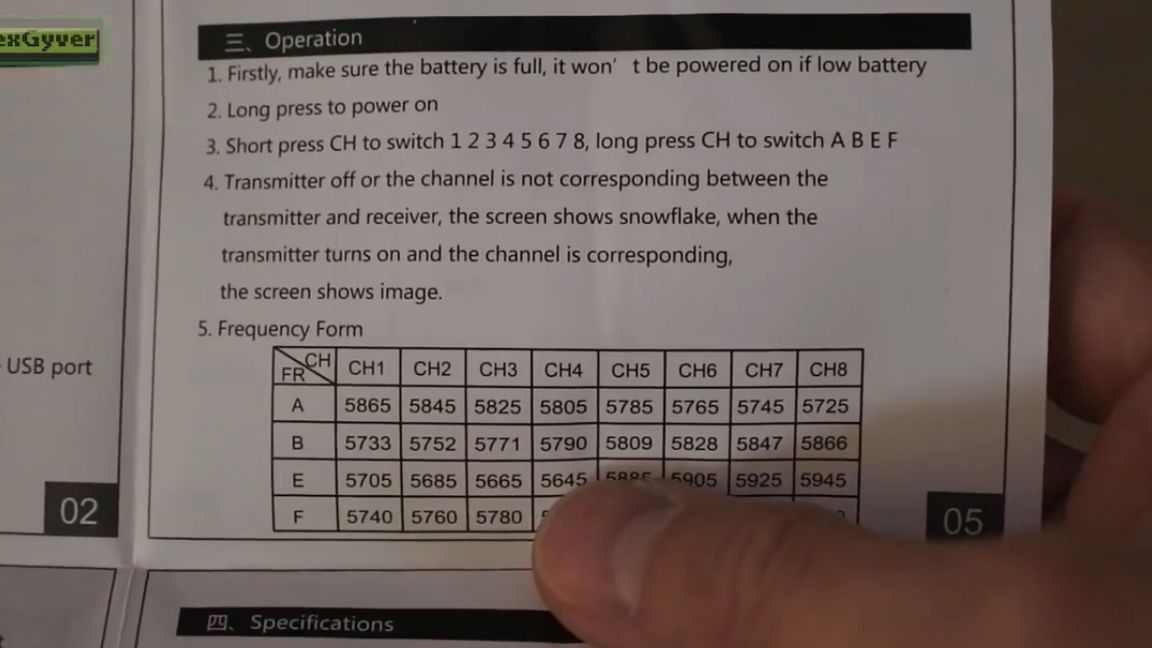
The channel must match on the transmitter and on the receiver.On the transmitter we have a channel with the number A8, you can change the button.
And the watch has a scale. By clicking and holding the button, you can set the channel number A8.

Everything, there is a contact. You can start surveillance.
The third option, in principle the cheapest, is such a receiver for a smartphone, download a special program, open, connect, enable, turn on the power on the video transmitter, press and hold the button on the receiver, and scanning begins.
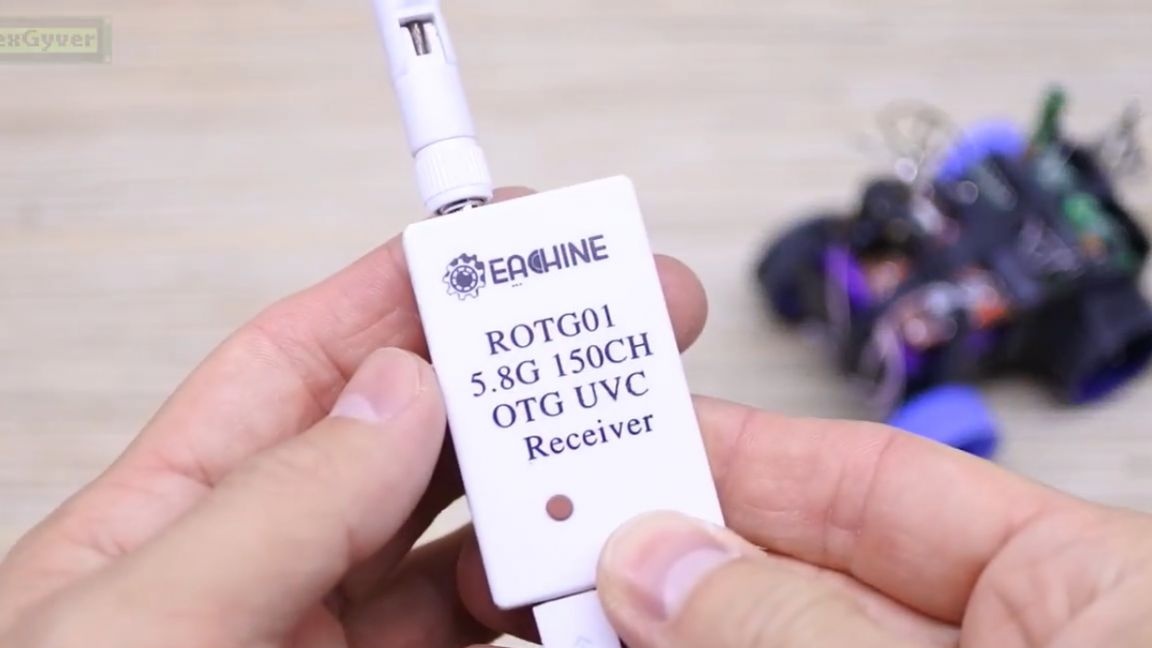
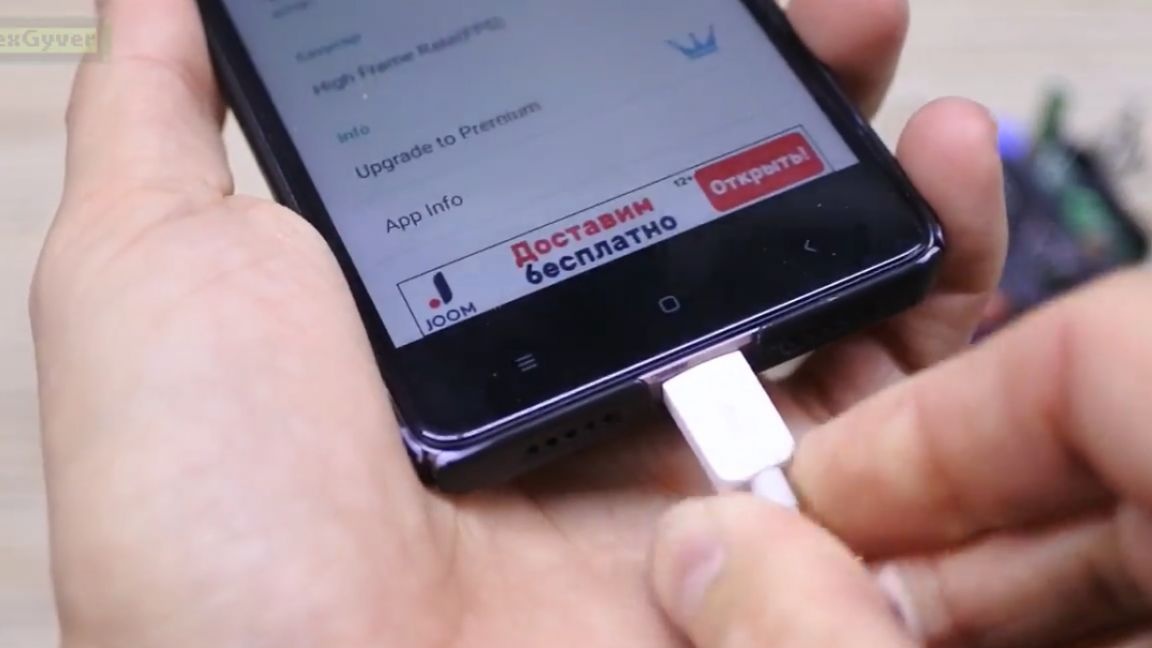
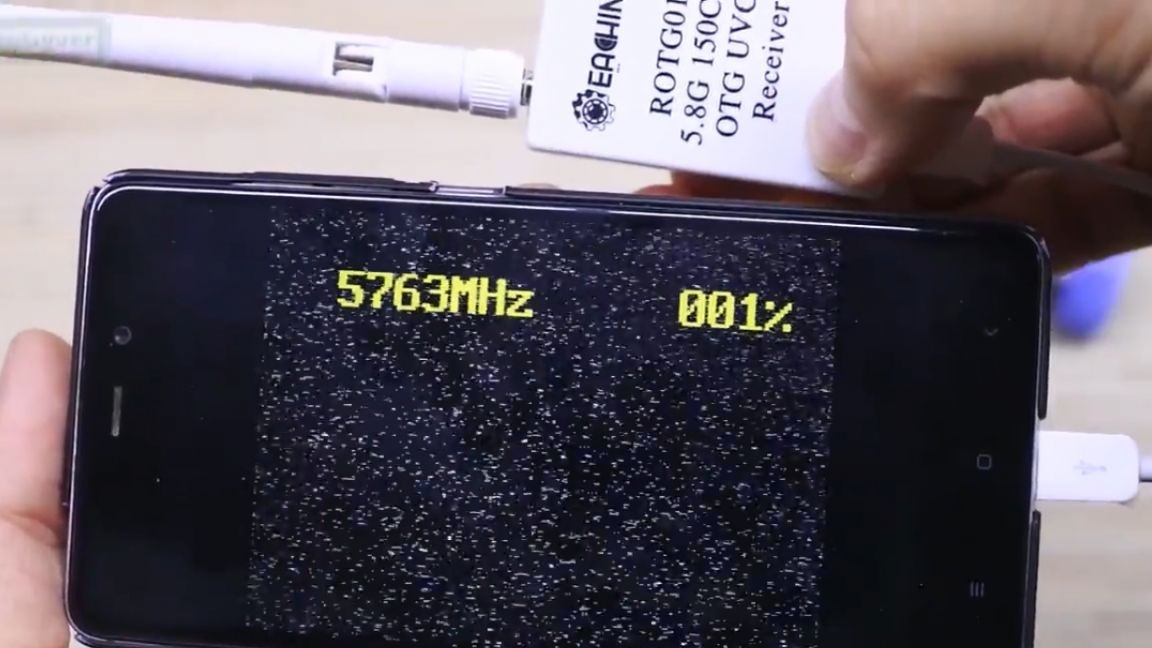
After that, the best frequency will be automatically selected and you can work with our video surveillance system.
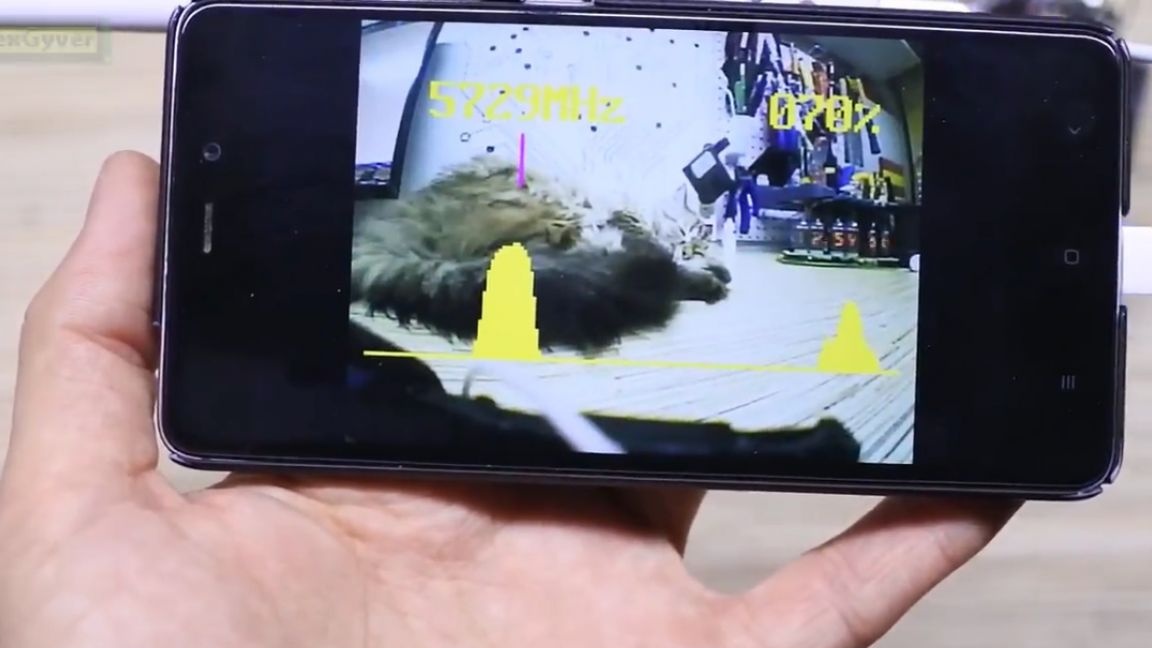
The coolest thing is that you can record video directly into the phone's memory.
That's all for today. Thank you for attention. See you soon!
Video: