
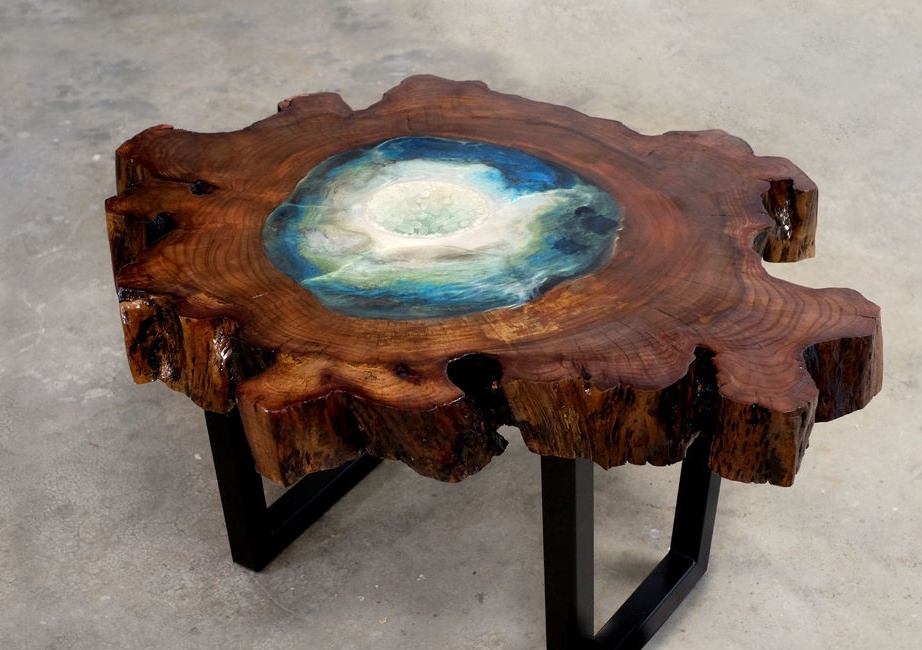
Hello everyone, in this instruction we will discuss how to make an interesting table from a cut of wood and epoxy with dyes. The table looks pretty beautiful, original, but it is not made as difficult as it might seem at first glance. As the main material, we need a saw cut of a tree, oak, maple and other species that have a beautiful pattern are well suited. If desired, you can leave the tree bark, if it is covered with epoxy, it will hold firmly.
The main problem when using a saw cut tree is its dryness. If the tree is at least a little damp, the epoxy will immediately cloud. In addition, the wood will deform and crack when dried. Some craftsmen pre-cook raw wood, and then dried. So it dries much faster, and also does not crack or deform. You can also find a dry tree and make a cut, after which it is well dried, cracks should not appear. In general, cracks are also not a problem, they can be filled with epoxy, everything will become even stronger than it was. So, let’s take a closer look at how you can make a table from a similar material.
List of materials and tools that the author used:
Material List:
- cross section of the tree;
- epoxy resin for pouring and dyes;
- foil or the like;
- varnish;
- crystals (installed inside the countertop);
- legs for tables;
- glue gun;
- masking tape;
- paint for metal;
- gas burner or building hair dryer.
Tool List:
- drill with a crown (to make a hole in the center of the countertop);
- grinder;
- brushes;
- grinding machine (orbital or belt);
- sandpaper.
The process of making a table:
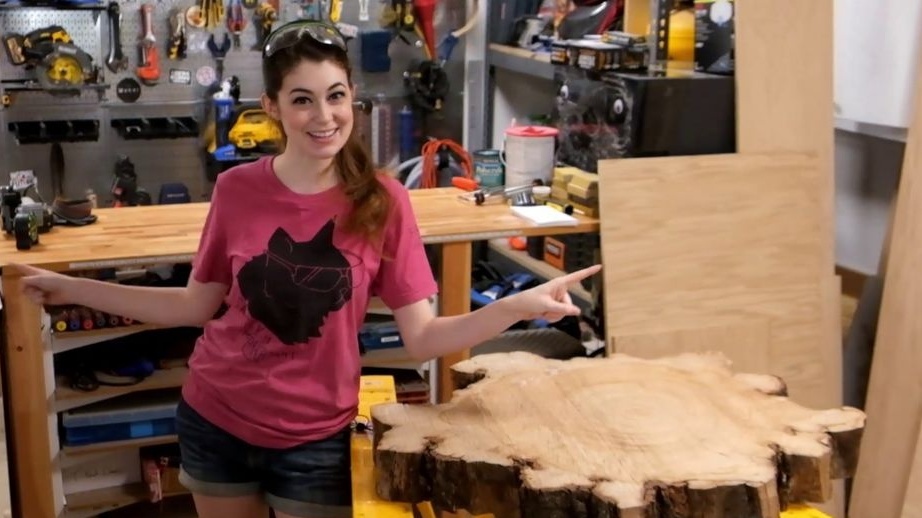
Step one. We prepare a cut of a tree
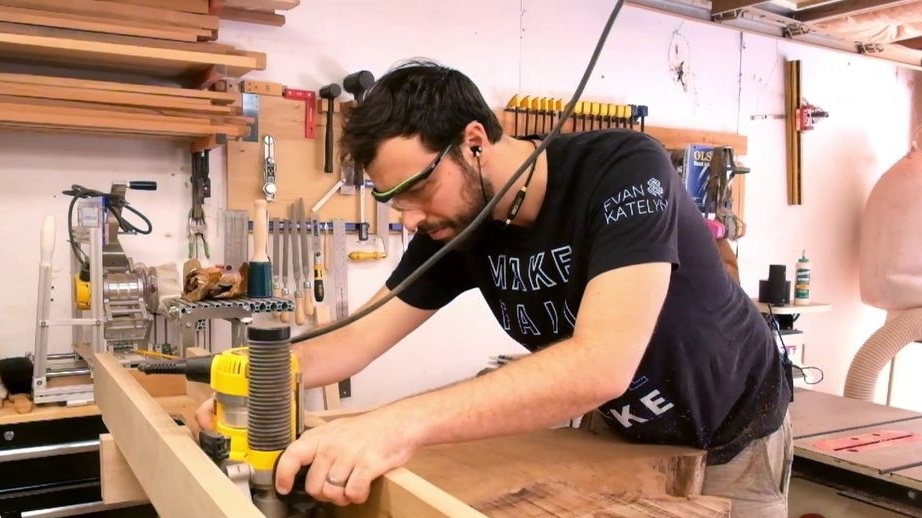
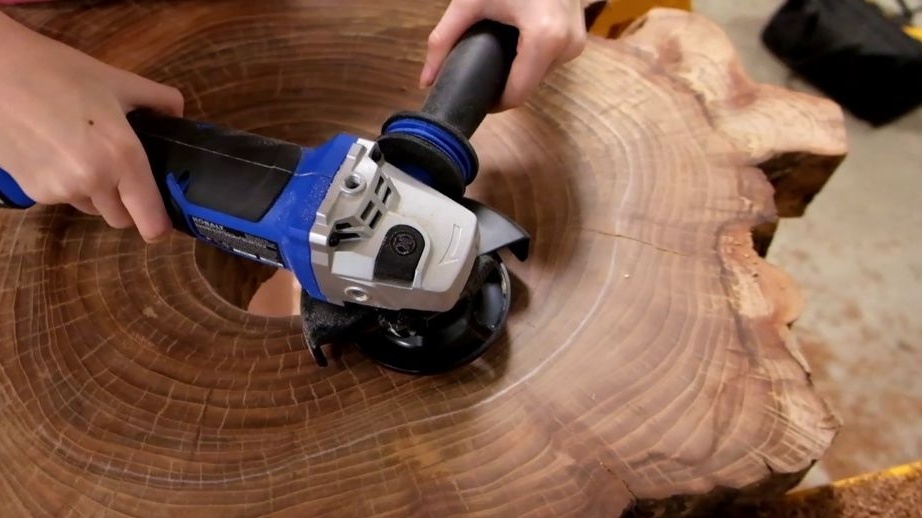
Let's start with the most important material - this is a slice of wood. The author decided to remove the bark, but the contour of the wood remained untouched. If the tree is well dried, you can start grinding. You need to align the planes, make them perfectly smooth.To begin with, you can go through a manual planer, and then proceed to grinding. Of course, manually doing all this will be quite difficult, here we need a manual orbital machine or a tape machine. We grind the front plane thoroughly, using first a coarse tape, and then a shallow one. If desired, then wood can be soaked with wood stain.

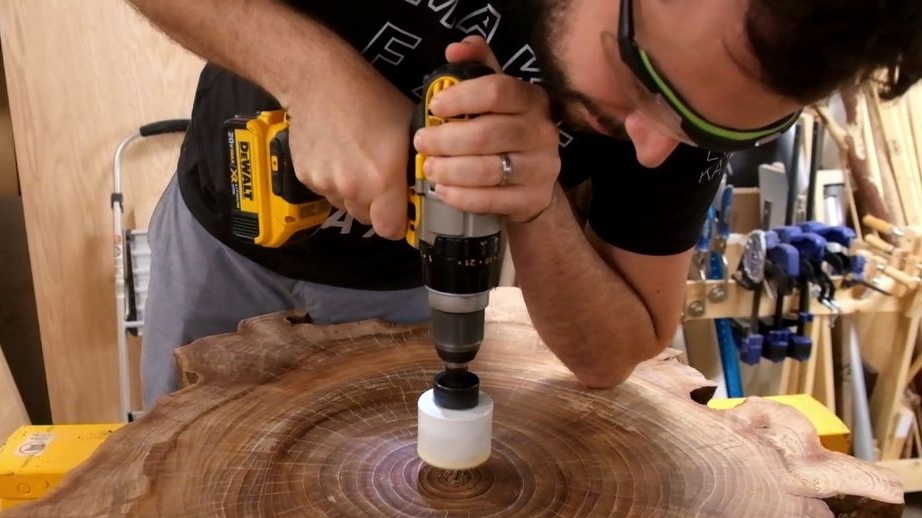
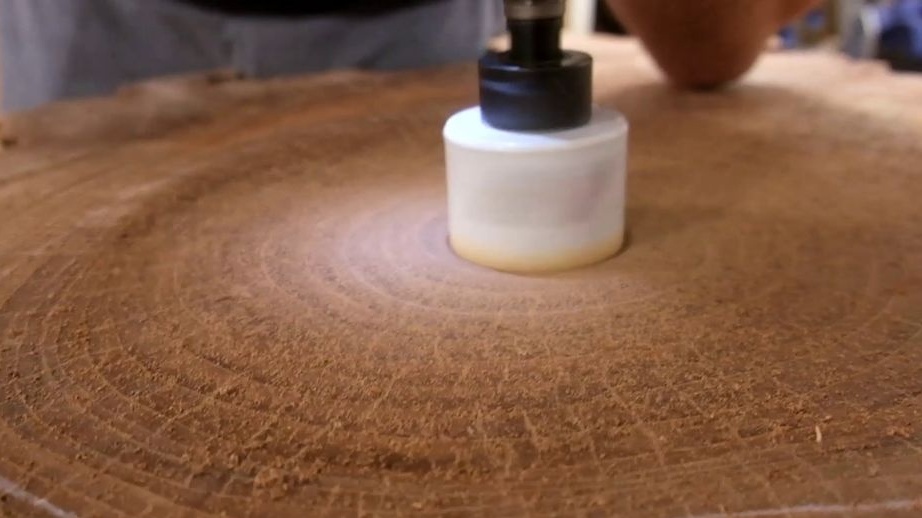
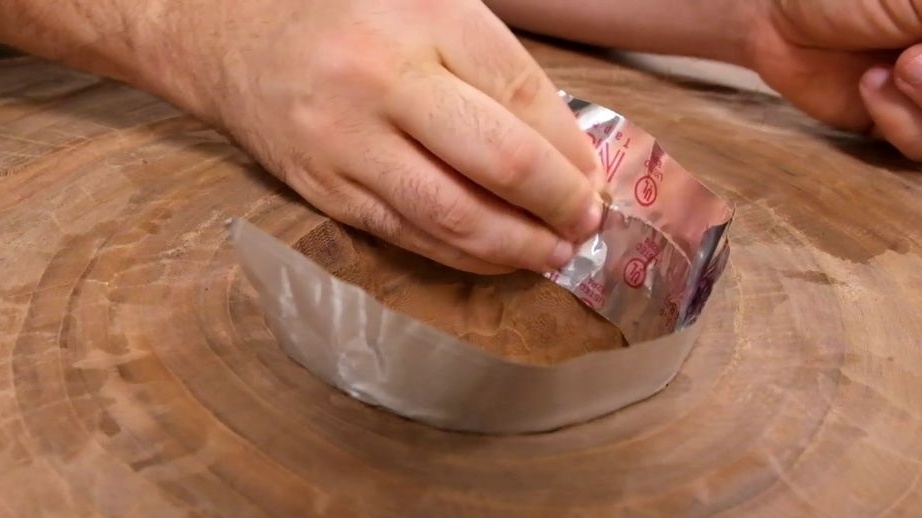
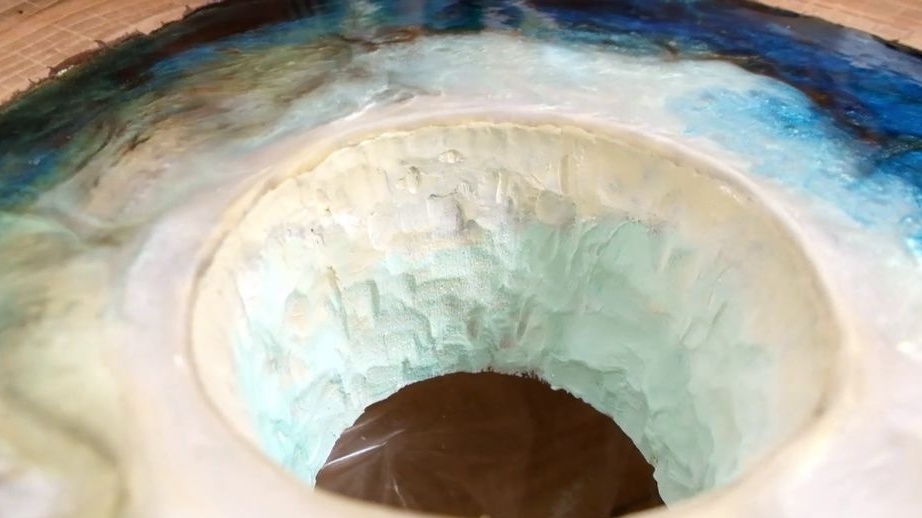
Step Two Drill a hole
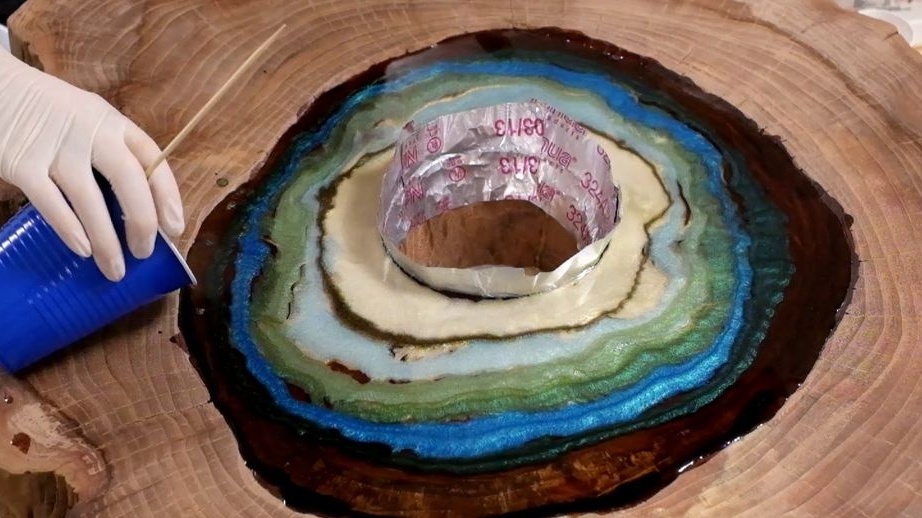
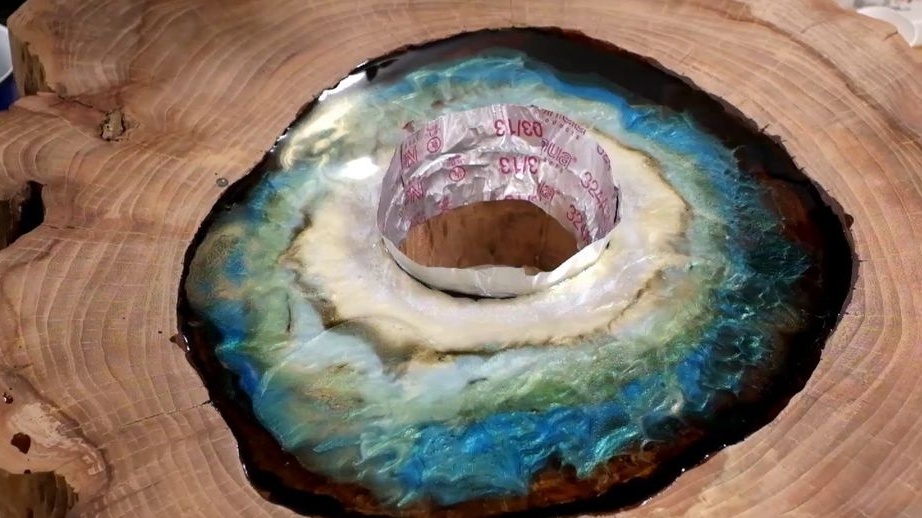
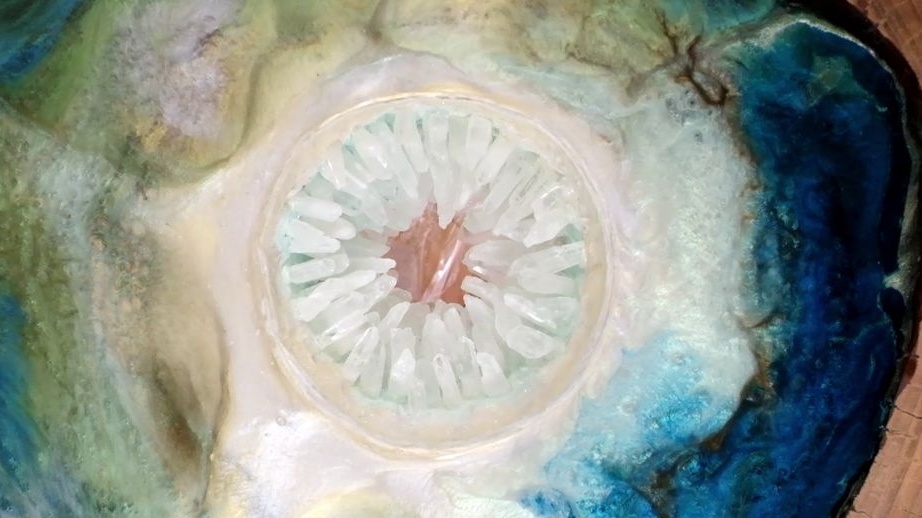
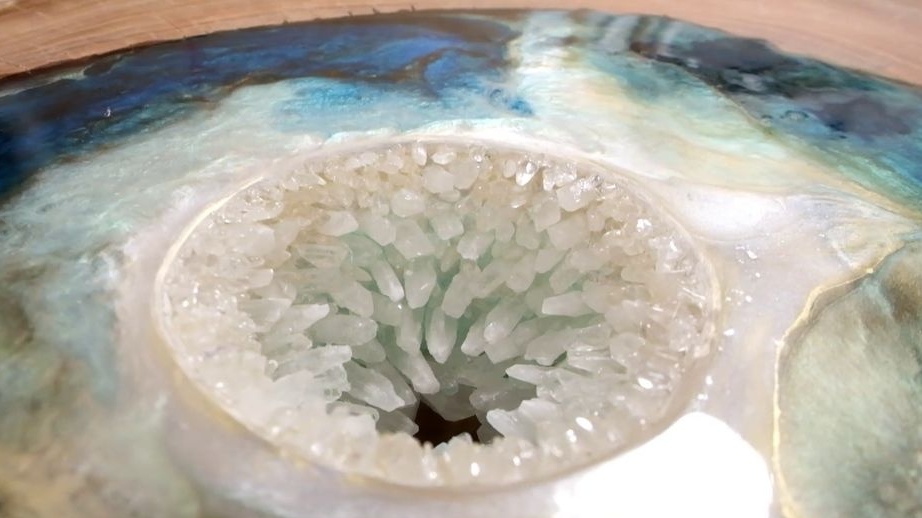
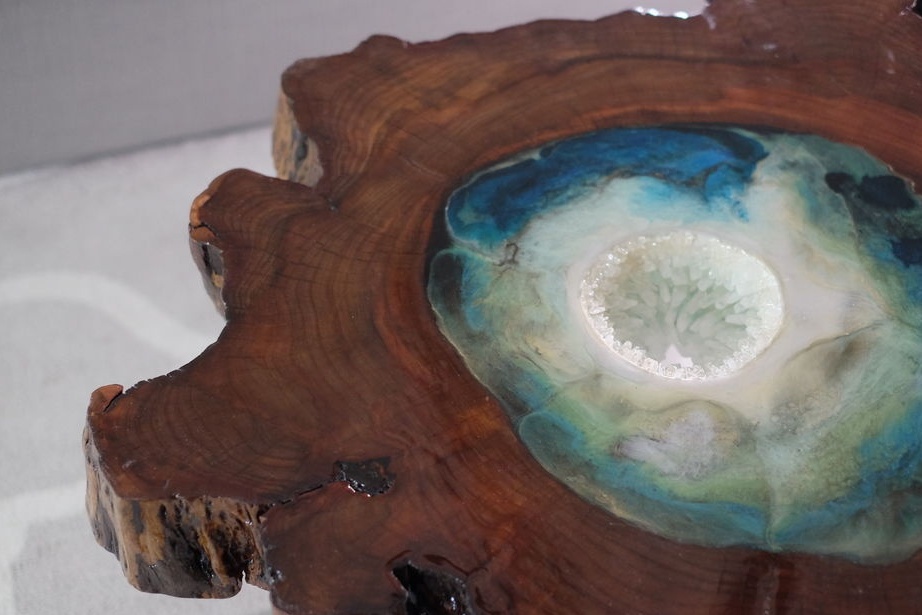
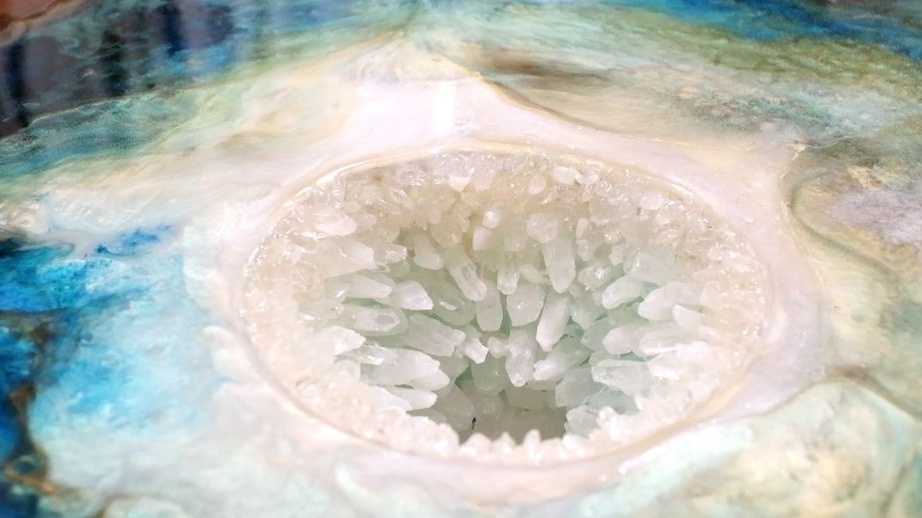
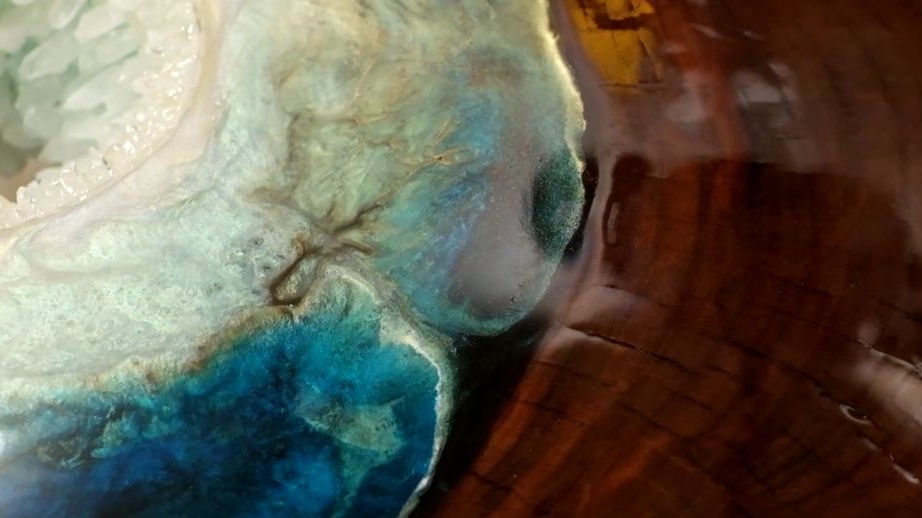
A hole is provided in the central part of the countertop, inside of which crystals are glued. An epoxy is poured around the hole. The result is the illusion that we have a black hole, a deep ocean trench, or something similar. The author makes a hole with a drill with a crown. Of course, the hole should not be perfectly straight, we need to slightly change its shape so that it resembles a natural one.
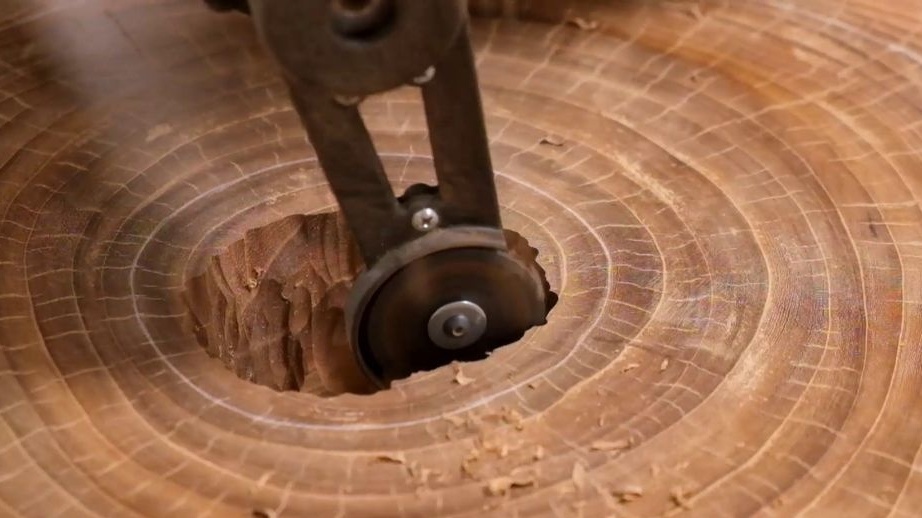
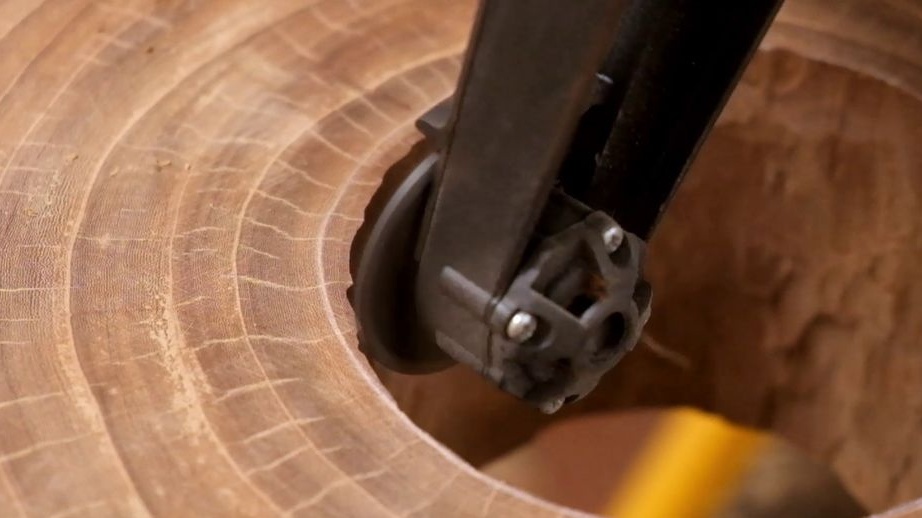
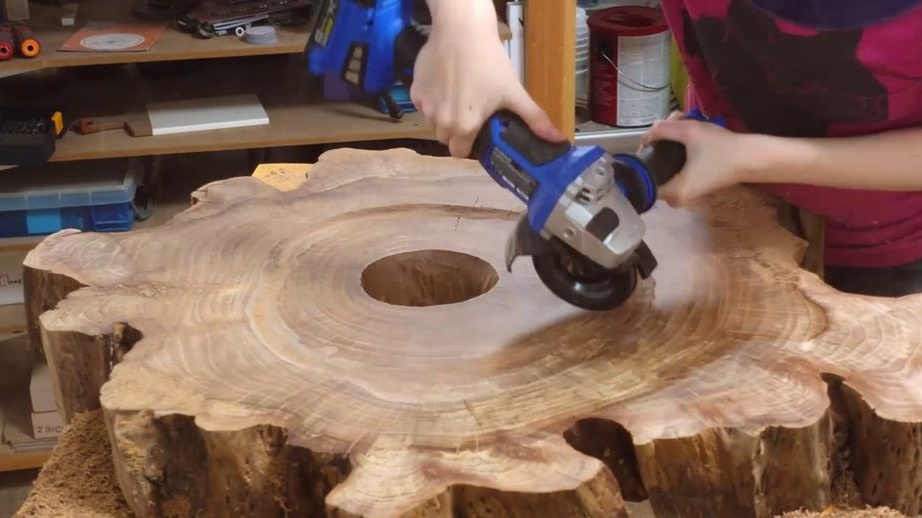
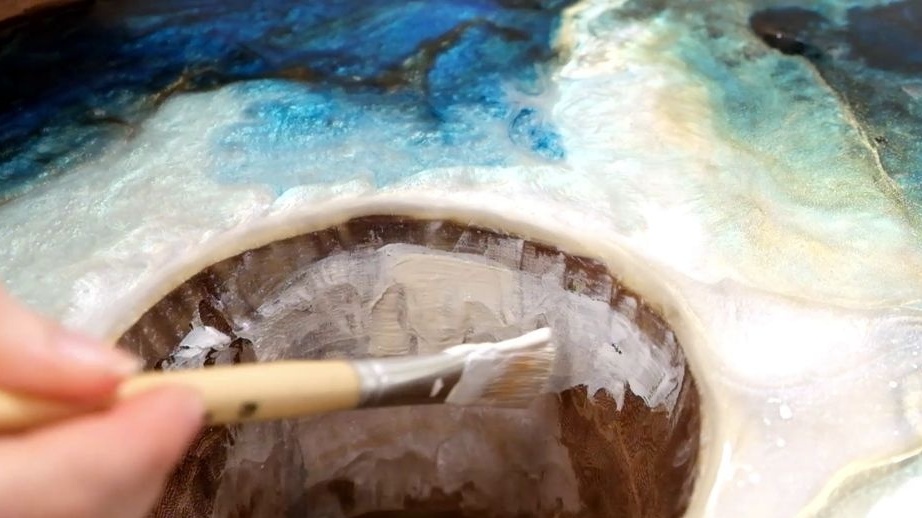
Step Three Fill Depth
Under the epoxy in the countertop we need to make a recess. The author uses a grinder with a special disk nozzle for this. If you wish, you can use it to set any relief on the countertop and then fill it with epoxy with dye.
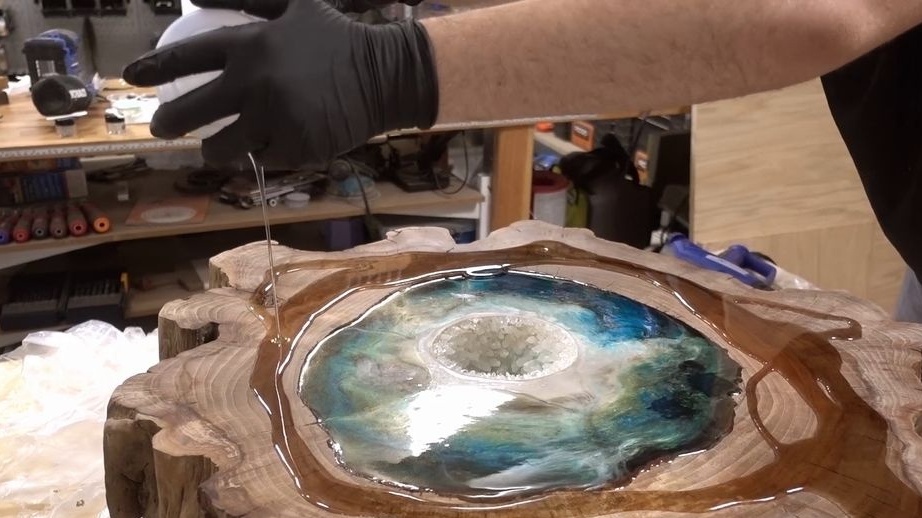
Step Four Epoxy Pouring
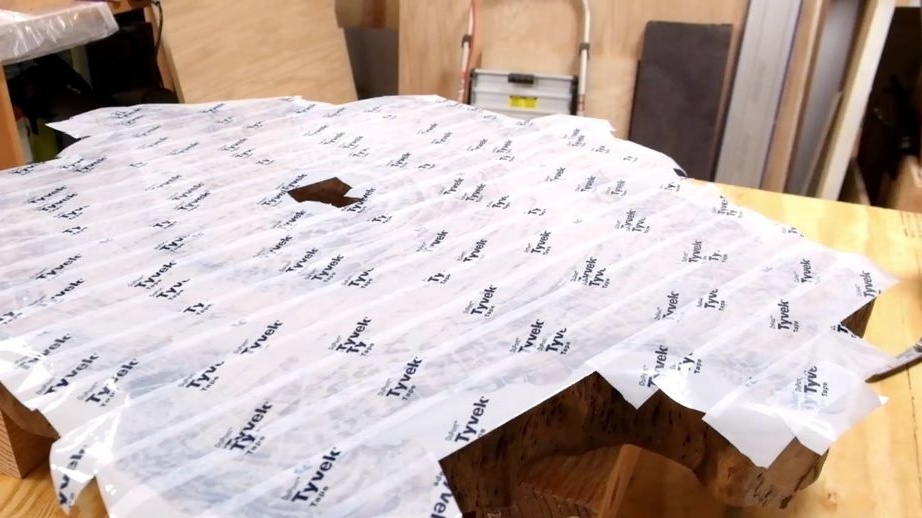
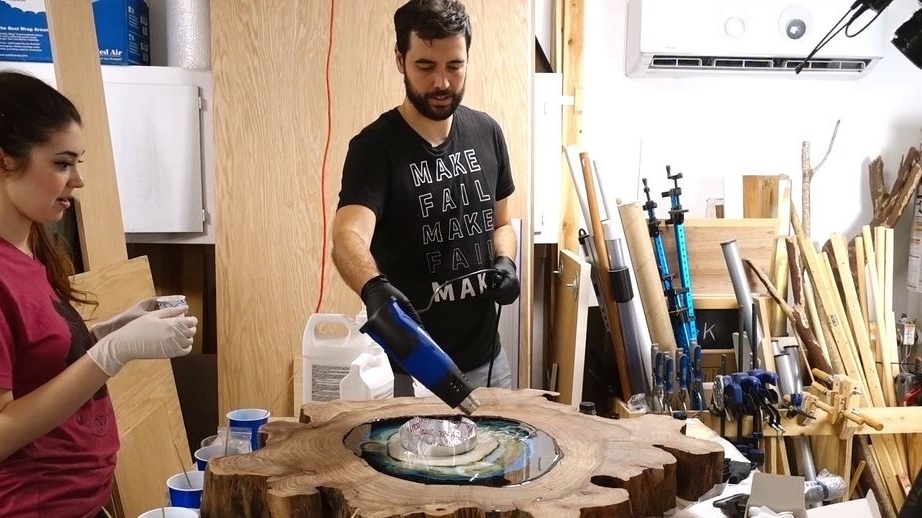
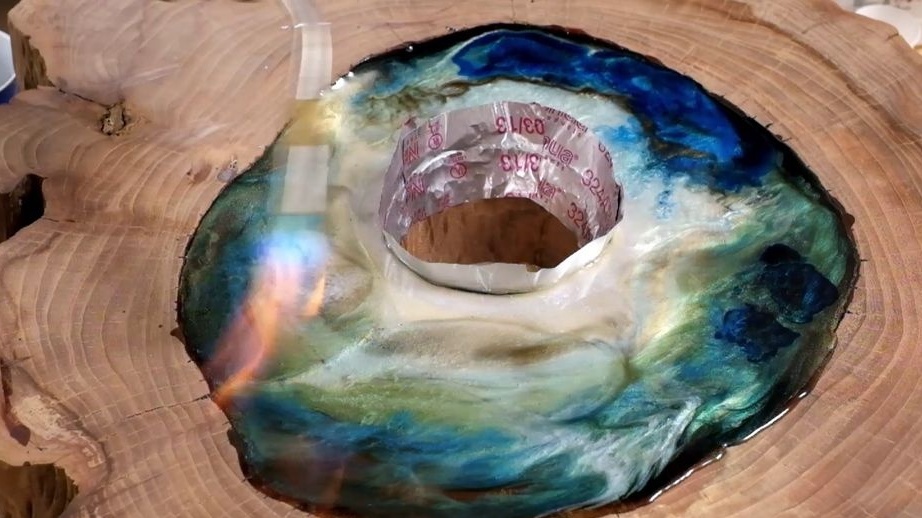
To begin, the back side of the countertop is glued with masking tape so that the countertop does not stick if something happens. It will be necessary to install foil or something similar in the hole so that the resin does not flow into the hole. Next, we dilute the resin with the hardener by weight and add the dye. That's all, you can start pouring. First fill the first layer of the selected color, then the second layer of a different color and so on. In order for the epoxy to spread well, it needs to be heated, then a construction hair dryer or gas burner is suitable for us. Using hot air, you can also set the pattern.
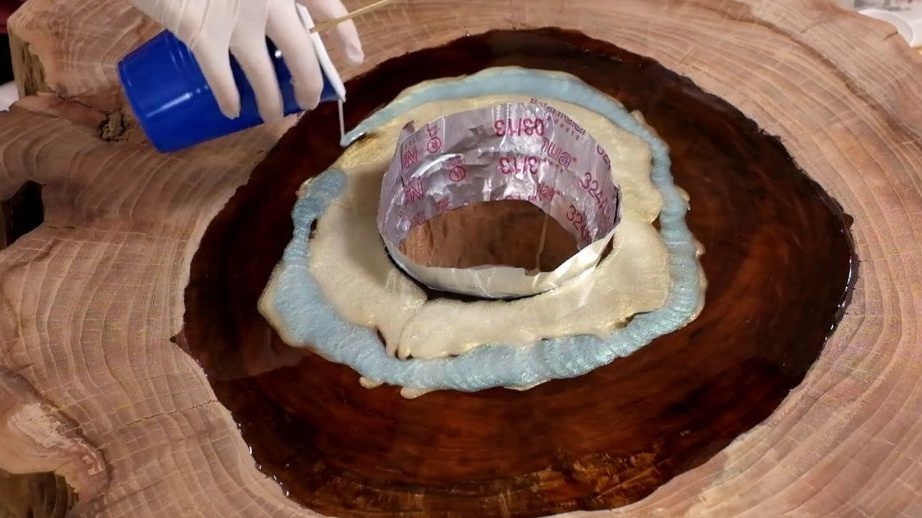

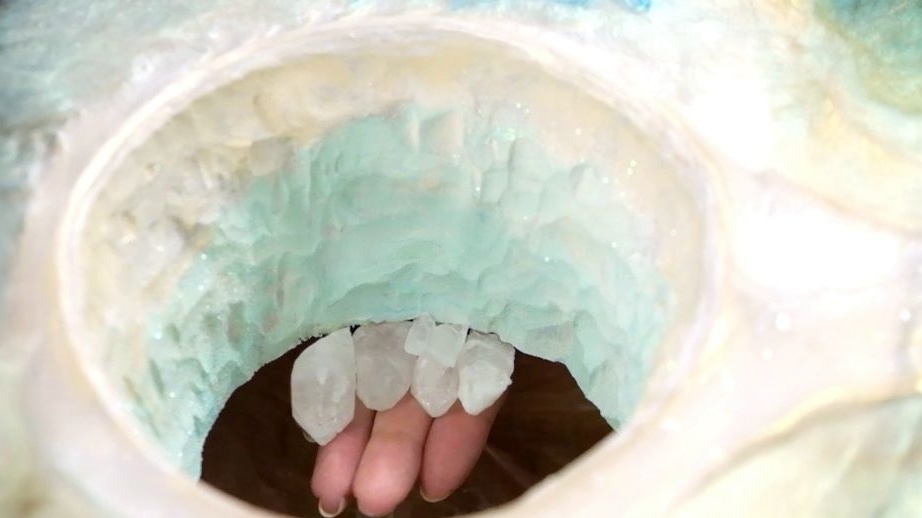
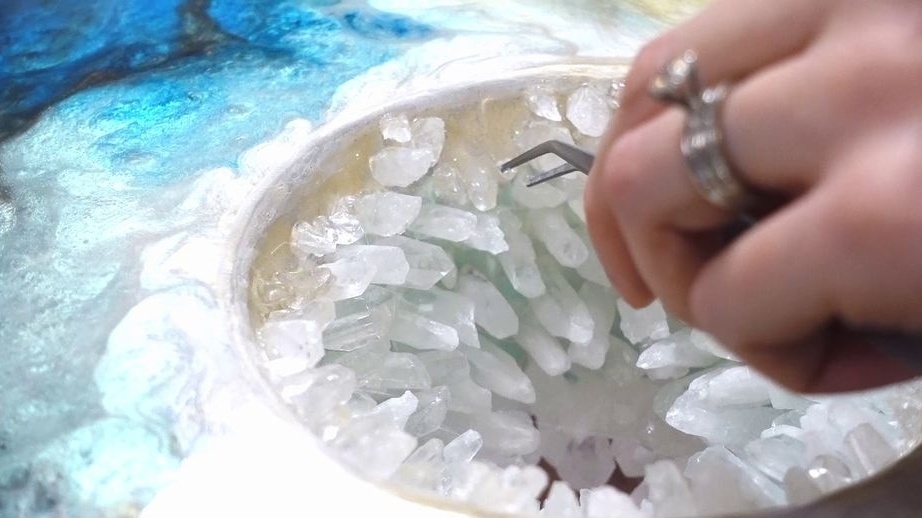
Step Five Crystal Installation
Crystals are installed in the center of the hole, such can be ordered via the Internet. First we need glue, the author has white color. Carefully glue the crystals in the center of the countertop with tweezers. If desired, they can also be later filled with glue, but homemade It looks more realistic.
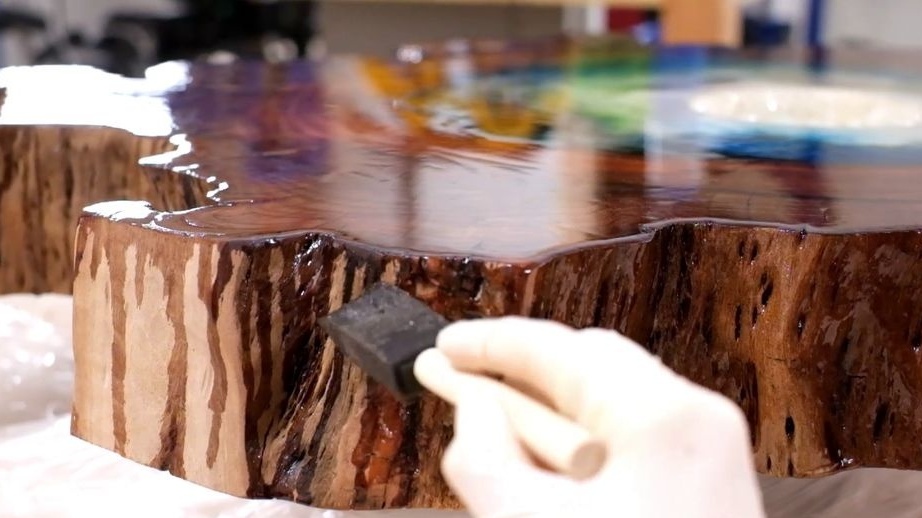
Step Six Countertop trim
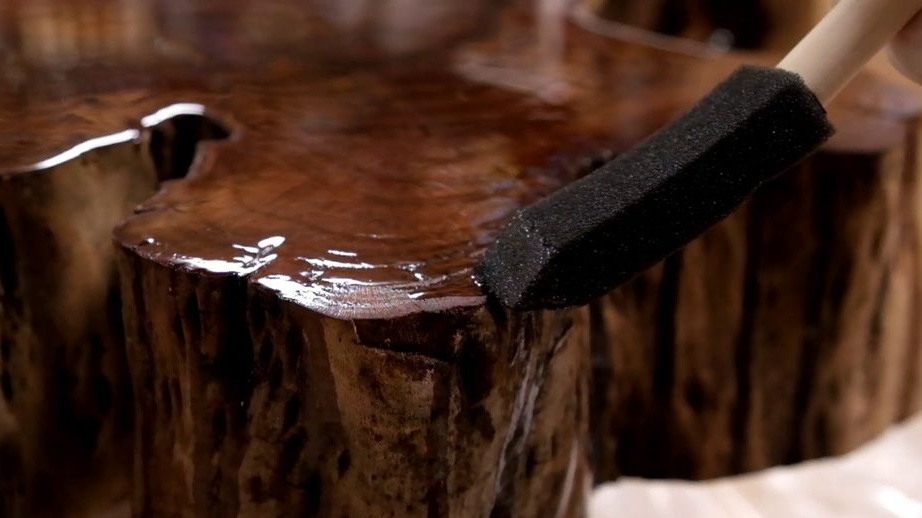
When everything is ready, a protective coating will need to be applied to the countertop. It can be varnish, or you can use a transparent epoxy resin for pouring. If this is a resin, preheat it, it will become fluid and it can be applied evenly with a thin layer. That's all, now we just have to wait until this thing dries up.

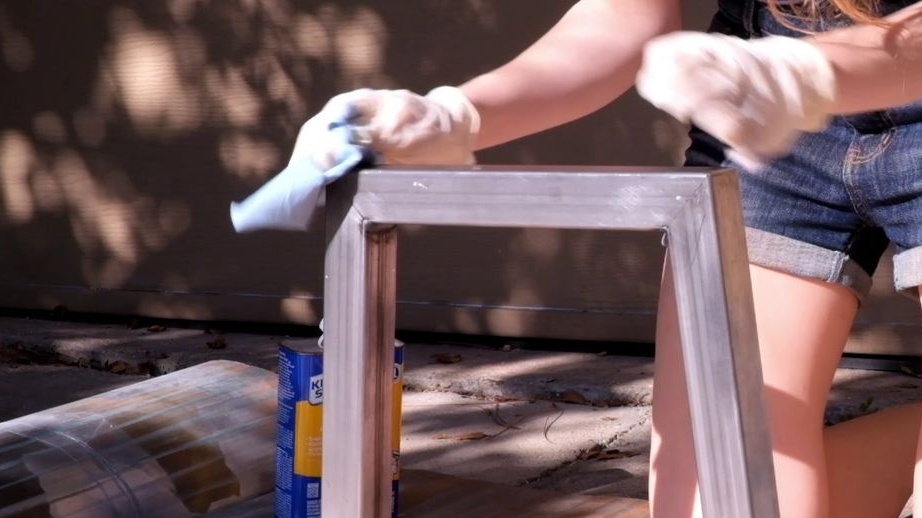
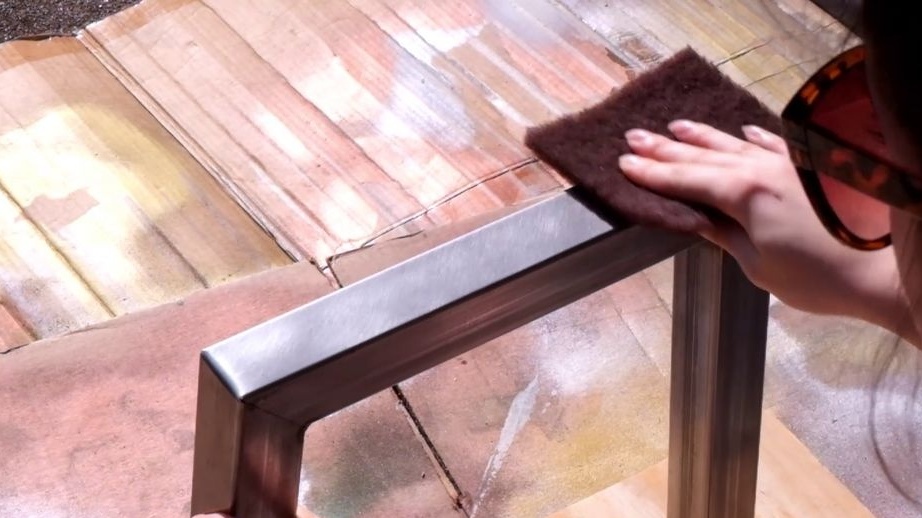
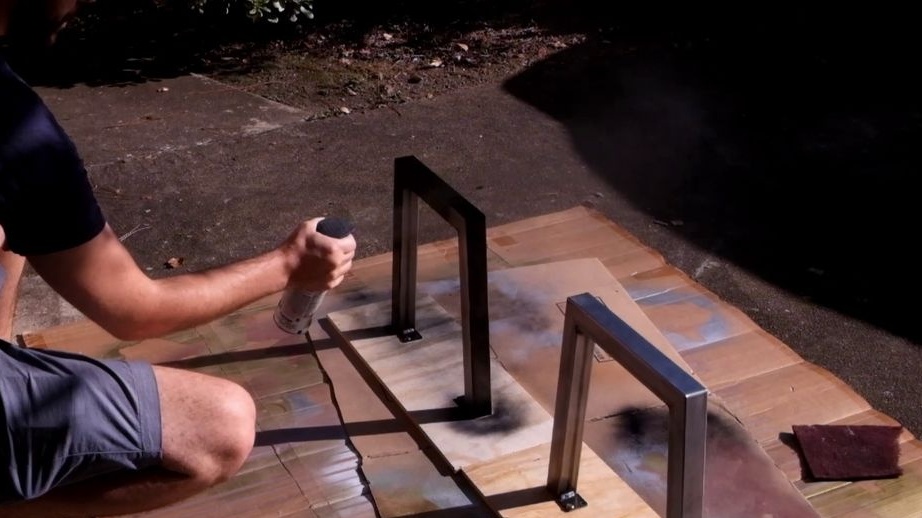
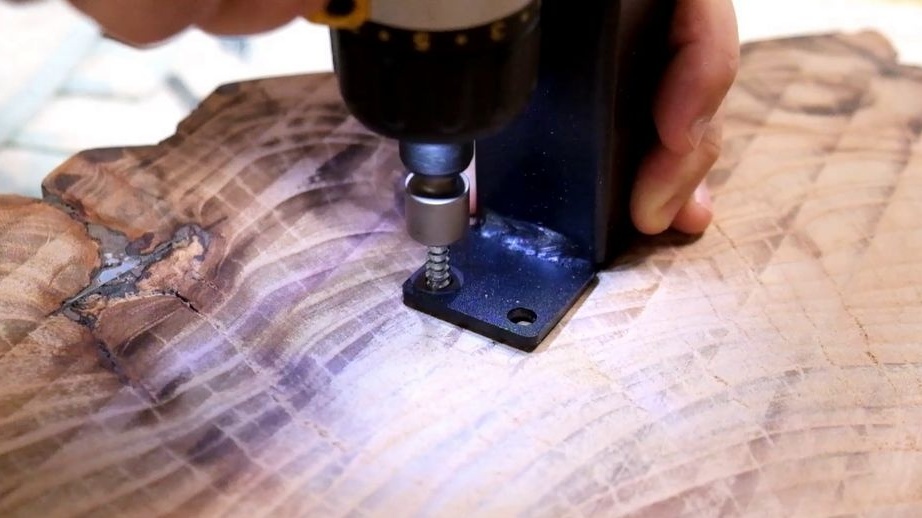
Seventh step. Legs
As for the legs, you can buy ready-made, but you can do it yourself. The legs can be made of square steel pipes, rods, fittings and so on. The author decided to paint the legs black; for this, paint was used in a spray can. Let the paint dry and they can be attached to the countertop. Here we need screws or screws. We drill holes and securely fasten the legs.
That's all, our table is ready. Everything turned out pretty beautifully, unique and inimitable. Such a table will not go unnoticed by the guests, and drinking tea at it yourself will be quite pleasant. I hope you liked the idea, and you found useful information for yourself. Good luck and creative inspiration, if you decide to repeat it. Do not forget to share your homemade products with us!