

Paul, this can be said basis, a bridgehead for placing everything you need in the room. If we talk about the workshop - these are racks, a desktop, equipment, cabinets. Work chairs, finally. Few years ago, was able to afford own workshop - timber structure, 6x6 mheated of course. Since the structure, conditionally not residential, could save some money at the initial stage - a number of elements to do later. For example, the floor, the roof.
Fish here is cheaper than yours, and beef at the same price. What? Vegetables, brother, those that you never dreamed of. Pumpkins are given to poor families under cottages. Summer residents and live in a pumpkin, and eat it. And thanks to this, the cottage, the longer you live in it, the more spacious it becomes. Here, brother. They tried to take watermelons, but it’s damp to live in them.
Eugene Schwartz - Ordinary Miracle.
Eugene Schwartz - Ordinary Miracle.
Initially, it was decided to abandon the floor - it was quite possible to put up with a leveled ground, however, several seasons in the winter showed that a lot of water evaporates from the ground floor into the room. In winter, the humidity in the workshop is extremely high. Iron tools rust, wood swells, walls in the corners mold. Wooden products without a protective coating, however long they have been in the workshop, have to be adapted to normal humidity, which is long and inconvenient, otherwise there is a high risk of it, products, warping or even cracking. The bottom of any moisture-proof item placed on the floor, after a few days, is covered with droplets of water. In the warm season, the humidity "inside" drops to acceptable, due to the open windows, however, we live in the village, and although in the southern, but still the Urals, the warm season is short and busy with street affairs.
Moss covered bayonets, bolts and drills -
And in the sky women naked fly.
BG - Moscow October
And in the sky women naked fly.
BG - Moscow October
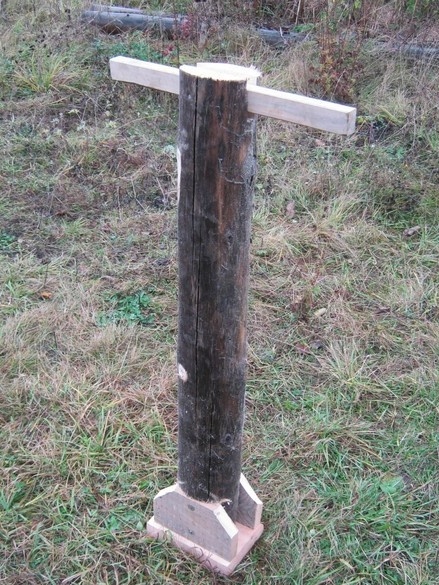
In addition to high humidity in winter, the problem was the temporality of such a floor. Any solid construction had to be installed temporarily, based on a rework. Actually, a large solid shelving unit was assembled in the workshop in the entire wall, the lower shelves of which were a long table for small sedentary work. Concrete "shoes" were cast to support wooden racks.Most of the equipment, in the desktop version, was placed on powerful shelves mounted on the wall. For the rest, I had to be content with temporary solutions. A good, solid, level floor would allow to continue equipping the workshop, expand the range of possible works and make the work more convenient.
Type of floor
- Denis, do you have a repair? What floor will you make in the living room?
- I'll put the asphalt! And on the walls there is a red tile ... like in the Mayakovskaya metro station.
From an overheard conversation.
- I'll put the asphalt! And on the walls there is a red tile ... like in the Mayakovskaya metro station.
From an overheard conversation.
It remains to determine the type of floor. There are not many options here - a wooden floor on the logs or a concrete screed. The wooden floor, of course, is good, and executed carefully enough, lasts a long time, it is pleasant to walk on it. However, however, however. I wanted to get rid of the “earthen” moisture once and for all, the concrete screed in this sense seemed more promising. Despite the fact that I spend most of the winter in the workshop, the room is still not residential. Wood is a combustible material, and in the workshop it is sometimes necessary to do small welding work - you will have to, with a fire extinguisher at the ready, to trace the fate of each large drop of molten metal that has fallen on the floor. Again - the concrete screed is smoother and firmer than the pine boards, fewer small debris will remain in crevices and bumps. In a word, stopped at her.
Concrete screed - the floor in the room, it is recommended to make it very thin, from a cement-sand mortar reinforced with a coarse-welded mesh. Having studied the experience and results of relatives and acquaintances, he lowered the reinforcement and applied ordinary concrete with gravel. At the same time, increased the thickness of the screed to 100 mm. In addition to the ability to use ordinary concrete with gravel, this thickness of the screed allows you to block many void-forming elements - bottles, small pieces of polystyrene foam and other rubbish that does not swell too much from moisture. This makes the concrete slab less heat conductive, eliminates trash, and saves expensive building materials. There is only one drawback - the concrete should be made “rigid” - such a consistency that it needs to be laid, not poured, otherwise a light “boot” will pop up. However, thick concrete is stronger and more correct - it does not stratify into components. Also, concreting of this kind, with the laying of voids, is much more convenient to do measured and thoughtful.
In my case, the main goal pursued was to save materials - they were few in late autumn, when it was not rational to import fresh ones.
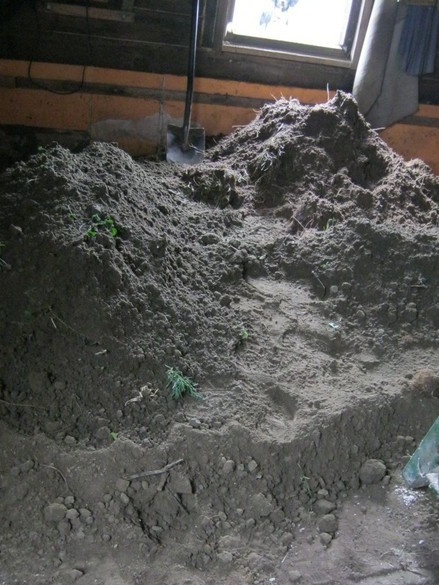
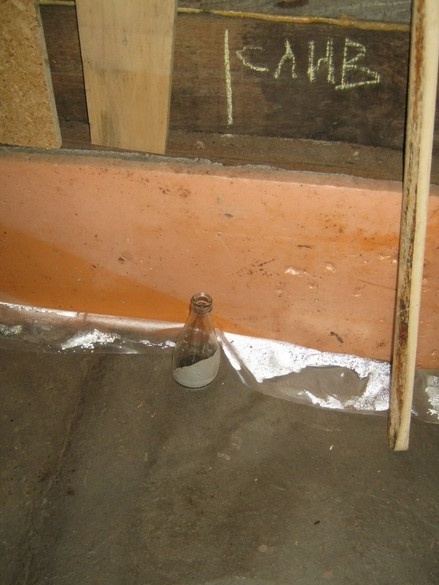
When using soft materials to form voids - pieces of polystyrene foam, plastic bottles, they had to be laid in such a way that there was a significant layer of concrete around, so that the slab would not break through, if it were to “poke” it in any weak place. Saving concrete at the same time, was not, no matter how significant. It was necessary for the boot to use the "classics" - stones, an exception was made only for glass bottles. Large and flat stones, a fair amount was obtained during the digging of the pit for the cellar-caisson. It was the densest sandstone, which lay in such thick layers. It was necessary to mine it, breaking up the layers with a magic crowbar, as a result, flat stones formed, a miracle as well suited for clogging a concrete screed.
The screed was divided into small pieces, cast in such wooden boxes without a bottom. The walls of these "boxes" of not planed pine boards - "inches", have a height of 100 mm and serve as guides when leveling the surface of concrete "rule". In addition, the layers of wood between the small plates will to some extent compensate for thermal expansion. Making the floor in small separate pieces also allows each element to be completed in one day, which has a positive effect on strength. The division of the entire screed into plates is usually done according to certain rules that stem from the convenience of work.
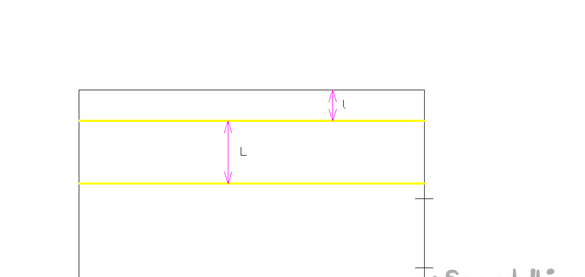
As a rule, “slices” are made long, from wall to wall, along the width L - of a slightly existing rule.The sections closest to the wall, from it, the walls, should be slightly “moved” a distance l, otherwise, when concreting, as mentioned by the rule, it will be inconvenient to act. This distance should not be too small - otherwise a narrow strip of concrete near the wall will not be particularly stable, however, very wide, it should not be done either - it will be difficult to level it during concreting. Reasonable, a width of 30 ... 40 cm is seen.
It is recommended to make strips along the room, towards the door, then the last portions of concrete are more convenient to lay back to the door. The recommendation makes sense for quick concreting, like - a “mixer” arrived, if you please decompose a few cubic meters of concrete in an emergency. If concreting slowly, preparing concrete with a small mixer, you can organize the process and otherwise - let the bands nearby harden and finish concreting by standing on them. In the latter case, you can “divide” the screed much more freely.
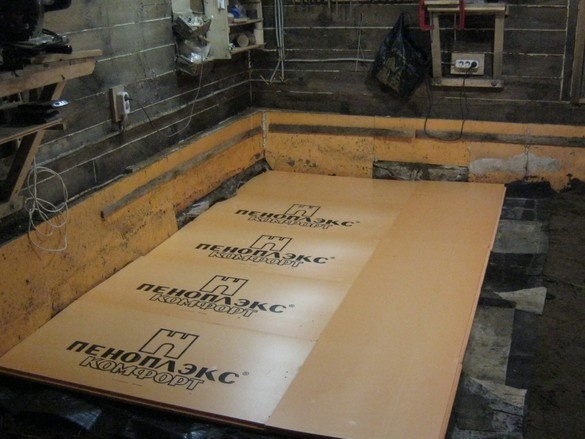
In the manufacture of concrete floors, screeds are desirable, and in my case, as a condition from humidity - waterproofing is required. Well, so as not to get up twice - warming in the form of a layer of dense orange polystyrene is not thick.
What was required to work.
Tools, equipment.
The textbook set of the trench tool - shovels, buckets, scrap - nowhere without it. I used a garden wheelbarrow with one wheel a lot. Not a short level, made locally, ramming. Rule, trowel. For the preparation of concrete I used a small concrete mixer with a manual drive, like in a meat grinder. A simple set of carpentry tools - for working with pieces of wood. Long smooth boards, sawed on a circular saw. A screwdriver came in handy. Construction knife, furniture stapler.
Materials
First of all, these are components for concrete mix - sand and gravel mix, cement, water. Sand for the "pillow". Boards 25 mm thick, self-tapping screws, but. "Penoplex" 30 mm thick (with lock), thick plastic film, ruberoid. Isolon 10mm thick.
To business
Generally speaking, when casting a concrete floor, the most dreary part of the job is preparation. This is later, when everything is ready, in fact, concreting, hourly you can see the addition to the final result, but before that ... Move cubic meters of heavy materials here and there, wave the tamper and other bad work when you cannot see the end. Of course, you should move your brains pretty well and organize the process wisely - often this reduces the number of body movements associated with the transfer of heavy loads. So.
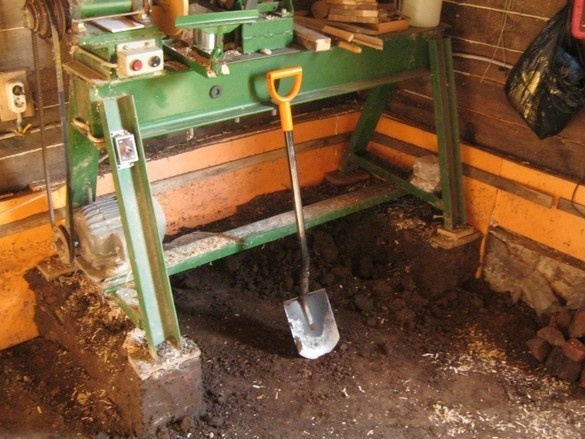
The base for the concrete screed requires a smooth, dense, not heaving - a thick layer of flattened, compacted sand. In his case, he removed the topsoil in the room - partly to remove the remains of the "fertile layer", partly to make room for a sand cushion - so as not to reduce the height to the ceiling in the workshop too much. I had to tinker - since the threshold is high and insurmountable with a wheelbarrow, I had to leave it outside, and load the soil in buckets and dump them into the wheelbarrow through the threshold.
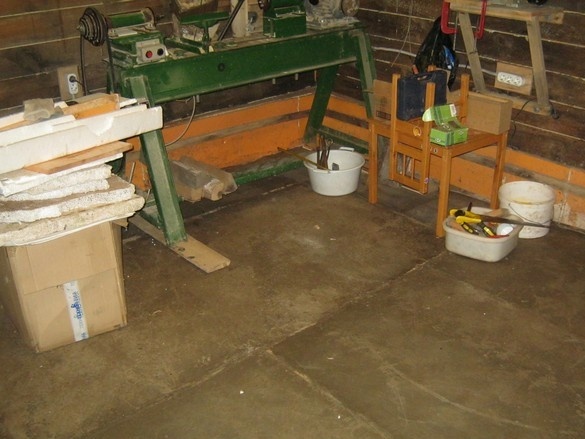
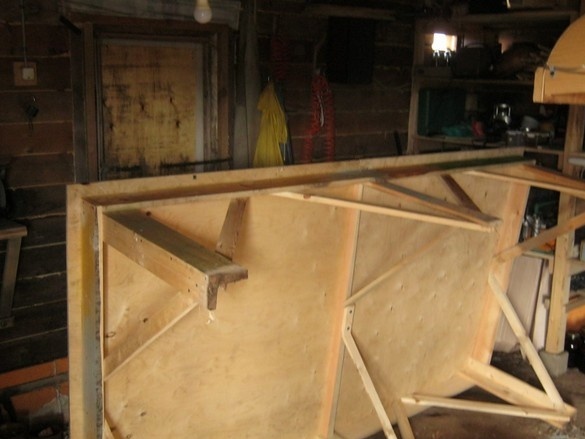
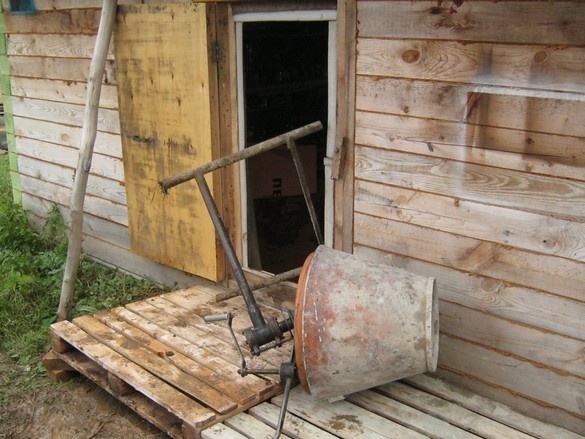
A few, hmm, objects were too heavy and bulky to remove at all - a wood lathe and a desktop. Lathe, impossible to bear - it was placed inside the foundation of the workshop and the walls were erected around. I had to, as light as possible, maneuver them inside while rolling on two even blocks. The desktop, originally born as a pin-pong table, had to be disassembled.
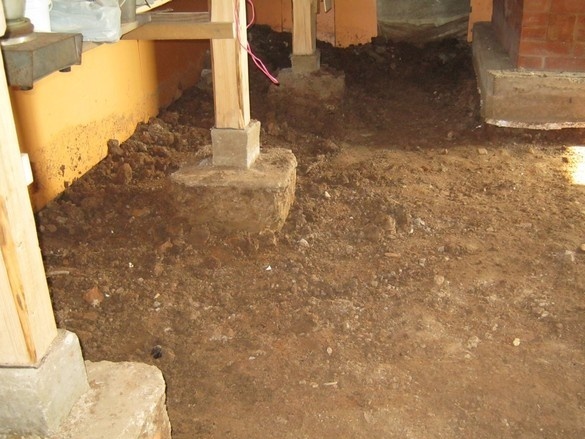
The mentioned “shoes” are visible - the supports of the rack racks, the top plate is also bare furnace foundation.
After removing the topsoil and leveling the surface, sandy “cushion”. There was no clean sand - I applied sand obtained by digging a foundation pit for the cellar, where it was with a small amount of medium-sized sandstone pebbles, plus a bit of clay. Heaps of it were thoroughly wet in the street with rain - it did not have to be moistened before tamping. The layer was impressive - about 30 cm.
The tool itself was made from a piece of a log and scraps of boards. Shell ... for the development of the upper shoulder girdle.
The first piece is the lathe parking spot.On a compacted and leveled surface of sand, he laid in several layers pieces of an old roofing material taken from above, from the roof, with installation of galvanized "corrugated board". For disposal usefully. After using a new roofing material. This is the primary, so to speak, waterproofing. On top of it is a layer of polystyrene foam, on it is polyethylene with a wraparound of the edges on the walls, so that a kind of tight trough is obtained. Well, on polyethylene - a mold box.
My concrete mixer, unfortunately, does not know how to dump ready-made concrete somewhat forward, so that it is possible to use the gutter, and dump the prepared mixture, outside, through the threshold. I had to organize the process as follows - a concrete mixer inside, near the door, the components are thrown out of the wheelbarrow, with a shovel outside. In the photo - the process of stuffing inward. The concrete mixer is old, solid, fairly weighs and can not be disassembled. The only thing that can be done is good.

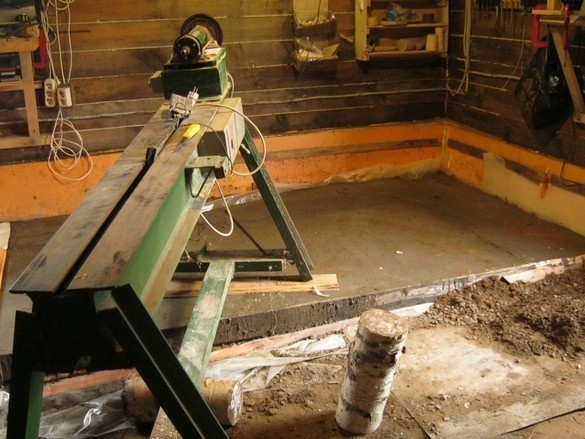
After a week of exposure under polyethylene, the corner of the workshop was deemed ready to install the machine, so it crawled into place.
It is planned to install a sink with a washbasin - in the right place I made a bookmark for a sewer pipe.
Sides - boards from molds-boxes, stick out flush with the floor surface. Fresh saw cuts, where they are not smeared in cement mortar, will be crushed by feet and will cease to stand out - the floor will look like a continuous surface.