
Good day to all dear friends! In today's article, I would like to show you a rather interesting idea homemade, which in turn will consist of the most affordable and simple materials. Namely, in today's article, we will consider and describe in detail how to make a simple column with a wireless audio input, namely via Bluetooth. This homemade product will be as simple as possible, as much as possible, it will not even have a battery. This homemade product can be a desktop small column, which can mainly be used for a computer. But since it will have a wireless way to transfer data, while working at your desktop, you can switch both to a computer and to a phone, which makes the operation of this homemade product more convenient. In general, the homemade product is very interesting, so let's not pull with a long introduction, let's go!
For this homemade product we need:
- MDF sheet (one sheet with a size of 1 * 1m is sufficient).
- (in Chinese online stores, choose a huge selection of such boards according to the parameters that you need).
- The speakers are 2pcs in diameter, which is 4cm (the parameters of the speakers must correspond to the parameters indicated on the selected sound card).
- Acoustic cable (if you are not a special music fan, then you can do with an ordinary installation wire)
- Connector for powering the structure.
- Power supply (the characteristics of the power supply must match the needs of your chosen sound card control)
- Rubber legs (can also be purchased in Chinese online stores for a penny).
Of the tools we will also need:
- Silicone glue.
- drill
- Step drill
- Soldering iron and solder
- A simple pencil
- Ruler
- Joiner's corner
- PVA glue
- Film for decorative column decoration (optional)
- Compass
- screwdriver
- Self-tapping screws
- Some kind of plastic sleeve (the author of the homemade product printed on a 3D printer)
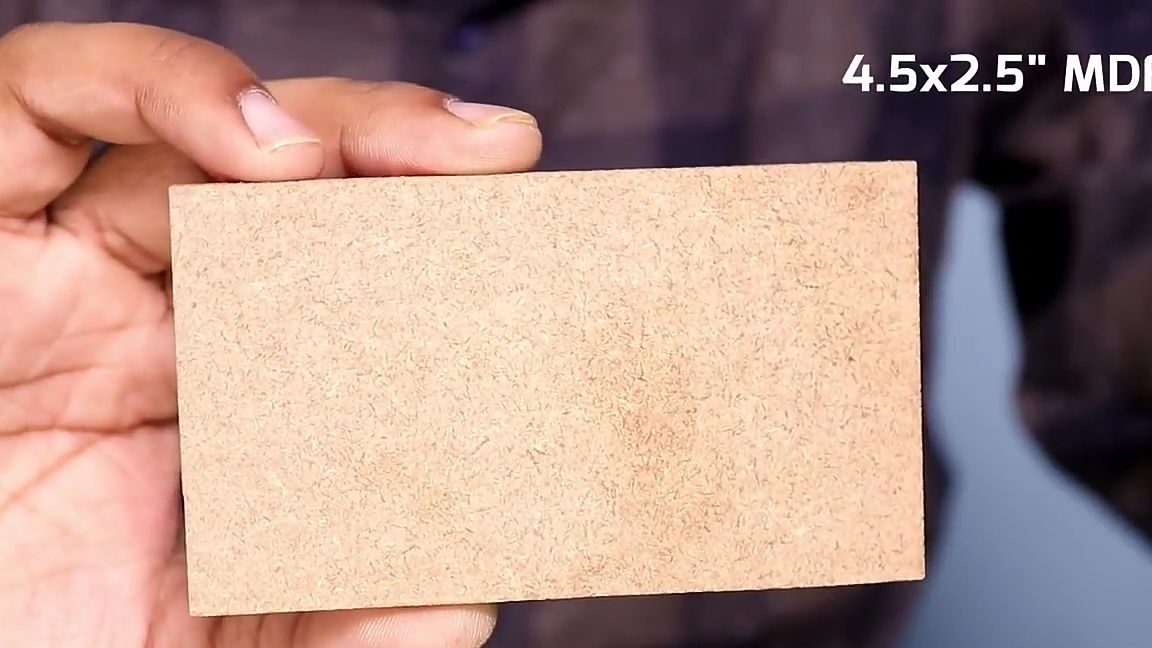
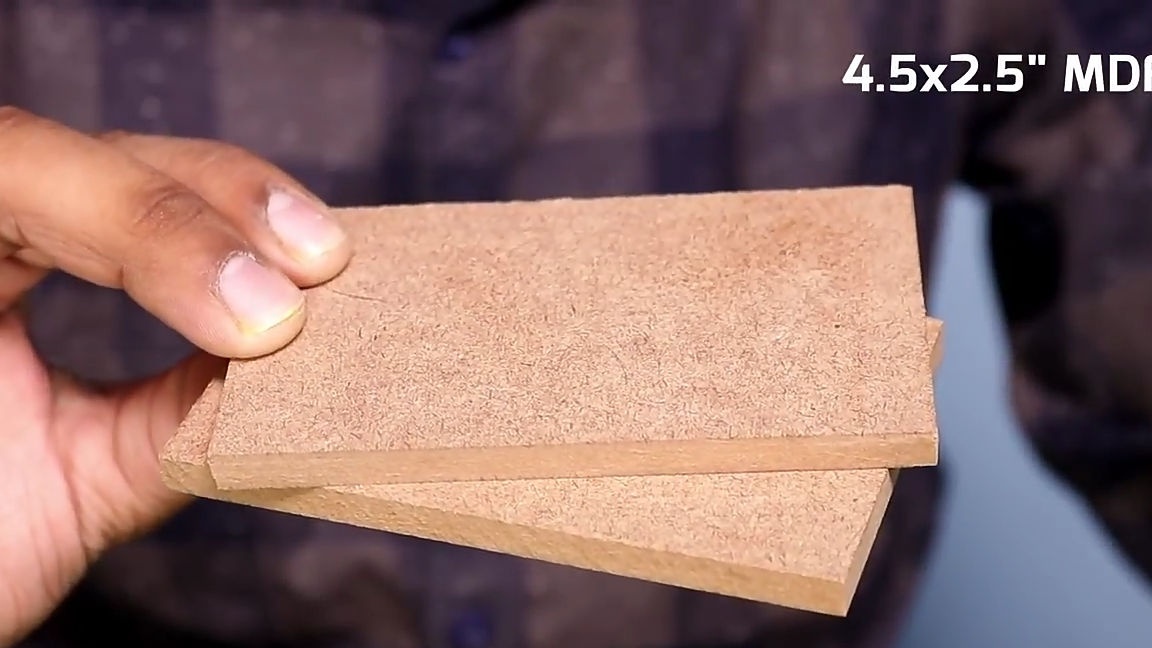
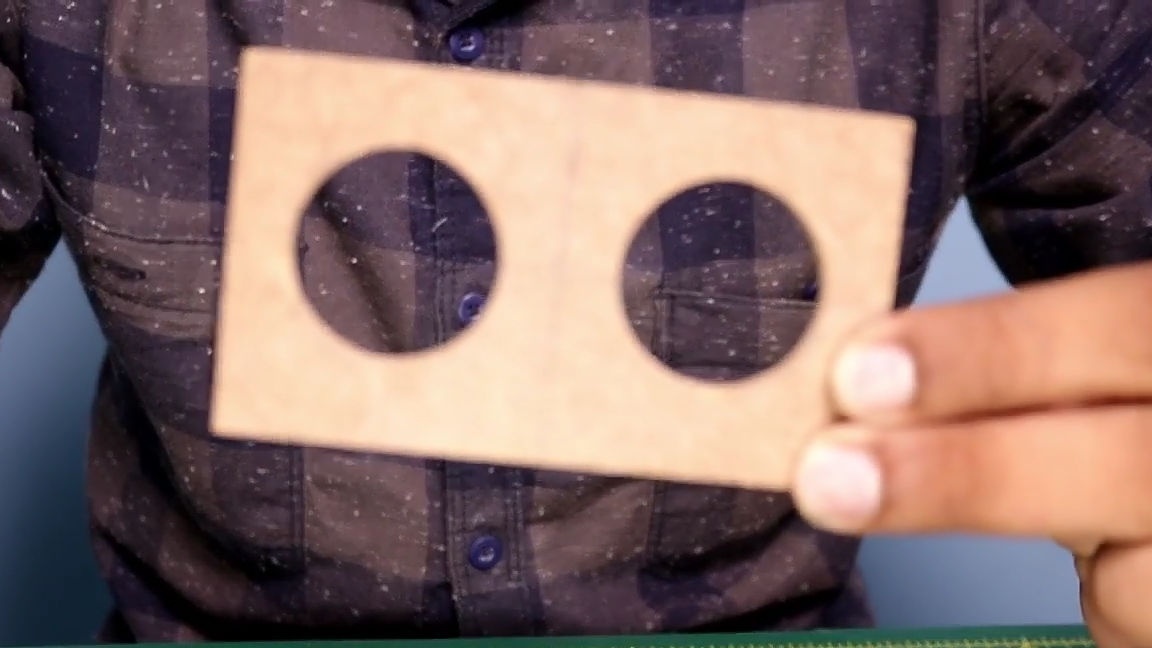
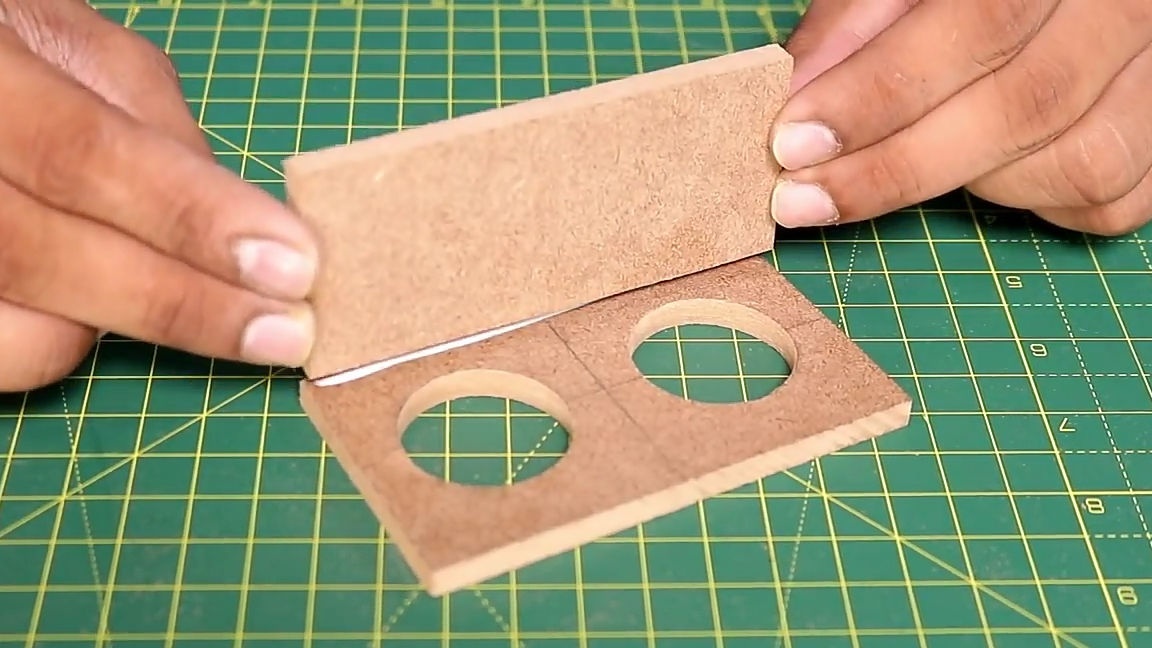
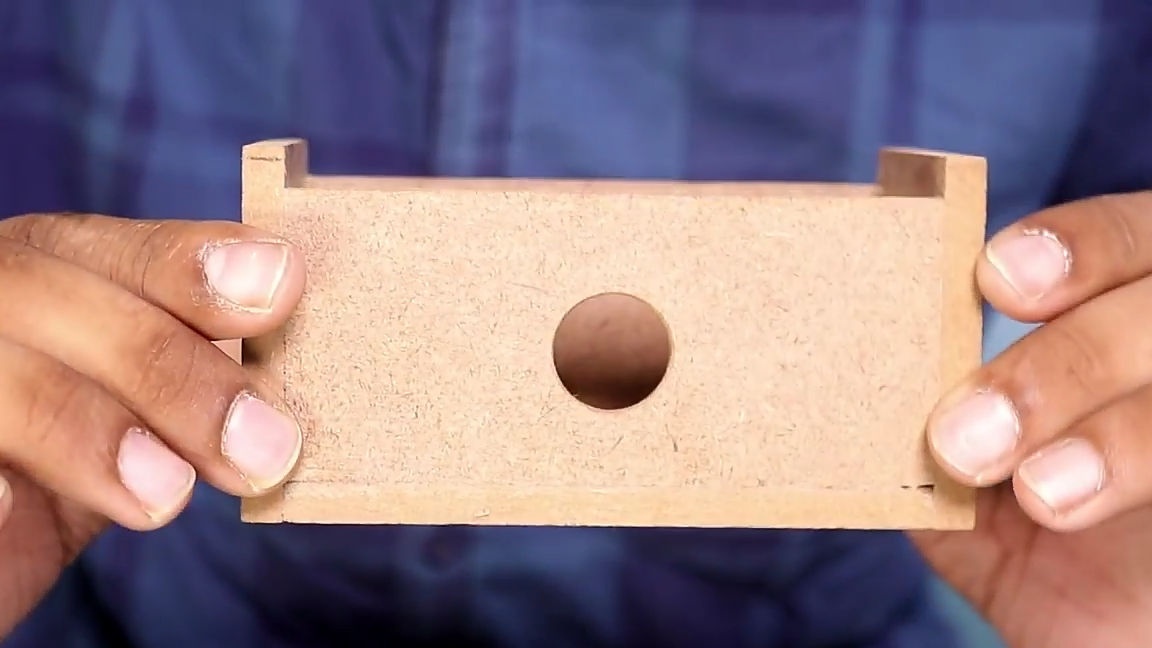
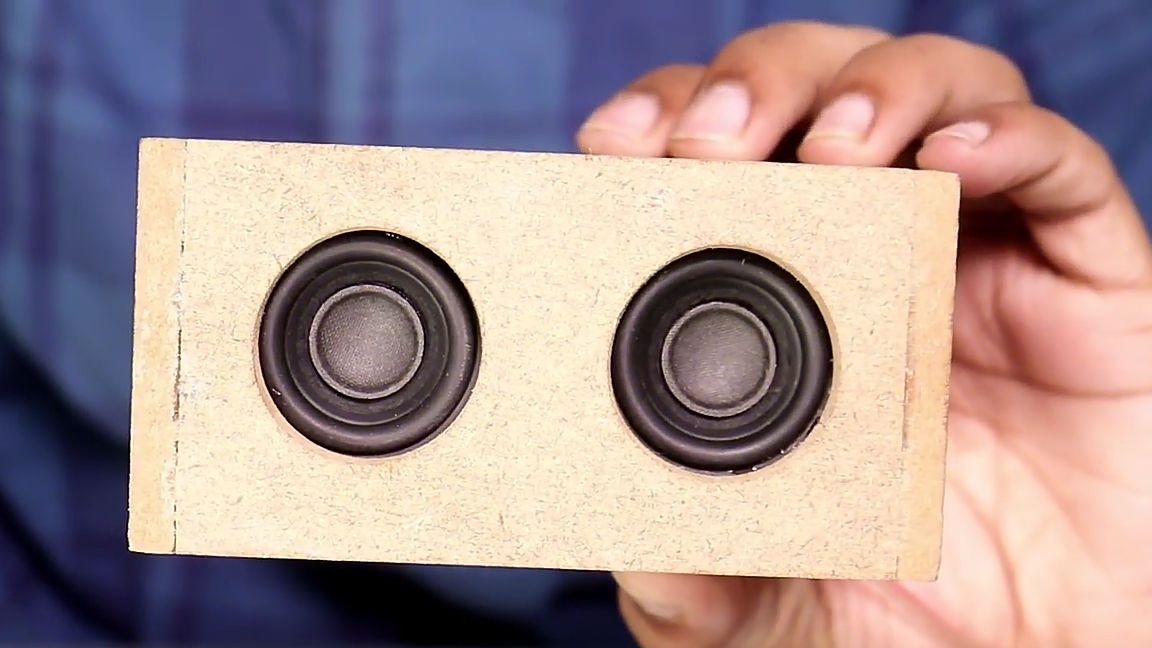
As usual, first we will prepare all the necessary wooden elements for assembling the case. Firstly, to know that the wooden case is chosen for good reason, as wood or wooden products is the most affordable material, which, due to its properties, does not emit unnecessary noise during the operation of the speakers. And so we need a rectangle the size of which is 11.5 * 6 cm.And two rectangles with dimensions of 11.5 * 6 cm, as well as a rectangle of 12.5 * 48 cm. Two rectangles of 11.5 * 5 cm. Two 6 * 6 cm. In principle, their location will be clear from photographs of the finished homemade product.

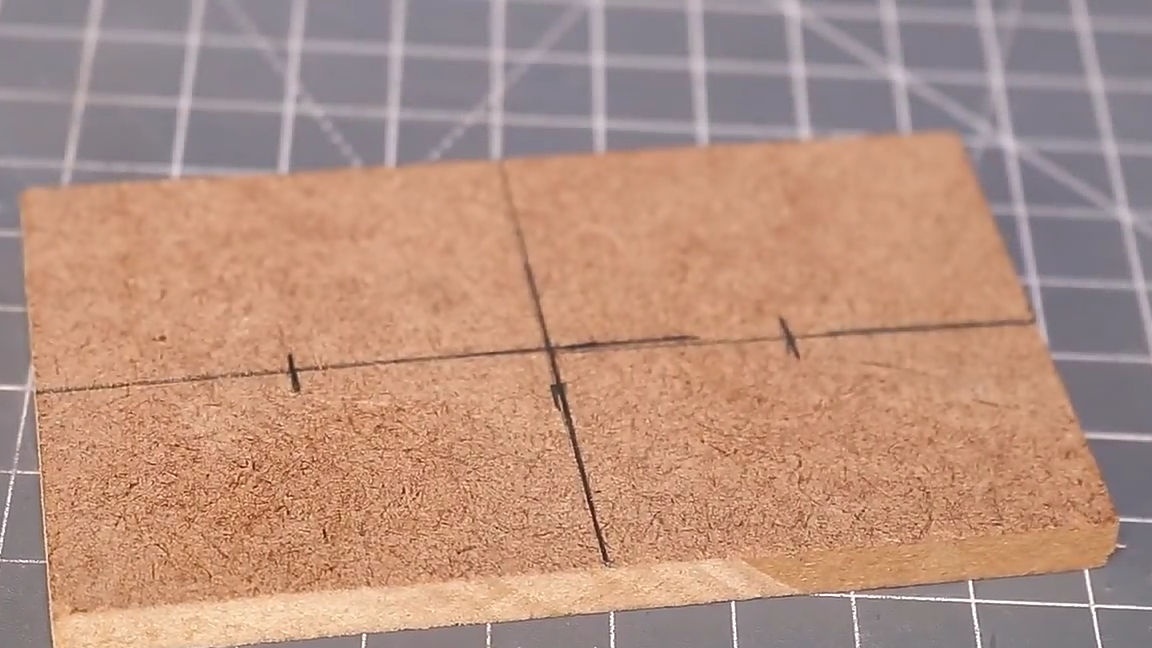
First, take one of the rectangles and do the following with it. To begin with, with the help of a ruler and a pencil, we find his center as shown in the photo below. Then we divide the half of the long straight line in half and put a point there, this should be done with both halves of the straight line.
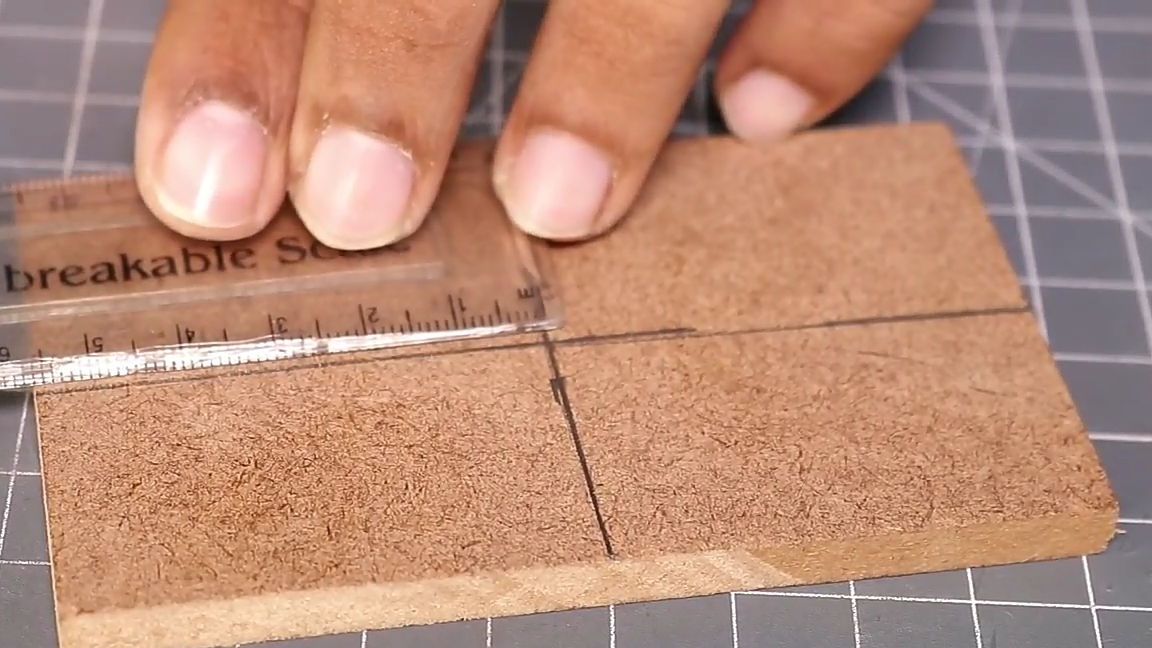
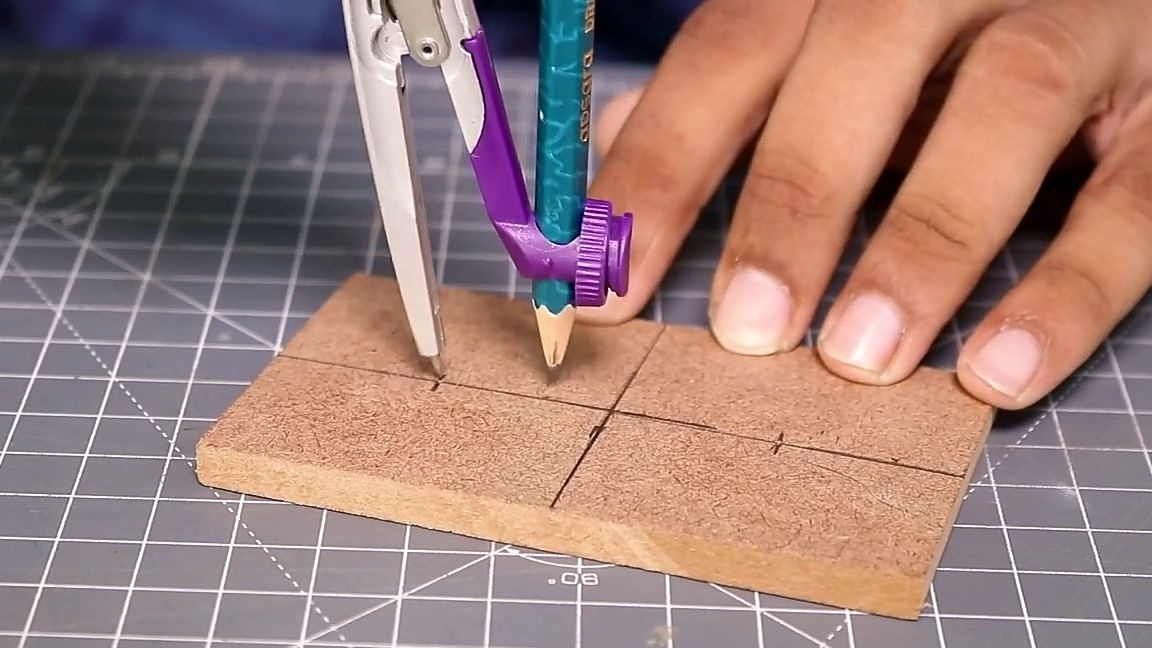
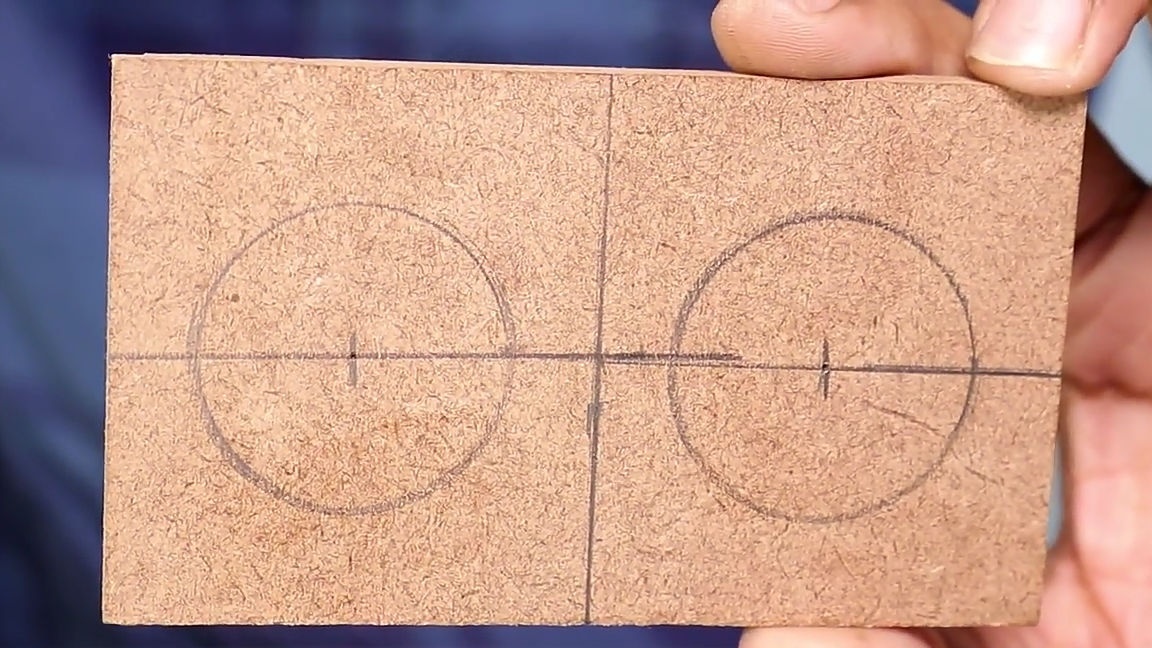
Next, take a compass and a ruler. Using a ruler, set the compass span to 2cm and attach the compass with a sharp end to one of the points noted earlier, draw a circle, as a result, two absolutely identical circles should be drawn, mirror-like, relative to the center of the rectangle (see photo)
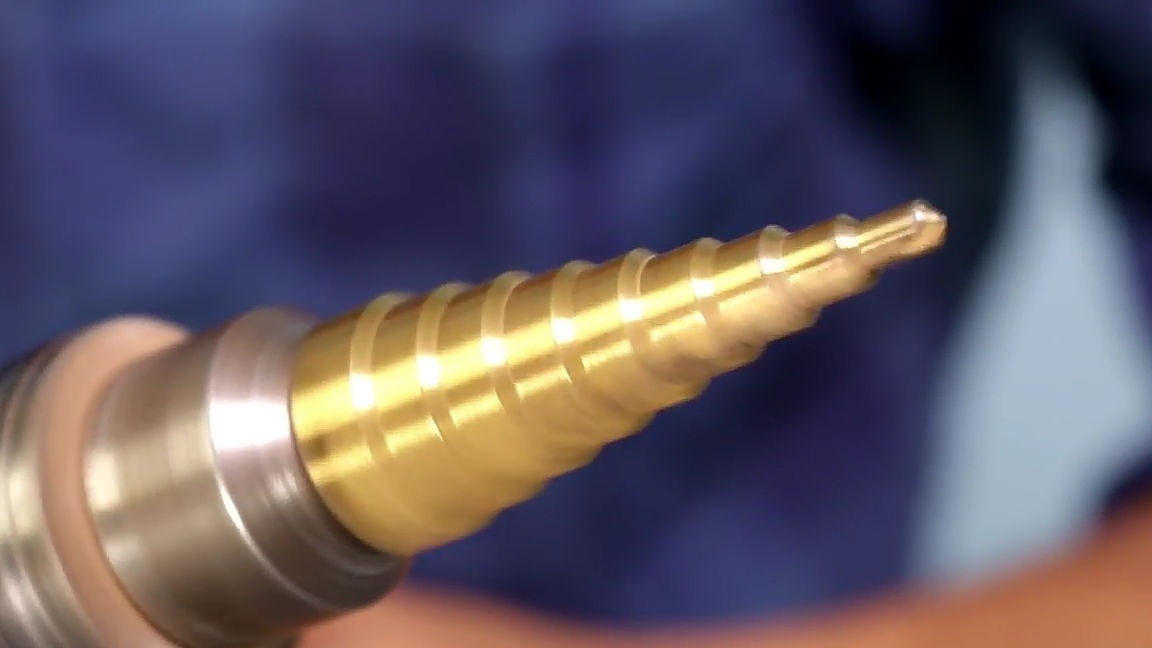
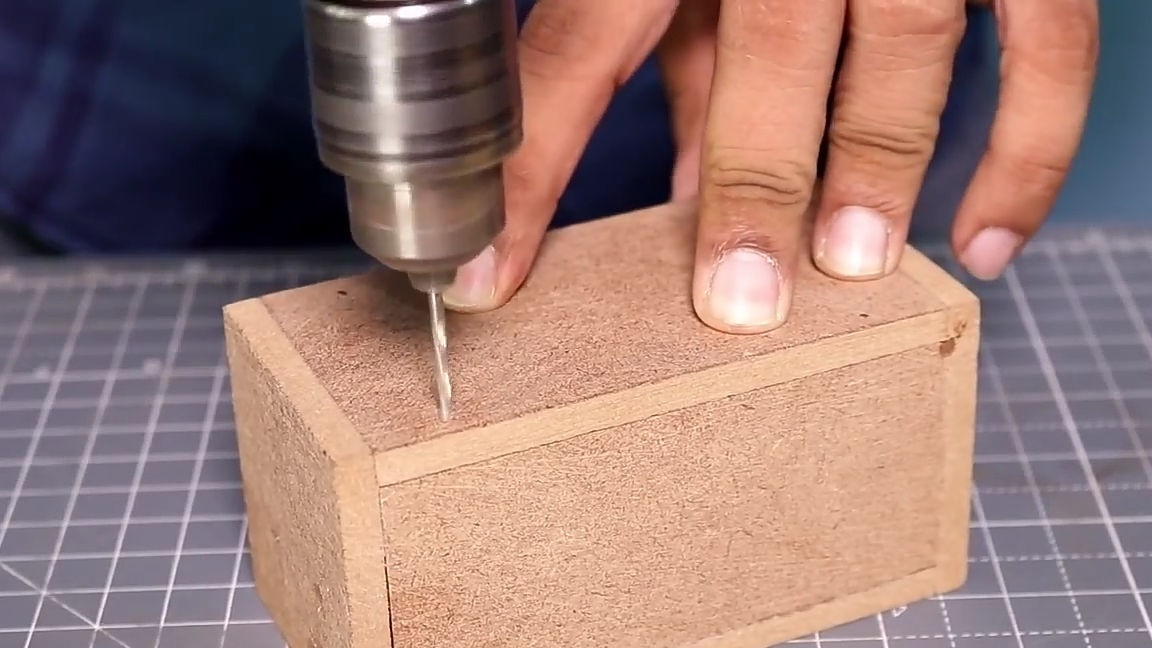
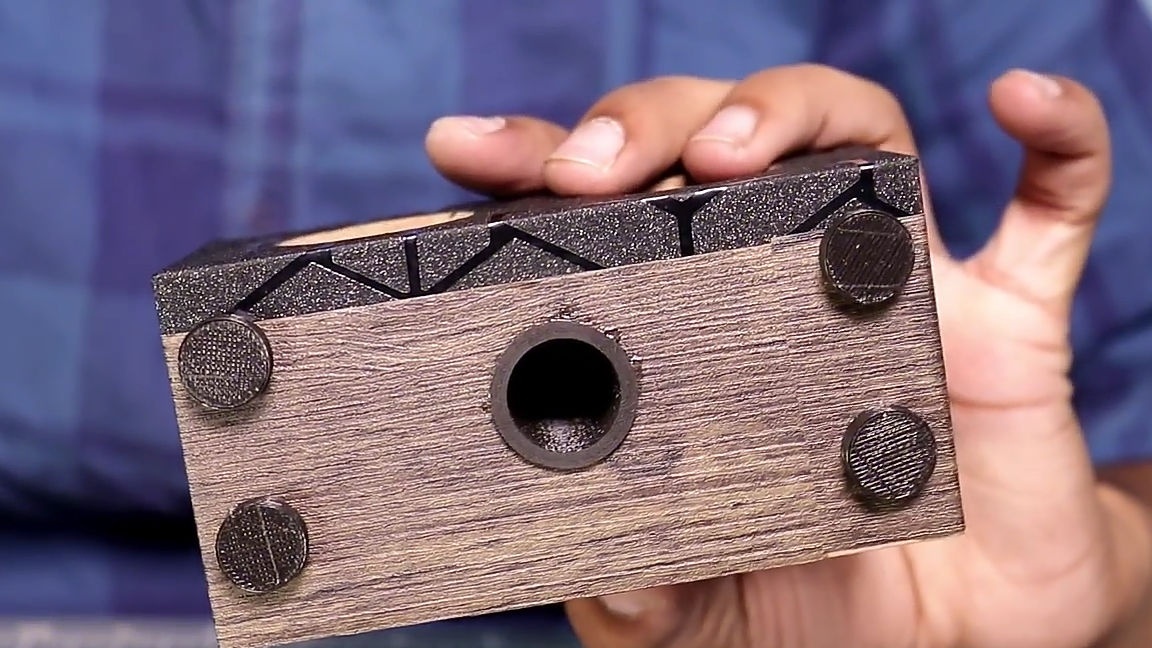
Then for the next step we need a drill and a step drill. With a step drill, we drill two through holes according to the marks we made earlier, it is important that the diameter of the holes coincides with the diameter of the speakers you selected.
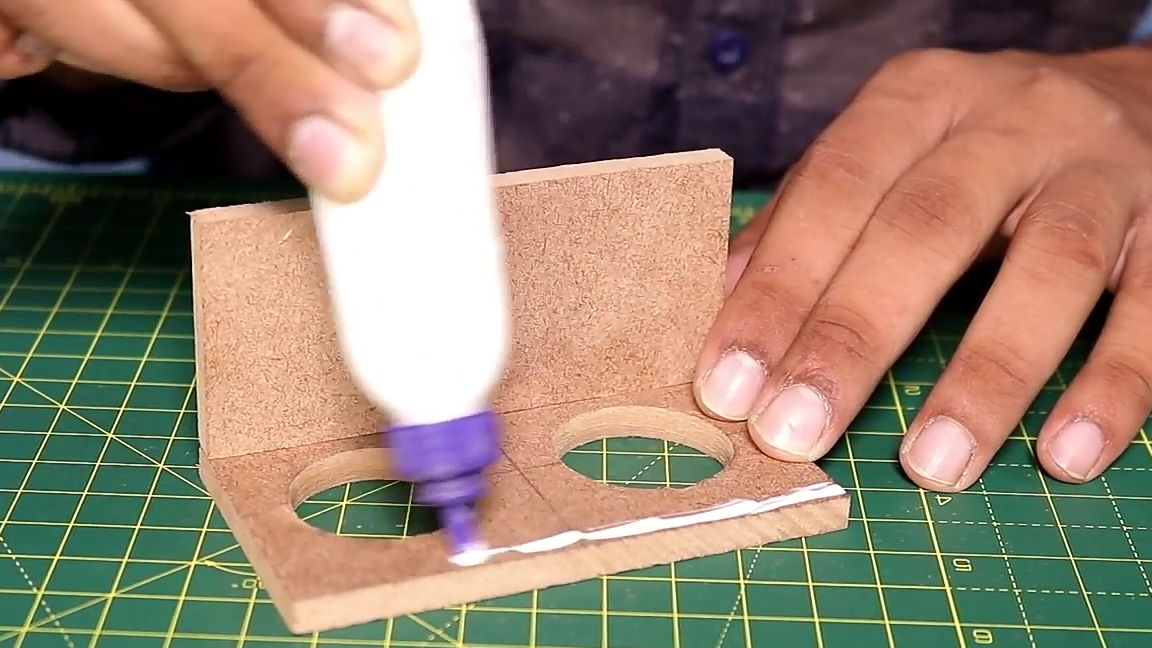
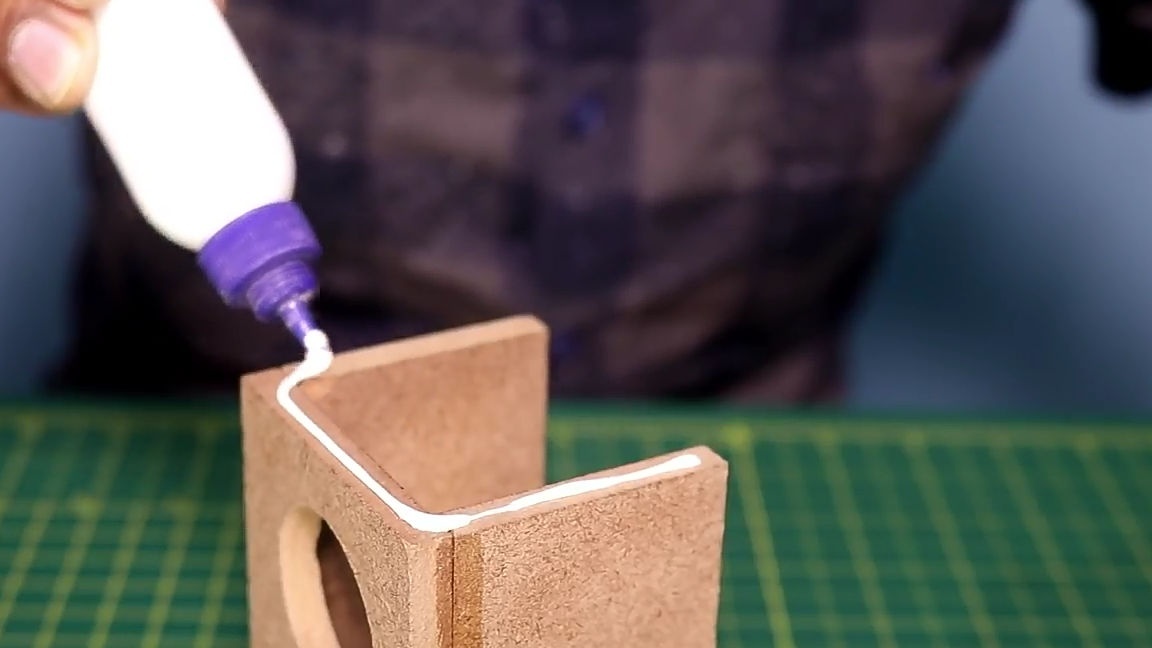
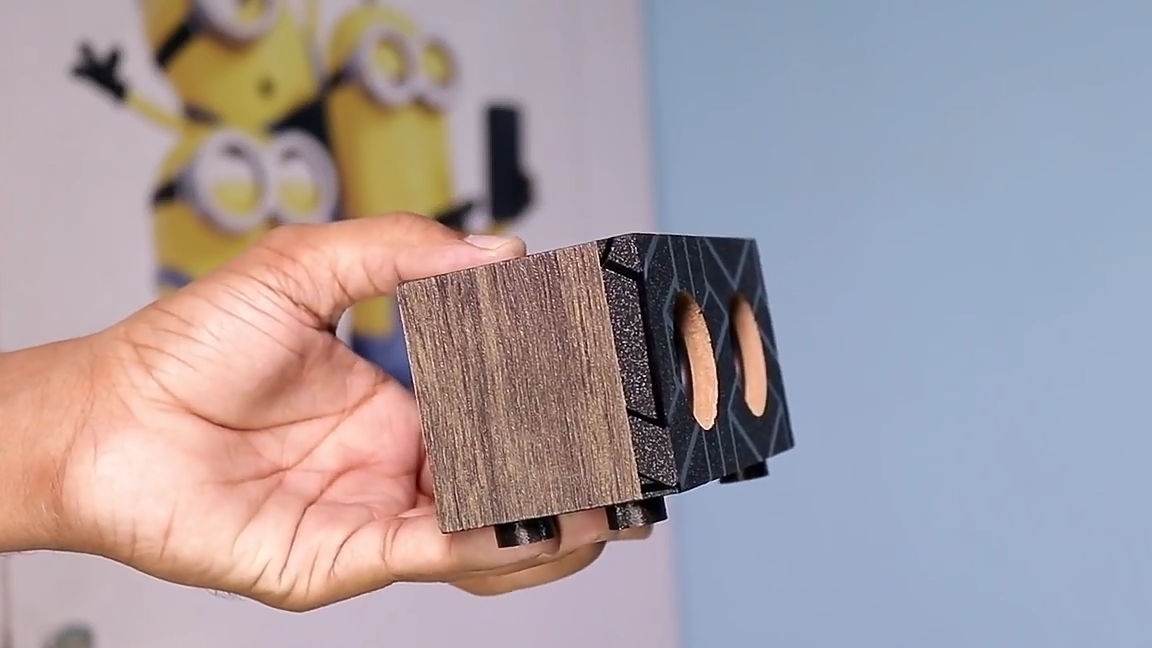
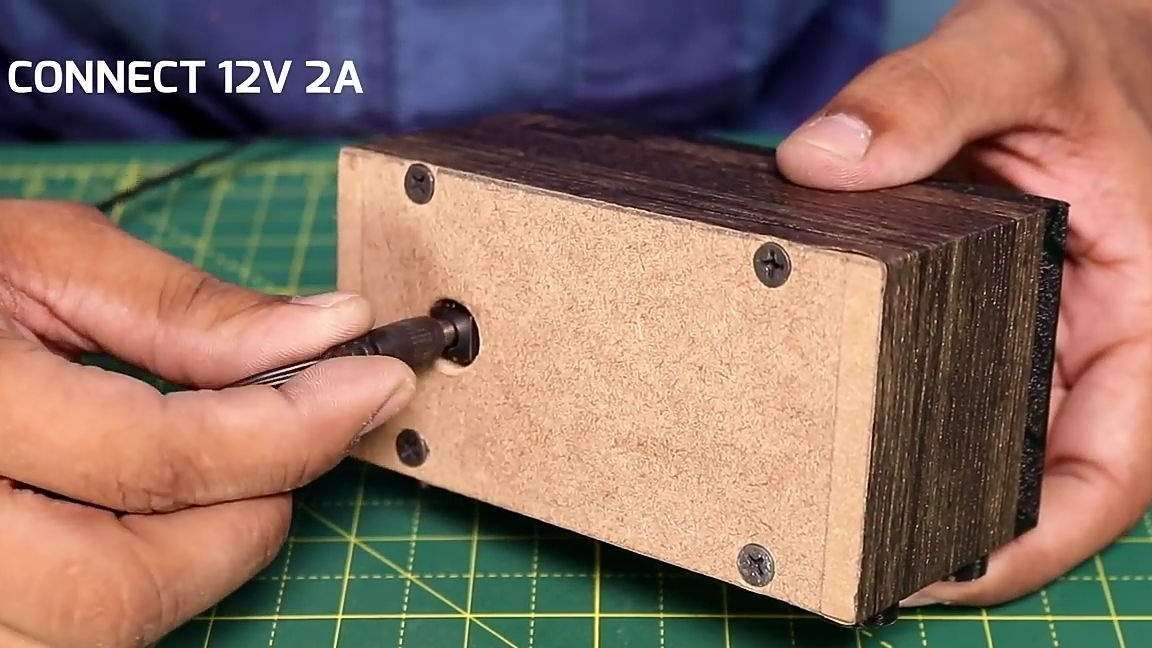
Then we assemble the case. The housing will consist of the above elements. For assembly, we simply repeat the step-by-step actions on the photos that are given to you below. It should be noted that on one of the large rectangles, holes should be made for air, (such a hole will be made on the lower part of the case for aesthetics.) And also a hole for the power connector should be made on the side of the opposite front. All sides should be connected using PVA glue; it is best to cope with this task. We do not glue the back wall, as it should remain removable.
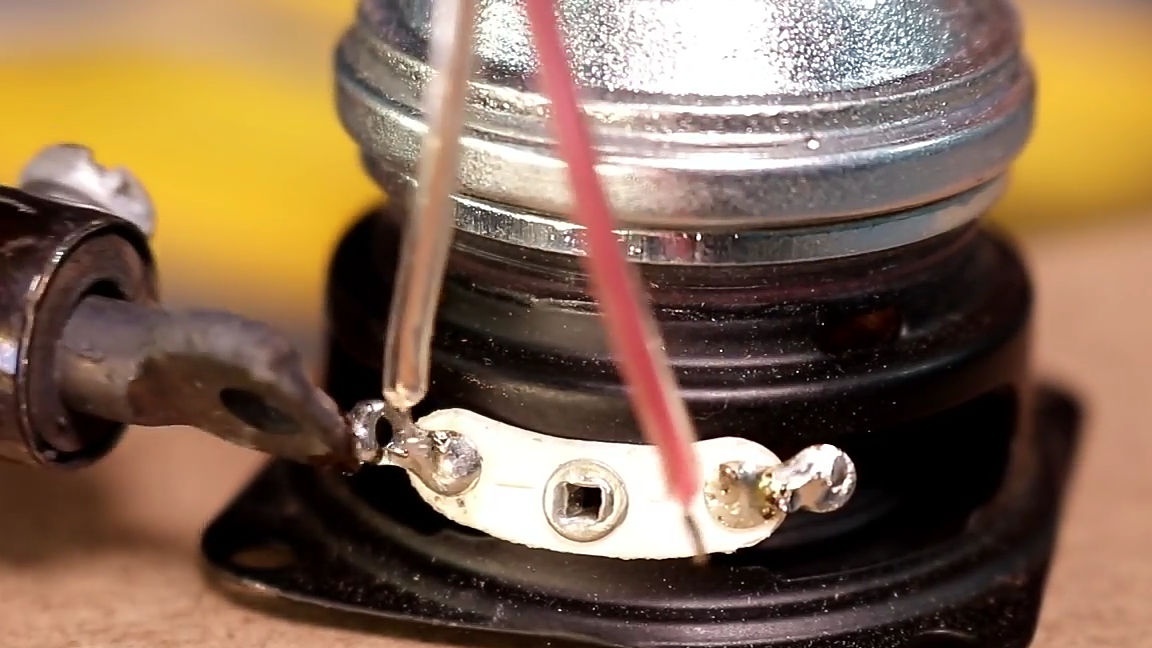
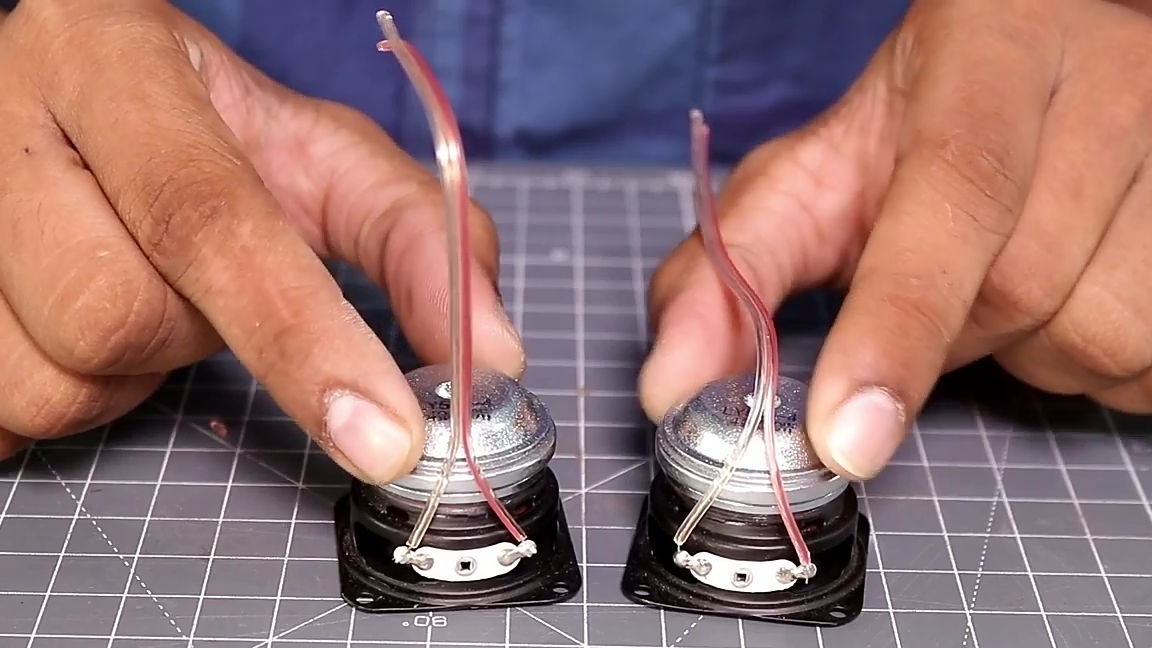
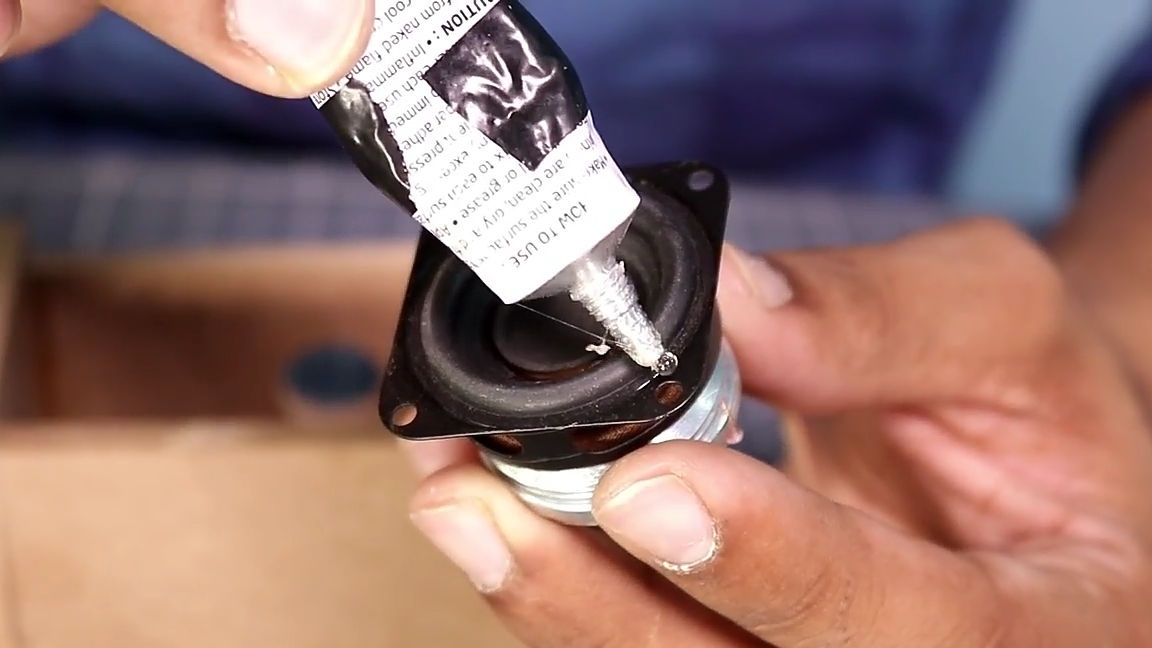
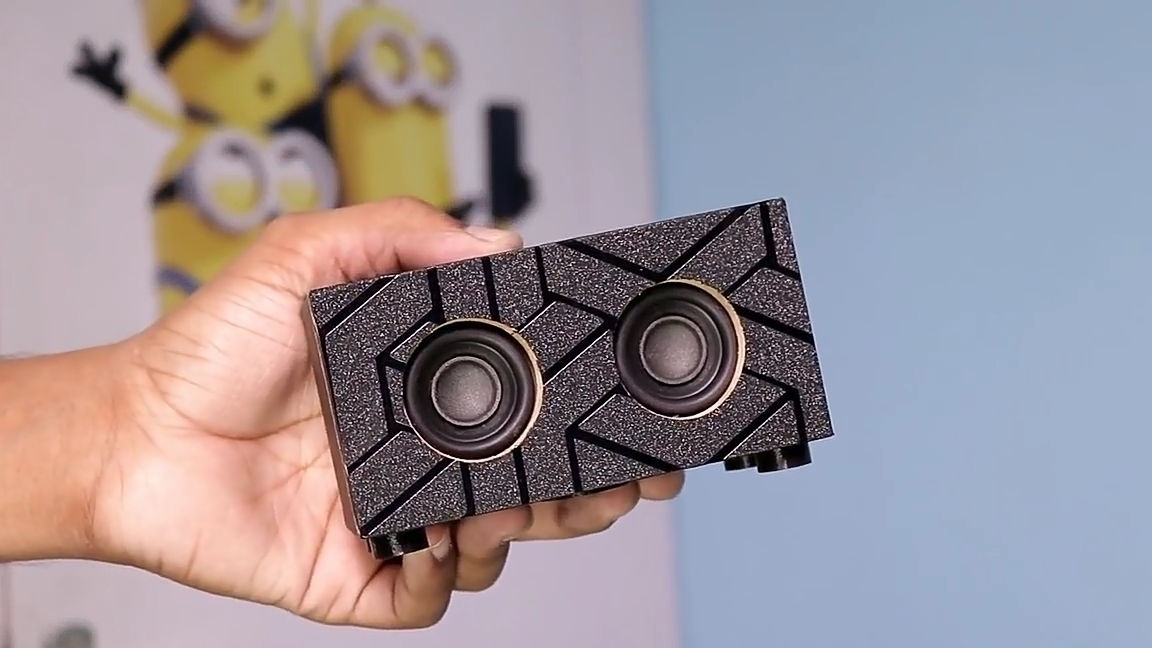
Next, solder a special sound cable to our speakers. And the speakers themselves, in turn, are glued to their places using silicone glue, this connection will give the most tight contact with the body and create a kind of vibration isolation layer. At this stage, everything should work out for us, as it is shown in the photo below.
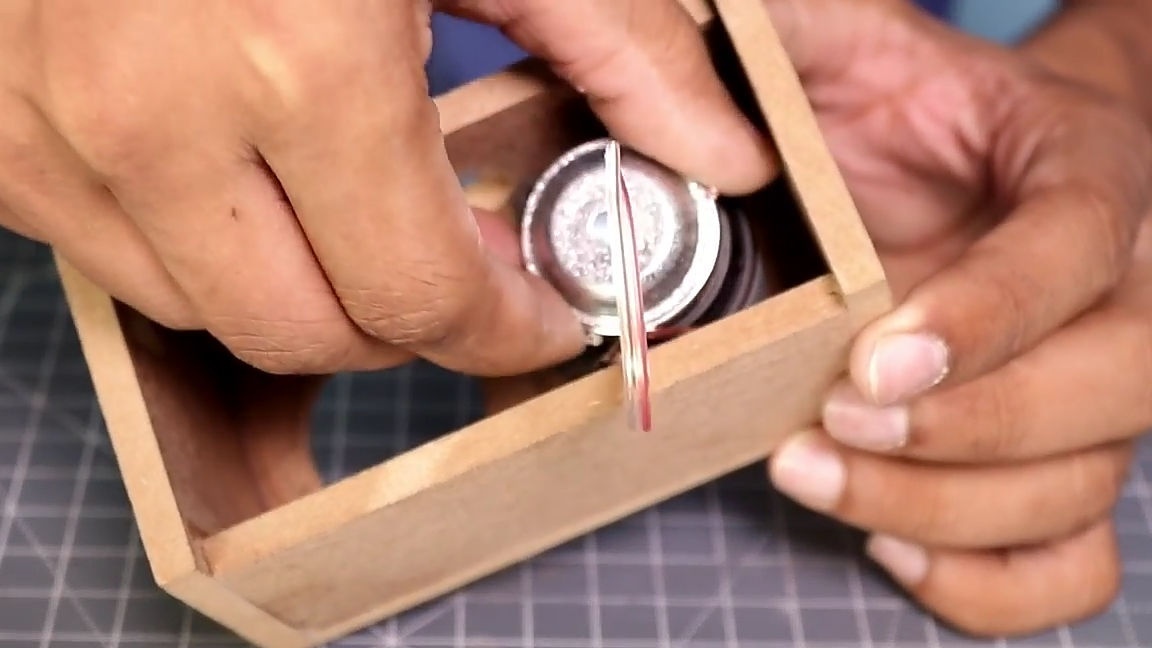
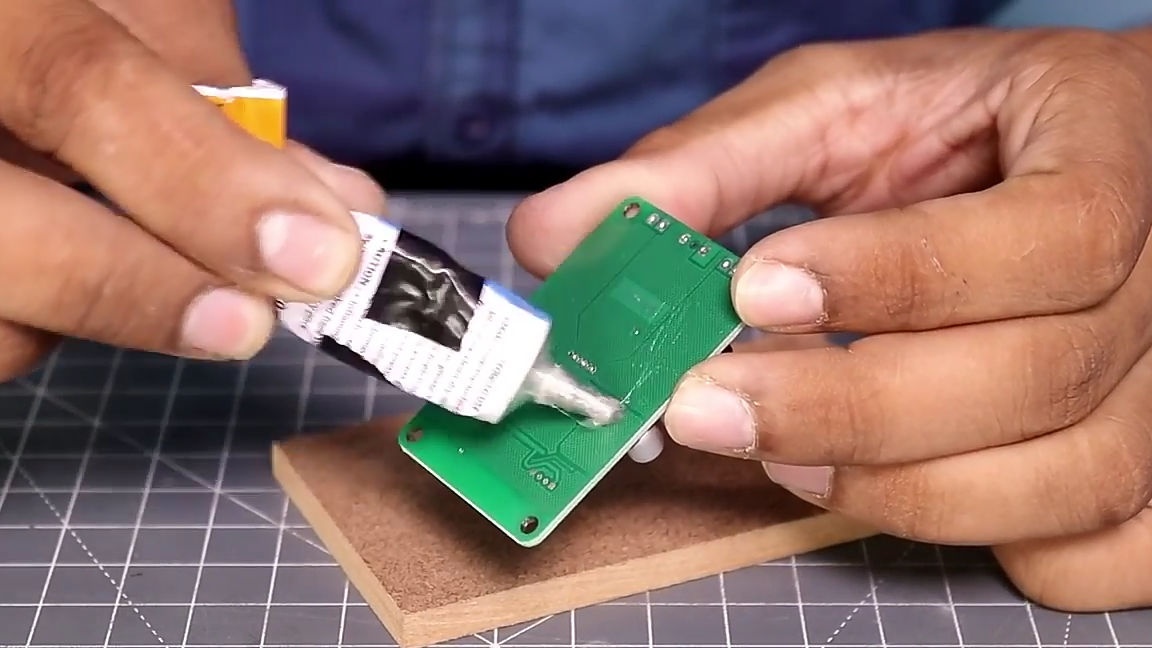
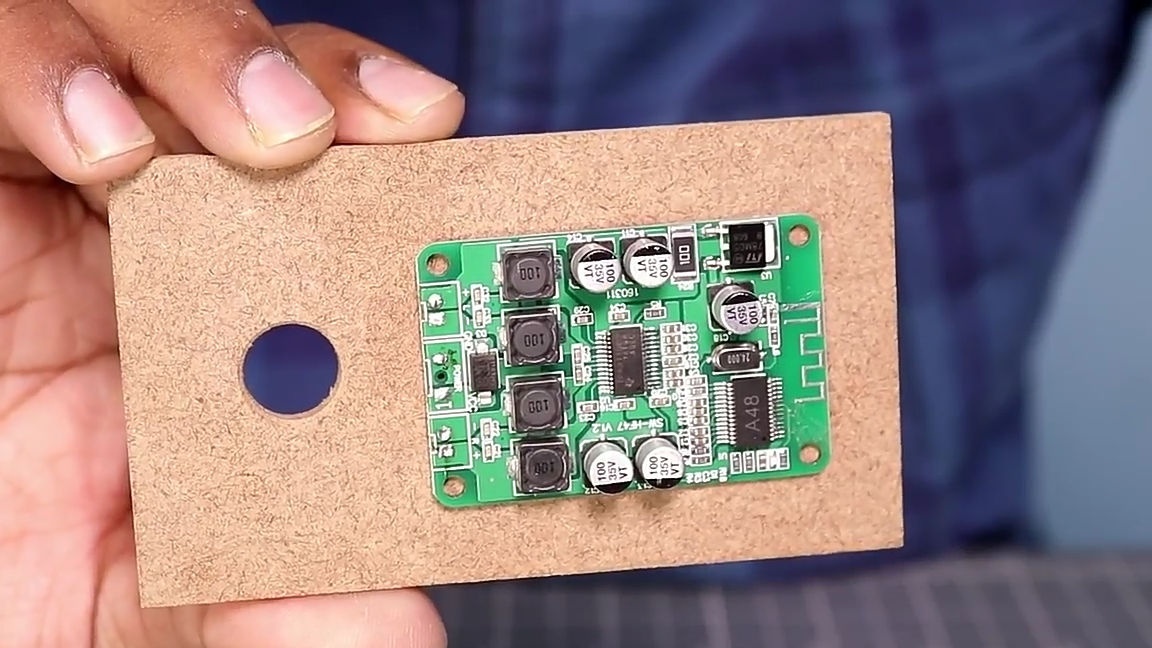
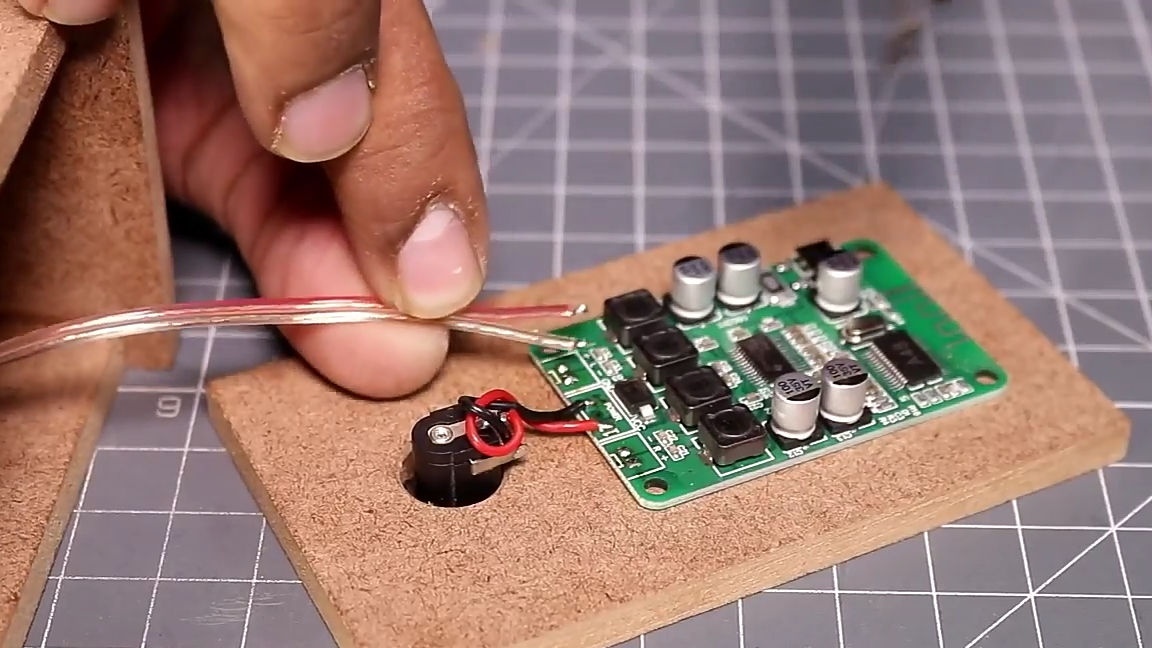
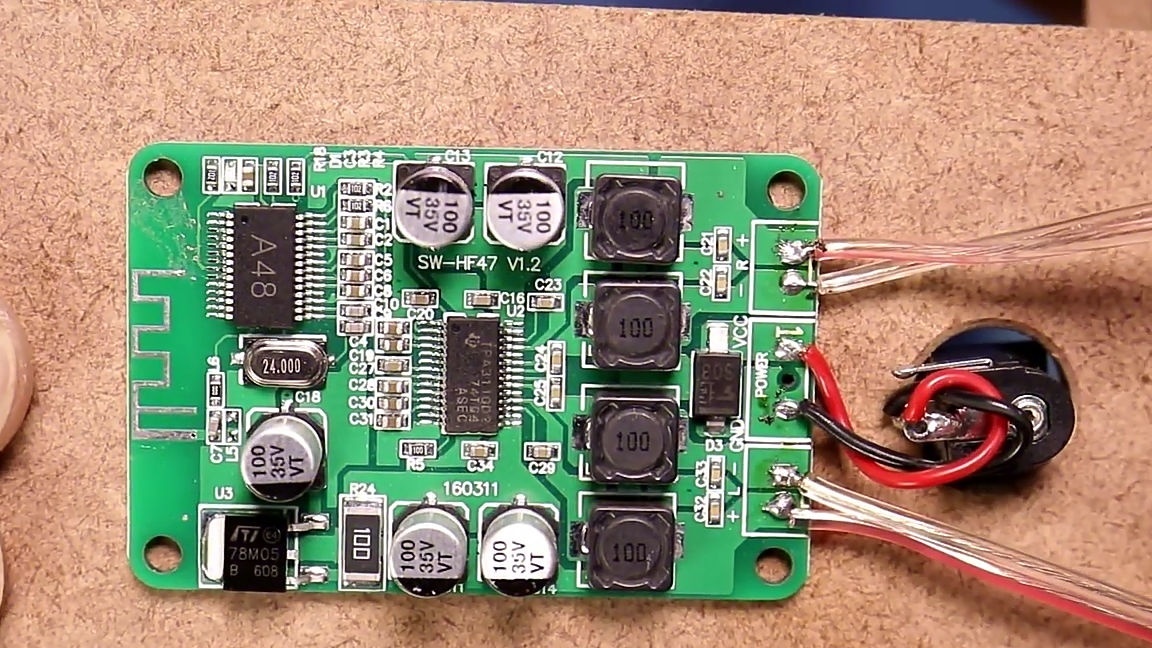
For the next step, we need the most important and main part of today's homemade work is the sound control board. The choice of such boards on Chinese online stores is very large, there are, as well as simple boards with wired data transfer, and wireless with a wide variety of parameters. You can choose a card for your parameters and for your wallet. We apply silicone glue to the board itself and glue it to the back removable part of the case. We solder a connector into the power input of the board, which in turn will be installed in a pre-made hole for it.
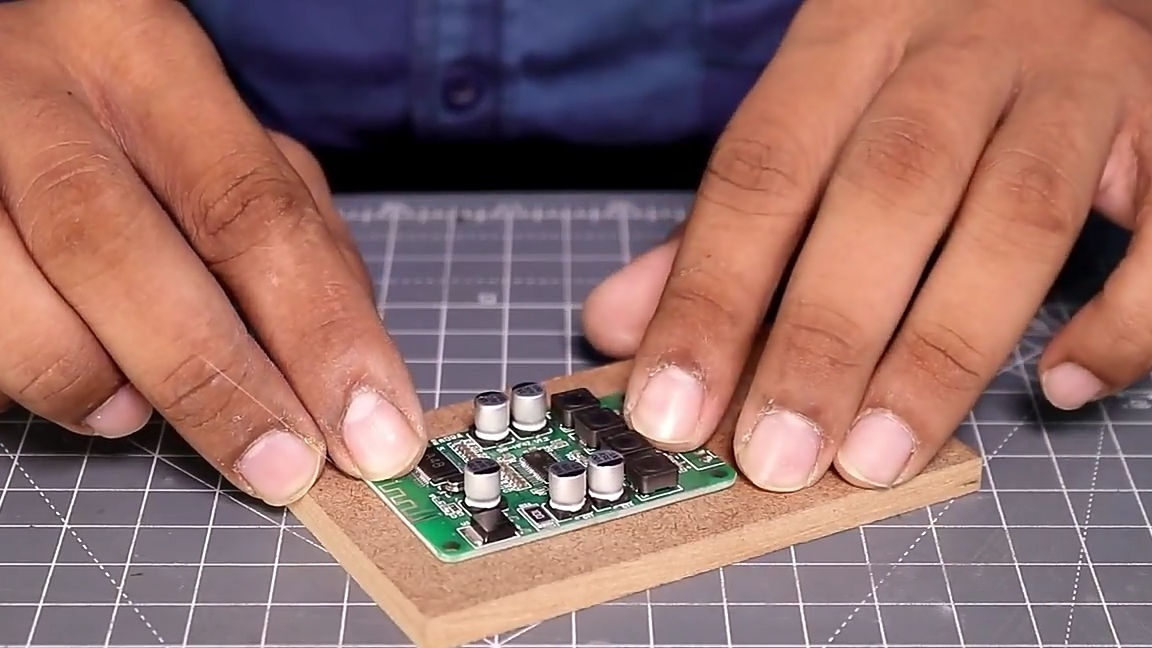
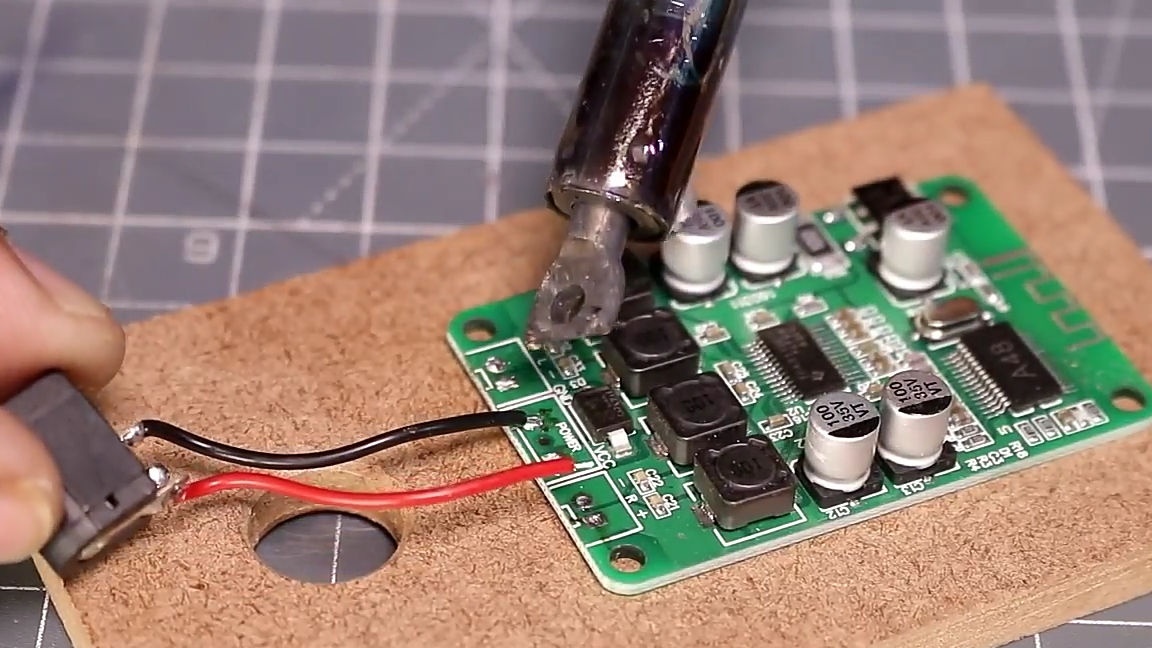
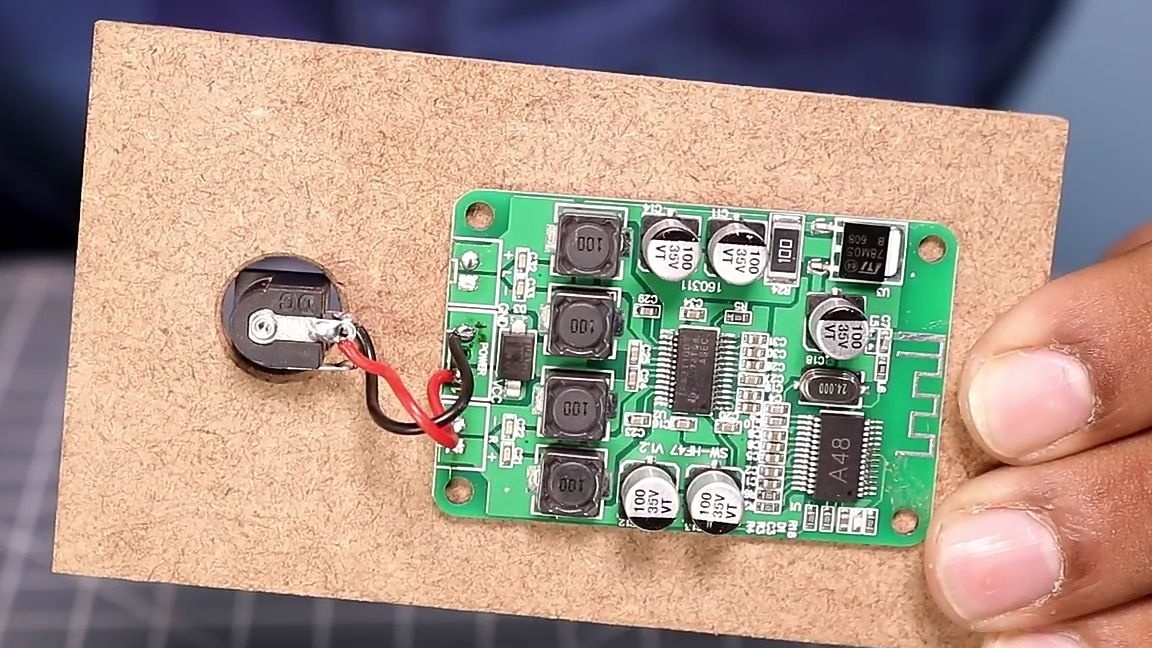
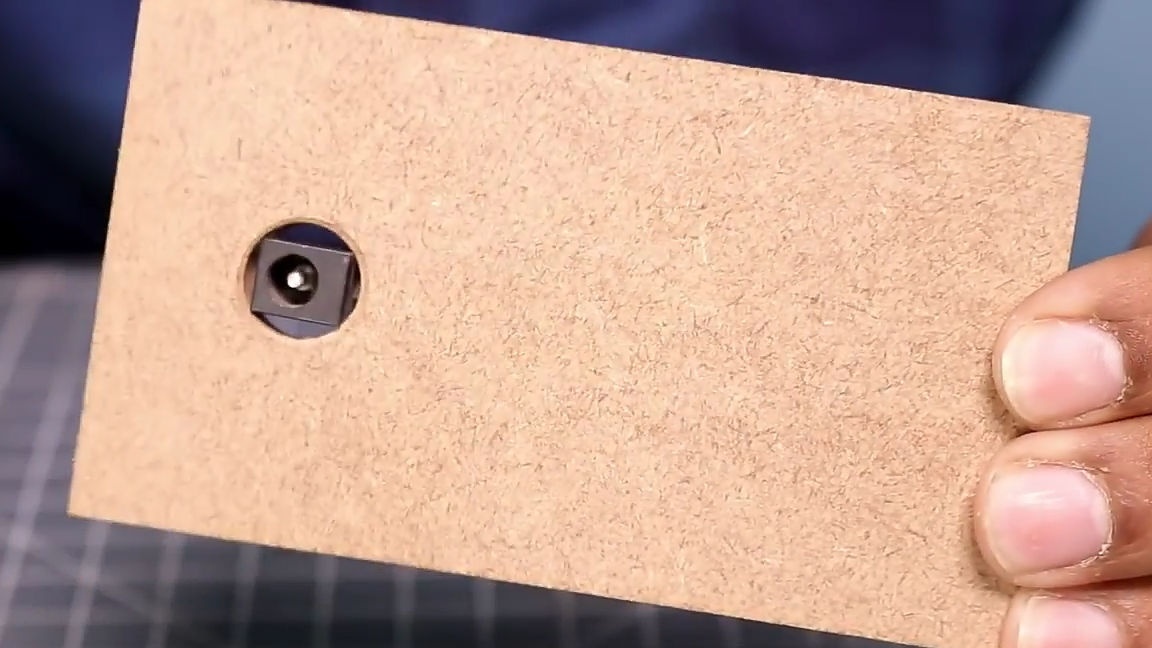
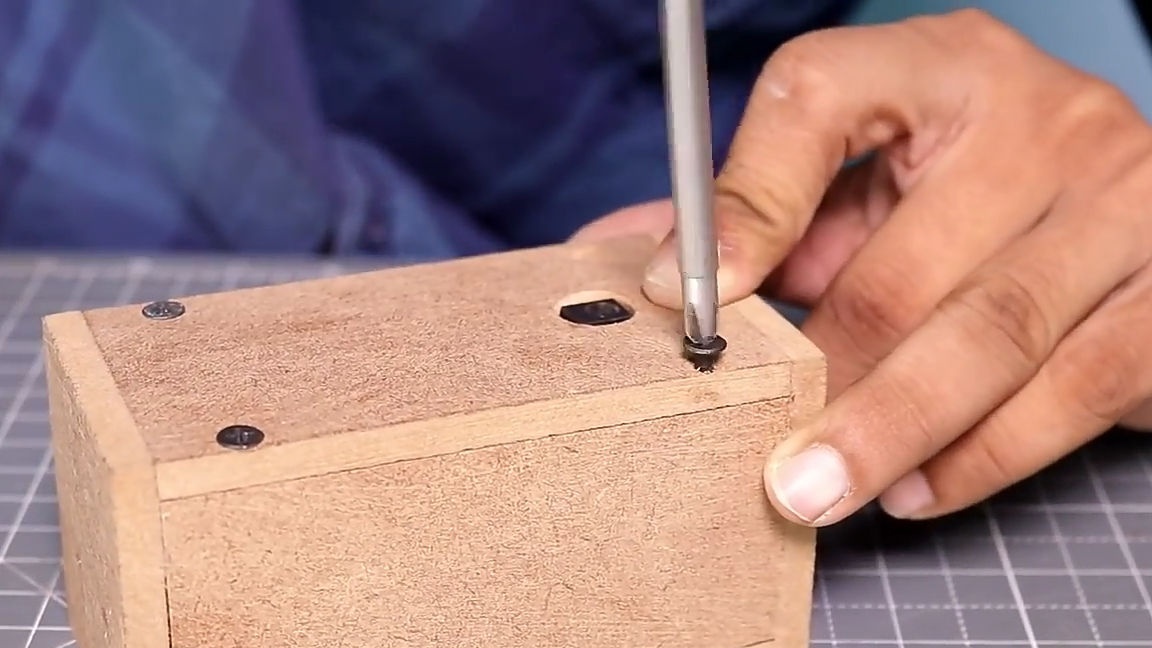
Then according to the instructions to the sound card control solder the speakers into those connectors and the polarity as on the seller’s website or instructions. Install the back cover to its seat. We drill four holes along the edges of the body for screwing in the screws, for fixing the back removable cover. It should be noted that it is not recommended to screw in screws without pre-made holes, as the MDF panel may burst.
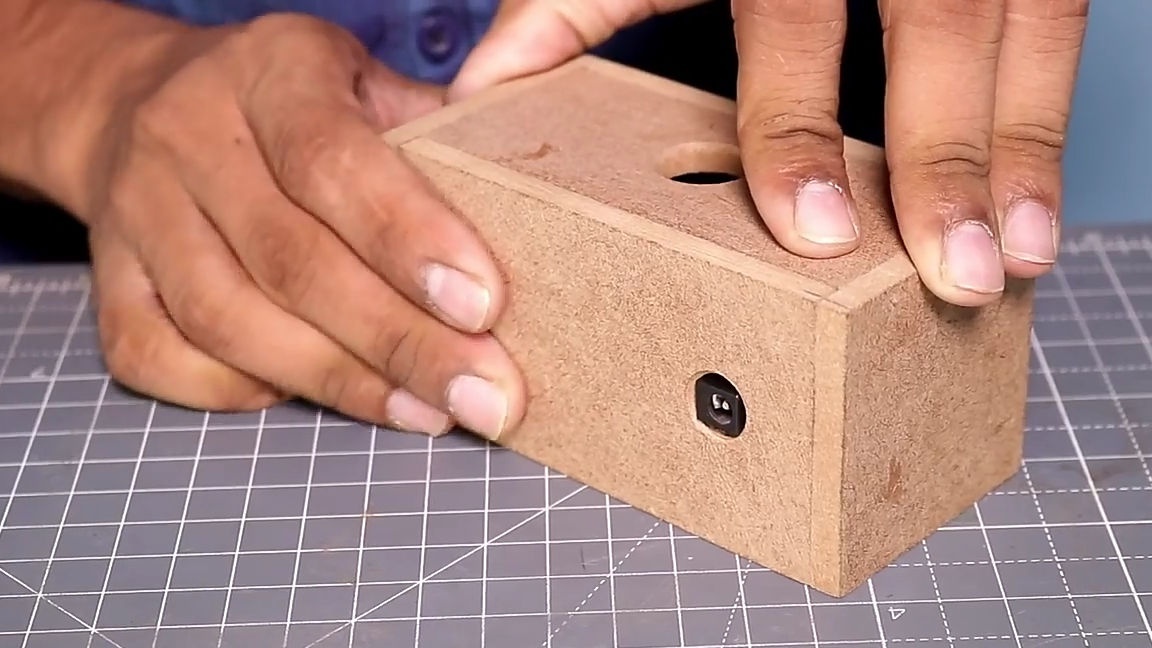
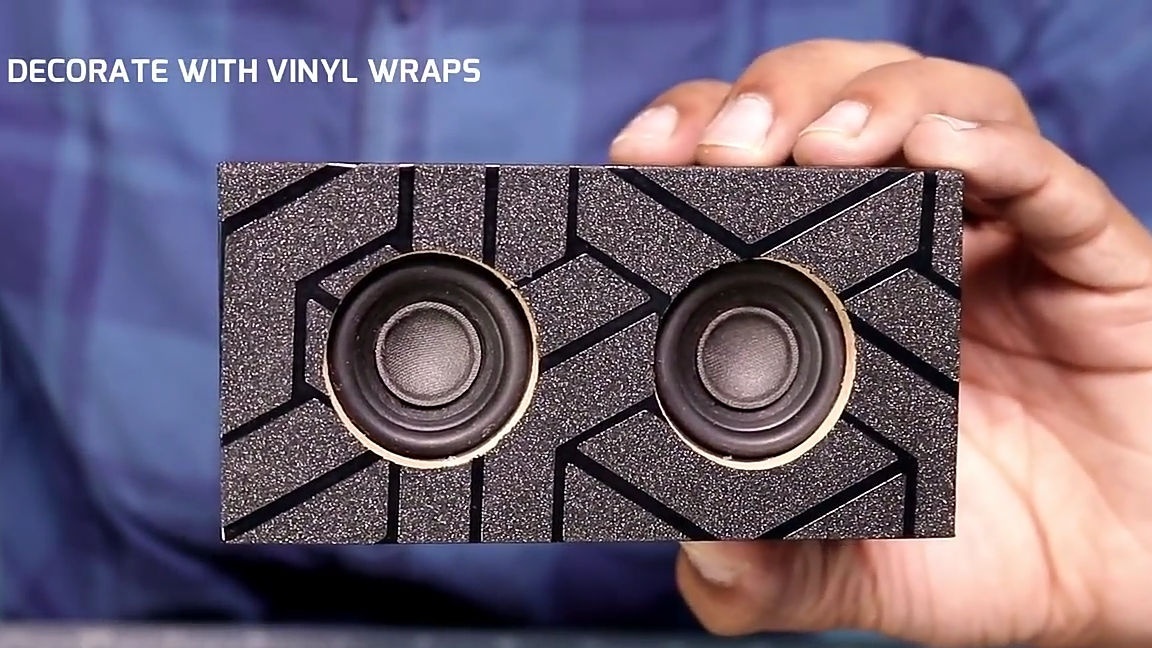
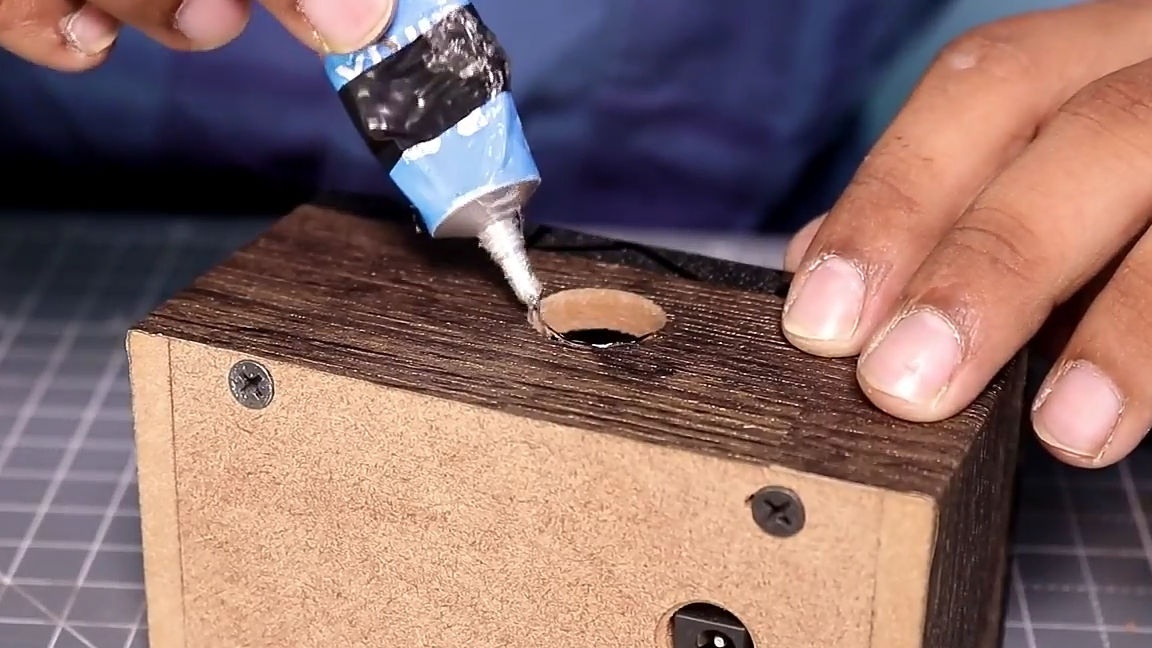
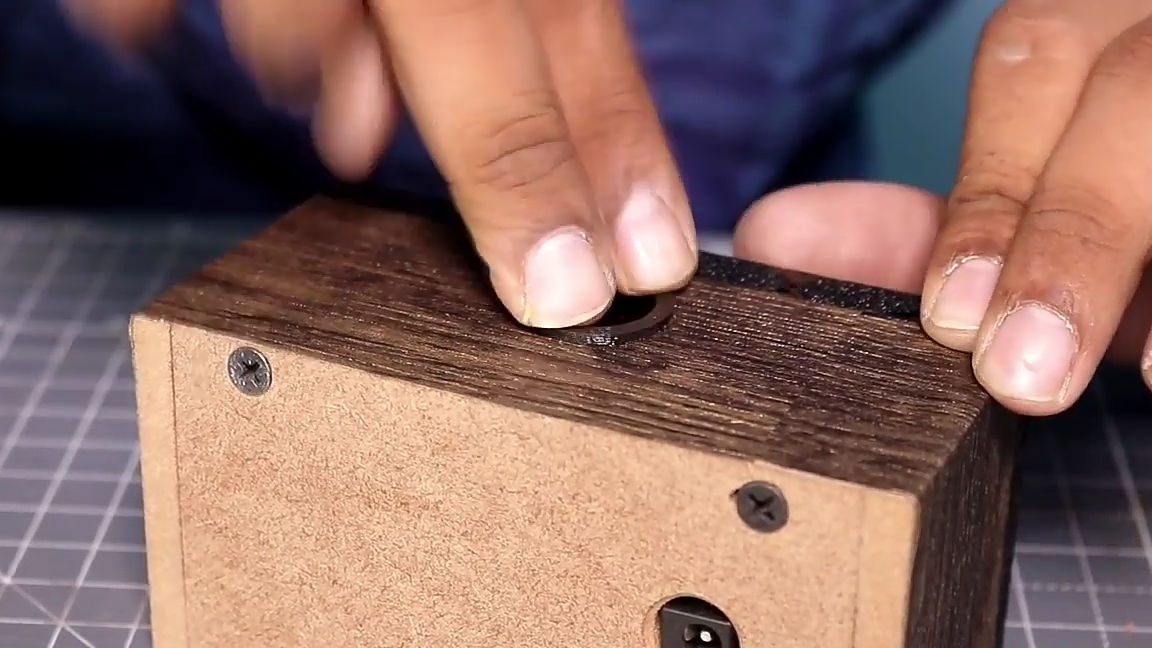
The column itself is ready, but in order for you not to be ashamed of it, you should pay attention to its appearance, for example, the author simply decided to glue it with the vinyl film that he had. Also, do not forget to install some sleeve in the hole in the lower part for the passage of air flows, it will perform, as well as the aesthetic function (its viscera will not be visible) and protective. And we glue the rubber feet, which will dampen the vibration and allow the flow of air to pass.
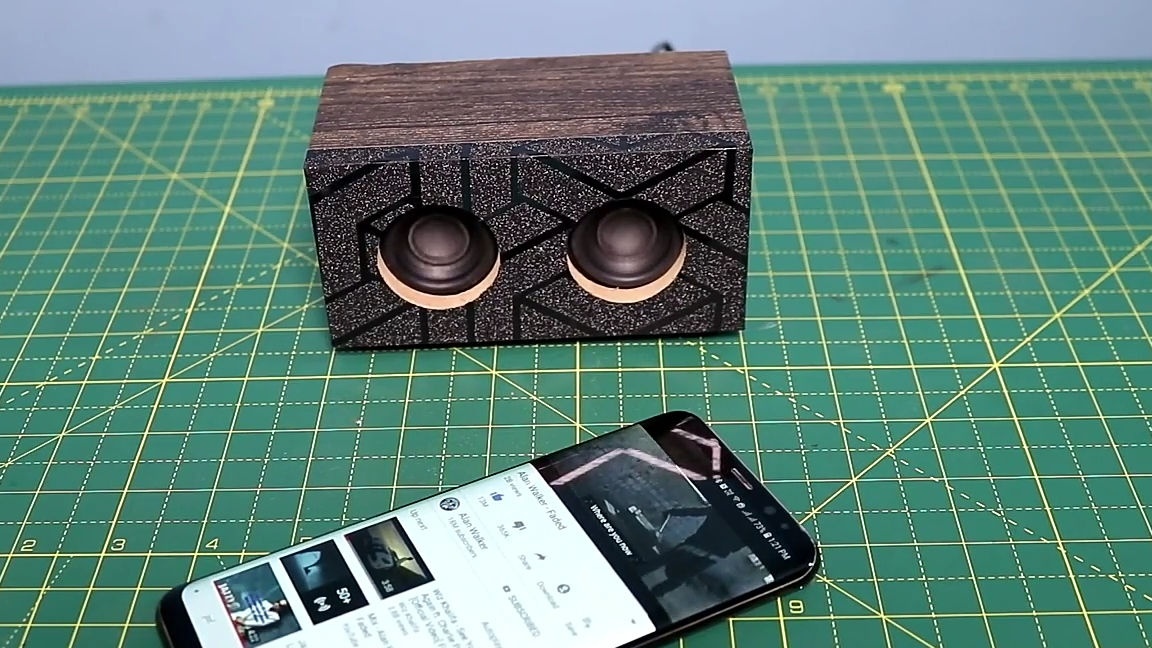
As a result, we got a very cool speaker made do it yourselfwhich looks not bad and also plays. Now it remains to test it, for this we supply the necessary power in our case, it is 12V DC, then we take the phone, turn on Bluetooth, click on “search for networks”, find the name of our board or the name indicated in the instructions for it and connect to it. When connecting for the first time, the board may request a password; the password, in turn, must be specified in the instructions. And that’s all! Enjoy listening to your favorite music.

Here is a video from the author with a detailed assembly and testing of this homemade product:
Well, thank you all for your attention and good luck in future projects, friends!