
In this article, John, the author of YouTube channel "John Heisz - I Build It" will show you a simple technology for making knife sharpeners from old, used whetstone.
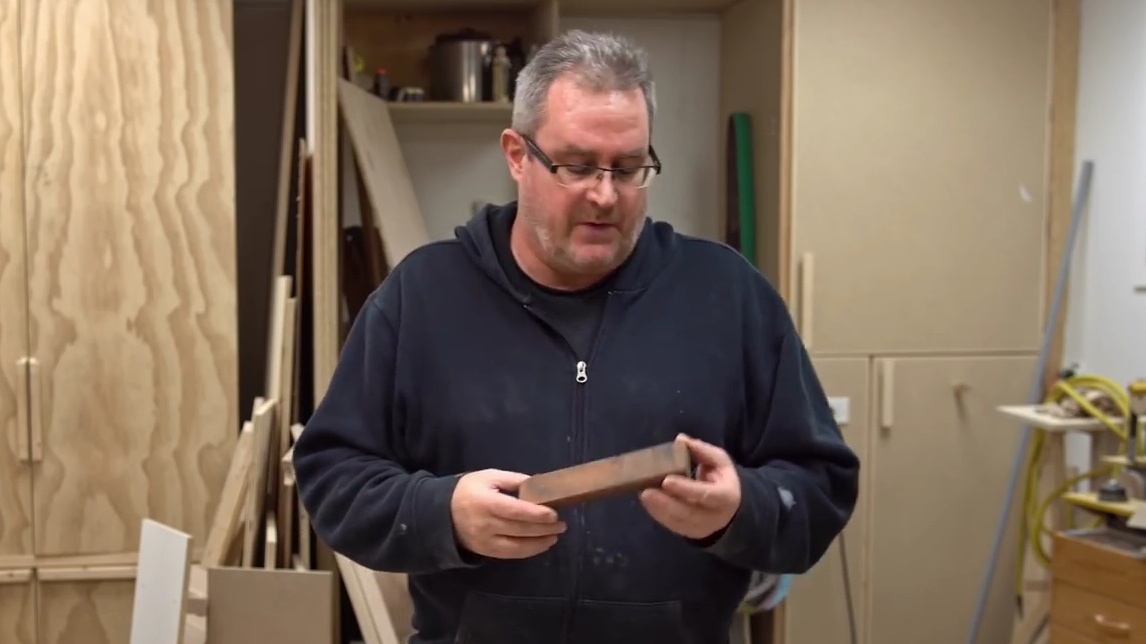
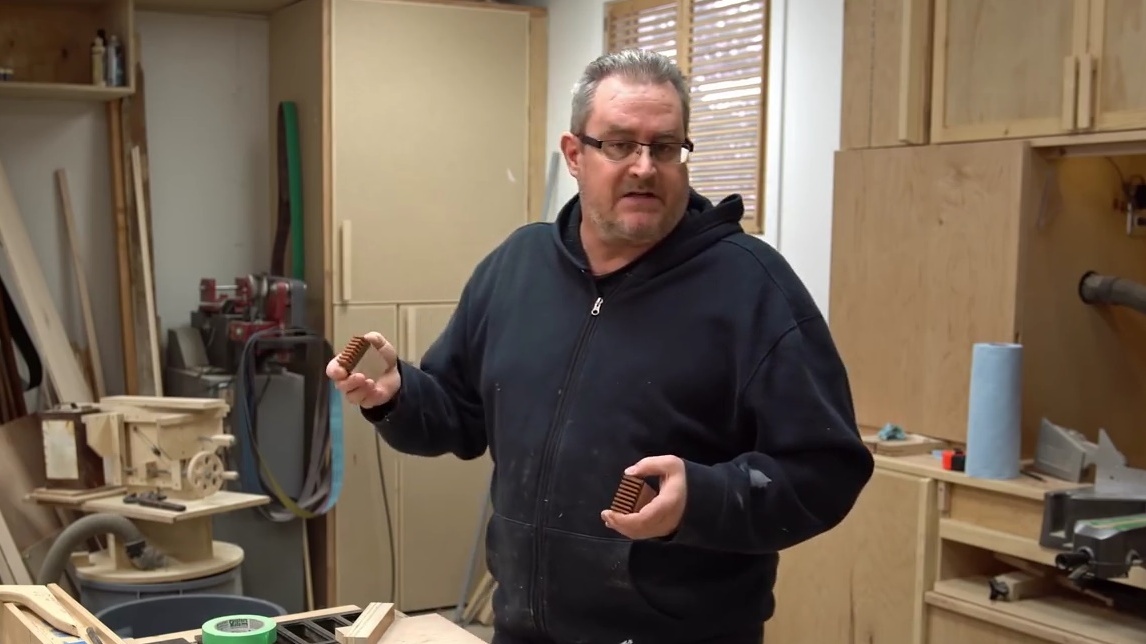
Here it is, there are already many jagged areas in it, and it is no longer suitable for quality sharpening.
Materials
- Old water whetstone
- Maple bars (or other hardwood)
- sheet plywood
- Two-component epoxy resin
- sponge
- solvent
- PVA glue
- Self-tapping screws.
Instruments, used by the author.
- A circular saw
- diamond blade
- Miter saw
- Air gun under the nail
- Roulette, ruler, pencil.
Manufacturing process.
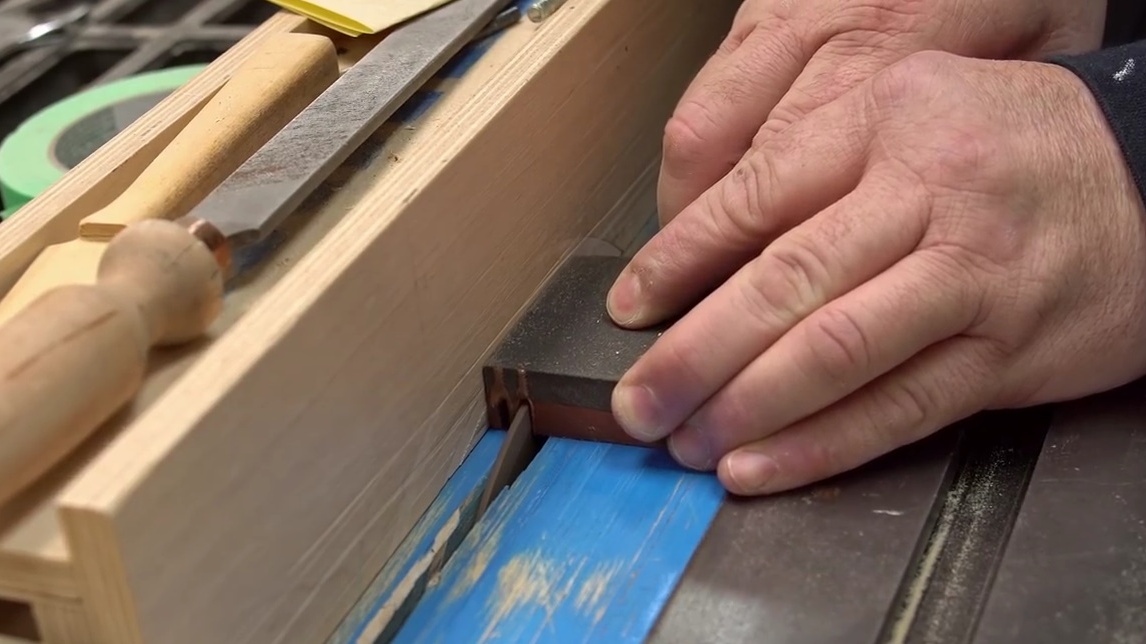
The first thing the author does, he cuts the stone across, about 2.5 inches in length. This is a kind of experiment, because not every disk is able to overpower the density of the stone, and cut it without chips. John inserts a diamond disk and watches it smoothly enter the structure of the stone.
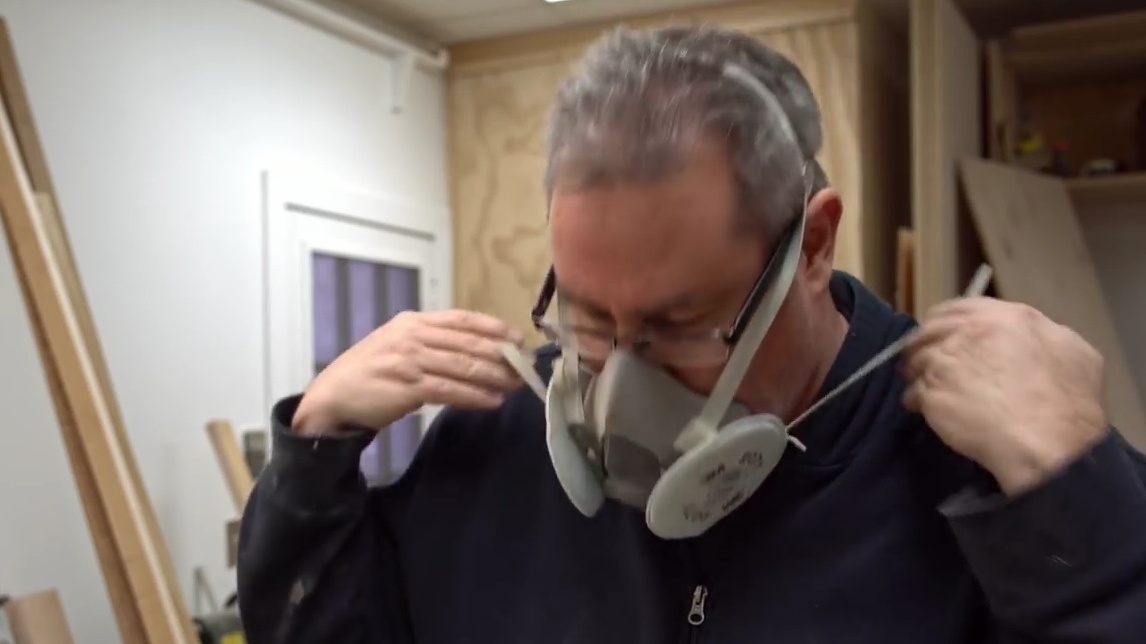
Warning: the use of a respirator or mask is mandatory! In order to immediately eliminate fine abrasive dust that appears during cutting, the master switches on the vacuum cleaner in advance, bringing its nozzle as close to the saw blade as possible.
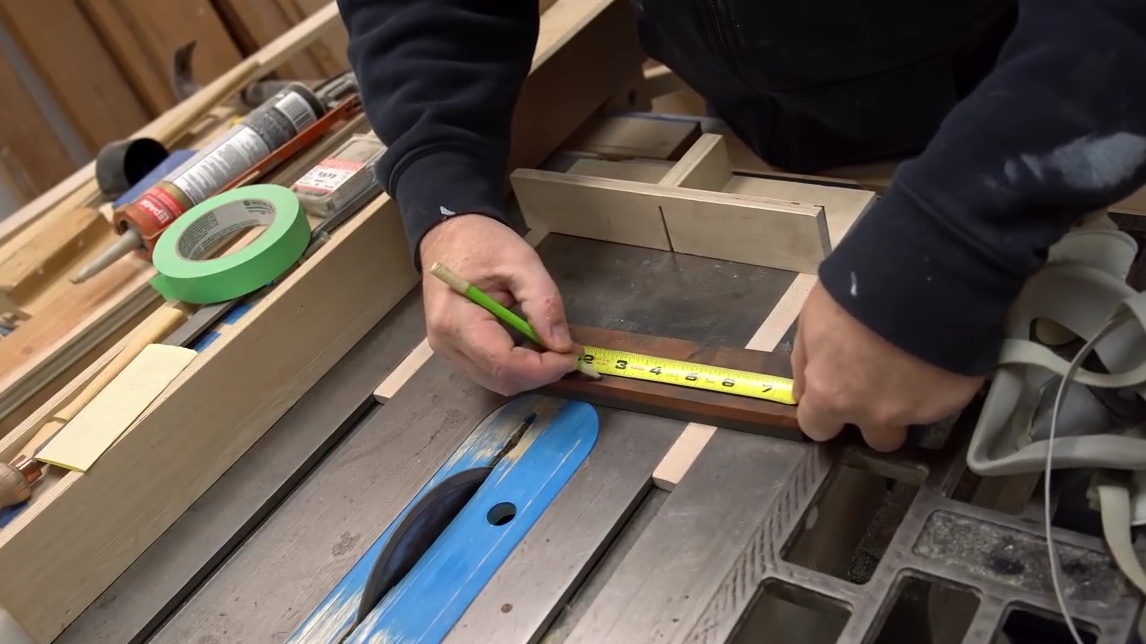
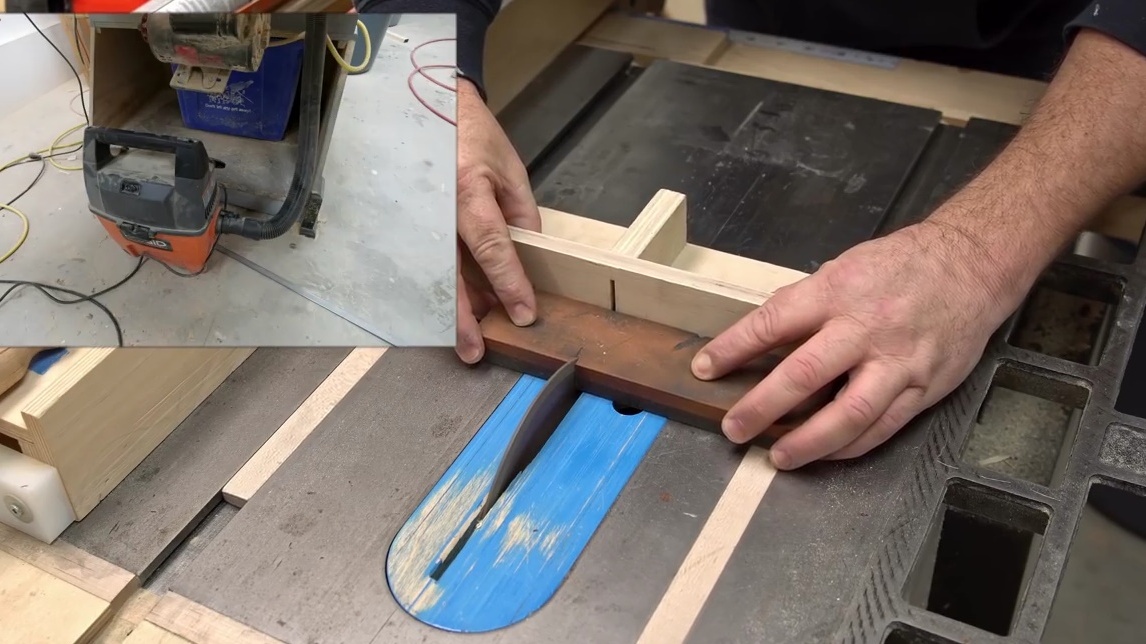
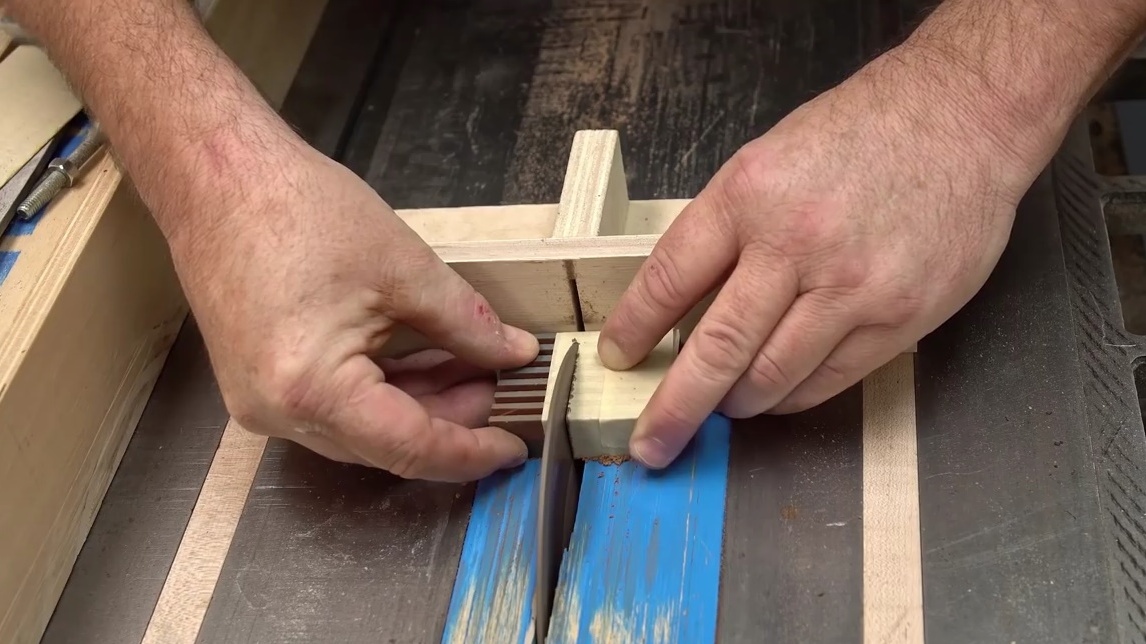
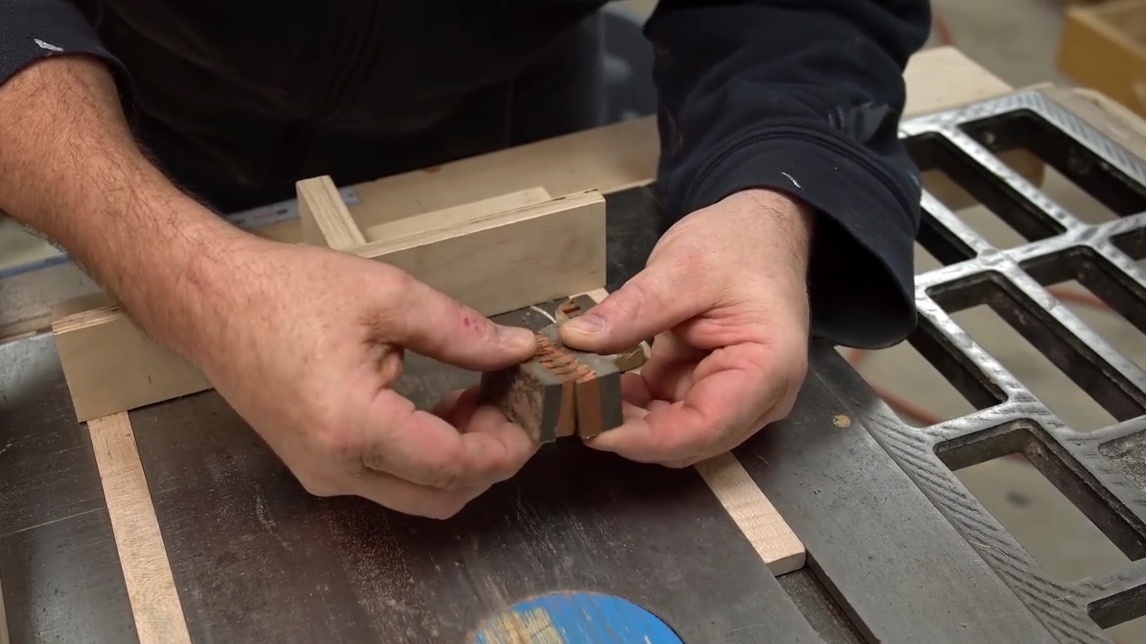
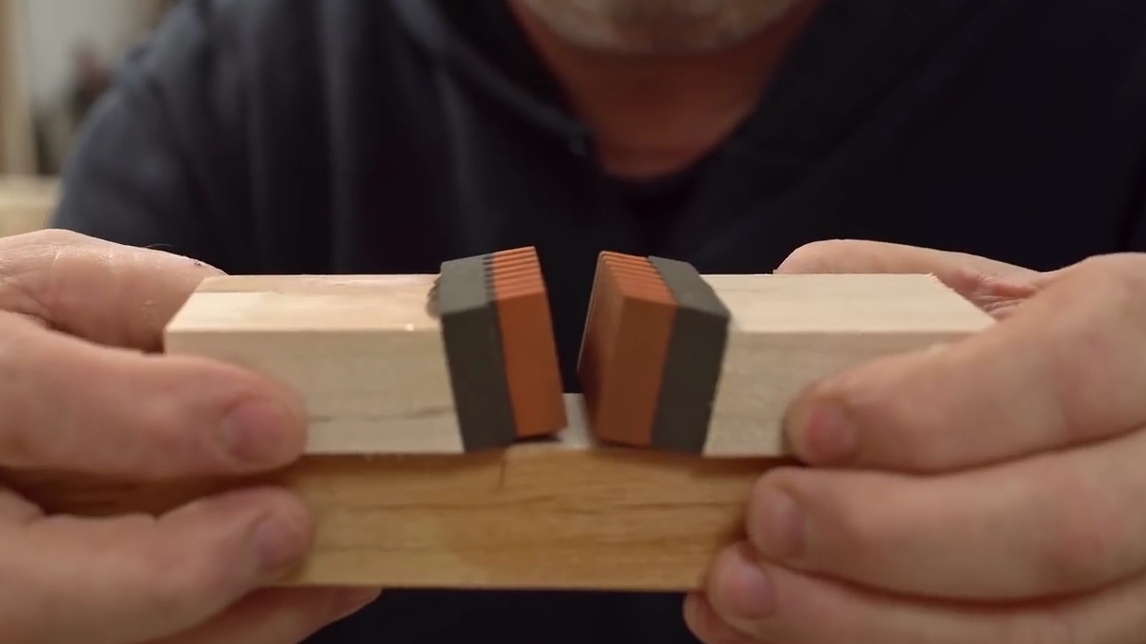
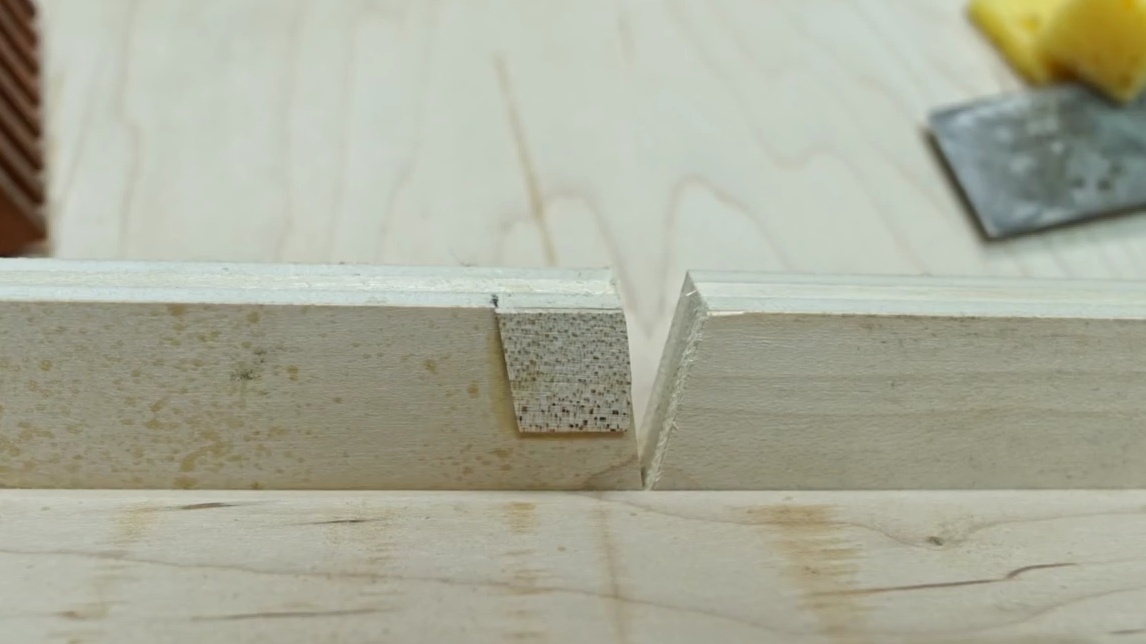
The slice turned out to be quite clean and smooth. Now each piece of stone has to be sawn into W-shaped sections. This must be done so that the cuts on both halves of the stone can be connected to each other, therefore, these cuts should be made as accurately as possible.
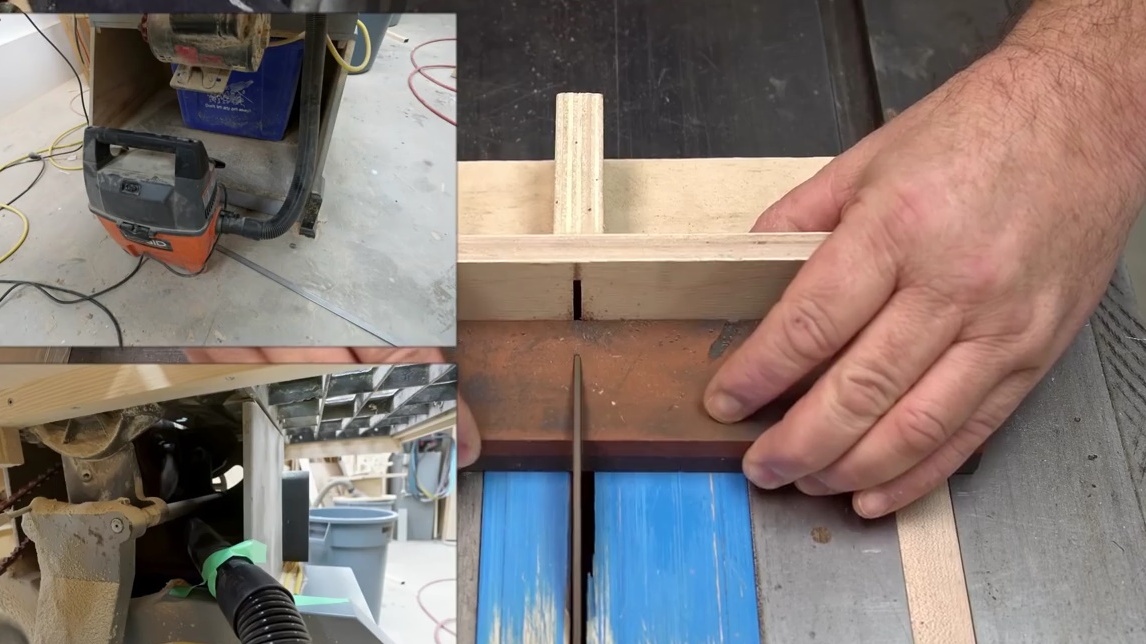
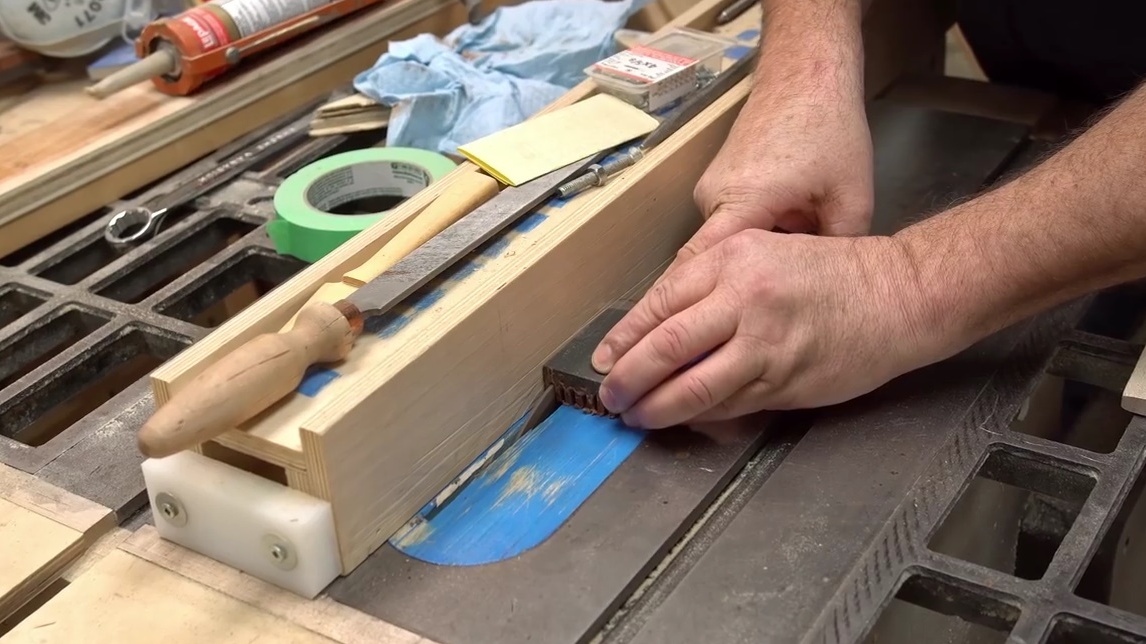
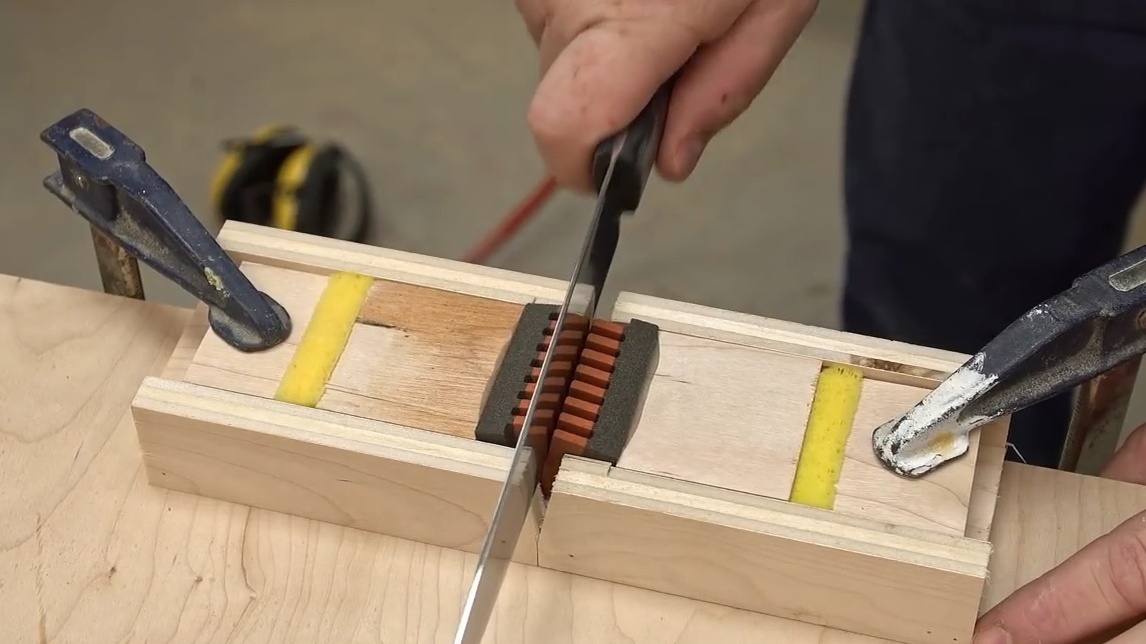
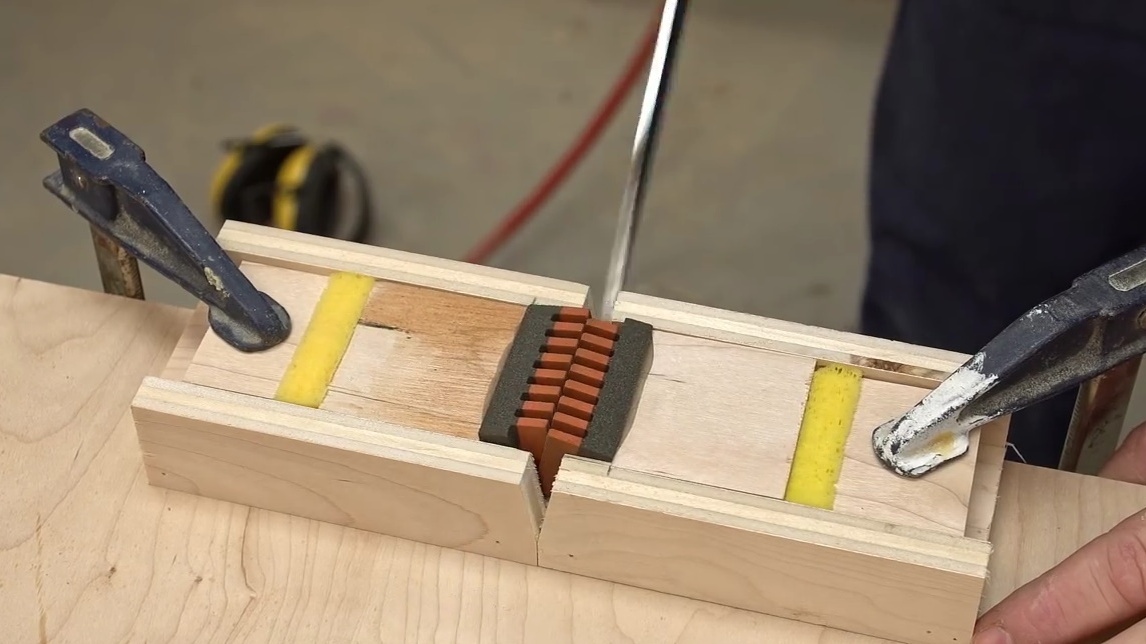
John deepens the saw blade so that it can cut the stone only half the thickness, and then sets the stop at a distance of 1/8 inch from the saw blade.
The craftsman is going to first make all the slots on one piece of stone, adjusting the emphasis accordingly. Moreover, it is necessary to make such slots so that after sawing both halves resemble each other. Simply put, the width of the protrusion should be equal to the width of the slot. The interval in theory is correct.
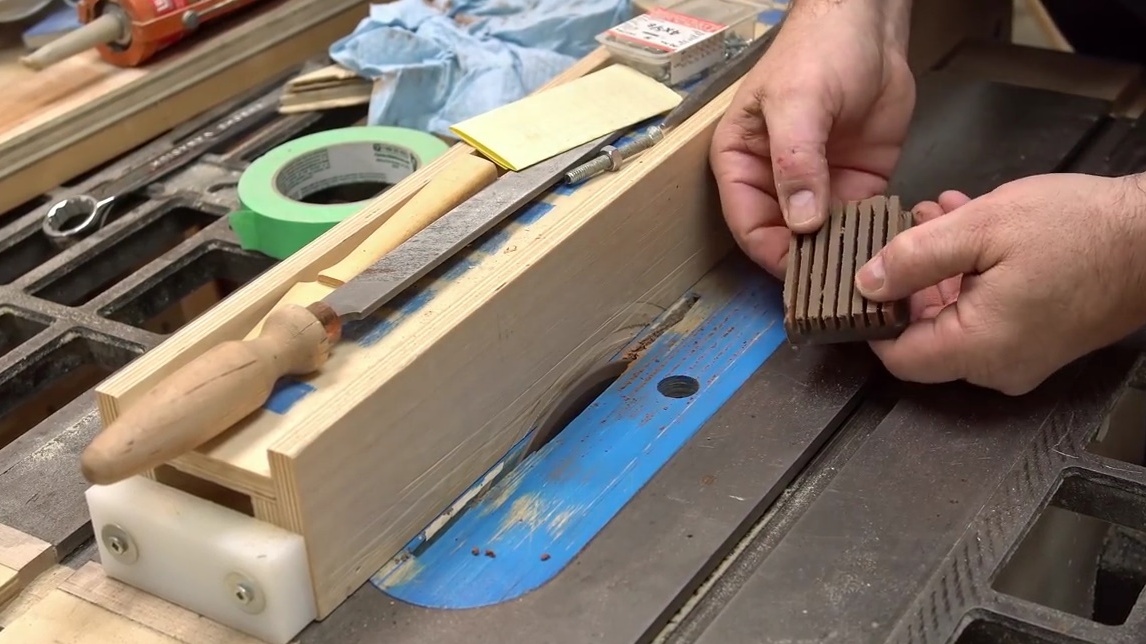
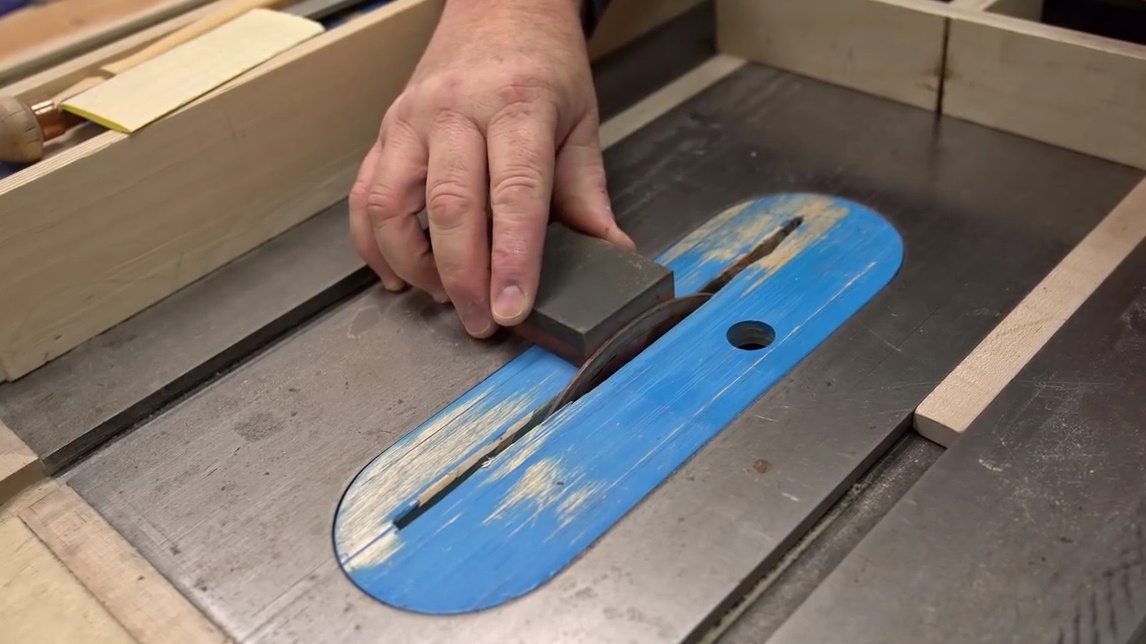
The next step - the author cuts the resulting piece into two inches long. So that the teeth do not break during sawing, the master pulls them with duct tape. In fact, this tape is not so much sticky as oily. And the oily layer prevents dust from entering the air. So you didn’t even need a vacuum cleaner in this procedure!
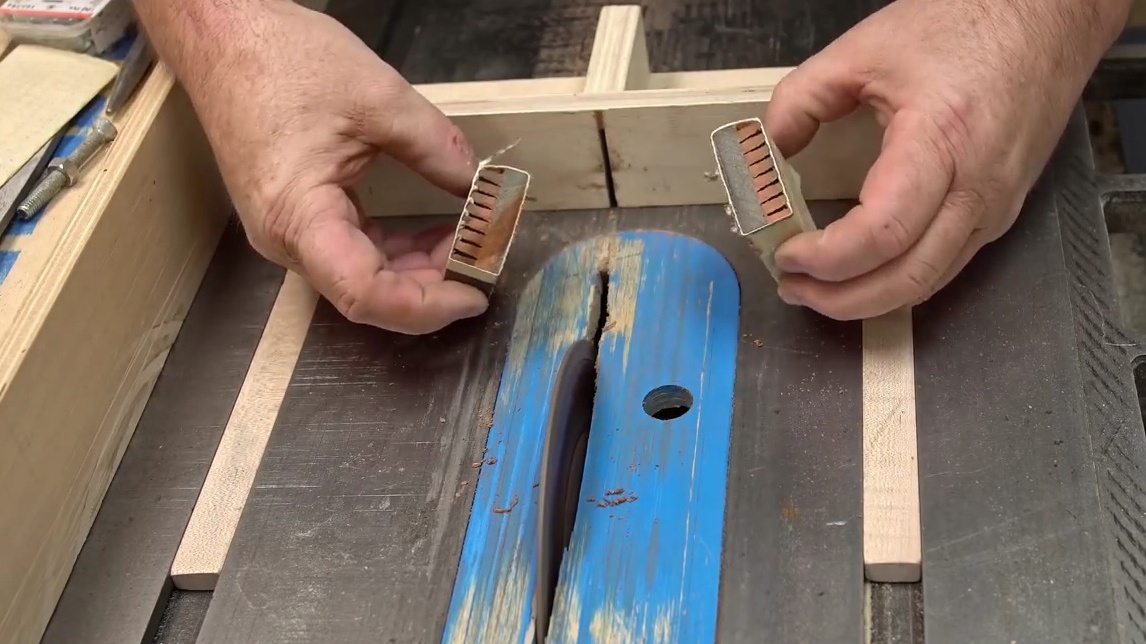
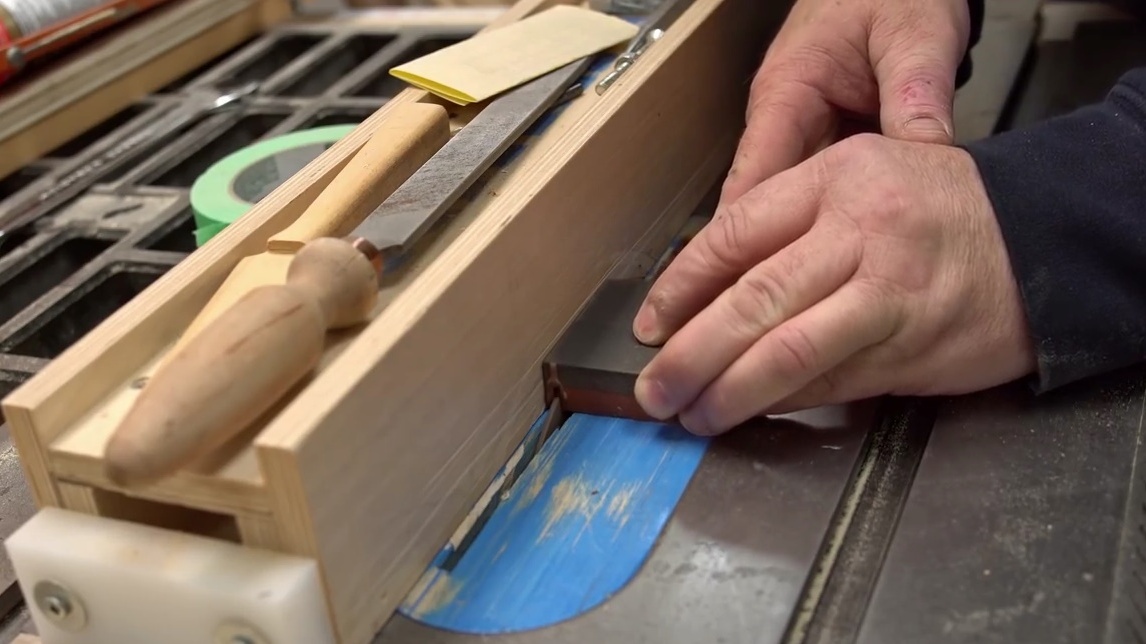
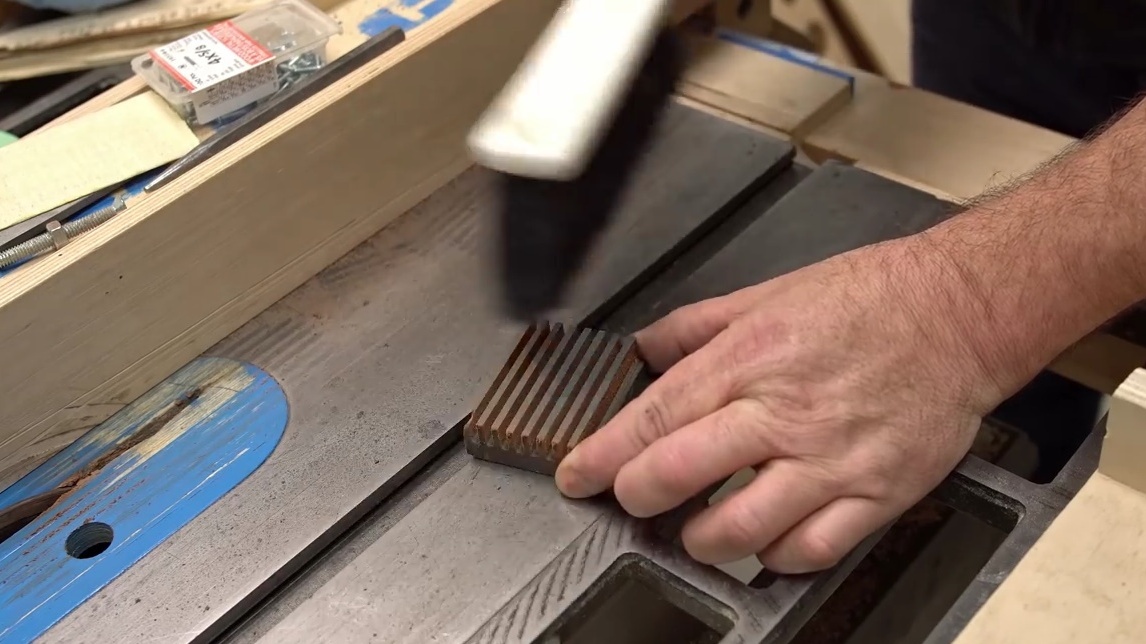
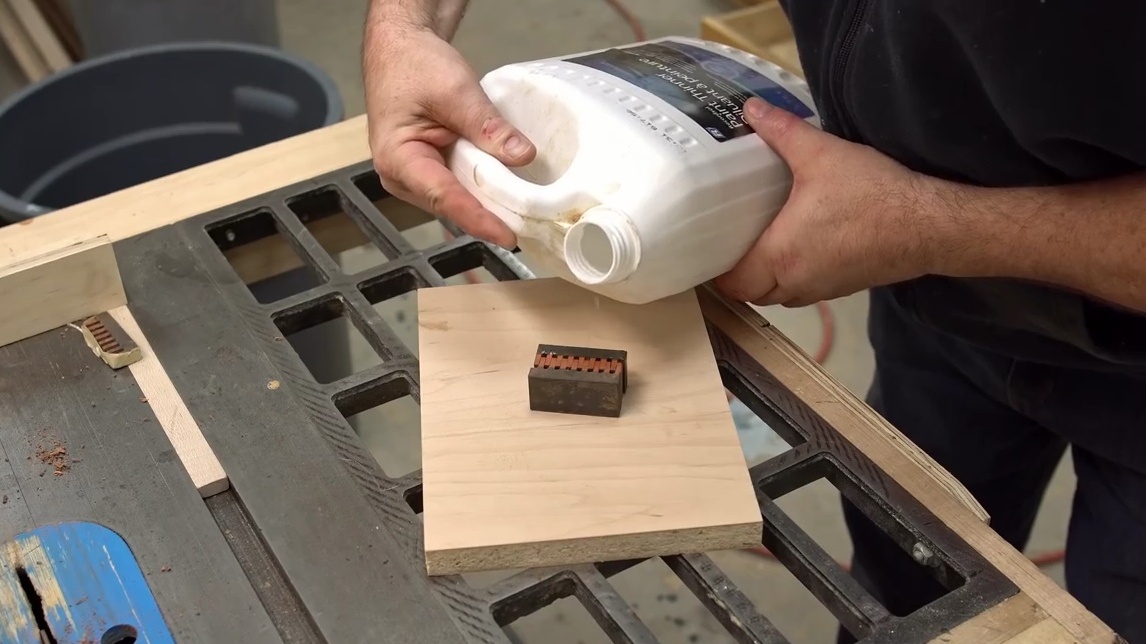
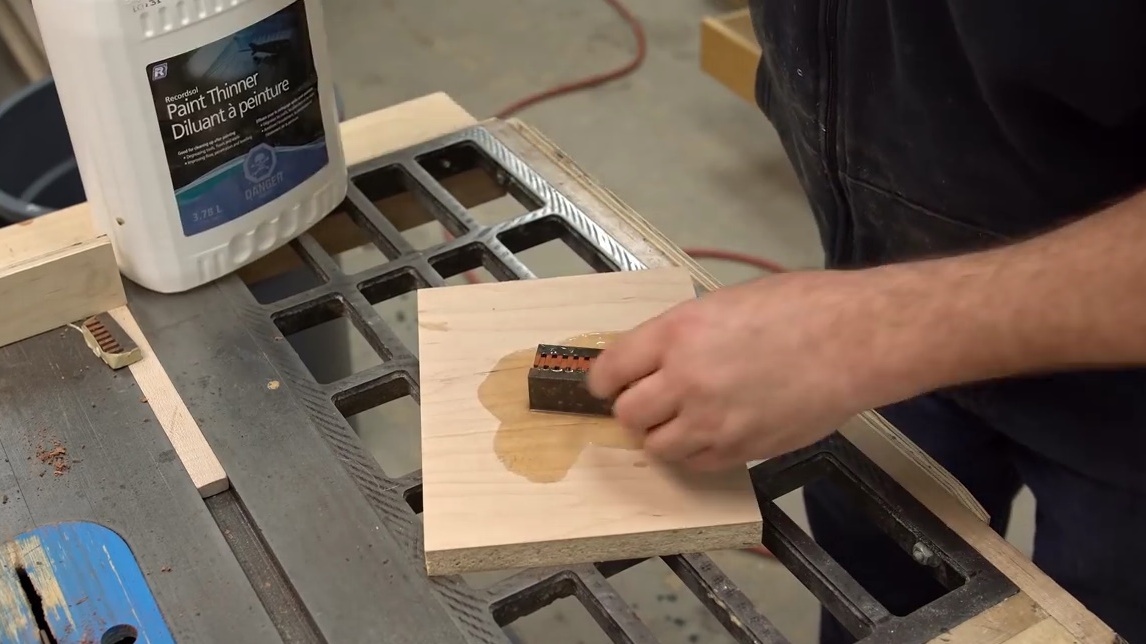
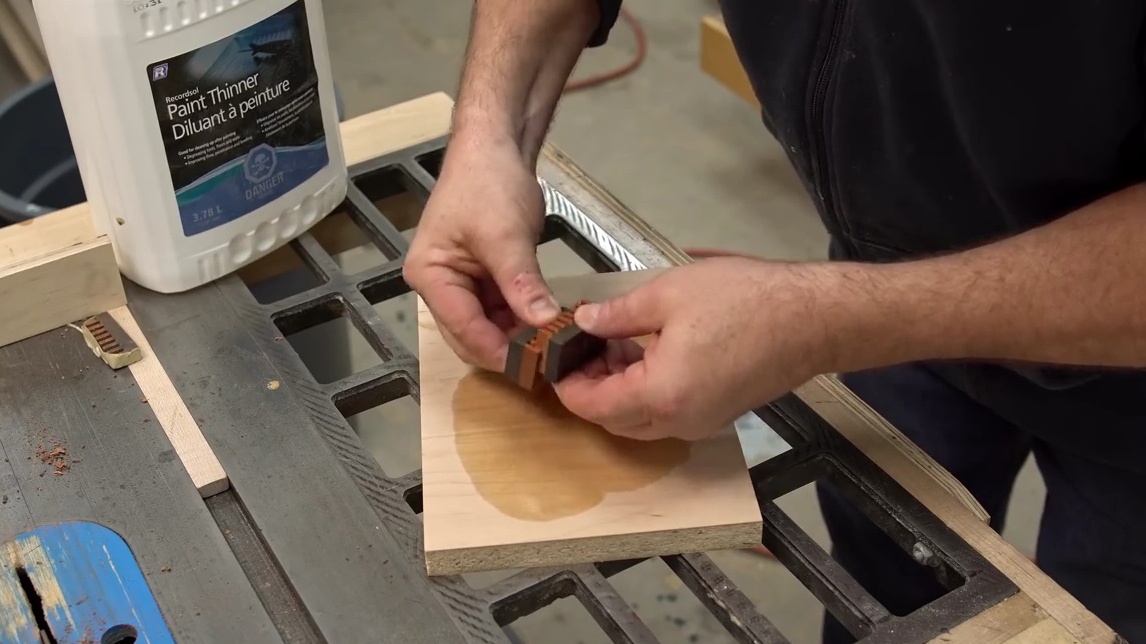
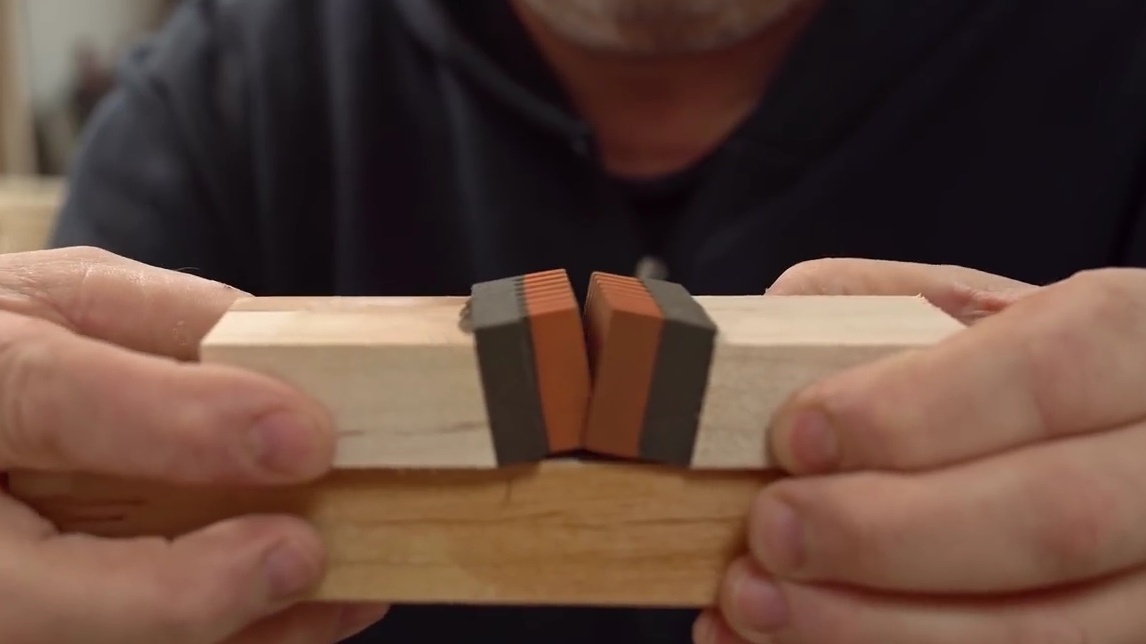
And now the moment of truth! Will these two parts fit together? They are too tightly joined together.
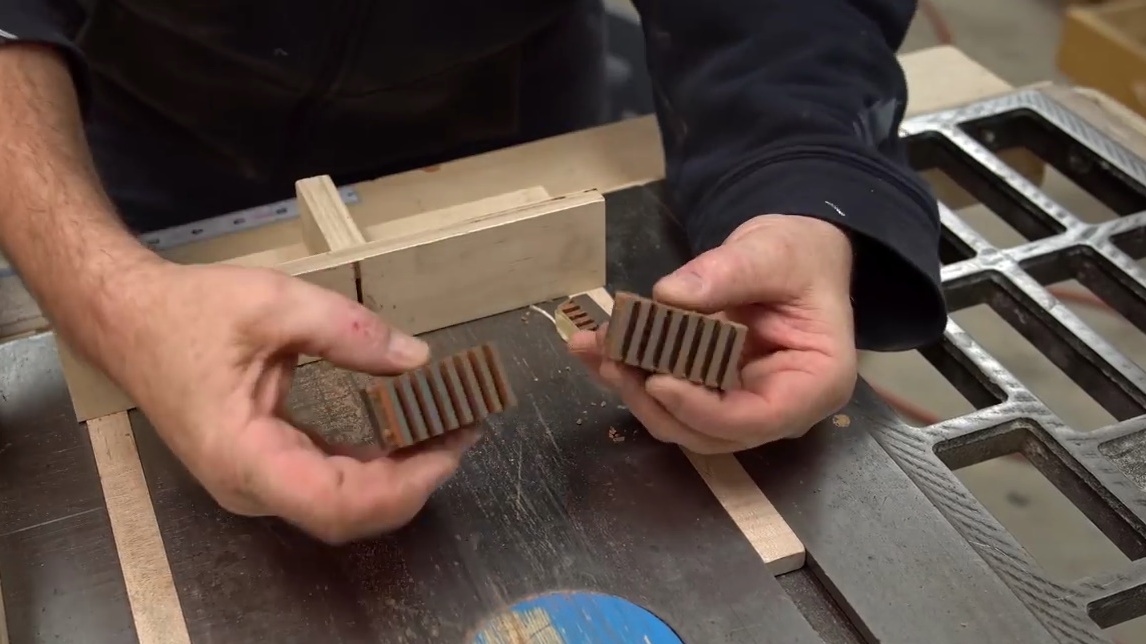
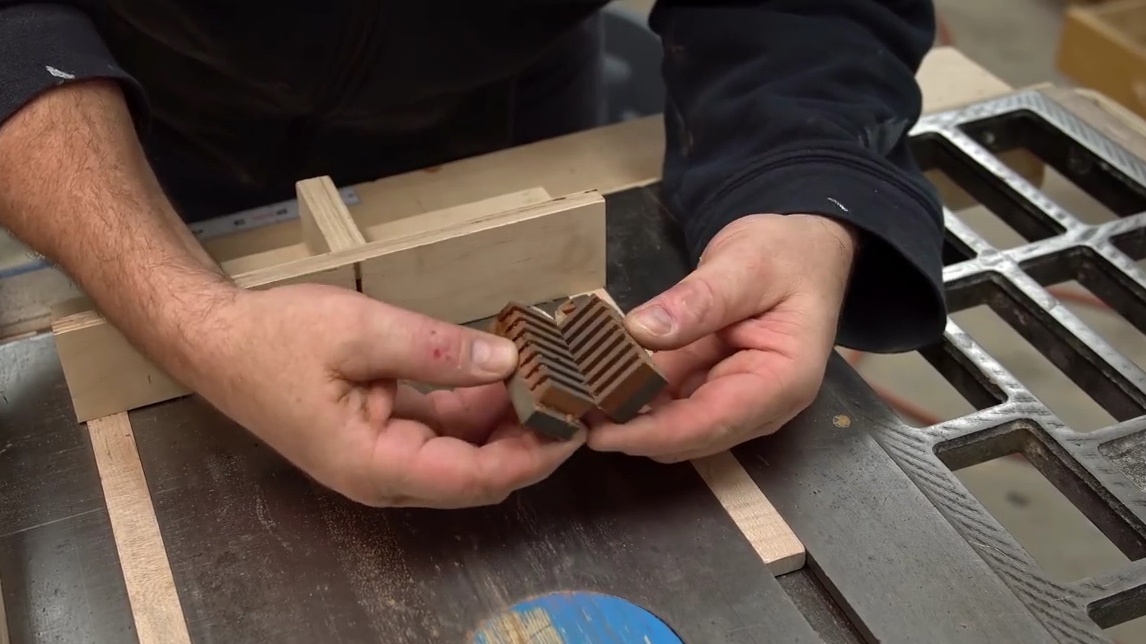
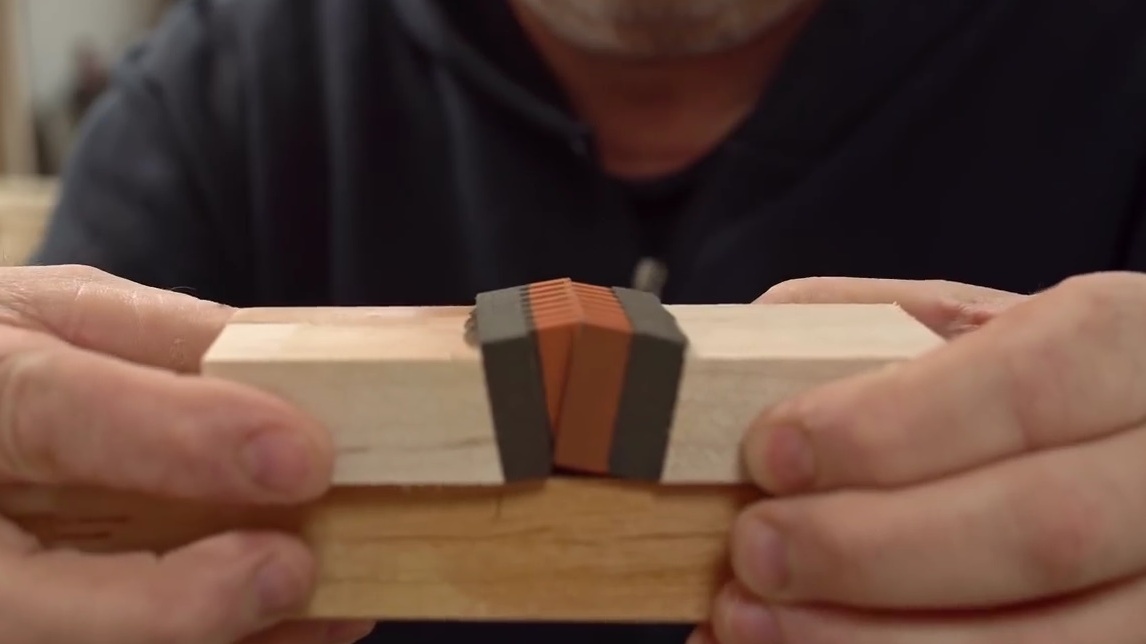
This tool (paint thinner) should release them a little. Now all that remains is to rub them against each other properly. It should be noted that these details are quite fragile, so you should not put much effort into, or drop them. The teeth can easily break off.
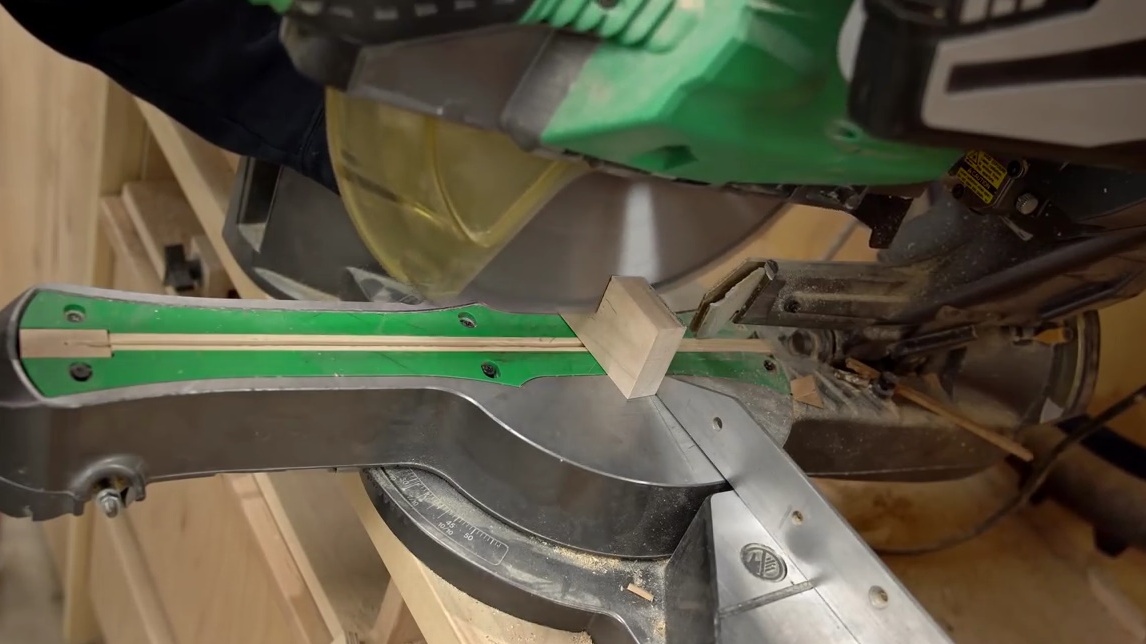
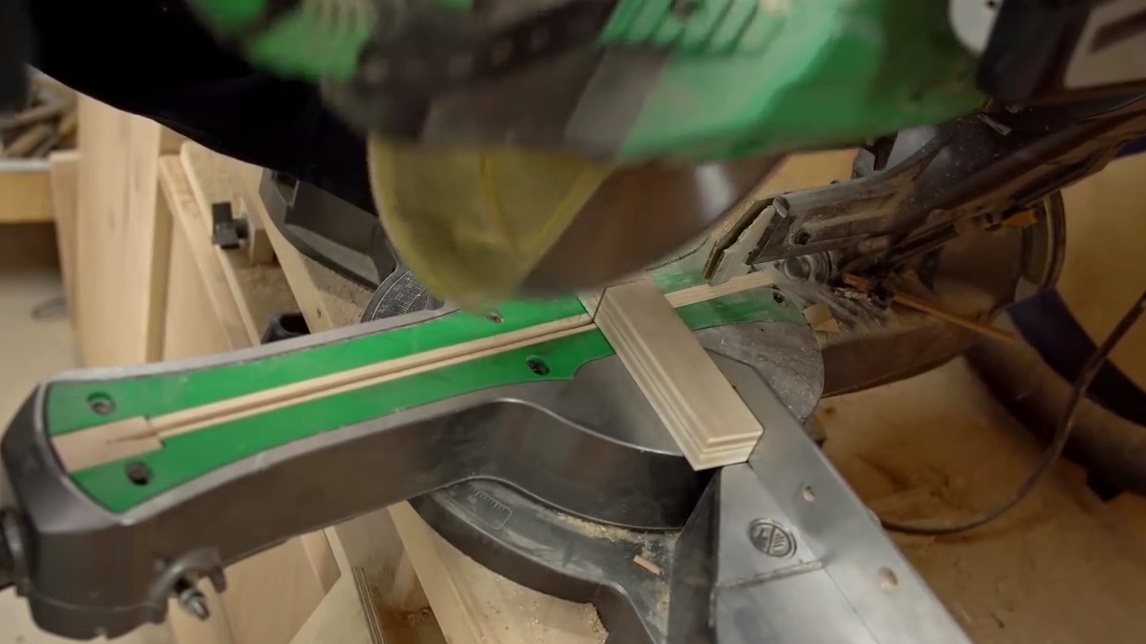
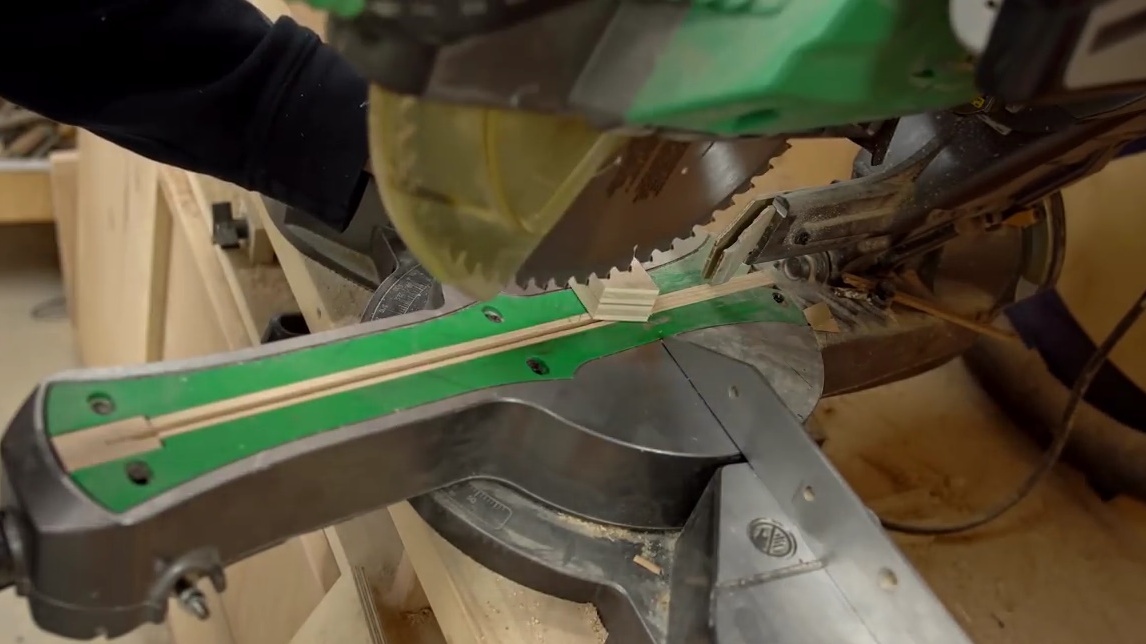
A few days later, after the teeth were thoroughly ground using a solvent, John began to manufacture support blocks of hard wood - maple. Grinding stones will be glued to them later. The author first cuts these blocks a little wider than the base of the stones. And then, before processing them on a miter saw, he cuts them to 7/8 inches in thickness.
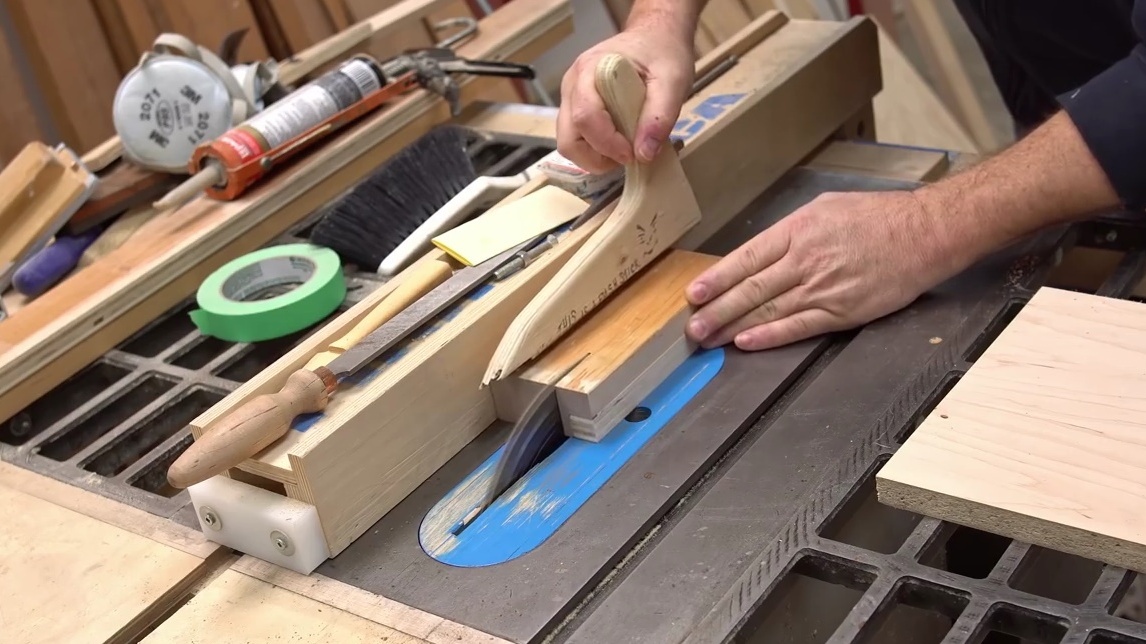
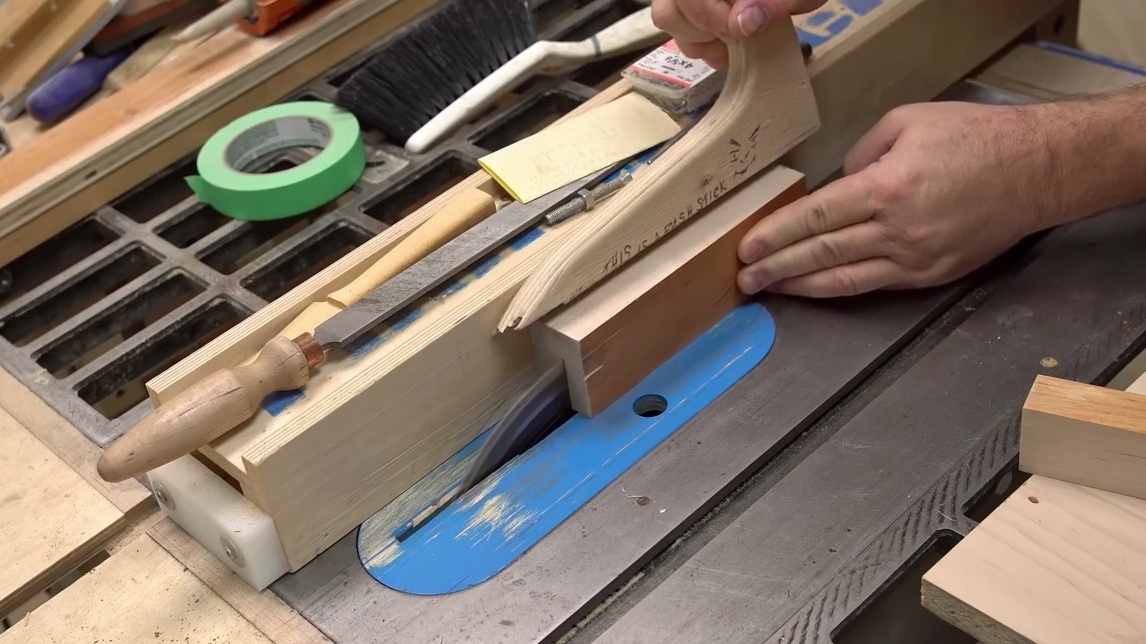
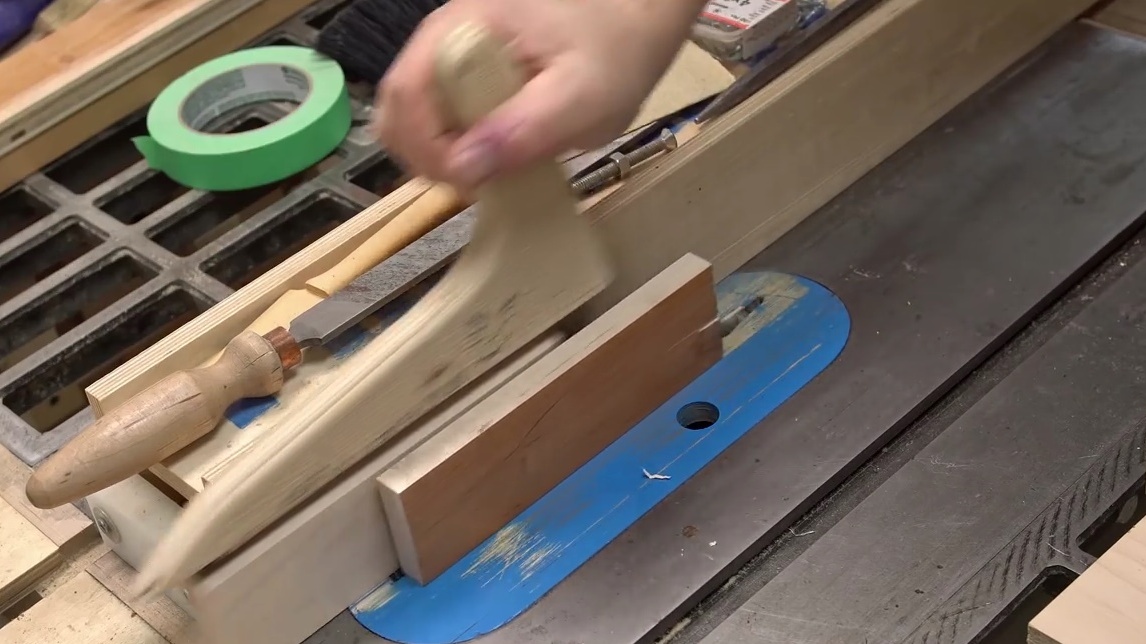
After that, he cuts each wooden part at an angle of 10 degrees on a miter saw.

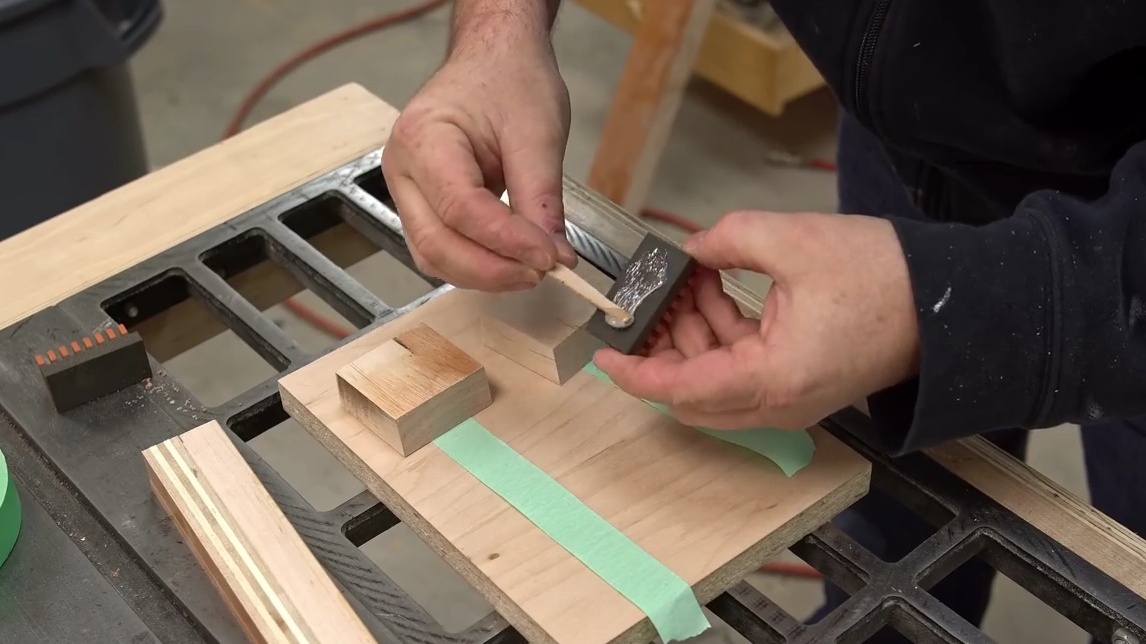
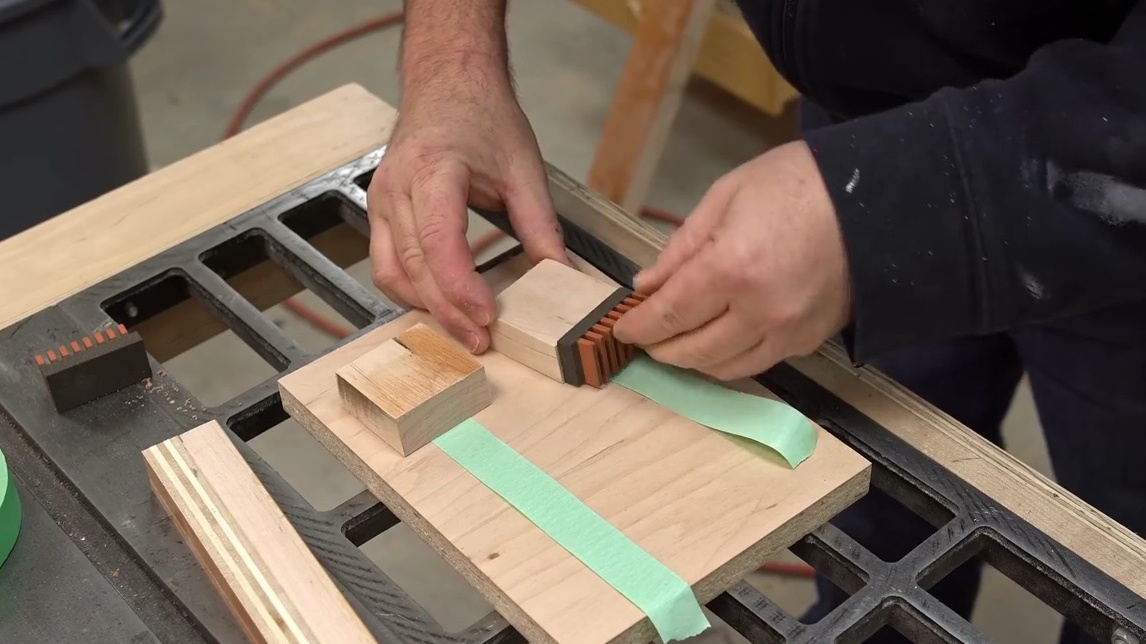
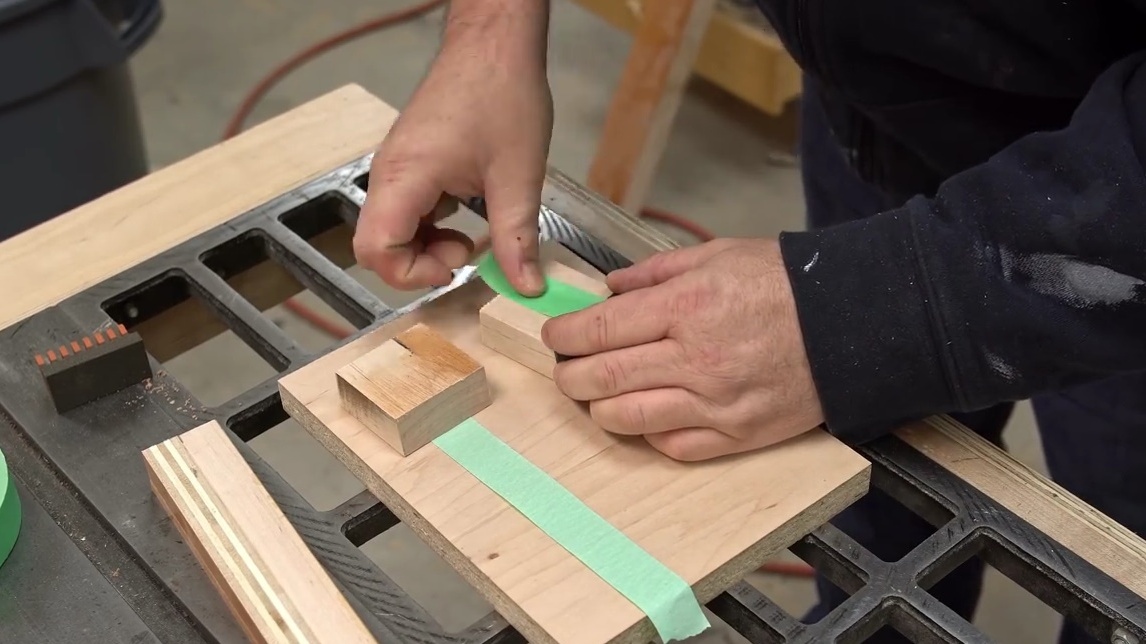
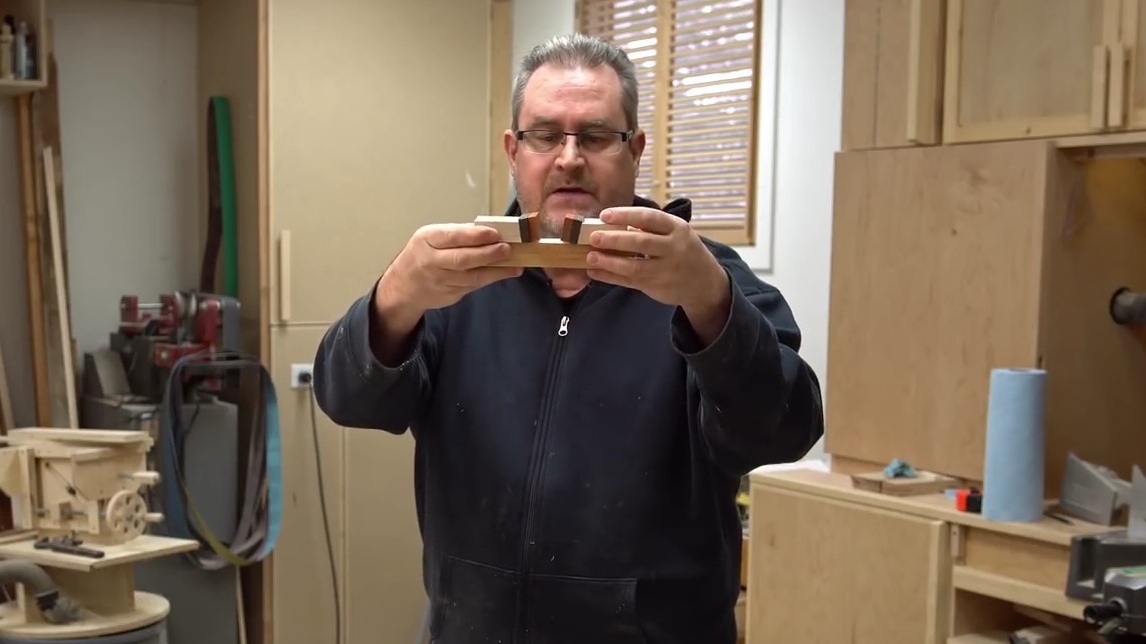
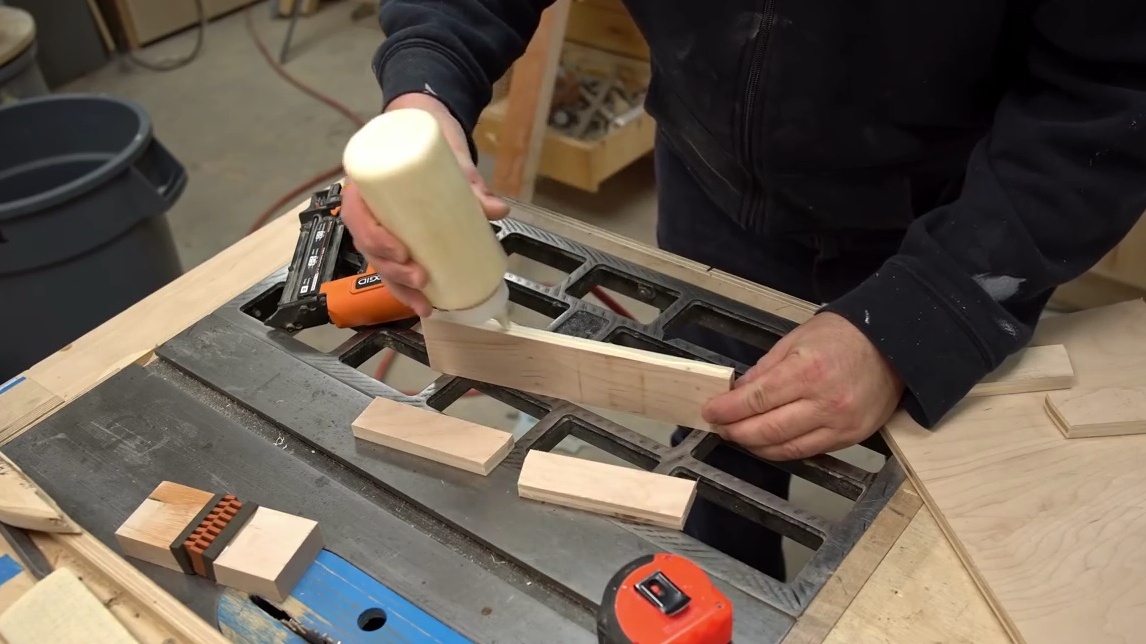
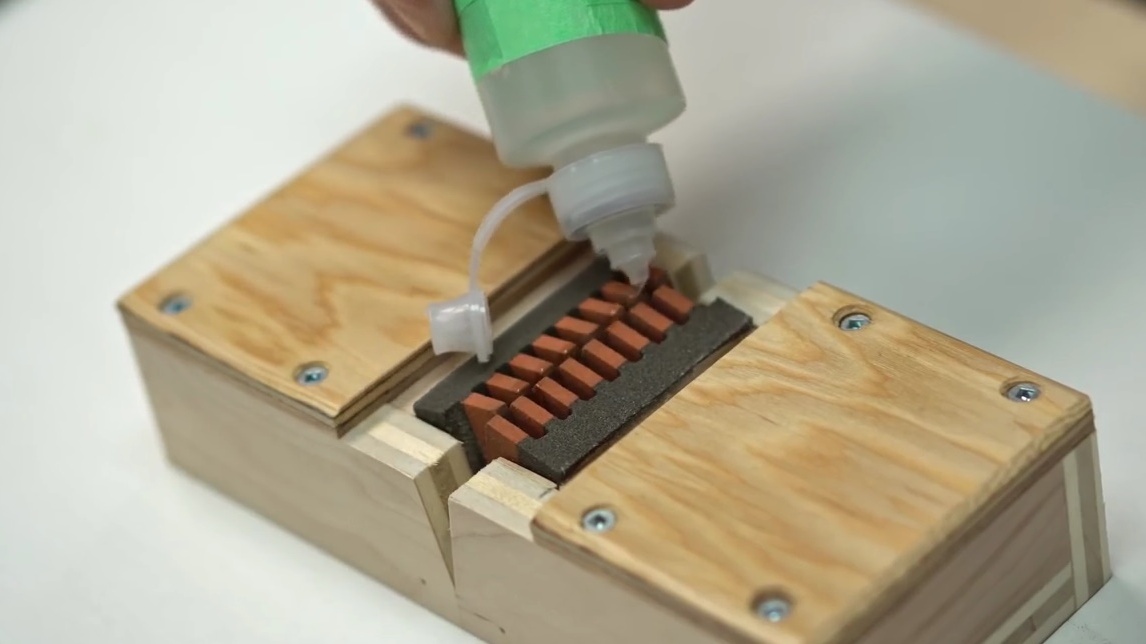
Now, when the clamping blocks have acquired the desired shape, the master sets stone billets on them, gluing them with a two-component epoxy resin. It uses small sections of duct tape to fix. This is a temporary measure, while the resin is finally polymerized.
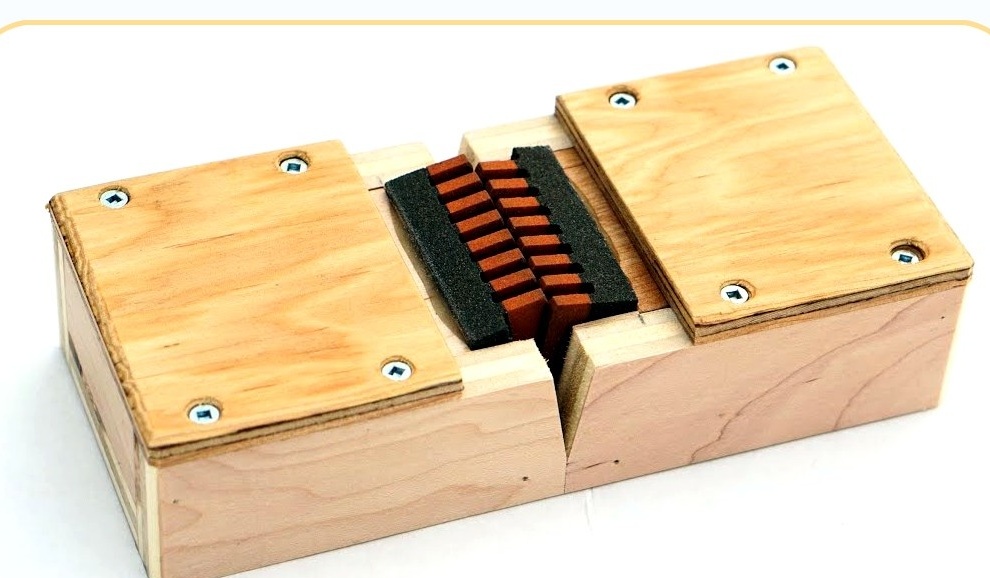
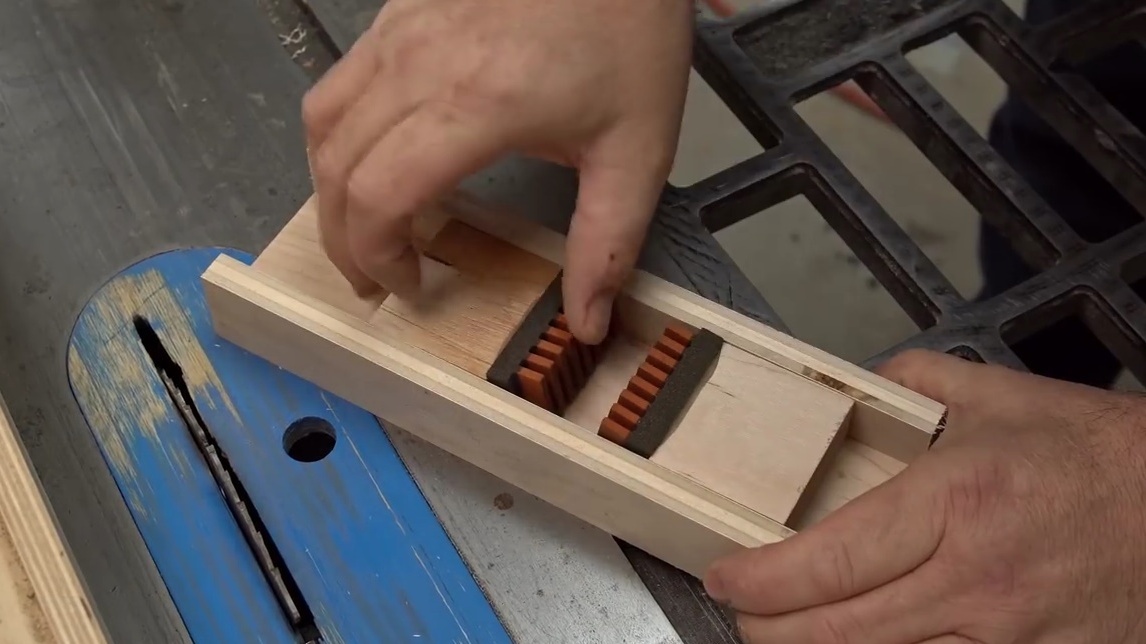
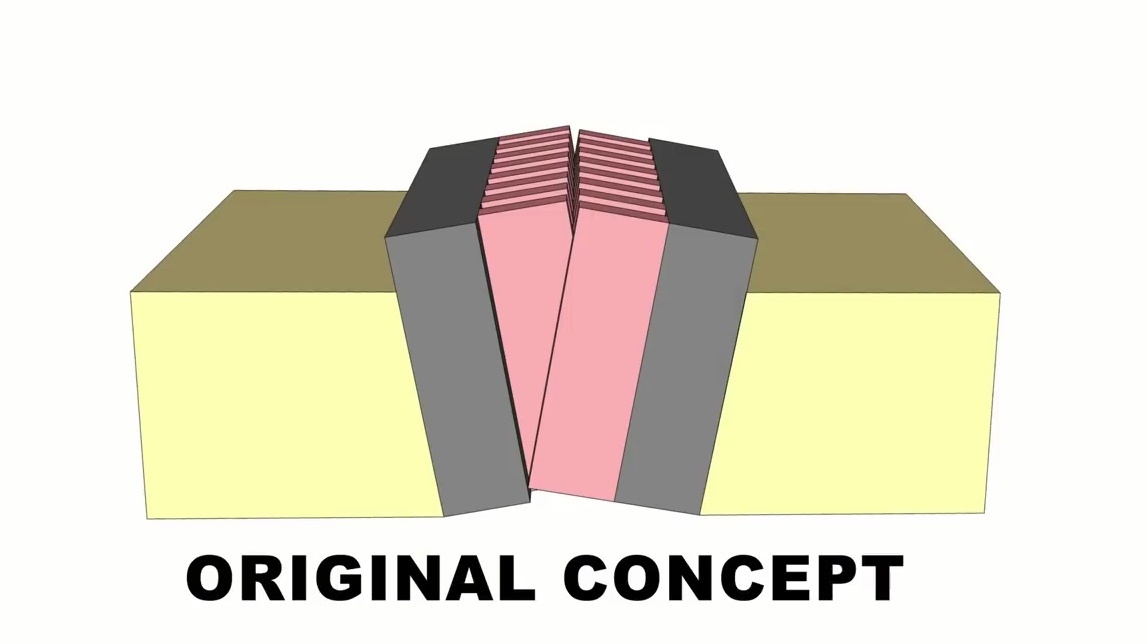
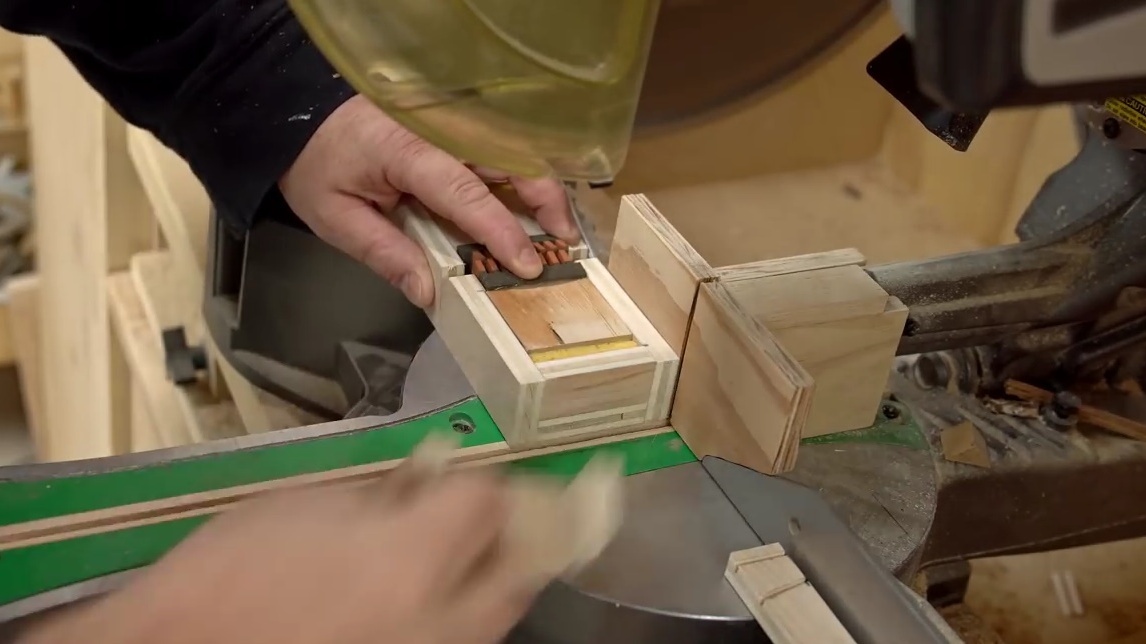
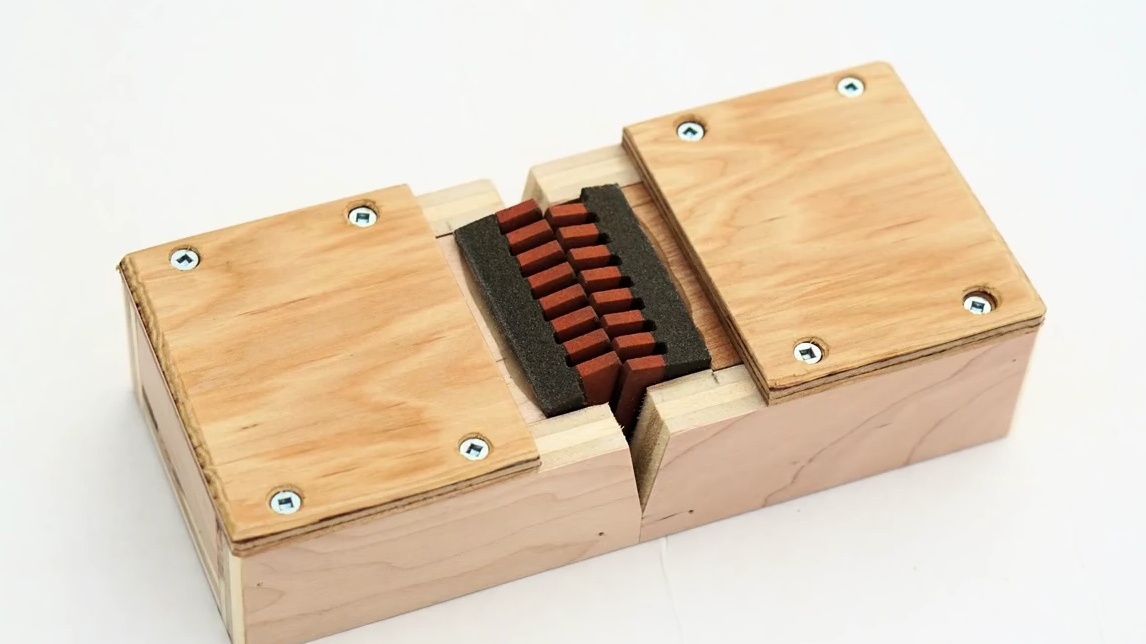
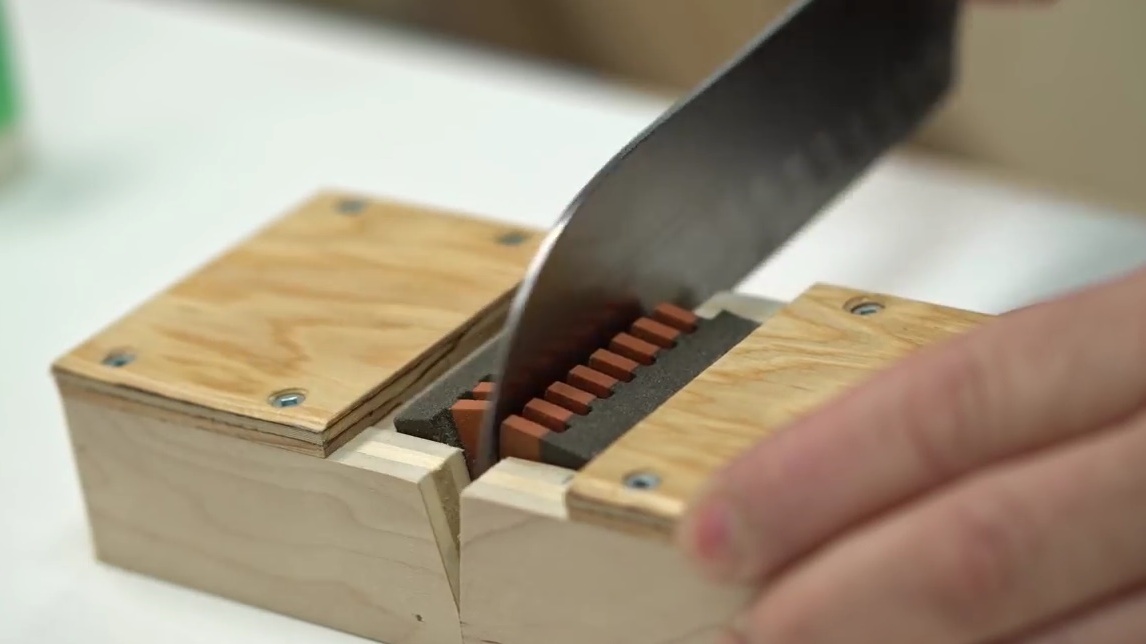
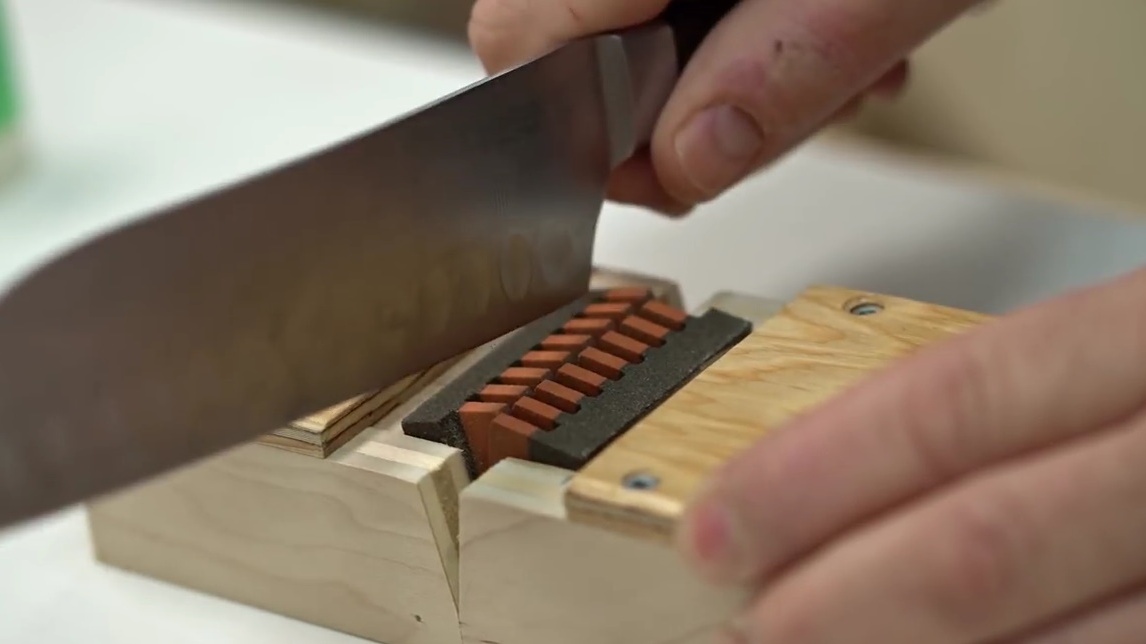
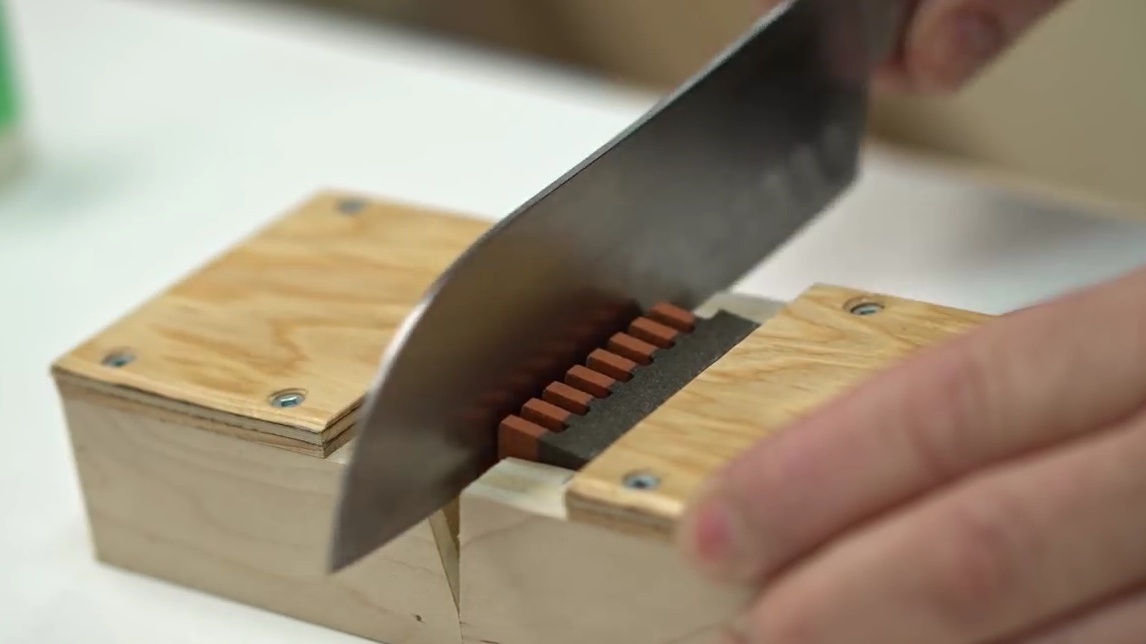
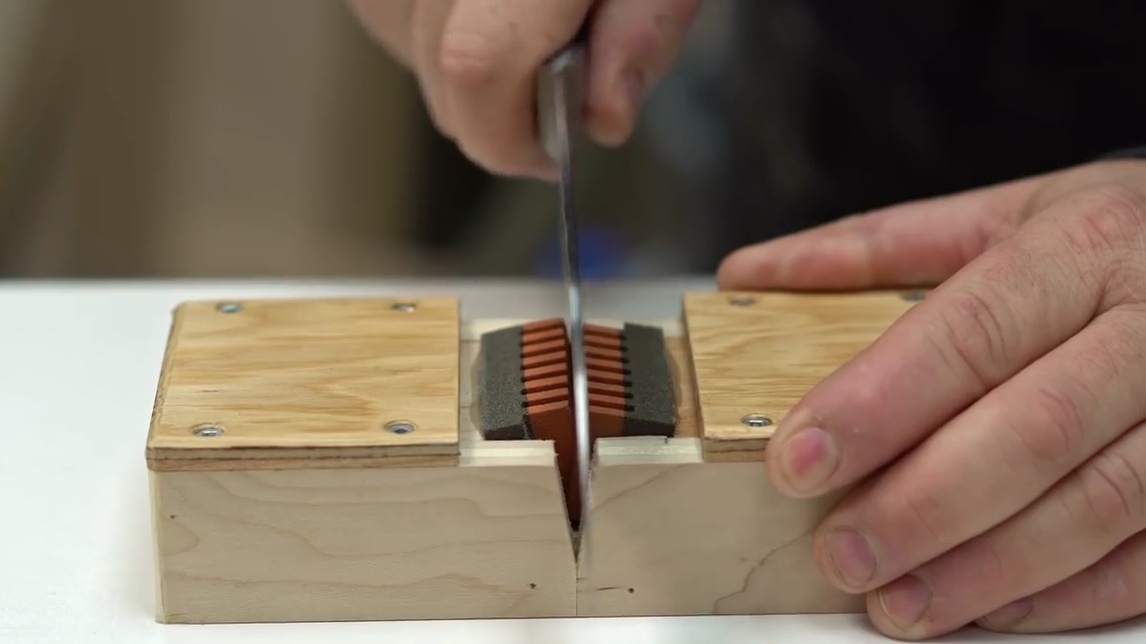
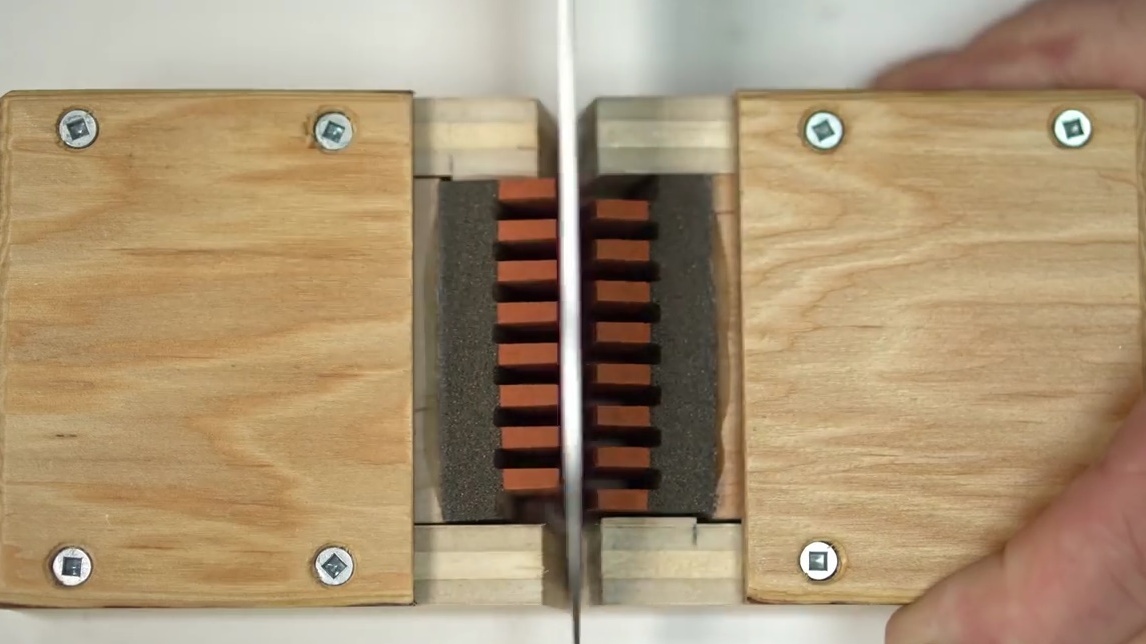
Next, the author will install these elements in a wooden case. The latter will give them a horizontal direction of movement. And now, as can be seen in the photo, the stone teeth mesh with each other in the lower position and only slightly intersect in the upper one, while the final angle between these two positions on the inside is 20 degrees. And this is what you need for a good sharpening!
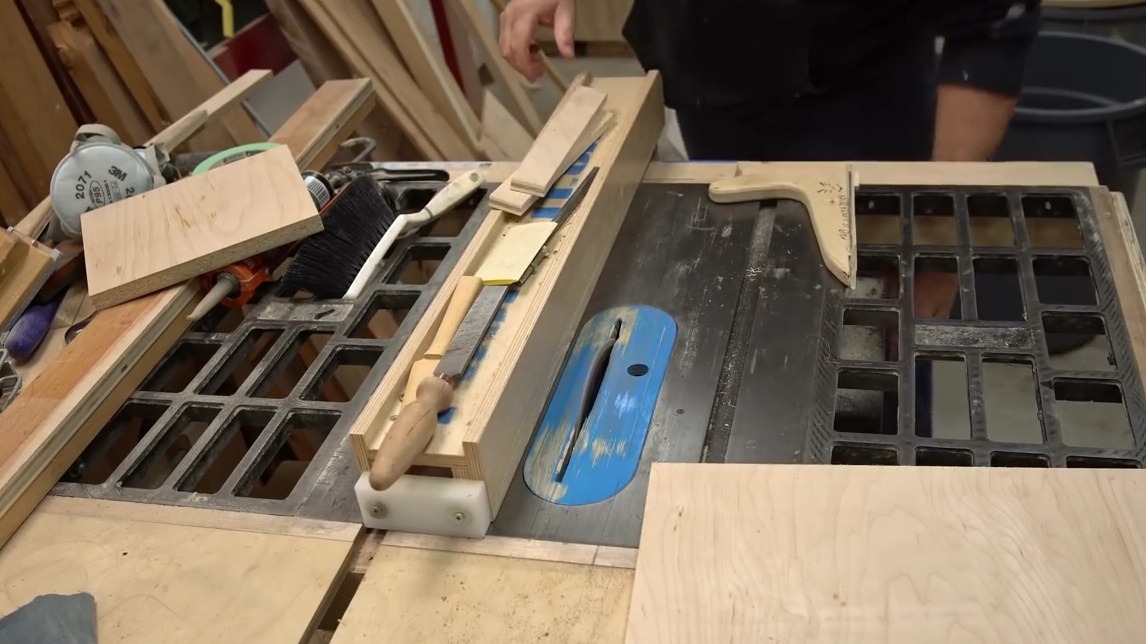
The next step, John cuts the elements for assembling the body of the sharpener from plywood. He cuts the base, then the sides. He makes them a little longer than they should be. Because he needs to be given a spring load on these blocks. And the foam rubber will perfectly cope with this task. Here, the craftsman really has to experiment to understand how much this sponge really needs in order for the axle boxes with grindstones to move forward and backward smoothly and, at the same time, with sufficient clamping force.
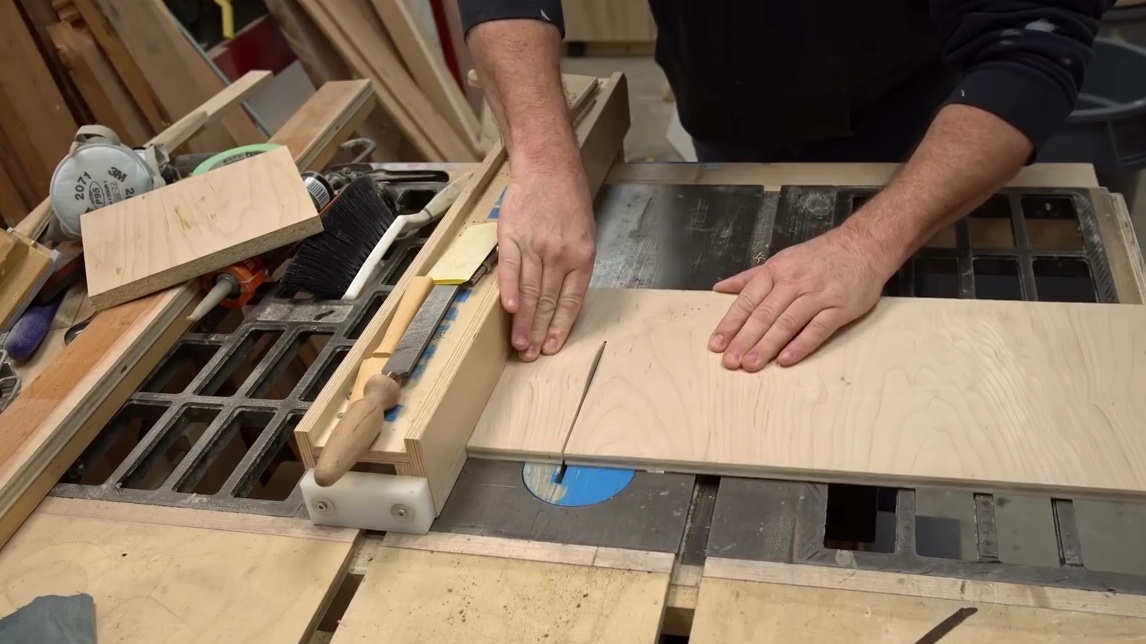
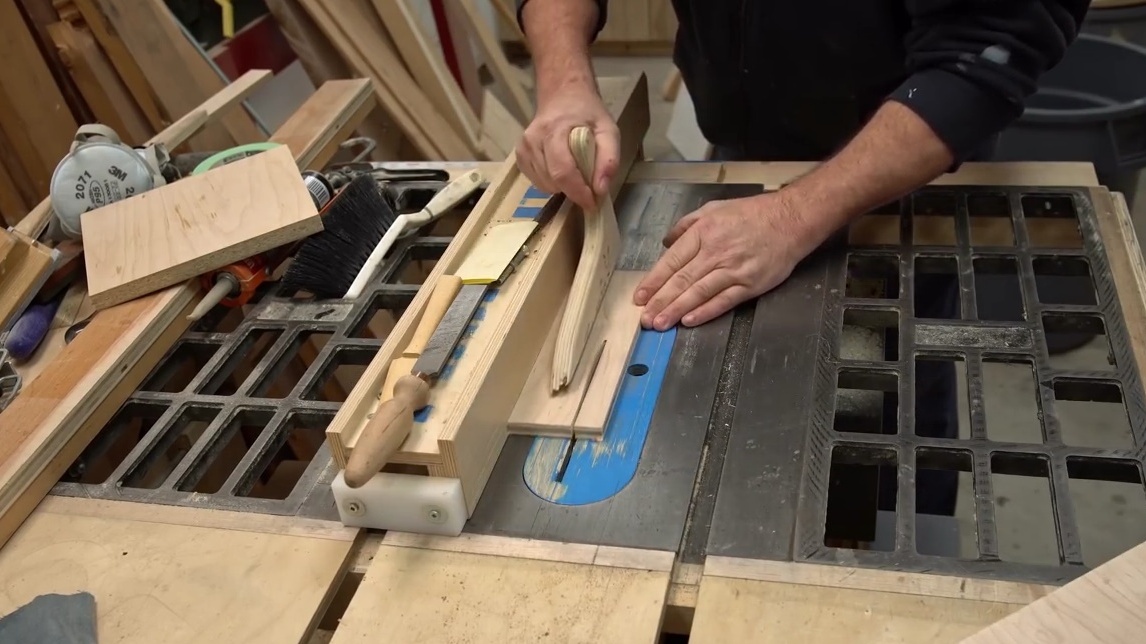
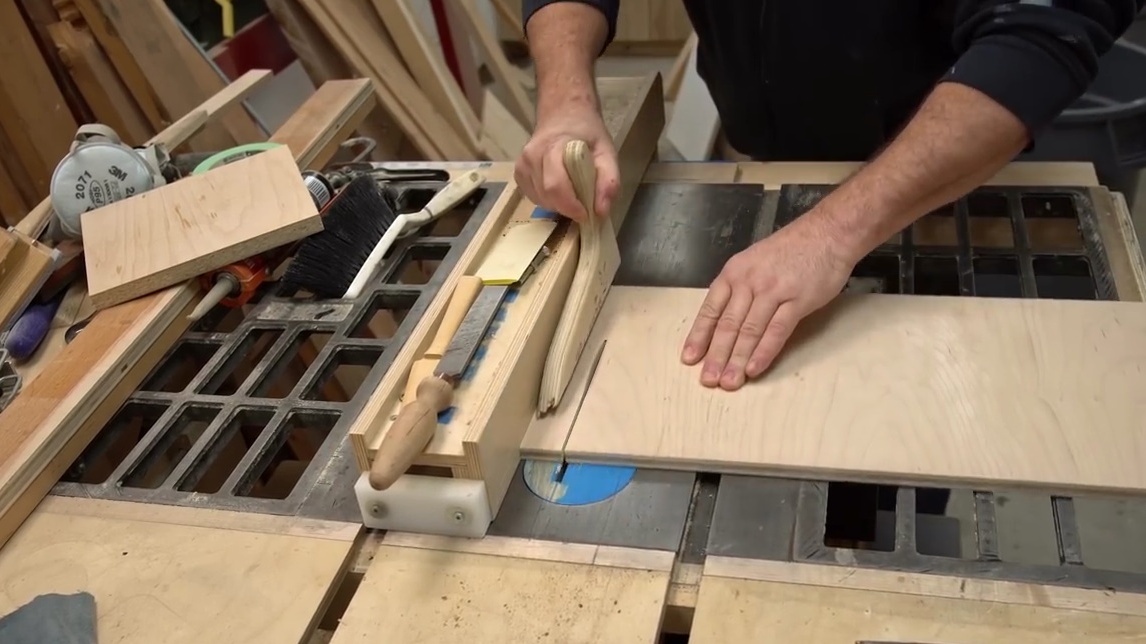
Before attaching the sides to the structure, John has to cut them in two
at the same angle of 10 degrees, at which the stones are closed. This creates a groove for the knife blade.
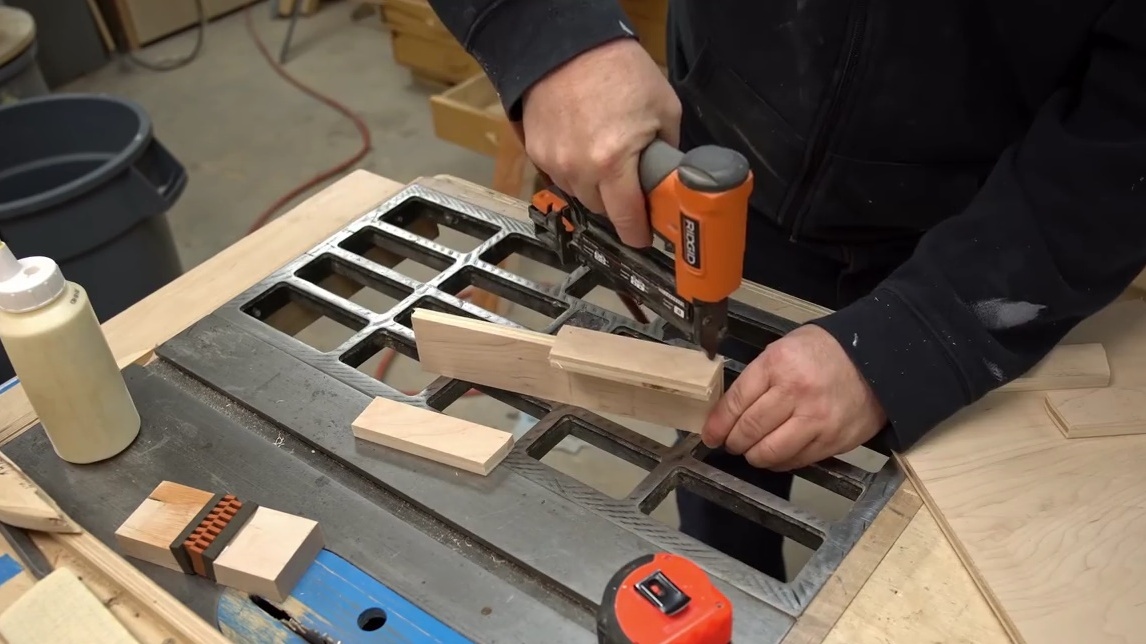
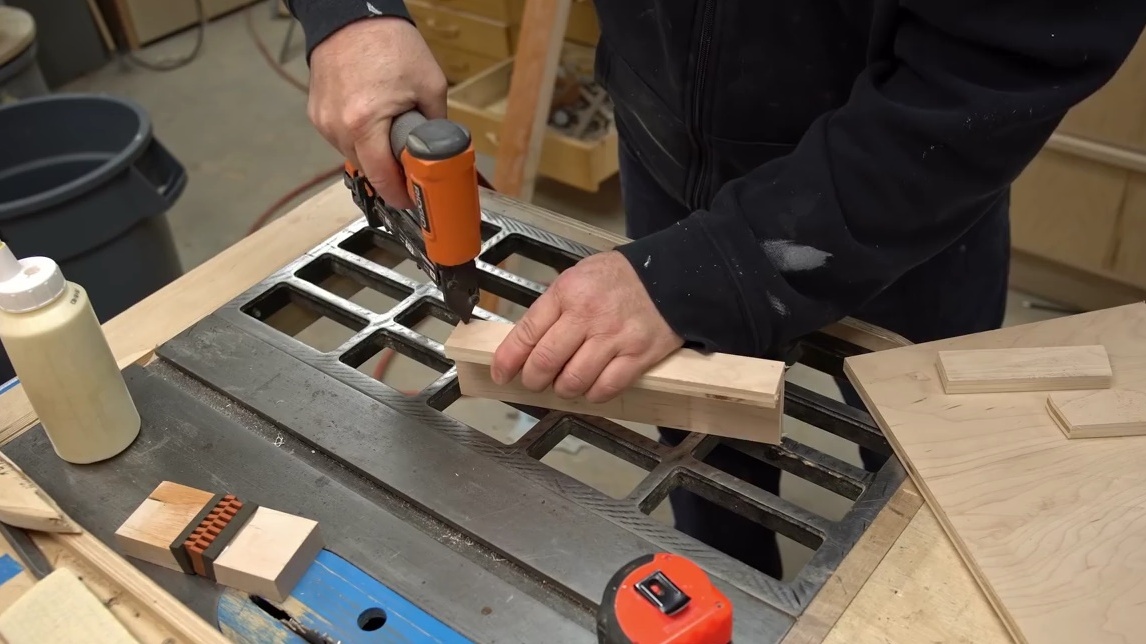
The sides are taken on glue, and for greater strength they are shot using a neiler.
In the role of springs, the author uses the most ordinary sponge for household work.
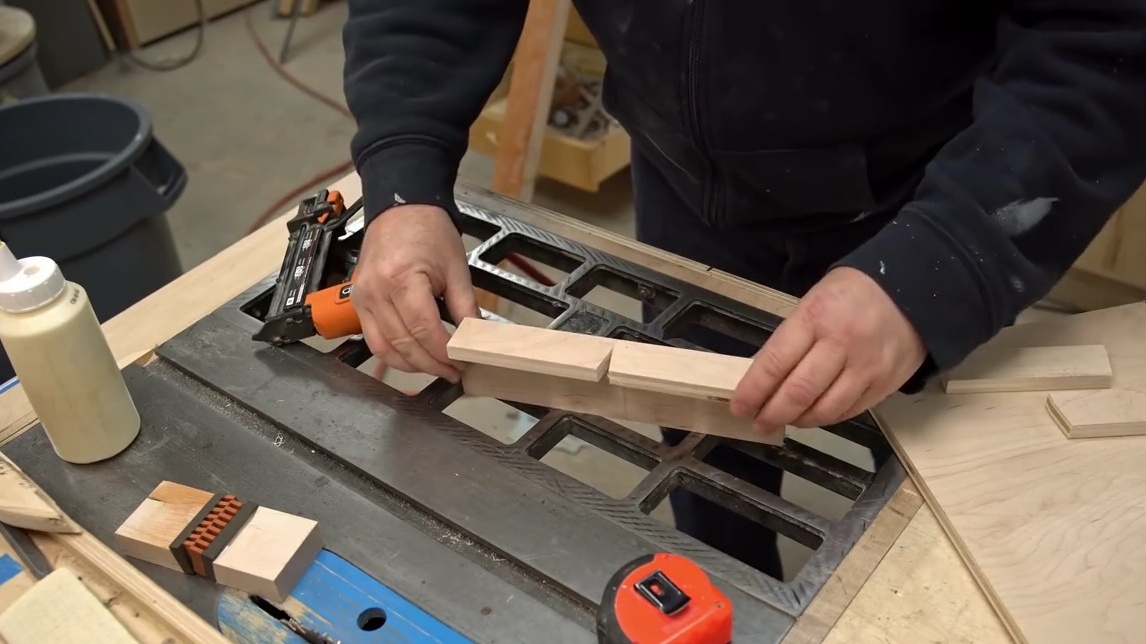
Now at the ends of the structure you need to create something like an emphasis for sponges.
The author admits that at first he made a mistake when he cut out the stones: they should have been 1 1/4 of an inch in height. Due to the height, the stones would cross more strongly in the lower part and thereby serve as a natural limiter, and in the upper position they would still be slightly open, freely taking the knife blade. And since the height of the stones is only 1 inch, and this is not enough to stop.
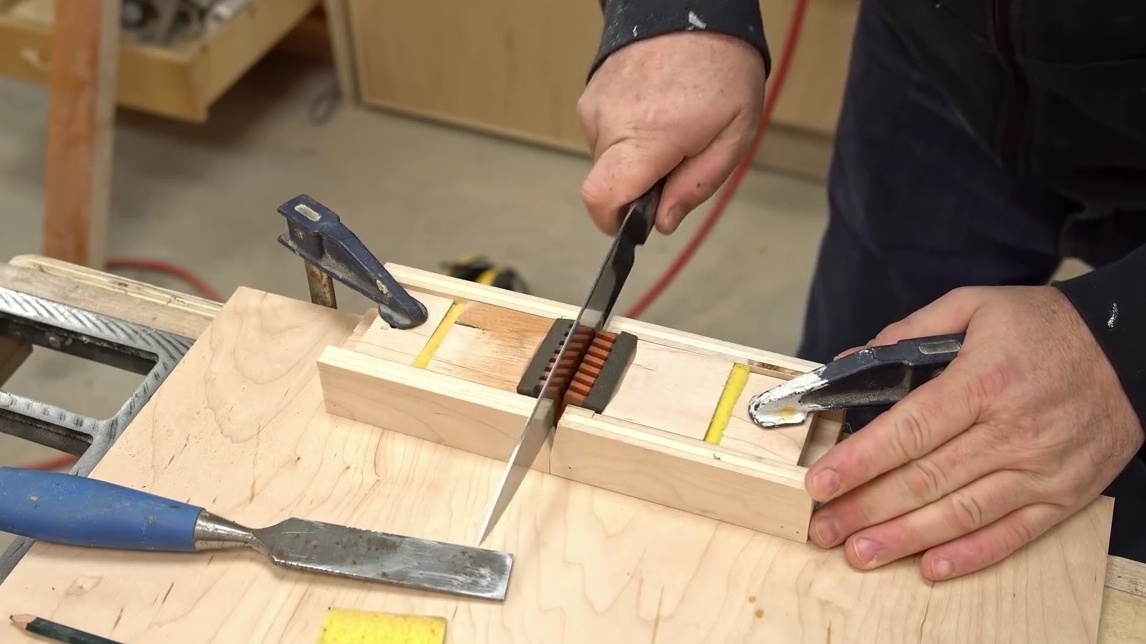
The craftsman solves the problem of closing grinding stones with the help of small wooden plates, which he glues into the groove for the blade.
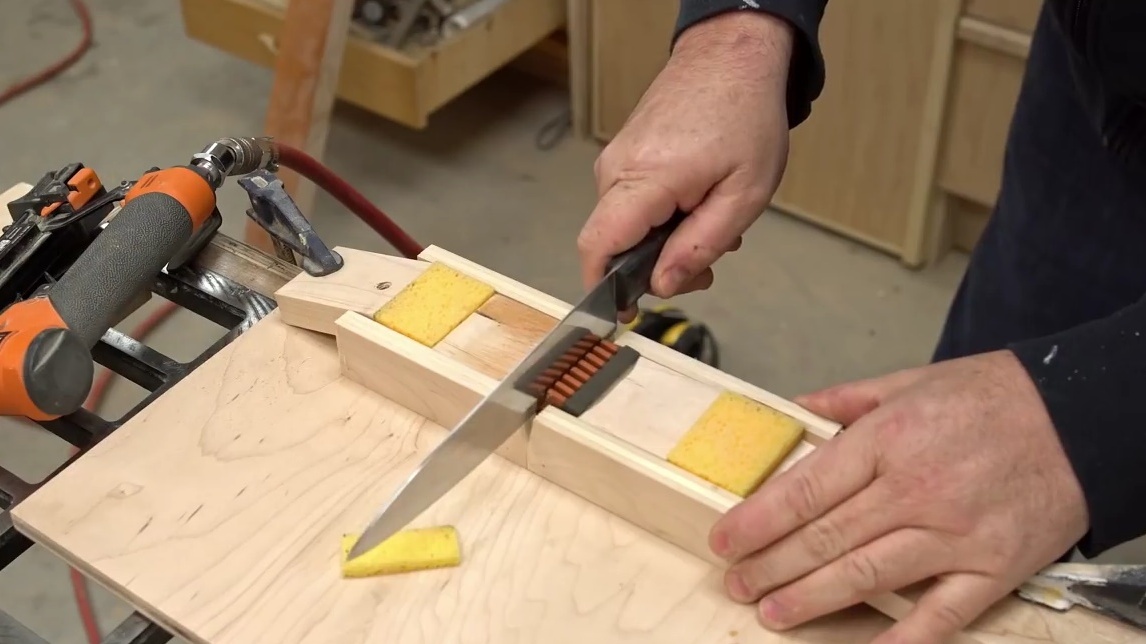
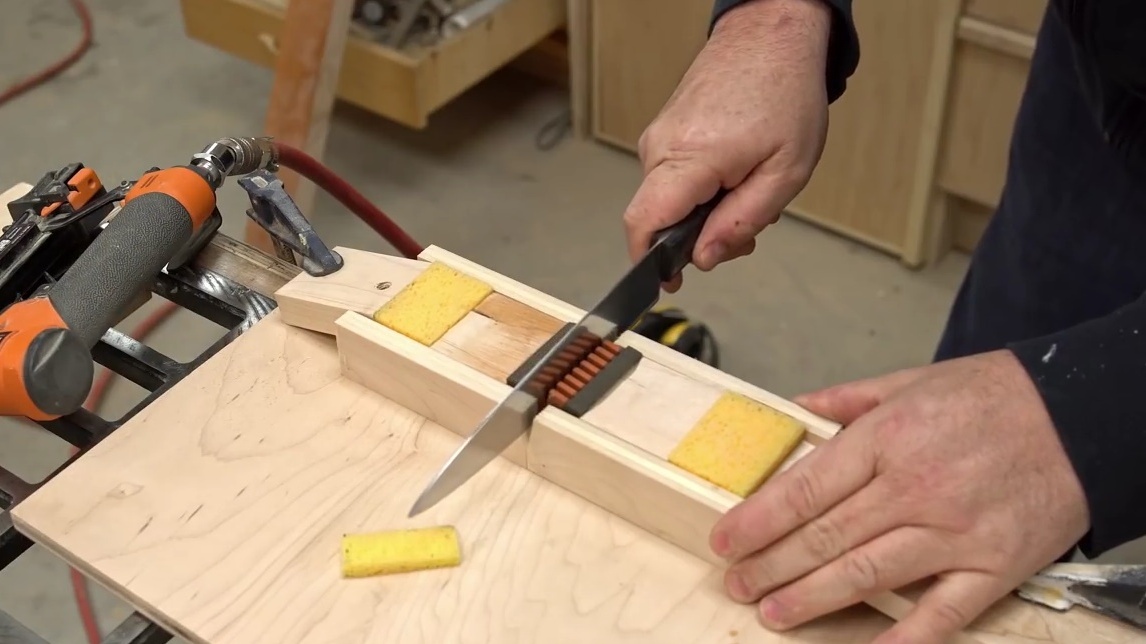
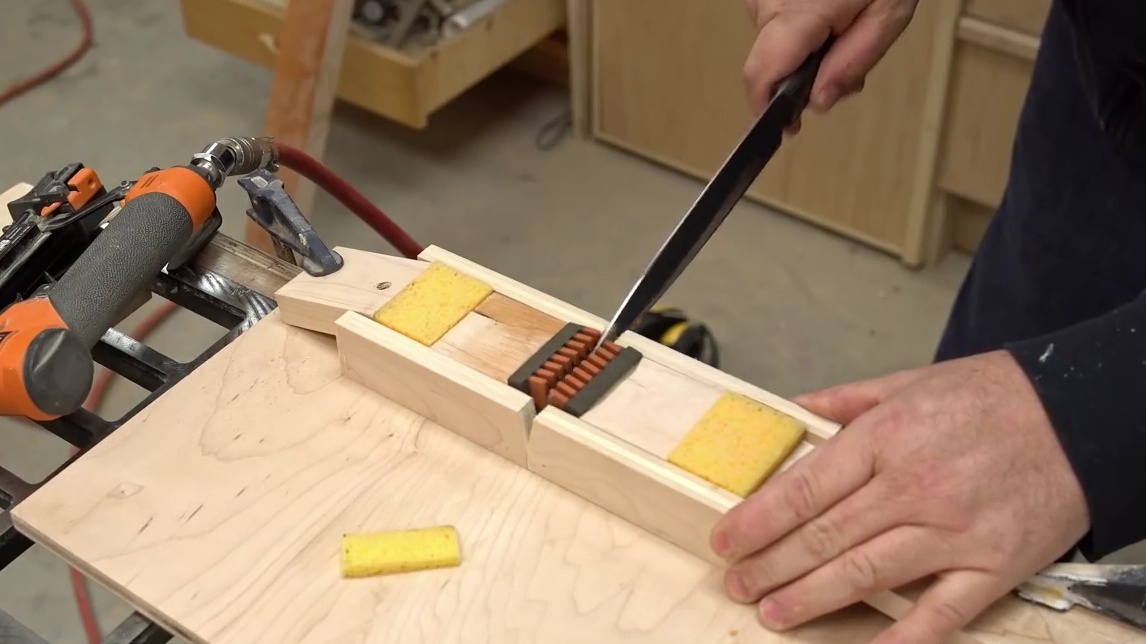
Further, the author tries to figure out how much effort it will take to open the stones. He puts inside the already cut pieces of the sponge and compresses them a little, fixing the stops with clamps. Sharpening stones should not move too far, just a little bit! Now the resistance on both sides is sufficient for efficient sharpening of the knife.
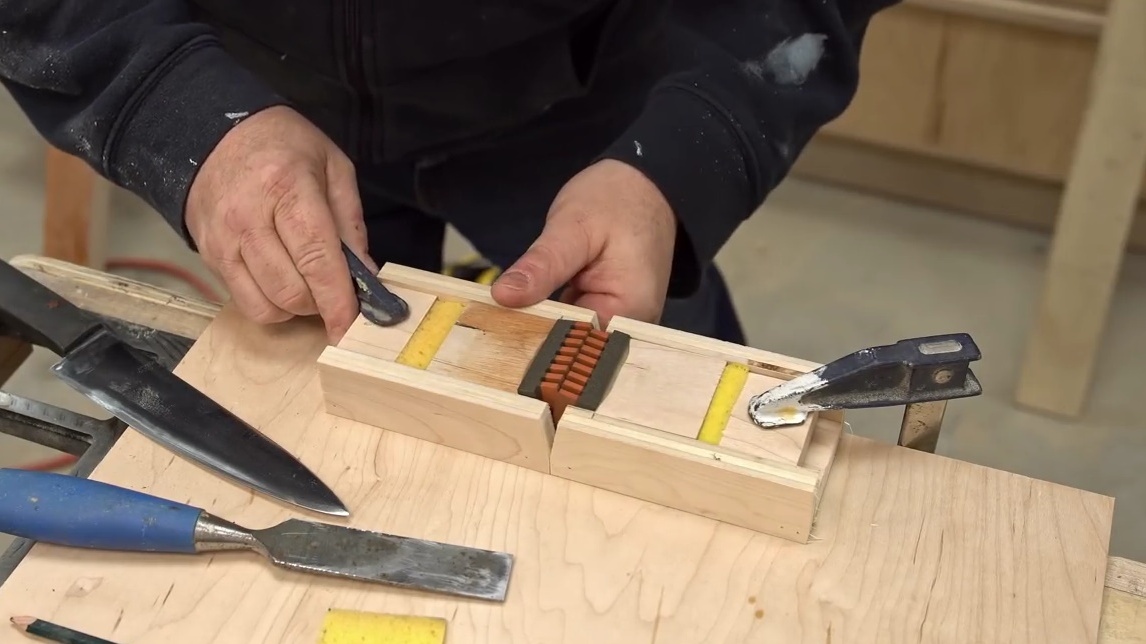
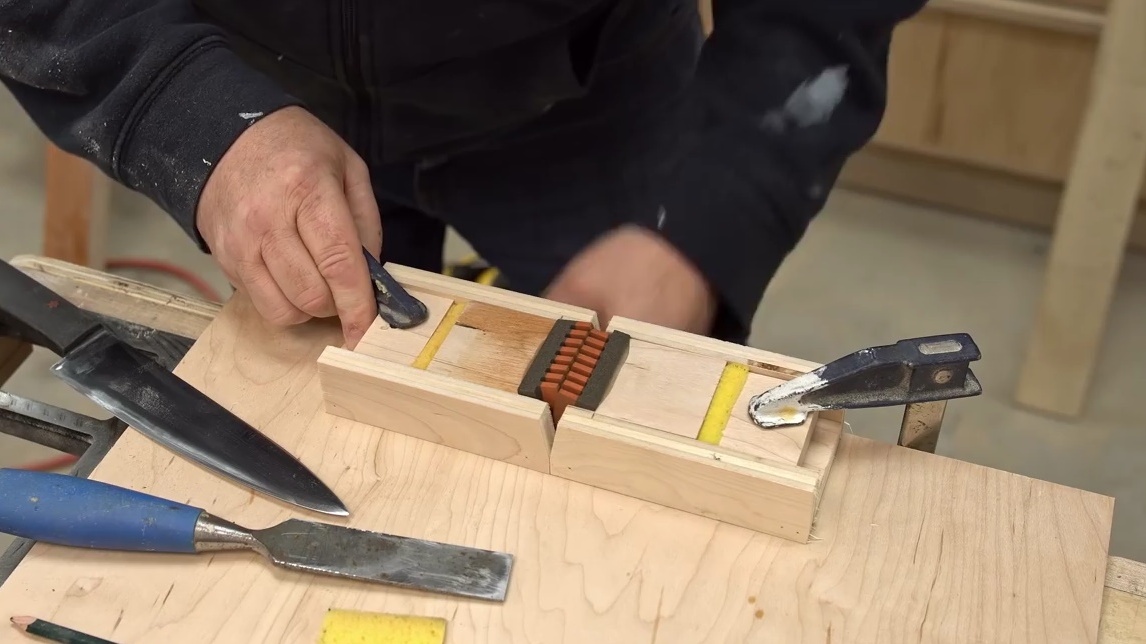
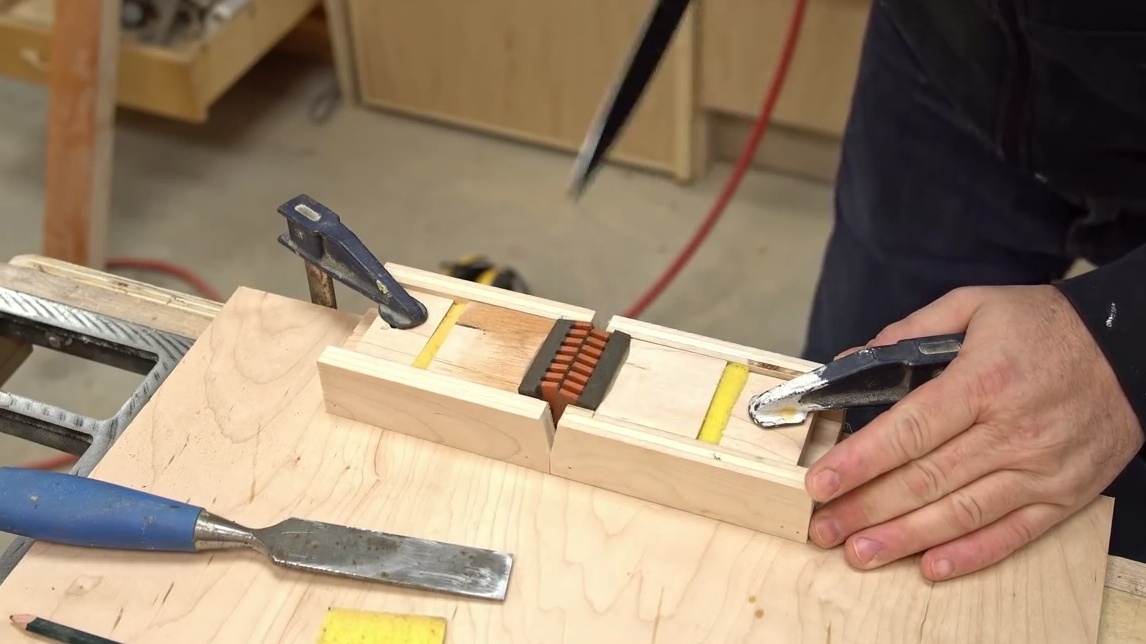
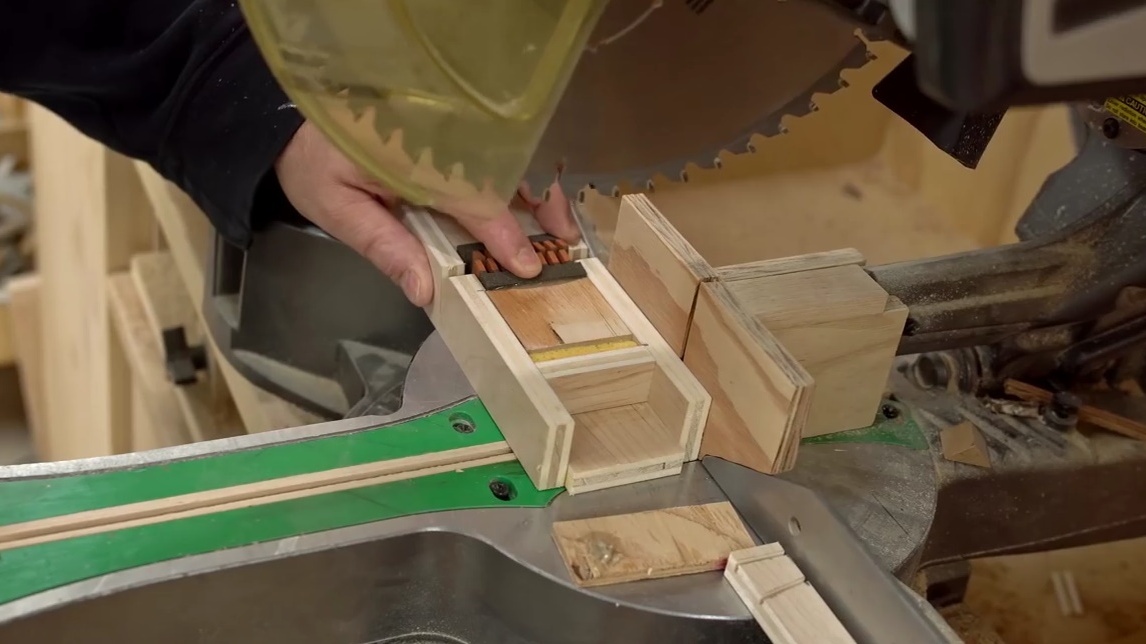
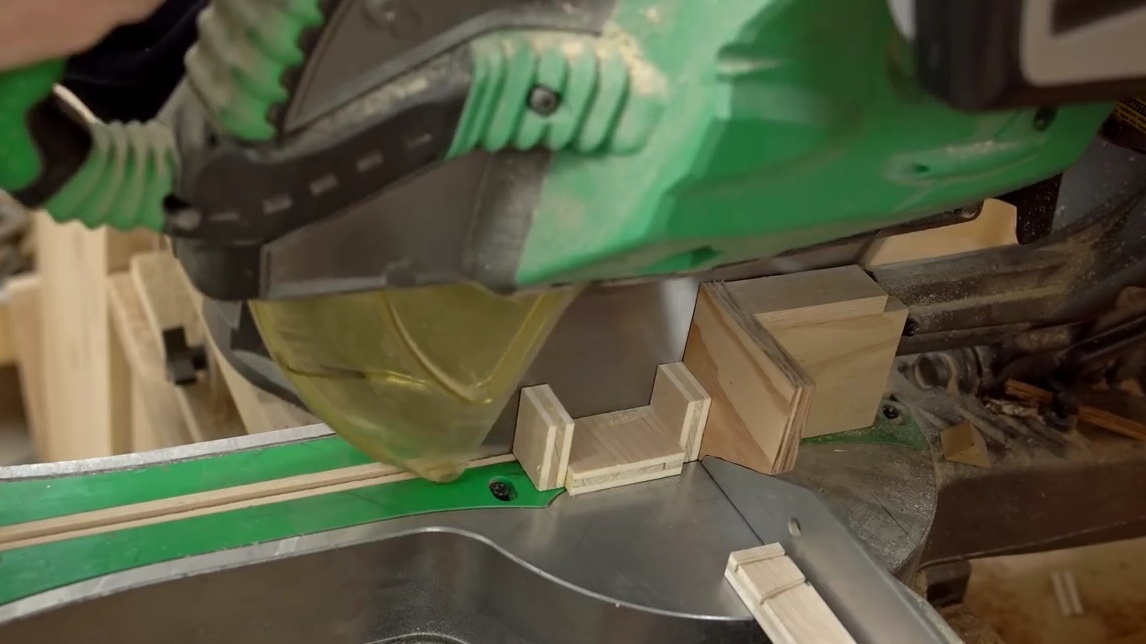
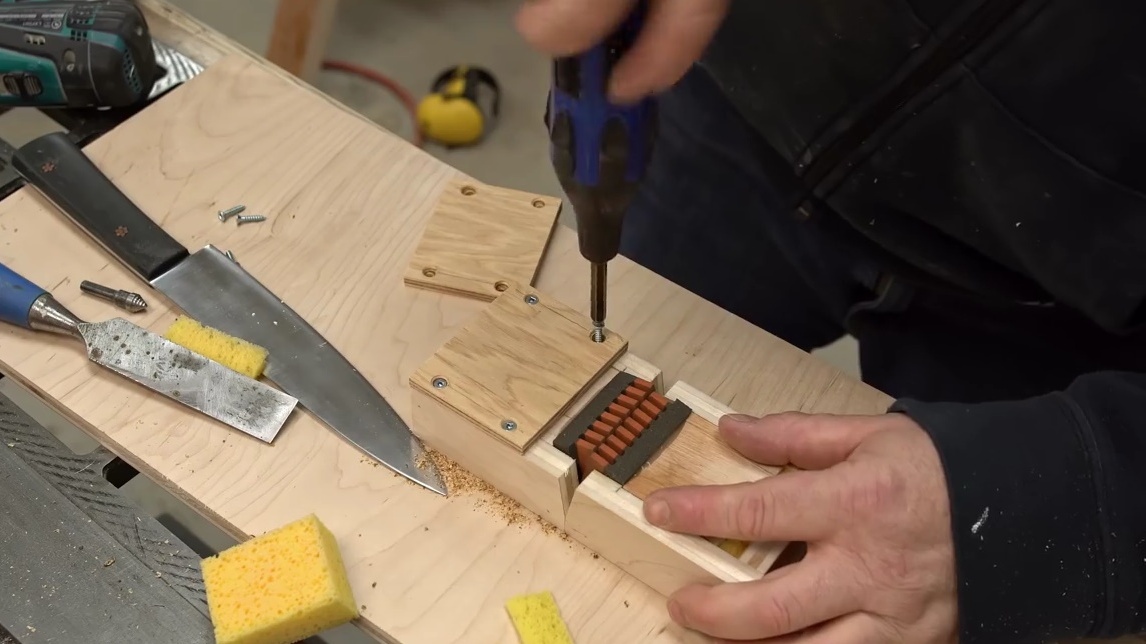
Now, plywood elements that give emphasis to the sponge, John sits on the glue and shoots with a neiler, and removes excess body on the miter saw.
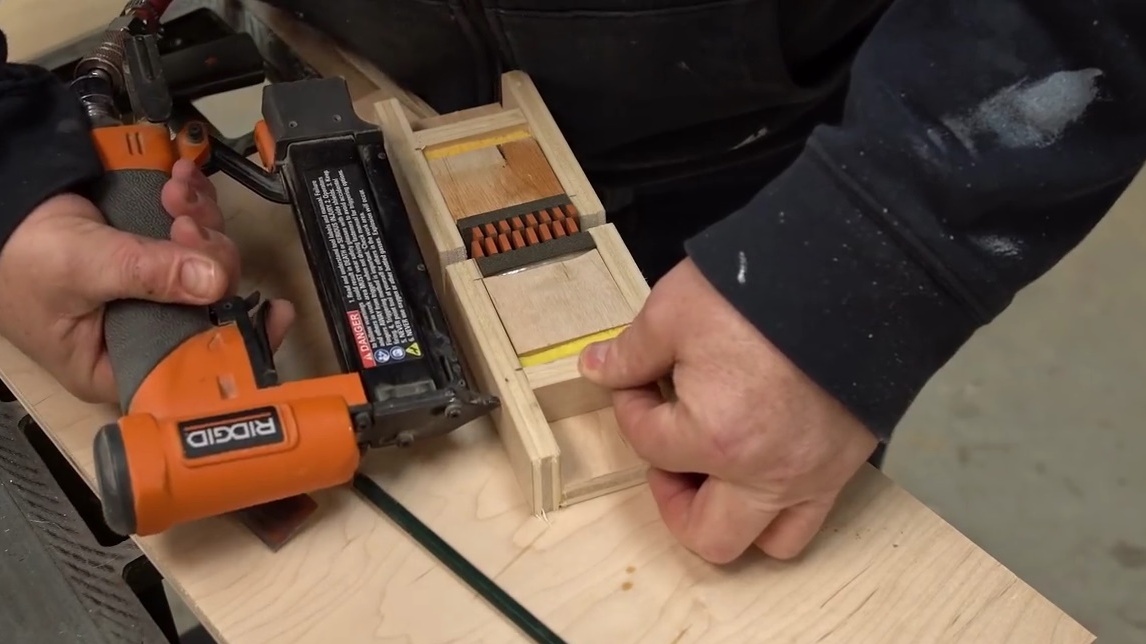
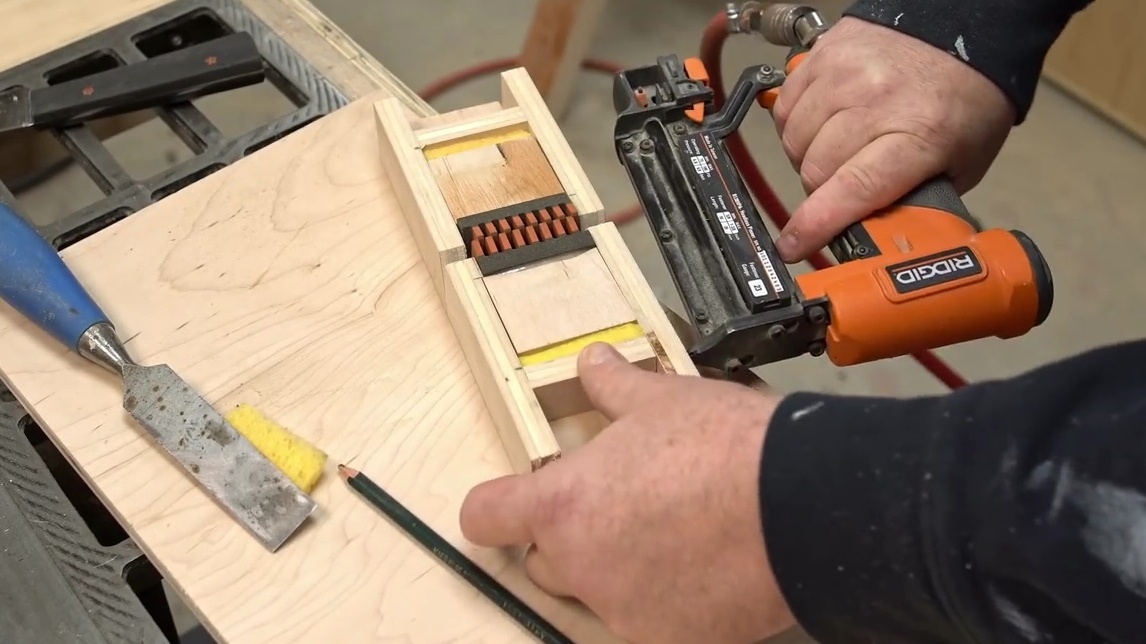
The upper panels covering the inside of the sharpener will be removable. The author takes them on the screws.
So he leaves himself the opportunity, if necessary, to disassemble the machine, if suddenly something sticks, or wants to change the clamping force.From myself I will say - the clamping blocks and the insides of the body can be coated with laundry soap or wax for better gliding.
The final touch is to give the product an aesthetic look. After sanding with sandpaper, the master covers the wooden parts of the tool with several layers of water-based polyurethane paint.
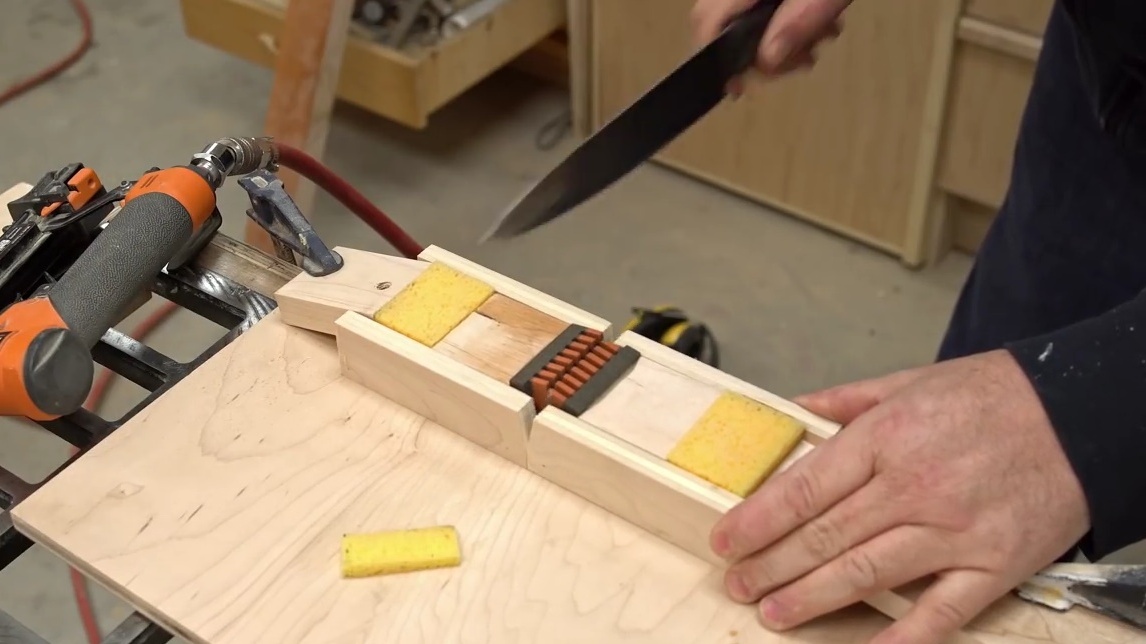
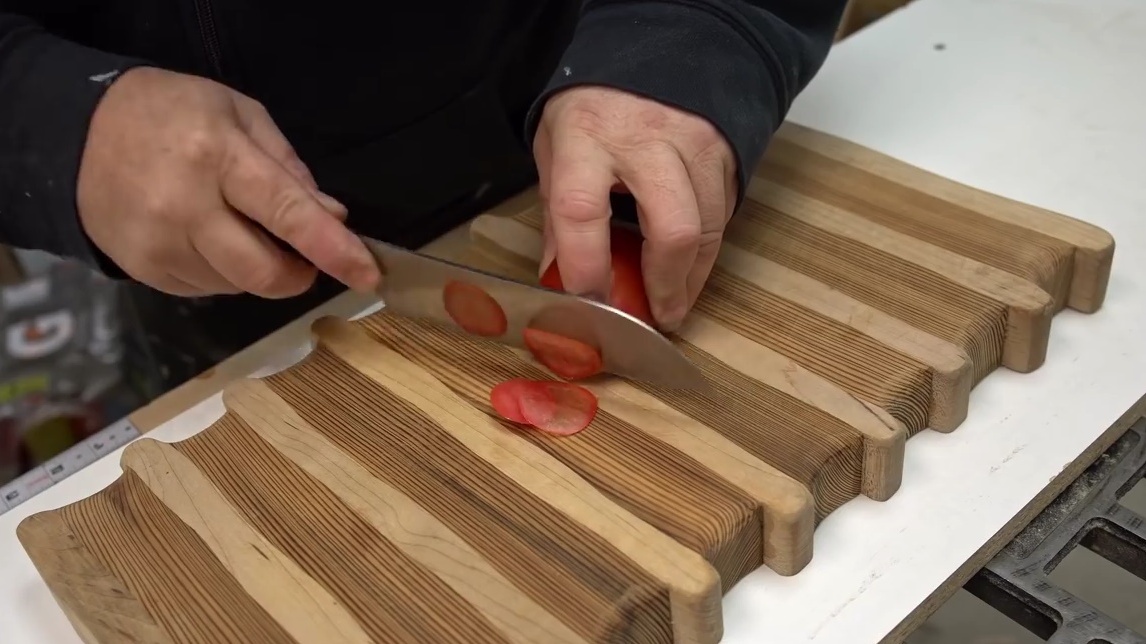
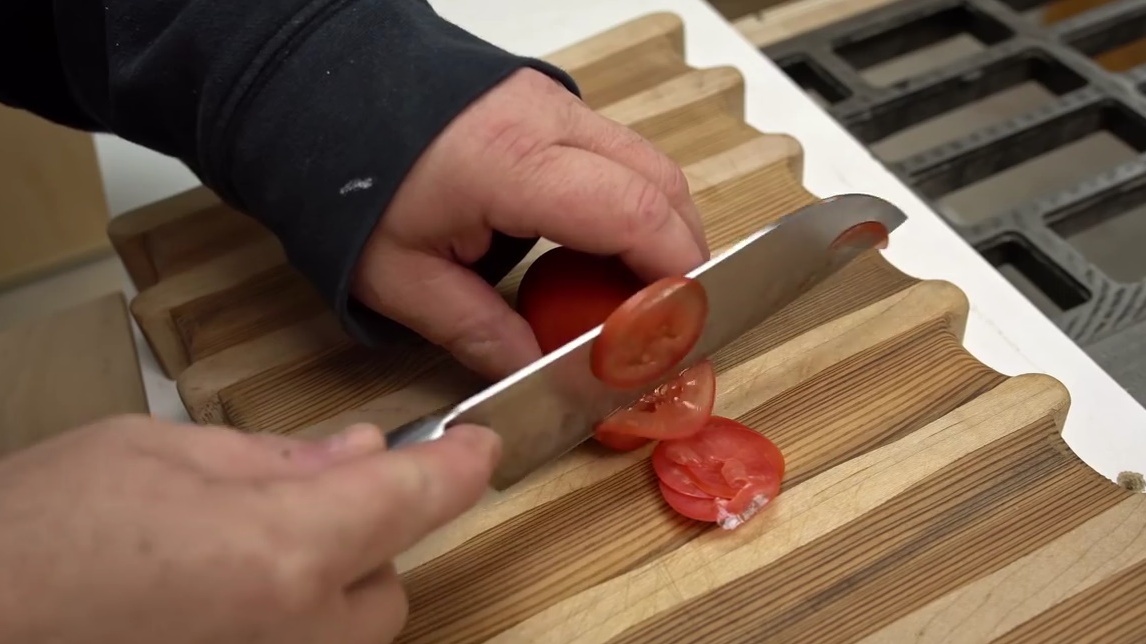
The sharpener works great: the knife has enough space, doesn’t jam anything and the downforce is pretty good. Yes, since it is a water stone, it is necessary to slightly moisten the work area before starting work.
Very good sharpening result, tomato slices are just transparent!
Thanks to John for the master class in making sharpeners!
All a good mood and ideas!