

Last warm season, the next portion of the necessary construction work was carried out in the workshop - equipping with a reliable roof and "real" floor - concrete screed, which allowed us to use the previously unused corner near the window (natural light, good view, the stove warms the back) to install solid structures. It was decided in this corner to make a workplace for small jobs.
It should be said that our small works are quite specific - relatively recently we got to decorative works with glass - these are small stained-glass windows with varieties (lamps, decors), and glass-blowing, and fusion of colored glass in the stove (fusing), and molding in the same place.
What was used for work
Tools, equipment.
A set of ordinary carpentry tools, a hammer of course. Electric planer for logs, portable universal (sawing, planing) machine for boards. An electric chain saw came in handy, while an electric jigsaw and a screwdriver. Good electrical extension cord, small step ladder. Safety glasses, earphones. Marking tools - a simple pencil with a sharpener, crayon, tape measure, level, plumb line.
Materials
Not long poles or thin softwood logs. Board - used not edged, 25 ... 30mm thick. Fasteners - nails, screws of a suitable size. Electric wire, spring terminals.
To business.
The workplace is made in the form of a powerful rack with racks - logs. The rear racks “stand” on the foundation of the workshop, several protruding several centimeters into the room. Front struts on the concrete floor. Between racks, in the right places pinned (nails in case of perpendicular loading, preferably self-tapping screws) horizontal supports on which are mounted boardwalks of the table and shelves.
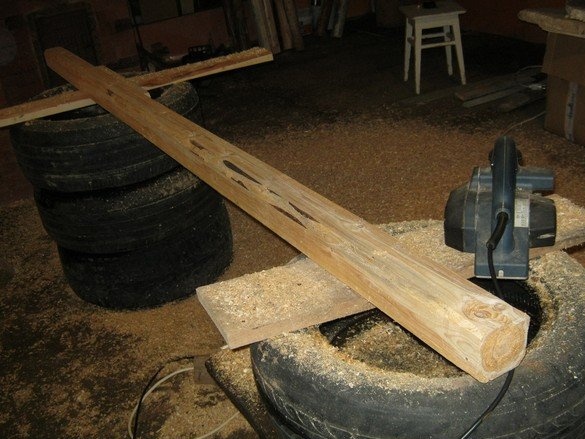
First of all, I prepared the rack-logs - with a chain saw I aligned the lower, thicker end, clarified the required length, cut off the excess. With a chain saw, he removed large knots, stroking from four sides in the manner of a beam. Smooth planes allow you to conveniently, evenly and reliably nail the board to the processed log.
It is more convenient to plan as follows - on supports, you should make two flat areas - you can simply put it on a board or bar.On one side of the log, he planed a flat platform holding the workpiece with his second hand.
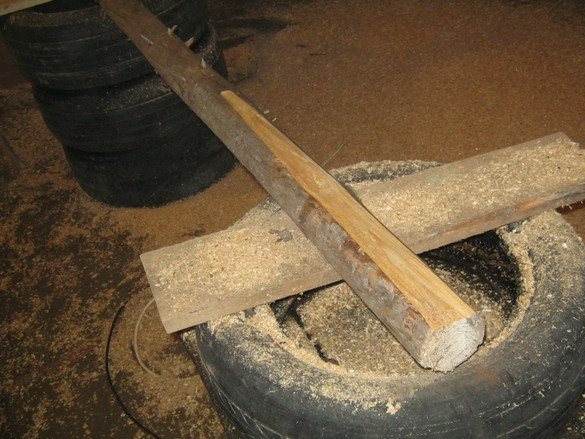
Turned the workpiece resulting "flat" down. Now it does not allow the log to roll and you can work with both hands. After aligning one of the sides, we turn the workpiece over to it - again nothing rolls anywhere, you can finish the side with a “flat”. We do the same with the remaining pair of sides.

After disassembling and freeing up space, I began installing the rear pillars. He put them on the edge of the foundation and with large nails with a “body” washer M6 placed under the hat, nailed it to a wooden wall. Each column in two places. Obstacles to the upset, one could not be afraid - the "log house" is quite a sufficient age.
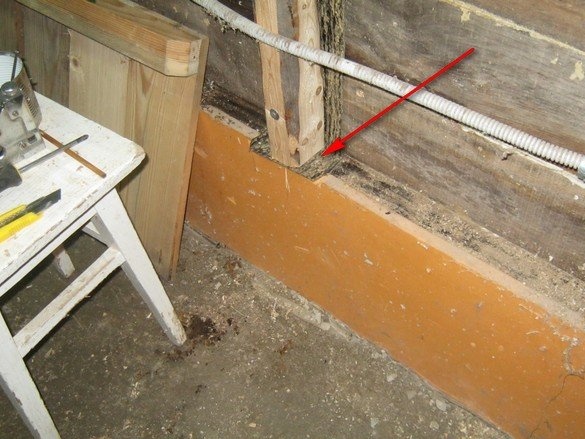
I got the logs of the "second freshness", in some places damaged by wood masons. In order not to let them into the wall, he separated the shelving racks from it with strips of roofing material.
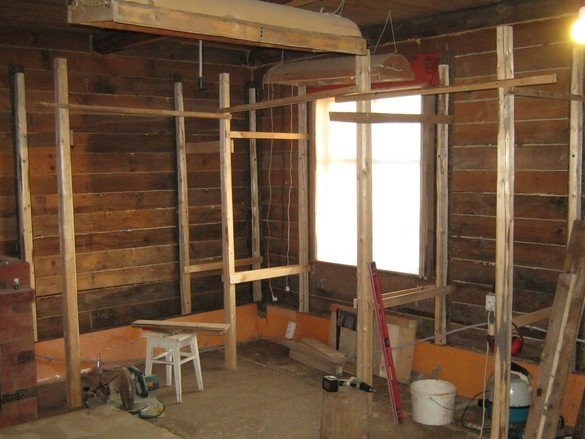
Having fixed all the “wall” racks, I marked and installed the external ones standing on the floor. They are fixed tightly when the rack is fully assembled, and now they are fastened with temporary ties. The racks stand on the concrete floor without waterproofing - under the stove it is double, and a layer of foam.
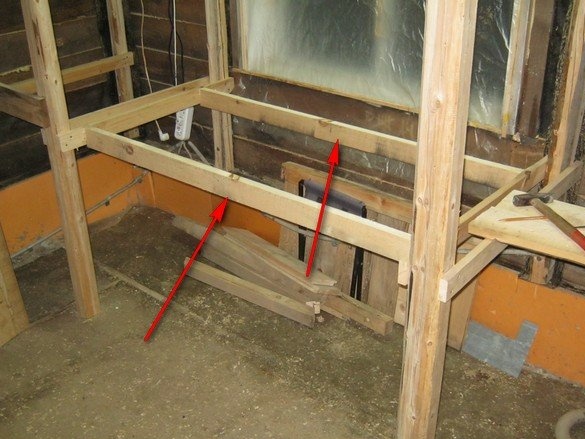
The working surface under the window should be flat and not bend, otherwise it will be difficult to cut glass on it. Flatness was ensured by a surface of 10 mm plywood, stiffness - by an impromptu frame. It turned out a miracle as well - the table easily withstood my 90 kg - I had to stand on it when installing the upper shelves.
Electrical wiring in a plastic corrugated gut, held parallel to the floor under the window. I had to redo it a bit - to conduct on specially made for this, the elements of the rack. Two blocks of sockets installed previously on the wall, moved to a more convenient place on the elements of the future rack, so that sitting at the table, you can reach out with your hand. The branching of the wires is performed using reusable spring terminals with a lever. The terminals are applied with an excessive amount of "seats". This will allow for the "habitat" of the workplace, if necessary, install additional outlets and lighting.
Yes - the standard corrugated hose mounts are disgusting and take up a lot of space, where it’s much more convenient and graceful to attach the self-made fasteners from tin strips. Roofing steel 0.5 mm is also suitable. Stripes of the desired length, a centimeter and a half wide, are cut with metal scissors and bent on a metal tube of a suitable diameter. Using a 100 mm nail, a hole for a self-tapping screw is punched.
In addition to the main table under the window, the remaining horizontal surfaces are made of a set of boards. I used an unedged board of 25 mm, sometimes it came across a little thicker. The board is standard length 6 m, cut into pieces of the desired length and, on a circular saw, finalized to trim.
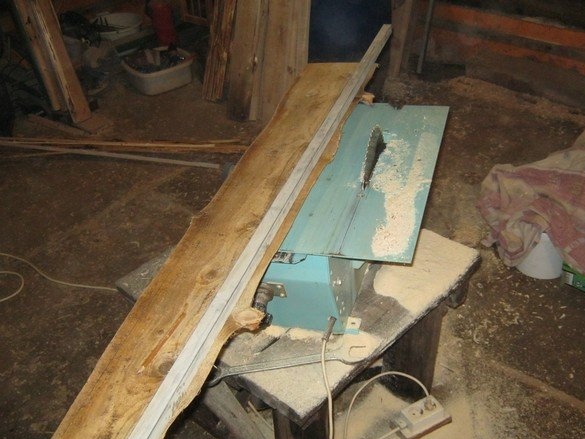
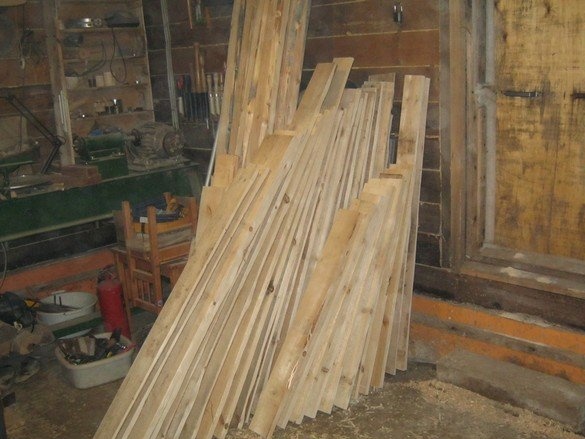
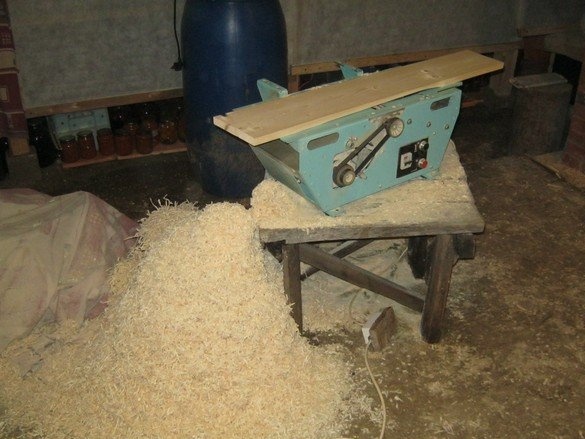
The resulting blanks were planed on the same universal "Mogilev", in portions, slowly. Yes, yes, - "Work is not a wolf ...".

The ends of the finished boards were aligned with the end pendulum saw.
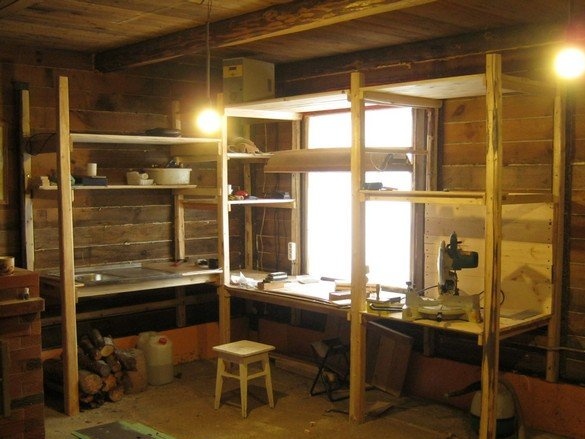
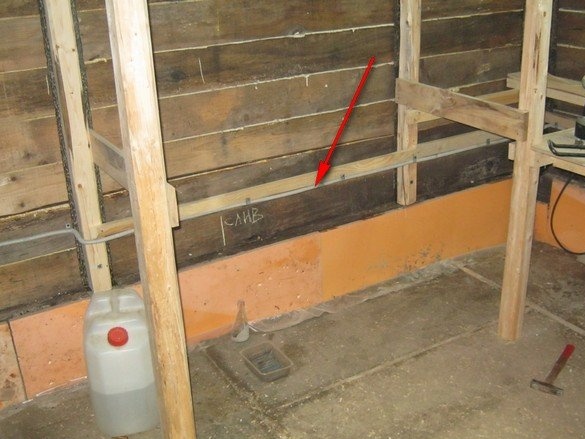
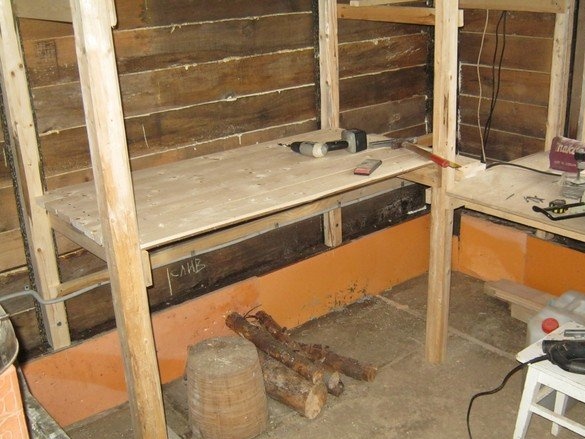
The height and size of the main surfaces often stemmed from their task, for example, the surface in the photo above is for installing the sink and standing work, the shelf above it is such a height that the washbasin fits like at home (at the same time, there was convenient access to the filler neck), and on the shelf itself from above, it was possible to put a container with cold water.
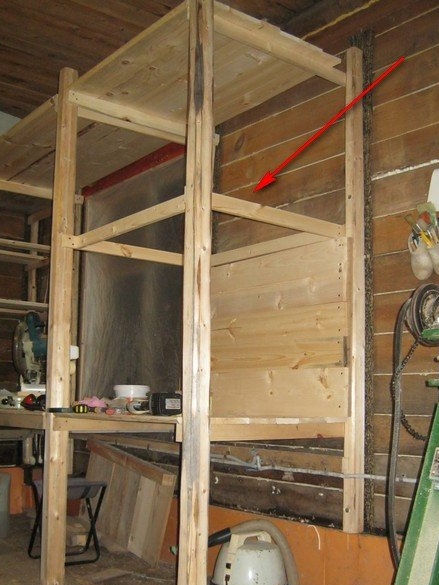
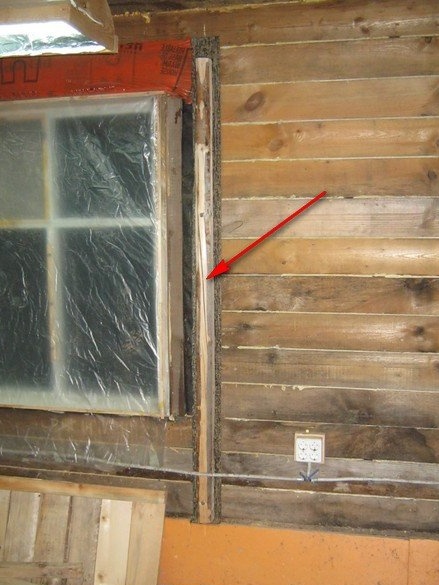
The future workplace for glassblowing - the arrow indicates the place for installing the exhaust hood, the lining of the back wall will conveniently trim it with sheet metal (non-combustible), the shelves above the window form a convenient place to store long workpieces (glass tubes in boxes). If necessary, having patched the side walls of the workplace, for example with removable glass walls, the glass blower workplace can be turned into a fume hood. This will improve the removal of local harmful substances, and safely work with significantly more harmful substances, the same mercury.
Natural light is on the side and, if necessary, can be fenced off with an opaque wall.The working wooden surface, with the final equipment, is equipped with low wooden sides, except for the sitting side, the surface is covered with sheet paronite, painted with black heat-resistant varnish or paint. The end wall is sheathed with sheet metal (cheaper than paronite) and also painted black. The dark background is very convenient for glassblowing.
Near the glassblowing table there is a bit of free space for the necessary units - petrol carburetor, electrolyzer. Here should be a carbon dioxide fire extinguisher. Compressor can be placed at a considerable distance.
Local artificial lighting of the workplace.
The main "sitting" table under the window is equipped with the best in the world - natural light. It’s good and pleasant to work with him, he’s more than enough, even in very cloudy or snowy weather. However, however. A winter day is short, and I must admit that it’s more like an “owl” - I experience the period of the greatest creative growth in the late afternoon, therefore, the task of good artificial lighting is one of the most important.
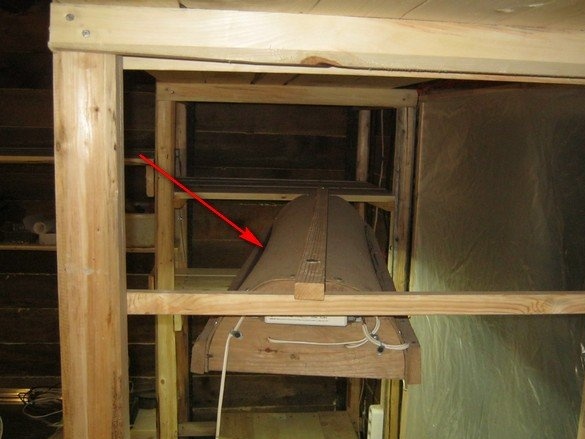
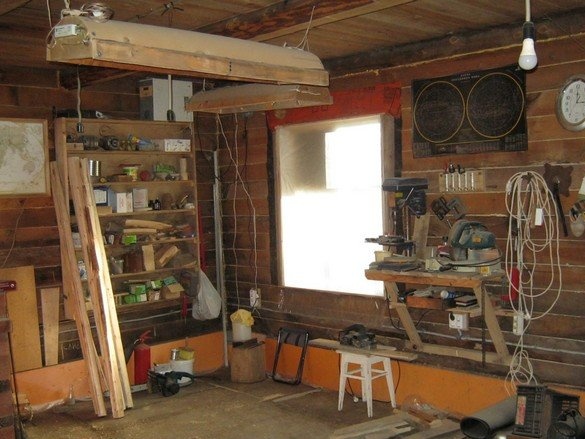
For local electric lighting, it was possible to "attach" a homemade lamp with tubular fluorescent lamps that turned out to be out of work. Once it was made to fill up seedlings on window sills, but with the appearance on the farm greenhouses, the problem with seedlings has disappeared, lamps have become unnecessary. One of them was screwed with screws to a long block that protrudes beyond the dimensions of the case, and the vertical rack-logs are equipped with horizontal "runners" in the right place. The lamp, in the horizontal plane, is not rigidly fixed, and can be easily moved to a convenient place, or completely removed.
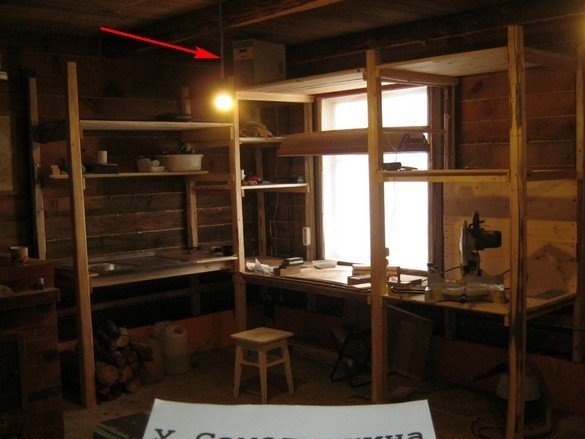
In the photo below, you can see how wonderful it was. greenhouse control processor - Now it stands stably in a place convenient for viewing, close to its terminals on the wall (cable leads from the greenhouse). If necessary (mainly controlled from a computer), it is easy to reach its buttons by standing on its toes.
The main work is completed, only sweep the chips, however, all this is still just a skeleton. There will be a gradual “settling”, in the process of work - moisture protection and lighting in the right places, probably outlets will be added. Wash basin, exhaust hood, and probably the walls of the fume hood.