There are many different sound electronic sound reproduction and recording modules. The sound file can be recorded to an external drive (flash card) or to the internal EEPROM memory of the chip.
In his homemade I used an inexpensive board for playing and recording sound on the ISD1820 chip. On Aliexpress () such modules are a huge selection. Sound modules can be used in a variety of home-made toys - talking toys, bells for entrance doors, voice dubbing of signals, parameters in appliances, cars, desktop clocks and so on.
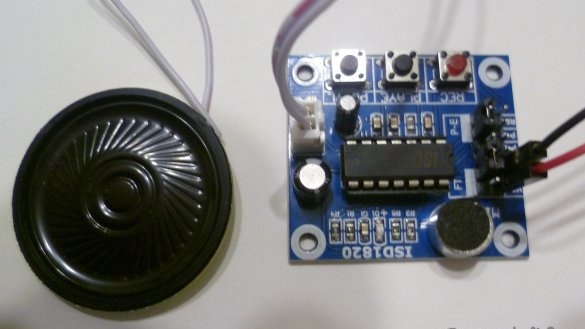
The sound module ISD1820 is powered by voltage from 3 to 5 V, allows you to record and play a sound file lasting ten seconds. The board has a jack for connecting a speaker with an internal resistance of 8 ohms. The size of the board itself is small only 38x43mm.
Consider the playback and recording device itself.
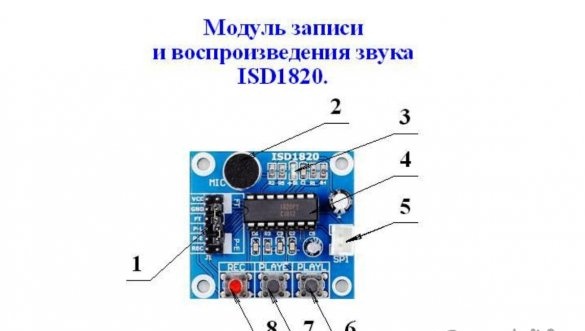
1. A pin connector for connecting the power, control, and REP functions (repeat of a recorded file) and FT-mode sound amplifier (megaphone).
2. Microphone mounted on the board.
3. The LED indicator lights up during recording, and blinks at the end of sound playback.
4. Chip ISD1820 mounted on a detachable panel.
5. VLF plug-in output for speaker switching.
6. The PLAYL button only starts recording when the button is pressed.
7. The PlAYE button; one short press starts playback of the entire recorded file.
8. The REC button, when pressed and held, records a file lasting 10 seconds.
On the two-row contact connector of the board, you can use the jumper to enable continuous playback of the recorded file (jumper on RE). And the jumper on the FT turns on the megaphone mode. The amplified sound from the microphone goes continuously to the loudspeaker. The operation of the buttons can be duplicated by connecting them to the corresponding pins of the contact connector and applying high-level logic signals to them. Given this, you can successfully control the sound module through Arduino, etc.
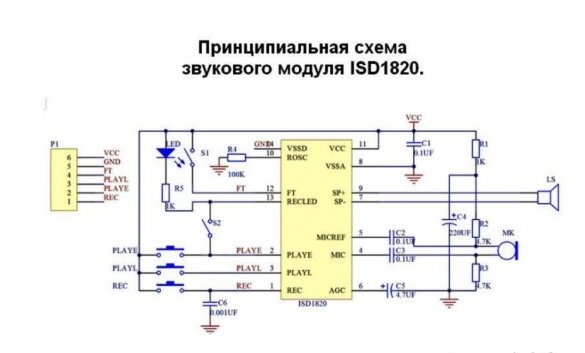
Schematic diagram of the sound module ISD1820.
By adjusting the R4 values to 200 kOhm of the ISD1820 chip installed on the ROSC input, you can increase the file recording time up to 20 seconds (with a slight loss in sound quality).
I have long wanted to do in car voice alarm of inclusion of a manual parking brake. You do not always look at the instrument panel (there is a light indicator for the position of the parking brake), as a result, you move from the place with the parking brake turned on. Because of this, brake pads, clutch wear out faster, in general, nothing good.
I assembled a loud reminder on the basis of this sound module ISD1820 about the timely release of the hand brake. You can’t miss such a signal! You can connect the circuit to the limit switch of the parking brake lever.
Enumeration of tools and materials.
- Sound module board -1 pc;
-plastic housing from the old call -1pcs;
- 0.5 W loudspeaker, resistance 8 Ohm -1pcs;
- or any similar - 1 pc;
--1 PC;
-Jack 3.5mm-1pc;
-resistors 500 kOhm and 50 kOhm -1pcs;
-source of power;
-connecting wires -Soldering iron;
-tester.
Step one. Assembly of the voice informant circuit.
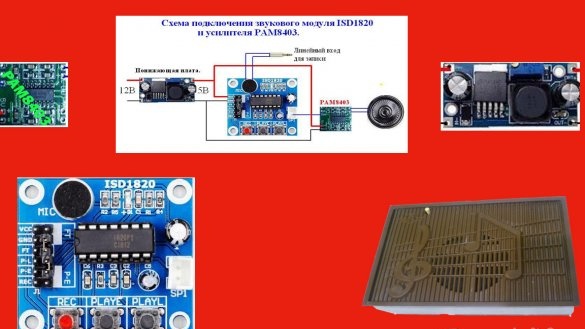
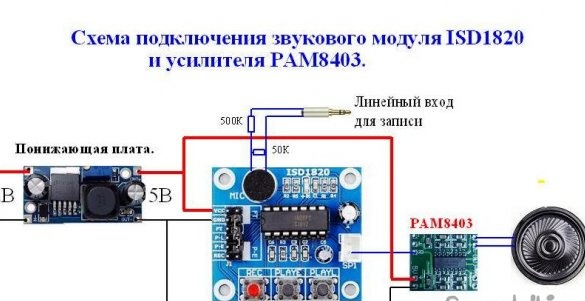
Having experienced working with the speaker that was bundled with the board, I decided from the beginning to replace the loudspeaker with a similar speaker in the Soviet issue (louder and better sound), then connect an additional PAM8403 low-frequency amplifier. To adapt to the vehicle’s on-board network, I powered the circuit through a lowering board on the LM2596 chip. If the device needs to be used outside the car, then you can connect the circuit by removing the lowering board, for example, from a 18650 battery.
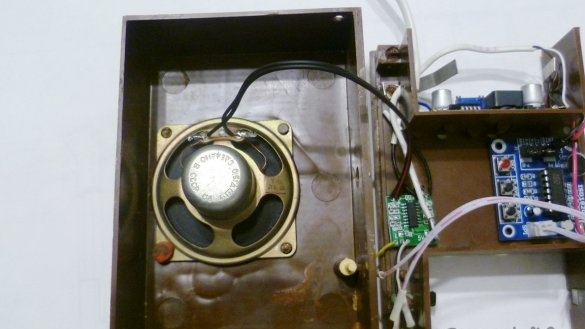
The body for this homemade work was the old Soviet-made doorbell, which by the way is still quite serviceable. He dismantled his electronic board (useful for a music box). In its place, the ISD1820 module board and PAM8403 VLF module perfectly fell.
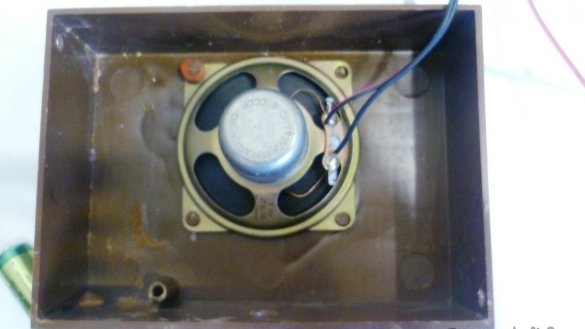
Fortunately, a loudspeaker is already installed in the ringer case.
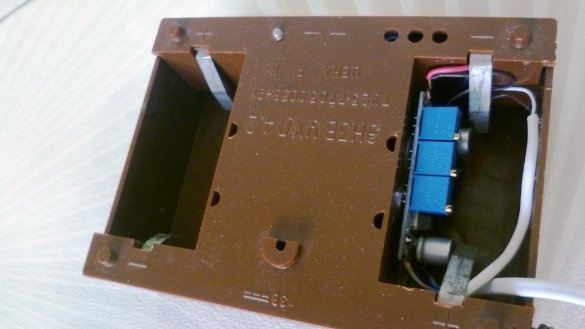
The LM2596 installed a lowering board on the microcircuit in the side compartment, where the ringer's batteries were previously located.
Second step. Checking the operation of the informant.
The circuit is assembled, the boards installed in the case, you can check everything in the assembly. With an amplifier and a domestic speaker, the sound was loud. Of course, you can get better sound if you record through the line input. To do this, connect a resistive divider to the loudspeaker connector and connect a telephone, computer, etc. to the signal source through the 3.5 mm jack connector. You can record voice files from ivona.com. It synthesizes the speech of professional speakers. Type the desired text and get a beautiful speech file.
On the basis of this module, you can make a lot of home-made products from music boxes to speech alarms, it all depends on your imagination. All work took a free evening and a minimum of funds: a sound module board on the ISD1820-75r., An amplifier RAM8403-30r., A lowering board on the LM2596-40r., The rest was available. This homemade work is for beginners and can be useful for many other purposes, as a result we get an interesting device for further creativity.
For more details, the process and test of this device can be seen in the video
I wish you all health and success in life and work!


