
Today we will make an alarm dawn, which will help wake up on a cold winter morning. The author of this homemade product is AlexGyver.

During sleep, the visual receptors respond to light levels and send signals to the brain, which controls the production of hormones necessary for sleep and awakening. In the morning, along with dawn, the body ceases to produce sleep hormone, and the level of the hormone of vitality rises. As a result of this body tuning, you gradually wake up and start the morning without drowsiness and bad mood, and the morning sets the pace at least in the first half of the day. Philips has been selling the dawn alarm for several years, you can read about it on the Internet yourself.


Actually, we will make an analog of this alarm clock today from cheap Chinese components.
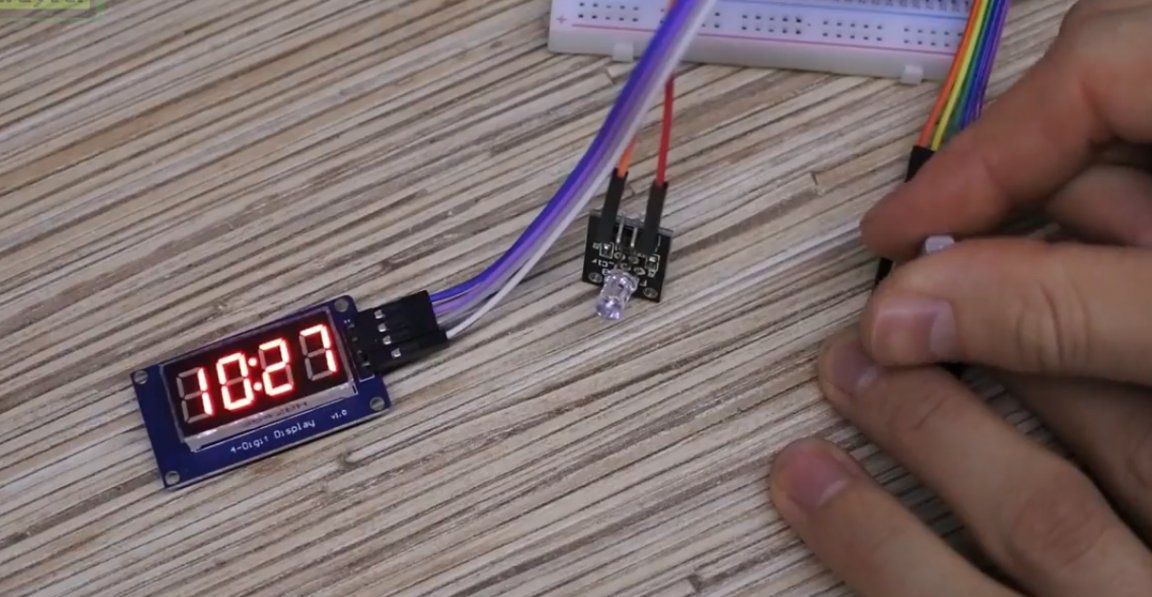
We will need: platform Arduino, which will control all other components, namely: a display on 7 segment indicators and a TM1637 chip, the display has points as is usually done in hours.


We will control the settings using the encoder, it is much more convenient than the buttons.

You need a real-time clock that counts seconds even after a power outage, since they have their own battery.

There are two options for controlling light: either these are LEDs: LED matrices, 12V LED spotlights or LED strip, the brightness of which is controlled by a field-effect transistor.

For example, you can take a ready-made Chinese module, and for simplicity we’ll take it.

Arduino in this case is powered by a common 12V. The second option is something from the outlet, whether it is an incandescent lamp, a network LED matrix or an LED spotlight, essentially the same matrix, but with a radiator.
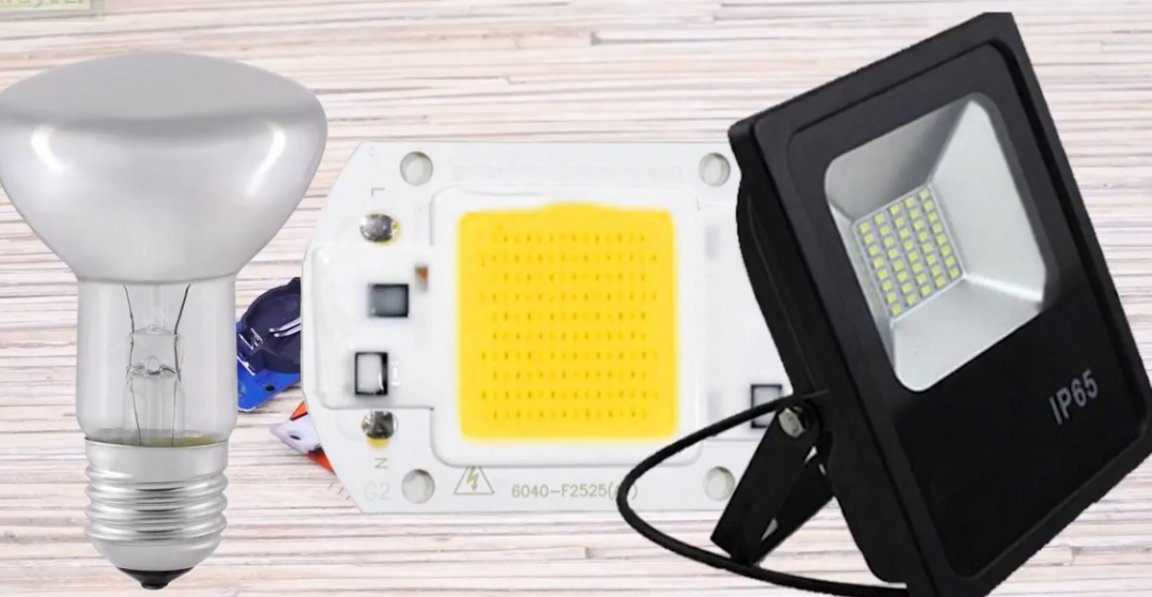
To manage this business, we need such a Chinese dimmer module.

The only thing is that not all floodlights can be connected via a dimmer, they are usually directly written on them, no dimming. In this case, you can power the system from the charger for the smartphone. If you use LEDs, then the unit is 12V. We also need a squeaker for an alarm clock. And let's take the LED, which will be an indicator of the alarm on.

Here is such a scheme for LEDs, that is, LED strips and matrices:

And this one is for 220 volt lamps, network LED matrices and spotlights:

Schemes can be viewed at project page. Let's put together a circuit on a breadboard and see how it works.

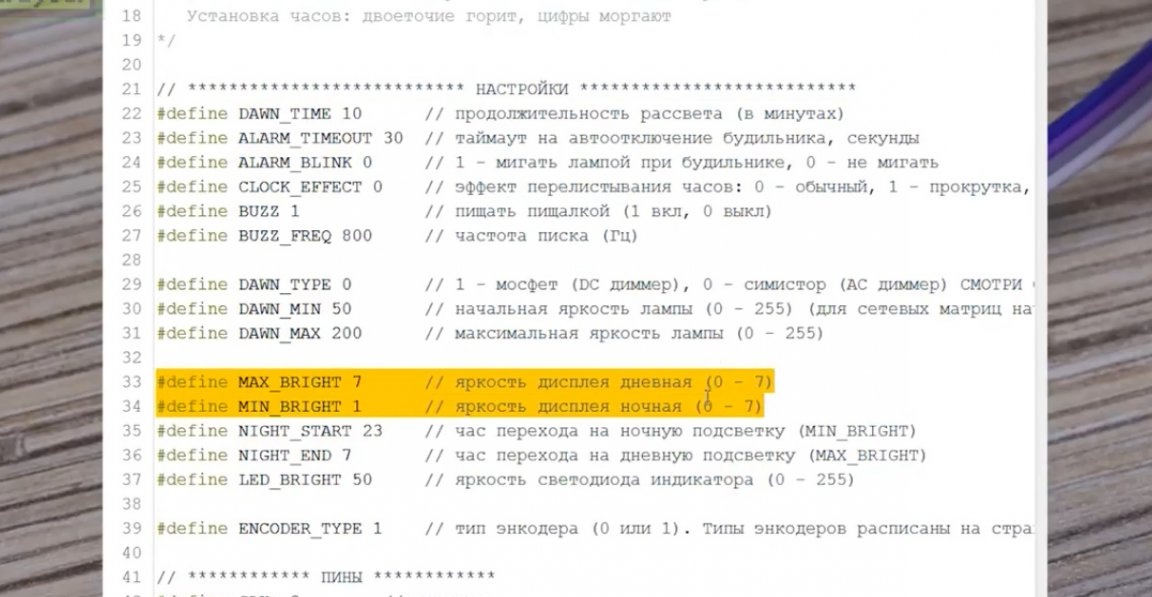
So, now you need to download the firmware. Download the archive from project pages.
When flashing, the current time is recorded in the memory, and the clock immediately shows correctly. When we click on the encoder button, we enter the alarm time setting mode. Rotate the knob to set the minutes, and rotate when the button is pressed, set the clock. Click and go back to watch mode.

By pressing and holding the button in clock mode we can turn the alarm on and off, everything is accompanied by the corresponding indication.


By the way, the time of the alarm clock and its state are recorded in memory and are not reset during reboot, that is, if a network outage suddenly occurs at night, the alarm will still work in the morning. To set the time of the clock, we click in the alarm setting mode, then a long click and we get into the clock setting. Everything is the same here, we turn the minutes, press the clock and turn it. Exit the setting by clicking, and the seconds are reset to zero, as is usually done in Chinese watches. The logic of work is this: we set an alarm, at the set time it will beep. If you put the squeaker of course. Before the alarm, for the time specified in the firmware, dawn begins. If you set half an hour, then half an hour before the ping, the light will begin to turn on smoothly, and the alarm will sound 100%.
You can interrupt the increase in brightness or turn off the screaming alarm by holding the encoder button. It is also possible to blink light with a squeaker, this is to directly wake up as much as possible and go blind from flashes.
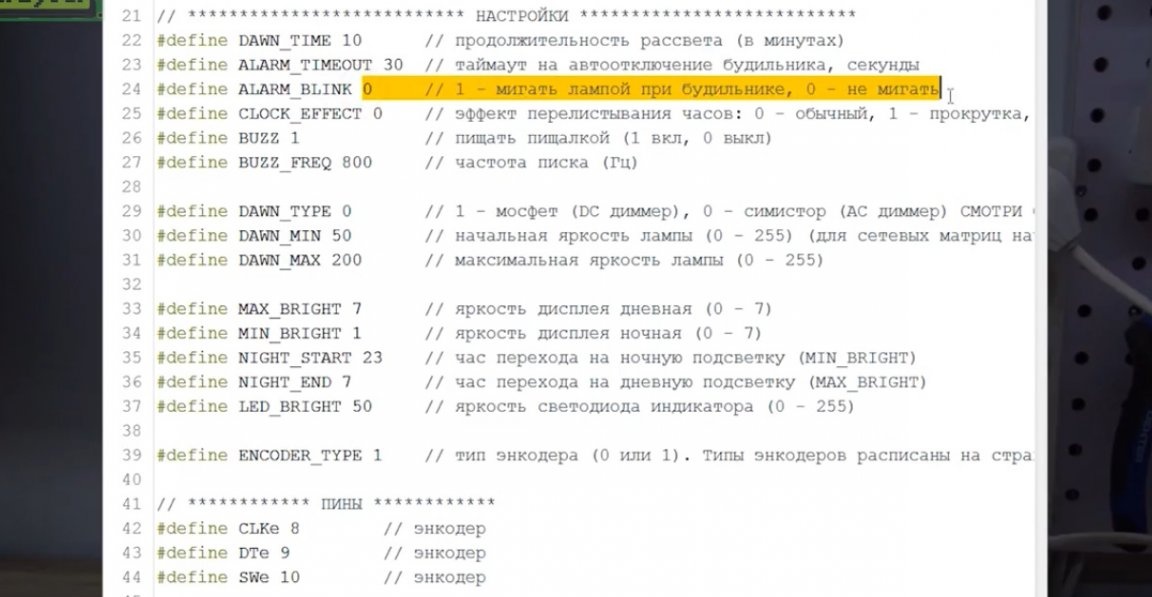
Well, you can read the rest of the settings by fiddling, everything is very simple and clear there. For example, the display can change the brightness depending on the time of day, so as not to blind your eyes at night.
What could be the realization at dawn itself. You can simply put the spotlight and direct it to the bed. You can glue LED strip shelves over the bed or furniture side of the bed. You can crash into the power circuit of a chandelier or a bedside lamp, and the alarm clock will control it, which by the way is a great option.

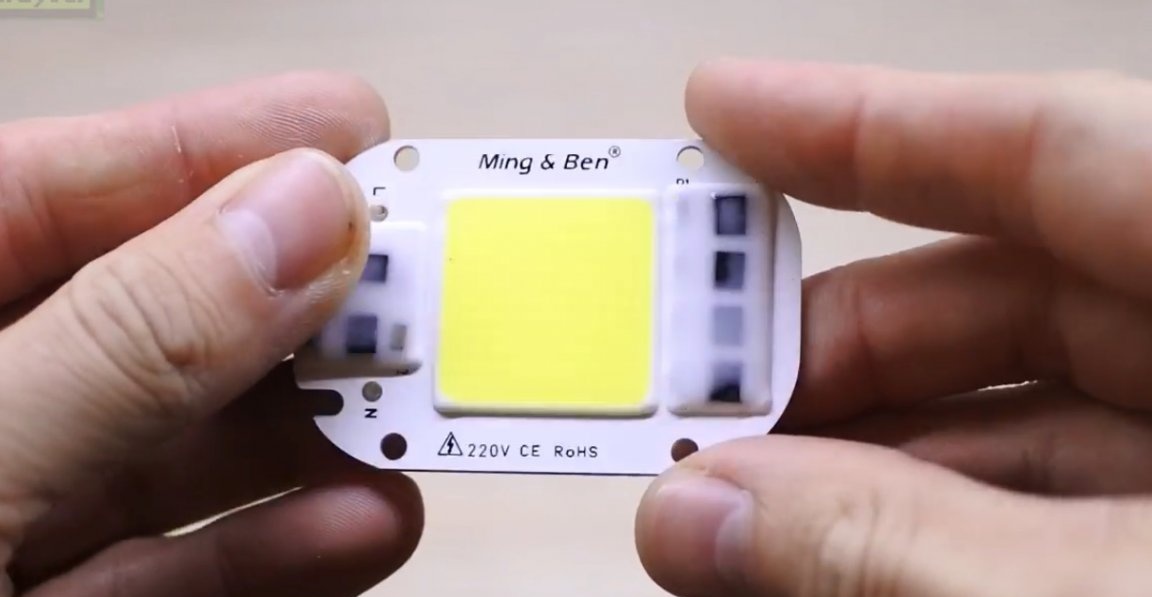
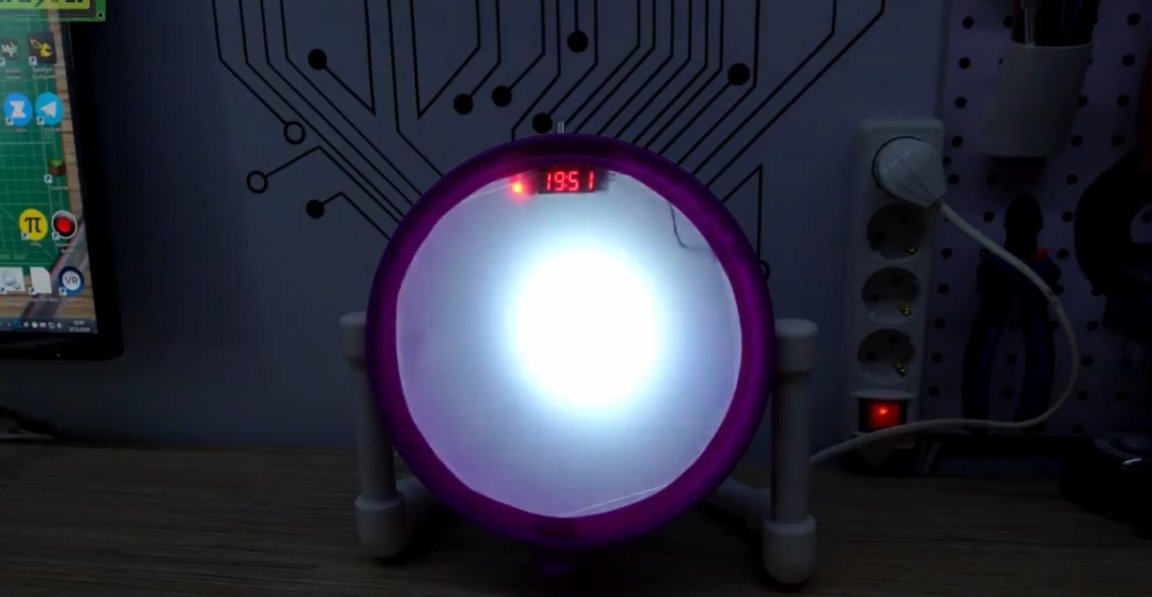
The author liked the option like a watch from Philips, an alarm clock in the form of a basin. We will need a 50W Chinese network array because it is compact and cheap.
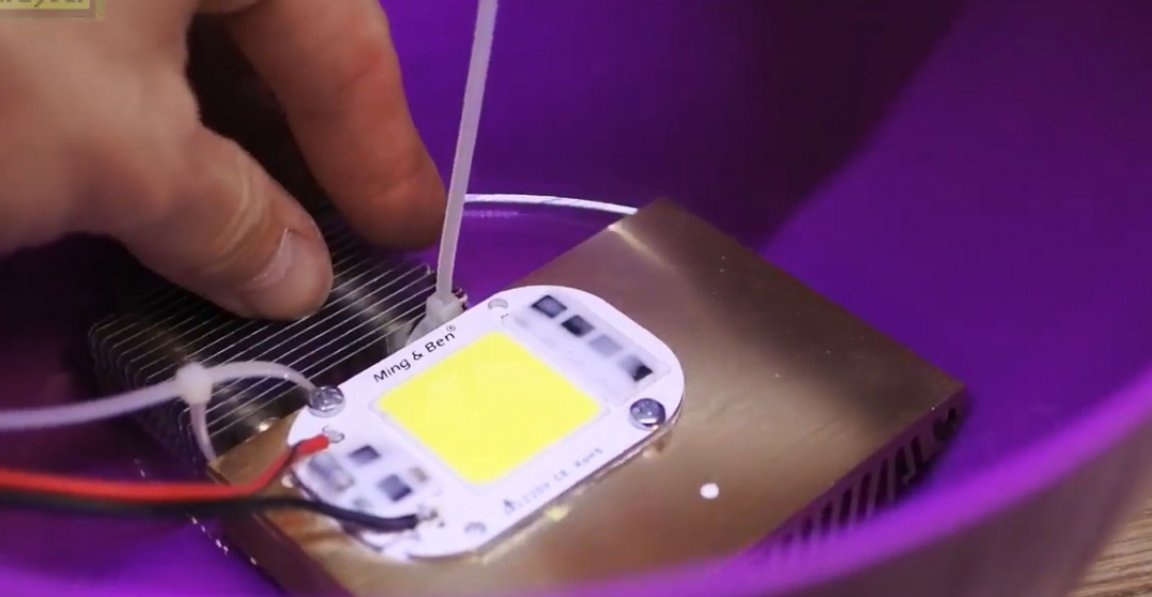
Cooling is necessary, take some radiator from old computer glands.

Basically, a basin, bought in fixprice.

You will also need a diffuser, the author uses translucent prefabricated boxes for all rubbish from the same fix-price. And we will make a support from santech.

First, we fix the diffuser on the lid of the basin, cutting out a circle and leaving a side for gluing.


The components are simply fixed inside the basin, nothing more.

We will connect using the Chinese mounting wire, it is thinner, and to solder it you need to get used to it, but the result is good.

This wire can conveniently be twisted into pigtails to each component of the circuit.

Actually, this is how we solder everything, the power leads, as in the scheme, are connected in one twist and soldered, adding more wires for connection.


It remains to connect everything to the arduino, and the multi-colored wires in this helps a lot.

Actually, we connected everything as needed. Solder carefully, always with flux. We attach the matrix to the radiator. We will not turn on full power, and such a radiator is enough.

Drill 2.5mm. And spin M3 straight into the carcass. We attach all components to double-sided tape and cable ties.

The author wanted to stick the display to the diffuser with superglue, but unfortunately the superglue was not super and did not take this matte plastic. I had to pour hot glue.

We assemble the stand and fix it all with a screw through a washer.


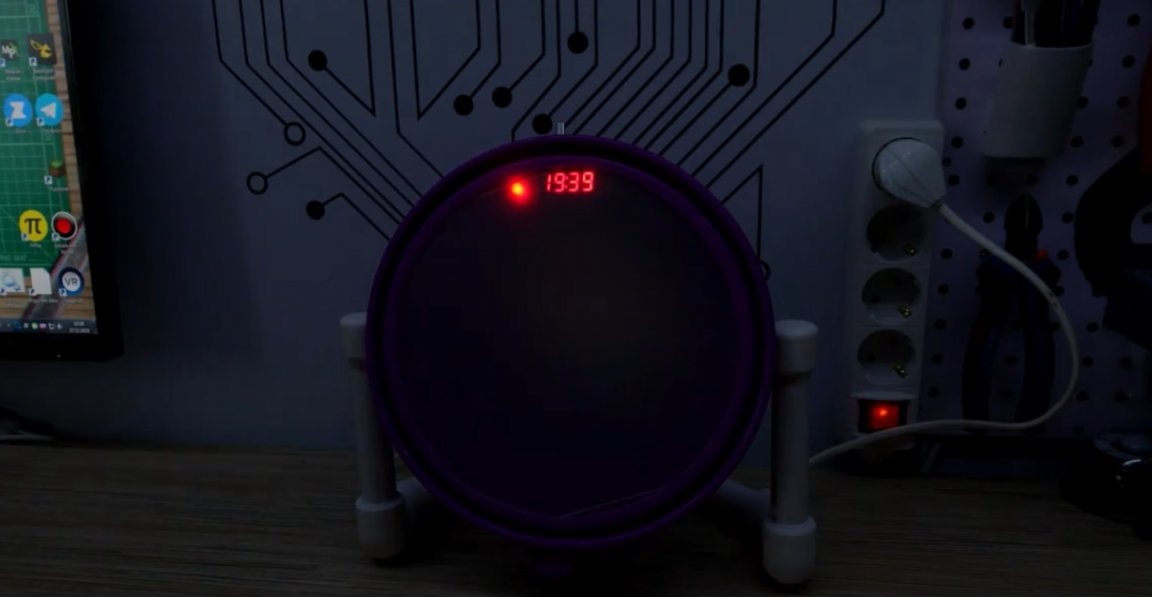
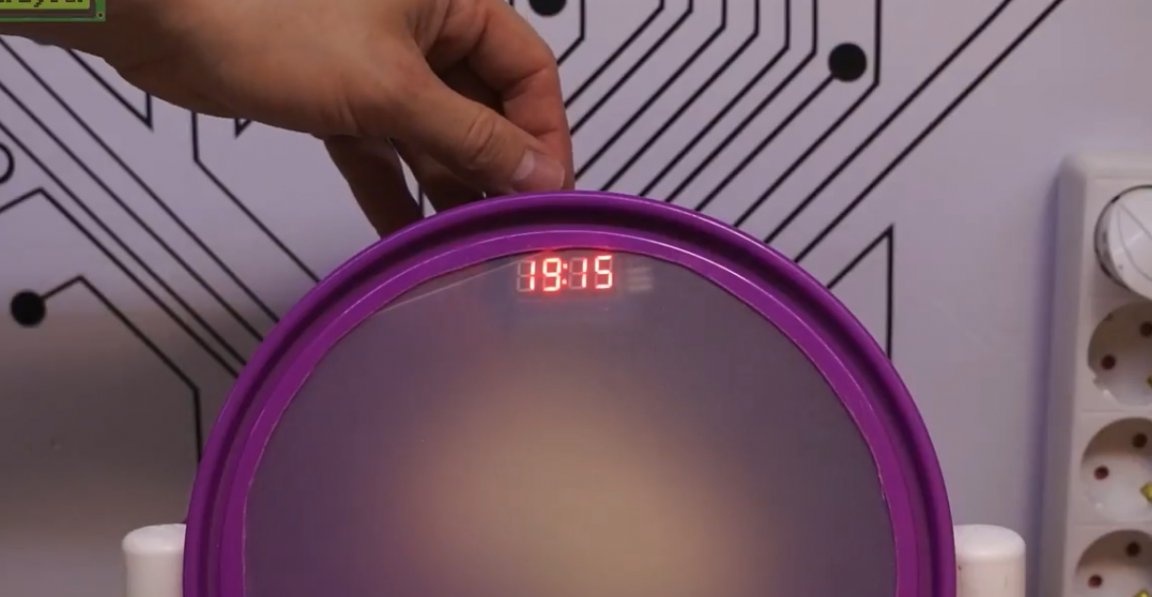
The lamp turned out almost like a Philips alarm clock. The tilt angle is adjustable, the design is stable.


We check.

The presence of a tweeter by the way is not necessary at all, you can use the dawn alarm clock along with the alarm clock on the smartphone, which starts at the same time. In the firmware settings, you can set a timeout through which the dawn light itself goes out. That is, the dawn flared up, your alarm clock rang, and you just leave, and the dawn itself turns off until the next morning. And that’s it!

Here is such a device. Thank you for attention. See you soon!
Video: