

But in the world there are clamps capable of pressing in any place where this clamp can be fixed. This is the kind of tool that will be discussed now.
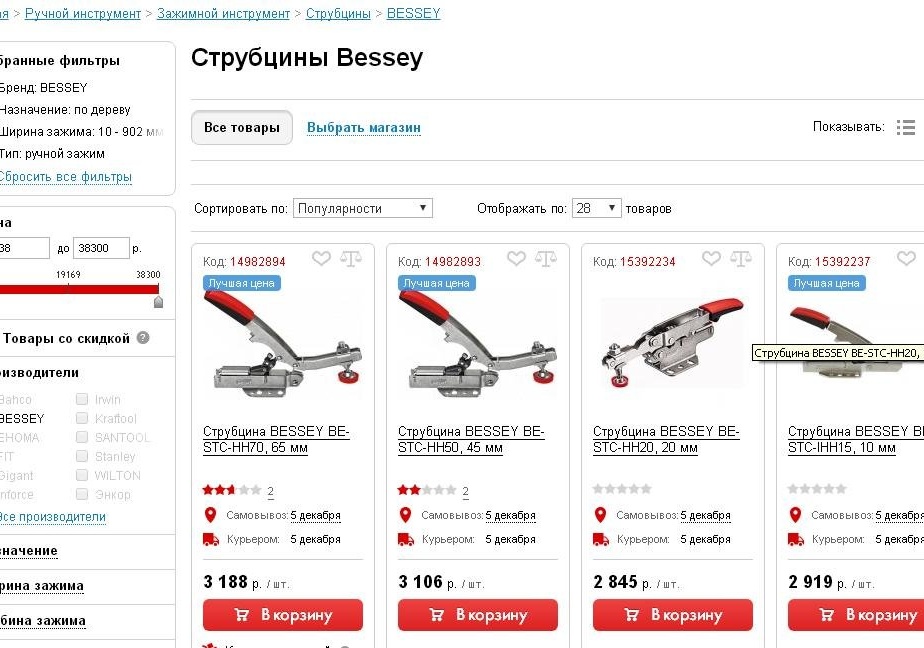
In the store, such a product is rare, I would say not even in every locality you can find. Not only can you not find with fire, but also a pricey toothy price tag. It’s not reasonable to take one, but a little too expensive (at the price of a budget electric tool). Think I'm kidding? Decide for yourself ...
But not everything is so bad, on the Internet there are craftsmen who make similar clamps - a woodpecker in their workshops. There is nothing complicated there. It is only necessary to have a drill, angle grinder, vice and welding, and preferably machines. But as they say "the devil is hiding in the details" the first time like homemade it may not work, you need to either know the exact drawing, or the principle of work and approximate calculations.
I’ll tell you how from cheap parts (each of the component parts cost less than 20 rubles, the average price is 4-7 rubles) and with the help of one screwdriver (and sometimes pliers), and some mother (joke) to assemble this device.
This idea came to me six months ago. Then, while walking in one of the chain hardware stores, I scored a handful of metal strips, corners and various hardware for them. Reflecting on the device of this miracle, I unraveled its focus and collected a semblance.
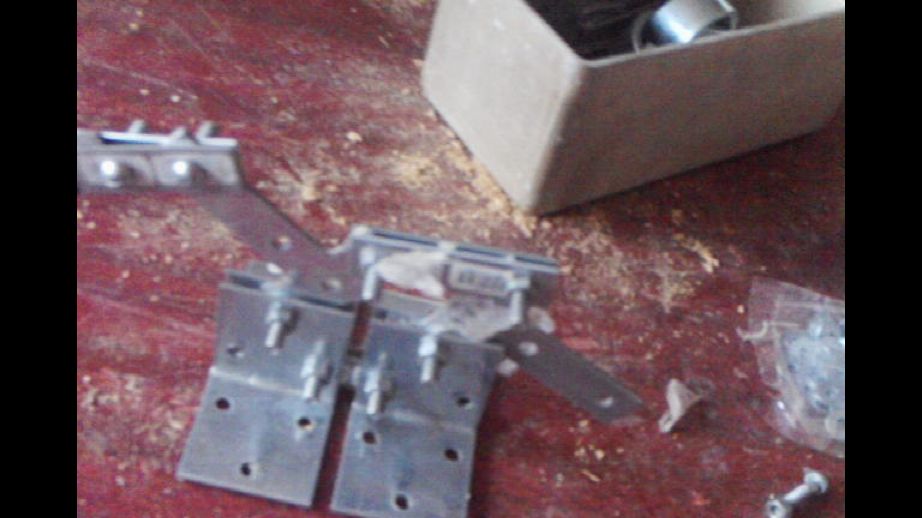
And here the other day just the situation arose where it is not possible to fix the workpiece with ordinary clamps (it will be said that it will take a lot of action). And he decided to return to past experience.However, everything is changing and in that store there are no more exactly the same hardware, which means what needs to be done from what is already there. In the first homemade product, all corners (all 4 pieces) were used, so I decided to simplify-complicate the design, so that no more than 2 corners would go on one clamp. Again, I didn’t want to bother with laborious, noisy operations with cutting metal into components, drilling precise holes without a machine and fastening all this to bolts, but rather welding. In the future, all this is of course to me. Since a good clamp should be powerful, however, for experiments it is better to use parts from the designer, rather than sheet material. This is also because I overhauled the structure several times yesterday evening (I would have to start using welding every time from the beginning).
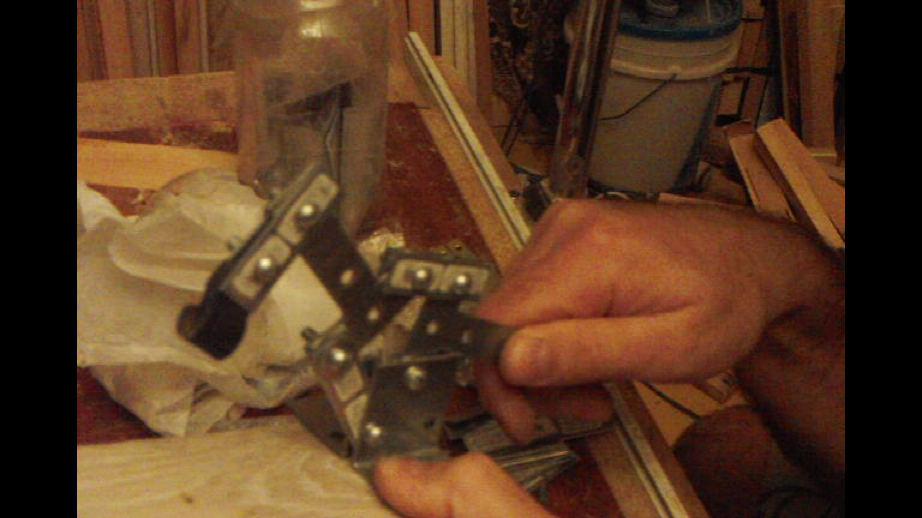
And so, the design is based on a movable figure similar to a truncated pyramid (not a regular parallelogram), the lower part of which is the base that is attached to the frame or workbench. The ribs are directly involved in the clamp, and the upper rib plays the role of a clamp. The nuances here are the length of these ribs. From their size will change the position of fixation and generally the possibility of this.
But I didn’t get four, but a pentagon. Despite this, it somehow works :)
Having assembled my homemade product, I realized that it’s not some kind of woodpecker :), but it’s a DINOSAURIC. So affectionately I will call him.
The assembly process is better to watch the video, which will be at the end. Anticipating the questions of what and why I put in nuts, without hiding I will say that this is how I prevent the nuts from unscrewing when working. No, of course, the connection is not so rigid as if fixing the nuts with another nut, but for that the weakened nut does not completely unscrew. In the same place where during operation the hinges under load rotate counterclockwise, untwisting the nut, two bolts are screwed onto the bolt. There is one knee in each clamp. So that the mechanism does not jam, I use washers and in some places even a grover (spring washers). It is clear that the whole load goes to the bolts and they will not last for a long time, here you need a strong (maybe even hardened) metal. For this, I did not even cut the bolts, but took those that are least needed (with a flat slot and a round hat).
These instances can not be called the final version, according to my classification they have version 1.2 and they have not developed a mechanism for adjusting the height of the clip. Here your ideas will be very useful to me ...
Later, I will make a few more such quick-clamping mechanisms, taking into account all the shortcomings and pros :)
But the video itself about the "dinosaurs" watch and do not kick much :)
Oh yes, for those who do not want to do, they can buy these clamps on the site (not advertising, since there they are not much cheaper than the above)