

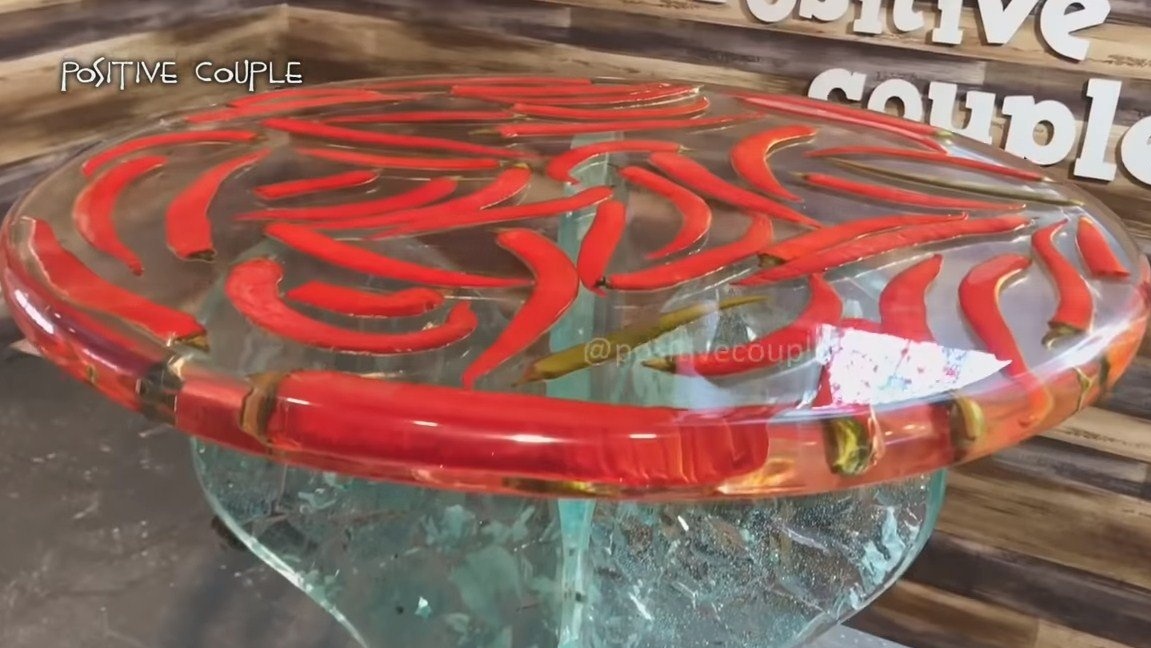
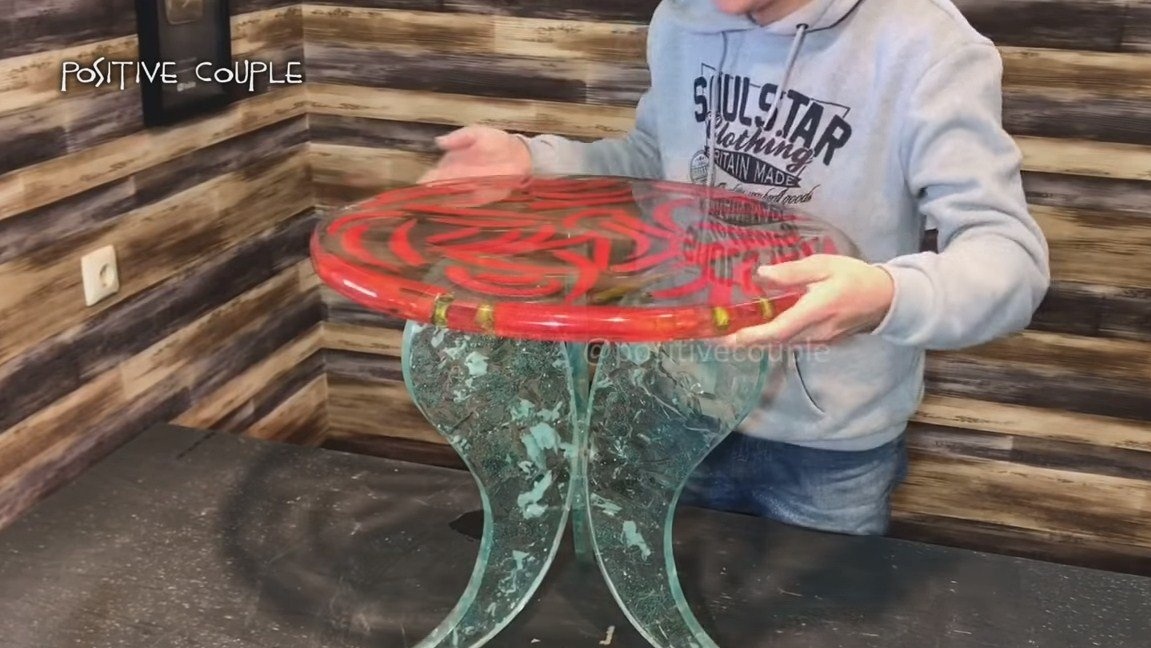
In this manual, we will look at how to make a beautiful epoxy table. The countertop is unique in that red pepper was poured into it, the whole thing looks pretty interesting. Unique and table legs, they are also molded by their epoxy, and the author used glass as a filler. As a result, the legs resemble ice, and in general the whole table looks like pepper frozen in ice.
It is not difficult to make a table, however, impressive volumes of epoxy are needed. If homemade You are interested in, and you want to repeat this, I propose to familiarize yourself with the project in more detail!
Materials and tools used by the author:
Material List:
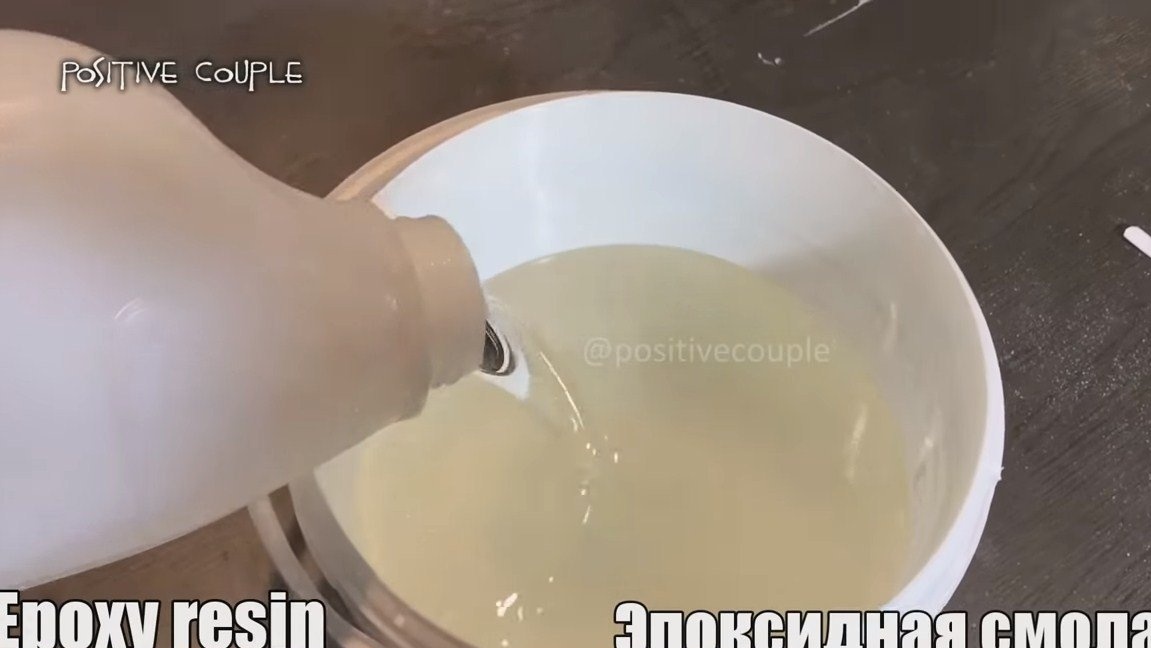
- epoxy resin;
- polycarbonate (for formwork);
- glass;
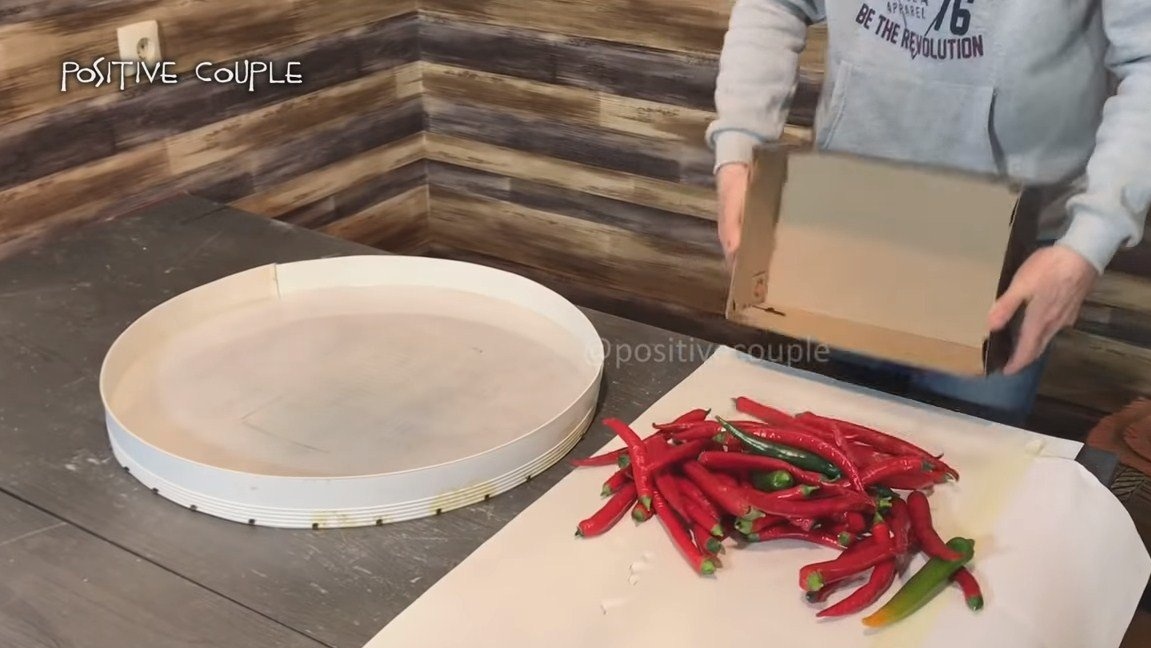
- Red pepper;
- bolts;
- acrylic lacquer;
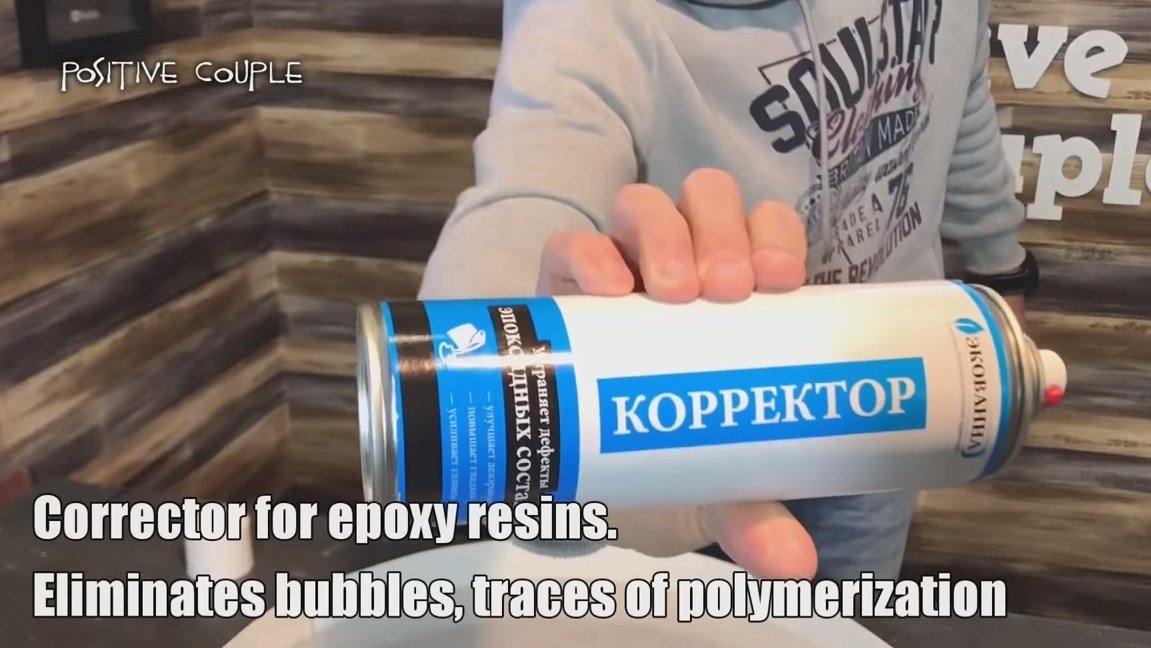
- corrector for epoxy resin;
- separating wax.
Tool List:
- grinder with Velcro;
- screwdriver;
- milling cutter;
- jigsaw;
- polished nozzles for grinders;
- silicone sealant;
- scissors;
- drill.
Homemade manufacturing process:
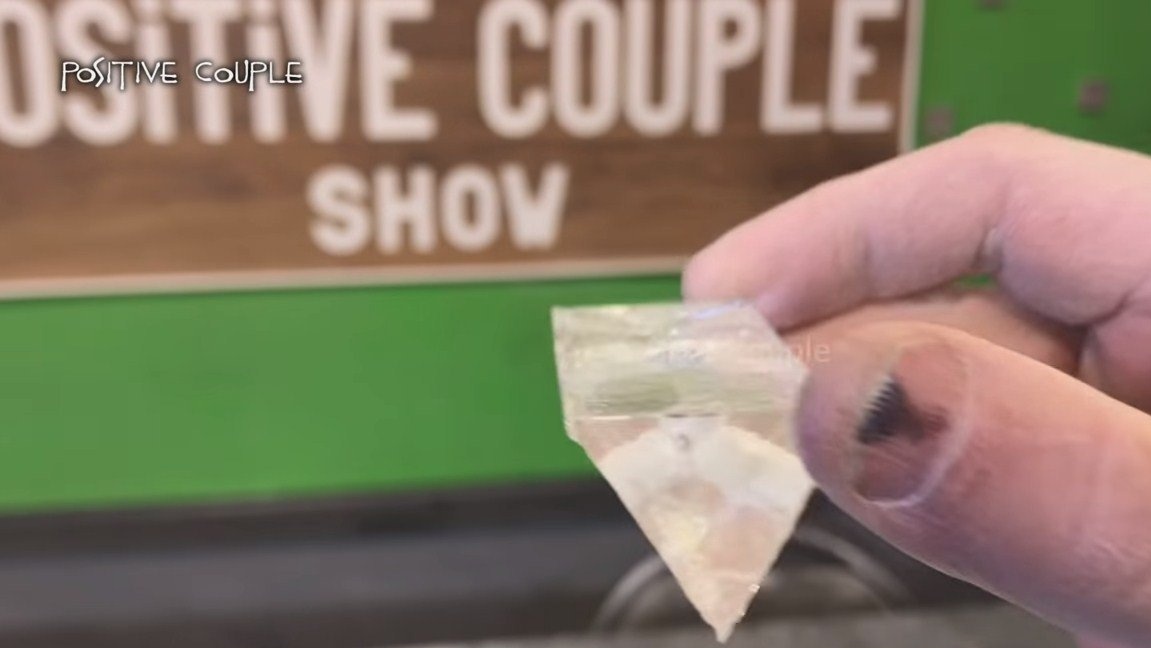
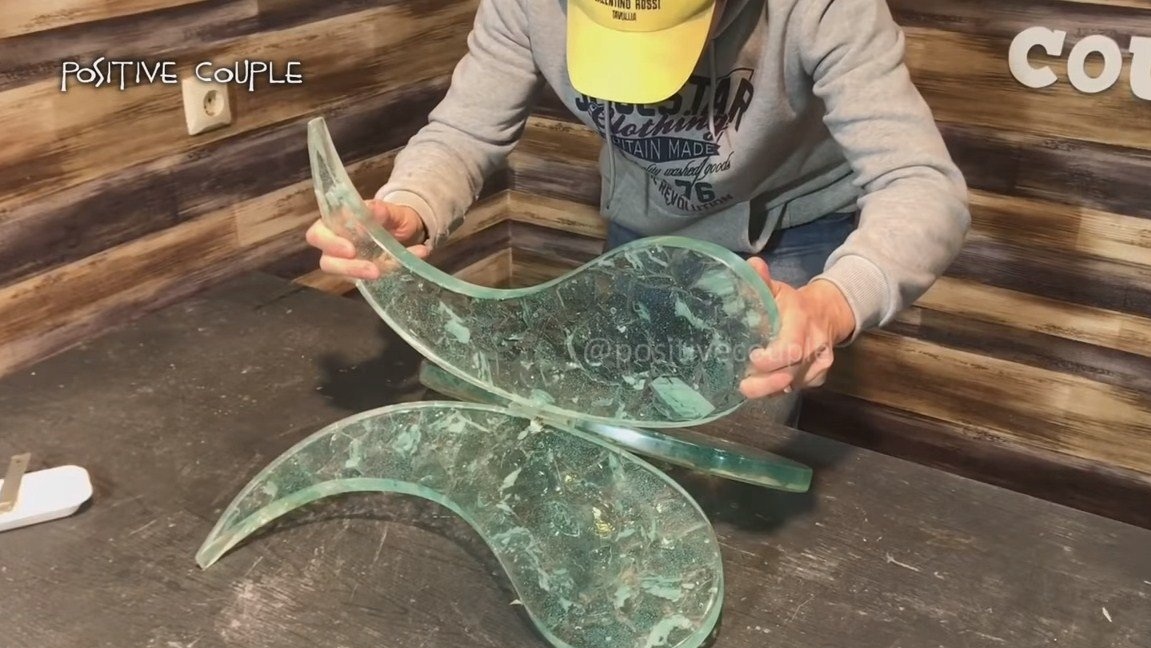
Step one. Cast the legs
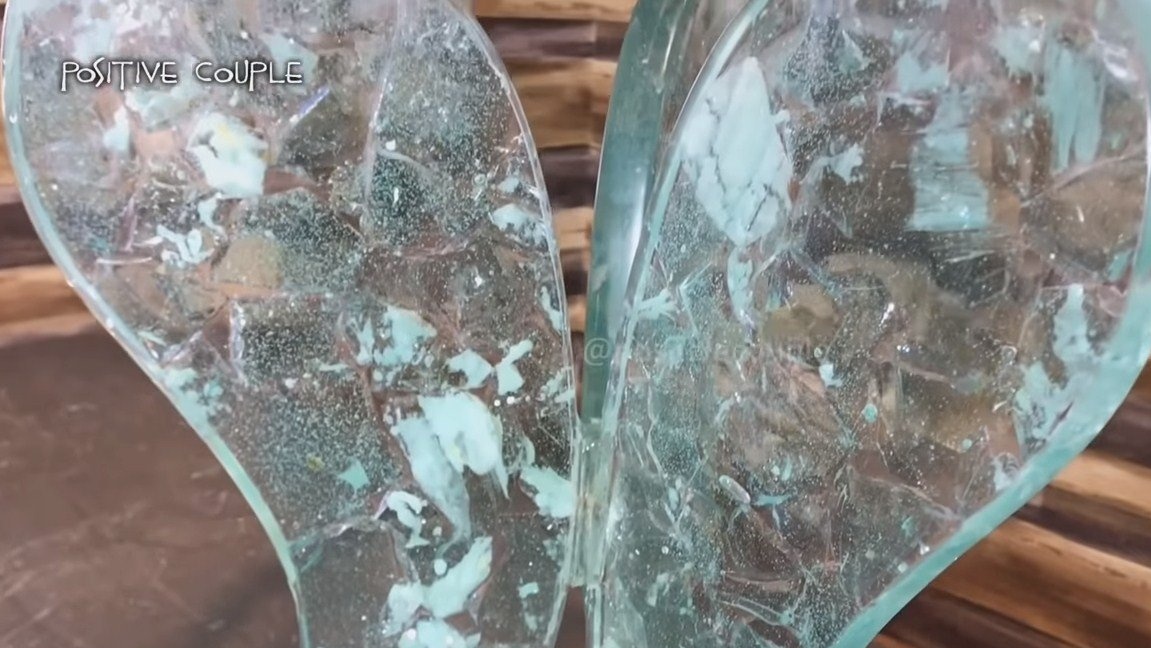
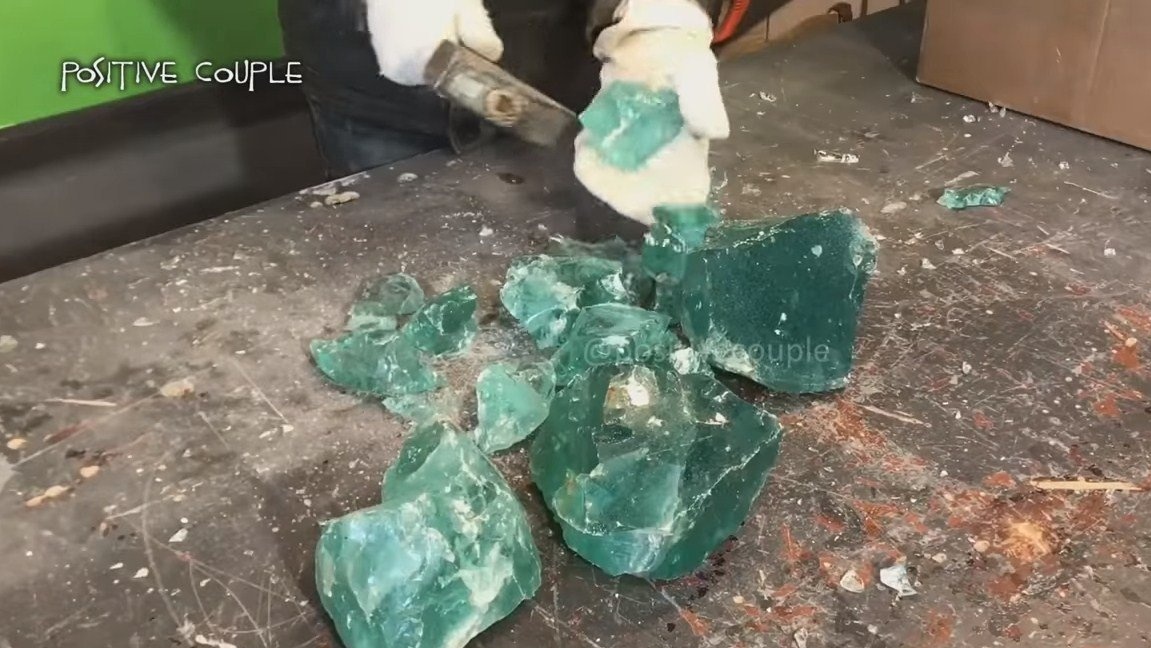
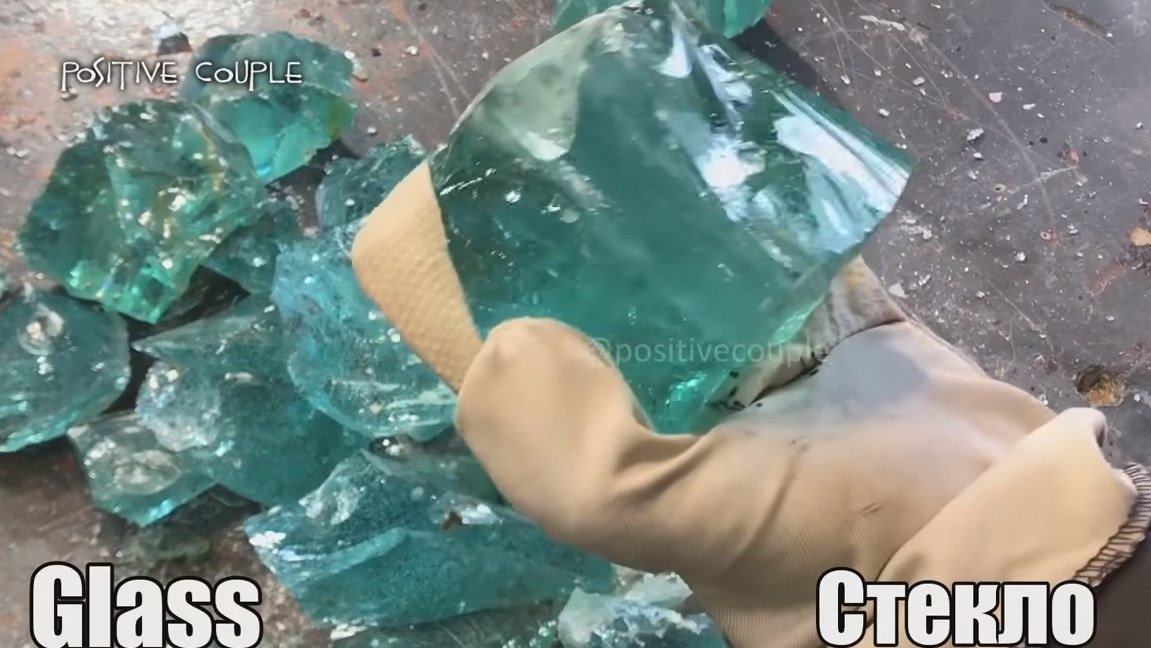
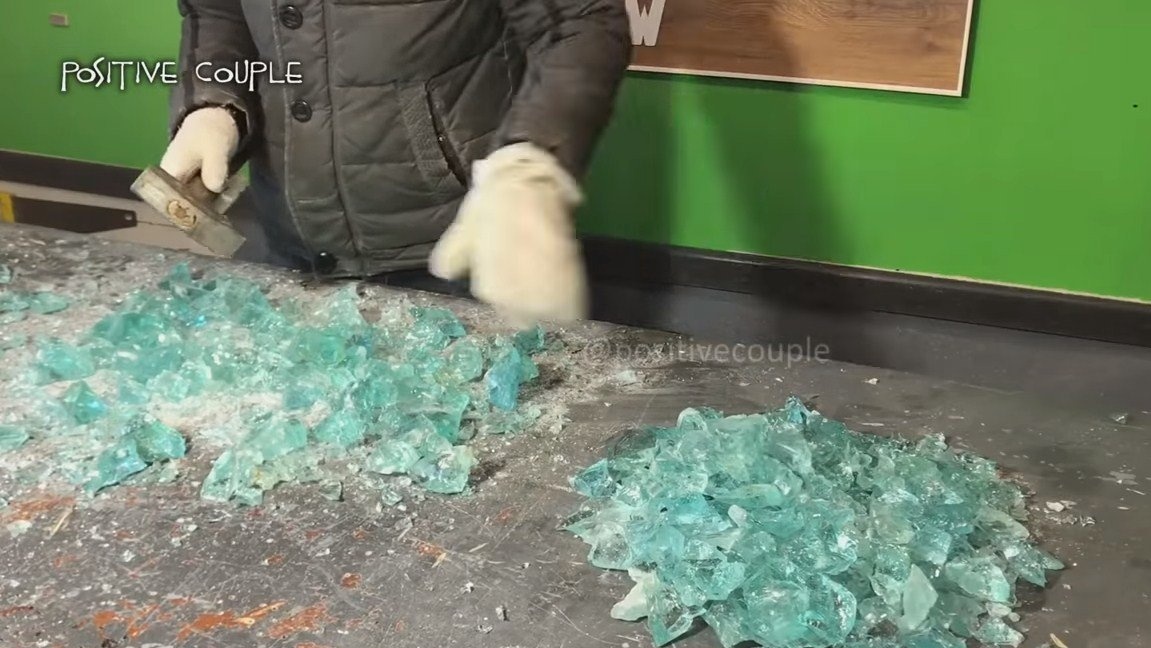
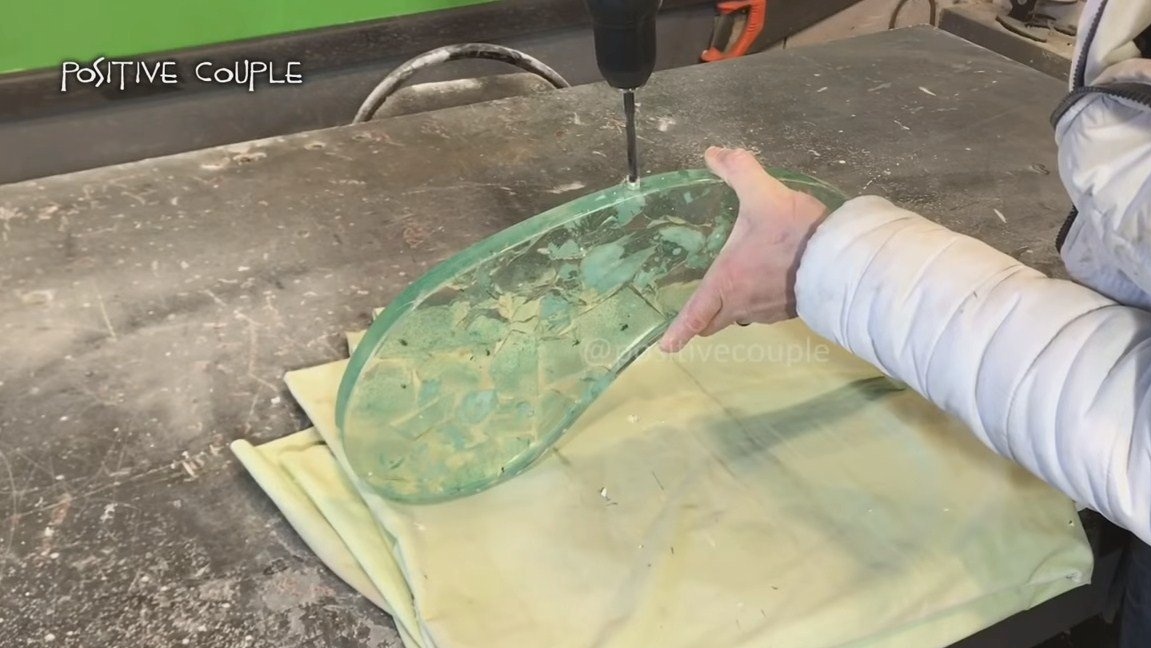
First we pour out the legs, for this we need to find a suitable filler. The author used a waste of thick glass with a blue tint. We beat the glass with a hammer into small pieces, as a result, it will simulate ice.
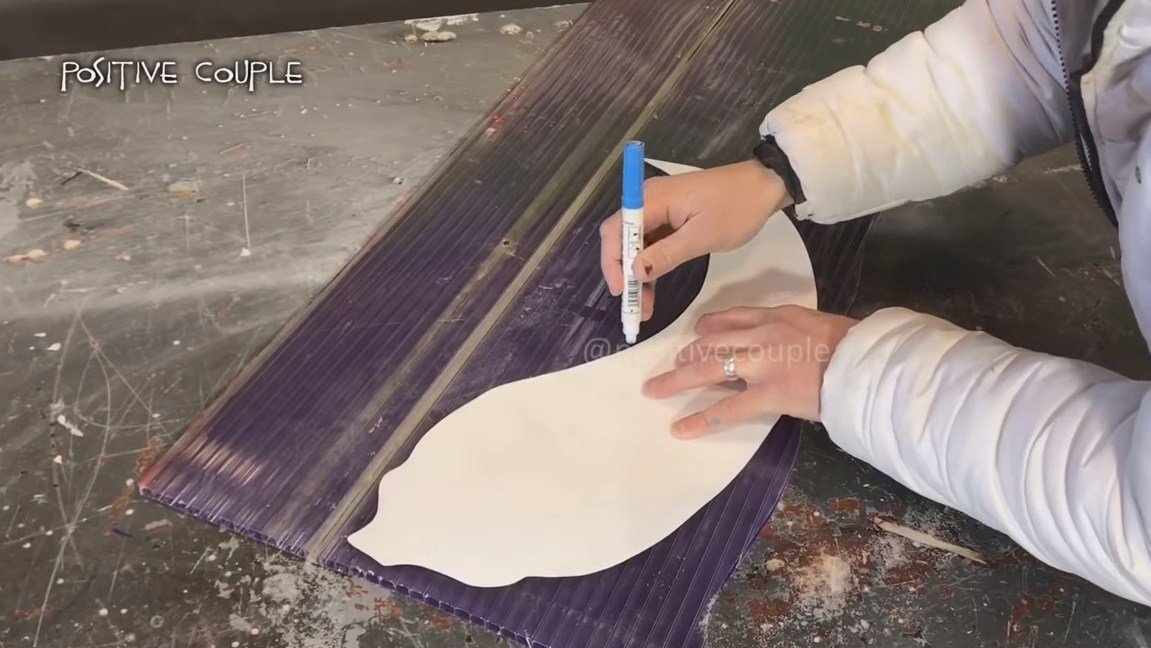
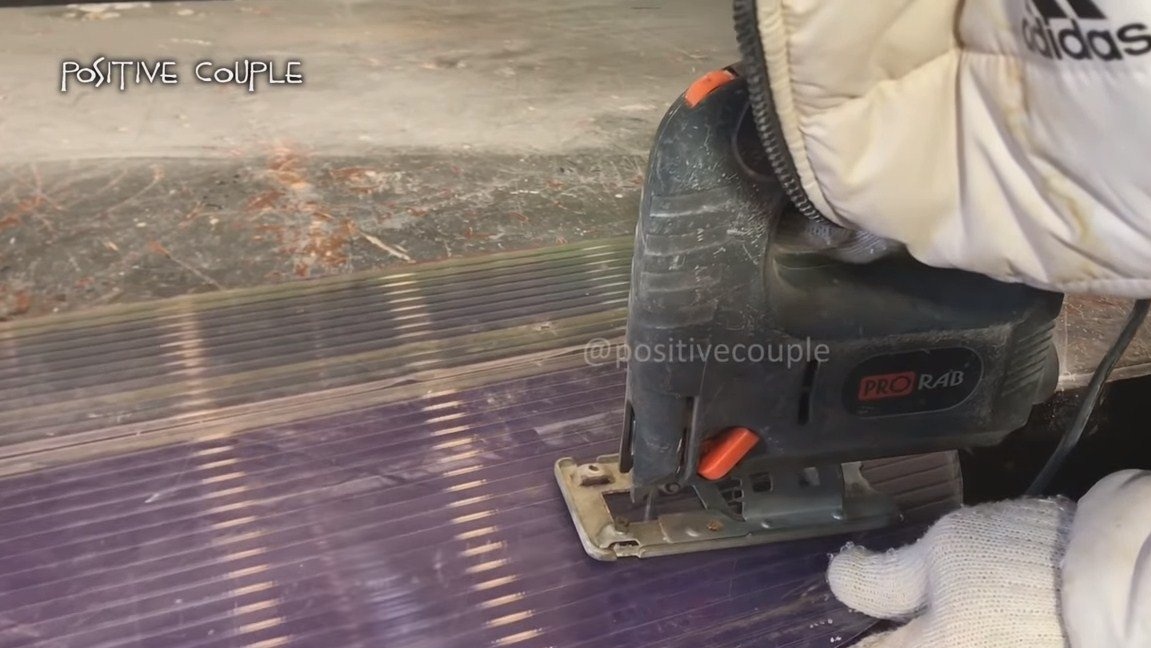
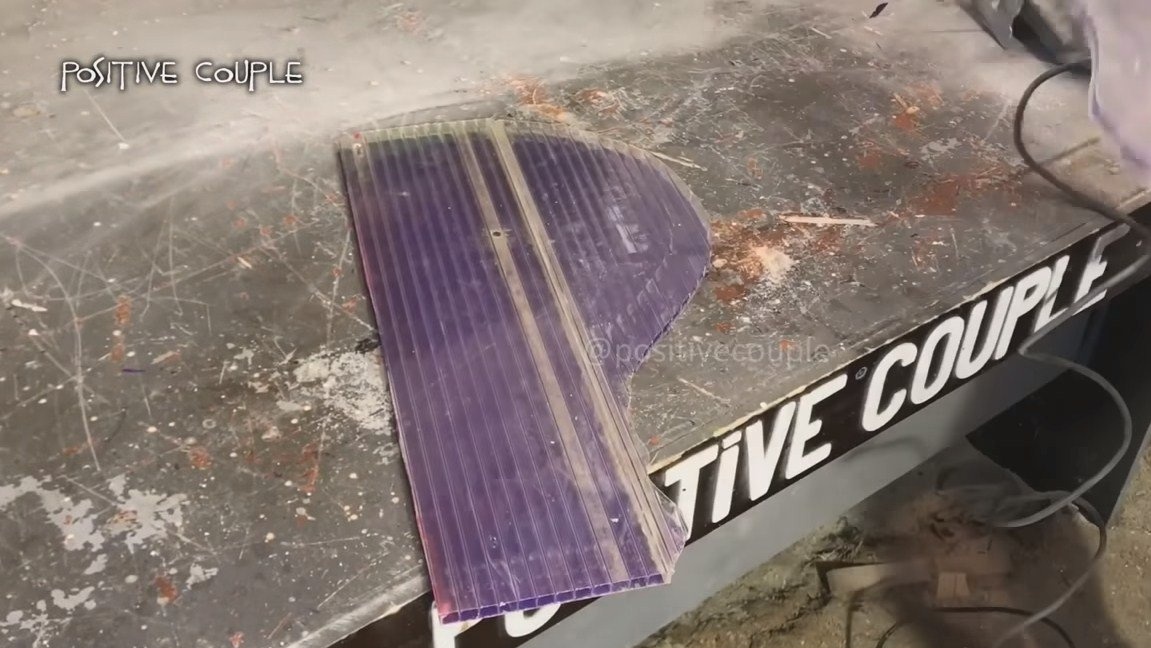
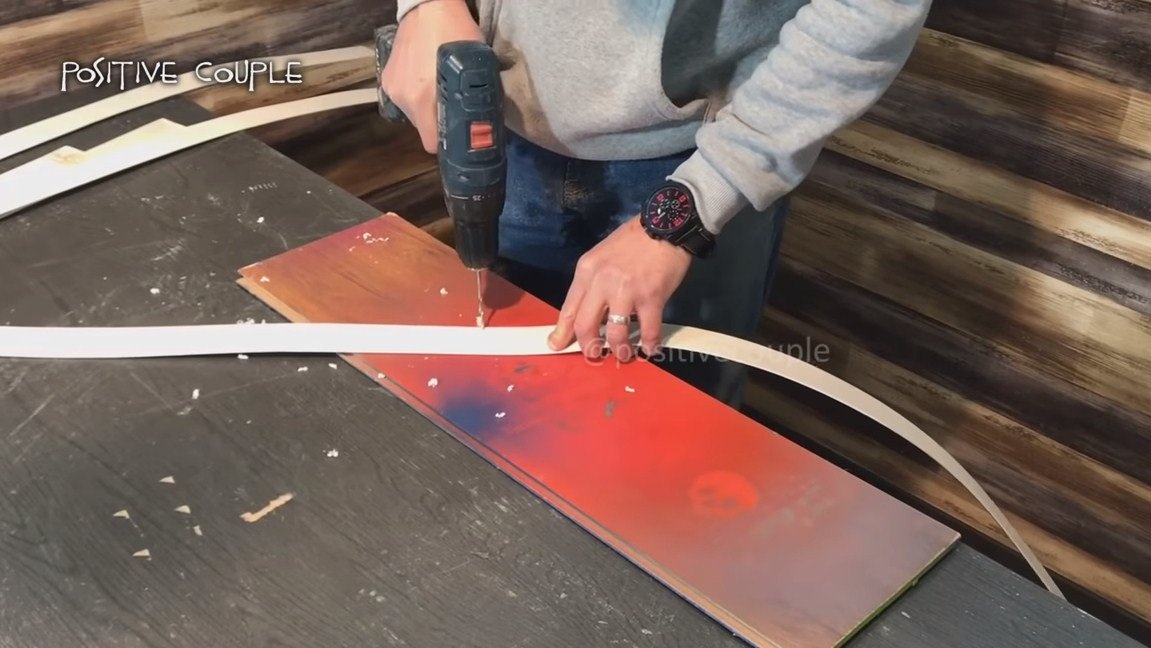
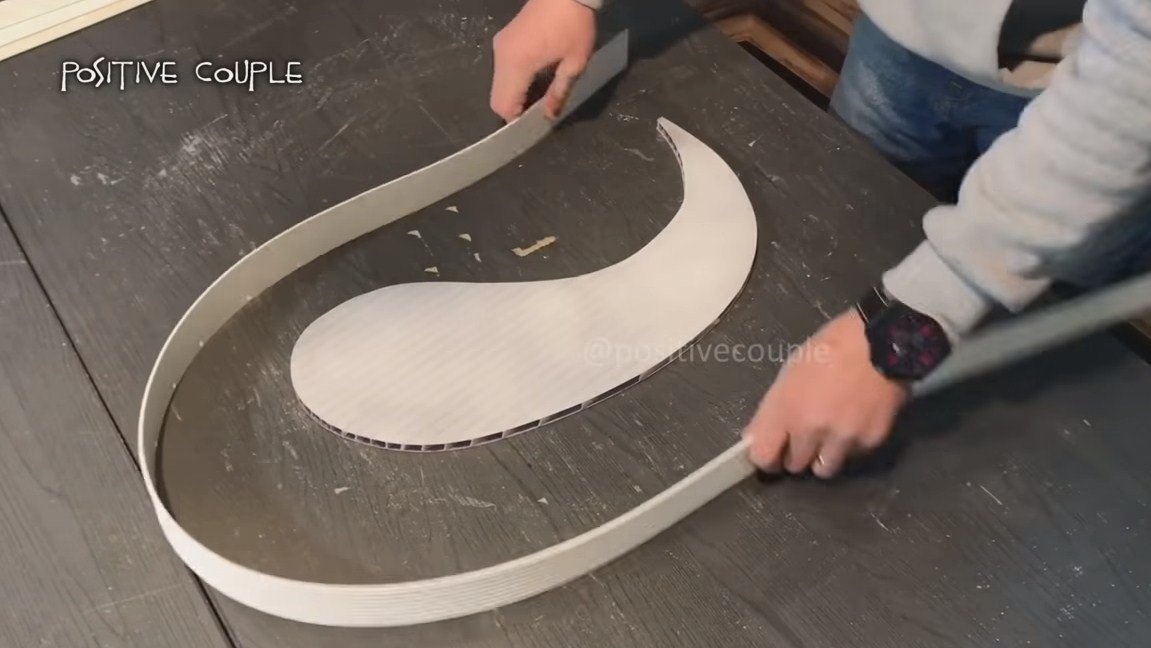
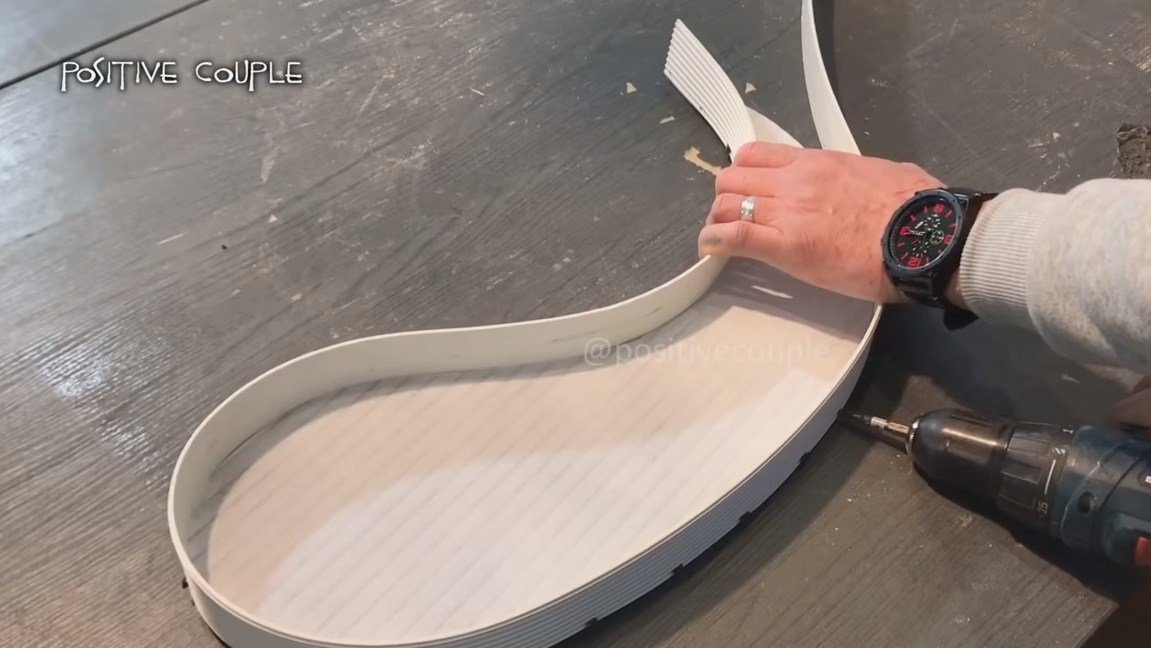
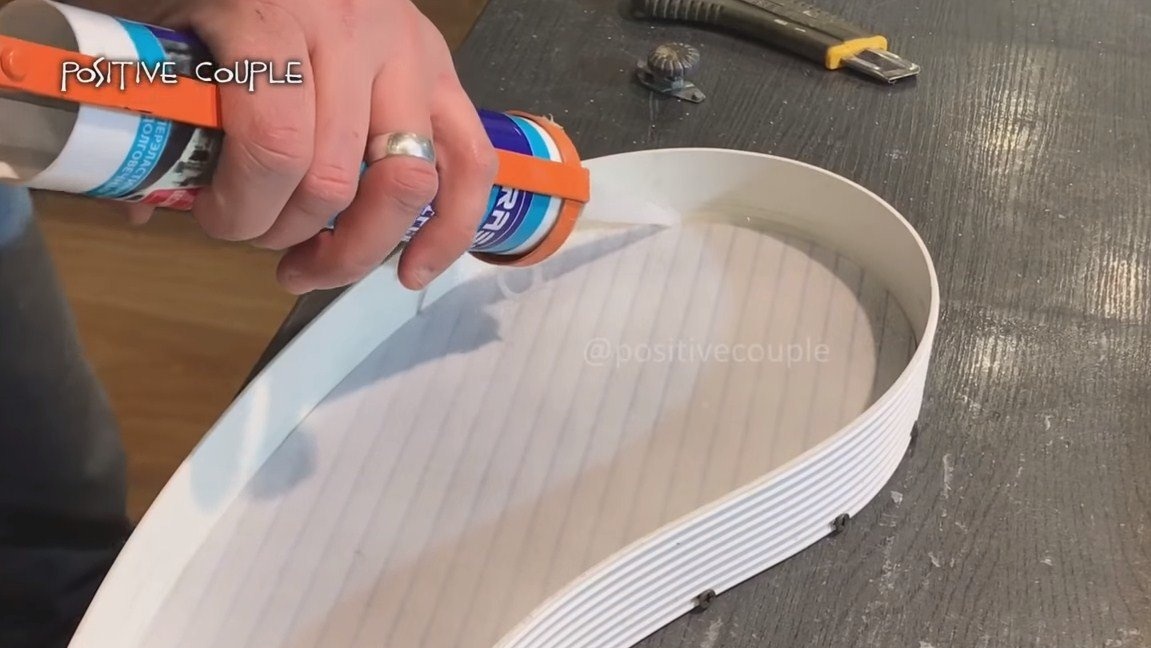
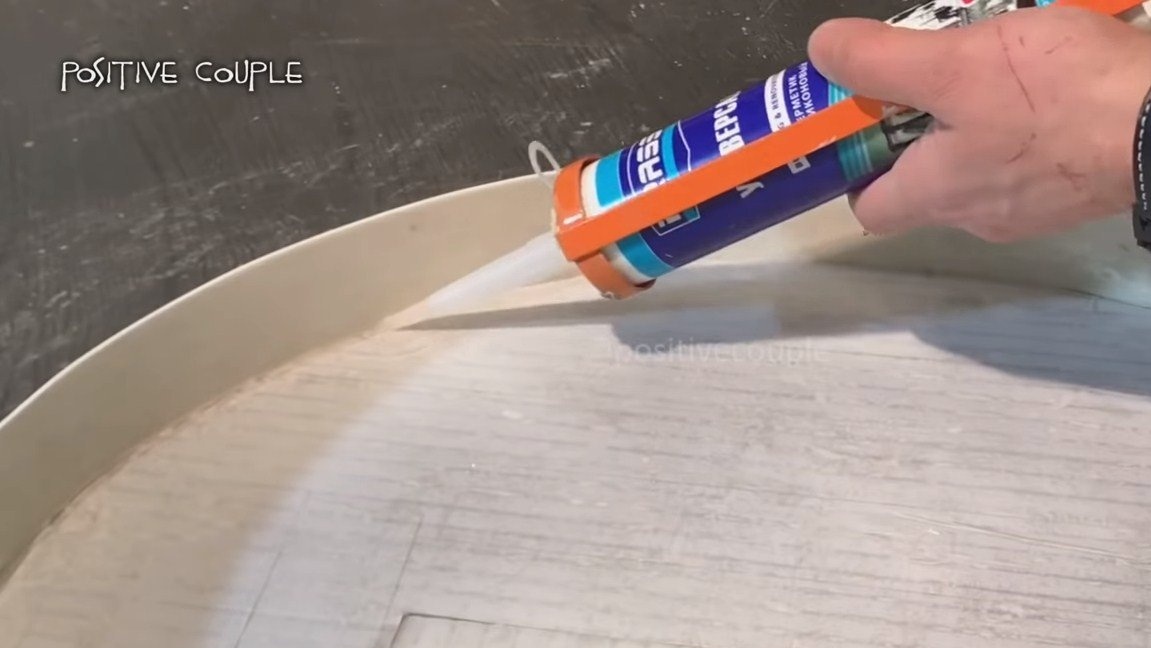
Next, we collect the formwork for pouring, in our case it is polycarbonate. We fasten the material with screws, and seal the joints with silicone, it is cut easily, you can work with a jigsaw.
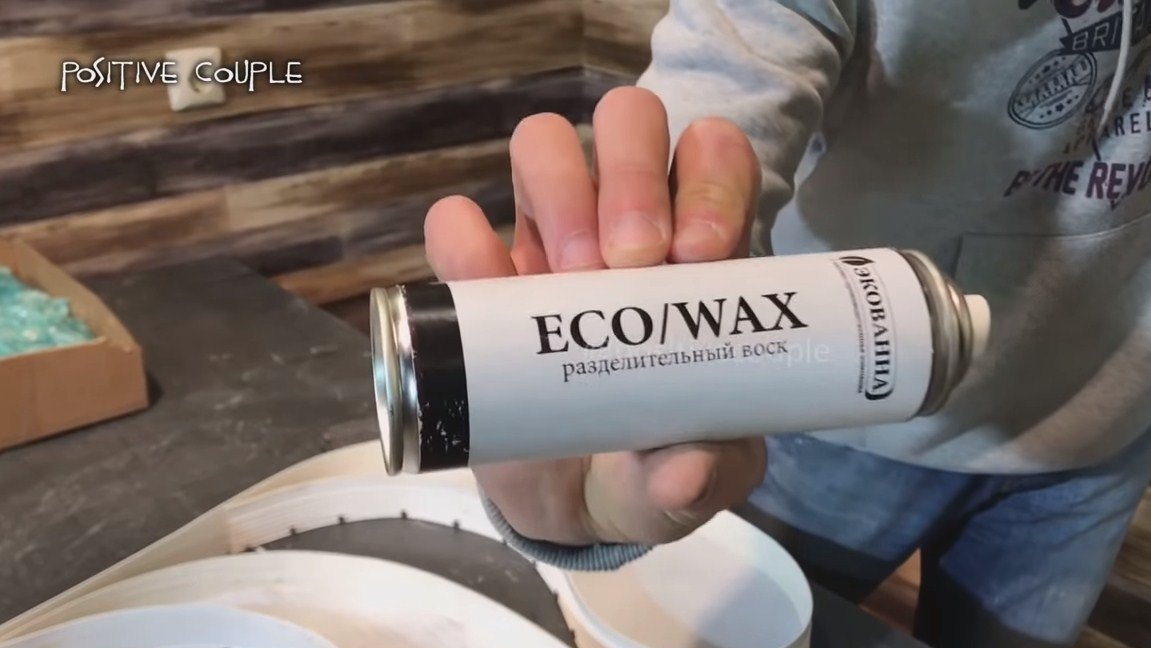
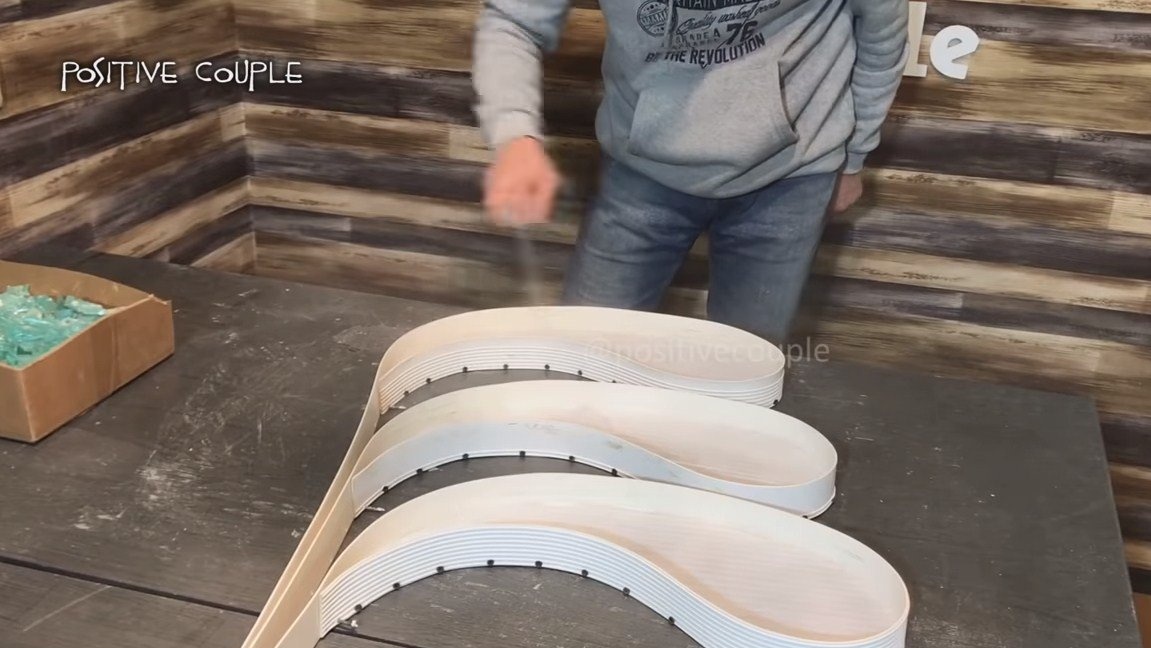
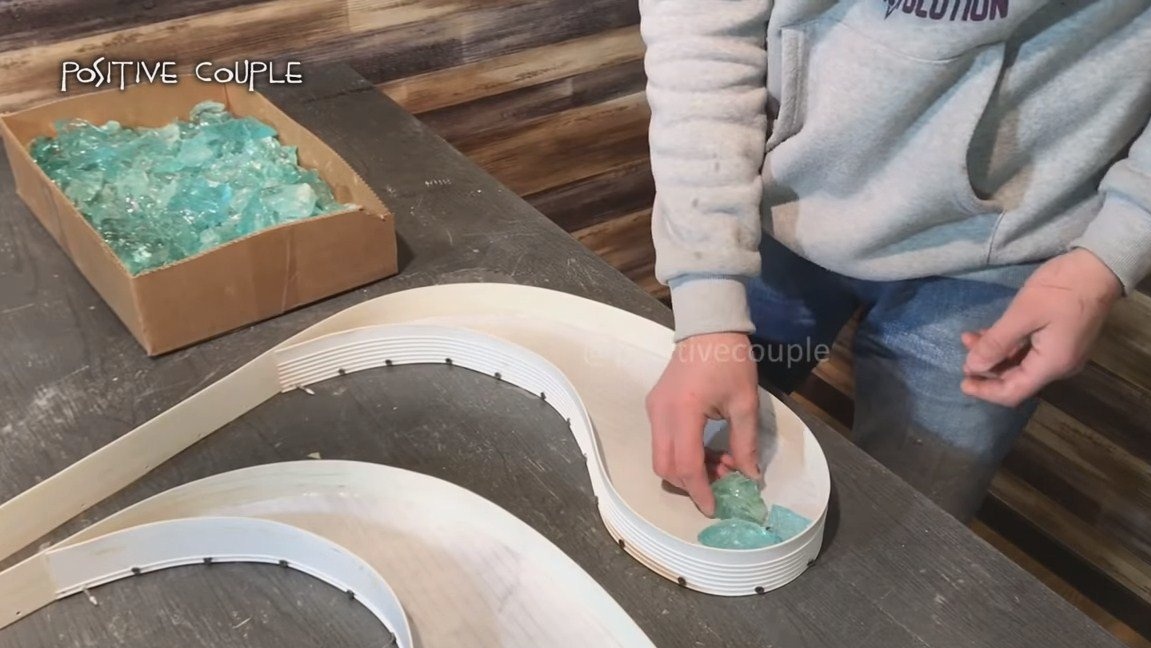
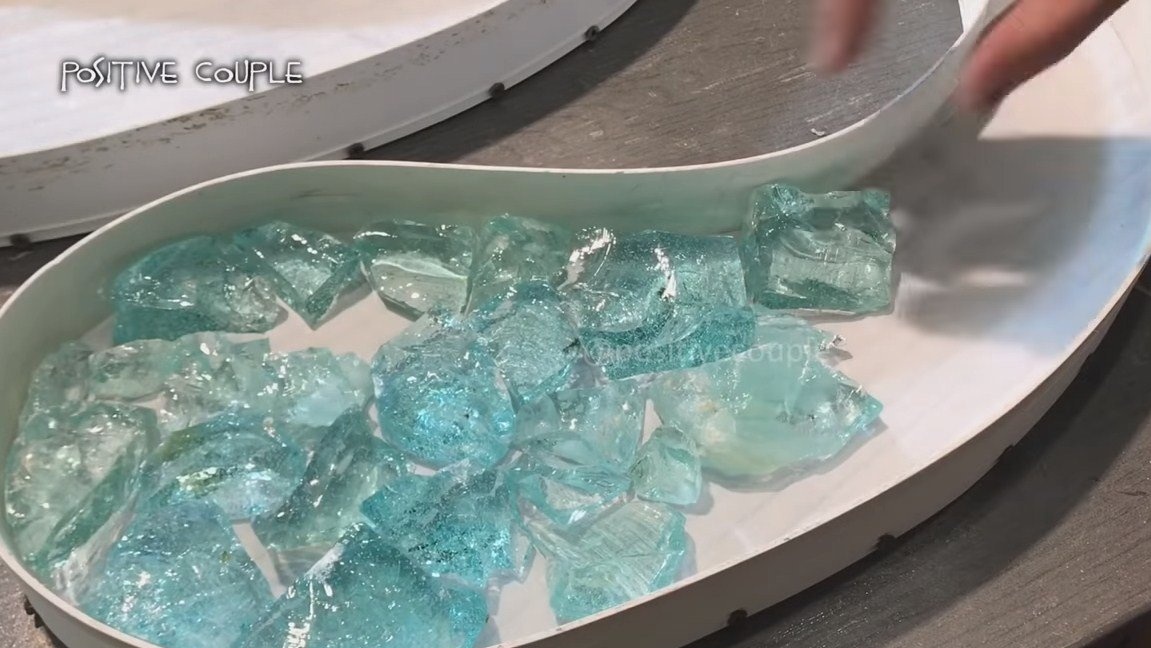
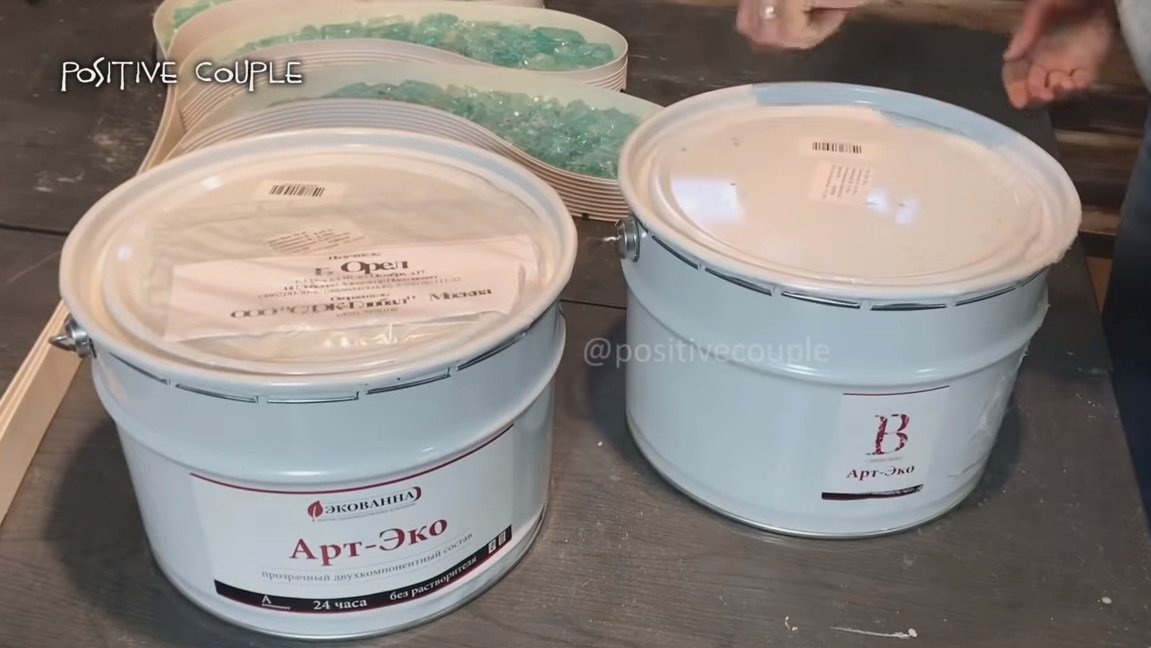
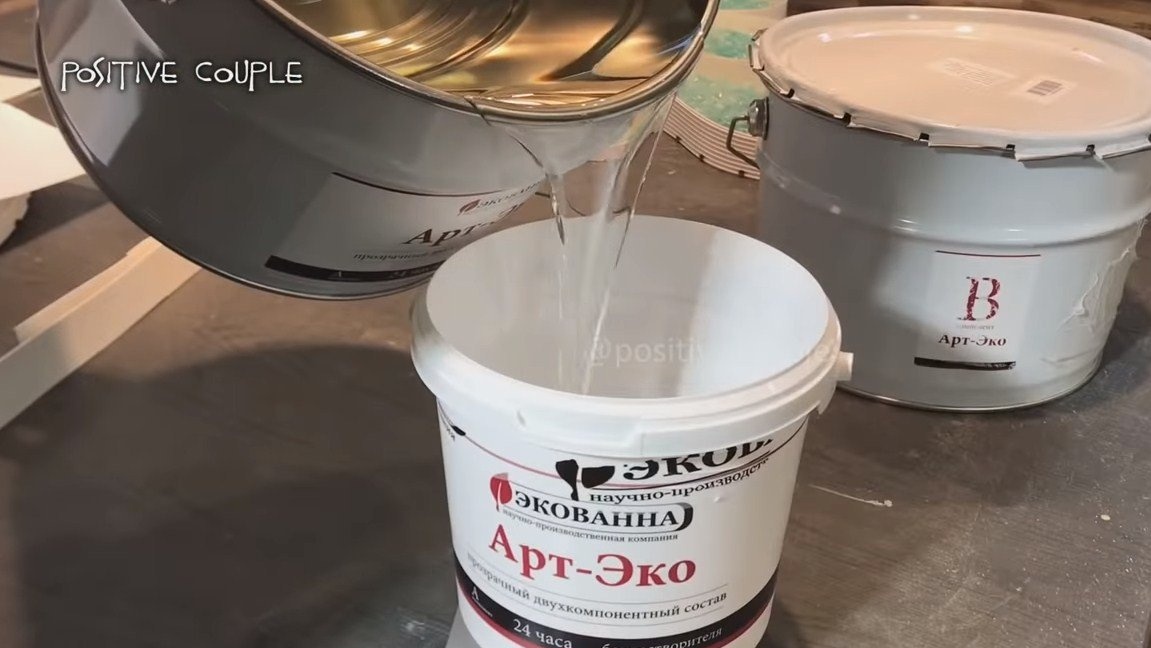
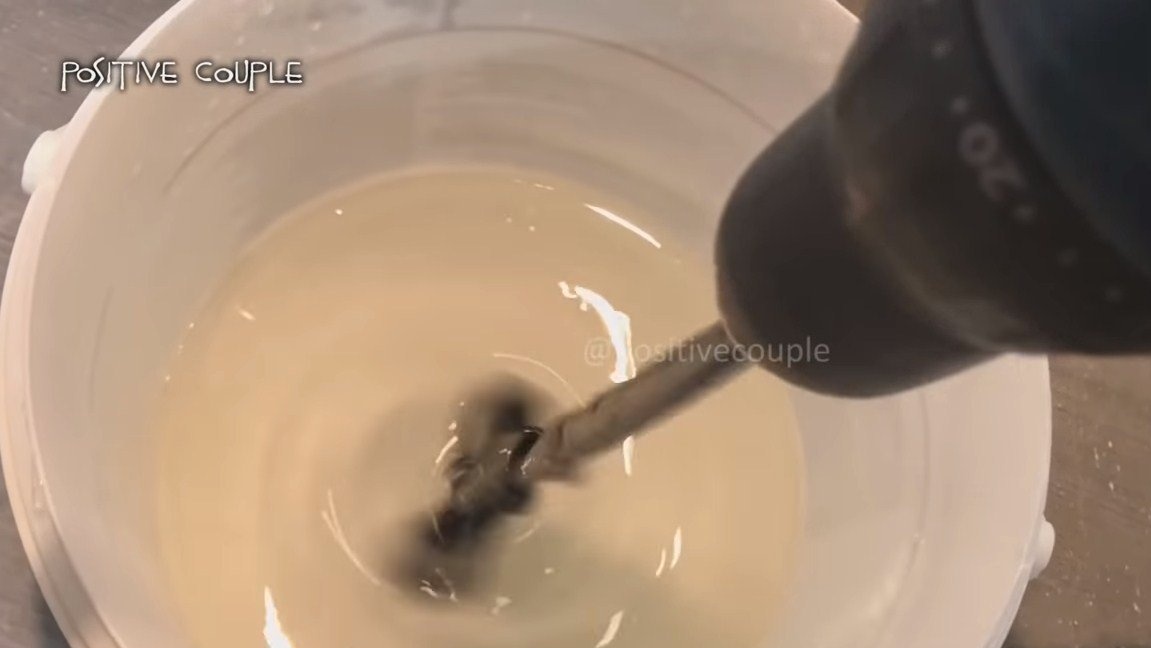
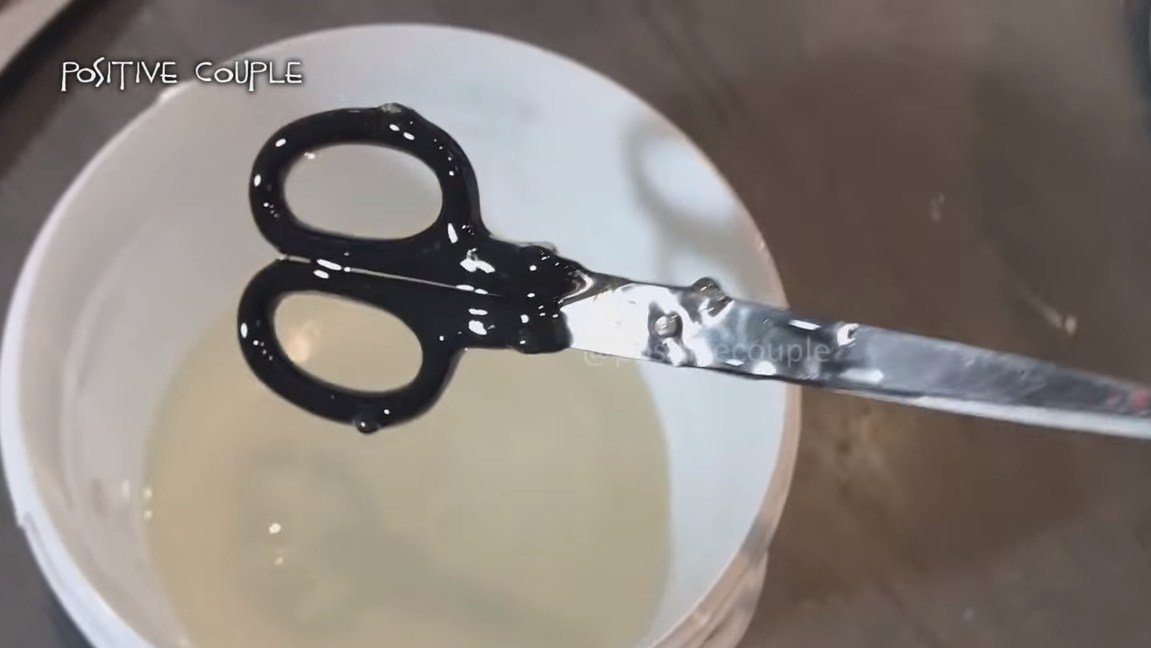
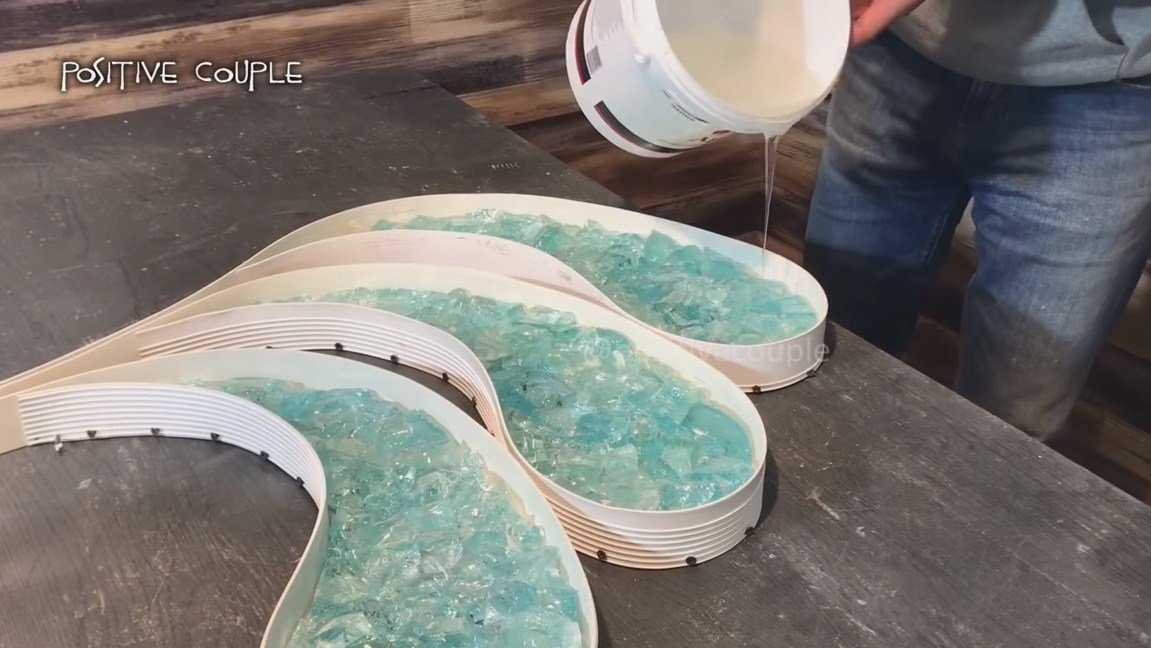
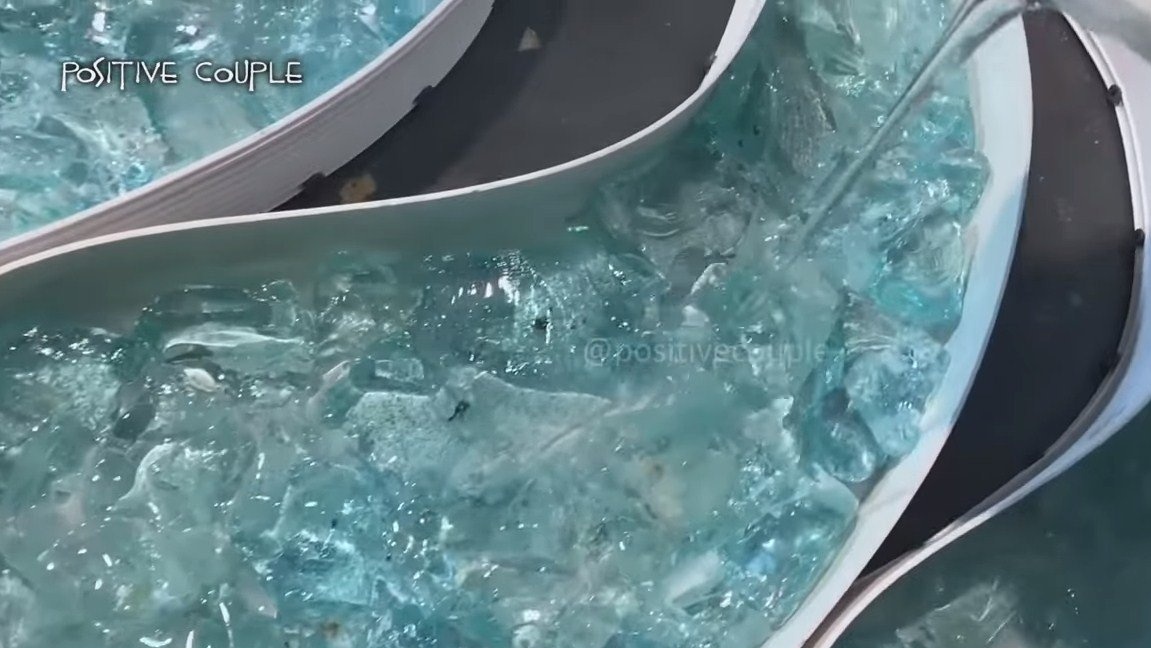
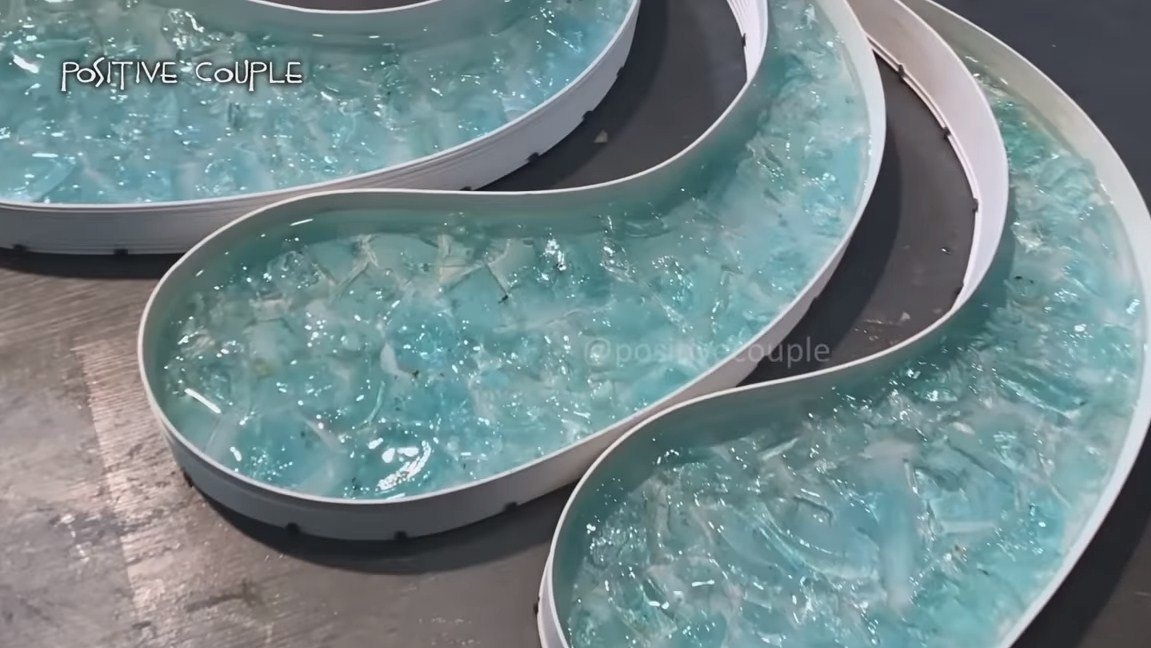
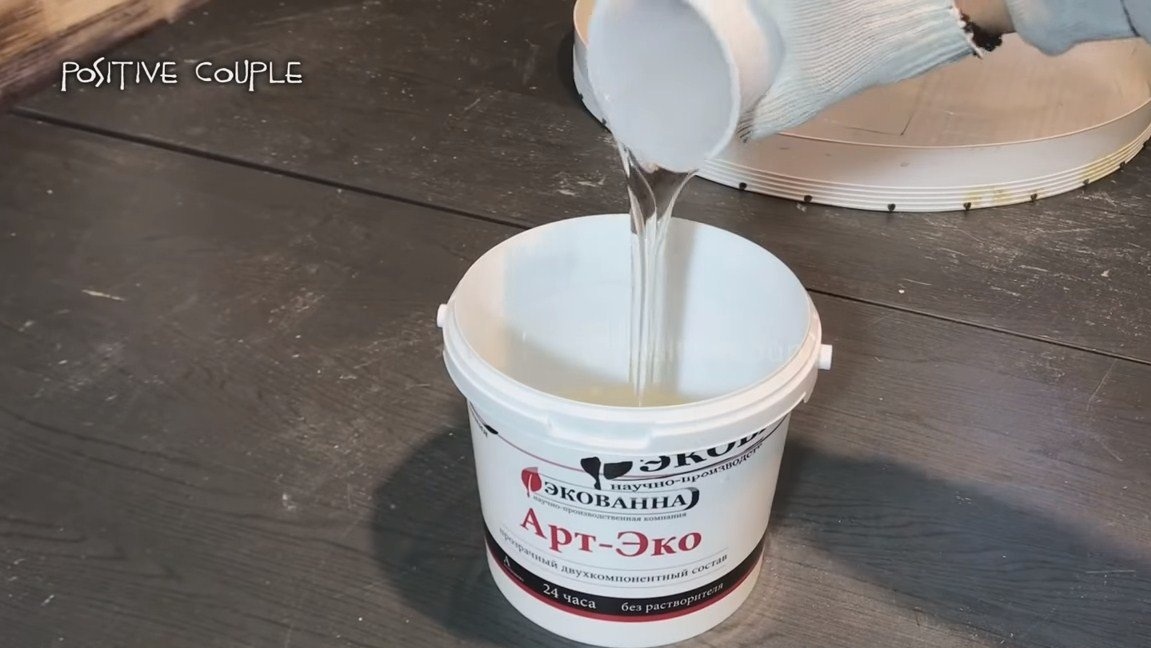
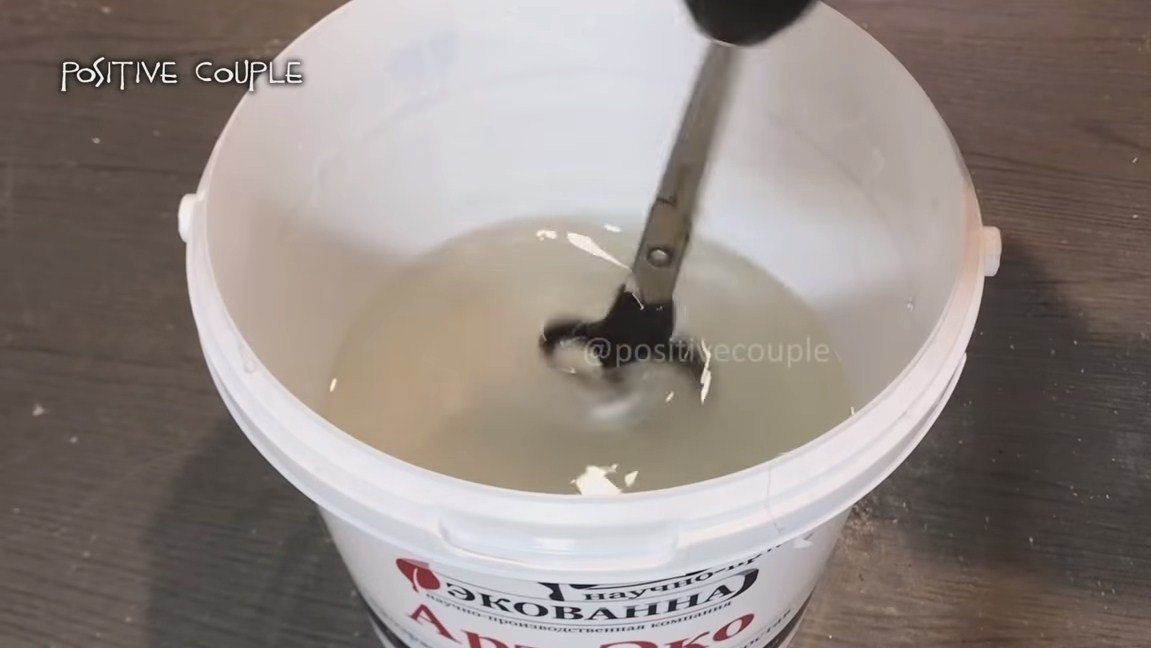
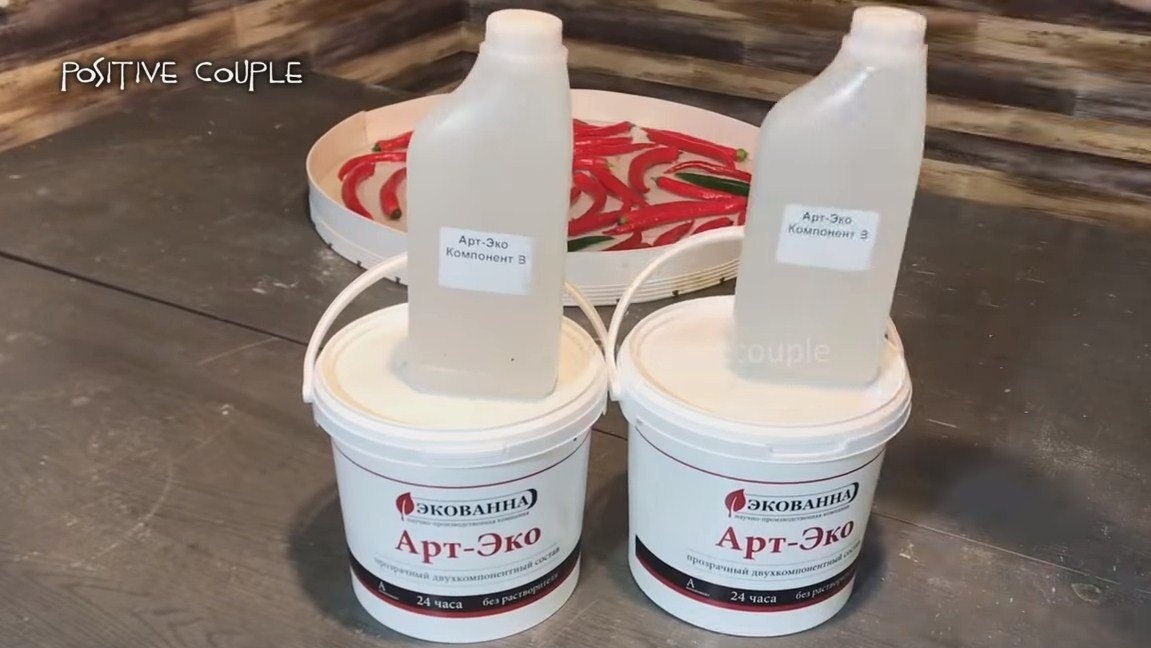
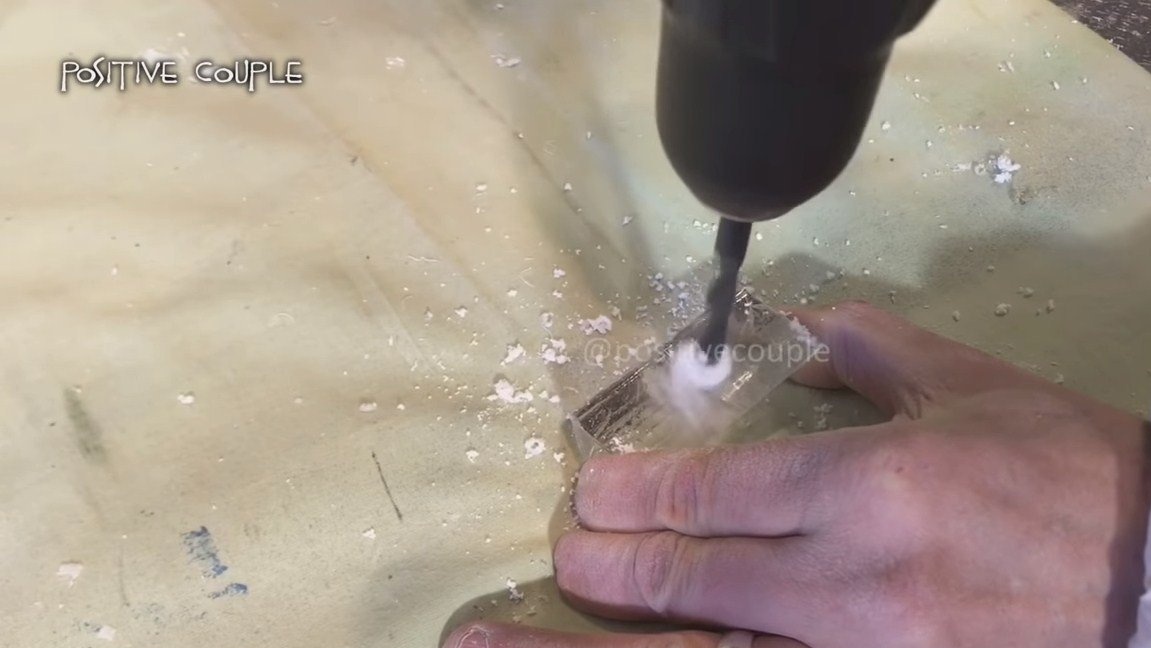
Next, we process the formwork with separation wax so that the resin does not adhere to the material, and pieces of glass can be laid. We will need to cast three legs. Stir the resin with the hardener and fill in the mold. The easiest way to mix a large volume of resin is with a screwdriver with scissors installed. After pouring, let the resin dry for a day, only after that it can be processed.
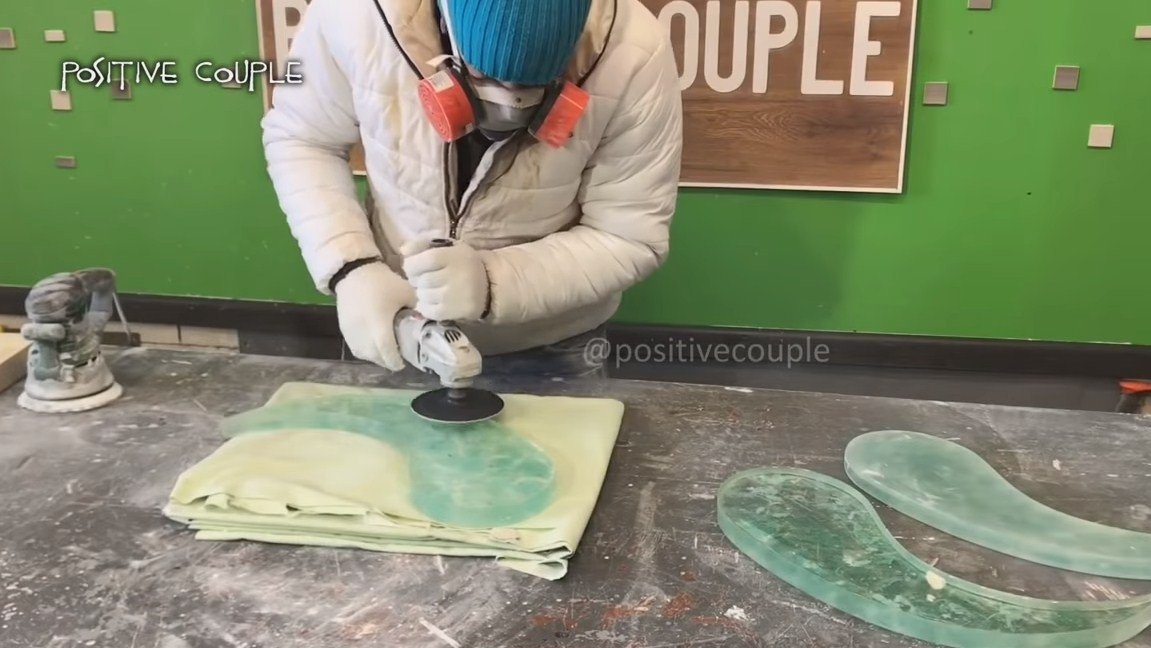
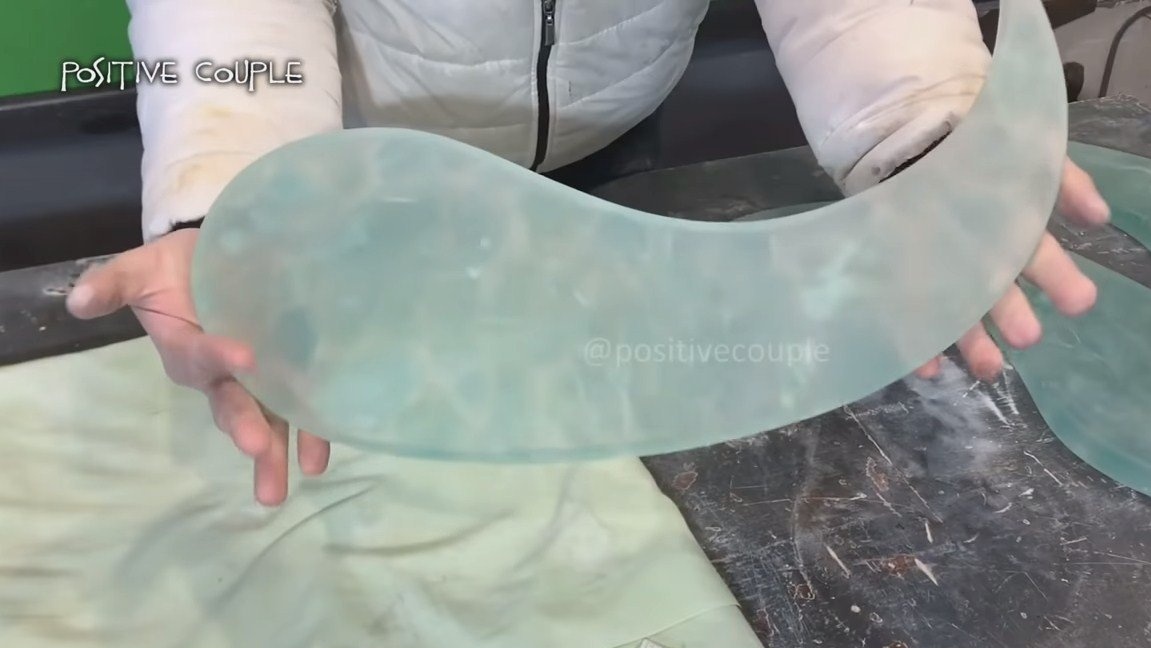
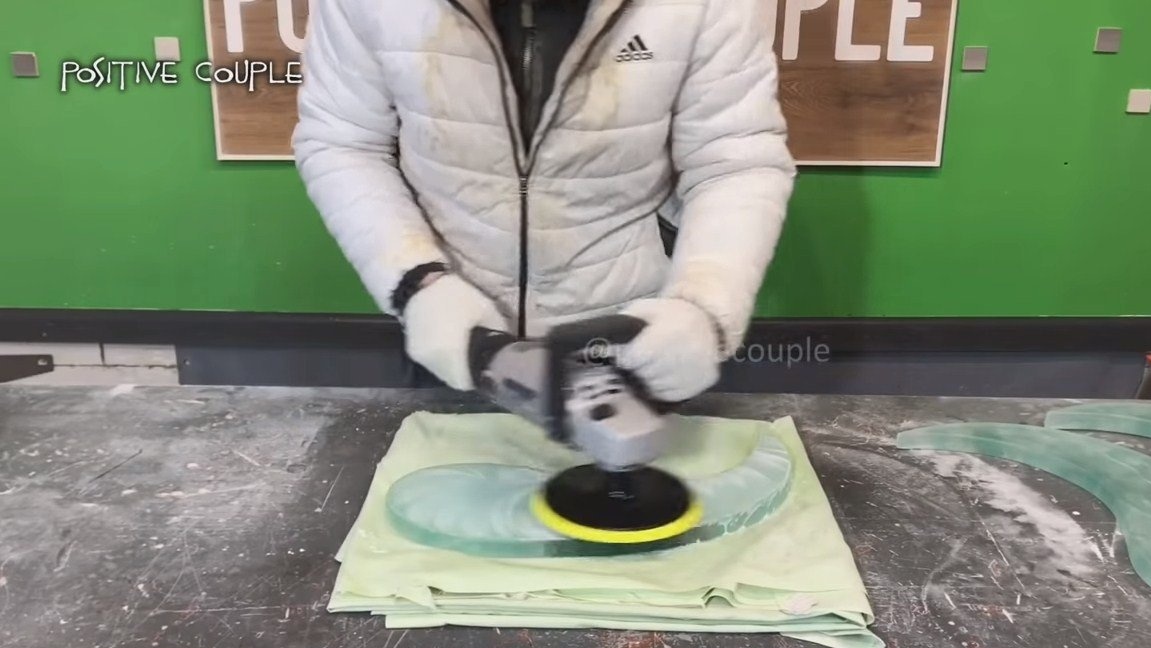
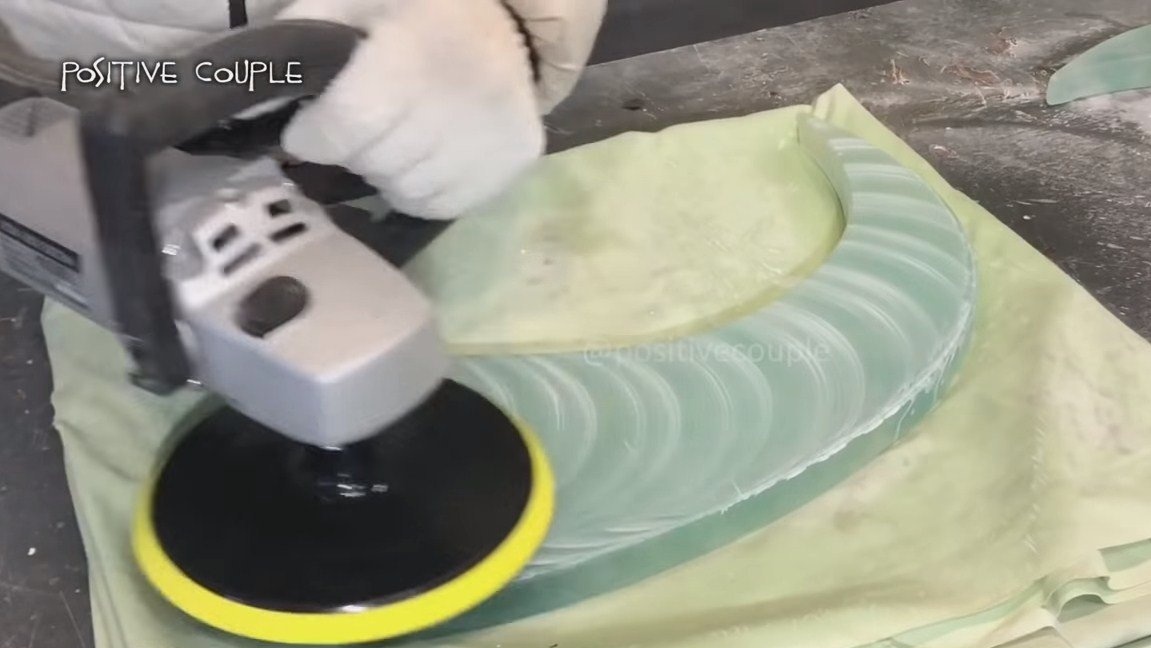
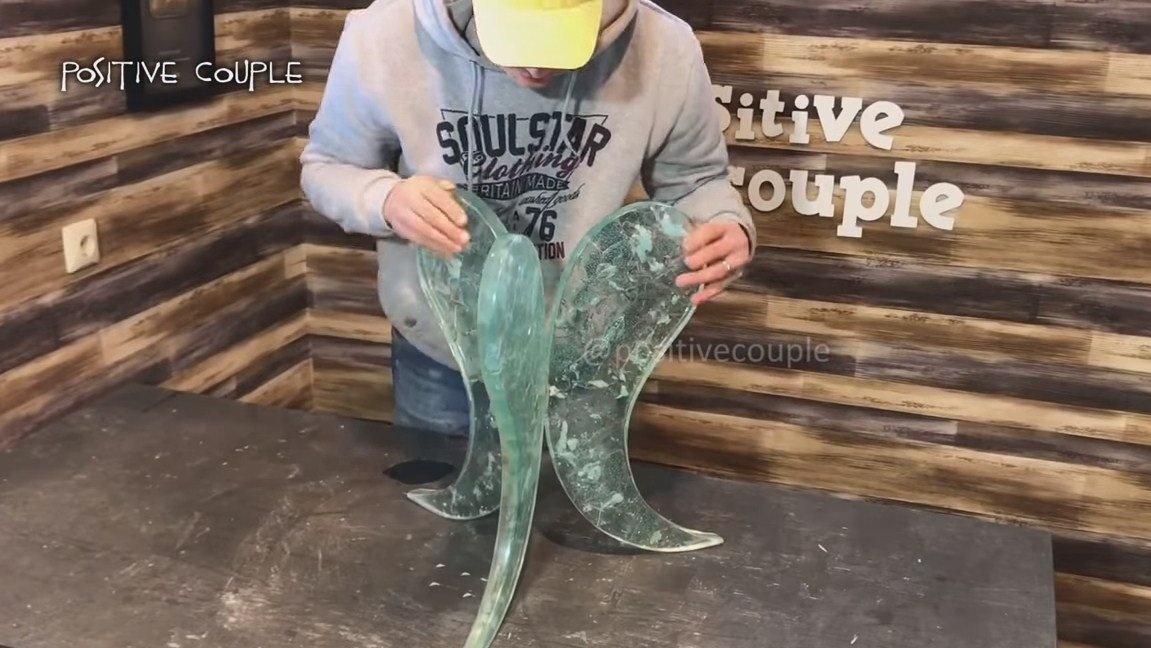
Step Two Leg processing
When the resin hardens, carefully dismantle the formwork and release the legs.Next, grind them with a grinder with Velcro for sandpaper. In the end, the author polishes the legs with polishing paste. As a result, the resin becomes perfectly transparent. The legs look pretty pretty.


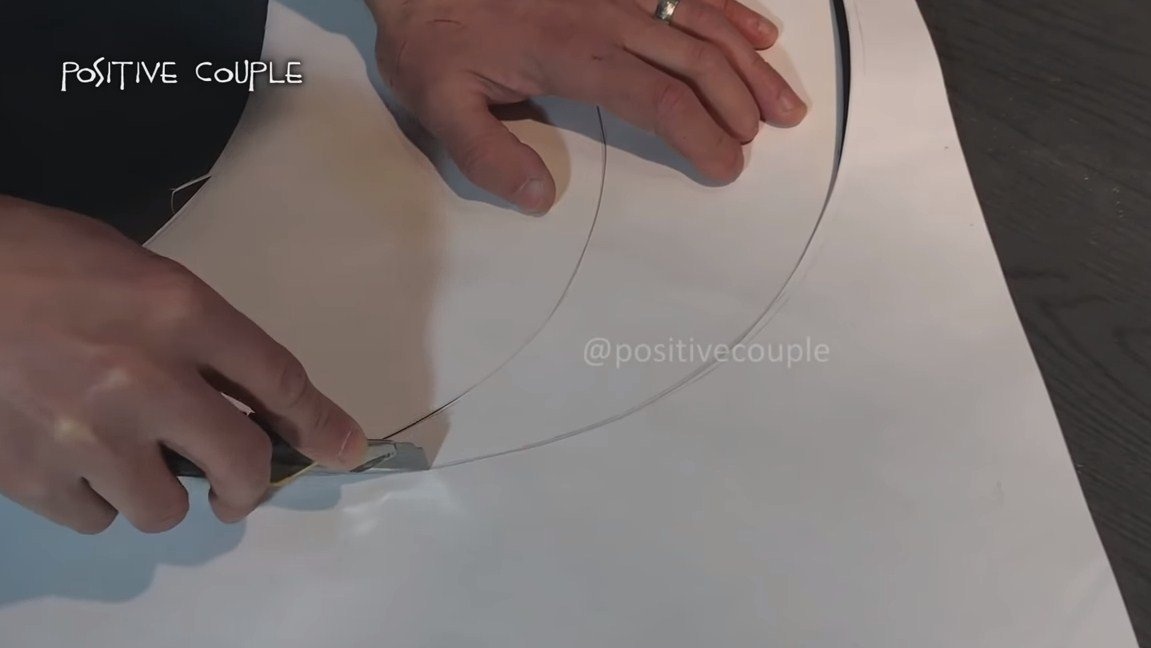
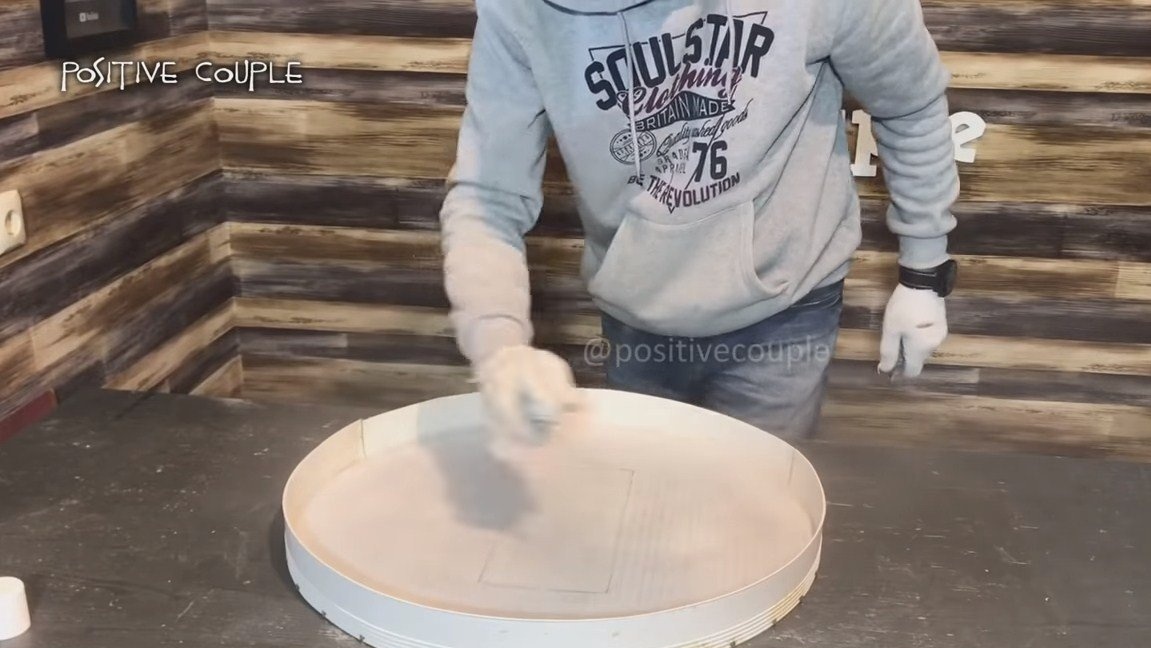
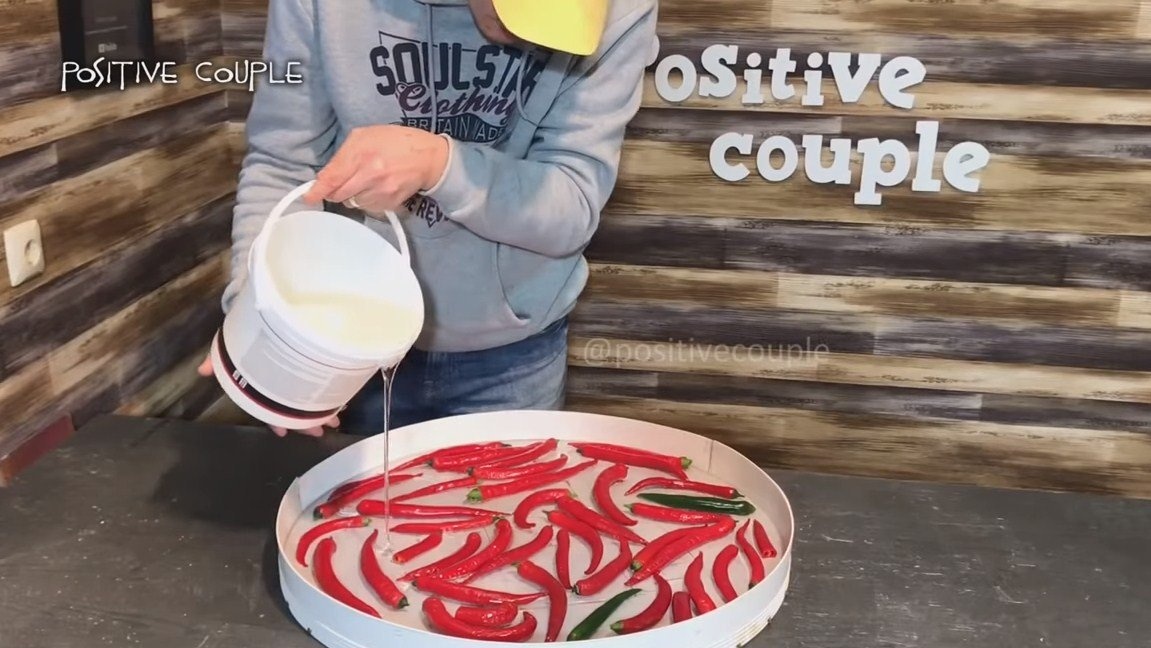
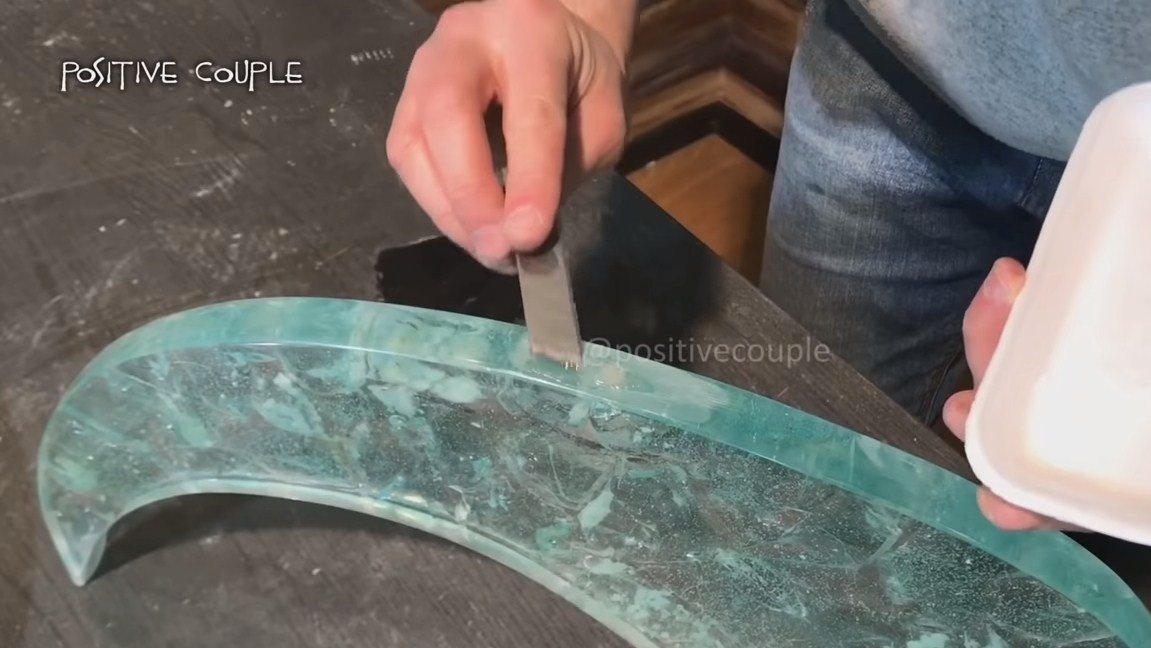
Step Three Fill the countertop
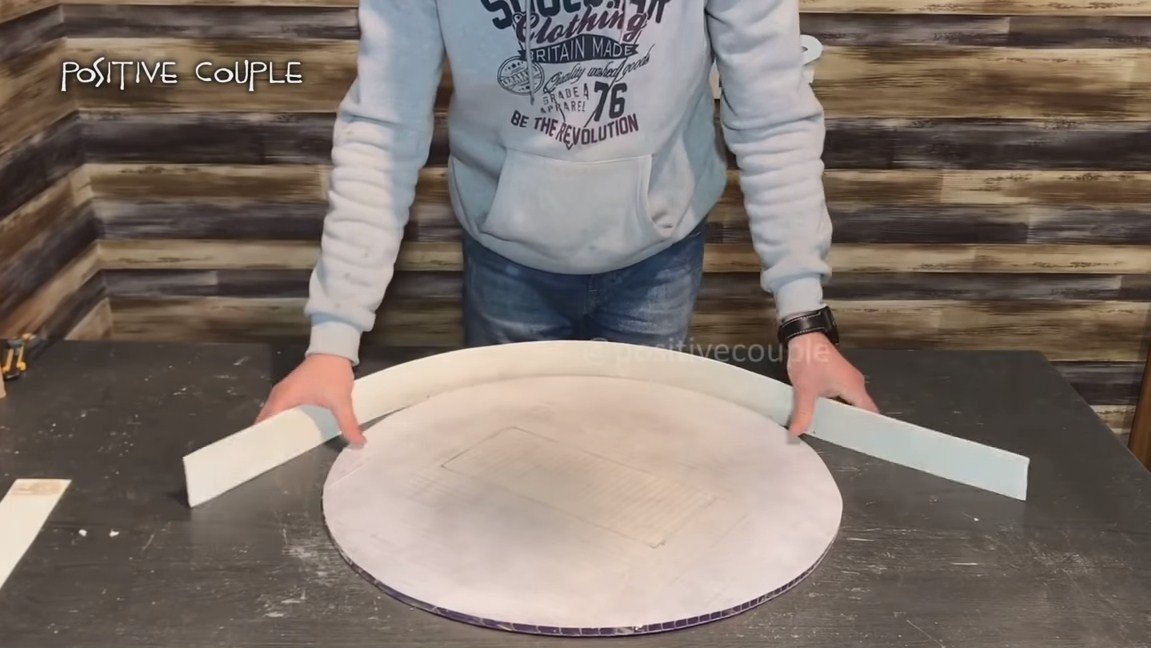
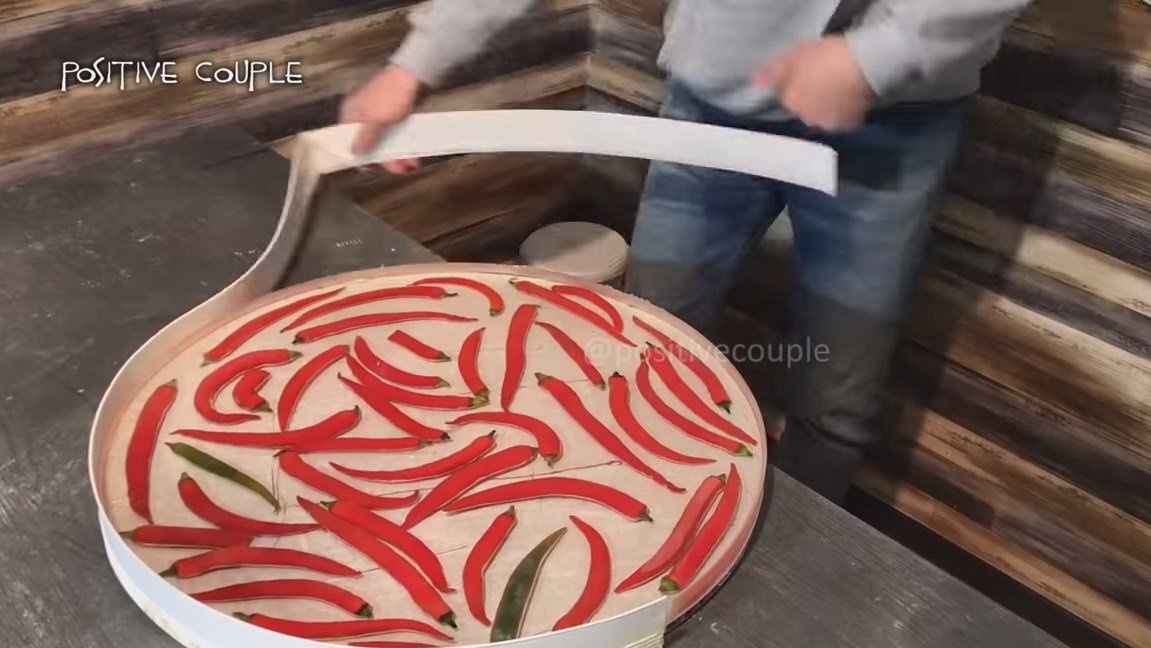
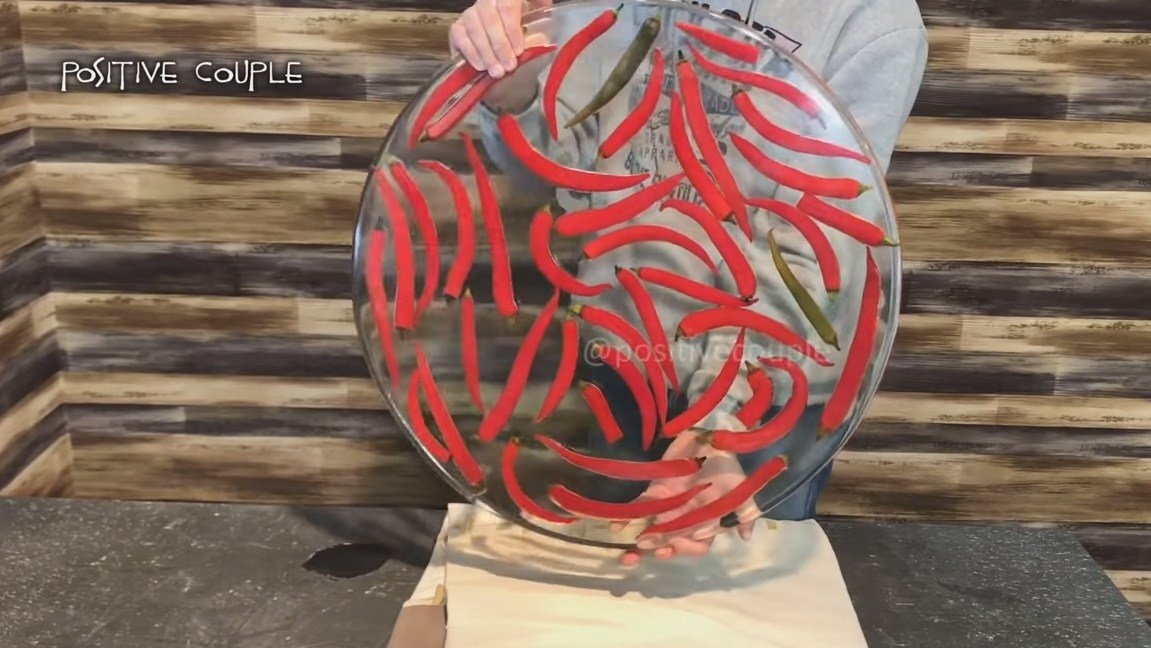
Next, you need to cast the countertop, similarly we collect for it a circular formwork made of polycarbonate, twist it with self-tapping screws, and as a seal we pass along the joints with silicone. Do not forget that the epoxy is quite fluid, it easily seeps through such crevices where even water can hardly pass. Do not forget to use a separating wax so that the resin does not adhere to the formwork.
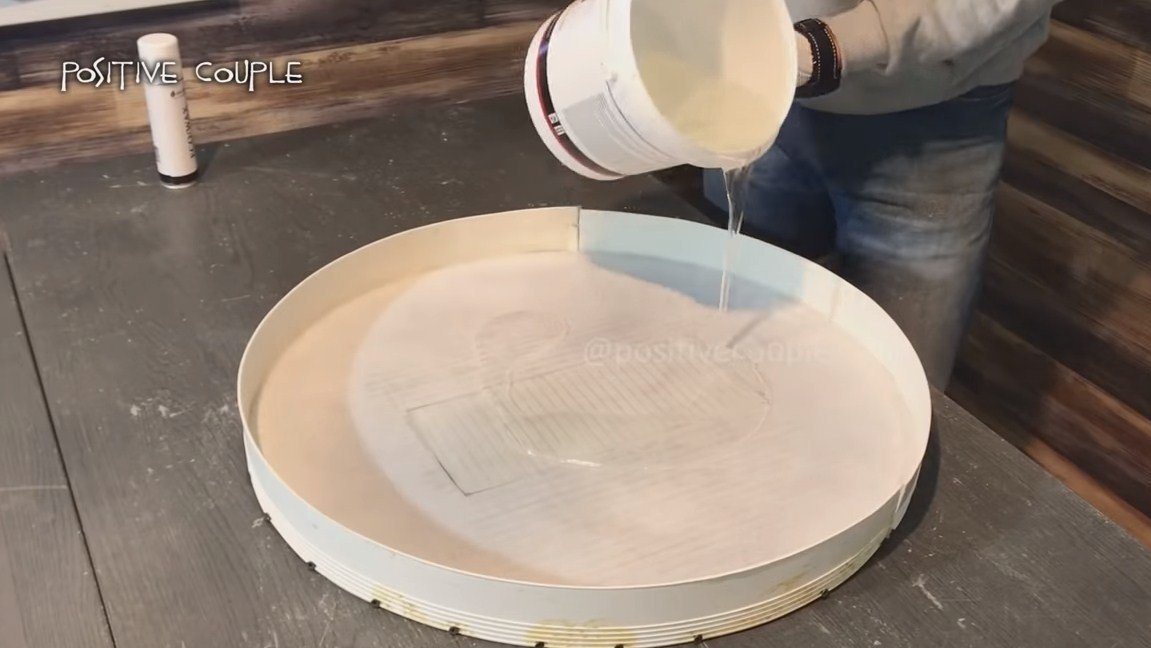
Fill the first layer and go through it with the corrector to get perfect transparency.
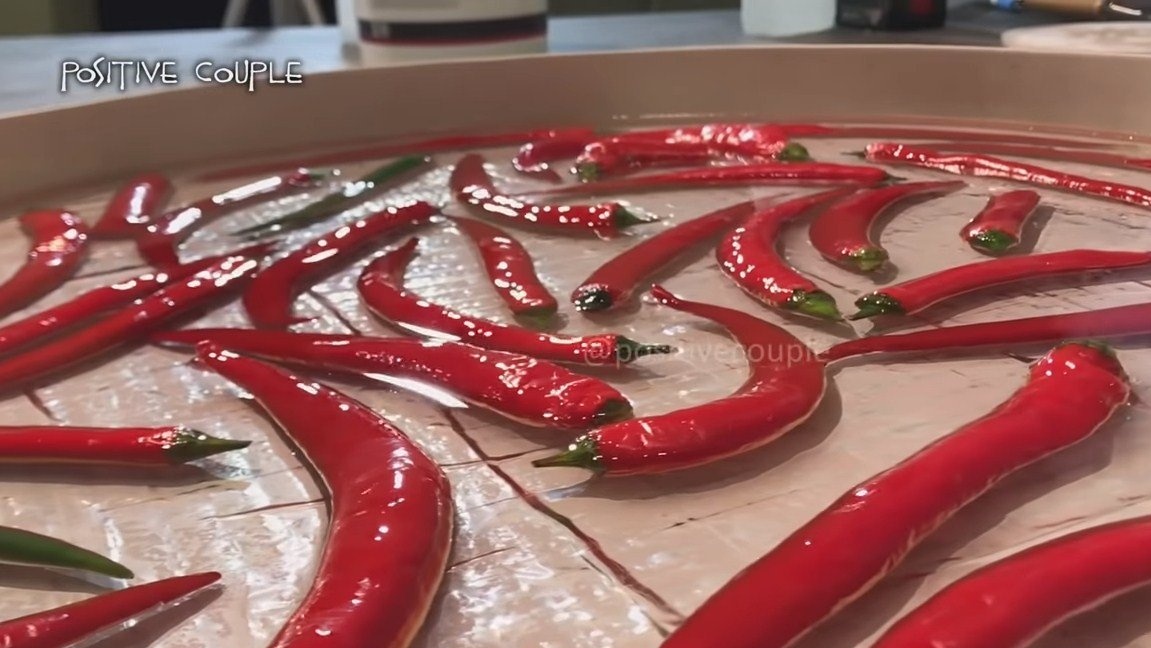
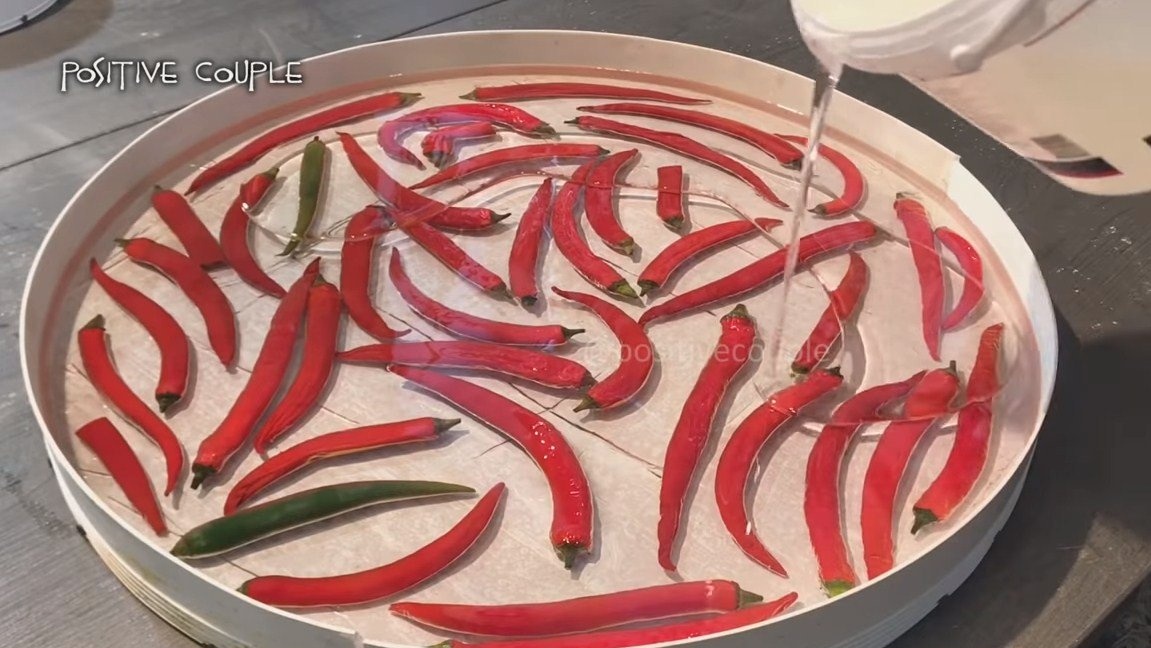
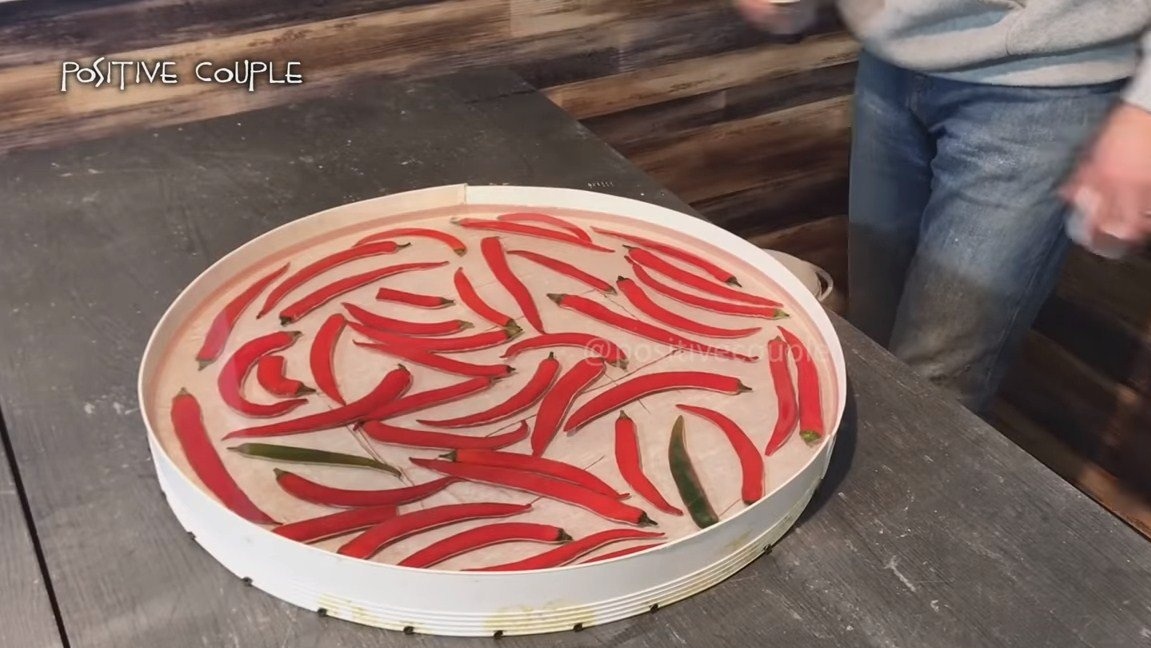
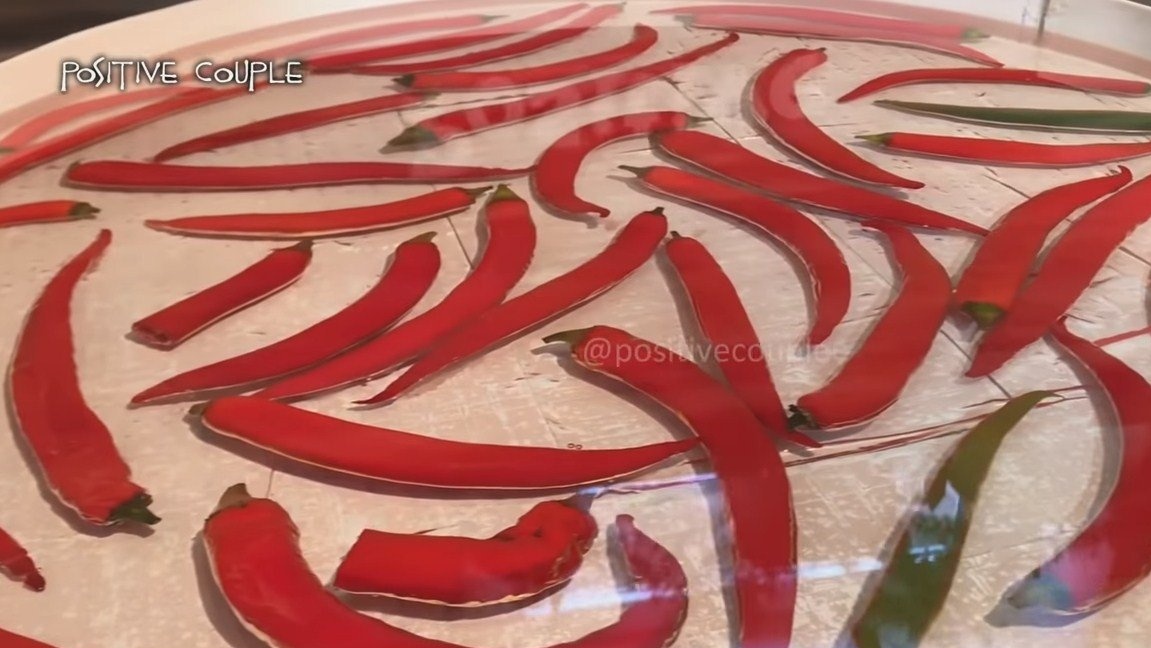
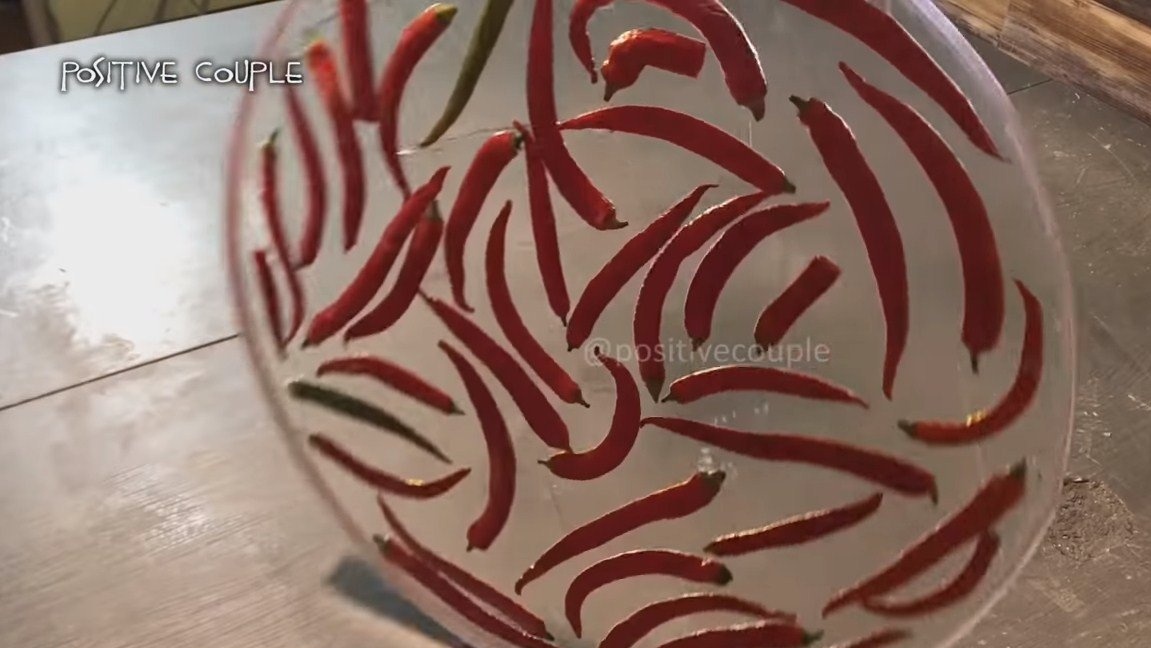
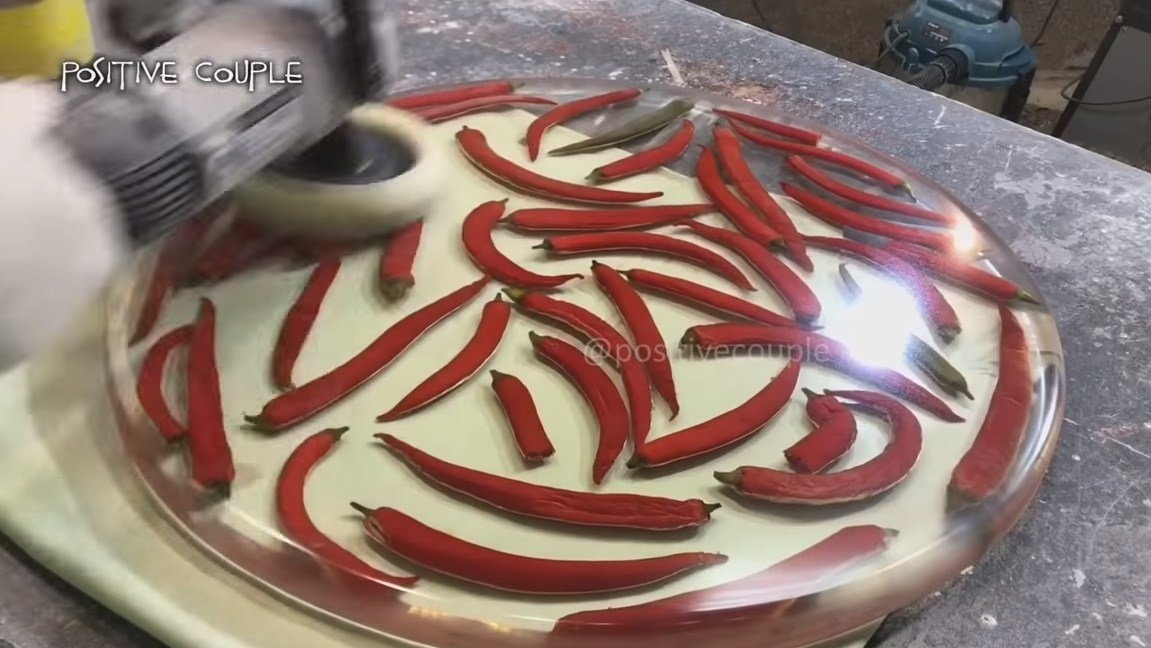
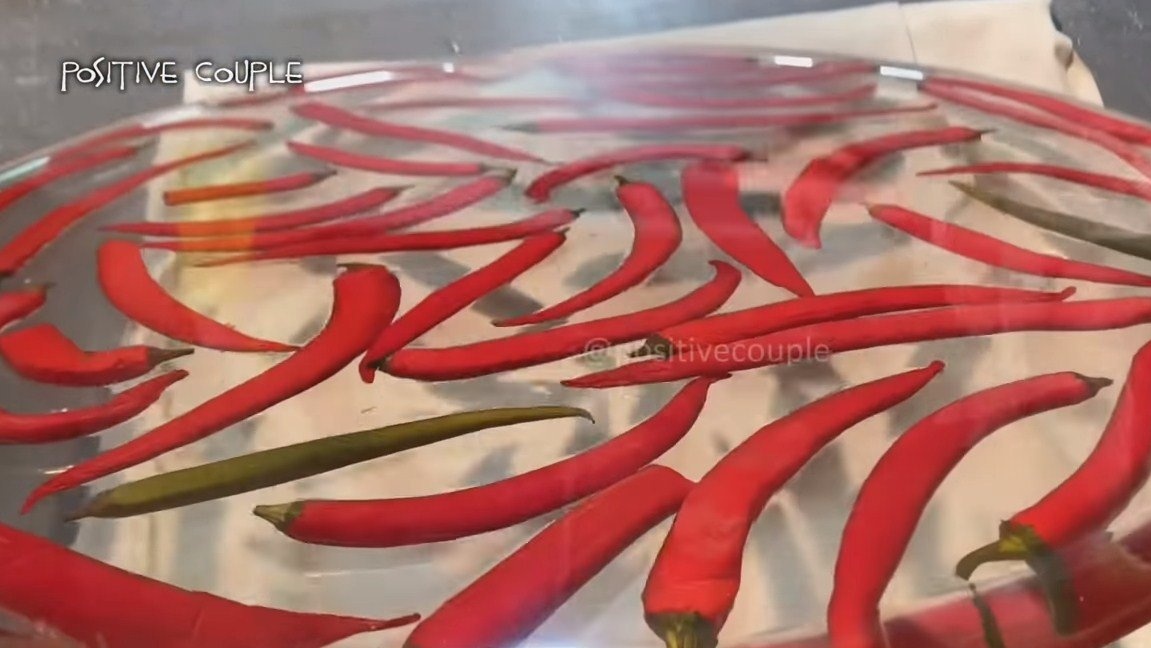
Further, when the first layer sets, you can lay the pepper. However, this can be done immediately after filling the first layer. The author chose raw pepper, judging by his appearance. In epoxy, raw pepper should remain normal, except that the color saturation may slightly change.
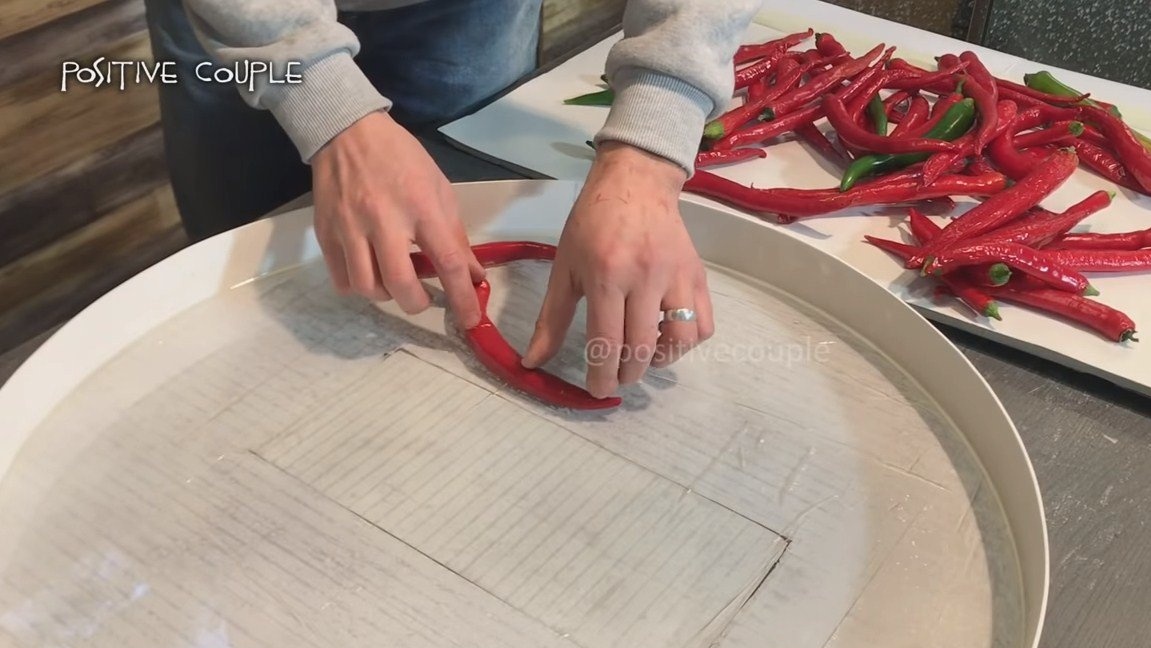
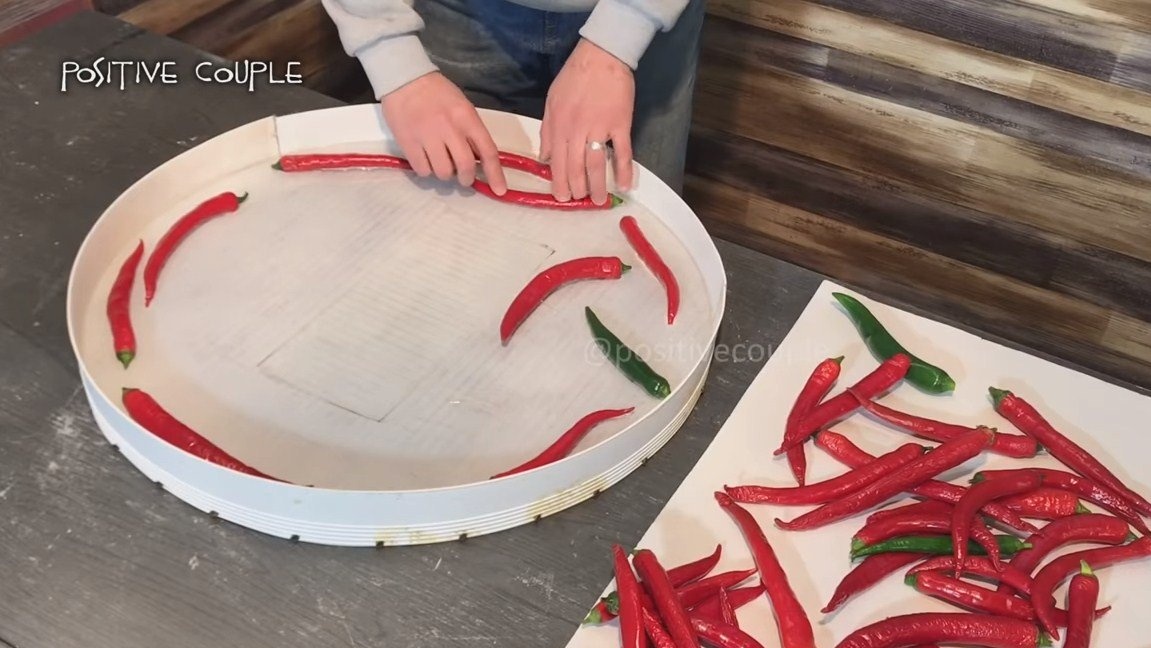
As soon as the pepper is laid, fill in the next layer, the resin must be poured so much so that the pepper can not emerge. We leave this whole thing to dry for 24 hours and then fill the next layer. Always between each new layer must be kept at least 24 hours.


Step Four Finish the countertop
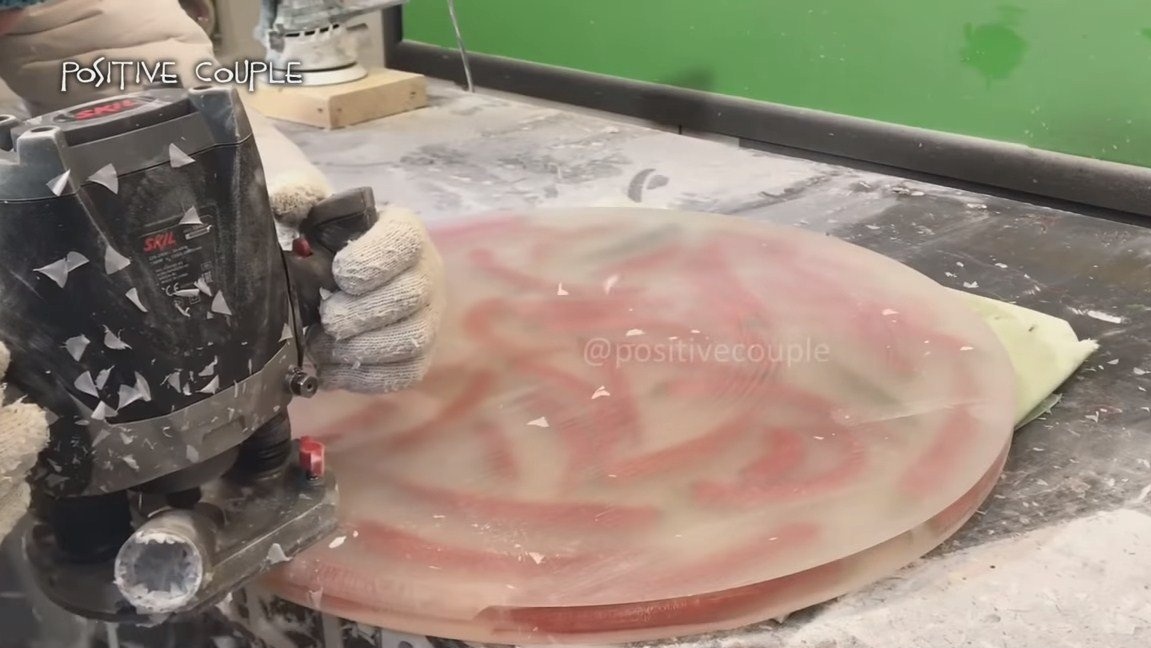
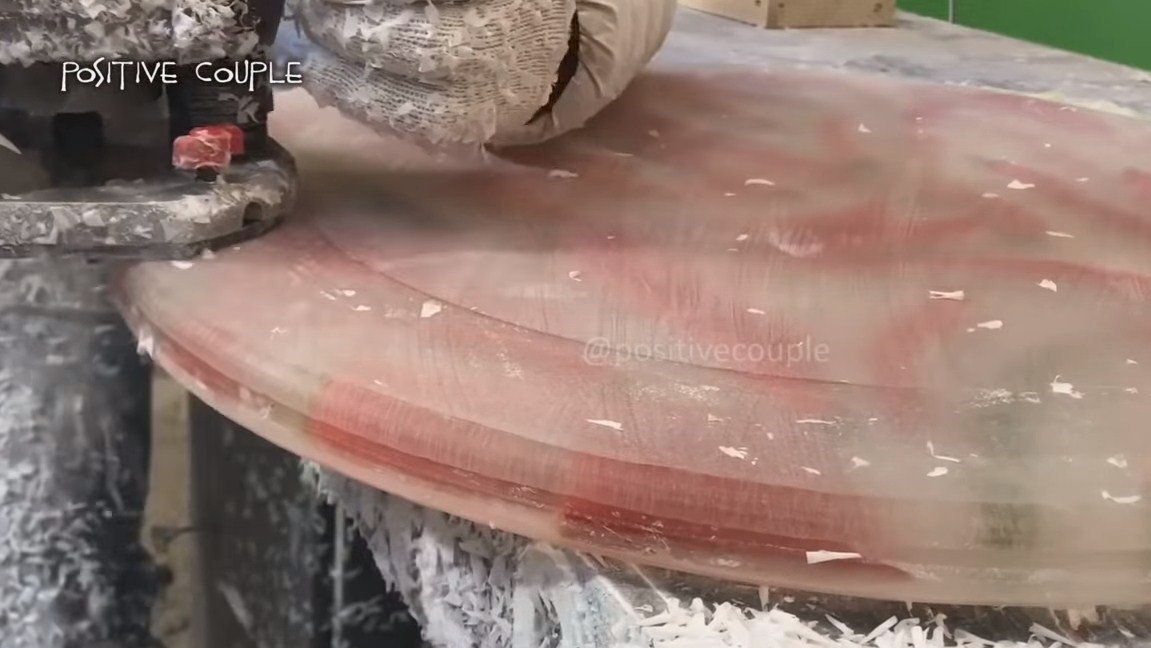
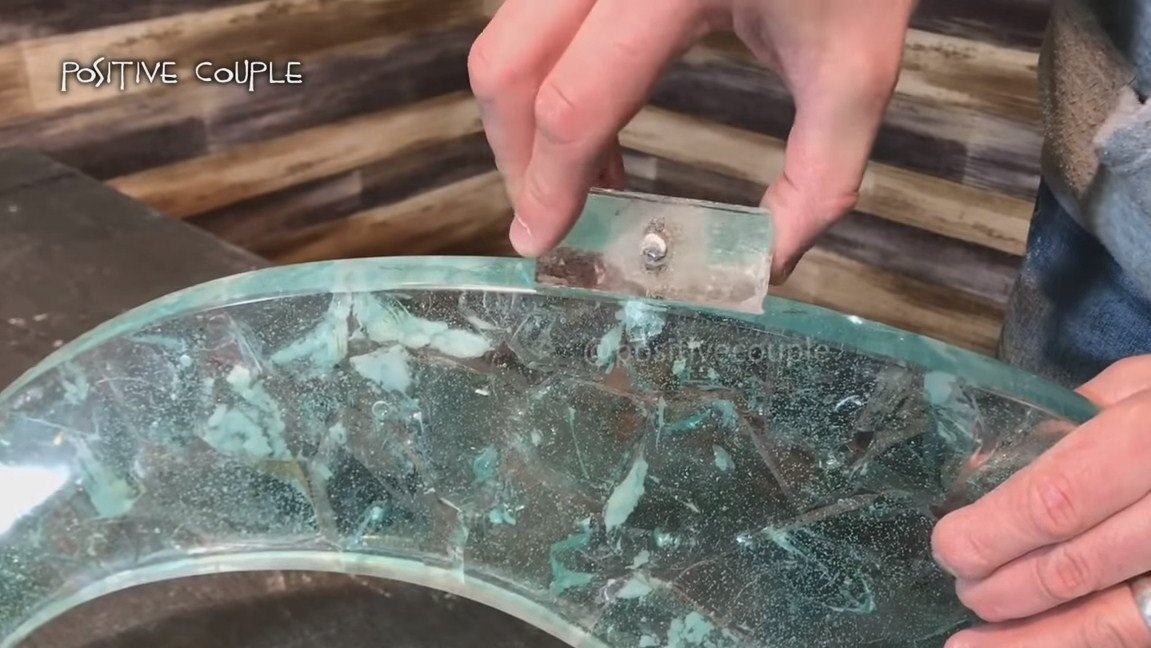
When the countertop dries, we grind it well with a grinder with a disk nozzle. Gradually set the emery paper smaller and smaller. We go around the circle with a milling cutter to give the edges a rounded shape.
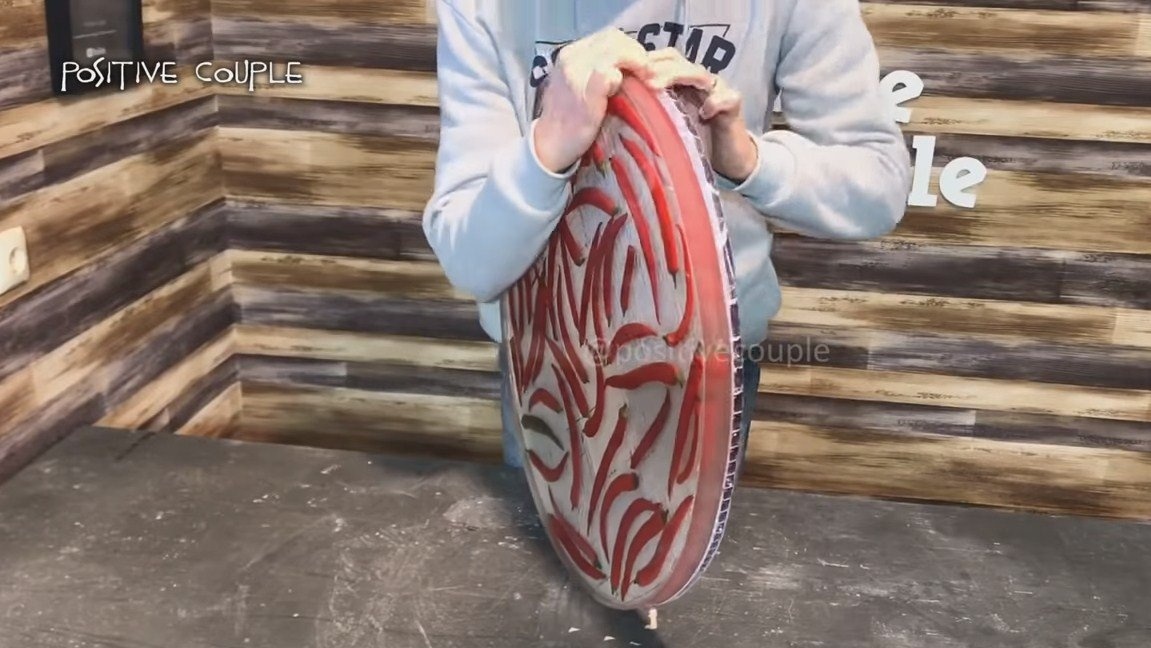

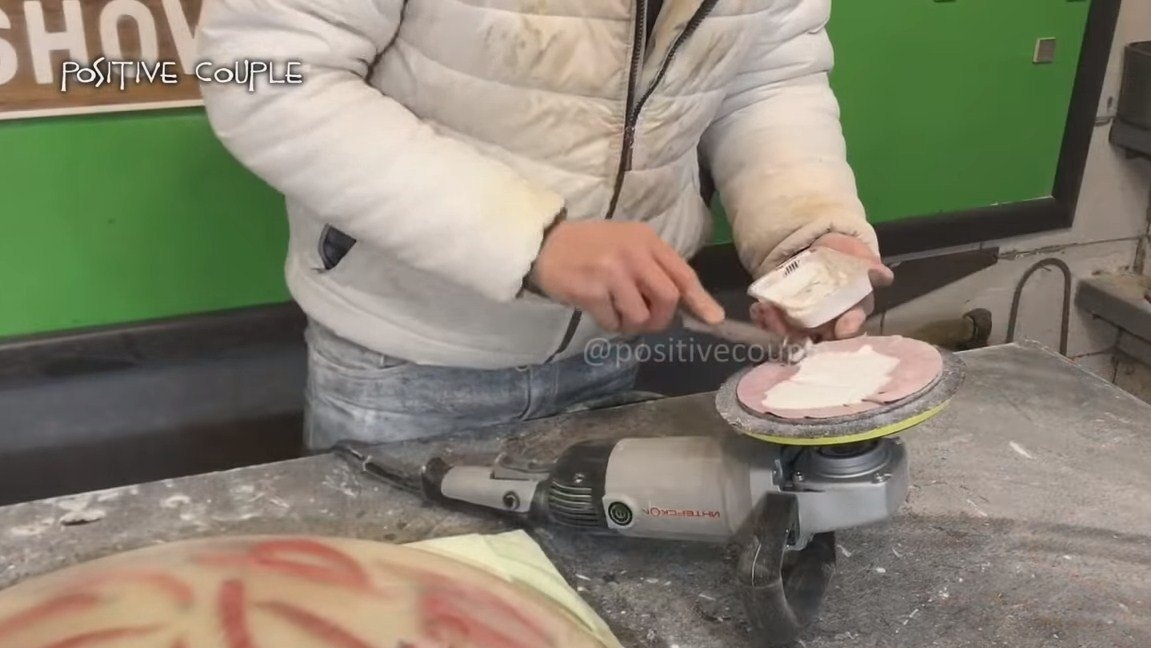
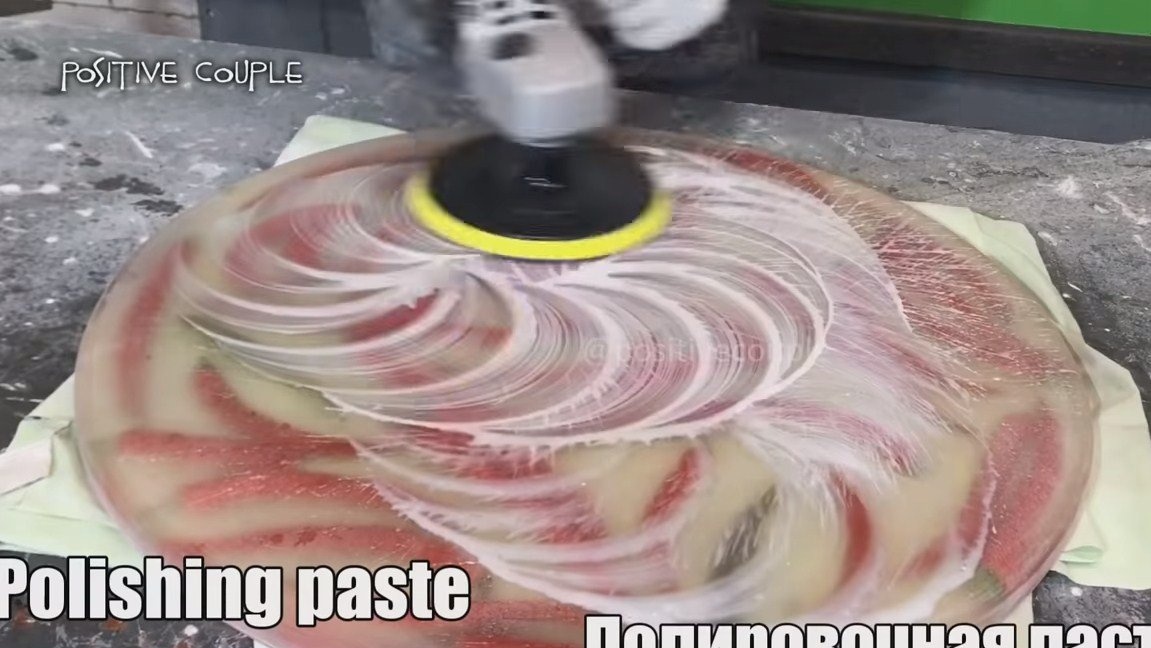
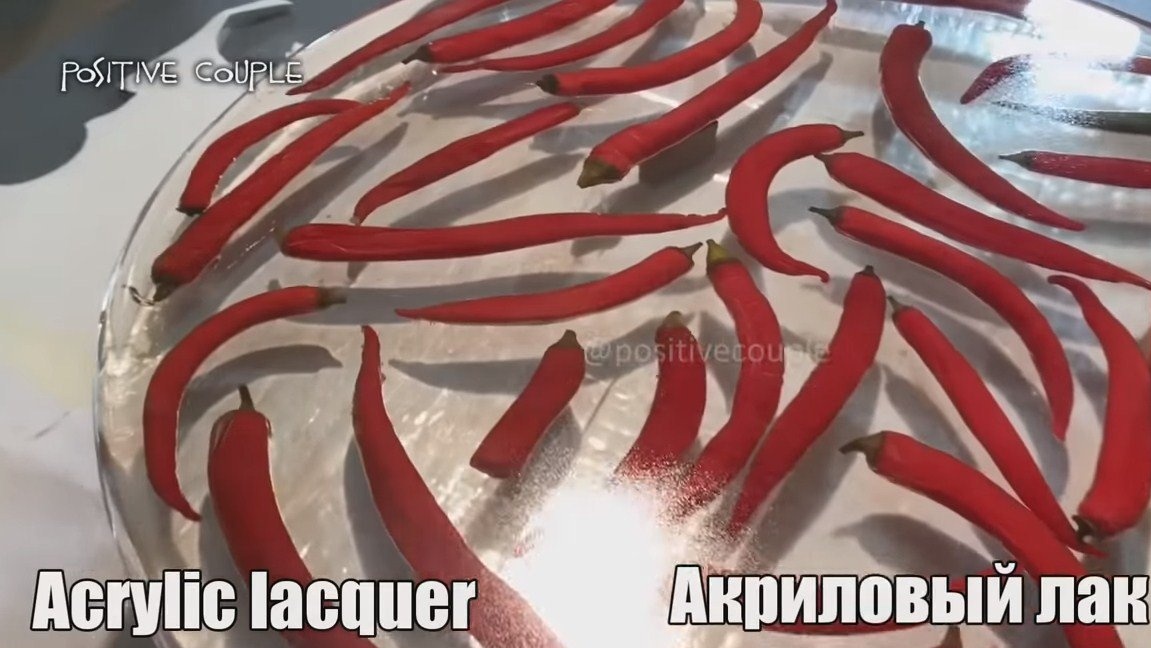
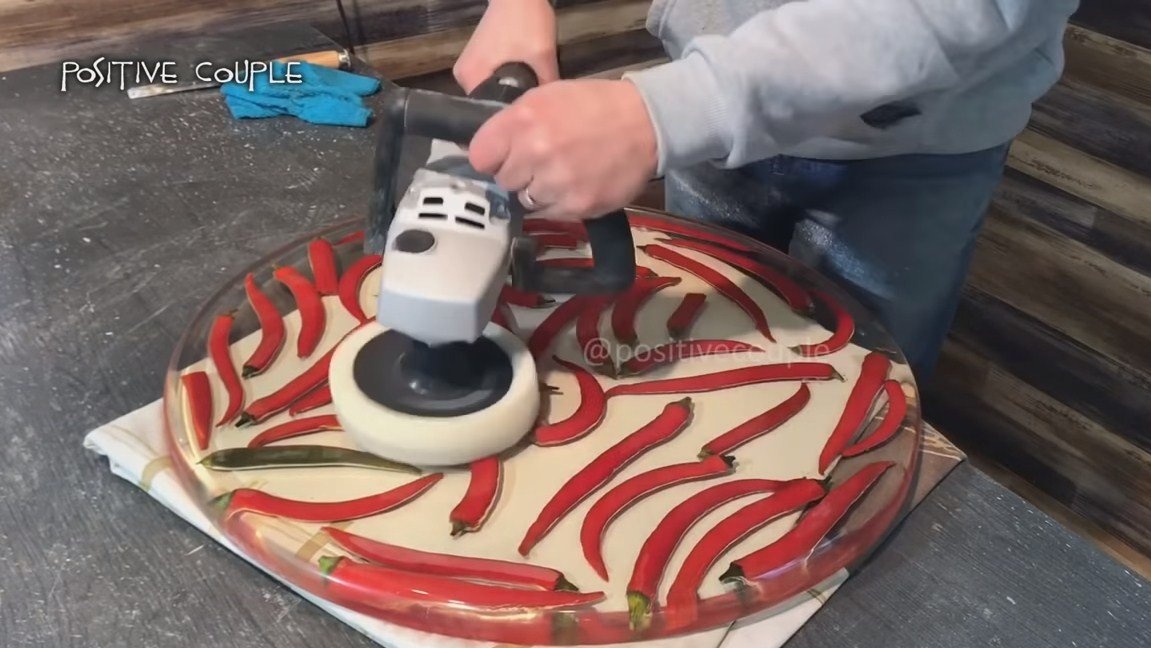

As a result, we polish the countertop with polishing paste. It turns out transparent, and to obtain perfect transparency and protect the resin from ultraviolet radiation, we cover it with acrylic varnish. The countertop looks masterpiece.
Step Five Putting a table together
A table can be assembled, first you need to fasten the legs. They are connected by a special part made of triangular-shaped epoxy. We also need pins, for these purposes the author used pieces of bolts. We glue everything on epoxy glue.
Now you can install the countertop, the author simply glues it with epoxy glue.

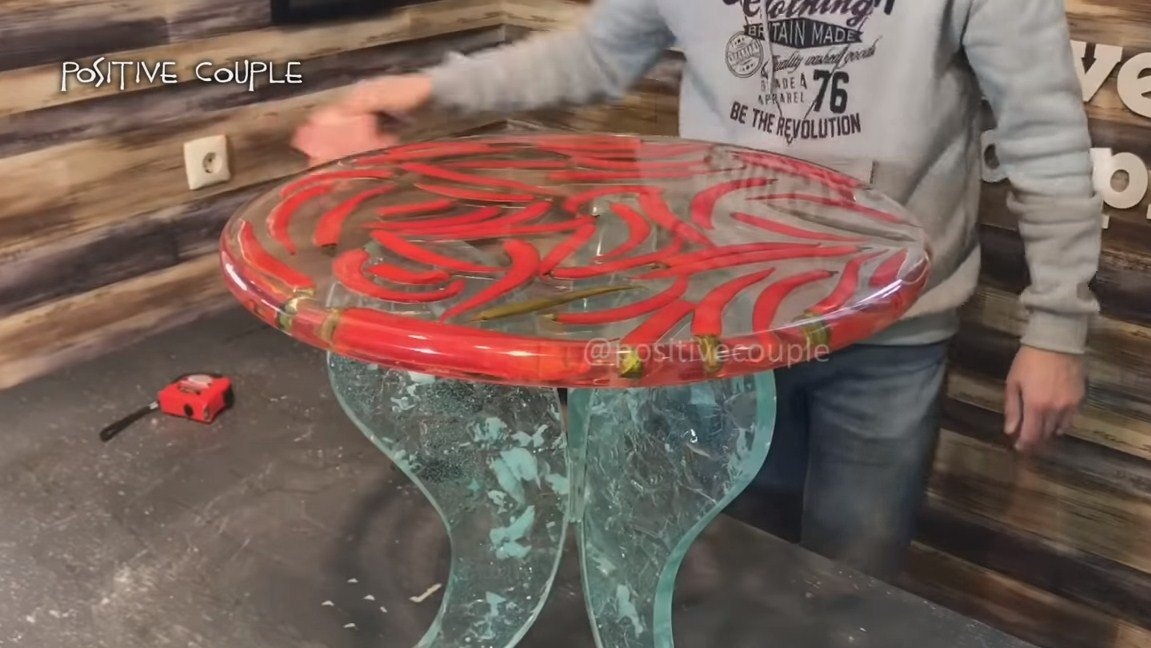
That's all, the table is ready, it looks very interesting, but the style, of course, is not for everybody. I hope you enjoyed the project and found useful information for yourself. Do not forget to share your ideas and homemade things with us! Good luck and creative inspiration!