

Despite general contempt for the “corps” of furniture with its square-nested design, the manufacture of panels is a very common task in the carpentry. In fact, trees of such a thickness that they can be cut out of, say, a countertop are not so common and there aren’t enough for all of them. Moreover - wide boards, often, are specially chopped into small parts and re-glued. This greatly reduces the likelihood of their warping and cracking in their subsequent, furniture hypostasis.
The gluing process itself contains a number of important points - the thickness, orientation of the layers, the thickness of the adhesive, about which later, right now, we are talking about a mechanism for convenient compression of pre-prepared wooden blanks. This is a specialized clamp. To glue one shield, at least two clamps are used.
It should be said here that there is a method of bonding workpieces with such “cloves”, which allows to increase the bonding area and, accordingly, its strength. Practice, however, shows that since the application of "samovar" carpentry glue from dry tiles, the chemical industry has stepped far forward, and now, any gluing of even ends is stronger than the main tree. In any case, their coniferous species, of which shields are usually glued. Therefore, planing is quite enough.
So, the options are.
Analysis of existing analogues.
The decision "on the forehead." It is more convenient than gluing directly on the workbench, but not by much. The only plus is the simplicity of the design. The base, however, must be very rigid, especially when, however large the length is.

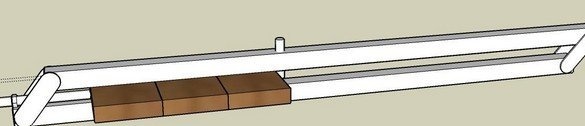
When gluing, additional simple carpentry clamps and an even rail along the width of the shield are required to prevent it from bending under load. Nevertheless, with not frequent work, the design is fully justified, some complication of the technology can be survived.
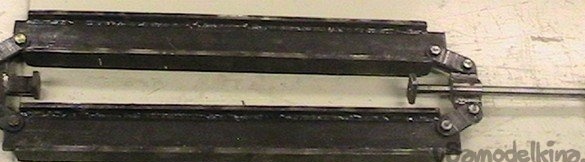
Symmetrical design. In general, it follows logically from the previous, simple one. End stops movably attached to two flat sidewalls. When applying axial force, the sidewalls are simultaneously compressed.
Several options for end stops.
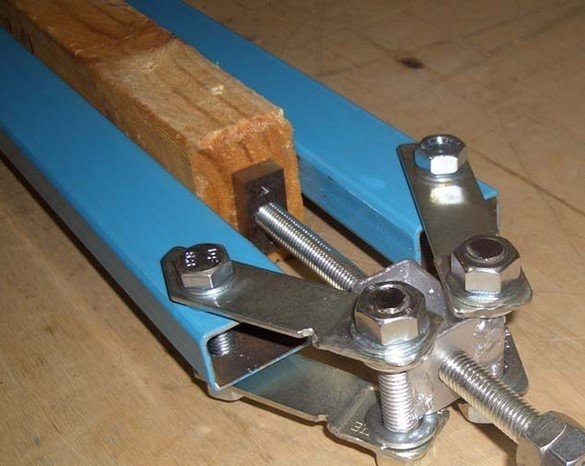
The blue version, in addition to painting, is notable for the fact that most of the details are standard - large hardware, a rectangular pipe.
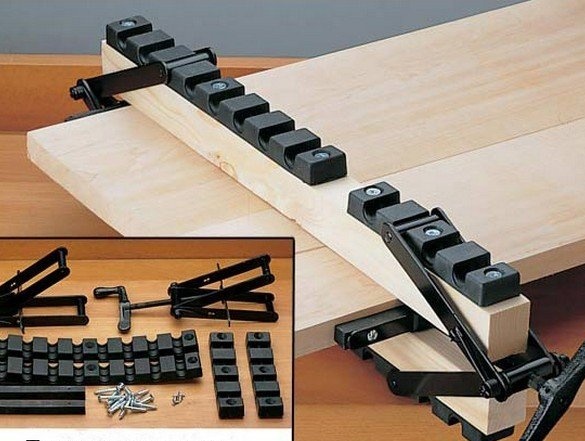
There was even a sort of designer kit "do it yourself". "Cogs" for stepwise changing the width of the workpiece will make it easier to jam the mechanism on the workpiece. The most dimensional and inconvenient parts for storage and transportation are proposed to be made independently from solid wood. Therefore, the set, presumably, is worth a penny.
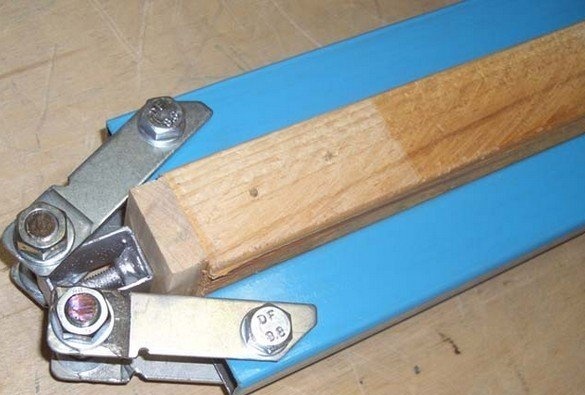
Practice, however, shows how not to be careful, there will still be glue on the clamps, which you can tear off from the glands without damaging them, even in very rough ways, up to the use of angle grinders. The wooden parts, either have to be protected with rough wood gaskets, or simply often changed. Both that and another, not too convenient.
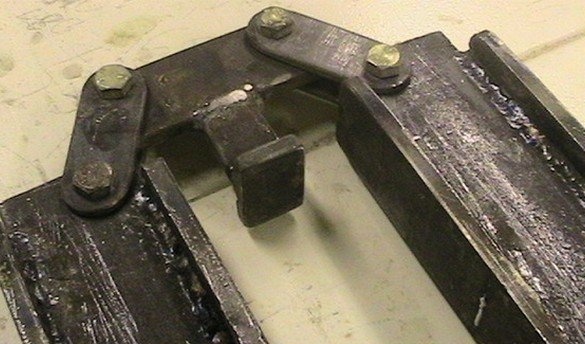
Homemade metal counterpart.
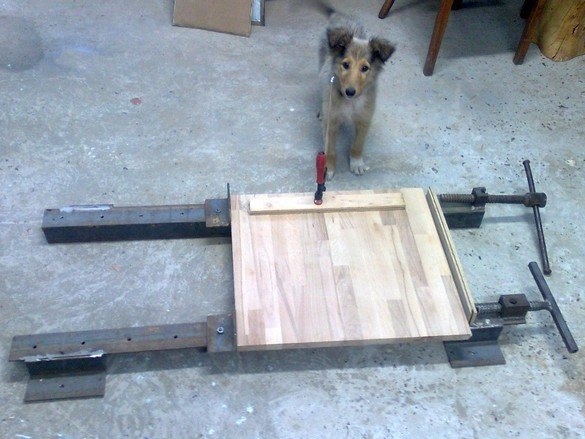
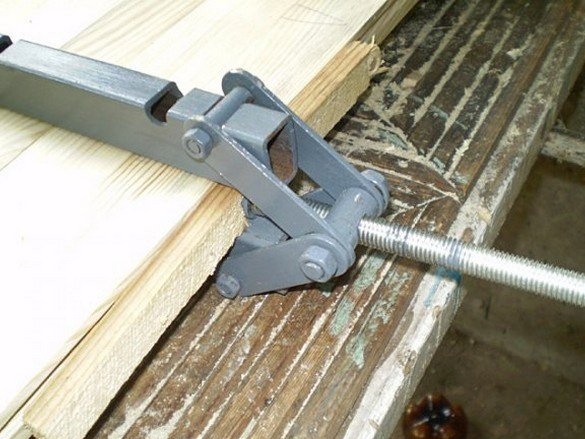
It can be seen that there are no special emphasis pads here, therefore, in order not to spoil the edges of the future shield with dents, they lay a technological wood lining.
Less obvious clamp design - asymmetric. The solution is witty, simple and elegant.
Our answer to Chamberlain.
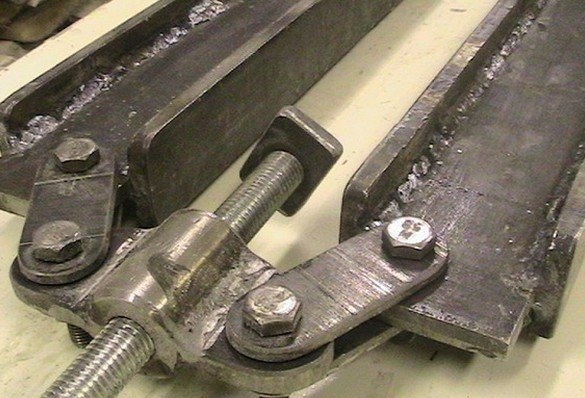
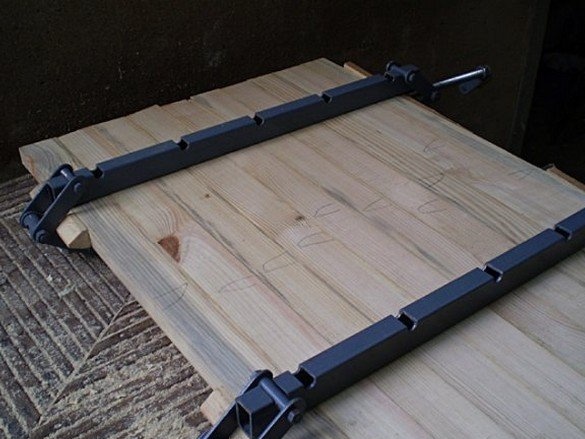
I offer my version of symmetrical clamps. Vaimy made without the use of stationary equipment - only a hand tool. Electric welding was used a little, but this is more likely from the delight of a neophyte - in those days, he had just mastered the welding inverter and applied a new skill wherever possible.
The materials were only standard hardware and two types of metal - a rectangular pipe and strip. Four identical hems were made, with their help, many different blanks were glued, both purely utilitarian in nature and for decorative crafts.
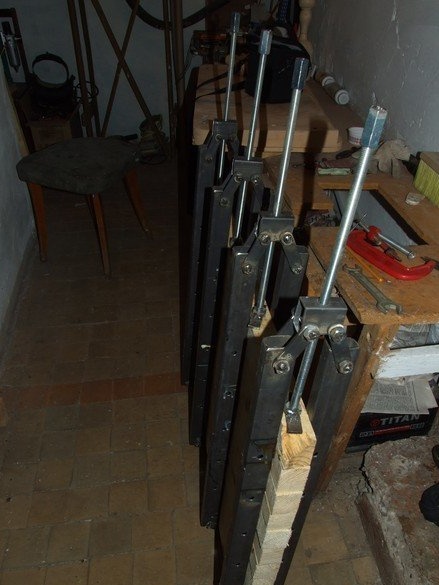
The size of the clamps is for moderate-sized shields, with a maximum width of about 700 ... 750 mm, however, you can connect the clamps in pairs and glue a fair amount of shields in two steps. The length of the shield, depending on the number of clamps and with four pieces, can reach 1 ... 1.5 m. A series of symmetrical holes on the sides of the clamp allows you to easily rearrange its back stop for convenient work when tightening narrow shields.
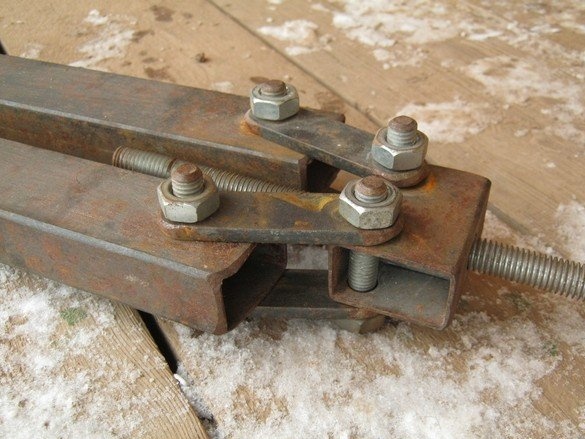
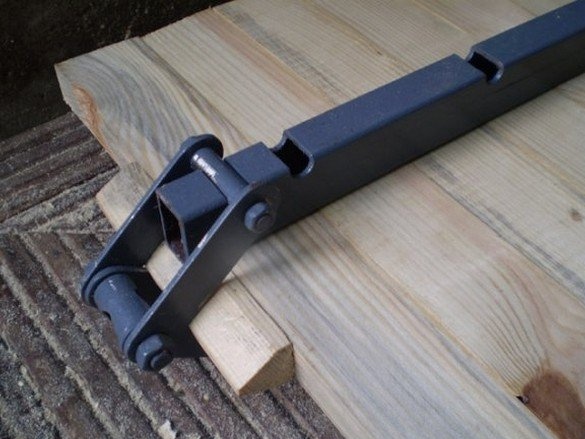
The design of the upper screw clamp is simple and technologically advanced, materials for it are also standard rolled products and hardware, which is a great advantage in the absence of access to machine equipment.
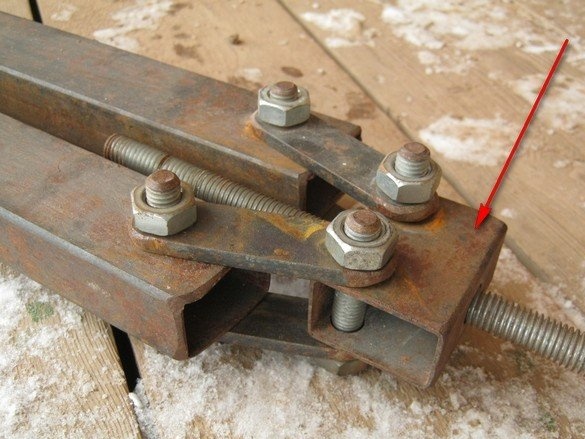
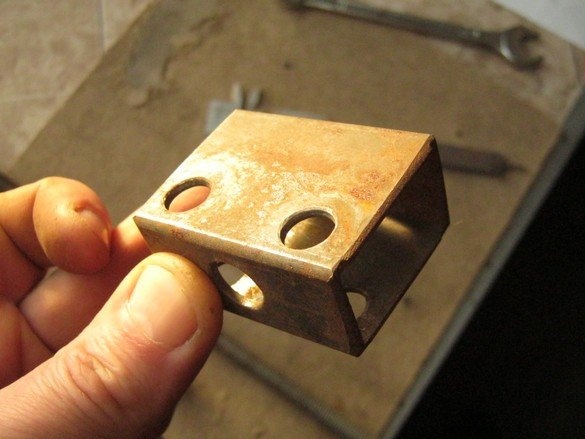
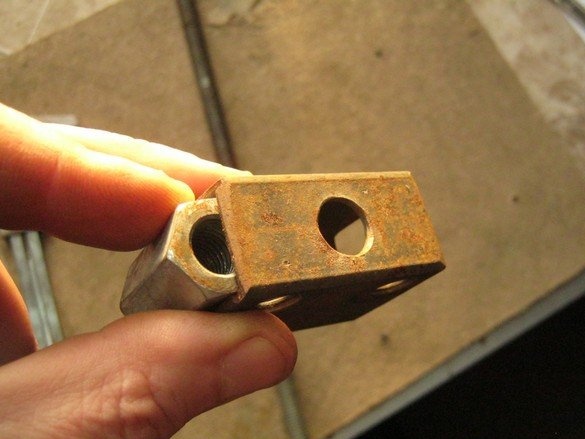
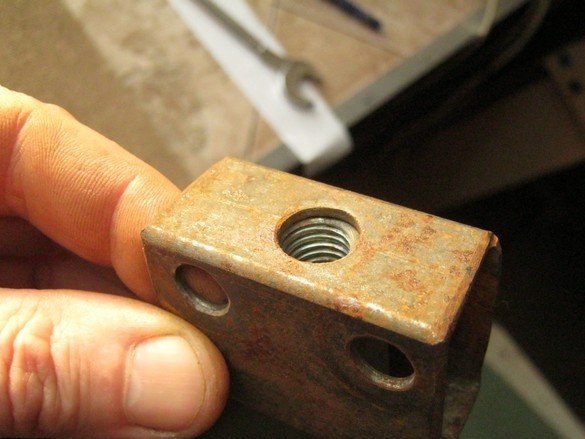
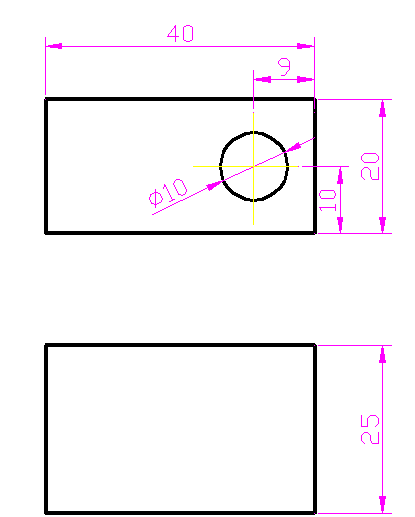
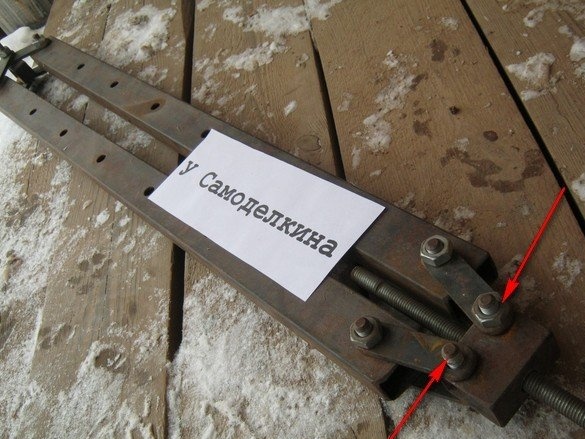
The screw clamp housing is made of a piece of the same rectangular pipe 40x25, inside it, an extension nut M12 is placed.
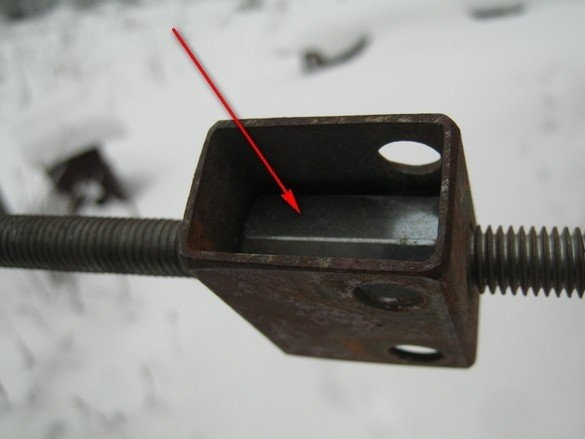
The nut is held only by the threaded rod and the housing walls, the narrow side of the housing does not allow the nut to turn. When unscrewing the stud, the nut simply falls out of the housing. The solution is very maintainable - in case of thread damage, the elements are easily replaced with standard inexpensive hardware.
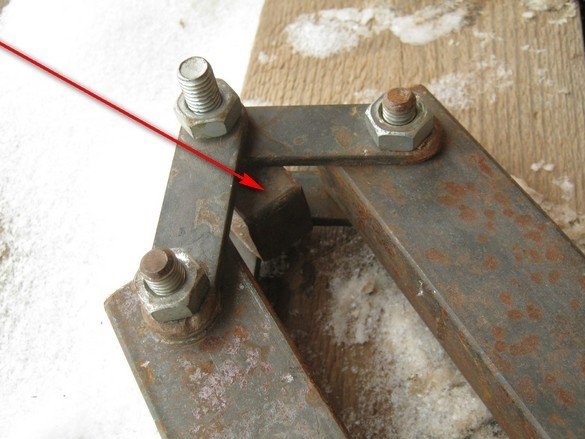
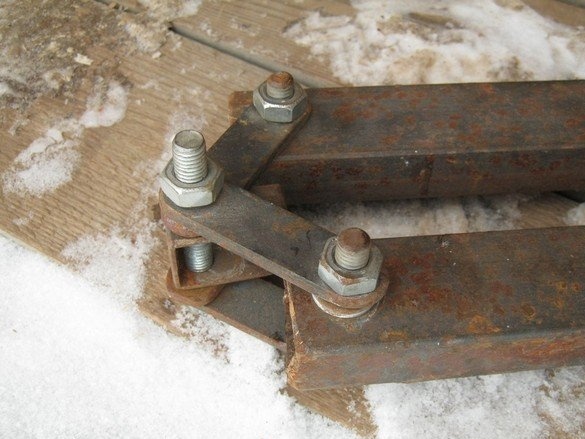
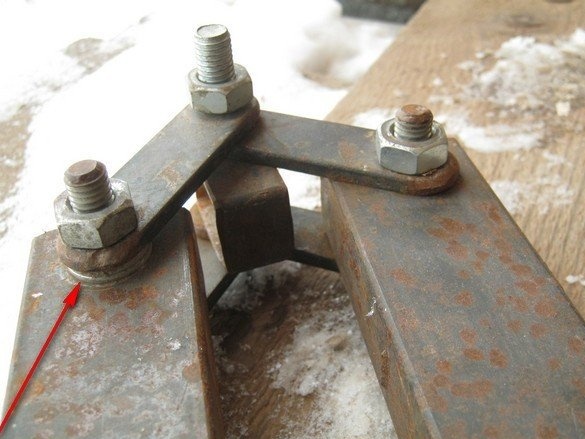
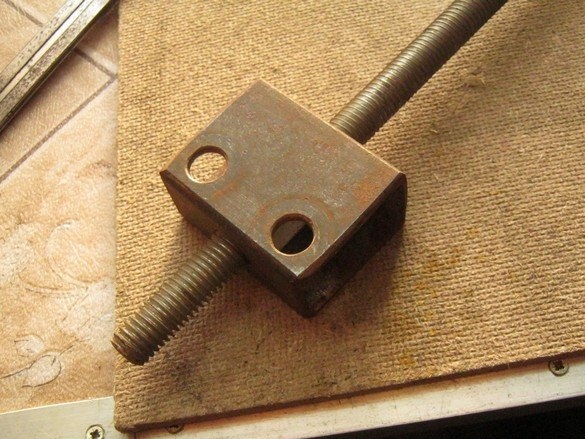
The back stop is also made of a 40x25 mm pipe segment held by two pairs of earrings. To compensate for the overlap thickness, two standard M10 washers are placed under one of the pairs, on each side (see photo below).
What was used for work.
Tools, equipment.
A set of ordinary bench tools, a good vice, a hand-held electric drill. Marking tool - tape measure, square, scriber or alcohol felt-tip pen. For cutting glands - angle grinder. An electric grinder will come in handy. In some places, welding was used, but you can do it. When working with an electric tool, it is mandatory to use safety glasses and headphones.
Materials
Rectangular pipe 40x25, strip stud with M12 thread, bolts, nuts, M10 washers.
Let's get started. Sidewalls.
We determine the required number of clamps and acquire the necessary materials.
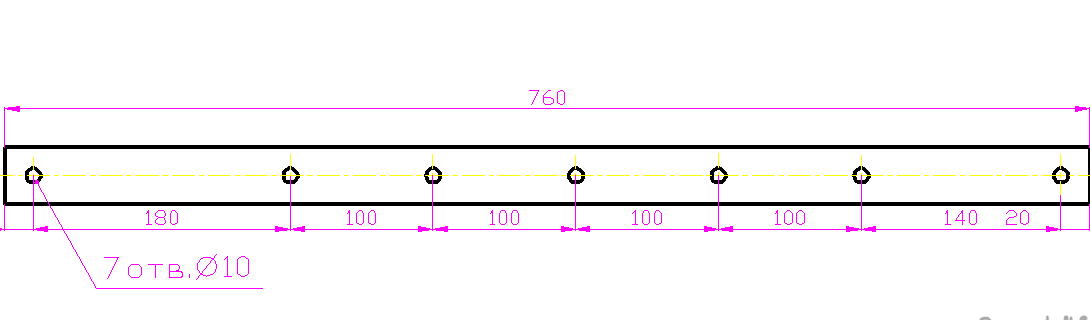
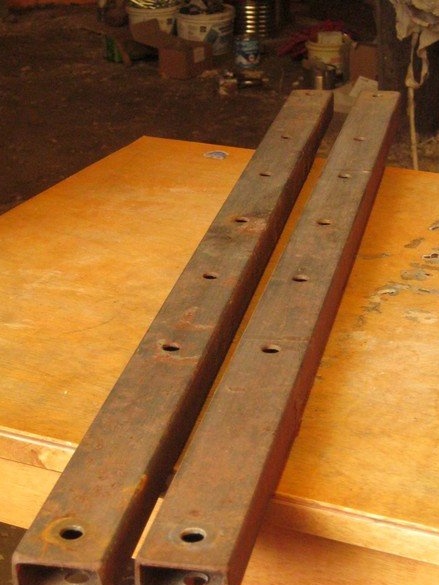
We cut pieces of a rectangular pipe, mark it out, and center the centers of the holes. If you have a machine, you can drill from one side, through, if you work with a hand tool, it is better not to be too lazy and mark and drill the other side as well. The holes in the metal, a relatively large diameter, it is better to drill at low speeds. It is convenient to work with a rotary hammer in drilling mode, while its clamp is equipped with a small three-jaw drill chuck with a simple adapter. Often, such a tool is included with the punch.High power and low revs make the work of such a tool very convenient.
After cutting and drilling, do not forget to dull sharp edges.
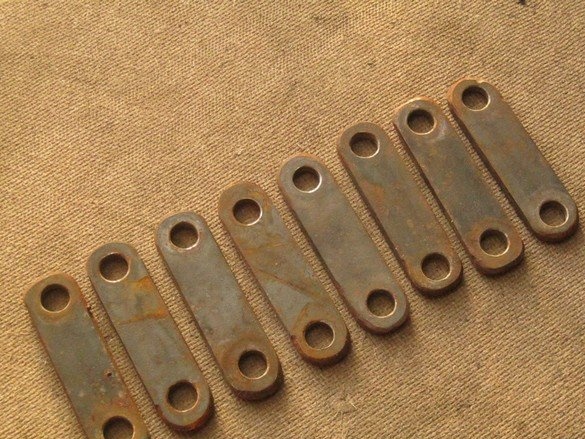
Earrings.
We cut, mark, drill. Marked the rounded edges without any effort - applying a suitable coin. Grind the edges on the sharpener, blunt the sharp edges. Magic file, in a vice.
Screw clamp, rear stop.
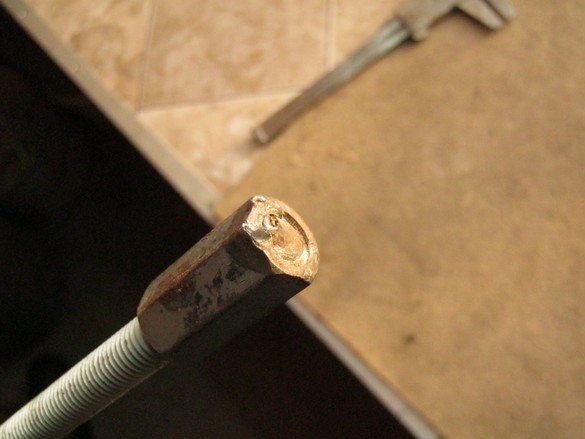
I cut the threaded rods of the required length, welded to one of the ends along a long "connecting" nut.

In the absence of access to welding, the screwed-in nut can be drilled and a transverse rocker lever with limiters, in the manner of a vice gate, can be threaded into it. The rest is obvious.
Work on the bugs, a few words in conclusion.
The axles used are standard bolts with M10 nuts of the appropriate length. It should be recognized that it is quite a workable, cheap option, although for a smoother move of the movable joints, it would be better to use smooth rods, for example - trimming the same bolts with incomplete thread. For the same purpose, it would be nice to drill holes in a machine tool.
Practice has shown that the length of the threaded rod can be safely reduced by a third, say, up to 300 mm.
Clamps, like any home-made glands from ordinary, "black" steel, it is desirable to paint.
For greater convenience, a number of connection nuts that are not involved in the “range switching” can be drowned out by making several points by welding, properly turning the end face of the bolt, or just riveting it. This will reduce the loss of nuts when carrying clamps.
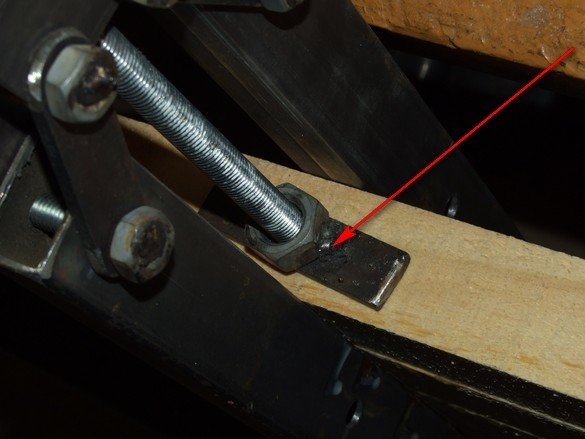
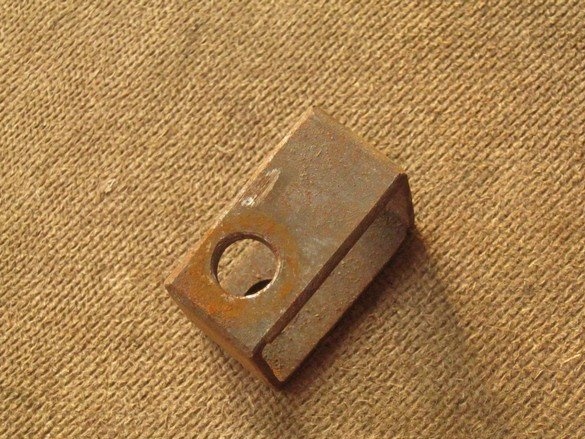
When clamping the shield, the steel screw rests against a soft piece of wood with considerable effort and pushes it through. Removable metal stops from a piece of iron strip with a welded nut turned out to be convenient. The nut prevents the emphasis from slipping when tightening. In the "transport position", the stops are stored in a rag sock, along with several spare bolts and nuts.
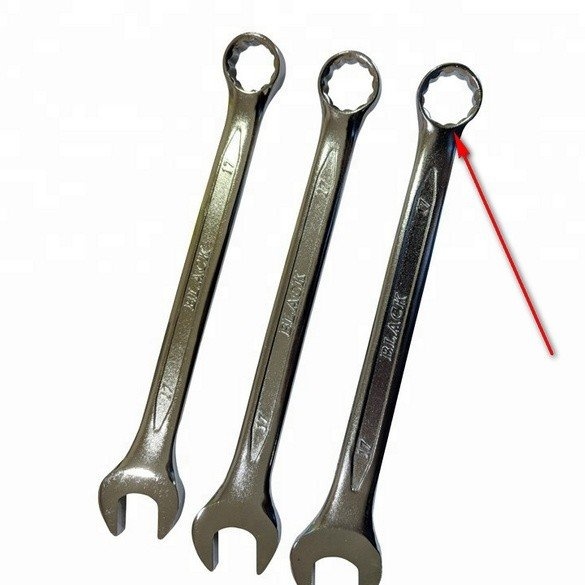
The obvious - to tighten the screws, it is more convenient and safer to use a ring spanner.
And the last - the most important thing when gluing the boards, as it turned out - setting up the planer on which the workpieces will be processed, and yes - whatever you say, the board does not work out completely, clamps will only reduce the “steps” and increase the convenience of the process, the glued board blank, still have to plan.