
Guitar pickup windings are different. Win less turns - distortion is small, but a preamp may be needed. Wind more - the amplitude will increase so much that you can do without a preamp, but the distortion will increase. Choose a pickup depending on what piece of electric guitar you want to perform. And to instruct automation to winding pickup windings homemade, which was invented by the author of Instructables under the nickname TheBigSuleskey.
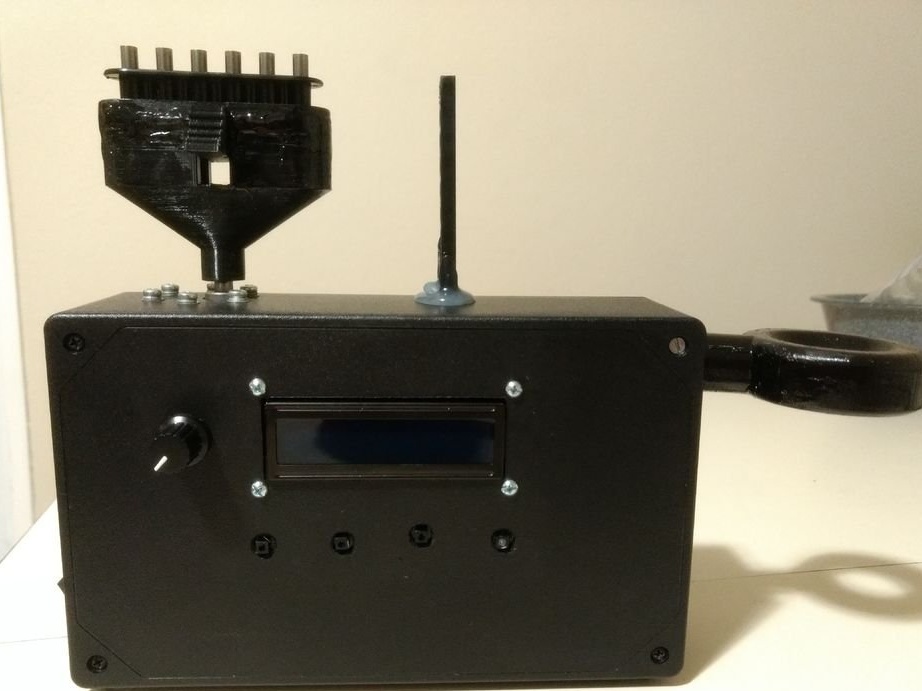
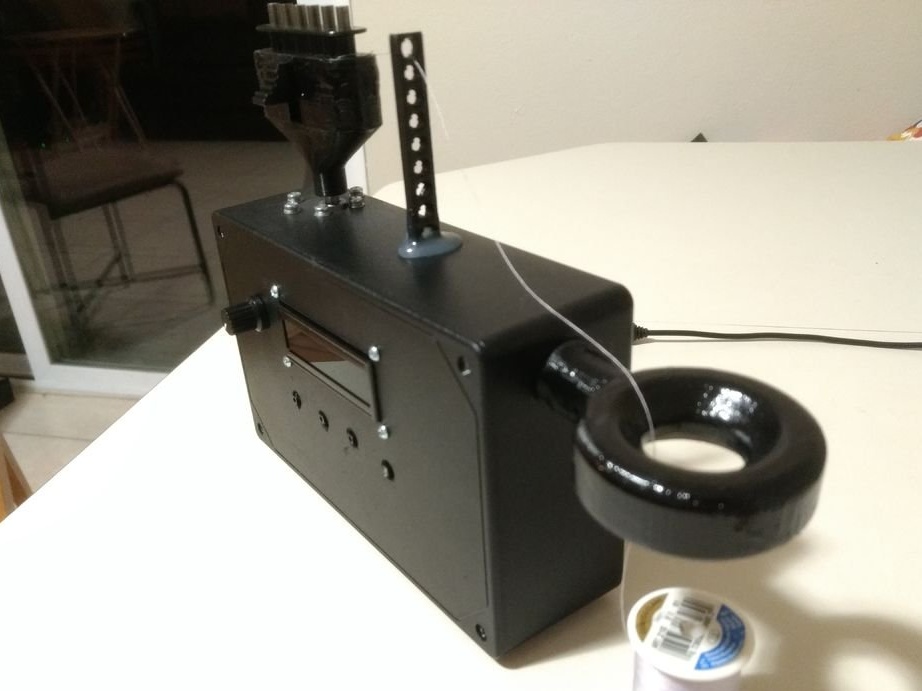
The device is designed to use ready-made frames, but can be redone to work with any others, including 3D-printed. The winding wire is wound up with a coil fixed on the table, passes through a ring and a vertical guide with several holes, then wound around a rotating frame:
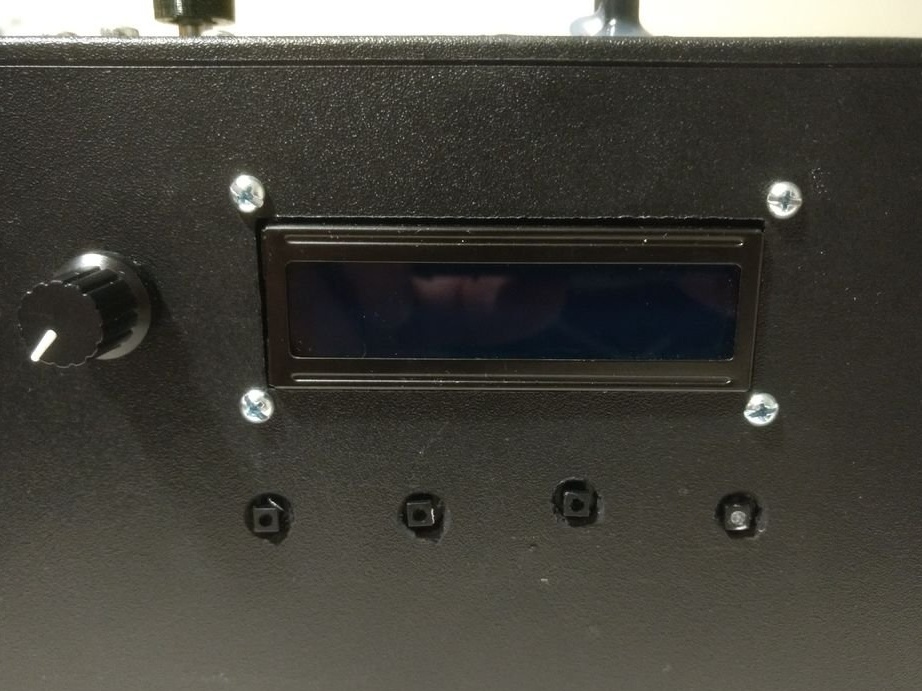
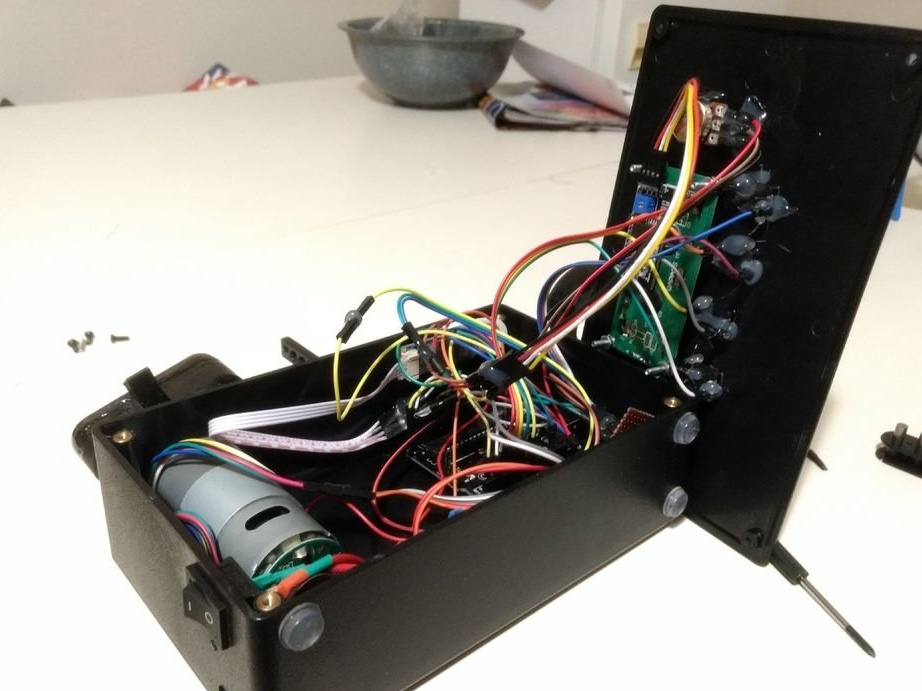
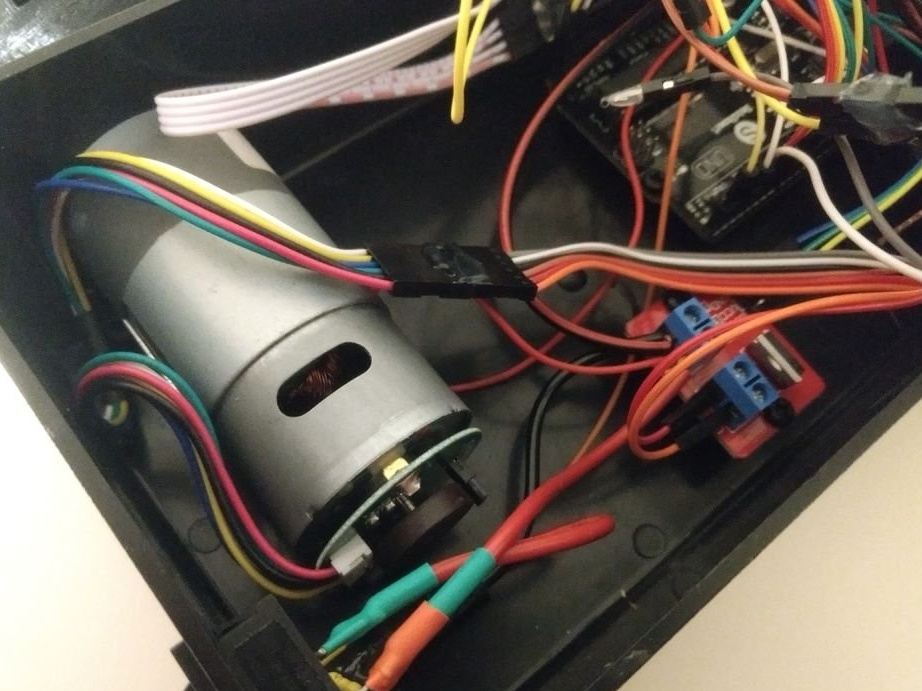
The winder is assembled in a PVC case with dimensions 200x120x65 mm with rubber legs, the most bulky component of the device is a 12-volt DC motor with a position sensor YC-52010. It is controlled through the power driver from the board Arduino Uno or compatible. Information is input from four buttons and a 10-kilo ohm variable resistor, and output to a 16x2 display with a serial interface. The diagram shows a module for converting a conventional display on the HD44780 into a serial. It is also possible to exchange via Bluetooth via the HC06 module, but this is an additional option.
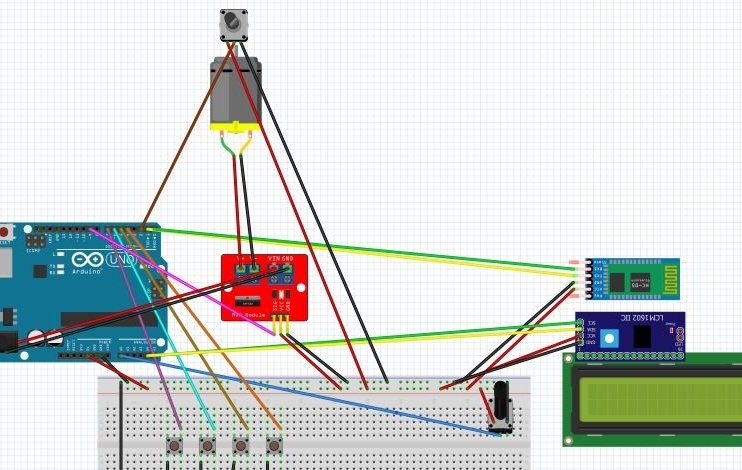
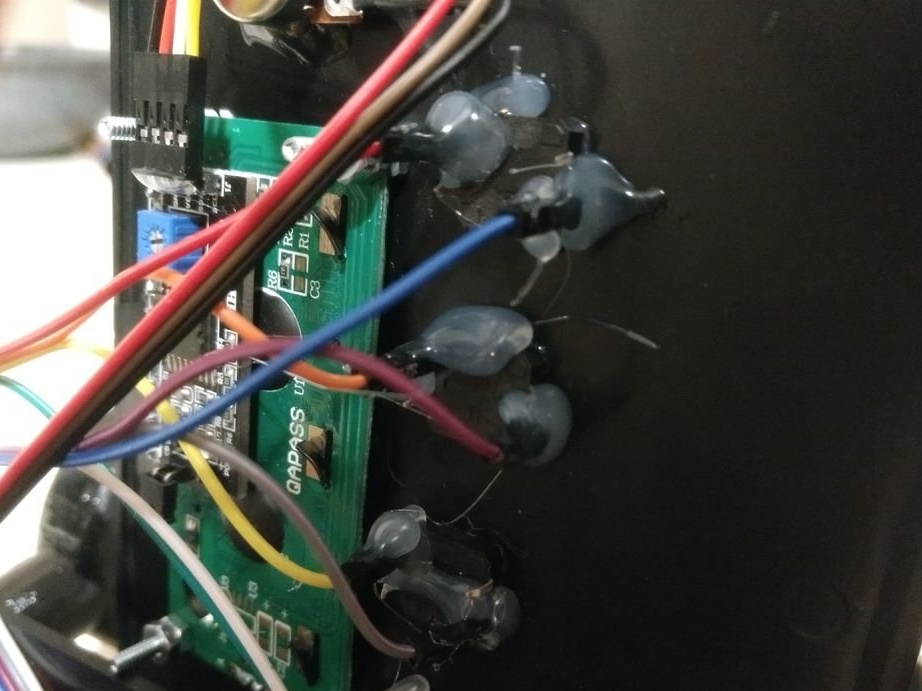
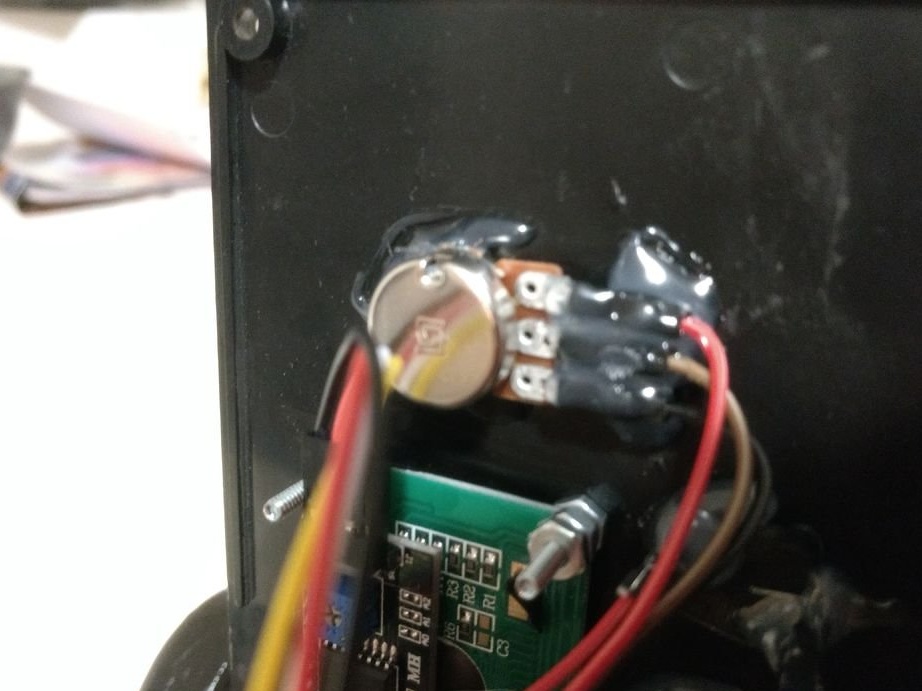
The buttons, when pressed, pull the Arduino digital inputs to the common wire, it would be nice to pull the same conclusions with the resistors to the plus, this will improve noise immunity, but TheBigSuleskey did not. The variable resistor is connected to the plus and the common wire with the lateral terminals, and to the analog input 0 as the middle one. Thus, the voltage at this input smoothly changes from 0 to 5 V relative to the common wire.
Everything is powered from a 12 V power supply from a netbook (laptops will not work, there is usually 19 V). Since netbooks are not very common today, a power supply for an LED strip is suitable, so that it can also give about 4 A.A router may not be suitable, from 1 to 2 A there, the engine can work sluggishly from voltage sagging. Arduino and the engine driver are parallelized (do not forget about polarity), while all components on the Arduino board are powered by a voltage of 5 V via a stabilizer installed there. Some modern compatible motherboards do not have a stabilizer, then you need to connect the board through a linear stabilizer on the 7805 chip or a pulse stabilizer board (usually on the MC34063A chip) from charging into the cigarette lighter. No matter where the stabilizer is located - directly on the Arduino or separately - the Bluetooth module, display, position sensor and the interface converter from serial to parallel are powered by it.
The master soldered a plug to the output cord of the power supply unit, which can withstand the current consumed by the entire circuit, and installed a socket suitable for it in the case. The driver and Arduino he connected through a switch. The socket and switch must also withstand this current.
In Arduino, he uploaded this, it is without Bluetooth support, if you need one, you will have to make the necessary changes yourself. And if Bluetooth is not only not needed, but not planned, the corresponding module can be omitted at all. If the motor rotates in the wrong direction, it must be reversed, if the speed controller is operating in the opposite direction, the reversed terminals of the variable resistor must be reversed. Having tested on the breadboard how everything works together, TheBigSuleskey removed it and connected everything according to the same scheme, but by soldering.
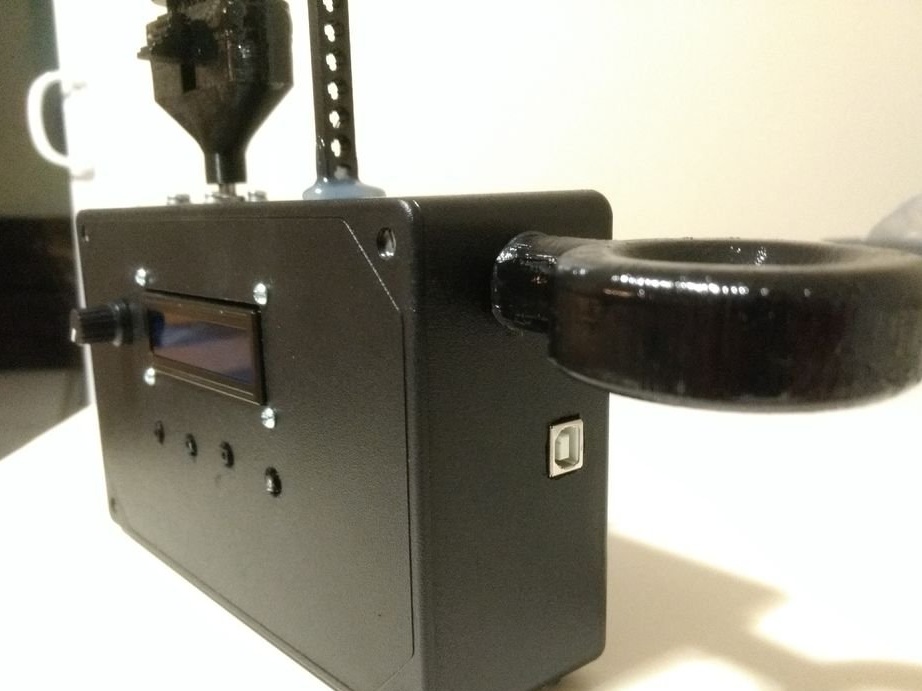
In the case, the master made holes for the buttons, switch, socket, motor shaft, variable resistor, etc. He used a hand tool for this, since the laser cutter is not suitable for this, but only with a very powerful hood: PVC emits more smoke than other plastics. Gluing the power socket with epoxy, he made sure that it did not get inside. And the Arduino USB socket was a bit filed. Rubber legs are required, without them the body will randomly ride around the table. Here, the finished design is shown from different sides with already installed 3D-printed parts, more on that later.

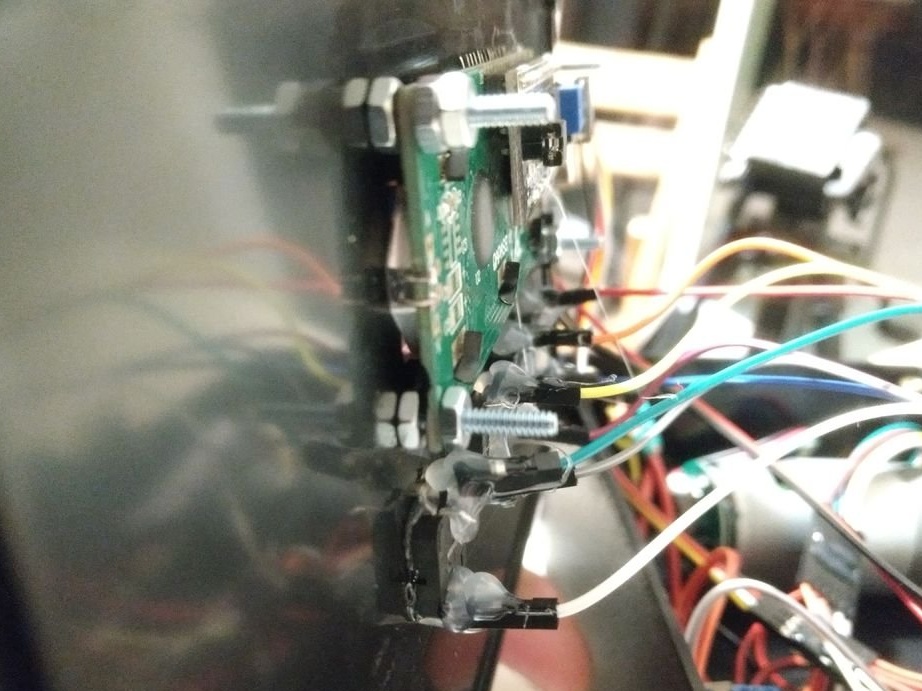
Elements of the circuit with difficulty, but got into the case:
You can take any plastic for 3D printing. The filling is small, but the walls are thicker so that there is a margin for subsequent manual grinding. Remove jumpers from printed parts.
Files for printing the ring and the guide with holes are not shown. The nozzle on the motor shaft consists of three parts:, and. Putting them together, the master made sure that the lower part glued to the upper, but did not get on the moving glue. Before that, he placed fountain pens in the corresponding holes in the lower part of the spring, and magnets in the recesses of the movable one. At the finished nozzle, he slightly warmed the hole for the motor shaft with a hairdryer so that the plastic softened, put the entire structure on the shaft and allowed to cool. After that, the device is ready for inspection and use.