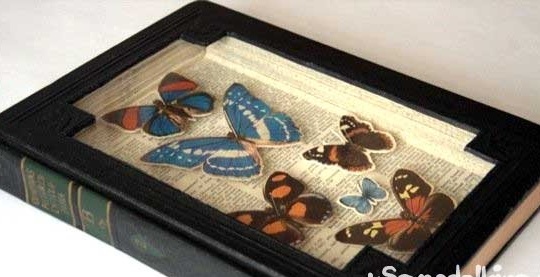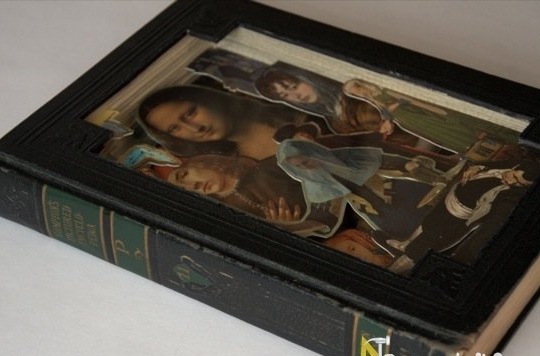
I have been looking for ways to give a second life to old unnecessary books for a long time and found an option to make boxing from an old book. Today I will tell you about this method.
Many people will say that doing something from old books is barbarism. I will make a reservation right away for crafts I use only those books whose value has been lost, they are outdated and are suitable only for waste paper. The author of the article will never spoil new and, especially, rare books - his hand will not rise. For crafts, for example, outdated directories, which were published in several new editions, are suitable, the information in them is outdated. Or, for example, old Soviet books, it is important that they have a beautiful and durable cover. In addition, importantly, you give books a second life, carving on them gives the opportunity for an updated book to become an adornment of your home, instead of following the path of recycling into toilet paper. Our conscience is clear - you can get to work.
To make a box from a book, you will need:
- a book, the cover of which will be strong and appropriate on the topic (after all, something will be stored in boxing, think in advance what exactly);
- scalpel, clerical knife, scissors and other cutting tools;
- plywood for laying;
- pencil, iron ruler;
- glue for paper;
- plexus or glass, as well as a tool for carving them;
- screwdriver, screws, drill for fixing.
All the tools are prepared, we proceed to the manufacture of boxing showcases from the book:
1) Making the main box.
- Open the book on page 25-30 (depending on the thickness of the glass that you put under the cover and the thickness of the paper).
- Mark the internal dimensions of the box with a ruler, given that the wall thickness should be at least 1.5 - 2 cm.
- Cut the inside of the book. The working time will depend on the sharpness of the instrument, the quality of the paper, your strength and, of course, the thickness of the book. Most likely you will have to do this for 25-50 pages, in stages. Place plywood under the bottom of the 50 sheets and carefully cut the sheets along the iron ruler. The procedure is repeated several times until the desired boxing depth is reached.
- Insert the page for the boxing substrate (you should select it in advance or paste the illustration).
2) We insert the glass.
- We prepare untouched thirty pages for glass, cut out a place. The glass should be larger than the main recess in the book by 0.5 - 1 cm. It is convenient to use transparent plexus or plastic instead of glass, it is easier and safer to process.
- Cut a hole in the cover. Its size should be less than the main box by 0.5 cm and less than glass by 1-1.5 cm to hide the flaws of the page cut and increase the stability of the glass. If the cover is beautiful, you can make a curly frame or experiment with corners, as seen in my photo.
3) Decorate.
- Glue to the cover of the page in which the glass is fixed, the glass itself from the opposite country, glue with tape on the border. So the glass will not fall out, and the pages will not fall apart.
- Glue the pages of the main box, you can instead tighten them with thin bolts on the nuts. It is important not to skew or spoil the cover (a screwdriver and a drill can come in handy here).
- decorate the contents of the display case. What you put in your box depends on your imagination.

That's all, your showcase - boxing from an old book is ready, one more thing got a new life.
