
And in what sense to play? Managing a video game character is understandable; using objects for their intended purpose is the easiest thing to do with them. Is playing weak on it like a musical instrument? The author of Instructables under the nickname ptevyesaur tells how he got to such a life.
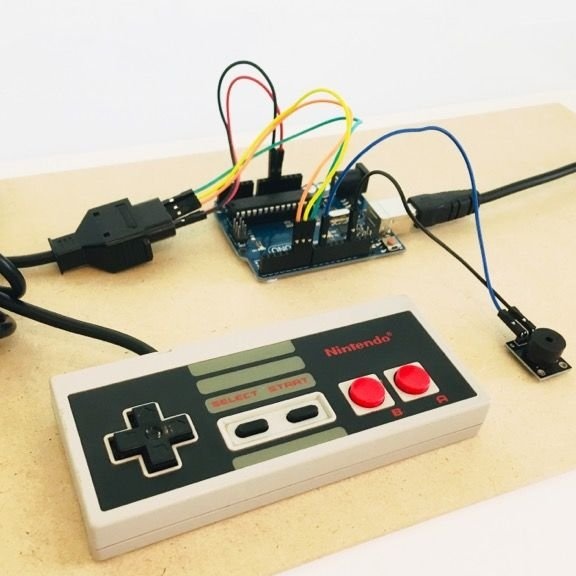
The structure includes three devices: Arduino Uno, a module with a sound emitter and a key, and the actual gamepad:

In addition to them, only jumpers will be required. Of course, you can take the usual piezodynamic by connecting it directly, without a key. A headphone included through a 1-kilo-ohm resistor is also suitable. You can also collect the key to control the dynamic head yourself.
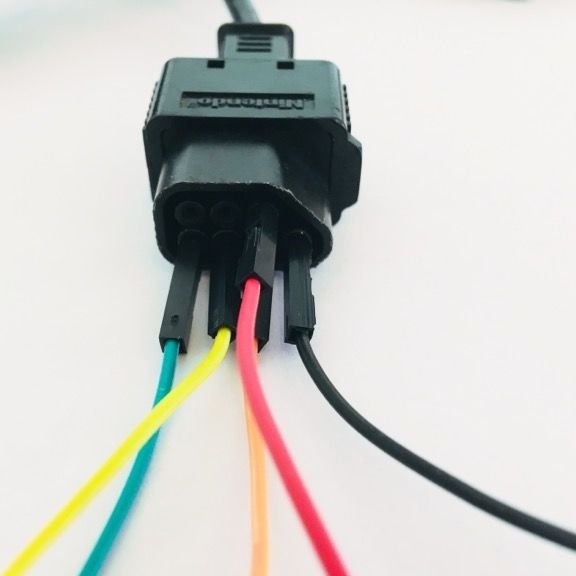
The master connected the gamepad to the Arduino as follows:
7 pin of the joystick connector - to the Arduino pin, designated as 5V - red wire.
1 pin of the joystick connector - to the Arduino pin, designated as GND (common) - black wire.
2 pin of the joystick connector (clocking) - to the Arduino pin, designated as D5 - orange wire.
3 pin of the joystick connector (latch) - to the Arduino pin, designated as D6 - yellow wire.
4 pin of the joystick connector (data) - to the Arduino pin, designated as D7 - green wire.
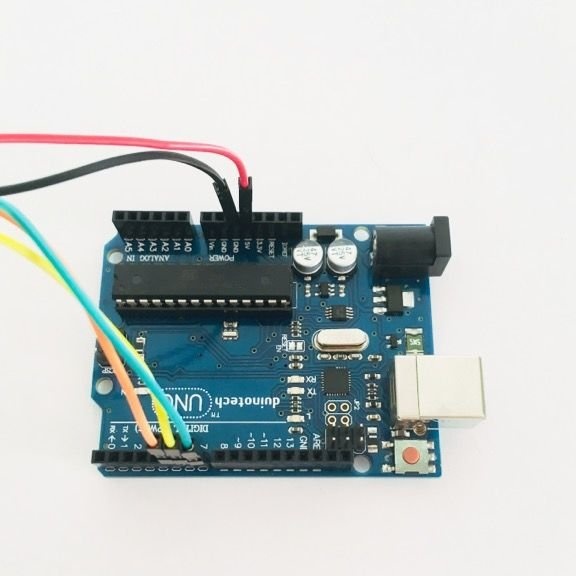
Of course, it is not necessary to use multi-colored wires, but this allowed the master to show the connection of wires from the side of the connector and Arduino in the photo:
When using joysticks from NES clones with standard DB connectors, you can see what pins should be used in this case, in this article.
For some reason, the key on the ptevyesaur sound emitter module does not use and does not supply power to it. The sound when the Arduino signal is directly sent to the sound emitter is not very loud. He connects the output of the S module to the D9 output of the Arduino with a blue wire, and the output of the module with a minus sign to the GND Arduino output.
Then the developer adds the library to the Arduino IDE pitches.h library and floods sketch. The program is based on the example of the Teachbot gamepad controller sketch / TeachbotServo_NES.ino from Gordon McComb's book “Do it yourself! Robot on Arduino. "
After filling in the sketch, the wizard opens the serial debugging console (this is not necessary) and starts playing. The correspondence of the buttons to the notes is as follows:
Up - to the fourth octave
Down - D Fourth Octave
Left - Fourth Octave E
Right - Fourth Octave Fa
Select - fourth octave salt
Start - for the fourth octave
B - fourth octave si
A - up to the fifth octave
Of course, without sharps, and even in such a narrow range, little can be played, but if you try ...