Hello friends and do-it-yourselfers! I want to share with you my first serious radio-controlled model. I called it Monstrik, because it doesn’t pull on a serious dirt-collector, but the view is formidable.
Previously, I was engaged exclusively in paper bench models, but once again visiting my grandson, my gaze lingered on a pile of broken cars, among which there were several radio-controlled Chinese. Begging them from him, he gutted them at home, pulling out motors, control boards and gears. Out of all this stuff, several original ones were born. homemade from improvised materials. And I liked it! I wanted something larger, powerful, beautiful. Good wheels were left from one of the jeeps, a body from another car and the idea was born to make a big foot.
What came of it and will be my story.
So, to create Monster I needed:
Materials
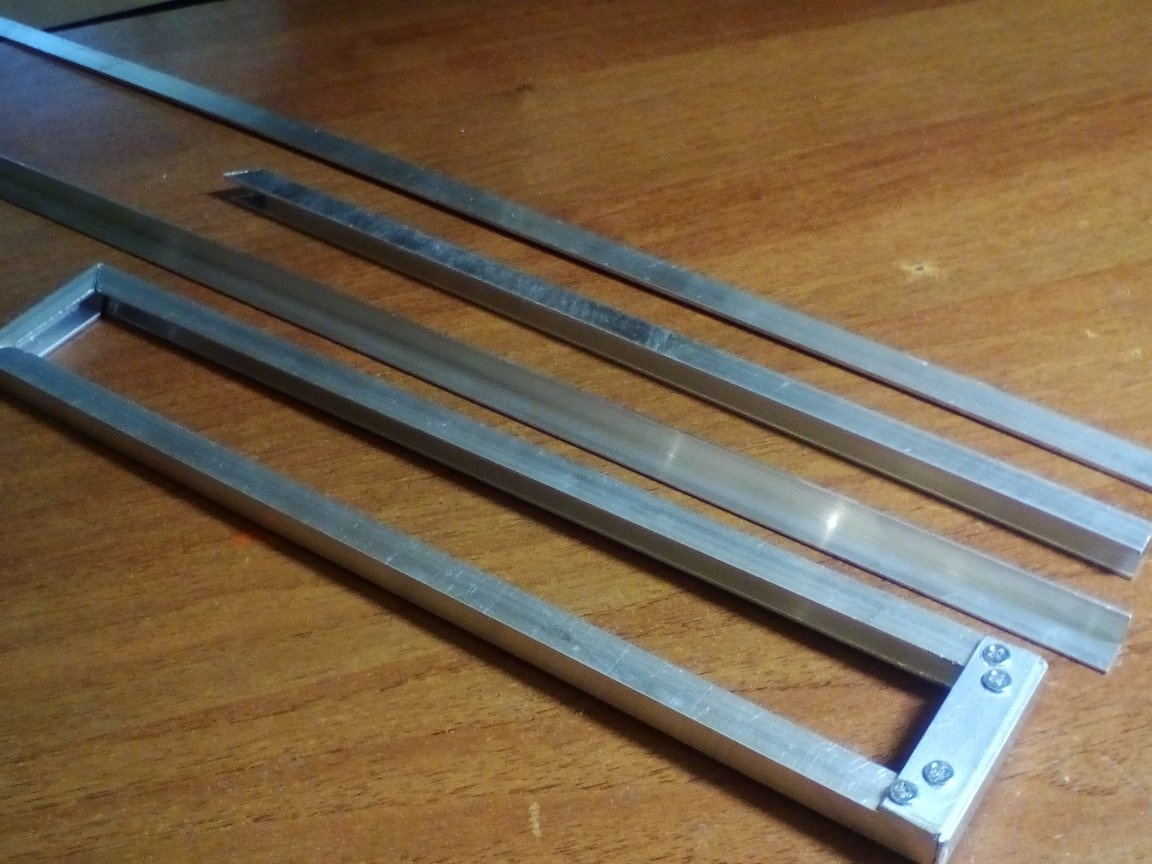
1. aluminum profile of various configurations
2. broken inertialess fishing reel
3. 5mm thick steel sheet trimming
4. 5mm diameter copper tubes
5. several springs
6. 3mm welding electrode
7. screws, bolts and nuts M3
8. foam plastic for the body
9. sheet transparent plastic for glasses
Instruments
1. joiner's knife
2. hacksaw
3. files and files
4. drill
5. sandpaper
6. screwdrivers
Chemistry
1. cyanocrylate based adhesive
2. car putty
3. spray paint
4. acrylic paint in a tube
5. varnish
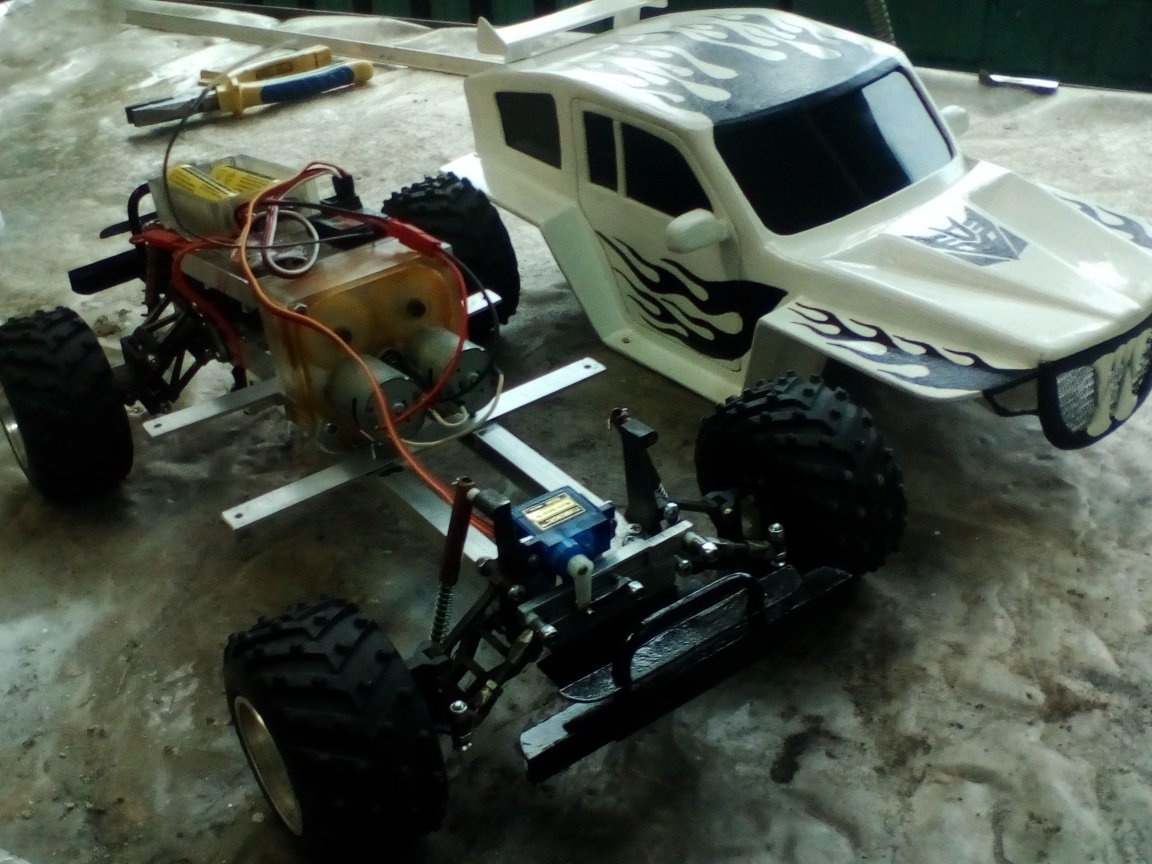
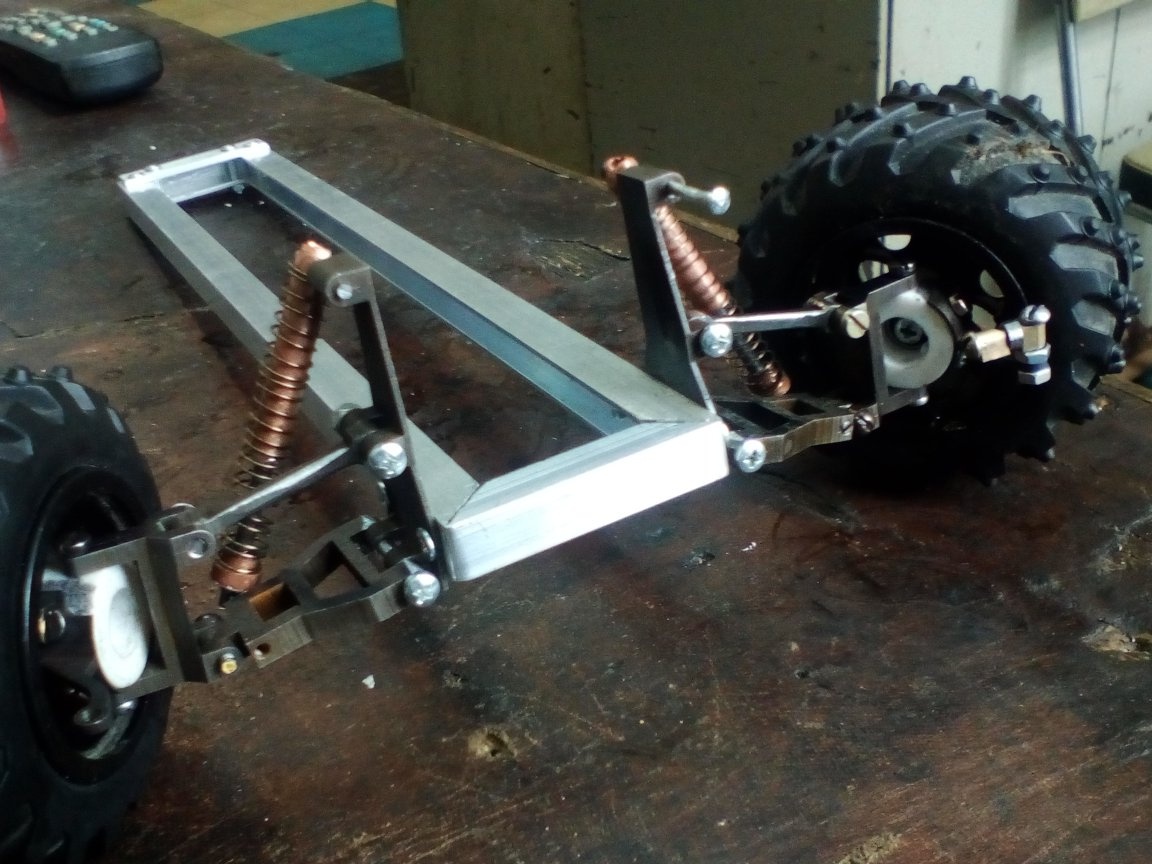
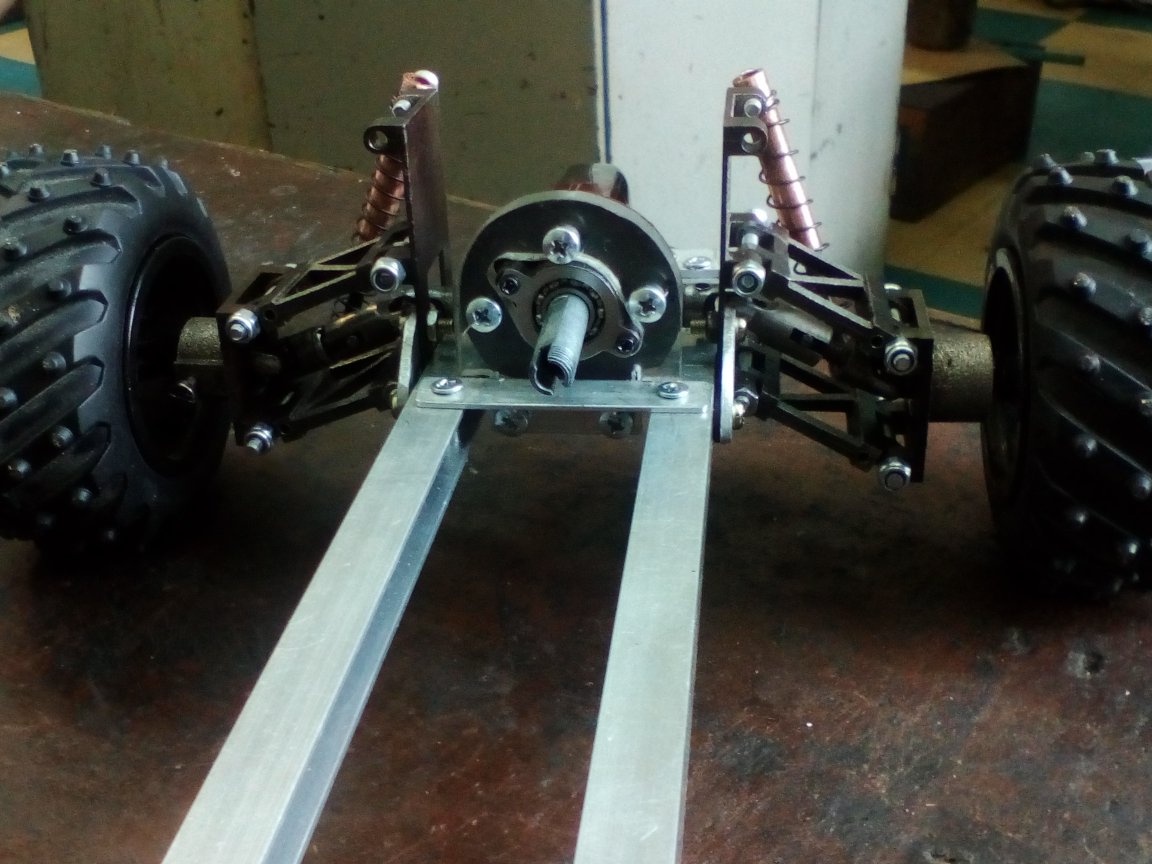
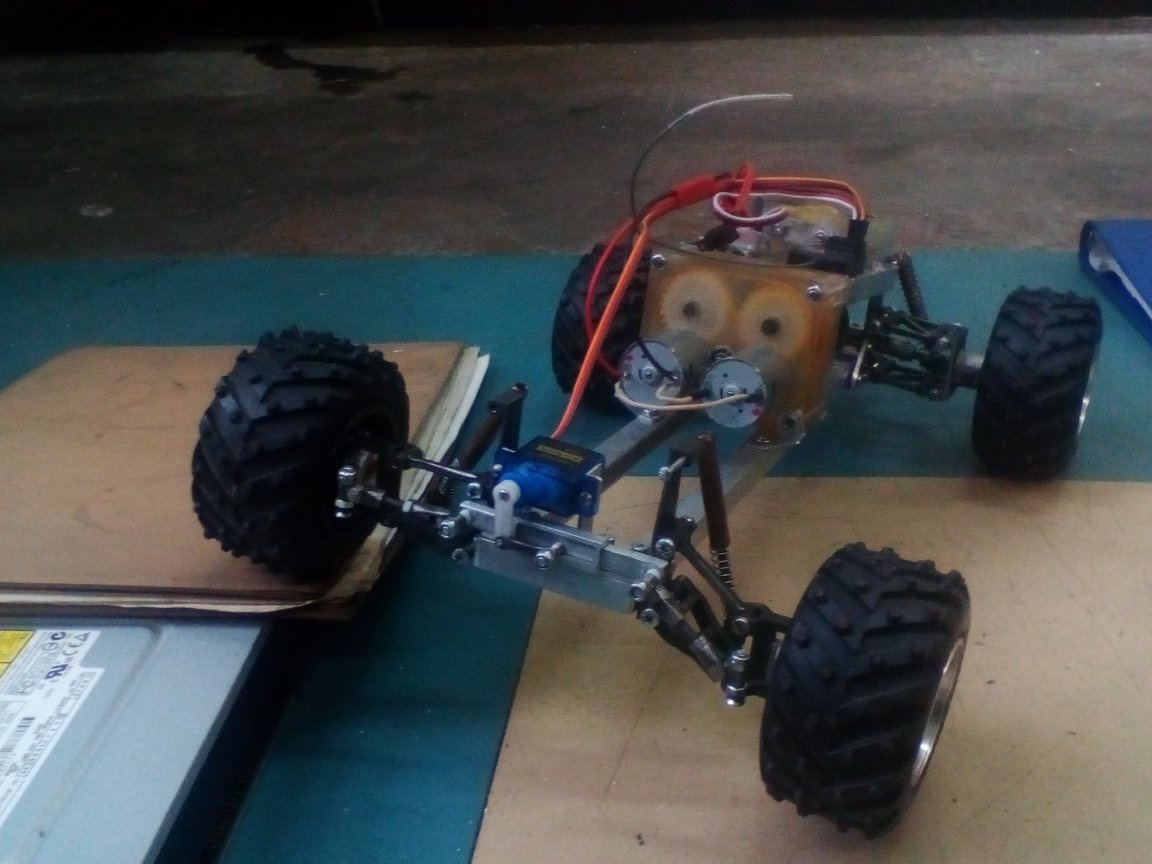
Any project begins with a technical task. in my head I had the image of a frame jeep with a simple body, completely independent suspension and, to begin with, rear-wheel drive. I had not yet decided on electronics at that time, so I tried to make it so that I could cram any. Naturally started with a frame. it was perhaps the simplest. I went to a building materials store and bought a profile of different sections 10 mm wide. From the U-shaped profile, sawing where necessary cutouts and bent the frame. The ends are fastened with screws.
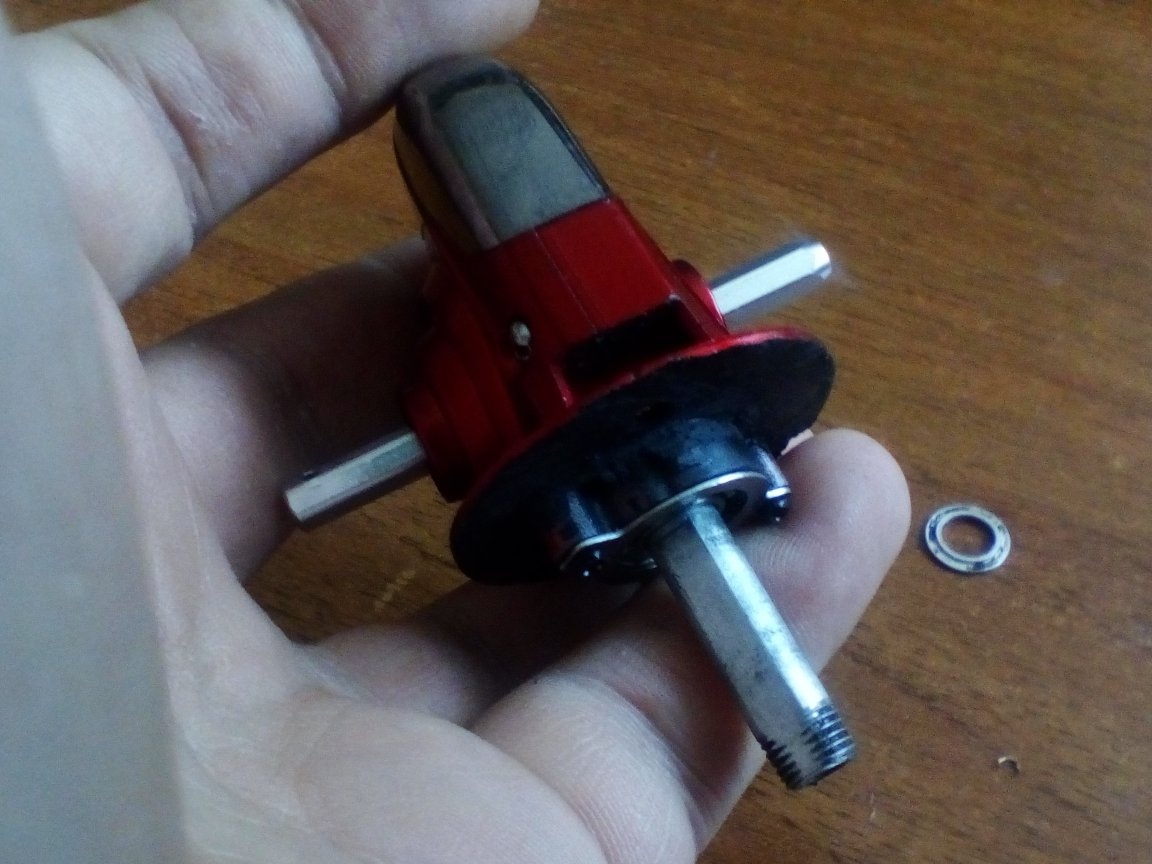
According to the experience of previous models, I decided that I would try to exclude glue from the chassis. I determined the dimensions of the frame by eye, based on the size of the wheels and the length of the proposed base. As a rear wheel drive, I decided to use a fishing reel, in which the friction clutch broke. Removed all unnecessary, left only the case with gears inside and the mounting pad in front. A piece of plexiglass, a piece of profile, several holes and now the rear suspension gear is in place!
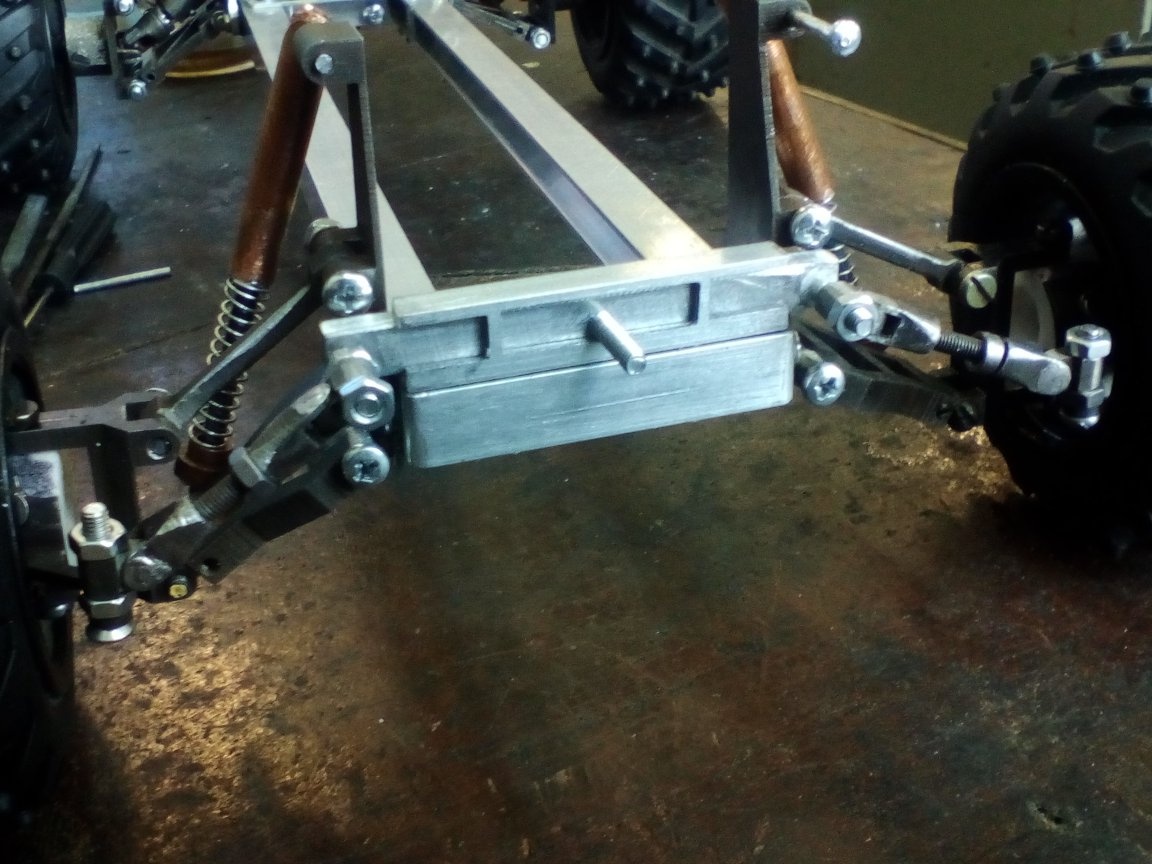
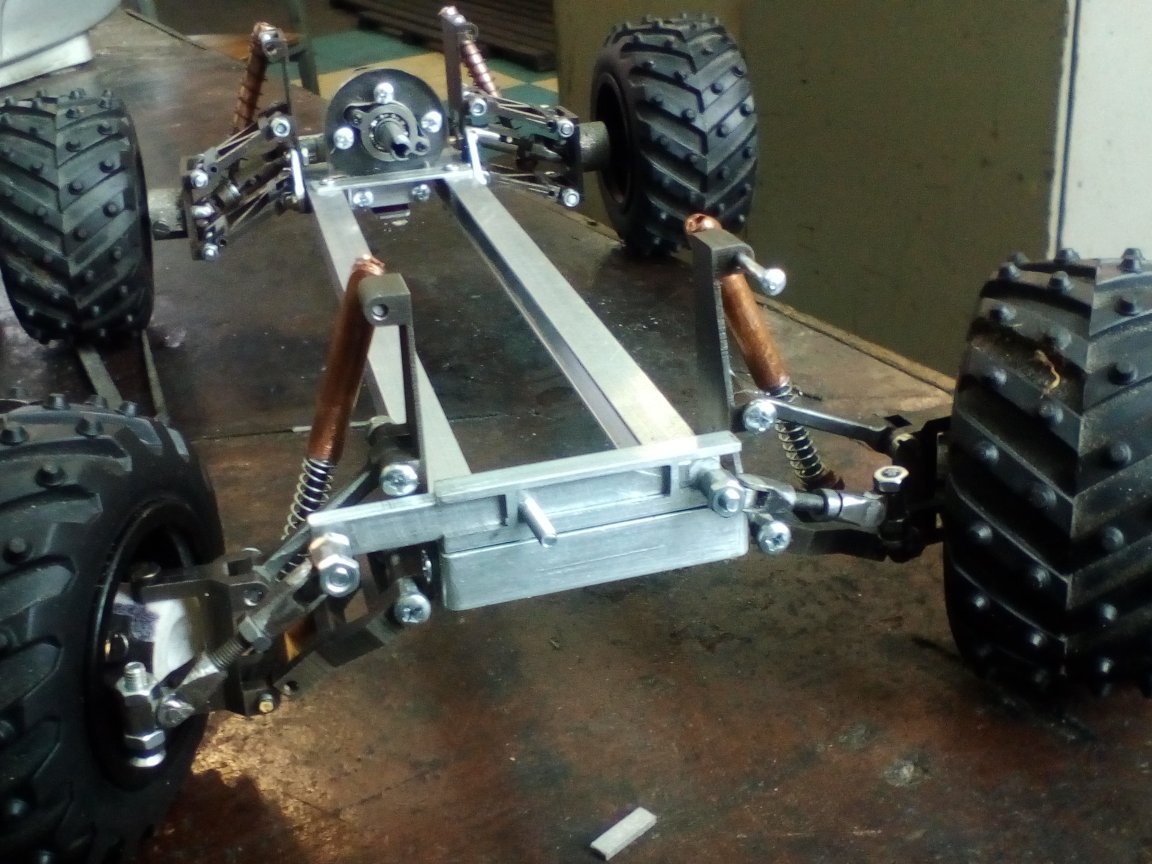
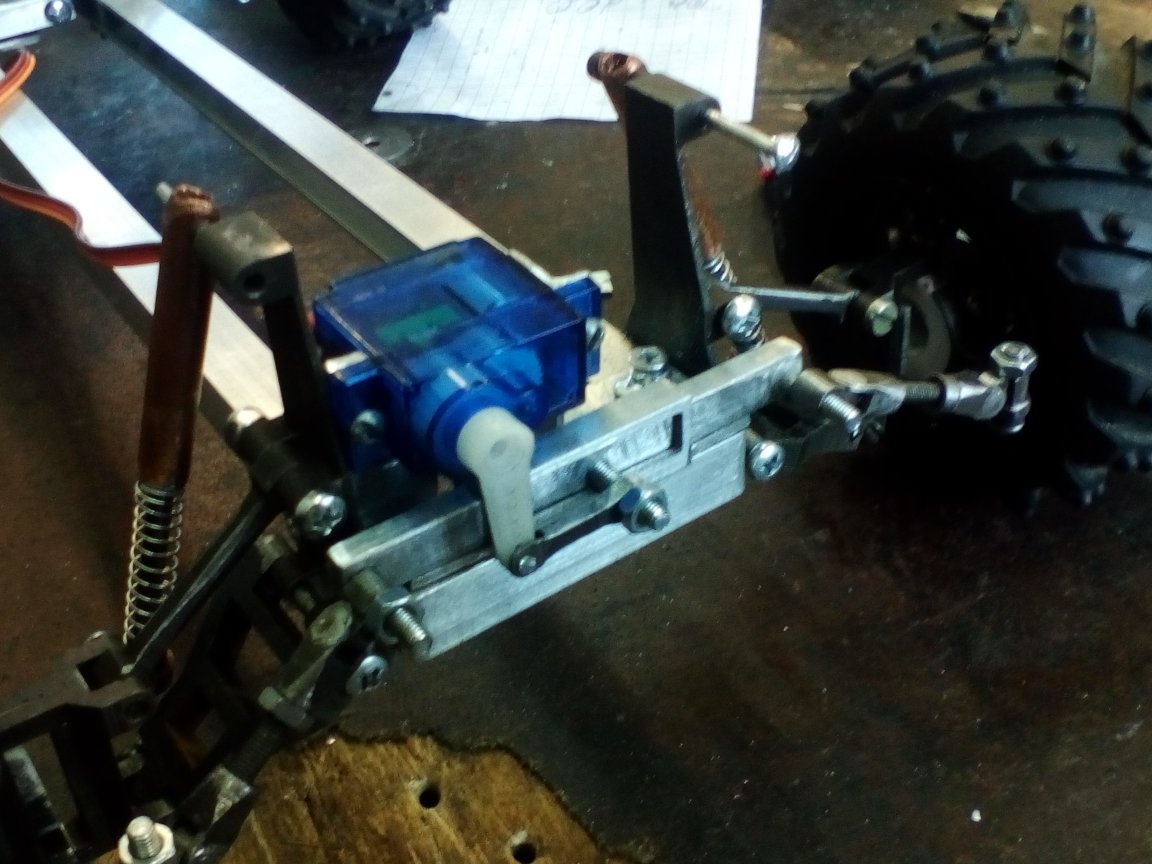
Next came the suspension.I reviewed a bunch of videos on their design applicable to models, digested it all in my head, and sketches were born, adapted to the materials and accessories that were available. In order not to act by the method of scientific poking, I decided to master the Compass. for it was much easier to create a model on the screen and correct errors in it than to do it with metal. I immediately decided to make the suspension modular, so that you could attach it to the frame with a pair of screws, and if necessary, easily change the mounting location. Here is what came of it.
Front suspension.
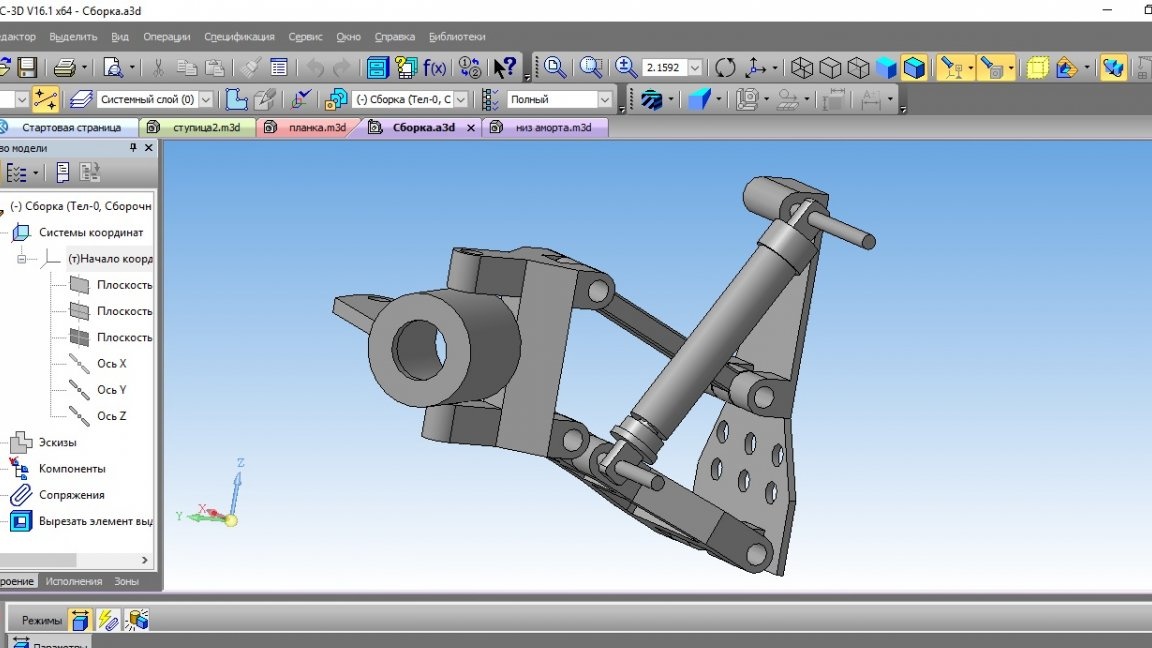
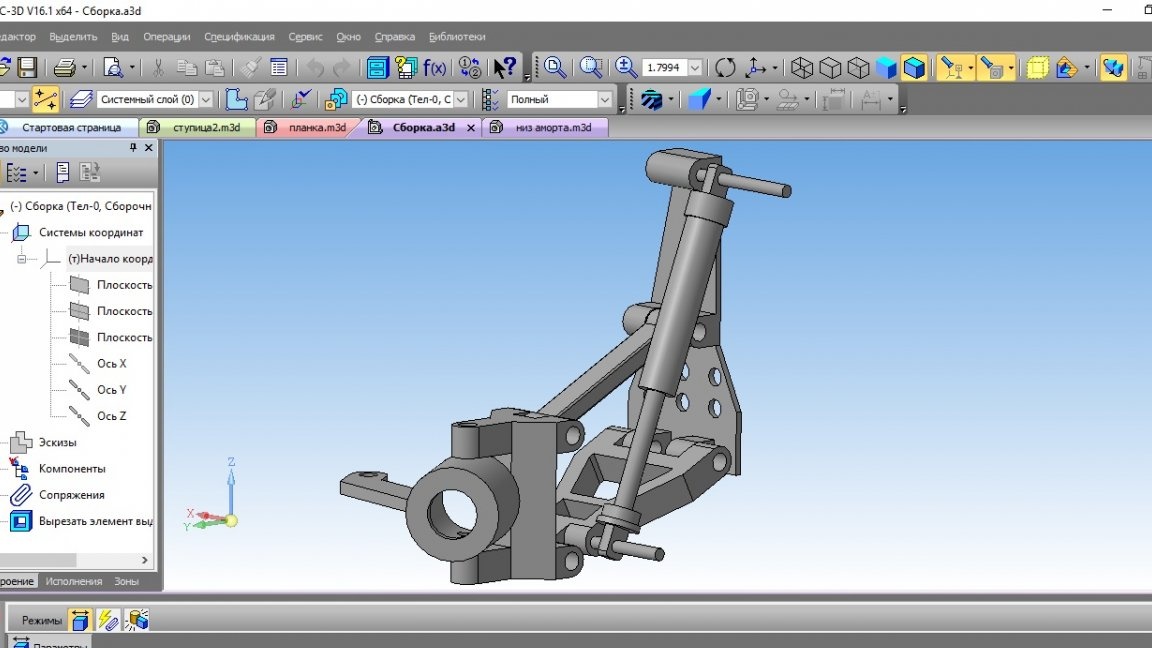
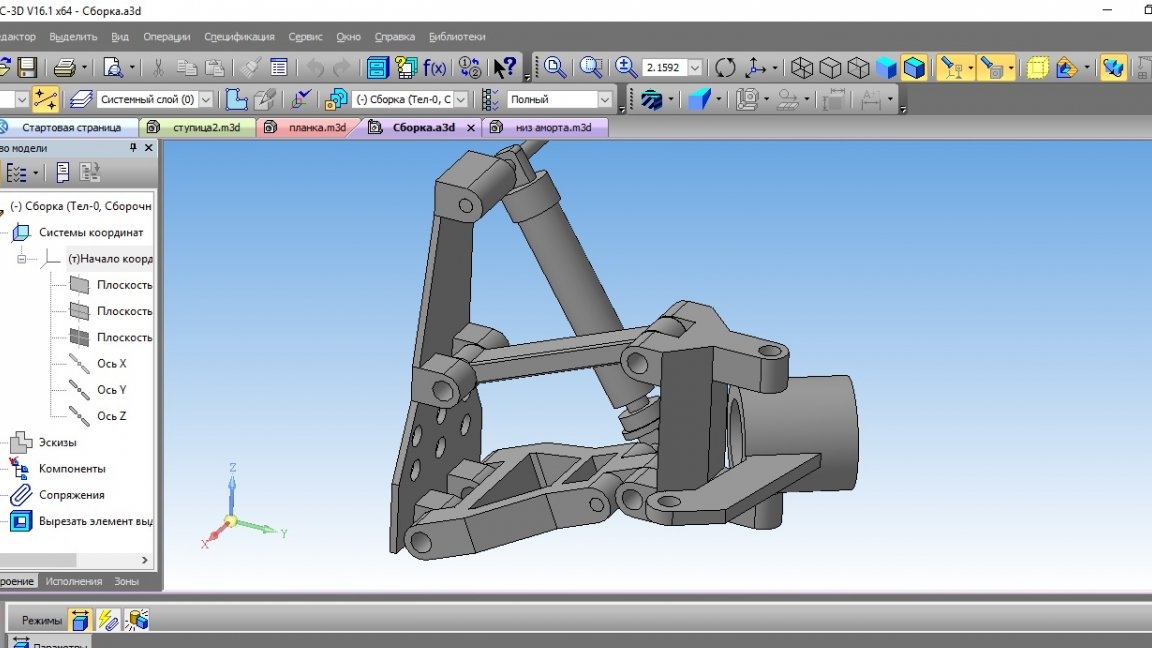
Rear suspension.
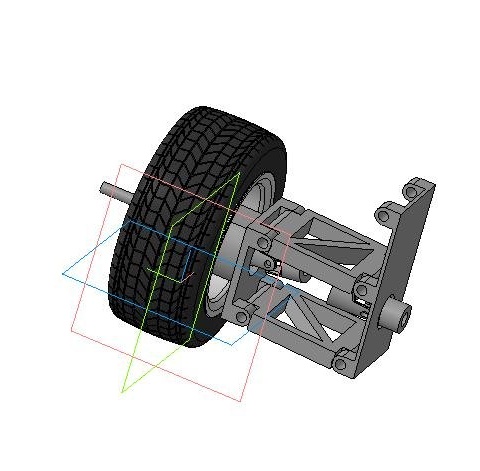
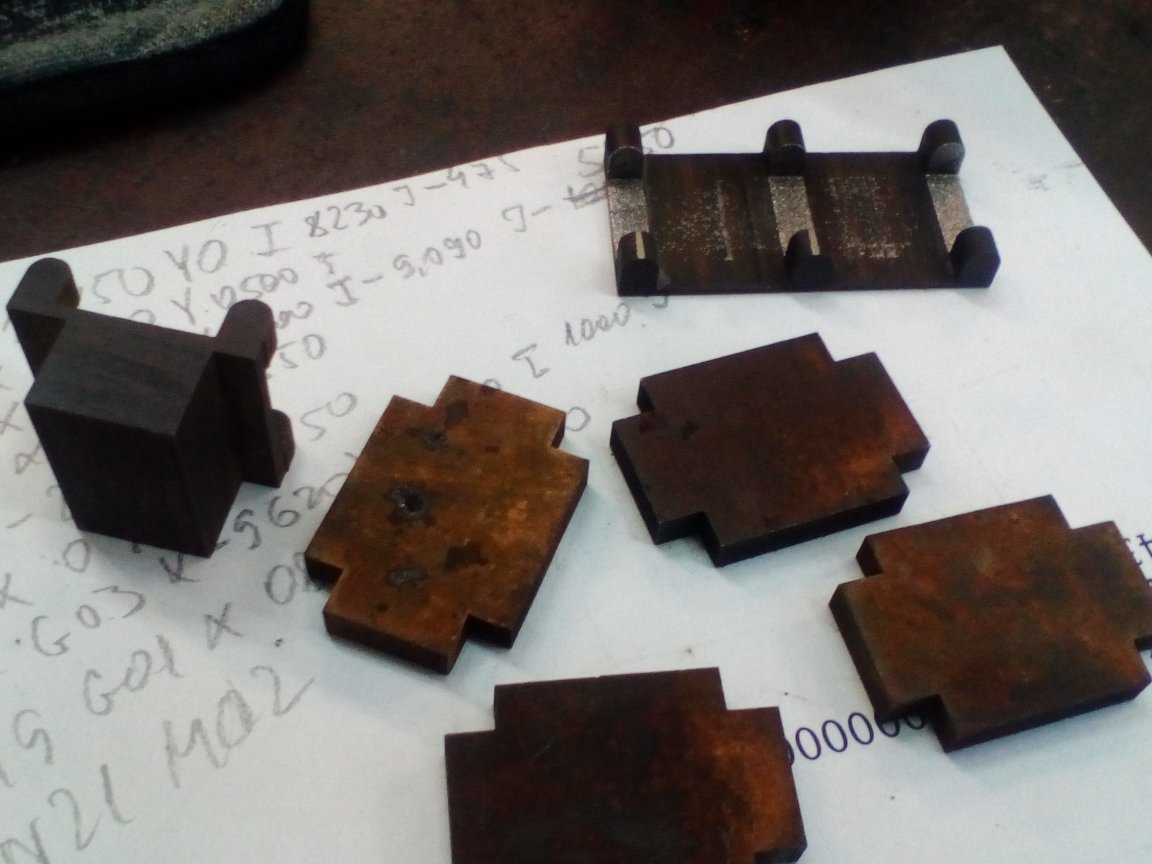
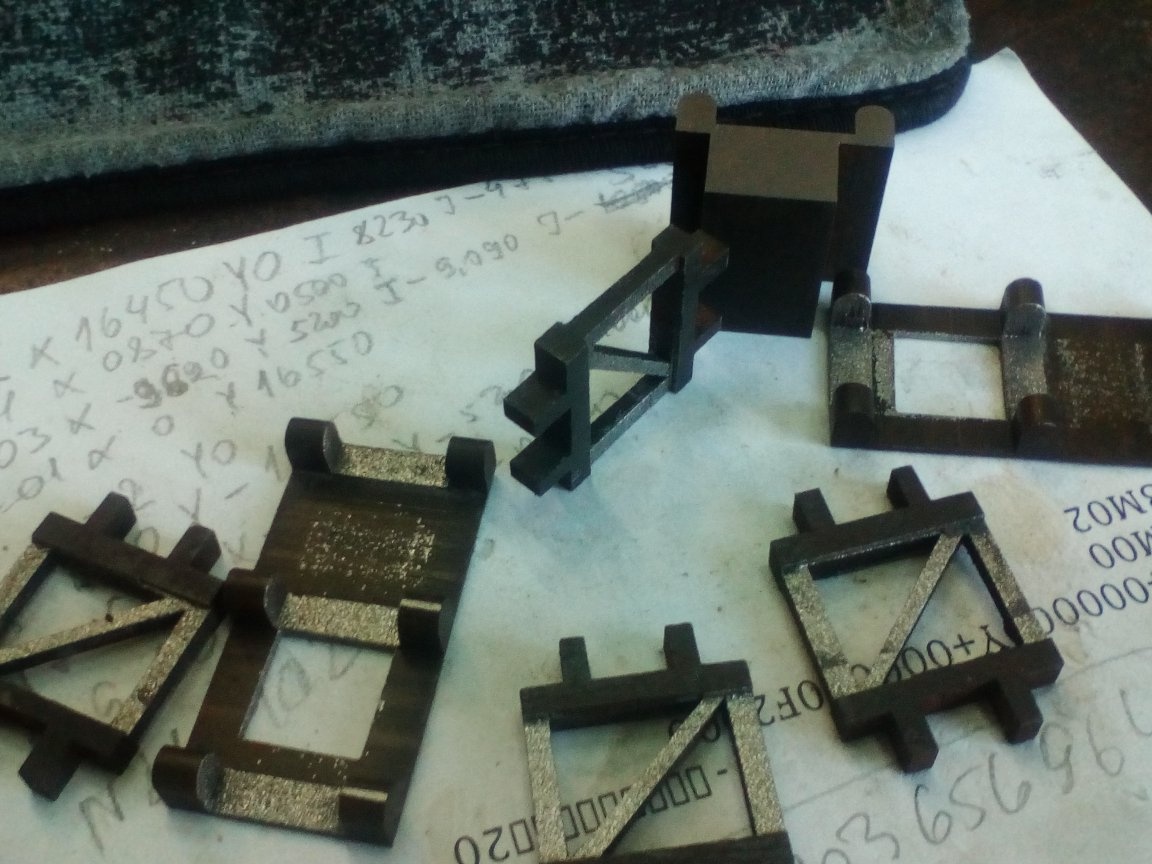
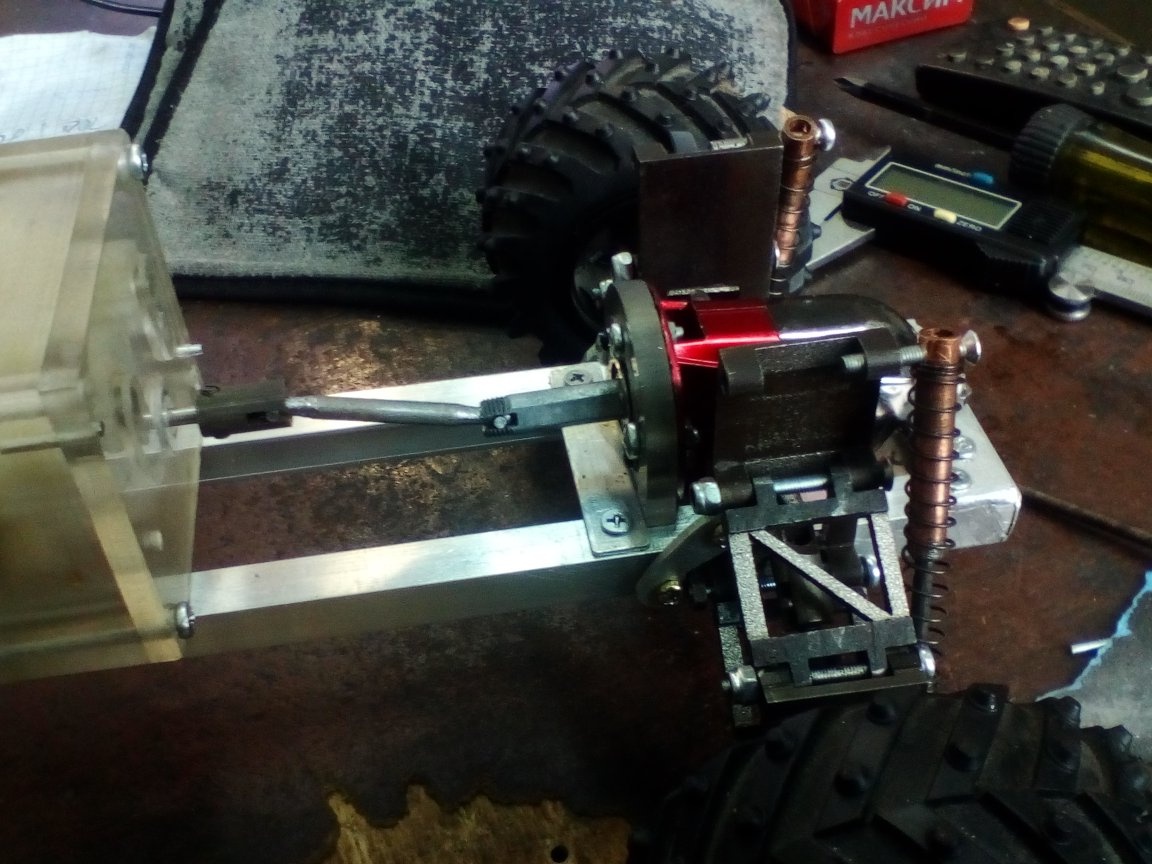
All elements of the pendants were sawn from scraps of steel sheet 5mm thick. And my machine tool helped me a lot in this. Although I had access to almost all metal-cutting machines, I tried to do more with my hands or do it alone. In any case, what was done on the machine could also be done manually, though spending more time and energy. So, having modeled the suspension in Compass, I sawed them out of metal, drilled holes for the axis of the levers, fasteners and for shock absorbers. assembled racks, levers and hubs in one piece, everything worked as it should.
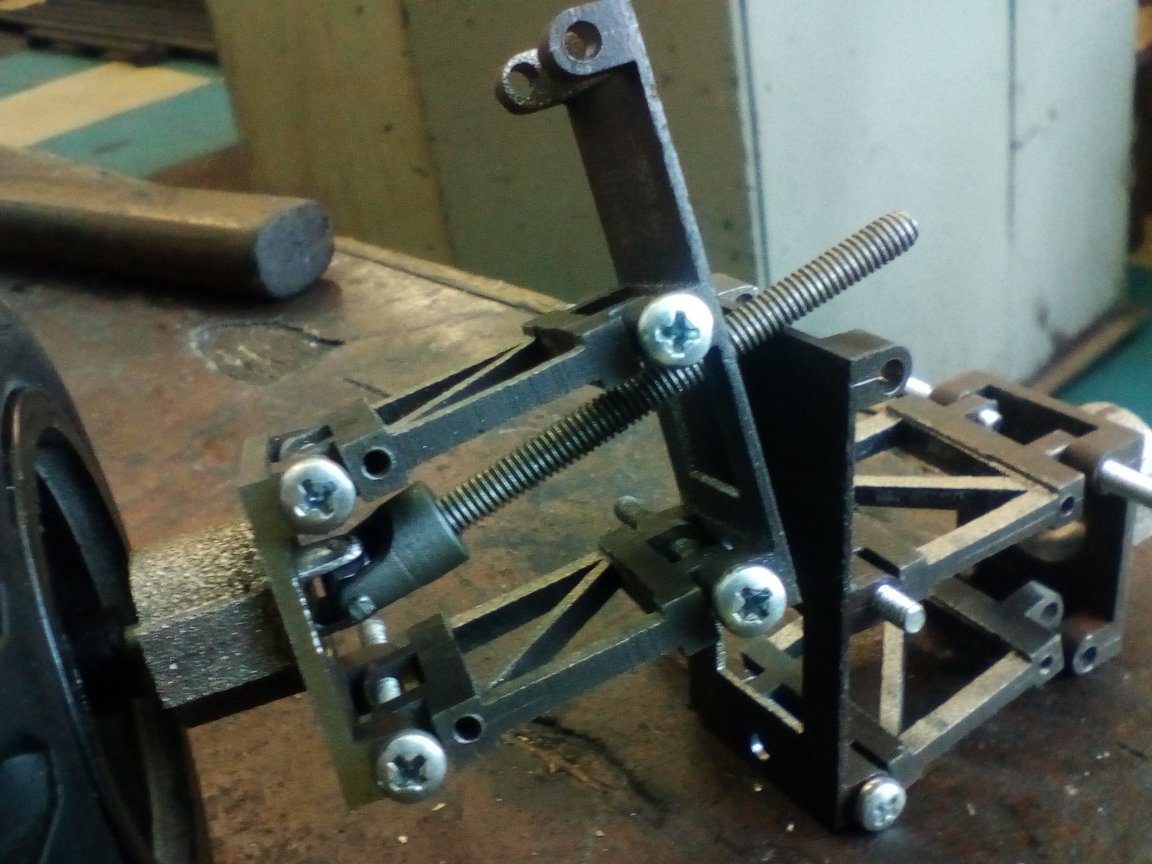
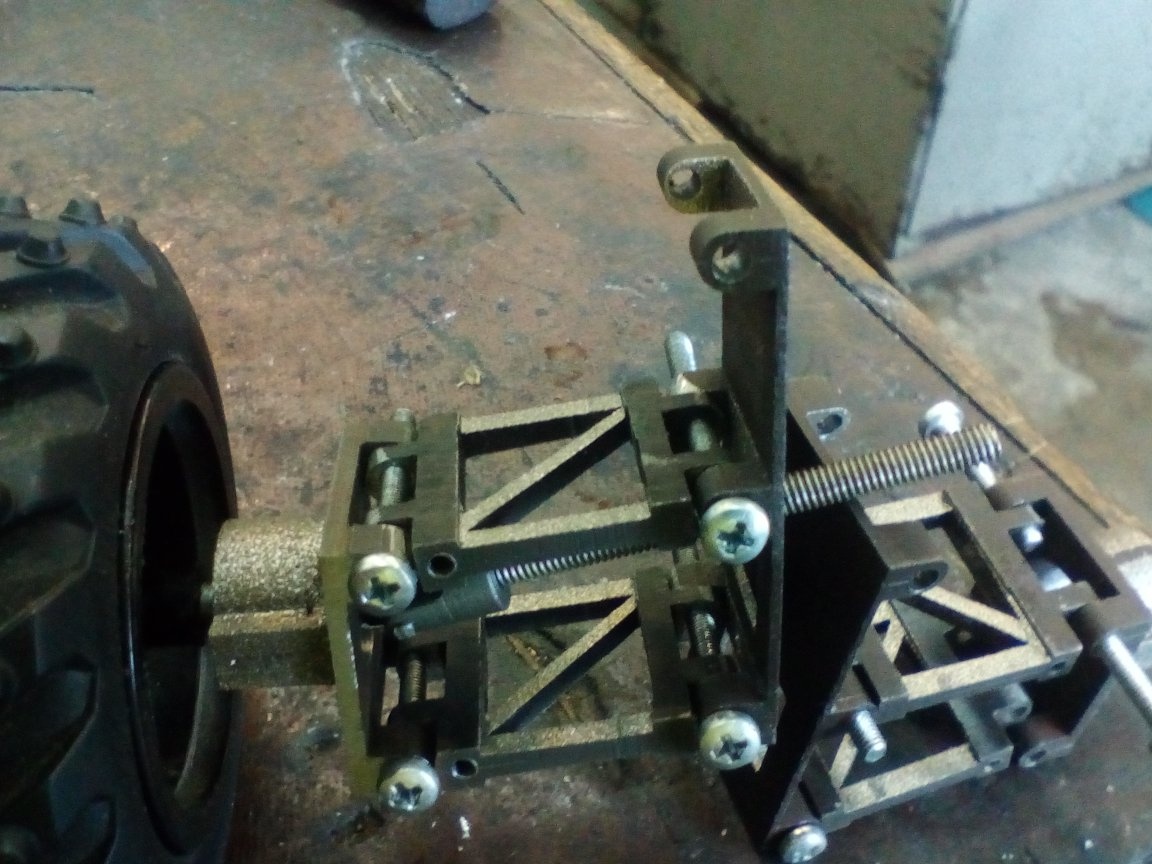
It was the turn of shock absorbers. It was decided to make them from copper tubes and a rod from a welding electrode. additionally cut restrictive rings onto the stem and spring stops. that's what happened in the end.
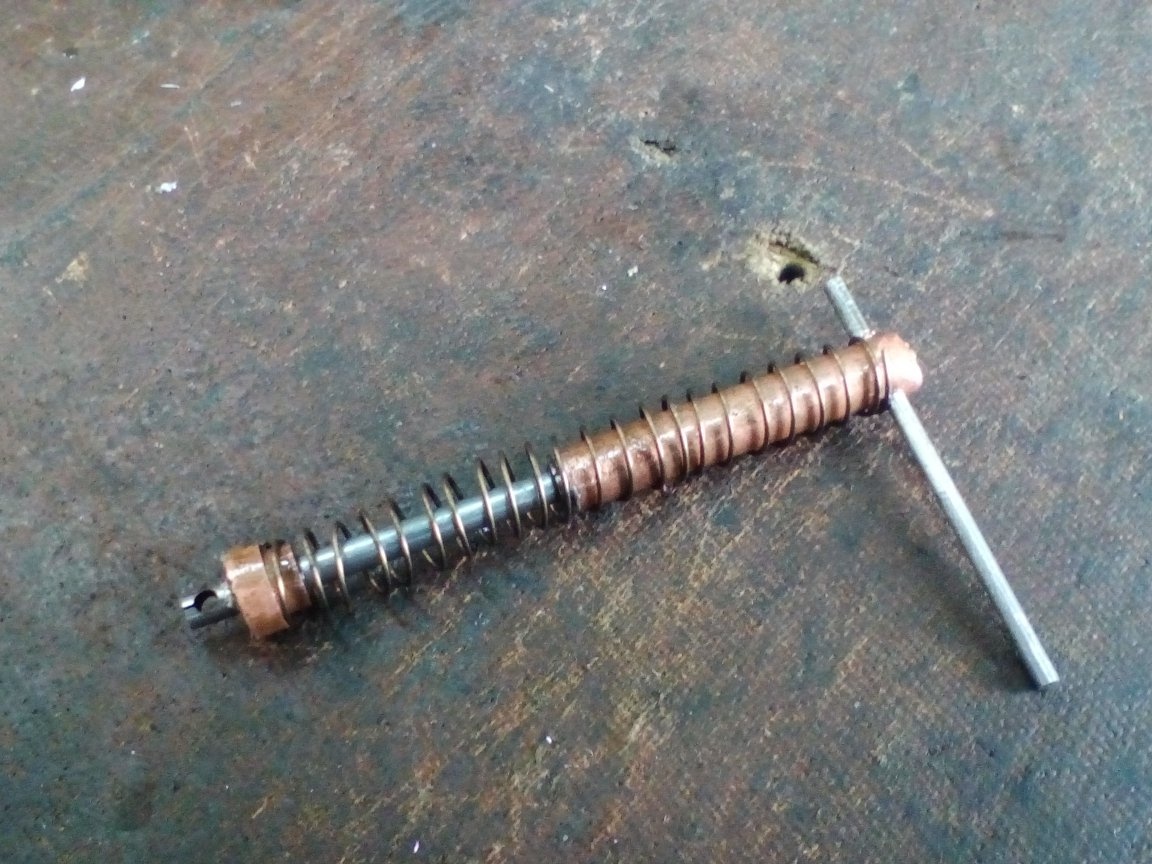
I had to suffer with springs. The weight was pretty good. He collected from the electricians springs of different sections, diameters and lengths and again the scientific poking method went into action. Unfortunately, not a single option came up. but ... we are not used to retreat! Having found a wire of different diameters, he wound the springs manually. and after quenching he began to try again. Finally got what I wanted! Screwed the suspension to the frame, attached shock absorbers, beauty! I made the front hubs from pieces of fluoroplastic. inserted bearings into them and cut out the knuckles.
It turned out pretty hard. the rear hubs were carved out of steel. also with bearings.
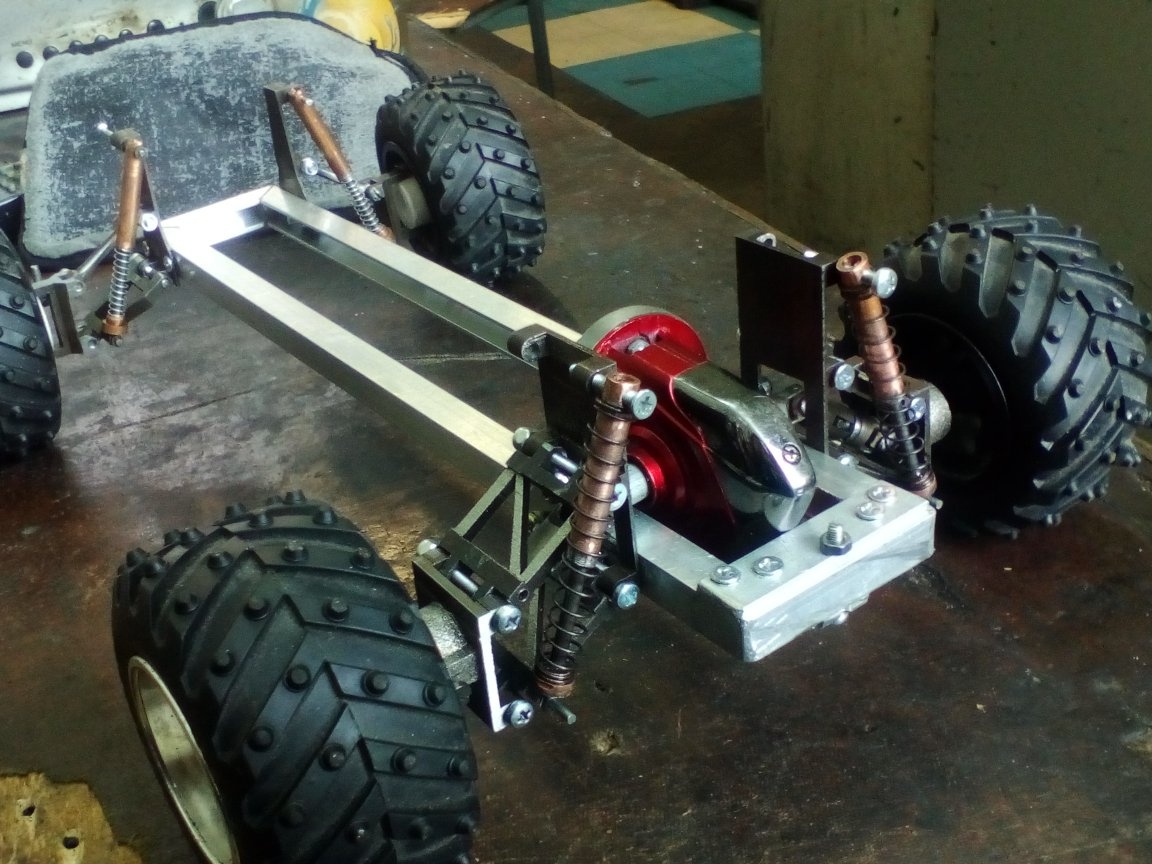
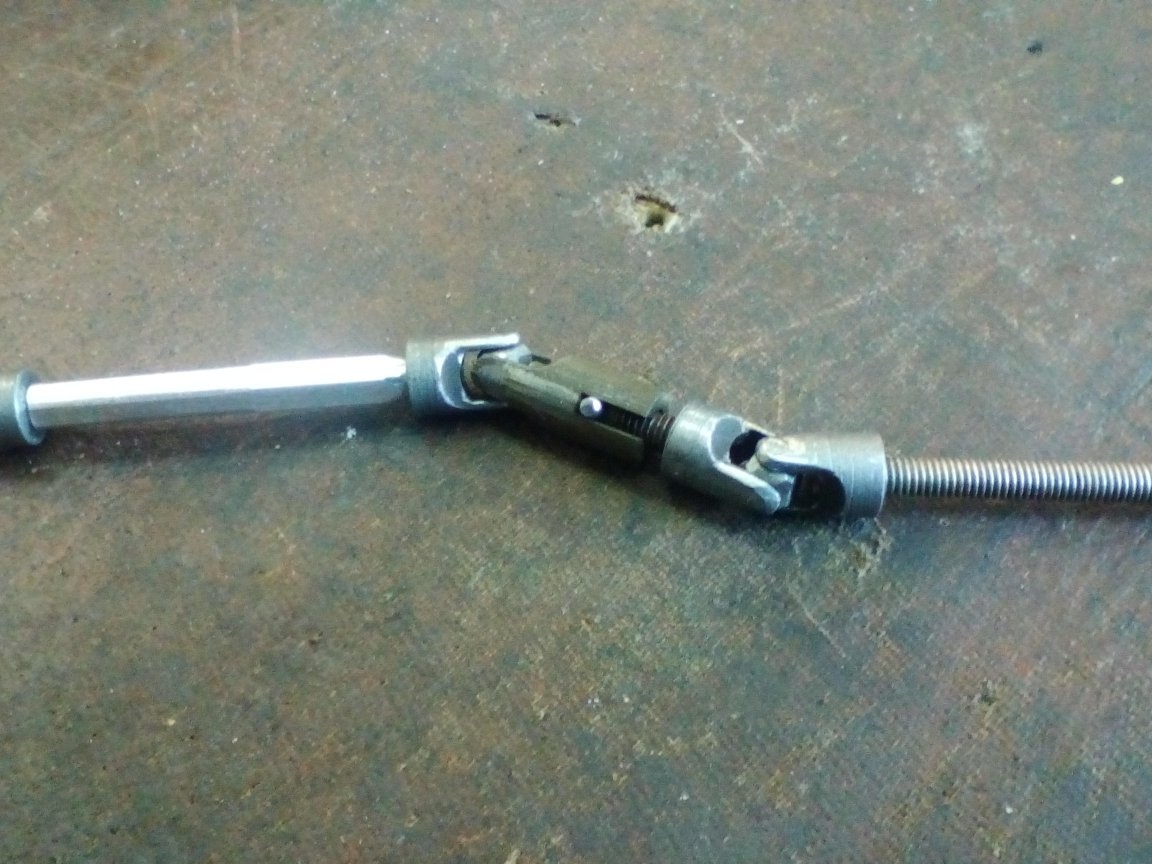
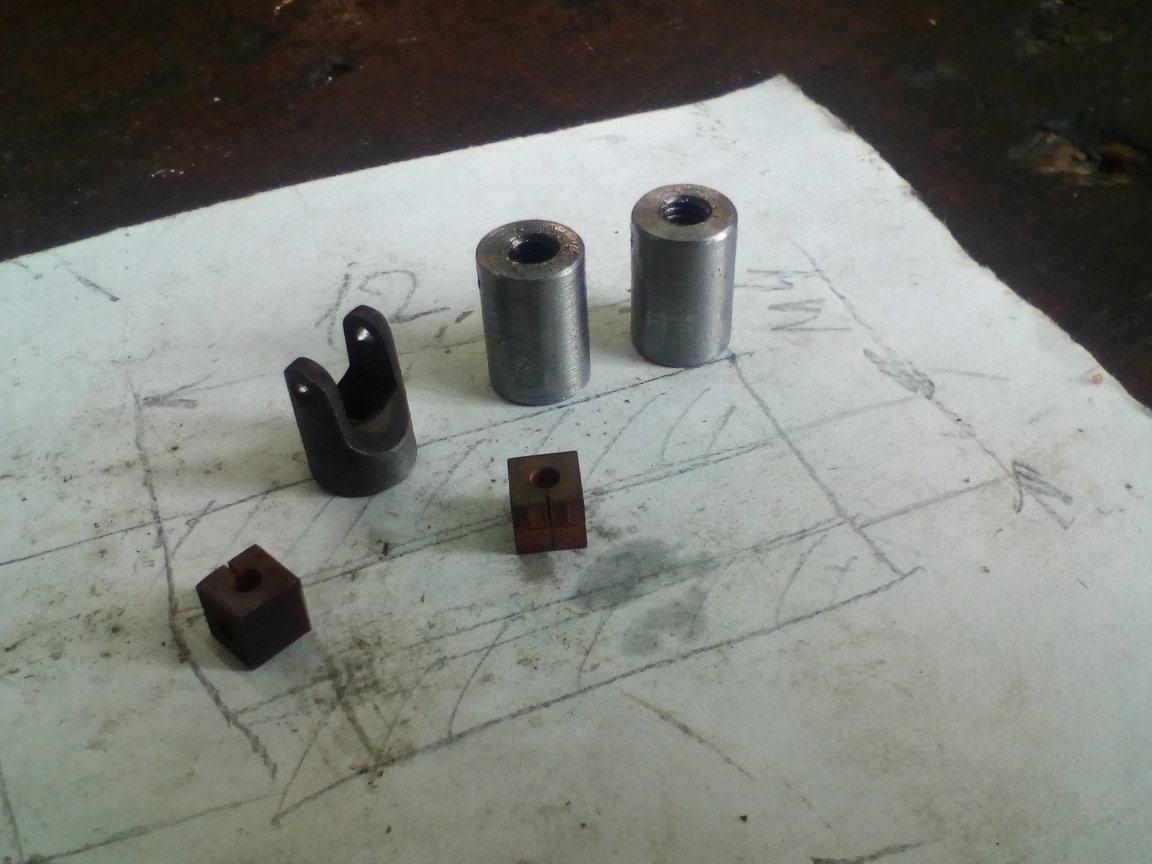
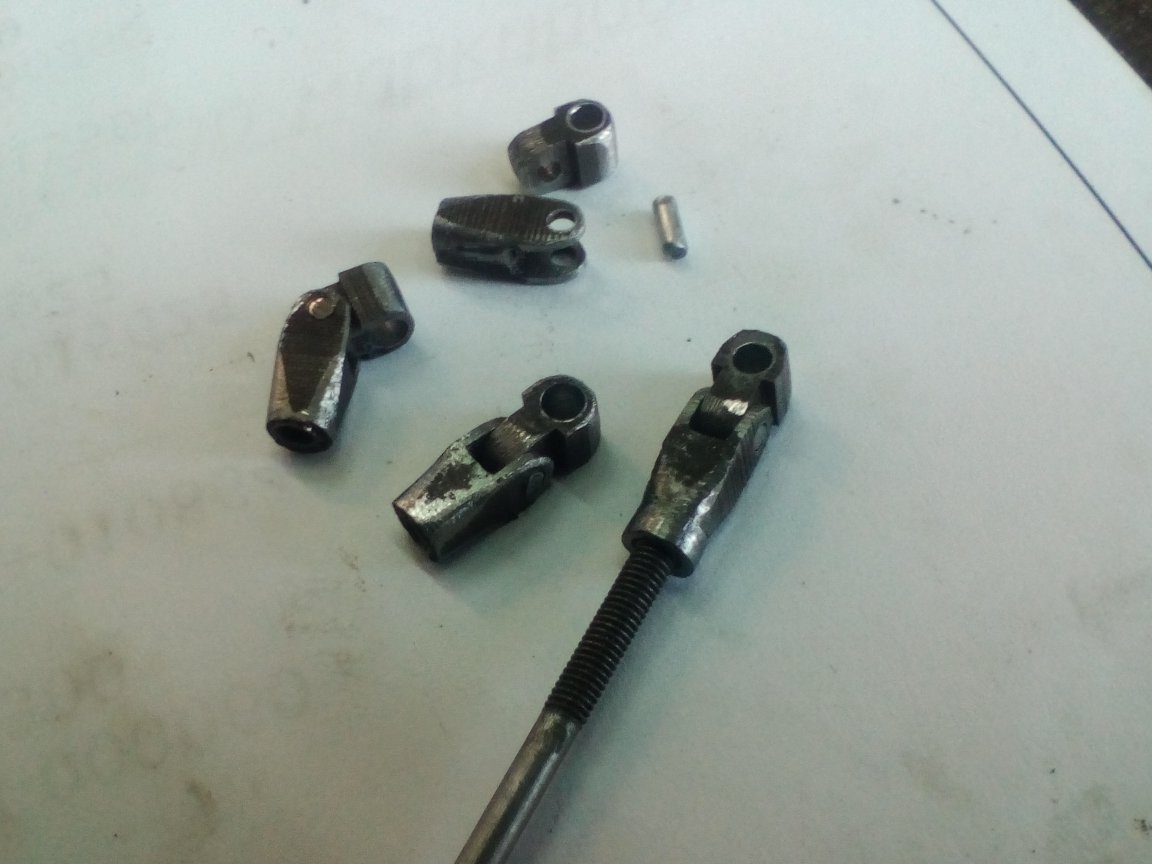
To transfer torque to the wheels, I decided to make cardans. You can find many ways to make them in YouTube, but my machine came to my aid again. I cut the parts from steel wastes of suitable sizes, the same cycling spokes as axles, sealed the holes so that the axes would not fly out. The suspension travel turned out to be large, so the cardan had to be made sliding.
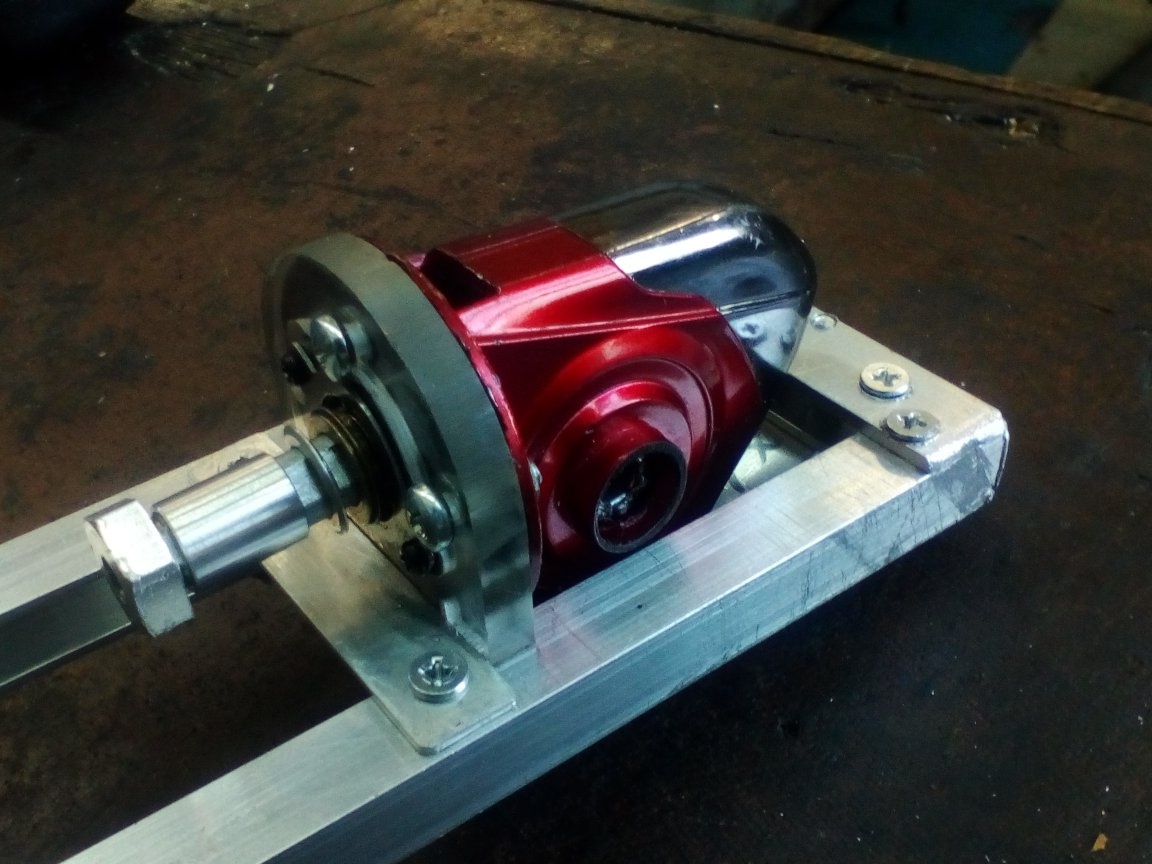
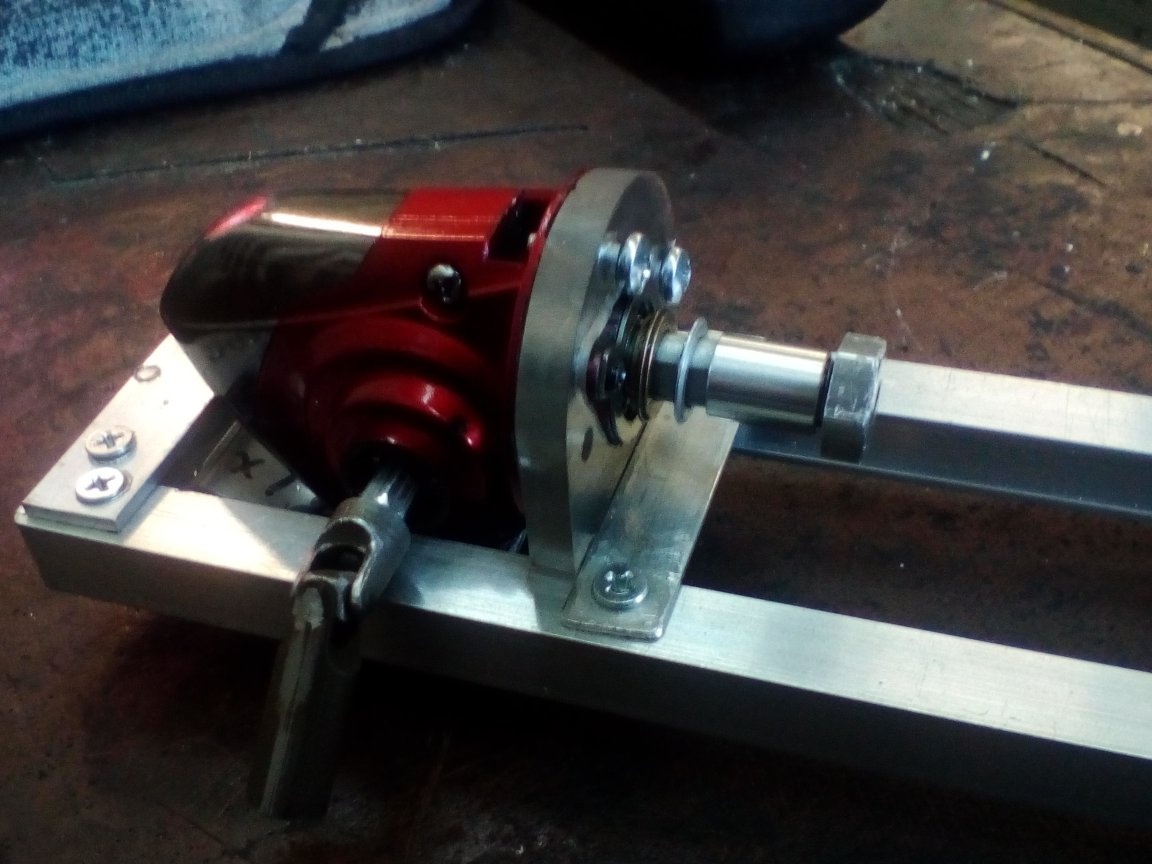
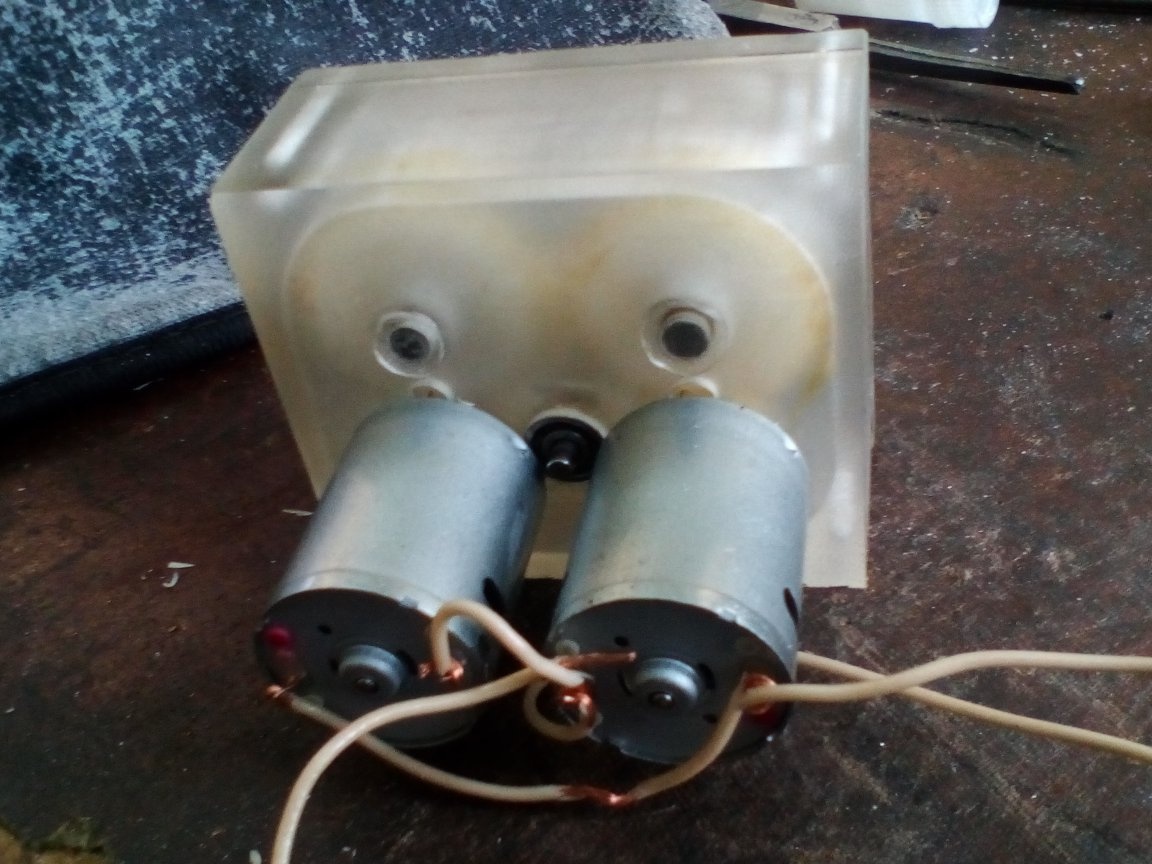
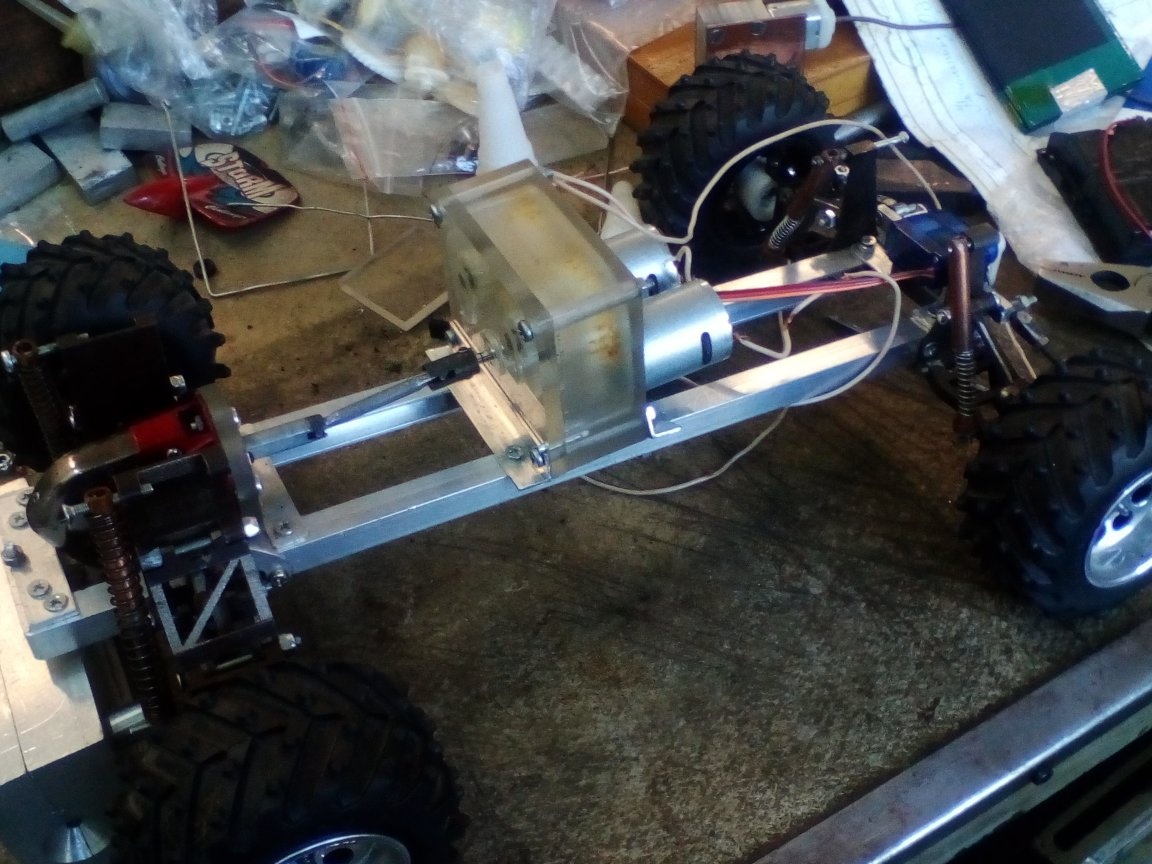
Ali wrote out two engines of the 370th series and two sets of gears. Of these, a gearbox for two motors with a gear ratio of about 1: 5 was obtained.
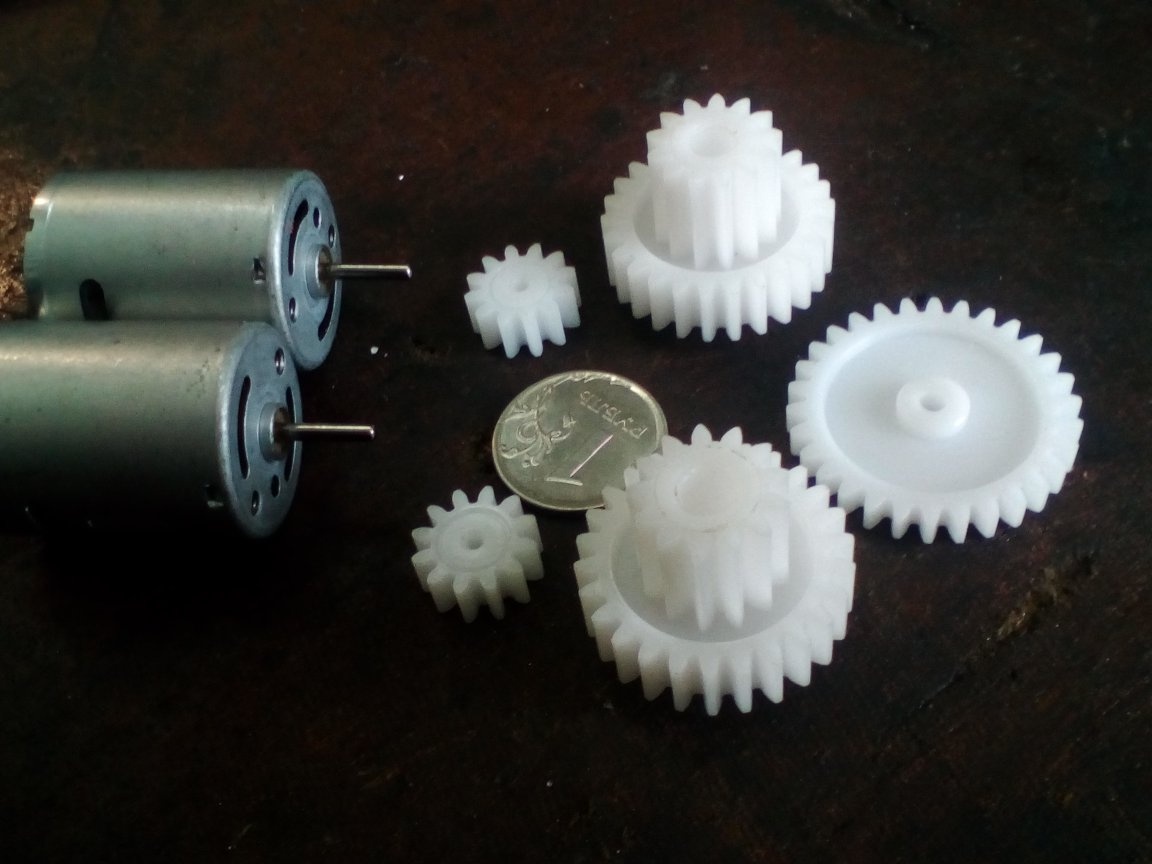
The case was made of a piece of plexiglass. The cover of it is the same, but sheet.
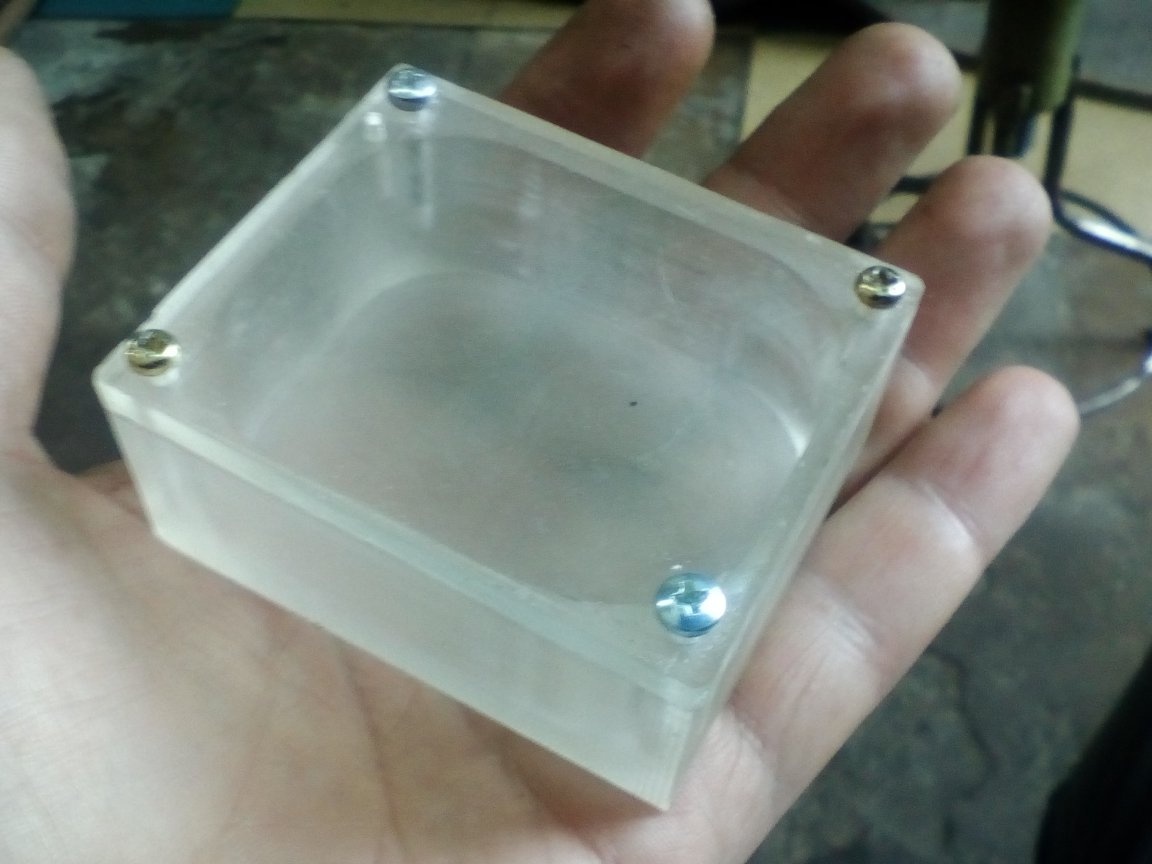
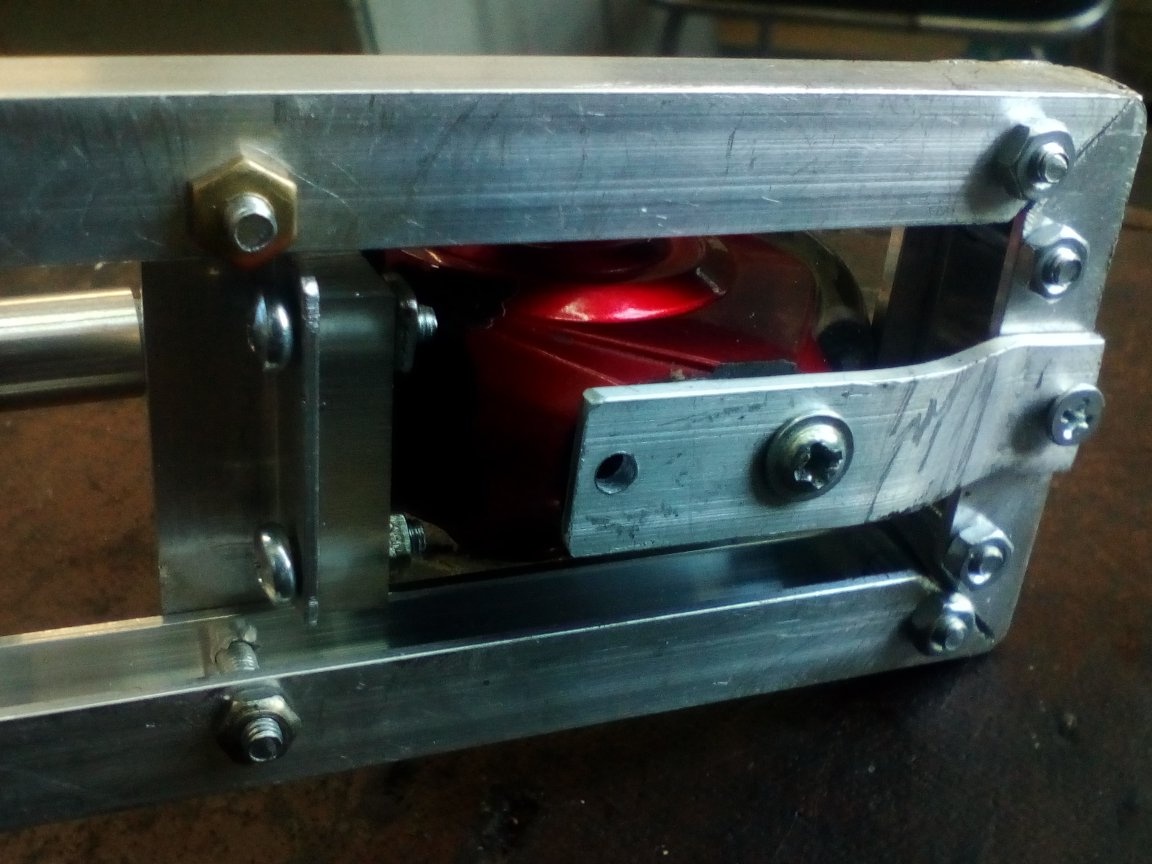
I drilled mounting and axial holes and assembled everything into one unit. It turned out to be cumbersome, but powerful!) Yes, I also did not forget about the bearings.
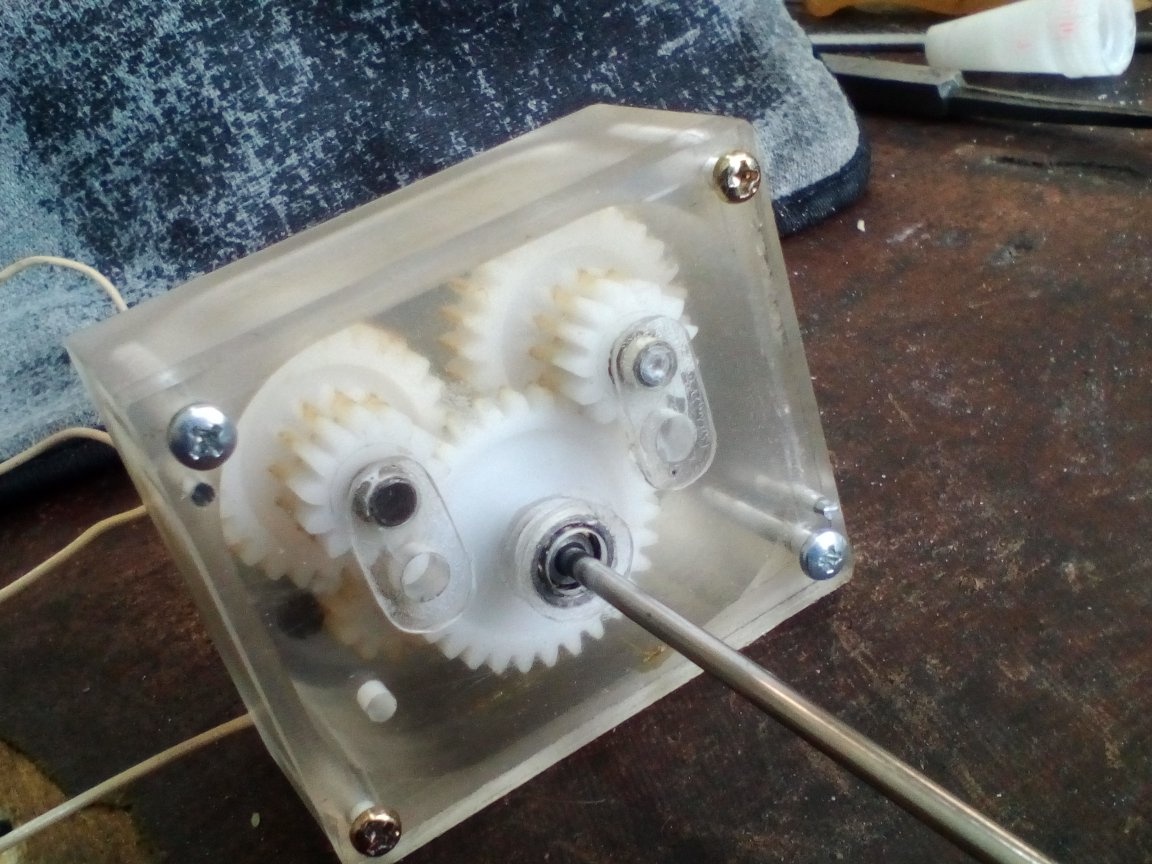
I drilled through the holes for fixing the cover through, and attached the corners of the gearbox to the frame to the bottom. The shaft of the gearbox and the coil was connected in the form of a cup-bone.
The next node with which I had to torment is the steering system. I will not describe how many design and layout options I tried so that the alignment remains unchanged at any position of the suspension, but an acceptable option was still found. There he is:
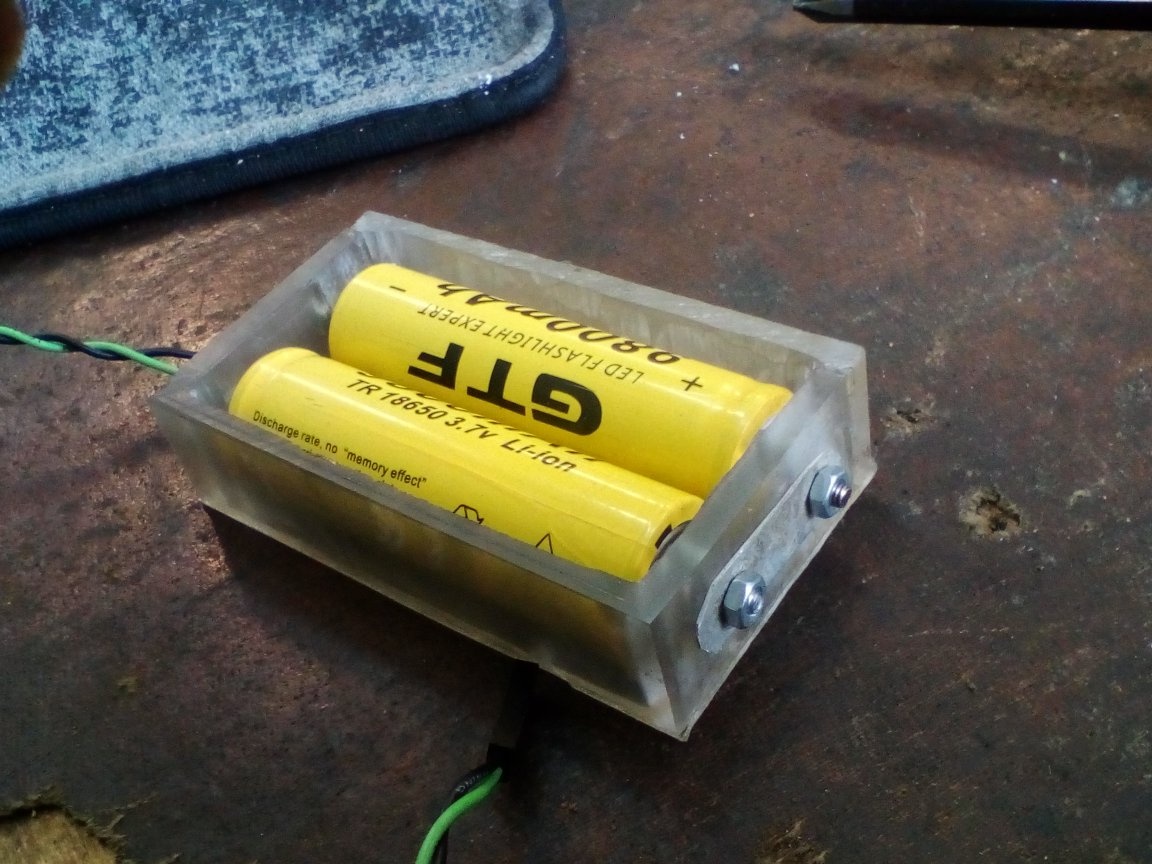
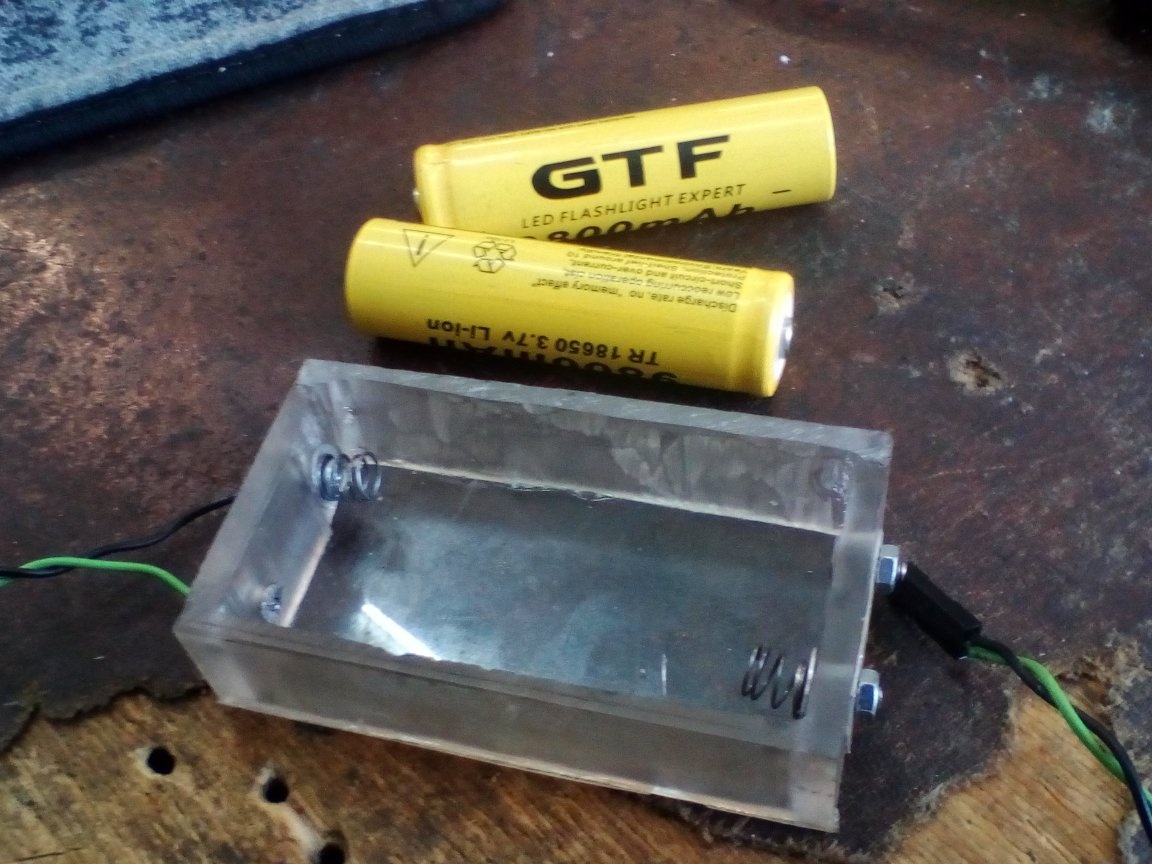
I made a container for batteries from plexiglass.
From the L-shaped profile and a piece of plexiglass made a platform for electronics. Attached it to the top screws of the gearbox and rear suspension.
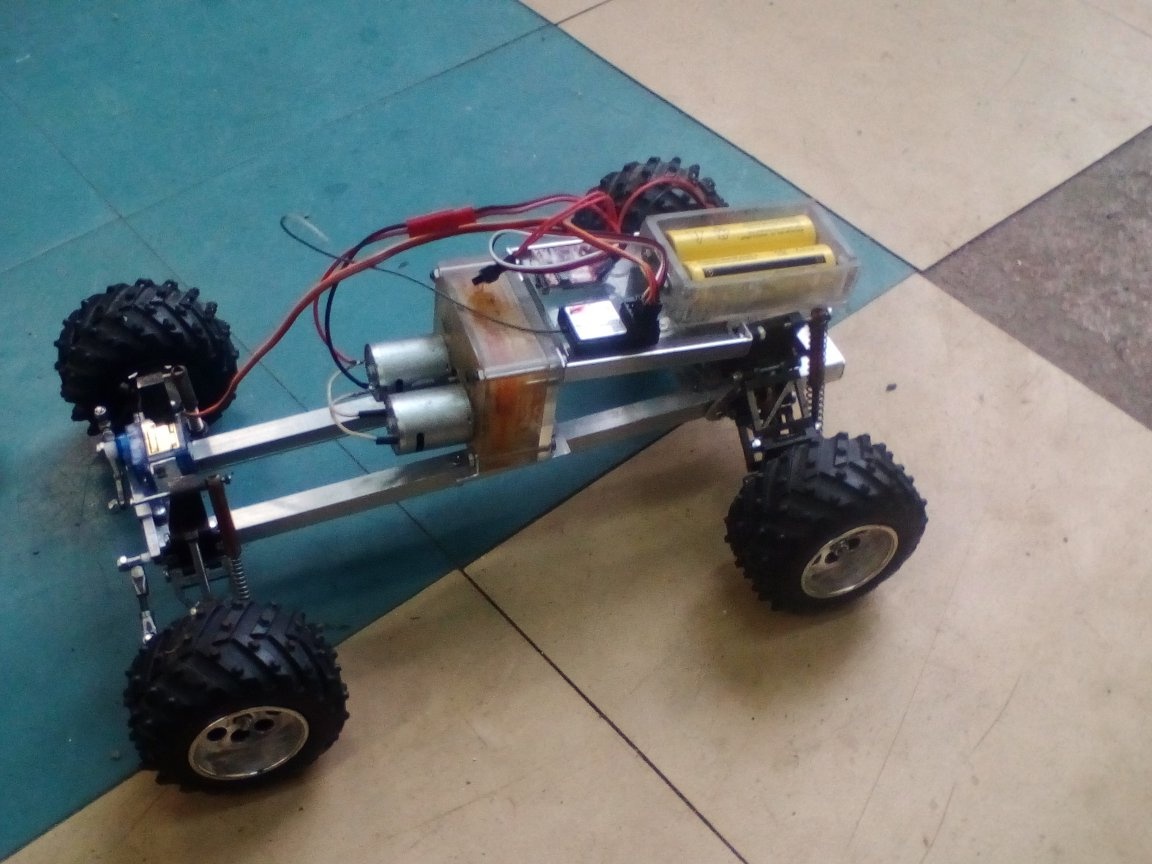
I installed a receiver, batteries and an engine speed regulator on it. All connected. Running gear is ready, you can experience!
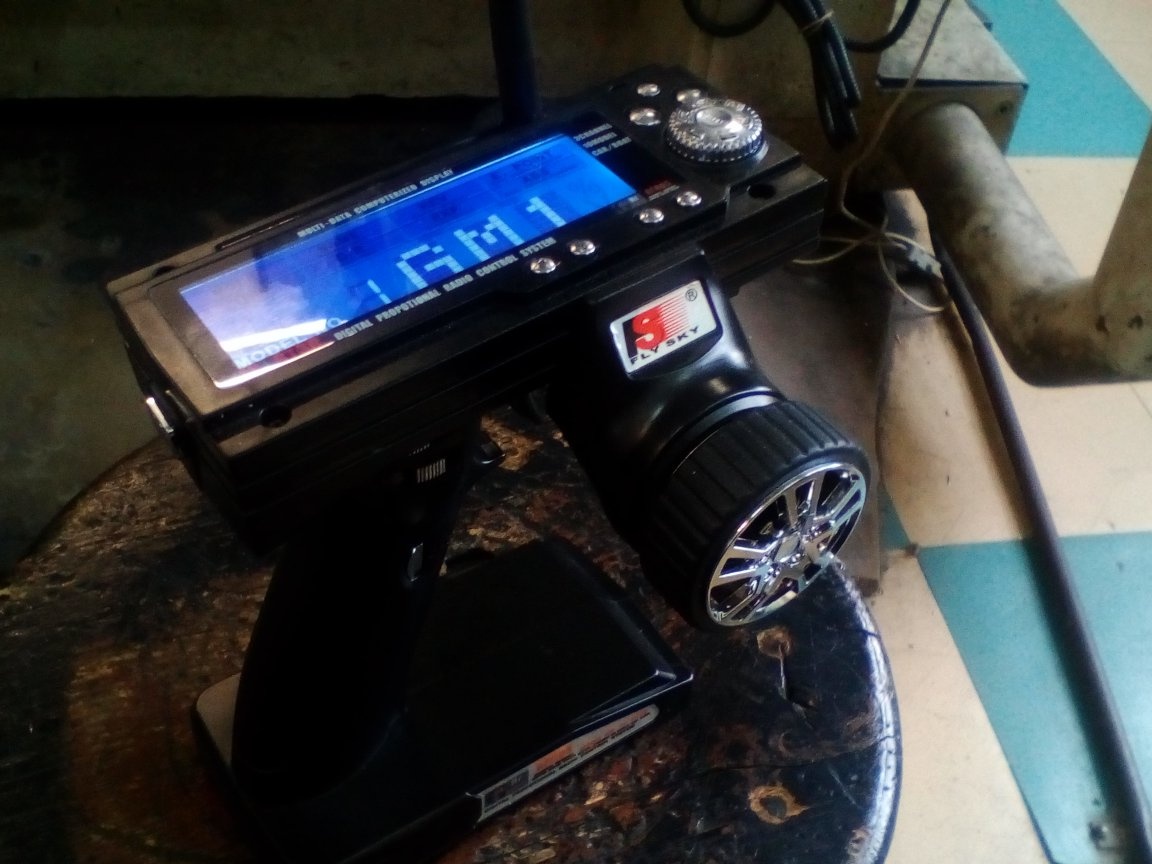
The equipment was used by FlySky FS GT3B
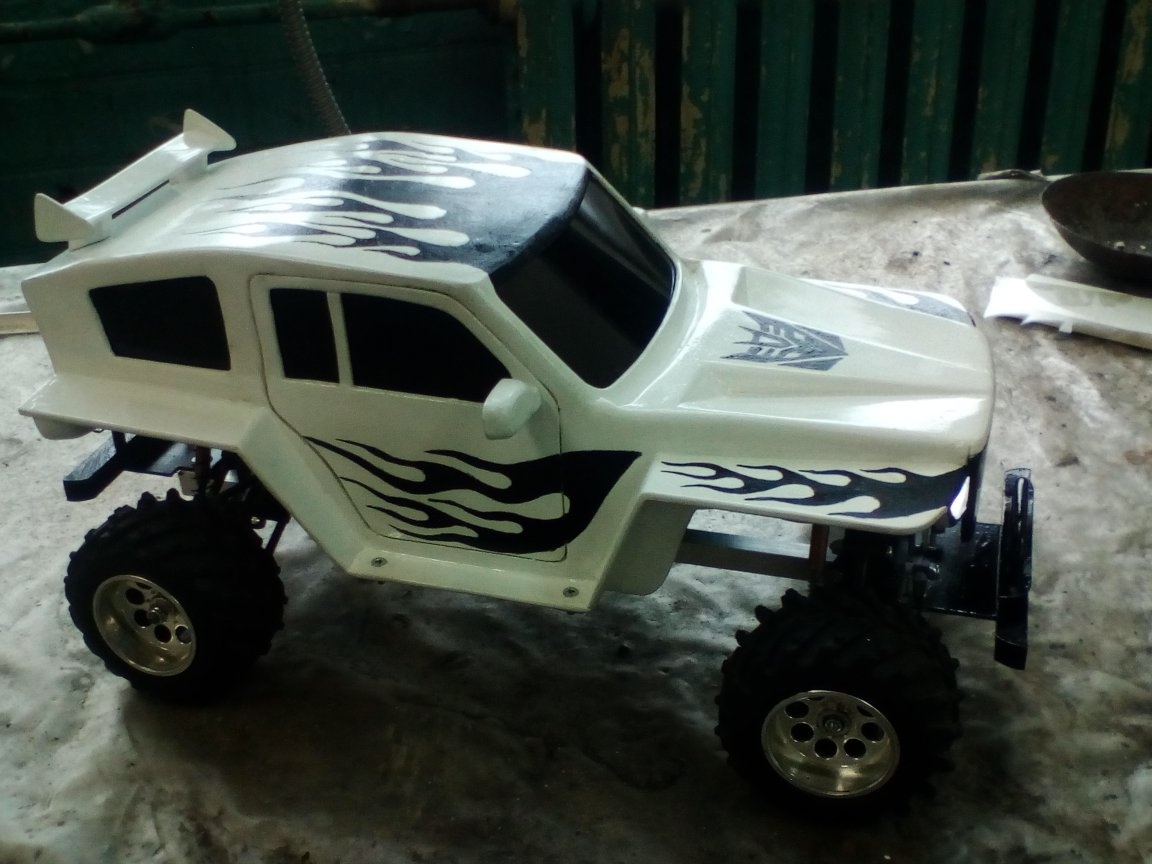
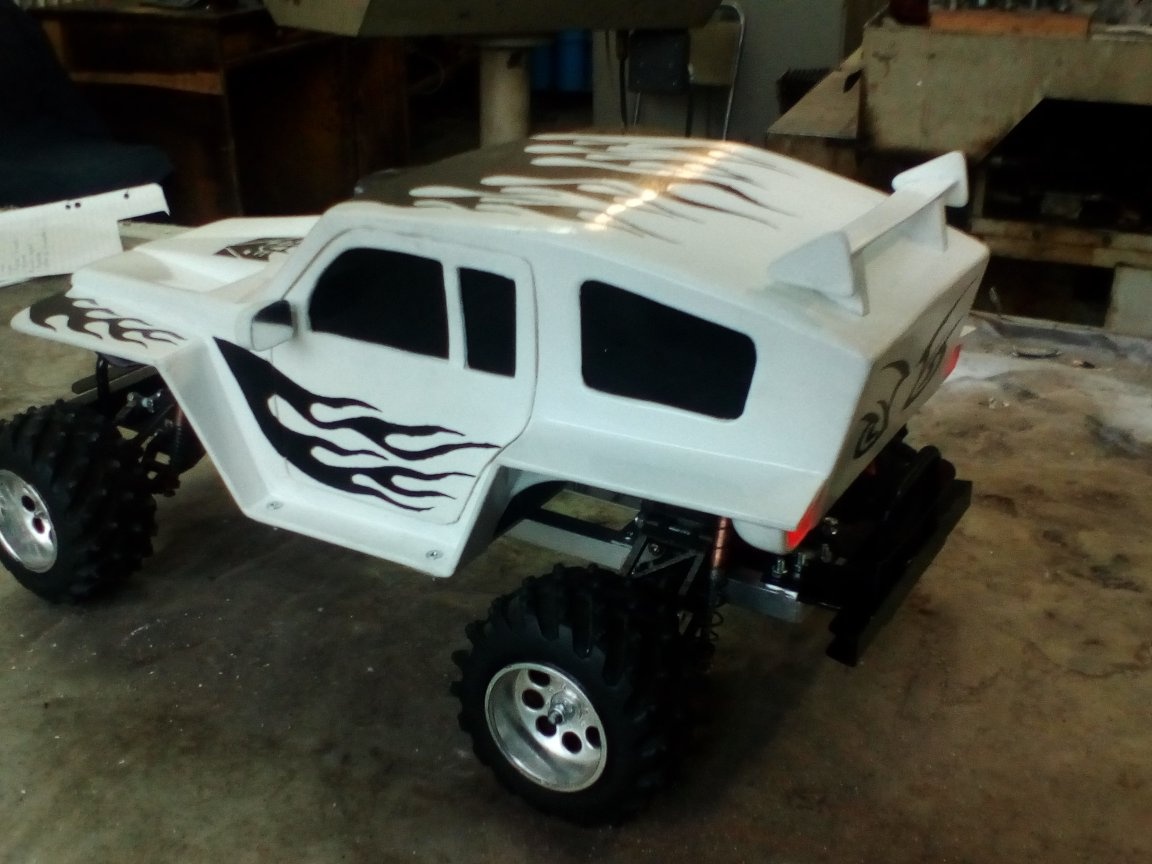
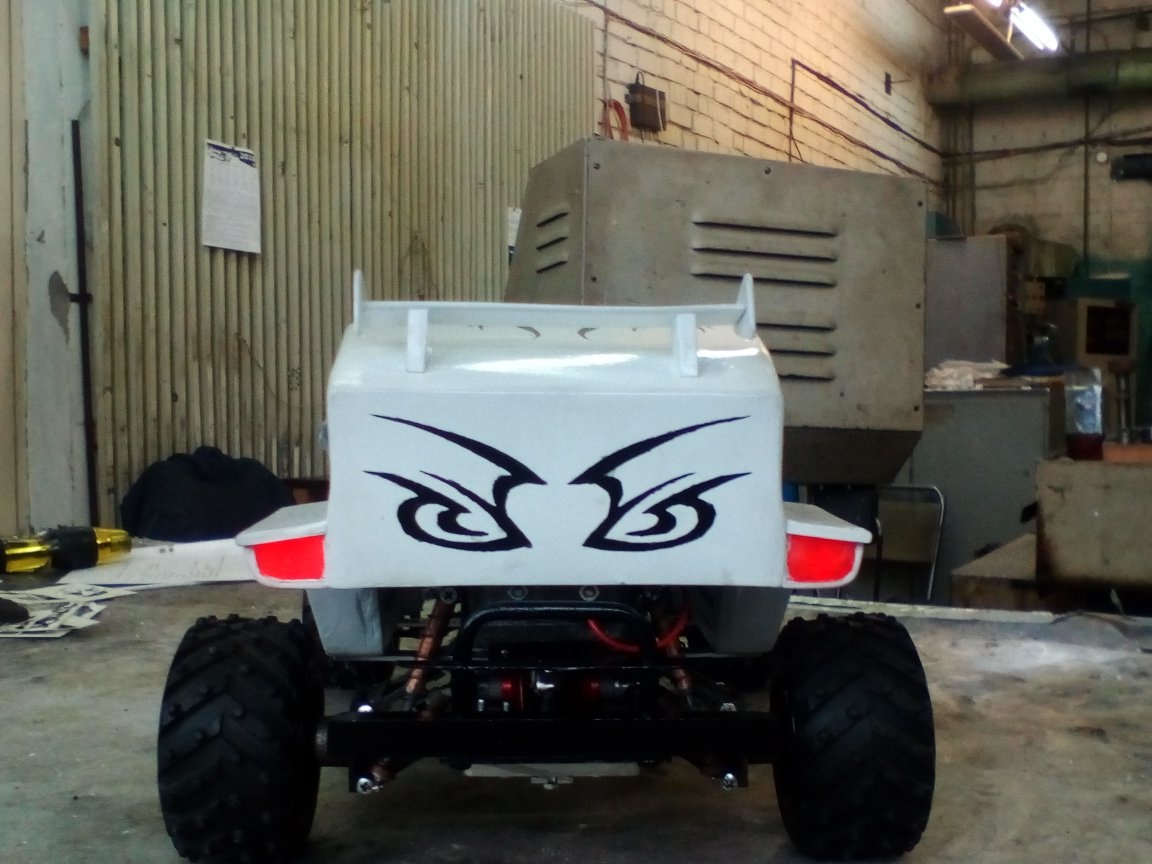
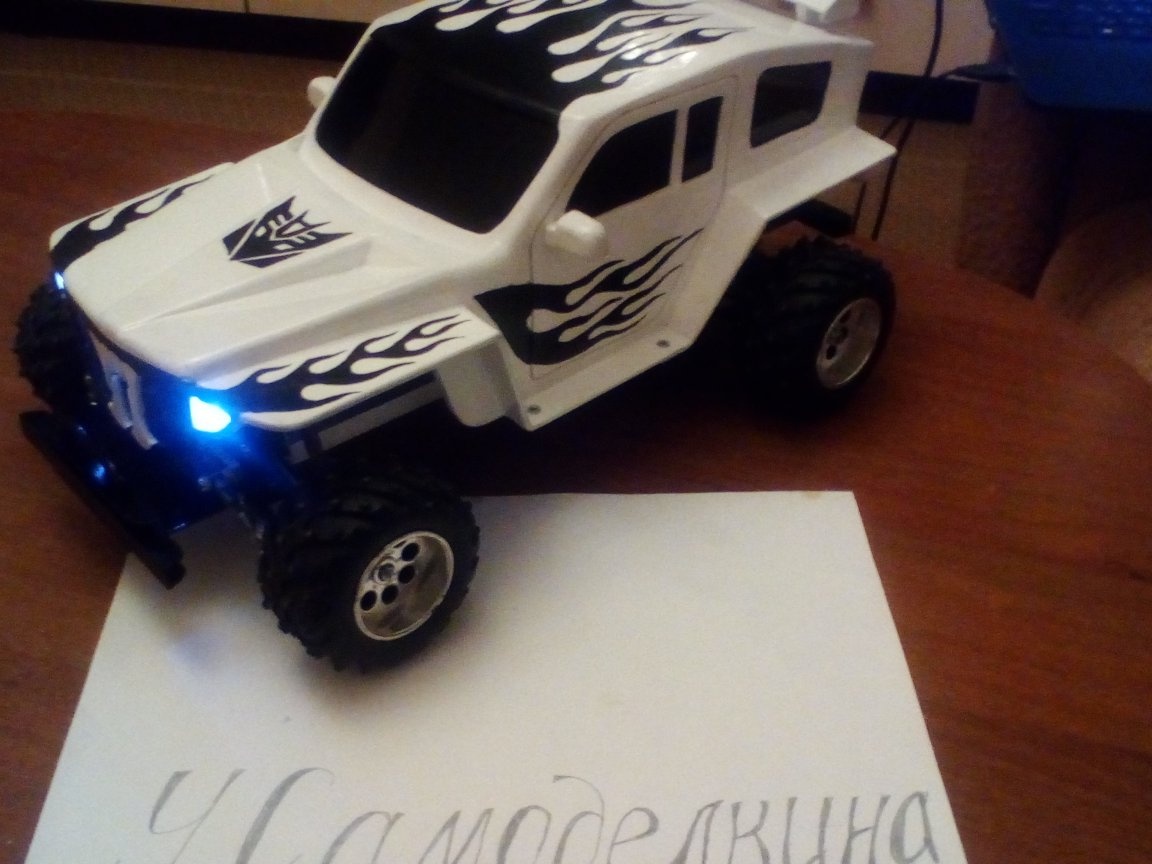
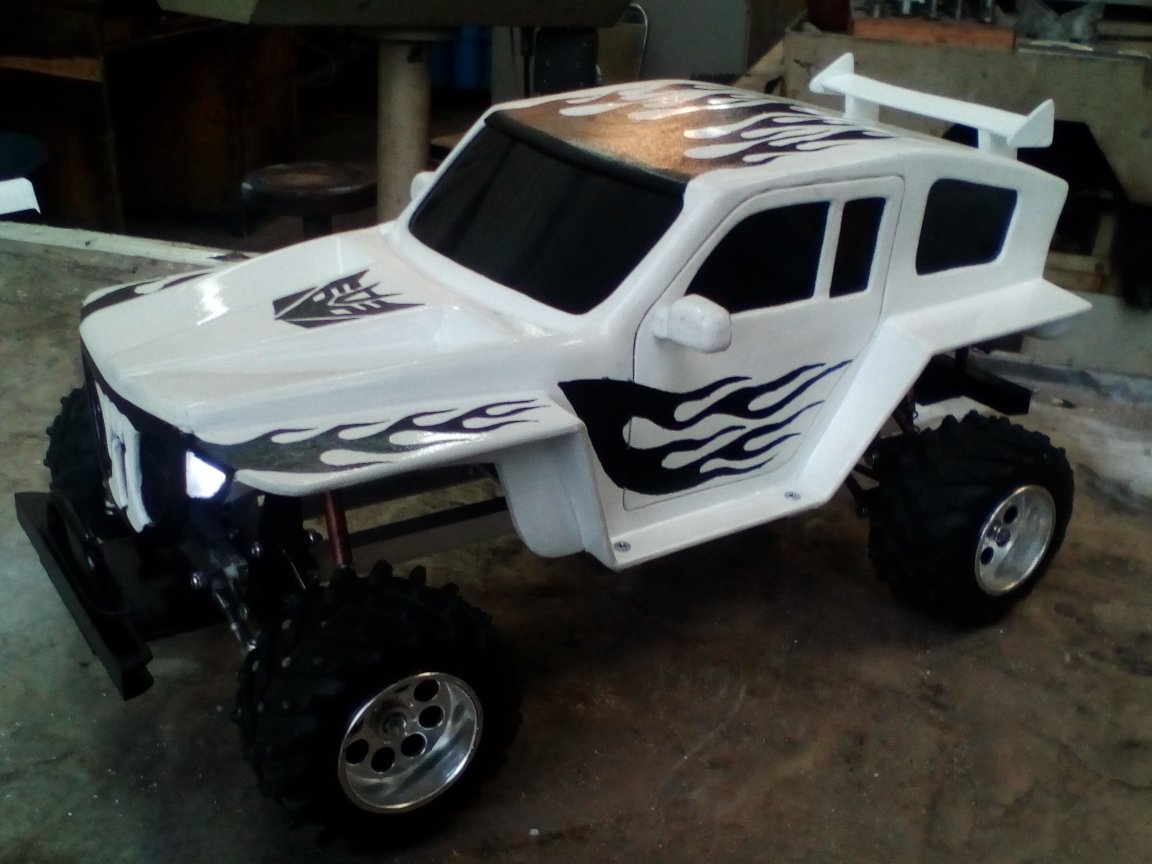
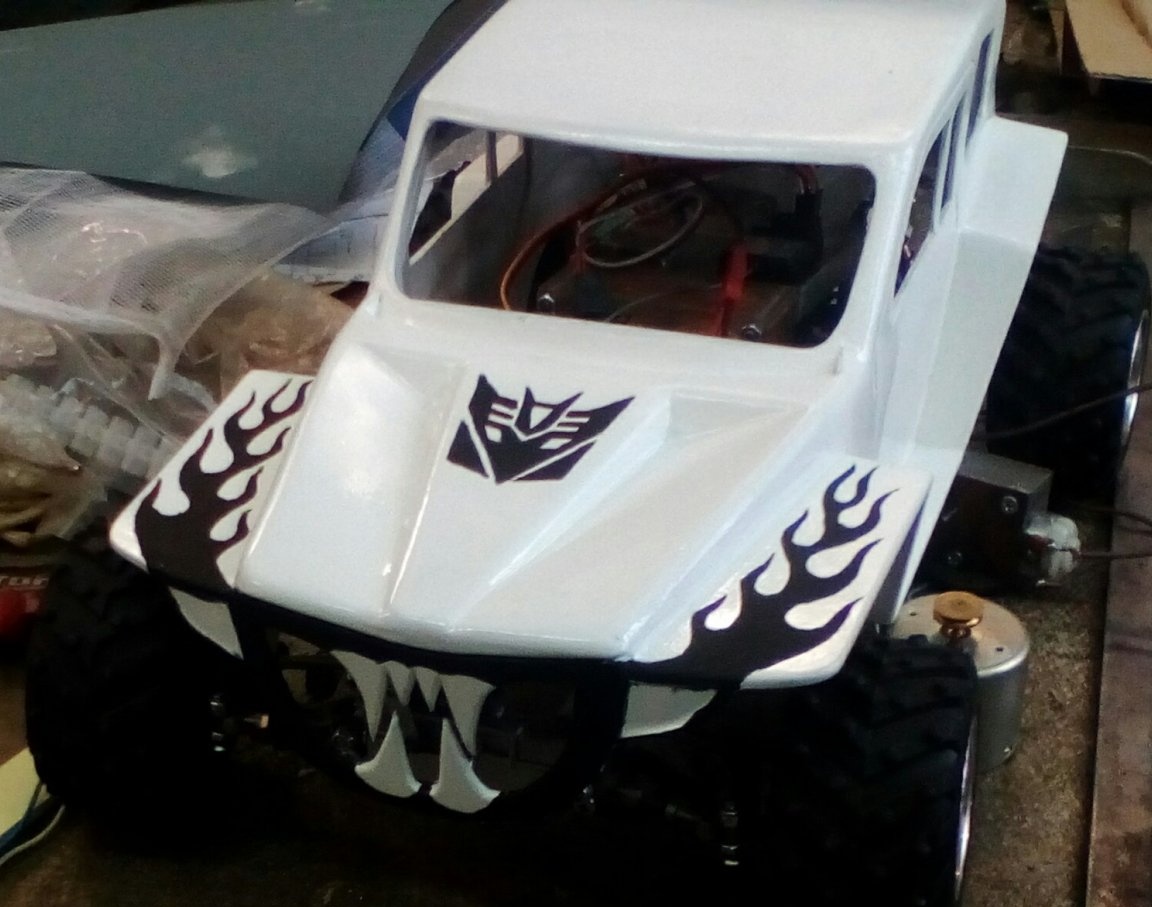
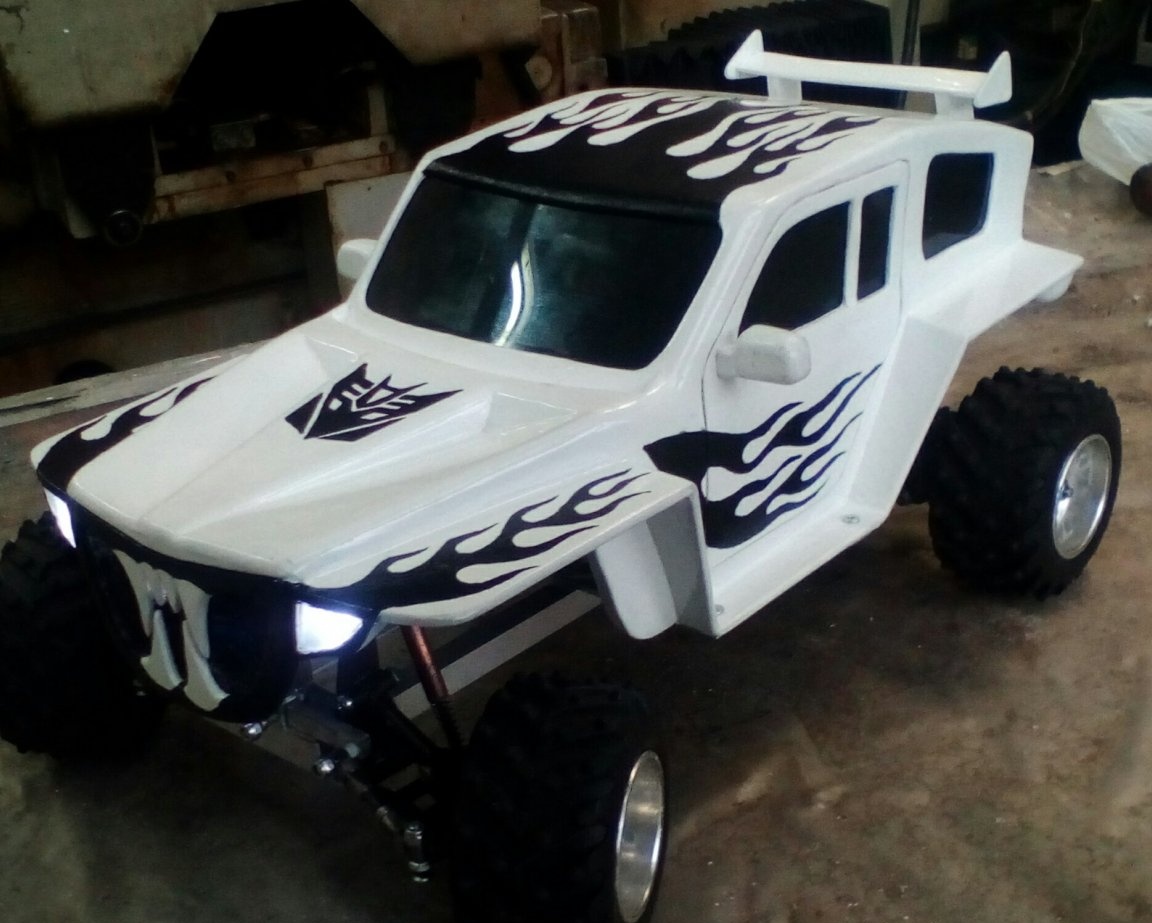
It is time to take up the corps. He made it from foam plastic from two to six mm thick. The design is completely out of the head. As well as technology. Therefore, do not judge strictly.
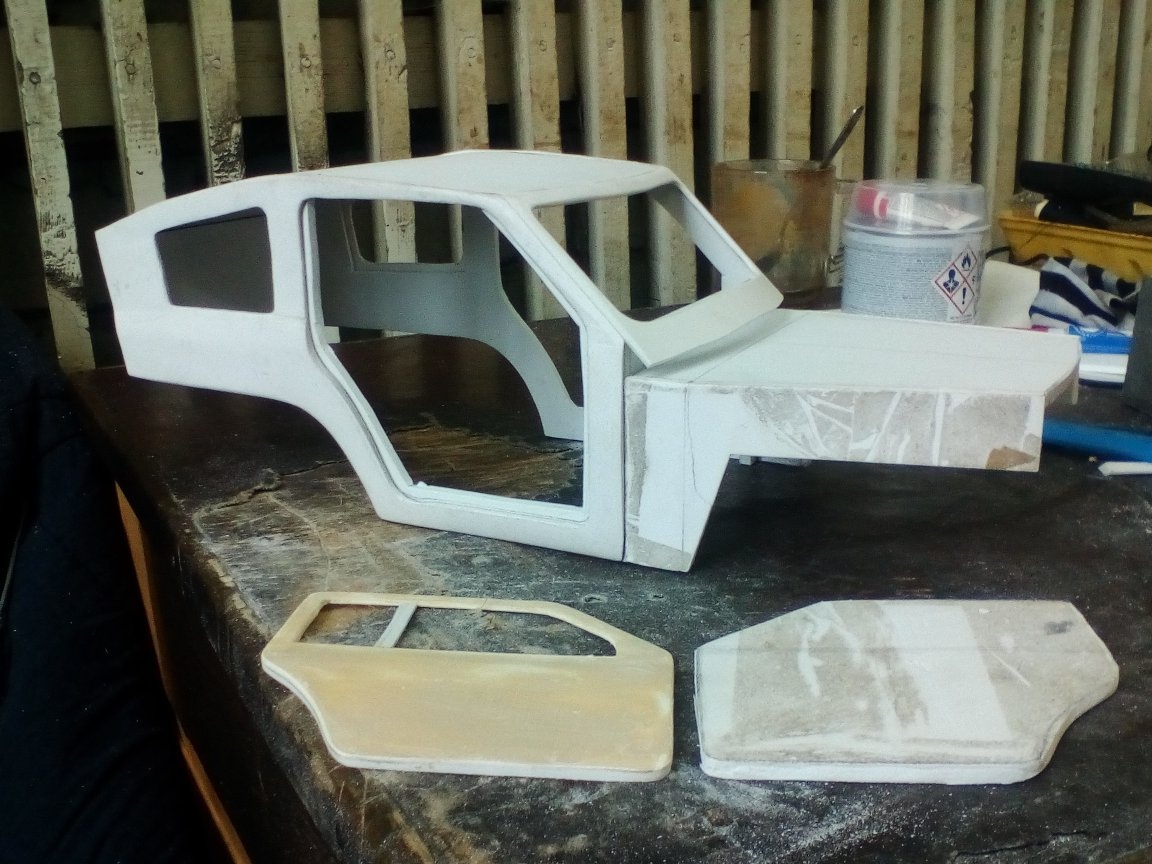
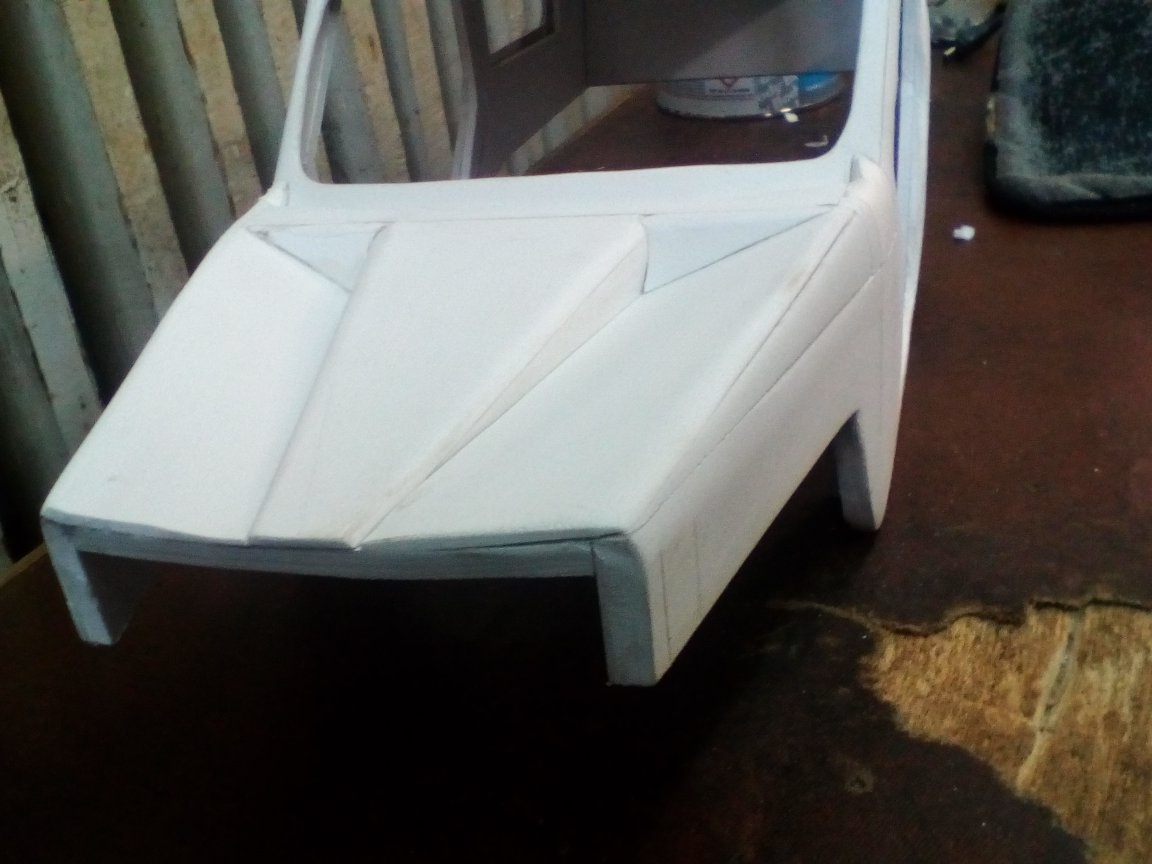
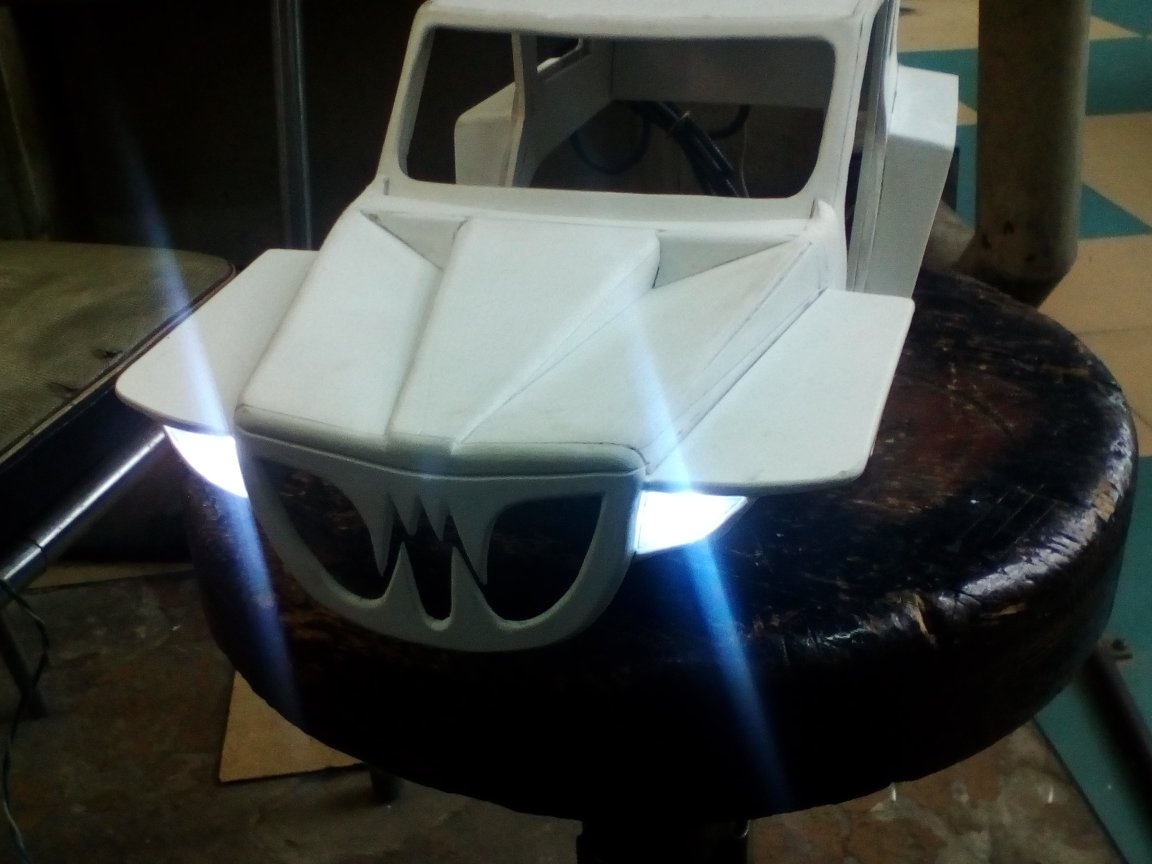
Muzzle wanted to make the original ... show off shorter.

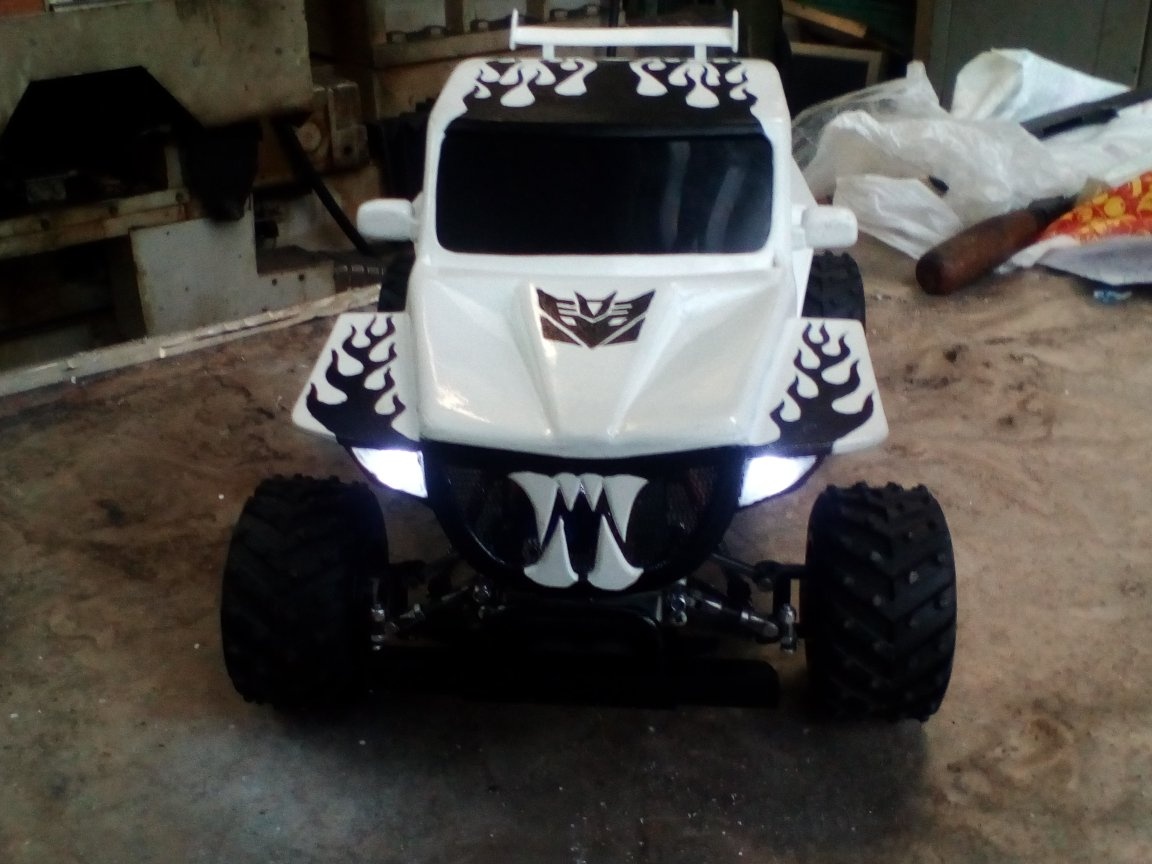
Next made the light.
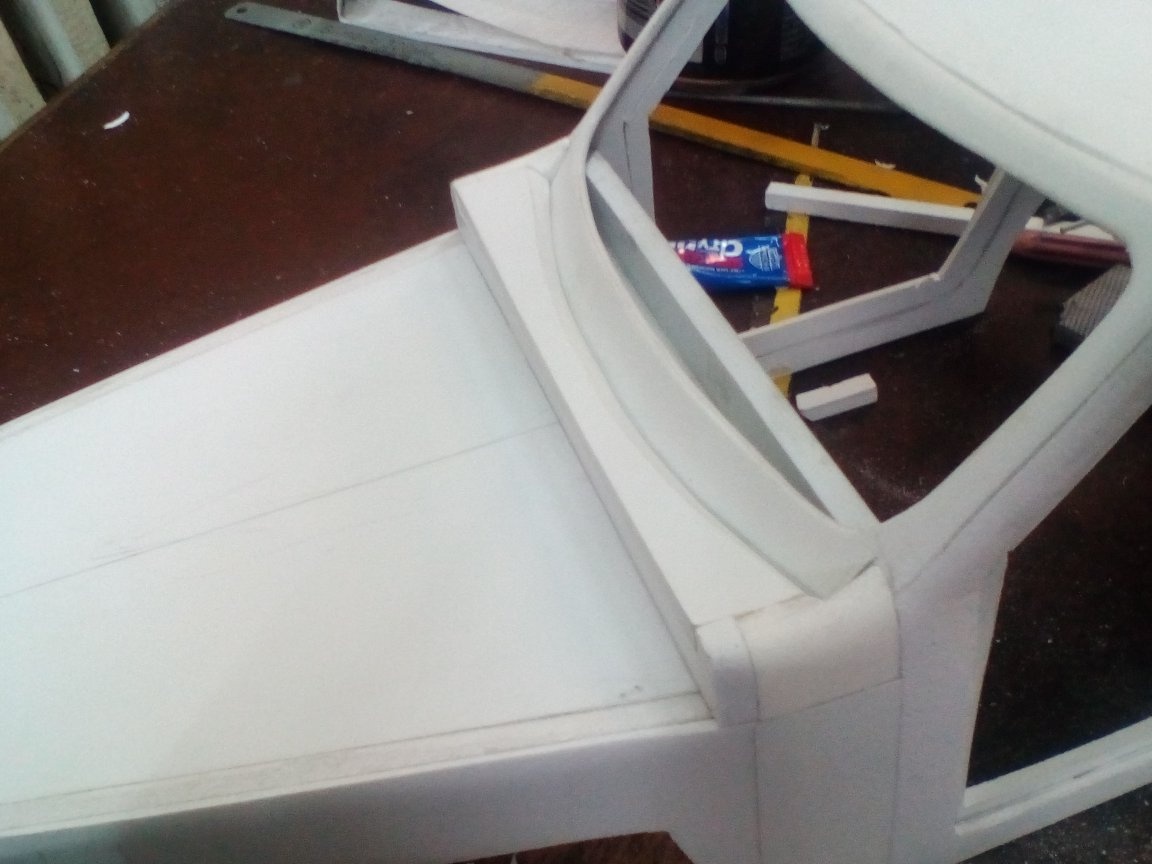
I never thought that such a big hemorrhage with puttying and smoothing this putty ... I had to apply and remove it several times ..
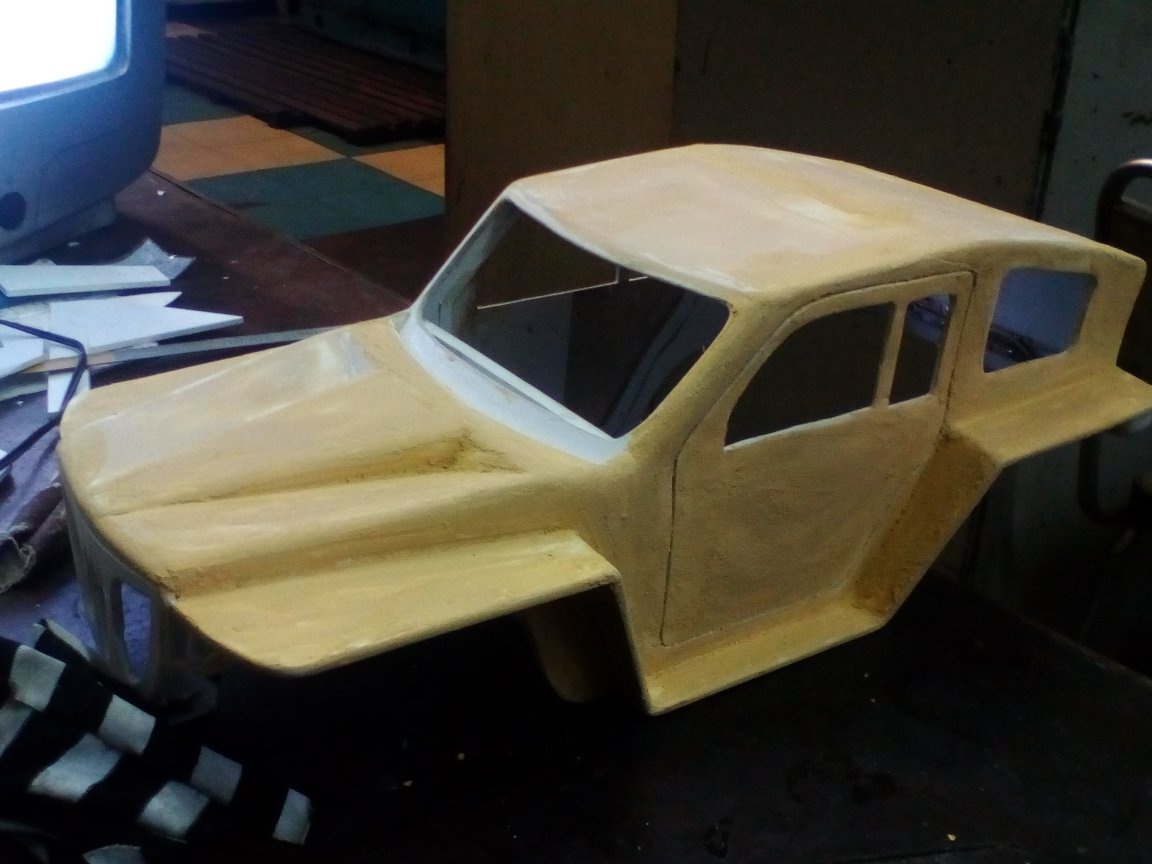
After that, it was poured in several layers of paint.

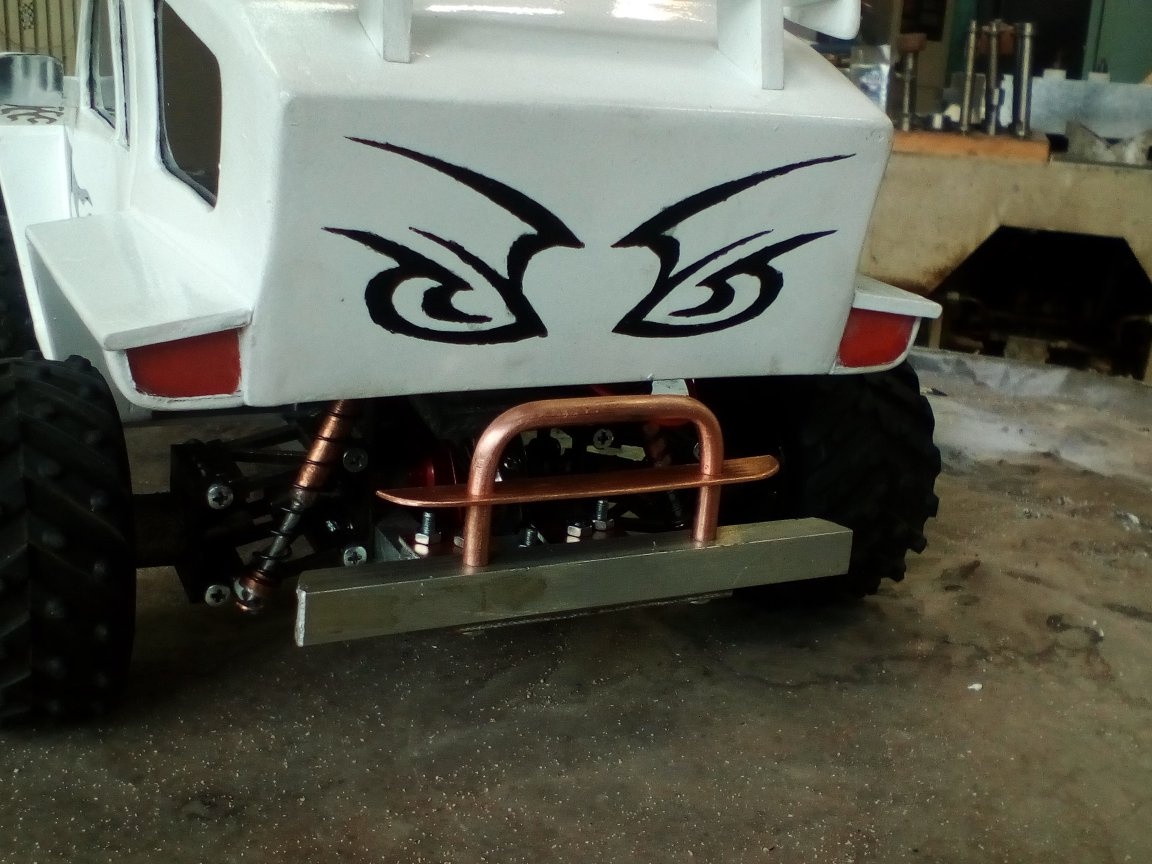
Long and hard chose drawings on the body. I downloaded a couple of catalogs of vinyl stickers and chose in my opinion suitable ones. I copied as much as I could on paper, cut out stencils and painted with a brush as I could ..
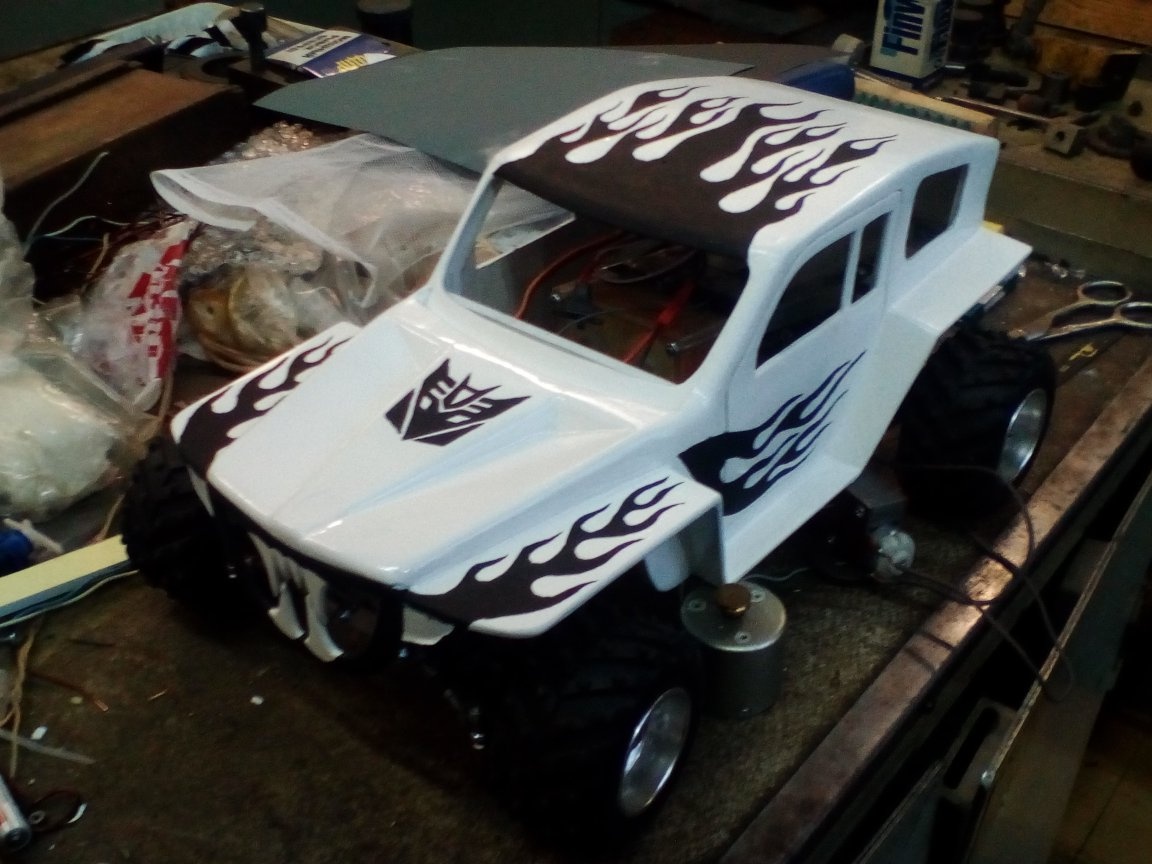
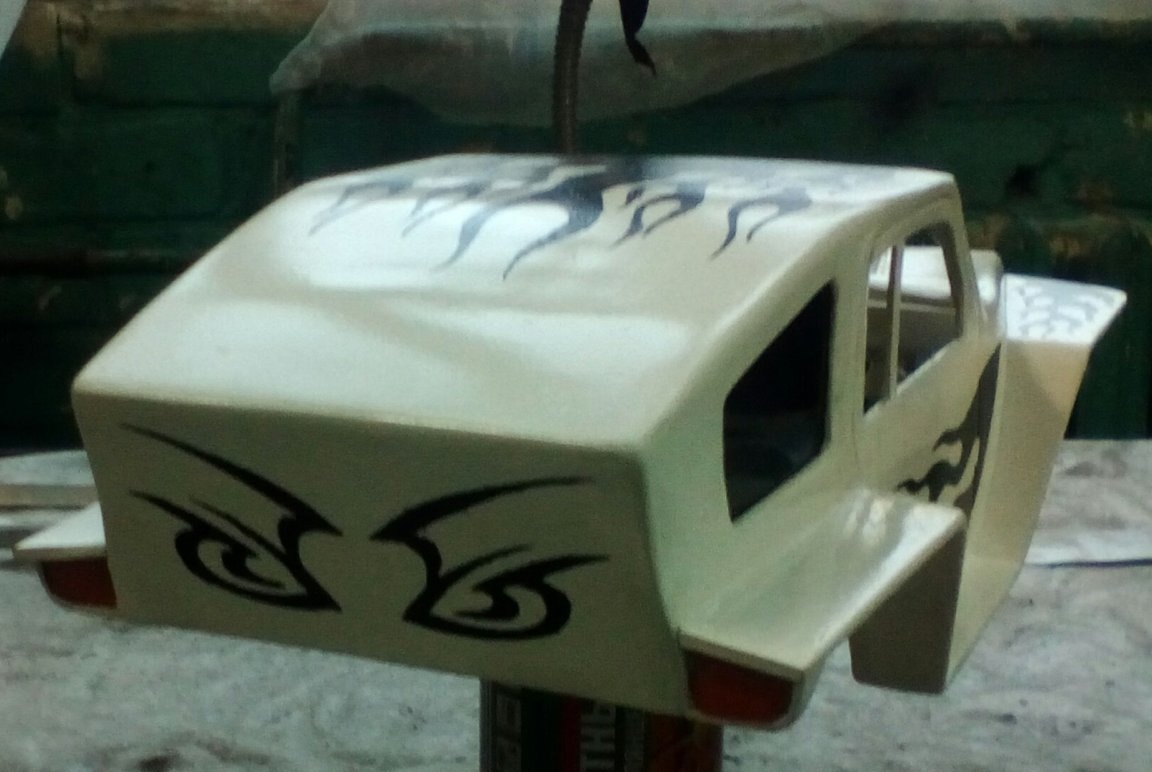
I cut out glass from transparent plastic, painted on the inside and glued it in place.
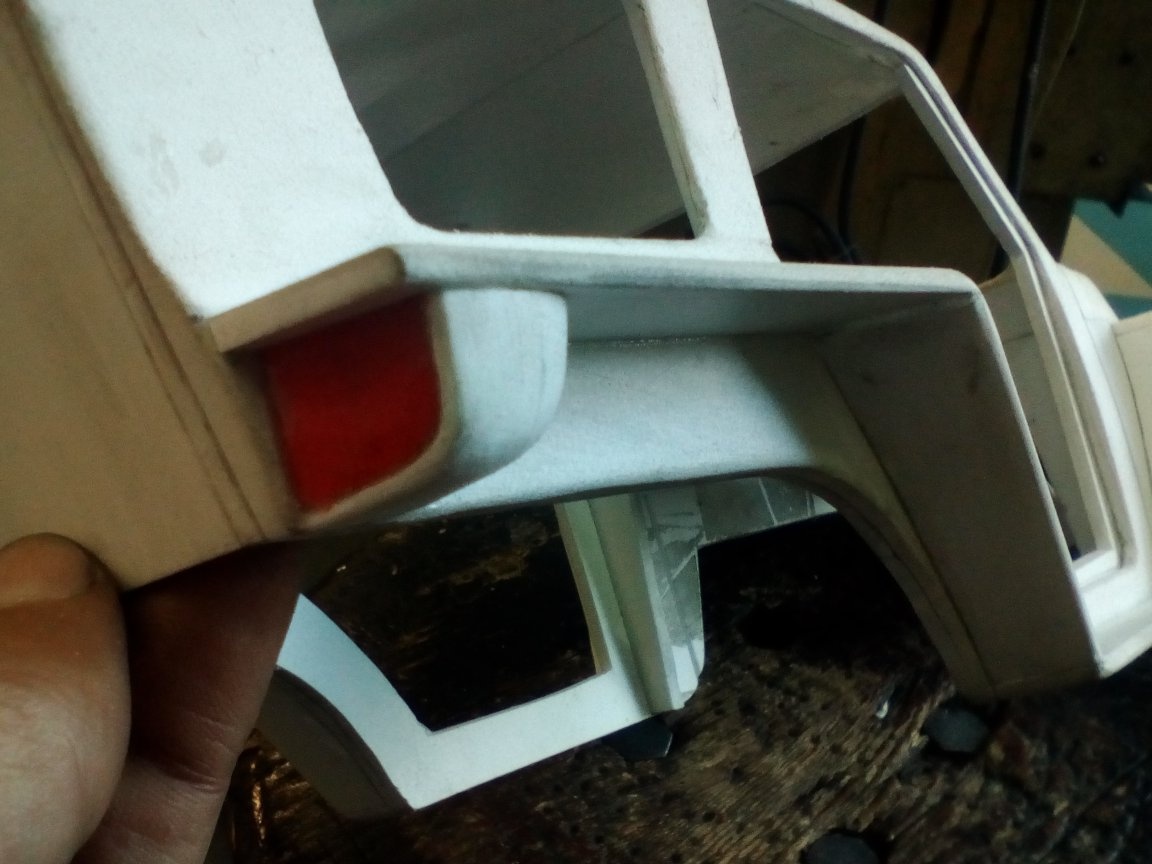
Well, the cherry on the cake has a wing and mirrors ..
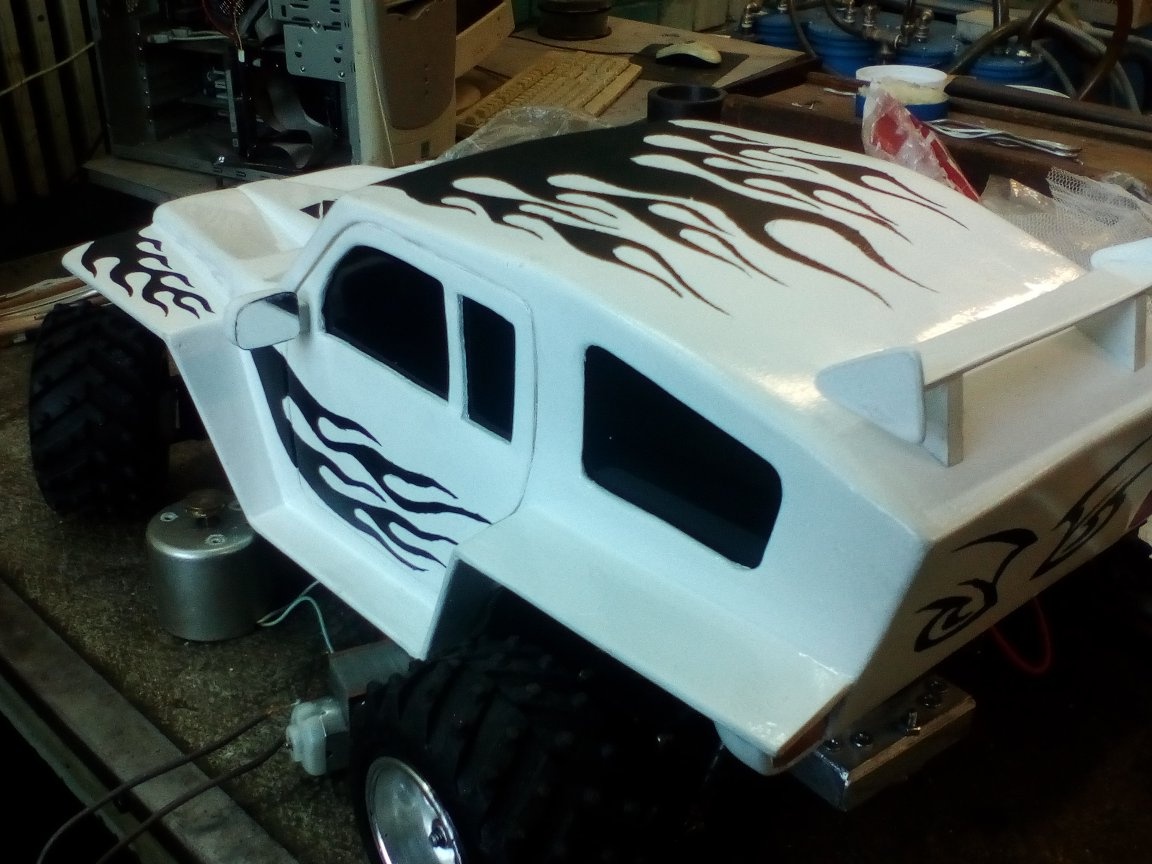
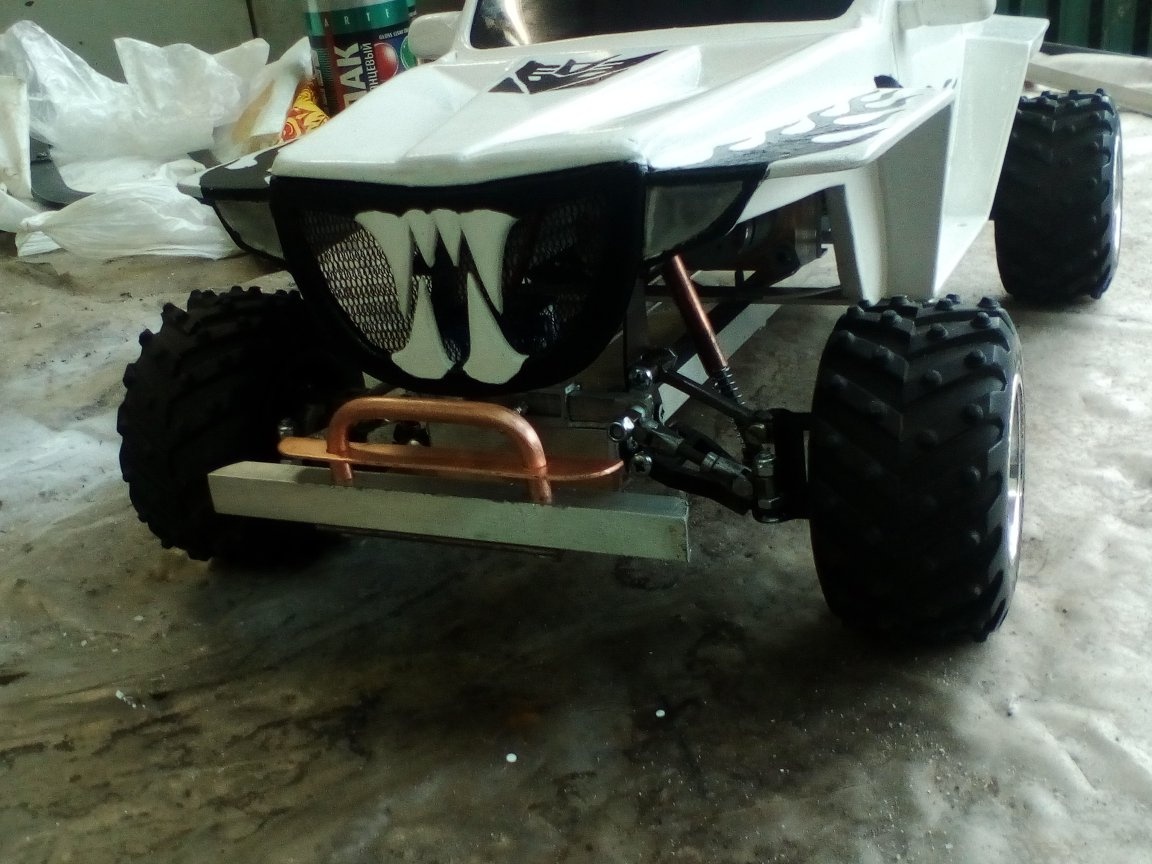
I screwed two brackets onto the frame and screwed the housing to them with 4 screws. From the getinax plates, the p-shaped profile, copper plates and tubes, I made the front and rear bumper-kenguryatniki.
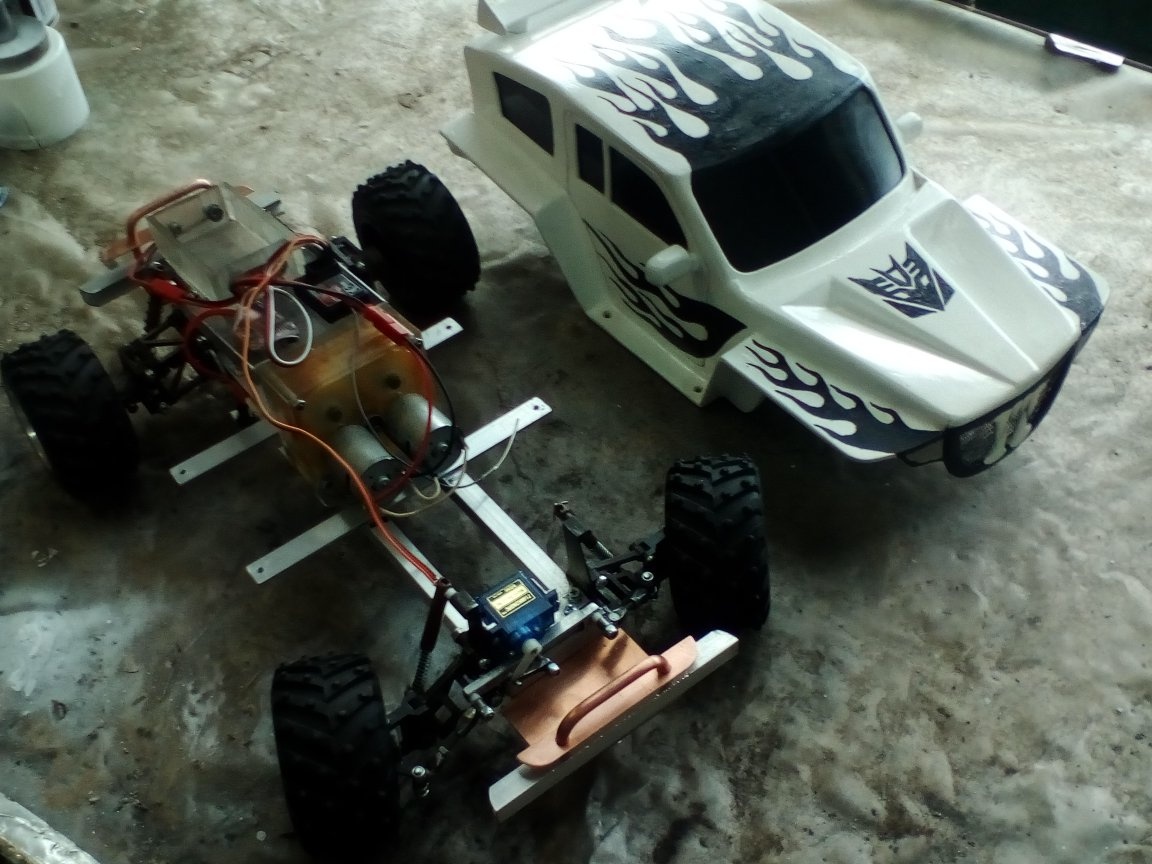
And now, Monster is ready! Despite a lot of obvious mistakes and shortcomings, I really liked it! It runs at a speed of about 15 km / h, there are enough batteries for 10 minutes. Range –– I did not check more than 40 meters.