
Good day to all my dear friends. In today's article, I would like to tell you and show a very interesting and useful idea homemade, which will be especially relevant for those who are just creating their own workshop, or for those who cannot afford a full-fledged, factory machine. In general, today we will consider how to make a very simple jigsaw machine do it yourself. The most interesting thing is that this machine can be made even without the most ordinary jigsaw (which is used in most such homemade products. That is undoubtedly a big plus, because someone can assemble such a machine precisely because of the lack of a conventional electric jigsaw. But an electric jigsaw, a very useful thing in creativity and repair, and normal model it costs a lot, of course you can buy a jigsaw for 990 rubles for a stock in some store that doesn’t deal with the tool, but I can say that in most cases, such jigsaws are disposable, but maybe someone was lucky.
Well, there will probably be enough long introductions and you can proceed, let's go!
And so, for a simple jigsaw machine, we need:
- a few pieces of thick plywood
-water PVC pipes
ball bearings
metal rods 3 pcs.
-nuts
self-tapping screws
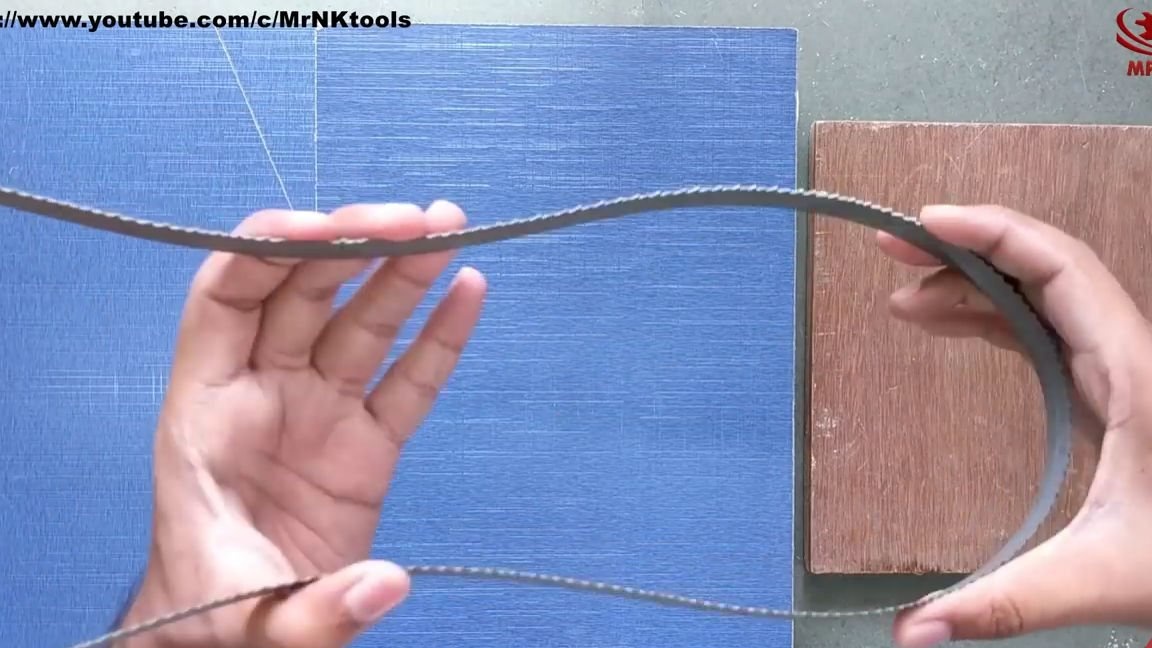
metal tape for a jigsaw machine
-bolts for nuts
washers
mini electric drill
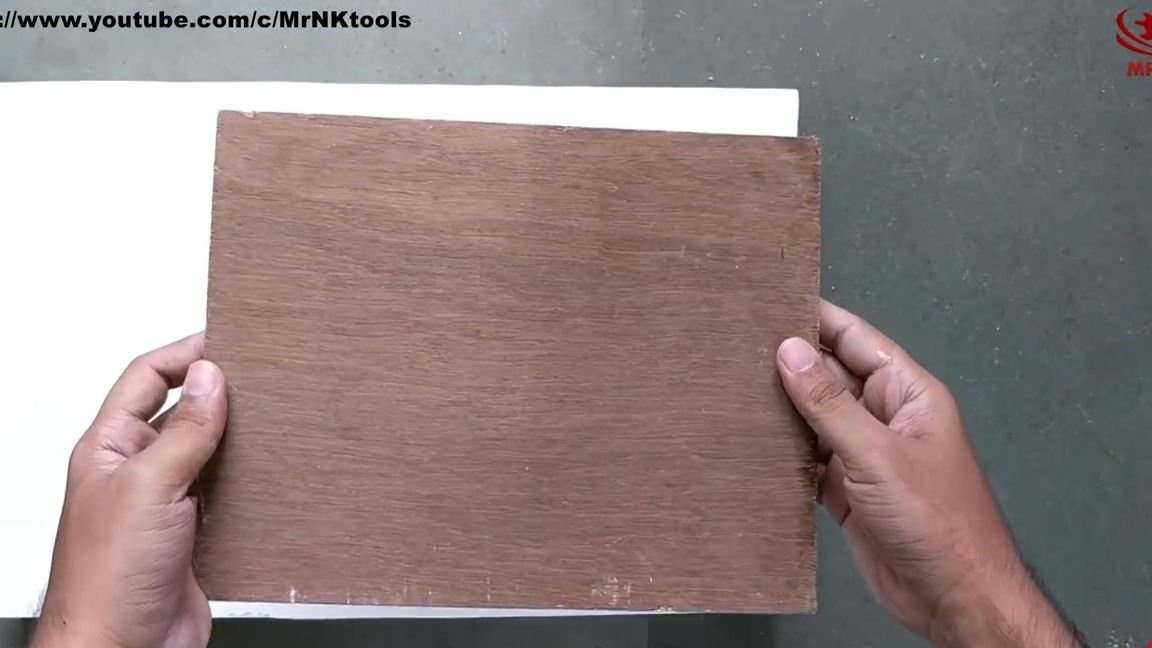
-dvp or chipboard, if with good thick plywood strained
Of the tools we will also need:
-electric drill
jigsaw (however ironic it may be, but I think you can ask a neighbor without any problems)
-hammer
marker, pencil or any other devicewith which you can make notes
line
And so, first of all, you need to take or cut a rectangle from fiberboard or plywood, with dimensions of 35 by 45 cm. This rectangle will serve as the basis of the entire structure.
You will also need a smaller rectangle, unfortunately the author did not show the dimensions, but you can easily figure it out based on the proportions.
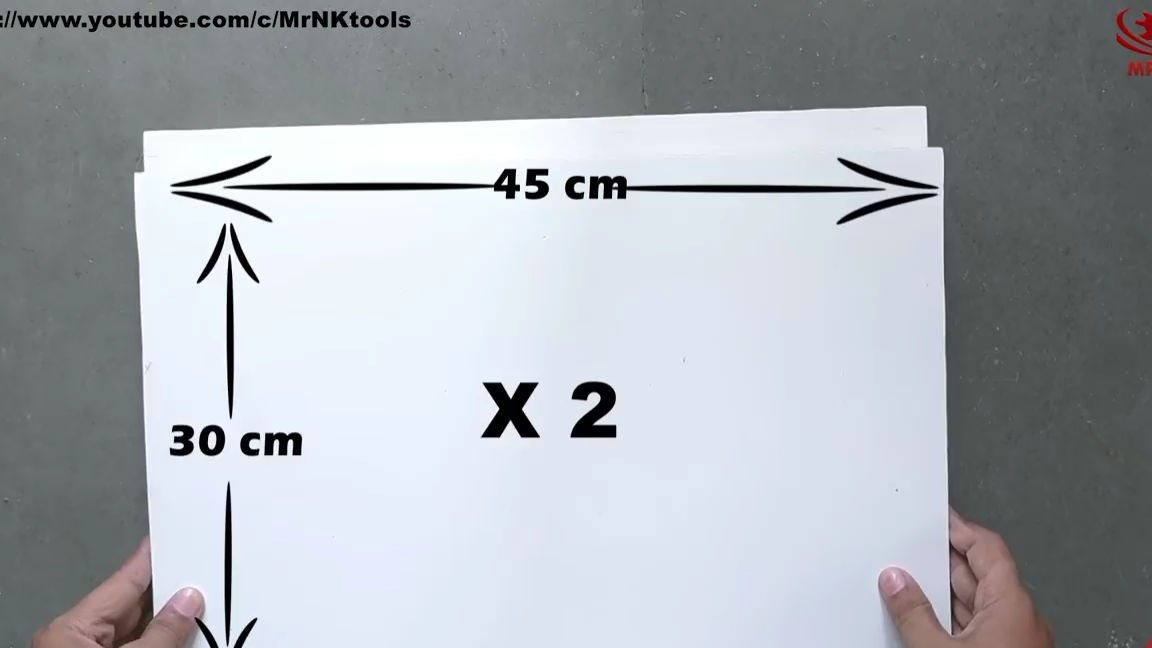
It is also necessary to cut from two more solid plywood, two rectangles 30 by 45 cm:

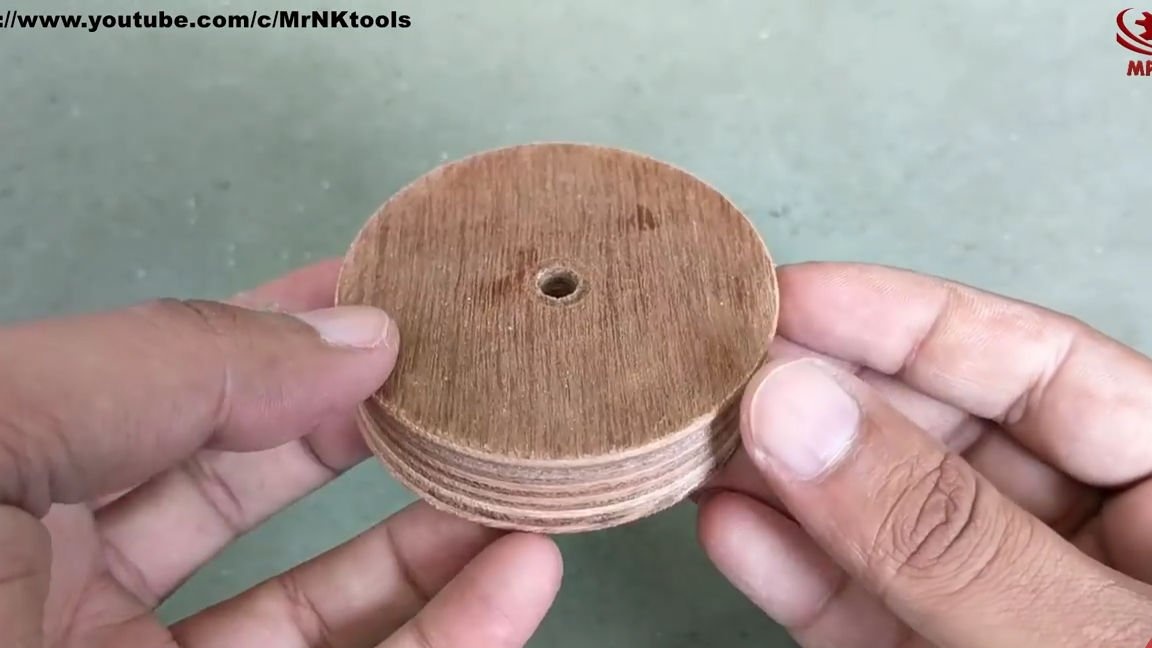
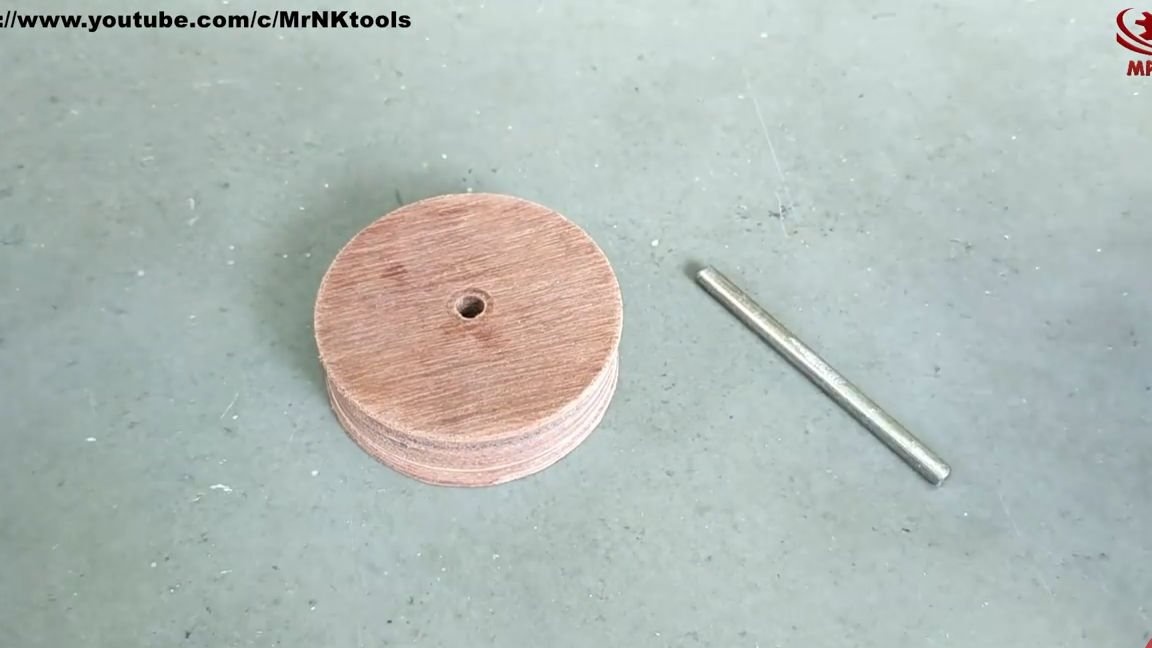
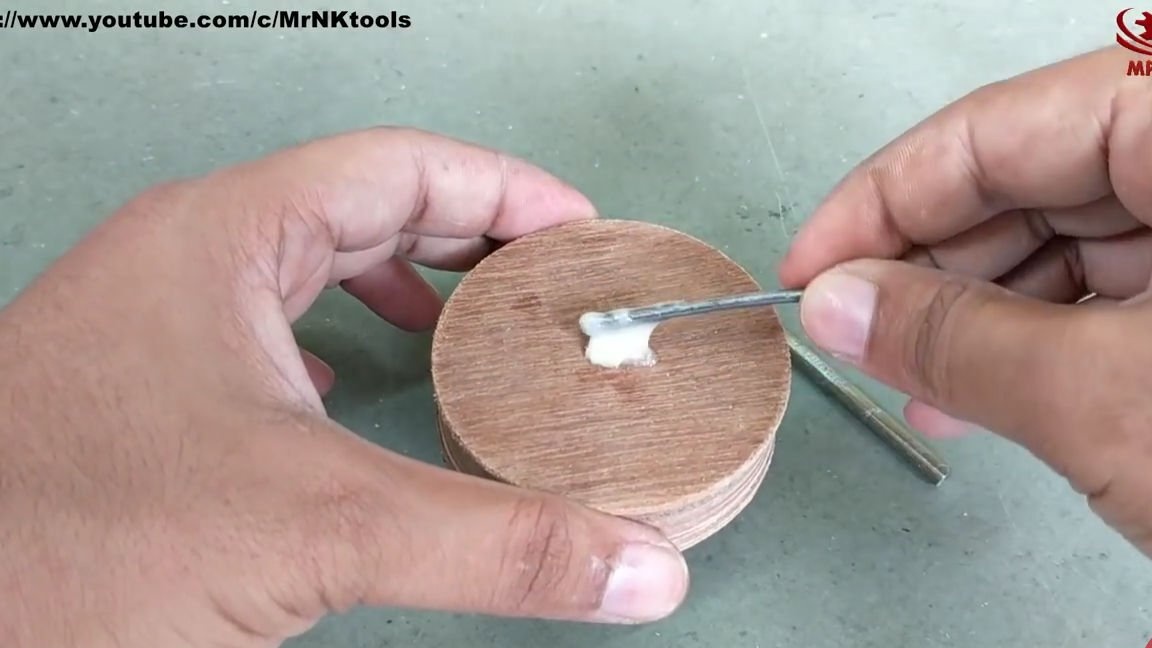
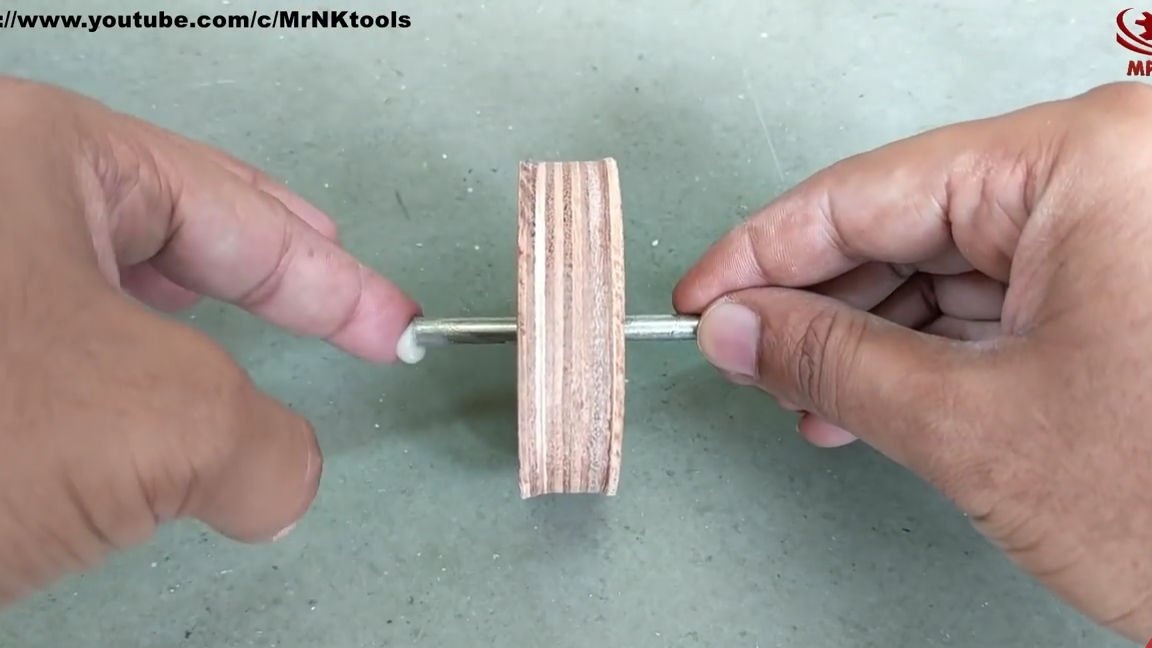
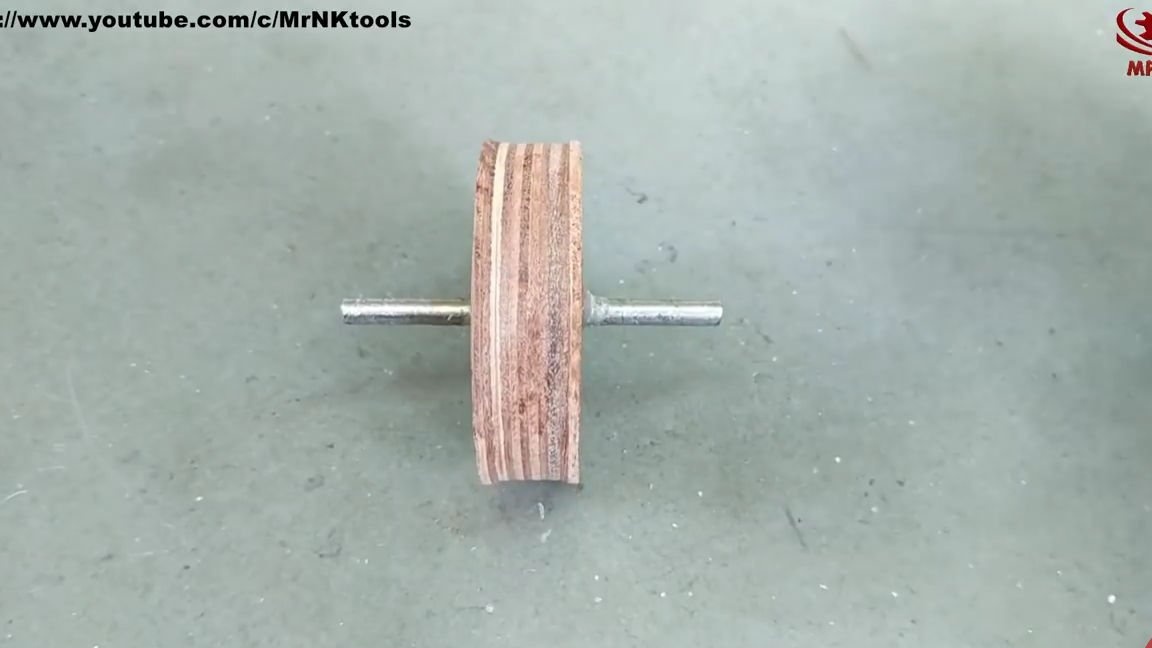
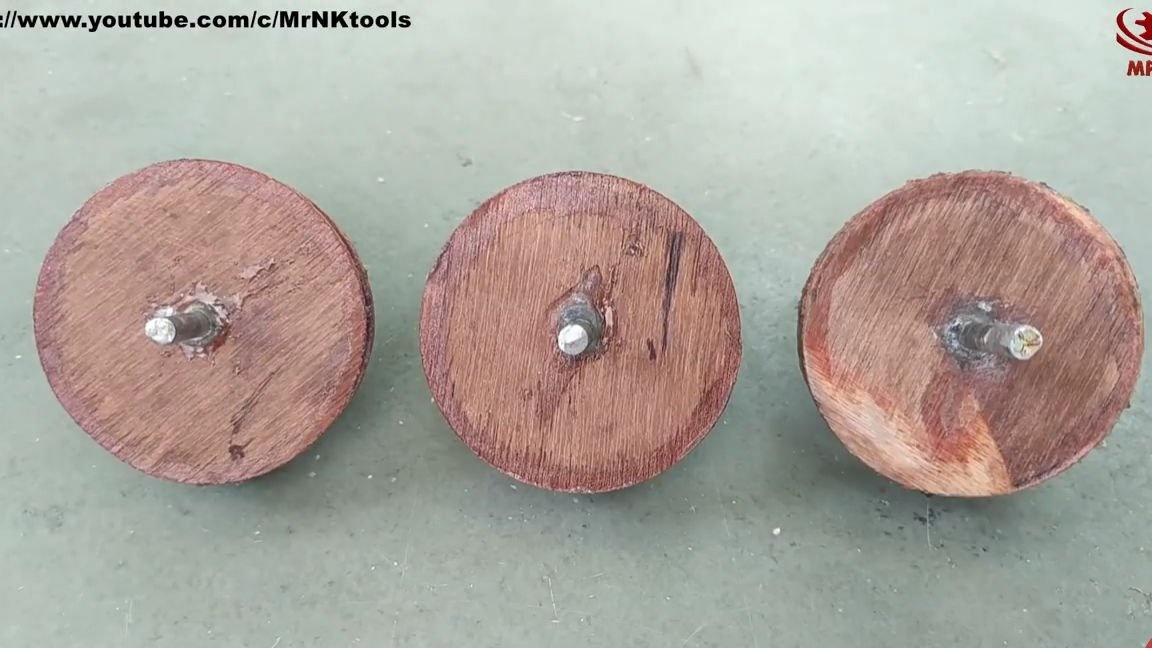
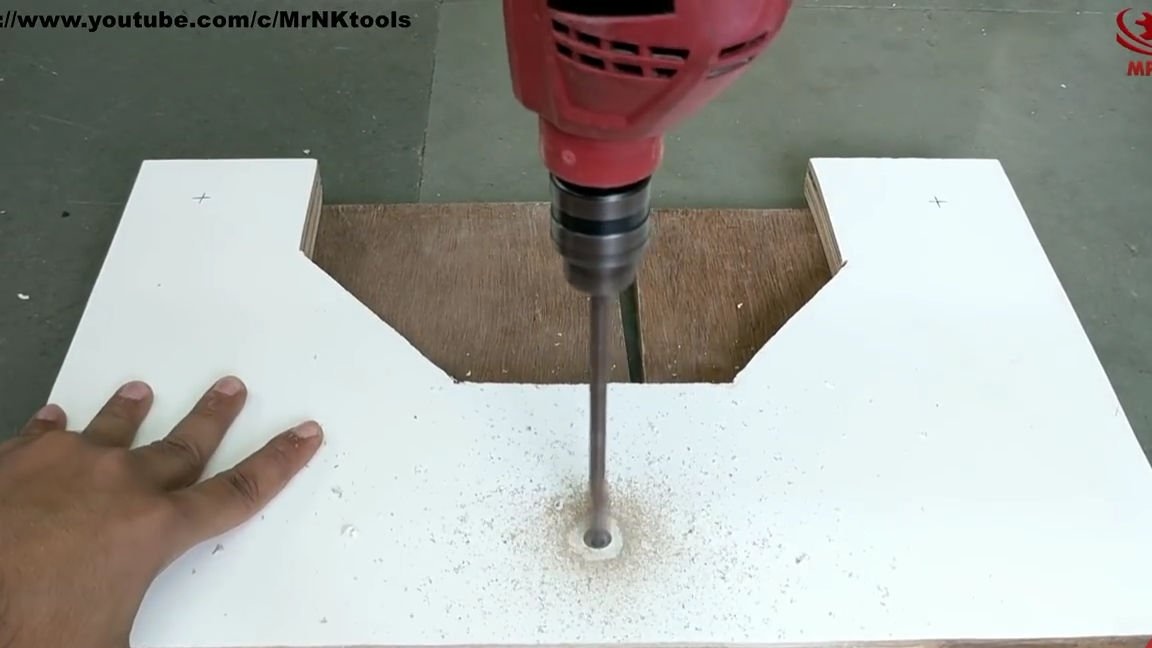
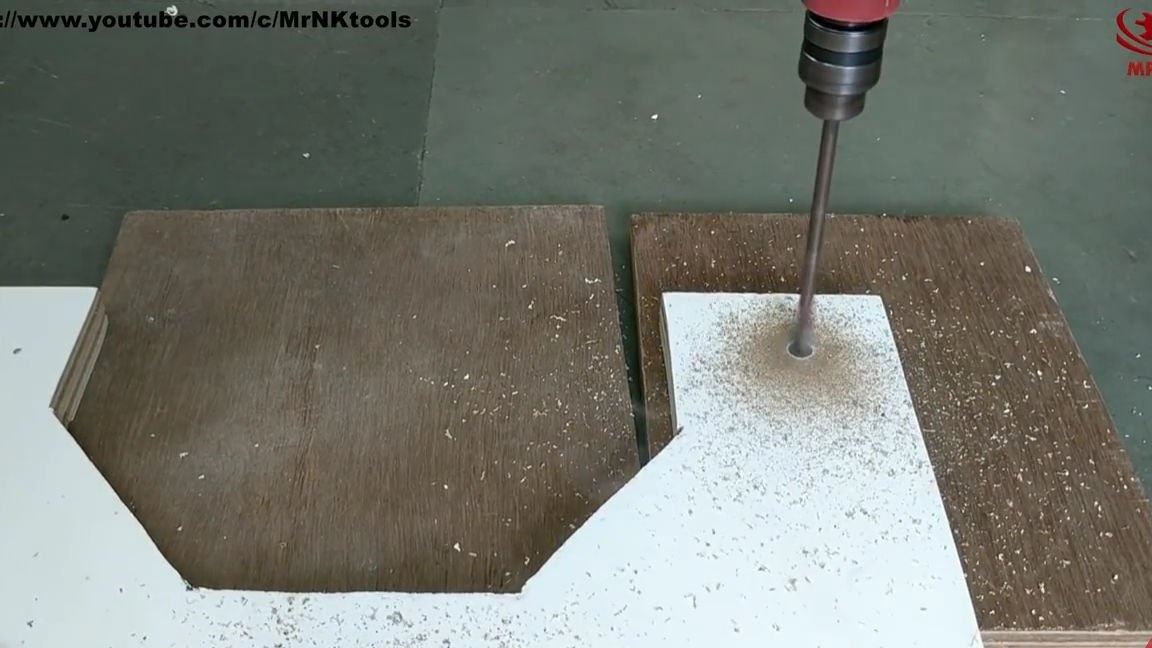
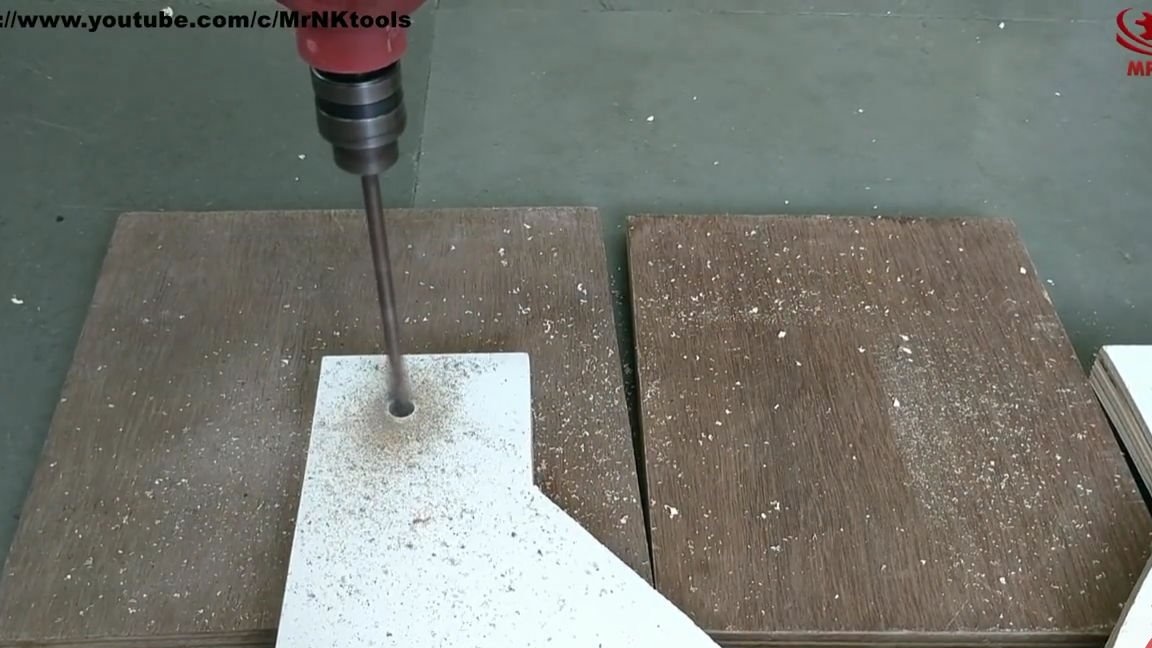
Then, from plywood, using a special cylindrical nozzle on the drill (crown), cut out three circles, with a hole exactly in the center.After that, take a metal rod of not long length, put a little masking glue inside the hole in the plywood circle, or something else that can be glued better. Now insert the rod into the hole, align and leave until fully fixed. All the same must be done with the rest of the circles:
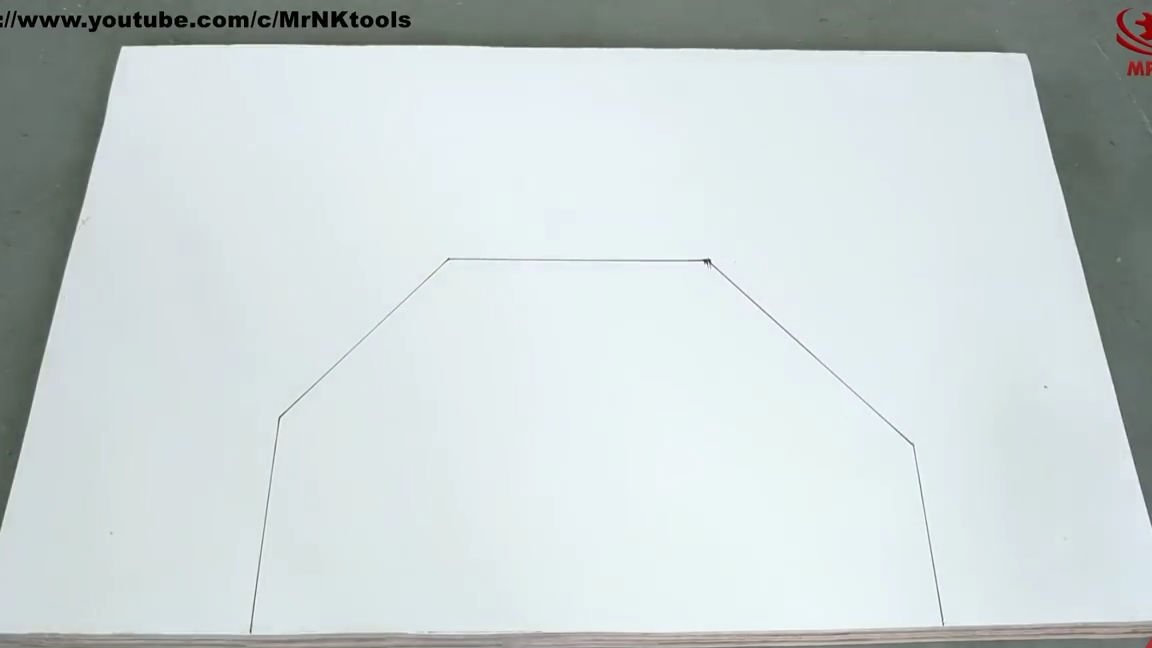
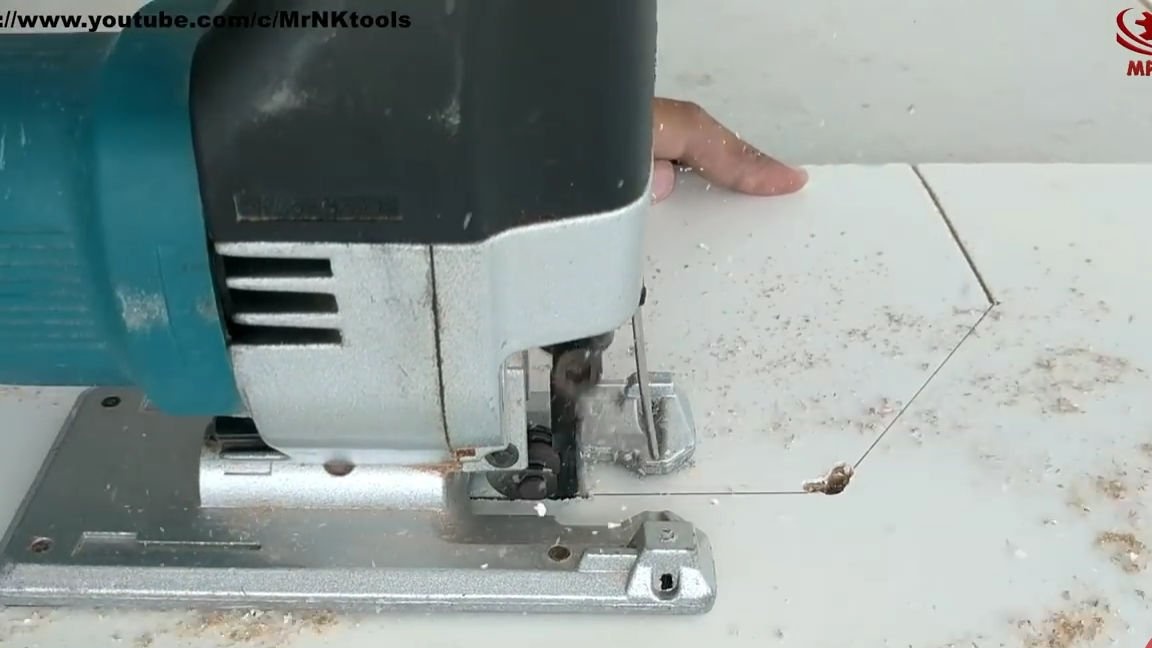
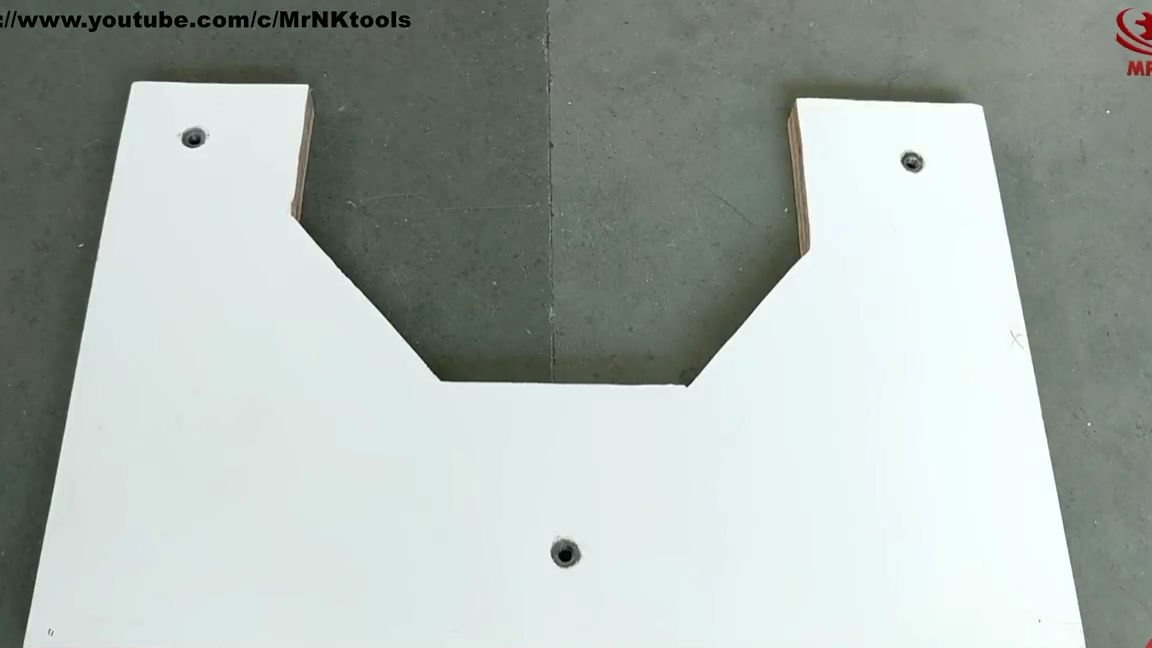
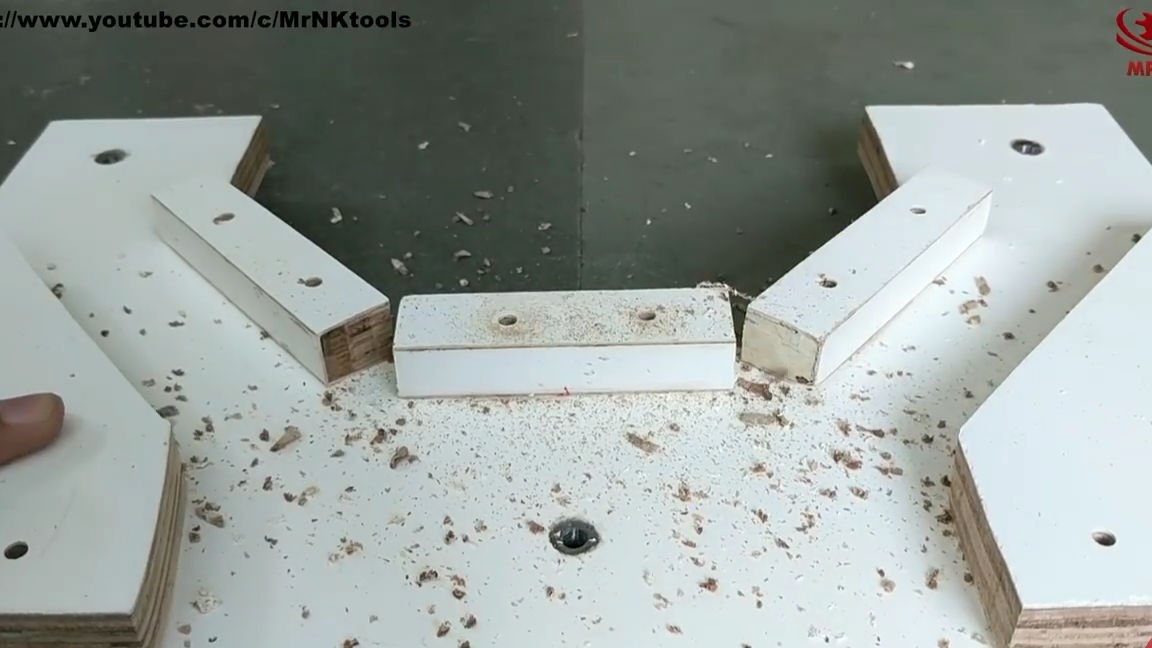
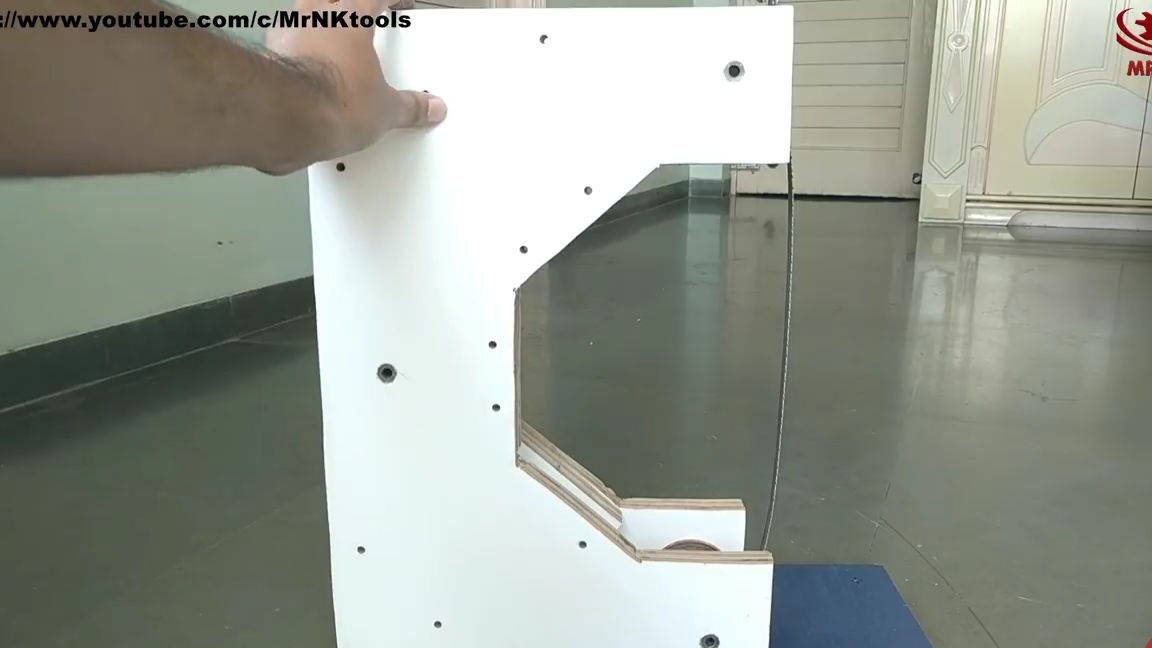
From a plywood sheet, it is necessary to cut a hexagonal figure out of a plywood rectangle, but for a start it naturally needs to be drawn. Draw as shown in the photo below.
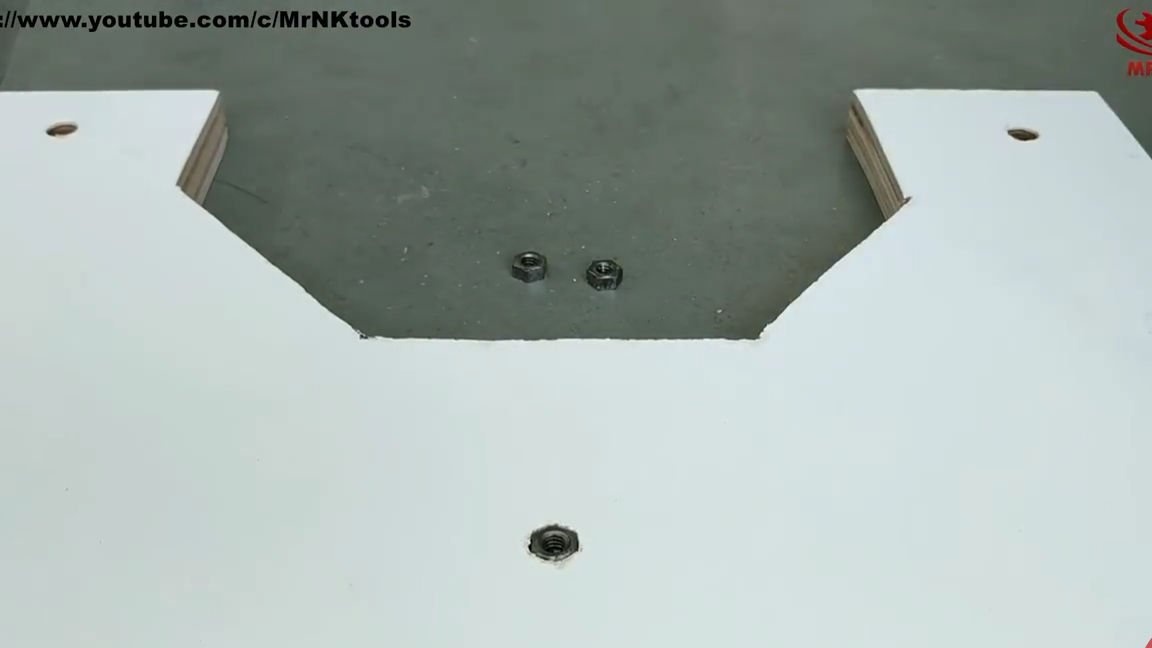
Now, over the upper side of the hexagon, exactly in the center, you need to drill a through hole with a thick drill, then drill three more holes on the sides, in general, do everything as shown in the photo below:
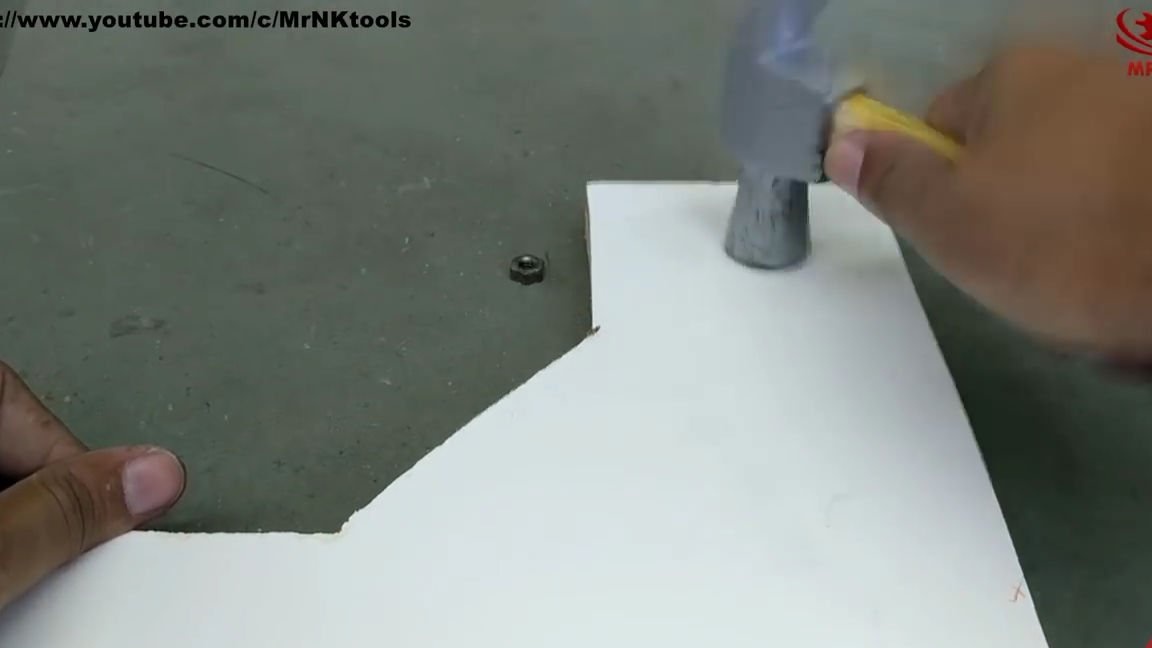
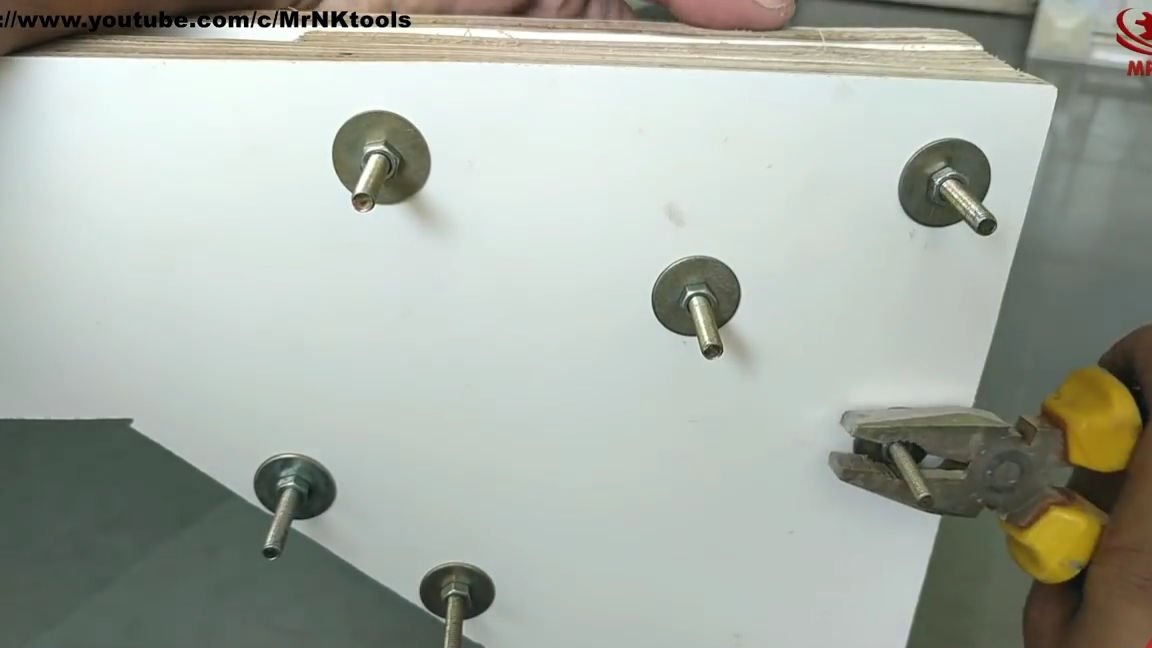
In the holes made earlier, it is necessary to insert the nuts, this is most conveniently done with a hammer, but the nuts must stand up very, very tightly:
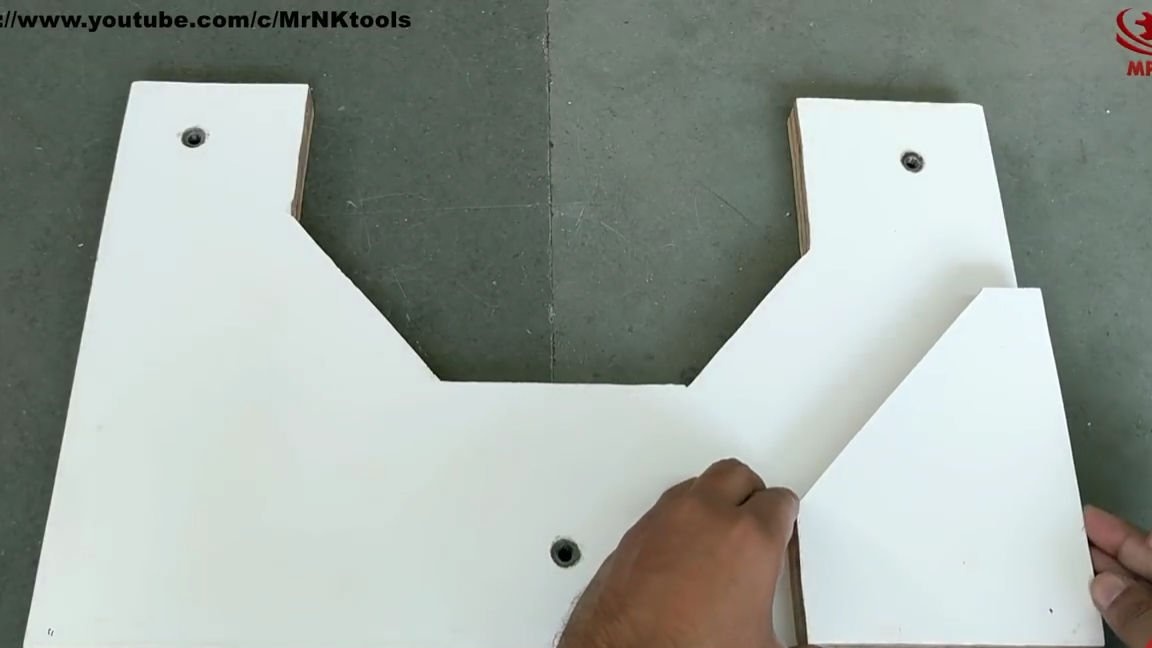
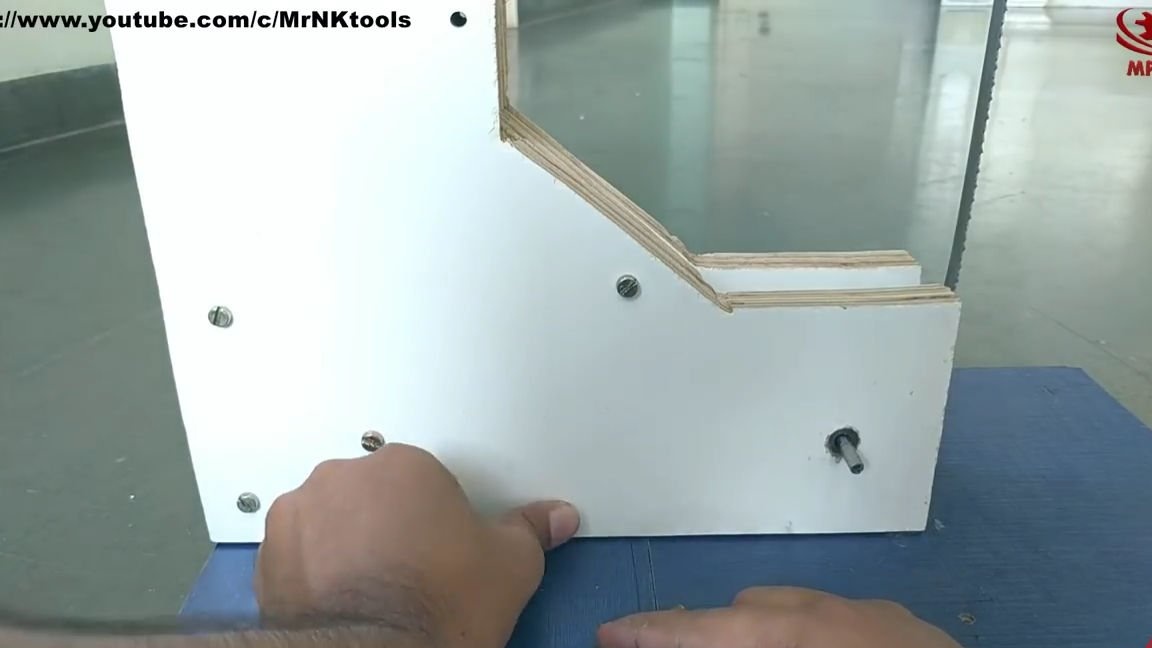
Now you need to glue other details from plywood to this blank, they naturally need to be cut, but there is nothing complicated here, so just do everything as in the photo below:
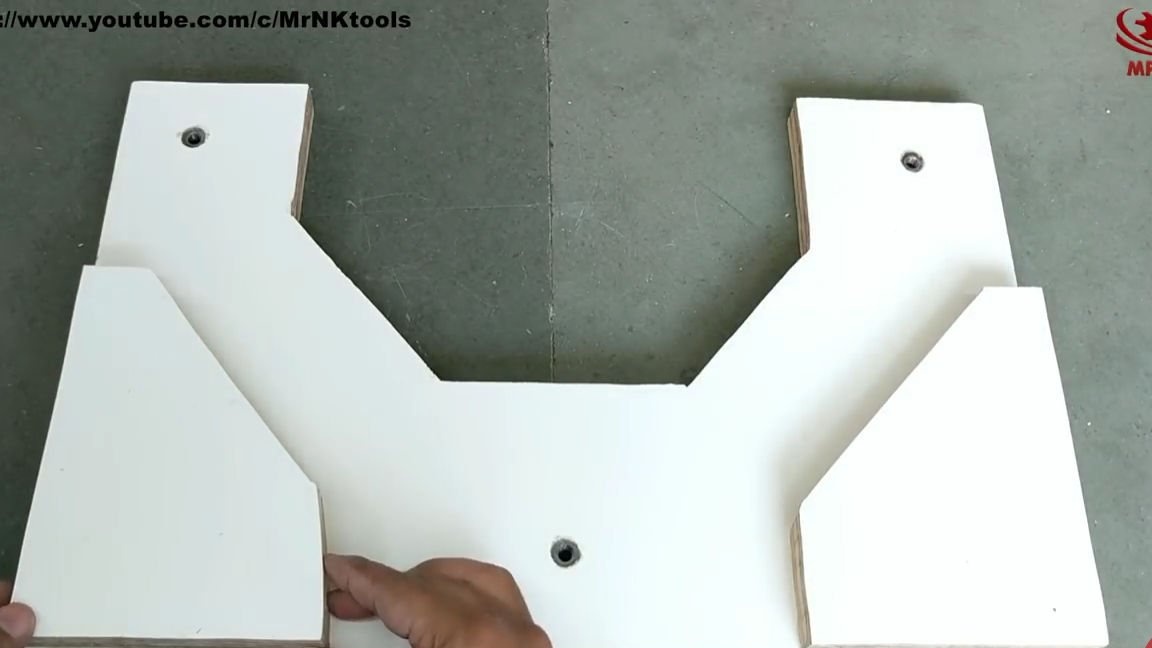
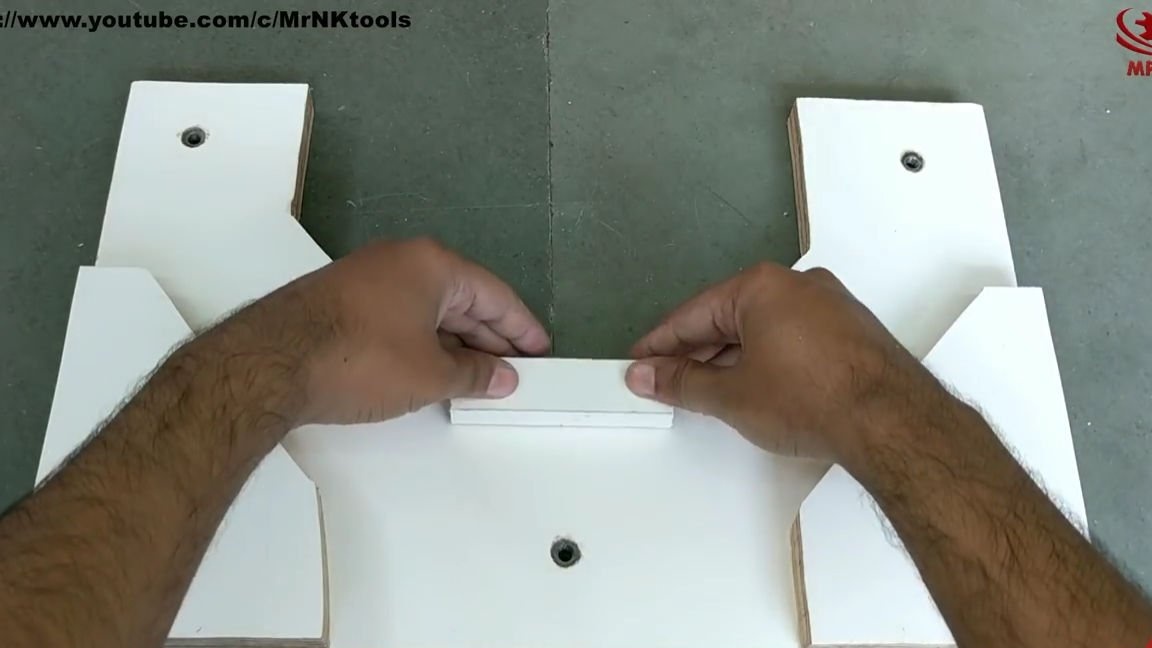
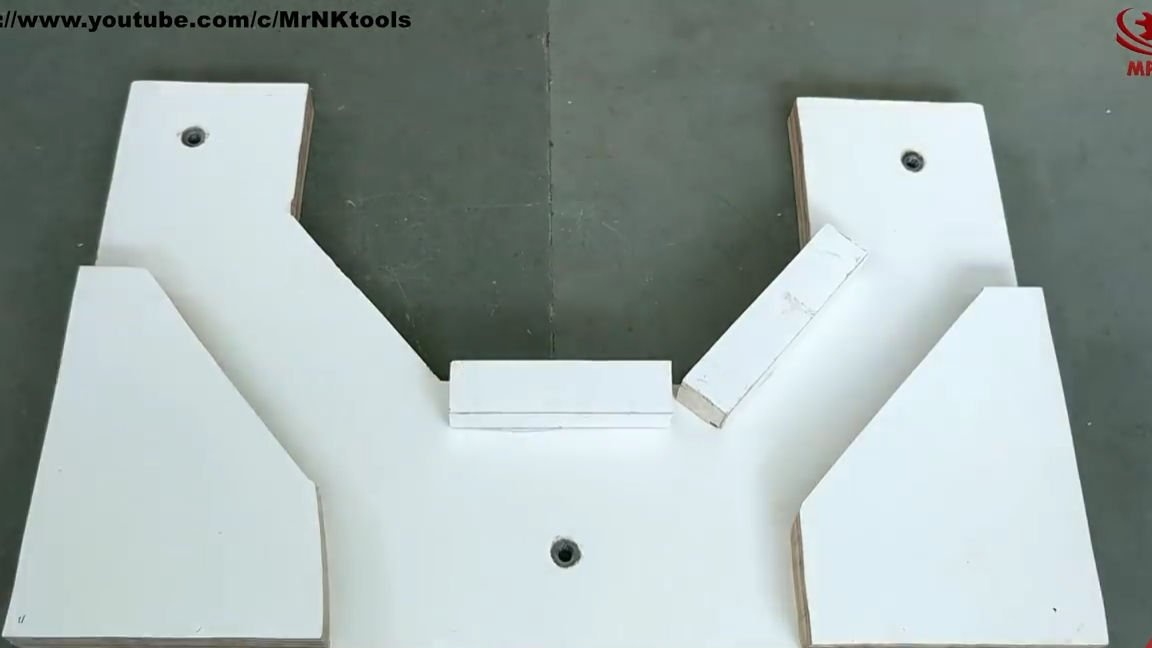
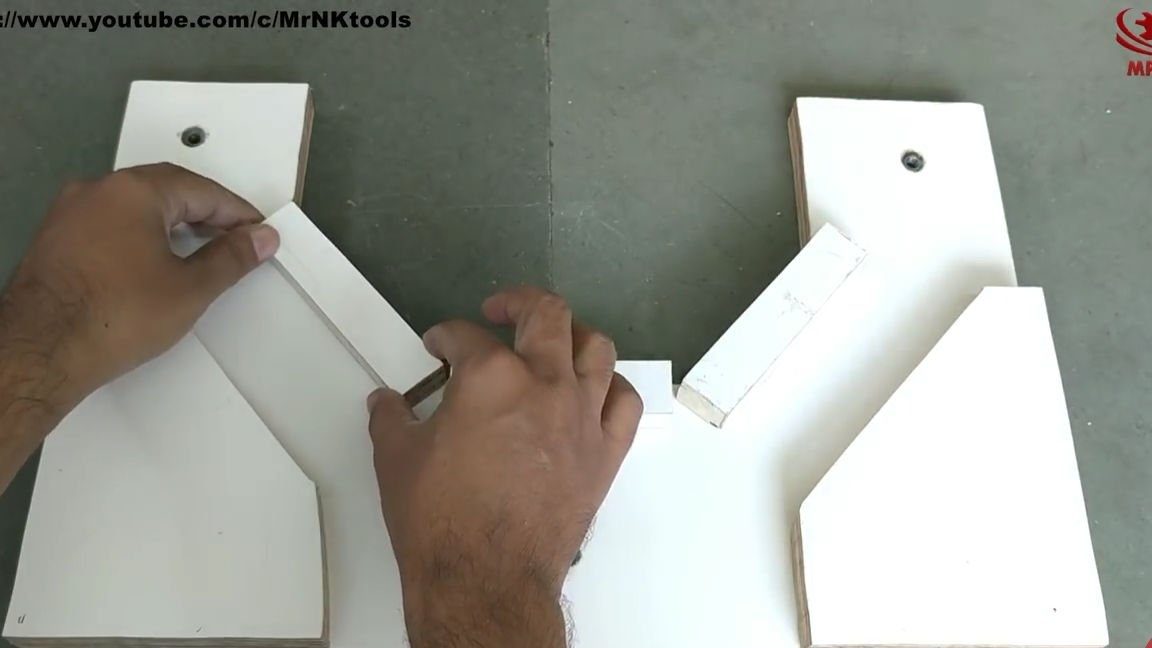
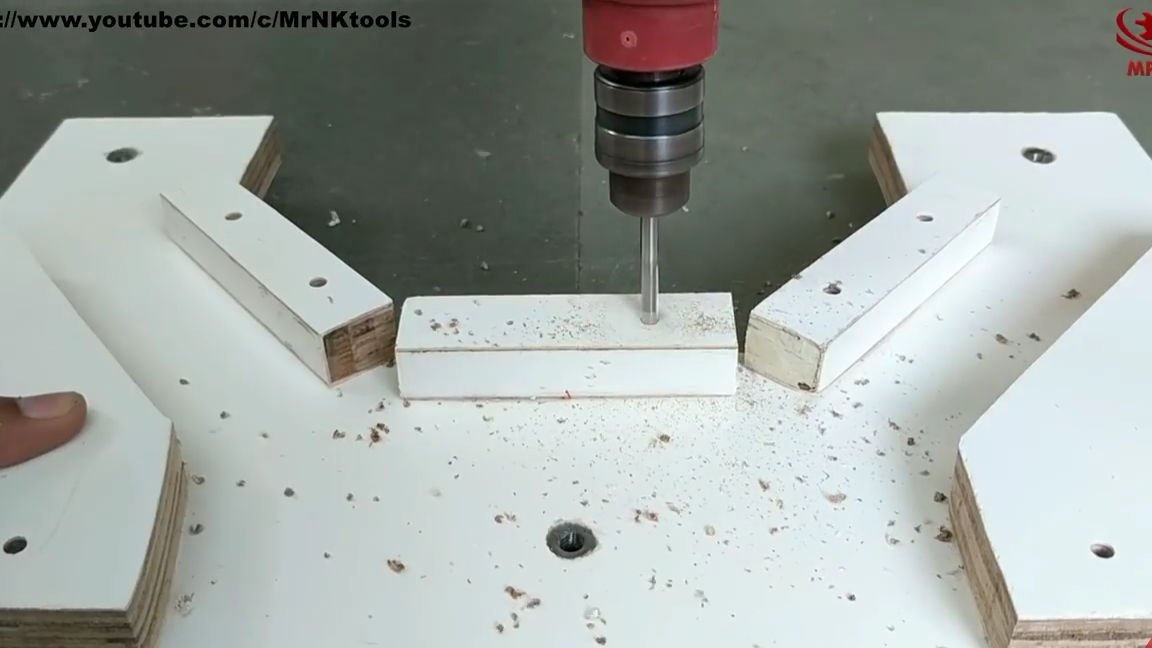
And again, with a drill, we drill through holes, to drill, it is also necessary, as in the photo below:
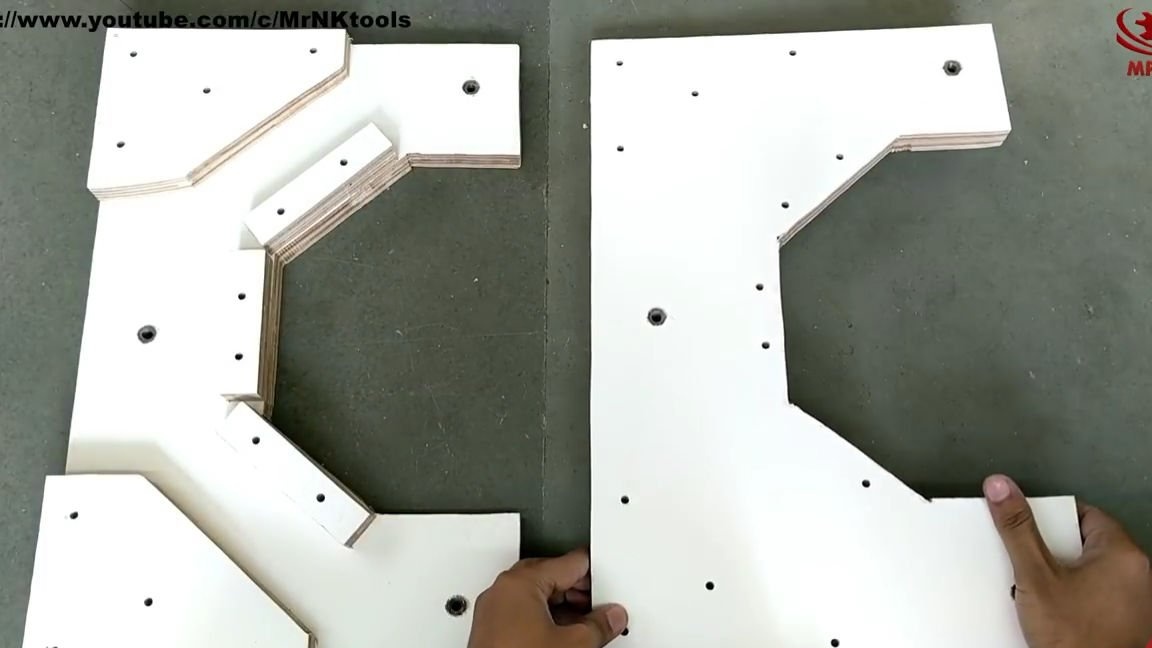
In total, we make two such blanks from plywood, but it is important to know that they should be mirrored to each other, why this is necessary, I think you already understood, and if not, you will understand soon.
And so, we proceed to the assembly of the entire structure, of course, there is nothing complicated and you can do everything by photo or video, but nevertheless I will describe some details.
Getting started.
First you need to install and fix using one of the mirror blanks on one of the sides of the plywood rectangle that was made at the very beginning of the article. You need to install it with small details inside. Then, into the previously drilled holes, insert the plywood blocks, so that they can rotate around its axis. Now, finally, you can put on the blocks and the metal tape itself (but as for me, this design has a big minus, the tape on such blocks is in a dangling state and it cannot be tensioned any harder, because of this, the quality and ease of operation of the machine in terms of sawing, they are greatly reduced, but it’s quite simple. What do you think about this, write in the comments to this article), in general, we put on everything. Well, close the entire mechanism with a second blank. We insert bolts into the drilled holes, on the other side we add the washers and fix with nuts, tightening more.
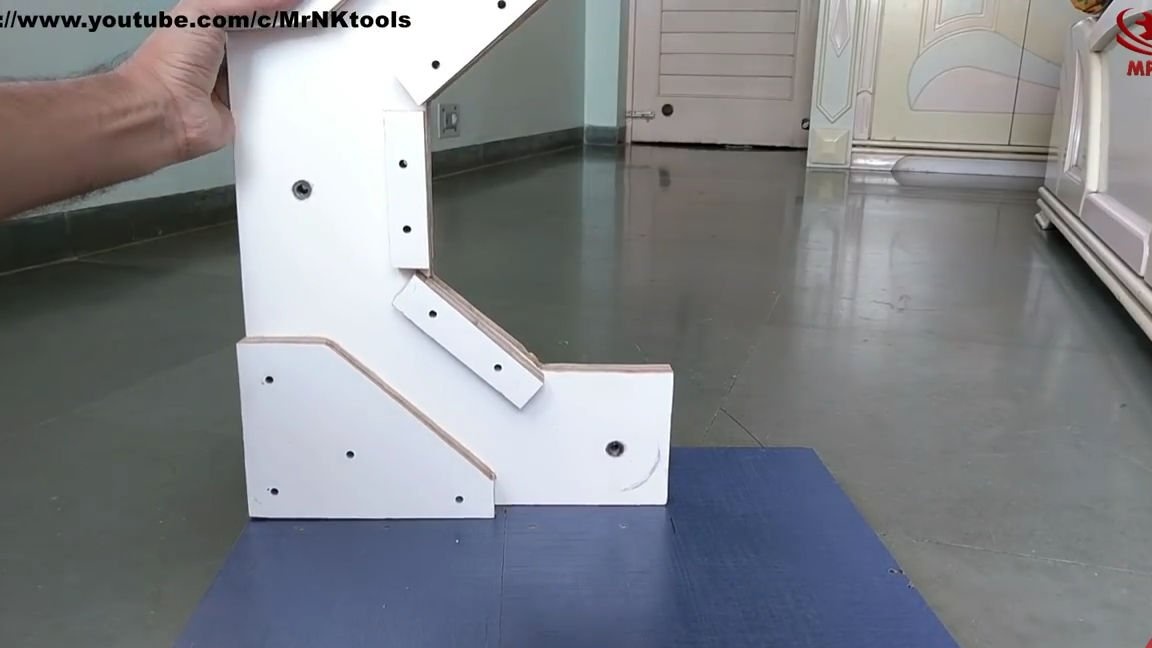
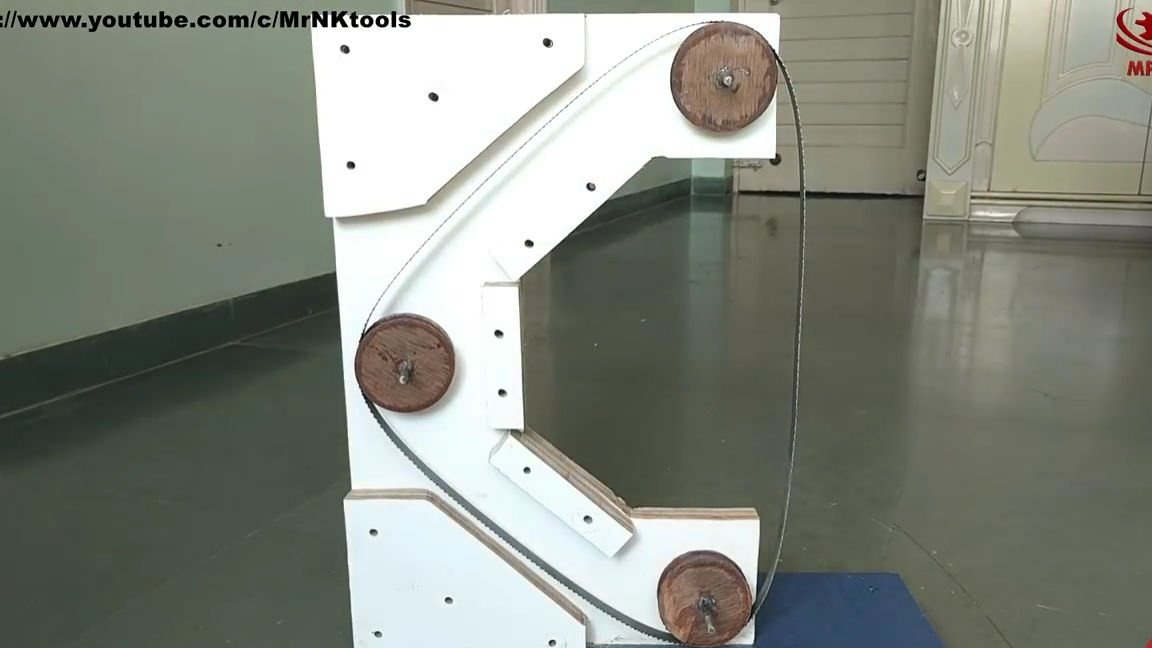
It turns out pretty reliable and practical.
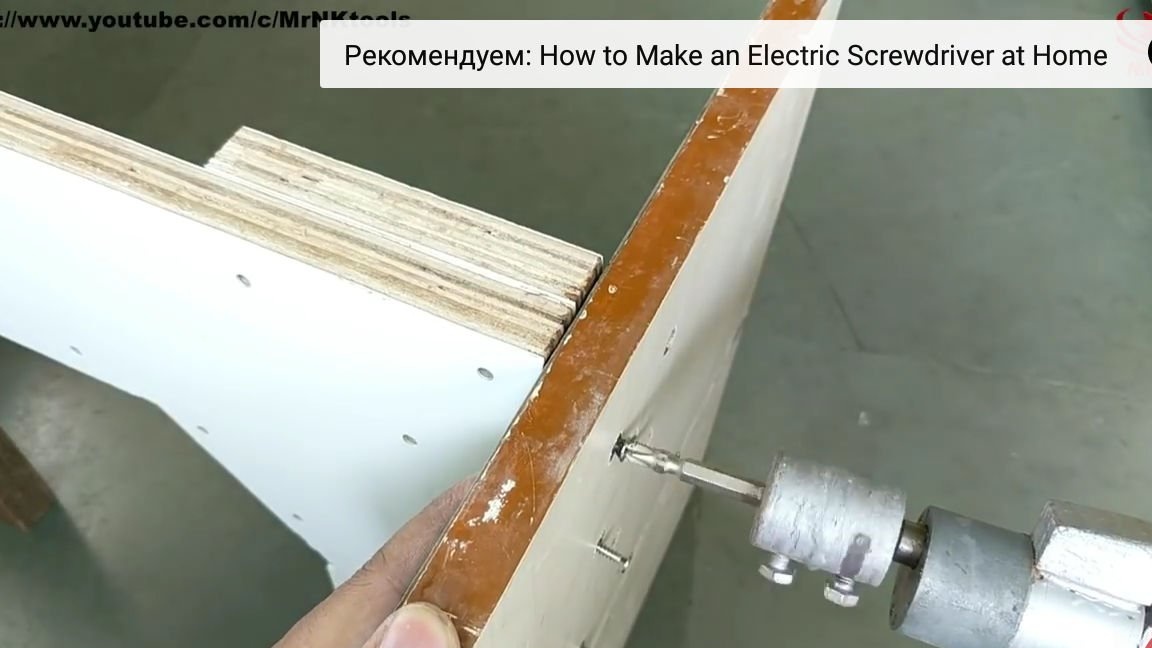
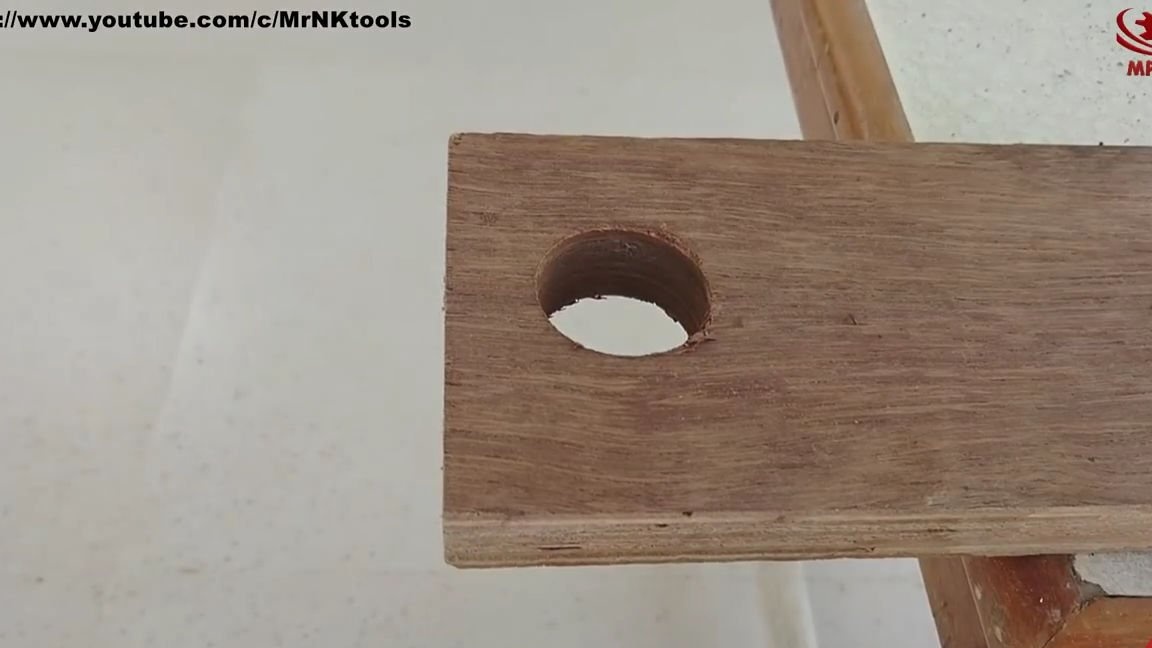
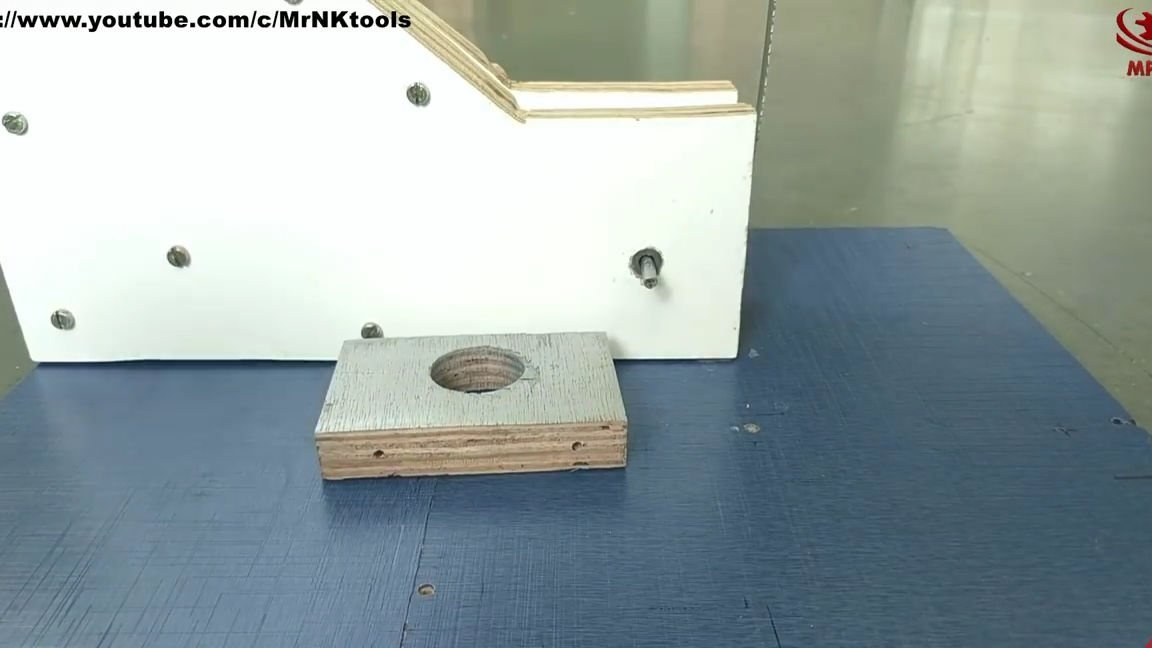
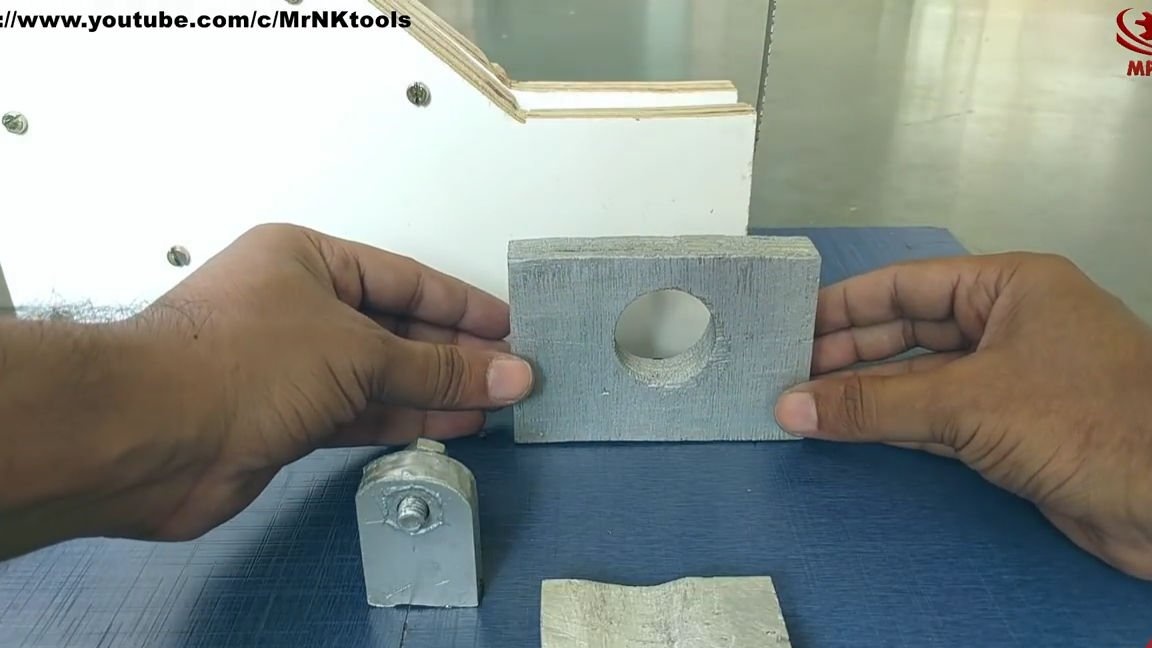
Now, using an electric drill and a small diameter crown, in another piece of plywood or fiberboard, we drill a round through hole, approximately from the edge of the workpiece. Then a jigsaw, saw off this part of the plywood. Then we make a few more details, all also from fiberboard or plywood, their shape and appearance in general, you can see in the photo below, it’s rather difficult to describe them and as they say “it’s better to see once than hear a hundred times”.
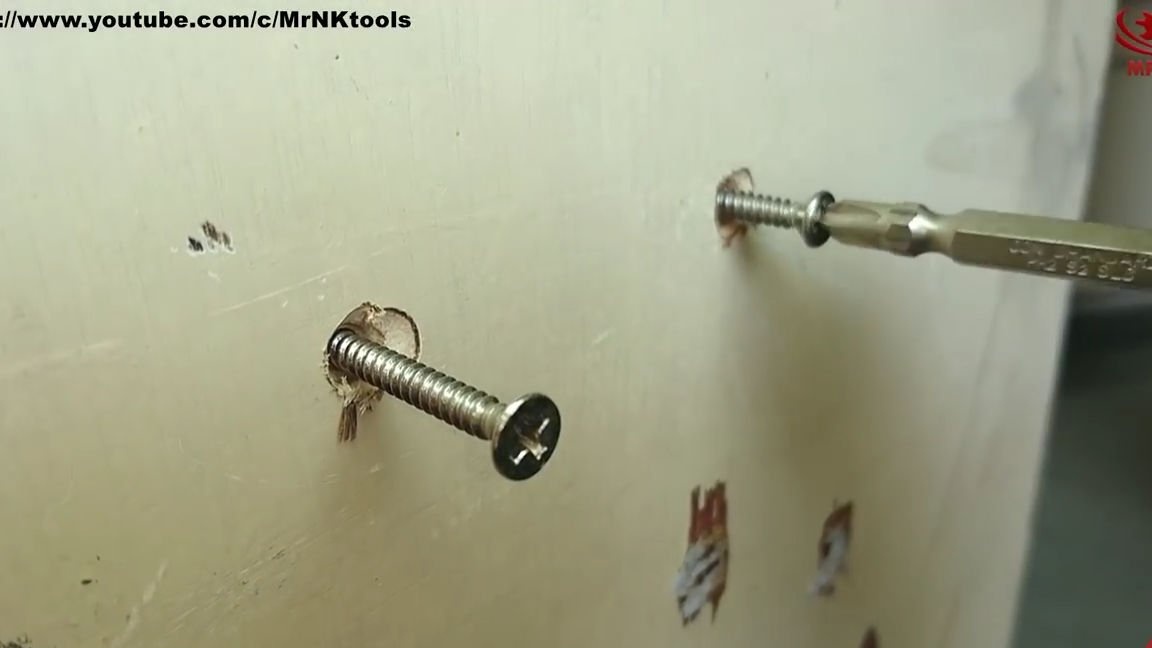
These details need to be fixed on the main part of the machine using self-tapping screws.
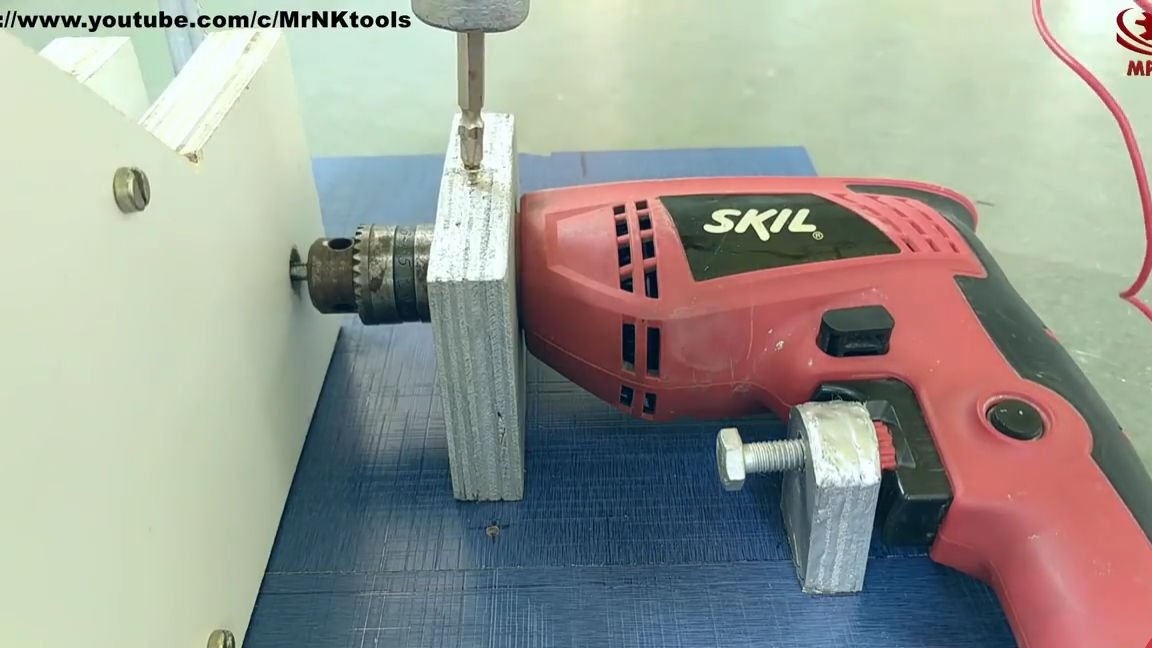
By the way, in a workpiece with a large hole, it is necessary to drill a thinner hole for this hole. It is necessary so that the drill cartridge can be fixed.
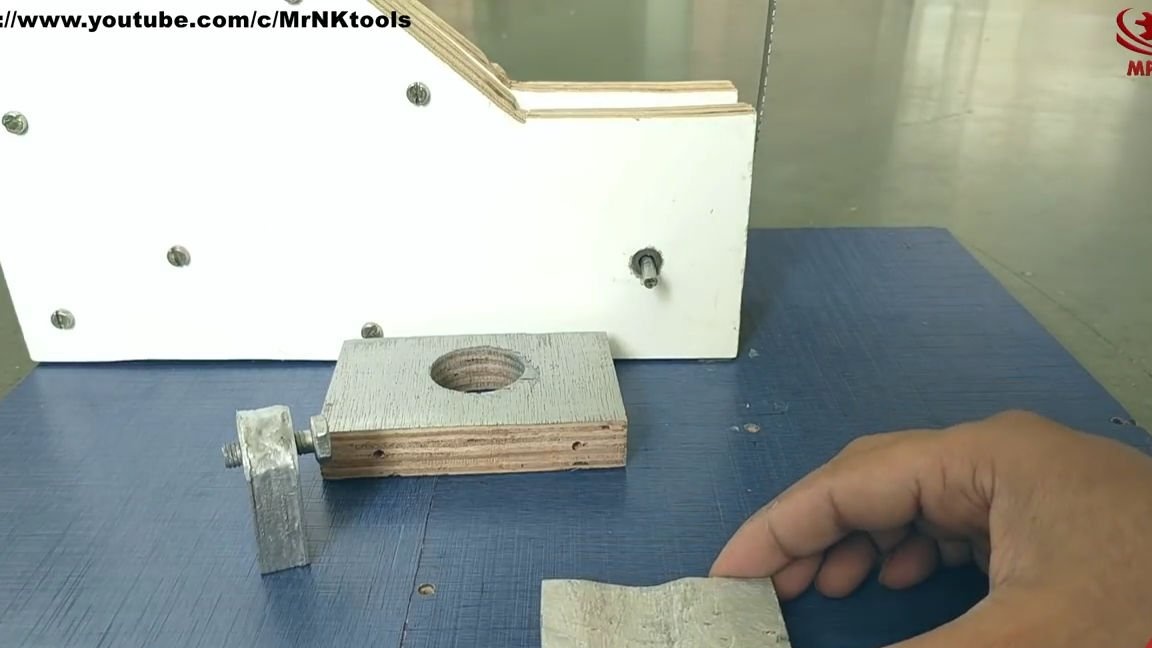
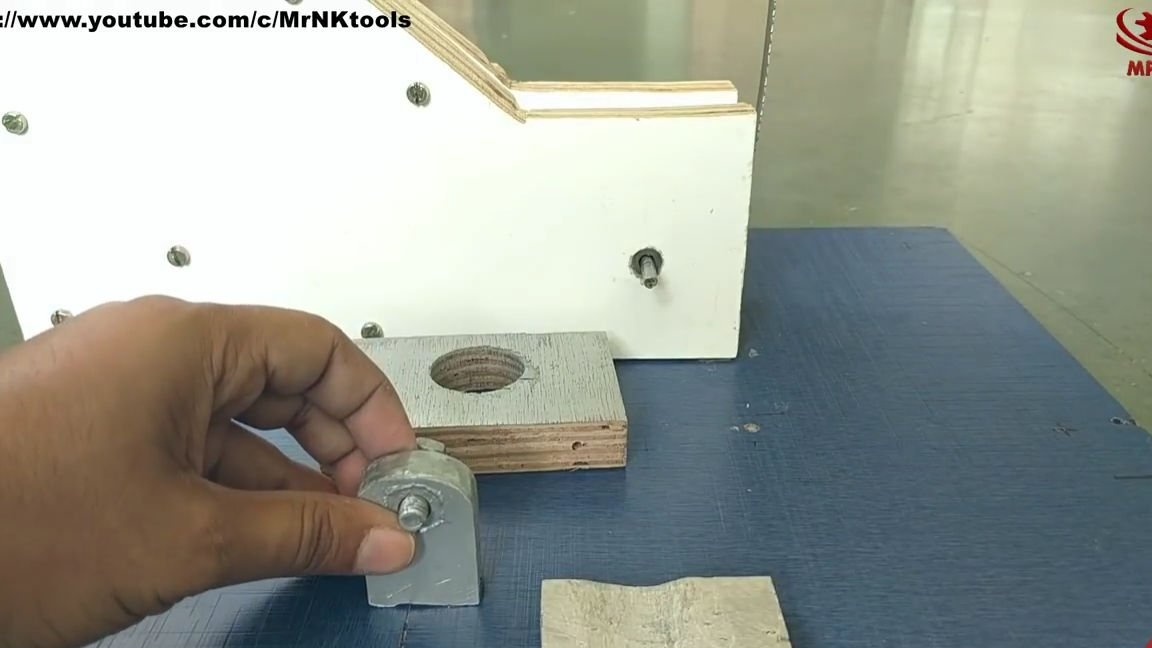
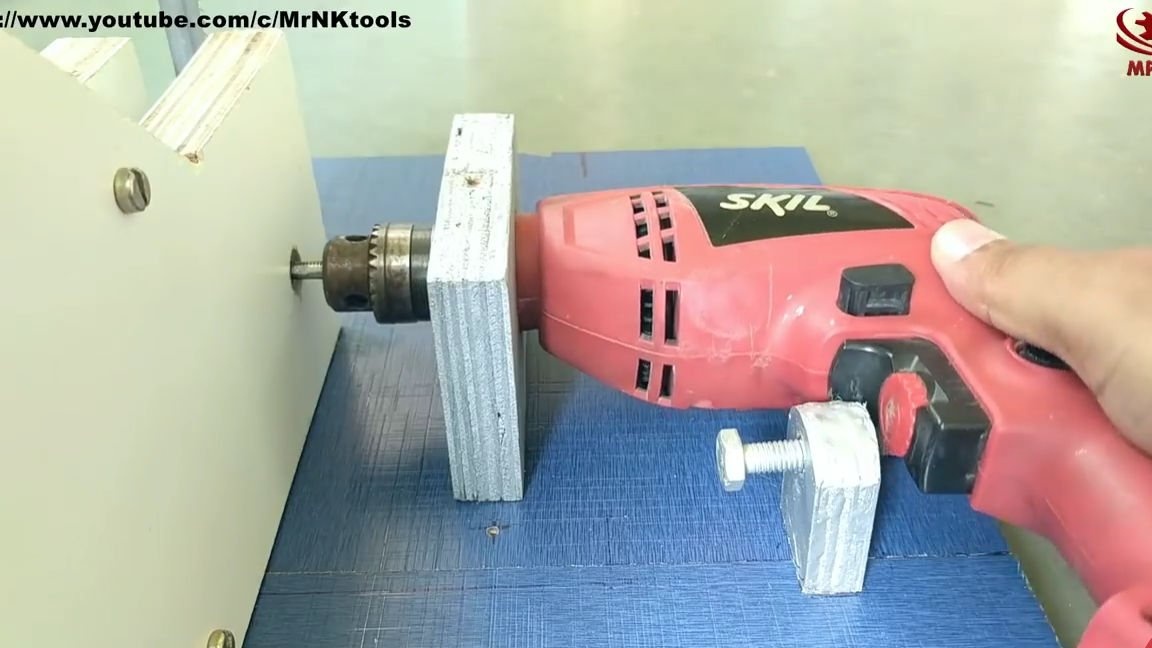
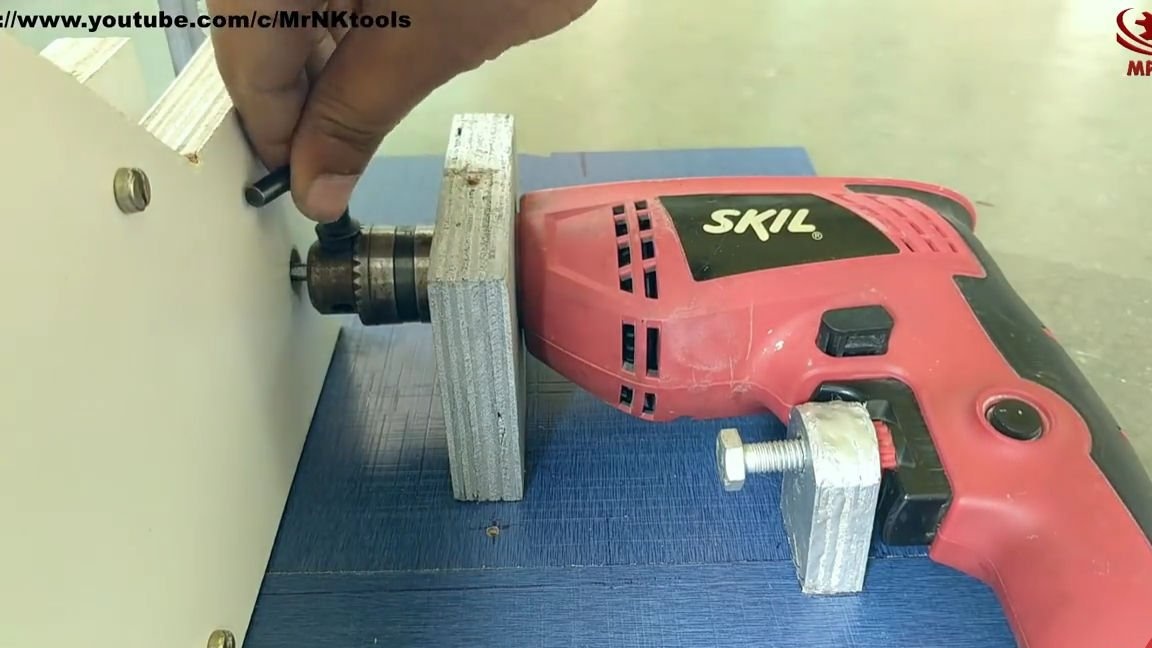
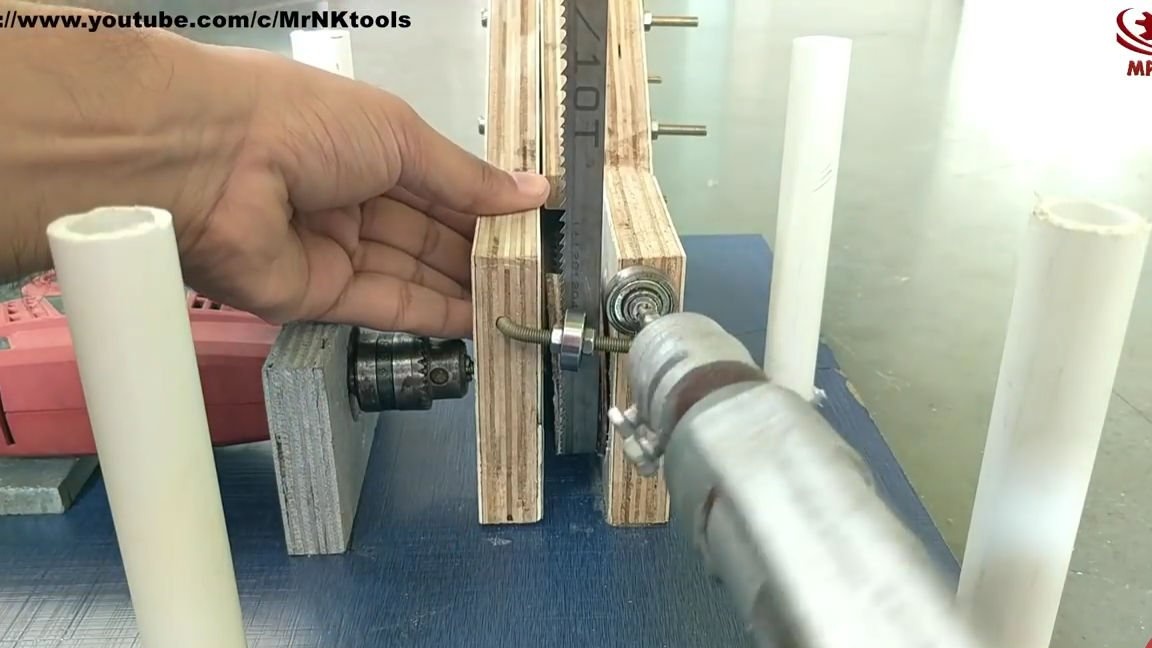
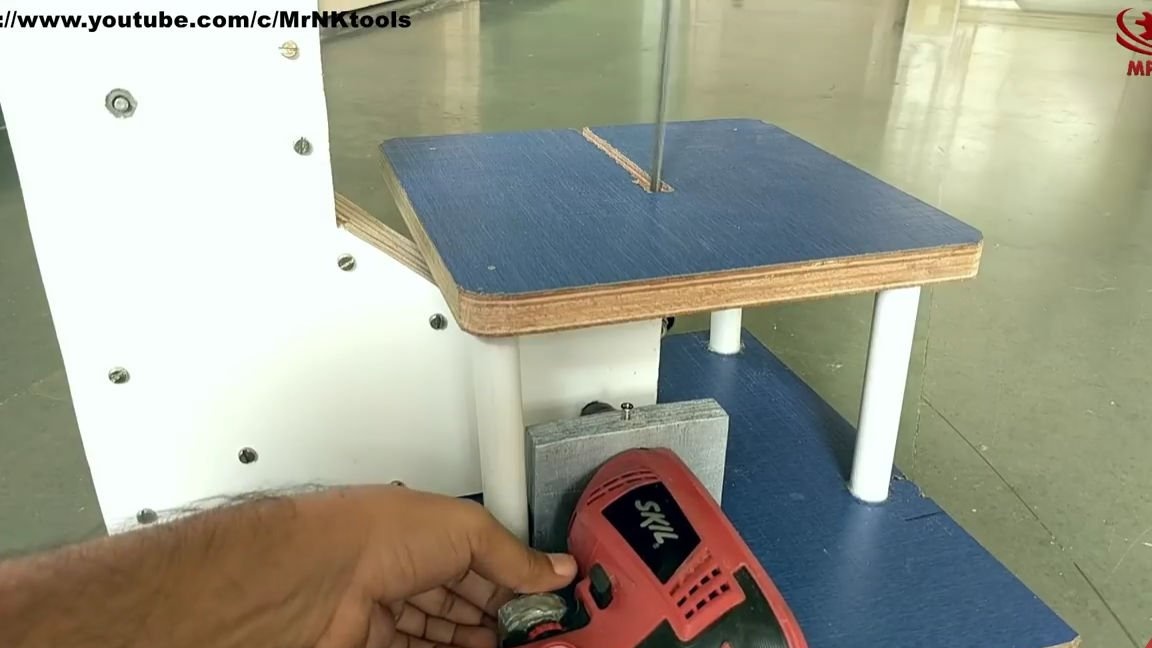
After all the previously done operations and actions, we insert the drill itself into a large hole, fix it, in general, do everything as in the photo below. And we insert and fix one of the block rods into the cartridge:
On the main part of the structure, we make 4 non-through holes, either using a crown or using a thick drill. We insert pvc pipes of equal length into these holes.
Then you need to attach ball bearings to the side of the structure, by the way, you can make one of these bearings create an interference fit for the sawing tape:
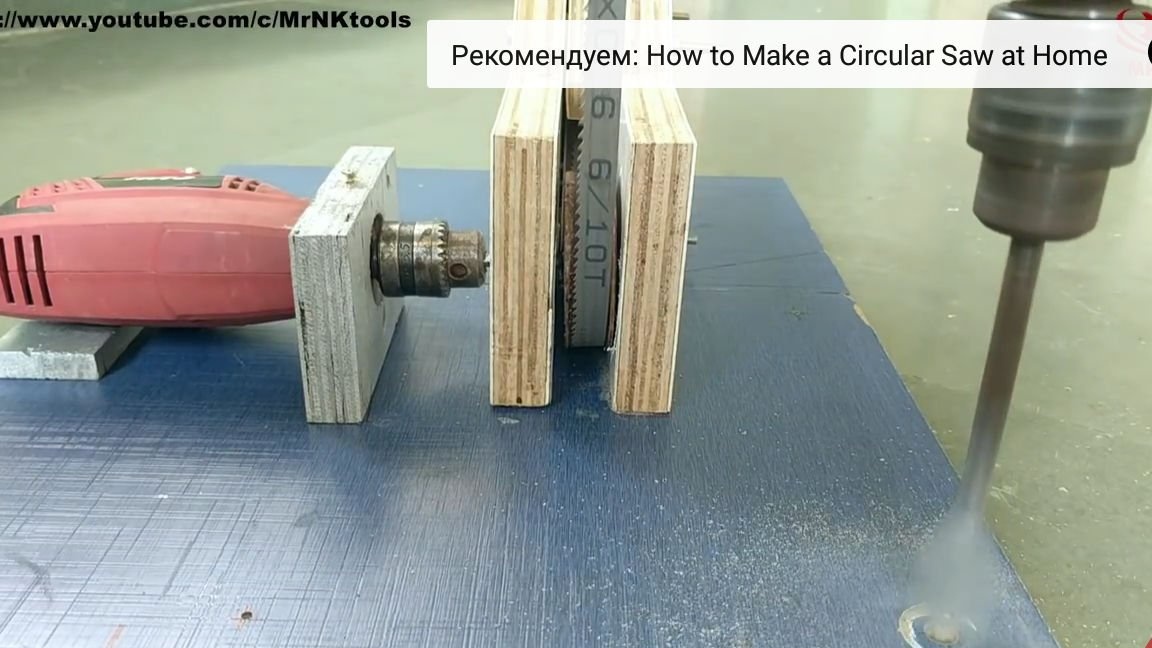
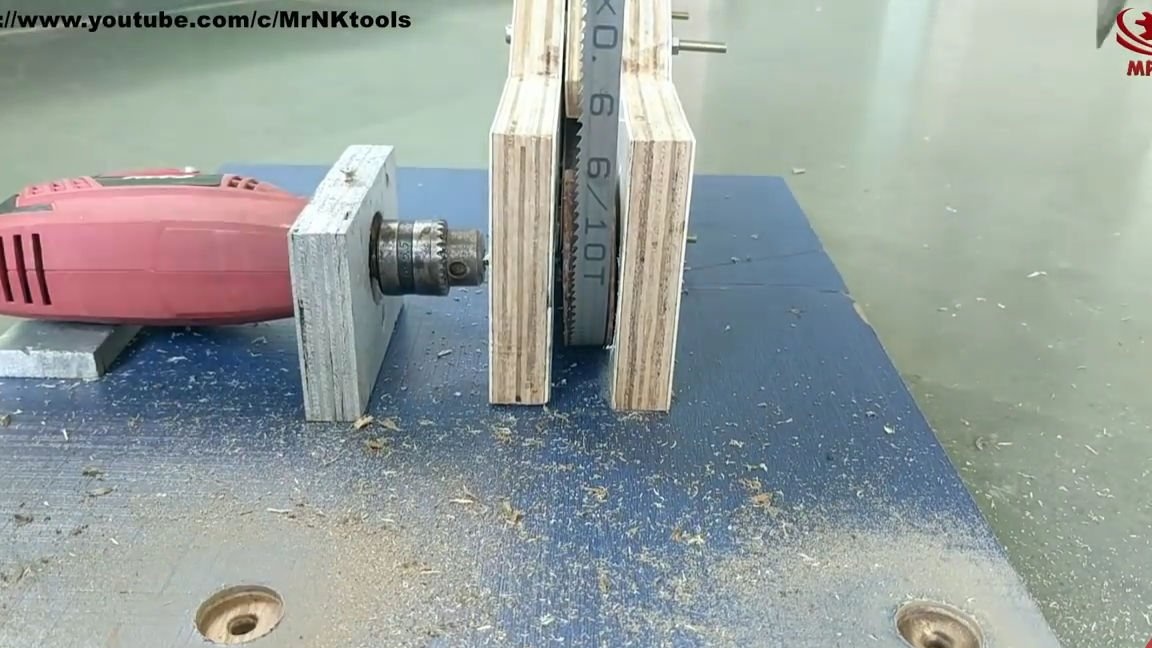

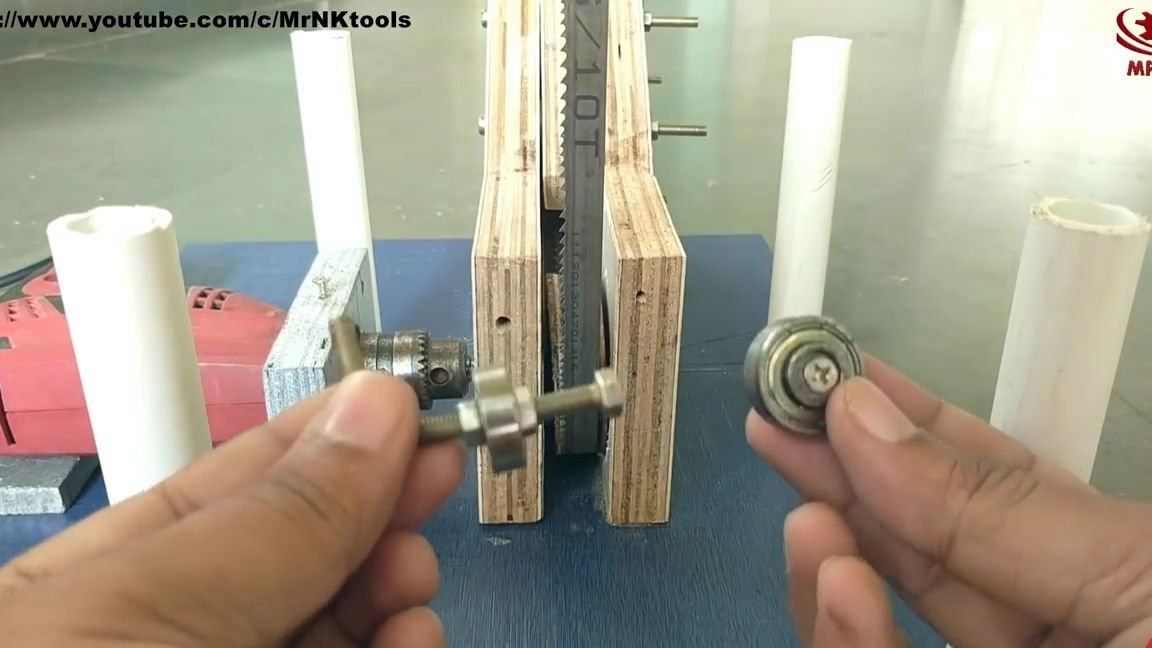
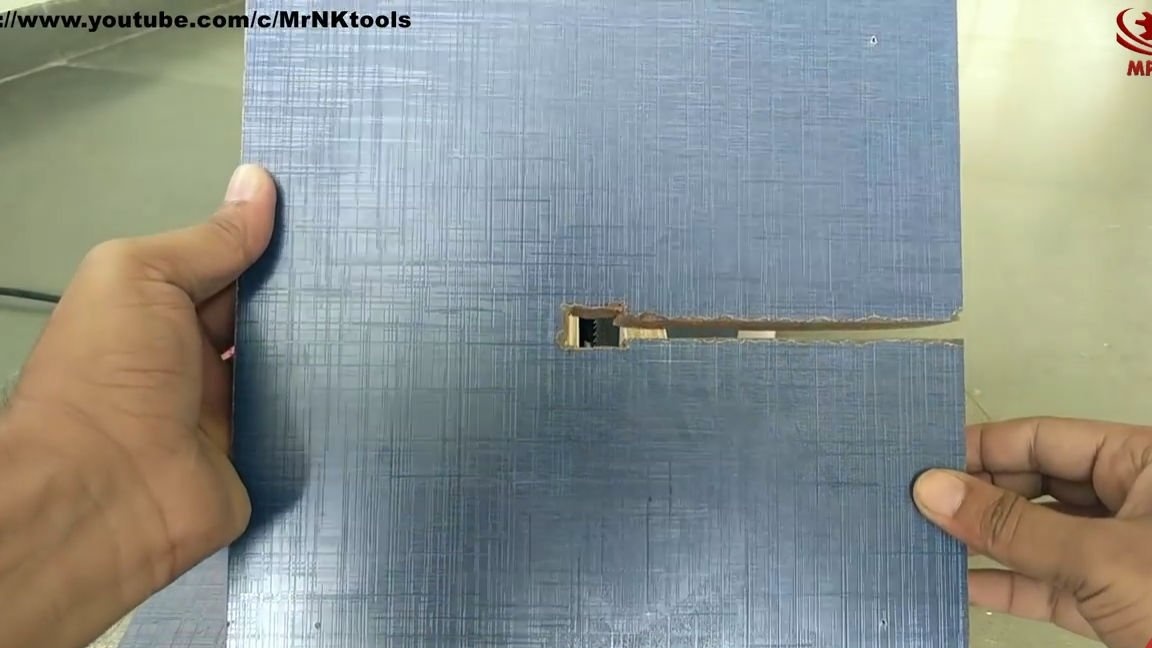
We take a square segment of thick plywood or fiberboard, and make a cut for the tape, I think I do not need to explain why it is needed:
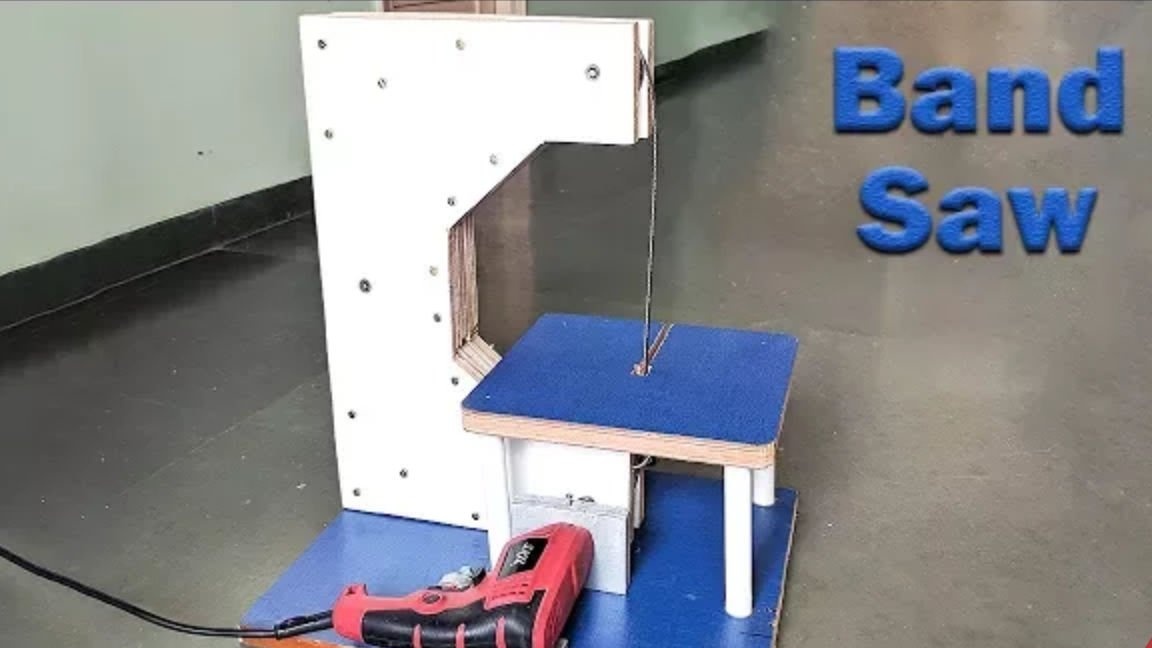
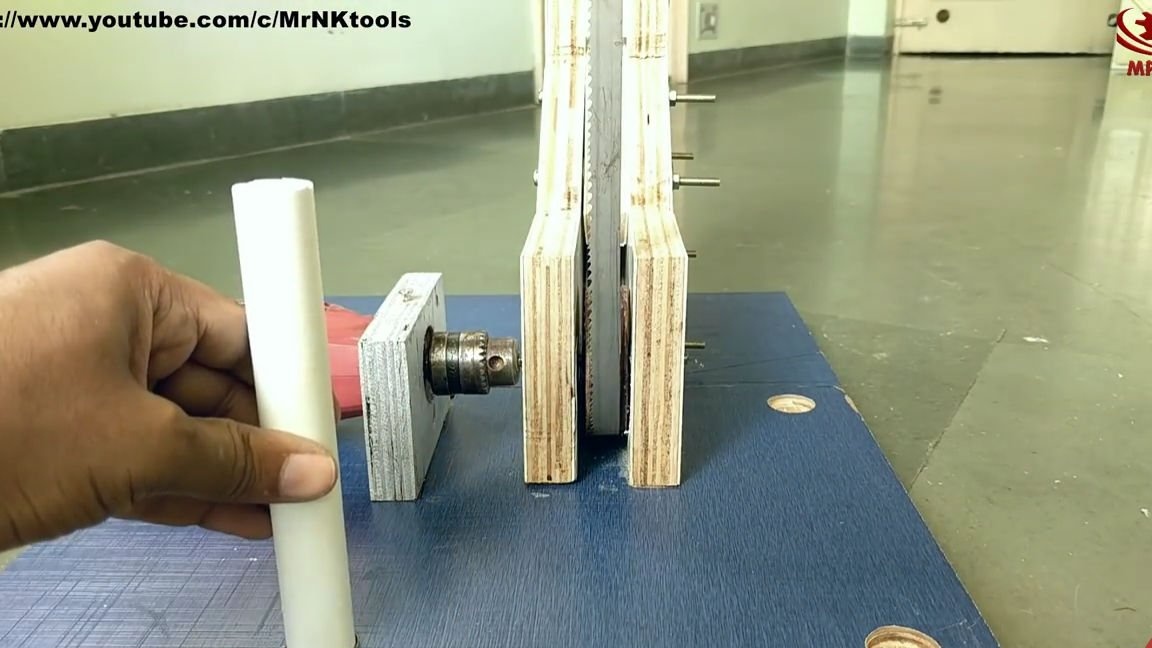
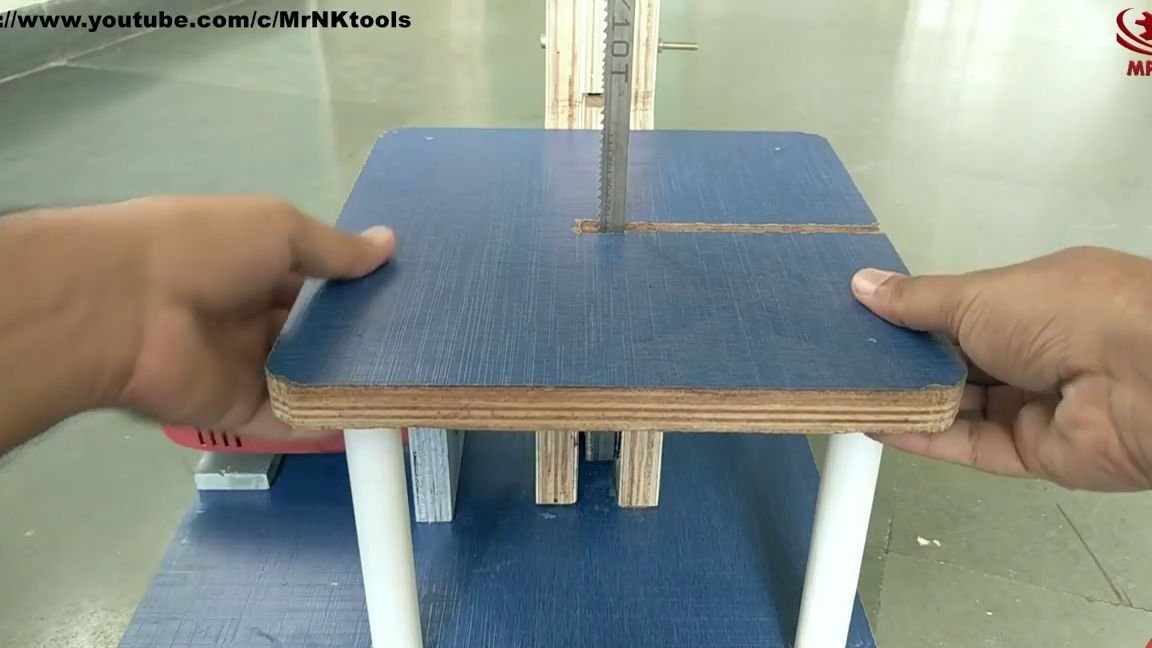
We install this part on a rack of PVC pipes, fixing it with glue or self-tapping screws and that's it! A simple jigsaw machine is ready and it remains only to test it. To do this, we start the drill and begin to create, cutting out various figures from not very thick materials that can be sawed. But remember the safety precautions! Work best in goggles and clothing, as well as protect your hands and not take risks, working carefully!
Here is a video from the author with a detailed assembly and testing of this homemade product:
Who cares, here is my video on how to make a funny mini "robot")
Well, thank you all for your attention and good luck in future projects, friends!