

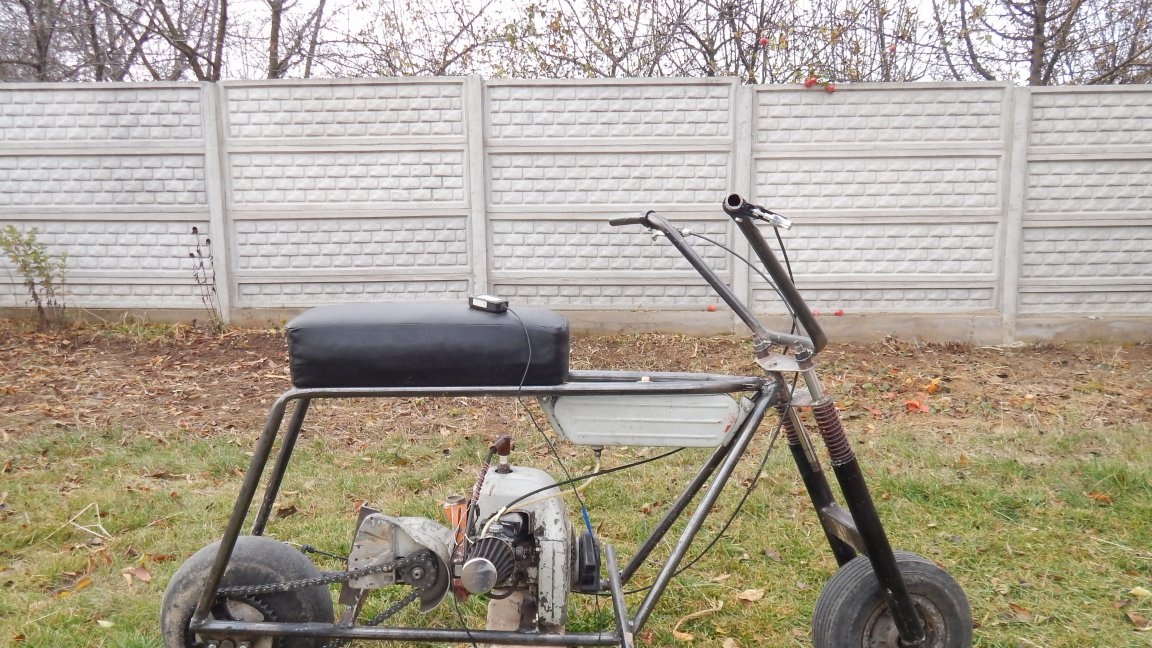
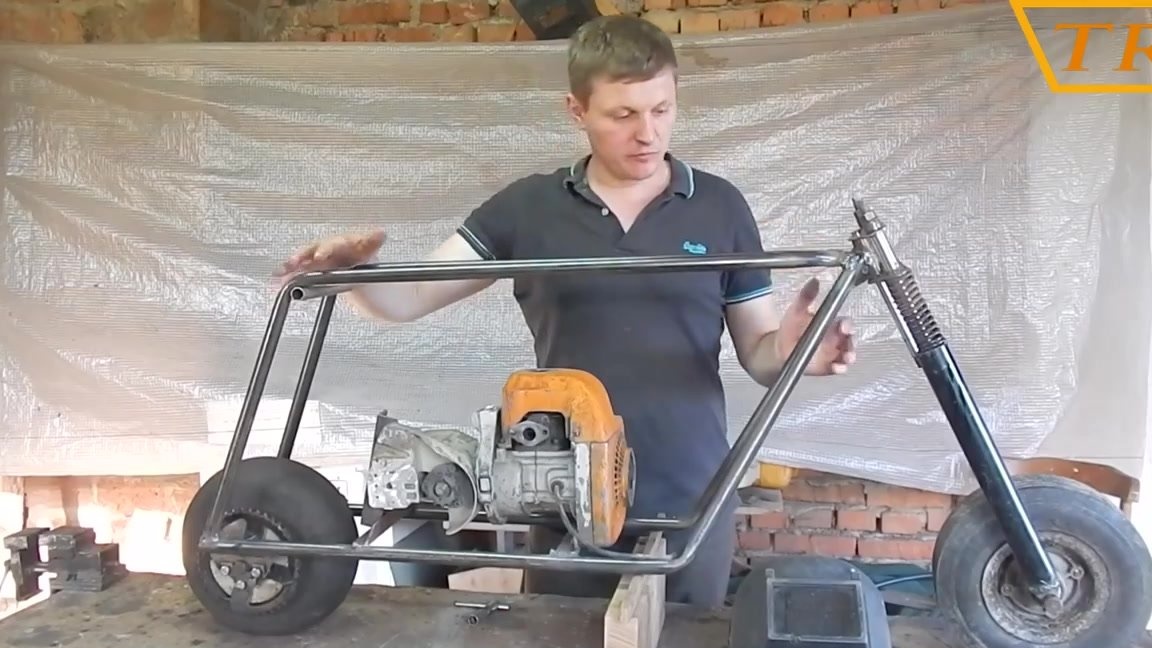
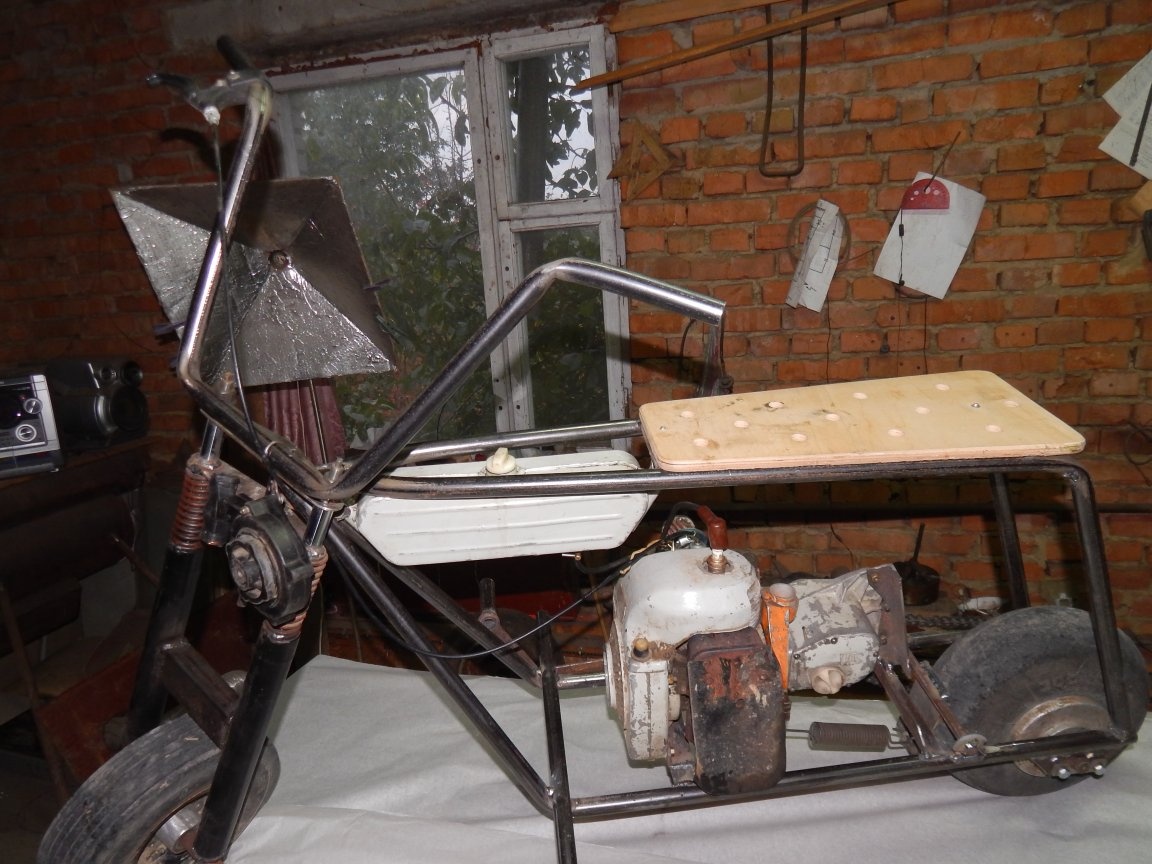
Hello to all lovers of home-made equipment! In this article I want to share my experience in creating a moped from a Ural Electron 2T chainsaw from zero. In order to make a moped myself, first I collected all the necessary parts and accessories - wheels, engine, pipes for the frame, and other accessories about which you will learn later. This article is not a 100% instruction for the manufacture of a moped, and even more so it is not necessary to repeat everything after me! My article is an algorithm of actions following which you will be able to assemble your first moped.
Materials and components
1. The engine from a Ural 2T chainsaw with a gearbox
2. Wheels can be taken from a garden wheelbarrow with a diameter of 265-300 mm on the outside, but with good motorcycle tires
3. Suture-water pipe length 7.5 meters
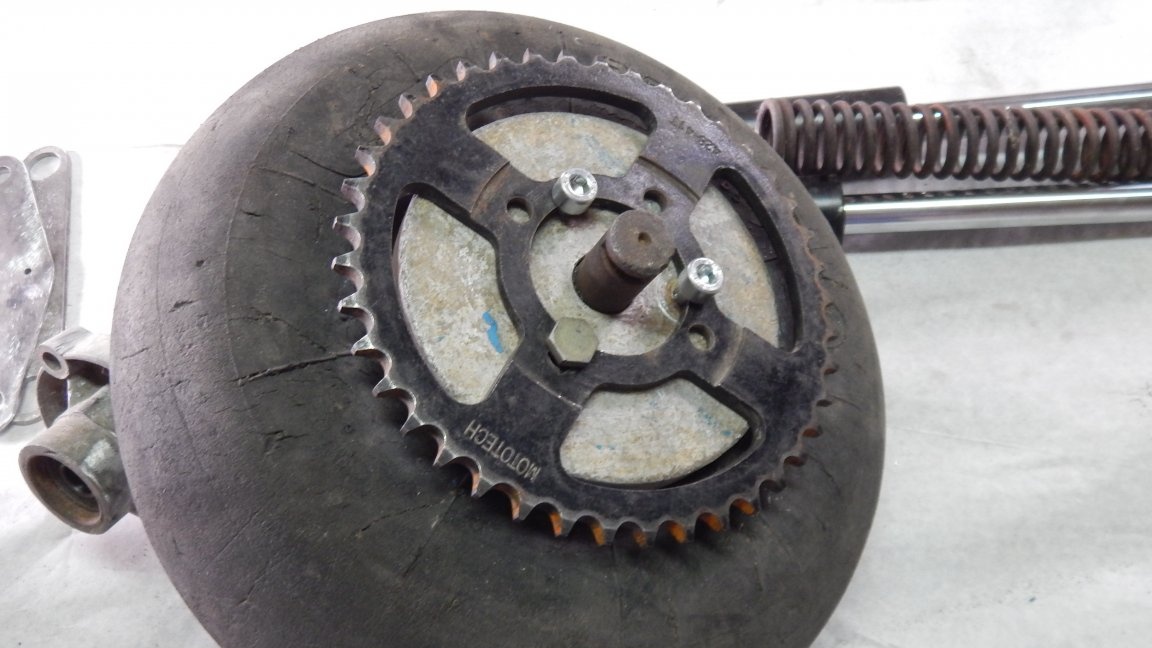
4. Brake disc with a caliper from a mountain bike
5. Drive chain with stars 13 and 41 tooth from a moped or motorcycle
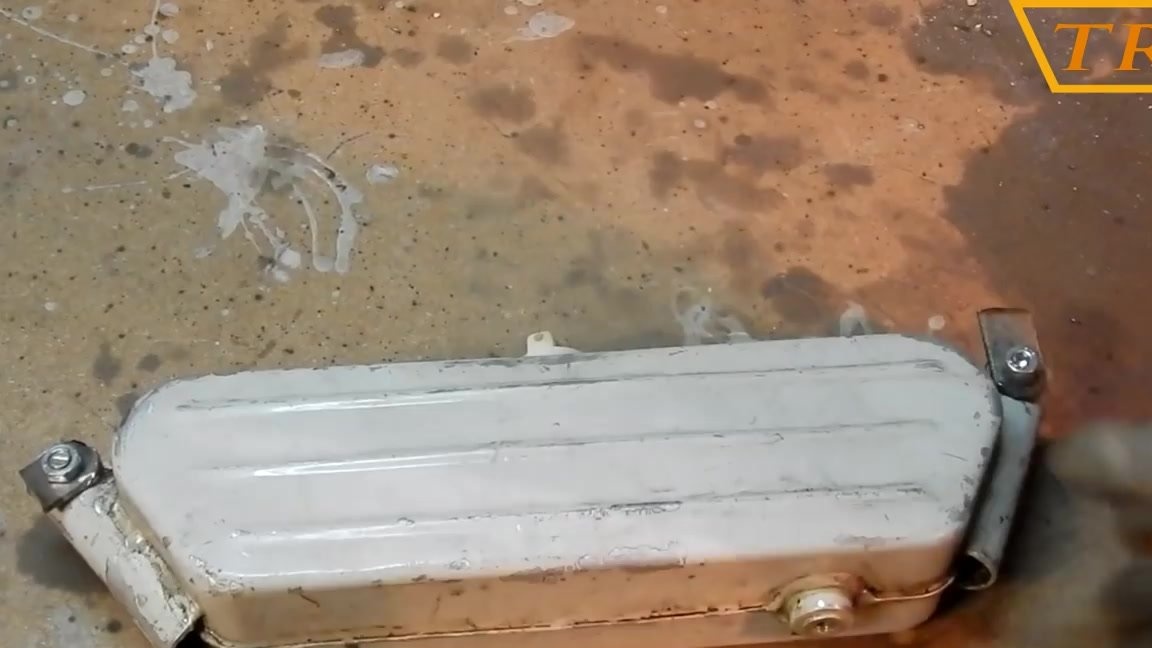
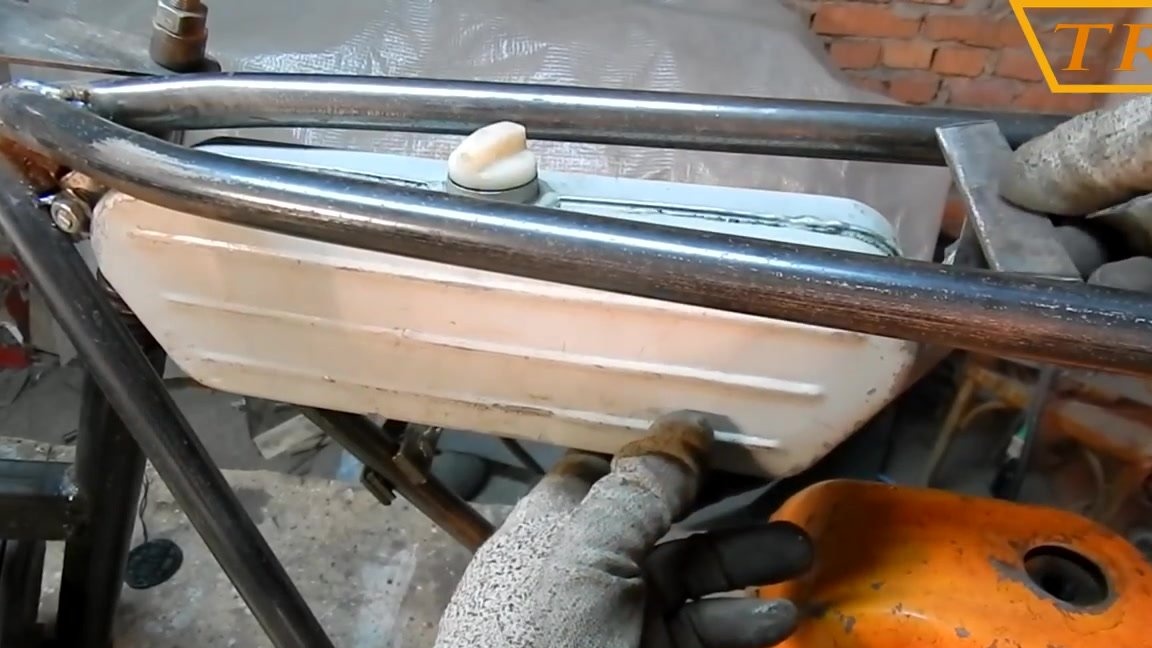
6. Fuel tank from a Ural 2T chainsaw
7. Ropes with casings for gas and brake 1.5 meters long
8. Handles of brakes from a mountain bike - 2 pcs.
9. Plywood 10 mm, foam rubber and dermantine for a seat
10. Struts of shock absorbers from Tavria 2 pcs.
11. Springs for the front fork
12. Front wheel axle
13. Rear axle
Tools and consumables
1. Welding machine
2. Bulgarian
3. Set of drills
4. Set of taps
5. Drill
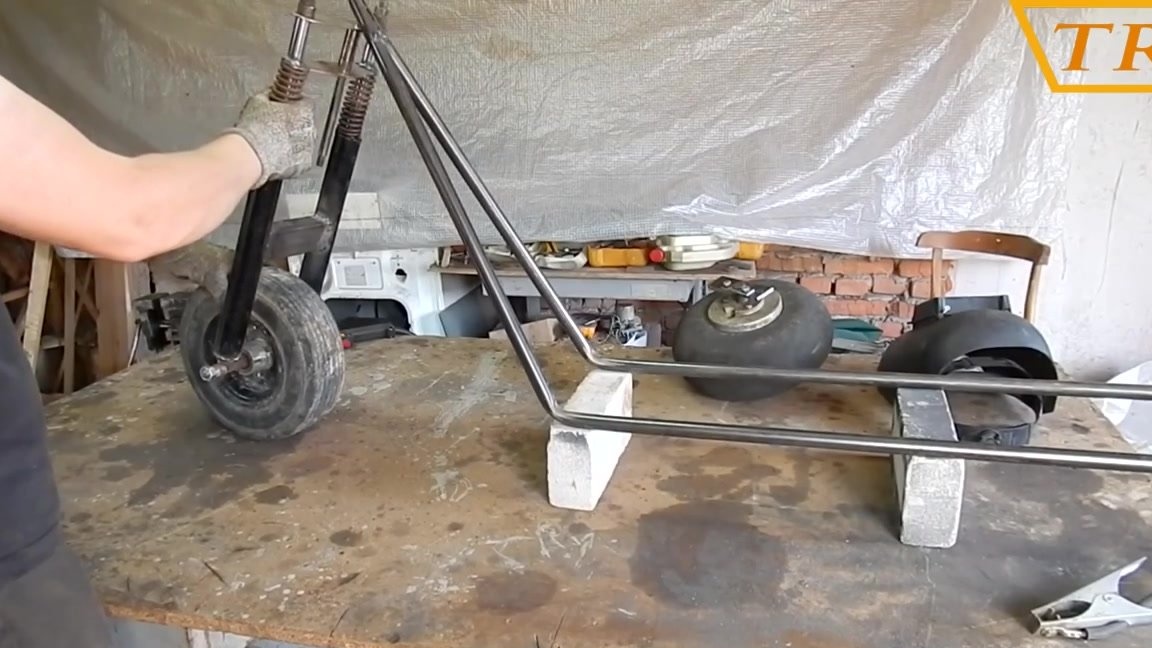
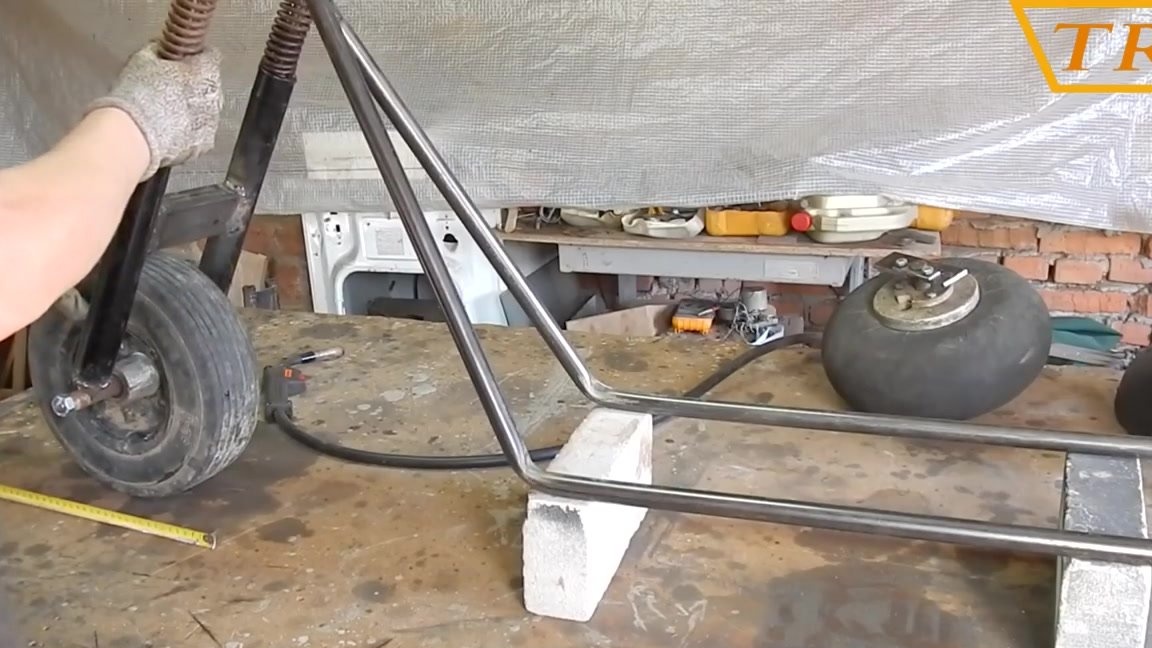
Step one: make a fork
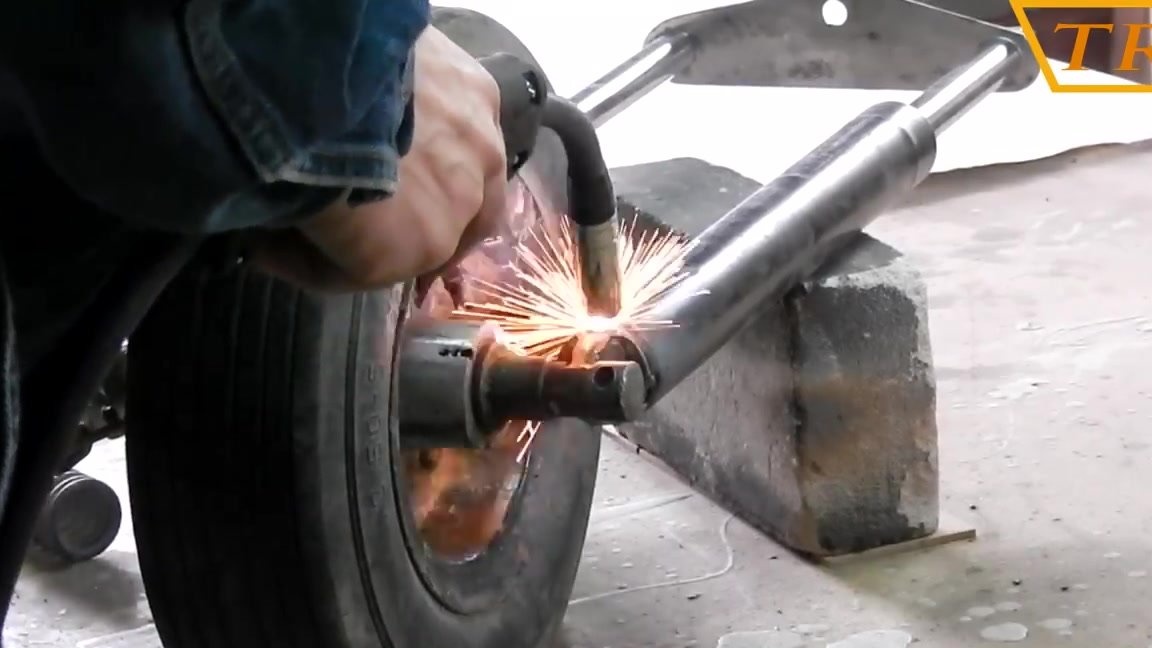
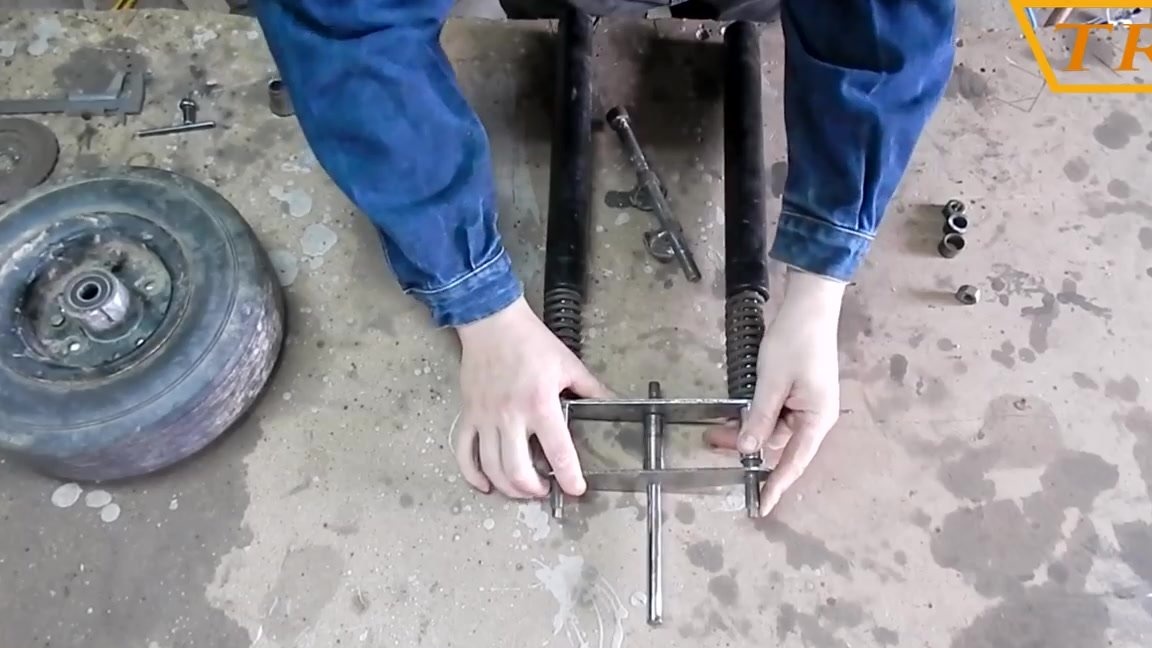
After all the parts have been assembled, you can begin to manufacture a moped. And I will start to do it not quite according to the standard scheme, as is usually customary, and I will start by making the front fork, not the frame. I started it with a fork because I will already adjust the frame to the height of the fork. To make a fork, I took two struts of shock absorbers from a Tavria car.
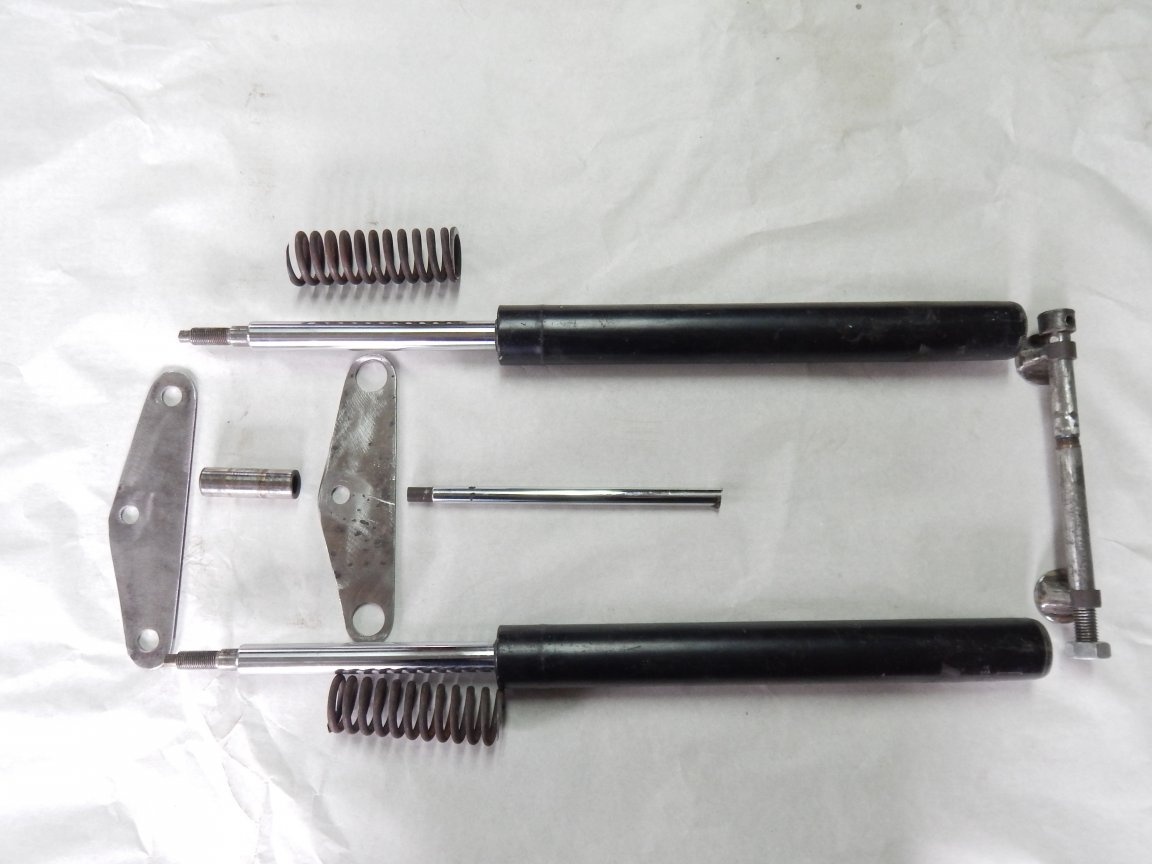
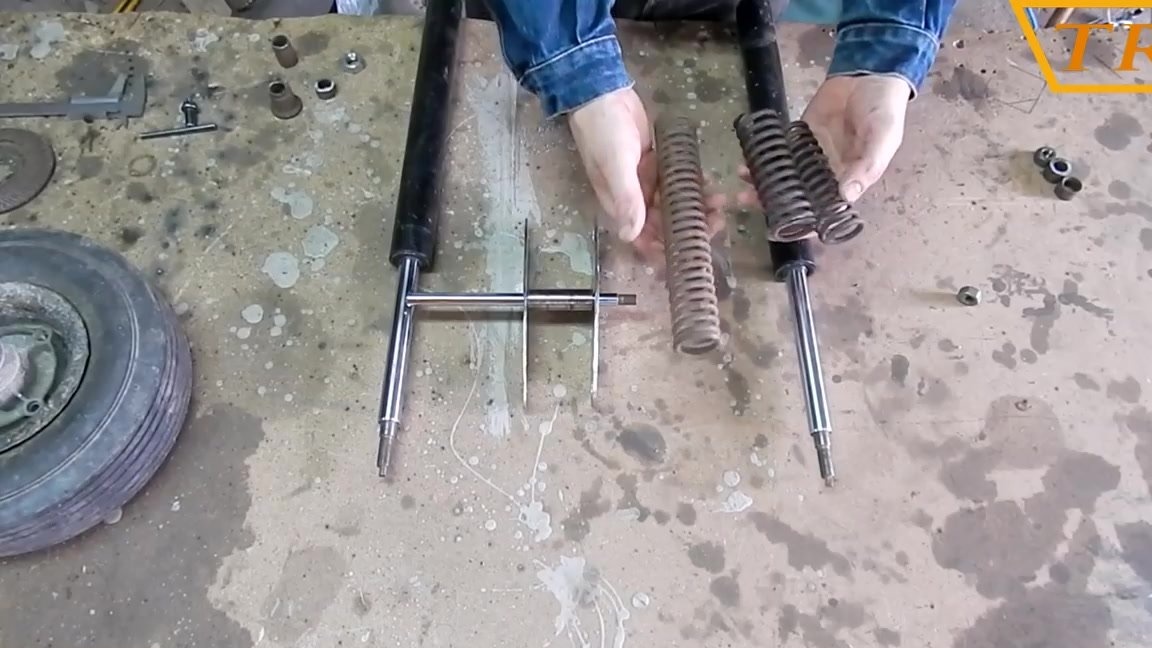
Here are all the parts we need for the plug. In two plates, a thickness of 3 mm is made at the same distance of the hole for the diameter of the rod of the shock absorber strut, in the upper plate of the hole is a smaller diameter, in the lower one is a larger one. In the middle of the plates we make a hole through which the rod connecting the plug with the frame will pass. I will not indicate the exact dimensions of the holes that I drilled in the plates because you can have completely different ones.
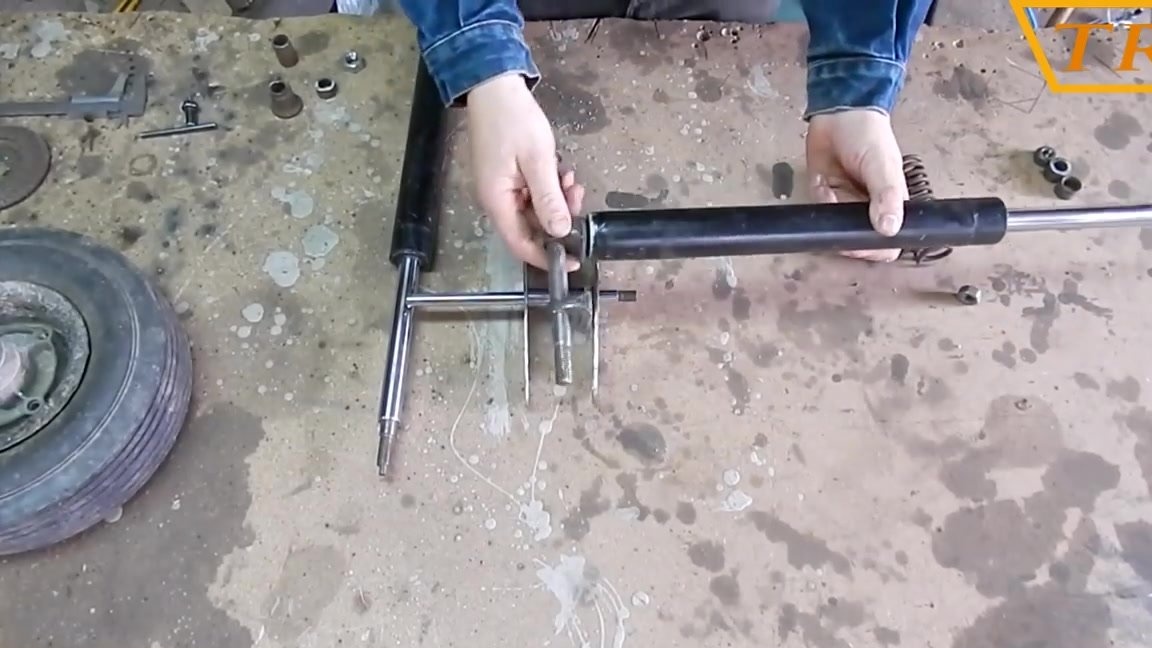
In order to smoothly weld the wheel axle holders, you need to pass the axis through the holders themselves and the wheel hub.
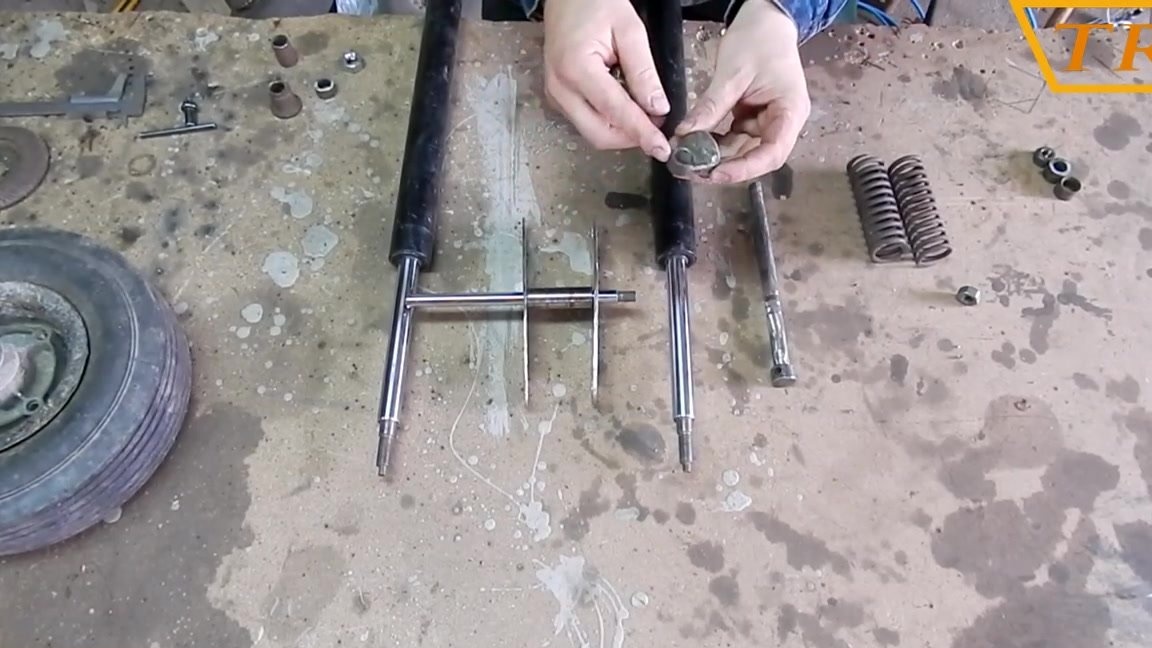
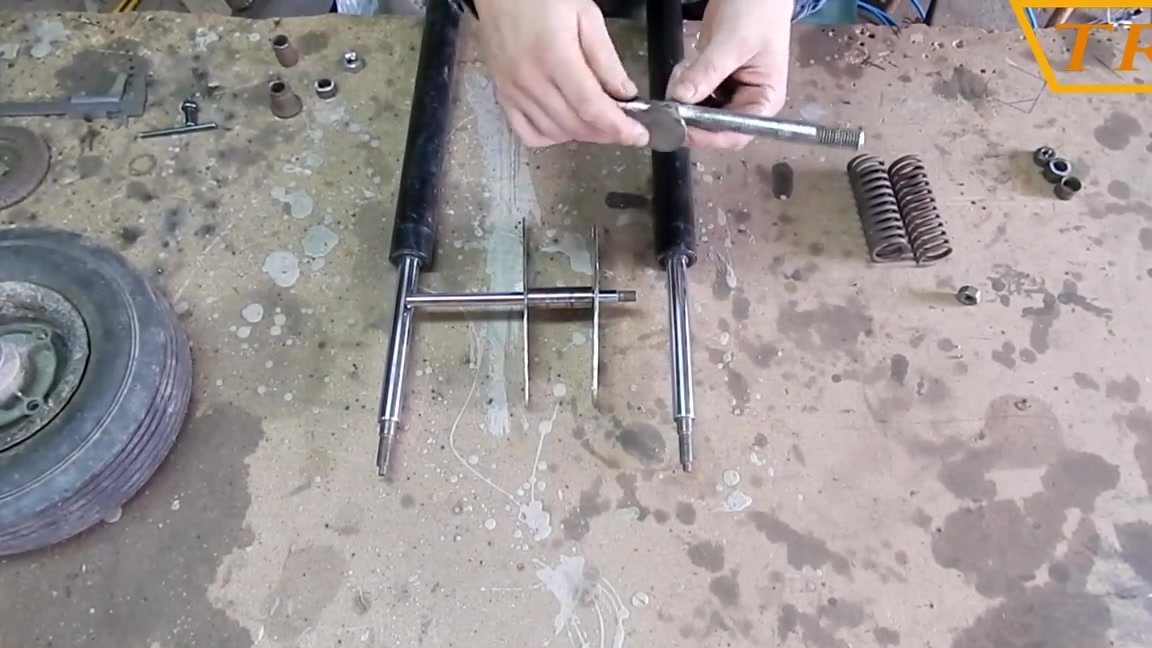
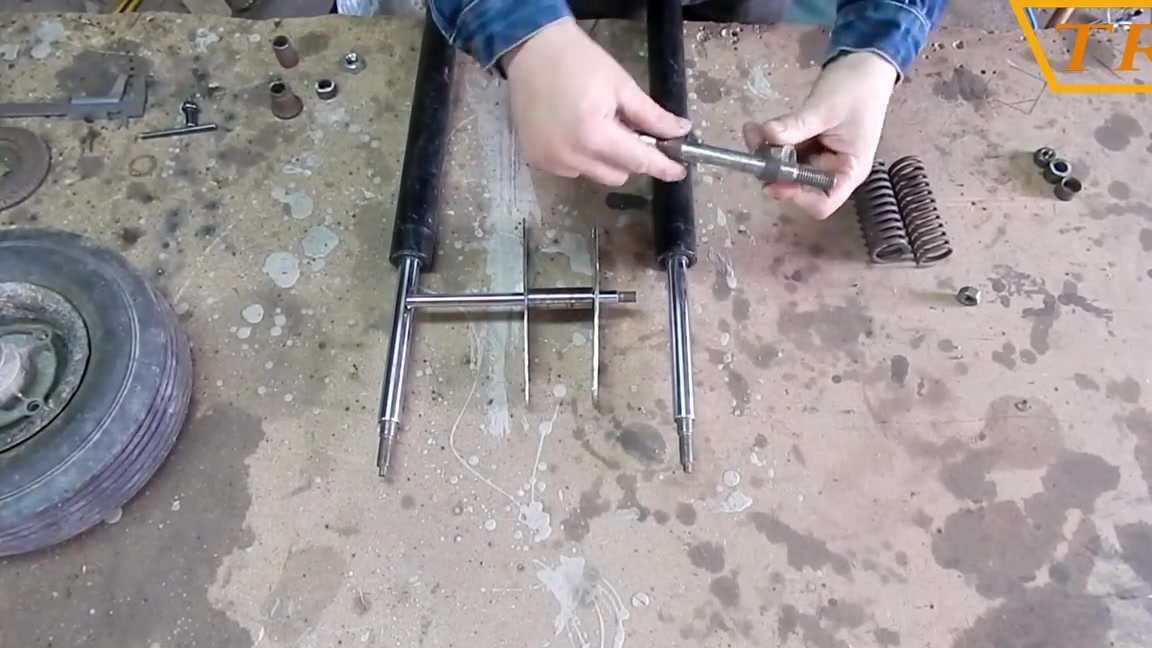
Then you need to connect the rods to the bar on top and fix them by tightening the nuts.
Next, put the fork on the bricks for convenience and check whether the wheel is parallel to the fork.If everything is set correctly, I proceed to welding the parts.
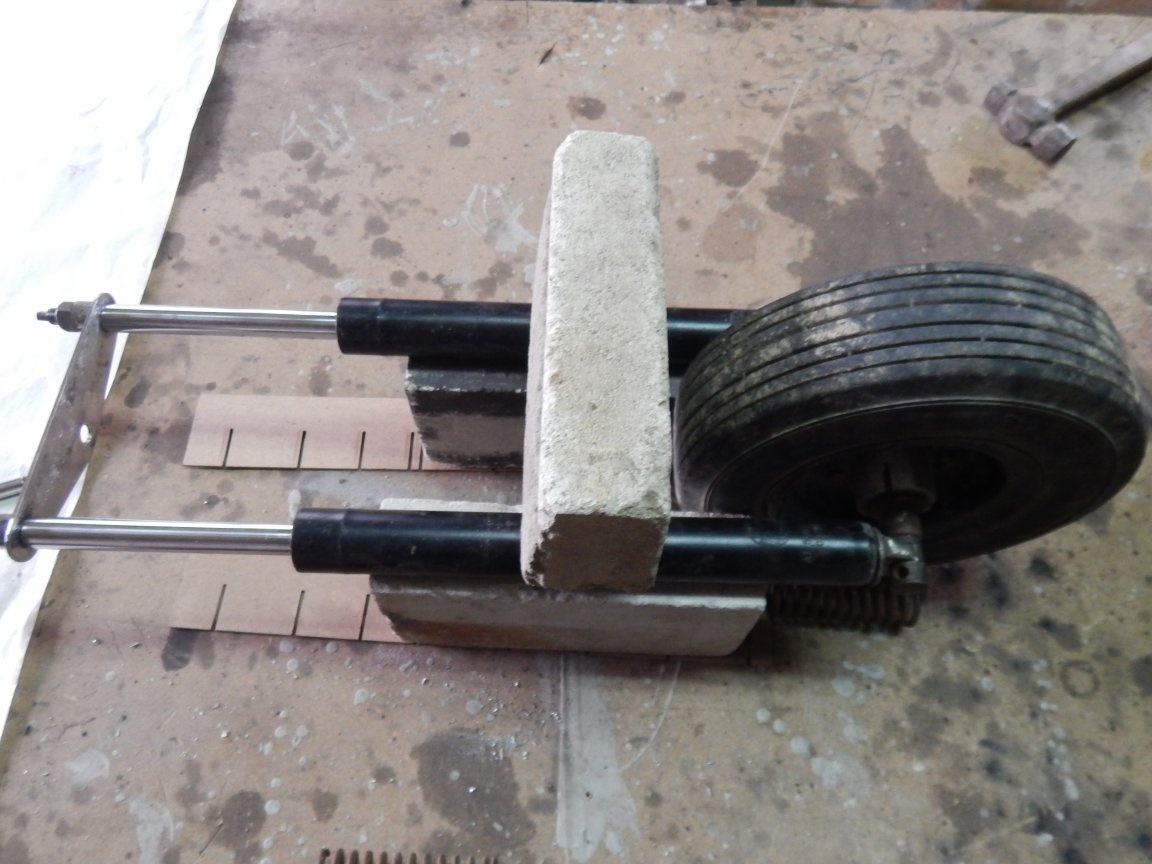
I use a spring as a shock absorber. I found a suitable spring for receiving scrap metal and cut it into two pieces of the desired length.
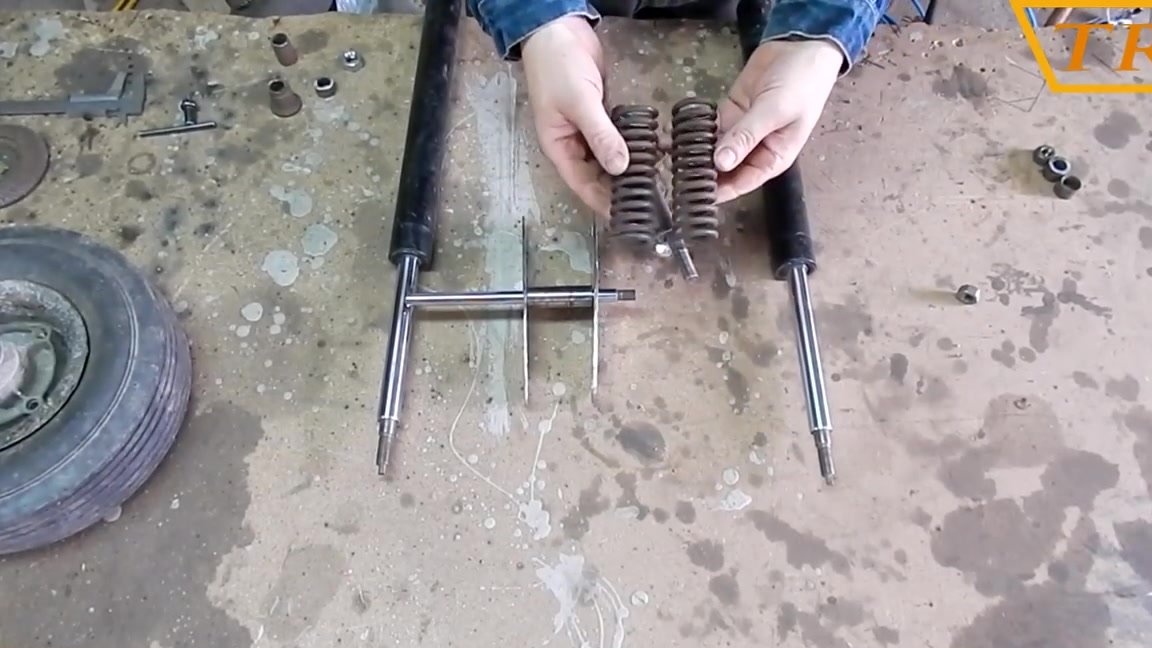
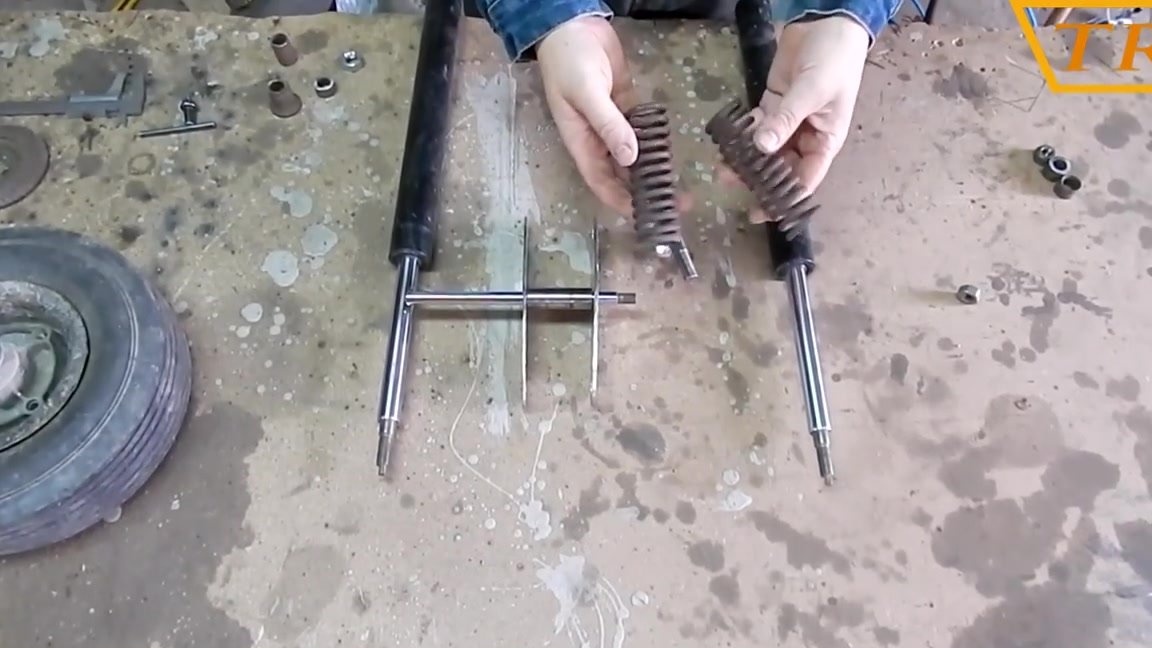
Now we collect the remaining parts on the fork from above with springs and plates, and screw the nuts on the rods.
In order for the fork to have greater rigidity and the wheel does not wobble to the sides, I connect the racks to each other with a jumper made of a profile pipe 30 X 50 mm.
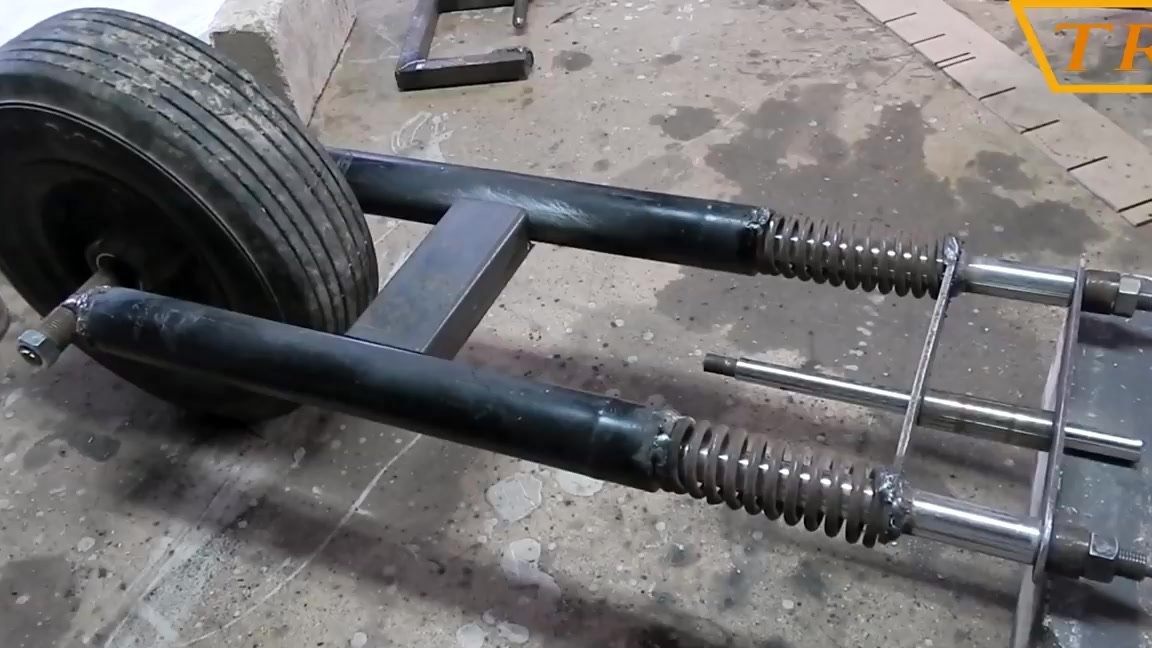
Next, we weld all joints with a jumper on all sides.
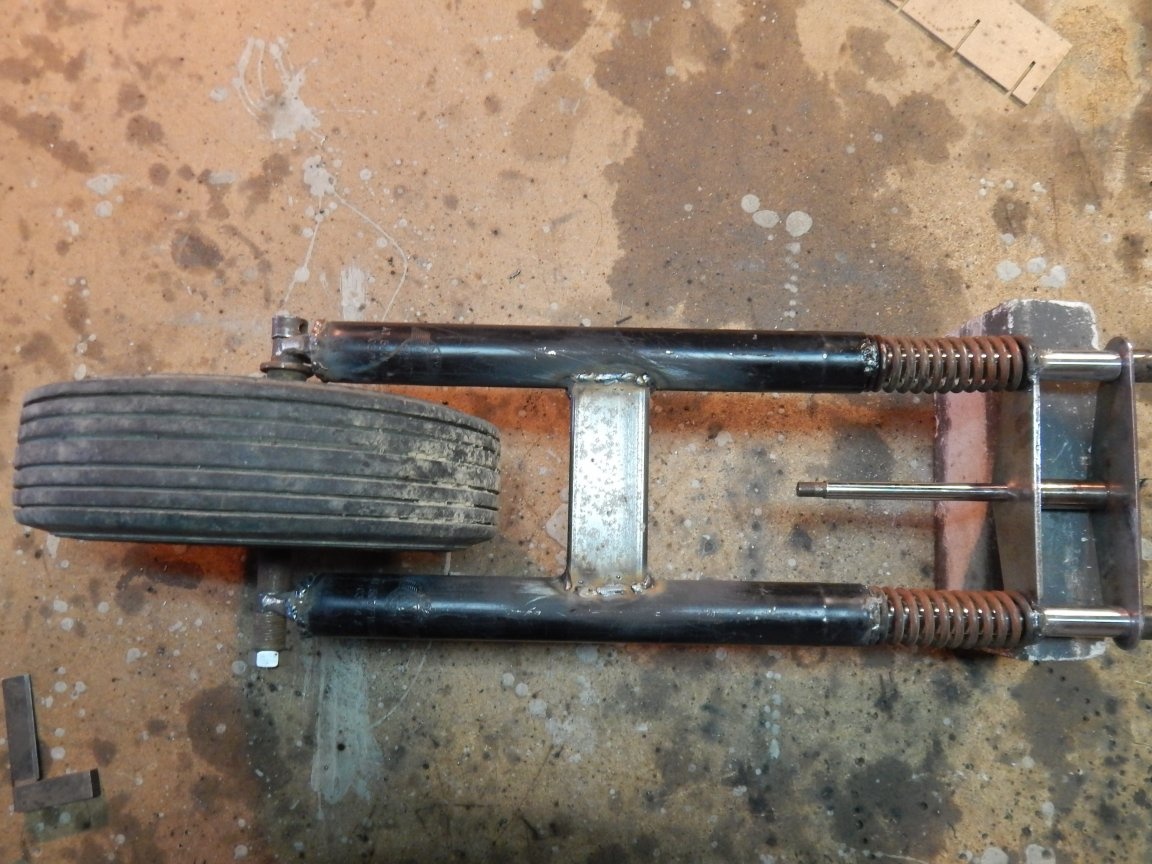
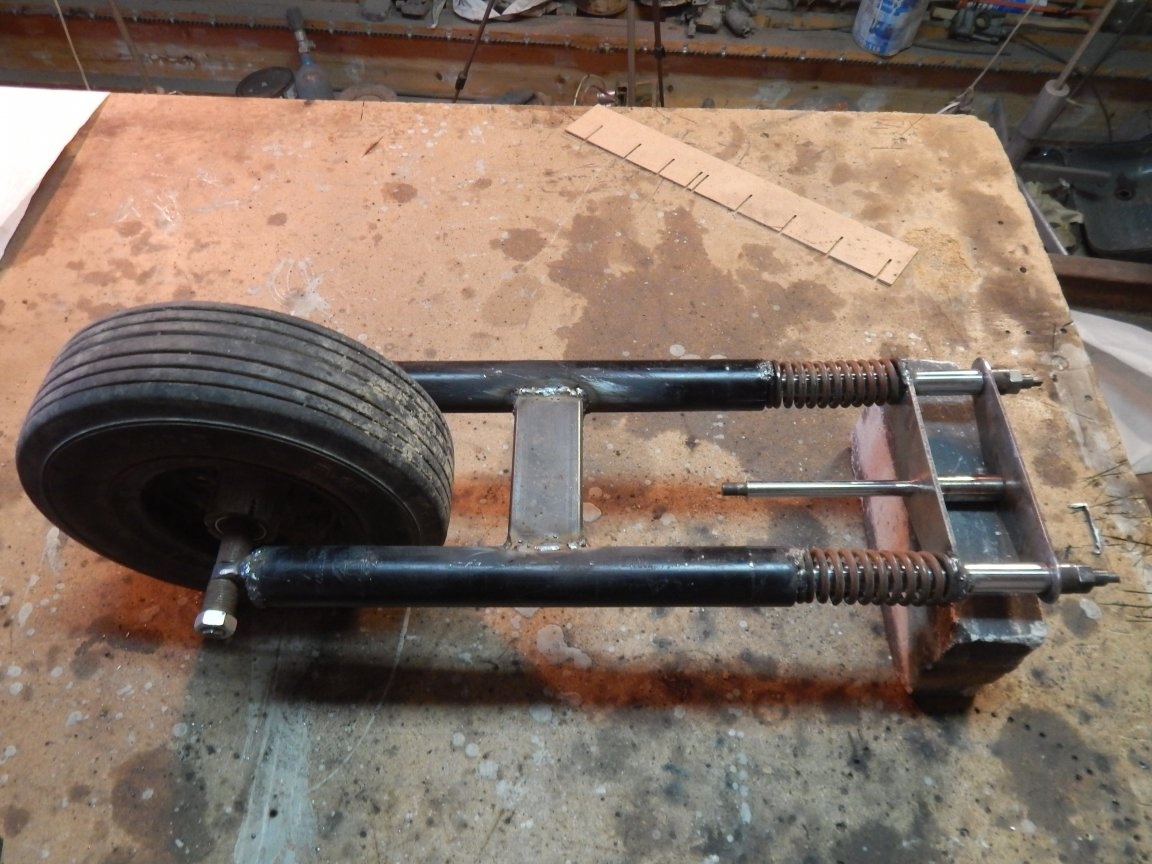
Well, the plug is ready!
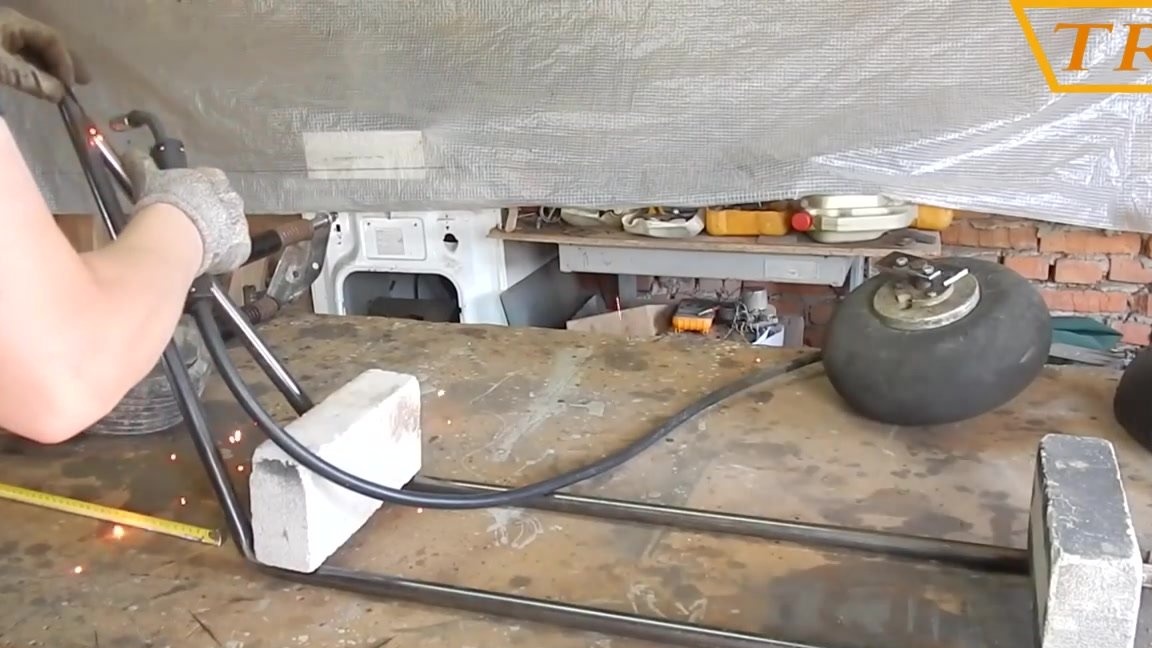
Step two: make the frame
Rama is certainly best done on a slipway, but since we make a moped in home conditions, then instead of the slipway we will use any flat surface. For the frame, I bought an ordinary 1/2 ”water pipe, or 21.3 mm, 7.5 meters long. We bend two pieces of the pipe of 1.5 meters in one place at an angle of 130 ° so that they are exactly the same, with one piece of the pipe bending 90 cm long, the other 60 cm.
Now we connect the tops of the pipes and grab by welding.
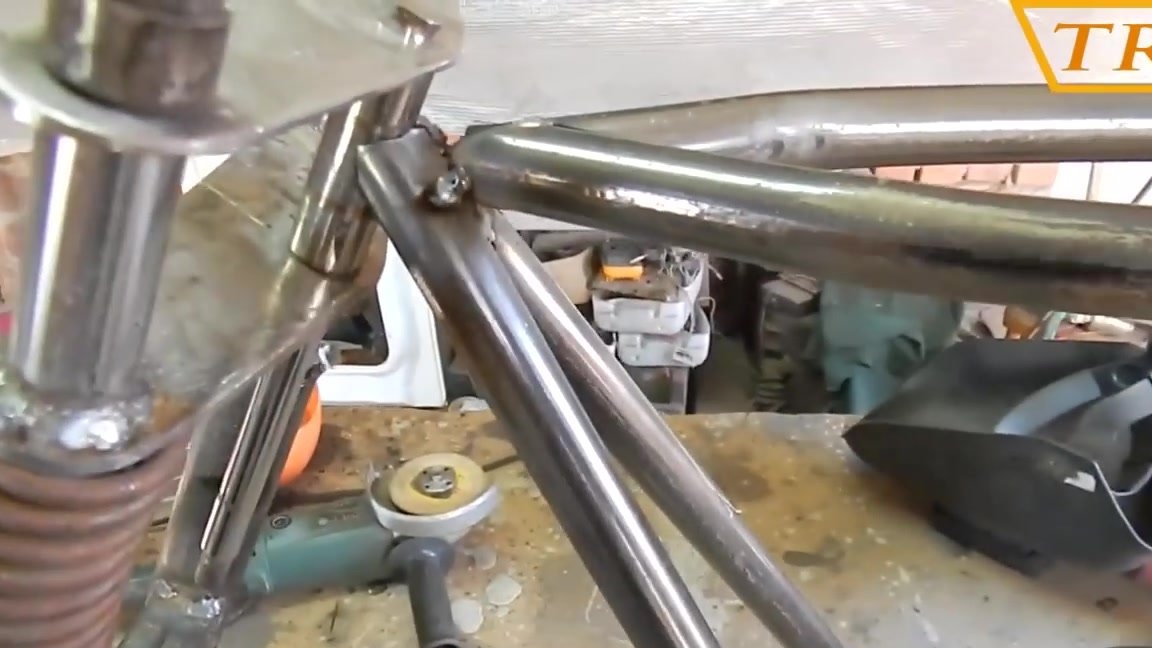
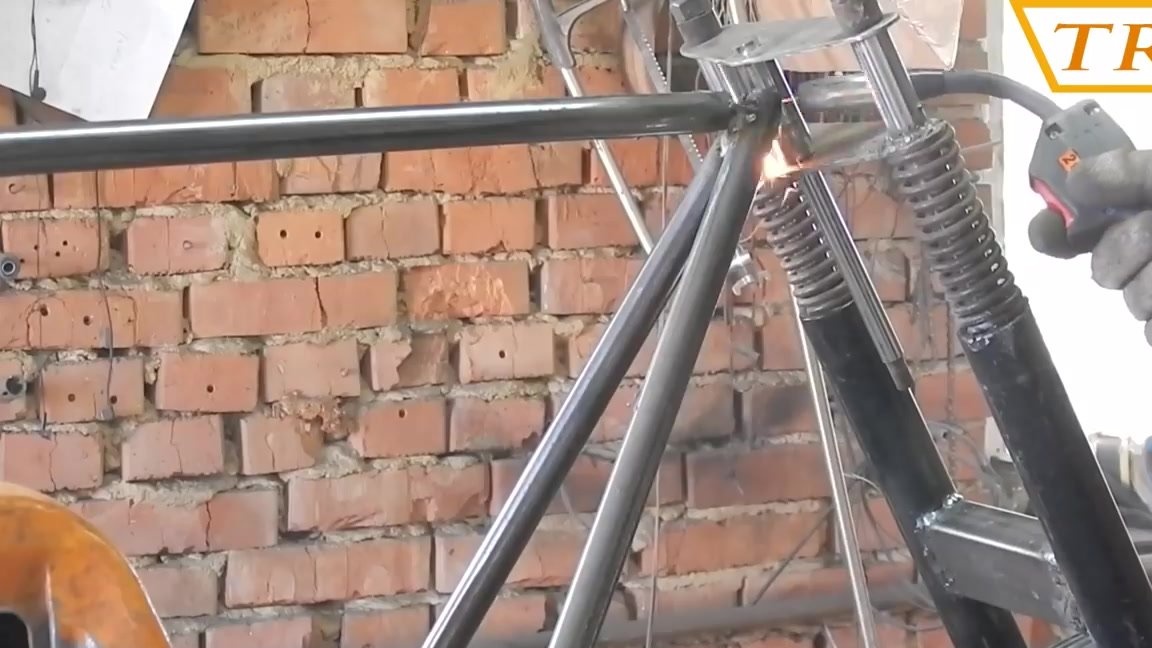
Next, I put the frame at the desired height from the surface, and try on a fork to understand whether the height of the frame is suitable or whether it needs to be lowered below.
Trying on a fork showed that the frame needs to be slightly trimmed in height. Cut off the excess and grab it again.
Now the plug is in place and you can continue on.
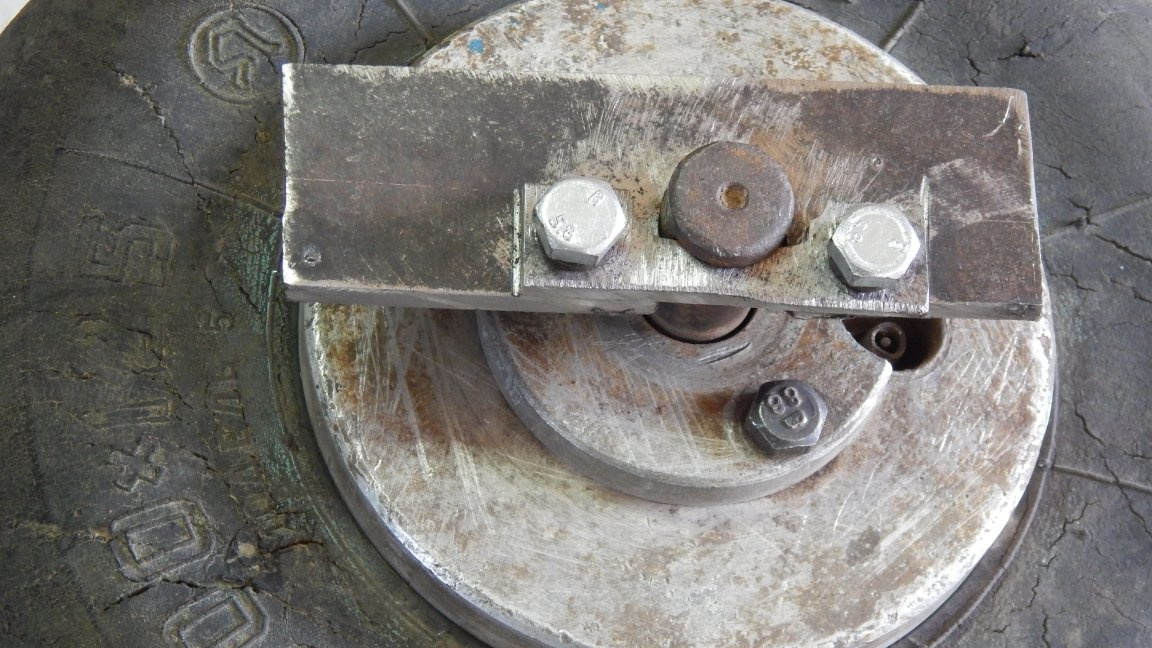
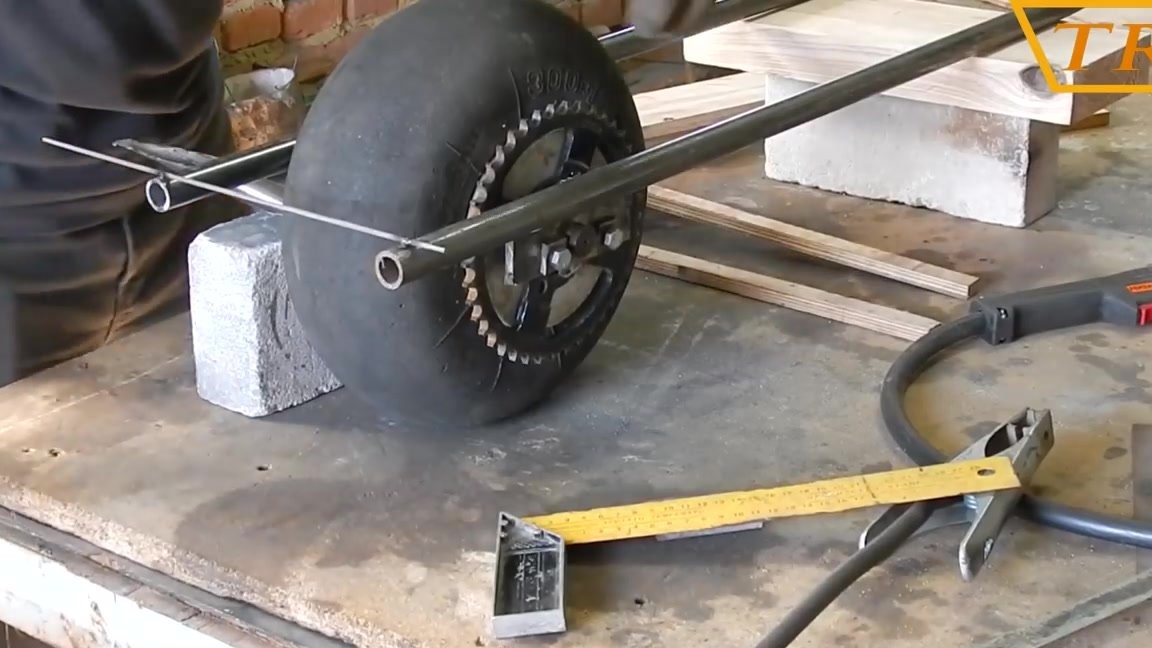
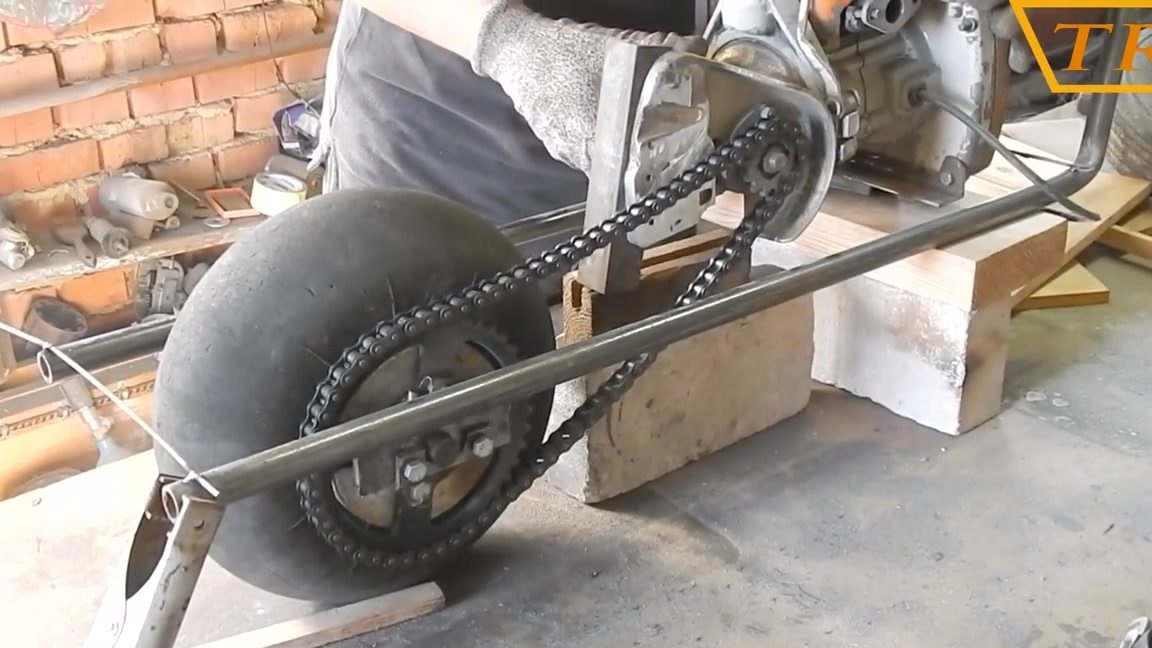
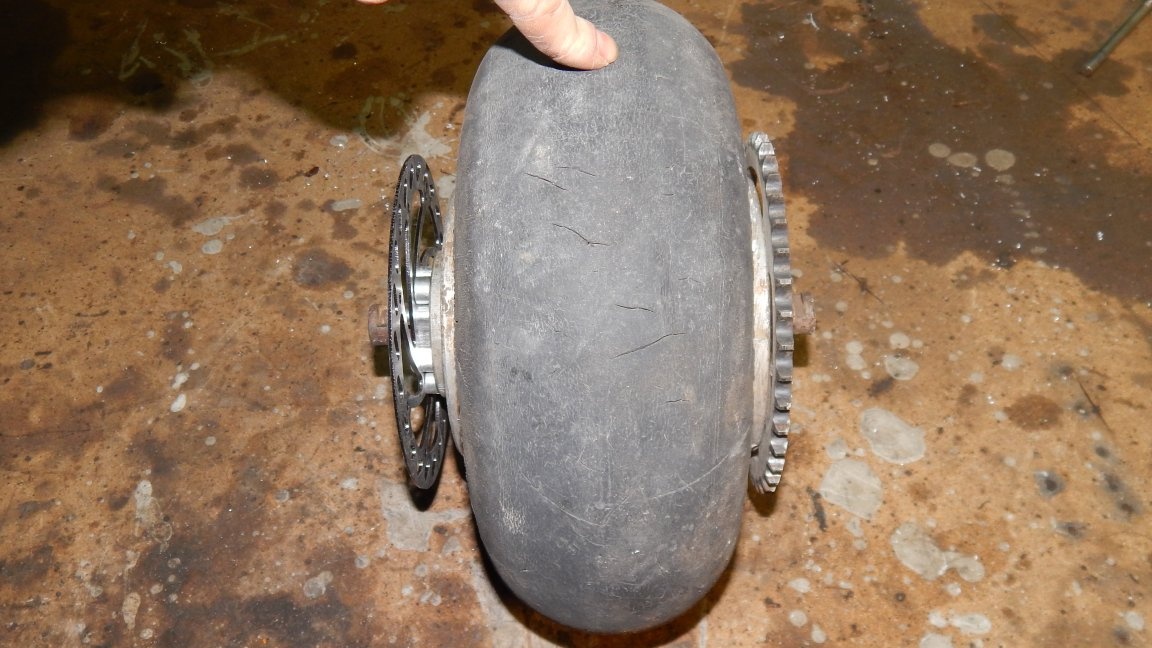
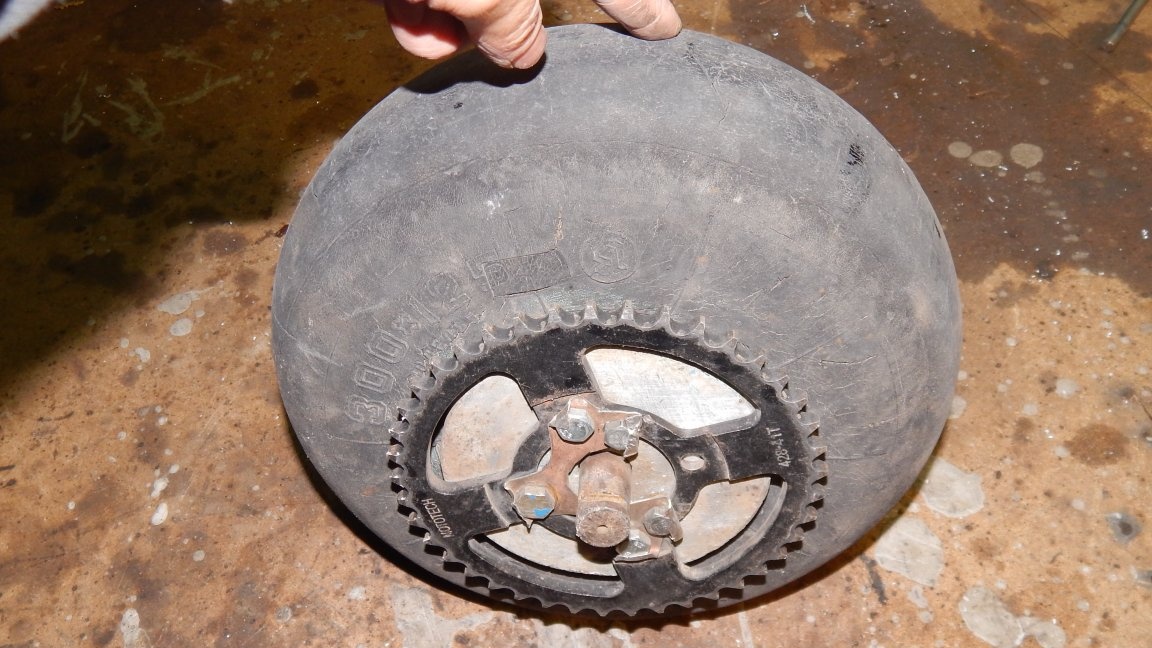
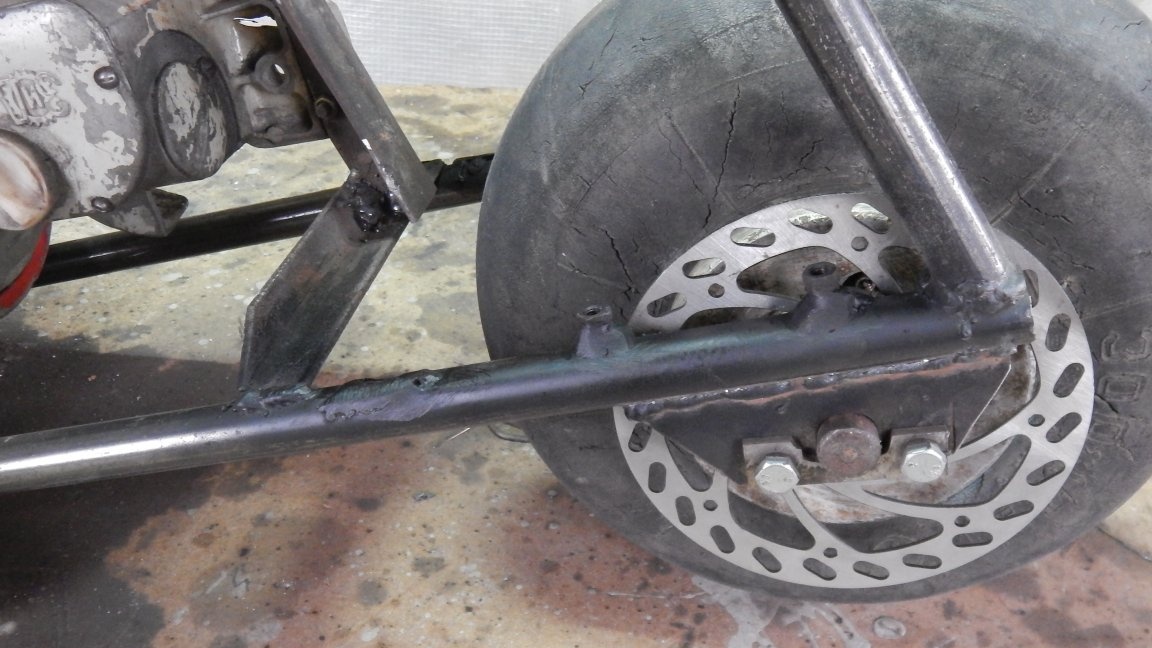
I don’t know the rear wheel from any airplane or helicopter, 300 mm in diameter outside, with an axle and an axle mount. It is not necessary to look for such a wheel, similar in size can be selected from a garden car. The disk of the wheel is aluminum and very thick, so that I could immediately screw a drive sprocket onto it onto 41 teeth.

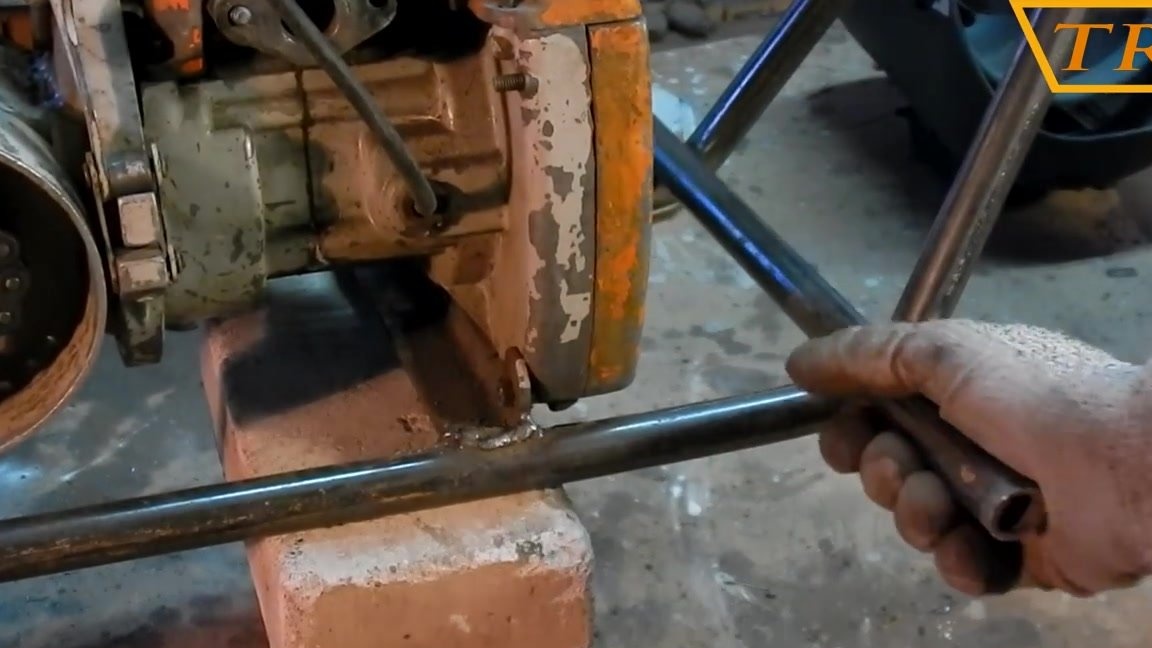
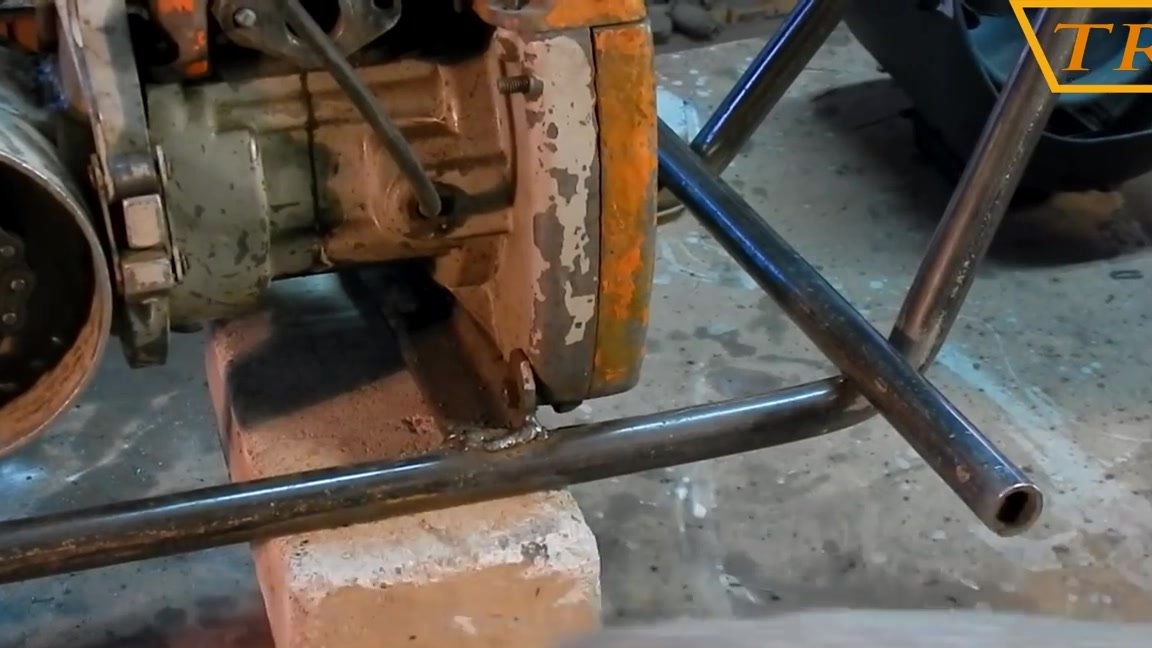
Now we put the engine on the frame, set the wheel and weld it to the frame on one side.
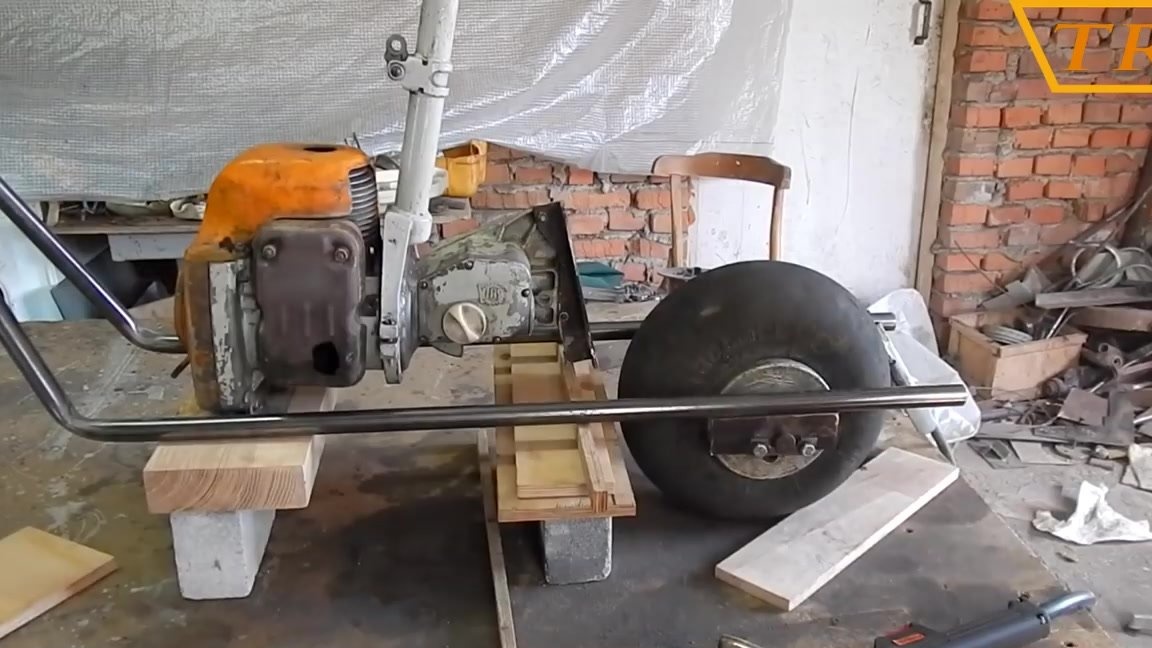
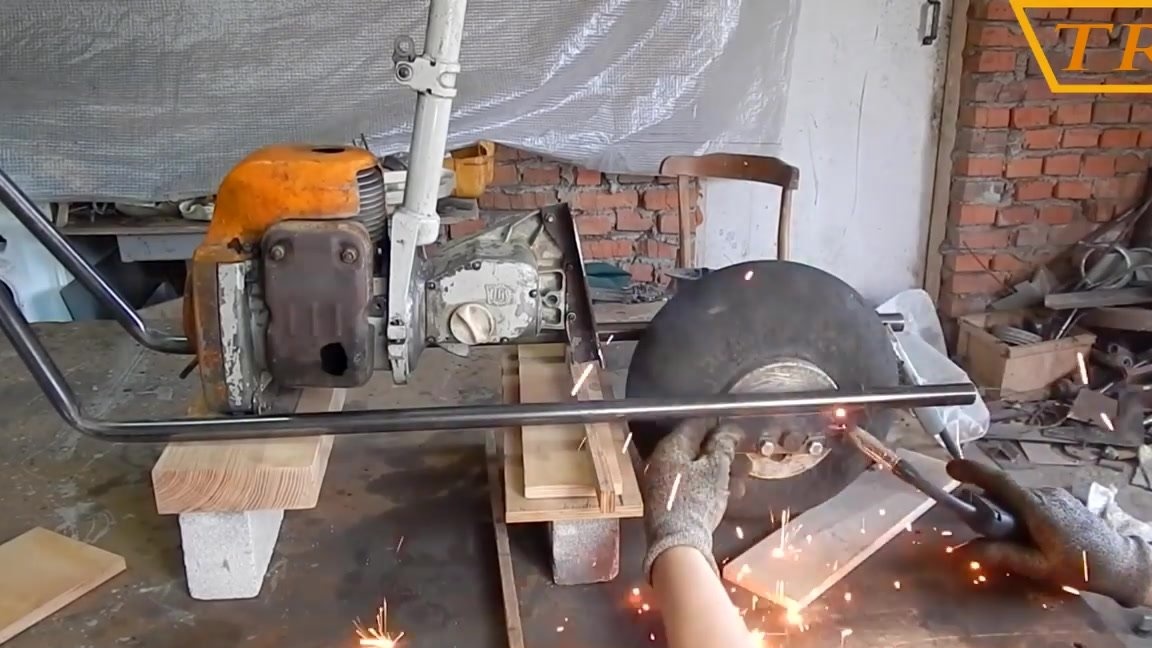
Now, on the other hand, we check the parallelism of the star and the frame and weld the axis to the frame.
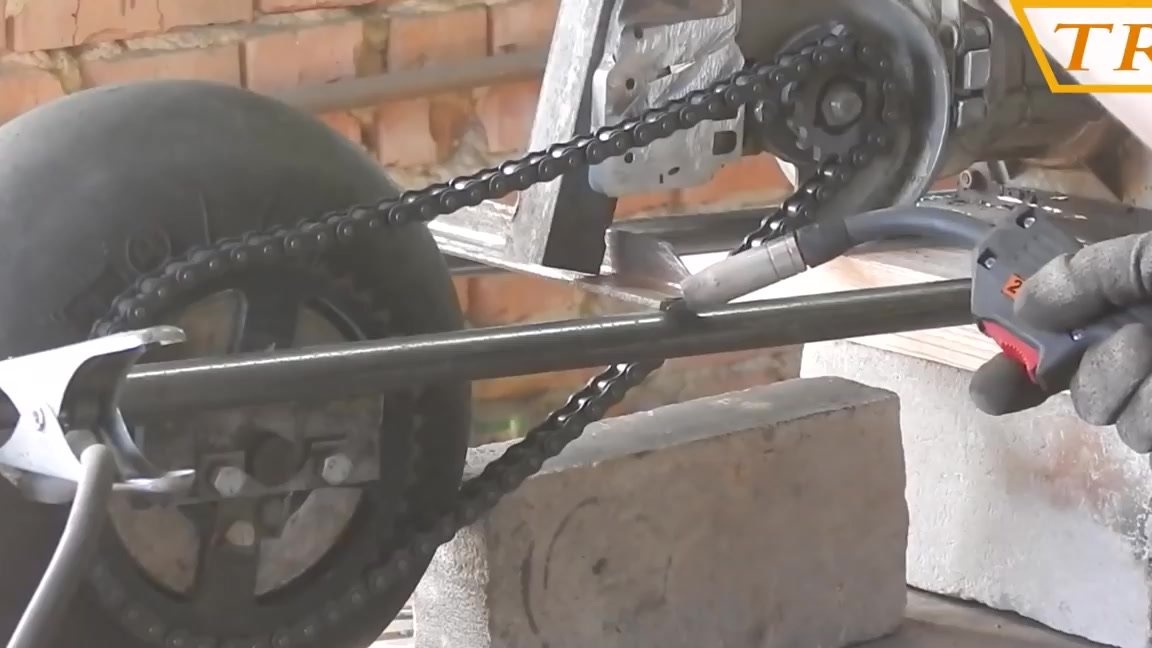
The engine is attached to the frame by three points. In front, the engine is attached to the lower screws of the blower casing to an angle of 30X30 mm, and from the rear to the gearbox to the place of the persistent comb. Now we pull the chain onto the sprockets, set the engine at the right distance from the rear axle, and weld the front engine mount to the frame.
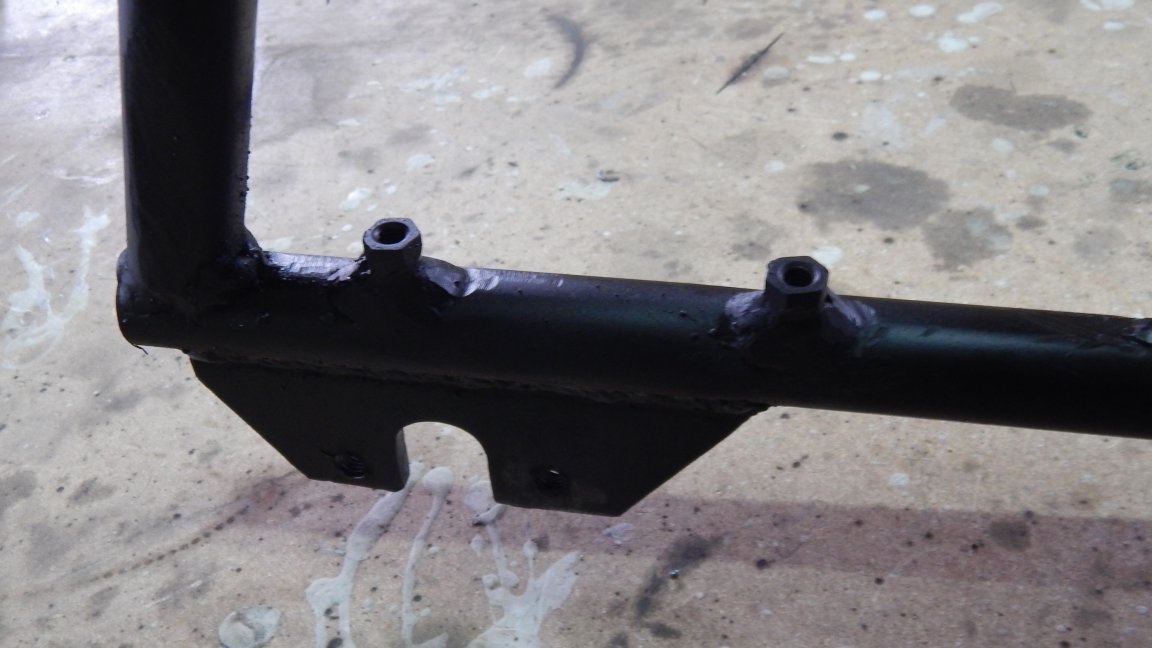
Next, we weld a piece of corner across the frame, and we cook the gearbox mount to it.

Now we take a piece of pipe 135 cm long and bend it at an angle of 115 °, with a pipe length up to a bend of 80 and 55 cm in different directions. We weld the prepared pipes on both sides of the frame. Also, to strengthen the frame, I weld a piece of pipe across the upper part at the back.

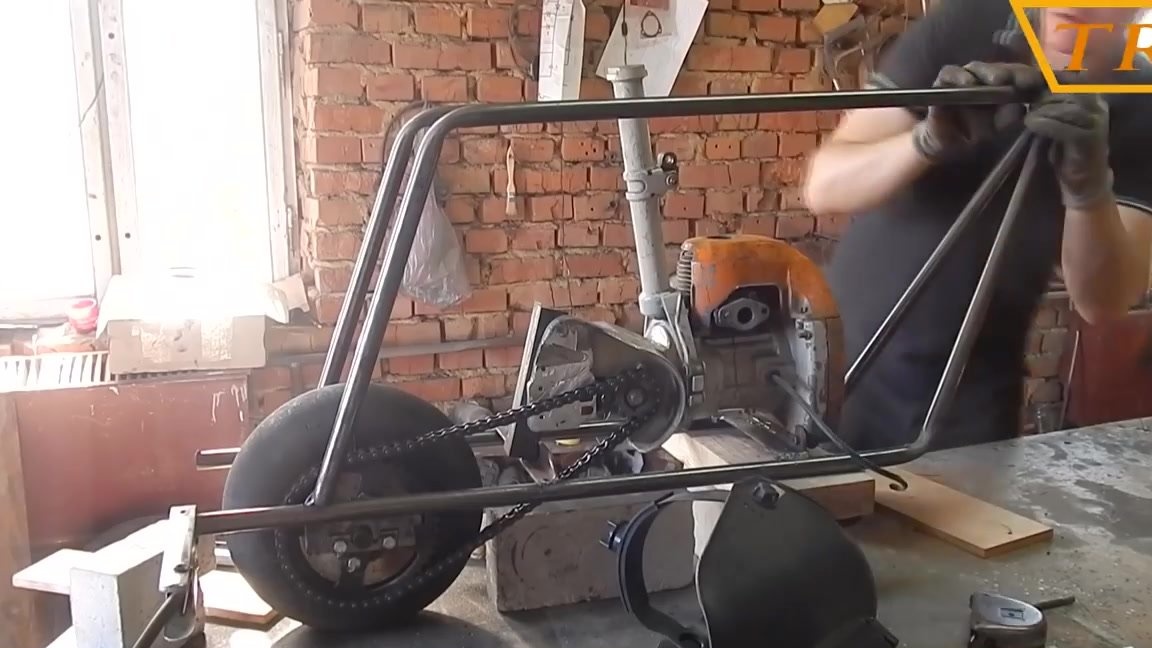
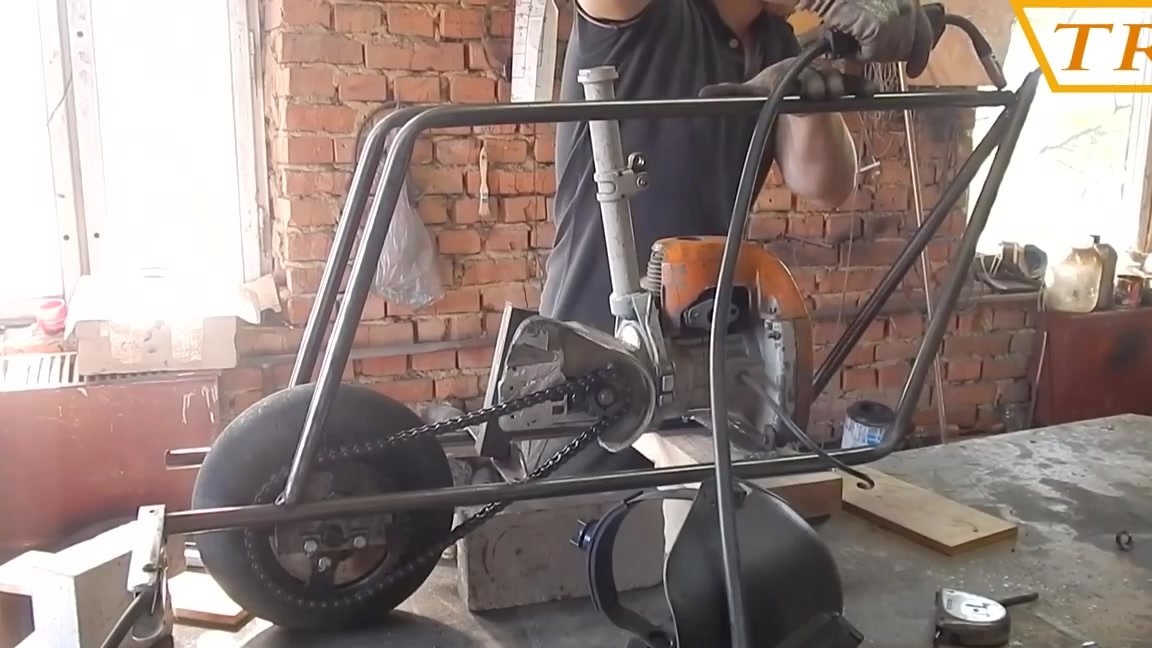
In front, near the engine, I weld a step from a piece of pipe so that 12 cm protrudes from both sides of the frame.
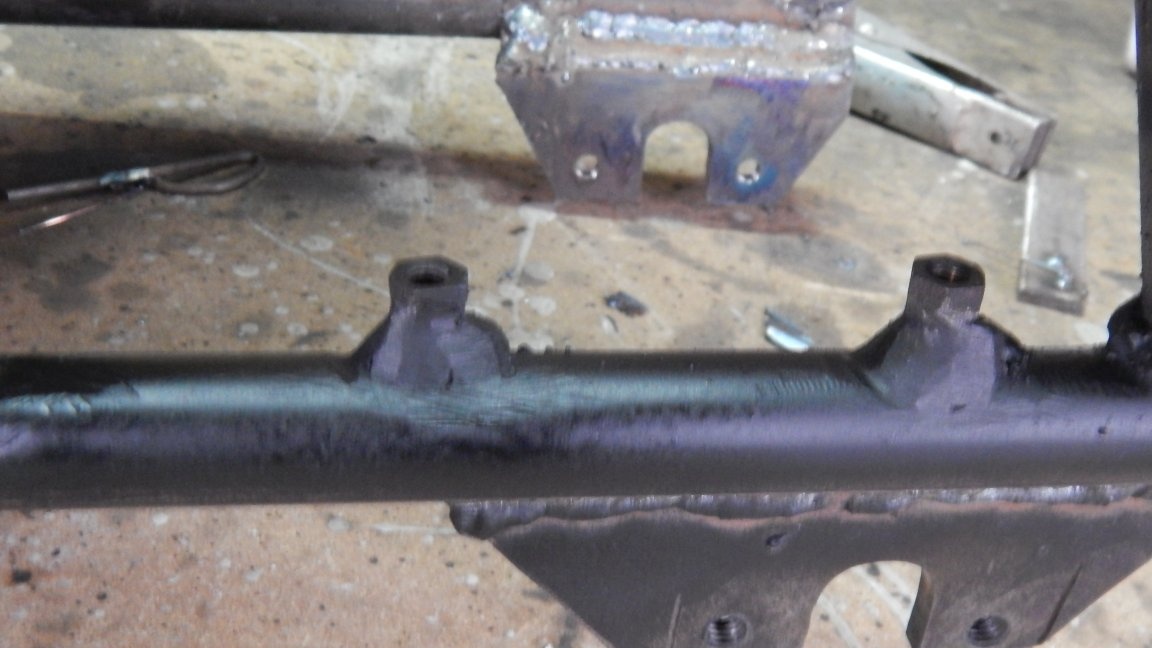
It remains to weld the mount through which the front fork will connect, and the main part of the frame is already ready.
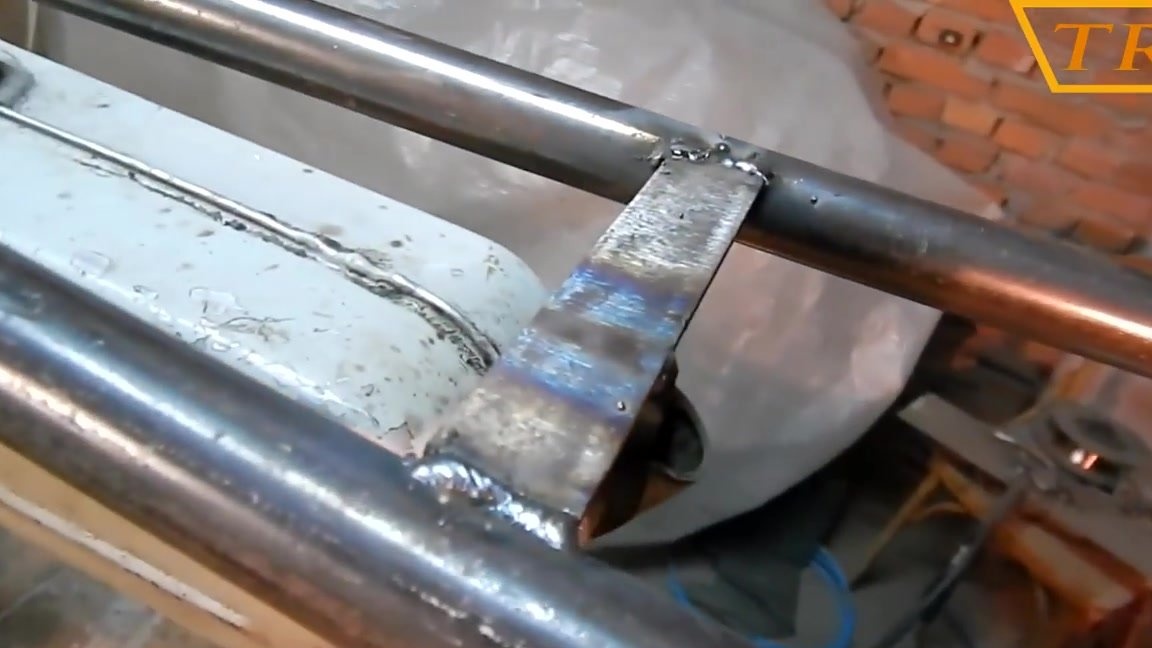
Step Three: Tank Mount
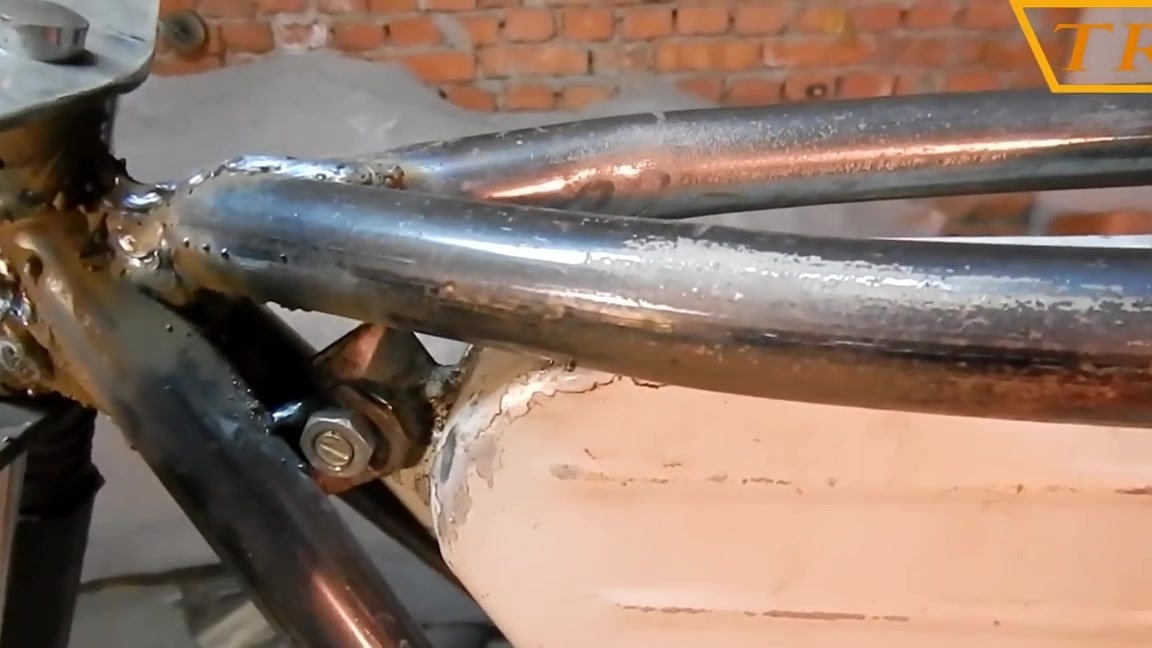
I took the tank from the same Ural chainsaw. I cut the tank from the steering wheel and screwed it on bolts to the pieces of metal that I will cook to the frame.
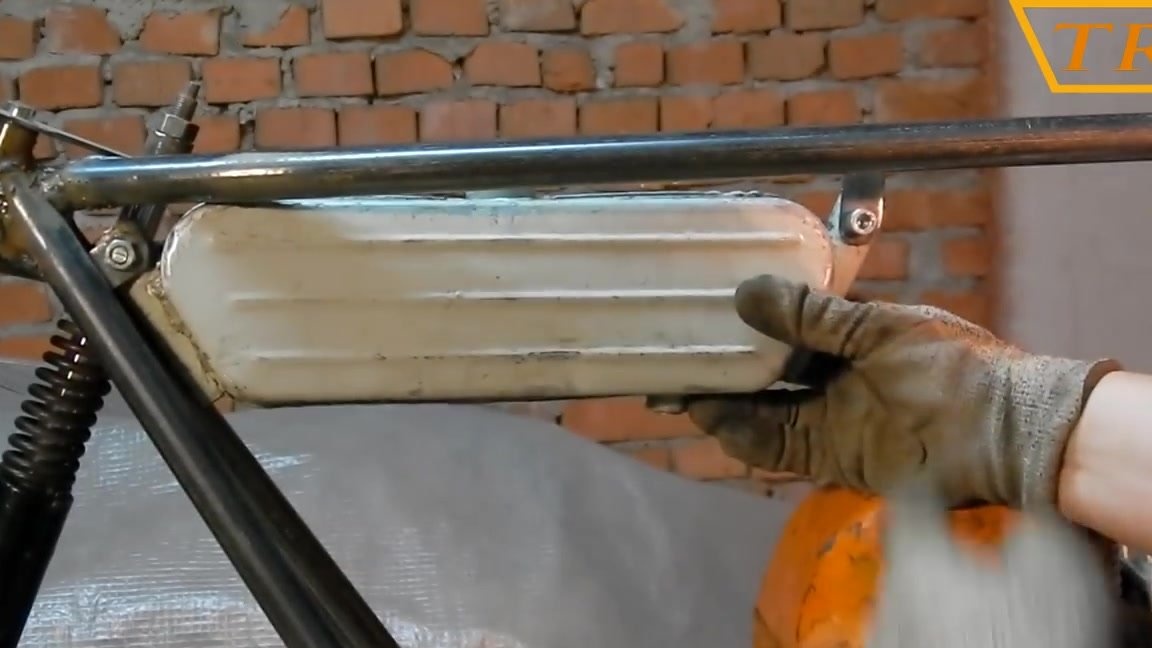
I weld the tank mounts to the frame in front, and a piece of strip between the pipes of the frame at the back.
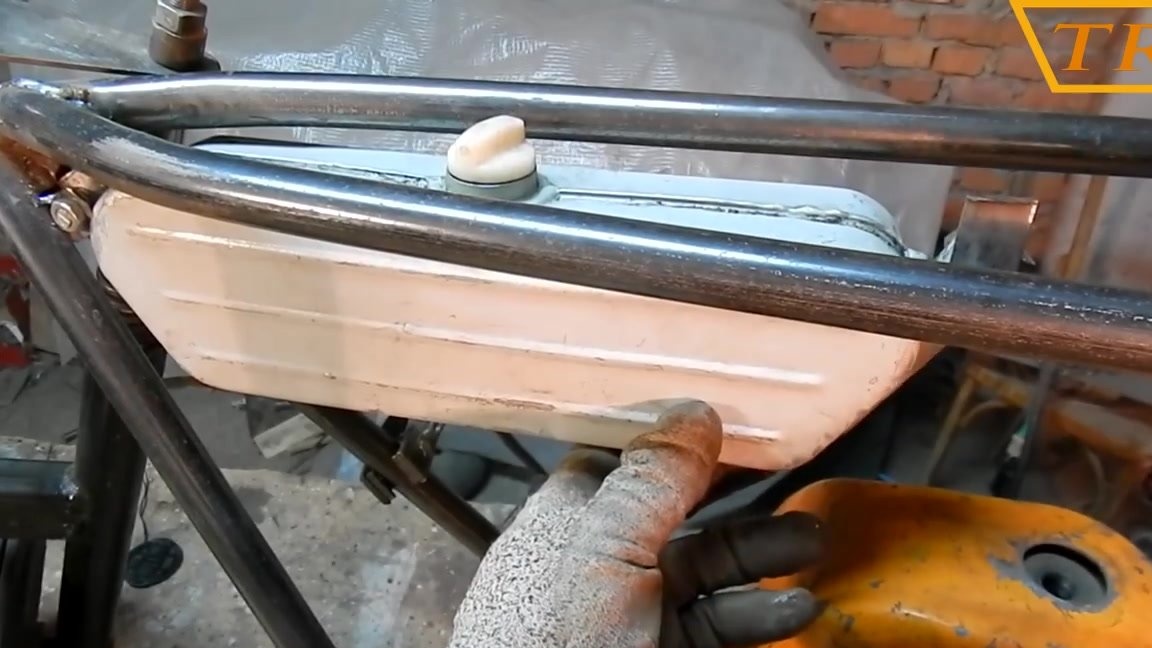
Now I weld the rear tank mount to the strip and weld all the seams.

Fourth step: do the brakes
First, I made the first version of the brakes, very simple, cheap and, as tests have shown, are not at all effective. The brakes were very weak and I immediately redid them.
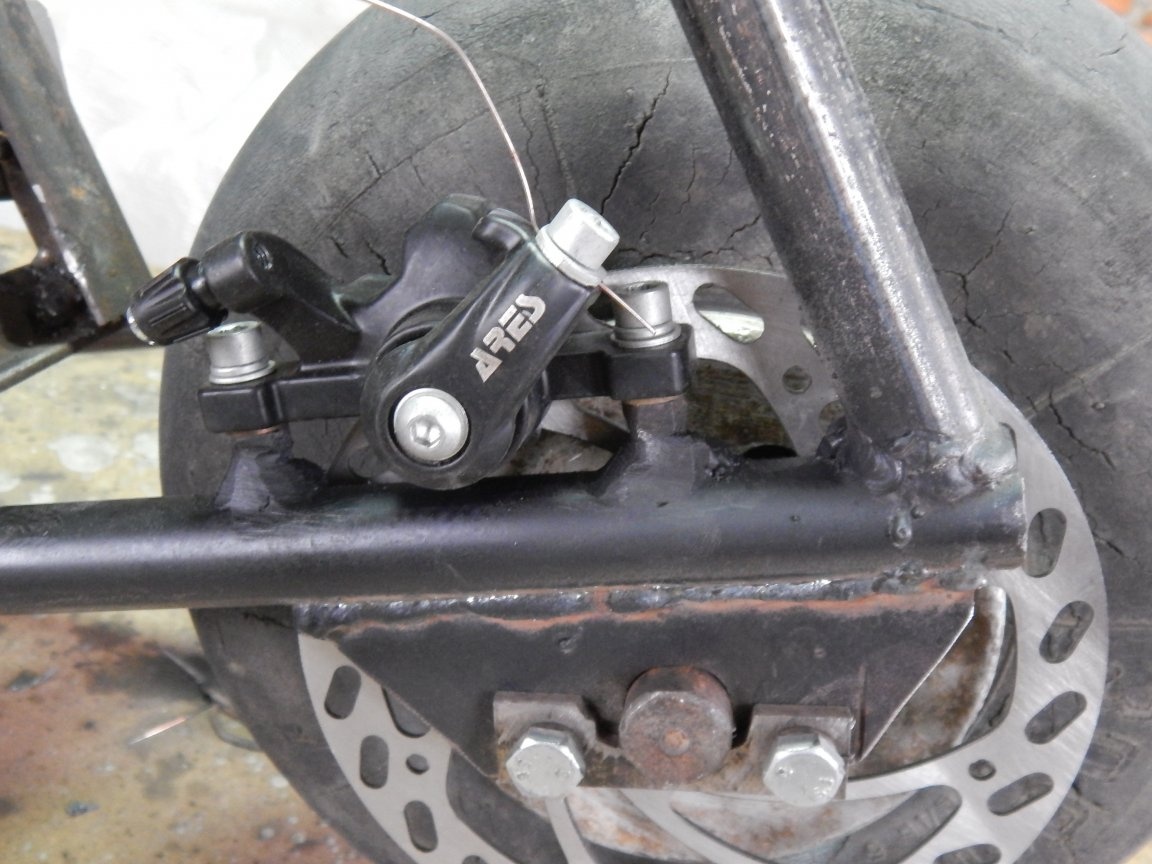
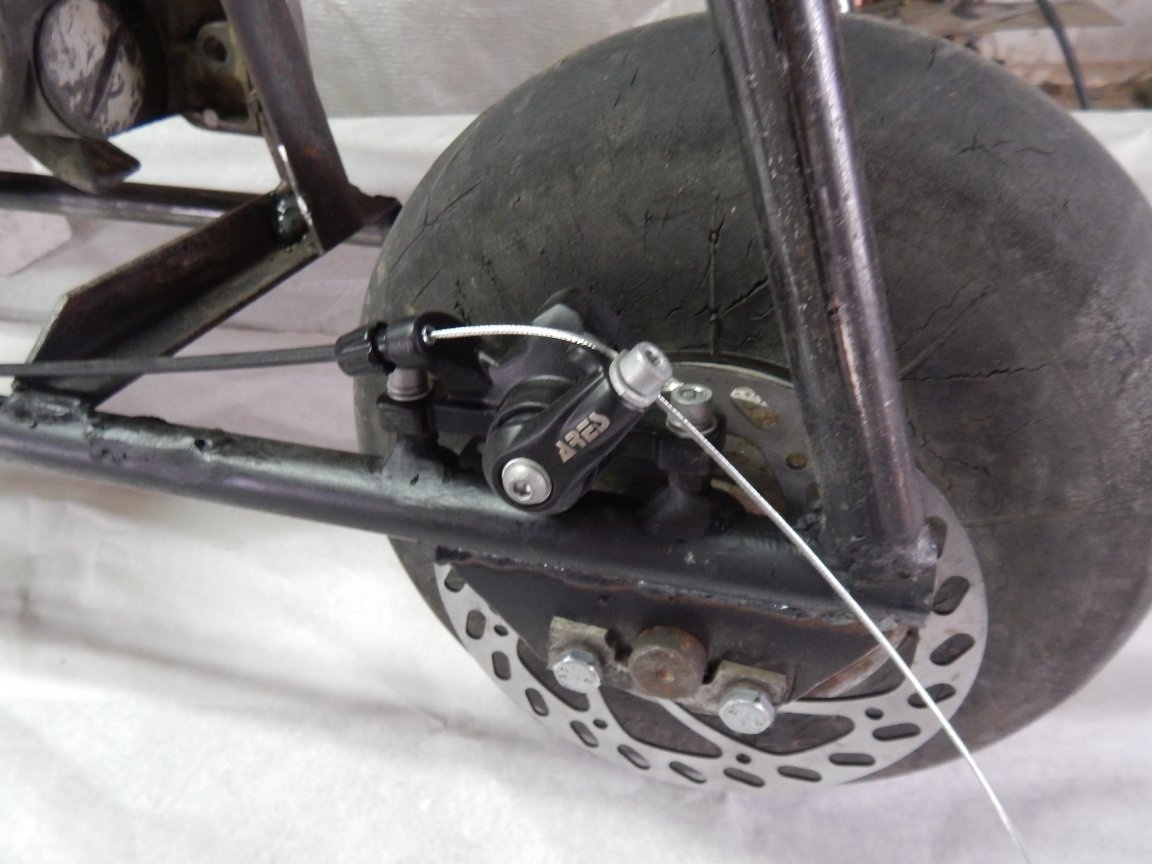
Therefore, I immediately offer you the best version of the brakes for repetition. I bought an inexpensive set of brakes from a mountain bike - caliper and the disc itself. Also took a pair of cables with casings and a pair of brake levers for the steering wheel.
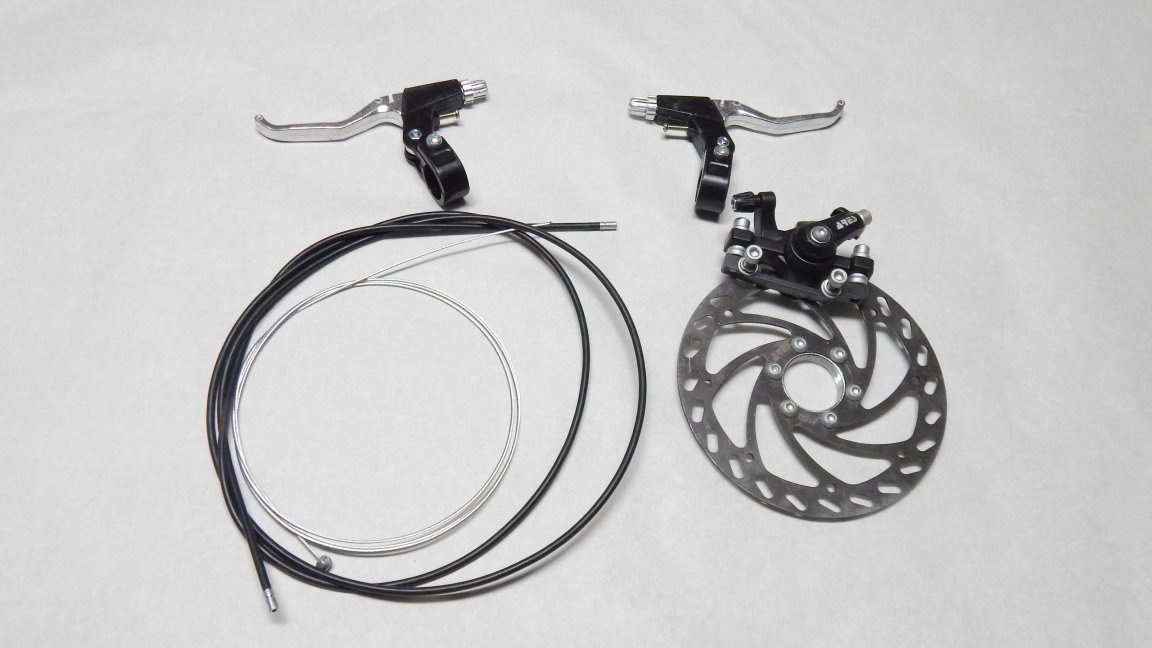
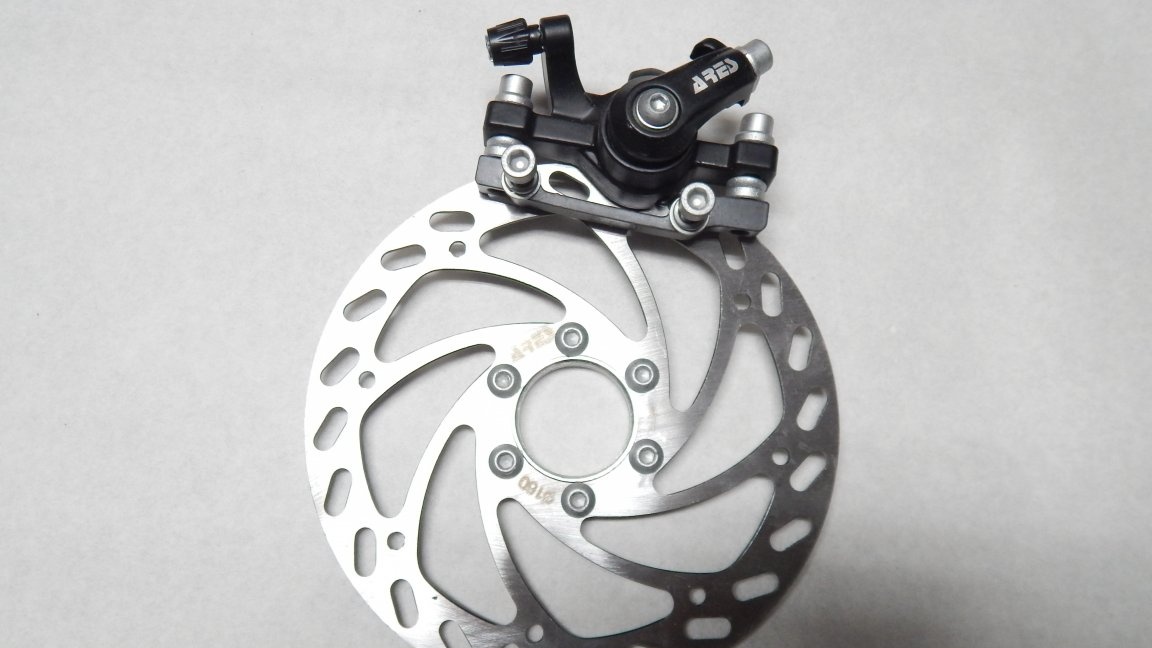
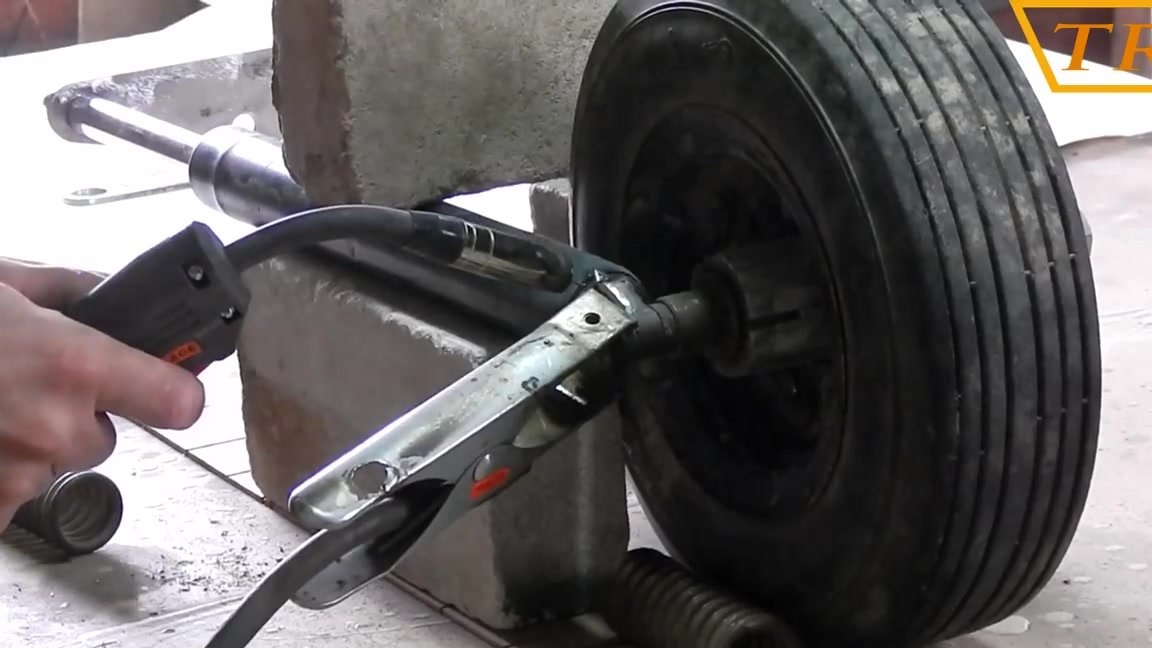
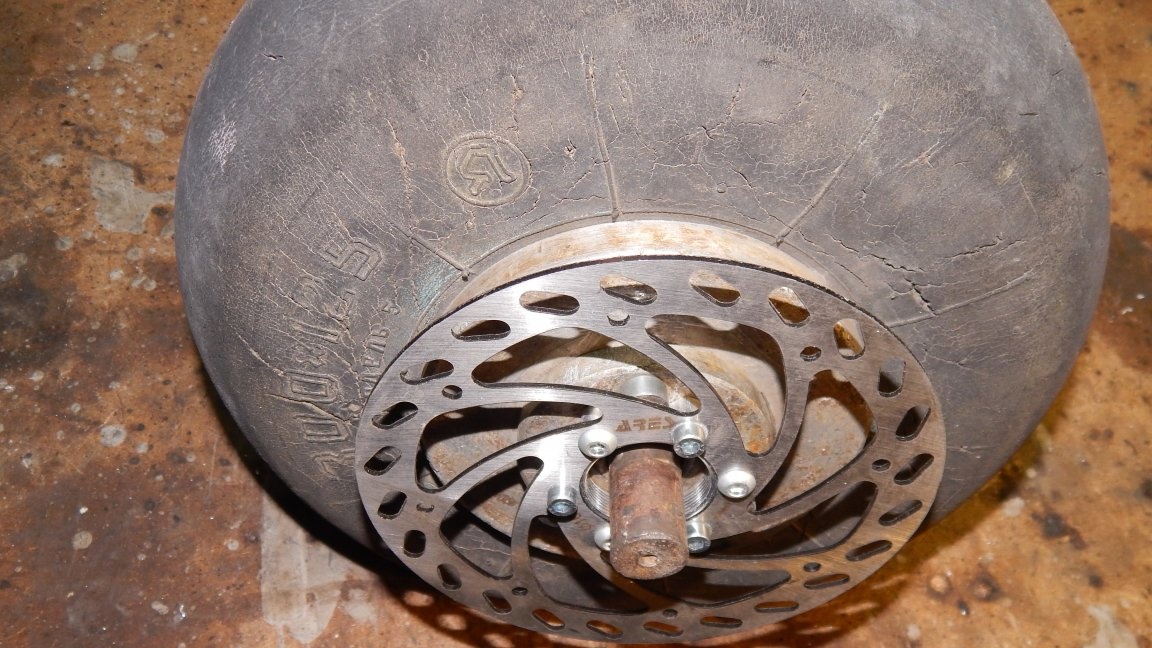
In order to attach the brake disk to the wheel, I marked the wheel disk along the holes of the brake disk and cut the threads for the bolts that come with the disk. He put out the brake disc and tightened all the bolts.
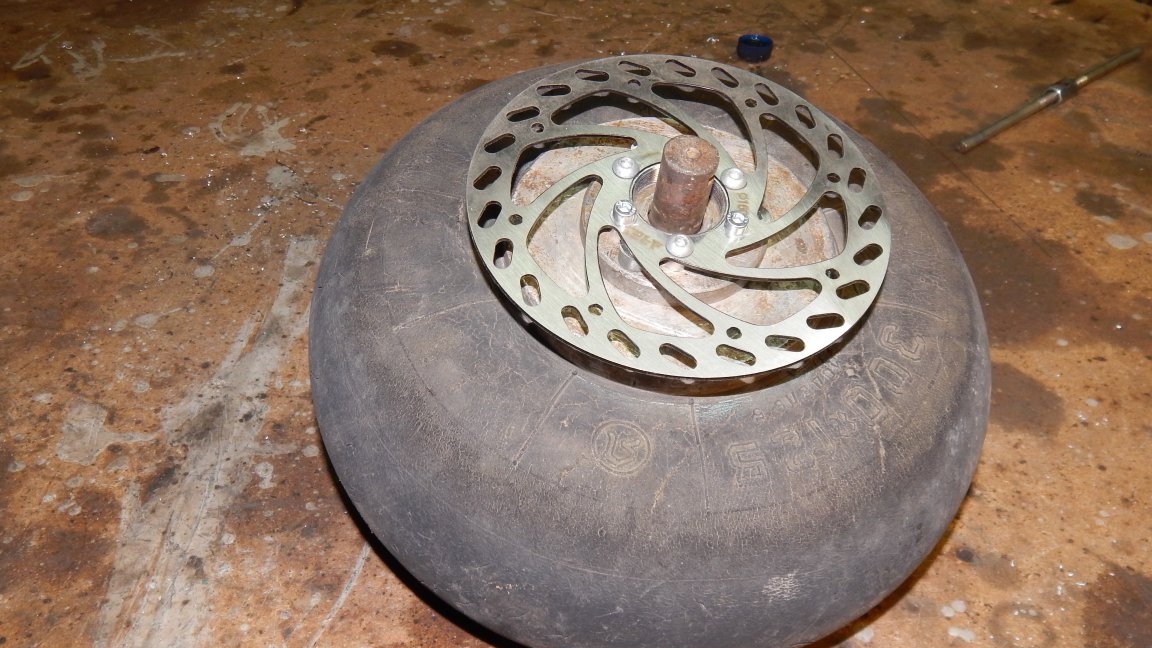
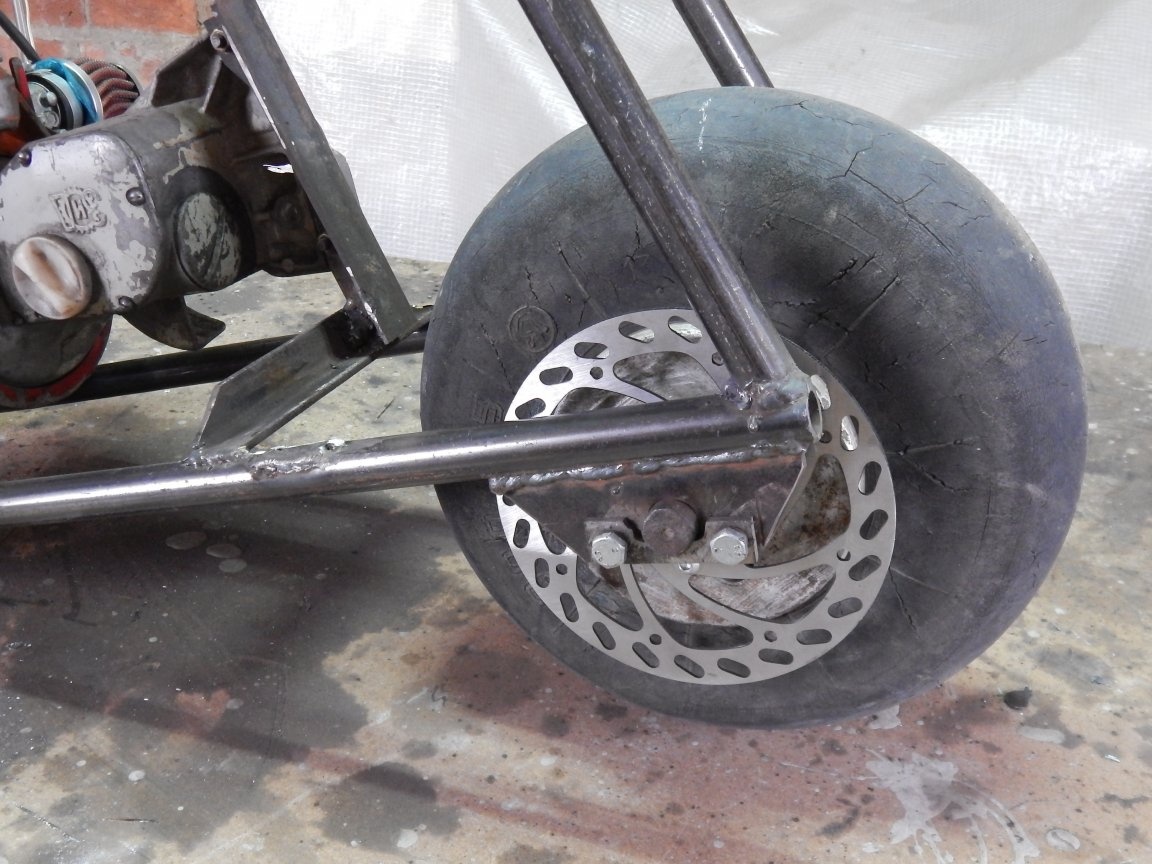
Then I put the wheel on the frame. Then I put the caliper on the brake disc and fix it by pressing the brakes - it is easy to do this with a piece of wire instead of a cable.
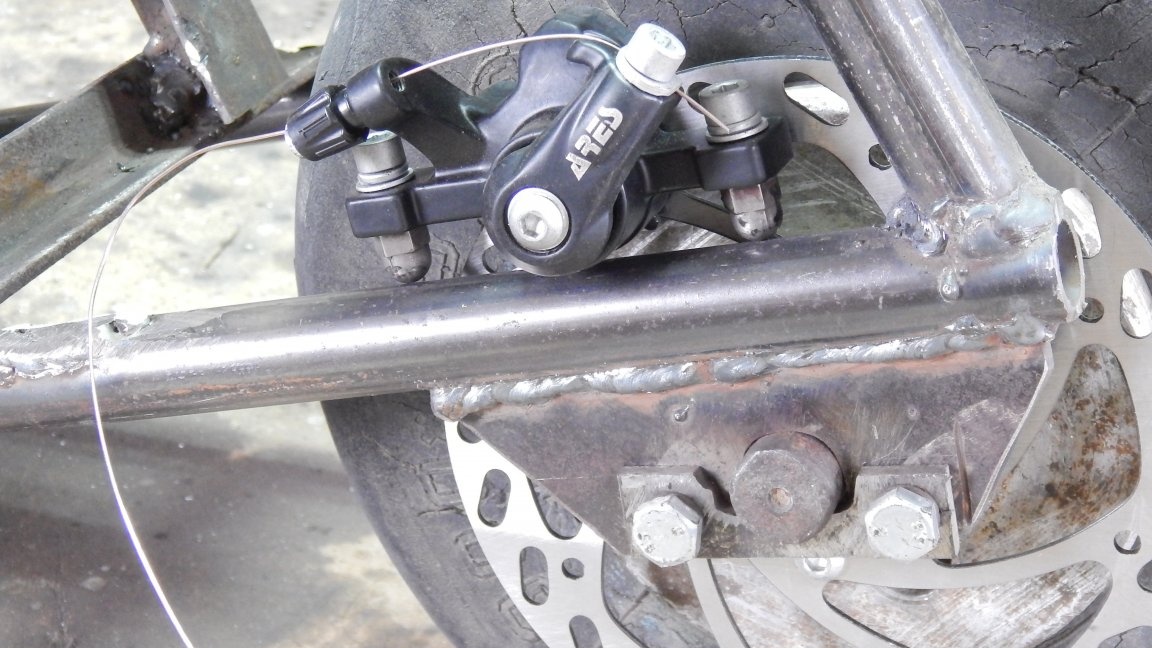
I immediately screwed nuts onto the caliper mounting bolts, which are now welded to the frame.
Now you can fix the caliper bolts on the frame and install the cable.
Step Five: Seat and steering wheel
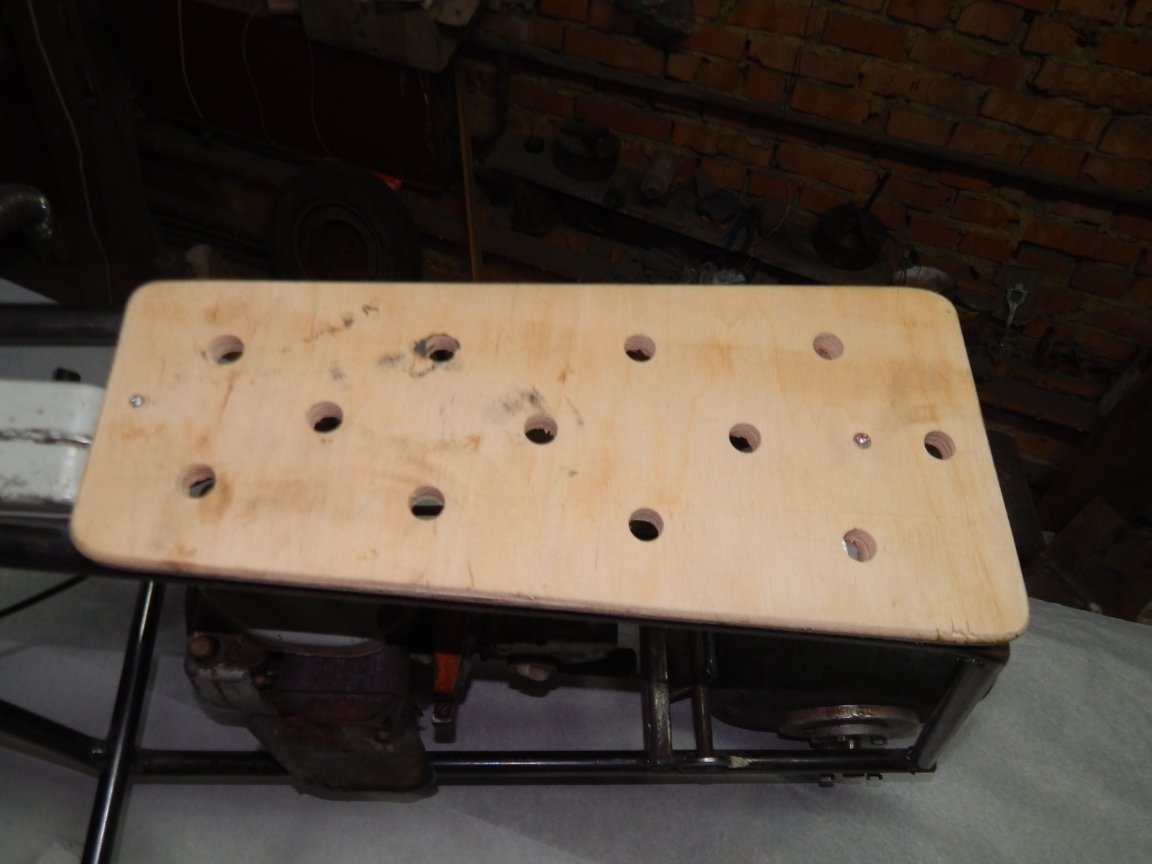
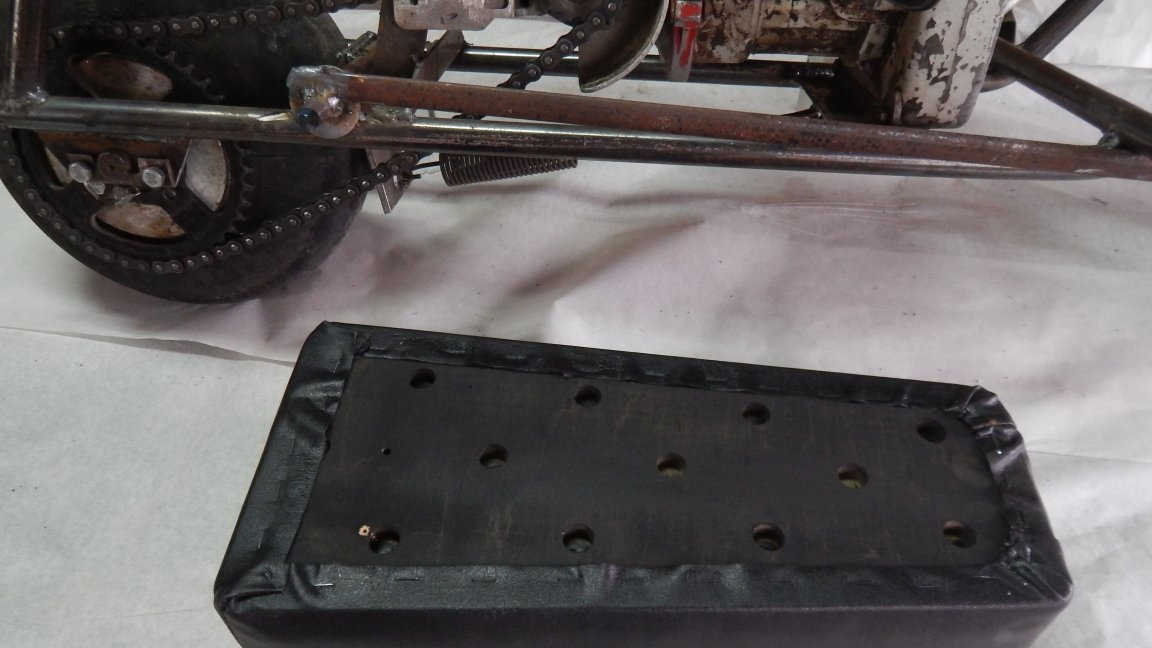
Most of the work has been done and now we can begin to manufacture the seat, and I made its base, which will be attached to the frame, from plywood 10 mm thick. I drilled holes in plywood so that the foam can be squeezed easily when you sit down on a seat, and then put it on the hauling.
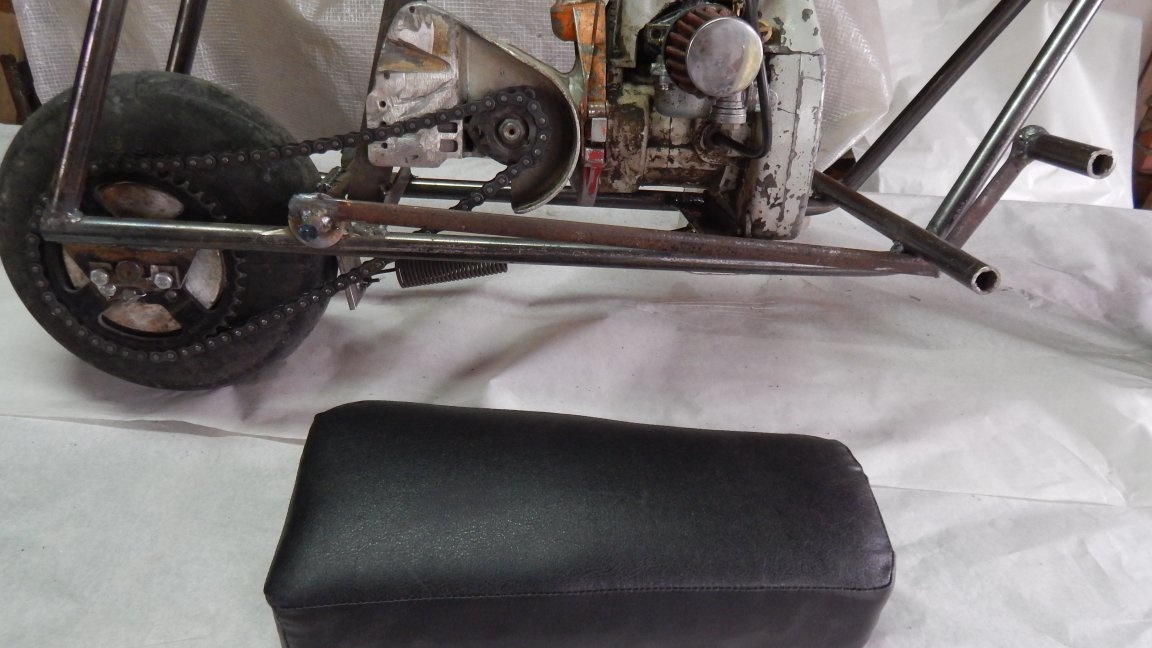
Seat is covered in black leatherette.
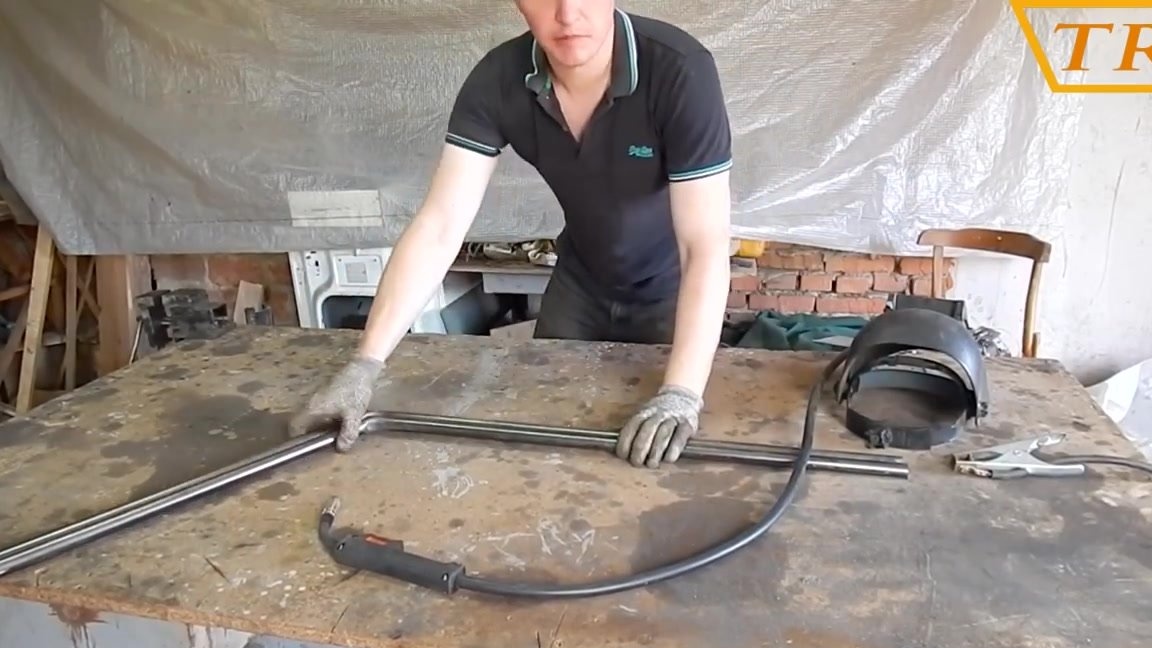
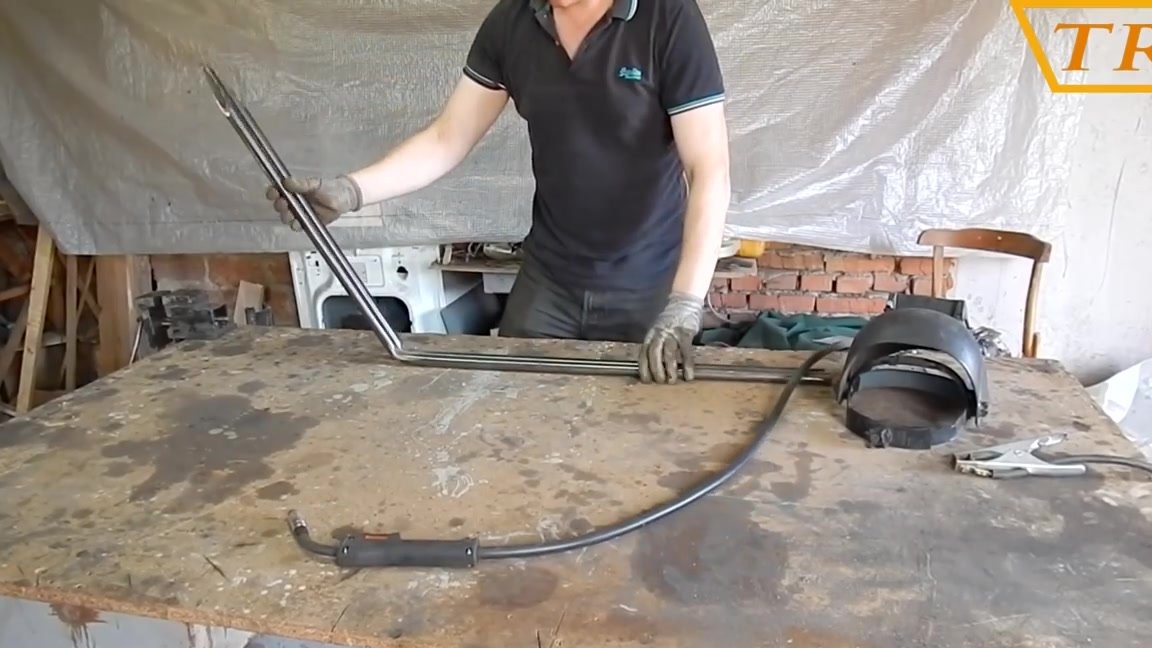
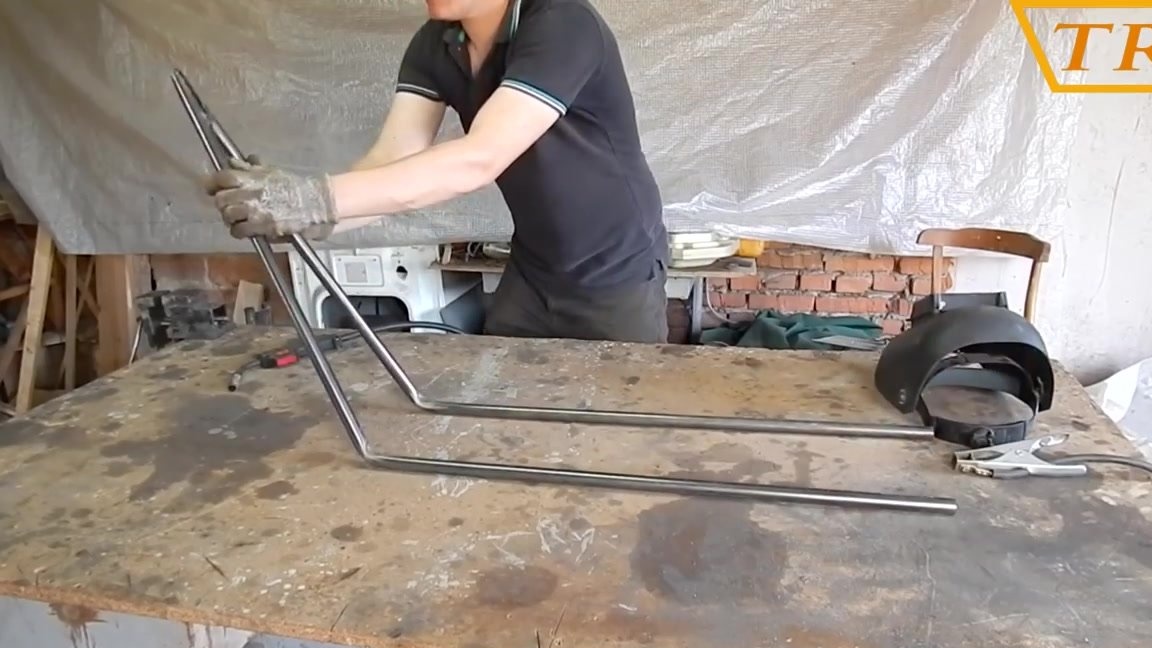
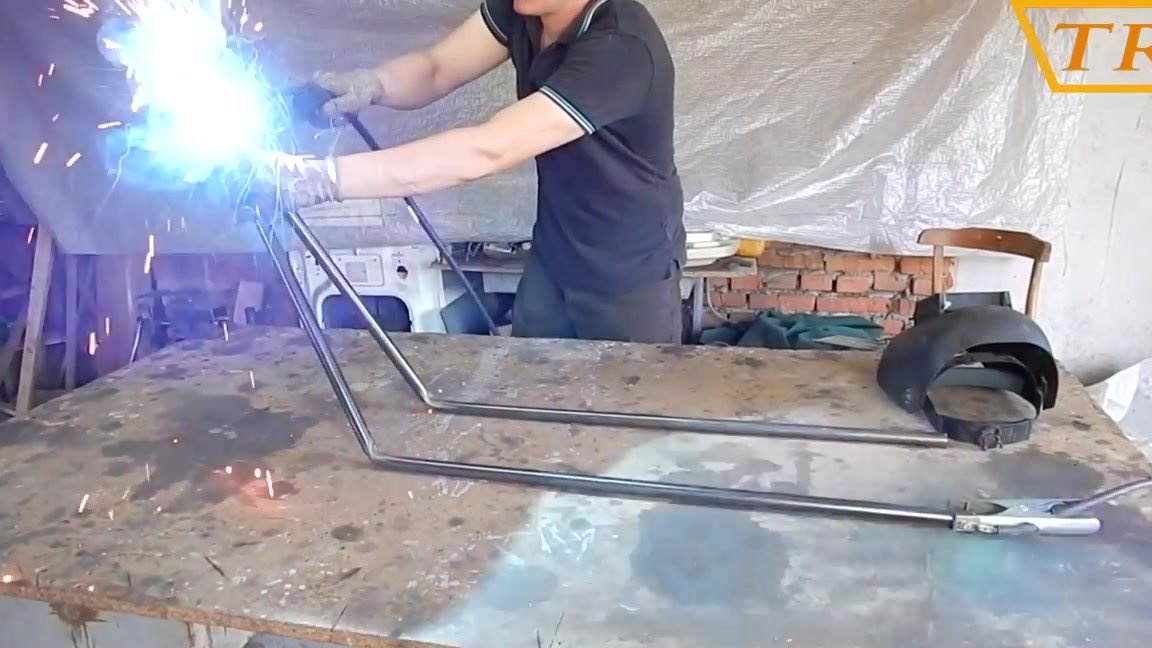
With the steering wheel, I did not bother much, and bent it out of the same water pipe from which the frame was made.
Step six: connecting the gas and the brake
In order to connect the gas and brake cable on the steering wheel, I put two brake handles on a mountain bike. Now the brake cable was simply connected to the handle, and set in motion in the usual way. To connect the gas cable, I did not buy the usual gas handle, but used the brake handle. Now the gas is triggered when you press the brake handle on the right hand drive. A little not the usual solution, but quite convenient and functional.
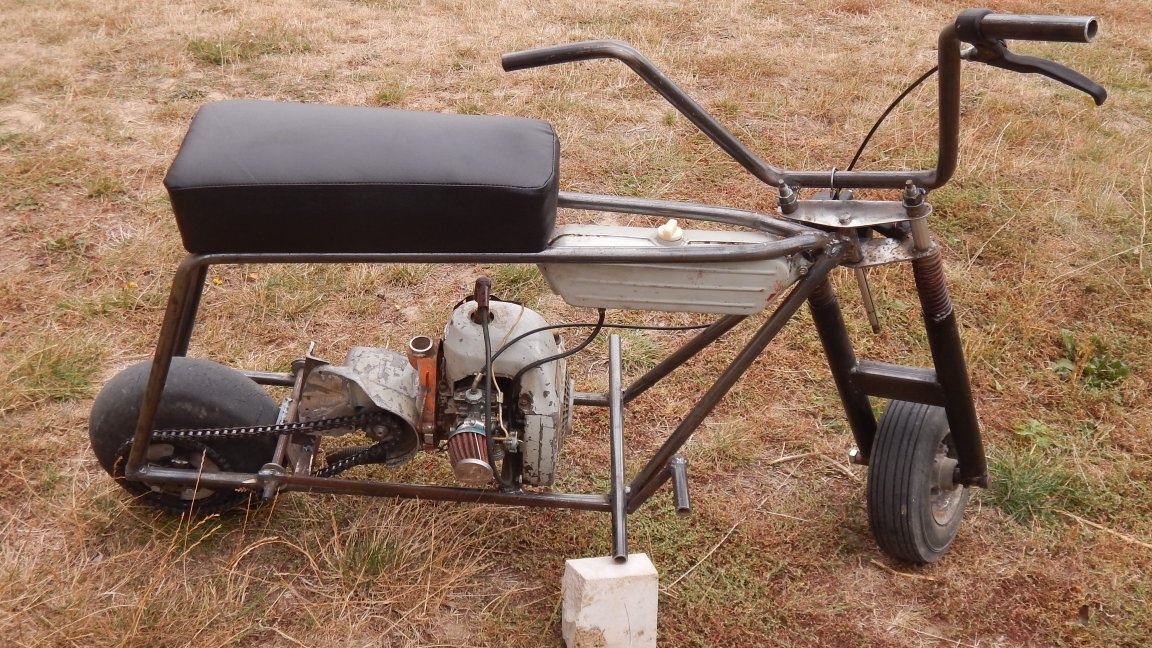
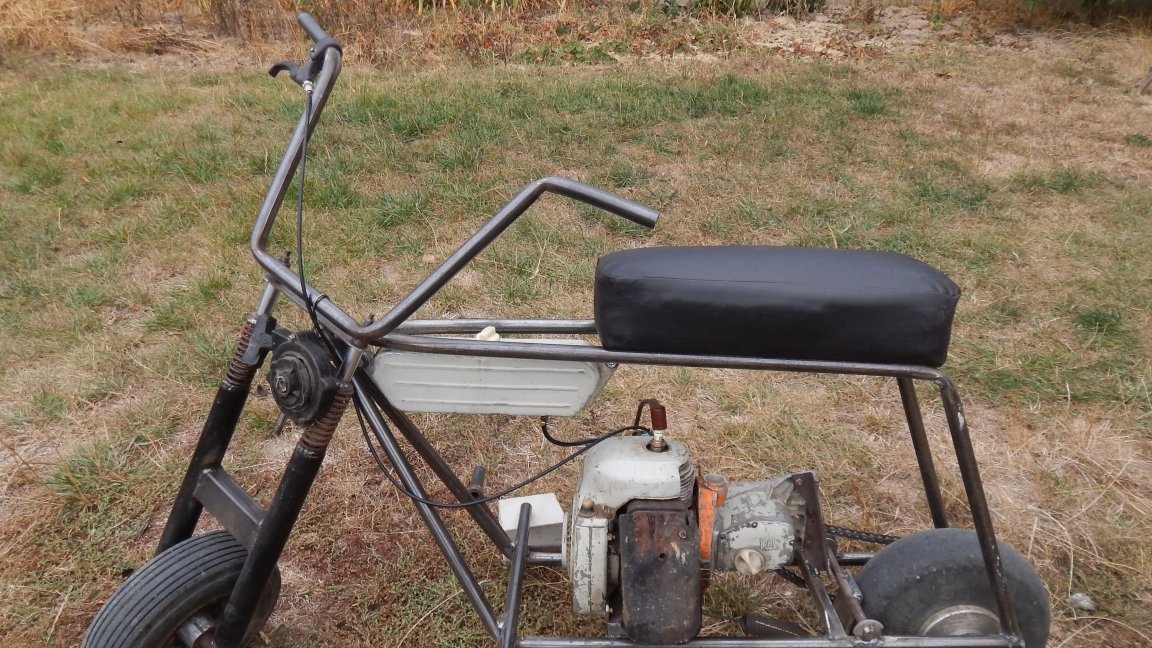
The final stage
Unfortunately, I did not paint the frame of the moped, because I put the engine from the Druzhba-4 chainsaw on this frame, for comparison with the Urals, and I had to change and digest the engine mount to the frame. But those who want to repeat this design will choose the color for the frame at their discretion. The moped turned out to be quite compact. The maximum speed is 55 km / h. If something is not clear in the design, ask, and I will be happy to answer all questions. Well, in conclusion, I want to advise you to watch a video of how a moped rides.