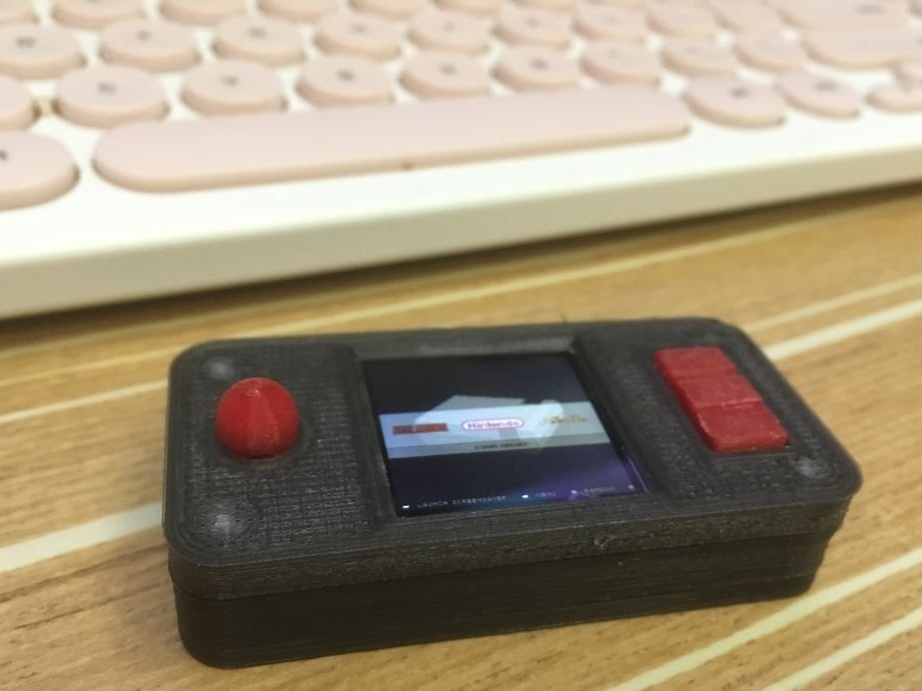
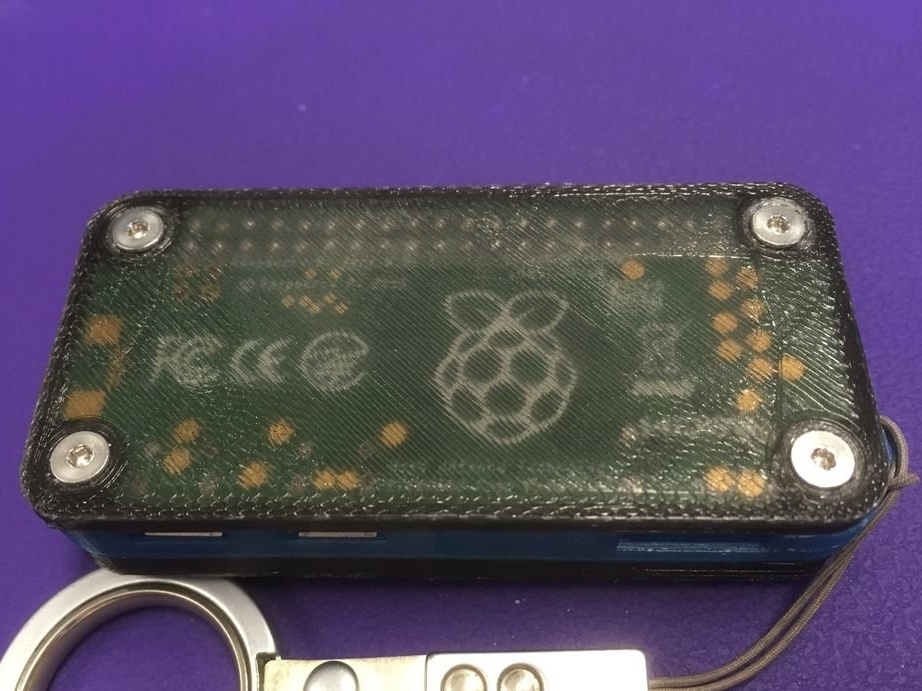
This is not the first or the last game console in the world on RetroPie, but among the many similar ones, the proposed Instructables design under the nickname 陳亮 stands out for its miniature size: it’s approximately the size of a more minimal Arduboy console.
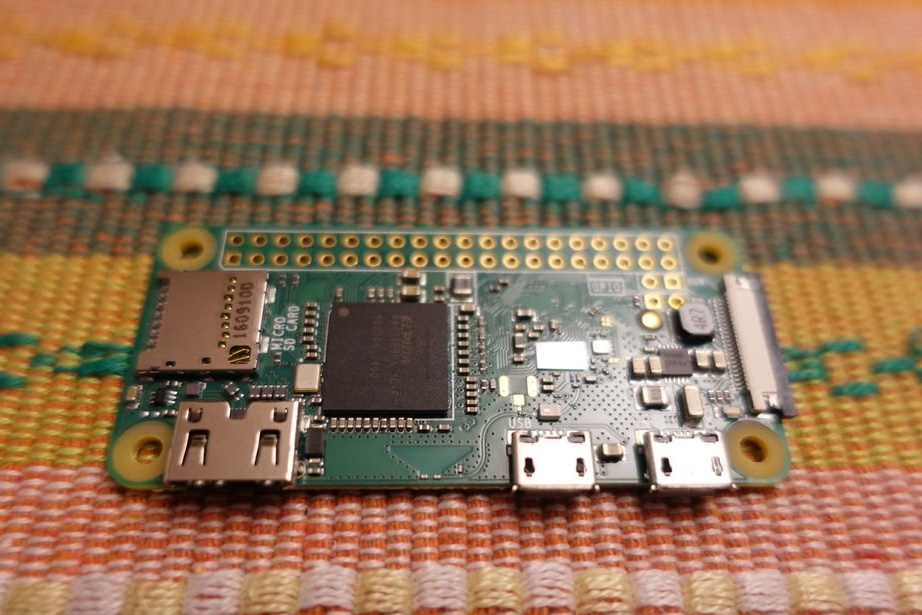
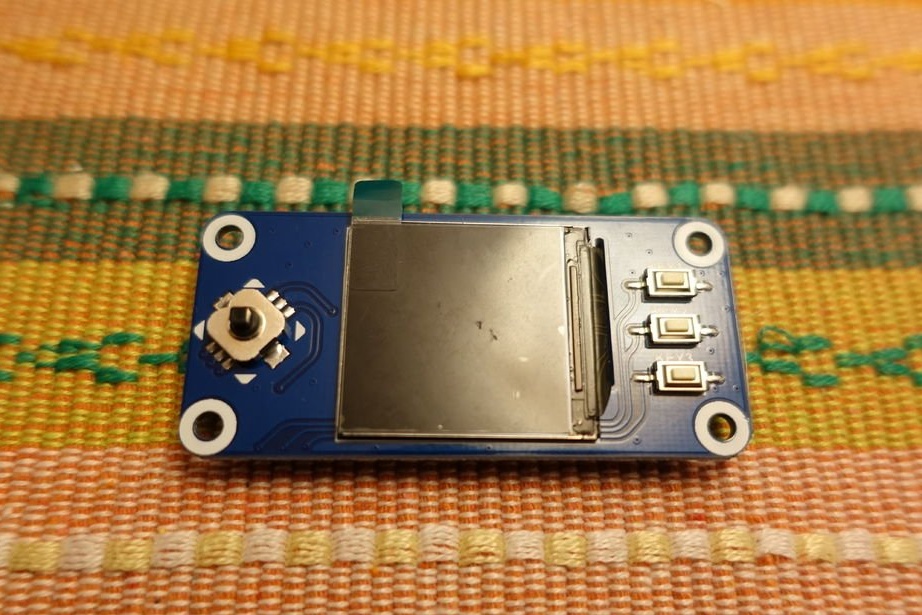
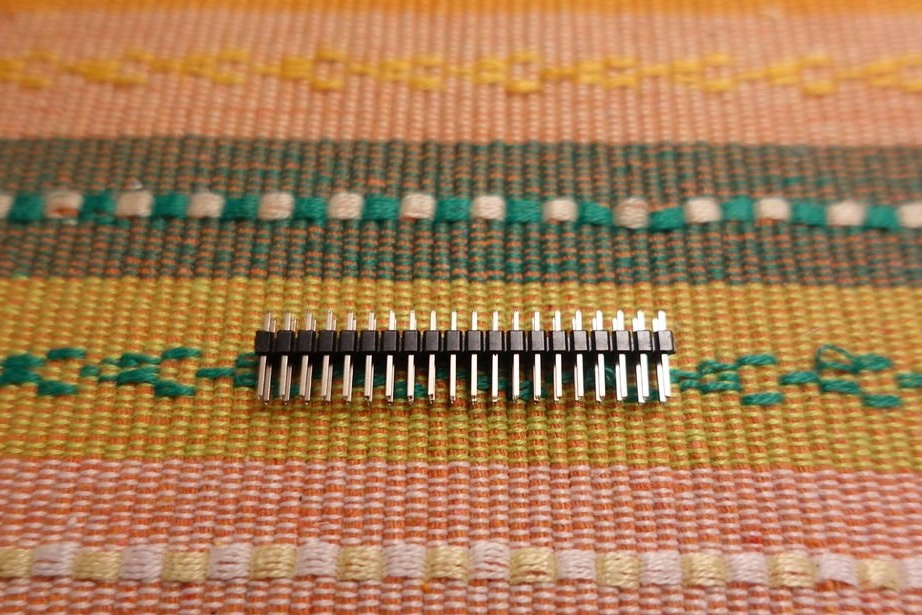
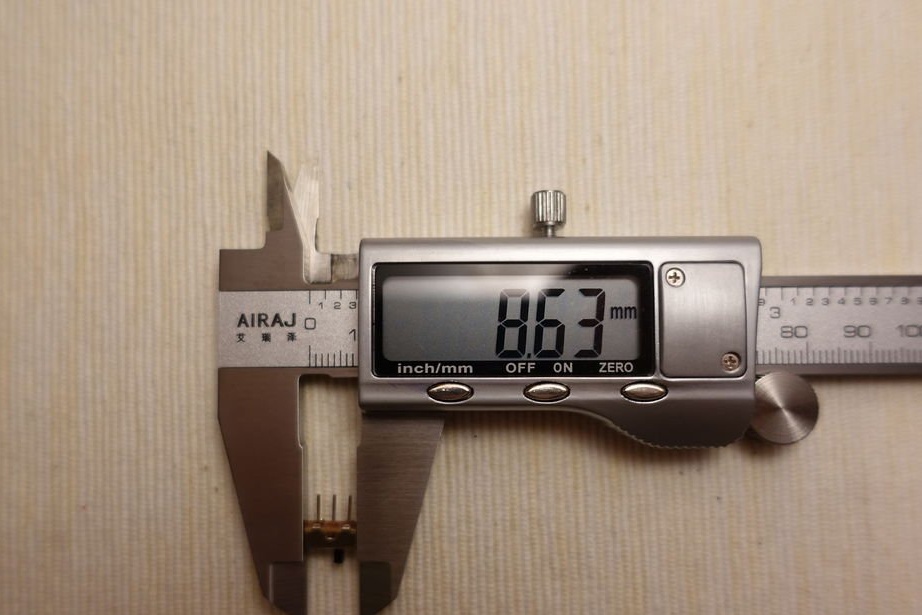
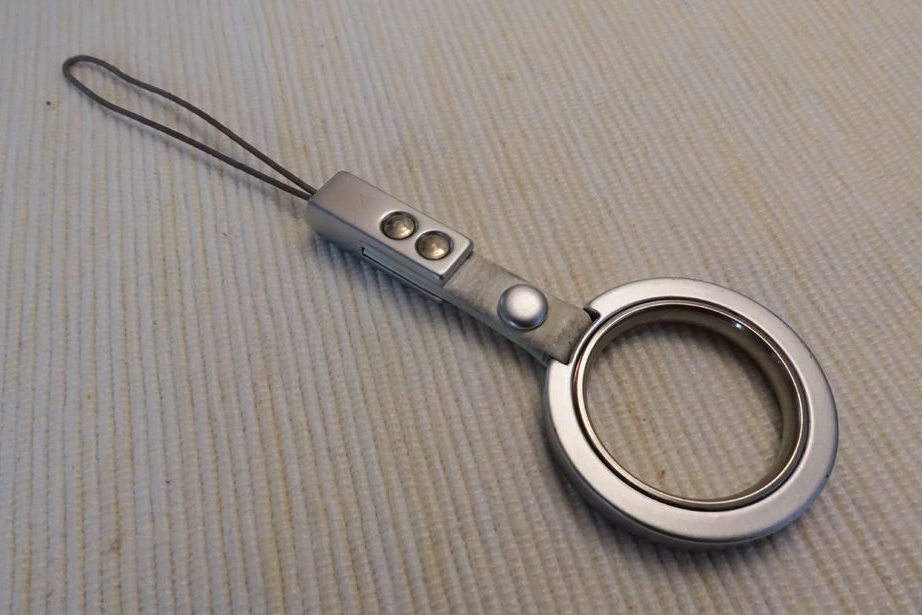
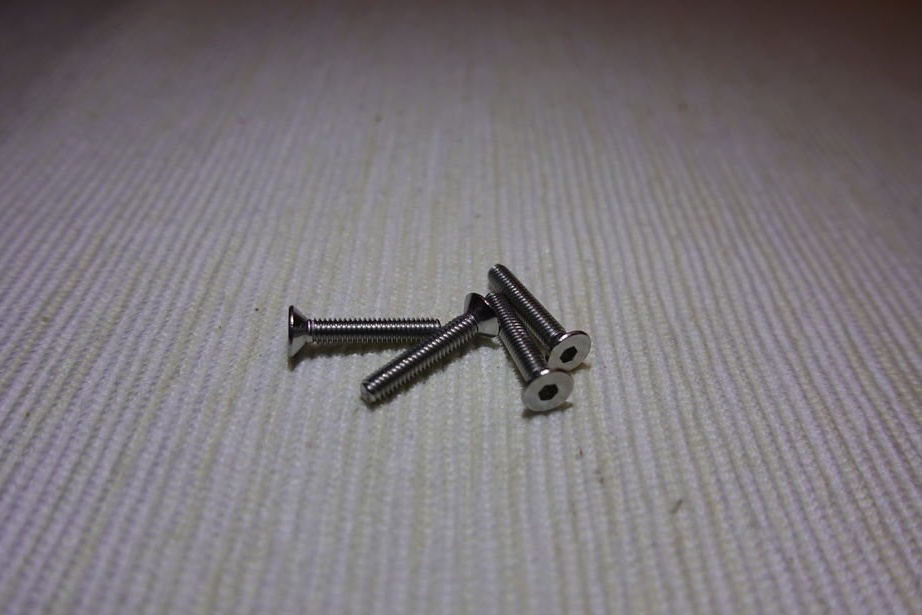
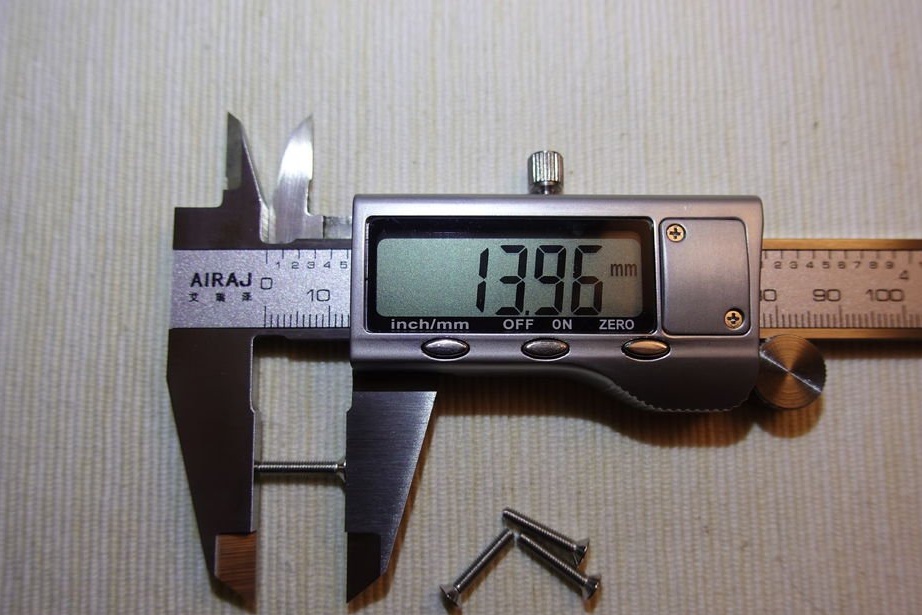
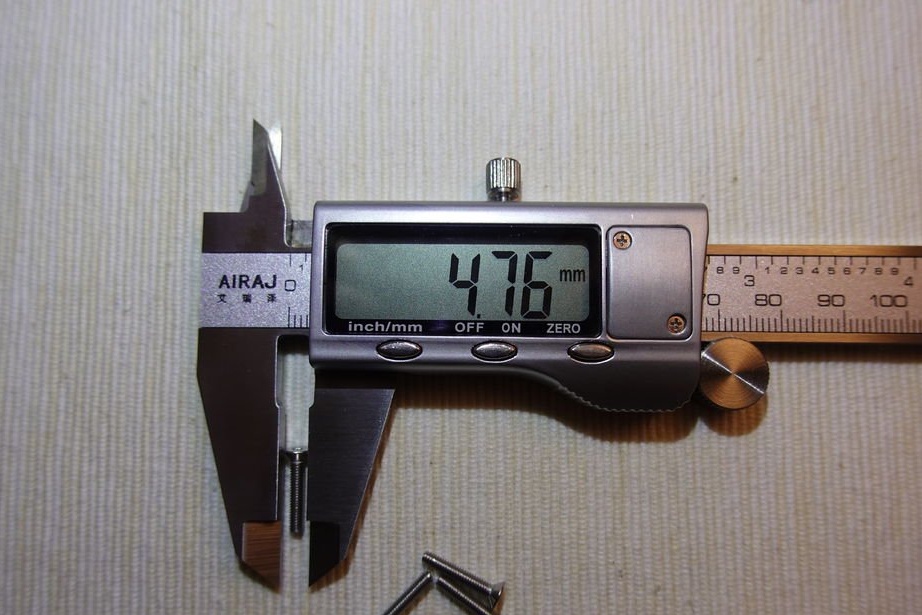
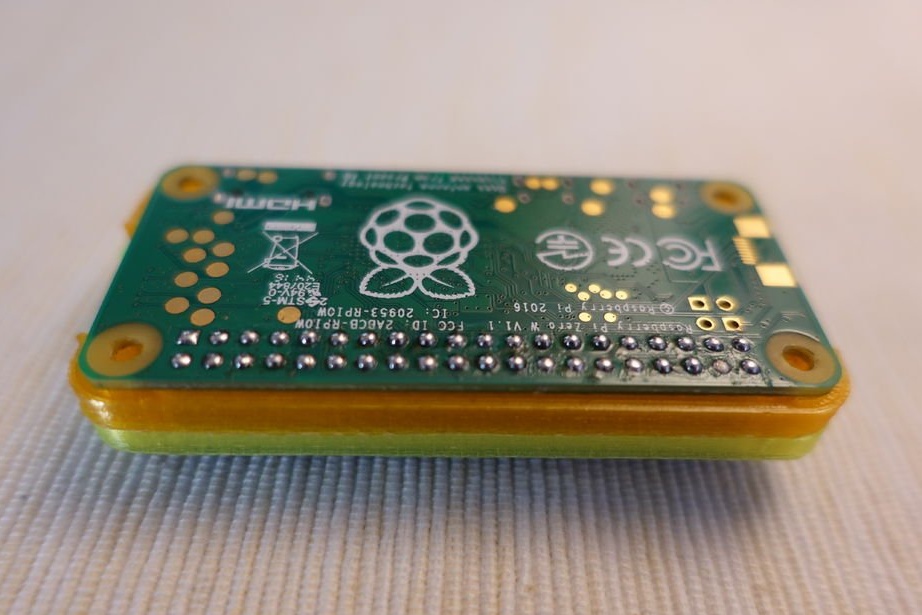
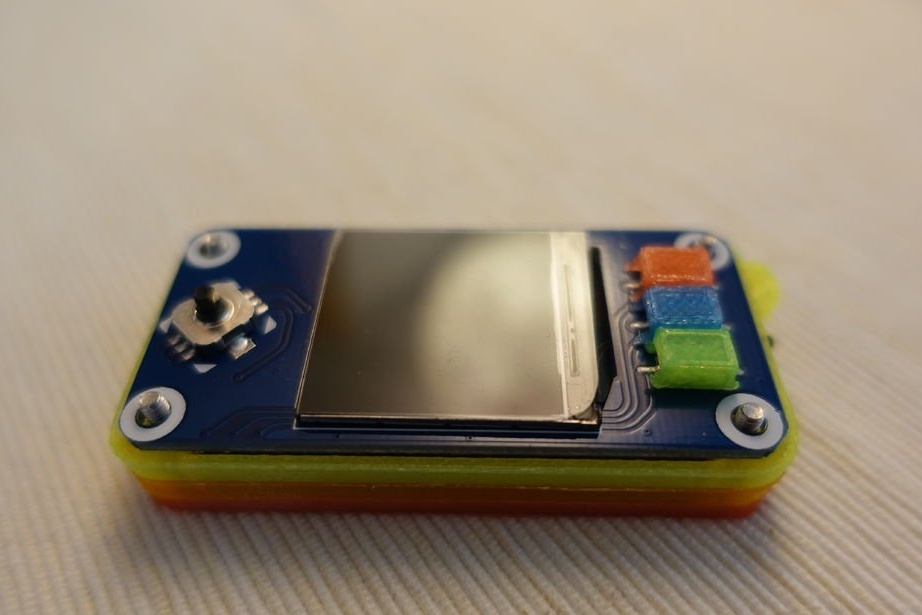
The device is based on the Raspberry Pi Zero board, the option is suitable with both WiFi and without. The first is more convenient, the second is more energy efficient. The master put a Waveshare LCD HAT on it. It is important to choose a newer version of the “hat” - with a 1.3-inch display having a resolution of 240x240. Yes, a square, but Instagram and Polaroid have nothing to do with it. On this "hat", in addition to the display, there is a joystick and buttons. The Raspberry Pi Zero does not include a comb. If you need it, you need to solder it yourself. To prevent the console from turning out too thick, you need a comb with 8 mm pins. I did not find such a master and shortened the 12 mm. It consists of two rows of 20 pins each. In the gap between the boards fit a LiPo battery measuring 45x23x5 mm with a built-in protection circuit. The capacity is not indicated on it. To it, 陳亮 added a very miniature charge controller with dimensions of 10x10 mm, which is good for everyone, but can only charge the battery in slow mode with a current of only 50 mA. The two-color LED shown next is optional. Of the additional components required: a mechanical power switch, a strap, four countersunk screws with an M2.5 thread of 14 mm length.

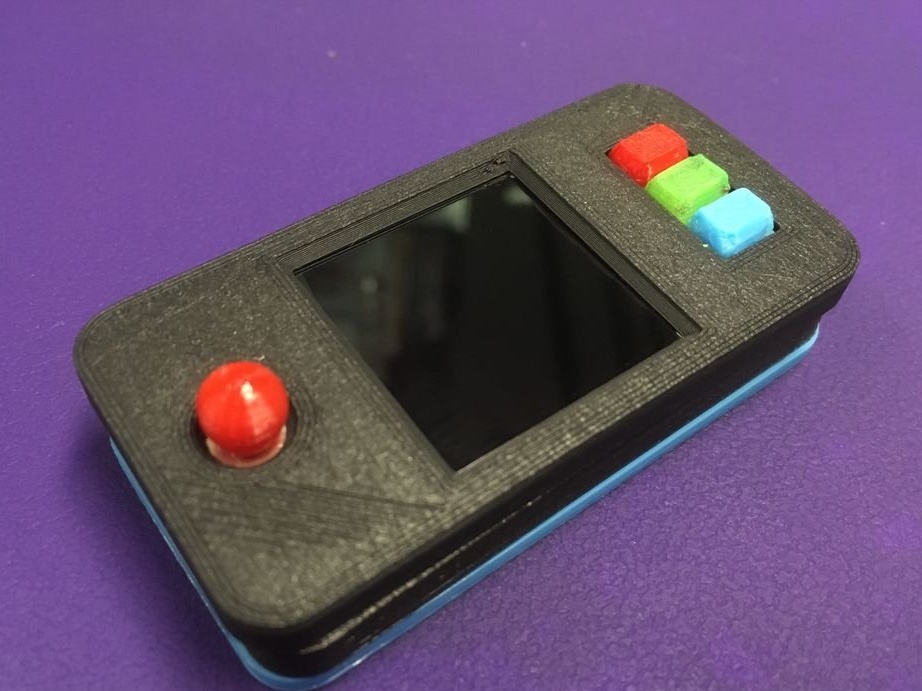
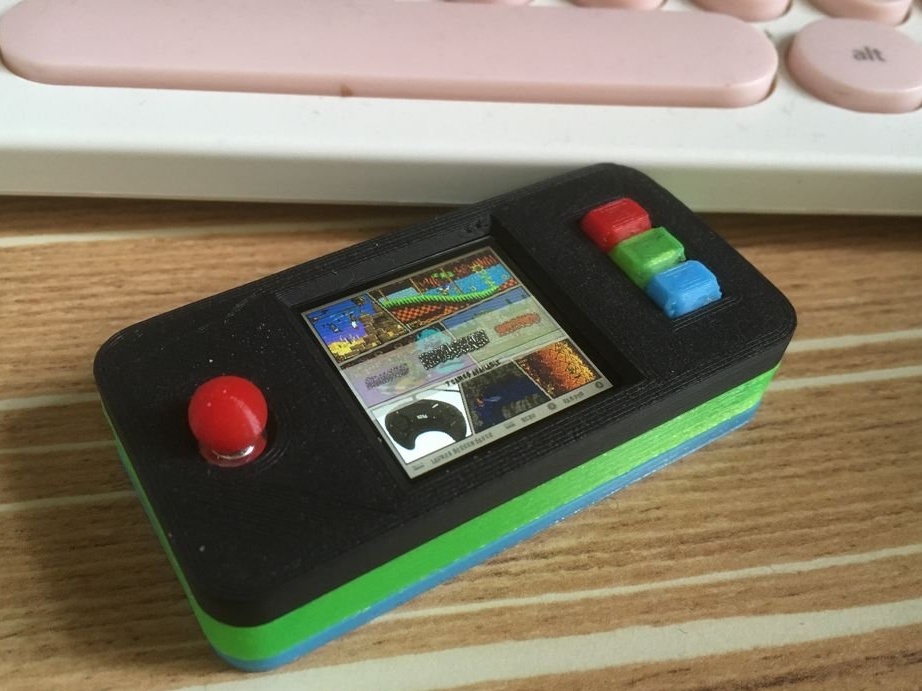
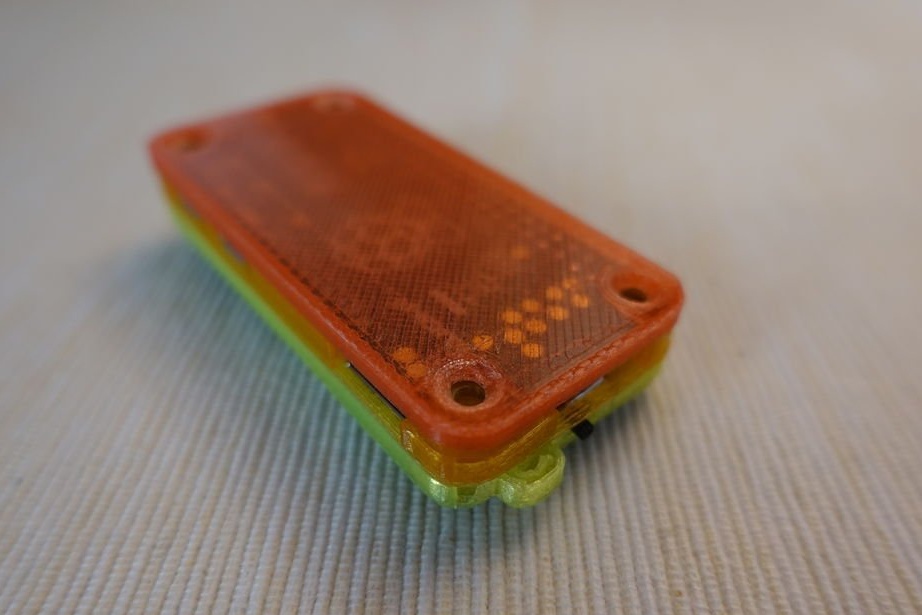
The case and buttons are 3D-printed, the master has laid out all the files necessary for their repetition on thingiverse. You can print them in one or different colors, in the author's version they are as follows: Layer123.stl - jet black, Layer4.stl - transparent yellow, Layer5.stl - transparent orange, Layer678.stl - transparent red, ButtonHead.stl - transparent red, blue and green (three buttons), CrossButtonHead.stl - dark red (and this is a D-pad).
The PAM2306 stabilizer on the Raspberry Pi Zero can work with a small voltage drop, it will generate 3.3 V at the output, even when the input voltage drops to 3.5 V. The console consumes one battery charge, consuming 100 to 200 mA when WiFi is disconnected , It works for about 90 minutes, while it consumes about 90% of the battery capacity. A board on which WiFi is not available in hardware will work even longer.
The master connects the “raspberry” and “hat” to each other with a comb with 12 mm pins, but so far does not solder it:
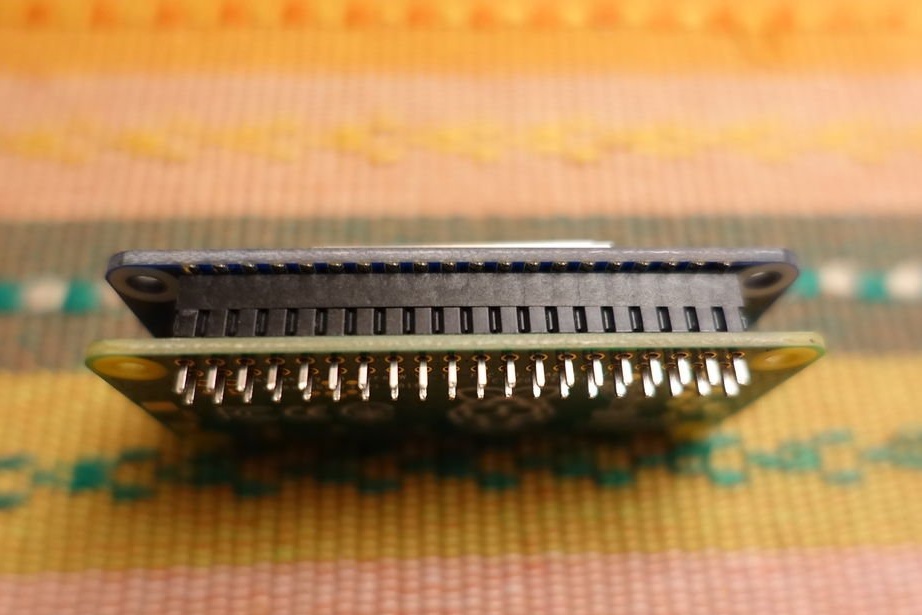
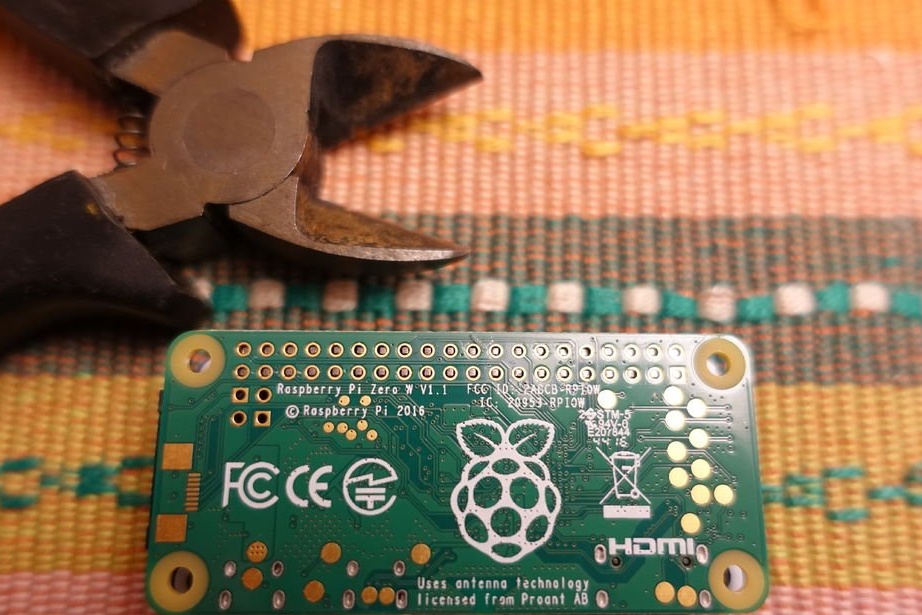
He bites out the excess, and the pins become 8 mm:
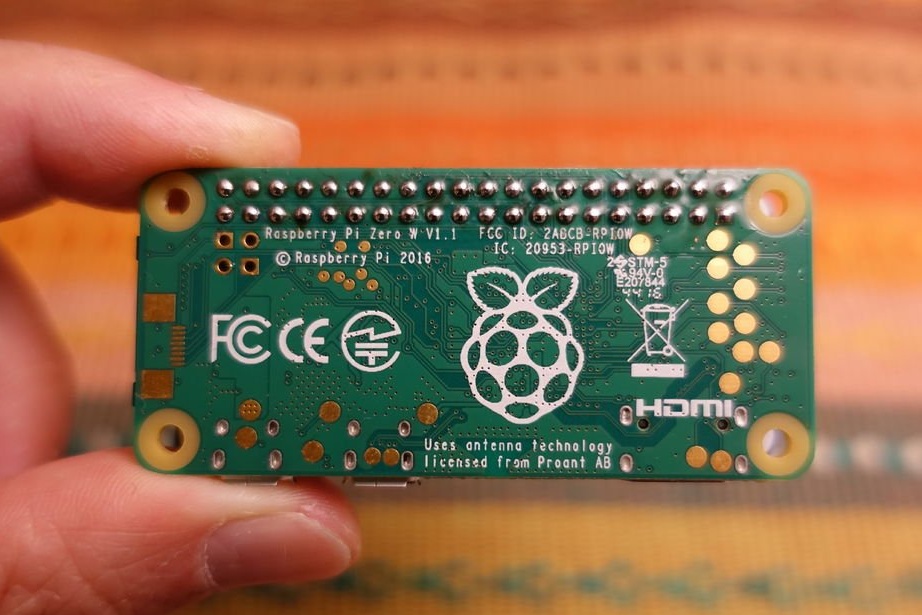
Solder the comb to one board, and the counterpart to another:
Connects to other components:
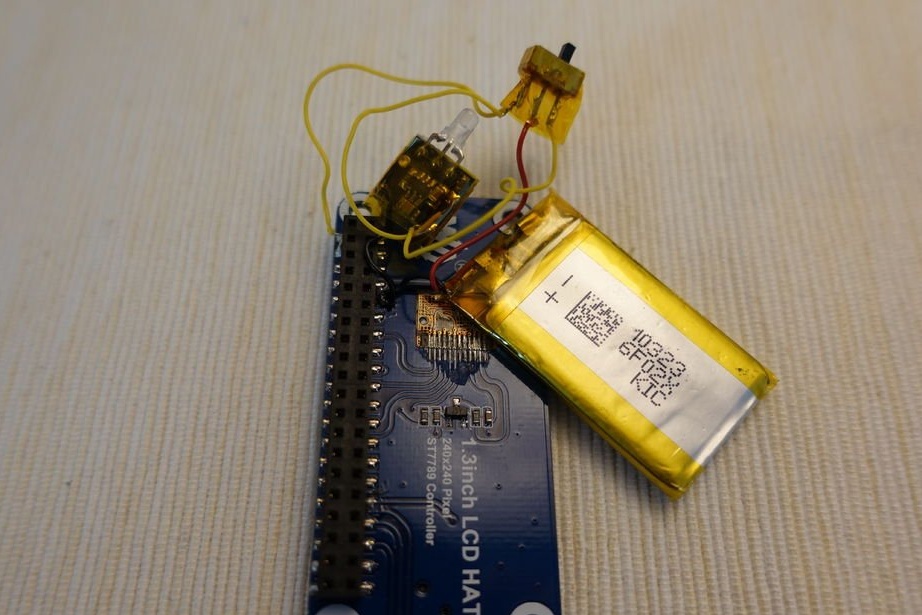
According to this scheme, composed in text form:

Note: the comb has a comb located on the back, so the numbering of its conclusions is reversed.
Everything but the Raspberry Pi is placed in the case detail printed from the Layer4.stl file, under the switch there is a footprint:
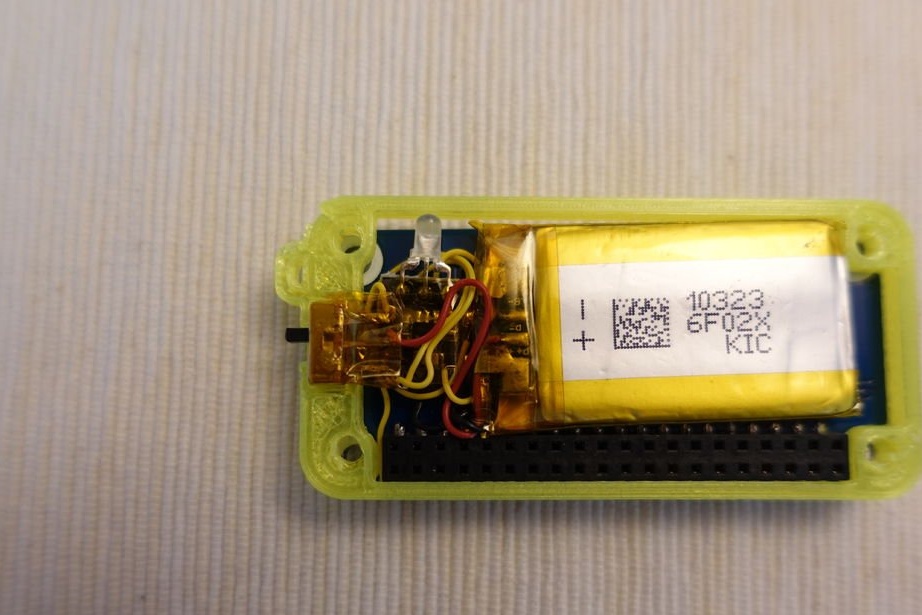
On top sets the part printed from the Layer5.stl file:
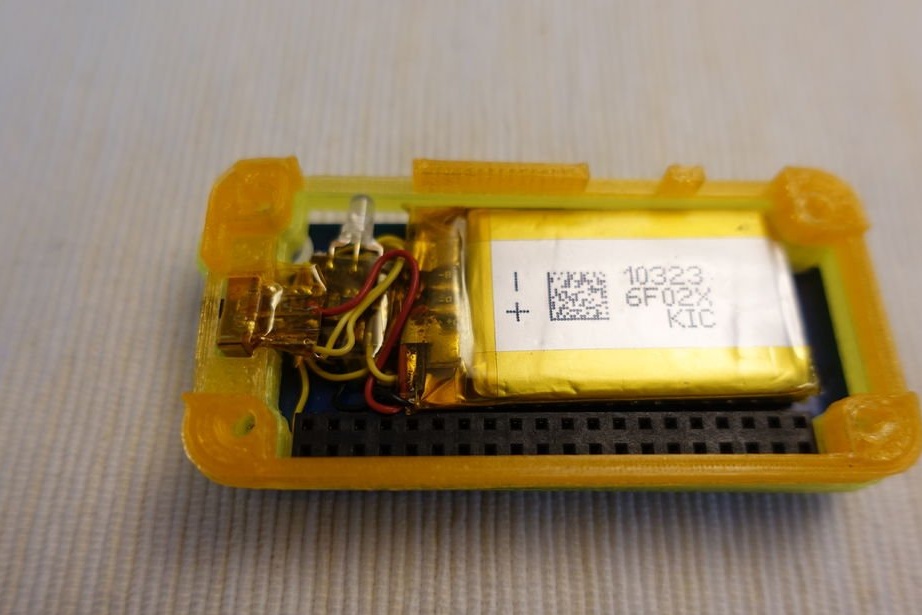
Then - Raspberry Pi:
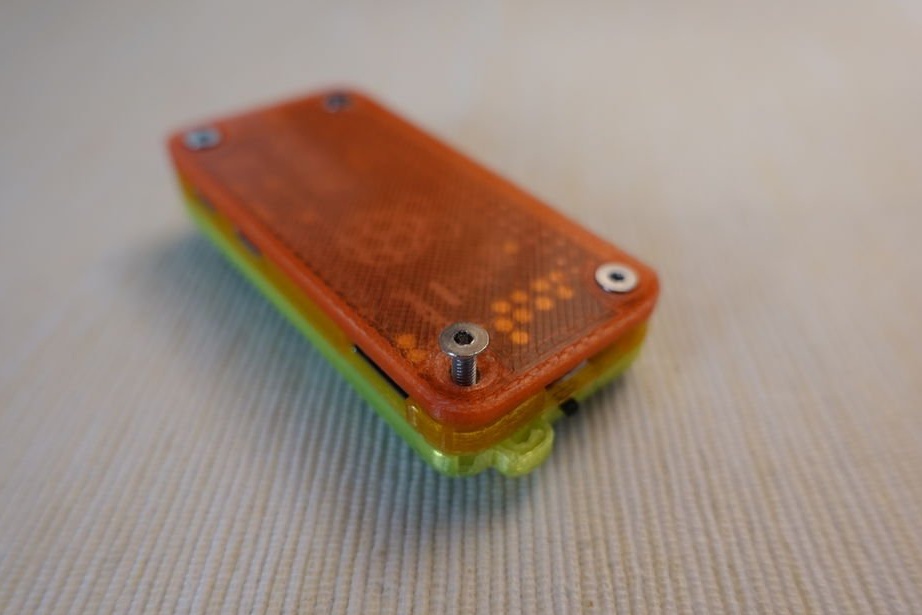
And the back wall is the Layer678.stl file:
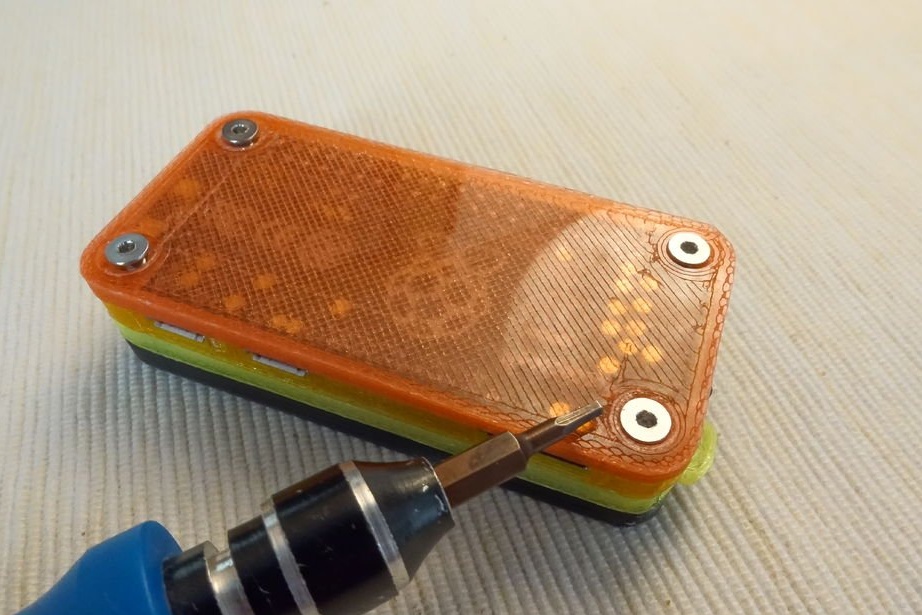
Places the screws in place:
Flips the whole construction, puts in place the buttons printed from the ButtonHead.stl file, but not the D-pad yet:
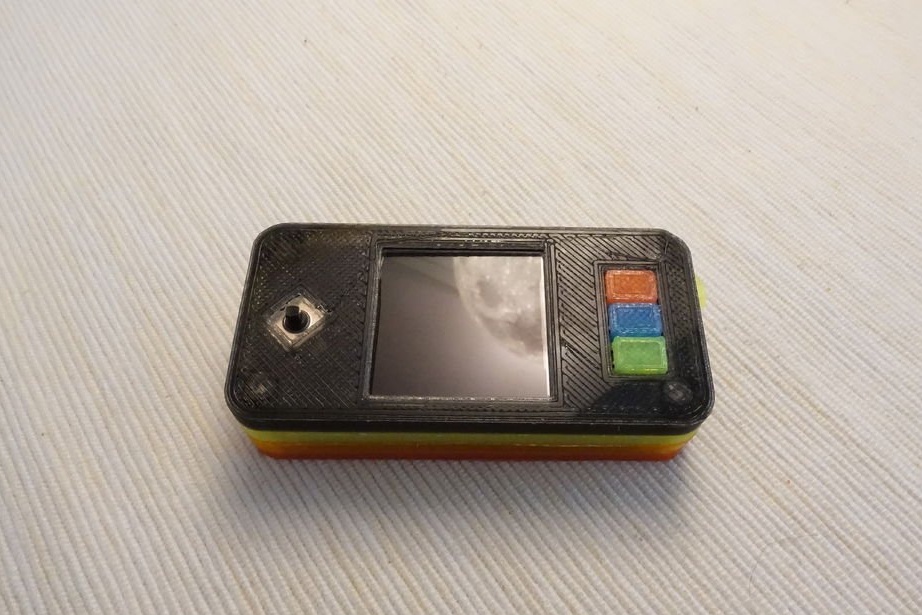
Closes with the front panel printed from the Layer123.stl file:
Turns and tightens screws:
Installs the D-pad on the joystick axis, printed from the CrossButtonHead.stl file:
Shakes Retropieby selecting the Raspberry Pi 0/1 option, and homebrew games. Downloading additional files: mk_arcade_joystick_rpi and rpi-fbcpby selecting the download option in the ZIP archive.
Writes the downloaded RetroPie image to the memory card. Just copying the file will not work. You need to use one of the methods, depending on which OS you have on the desktop.
Method for Linux
Way for MacOS
Way for Windows
In all cases, the image file name in the example must be replaced with the name of the file you downloaded.
Places the mk_arcade_joystick_rpi-master.zip and rpi-fbcp-master.zip archives on the memory card.
At the end of the config.txt file on the memory card, puts the line:
dtoverlay = dwc2After the keyword rootwait puts in the codlin.txt file: modules-load = dwc2, g_ether
It turns out:
dwc_otg.lpm_enable = 0 console = serial0,115200 console = tty1 root = PARTUUIDIt creates an empty ssh file on the memory card, on MacOS the wizard has the following command:
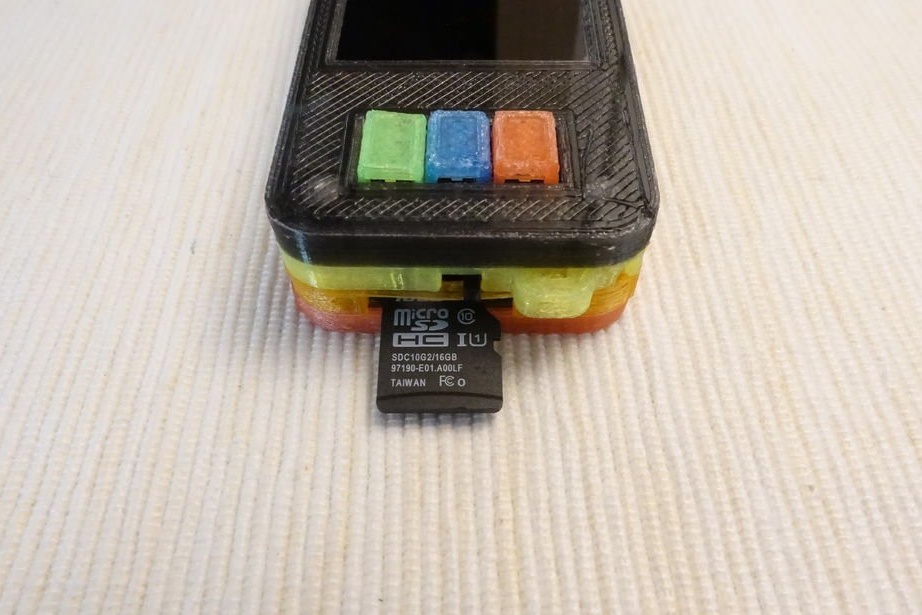
touch / volumes / boot / sshThe 3D-printed case already has recesses for a USB connector and a slot for a memory card, so installing a card and connecting the cord is not more difficult than in a player, for example:
Shortly after loading RetroPie, the computer’s OS console recognizes the virtual network card. As soon as this happens, the wizard enters the command:
ssh pi@retropie.localThe default password is raspberry, it 陳亮 immediately changes it with the passwd command.
At the end of the / etc / modules file, it adds:
spi-bcm2835
flexfb
fbtft_device
Creates a /etc/modprobe.d/fbtft.conf file with the following contents:
options flexfb setaddrwin = 0 width = 240 height = 240 init = -1,0x11, -2,120, -1,0x36,0x70, -1,0x3A, 0x05, -1,0xB2,0x0C, 0x0C, 0x00,0x33,0x33, -1.0xB7.0x35, -1.0xBB, 0x1A, -1.0xC0.0x2C, -1.0xC2.0x01, -1.0xC3.0x0B, -1.0xC4.0x20, -1.0xC6.0x0F, - 1,0xD0,0xA4,0xA1, -1,0x21, -1,0xE0,0x00,0x19,0x1E, 0x0A, 0x09,0x15,0x3D, 0x44,0x51,0x12,0x03,0x00,0x3F, 0x3F, -1,0xE1 , 0x00.0x18.0x1E, 0x0A, 0x09.0x25.0x3F, 0x43.0x52.0x33.0x03.0x00.0x3F, 0x3F, -1.0x29, -3
options fbtft_device name = flexfb gpios = reset: 27, dc: 25, cs: 8, led: 24 speed = 125000000 bgr = 1 fps = 60 custom = 1 height = 240 width = 240
Extracts files from one of two archives previously copied to the card (see above):
unzip /boot/rpi-fbcp-master.zipCompiles and installs:
cd rpi-fbcp-master /
mkdir build
cd build
cmake ..
make
sudo install fbcp / usr / local / bin / fbcp
Starts up:
/ usr / local / bin / fbcp &At the end of the file, /boot/config.txt adds:
disable_overscan = 1
hdmi_force_hotplug = 1
hdmi_group = 2
hdmi_mode = 87
hdmi_cvt = 240 240 60 1 0 0 0
dtparam = spi = on
Unpacks another archive:
unzip /boot/mk_arcade_joystick_rpi-master.zipLaunches the editor and opens the gamepad configuration file:
cd mk_arcade_joystick_rpi-master /
vi mk_arcade_joystick_rpi.c
Finds the string static const int mk_arcade_gpio_maps [] and makes it look like this:
static const int mk_arcade_gpio_maps [] = {6,19,5,26,13,21,16,20,0,0,0,0,0};Saves the file, compiles and installs the module:
sudo mkdir /usr/src/mk_arcade_joystick_rpi-0.1.5/
sudo cp -a * /usr/src/mk_arcade_joystick_rpi-0.1.5/
export MKVERSION = 0.1.5
sudo -E dkms build -m mk_arcade_joystick_rpi -v 0.1.5
sudo -E dkms install -m mk_arcade_joystick_rpi -v 0.1.5
Checks buttons:
sudo modprobe mk_arcade_joystick_rpi map = 1
jstest / dev / input / js0
At the end of the file, / etc / modules adds:
mk_arcade_joystick_rpiCreates a /etc/modprobe.d/joystick.conf file with the following contents:
options mk_arcade_joystick_rpi map = 1Downloaded files (see above) with homebrew games are scattered from the / boot folder into the ~ / RetroPie / roms / $ CONSOLE folders, where $ CONSOLE is the name of the platform for which they are intended.
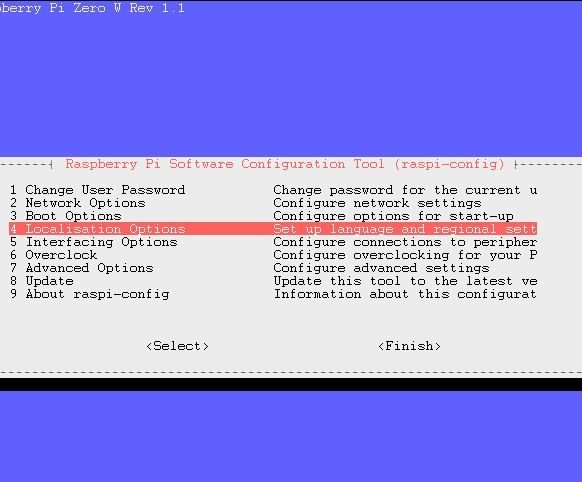
Run raspi-config:
sudo raspi-configConfigures:
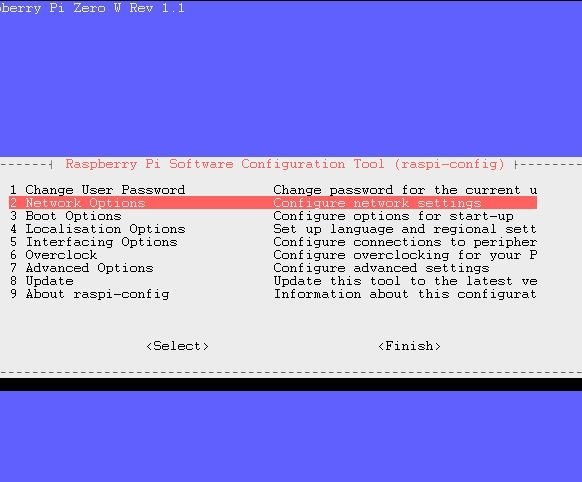
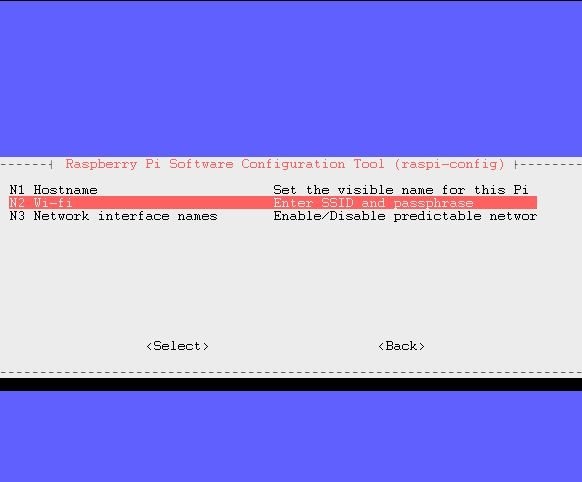
Selects a WiFi network (only for the board where it is): 2 Network Options -> N2 Wi-fi -> enter data about your network
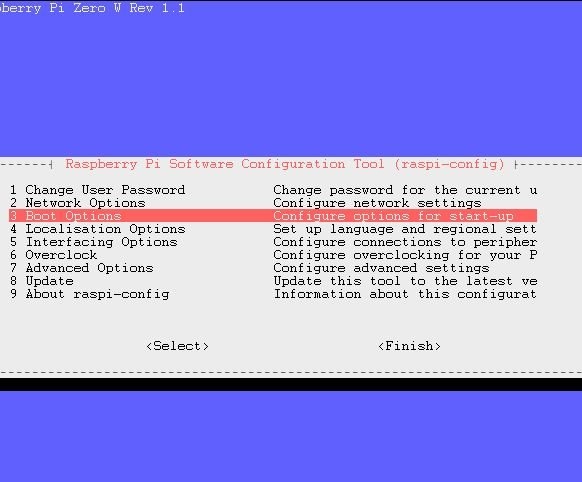
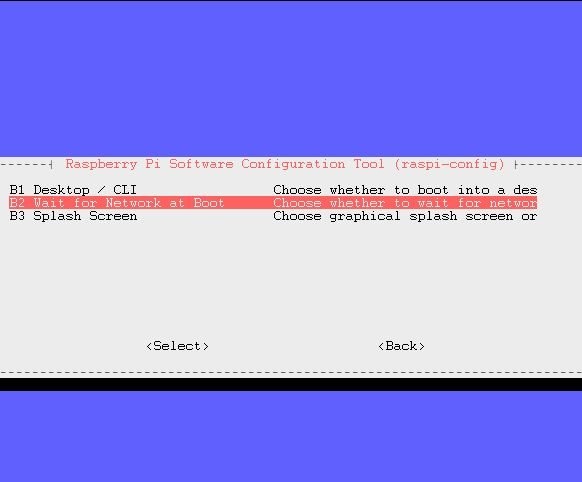
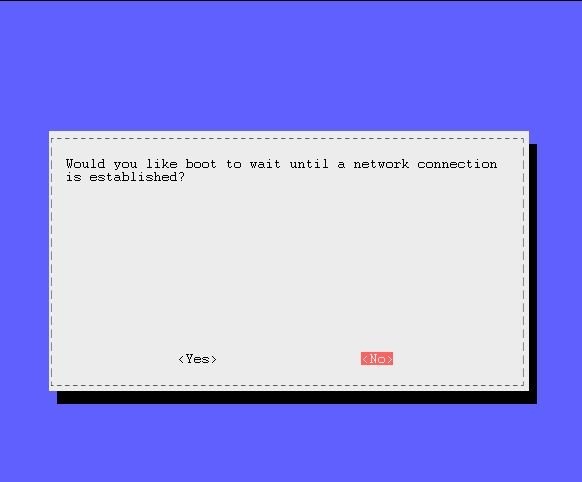
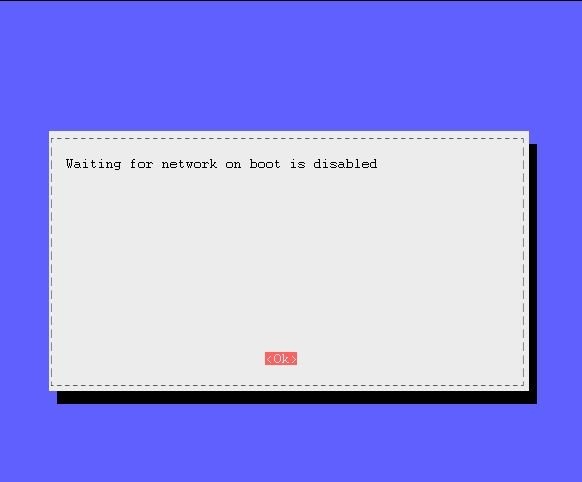
Makes sure that the download does not stop for the network to appear: 3 Boot Options -> B2 Wait for Network at Boot -> No -> OK
Indicates the time zone: 4 Localization Options -> I2 Change Timezone -> selects your time zone
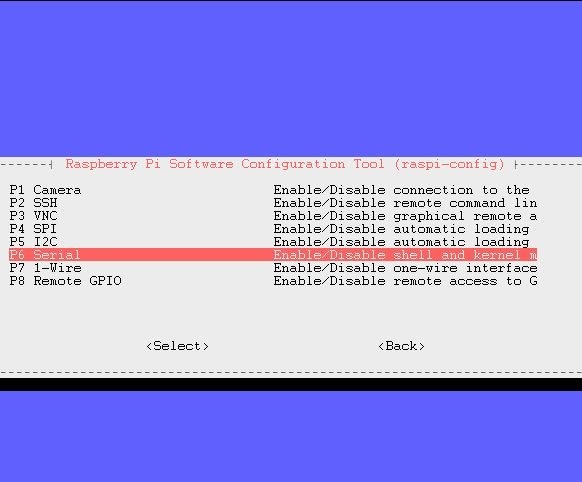
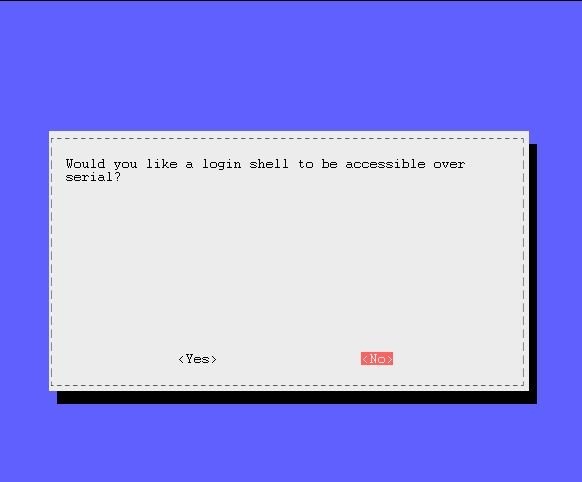
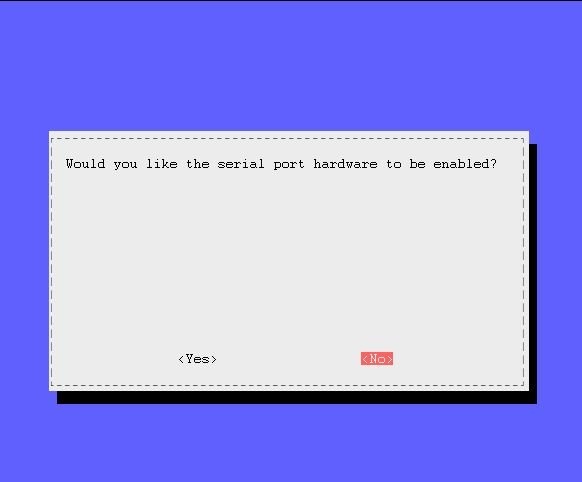
Disables the serial port: 5 Interfacing Options -> P6 Serial -> No -> No -> OK
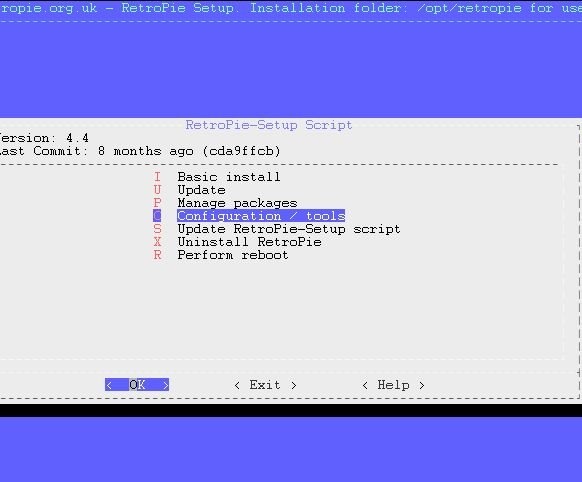
Runs the RetroPie configuration script:
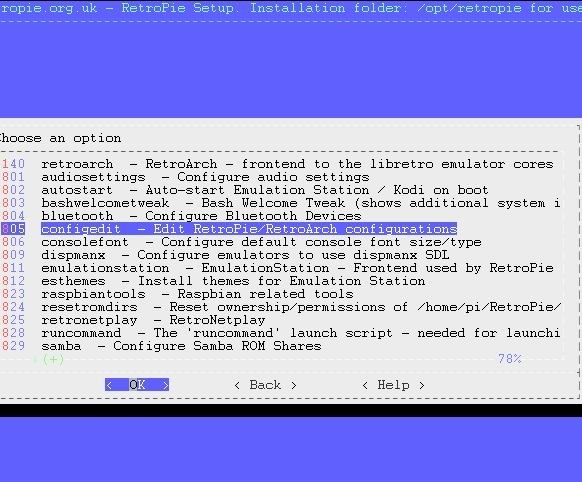
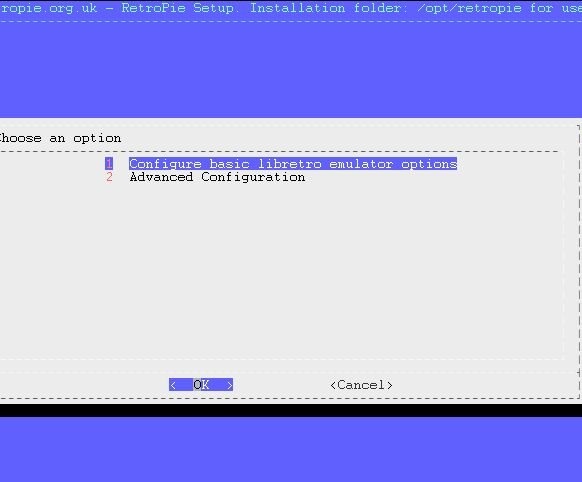
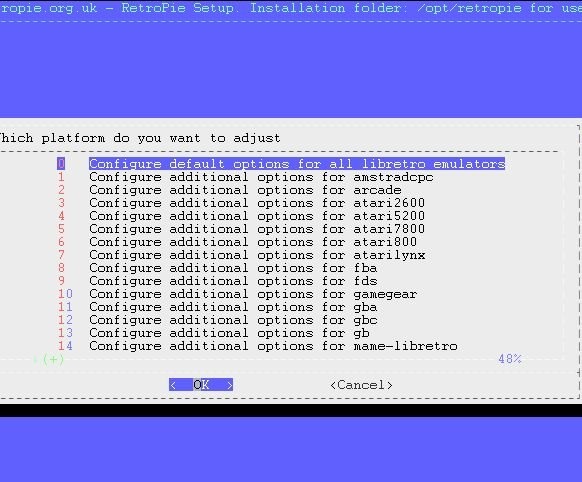
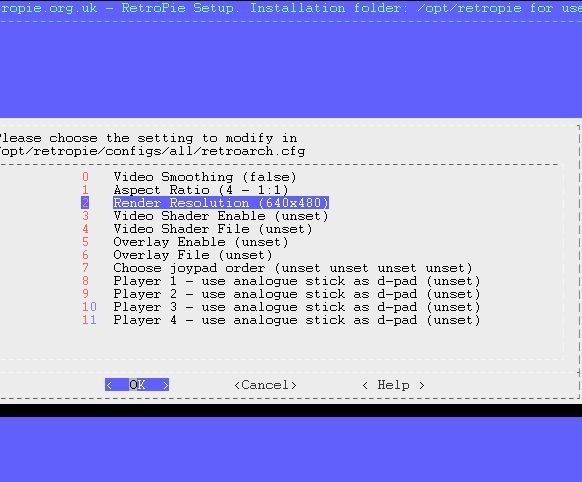
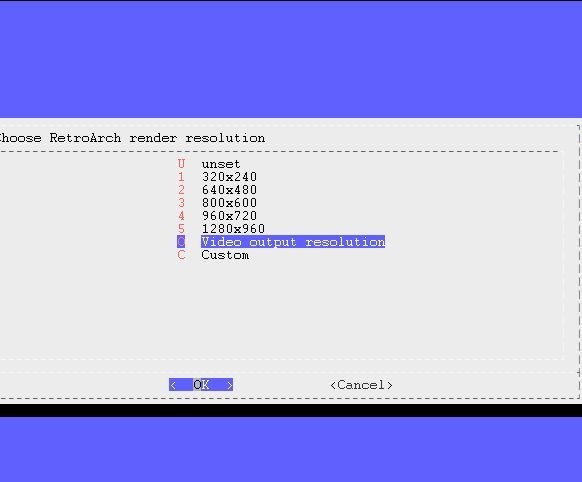
sudo ~ / RetroPie-Setup / retropie_setup.shOptimizes resolution for a 1.3-inch screen: C Configuration / Tools -> 805 configedit -> 1 -> 0 -> 2 Render Resolution -> O Video output resolution -> OK -> Cancel -> Cancel -> Cancel
Changes the theme to a suitable one for such a display (you need WiFi to be connected): 812 esthemes -> 14 Pixel-tft -> OK -> 1 carbon -> 2 Uninstall
The “hat” has only three separate buttons, plus one built-in directly in the D-pad. And the display resolution is 240x240. The master prefers the NES platform, where the resolution is 256 x 240. So that the image is not distorted, he decided to crop it. For readers who want to play NES-only games, he recommends adding lines to the end of the /opt/retropie/configs/nes/retroarch.cfg file:
video_fullscreen_x = "0"
video_fullscreen_y = "0"
video_scale_integer = true
And at the end of the file /opt/retropie/configs/all/retroarch-core-options.cfg - the line:
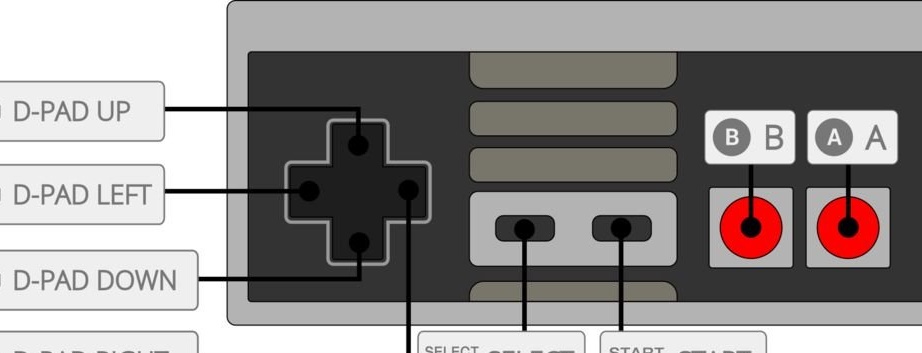
quicknes_use_overscan_h = "disabled"The buttons of the gamepad emulated by NES are scattered by the buttons of the console according to the figure:
Users accustomed to the Turbo buttons will have to break the habit. The wizard launches the editor and opens the EmulationStation settings file:
There it puts the text:
& lt;? xml version = "1.0"? & gt;
/opt/retropie/supplementary/emulationstation/scripts/inputconfiguration.sh
After saving the file and closing the editor, it starts it again, but with the RetroArch settings file:
vi / opt / retropie / configs / all / retroarch / autoconfig / GPIO \ Controller \ 1.cfgAnd there it puts the text:
input_device = "GPIO Controller 1"
input_driver = "udev"
input_start_btn = "11"
input_exit_emulator_btn = "11"
input_down_axis = "+1"
input_right_axis = "+0"
input_state_slot_increase_axis = "+0"
input_select_btn = "10"
input_left_axis = "-0"
input_state_slot_decrease_axis = "-0"
input_up_axis = "-1"
input_a_btn = "0"
input_b_btn = "1"
input_reset_btn = "1"
input_enable_hotkey_btn = "10"
It also saves and closes, speeds up loading by sequential input of commands:
sudo systemctl disable asplashscreen
sudo systemctl disable dphys-swapfile
sudo systemctl disable hciuart
sudo systemctl disable keyboard-setup
sudo systemctl disable nmbd
sudo systemctl disable raspi-config
sudo systemctl disable smbd
sudo systemctl disable nfs-config
What swap disables, it does the right thing, he does not want the memory card to quickly bend.
In the file /boot/cmdline.txt sets the parameters like this:
dwc_otg.lpm_enable = 0 console = tty1 root = PARTUUID = 14a75fe9-02 rootfstype = ext4 elevator = deadline fsck.repair = yes rootwait loglevel = 3 consoleblank = 0 plymouth.enable = 0 logo.nologo fastboot quietAnd this line turns into a comment by placing a grid in front:
# dtoverlay = dwc2Reboots the device. Turns off with the command:
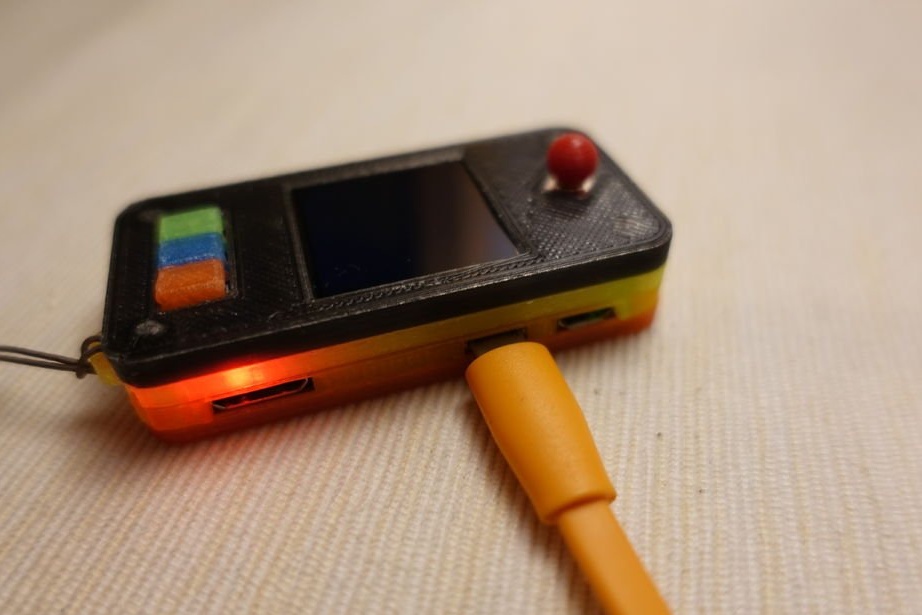
sudo haltDisconnects the cable, turns on the switch, and it loads already without a PC. About a minute later, when the download is completed, it configures, selects the emulator and the game.
As the reader has already guessed, reading the configuration files above, the Start key corresponds to clicking on the D-pad in the middle. By the same pressing, when the game is not running, you can call up the settings menu. There, the wizard selects the following items:
UI SETTINGS - & gt; SCREENSAVER SETTINGS - & gt; SCREENSAVER AFTER - & gt; 1 minute
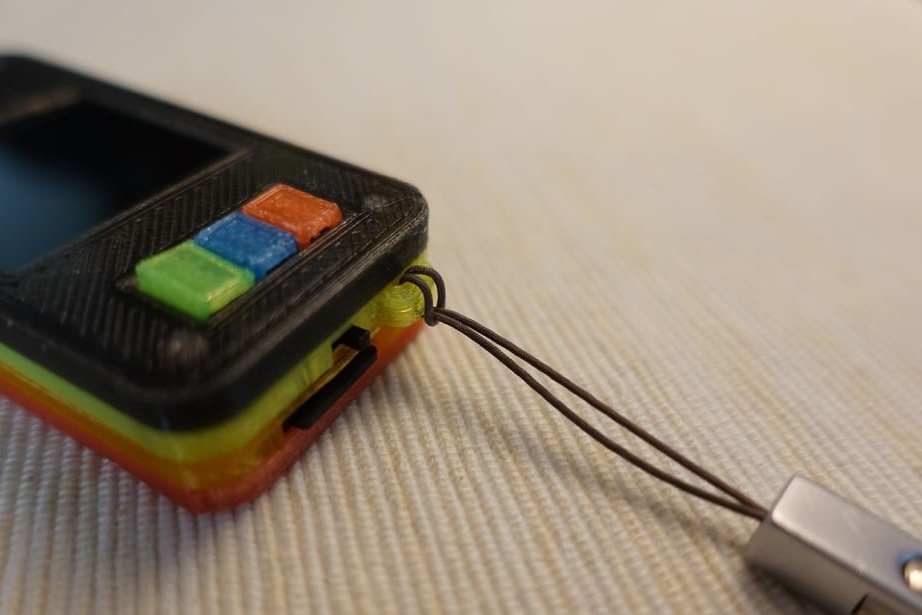
OTHER SETTINGS - & gt; POWER SAVER MODES - & gt; INSTANTPuts the strap in the designated “ear”:
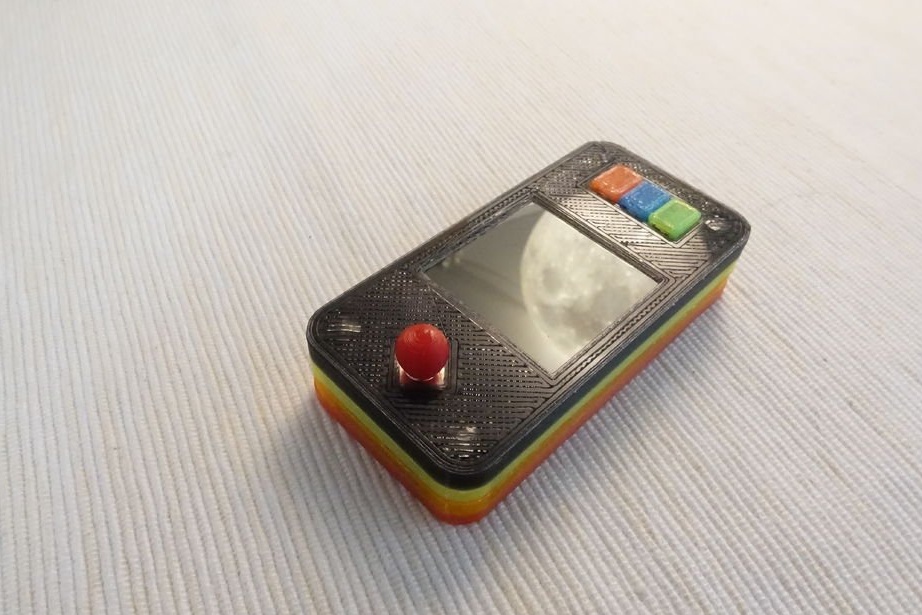
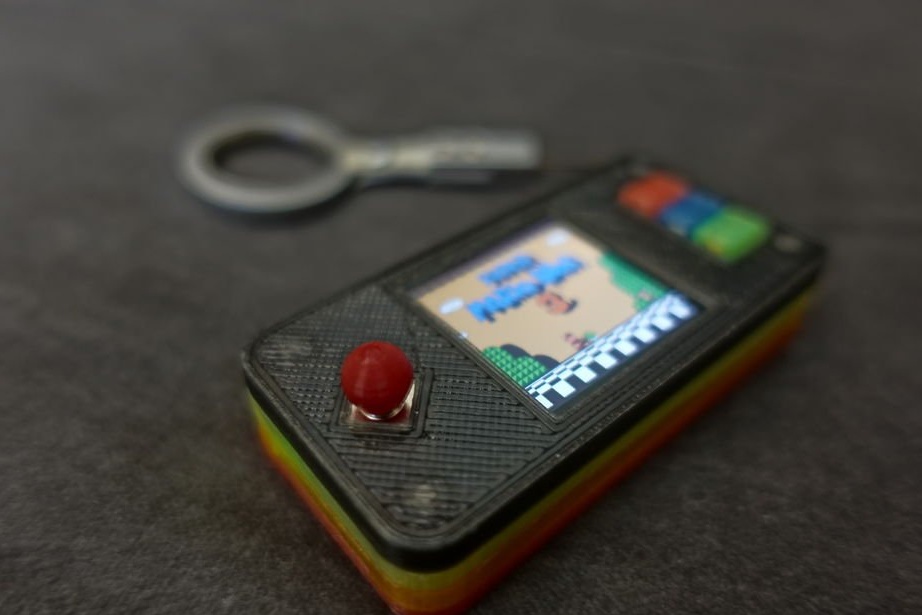
Done, you can use:
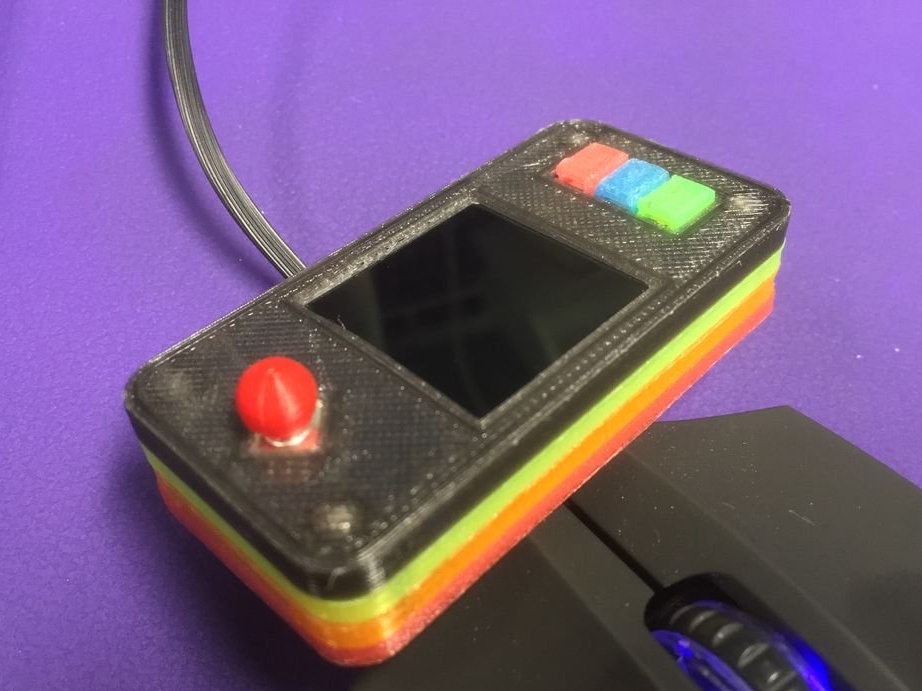
Below are the different colors for the console: