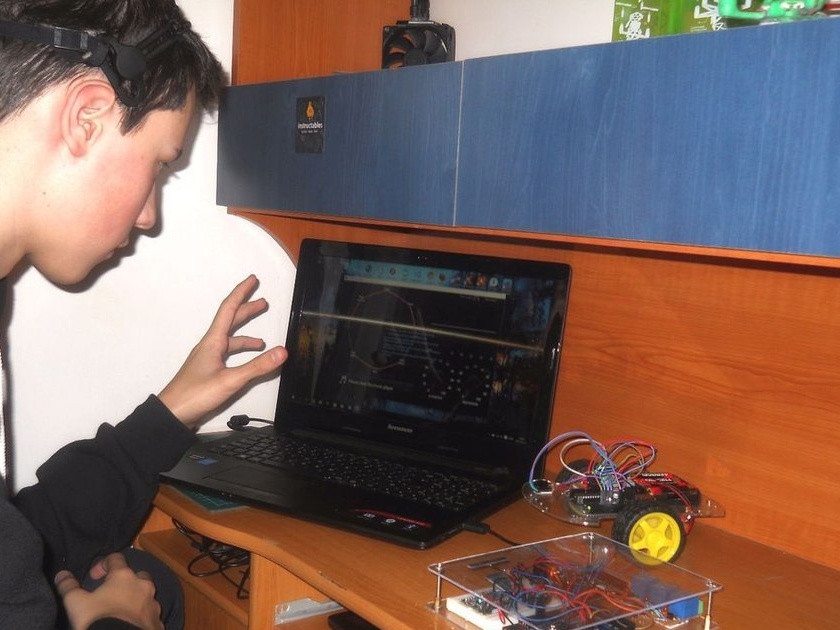
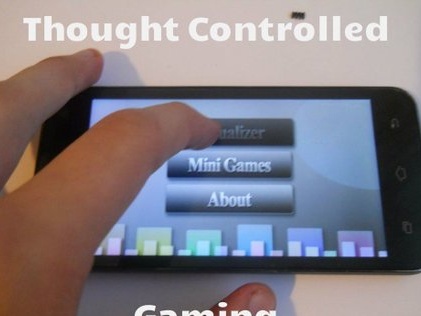

The main concept of this project is that with the help of various brain waves, the user will be able to control the robot, the cursor on his PC or turn on / off the lights in his house, while the microcontroller (Particle Photon) creates an online analysis of the user's brain waves. So yes, with this device you can really use the Power of Thought
 ... This device is not only intended for lazy or fans, it was created in order to give people the opportunity. who struggle every day with their disability. Robotdeveloped by the author works just like a wheelchair system home automation will help the user to control the light or the television, even if he / she cannot move. PC controller mode can be useful even to those who are completely healthy.
 How it works?

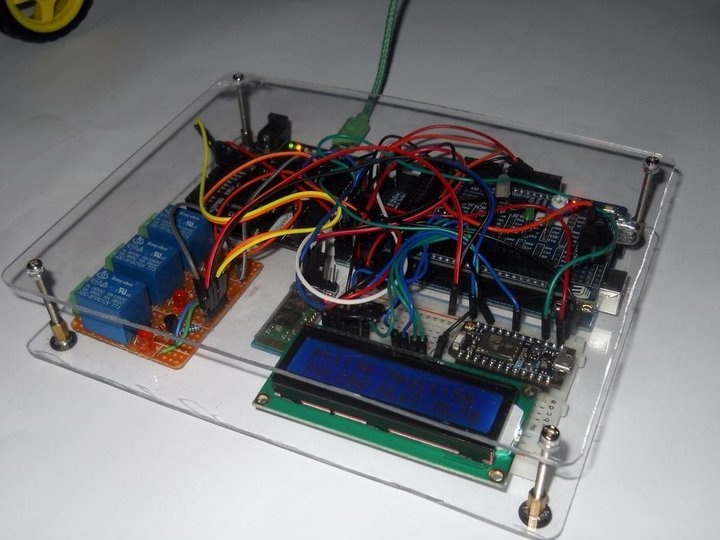

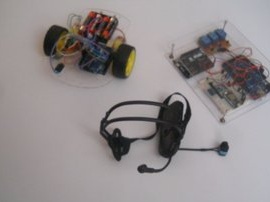
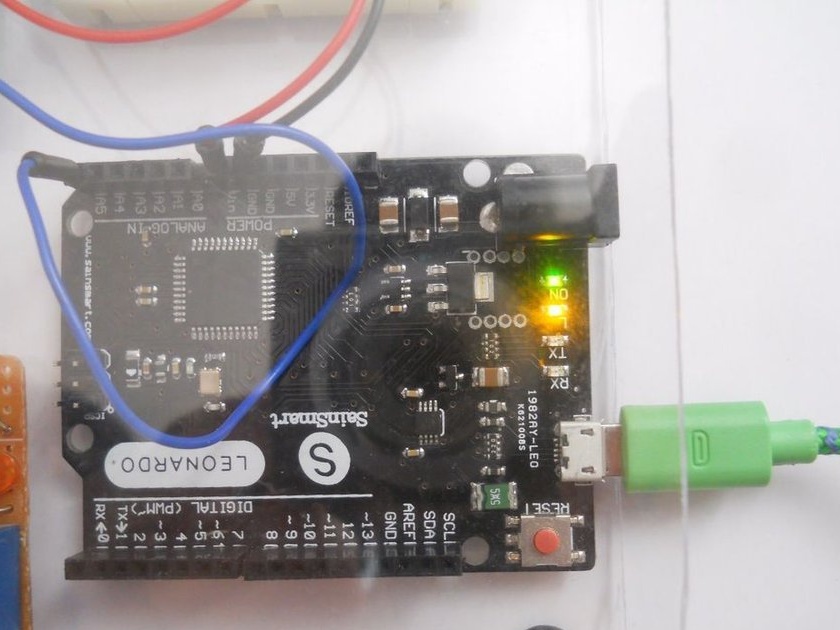
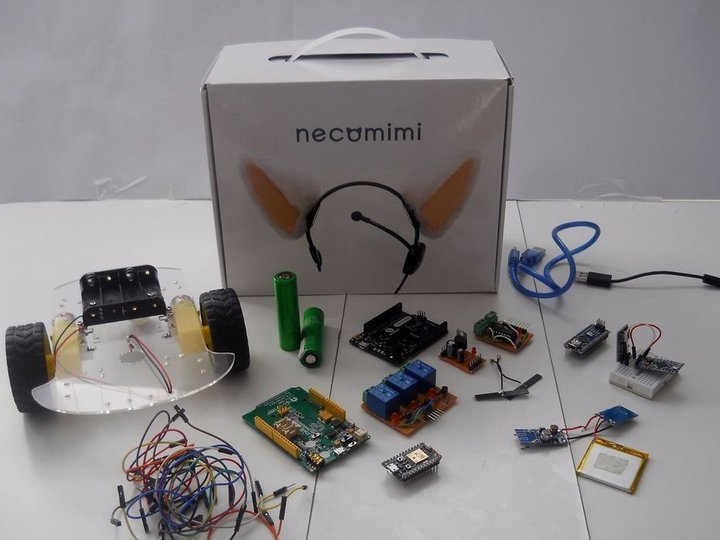
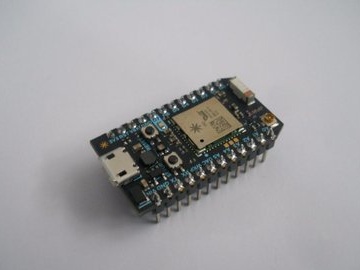
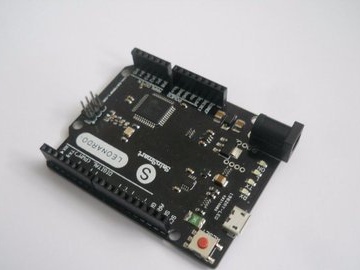
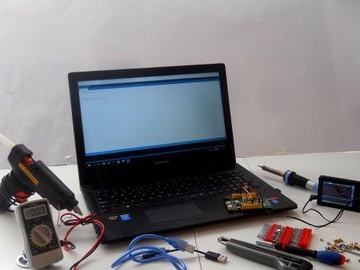
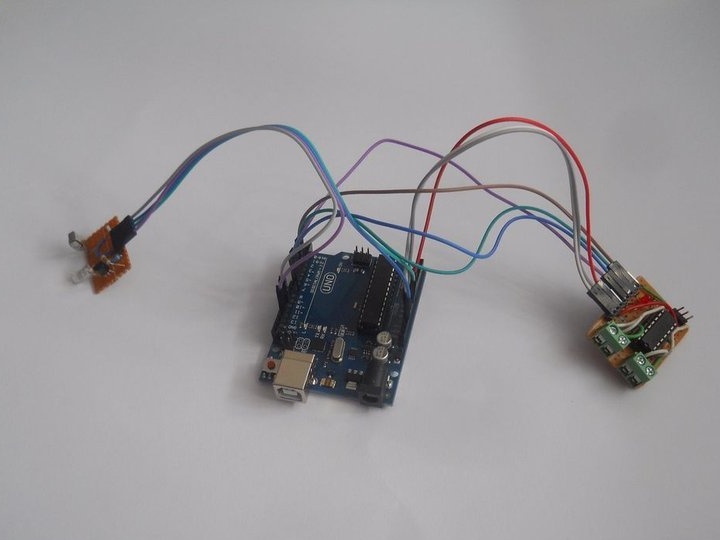
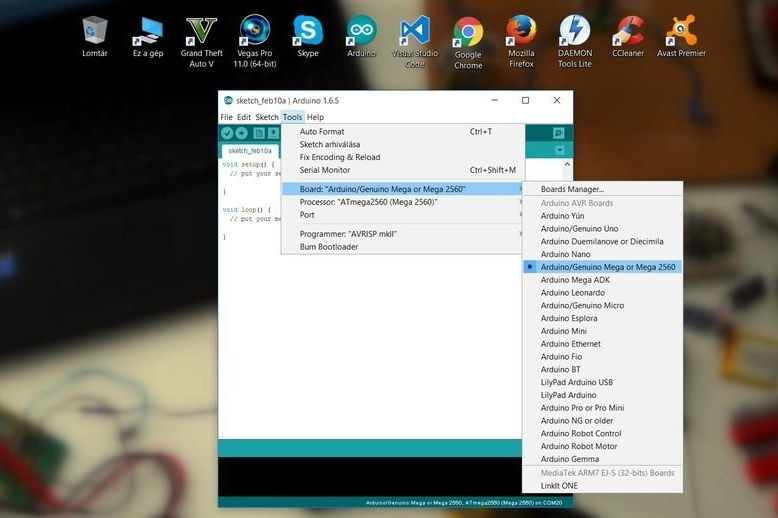
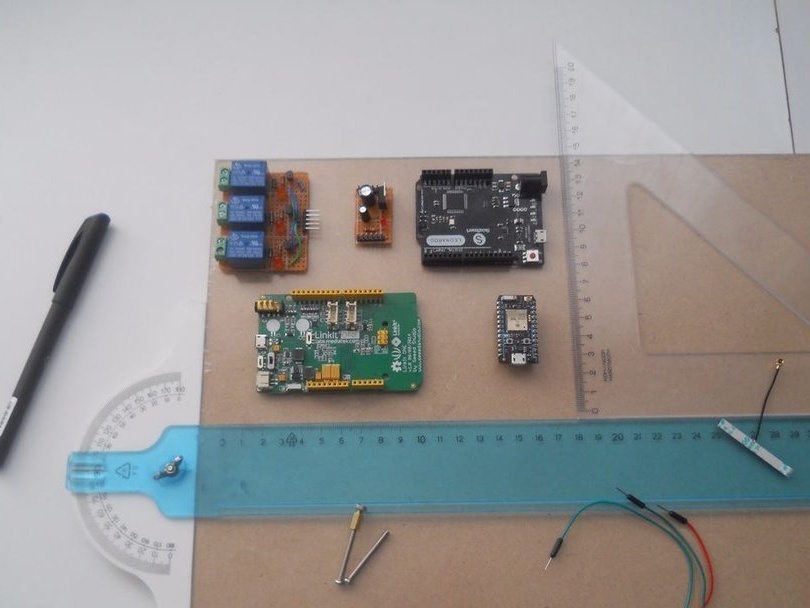
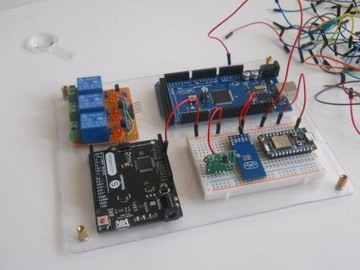
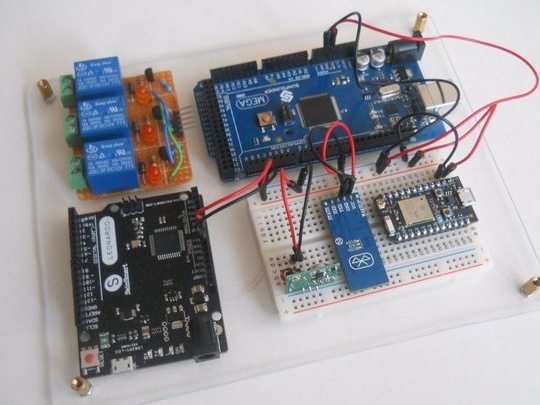
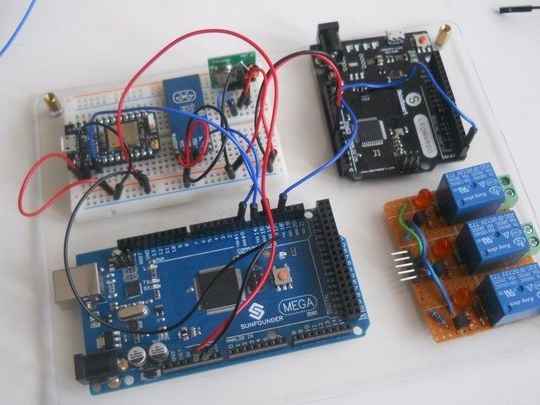
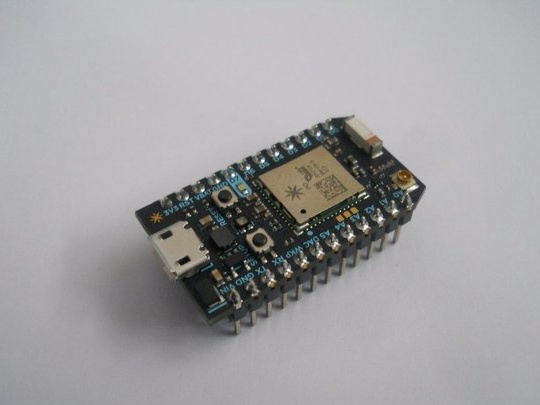
Four microcontrollers were used to bring this project to life: Arduino Mega, Arduino Leonardo, UNO and Particle Photon. Mega is the brain of the project, which receives signals from the headset, analyzes and sends commands to other devices. Passes all data to Particle Photon, which creates a web server. Leonardo controls the mouse on a PC, and Uno is used to receive IR (infrared signals) and control the robot. A device is capable of controlling three different devices (or more if you want to program something else). Further, these three different devices will be called channels. The device switches between these channels if you close your eyes:
Close your eyes for 1-2 seconds: switch to the home automation function
Close your eyes for 2-4 seconds: switch to robot controller mode
Close your eyes for 1-6 seconds: switches to mouse controller mode
To make the function of home automation, to which you can connect anything: a TV, light bulbs, sockets, everything you want, relays were used
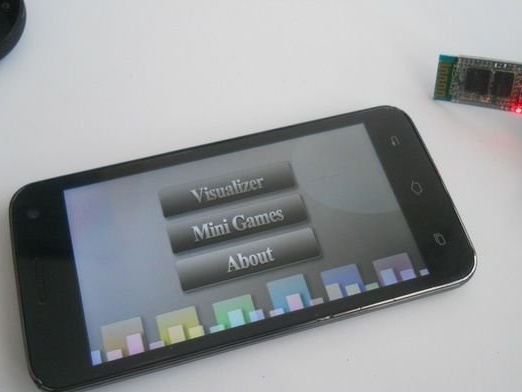
For the perception of brain waves - Necomimi, which can move your ears depending on your brain waves (attention, meditation). Inside a small chip that reads brain waves, filters out noise and gives a very good signal. It works with the UART (Serial) interface, so with some hacking we can use Arduino to read brain waves.The role of this headset is to wirelessly transmit brain waves to a central server.
If you are already familiar with previous projectthen you can skip the Necomimi disassembly and remodeling phase.
Go down to see how to disassemble and make a wireless Bluetooth headset out of it.
Home Automation Control System

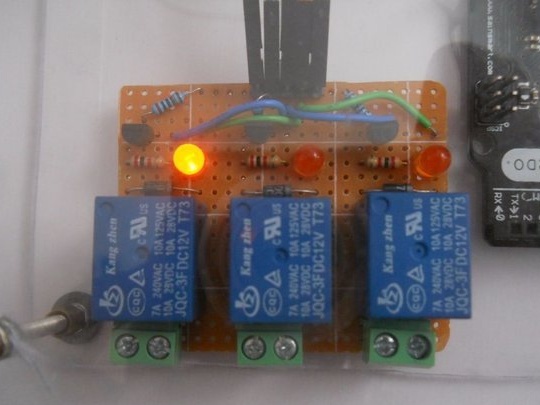
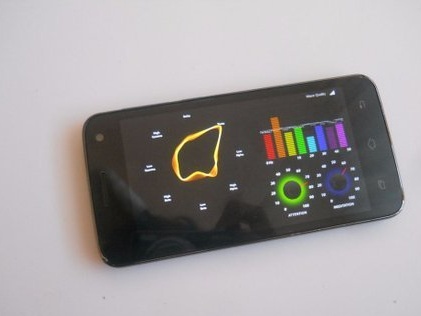
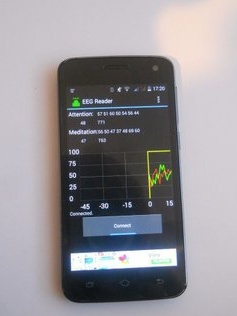
If you switch to home automation mode, increase your attention level above 70 to turn on the first relay, increase your meditation level above 70 to turn on your second relay, and increase both values above 70 to turn on your third relay. It is a little difficult, but not impossible after some training of the mind. If the relay is already on, use the same command to turn it off (if it is on, reach 70 to turn it off). When the system is ready, any high-voltage device (light, TV, computer, fan, anything) can be connected to the relay module.
Mouse control
The cursor is controlled by emotions. If the attention level is less than 25 it moves to the left, if between 25 and 50 it moves to the right, if between 50 and 75 it goes up, and if between 75 and 100 it goes down. You can emit a click on the mouse button by increasing the level of meditation. Of course, you need to train for this.
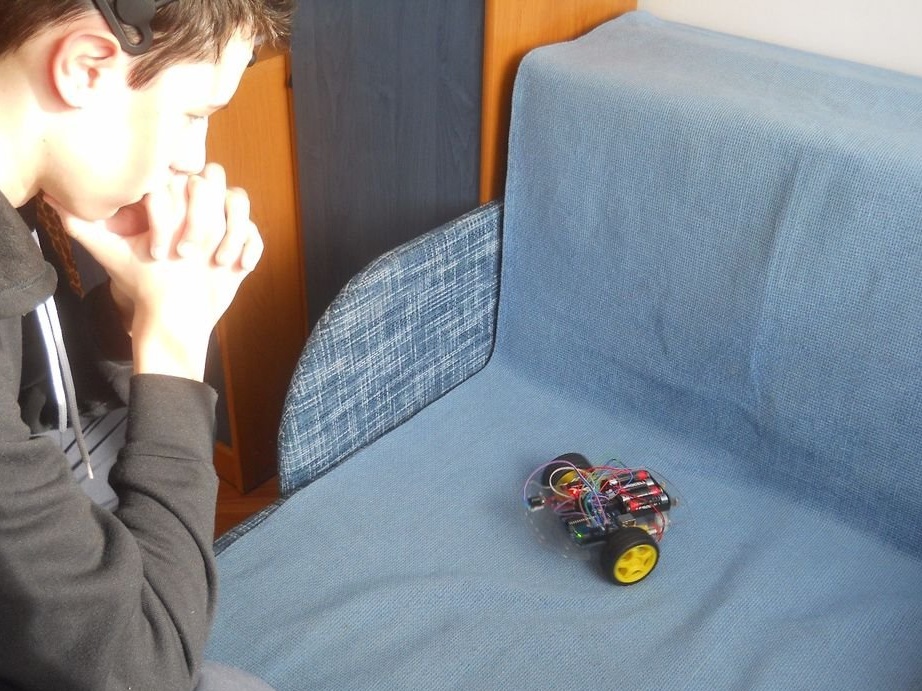
Robot control
The robot has only three different teams: stop, turn left and move forward. Why only two motion options? Because these two directions are enough to move the robot anywhere. Use your level of meditation to rotate with the robot, and when you have reached the direction you want to move, stop the robot, then move forward with the level of attention. This is the best way to control the robot, and even beginners who cannot control their attention / meditation values so well can play with this robot.
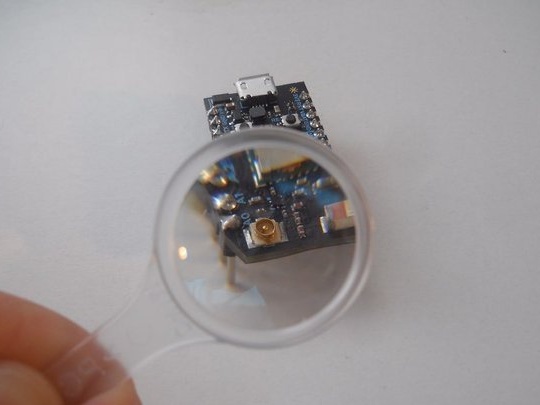
The headset transmits BT (Bluetooth) signals to the Arduino Mega, which analyzes incoming bytes and, depending on the user's thoughts, controls various functions. At first, the author wanted to use Particle Photon as a data transmitter, but this small module got a role in creating a web server. It was the biggest modification in the whole project. He also used home-made Arduino modules, but you can buy these modules online.
All parts are from GearBest.com. This is an online store, the same as eBay, but spare parts are delivered much faster (maybe all this is on aliexpress). Therefore, if you want to create your own game controller, robot controller or Force Detecto r, start by buying parts.

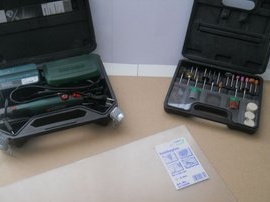
Tools required:
soldering iron
solder
glue gun
self-adhesive tape / double-sided tape
wire stripper
wire cutters
Equipment:
/ Arduino Nano
Software:
Hacking Necomimi
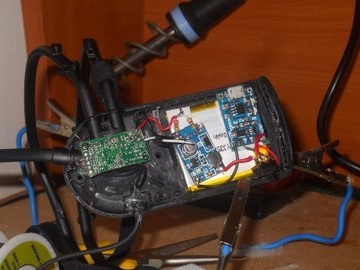
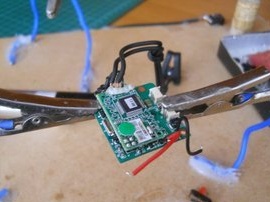
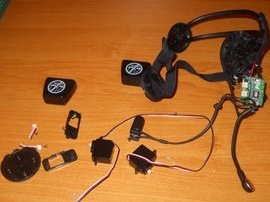
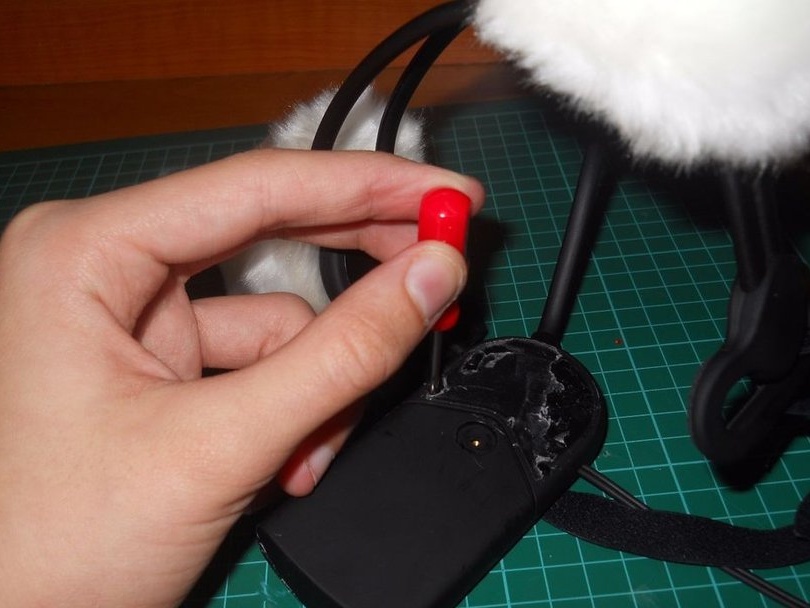
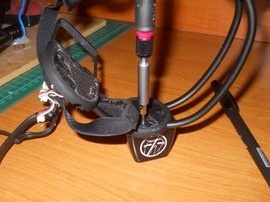
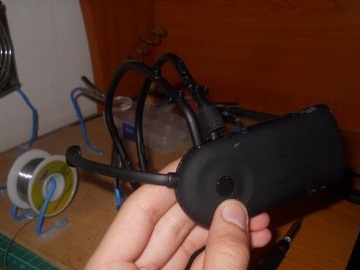
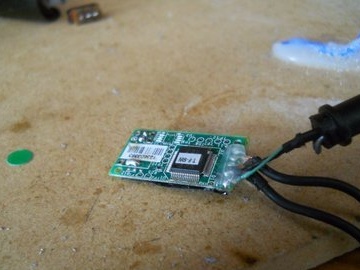
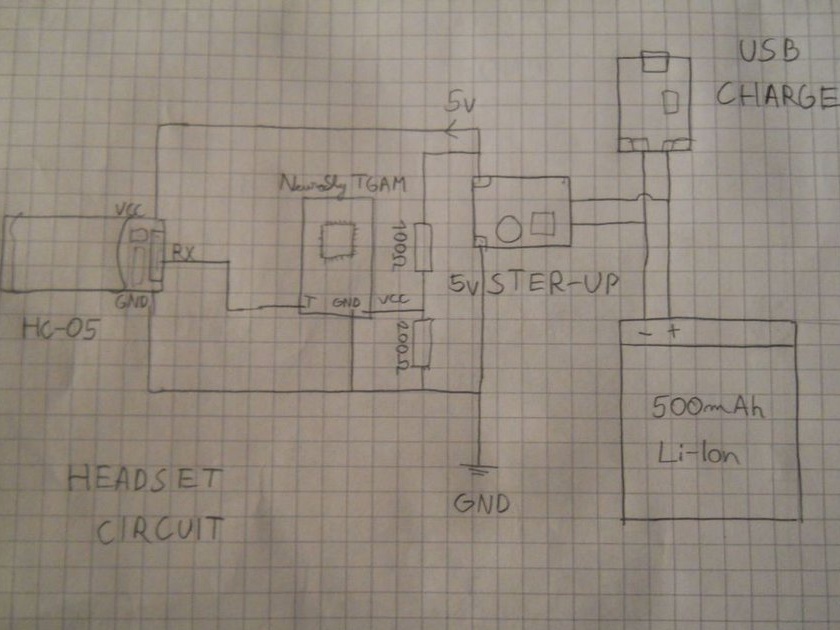
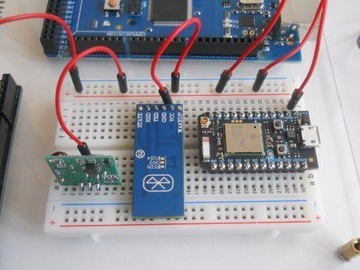
We want to modify this EEG toy for data transfer via Bluetooth, so first we will disassemble the case. Screws are under the sticker. Remove the sticker and the back of the device and you will find small boards inside. The one under the main board is the Neurosky TGAM chip. 4 wires from the main board of the microcontroller are soldered to it, so take a soldering iron and carefully remove this circuit. Now solder the three wires to the GND pin, to the VCC pin, and to the T pin. A T-pin is a transmitter output with a speed of 57600 baud, which sends data packets to our microcontroller. Once you have soldered the three wires above, you can build in your own rechargeable power source. The author uses a 500 mAh lithium-ion battery, a USB charger circuit, a 5 V boost circuit, and two resistors (100 Ohms and 200 Ohms) to provide a separate 3.4 V power supply for the chip and the Bluetooth module. In the photo, the connection diagram.
If the circuit is ready, configure the Bluetooth module.
Follow the instructions and figures below and create your own wireless EEG headset.
The most important part is to connect the “T” pin to the “RX” on the Bluetooth module.

HC-06: First upload the sketch named “HC_06_Bluetooth” to Arduino UNO, then connect the Bluetooth module as shown in the diagram.
// HC-06-Bluetooth
void setup () {

   // Start the hardware serial.
Serial.begin (9600); // default HC-06 baud rate
delay (1000);
Serial.print ("AT");
delay (1000);
Serial.print ("AT + VERSION");
delay (1000);
Serial.print ("AT + PIN"); // to remove password
delay (1000);
Serial.print ("AT + BAUD7"); // Set baudrate to 576000 - eg Necomimi dafault
delay (1000);
Serial.begin (57600); //
delay (1000);
}
void loop () {
}
Open the Serial Monitor in the Arduino IDE and wait for the Arduino to configure the BT module. Your Bluetooth module is now set to 57600 baud. You can try many BCI (Brain Computer Interface) applications because this hacked Necomimi toy will be compatible with any Neurosky applications.
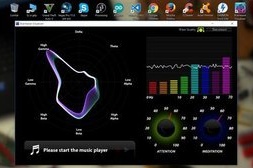
You can use these apps to learn how to control your brain waves.
HC-05: Then use “HC_05_Bluetooth” and load your Arduino the same way as before.
// HC-06-Bluetooth

 void setup () {
  // Start the hardware serial.
  Serial.begin (9600); // default HC-05 baud rate
  delay (1000);
  Serial.print ("AT");
  delay (1000);
  Serial.print ("AT + VERSION");
  delay (1000);
  Serial.println ("AT + ROLE = 1"); // set the HC-05 to master mode
  delay (1000);
  Serial.println ("AT + LINK =" Insert your address here "); // now the module should connnect automatically
  delay (1000);
  Serial.print ("AT + UART = 57600,1,0"); // Set baudrate to 576000
   Serial.begin (57600); //
  delay (1000);
}
void loop () {
}
Connect the "EN" pin of the HC-05 to the 3v3 Arduino. You must write the address of your HC-06 module in code. Check the BT module address on your Android smartphone. Replace ":" (double dots) with "," commas in the code.
And you must change the address in the code: 20: 15: 09: 15: 17: 82 = 2015.09.151782 Thus, the HC-05 module can recognize the address.
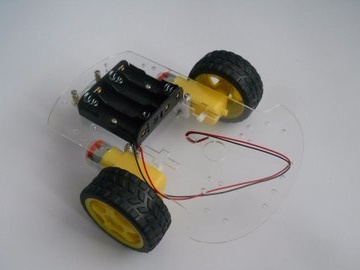
Remote control
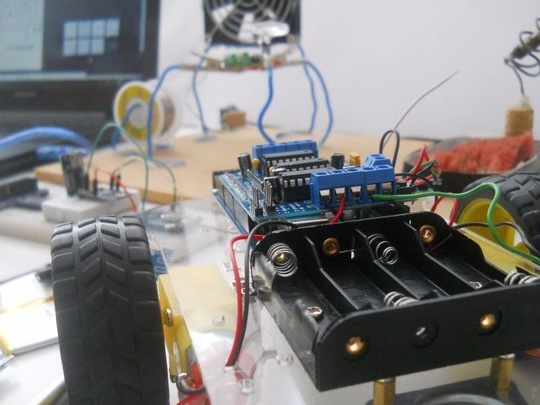
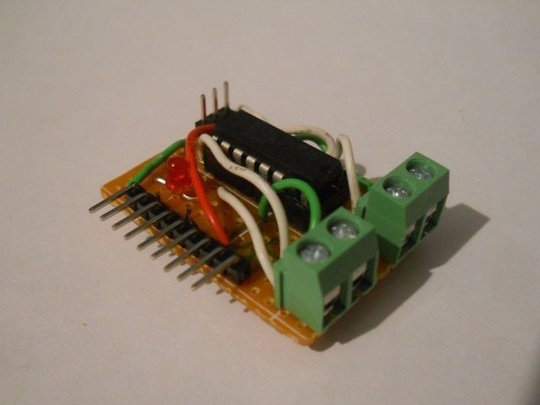
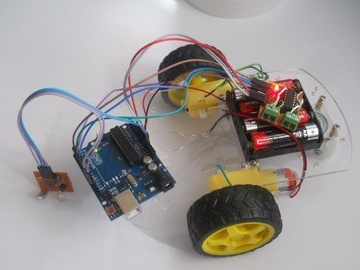
To create this inexpensive robot, a 38 kHz infrared sensor was used, which is used in television remote controls.
Engine driver
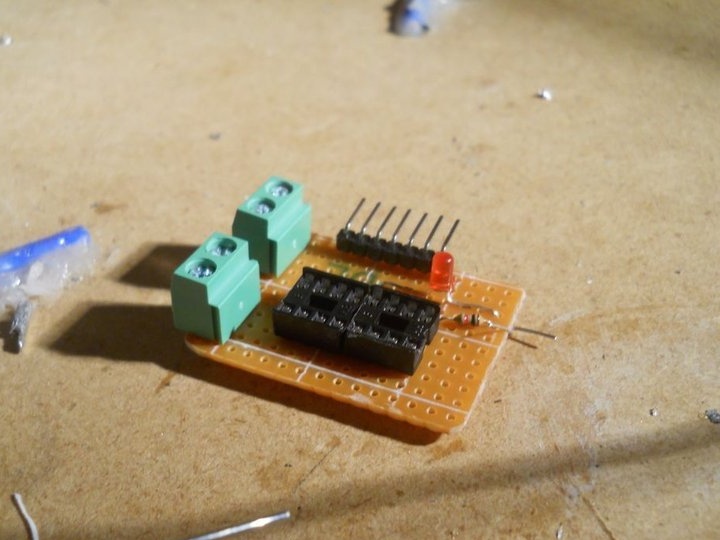
Engine Drive Diagram - You will need the following details:
2 Screw Terminals
L293D IC3
Header Pin (90 degrees)
1k resistor
Red LED
Wires
Printed circuit board

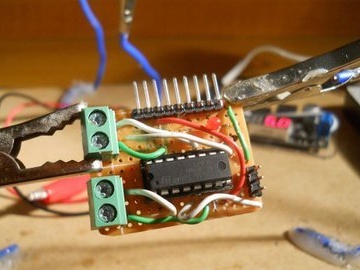
Using several copper wires and, following the diagram, connect the microcircuit pins to the connector pins. It does not matter which leg of the microcircuit to which pin of the connector, just remember where you connected them. The LED is connected in series with the resistor and in parallel with 5 V VCC.
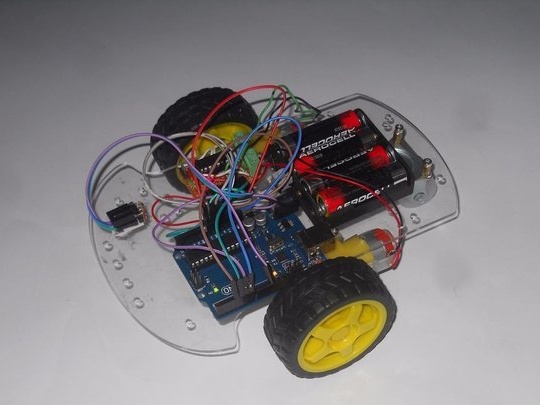
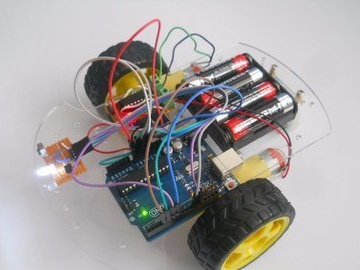
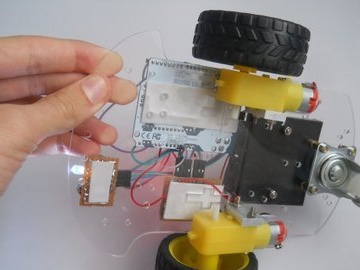
chassis assembly
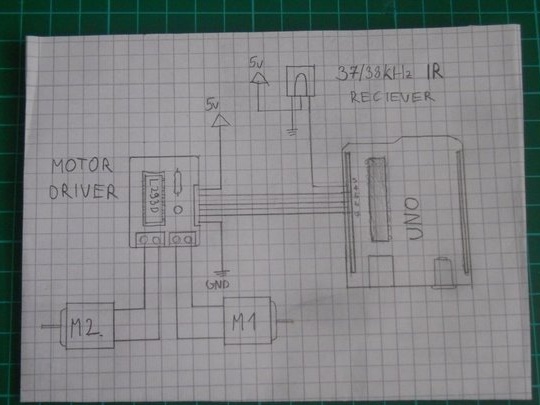
 As an electric motor driver, the L293D chip is used, which can control two motors. Look at the diagram to build the diagram.
Connect parts to Arduino
Arduino Pin == & gt; motor driver
                   4 == & gt; fifteen
                   5 == & gt; 10
                   6 == & gt; 7
                   7 == & gt; 2
               VIN == & gt; 8
5v == & gt; 1, 9, 16
GND == & gt; 4, 5, 13, 12
So, look at the circuit diagram of the L293D module, then connect its contacts to the Arduino UNO, as described above. Pin 5v Arduino must be connected to pin 1, 9, 16 to activate the chip motor control function. Then finally use the screw terminals to turn on the motors.
The library uses IRremote, a code that reads 38 kHz infrared signals, decodes them, and then moves the robot. (Download the library in the "software" section).

There are comments in the code, but the bottom line is that it decodes the IR signals coming from the main server, then, depending on what the user wants, it turns on the engines, after which the robot moves forward or turns left. Download the code: "Robot_Code". Download this to your Arduino and your robot will be ready.
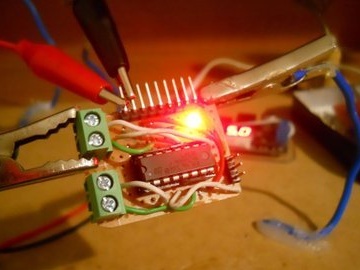
Main server (Arduino Mega, Leonardo, Photon)


The server reads incoming data packets from the wireless headset. We will use the configured BT module to provide communication between the headset and the server. Arduino Mega is the brain of the whole circuit, everything is connected to this microcontroller: Bluetooth, infrared transmitter LED, web server and mouse controller. The code is a bit complicated, but as a rule, it has comments to understand.
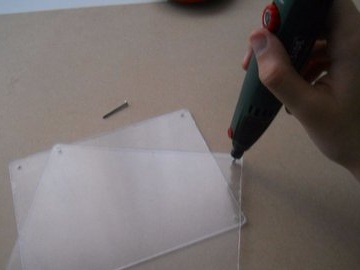
Housing
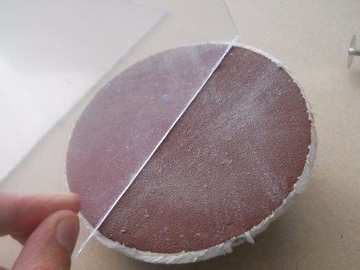
Everything is simple. Two 18x15 cm plexiglass plates, smooth the edges with sandpaper. Several screws to connect them to each other.
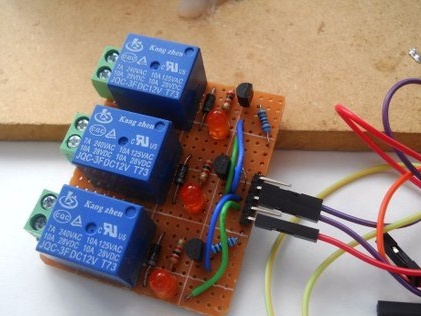
Relay board
You will need the following details:
2n2222 transistor (3 pcs)
germanium diodes (3 pcs)
330 ohm resistors (3 pcs.)
1 kOhm resistors (3 pcs.)
Relay 5 V (3 pcs.)
pin connectors
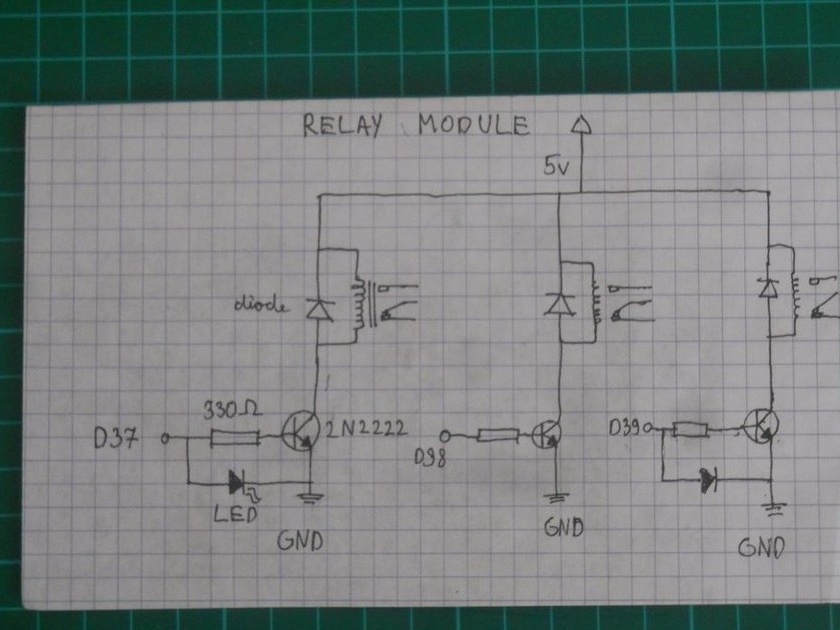
Printed circuit board
An image is worth more than a thousand words, so look at the diagram of how to connect parts on a printed circuit board.

If the “Signal” output is from an Arduino, the relay will turn on. The transistor amplifies the signal to provide sufficient power for the relay. We will use 37-38-39 contacts to control the HIGH LOW levels of each relay.
To install parts on a plexiglass case, the author used double-sided tape. He pretty much holds the details.
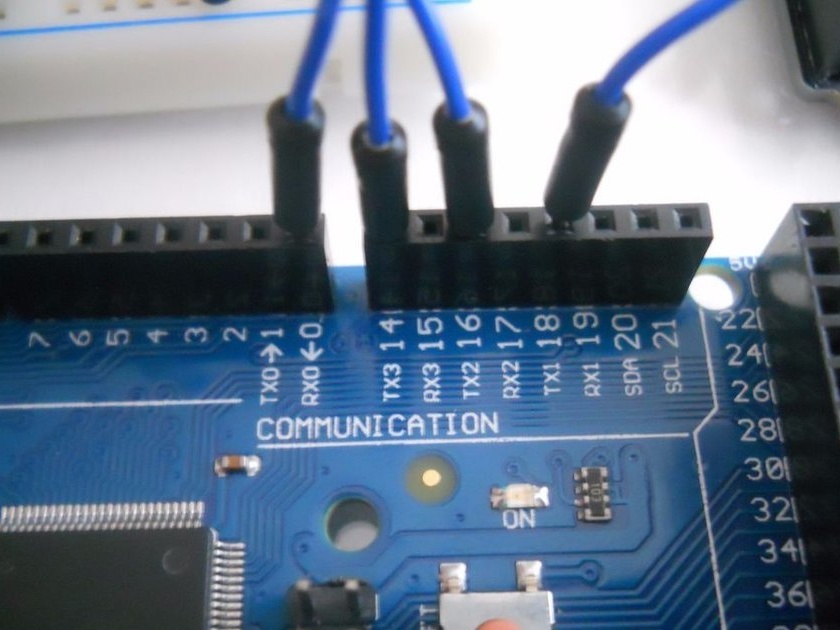
This is a software server, so making a circuit is not so difficult. You just need to turn on the microcontrollers and establish a connection between them. The IR LED is connected to pin D3, and the relay is connected to 37-38-39. The D16 Arduino Mega goes to the RX Photon and the D18 to the RX Leonardo.
Robot connection
[2.02 Kb] (downloads: 14)
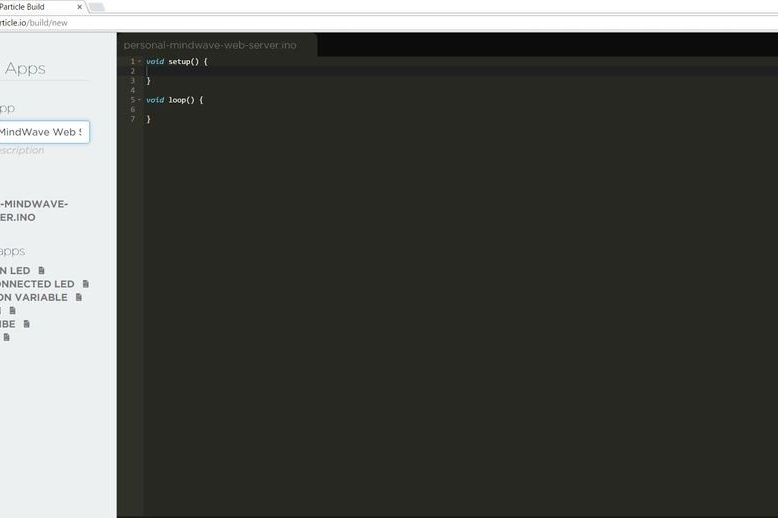
But now the code is ready and working, so you just have to download your microcontrollers. Download the .ino file or copy / paste the code into your IDE and use it. The code for Particle Photon must be downloaded via the browser IDE. To do this, register at. And connect your laptop to your microcontroller. Everything happens almost automatically, just add your device ID.
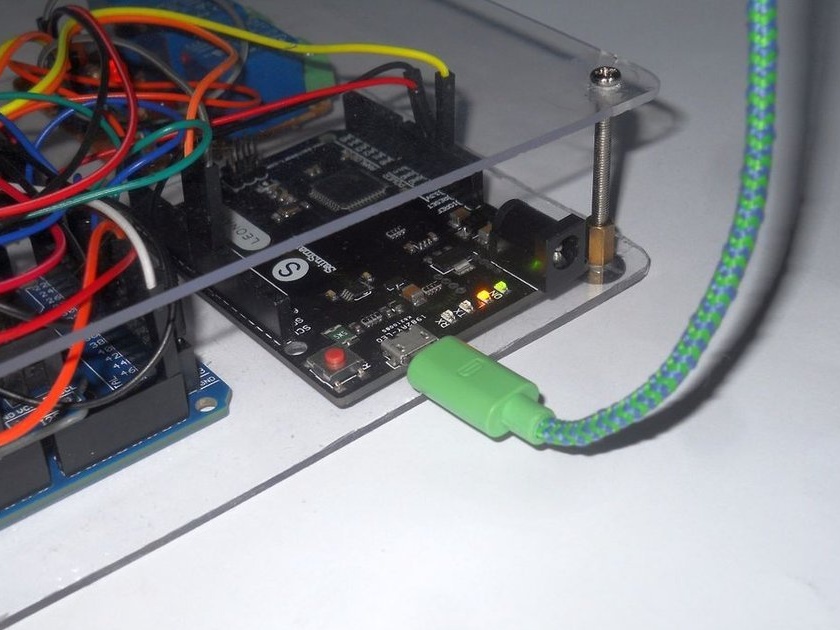
Before downloading the codes, make sure that nothing is connected to the RX / TX pins. So disconnect your Bluetooth module from Mega, and disconnect Mega from Leonardo and Photon.
[489 b] (downloads: 15)
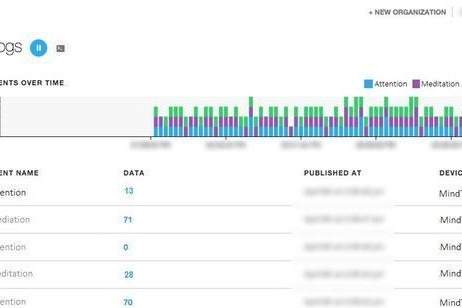
Web serverTo add the IoT (Internet of Things) function to his project, the author made an online data logger using Particle Photon. Depending on what you do with the device, Photon creates a personal server and writes data to the cloud.This may seem intimidating at first, but imagine that you can determine if you are stressed (attention levels increase and decrease rapidly) or is it worth going to sleep
(meditation level is always above 80)
. This web server can help you live healthier.
Browser Encoding
Particle also has an online panel where you can publish any data using “Particle.publish ();” syntax. Toolbar developers have saved a lot of time for users.