
You decided to ventilate the room. They opened the window "for a few minutes", went into the kitchen, and remembered after a couple of hours. The author of Instructables under the nickname DerGlorreiche came up with how to use the DigiSpark board to prevent such situations. It is very cheap, and the microcontroller on it has a built-in temperature sensor. Inaccurate, but it will do for such an application, because the temperature change during ventilation is quite large and is easily recorded even with inaccurate measurement.
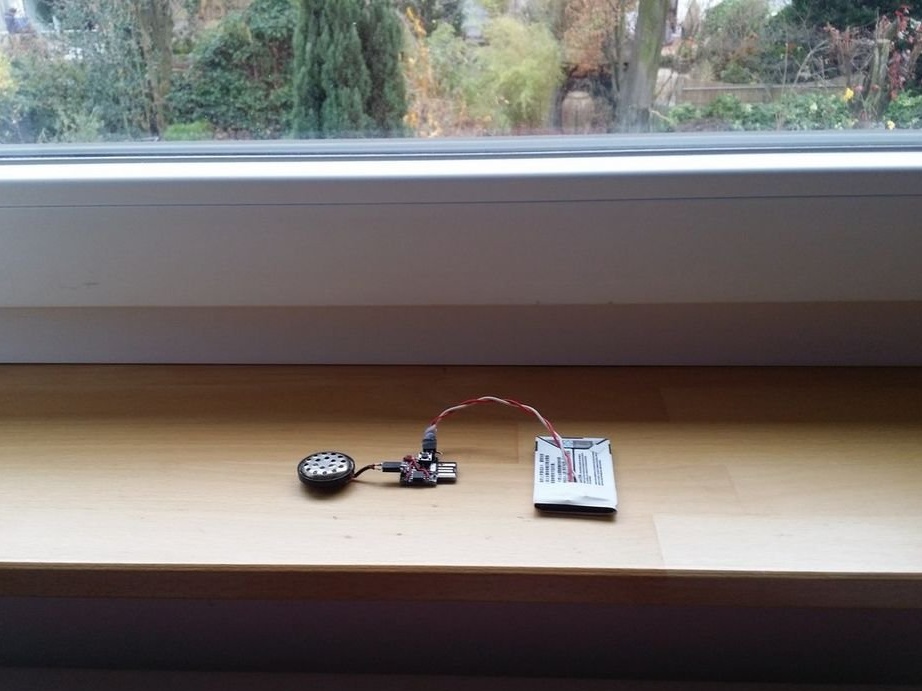
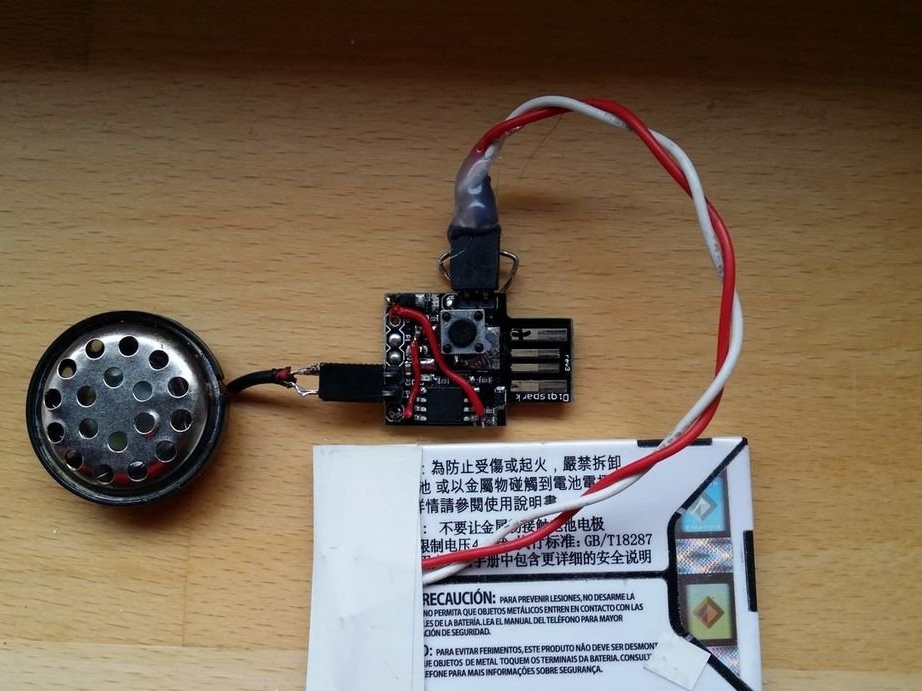
Consider homemade closer. It consists of DigiSpark itself, an “ear” from old headphones, a button and a battery:
But these components are separate, plus a diode, charge controller and comb, here are examples of other batteries that are also suitable for design:
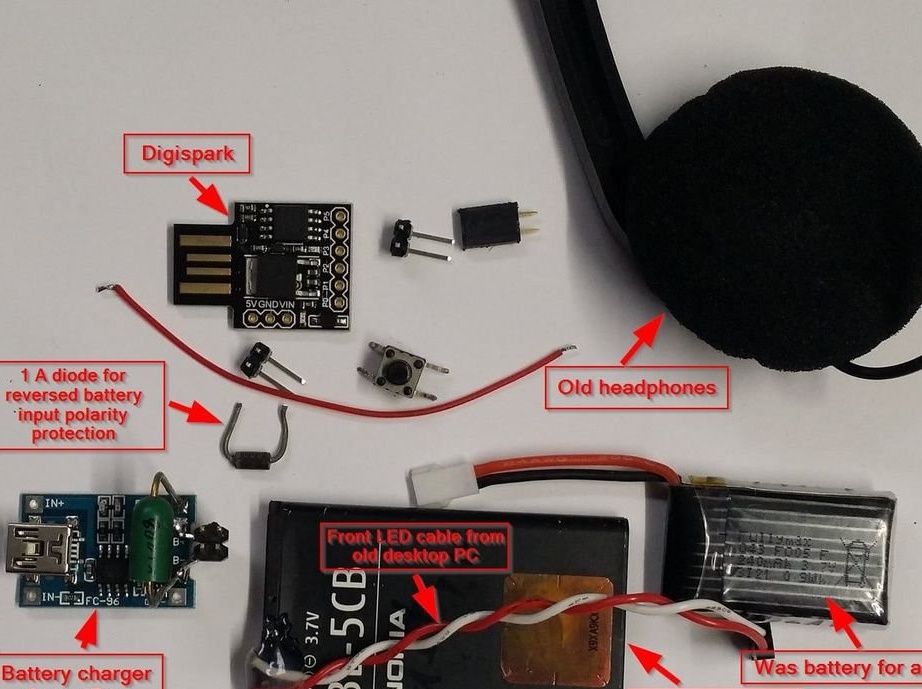
And the main component is very close:
The wizard begins work on homemade work with DigiSpark firmware.
First of all, he matches the board with Arduino IDE as described. He takes the first step to reducing power consumption by selecting Digispark (1mhz - No USB) in the Tools menu. If anything, the millihertz have nothing to do with it.
There are two ways to fill a sketch. First: go through, copy the text to the clipboard, create a new file in the programming environment, and put the code from the clipboard into it. The second is to download, unzip the archive and open the sketch file from the programming environment. Then it is necessary to start pouring with the dynamic head turned off, otherwise nothing will be recorded. After successful programming, the light-emitting diode on the board at pin 6 of the microcontroller will flash five times, and after eight seconds it will flash once, after which it will flash once every 24 seconds.
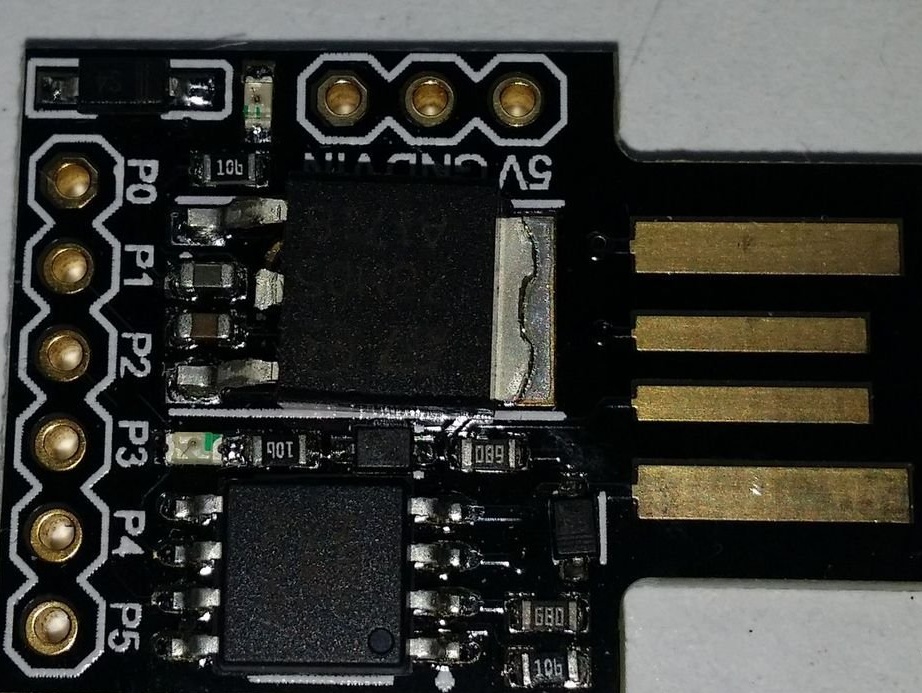
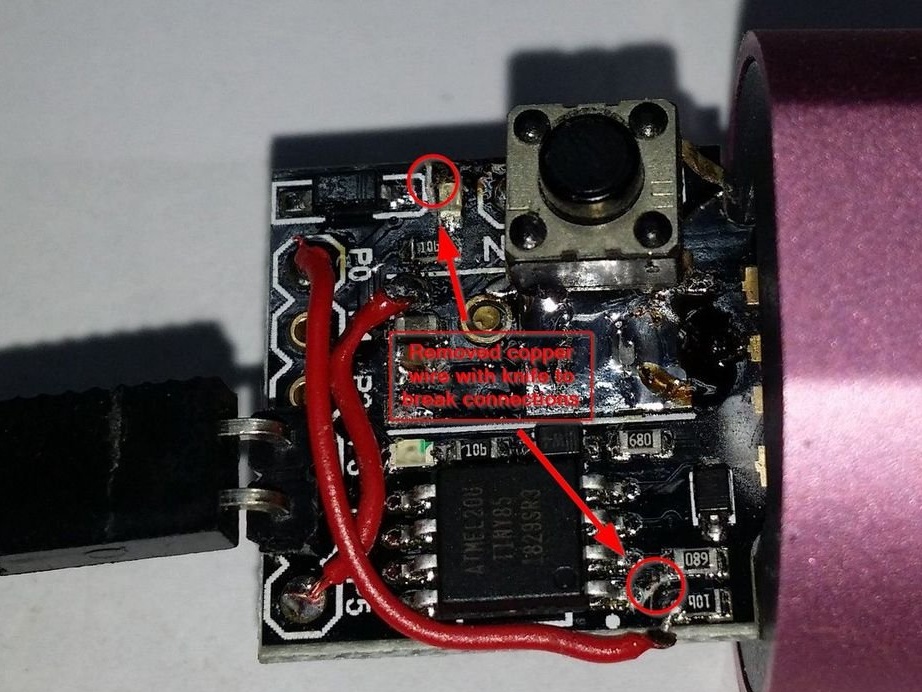
Additionally, to reduce power consumption, you can do nothing, the current consumption of the board in this form is measured in units of milliamps. But DerGlorreiche does not like to charge batteries even every few days, and wants to reduce the current to units of microamps. It cuts the printed conductor that goes to the power indication LED, instead you can remove the resistor with the marking 102. It removes the linear stabilizer located between the external power contact pad and the microcontroller, directs voltage from this pad to the microcontroller directly. It cuts the conductor coming from the resistor marked 152 to the eighth pin of the microcontroller.In order not to lose the possibility of reprogramming the board, it connects the terminal of the resistor that has just been disconnected to the output of the USB connector from which the voltage is +5 V. Now, when powered by USB, this resistor consumes current, but when powered from the designated pads, it does not since this is prevented by the diode located on the board (the voltage drop across it is less than 0.5 V, and it does not open).
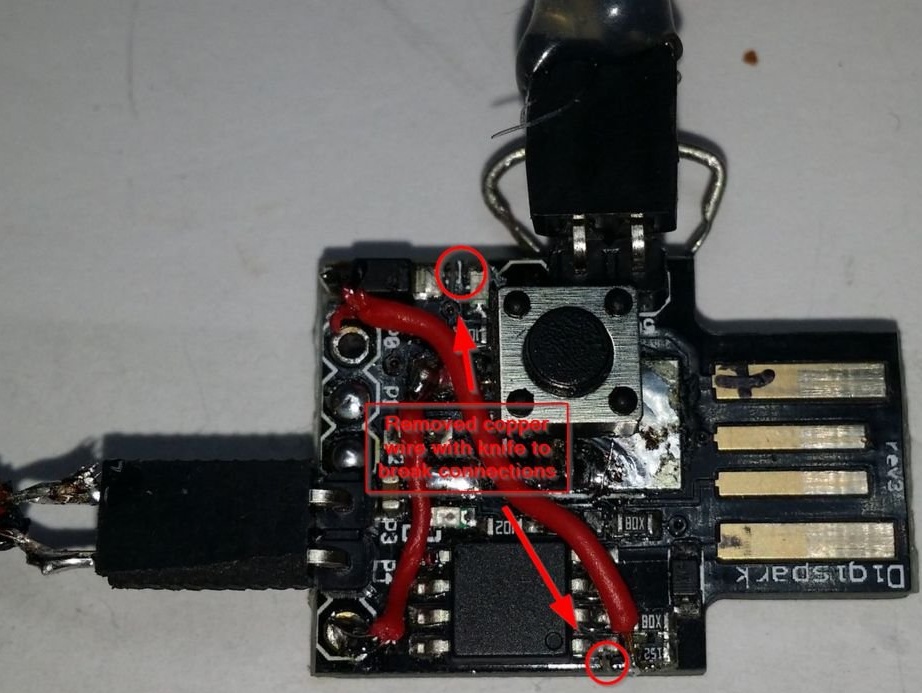
But if you power the device not from the battery connected to the designated pads, but via USB from the power bank without the auto-off function (in the EU, where the master lives, the sale of those is officially prohibited), this resistor will still consume current. To prevent this from happening, you can connect the resistor not to the +5 V USB line, but to pin 5 of the microcontroller (the developer incorrectly indicated pin 4, and there is a common wire), before that (be sure to!) Flashing. Now, when programming, the logical unit will appear on the fifth pin of the microcontroller, and the resistor will ensure the correct operation of the USB interface.
A simpler solution is to program DigiSpark once, then disconnect the resistor and not connect it anywhere. The firmware is simple and single-functional, so it is not a fact that it will ever need to be updated. If it flies, but then you can temporarily connect a resistor, and then turn it off again.
In the photo DigiSpark is powered by a power bank:
Before each airing, the reminder must be restarted. You can turn off the power for a short time, or you can put a button between the common wire and the PB5 terminal pad (this is pin 1 of the microcontroller — reset). The developer soldered the button to where the voltage stabilizer was: the large platform was a common wire, and on the small ones there was a stabilizer input and output so that the supply voltage did not get through the button through them, the master cut the corresponding conductors.
The master connected the dynamic head to the board conclusions shown in the photo. If you are going to reprogram the board, then both the head and the battery must be made disconnectable with the help of combs. The battery can only be charged through the charge controller.

Use the reminder like this. They put it on the windowsill, restart it by briefly turning off the power or by pressing the button, if any. Open the window and leave. The temperature drops, the temperature sensor built into the microcontroller detects this. If after five minutes the temperature does not start to increase (the window is closed), the device will start to sound an alarm. At first, the signal sounds for 10 minutes, then stops, after which it is periodically turned on for 10 seconds with interruptions gradually increasing from 24 seconds to 5 minutes. And so on until the airing stops. Before the next airing, a manual restart is required again.