» Car DIY »Homemade, which turns on the headlights after starting the car engine

Homemade, which turns on the headlights after starting the car engine


Many drivers forget to turn on the headlights when driving, and turn them off when the ignition is turned off. And this faces a fine of 500 rubles, and a complete discharge of the battery, if you forget to turn off the headlights. And this has already happened to me more than once. I did homemade, which automatically turns on the side lights and dipped headlights when starting the engine, and turns it off when the ignition is turned off.

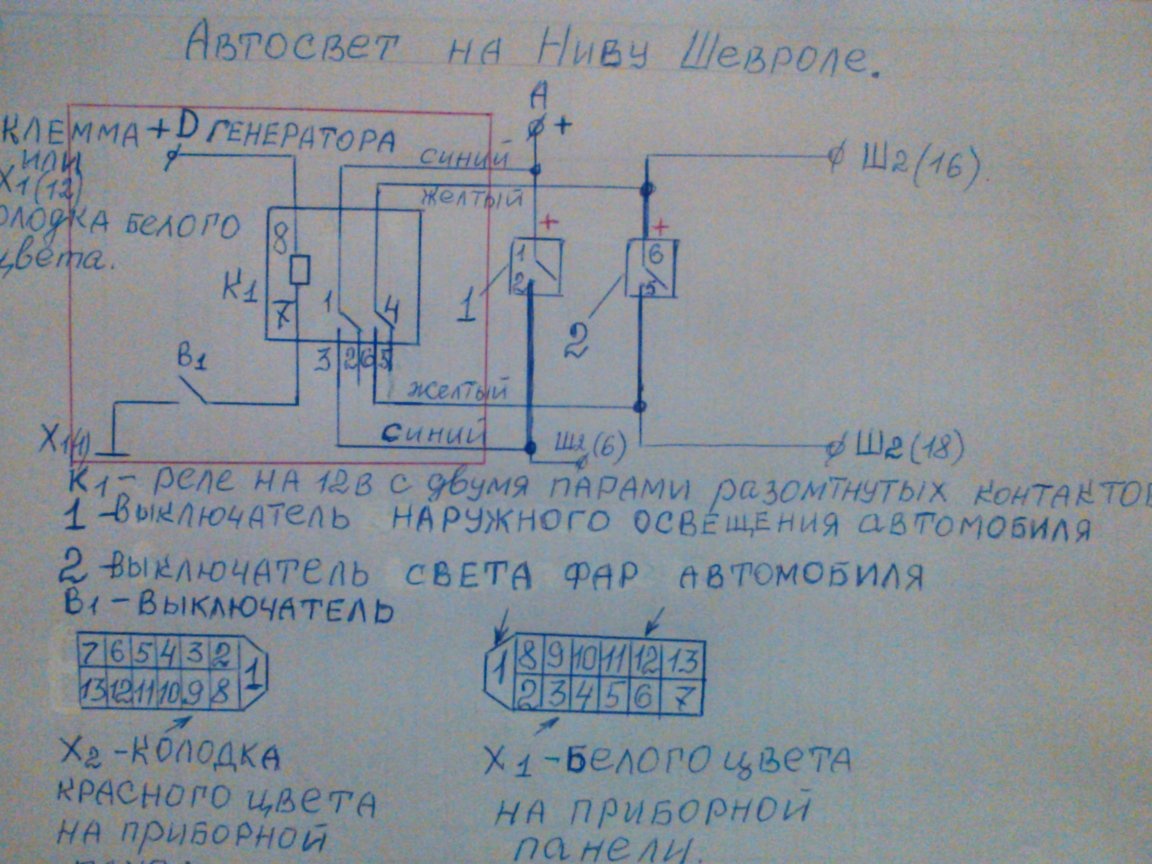
Now I completely forgot about turning the headlights on and off, for me all this is done by a homemade product. Here is her outline.

We will need the following materials and tools:

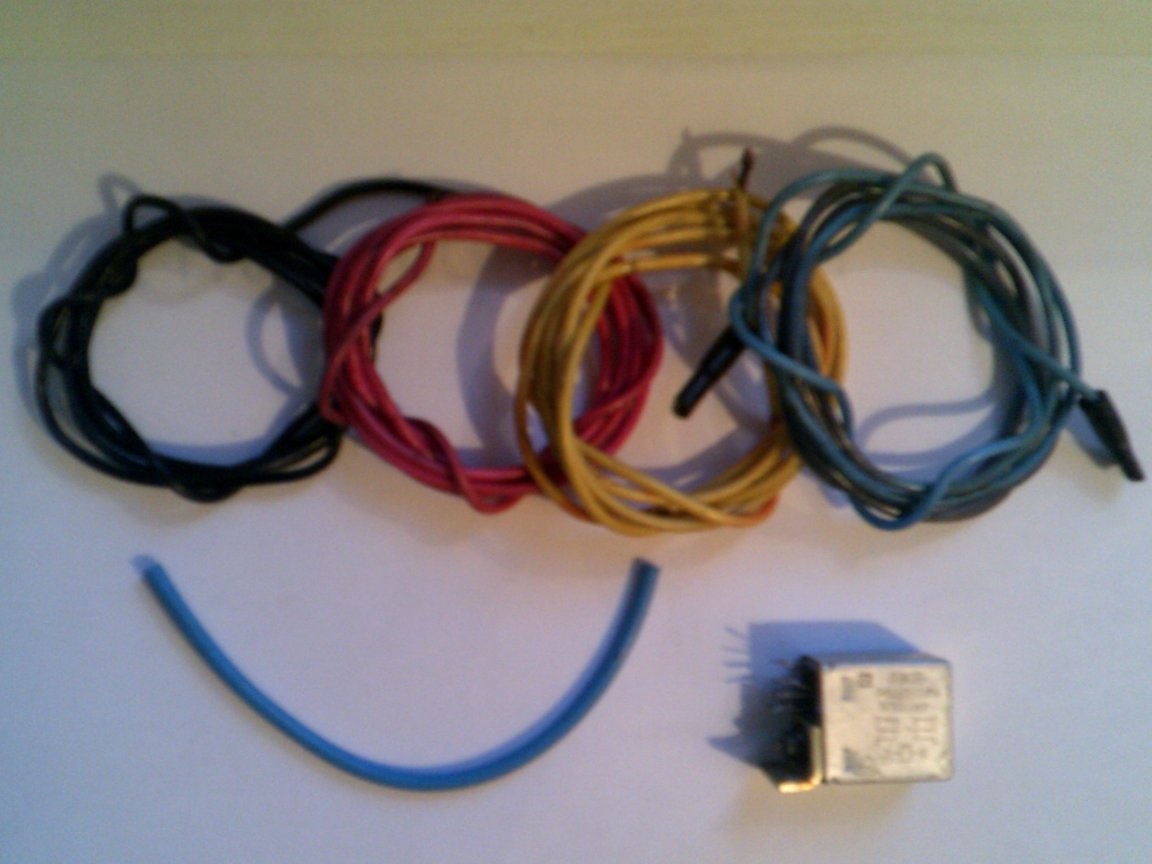
1- 12V relay with two pairs of open contacts, designed for a current of 10-30a. For example, Res6 RFO 452. 104. It is possible and automobile. 2- automobile wires, preferably of different colors with a cross section of 0.75-1mm. 3- push-button switch, or any other. 4- solder, 5- soldering iron, 6- insulating tape, 7- tweezers, pliers, cambric. We assemble as follows:

Step 1
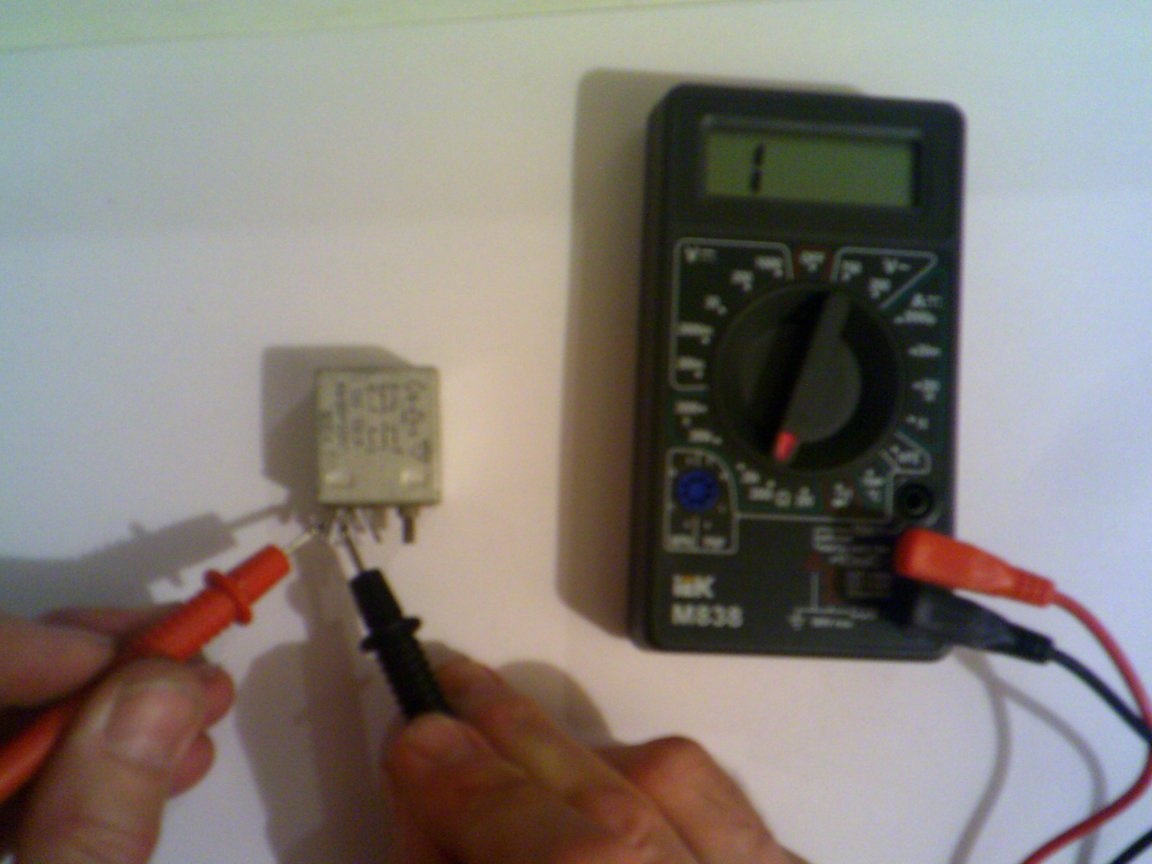
We check the operability of the relay by connecting + 12V power from any power supply or a car battery to its winding, relay contacts 1-3 and 4-6 should close.


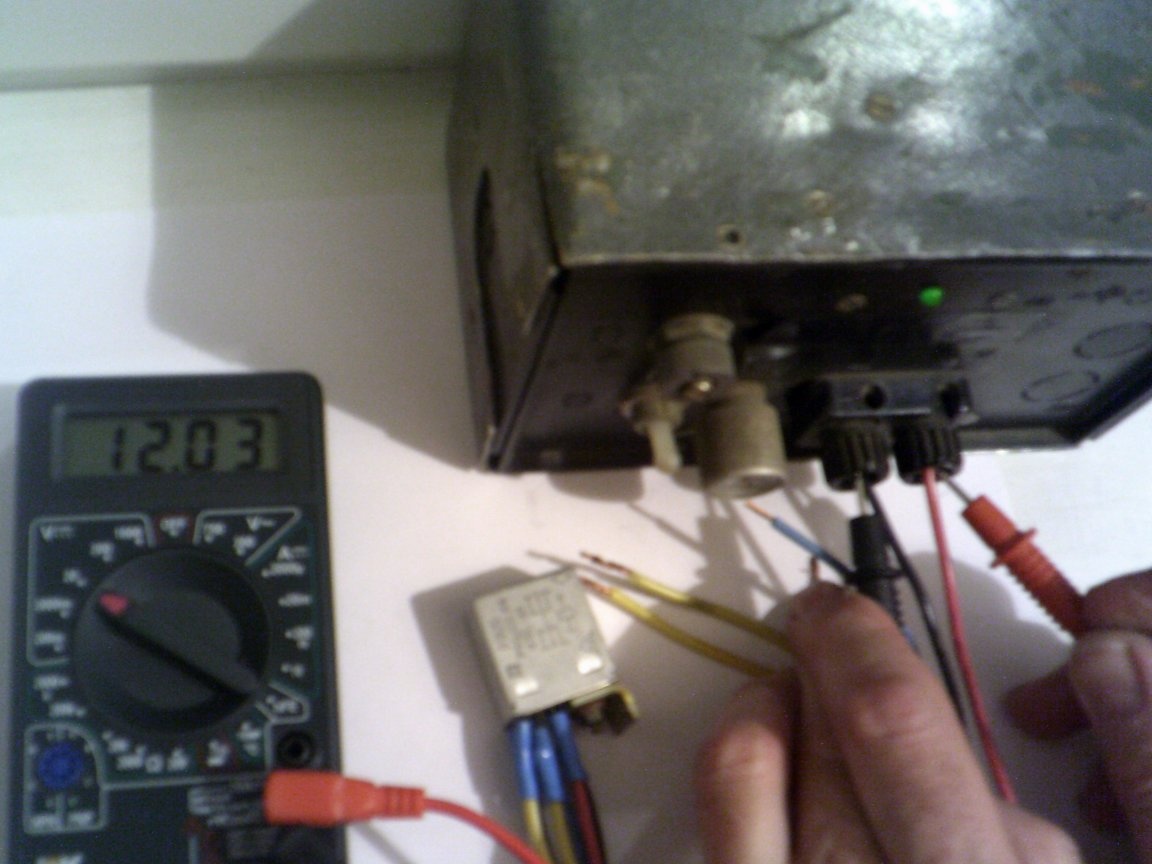
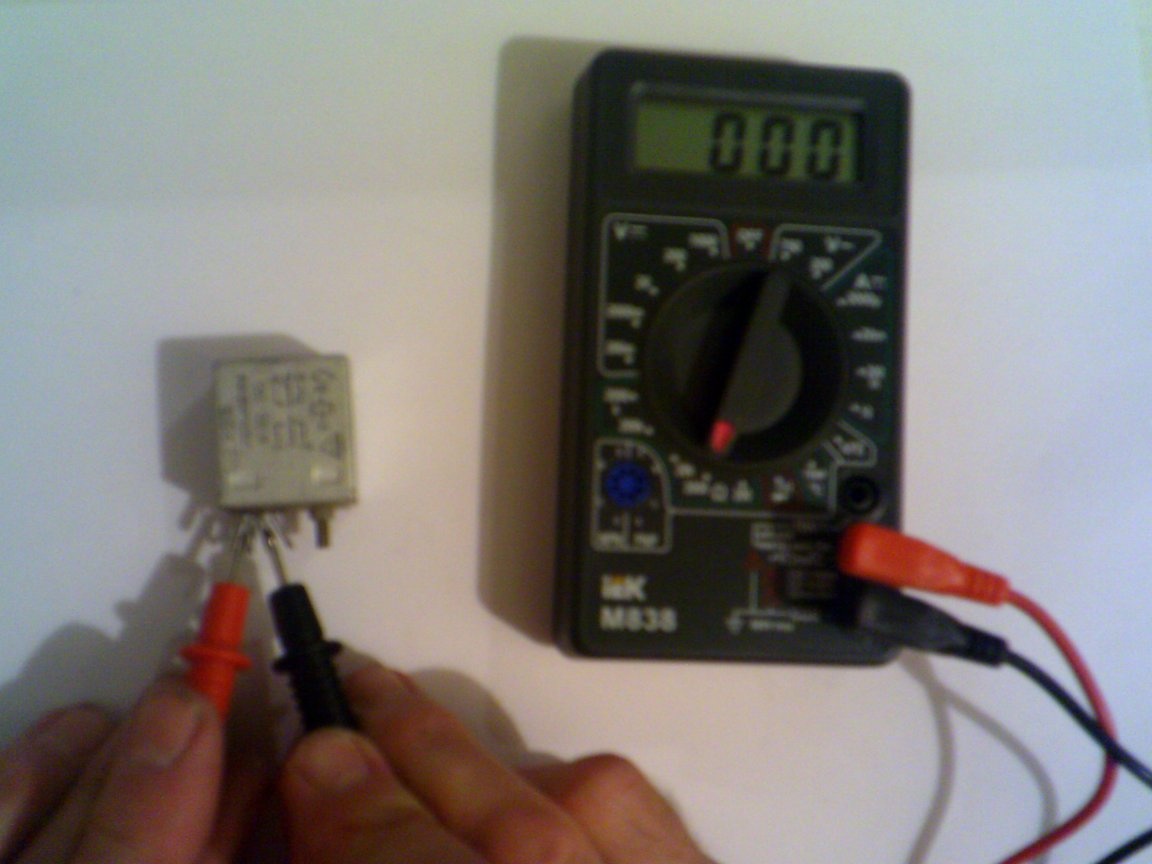
We set the multimeter to measure resistances of 2000 ohms. Open contacts - the multimeter shows 1, and if closed, it shows 0.

Step 2

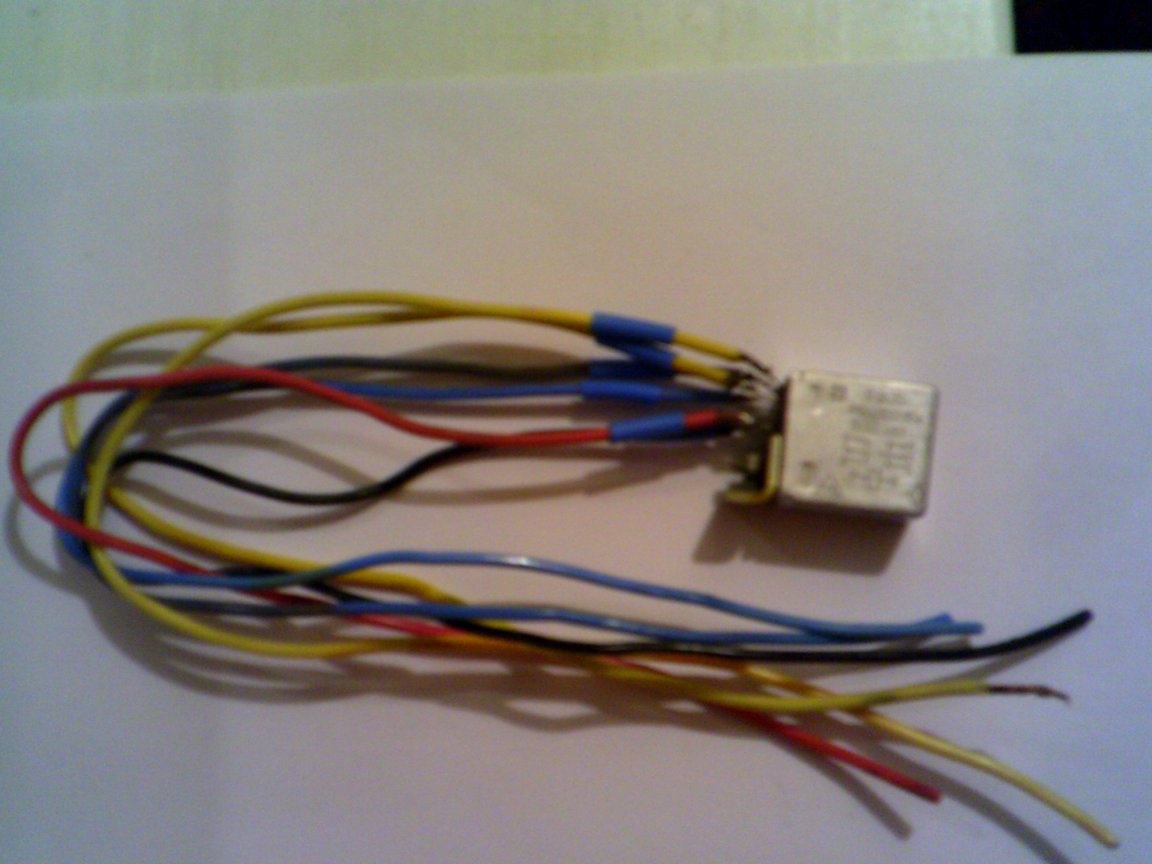
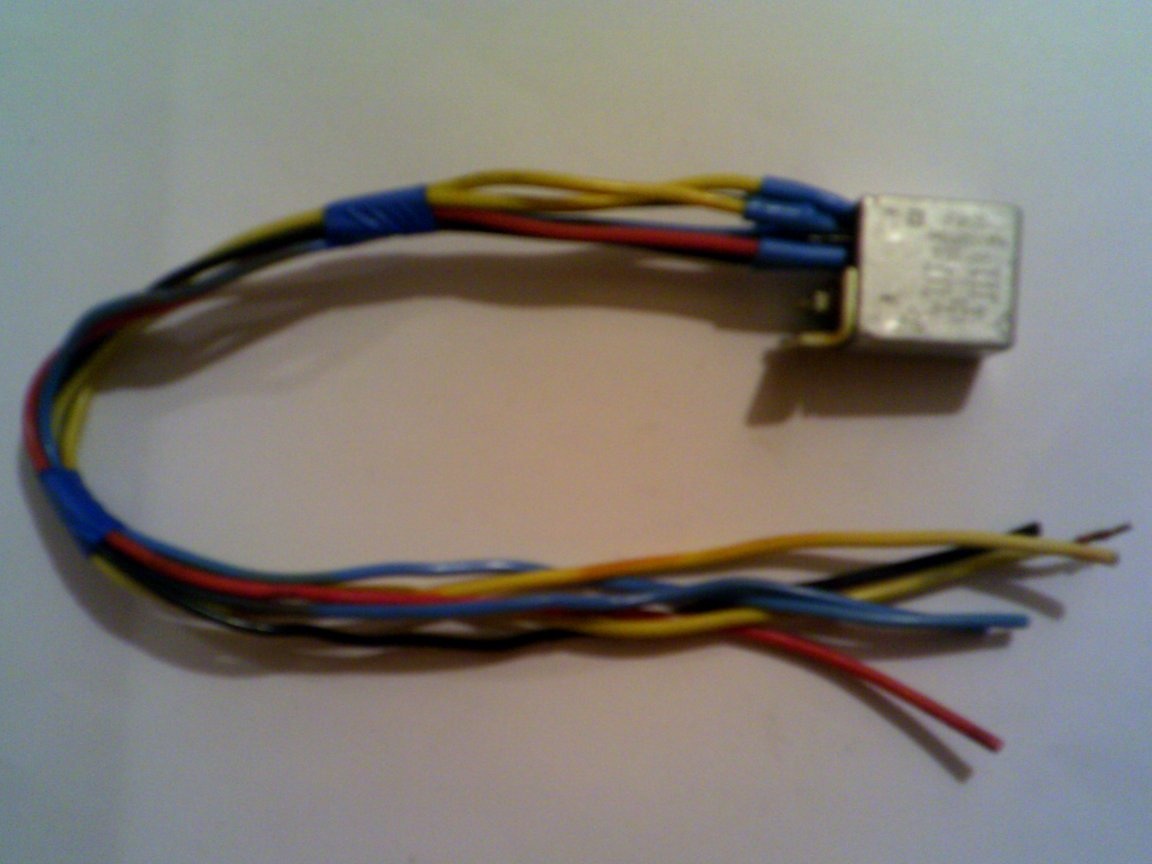
- Solder wires 35cm long, red to terminal 7 of the relay - this will be + 12V power, the black wire to terminal 8, this will be -12V. Next, solder the yellow wires to 1 and 3, and the blue wires to 4 and 6 relay outputs.

Step 3

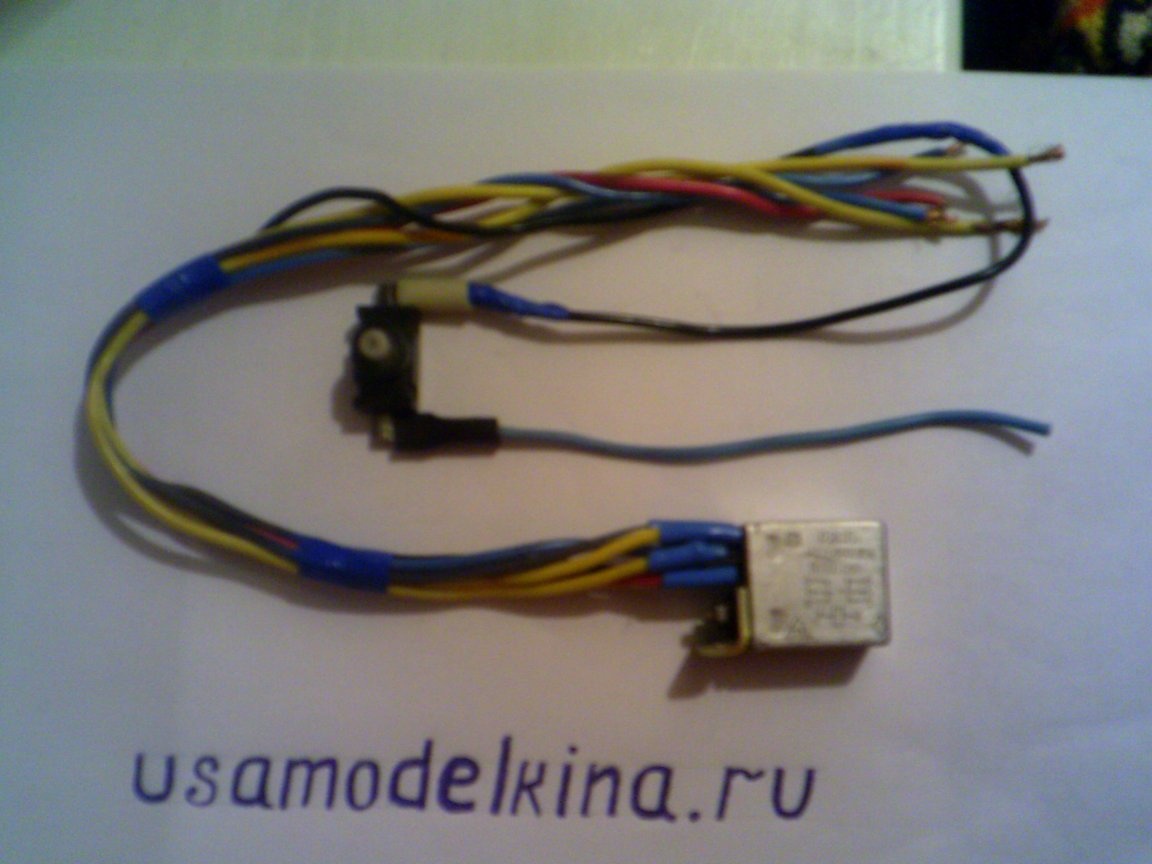
We dress cambrics on the relay outputs so that they do not short circuit with each other. We tighten the wiring harness with electrical tape in two places. We connect wires with the “mother” terminals to the B1 switch, the homemade product is ready.

Step 4. Connect it to car. To do this, connect the red homemade wire to a wire that matches the output of 12 white pads on the Chevrolet Niva dashboard. And the black wire is connected to switch B1, and the second wire of the switch is connected to the car body. Yellow wires - to conclusions 5 and 6 of the switch of light of headlights of the car. Blue wires - to conclusions 1 and 2 of the switch of external illumination of a car. We attach the homemade product with a car tie to the wiring harness in a place convenient for us near the dashboard, and the B1 switch is in place of any stub of the switches that are not installed on the car. This homemade product is installed on the car 8.01.2017 year and works flawlessly. Switch B1 is needed to turn off the circuit during prolonged warming up of the car in the parking lot.If the circuit fails, turn it off with the B1 switch and turn on the car light as usual, because the car circuit has not been changed.
7
6.6
5.5

Add a comment

    • smilesmilesxaxaokdontknowyahoonea
      bossscratchfoolyesyes-yesaggressivesecret
      sorrydancedance2dance3pardonhelpdrinks
      stopfriendsgoodgoodgoodwhistleswoontongue
      smokeclappingcraydeclarederisivedon-t_mentiondownload
      heatirefullaugh1mdameetingmoskingnegative
      not_ipopcornpunishreadscarescaressearch
      tauntthank_youthisto_clueumnikacuteagree
      badbeeeblack_eyeblum3blushboastboredom
      censoredpleasantrysecret2threatenvictoryyusun_bespectacled
      shokrespektlolprevedwelcomekrutoyya_za
      ya_dobryihelperne_huliganne_othodifludbanclose
7 comments
Christmas trees, sticks, why is this all! I have a Shniva, I did everything in 5 minutes without any relays. It is necessary: ​​1. Remove the light switch with a screwdriver (two buttons on the left). 2. Break the jumper between the power button and the dipped beam. 3. Now the buttons are independent of each other, press the dipped button - nothing. 4. Turn on the ignition and oh, a miracle! The dipped-beam lamps are on, as it should be when driving during the day. When you remove the key from the lock, the lamps go out. That's all...
It should be so
Some nonsense. I ordered a 12-volt delay delay relay in China, I do not remember exactly EN-555 like. The relay itself 30 A delay from 0 to 2-3 minutes. Connected via a light switch and an additional 12 V relay to the running lights (fog lights are possible). I start the car, after 2-3 minutes (how to set) EN-555 is activated (when the dipped beam switch is off) and the running lights turn on, you can go, and if you turn on the dipped beam switch, an additional relay will work and turn off the EN-555, i.e., turn off the running lights, and the dipped beam will light up as it should in the factory diagram, but at the same time the EN-555 will remain energized and if you turn off the dipped beam switch again, the running lights
Quote: Michael machikhin
direction of current in the magnetizing winding

Probably, nevertheless, an excitation winding. And the current through it is not a fact that it is constant. In most cases, it is pulsed. Sometimes PWM is used.
why the hell do you need two relays, there is a diode and there is a current direction in the magnetization winding
It is easier to connect the relay contacts in parallel, in order to increase the switching current. And connect the switching contacts parallel to the contacts of the stationary relay. In case of burnout of the relay coil, you can turn it on as usual. Also install an LED or light bulb to indicate.
The maximum current through the RES-6 contacts is only 6A. Use in this homemade product is not recommended. You need to use a car relay.
Daytime running lights should be on. On the Chevy Niva they are not. Therefore, you only need to turn on the headlights or foglights. Dimensions are not needed. If you look at the technical requirements for DRL, then it is clearly stated that DRL shouldsturn off when the head light is on. And the head, include the dimensions, near, far and PTF.

We advise you to read:

Hand it for the smartphone ...